2~5
6~8
9
10
10
11
12~14
15
16~17
18
19
20
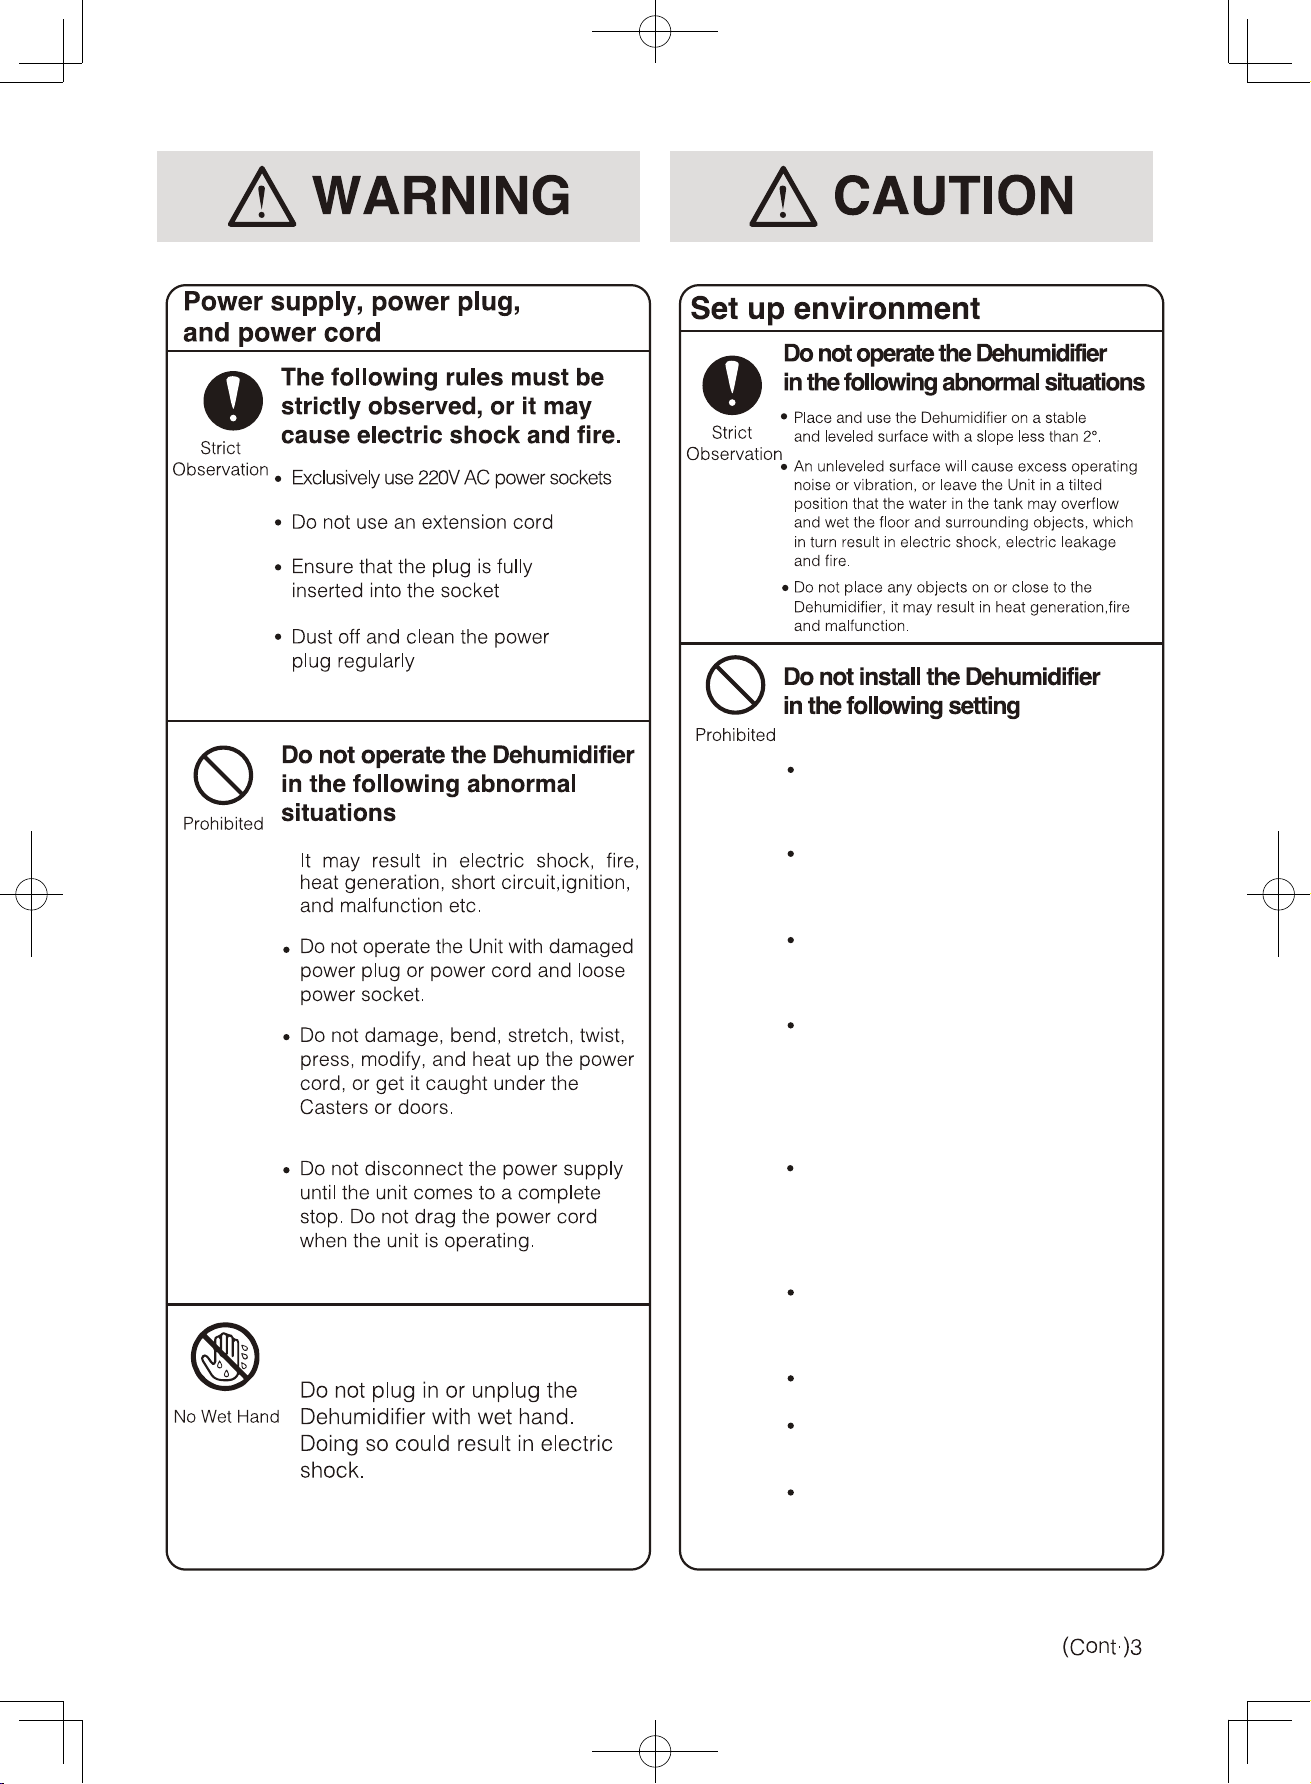
A place where it is likely to come into contact with
water such as bathroom. This could cause electric
shock, electric leakage and fire.
Where the unit may be subject to oil or flammable
gas leakage. The flammable gas around the
Dehumidifier could cause fire or explosion.
Elevated position such as on a table, as the
Dehumidifier may drop and cause damage
to the Unit.
Where the ambient temperature of the Dehumidifier
and drain hose is below freezing point. Water
inside the drain hose may freeze, that maywet the
surrounding objects when it thaws, and result in
electric shock, electric leakage or fire.
The Water Tank may consequently break and leak.
Where drugs and chemicals are used, such as
hospital, factory, laboratory and beauty salon.
Chemicals in the air may affect the performance
of the Unit, cause leakage, heat generation,
ignition and fire.
Outdoor location where the Dehumidifier is
exposed to direct sunlight or rain that may result
in leakage, heat generation, ignition and fire.
This Dehumidifier is for indoor use only.
Where space is narrow and enclosed that may
cause heat generation or fire.
Do not use combustion appliances
in the path of the airflow of the Dehumidifier,
as this may cause incomplete combustion.
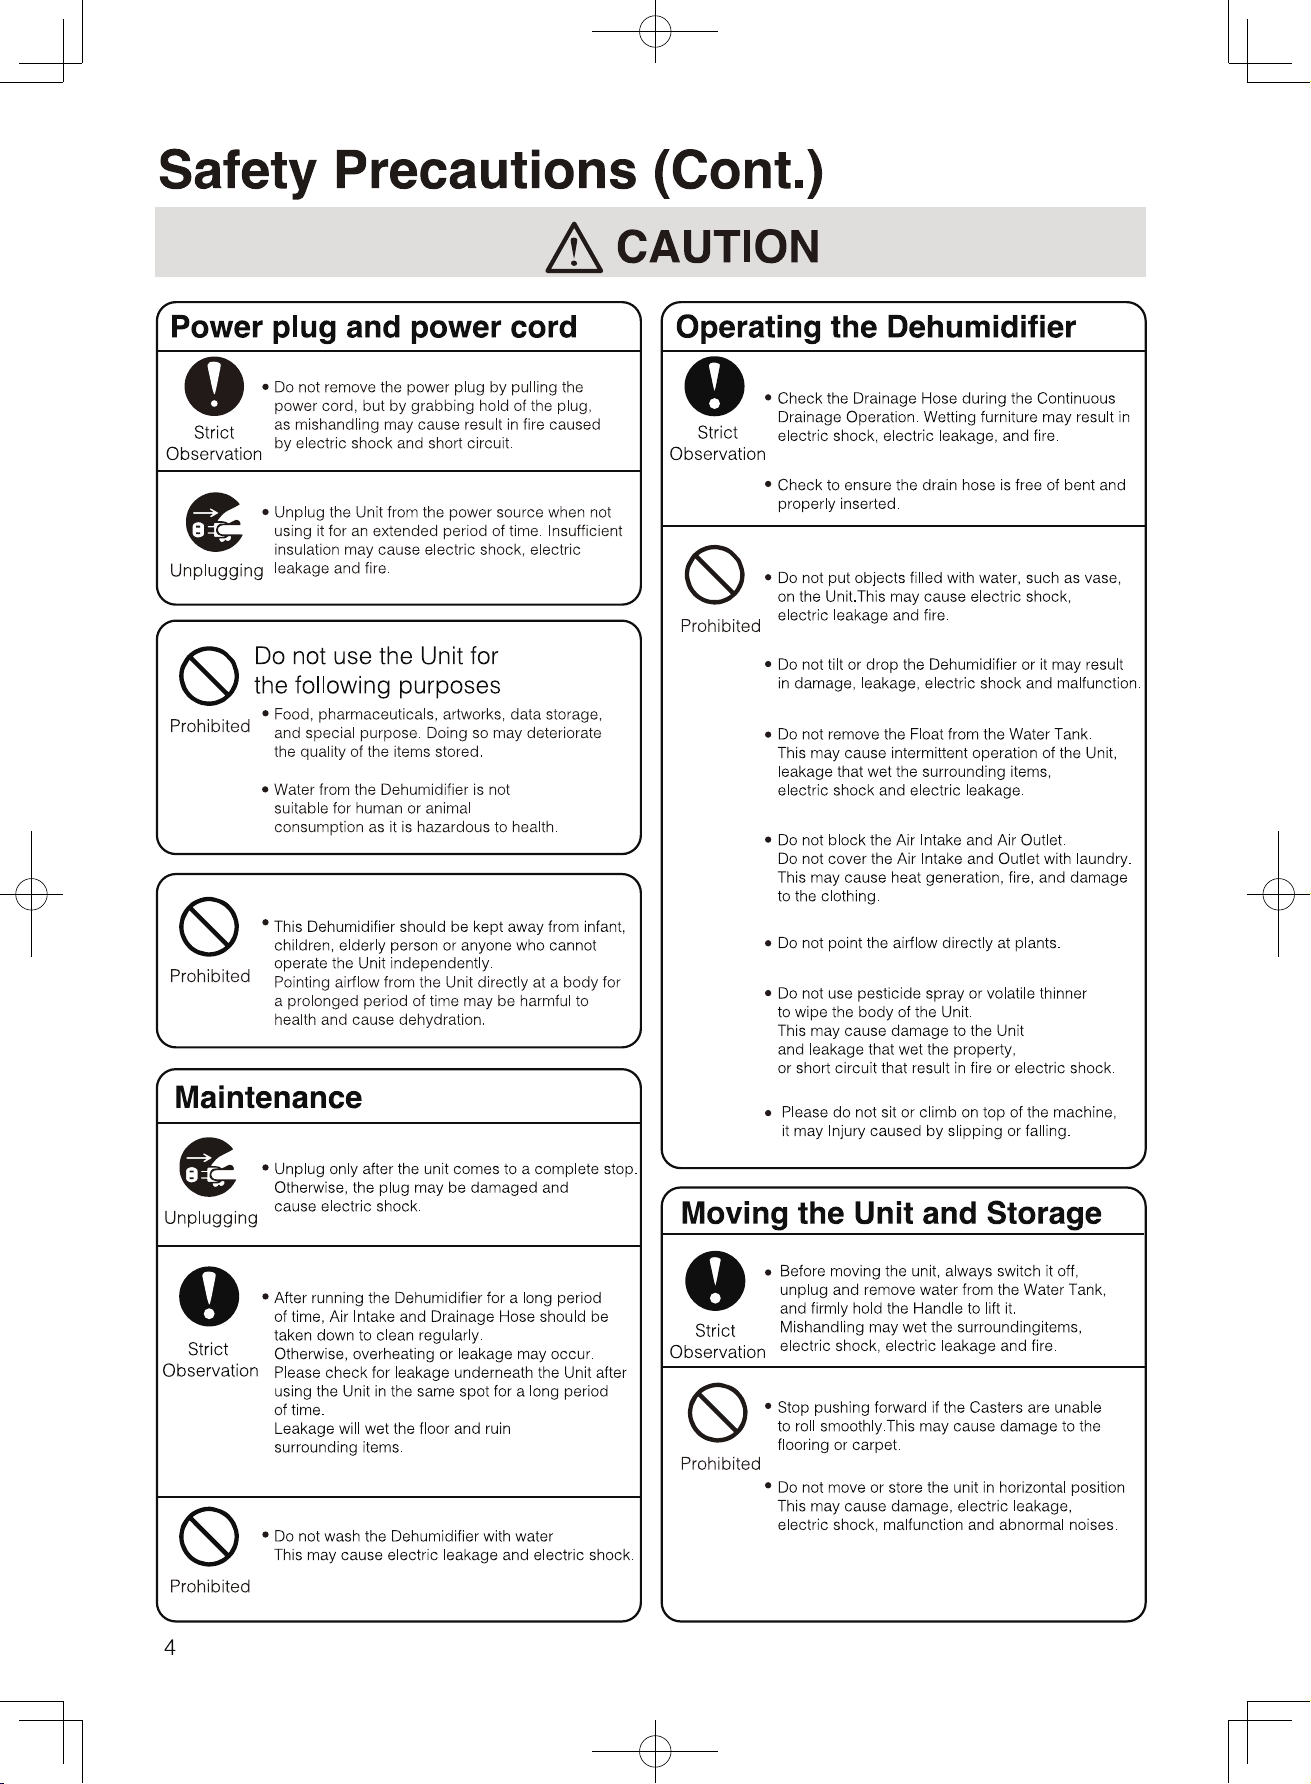
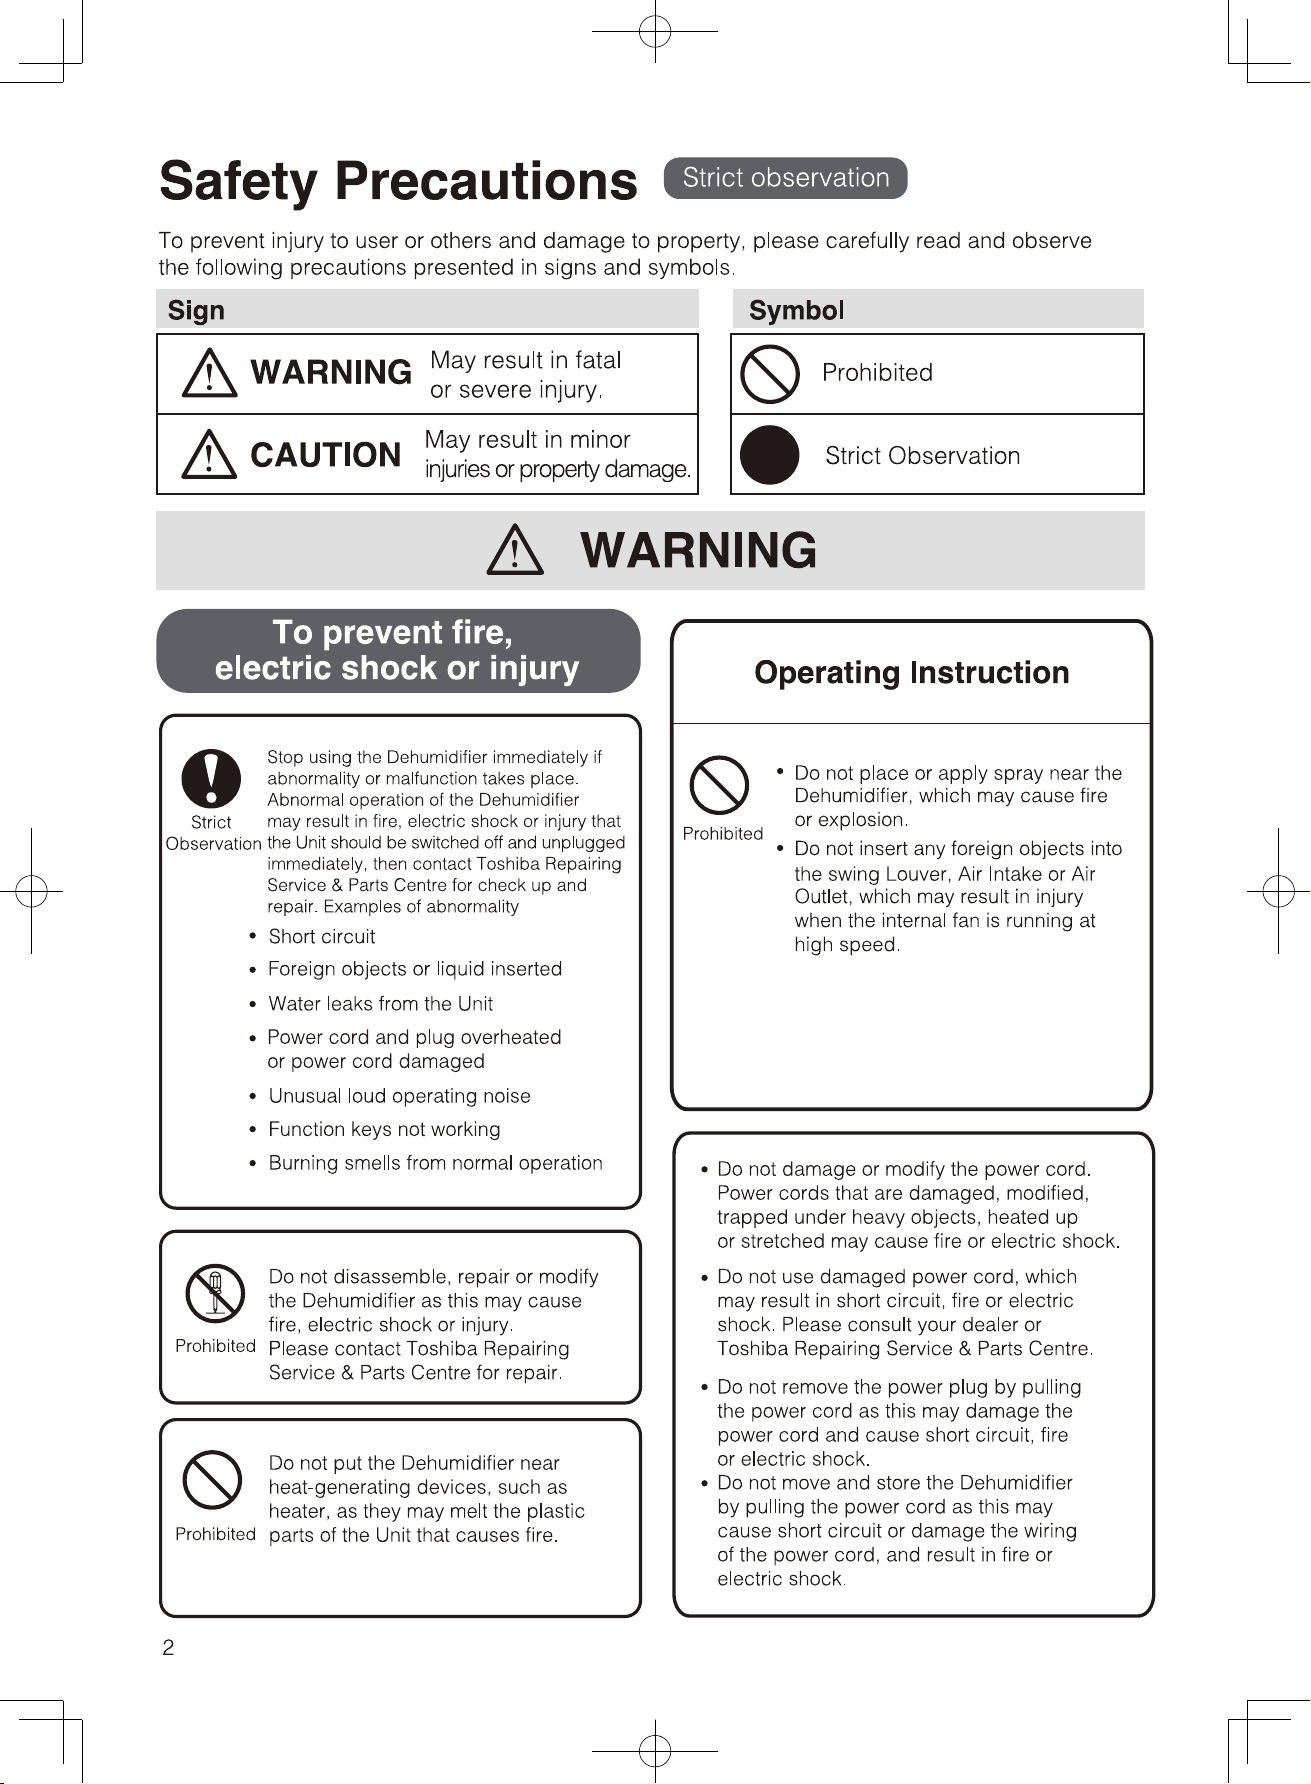
Prior to cleaning or other maintenance, the appliance must be disconnected from
the supply mains.
Unintended use of the appliance or damage to the housing may result in the escape
of dangerous UV radiation. UV radiation may, even in small doses, cause harm to
the eyes and skin.
The appliance must be disconnected from the supply before replacing the UV light.
Before opening doors and access panels bearing the ultraviolet radiation hazard
symbol for the conducting user maintenance, it is recommended to disconnect the
power.
UV light model: OL-UV1C16-5V, DC 5V, 1.6mW.
UV barriers bearing the ultraviolet radiation hazard symbol should not be removed.
Do not operate the UV light outside of the appliance.
Safety Warning
Maintenance:
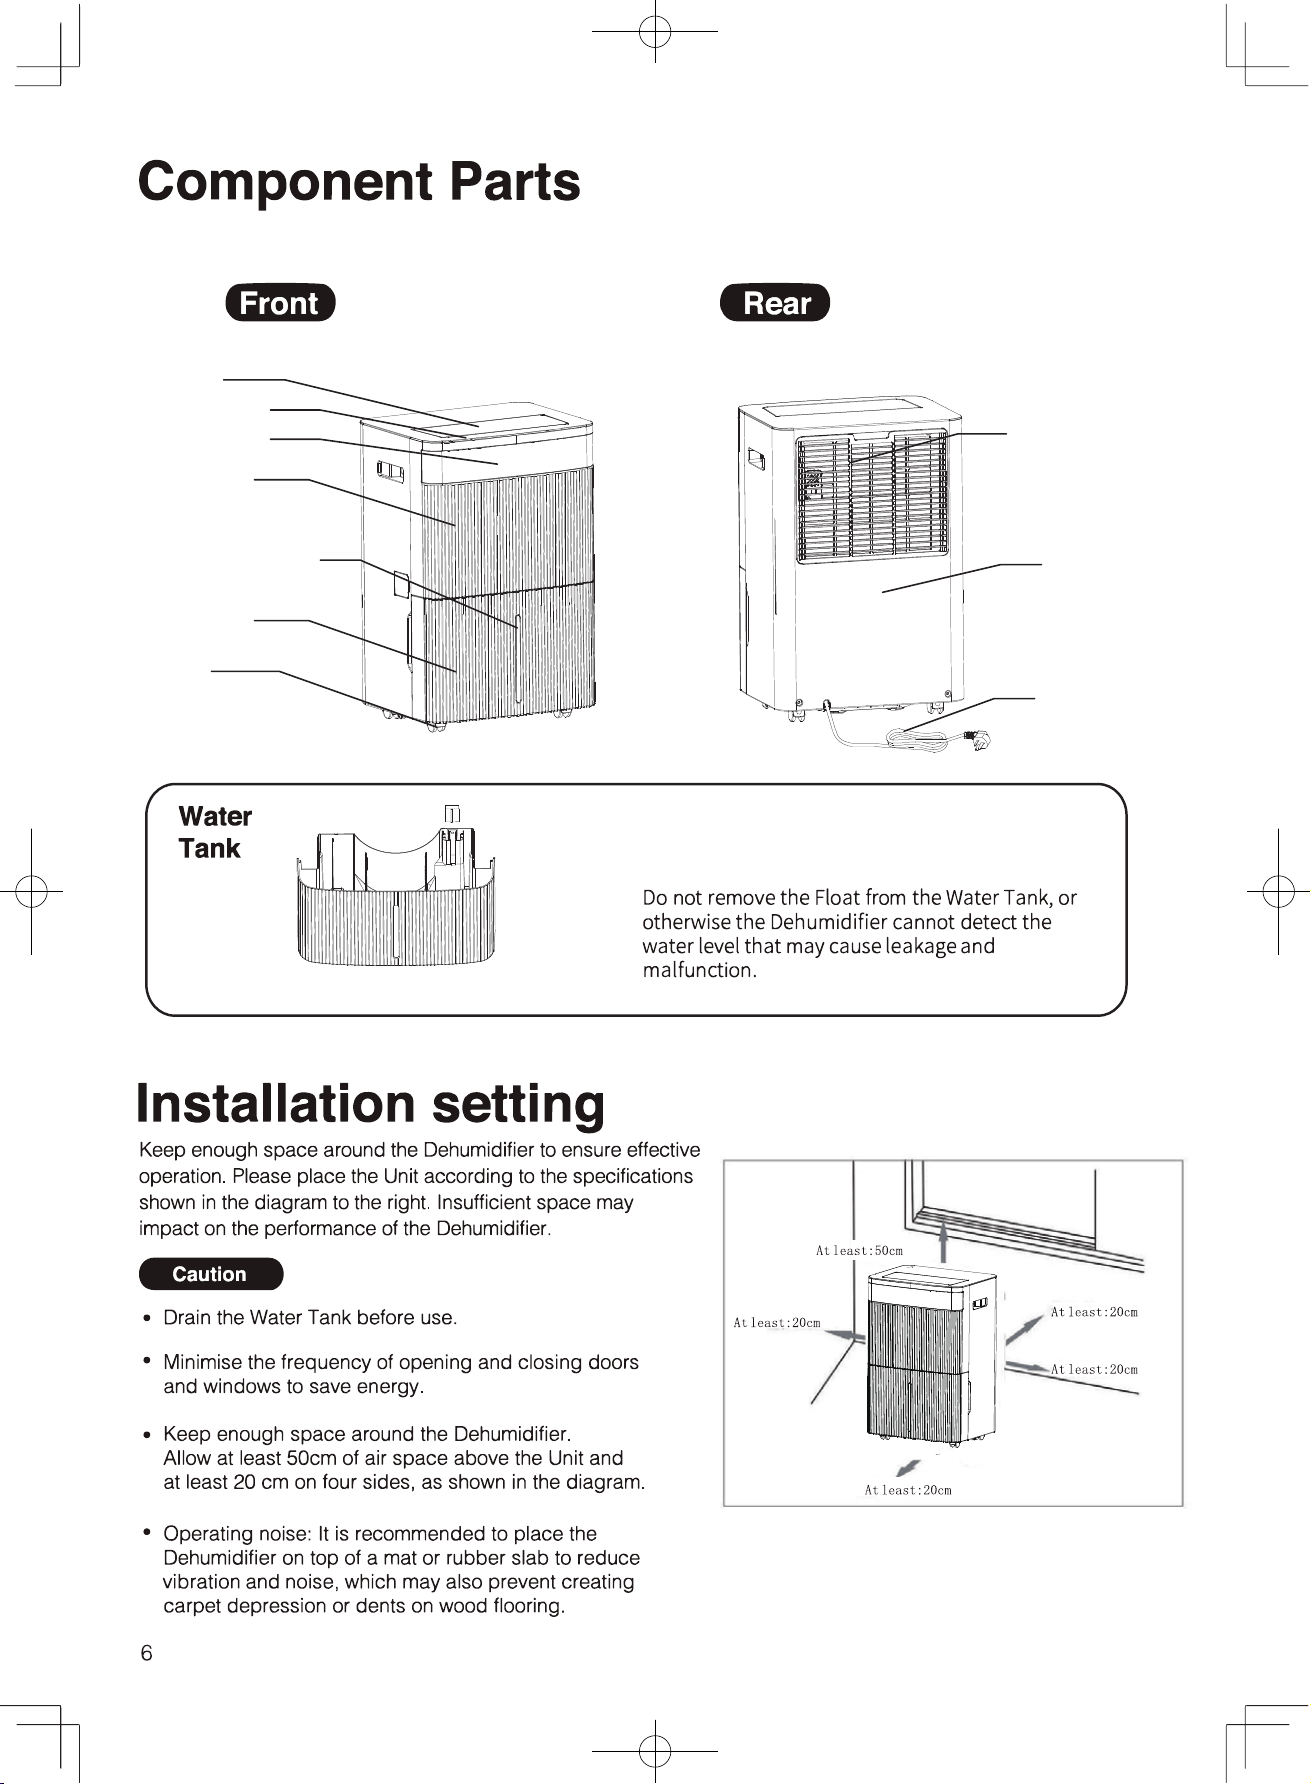
Louver
Air Intake Grille
Back Panel
Caster
Water Tank
Front Panel
Power Cord
Control Panel
Display Panel
Water Level Mirror
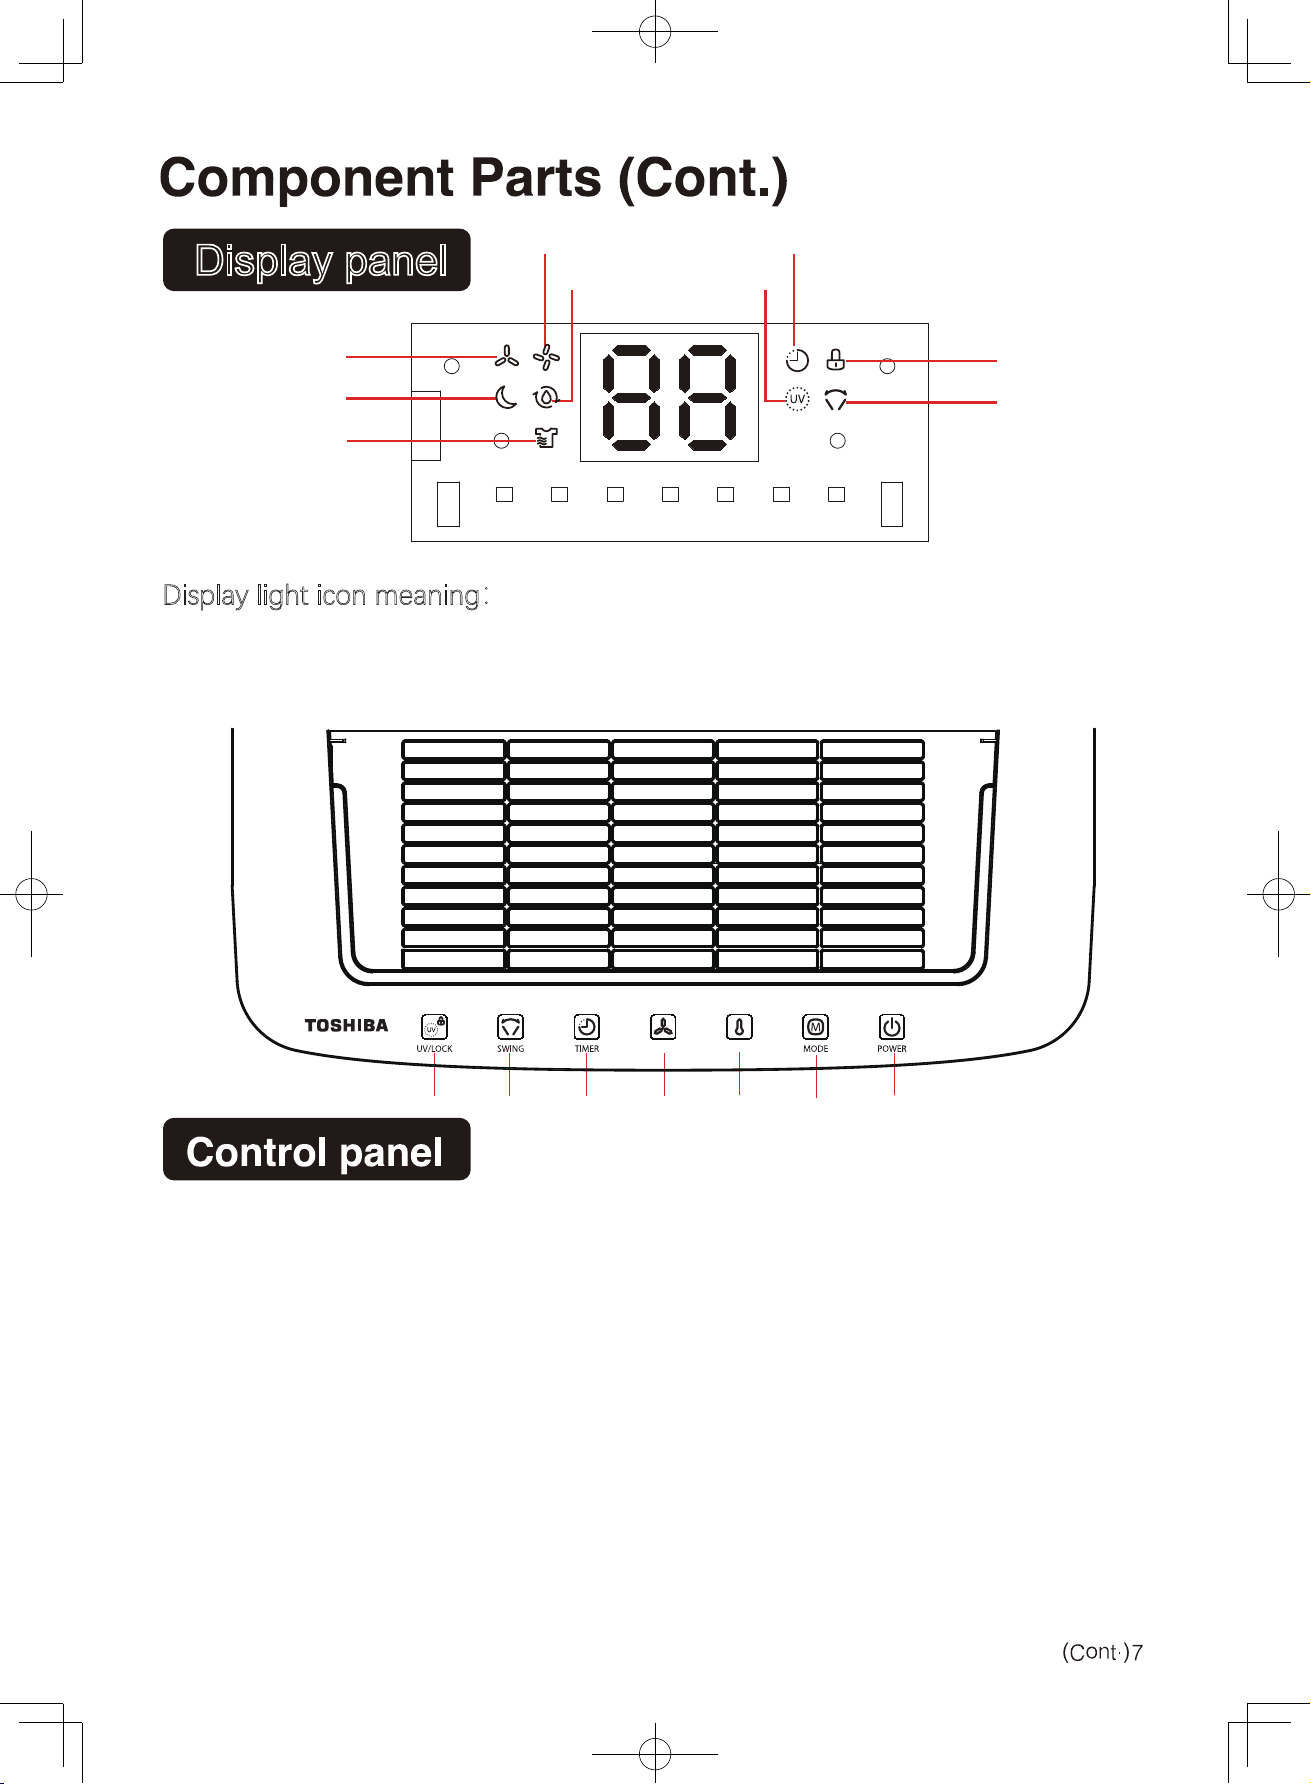
Display panel
Display light icon meaning:
1. Low wind speed pattern 2. High wind speed pattern 3. Sleep mode pattern
4. Dehumidification mode pattern 5. Dry clothes mode pattern
6 . Timer pattern 7. Child lock pattern 8. UV light pattern 9. Air circulation pattern
1.
3.
5.
7.
9.
2.
4.
6.
8.
1.
2. 3.
4. 5.
6.
7.
1.UV/ Child Lock
Press this key alone to choose to turn the UV function on or off.
Press and hold for 3 seconds to choose to lock or unlock the child lock.
2. Swing button
Press this button to turn on/off the swing function.
3. Timer button
Press the timing key to set timing / check timing / cancel timing
In the non timing state: press the timing key to enter the timing setting state. The digital screen
flashes to display the timing time. During the flashing period of the digital screen, press the hour
key to adjust the timing time (0 ~ 24h).
In the timing state: press the timing key, and the digital screen flashes to display the remaining
timing time. Press the timing key again during the flashing period of the digital screen to cancel the
timing.
4.Fan Speed button
Press this button to switch the fan speed between high and low fan speed cycle, and the corresponding
indicator light will be on.
FANSPEED
HUM&HOUR
UV/童鎖 送風 時間掣 風速 濕度&小時 模式 電源
Key Function
5.HUM button
Press this button to set humidity .
To humidity adjusting , press one time to add 5% humidity value, the humidity adjusting follow the order
as below : 30% - 35% - 40% - 45% - 50% - 55% - 60% - 65% - 70% - 75% - 80% - 30% cycle.
To timing,press one time to add 1 hours timing value, the timing follow the order as below:
00-01-02-03-04-05-06-07-08-09-10-11-12-13-14-15-16-17-18-19-20-21-22-23-24-00 cycle.
6.Mode button
Press the mode button to switch between Auto and Laundry Drying Mode.the corresponding indicator
will light up.
Auto mode:
when environmental humidity > set humidity +3%, the fan starts and the fan operates at the set wind
speed.
When environmental humidity < set humidity -3%, the press stops and the fan stops after a delay of 30
seconds.
In the dehumidification mode (automatic dehumidification mode), both the fan speed and humidity Settings
can be adjusted.
Laundry Drying Mode:
In this mode,The machine will continue to run in high fan speed , fan speed is adjustable,humidity setting
can not be adjusted.
Sleep mode:
Long press MODE button to turn on sleep function.
In sleep mode, except sleeping mode indicator light, other indicator lights and display screen will be off or
darken.Press any button will restored in normal display. Other functions are the same as auto dehumidify
-ing mode.
In sleeping mode, the fault code is not displayed, the wind speed and the humidity is adjustable.
In standy mode, when the water tank is full , the machine will not alarm, the“FL” to remind that the
water tank is full and you need to empty the water tank.
7.Power
Press to turn the dehumidifier on or off.
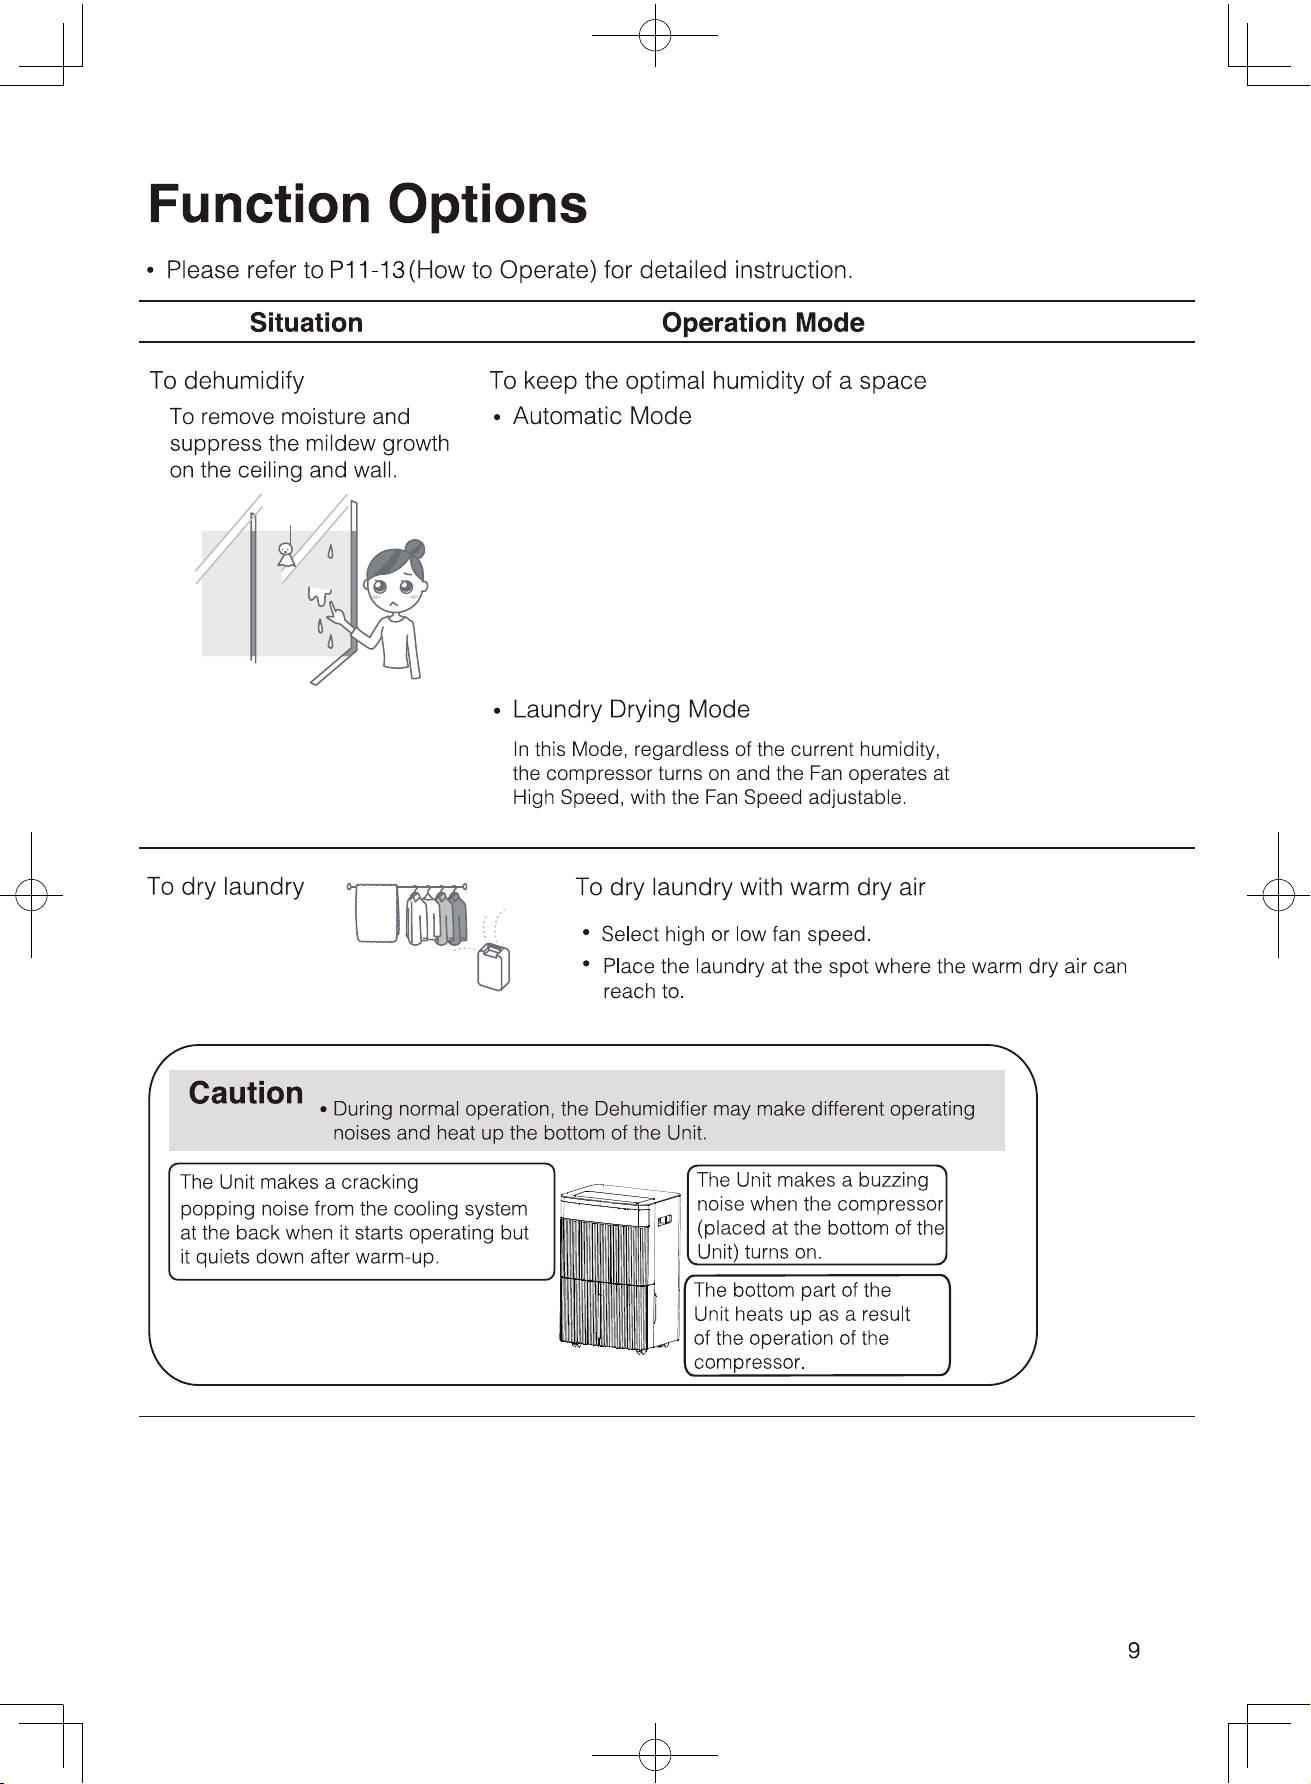
When Hr>Hs+3%, the press starts and the fan operates at the set
wind speed.
When Hr<Hs-3%, the press stops and the fan stops after a delay
of 30 seconds.
In the dehumidification mode (automatic dehumidification mode),
both the fan speed and humidity Settings can be adjusted.
(Page 9)
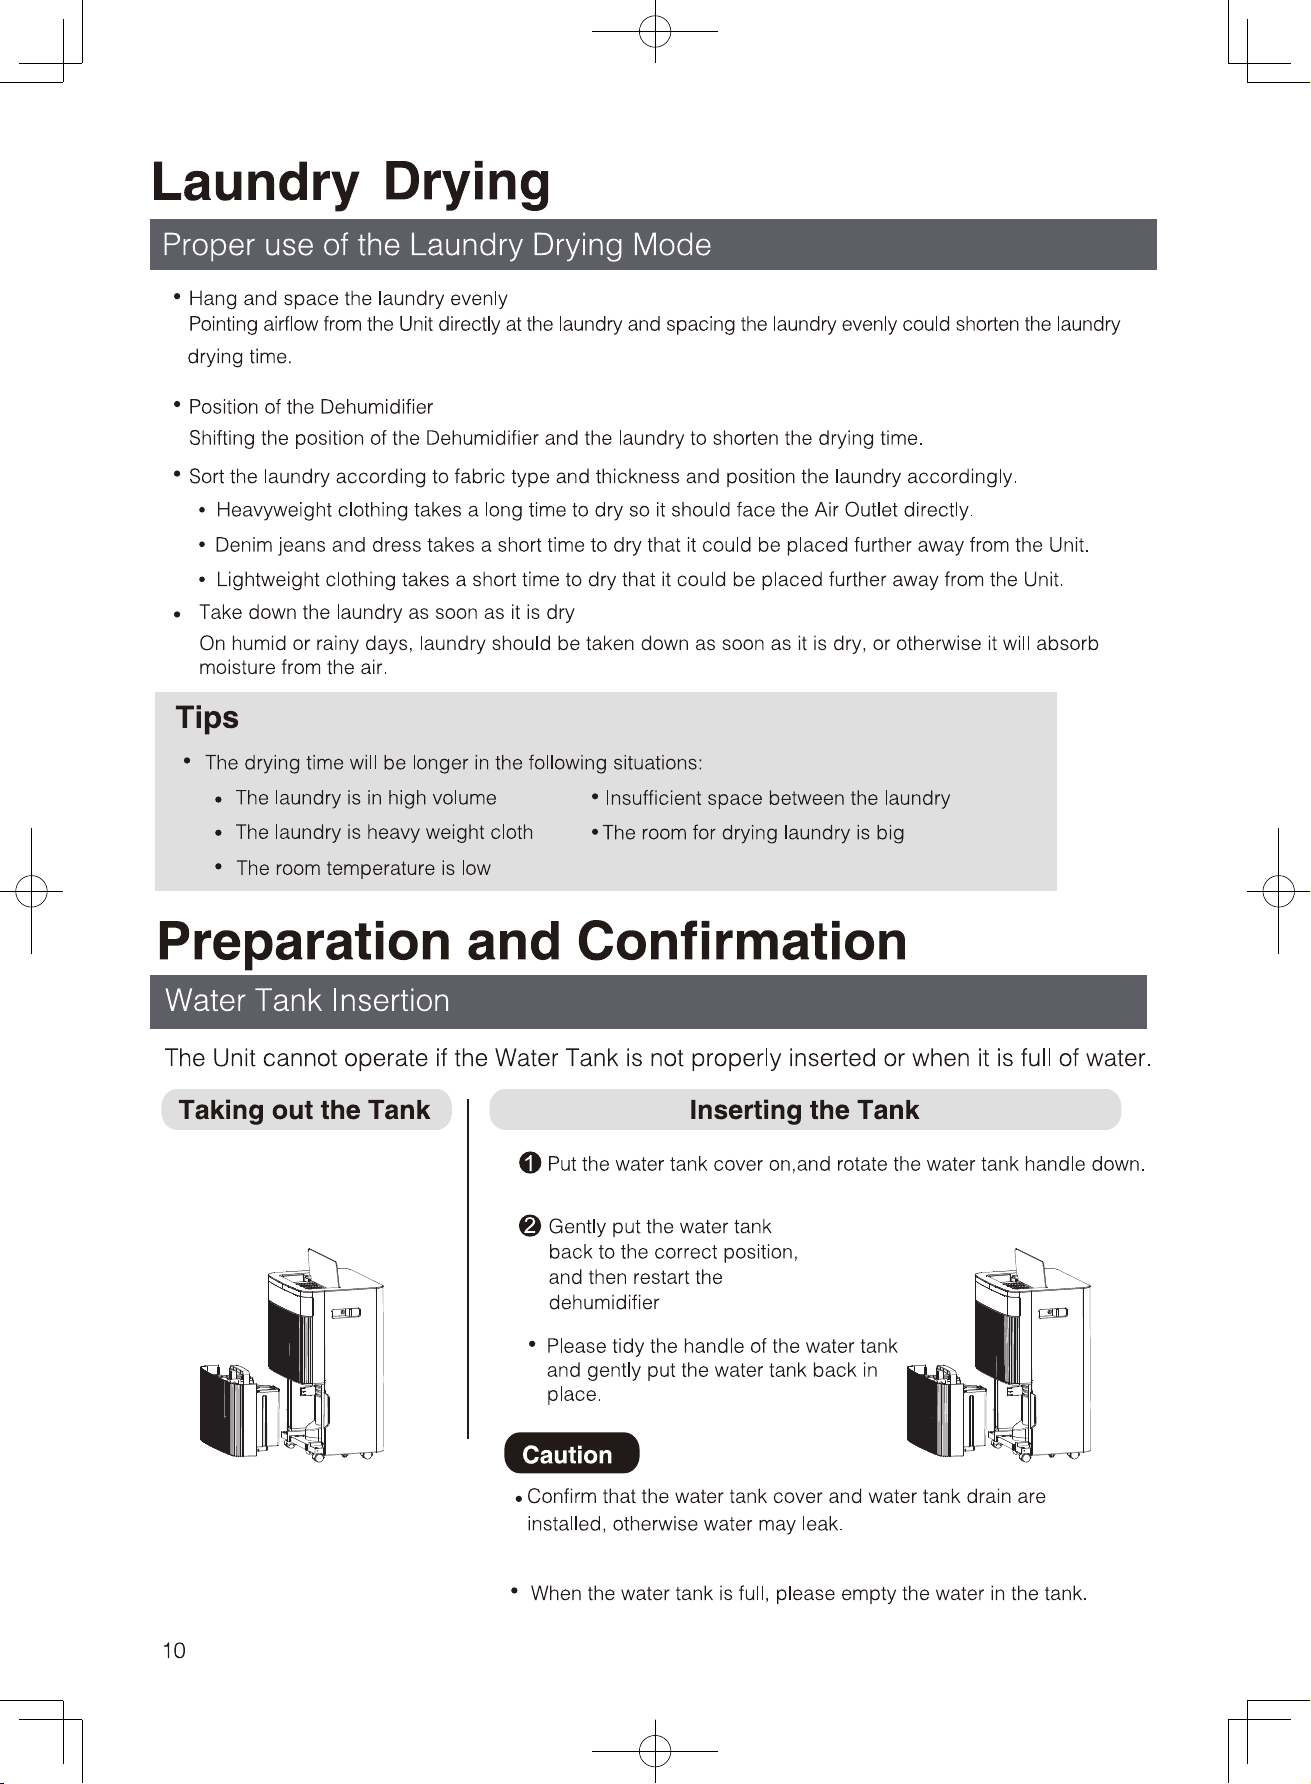
Hold the sides of the water
tank with both hands respect
-ively and pull it out forcefully.
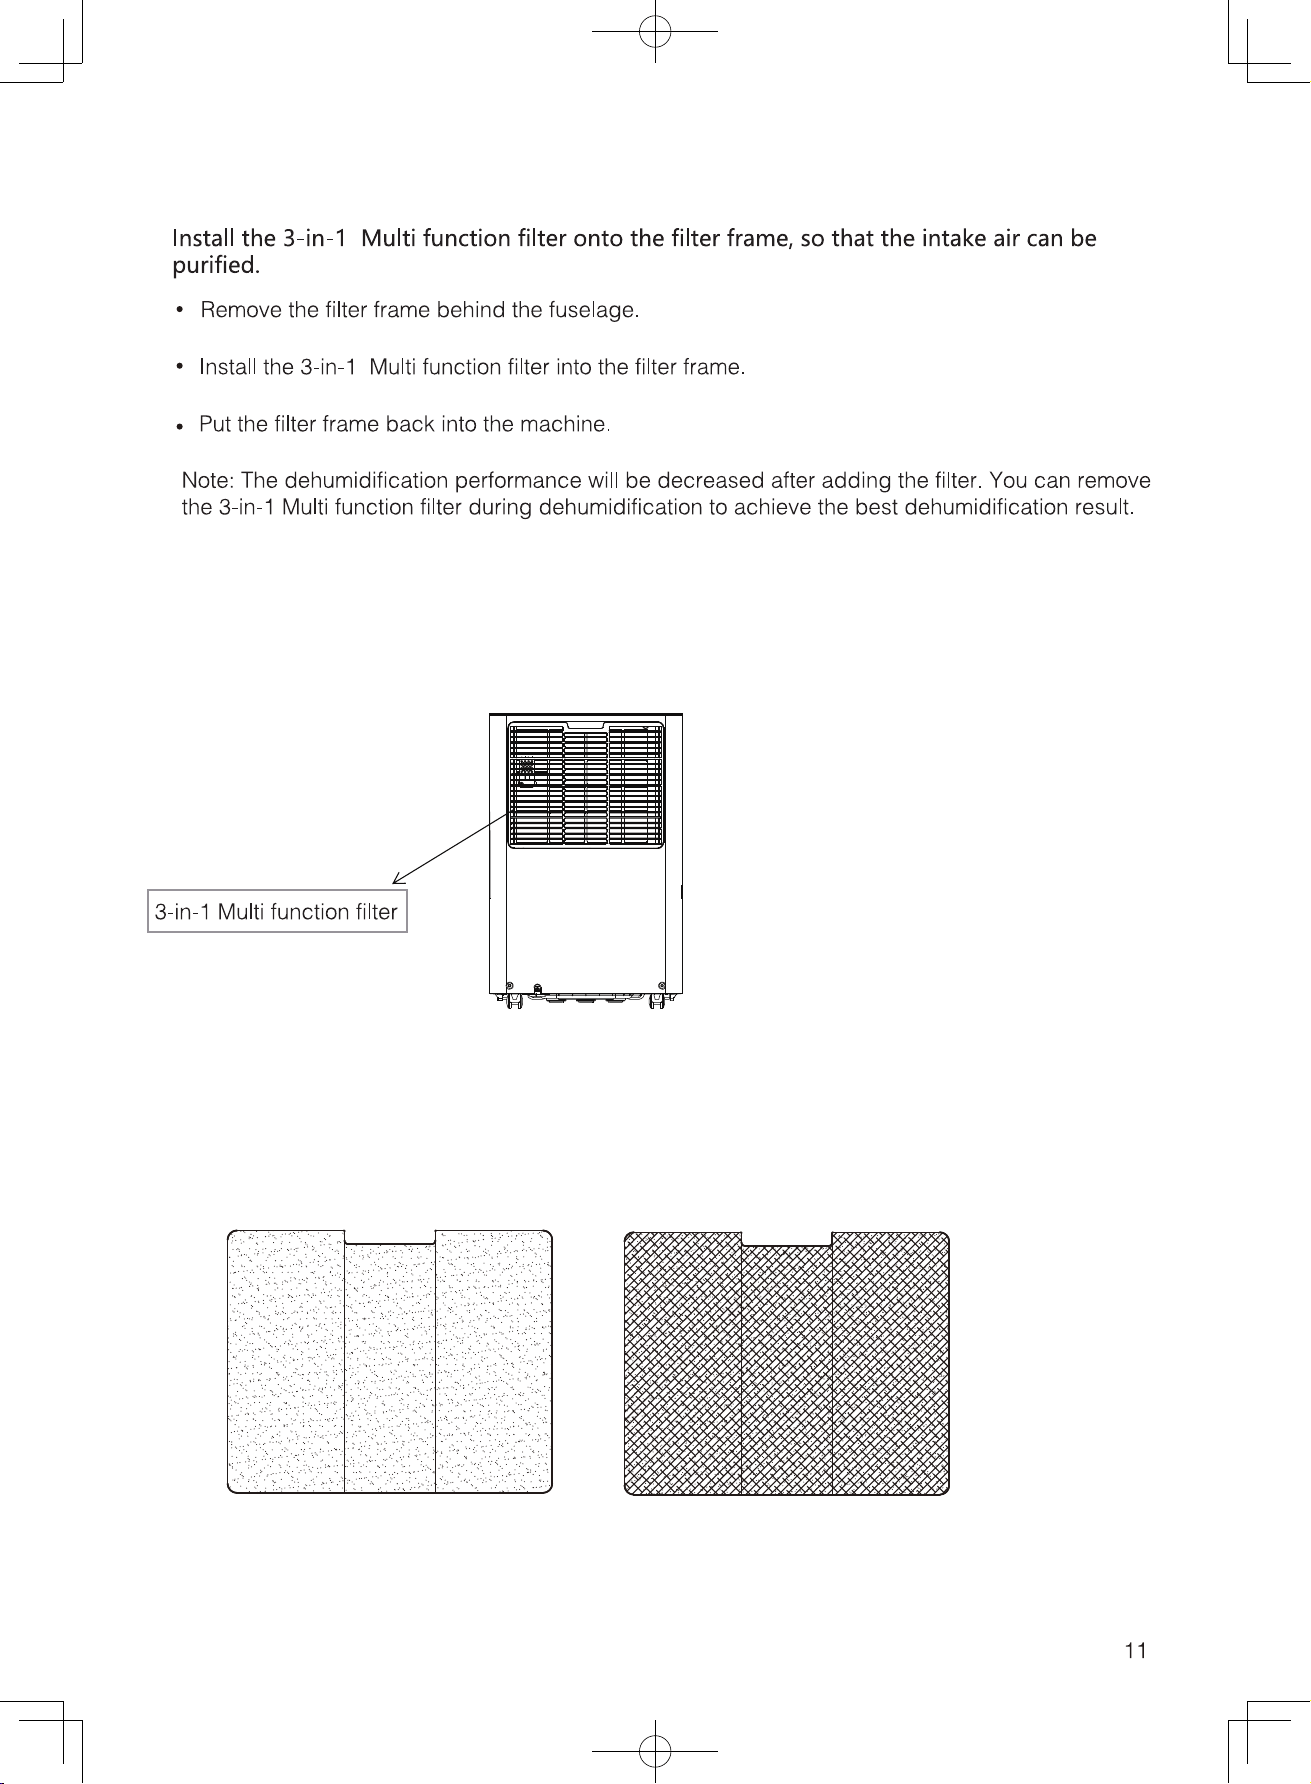
Filter installation method
With plastic net (Outward)
Inward
Note: When installing, the side of the filter screen with the plastic surface should face
outward.
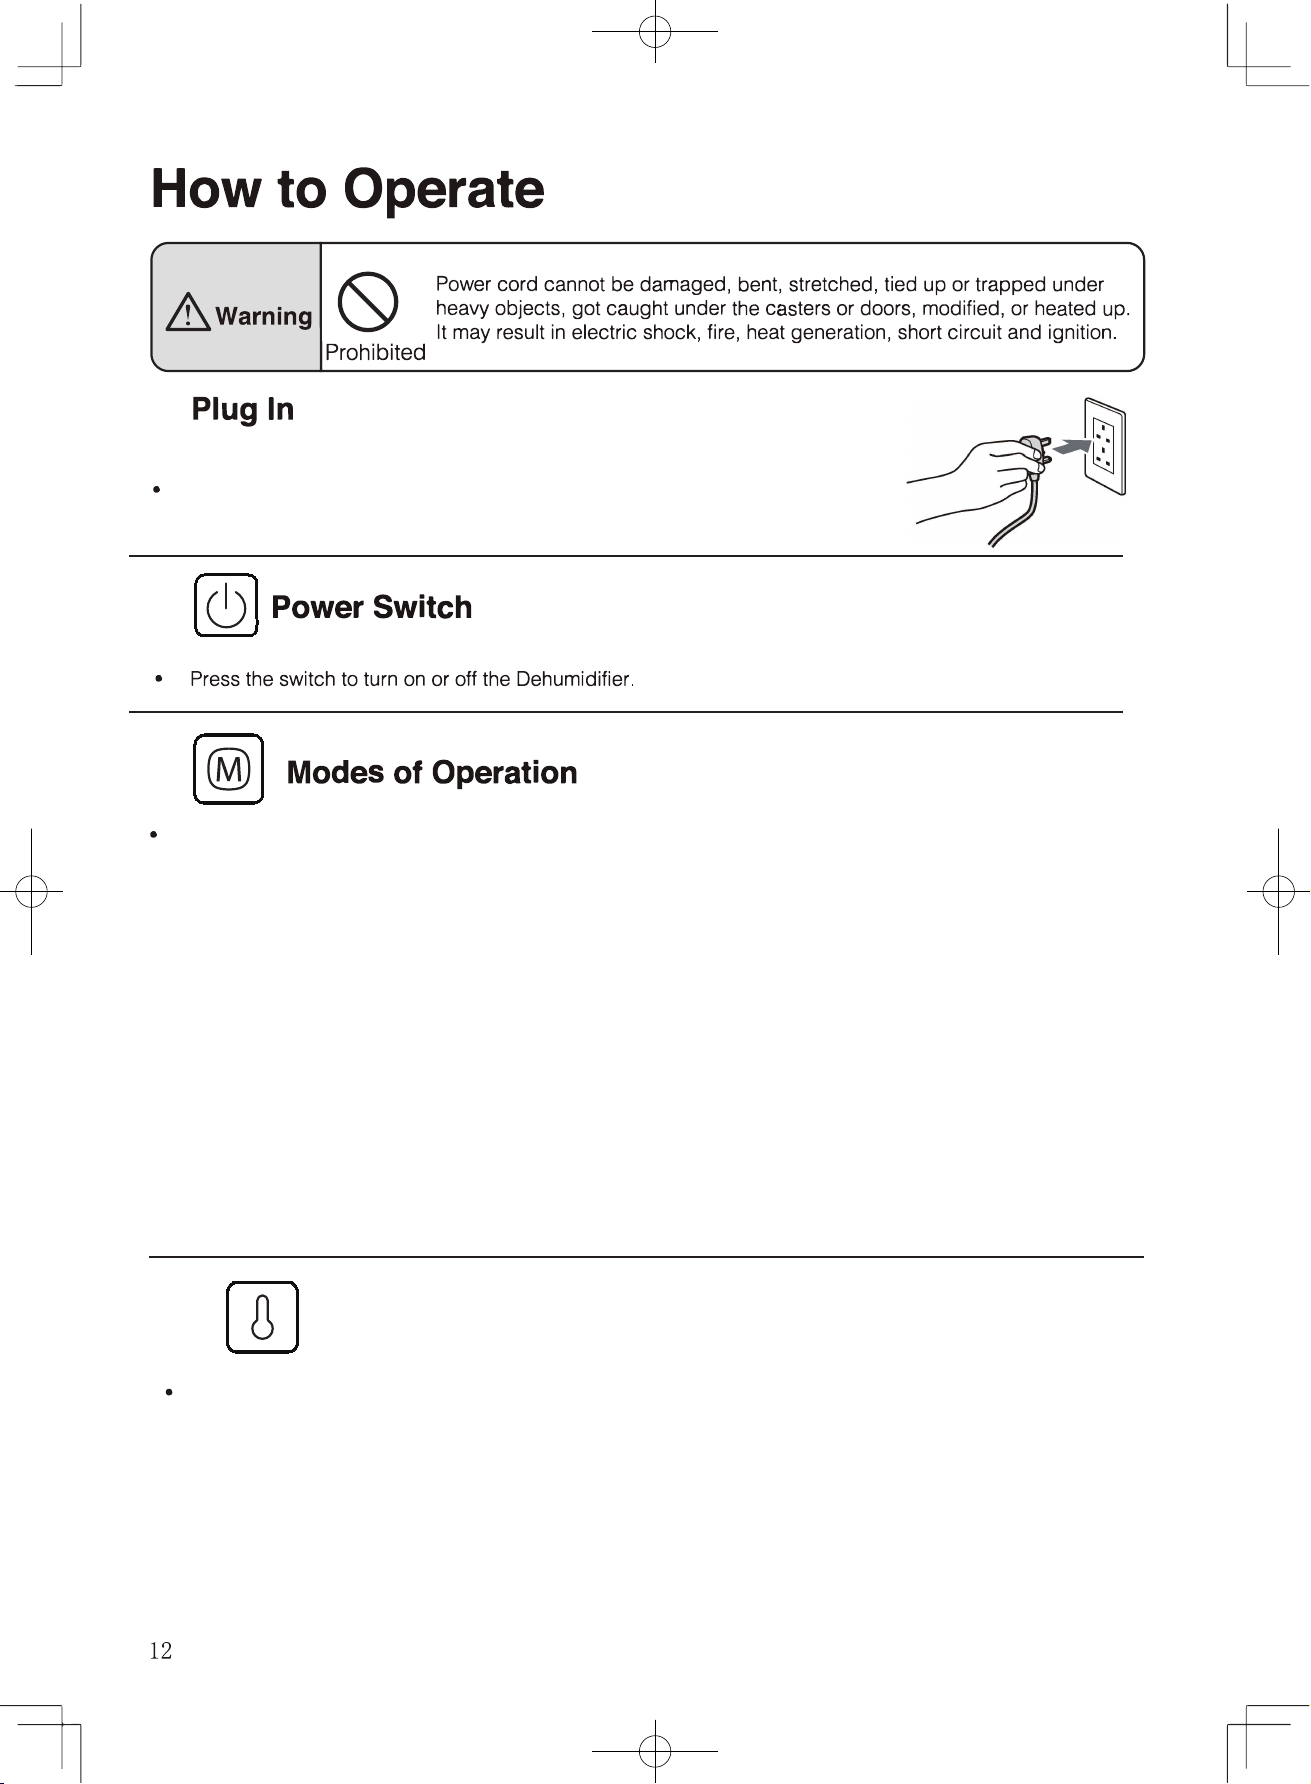
Press the mode button to switch between Auto and Laundry Drying Mode.
Startup sound “DING”
Auto mode - continuously dehumidify mode cycle, press once to switch the mode from one to another,
the corresponding indicator will light up.
Auto mode:
when environmental humidity ≥ set humidity +3%, the fan starts working and compressor starts working
after 3 seconds.
When environmental humidity ≤ set humidity -3%, the compressor stops working and fan stops working
after 30 seconds’ delay.Both fan speed and humidity setting can be adjusted under Auto mode.
Continuously dehumidify mode:
In this mode,The machine will continue to run in high fan speed , fan speed is adjustable,humidity setting
can not be adjusted.
Sleep mode:
Long press MODE button to turn on sleep function.
In sleep mode, except sleeping mode indicator light, other indicator lights and display screen will be off or
darken.Press any button will restored in normal display. Other functions are the same as auto dehumidify
-ing mode.
In sleeping mode, the fault code is not displayed, the wind speed and the humidity is adjustable.
In sleeping mode, when the water tank is full , the machine will not alarm, the display “FL” to remind
that the water tank is full and you need to empty the water tank.
Press and hold the "Adjust" key for a long time to switch and flash the ambient temperature. After 5 seconds,
the ambient humidity or timing will still be displayed.
Press this button to set the humidity and timing time:
In the dehumidification mode (automatic dehumidification mode), for humidity adjustment, pressing once can
increase the humidity value by 5%.
The specific adjustment sequence is as follows: 30%-35%-40%-45%-50%-55%-60%-65%-70%-75%
80%-30% (cycle period).
Humidity/Hour key
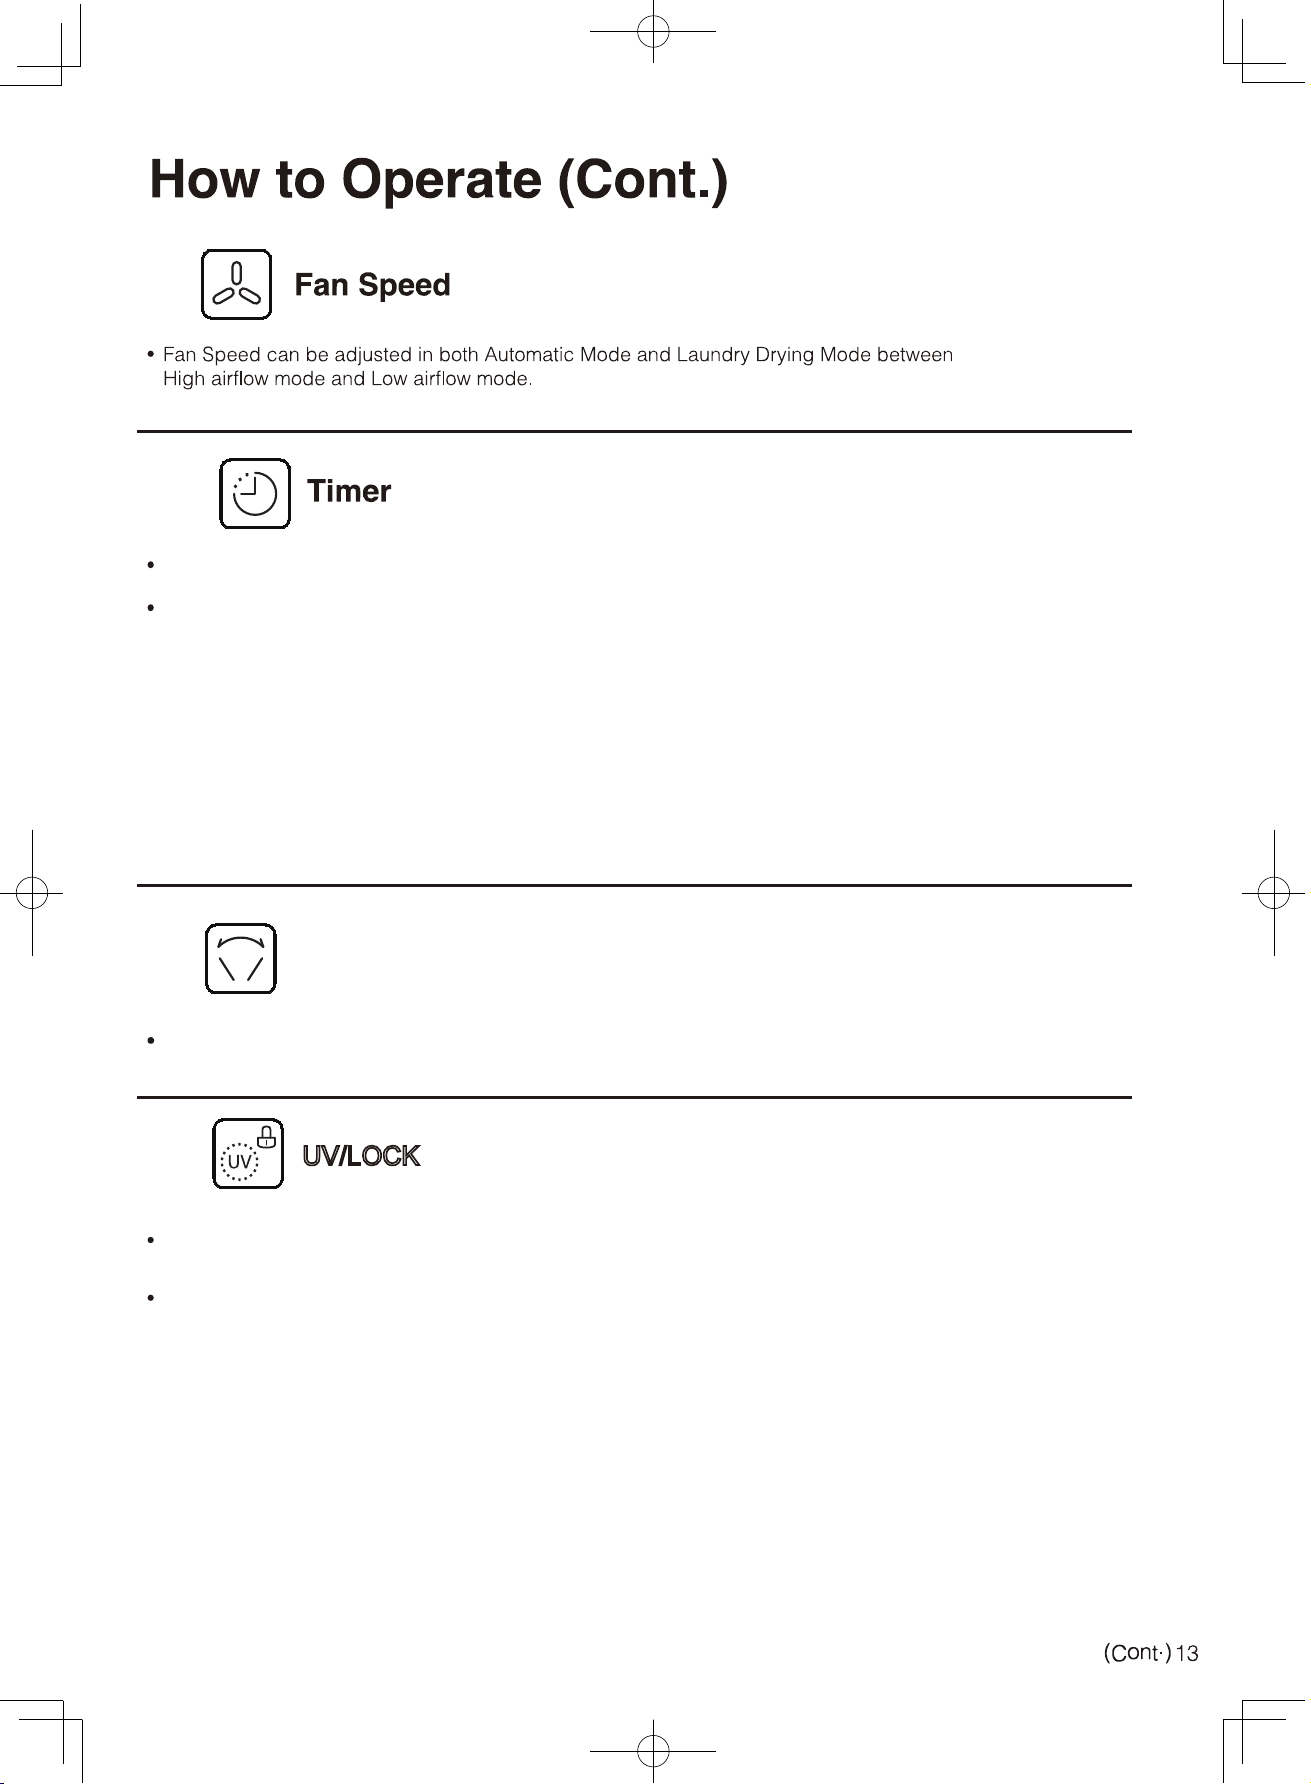
UV/LOCK
Press this key alone to choose to turn on or off the UV function.
Press and hold for 3 seconds to choose to unlock or unlock the child lock.
Press this key alone to set the timer/query the timer/cancel the timer.
When starting up press the timer key to set the timer,query the timer or cancel the timer.
In non-timed state:Press the timed key to enter the timed setting state.The digital display screen flashes to show
the timing.
During the flashing of the digital display screen,press the adjustment key to adjust the timing(O to 24 hours).In the
timing state:Press the timing key,and the digital display screen will flash to show the remaining timing time.Press
the timer button again during the flashing of the digital display screen to cancel the timer.
For timing, the timing value can be increased by 1 hour each time. The timing sequence is as follows: 00-01-
02-03-04-05-06-07-08-09-10-11-12-13-14-15-16-17-18-19-20-21-22-23-24-00 (Cycle period).
During the timer period, the timer indicator lights up. When the timer ends, the timer indicator turns off.
Setting a timer on/off does not change the current on/off state; the timer setting is valid only for the last timer
setting. Pressing a key to turn the power on/off will clear all timer settings.
Timed start-up: When the machine is turned off, press the timer control button to set the time.
Press this button to turn on/off the air supply function.
Air supply button
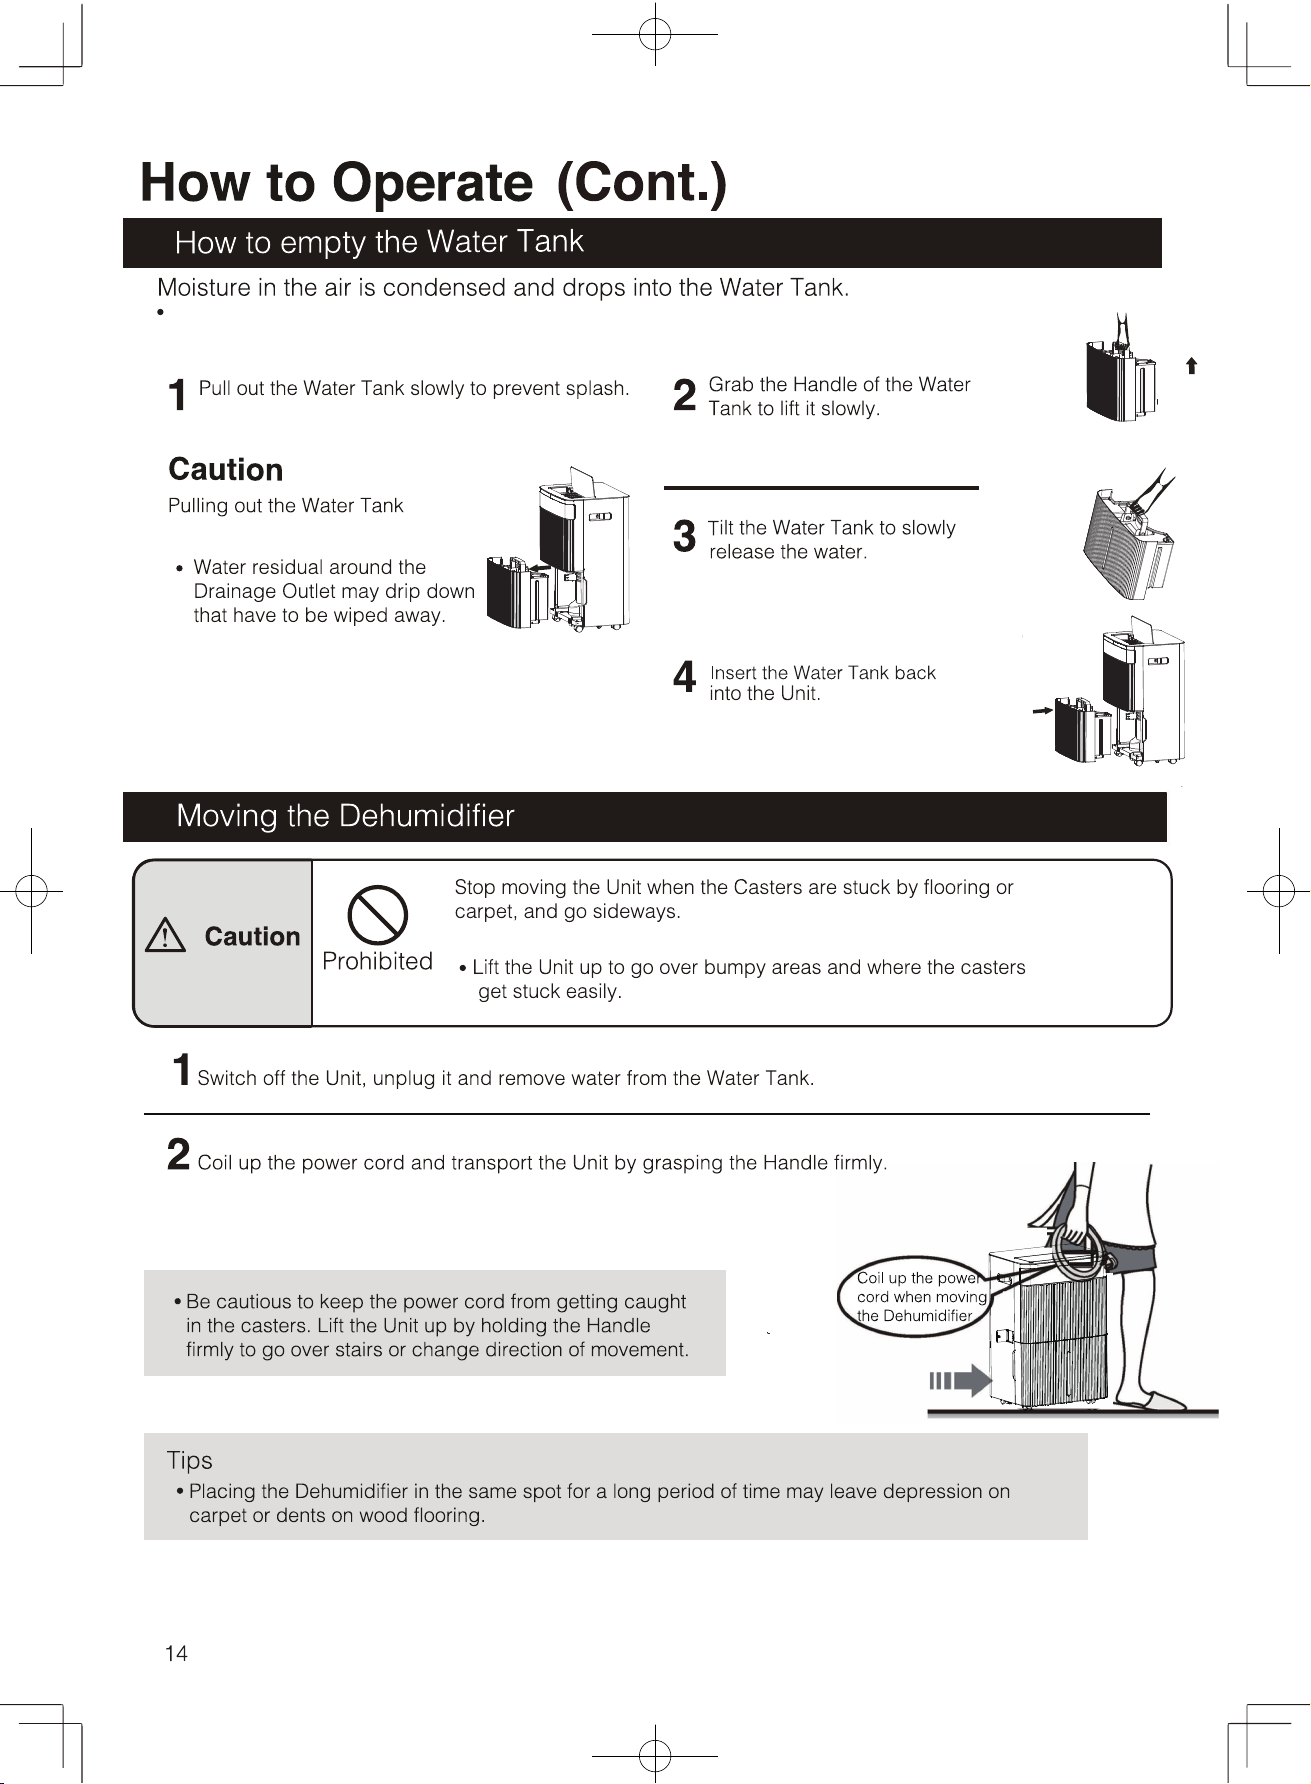
When the water tank is full, the machine stops running and the full water status is indicated
by "FL". After the water is drained, the water tank returns to its original state, and the entire
machine can resume operation.
Please go to P14 for Continuous Drainage
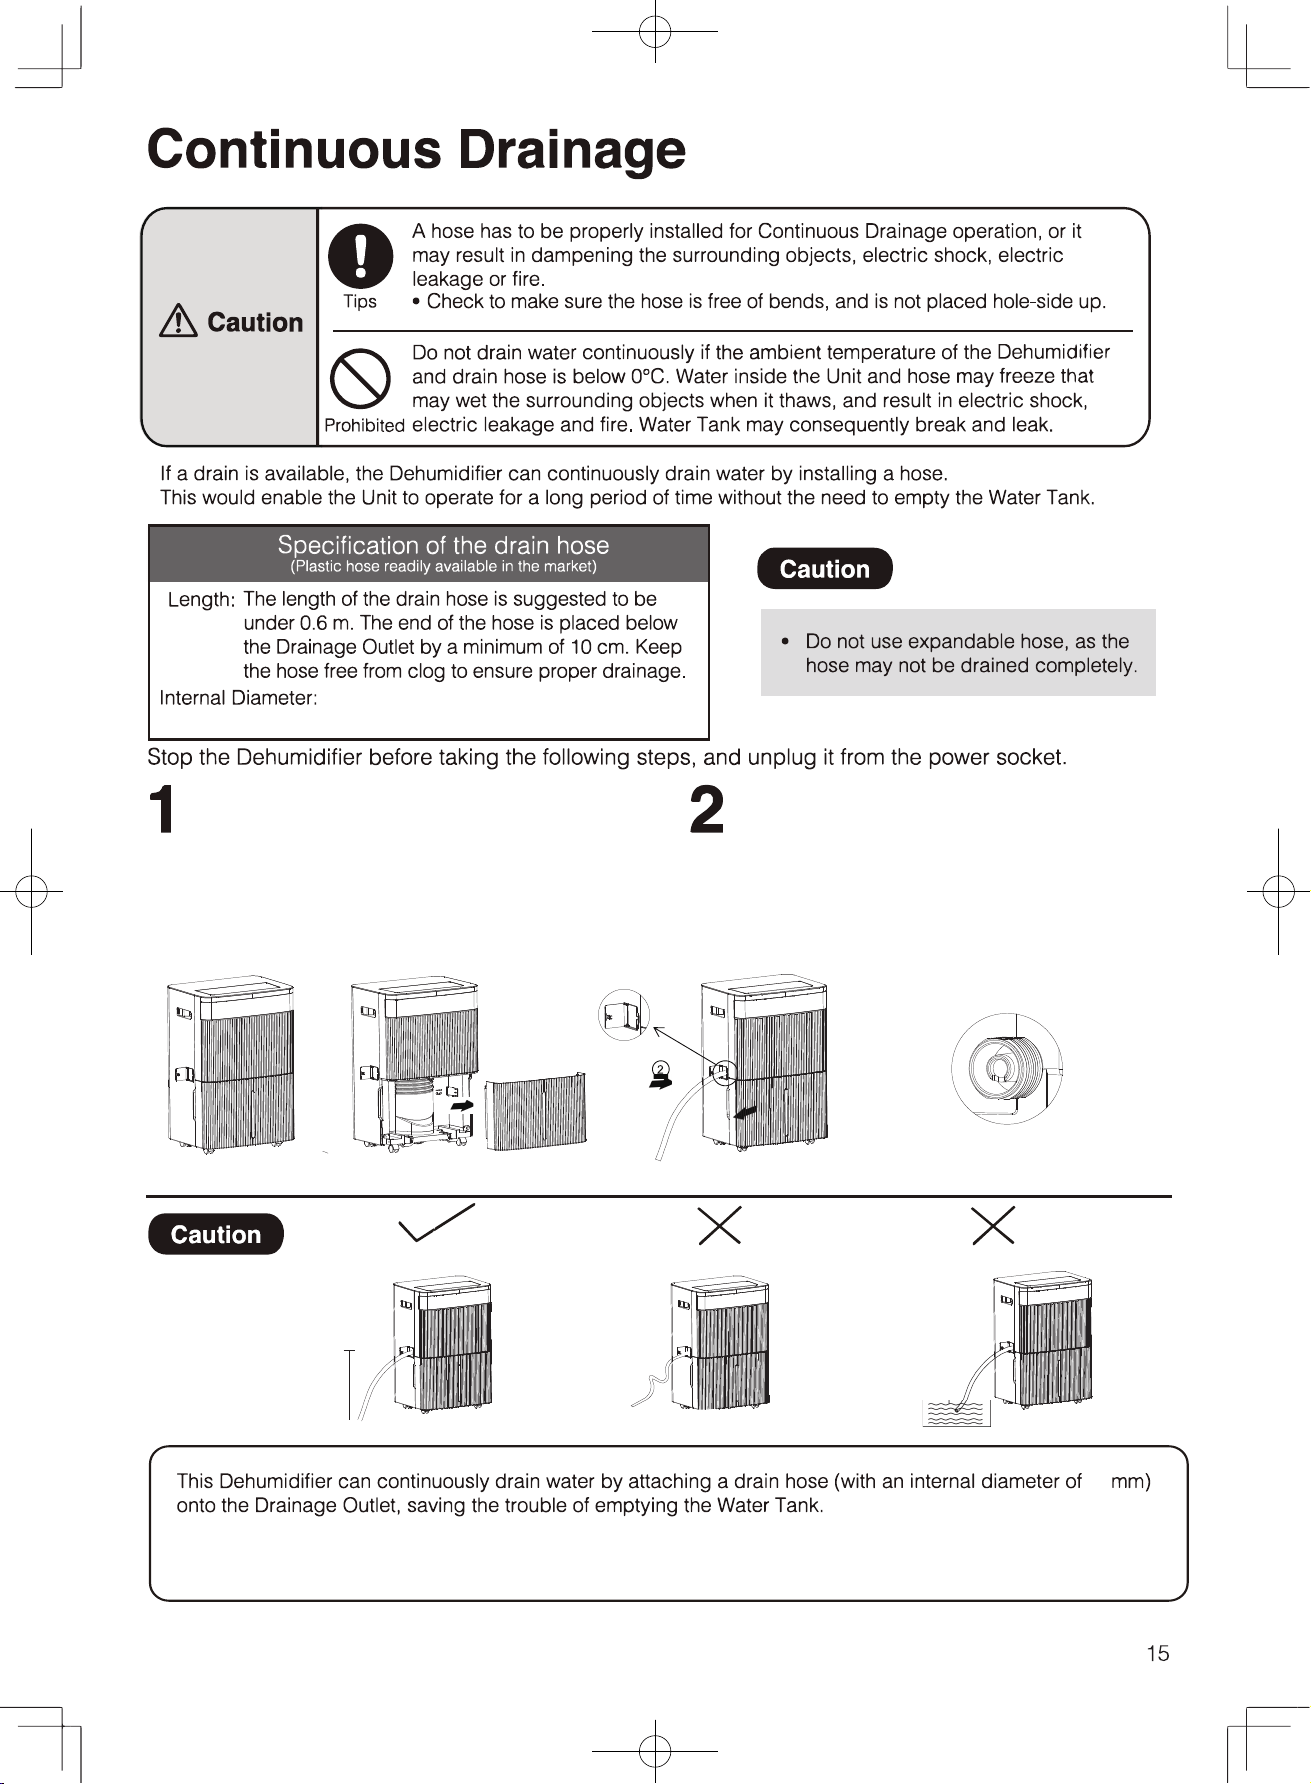
10cm
After removing the water tank,Open the
drain cover on the side of the Fuselage.
Connect the 11-millimeter threaded pipe to the
drain,Use both hands to push the threaded
pipe from the outside of the machine body to
the inside. After installing the pipe, put the
water tank back.
11 millimeters
11
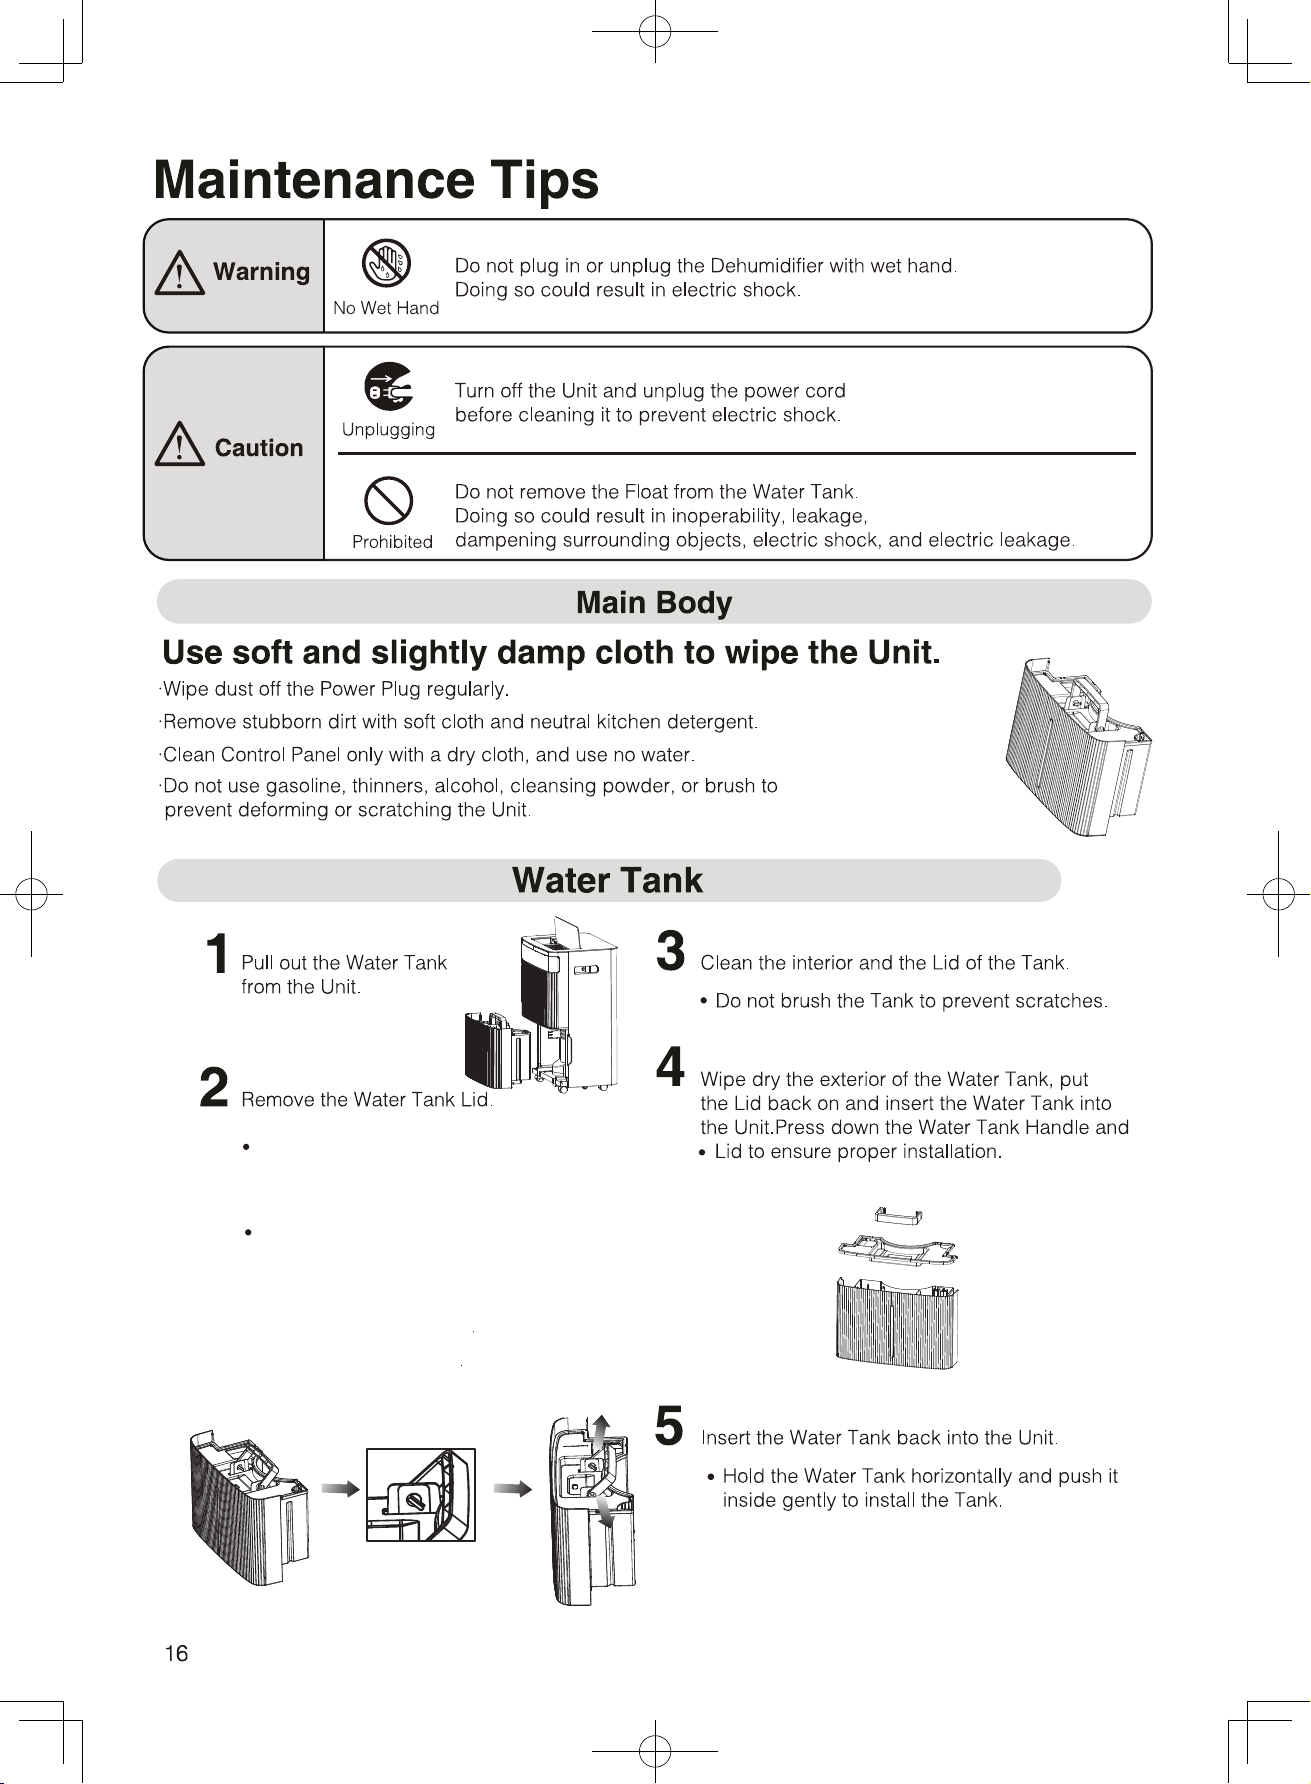
Remove the water from the tank by puling it
out through the handle limit slot.
The water tank cover is opened upwards.
Removing the Tank Handle
Lift the handle from a horizontal position to the
desired angle.
Find the correct tank handle retaining groove
as shown in the figure.
Once you have found the retaining groove,
apply pressure outward with both hands
simultaneously to remove the tank handle.
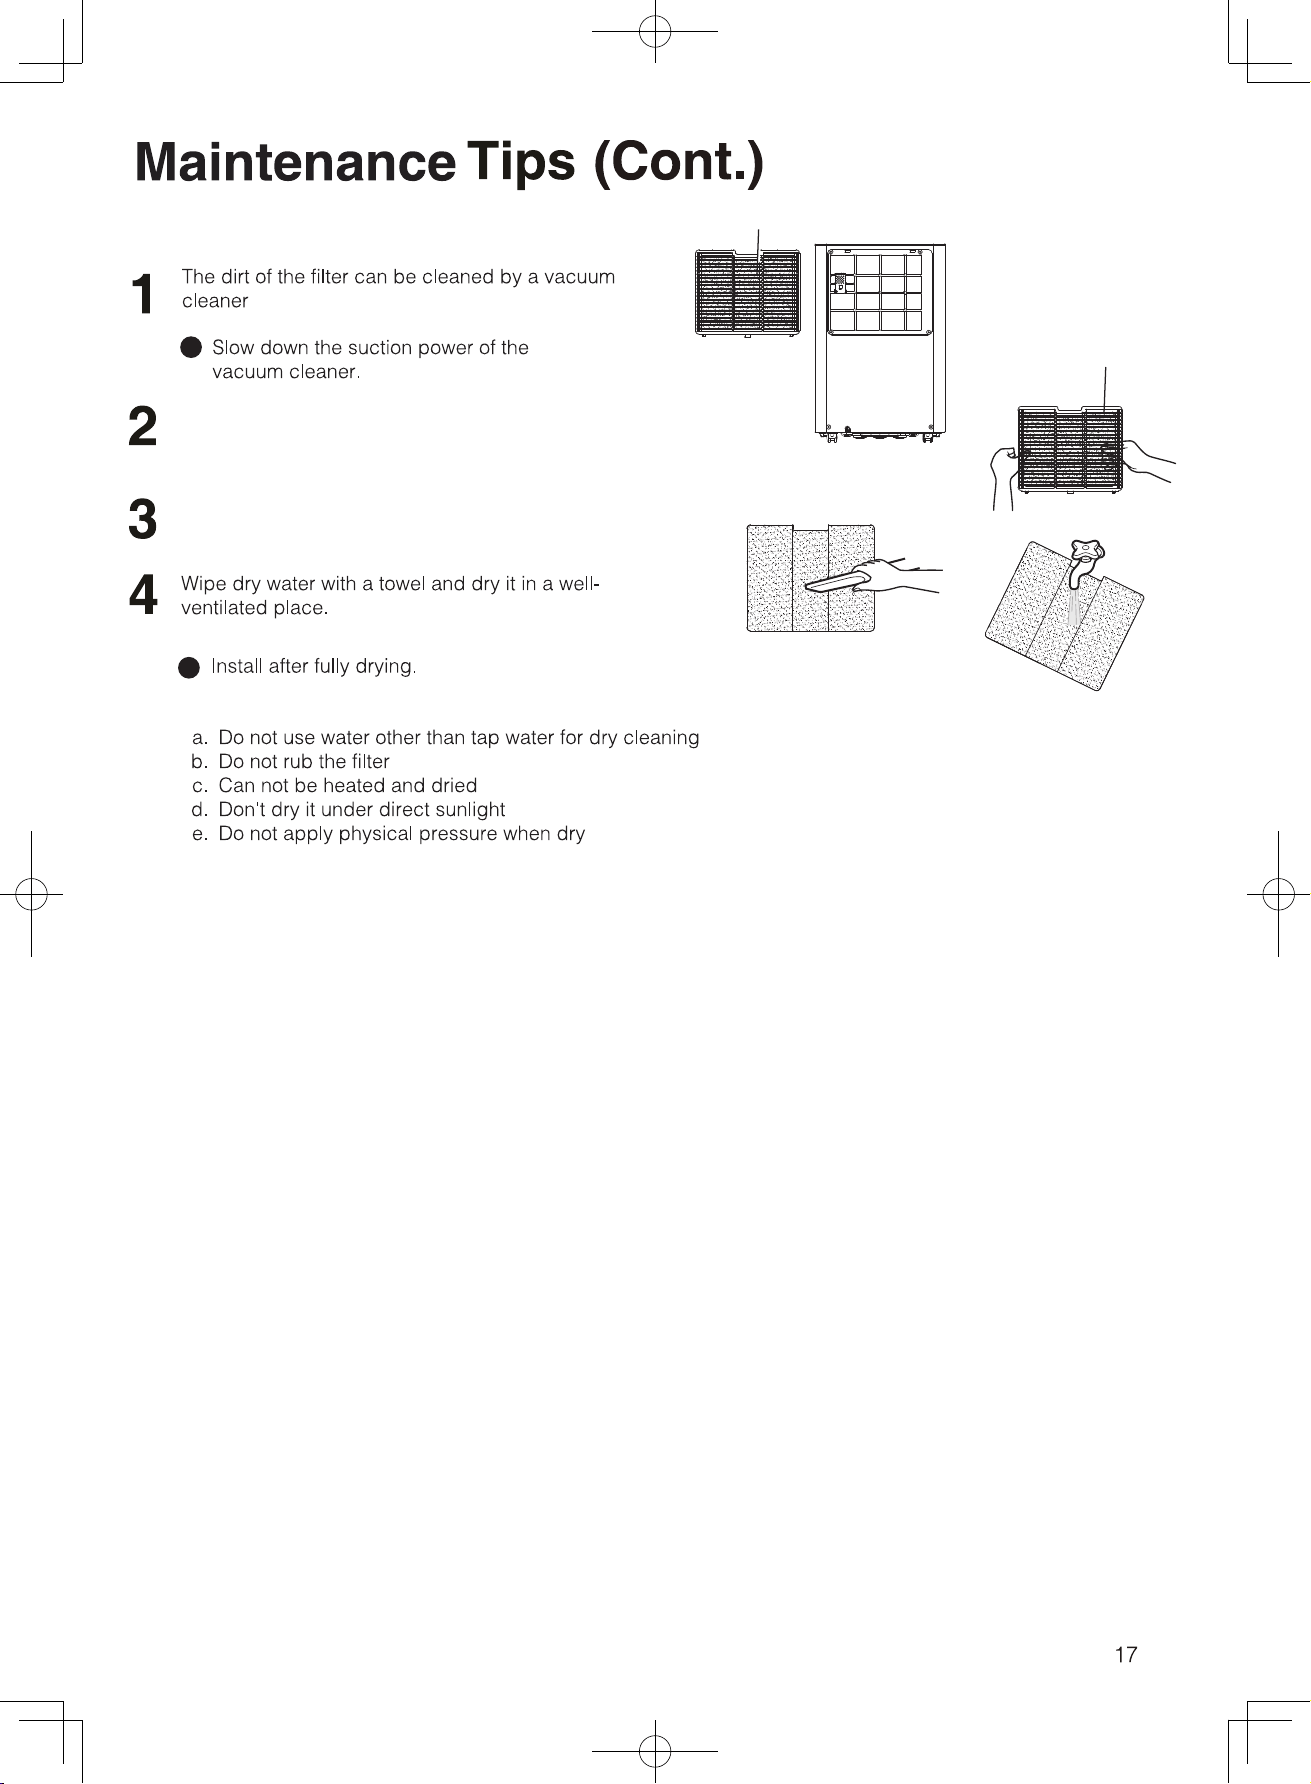
Activated carbon formaldehyde removal silver ion filter
(once every 2 weeks)
Remove the filter frame and take out the Activated
carbon formaldehyde removal silver ion filter
Use a vacuum cleaner to clean up the dust on the Activated
carbon formaldehyde removal silver ion filter and then wash
it with water.
Prohibited items for Activated carbon formaldehyde removal silver ion filter
Activated carbon formaldehyde
removal silver ion filter
Activated carbon formaldehyde
removal silver ion filter
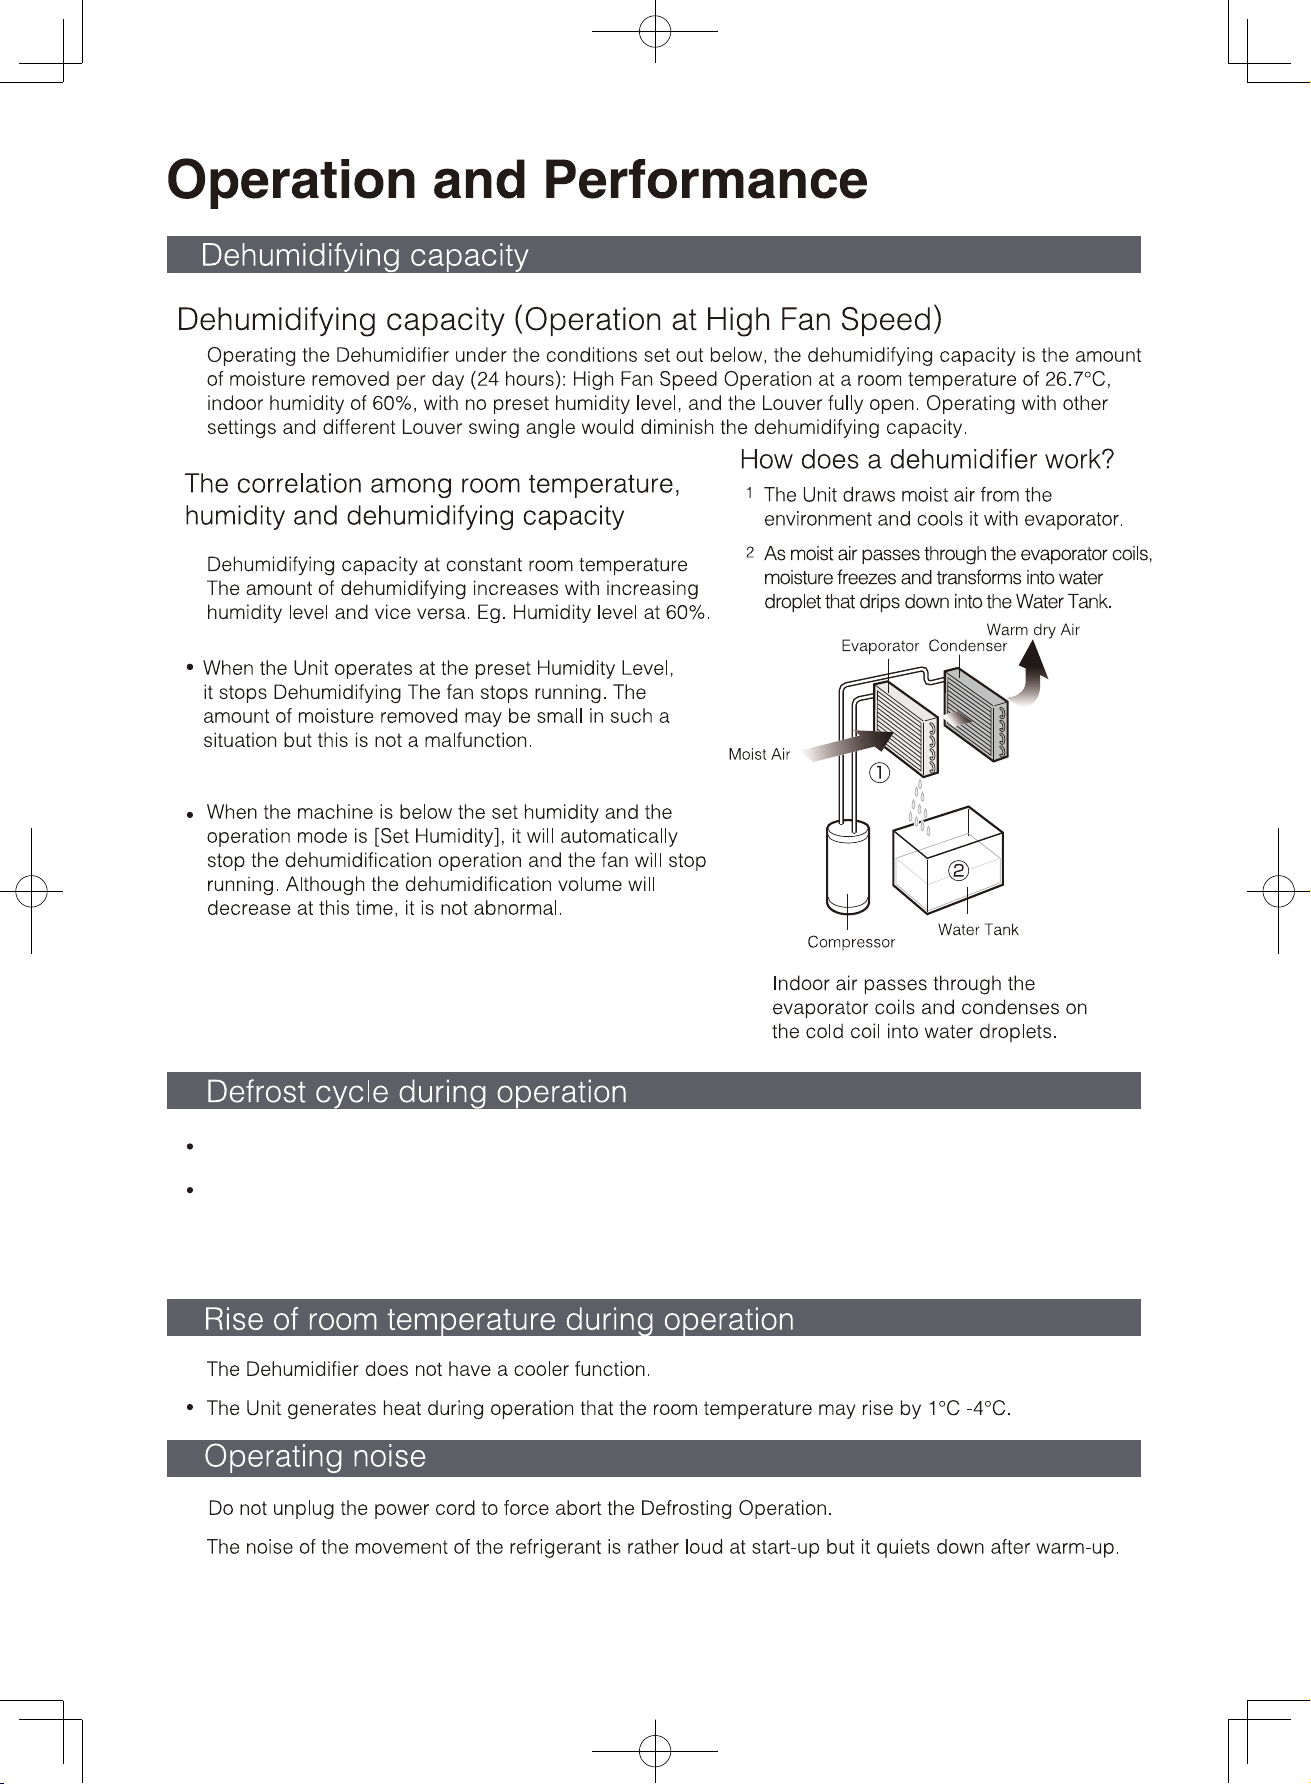
During the defrosting process, please do not unplug the power cord or forcibly stop the operation.
When the ambient temperature is low, the entire machine will enter intelligent defrosting control,
and during the defrosting period, the corresponding mode indicator light will flash to display.
18
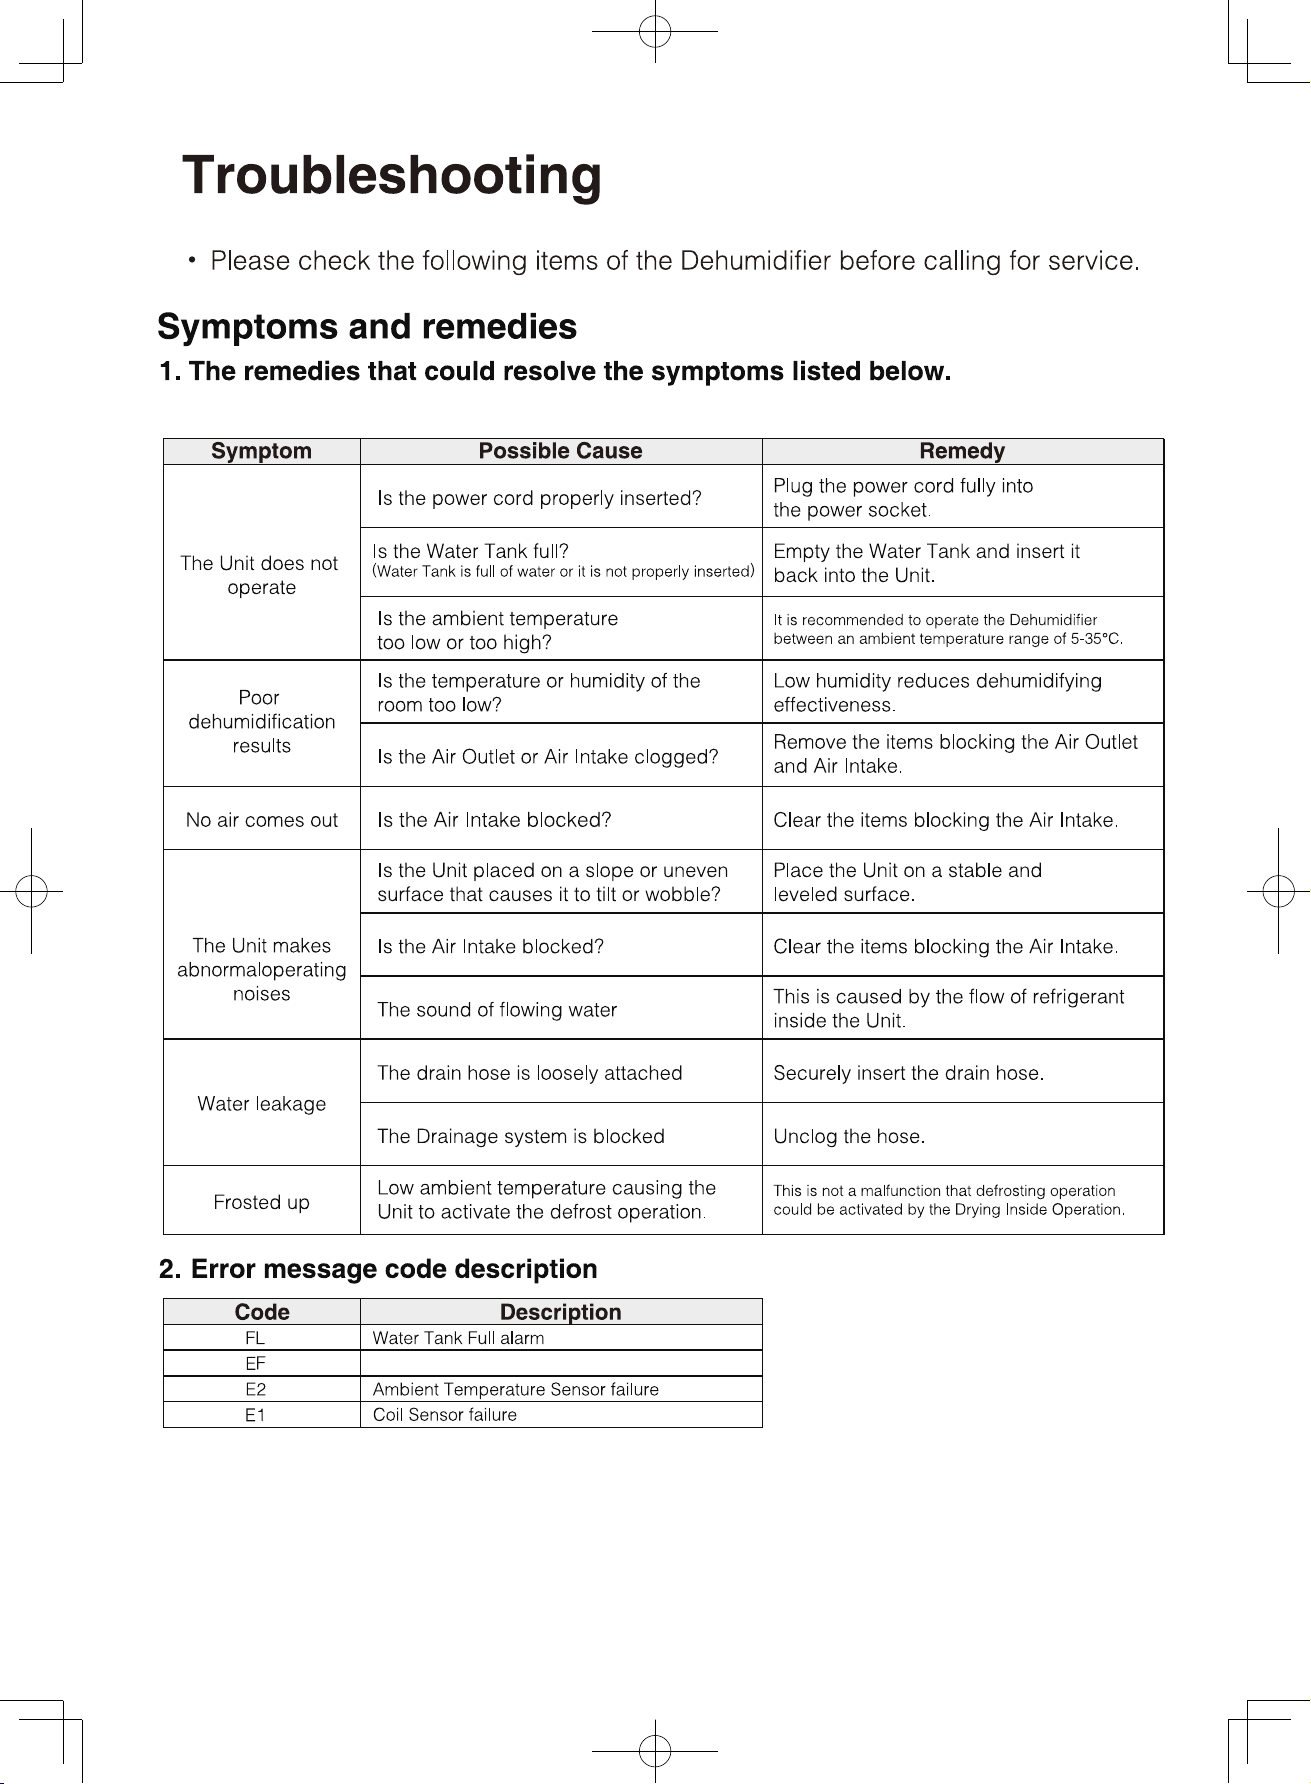
Motor feedback failure
19
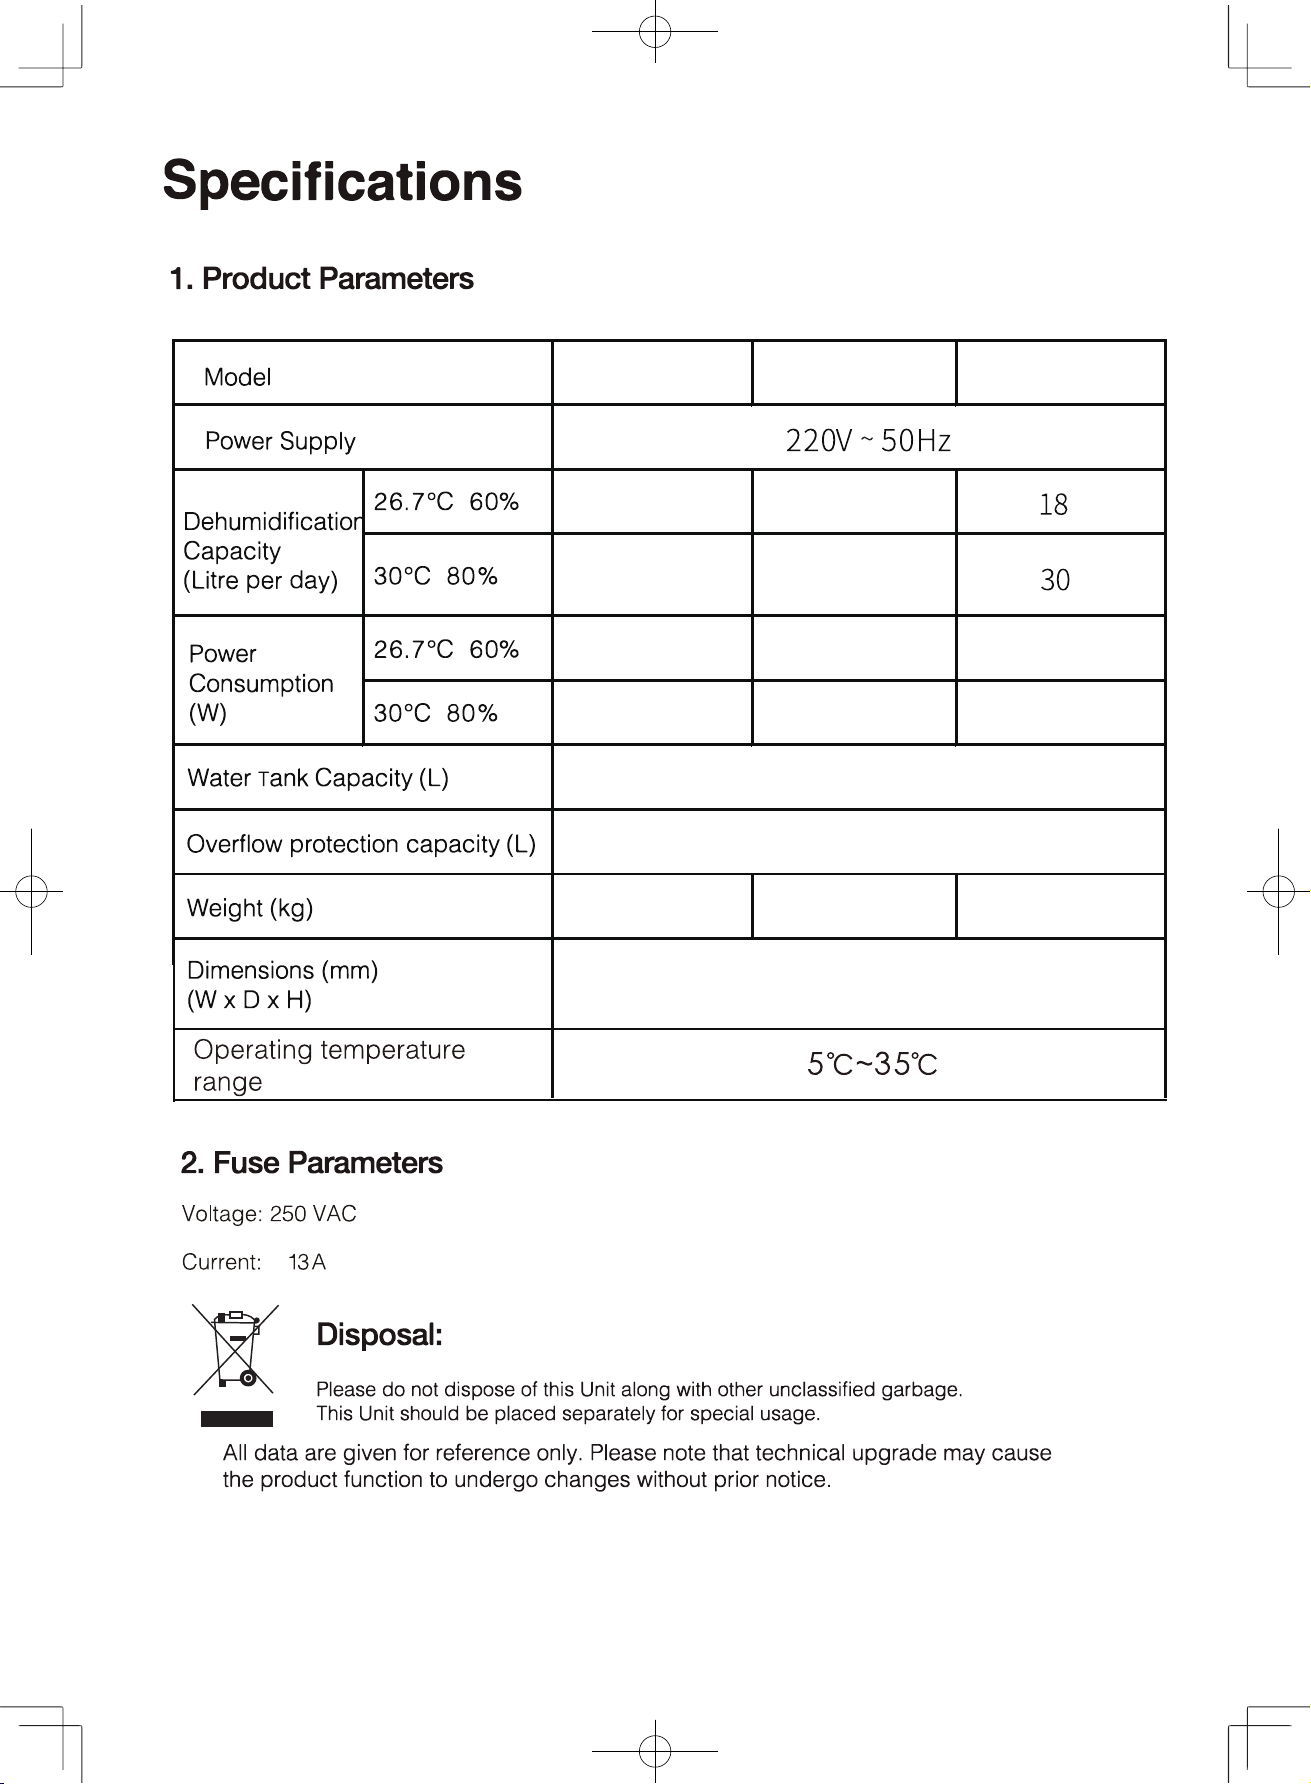
RAD-D200H
RAD-D250H
RAD-D300H
340X265X520
5.2
5.5
13.5
14.9
22 25
244 260
295
280 300
350
14.5
14.5
14.5
20

