MAINSTAYS
TM/MC
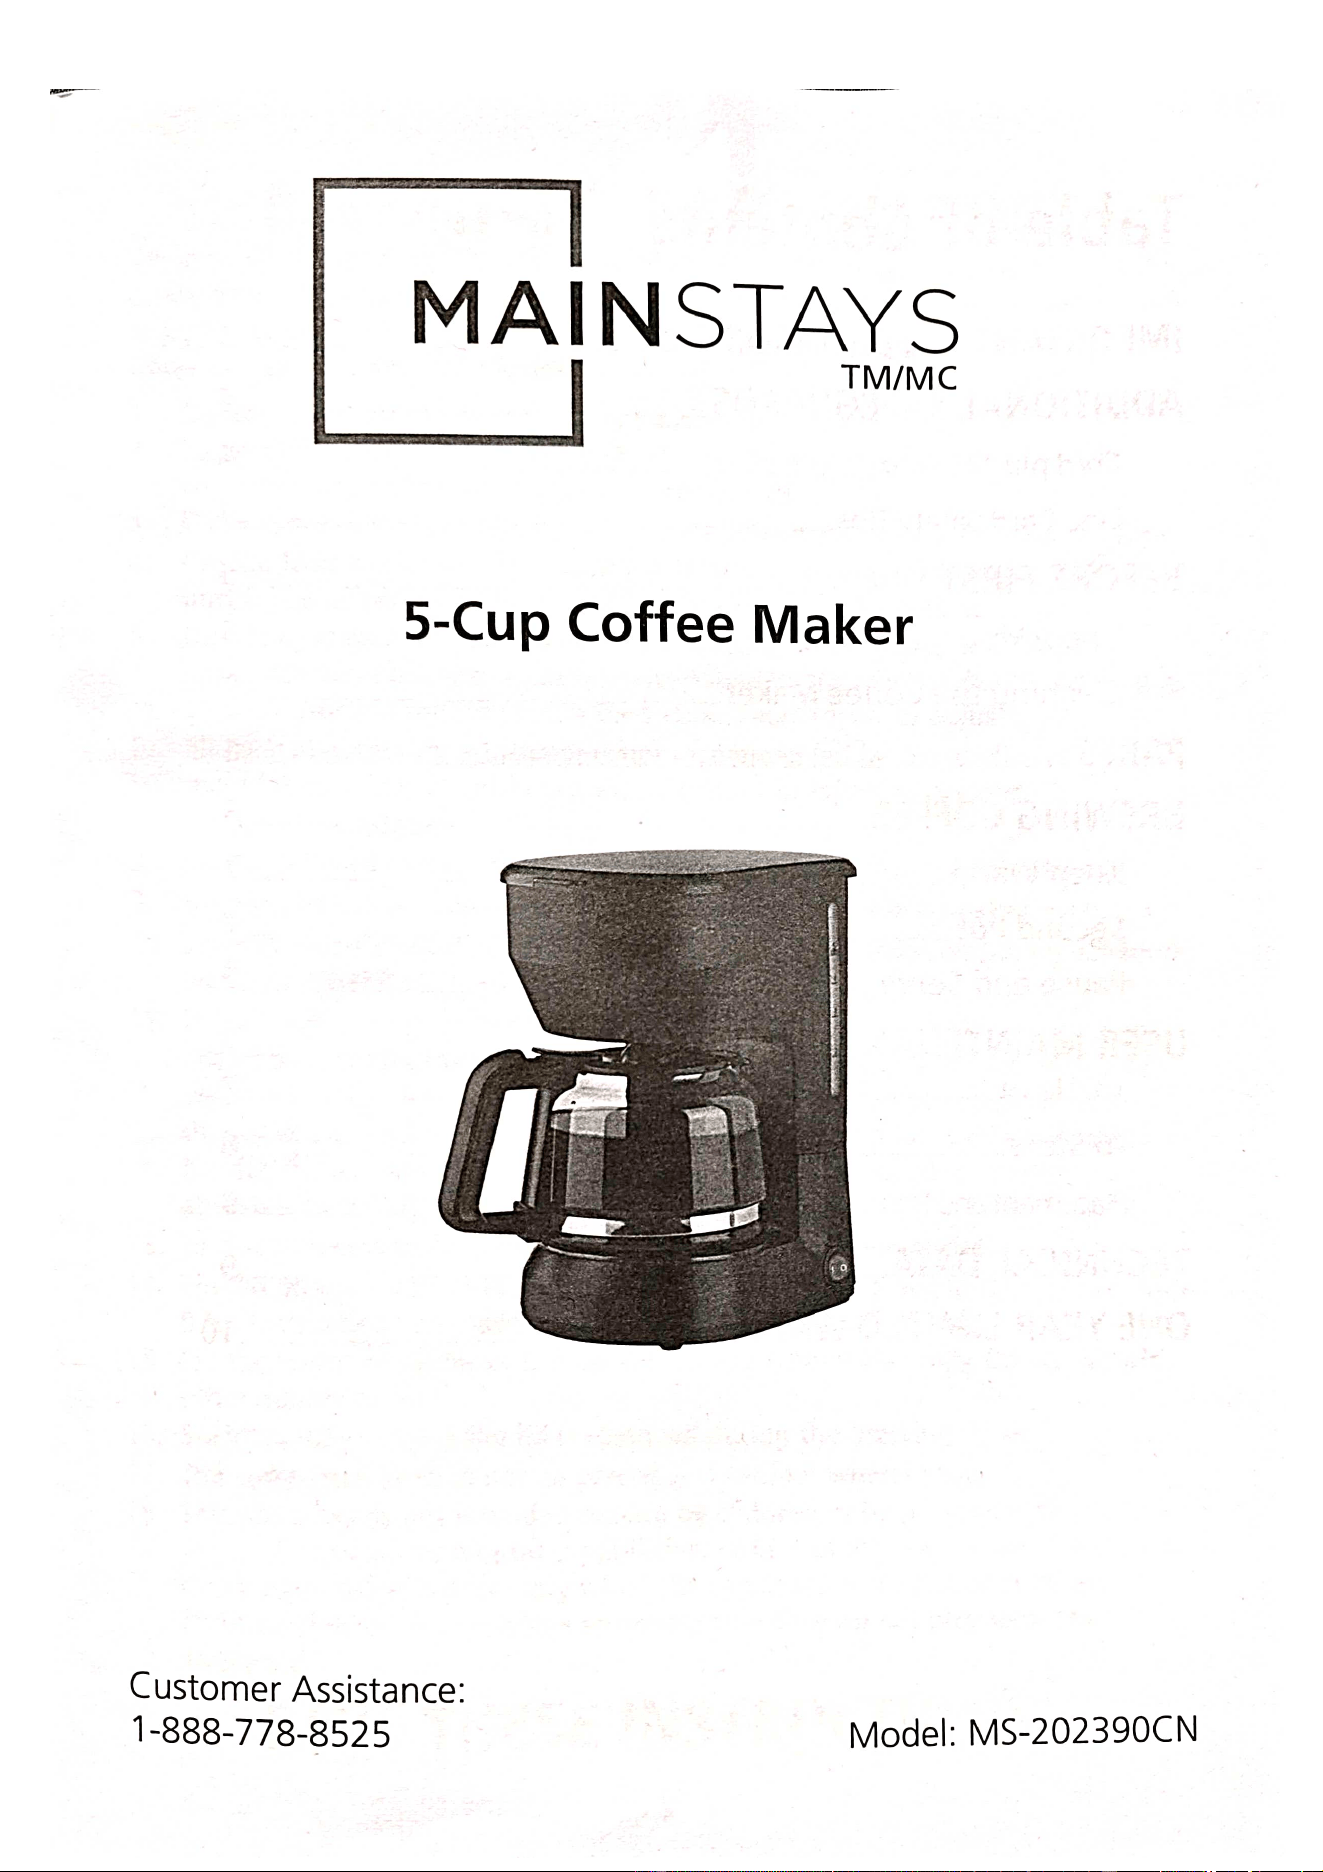
5-Cup
Coffee
Maker
Customer
Assistance:
1-888-778-8525
Model:
MS-202390CN
Page 1 of 10
Table
of
Contents
IMPORTANT
SAFEGUARDS
ADDITIONAL
SAFEGUARDS.
Cord
plug.
Line
Cord
Safety
Tips.
BEFORE
FIRST
USE.
Unpacking
Cleaning
the
Coffee
Maker.
PARTS.
BREWING
COFFEE.
Keep
Warm.
Second
Pot...
Pause
and
Serve.
USER
MAINTENANCE
INSTRUCTIONS.
To
Clean.
To
Store.
Placementand
Removal
of
Carafe
Lid
TECHNICAL
DATA.
ONE
YEAR
LIMITED
WARRANTY
2
3
4
4
4
5
5
5
6
.7
7
8
9
9
.10
Page 2 of 10
precautions
should
always
be
followed
to
reduce
the
risk
of
fire,
electric
shock,
and/
When
using
eleectrical
appliances
especially
when
children
are
present,
basic
safety
or
injury
to
persons,
including
the
following:
IMPORTANT
SAFEGUARDS
Read
all
instructions
before
use.
1.
Do
not
touch
hot
surfaces.
Use
any
handles
or
knobs.
2
To
protect
against
fire,
electrical
shock,
and
injury
to
persons
do
not
place
cord,
plug
or
appliance
in
water
or
other
liquids.
Close
supervision
is
necessary
when
any
appliance
is
used
by
or
near
children.
4.
Unplug
from
outlet
when
not
in
use
and
before
cleaning.
Allow
to
cool
before
7.
putting
on
or
taking
off
parts
and
betore
cleaning
the
appliance.
5.
Do
not
operate
any
appliance
with
a
damaged
cord
or
plug,
or
after
the
annliance
malfunctions
or
has
been
damaged in
any
manner.
Return
appliance
to
an
authorized
service
facility
for
examination,
repair
or
adjustment.
6
The
use
of
accessory
attachments
not
recommended
by
the
appliance
manufacturer
may
result
in
fire,
electric
shock
or
injury
to
persons.
Do
not
use
outdoors,
8.
Do
not
let
cord
hang
over
edge
of
table
or
counter
or
touch
hot
surfaces.
9.
Do
not
place
on
or
near
a
hot
gas
or
electric
burner,
or
in
a
heated
oven.
10.
Extreme
caution
must
be
used
when
moving
an
appliance
containing
hot
food,
water
or
other
hot
liquids.
11.
Do
not
use
appliance
for
other
than
intended
use.
12.
The
glass
container
is
designed
for
use
with
this
appliance.
It
must
never
be
used
on
a
range
top.
Do
not
set
a
hot
container
on
a
wet
or
cold
surface.
Do
not
use
a
cracked
container
or
a
container
having
a
loose
or
weakened
handle.
Do
not
clean
container
with
cleaners,
steel
wool
pads
or
other
abrasive
materials.
Do
not
place
in
microwave
oven.
13.
To
disconnect
turn
switch
to
Off,
then
remove
plug
from
outlet.
14.
The
lid
on
the
glass
carafe
must
be
closed
for
brewing.
See
illustration
on
page
9
for
instructions
on
placement
and
removal
of
the
carafe
lid.
13.
Pll
the
water
reservoir
of
this
appliance
with
cool
water
only.
Do
not
fill
with
other
liquids
or
foods.
1B.
Scalding
may
occur
if
the
lid
is
removed
during
the
brewing
cycle.
1/.
The
coffee
maker
shall
not
be
placed
in
a
cabinet
when
in
use.
0.
Inis
appliance
is
not
intended
for
use
by
children
or
by
persons
with
reduced
Pnystcal,
sensory,
or
mental
capabilities,
or
lack
of
experience
and
knowledge.
Qlose
supervision
is
necessary
when
the
appliance
is
used
near
children.
Cniidren
should
be
supervised
to
ensure
that
they
do
not
play
with
the
appliance.
SAVE
THESE
INSTRUCTIONS!
3
Page 3 of 10
ADDITIONAL
SAFEGUARDS
This
appliance
is
for
HOUSEHOLD
USE
ONLY.
It
may
be
plugged
into
an
AC
electrical
outlet
(ordinary
household
current).
Do
not
use
any
other
electrical
outlet.
DO
NOT
OPERATE
APPLIANCE
IF
THE
LINE
CORD
SHOWS
ANY
DAMAGE,
OR
IF
APPLIANCE
WORKS
INTERMITTENTLY
OR
STOPS
WORKING
ENTIRELY.
A
short
power-supply
cord
is
to
be
provided
to
reduce
risks
resulting
from
becoming
entangled
in
or
tripping
over
a
longer
cord.
Longer
detachable
power
supply
cords
or
extension
cords
are
available
and
may
be
used
if
care
is
exercised
in
their
use.
If
a
longer
detachable
power-supply
cord
or
extension
cord
is
used:
The
marked
electrical
rating
of
the
detachable
power-supply
cord
or
extension
cord
should
be
at
least
as
great
as
the
electrical
rating
of
the
appliance,
and;
The
longer
cord
should
be
arranged
so
that
it
will
not
drape
over
the
countertop
or
tabletop
where
it
can
be
pulled
on
by
children
or
tripped
over
unintentionally.
CORD
PLUG
This
appliance
has
a
polarized
plug
(one
blade
is
wider
than
the
other).
To
reduce
the
risk
of
electric
shock,
this
plug
is
intended
to
fit
into
a
polarized
outlet
only
one
way.
If
the
plug
does
not
fit
fully
into
the
outlet,
reverse
the
plug
and
try
again.
If
it
still
does
not
fit,
contact
a
qualified
electrician.
Do
not
attempt
to
modify
the
plug
in
any
way.
LINE
CORD
SAFETY
TIPS
1.
Never
pull
or
yank
on
cord
or
the
appliance.
3.
2.
To
insert
plug,
grasp
it
firmly
and
guide
it
into
outlet.
To
disconnect
appliance,
grasp
plug
and
remove
it
from
outlet.
Do
not
pull
on
the
line
cord.
4.
Before
each
use,
inspect
the
line
cord
for
cuts
and/or
abrasion
marks.
If
any
are
found,
this
indicates
that
the
appliance
should
be
serviced
and
the
line
cord
replaced.
5.
Never
wrap
the
cord
tightly
around
the
appliance,
as
this
could
place
undo
stress
on
the
cord
where
it
enters
the
appliance
and
cause
it
to
fray
and
break.
IMPORTANT
During
the
first
few
minutes
of
initial
use,
you
may
notice
smoke
and/or
a
slight
odor.
This
is
normal
and
should
quickly
disappear.
It
will
not
recur
after
appliance
has
been
used
a
few
more
times.
4
Page 4 of 10
WARNING:
To
reduce
the
risk
of
fire
or
electric
shock,
do
not
remove
the
bottom
cover.
No
user
serviceable
parts
inside.
Repair
should
be
done
by
authorized
service
personnel
only.
Unpacking:
BEFORE
FIRST
USE
4
Carefully
unpack
the
Coffee
Maker
and
all
parts.
Remove
any
tape,
labels
or
packaging
materials.
,
Wash
the
glass
carafe
and
carate
lid
in
warm,
soapy
water,
rinse
well
and
dry
thoroughly,
then
wipe
unit
with
a
soft
cloth
or
sponge.
3
Wipe
exterior
surfaces
of
the
product
with
a
soft,
moist
cloth
to
remove
dust
particles
collected
during
packing
and
handling.
NEVER
IMMERSE
THE
COFFEE
MAKER,
CORD
OR
PLUG
IN
WATER
OR
ANY
OTHER
LIQUID.
4.
Place
Coffee
Maker
on
a
solid,
level,
heat-resistant
surface.
CLEANING
THE
COFFEE
MAKER:
Before
the
first
use,
the
Coffee
Maker
should
be
rinsed
with
clean
water
by
running
a
brew
cycle.
1.
Fill
the
glass
carafe
to
MAXIMUM
FILL
LINE,
which
is
5
cups,
with
cool water
and
pour
it
into
the
water
reservoir.
2.
Open
the
flip-top
brew
chamber
and
make
sure
the
tabs
align
with
the
openings
on
the
brew
basket.
Once
brew
basket
is
placed
within
the
chamber,
close
the
flip-top
lid
again,
The
lid
will
not
close
unless
the
basket
is
properly
aligned
in
the
chamber.
3.
Place
carafe
on
the
warming
plate
and
plug
the
Coffee
Maker
into
an
electrical
outlet.
ldeally,
the
Coffee
Maker
should
be
operated
on
its
own
circuit,
separate
from
other
appliances.
4
Push
the
Illuminated
Power
Switch
to
the
ON
position.
Allow
water
to
cycle
through
without
coffee
or
paper
filter;
this
will
clean
the
water
reservoir
and
brew
chamber
prior
to
use.
Discard
water
in
glass
carafe
once
cycle
is
complete.
5.
After
the
position.
cycle
is
complete,
push
the
lIluminated
Power
Switch
to
the
OFF
b.
The
Coffee
Maker
is
now
ready
tor
use,
5
Page 5 of 10
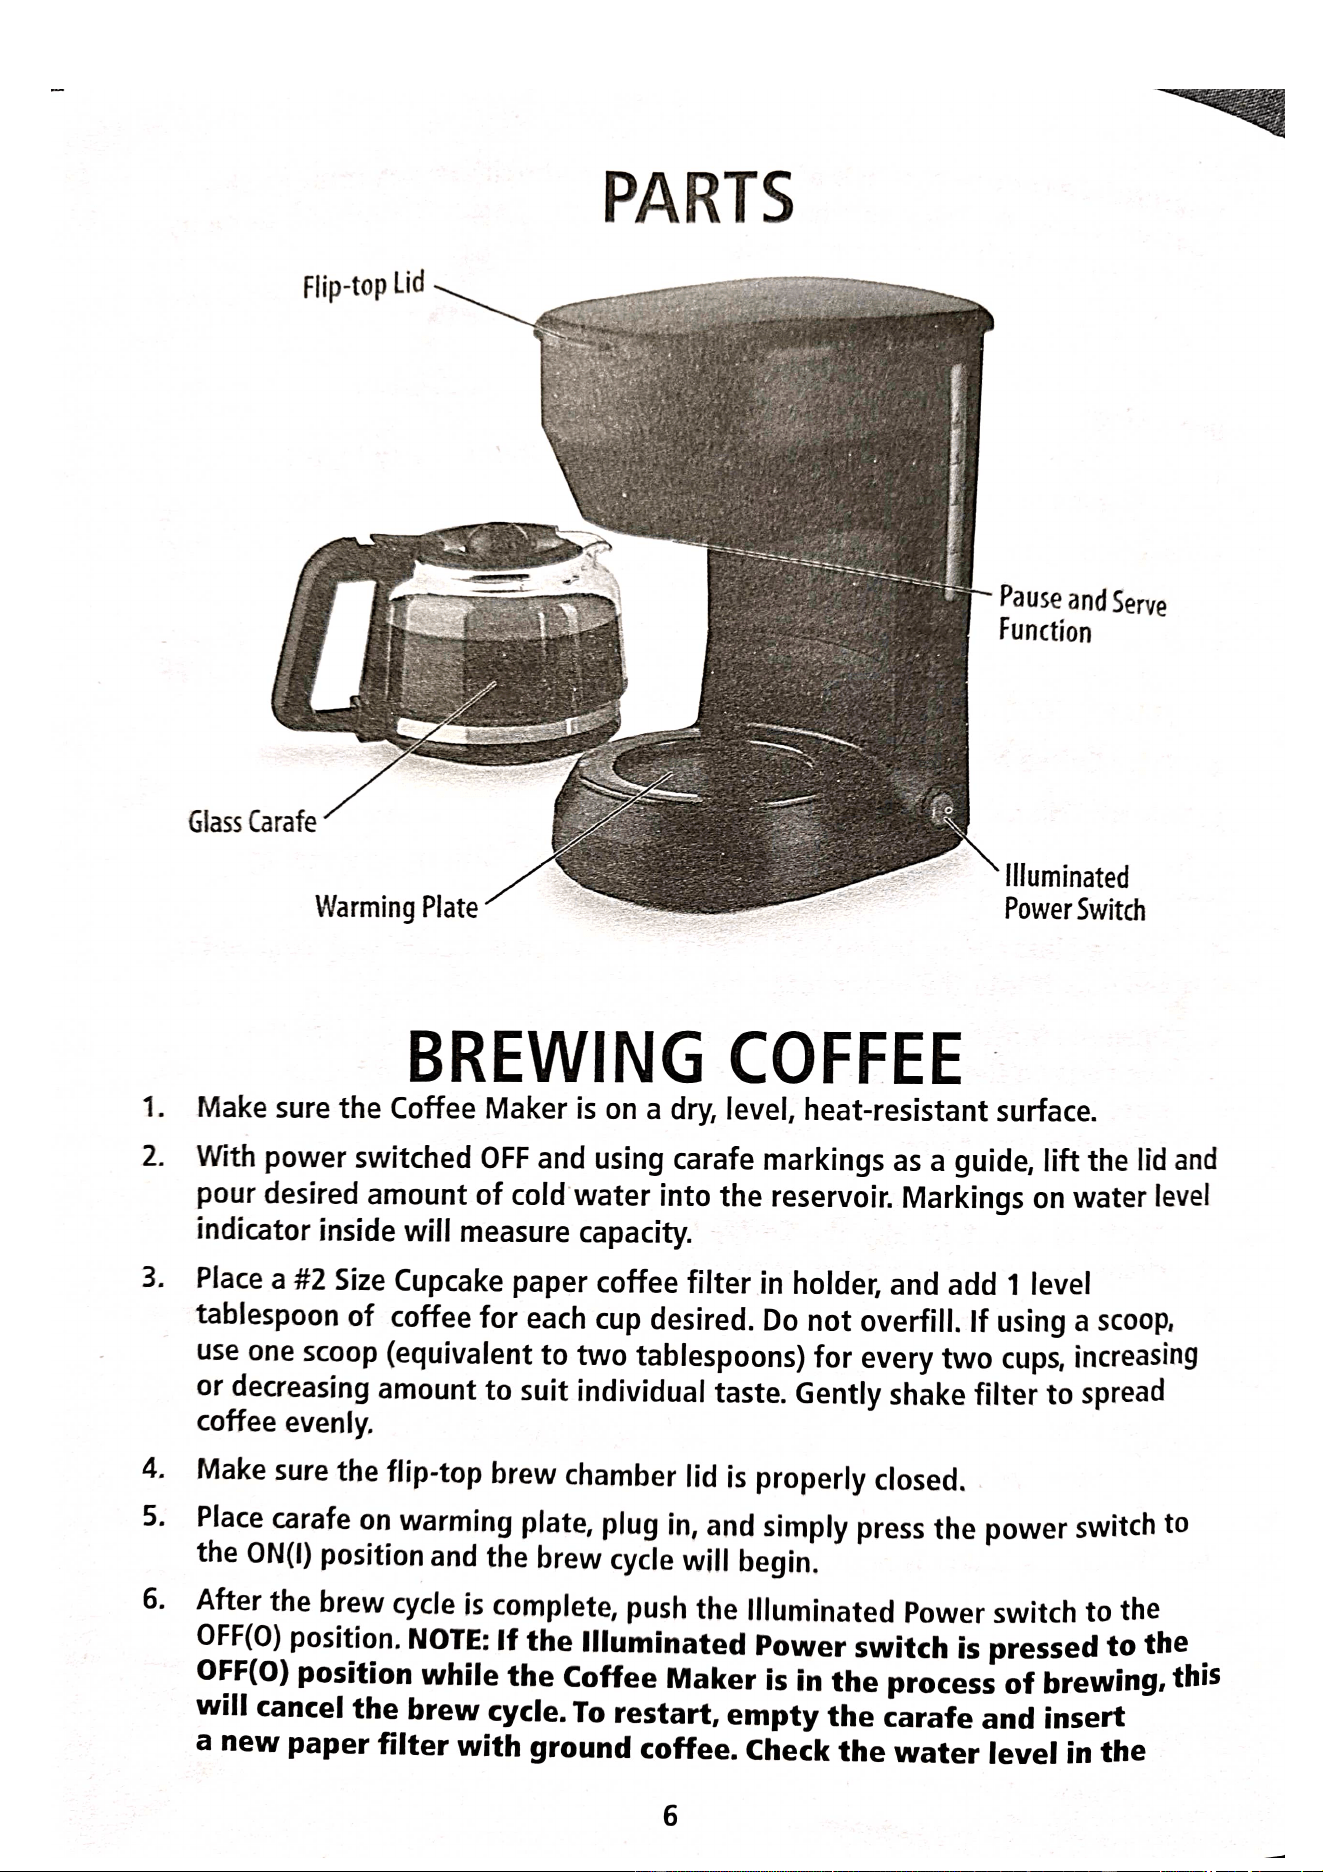
Flip-top
Lid
Glass
Carafe
Warming
Plate
4.
PARTS
BREWING
COFFEE
1.
Make
sure
the
Coffee
Maker
is
on
a
dry,
level,
heat-resistant
surface.
Pause
and
Serve
Function
2,
With
power
switched
OFF
and
using
carafe
markings
as
a
guide,
lift
the
lid
and
pour
desired
amount
of
cold
water
into
the
reservoi.
Markings
on
water
level
indicator
inside
will
measure
capacity.
Illuminated
Power
Switch
3.
Place
a
#2
Size
Cupcake
paper
coffee
filter
in
holder,
and add
1
level
tablespoon
of
coffee
for
each
cup
desired.
Do
not
overfill.
If
using
a
scoop,
use
one
scoop
(equivalent
to
two
tablespoons)
for
every
two
cups,
increasing
or
decreasing
amount
to
suit
individual
taste.
Gently
shake
filter
to
spread
coffee
evenly.
Make
sure
the
flip-top
brew
chamber
lid
is
properly
closed.
5.
Place
carafe
on
warming
plate,
plug
in,
and
simply
press
the
power
switch
to
the
ON(U)
position
and
the
brew
cycle
will
begin.
6.
After
the
brew
cycle
is
complete,
push
the
llluminated
Power
switch
to
the
OFF(O)
position.
NOTE:
If
the
Illuminated
Power
switch
is
pressed
to
the
OFF(O)
position
while
the
Coffee
Maker
is
in
the
process
of
brewing,
tnis
will
cancel
the brew
cycle.
To
restart,
empty
the
carafe
and
insert
6
a
new
paper
filter
with
ground
coffee.
Check
the
water
level
in
the
Page 6 of 10
water
reservoir
for
any
remaining
water
to
prevent
over-filling
on
the
next
brew
cycie.
After
brewing
the
Coffee
Maker
will
switch
to
a
keep
warm
function.
During
this
function,
t
to
keep
the
brewed
coffee
at
a
suitable
serving
temperature.
KEEP
WARM
NOTE:
There
is
no
Automatic
Off
setting
for
this
Coffee
Maker.
To
turn
off
the
coffee
maker,
the
Illuminated
Power
switch
must
be
pushed
to
the
OFF(O)
possition.
When
the
power
light
is
no
longer
illuminated,
the
coffee
maker
is
the
warming
plate
stays
hot
off.
Do
not
operate
with
an
empty
carafe.
FOR
A
SECOND
POT
Turn
the
unit
off
and
allow
to
cool
for
10
minutes
before
brewing
a
second
pot
of
offee.
If
you
wait
less
than
10
minutes,
hot
water
left
in
the
tubes
could
splash
out.
To
avoid
this,
rinse
carafe,
replace
filter
and add
fresh
coffee.
Place
carafe
on
warming
plate
and
use
another
container
to
pour
cold
water
into
water
reservoir.
Ilse
the
water
level
indicator
to
determine
water
level.
PAUSE
AND
SERVE
This
feature
ensures
that
coffee
will
not
drip
for
30
seconds
if
carafe
is
removed
from
warming
plate
to
serve
a
cup
of
coffee
while
it
is
brewing.
To
use
this
feature,
be
sure
carafe
is
properly
positioned
on
warming
plate,
and
allow
it
to
fill
with
at
least
one
or
two
cups
of
freshly
brewed
coffee
before
removing.
After
pouring,
immediately
replace
carafe
on
warming
plate.
WARNING:
TO
AVOID
DAMAGE
TO
THE
UNIT,
SPILLS
OR
BURNS,
USE
THE
PAUSE
AND
SERVE
FEATURE
ONLY
AS
DIRECTED.
DO
NOT
PLACE
A
MUG
OR
CUP
DIRECTLY
UNDERNEATH
THE
WATER
OUTLET.
USER
MAINTENANCE
INSTRUCTIONS
s
ppiiance
requires
little
maintenance.
To
reduce
the
risk
of
electric
Snock,
do
not
open
or
remove
the
bottom
cover
of
unit.
It
contains
no user
vIceable
parts.
Do
not
try
to
repair
it
yourself.
Refer
it
to
qualified
personnel
it
servicing
is
needed.
TO
CLEAN:
•
Remove
paper
filter
and
coffee
grounds
from
the
brew
basket.
r
tne
glass
carafe
with
cool
water
and
pour
into
the
water
reservol.
ess
the
lluminated
Power
Switch
to
runa
brew
cycle
with
only
clean
water.
7
Page 7 of 10
•
Turn
off
the
Coffee
Maker
and
unplug
from
the
wall
outlet.
•Wipe
down
the
outside
surfaces
of
the
Coffee
Maker
with
a
damp
cloth
and
dry
thoroughly.
NEVER
use
harsh
chemicals
or
abrasive
cleaning
pads.
NEVER
immerse
the
Coffee
Maker
in
water
or
any
other
liquid
and
NEVER
place
the
appliance
under
running
water.
•
Remove
the
brew
basket,
and
glass
carafe
and
wash
in
warm
soapy
water.
De
not
use
harsh
chemicals
or
abrasive
cleaners.
Dry
thoroughly
prior
to
use.
•
FORA
MORE
THOROUGH
CLEANING,
pour
one
cup
of
white
vinegar
into
carafe
Add
cold
water
until
carafe
is
filled
to
the
MAX
marking.
Pour
water
and
vinegar
mixture
into
water
reservoir.
Place
a
filter
in
the
brew
basket
and
place
the
carafe
on
the
warming
plate
and
press
the
lluminated
Power
Switch
button.
Allow
to
steam
and
drip
until
carafe
is
half
full.
Turn
Coffee
Maker
off,
remove
carafe
from
warming
plate
and
let
it
sit
for
15
minutes.
•
When
carafe
is
cool,
pour
liquid
back
into
water
reservoir,
place
carafe
back
on
warming
plate,
and
press
the
illuminated
power
switch
again.
Allow
all
liquid
to
drip
into
carafe.
Turn
Coffee
Maker
OFF,
and
discard
the
liquid
in
the
carafe.
•
Allow
Coffee
Maker
to
cool
for
10
minutes;
then
rinse
by
filling
the
water
reservoir with
clean,
cold
water,
inserting
a
new
filter
and
allowing
water
to
drip
into
carafe.
Turn
Coffee
Maker
OFF
and discard
water.
Wash
and
dry
carafe
and
brew
basket.
When
Coffee
Maker
has
cooled,
wipe
with
a
dry
cloth.
•
The
carafe,
brew
basket
and
carafe
lid
may
be
washed
in
warm,
soapy
water
or
on
the
top
rack
of
dishwasher.
The
unit
can
be
wiped
with
a
soft,
slightly
damp
cloth
and
dried.
Never
use
abrasive
scouring
pads
or
cleanser.
Never
immerse
unit
in
water
or
any
other
liquid.
TO
STORE:
Be
sure
all
parts
are
clean
and
dry
before
storing.
Store
appliance
in
its
boX
or
in
a
clean,
dry
place.
Never
store
it
while
it
is
hot
or
wet
or
still
plugged
in.
Never
wrap
cord
tightly
around
the
appliance.
ALWAYS
store
the
Coffee
Maker
in
an
upright
position.
8
Page 8 of 10
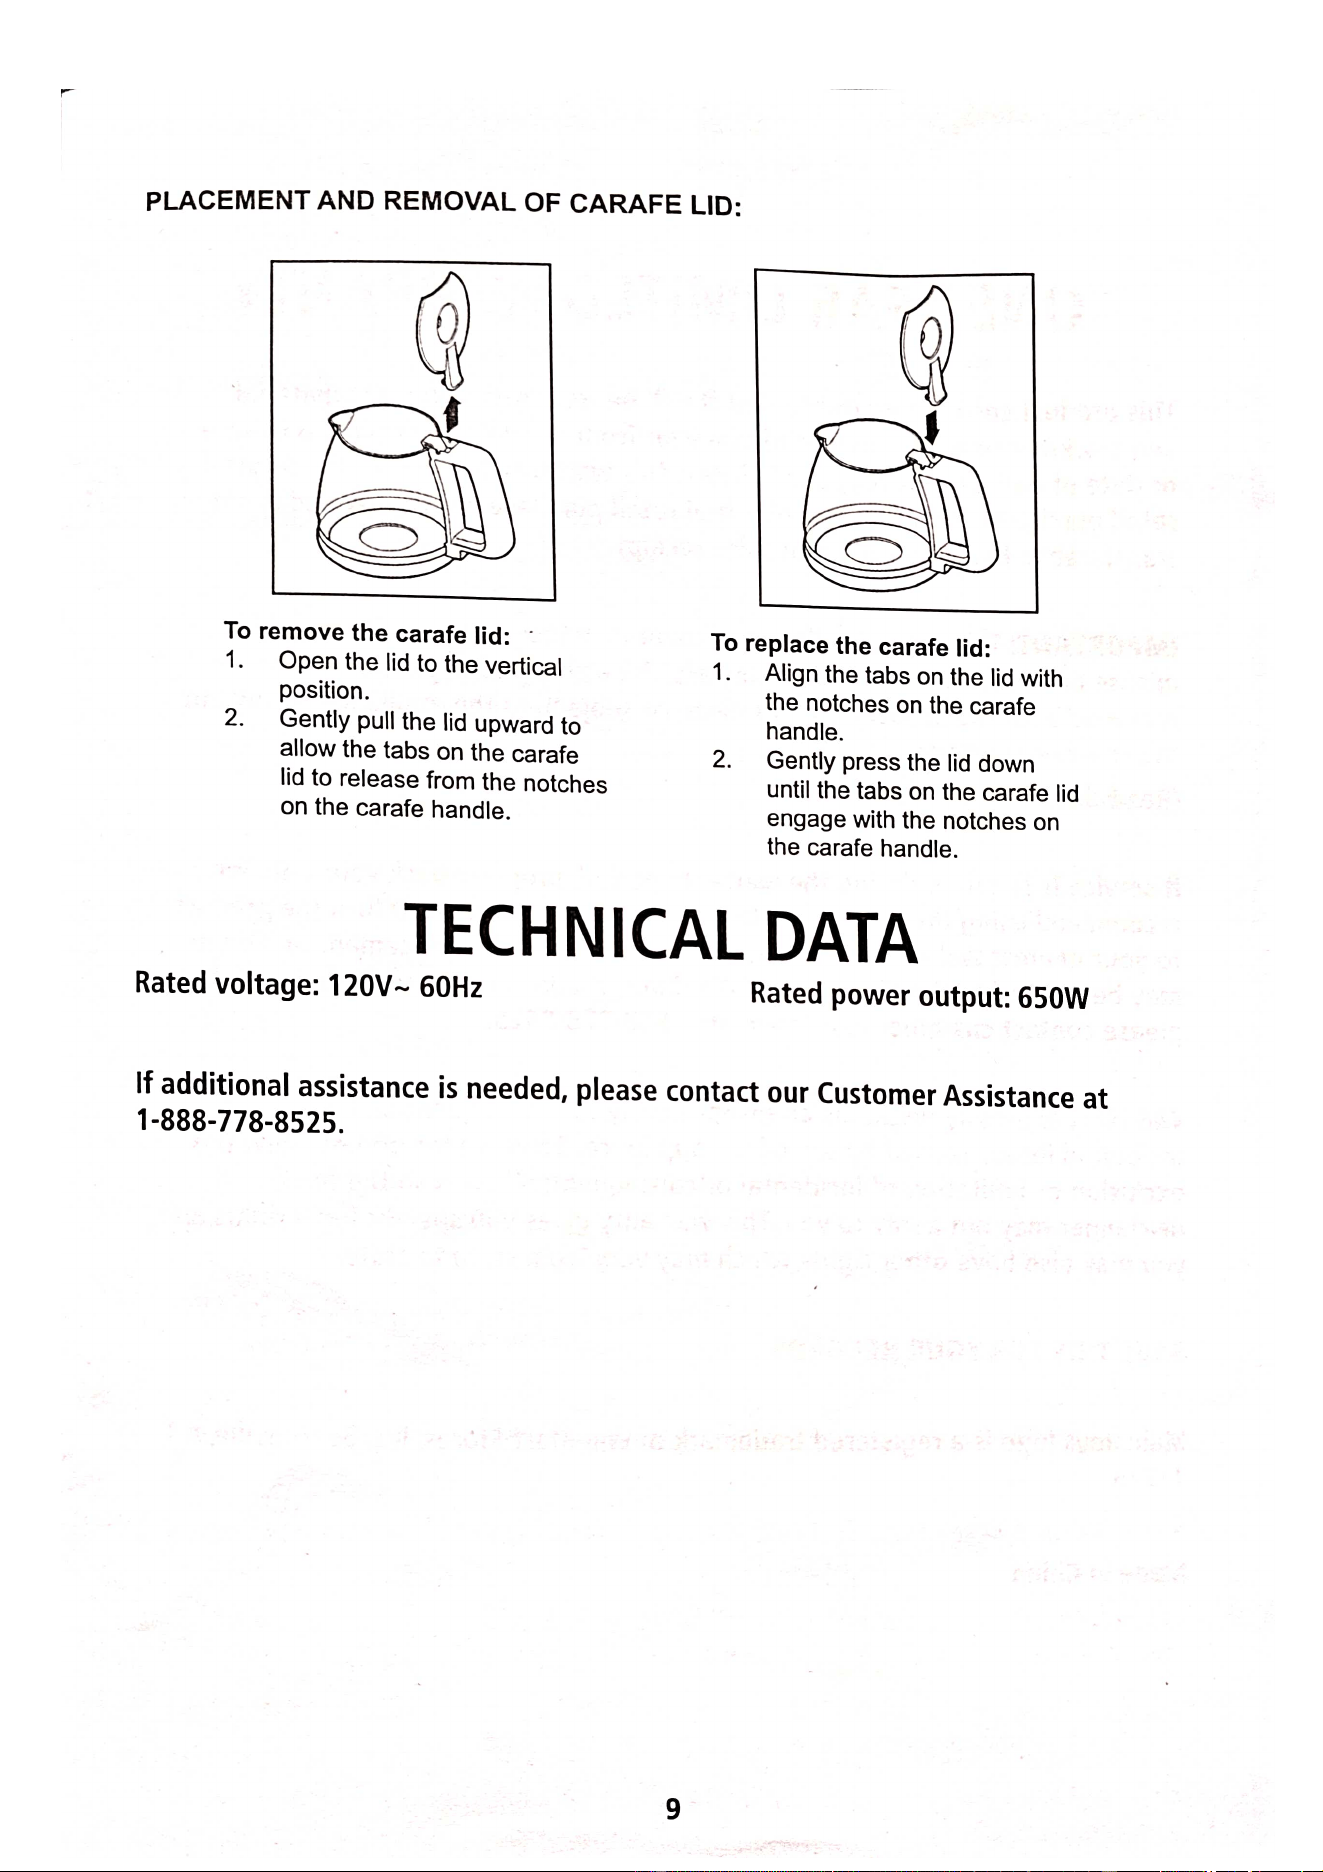
PLACEMENT
AND
REMOVAL
OF
CARAFE
LID:
To
remove
the
carafe
lid:
Open
the
lid
to
the vertical
position.
1.
2.
Gently
pull
the
lid
upward
to
allow
the
tabs
on
the
carafe
lid to
release
from
the
notches
on
the
carafe
handle.
Rated
voltage:
120V~
60Hz
To
replace
the
carafe
lid:
1
9
2
Align
the
tabs
on
the
lid
with
the
notches
on
the
carafe
handle.
TECHNICAL
DATA
Gently
press
the
lid
down
until
the
tabs
on
the
carafe
lid
engage
with
the
notches
on
the
carafe
handle.
Rated
power
output:
650W
If
additional
assistance
is
needed,
please
contact
our
Customer
Assistance
at
1-888-778-8525.
Page 9 of 10
ONE
YEAR
LIMITED
WARRANTY
This
product
carries
a
warranty
that
it
will
be
free
from
defects
in
material
and
workmanship
for
a
period
of
one
year
from
the
date
of
original
purchase
or
date
of
delivery,
whichever
is
later.
This
warranty
is
valid
for
the
originl
retail
purchaser
from
the
date
of
initial
retail
purchase
or
delivery
and
is
not
transferable.
Keep
your
original
sales
receipt.
IMPORTANT:
This
warranty
does
not
cover
damages
resulting
from
accident
misuse
or
abuse,
lack
of
reasonable
care,
the
atfixing
of
any
attachments
not
provided
with
the
product,
loss
of
parts,
or
subjecting
the
appliance
to
any
but
the
specified
voltage.
(Read
directions
carefully.)
If
service
is
required
during
the
warranty
period,
properly
pack
your
unit.
We
recommend
using
the
original
carton
and
packing
materials.
Return
the
product
to
your
nearest
Wal-Mart
store
with
the
sales
receipt.
Â
replacement
or
refund
may
be
offered
at
the
discretion
of
Wal-Mart.
If
additional
assistance
is
needed,
please
contact
customer
assistance
at:
1-888-778-8525.
Wal-Mart
expressly
disclaims
all
responsibility
for
consequential
damages
or
incidental
losses
caused
by
use
of
the
appliance.
Some
states
do
not
allow
this
exclusion
or
limitation
of
incidental
or
consequential
losses
so
the
foregoing
disclaimer
may
not
apply
to
you.
This
warranty
gives
you
specific
legal
rights,
and
you
may
also
have
other
rights
which
may
vary
from
state
to
state.
SAVE
THIS
FOR
YOUR
RECORDS
Mainstays
logo
is
a
registered
trademark
of
Wal-Mart
Stores,
Inc.
Bentonville,
i
72716
Made
in
China
10
Page 10 of 10