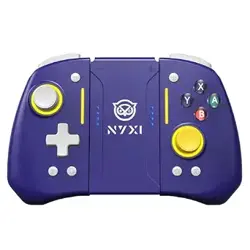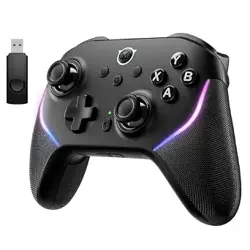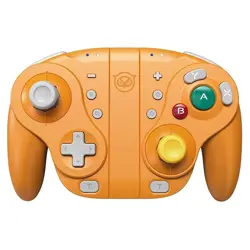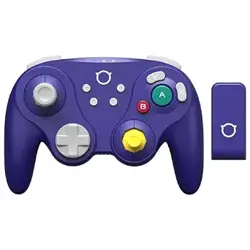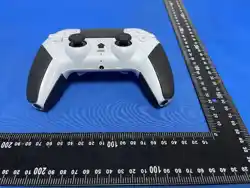

GCC Game Pad Setup:
Part1:
Getting Started
入门指南
Connect and configure your Controller
连接并配置你的控制器
Getting Started with Your Controller
如何开始使用你的手柄
Welcome! This guide gets your controller up and running with the ConsoleNinja companion
app — from unboxing to your first game session. The whole process takes about 5 minutes.
欢迎!本指南将让你的手柄通过 ConsoleNinja 伴随应用运行——从开箱到首次游戏体验。
整个过程大约需要 5 分钟。
What you need
Your controller (charged, or plugged into USB-C power)
A phone with the ConsoleNinja app:
你需要什么 你的手柄(充电或插在 USB-C 电源上) 一款带有 ConsoleNinja 应用的手机:
Your home WiFi name and password (2.4 GHz)
你的家庭 WiFi 名称和密码(2.4 GHz)
Bluetooth or enabled on your device (used only for the initial setup)
蓝牙或在设备上启用(仅用于初始设置)
Step 1 — Install the app and sign in
Install ConsoleNinjas from your app store and open it.
Create an account (or sign in if you already have one). Your account keeps your controllers,
button profiles, and macros synced across devices.
Once you're signed in, you'll land on the Home screen.
步骤 1 — 安装应用并登录
从你的应用商店安装 ConsoleNinjas 并打开它。 创建一个账户(如果你已经有账户,请登
录)。你的账户会在不同设备上保持手柄、按钮配置文件和宏同步。 登录后,你会进入主屏
幕。
Step 2 — Power on the controller
Press the HOME button to turn the controller on.
步骤 2 — 开启控制器
按下 HOME 键即可开启手柄。

The LED glows yellow while it boots.
启动时 LED 会发出黄色光芒。
On its first power-on (or whenever WiFi isn't set up yet), the controller automatically enters
WiFi setup mode — the LED breathes blue.
在第一次开机(或尚未设置 WiFi 时),手柄会自动进入 WiFi 设置模式——LED 灯会发出蓝
色信号。
If the LED isn't breathing blue, hold HOME + D-pad Up for 2 seconds to enter WiFi setup
manually.
如果 LED 灯没有蓝光,按住 Home + 方向键上键 2 秒,手动进入 WiFi 设置。
Step 3 — Add the controller in the app
步骤 3 — 在应用中添加手柄
On the Home screen, tap Add Controller.
The app scans over Bluetooth and lists nearby controllers as GCC_XXXXXXXX.
Tap your controller to connect.
在主界面,点击添加手柄。
应用通过蓝牙扫描,并显示附近的控制器为 GCC_XXXXXXXX。 点击你的手柄即可连接。
SETUP TIP
设置技巧
Keep your phone close to the controller during this step — Bluetooth is only used to hand
over your WiFi details; it's not how you play.
在此过程中,保持手机靠近手柄——蓝牙仅用于传递 WiFi 信息;关键不是你怎么玩。
Step 4 — Connect the controller to WiFi
步骤 4 — 将手柄连接到 WiFi
After connecting, the app shows the WiFi networks the controller can see:
连接后,应用会显示控制器能看到的 WiFi 网络:
Select your network from the list (or type the name if it's hidden).
Enter your WiFi password.
Tap Connect.
The controller LED turns cyan while it joins your network, then steady cyan once it's online.
The app confirms the connection and moves on automatically.
从列表中选择你的网络(如果隐藏了,也可以输入名称)。
输入你的 WiFi 密码。
点击连接。
控制器 LED 在加入网络时会变成青色,上线后会稳定为青色。
应用会确认连接并自动继续。

SETUP TIP
设置技巧
The controller remembers this network, so you only do this once. To change networks later,
hold HOME + D-pad Up for 2 seconds to re-run WiFi setup.
控制器会记住这个网络,所以你只做一次。之后要切换网络,按住 HOME + 方向键上 2 秒,
重新运行 WiFi 设置。
Step 5 — Choose your platform
第五步 — 选择你的平台
With the controller online, the app guides you through picking your gaming platform and
signing in to the matching console account where required.
手柄在线后,应用会引导你选择游戏平台,并在需要时登录匹配的主机账户。
Pick your platform in the app and follow the on-screen steps (the linked guides have the full
detail). When the controller connects to your console, the LED turns green.
在应用中选择你的平台,并按照屏幕上的步骤操作(链接的指南中有完整细节)。当手柄连
接到主机时,LED 会变绿。
Step 6 — You're ready to play
第六步——你准备好开始了
That's it — your controller is set up. From the app you can now:
仅此而已——你的手柄已经设置好了。通过应用程序,你现在可以:
Profiles & macros — create button-remap profiles and macros per game, synced to your
account.
Calibration — fine-tune stick and trigger response (Settings → Calibration).
Input test — verify every button and stick (Settings → Input Test).
Firmware updates — keep the controller current (Settings → Update).
个人资料与宏——为每个游戏创建按键重映射配置文件和宏,并同步到你的账户。
校准——微调摇杆和扳机响应(设置→校准)。
输入测试——验证每个按钮和摇杆(设置→输入测试)。
固件更新——保持手柄最新(设置→更新)。
Quick reference
快速参考
LED colors
Color Meaning
Yellow (breathing) Booting up
Blue (breathing) Waiting for app — WiFi setup
Cyan (breathing) Connecting to WiFi
Cyan (steady) WiFi connected
Green (breathing) Connecting to console

Green (steady) Playing — session active
Red (blinking) Error or disconnected
LED 颜色 颜色含义
黄色(呼吸声)启动中
蓝色(呼吸)等待应用——WiFi 设置
青色(呼吸声)连接 WiFi。
青色(稳定)WiFi 连接
绿色(呼吸)连接控制台
绿灯(稳定)演奏中——会话进行中
红色(闪烁)错误或断线
Button combos (hold 2 seconds)
按键组合(按住 2 秒)
Combo Action
HOME (quick press) Turn on / wake
HOME + D-pad Up Re-run WiFi setup
HOME + D-pad Left Reset platform pairing (start fresh)
HOME + D-pad Down Power off
组合按键
主页(快速按键)开机/唤醒
HOME + 方向键上 重新运行 WiFi 设置
HOME + 方向键 左 复位平台配对(重新开始)
主页 + 方向键 下 电源关闭
Troubleshooting 故障排除
The controller doesn't appear in the app
手柄在应用里没有显示
Make sure the LED is breathing blue (WiFi setup mode). If not, hold HOME + D-pad Up for 2
seconds.
确保 LED 灯是蓝色的(WiFi 设置模式)。如果没有,按住 Home + 方向键上键 2 秒。
Confirm Bluetooth is enabled on your phone and keep the phone close.
确认手机已启用蓝牙,并保持手机近距离。
WiFi won't connect
WiFi 无法连接
Double-check the password and use a 2.4 GHz network.
Re-enter WiFi setup (HOME + D-pad Up, 2 seconds) and try again.
请再次核对密码,并使用 2.4 GHz 的网络。
重新进入 WiFi 设置(主页+方向键向上,2 秒)然后再试一次。

The console can't find the controller
主机找不到手柄
Make sure the controller and console are on the same WiFi network (for Remote Play
platforms).
Hold HOME + D-pad Left for 2 seconds to clear pairing and re-run the platform setup.
确保手柄和主机连接同一个 WiFi 网络(针对远程游玩平台)。
按住 HOME + 方向键左键 2 秒以清除配对并重新运行平台设置。
Controller won't power on
手柄开不了机
Plug in the USB-C cable to charge — the LED breathes a warm white while charging.
插入 USB-C 线充电——充电时 LED 会发出温暖的白色光。

Part2 for PS5
What You Need
• A PlayStation 5 console with Remote Play enabled
• Your PSN (PlayStation Network) account credentials
• The PS5 and controller on the same WiFi network
• The ConsoleNinjas companion app
你需要什么
一台启用远程游玩的 PlayStation 5 主机
你的 PSN(PlayStation Network)账户及密码
PS5 主机和手柄在同一个 WiFi 网络上
ConsoleNinjas APP
Enable Remote Play on Your PS5
在你的 PS5 上启用远程游玩
Before setting up the controller, make sure Remote Play is enabled on your PS5:
1. On your PS5, go to Settings > System > Remote Play
2. Turn on Enable Remote Play
3. Go to Settings > System > Power Saving > Features Available in Rest Mode
4. Enable Stay Connected to the Internet and Enable Turning On PS5 from Network
在设置手柄之前,确保你的 PS5 已启用远程游玩:
在你的 PS5 上,进入设置>系统>远程游玩
开启启用远程游玩
进入系统设置>>静电模式下可用的省电>功能
启用“保持连接互联网”和“从网络开启 PS5
Controller Setup
控制器设置
Step 1 — Initial Setup
Complete the initial setup if you haven't already.
第一步——初始设置
如果你还没完成初始设置,请先完成。
Step 2 — Select PlayStation 5
In the ConsoleNinjas app's console selection screen:
• Your PS5 should appear under Discovered Consoles if it's on the same network
• Alternatively, select PlayStation 5 from the preconfigured list
• The app will configure your controller for PS5 mode
步骤 2 — 选择 PlayStation 5

在 ConsoleNinjas 应用的主机选择界面:
如果你的 PS5 在同一网络上,应该会出现在已发现主机的选项里
或者,从预配置列表中选择 PlayStation 5
应用会将你的手柄配置为 PS5 模式
Step 3 — Sign In to PSN
The app opens a PlayStation Network login page:
1. Sign in with your PSN email and password
2. Complete any two-factor authentication if prompted
3. Once authenticated, the app receives your PSN credentials
步骤 3 — 登录 PSN
该应用会打开一个 PlayStation Network 登录页面: 用你的 PSN 邮箱和密码登录
如果被要求,请完成任何双因素认证
认证后,应用会收到你的 PSN 凭
Step 4 — Pair with Your PS5
After signing in:
1. On your PS5, go to Settings > System > Remote Play > Link Device
2. Your PS5 displays an 8-digit PIN code
3. Enter this PIN in the ConsoleNinja app when prompted
4. The controller LED turns green (breathing) while connecting
5. Once paired, the LED turns steady green — you're playing!
步骤 4——与你的 PS5 配对
登录后: 在你的 PS5 上,进入设置>系统>远程游玩>链接设备
你的 PS5 显示一个 8 位 PIN 码 在提示时,在 ConsoleNinja 应用中输入此 PIN 码
连接时手柄 LED 灯会变绿(呼吸)
配对完成后,LED 会稳定变绿——你在玩了!
Playing
After initial setup, just press HOME to turn on the controller. It automatically:
1. Connects to WiFi (cyan LED)
2. Connects to your PS5 via Remote Play (green LED)
3. Ready to play (steady green LED)
The PS5 may set the controller's LED to your player color (blue, red, green, or pink) once the
session is active.
使用
初始设置后,只需按 HOME 键即可开启手柄。它会自动:
连接 WiFi(青色 LED)
通过远程游玩连接到你的 PS5(绿色 LED 灯)
准备游戏(稳定绿色 LED 灯)
PS5 可以在游戏激活后将手柄的 LED 设置为玩家颜色(蓝色、红色、绿色或粉色)。

Troubleshooting
故障排除
"Connection failed" or red LED blinking
• Make sure your PS5 is turned on or in Rest Mode with network features enabled.
• Verify both devices are on the same WiFi network.
• Try holding HOME + D-pad Left (2s) to reset pairing, then re-pair via the app.
“连接失败”或红色 LED 闪烁
确保你的 PS5 开机或处于休眠模式并启用网络功能。
确认两台设备是否在同一个 WiFi 网络上。
试着按住 HOME + 方向键左键(2 秒)重置配对,然后通过应用重新配对。
High latency or stuttering
• Move the controller closer to your WiFi router.
• Reduce network congestion (pause downloads, streaming on other devices).
高延迟或卡顿
把手柄移得更靠近你的 WiFi 路由器。
减少网络拥堵(暂停下载,在其他设备上流媒体播放)。
PS5 shows "Remote Play session ended"
• The controller reconnects automatically. If it doesn't, press HOME to trigger a
reconnect.
• If the controller was idle for a long time, unplug and replug USB-C, then press HOME.
PS5 显示“远程游玩会话结束”
手柄会自动重新连接。如果没有,按 HOME 键触发重新连接。
如果手柄长时间空闲,拔掉再插 USB-C,然后按 HOME。
Need to re-pair after PS5 system update
• Hold HOME + D-pad Left (2s) to clear pairing, then follow Step 4 again.

Part3:
Setup PlayStation 4
Connect and configure your PS4 setup.
连接并配置你的 PS4 设备。
What You Need
• A PlayStation 4 console with Remote Play enabled
• Your PSN (PlayStation Network) account credentials
• The PS4 GCC controller on the same WiFi network
• The ConsoleNinjas companion app
你需要什么
启用远程游玩的 PlayStation 4 主机
你的 PSN(PlayStation Network)账户凭证
PS4 的 GCC 手柄在同一 WiFi 网络上
ConsoleNinjas 配套应用
Enable Remote Play on Your PS4
1. On your PS4, go to Settings > Remote Play Connection Settings
2. Check Enable Remote Play
3. Go to Settings > Power Save Settings > Set Features Available in Rest Mode
4. Enable Stay Connected to the Internet and Enable Turning On PS4 from Network
在你的 PS4 上启用远程游玩
在你的 PS4 上,进入设置>远程游玩连接设置
检查启用远程游玩
进入设置>省电设置>设置休眠模式可用的功能
启用“保持连接互联网”和“从网络开启 PS4
Controller Setup
控制器设置
Step 1 — Initial Setup
Complete the initial setup if you haven't already.
第一步——初始设置
如果你还没完成初始设置,请先完成。
Step 2 — Select PlayStation 4
In the ConsoleNinja app's console selection screen:
• Your PS4 should appear under Discovered Consoles if it's on the same network
• Alternatively, select PlayStation 4 from the preconfigured list
• The app will configure your controller for PS4 mode
步骤 2 — 选择 PlayStation 4

在 ConsoleNinja 应用的控制台选择界面:
如果你的 PS4 在同一网络,
应该会出现在已发现主机的设置里 或者,从预配置列表中选择
PlayStation 4 应用会将你的手柄配置为 PS4 模式
Step 3 — Sign In to PSN
The app opens a PlayStation Network login page:
1. Sign in with your PSN email and password
2. Complete any two-factor authentication if prompted
3. Once authenticated, the app receives your PSN credentials
步骤 3 — 登录 PSN 该应用会打开一个 PlayStation Network 登录页面:
用你的 PSN 邮箱和密码登录
如果被要求,请完成任何双因素认证
认证后,应用会收到你的 PSN 凭
Step 4 — Pair with Your PS4
After signing in:
1. On your PS4, go to Settings > Remote Play Connection Settings > Add Device
2. Your PS4 displays an 8-digit PIN code
3. Enter this PIN in the ConsoleNinja app when prompted
4. The controller LED turns green (breathing) while connecting
5. Once paired, the LED turns steady green — you're playing!
步骤 4 — 与你的 PS4 配对 登录后:
在你的 PS4 上,进入设置>远程游玩连接设置>添加设备
你的 PS4 显示一个 8 位数字的 PIN 码
在提示时,在 ConsoleNinja 应用中输入此 PIN 码
连接时手柄 LED 灯会变绿(呼吸)
配对完成后,LED 会稳定变绿——你在玩了!
Playing
使用
After initial setup, just press HOME to turn on the controller. It automatically connects to your
PS4.
初始设置后,只需按 HOME 键即可开启手柄。它会自动连接到你的 PS4。
Troubleshooting
故障排除
"Connection failed" or red LED blinking
• Make sure your PS4 is turned on or in Rest Mode with network features enabled.
• Verify both devices are on the same WiFi network.
• Try holding HOME + D-pad Left (2s) to reset pairing, then re-pair.
“连接失败”或红色 LED 闪烁
确保你的 PS4 开机或处于休眠模式,并启用网络功能。

确认两台设备是否在同一个 WiFi 网络上。
试着按住 HOME + 方向键左键(2 秒)重置配对,然后再重新配对。
High latency or stuttering
• Move closer to your WiFi router.
高延迟或卡顿
靠近你的 WiFi 路由器。
Need to re-pair
• Hold HOME + D-pad Left (2s) to clear pairing data, then follow Step 4 again.
需要重新配对
按住 HOME + 方向键左键(2 秒)清除配对数据,然后再次按步骤 4。

Part4 :
Setup Xbox Series
Xbox Series 的设置
Connect and configure your Xbox Series setup.
连接并配置你的 Xbox Series 设备。
What You Need
• An Xbox Series S or Xbox Series X console
• Your Microsoft account linked to Xbox
• The Xbox and controller on the same WiFi network
• The ConsoleNinjas companion app
你需要什么
Xbox Series S 或 Xbox Series X 主机
你的 Microsoft 账户关联到 Xbox
Xbox 和手柄在同一个 WiFi 网络上
ConsoleNinjas 配套应用
Enable Remote Play on Your Xbox
1. On your Xbox, go to Settings > Devices & connections > Remote features
2. Check Enable remote features
3. Set your Xbox power mode to Sleep (so it stays reachable when idle)
在你的 Xbox 上启用远程游玩
在你的 Xbox 上,进入设置>设备与连接>远程功能
勾选启用远程功能
把 Xbox 电源模式设置为睡眠(这样空闲时它依然可访问)
Controller Setup
控制器设置
Step 1 — Initial Setup
Complete the initial setup if you haven't already.
第一步——初始设置
如果你还没完成初始设置,请先完成。
Step 2 — Select Xbox
In the ConsoleNinja app's console selection screen:
• Your Xbox should appear under Discovered Consoles if it's on the same network
• Select it and tap Continue
• The app will configure your controller for Xbox mode
步骤 2 — 选择 Xbox 在 ConsoleNinja 应用的控制台选择界面:
如果你的 Xbox 在同一网络上,应该会出现在已发现主机的选项下
选择它并点击继续
应用会将你的手柄配置为 Xbox 模式

Step 3 — Sign In to Microsoft
The app opens a Microsoft login page using the Device Code flow:
1. A device code appears on screen — copy it (tap the copy button)
2. The app also opens Microsoft's device activation page in a browser
3. Paste or enter the device code on the Microsoft page
4. Sign in with your Microsoft/Xbox account
5. Approve the sign-in when prompted
6. The app automatically detects the successful login
步骤 3 — 登录 Microsoft
该应用通过设备代码流程打开一个 Microsoft 登录页面:
屏幕上会出现设备代码——复制(点击复制按钮)
该应用还能在浏览器中打开 Microsoft 的设备激活页面
在 Microsoft 页面粘贴或输入设备代码
用你的 Microsoft/Xbox 账号登录
提示时批准登录
应用会自动检测成功登录
Step 4 — Connect to Your Xbox
After authentication:
1. The app sends your credentials to the controller
2. The controller connects to your Xbox via the xHome protocol
3. LED turns green (breathing) while connecting
4. Once connected, the LED turns steady green — you're playing!
步骤 4 — 连接您的 Xbox 认证后:
应用会把你的凭证发送给控制器
手柄通过 xHome 协议连接到你的 Xbox。
连接时 LED 变绿(呼吸) 连接后,
LED 灯会稳定变绿——你在玩了!
Playing
使用
After initial setup, just press HOME to turn on the controller. It automatically:
1. Connects to WiFi (cyan LED)
2. Connects to your Xbox via Remote Play (green LED)
3. Ready to play (steady green LED)
初始设置后,只需按 HOME 键即可开启手柄。它会自动:
连接 WiFi(青色 LED)
通过远程游玩连接你的 Xbox(绿色 LED)
准备游戏(稳定绿色 LED 灯
Troubleshooting
故障排除
"Connection failed" or red LED blinking
• Make sure your Xbox is turned on or in Sleep mode with remote features enabled.
• Verify both devices are on the same WiFi network.

• Try holding HOME + D-pad Left (2s) to reset OAuth tokens, then re-authenticate.
Microsoft login fails or code expired
• Wait for a new device code to appear and try again.
• Make sure you're signing in with the correct Microsoft account that owns the Xbox.
High latency or stuttering
• Ensure your Xbox has a wired Ethernet connection for best streaming quality.
Need to re-authenticate
• Hold HOME + D-pad Left (2s) to clear stored tokens, then follow Step 3 again.
“连接失败”或红色 LED 闪烁
确保你的 Xbox 开机或处于睡眠模式,并启用遥控功能。
确认两台设备是否在同一个 WiFi 网络上。
试着按住 HOME + 方向键左键(2 秒)重置 OAuth 令牌,然后重新认证。 Microsoft
登录失败或代码过期
等待新的设备代码出现后再试一次。
确保你用的是拥有 Xbox 的正确 Microsoft 账号登录。
高延迟或卡顿
确保你的 Xbox 有线以太网连接,以获得最佳流媒体质量。
需要重新认证
按住 HOME + 方向键左键(2 秒)清除存储的数据,然后再次按步骤 3。

Part5 :
Setup Switch 2
设置 NS 2
Connect and configure your Nintendo Switch 2 setup.
连接并配置你的任天堂 Switch 2 设备。
What You Need
• A Nintendo Switch 2 console
• The ConsoleNinjas companion app
你需要什么
一台任天堂 Switch 2 主机
ConsoleNinjas 配套应用
Controller Setup
控制器设置
Step 1 — Initial Setup
Complete the initial setup if you haven't already (WiFi provisioning via the app).
第一步——初始设置
如果还没完成初始设置(通过应用实现 WiFi 配置)。
Step 2 — Select Switch 2
In the ConsoleNinja app's console selection screen:
• Select Switch 2 from the preconfigured list
• The app configures your controller for Switch 2 mode
• The controller will reboot into Switch 2 mode
步骤 2 — 选择 NS2
在 ConsoleNinja 应用的控制台选择界面:
从预配置列表中选择 ns2
这个应用会把你的手柄配置成 Switch 2 模式
手柄会重启进入 Switch 2 模式
Step 3 — Pair with Your Switch 2
1. On your Switch 2, go to Home > Controllers > Change Grip/Order (or Pair New
Controller)
2. Turn on your controller by pressing HOME
3. The controller LED breathes green while searching for the Switch
4. Your Switch 2 should detect the controller as a Pro Controller
5. Once connected, the LED turns steady green — you're paired!
The pairing is saved. Next time, just press HOME and the controller reconnects automatically.

步骤 3 — 与你的 Switch 2 配对
在你的 Switch 2 上,进入“主页>手柄”>更改握把/顺序(或配对新手柄)
按 HOME 键开启手柄
控制器 LED 在寻找开关时会闪绿灯
你的 Switch 2 应该能把手柄识别为 PRO 手柄
连接后,LED 会稳定变绿——你们已经配对成功!
这次配对会保存。下次只需按 HOME,手柄会自动重新连接。
Playing
使用
After initial pairing:
1. Press HOME to turn on the controller
2. The controller connects via Bluetooth automatically (green LED)
3. Ready to play!
初始配对后:
按 HOME 键开启手柄
手柄通过蓝牙自动连接(绿色 LED 灯)
准备开玩!
Troubleshooting
故障排除
Switch doesn't detect the controller
• Make sure the Switch 2 is in pairing mode (Change Grip/Order screen).
• Try holding HOME + D-pad Left (2s) on the controller to clear old pairing data, then
pair again.
• Move the controller closer to the Switch (within 2 meters for initial pairing).
Switch 检测不到手柄
确保 Switch 2 处于配对模式(切换握持/顺序界面)。
试着按住手柄上的 HOME + 方向键左键(2 秒)清除旧配对数据,然后再配对一次。
把手柄移得更靠近开关(初始配对时保持在 2 米以内)。
Controller disconnects during play
• Check battery level — charge via USB-C if low.
• Reduce distance between the controller and Switch 2.
手柄在游戏中断开连接
检查电量——电量低时通过 USB-C 充电。
缩短手柄与 Switch 2 之间的距离。
Need to pair with a different Switch
• Hold HOME + D-pad Left (2s) to clear the current pairing.
• Follow Step 3 with the new Switch 2 console.
需要与另一台 Switch 配对
按住 HOME + 方向键左键(2 秒)以清除当前配对。
按照第三步操作新的 Switch 2 主机。

Want to change settings or update firmware?
• Hold HOME + D-pad Right (2s) to enter Config mode. This temporarily enables WiFi
so the ConsoleNinjas app can connect for settings, macros, and firmware updates.
• When done, power off (HOME + D-pad Down, 2s) and press HOME to return to
Switch 2 mode.
想更改设置或更新固件?
按住 HOME + 方向键右键(2 秒)进入配置模式。这会暂时启用 WiFi,让 ConsoleNinjas
应用连接设置、宏和固件更新。
完成后,关机(HOME + 方向键向下,2 秒),然后按 HOME 回到 Switch 2 模式。
FCC Warnning:
This equipment has been tested and found to comply with the limits for a Class B digital
device,pursuant to part 15 of the FCC Rules. These limits are designed to provide reasonable
protection against harmful interference in a residential installation. This equipment generates,
uses and can radiate radio frequency energy and, if not installed and used in accordance with
the instructions, may cause harmful interference to radio communications. However, there
is no guarantee that interference will not occur in a particular installation. If this
equipment does cause harmful interference to radio or television reception, which can be
determined by turning the equipment off and on, the user is encouraged to try to correct
the interference by one or more of the following measures:
• Reorient or relocate the receiving antenna.
• Increase the separation between the equipment and receiver.
• Connect the equipment into an outlet on a circuit different from that to which the receiver
is connected.
• Consult the dealer or an experienced radio/TV technician for help.
Caution: Any changes or modifications to this device not explicitly approved by manufacturer
could void your authority to operate this equipment.
This device complies with part 15 of the FCC Rules. Operation is subject to the following two
conditions:
(1)This device may not cause harmful interference, and (2) this device must accept any
interference received, including interference that may cause undesired operation.
This equipment complies with FCC radiation exposure limits set forth for an uncontrolled
environment. This equipment should be installed and operated with minimum distance 0cm
between the radiator and your body.