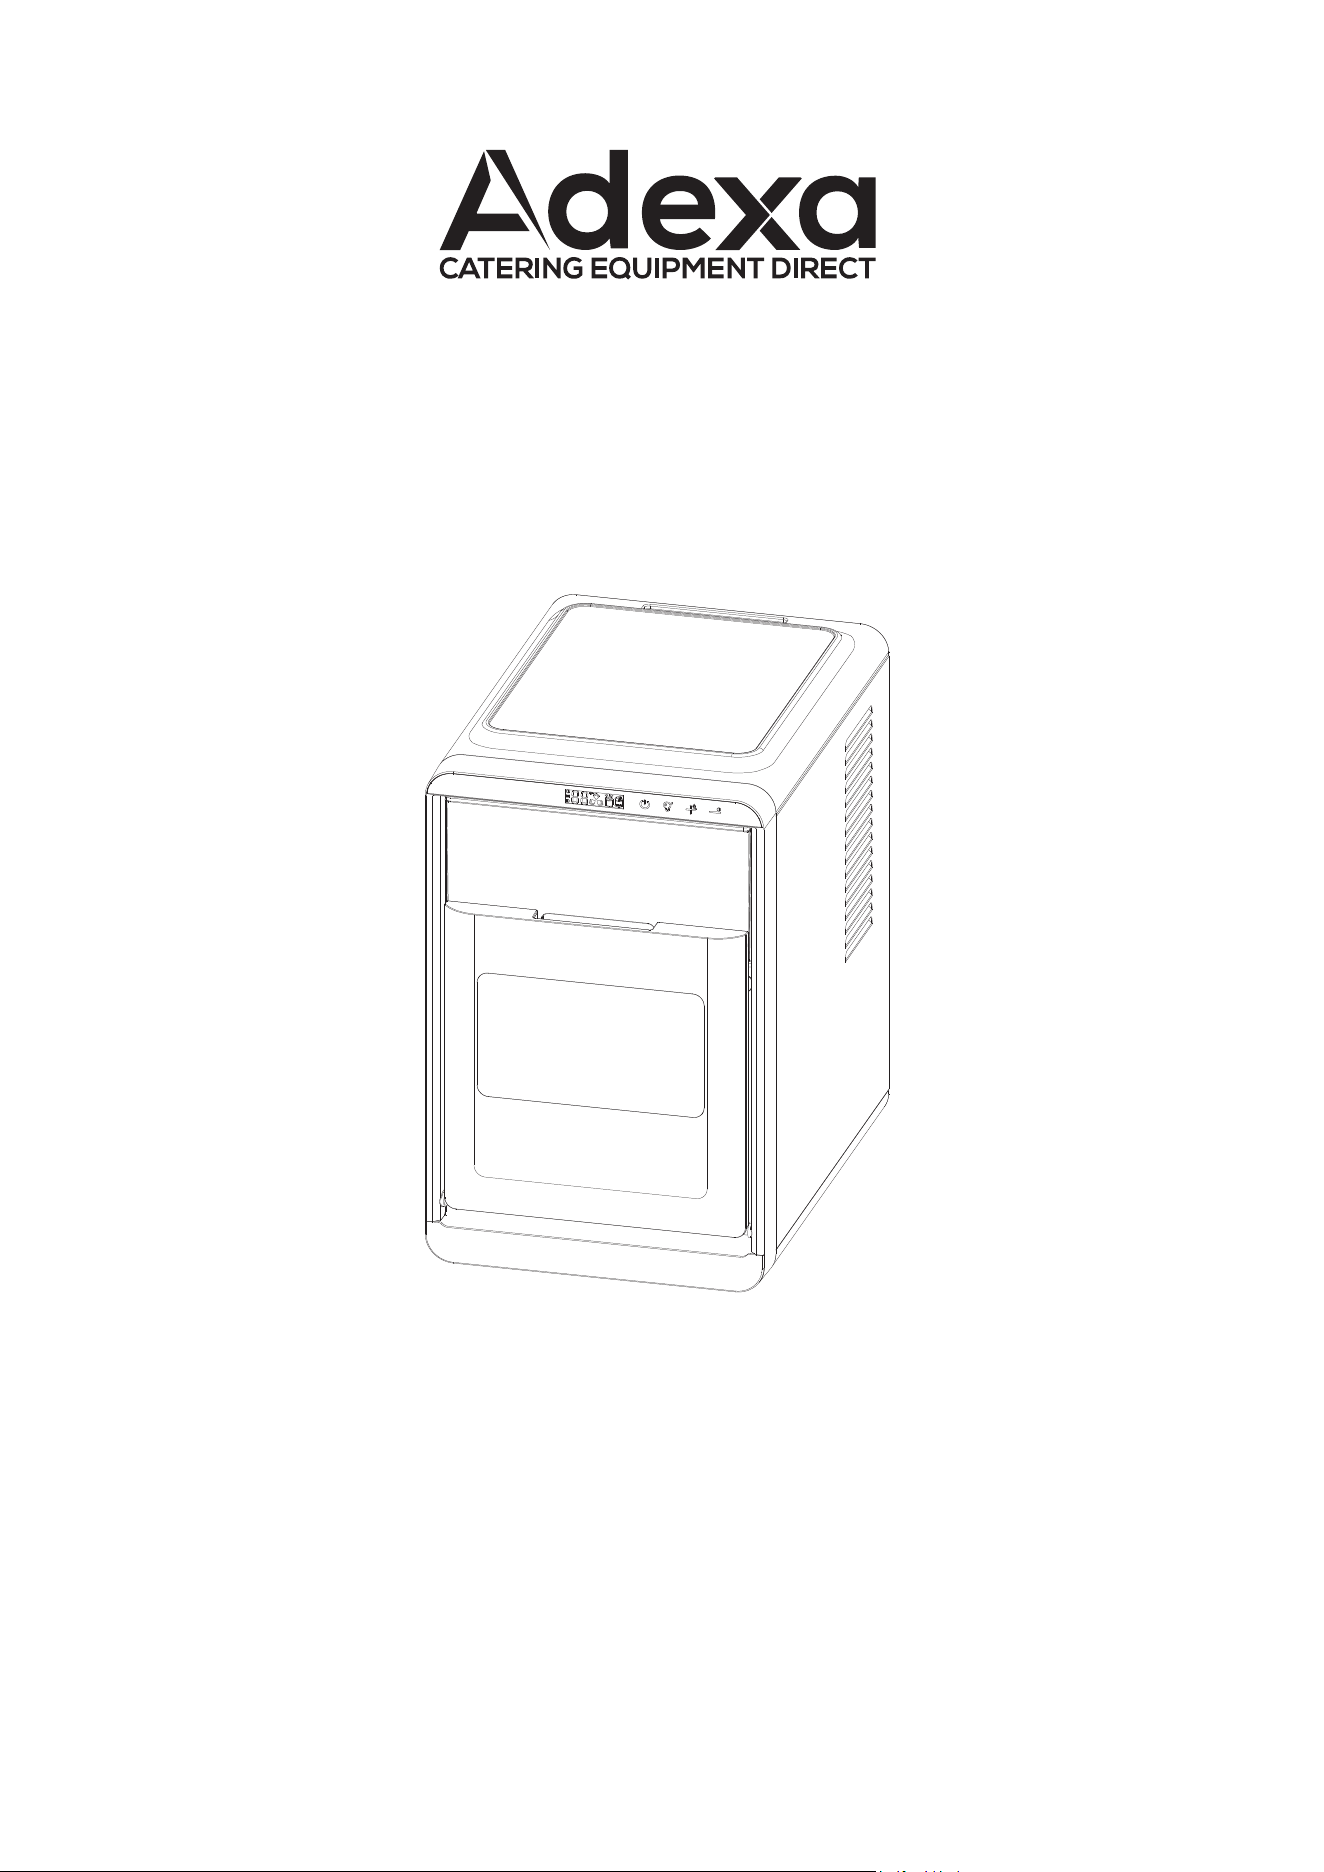
USER MANUAL
ICE MAKER
HZB-12M
It is important that you read these instructions before using your portable ice
maker and we strongly recommend that you keep them in a safe place for future
reference.

1
IMPORTANT SAFETY INSTRUCTIONS ............................................................ 2
PREPARING YOUR ICE MAKER FOR USE
IMPORTANT SAFETY TIPS ....................................................................................... 3-4
GETTING TO KNOW YOUR UNIT ...................................................................... 5
OPERATION AND DISPLAY AREAS ................................................................. 5-6
OPERATING PROCEDURES & MAINTENANCE
UNPACKING YOUR ICE MAKER ............................... ................................. 6
CONNECTING YOUR ICE MAKER ................................................... ........... 6
CLEANING AND MAINTAINING YOUR ICE MAKER ........................................... 7
USING YOUR ICE MAKE
ADD WATER TO ICE MAKER .................................................................... 8
ICE MAKING OPERATION ....................................................................... 8-9
FORCED ICE REMOVAL OR EVAPORATOR ICE REMOVAL ................................. 9
AUTOMATIC SELF-CLEANING PROGRAM ..................................................... 9-10
TIMER FUNCTION FOR AUTOMATIC STARTUP AND SHUTDOWN .......... 10
MACHINE DRAINAGE.......................................................................... 10
CLEANING THE WATER DISTRIBUTION PIPE AND WATER DISTRIBUTOR... 11-12
TROUBLESHOOTING .......................................................................................... 13
TABLE OF CONTENTS
2
IMPORTANT SAFETY INSTRUCTIONS
Your safety and the safety of others are very important.
We have provided many important safety messages manual and your appliance.
Always read and obey all safety messages.
This is the safety alert symbol:
!
All safety messages will follow the safety alert symbol and the word “ DANGER” or
“WARNING” .
These words mean:
You can be killed or seriously injured if you don’t immediate follow instructions.
All safety messages will tell you what the potential hazard is, tell you how to reduce
the chance of injury, and tell you what can happen if the instructions are not followed.
WARNING
DANGER

4
PREPARING YOURICE MAKER FOR USE
IMPORTANT SAFETY TIPS
When using electrical appliances, basic safety precautions should be followed to reduce the
risk of fire, electric shock, and injury to persons or property. Read all instructions before
using any appliance.
This appliance can be used by children aged from 8 years and above and persons with
reduced physical, sensory or mental capabilities or lack of experience and knowledge if they
have been given supervision or instruction concerning use of the appliance in a safe way
and understand the hazards involved. Children shall not play with the appliance. Cleaning
and user maintenance shall not be made by children without supervision.
Do not operate this,or any other appliance with a damaged cord.
If the supply cord is damaged, it must be replaced by the manufacturer or its service agent
or a similarly qualified person in order to avoid a hazard.
This ice-maker must be positioned so that the plug is accessible .
Connect to properly polarized outlets only. No other appliance should be plugged into the
same outlet. Be sure that the plug is fully inserted into the receptacle.
Do not run the power cord over carpeting or other heat insulators. Do not cover the cord.
Keep cord away from traffic areas, and do not submerge in water.
We do not recommend the use of an extension cord, as it may overheat and become a risk
of fire. If you must use an extension cord, use No.0.75mm
2
minimum size and rated no less
than 16A/250V~ with a plug.
WARNING: This appliance must be earthed.
Unplug the ice maker before cleaning or making any repairs or servicing.
Exercise caution and use reasonable supervision when appliance is used near children.
Do not use your ice-maker outdoors. Place the ice-maker away from direct sunlight and
make sure that there is at least 6 inches of space between the back of your unit and wall.
Keep a minimum distance of 6 inches on each side of your unit free.
Do not use other liquid to make the ice-cube other than water.
Do not clean your ice maker with flammable fluids. The fumes can create a fire hazard or
explosion.
Do not tip over.To avoid a hazard due to instability of the appliance, it must be placed at a
even or flat surface.
If the ice maker is brought in from outside in wintertime, give it a few hours to warm up to
room temperature before plugging it in.
This appliance is not intended for use by persons (including children) with reduced physical,
sensory or mental capabilities, or lack of experience and knowledge, unless they have been
given supervision or instruction concerning use of the appliance by a person responsible for
their safety.
Children should be supervised to ensure that they do not play with the appliance.
This appliance must be earthed.
4
Do not store explosive substances such as aerosol cans with a flammable propellant in this
appliance.
This appliance is intended to be used in household and similar applications such as
– staff kitchen areas in shops, offices and other working environments;
– farm houses and by clients in hotels, motels and other residential type environments;
1. bed and breakfast type environments;
2. catering and similar non-retail applications.
Warning: Risk of fire/flammable materials used. Please according to local
regulations regarding disposal of the appliance for its flammable blowing gas.
WARNING: Keep ventilation openings, in the appliance enclosure or in the built-in structure,
clear of obstruction.
WANING: Do not damage the refrigerant circuit.
WARNING: Do not use mechanical devices or other means to accelerate the defrosting
process or ice harvesting process, other than those recommended by the manufacturer.
WARNING: Do not use other type of electrical appliances inside the ice-maker.
IMPORTANT:
The wires in this mains lead are colored in accordance with the following code:
Green and yellow: Grounding
Blue: Neutral
Brown: Live
This appliance is not intended for use by persons (including children) with reduced physical,
sensory or mental capabilities, or lack of experience and knowledge, unless they have been
given supervision or instruction concerning use of the appliance by-a person responsible for
their safety.
Young children should be supervised to ensure that they do not play with the appliance.
-Please according to local regulations regarding disposal of the appliance for its flammable
refrigerant and blowing gas. Before you scrap the appliance, please take off the doors to
prevent children trapped.
5
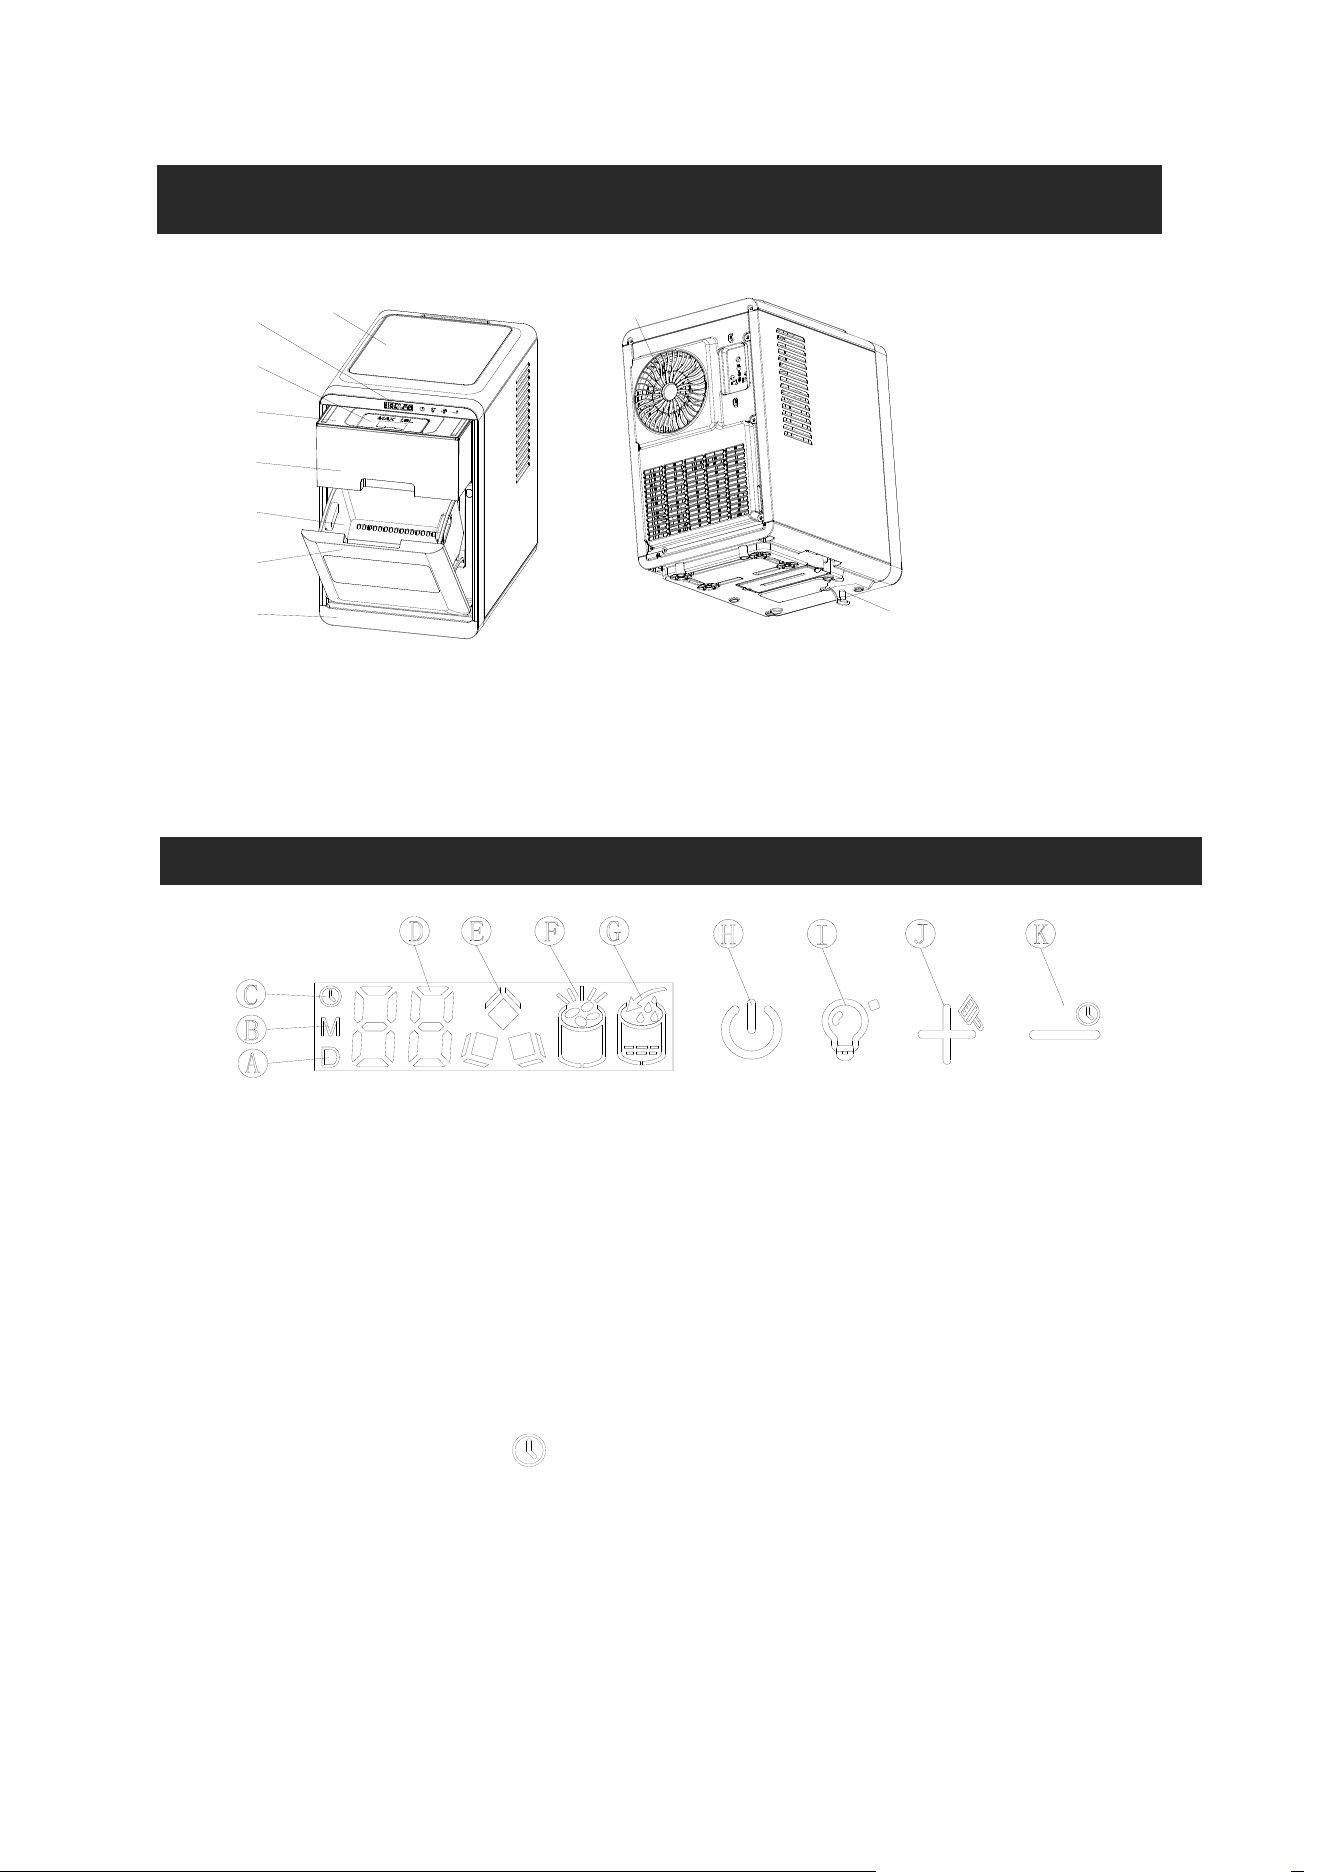
1. Water Tray 2. Ice Basket Panel
3. Ice Basket 4. Water tank
5. Water Tank Cover 6. Water Tank Fill Cover
7. Display and Control Panel 8. Top Cover
9. Air Outlet Ensure smooth airflow. 10. Drain Plug
A. Ice cube thickness adjustable symbol.
B. Ice-making time countdown indicator, displayed alongside the numeric display.
C. Timer setting indicator, displayed alongside the numeric display.
D. Number Display:
Ice Thickness Adjustment Display:
When "D" and a number are displayed together, it shows the ice cube thickness
setting. For example, "1" and "D" indicate an additional 1-minute ice-making time.
Ice-Making Time Countdown Display:
When "M" and a number are displayed together, it indicates the remaining time for
the current ice-making process. For example, "2" and "M" indicate approximately 2
minutes left before defrosting begins.
Timer Display:
When the symbol " " is displayed, it indicates the timer for auto-on or auto-off.
Automatic Cleaning Countdown Display:
When the numeric display flashes with no additional symbols, it shows the
remaining time for the cleaning process. For example, a flashing "20" indicates
approximately 20 minutes left to complete the automatic cleaning.
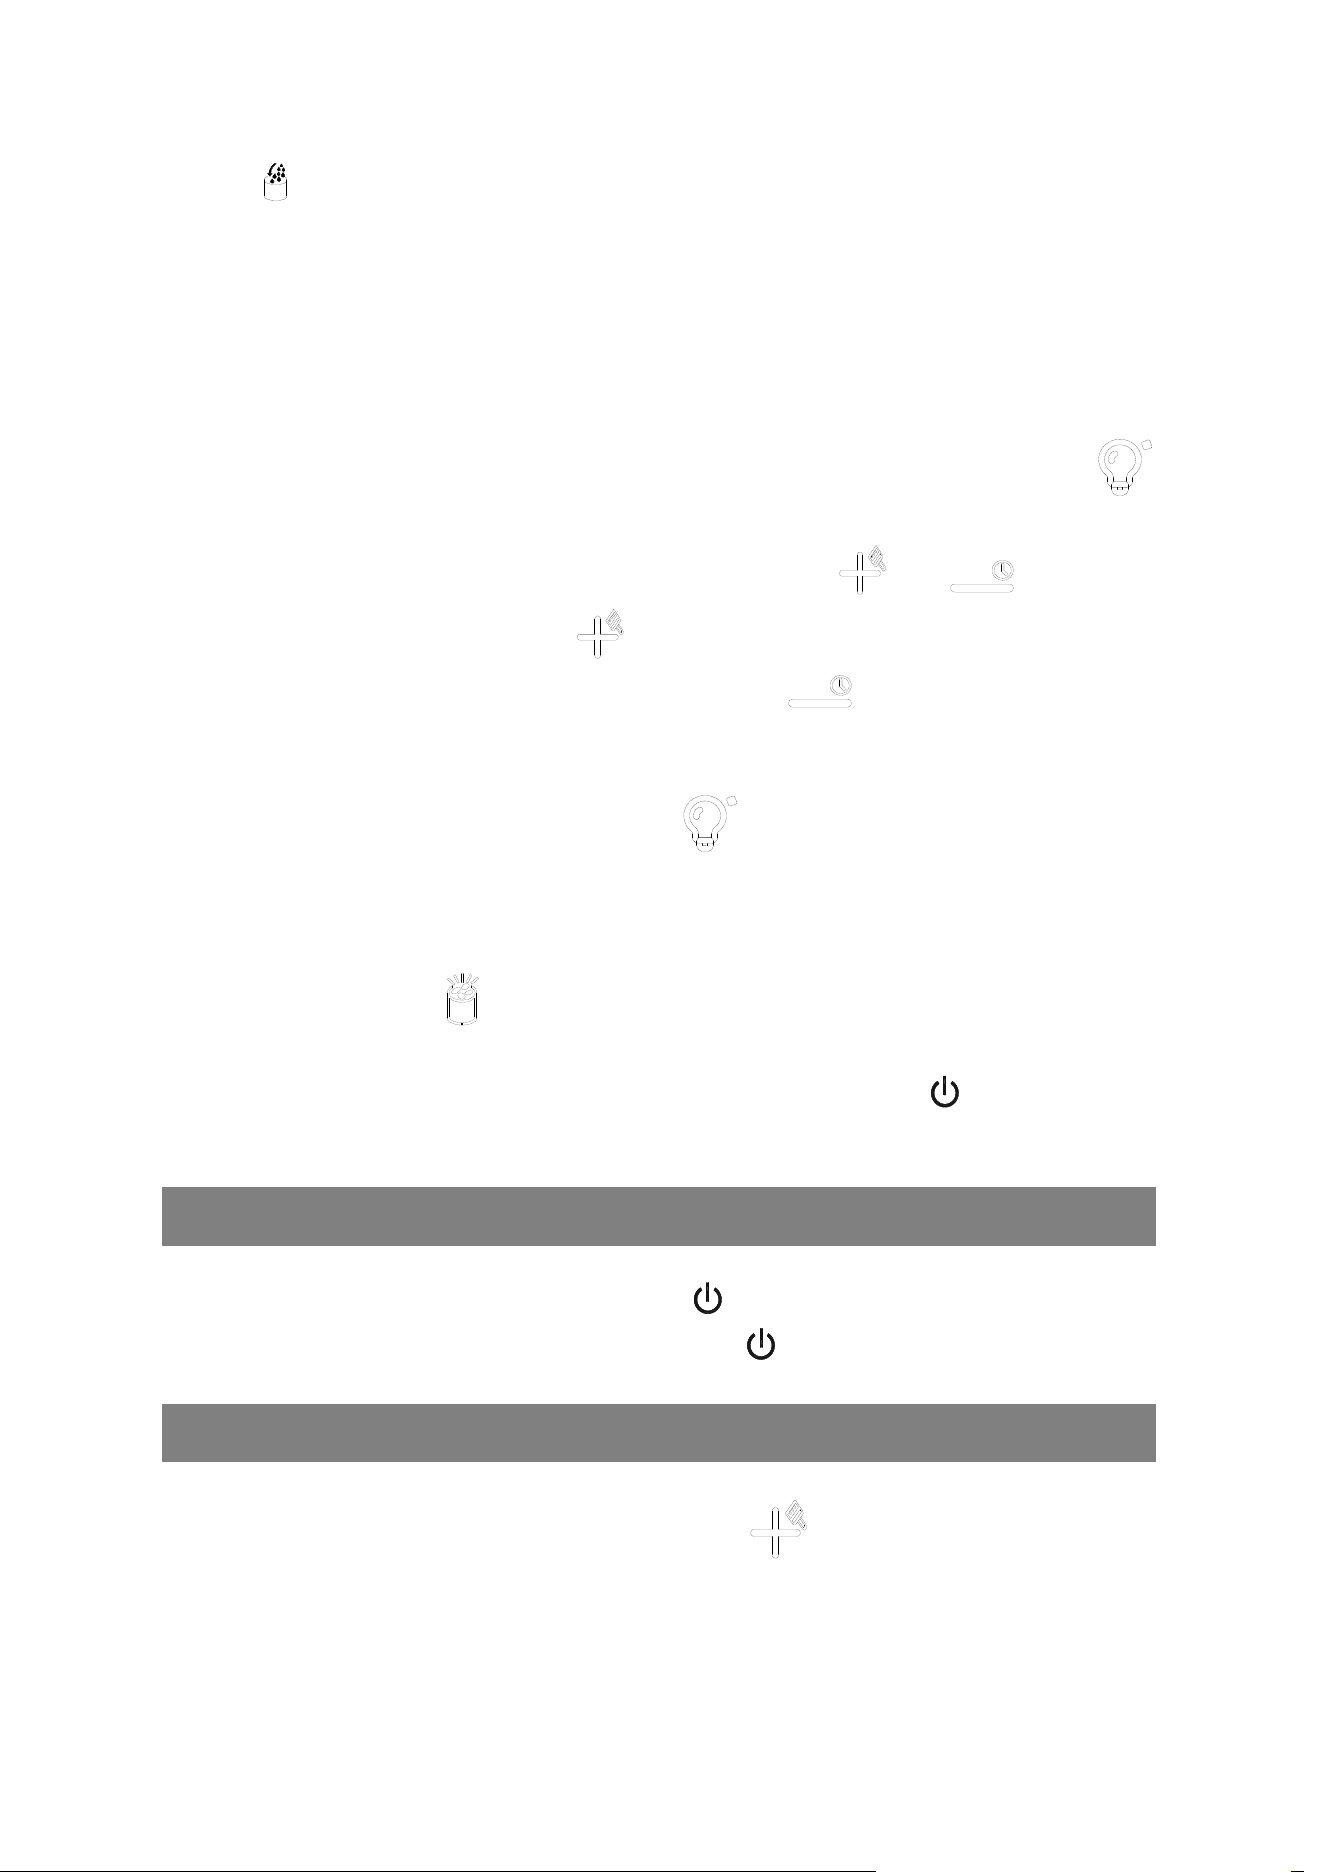
E. Ice-Making and Defrosting Indicator: A steady icon indicates ice-making is in progress,
A flashing icon indicates defrosting is in progress
F. Ice-Full Indicator:After removing ice, the machine will automatically resume ice-making.
GETTING TO KNOW YOUR UNIT
Operation and display areas
⑥
⑤
③
④
⑨
⑧
②
①
⑩
⑦

6
G. Water Shortage Indicator:A steady icon indicates a water shortage. A flashing icon
indicates defrosting timeout.
H. On/Off Button:Used to start or stop ice-making, cancel cleaning, or cancel the timer
function;During ice-making, holding the button for
more than 5 seconds forces the machine into the
defrosting state.
I. Light and Ice Thickness Adjustment Button:A short press toggles the light on and
off.Holding the button for more than 5 seconds enters ice
thickness adjustment mode. Use the "+" and "-" buttons to adjust
the ice thickness.
J. Time "+" and Auto-Clean Button:
Ice-Making Time Adjustment: Each press increases the ice making time by 1 minute.
Timer Adjustment: Each press increases the timer by 1 minute.
Auto-Clean Setting:Holding more than 5 seconds in standby mode allows auot-clean
function
K. Time "-" and Timer Setting Button:
Ice-Making Time Adjustment: Each press decreases the ice making time by 1 minute.
Timer Adjustment: Each press decreases the timer by 1 hour.
Timer Setting:Holding more than 5 seconds in standby mode allows
setting the timer for auto-on or auto-off.
OPERATING PROCEDURES & MAINTENANCE
UNPACKING YOUR ICE MAKER
1. Remove the exterior and interior packaging. Check that ice basket and ice scoop is included.
If any parts are missing, please contact our customer service.
2. Clean the interior with lukewarm water and a soft cloth. Take out the ice basket and clean it
3. Find a location for your ice maker that is protected from direct sunlight and other sources of
heat (i.e.: stove, furnace, radiator). Place the ice maker on a level surface. Maker sure that
there is at least 6 inches of space between the back and sides of your ice maker and the wall.
4. Allow one hour for the refrigerant fluid to settle before plugging ice maker in.
5. The appliance must be positioned so that the plug is accessible.
WARNING: fill with potable water only.
CONNECTING YOUR ICE MAKER
DANGER
* Improper use of the grounded plug can result in the risk of electrical shock. If the power
cord is damaged please call our customer service.
1. This unit should be properly grounded for your safety. The power cord of this appliance is
equipped with a three-prong plug which mates with standard three prong wall outlets to
minimize the possibility of electric shock.
2. Plug your appliance into an exclusive, properly installed, grounded wall outlet. Do not under
any circumstances, cut or remove the third (ground) prong from the power cord. Any questions
concerning power and/or grounding should be directed toward a certified electrician.
3. This appliance requires a standard 220-240volt, 50Hz electrical outlet with three-prong ground.
7
CLEANING AND MAINTAINING YOUR ICE MAKER
Before using your ice maker, it is strongly recommended to clean it thoroughly.
1. Take out the ice basket.
2. Clean the interior with diluted detergent, warm water and a soft cloth.
3. Then use the water to rinse the inside parts, and drain out the water from the draining port by
unplugging the Water drainage cap on the bottom.
4. The outside of the ice maker should be cleaned regularly with a mild detergent solution and
warm water.
5. Dry the interior and exterior with a soft cloth.
6. When the machine is not in use for a long time, open the water drain cap to drain water
completely out from the water reservoir.
After using your ice maker for a long time, we also suggest you should clean
your unit. Especially to the water separator pipe and the wate filters, you must clean them
periodically.
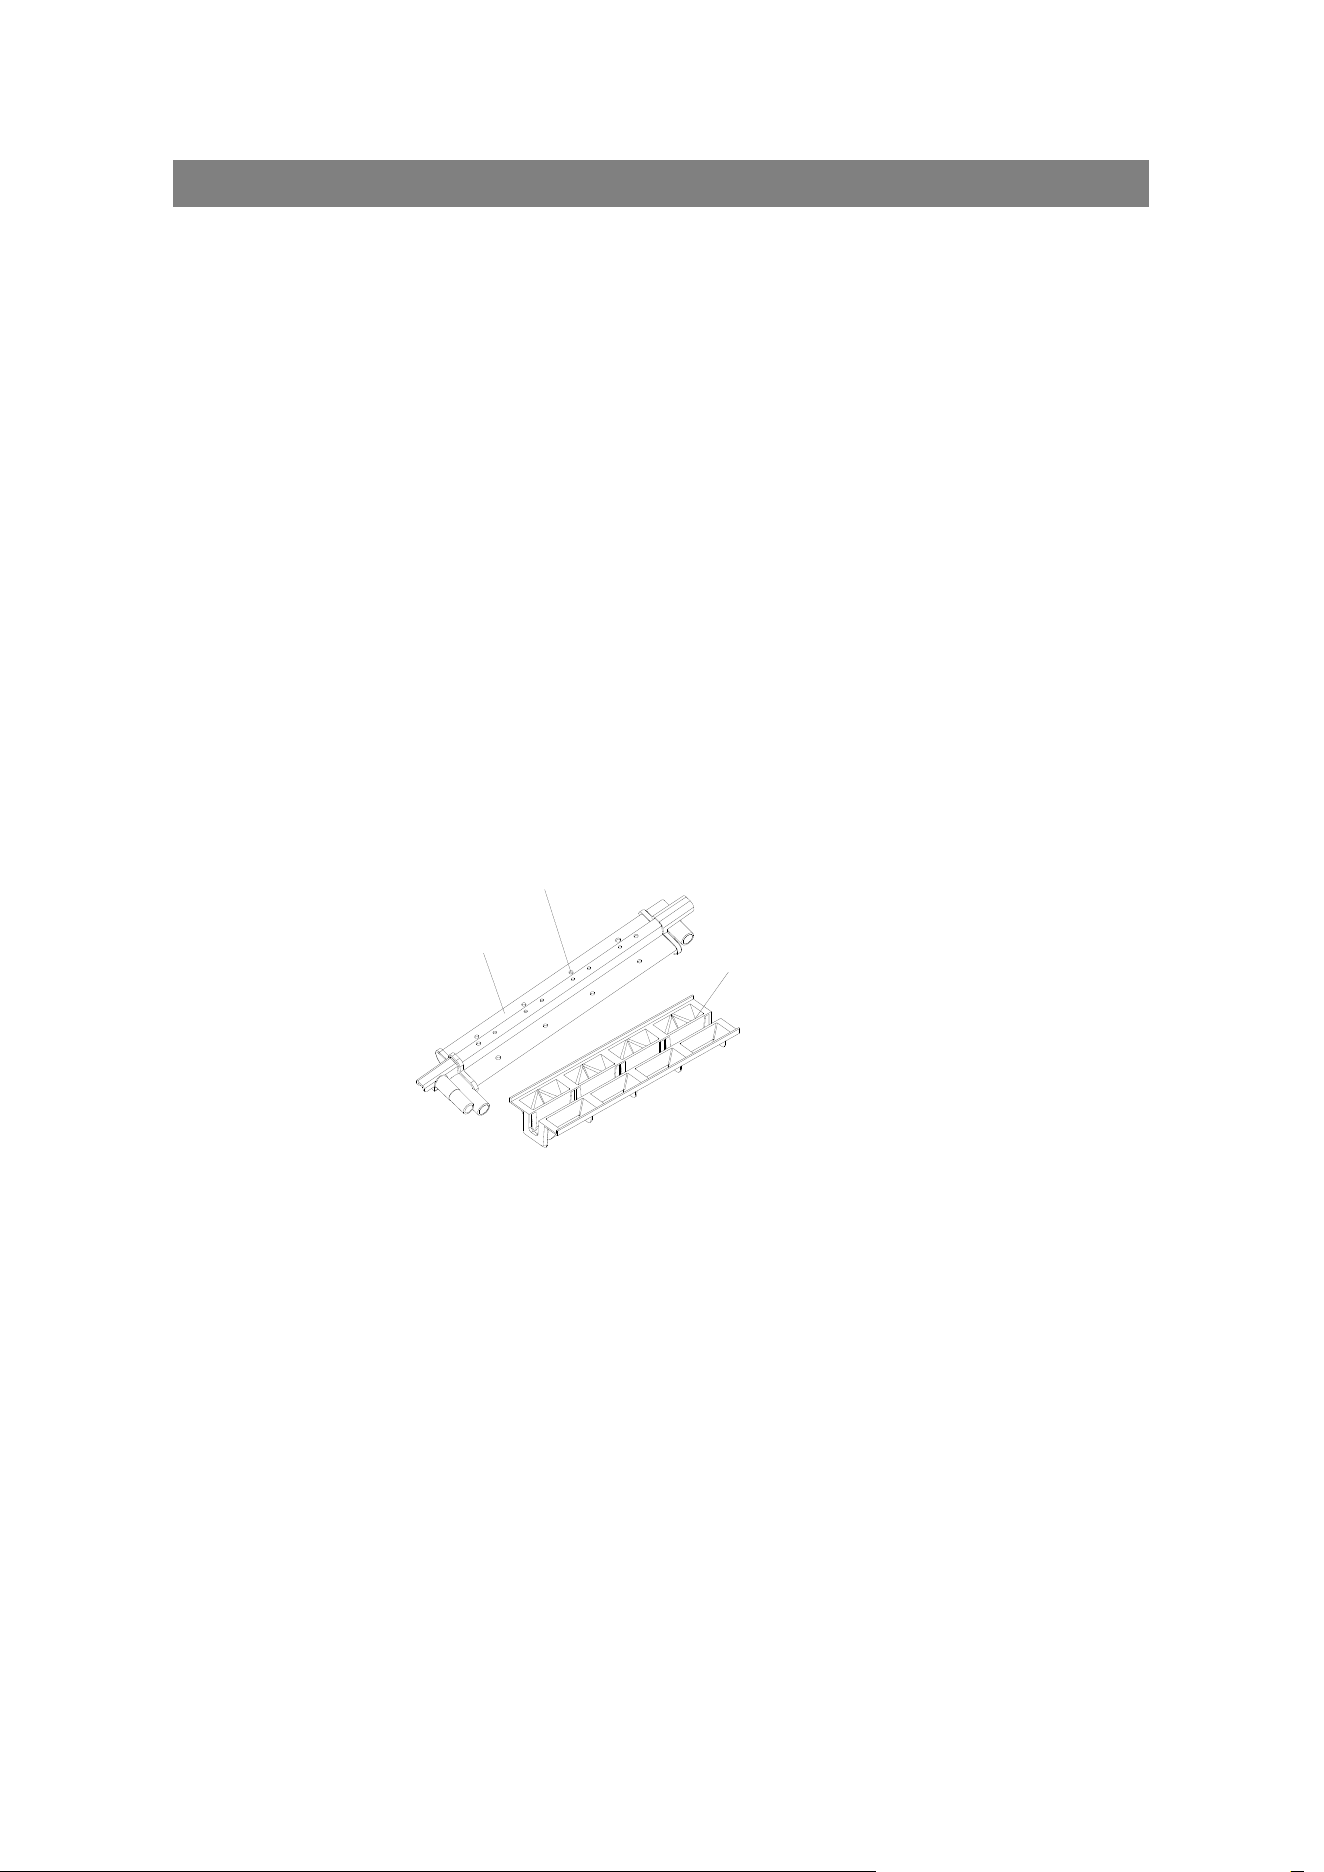
1. If the water separator pipe is blocked and there is no water flowing down when you listen the
compressor and the water pump inside are still working.Clean the each hole on the pipe wall
displayed in following picture.
2. For both of the water tank and the big water reservoir, clean them with diluted detergent, warm
water and a soft cloth. Then use the water to rinse the inside, and drain out the water from the
draining port by unplugging the Water drainage cap on the bottom. It will help you keep the
unit and ice-cube hygienicly, and also make the unit work normally.
3. When cleaning, if find that the ice cube left on the evaporator and can not be taken out easily,
you can turn on the unit to let the unit enter the ice making process, then press “ON/OFF”
button for more than 5 seconds to let the unit start ice harvest process to melt the ice cube.It
will help you remove the hard ice cube.
How to drain out the water from the internal tank and big water reservoir
completely
Because the water in the big water reservoir is stop to drain port by the water valave, if you want to
drain away all the water, please plug on the unit and but don’t start the unit, then remove the
Water drainage cap at the bottom. Wait some minutes, all of the water will flow out.
water distribution pipe
hole
water distribution hopper
8
USING YOURICE MAKER
Add water to ice maker
Manually add water:
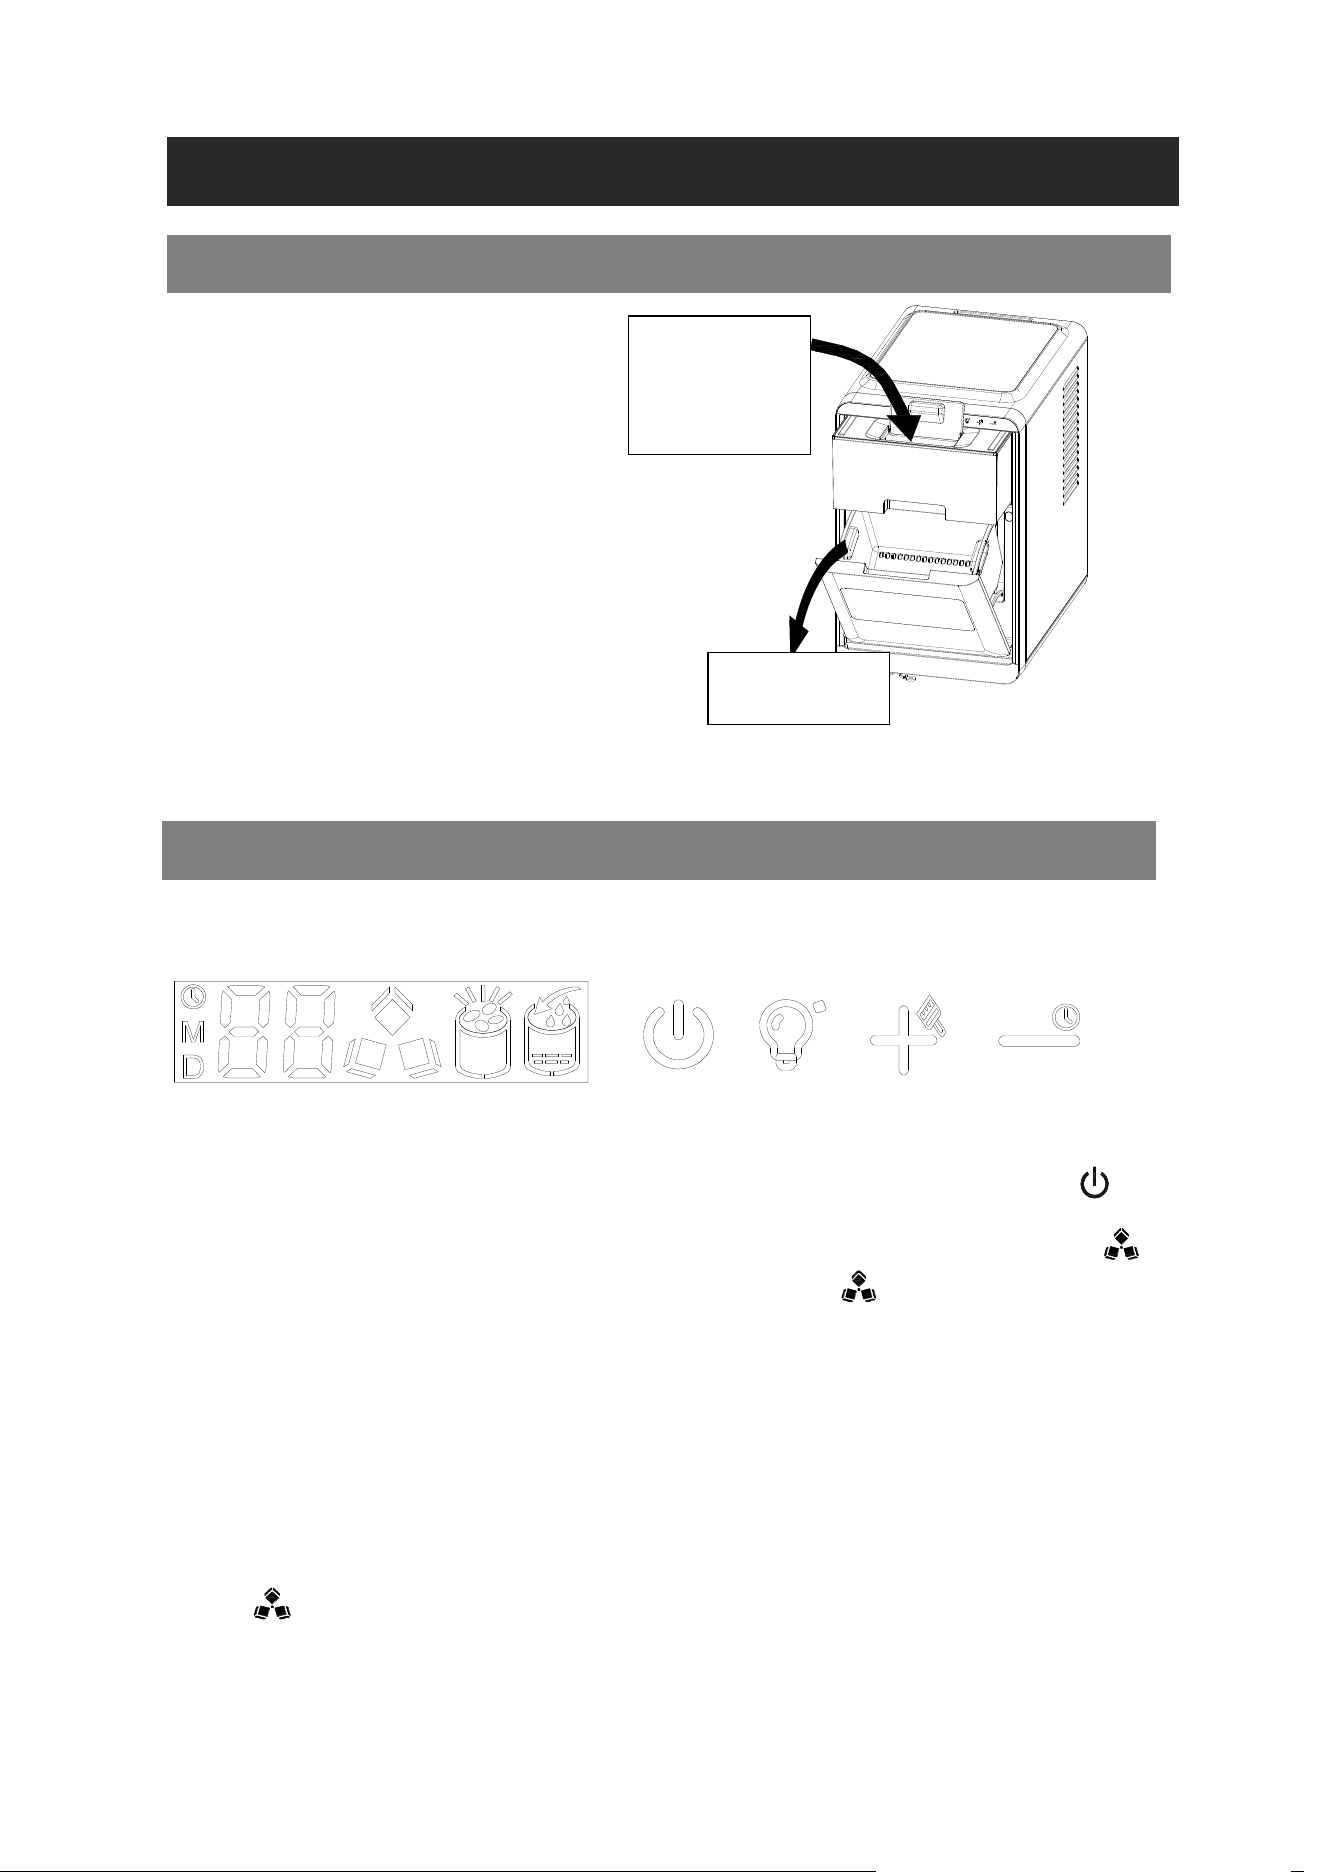
Open the ice basket panel, then pull out
the water tank.Open the water tank filling
cover fill drinkable water. As shown in the
picture on the right:
Note: The water tank must be fully inserted
into the machine; otherwise,the machine will
detect a lack of water and will not function
Properly.
Operation and display areas
1. Starting Ice-Making:Plug in the power cord. The four buttons will light up. Press the button
on the control panel,the water tank will be refilled through the solenoid valve to the standard water
level. The machine will first enter the ice-harvest program, indicated by the flashing symbol .After
a few minutes, the ice-harvest process will finish, and the symbol will stay on steadily,start the
ice-making process.
If start the ice thickness adjustable, the screen will show "D" and "1" steadily, indicating the ice-
making time has increased by 1 minute to produce thicker ice. If "D" and "-1" are displayed steadily, it
indicates the ice-making time is reduced by 1 minute, to produce thinner ice.
During ice-making, flashing digits and the symbol "M" appear. For example, flashing "M12" indicates
12 minutes remain for this ice-making cycle to complete.
2. After each ice making is finished, the unit will start to harvest the ice cube, and the ice making
symbol will be shining. Water will be added to the tank through the electromagnetic water
valve until it reaches the standard water level of the tank, and the unit will enter the next ice making
cycle; when the water added to the tank cannot reach the standard water level of the tank , the
Ice making operation
1.Open Ice
Basket Panel
2.Fill
drinkable
water to the
water tank
9
symbol will stay on, and the machine will stop working. Restart the machine, or wait
approximately 15 minutes to restart automatically.
Note: Each ice-making cycle takes approximately 10-25 minutes, depending on the ambient
temperature and water temperature. For the first cycle, higher water temperatures in the tank may
result in longer cycles but generally will not exceed 45 minutes
3. Adjustment of Ice Thickness:If the ice thickness is unsatisfactory, press and hold the “
”button for more than 3 seconds to enter the ice thickness adjustment mode. The symbol "D" flashes
on the display, and digits are displayed steadily. Adjust using the“ ” and“ ” buttons on the
control panel.Default setting: "0".Press “ ”once to increase ice-making time by 1 minute,
producing thicker ice (maximum increase: 5 minutes).Press “ ” once to decrease ice-making
time by 1 minute, producing thinner ice (maximum decrease: 5 minutes).
If no action is taken within 5 seconds, the current settings will be saved, and the machine exits the
adjustment mode. To re-enter, press and hold the“ ”button for more than 3 seconds.
After a power outage, the machine returns to the default setting of "0" .Adjustments will only affect
the next and subsequent ice-making cycles.
4. When the ice full symbol lights up, the machine stops working. Remove the ice cubes to
resume operation.
5. Shutting Down the Ice Maker: During the ice-making process, press “ ”button on the control
panel to stop the machine and enter standby mode.
During the ice-making process, press and hold the“ ” more than 5s to forced the ice remove from
the evaporator during the ice-making process.Press the“ ”button again to turn off the machine.
The automatic self-cleaning program has a default cleaning time of 20 minutes. Fill the water tank
with water, plug in the machine, and press and hold the “ ”button on the control panel for more
than 5 seconds to start the self-cleaning function. The number “20” will flash on the display,
indicating that the self-cleaning will end in 20 minutes.
Forced Ice Removal or Evaporator Ice Removal
Automatic Self-Cleaning Program
10
Canceling the Self-Cleaning Program:A full self-cleaning cycle takes approximately 20 minutes.
When the program ends, the system will automatically turn off. You can also press the “ ” button
on the control panel to forcefully stop the self-cleaning program.
Timer Range: 1-24 hours
Timed Shutdown: Can be set during ice-making.
Timed Startup: Can be set during standby mode.
How to Set the Timer:
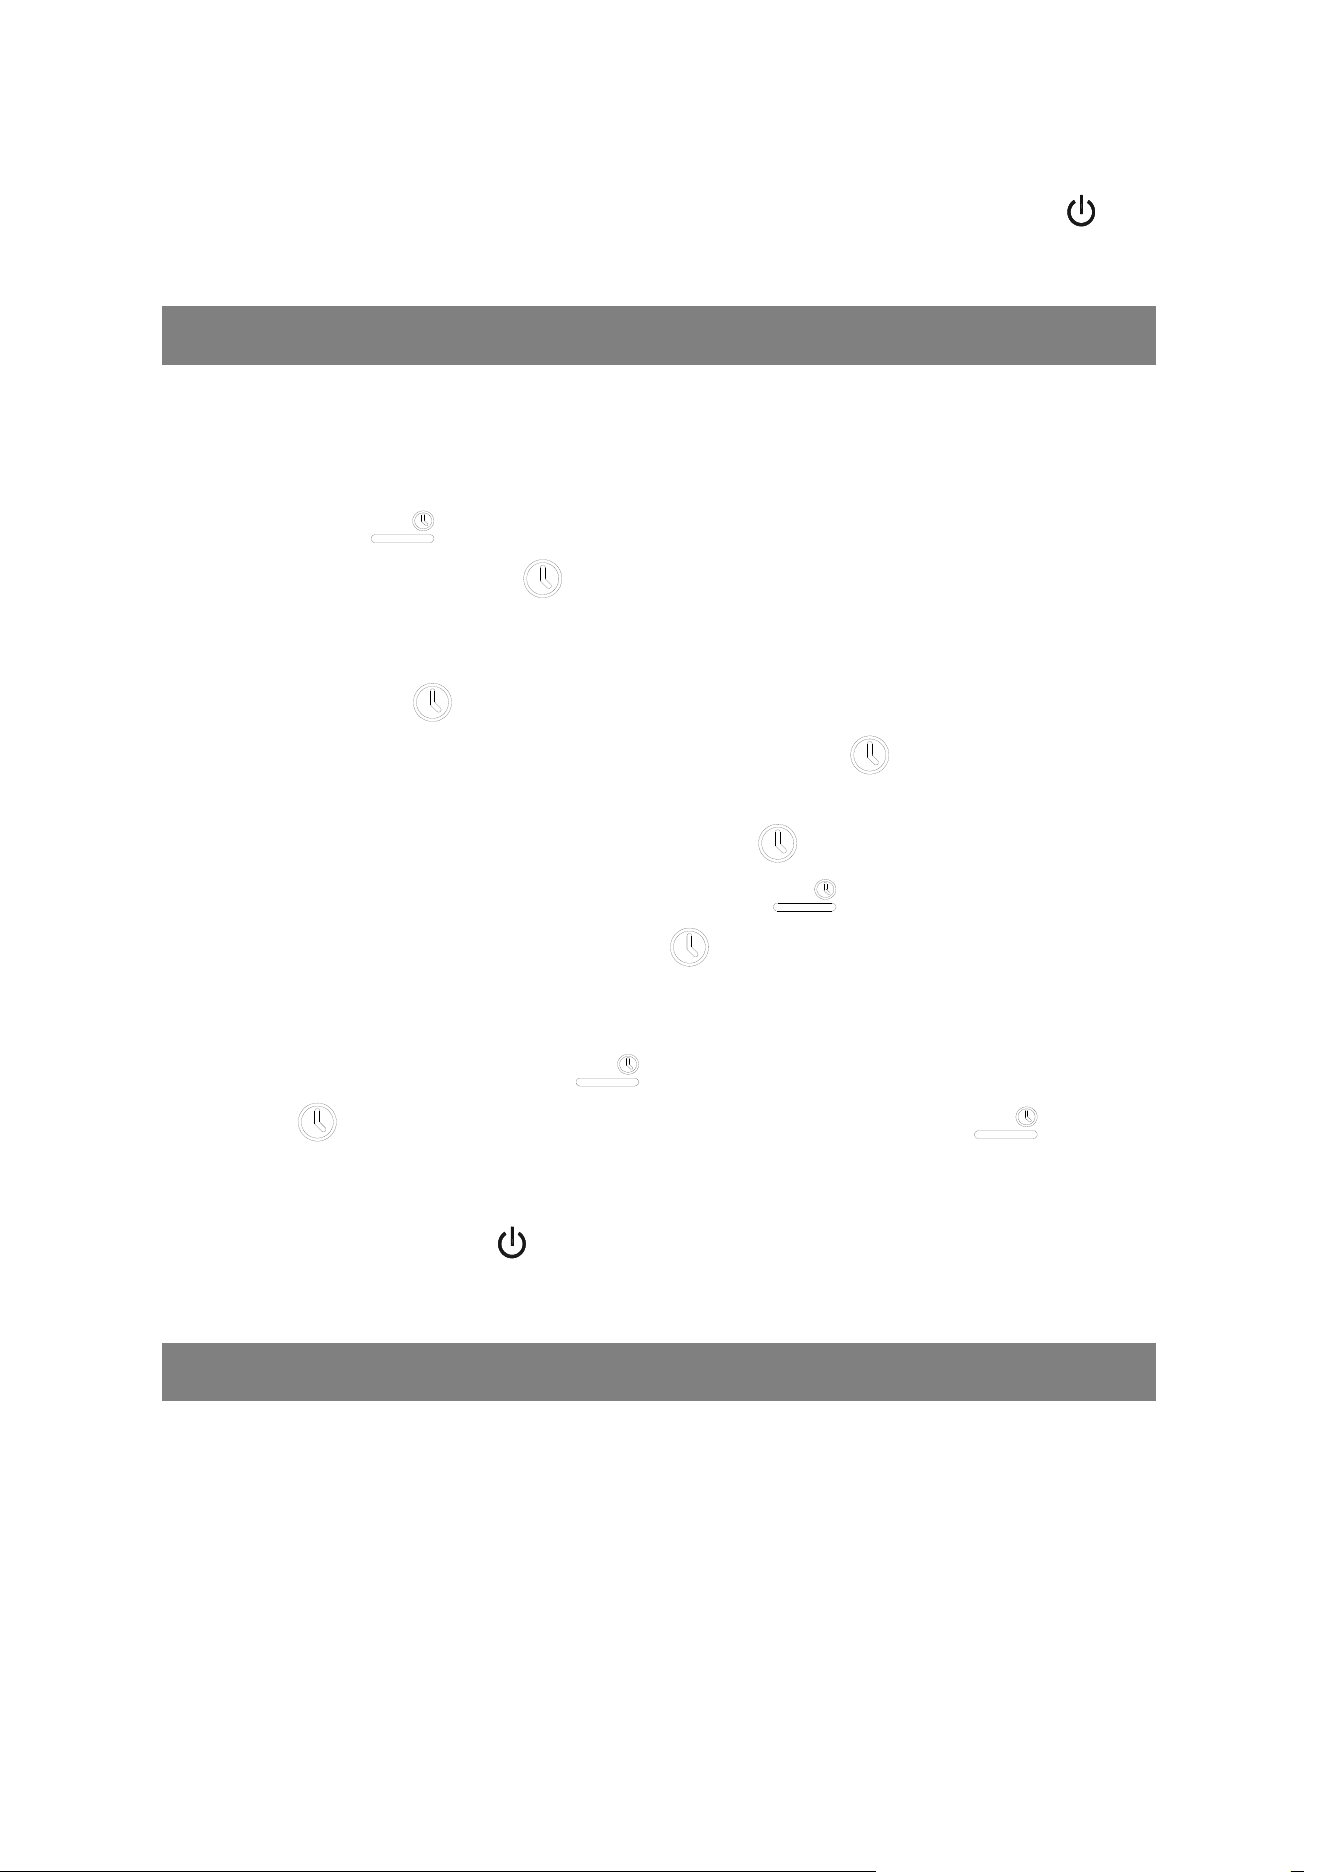
Press and hold the “ ” button on the control panel for more than 5 seconds. The screen will
display the timer value "1" and the“ ”symbol. Use the "+" button to increase the timer by 1 hour
per press. Use the "-" button to decrease the timer.
During adjustment, the “ ”symbol flashes. Once it remains steady after 5 seconds, the timer is set.
Timer Startup Display: When in standby mode, the display shows “ ” and “5”, indicating that the
machine will automatically start in 5 hours.
Timer Shutdown Display: When in ice-making mode, the “ ” symbol remains on steadily,
indicating that a timer shutdown is set. Press and hold the “ ” button for more than 5 seconds
to display the current timer setting. For example,“ ” and “5” indicate that the machine will
automatically shut down in 5 hours.
How to Cancel the Timer
If the timer is active, press and hold the“ ” button on the control panel for more than 5 seconds.
The symbol “ ” and digits on the screen will flash. Then, press and hold the“ ”button again
for more than 5 seconds to cancel the timer. Alternatively, set the timer value to "0"; after 5 seconds,
the timer will be canceled.
You can also directly press the “ ”button on the control panel to forcibly disable the timer function,
starting or stopping the machine immediately.
Pull out the drain plug located at the bottom of the machine to empty the water inside the inner tank.
After draining, return the drain plug to its original position.
To maintain hygiene, replace the water every 24 hours and clean the inner tank and water tank
every three days.
Timer Function for Automatic Startup and Shutdown
Machine Drainage
11
Cleaning the Water Distribution Pipe and Water Distributor
During machine operation, regularly clean the water distribution pipe. Issues like scale and foreign
objects can easily block the small holes on the water distribution pipe, especially in the following
cases:
A.During ice-making, the compressor and water pump operate normally, but there is little or no water
flow from the water distribution pipe. The small holes on the water distribution pipe are blocked,
leading to abnormal ice shapes or insufficient ice.
B.During ice release, the compressor and water pump operate normally, but the ice often does not
fall off.
Note: Disconnect the power supply and drain the water from the bottom of the machine and
the water tank before cleaning.
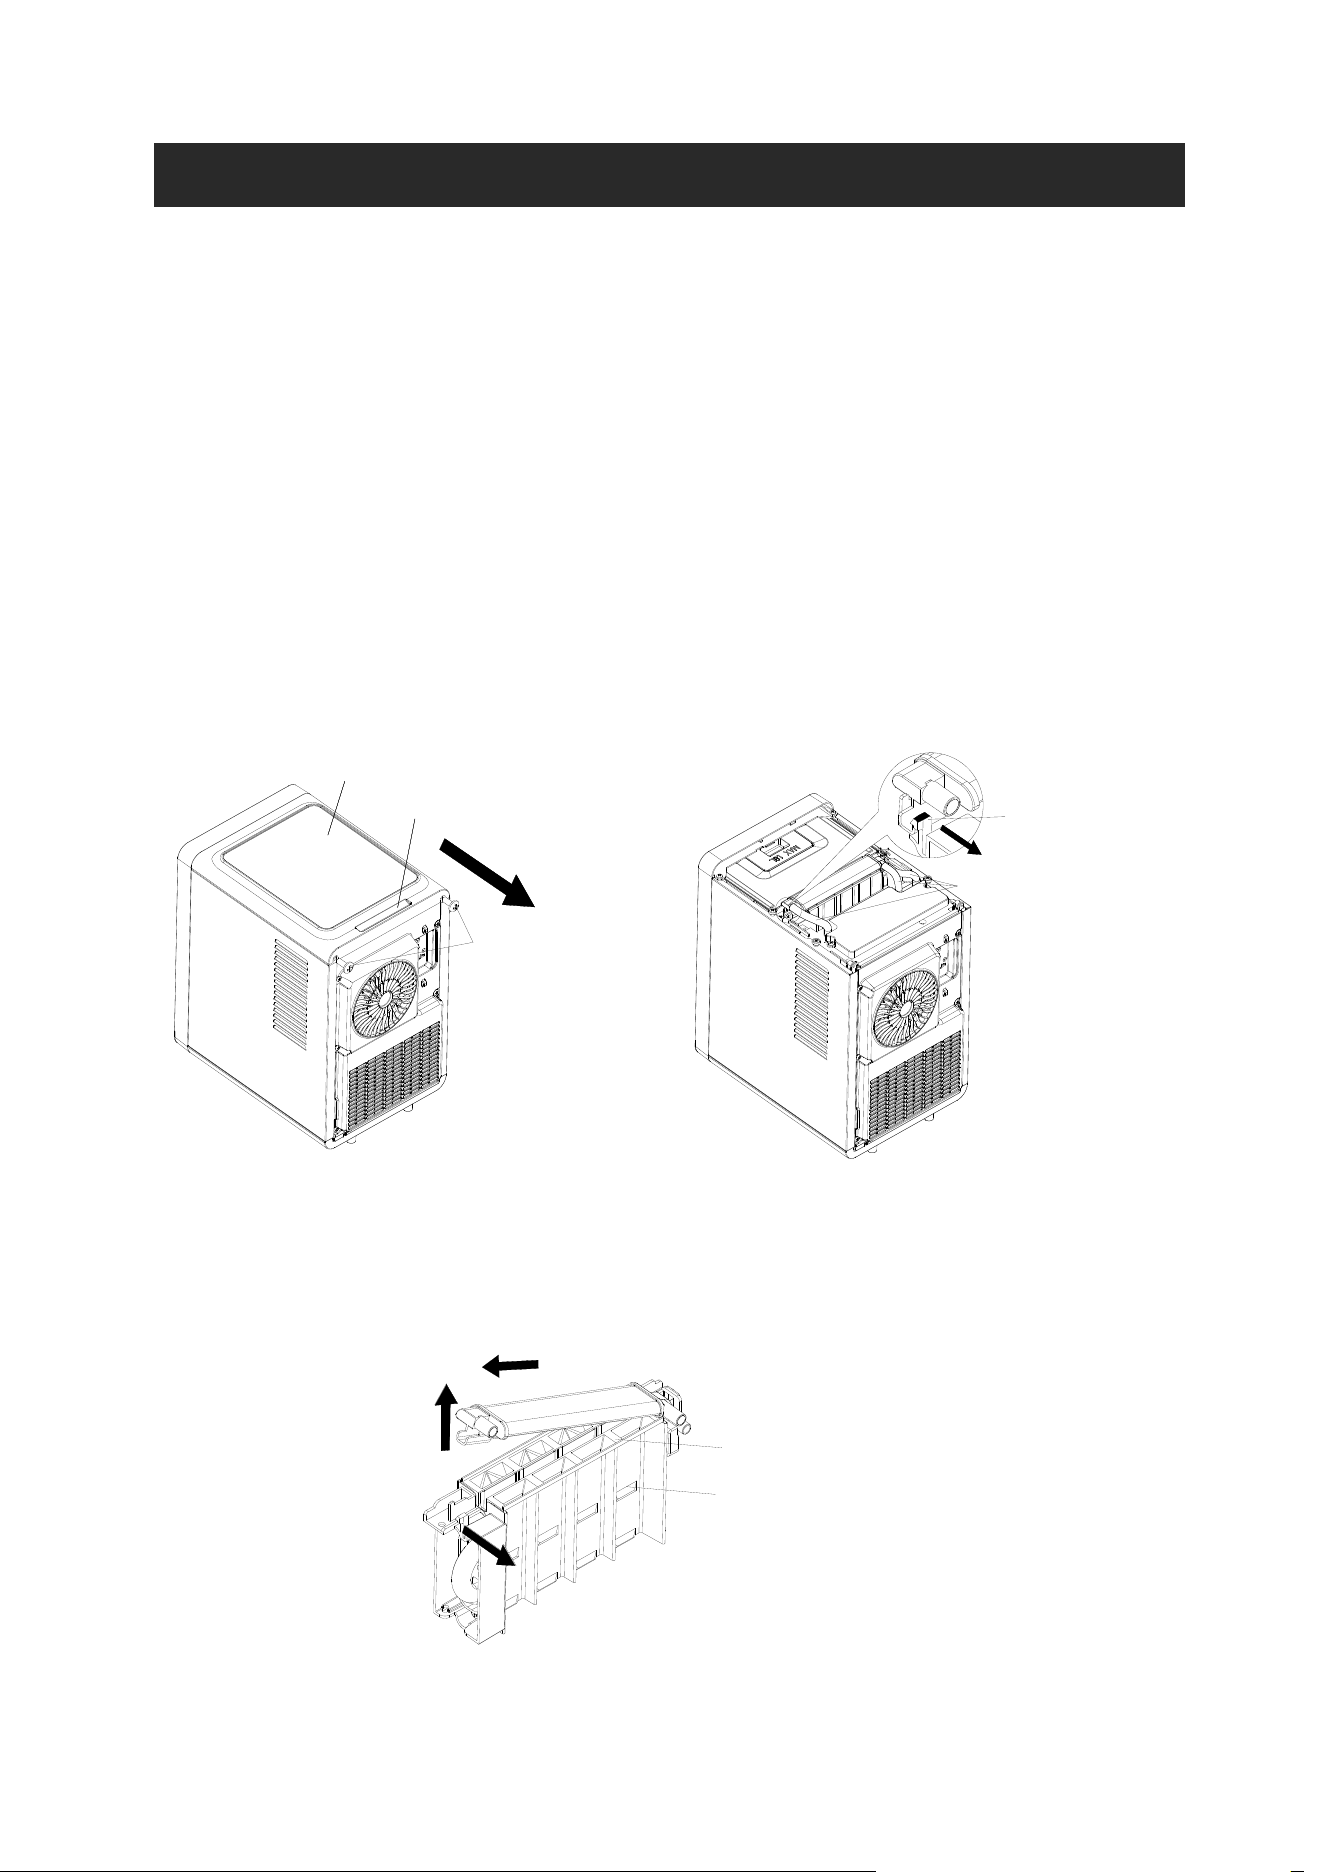
1. Use a tool to remove the two screws on the upper rear part of the machine, as shown in Figure 1.
2. Press the "handle" position of the upper cover with your hand and push the "upper
cover"backward. After pushing it out, place the "upper cover" aside, as shown in Figure 1.
3. After removing the "upper cover", pull out the "three silicone tubes" from the "water distribution
pipe", as shown in Figure 2.
4. Press the "clip" on the side of the "water distribution pipe" backward, then pull the "water
distribution pipe" upward, and then take out the "water distribution pipe" obliquely upward.
At the same time, the water distribution hopper can be taken out, as shown in Figure 3.
two screws
upper cover
handle
Figure 1
three silicone tubes
clip
Figure 2
1.Clip
2.Water
distribution
pipe
3.Water distribution pipe
Water distribution hopper
Evaporator
Figure 3
12
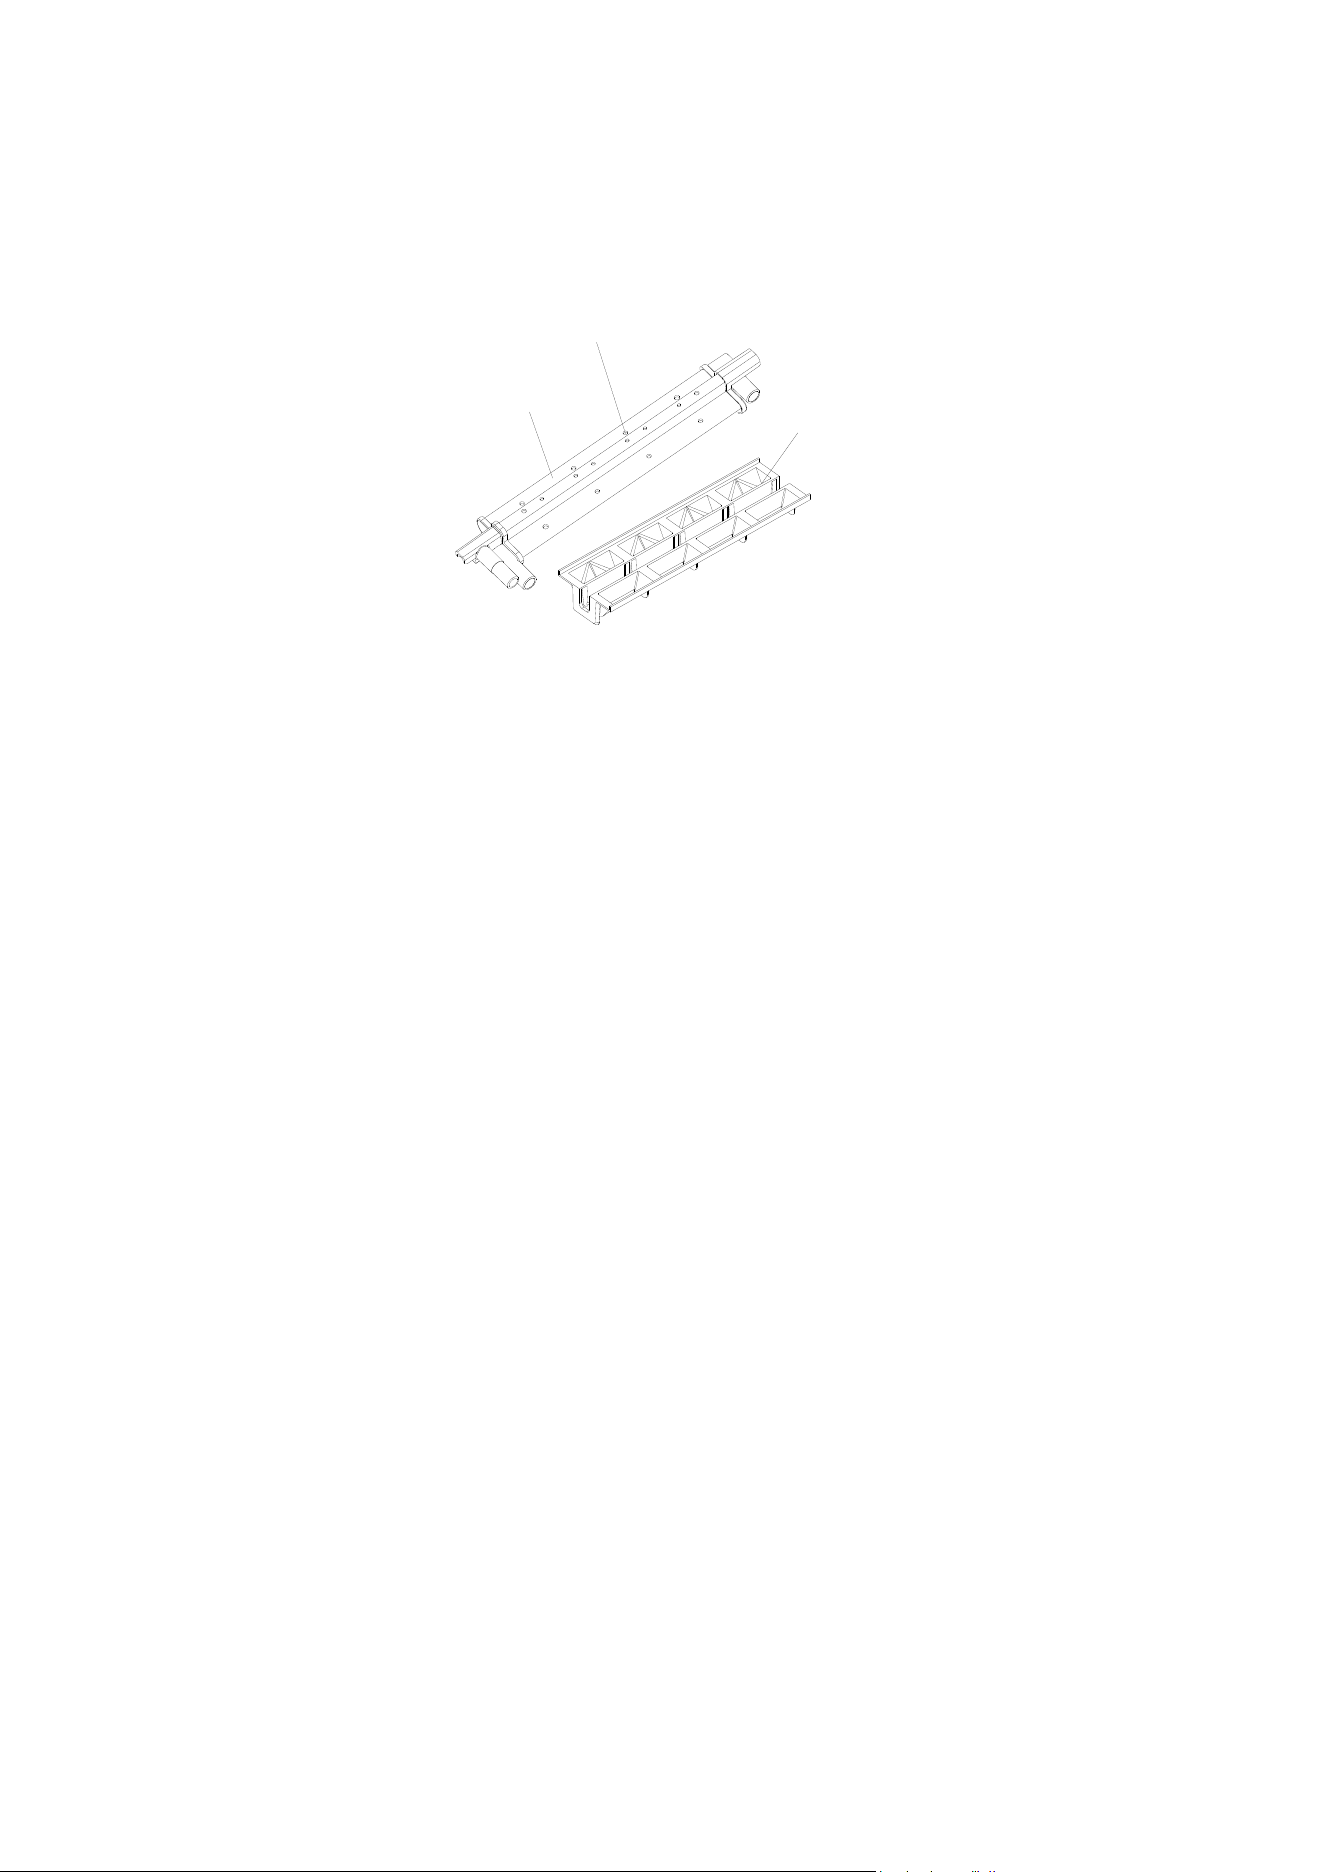
5. After taking out the "water distribution pipe", please clean the inside of the water distribution pipe,
especially clean each small hole on the water distribution pipe to ensure that each small hole is
unobstructed. At the same time, clean the water distribution hopper to ensure that there is no foreign
matter in the water distribution hopper, as shown in Figure 4.
Usage Notes:
A. Always push the water tank completely into the machine after adding water.
B. Regularly check if the water tank, inner liner filter, and water distribution pipe are blocked by dirt
or impurities, affecting water flow. Clean them as needed.
C. The temperature of the added water and the environment directly affects ice production. Lower
temperatures yield more ice.
D. The quality of the water used affects the service life of the machine's recirculating pump. For
optimal results, use purified or distilled water. Abnormal noises during pump operation are typically
caused by water impurities and do not affect machine usage.
E. During operation, there is a 3-minute delay before the compressor restarts.
Figure 4
water distribution pipe
hole
water distribution hopper
13
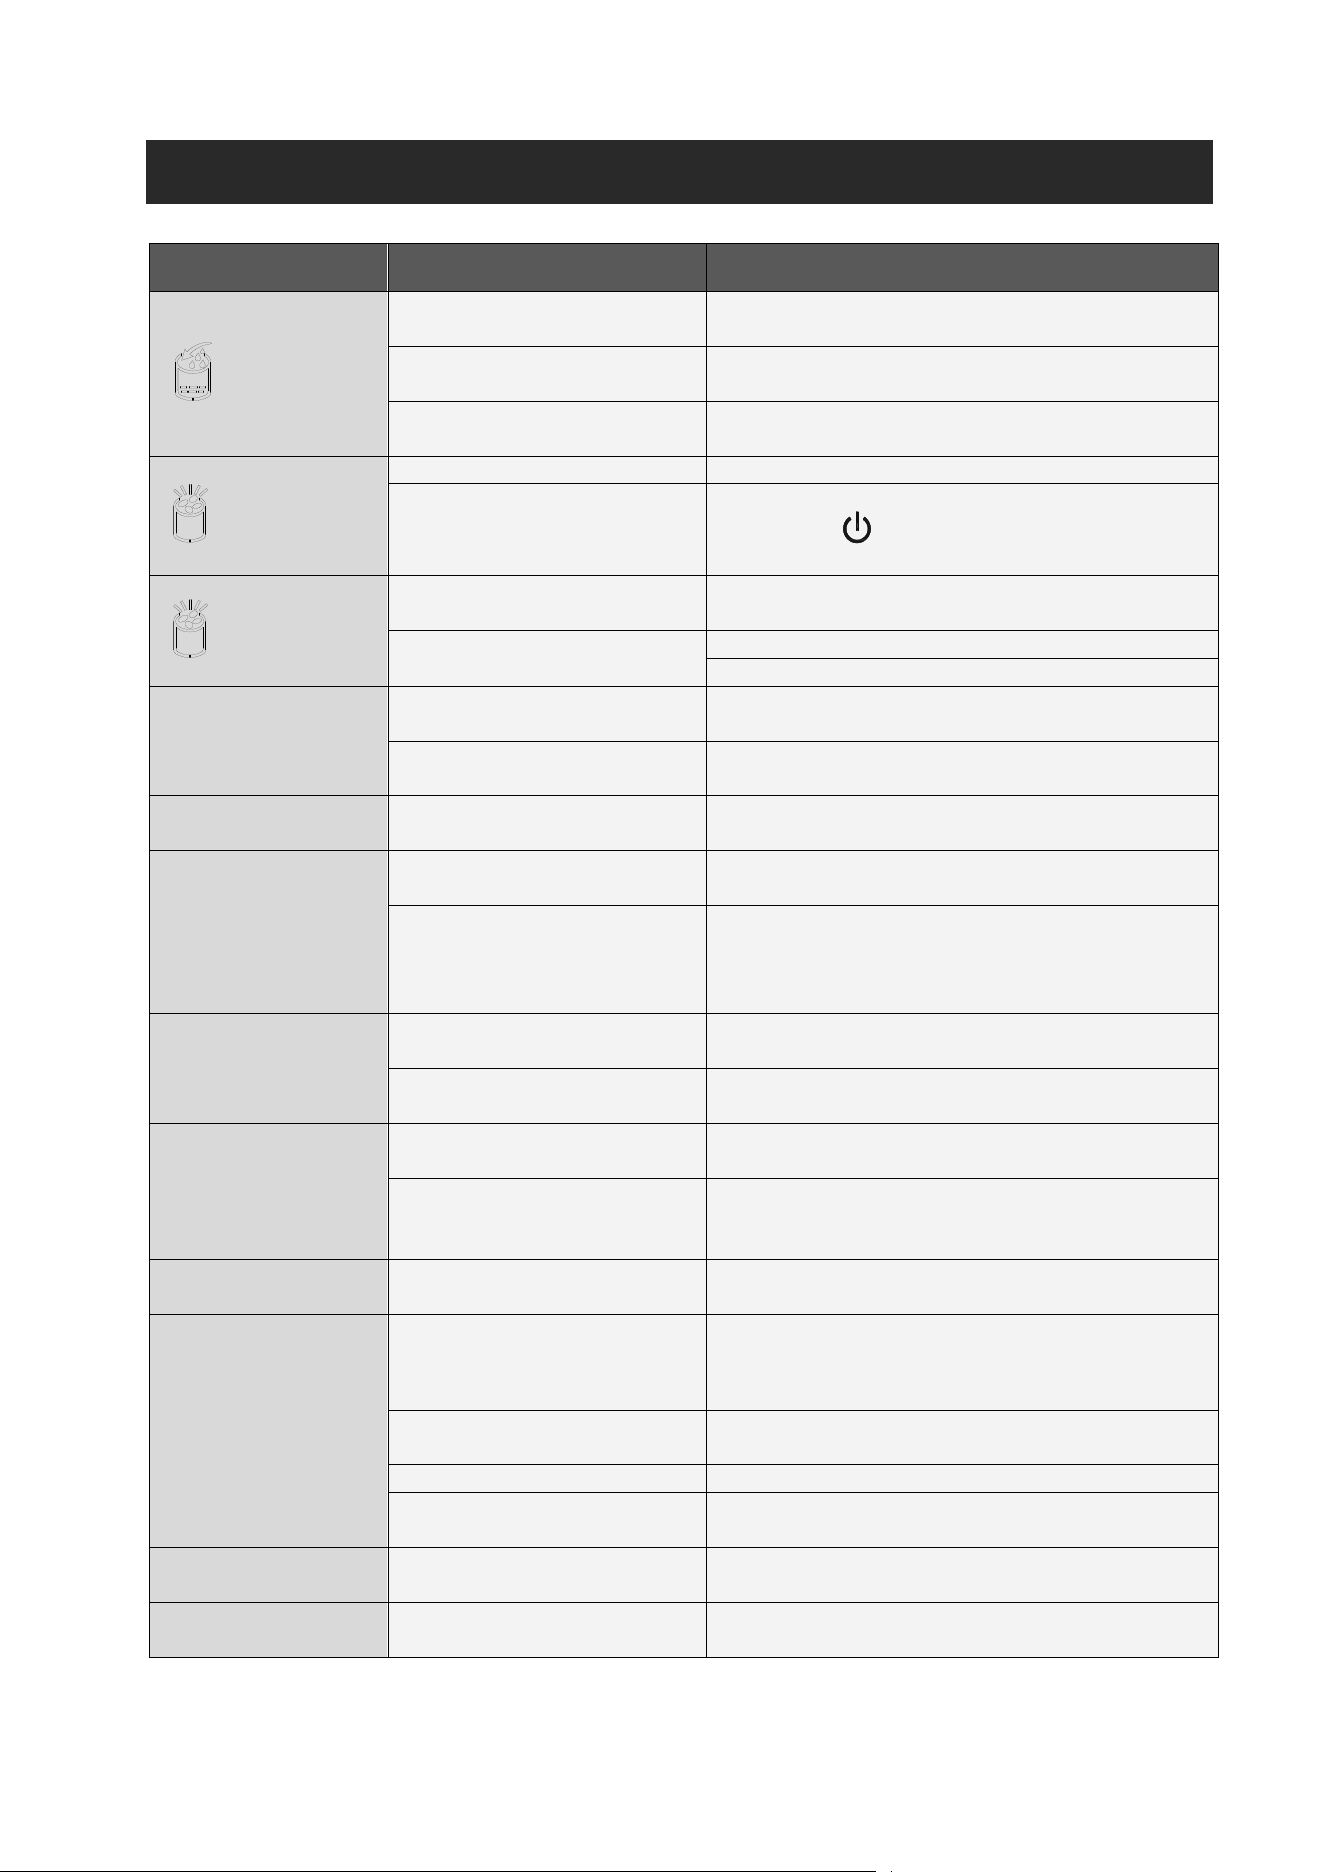
Troubleshooting
PROBLEM
POSSIBLE CAUSE
SOLUTION
“ ”lights up
Water tank not pushed into
place
Reinsert the water tank fully into the machine.
Float of the water level
switch stuck
Clean the water tank and water level switch.
Drain plug at the bottom not
inserted
Reinsert the drain plug at the bottom of the
machine.
“ ”lights up
Too much ice
Remove from the inner container
Ice full sensor malfunction
Seek professional repair or force ice-making by
holding the for more than 3 seconds to
make 5 consecutive batches.
“ ”flashes
Small holes on the water
distribution pipe are blocked
Clean the water distribution pipe as instructed
Ice-melting water pump
malfunction
Restart the machine
seek professional repair to replace the pump.
The water pump is
running, but no
water flows from the
distribution pipe.
Ice slush has formed
beneath the ice basket
Continue operation; the machine will recover
automatically.
Blocked small holes on the
pipe
Clean the water distribution pipe as instructed
Ice is not
transparent
Poor water quality
Change the water and use filtered or softened
water.
Less than 16 ice
pieces per cycle
Blocked small holes on the
pipe
Clean the water distribution pipe and water
distributor as instructed
One ice-making pump is
faulty
If each ice-making cycle produces only 8 ice
cubes, one of the water pumps is faulty. You
can continue using the machine or seek
professional support
Irregular ice shapes
Poor water quality or dirty
water tank
Clean the water tank and replace the water.
Blocked small holes on the
pipe or distributor
Clean the water distribution pipe as instructed
Thin ice
High ambient temperature
or ice set too thin
Move the machine to a cooler location and
adjust ice thickness.
Poor Ventilation
The distance between the back and front of the
machine and any obstructions should be
greater than 20cm .
Thick ice
Low ambient temperature or
ice set too thick
Adjust ice thickness and reduce production
time
"E" displayed
High ambient or water
temperature
Move the machine to a location with an
ambient temperature below 32℃(89.6°F) and
add cooler water.
High water level below ice
basket
Drain water and restart.
Refrigerant leak
Professional repair needed
Refrigeration system
pipeline blockage
Professional repair needed
"E1" displayed
Ambient temperature
sensor malfunction
Continue using; seek professional repair for
sensor replacement.
"E2" displayed
Water temperature sensor
malfunction
Continue using; seek professional repair for
sensor replacement.