
.com
support@garvee.com
Distributed by
rocking chair
Product ID. 7A2YN
Scan for Support

Support Email:[email protected]
Customer Phone Service:+1 888 891 2855
Mon - Fri from 9AM to 5PM (PST)
ASSEMBLY INSTRUCTIONS
ROCKING CHAIR

Thank you fo「 choosing our outdoor furnit『e! To ensure you「 safety and a positive use『
experience, please carefully read the llowing safety statement:
1.Pre-Use Inspection: Before using the outdoo「 furnit「e, please inspect all components to
ensure there are no damages, missing pas,。r improper installation. If any issues are und, do
not use the product and contact us immediately.
2.Weight Limit: Please adhere to the weight limits provided by the manufacturer. Exceeding the
weight limit may cause damage to the furniture or lead to tipping, resulting in inju.
3.Stable Placement: Ensure that the furniture are used on a flat and sturdy suace to prevent
collapse or sliding due to unevenness or instabili.
4.Extreme Weather: In extreme weather conditions such as strong winds, heavy rain, or sno毗
please store the outdoo「 furnitl』「e indoors to prevent damage or accidents.
S.Designed for Outdoor Use: This product is designed f。「。utdo。r use, but care should be taken
to avoid contact with sharp objects that could scratch or damage the surface.
6.Regular Maintenance: Regularly check the condition of the furniture, including c。nnecti。n
points and stability. If any pas are loose or damaged, please repair or replace them promptly.
7.Safe Use: Please exercise caution while using the furniture. Aid jumping or rocking vigor。usly,
as this could res It in accidental injury.
8.Child Safety: When children are using the furniture, please supeise them at all times to
ensure they use the product correctly and safely.
Disclaimer: By using this produ, y。u acknowledge that you have read, understo。d, and agreed
to adhere to this safety statement. The manufacturer or supplier shall not be liable r any loss or
inju叩resulting from failure to comply with this safety statement.
If you have any questions or need fuher assistance, please feel free to contact us.
Thank you for y。ur understanding and suppo, and we wish you a pleasant experience!
1
4
M6*60mm
M6*35mm
1
8
M6*15mm
X2
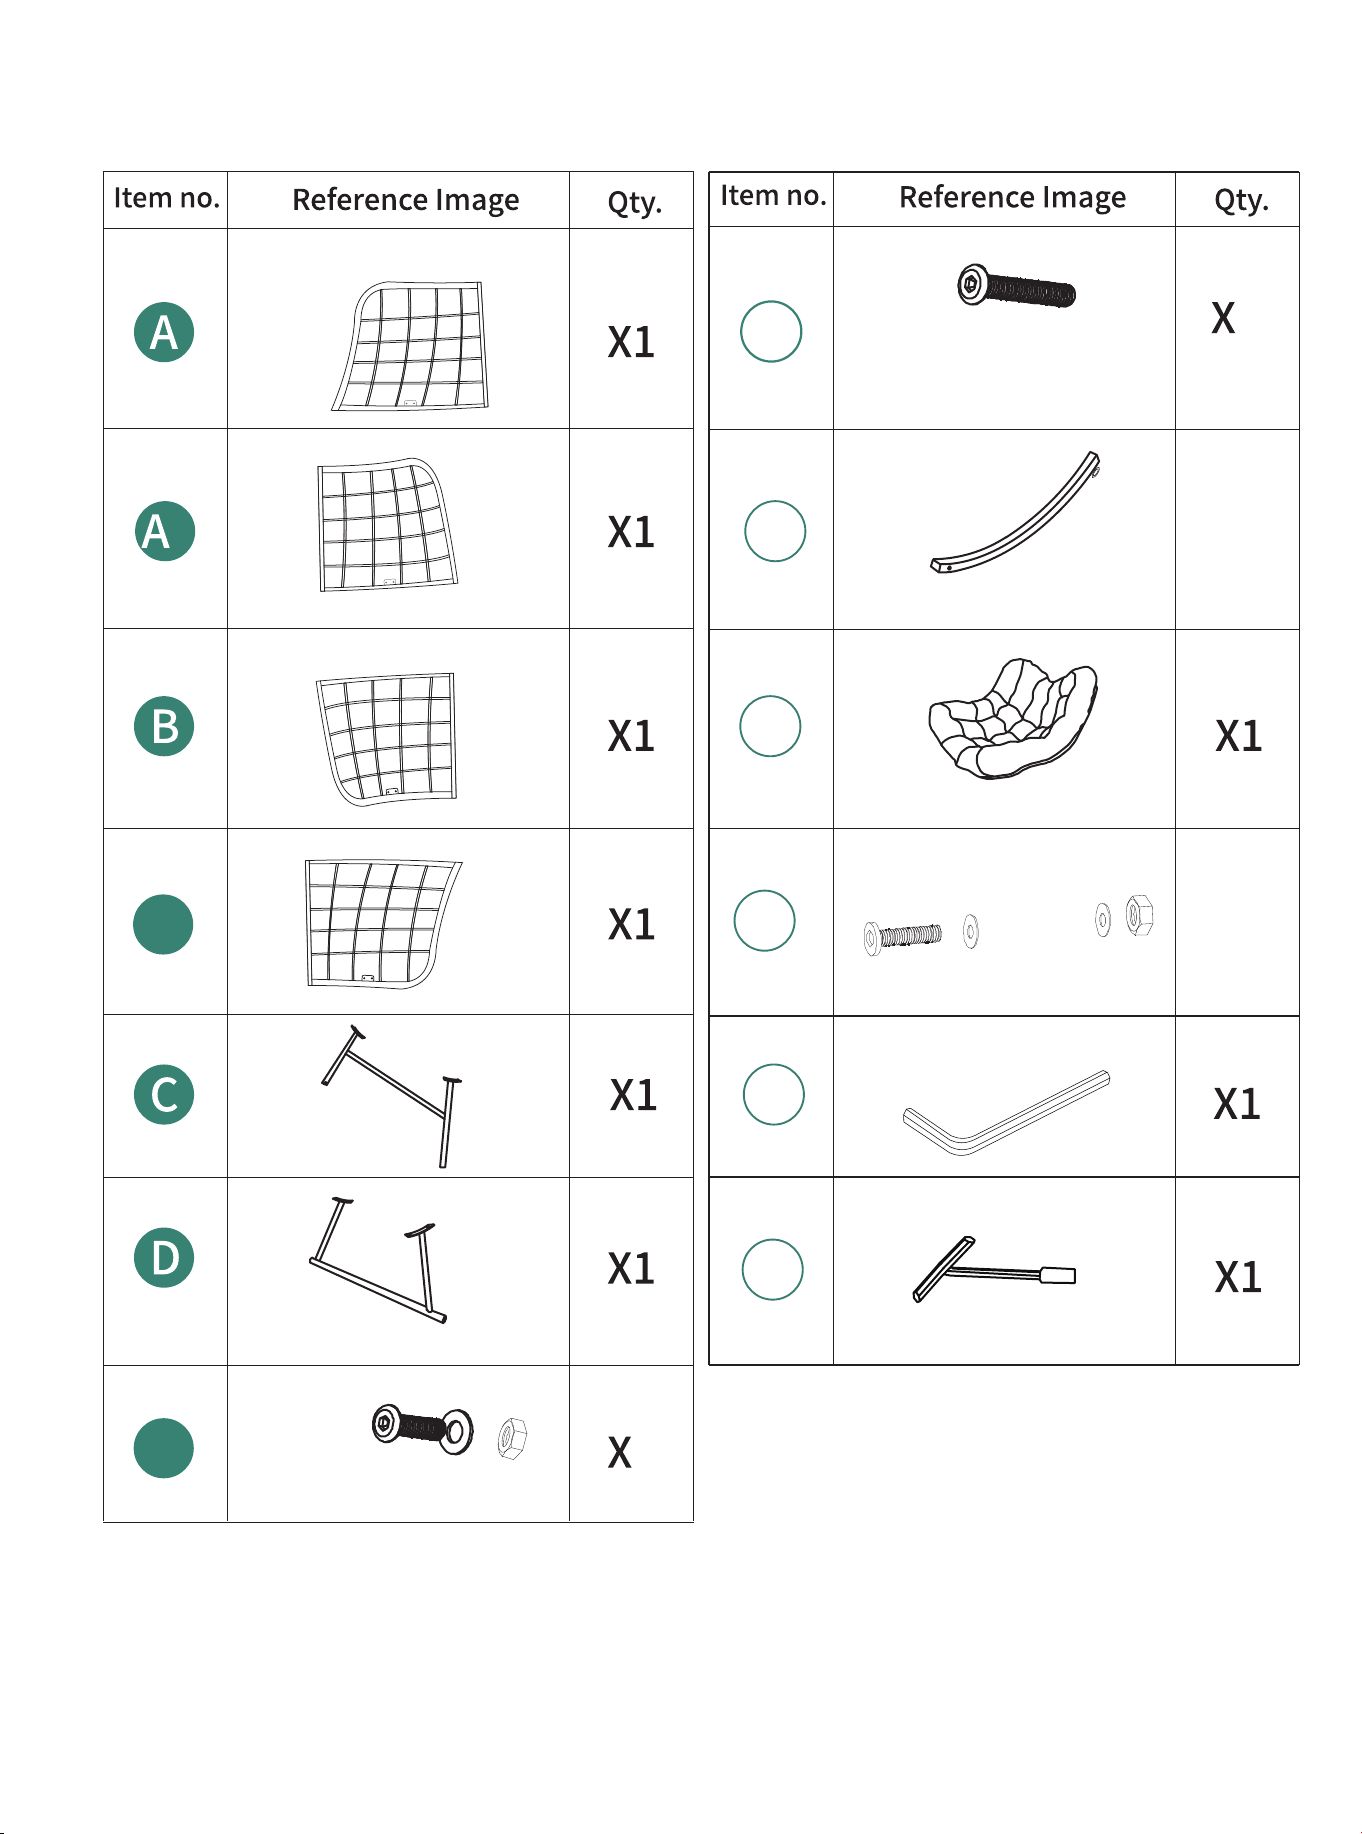
B1
E
F
G
H
I
J
K
X12
I
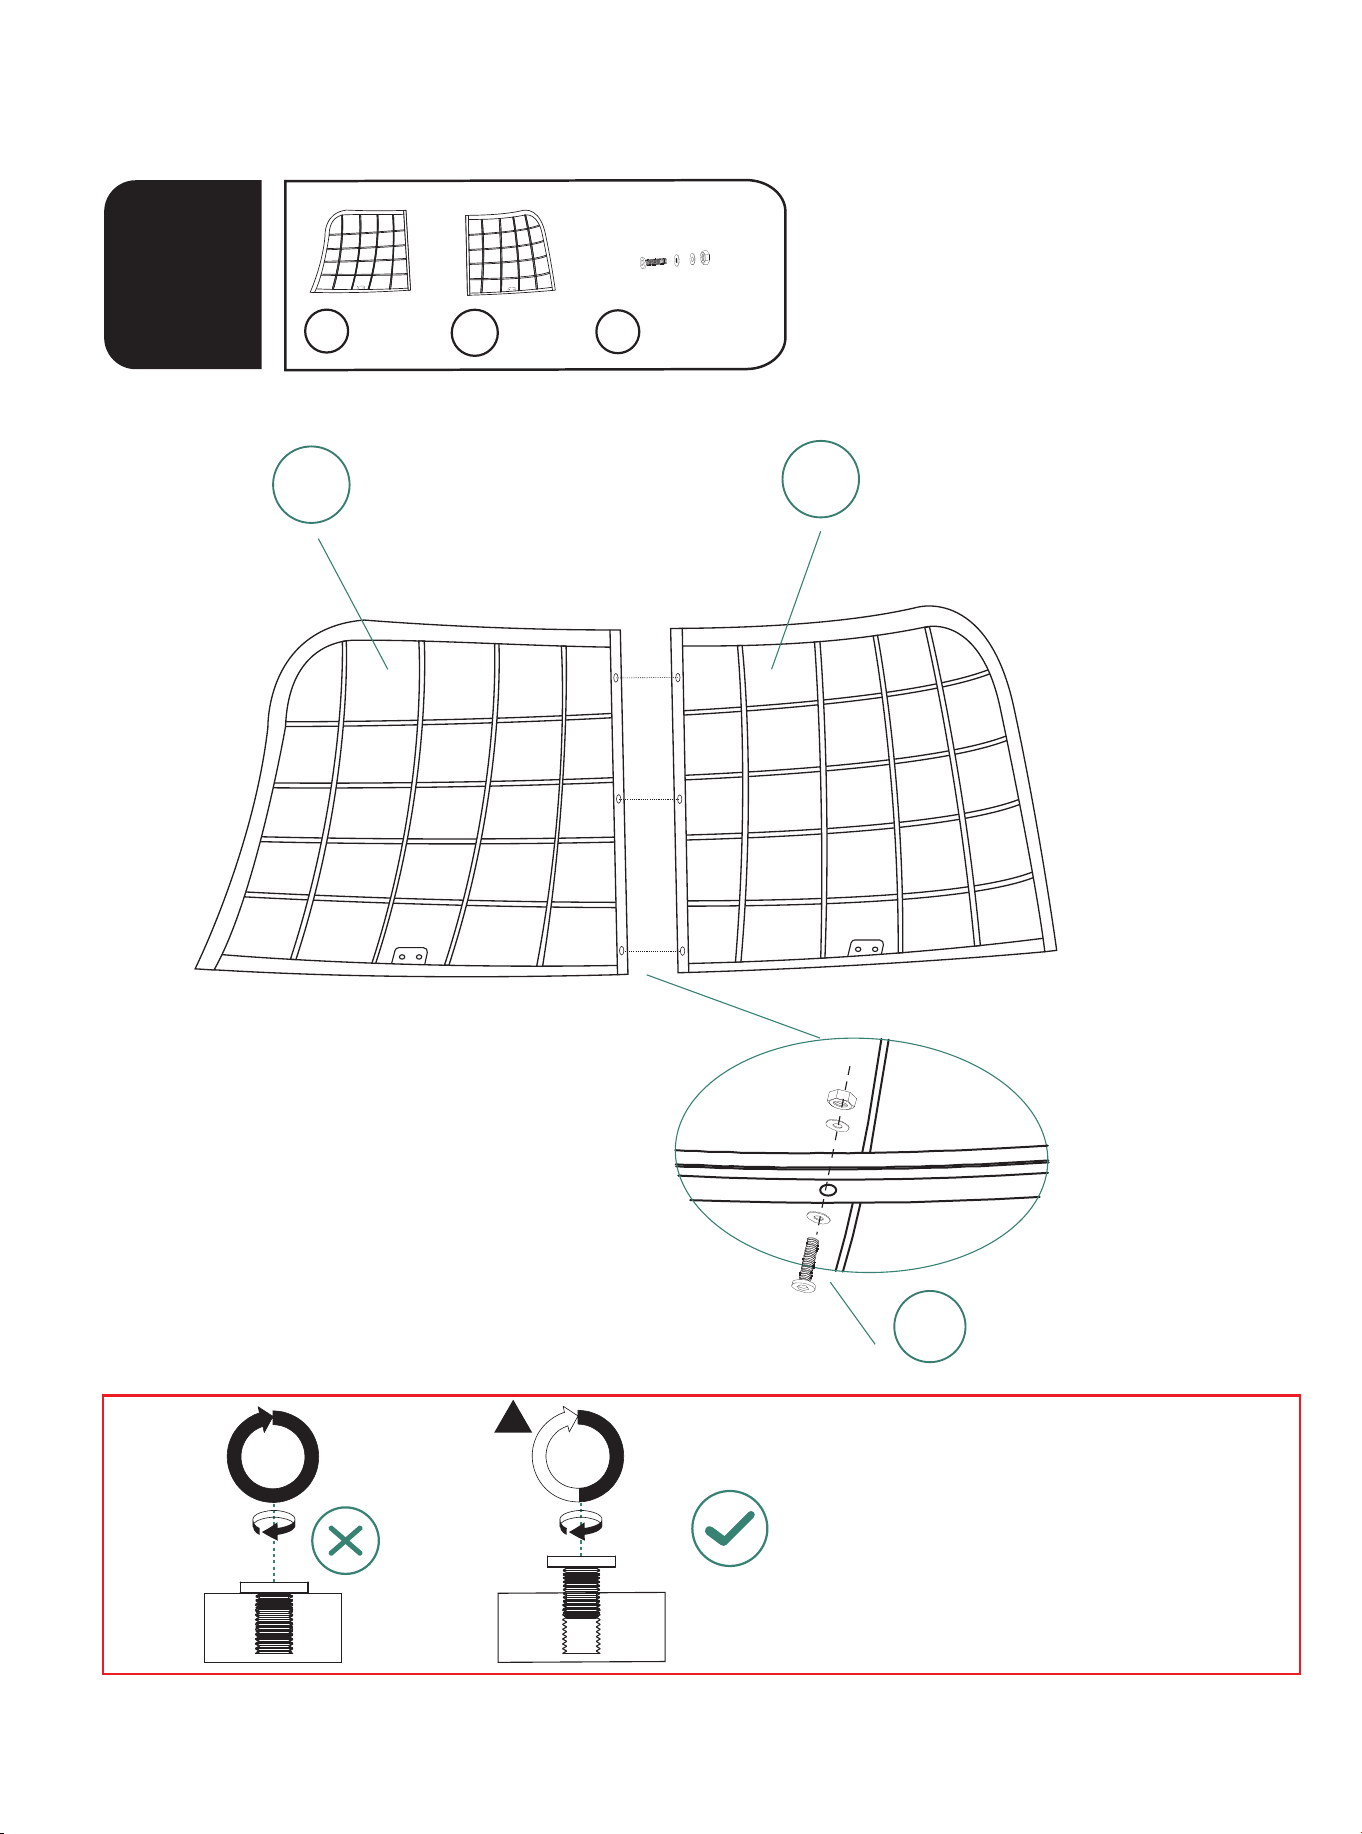
A
A1
1
A
1pc
A1
1pc
M6*35mm
I
3pcs
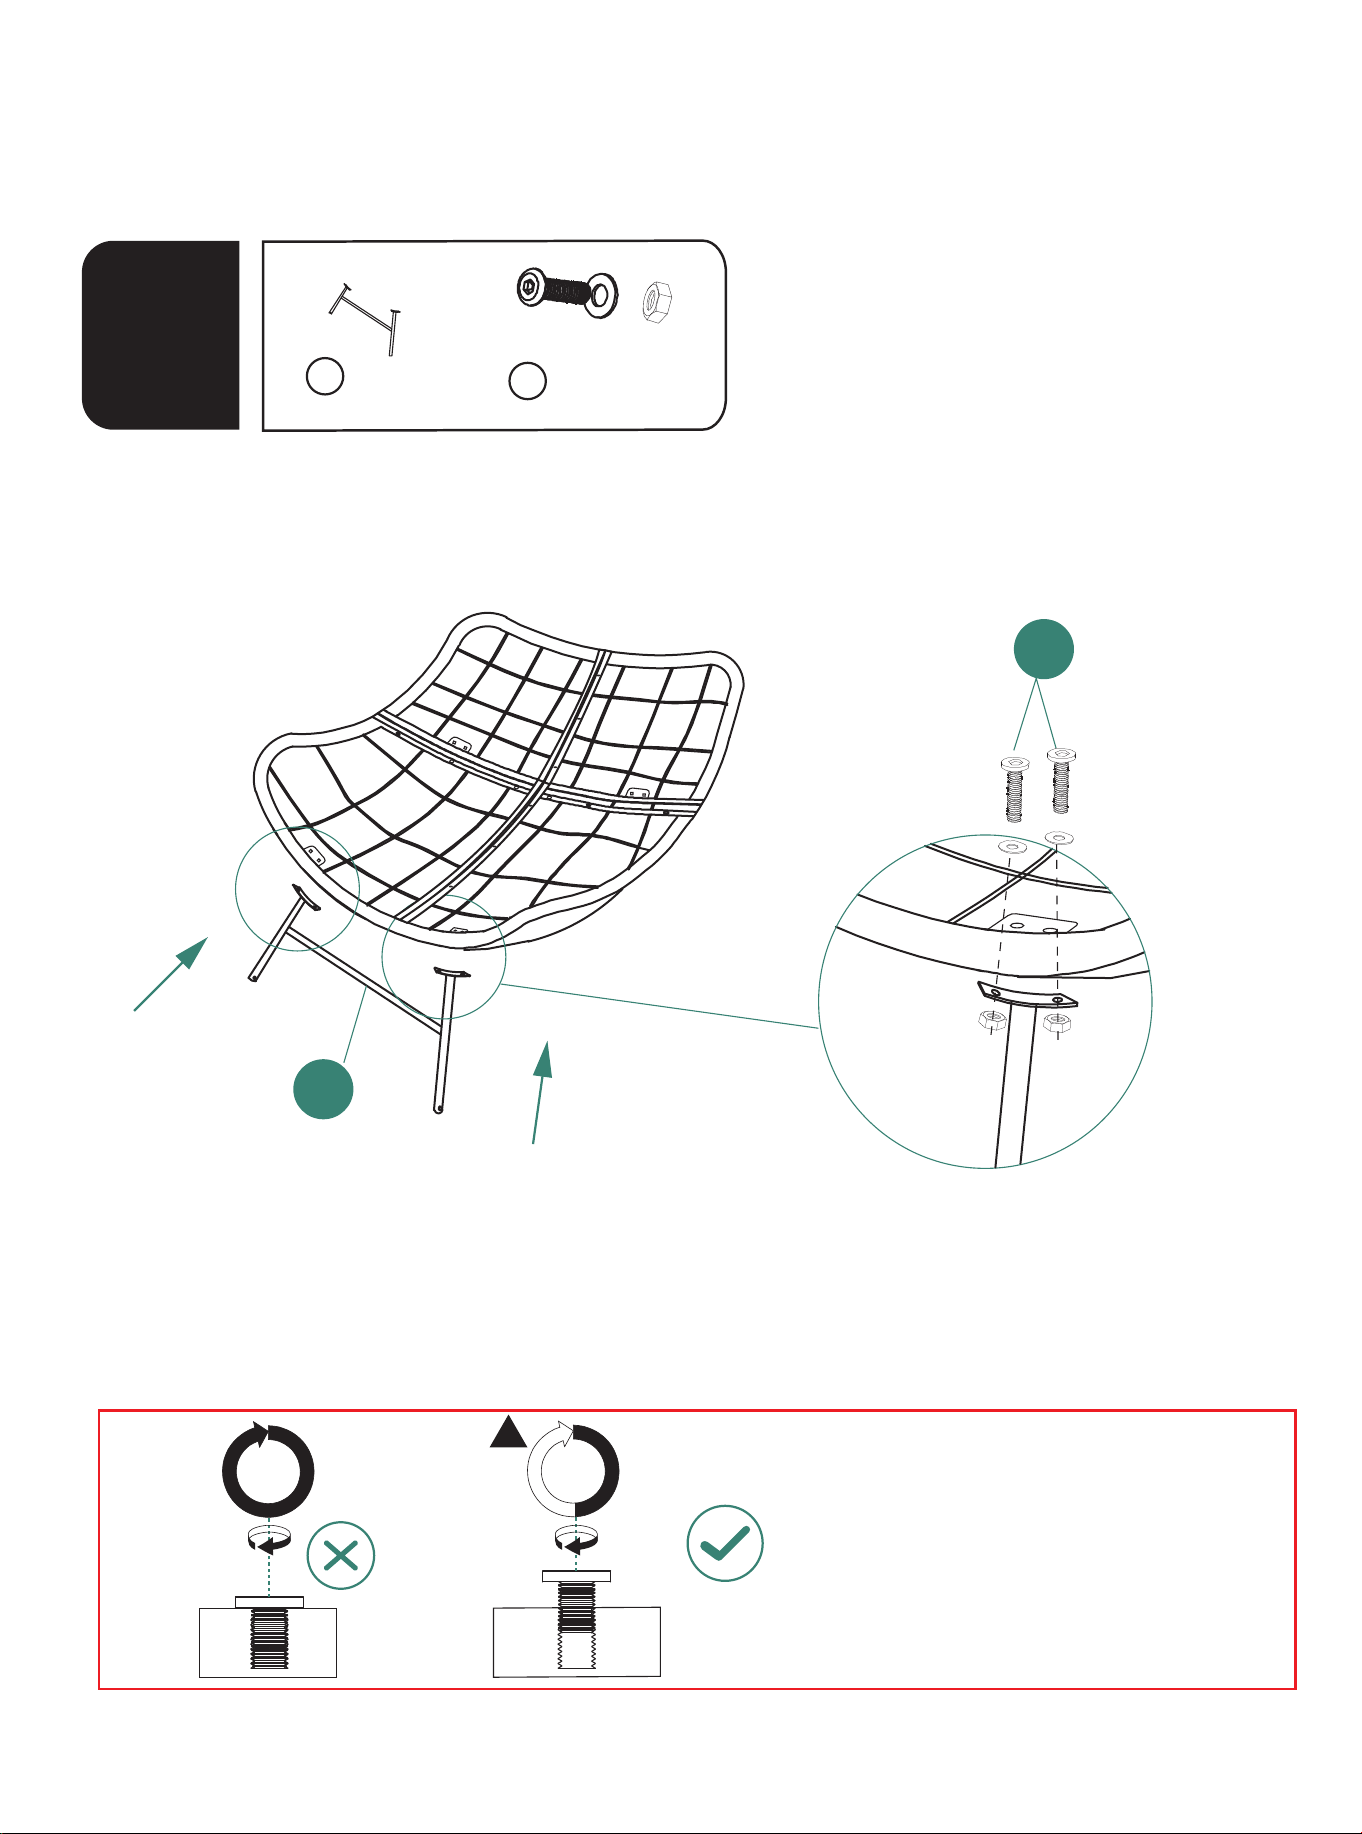
2
1. First, partially tighten all the screws
to about 50% of the full torque, do
not fully tighten them.
50%
100%
1
I
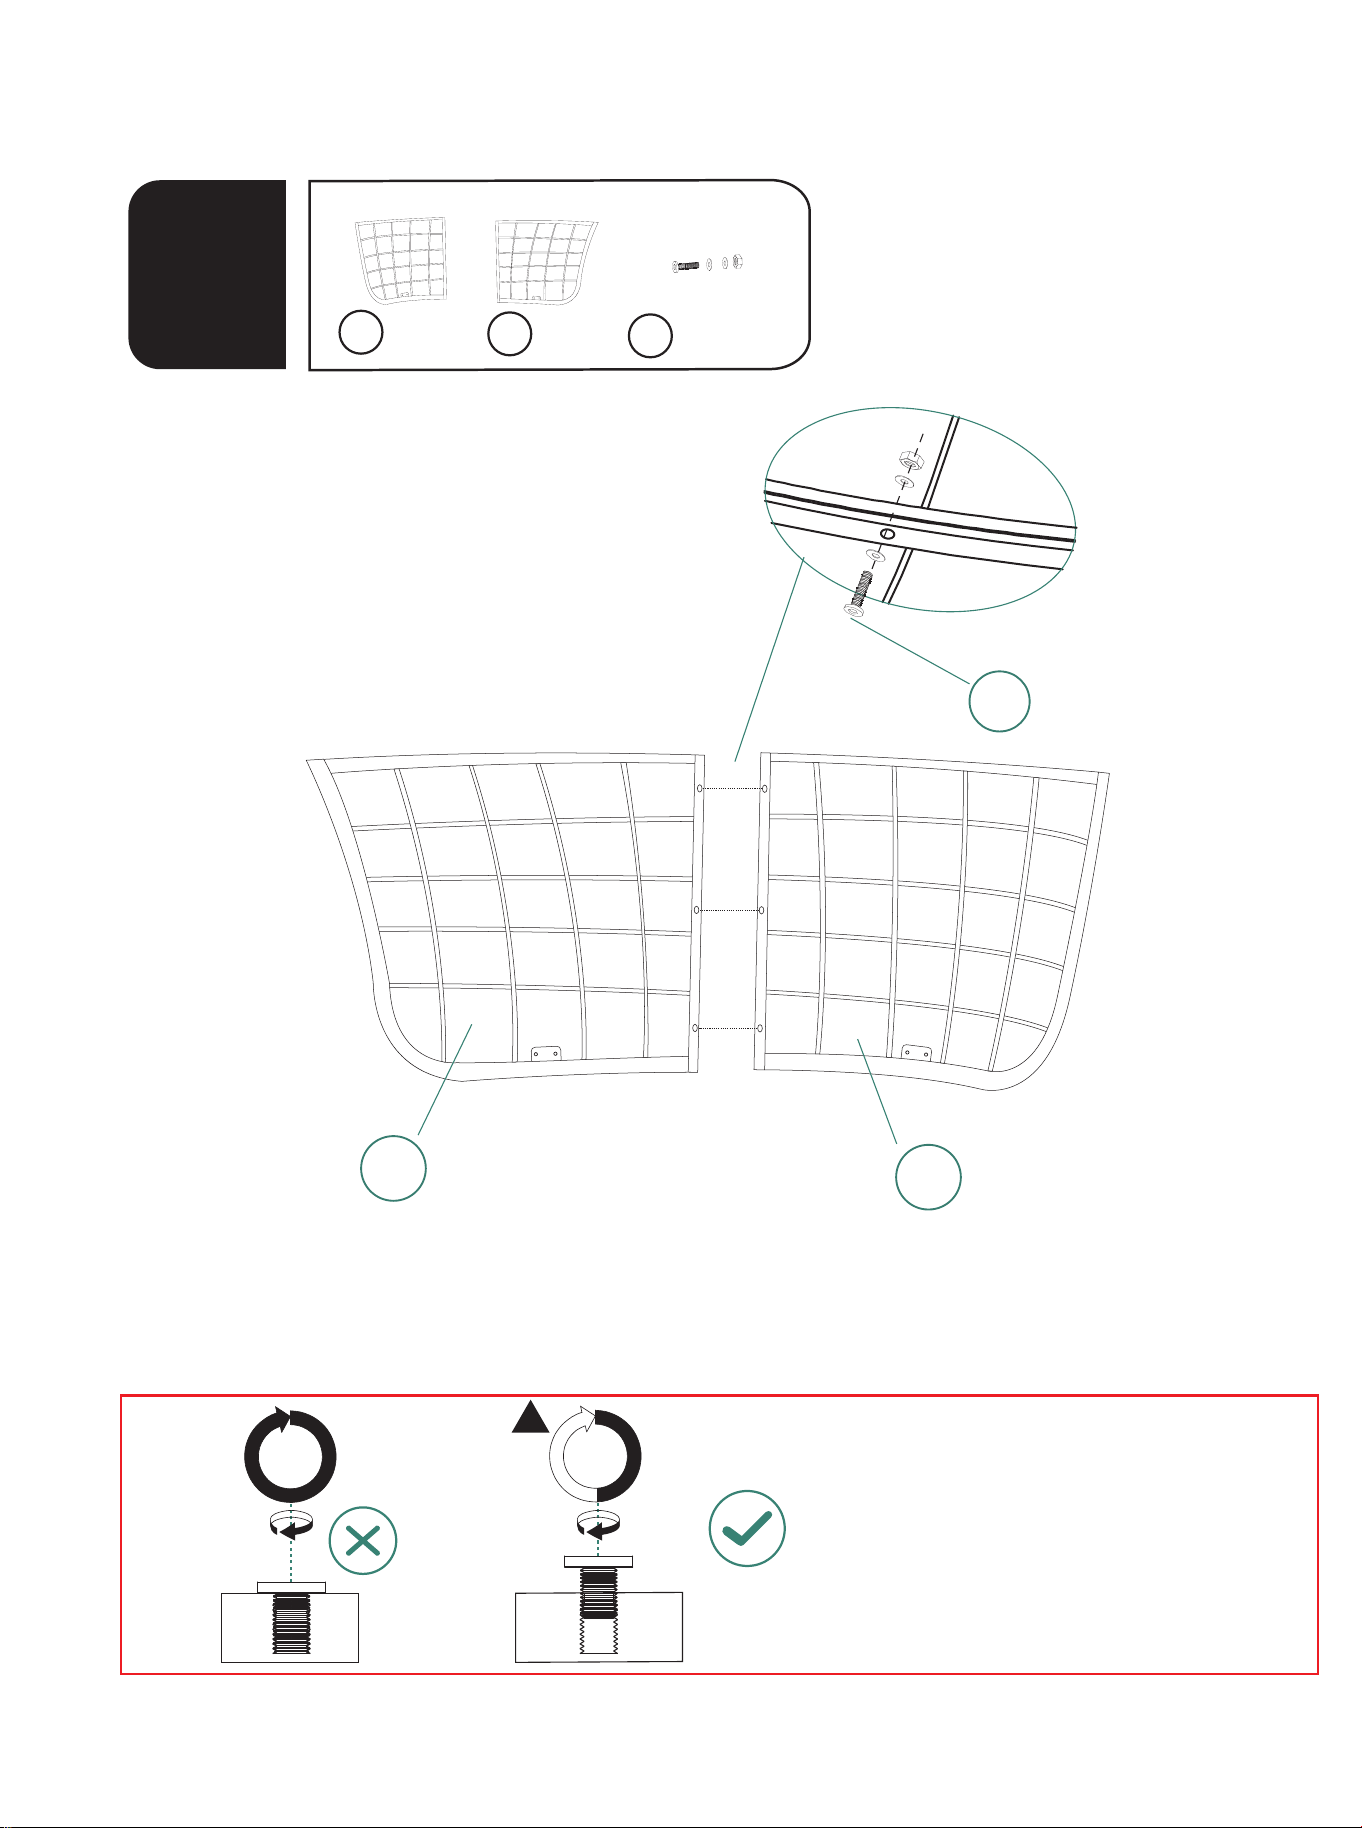
B1
B
B
1pc
B1
1pc
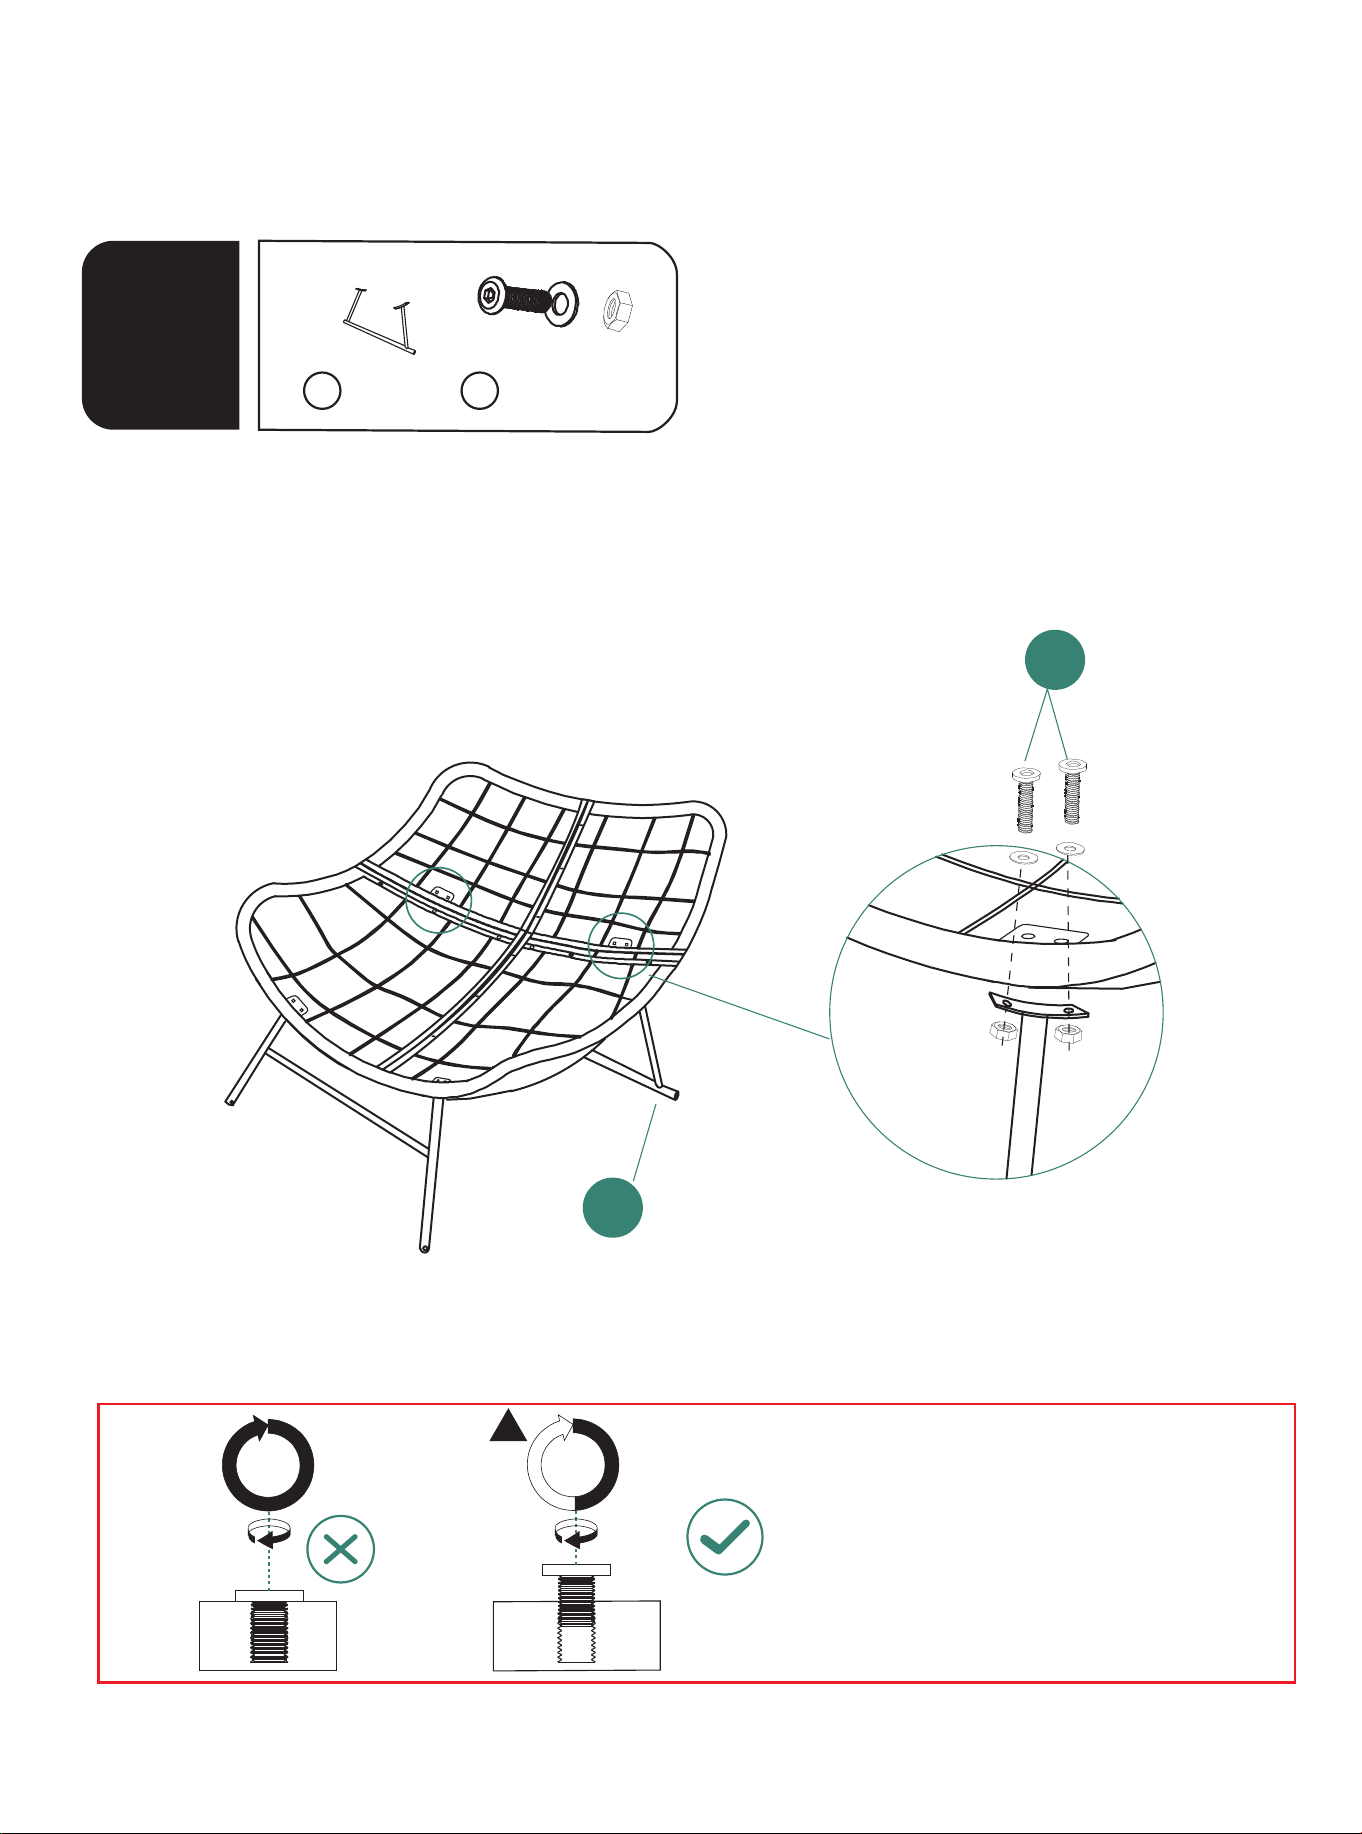
2
M6*35mm
I
3pcs
3
1. First, partially tighten all the screws
to about 50% of the full torque, do
not fully tighten them.
50%
100%
1

4
I
M6*35mm
I
6pcs
3
1. First, partially tighten all the screws
to about 50% of the full torque, do
not fully tighten them.
50%
100%
1
5
4
C
1pc
c
mm51*6M
E
4pcs
E
1. First, partially tighten all the screws
to about 50% of the full torque, do
not fully tighten them.
50%
100%
1
6
5
mm51*6M
D
1pc
E
4pcs
D
E
1. First, partially tighten all the screws
to about 50% of the full torque, do
not fully tighten them.
50%
100%
1
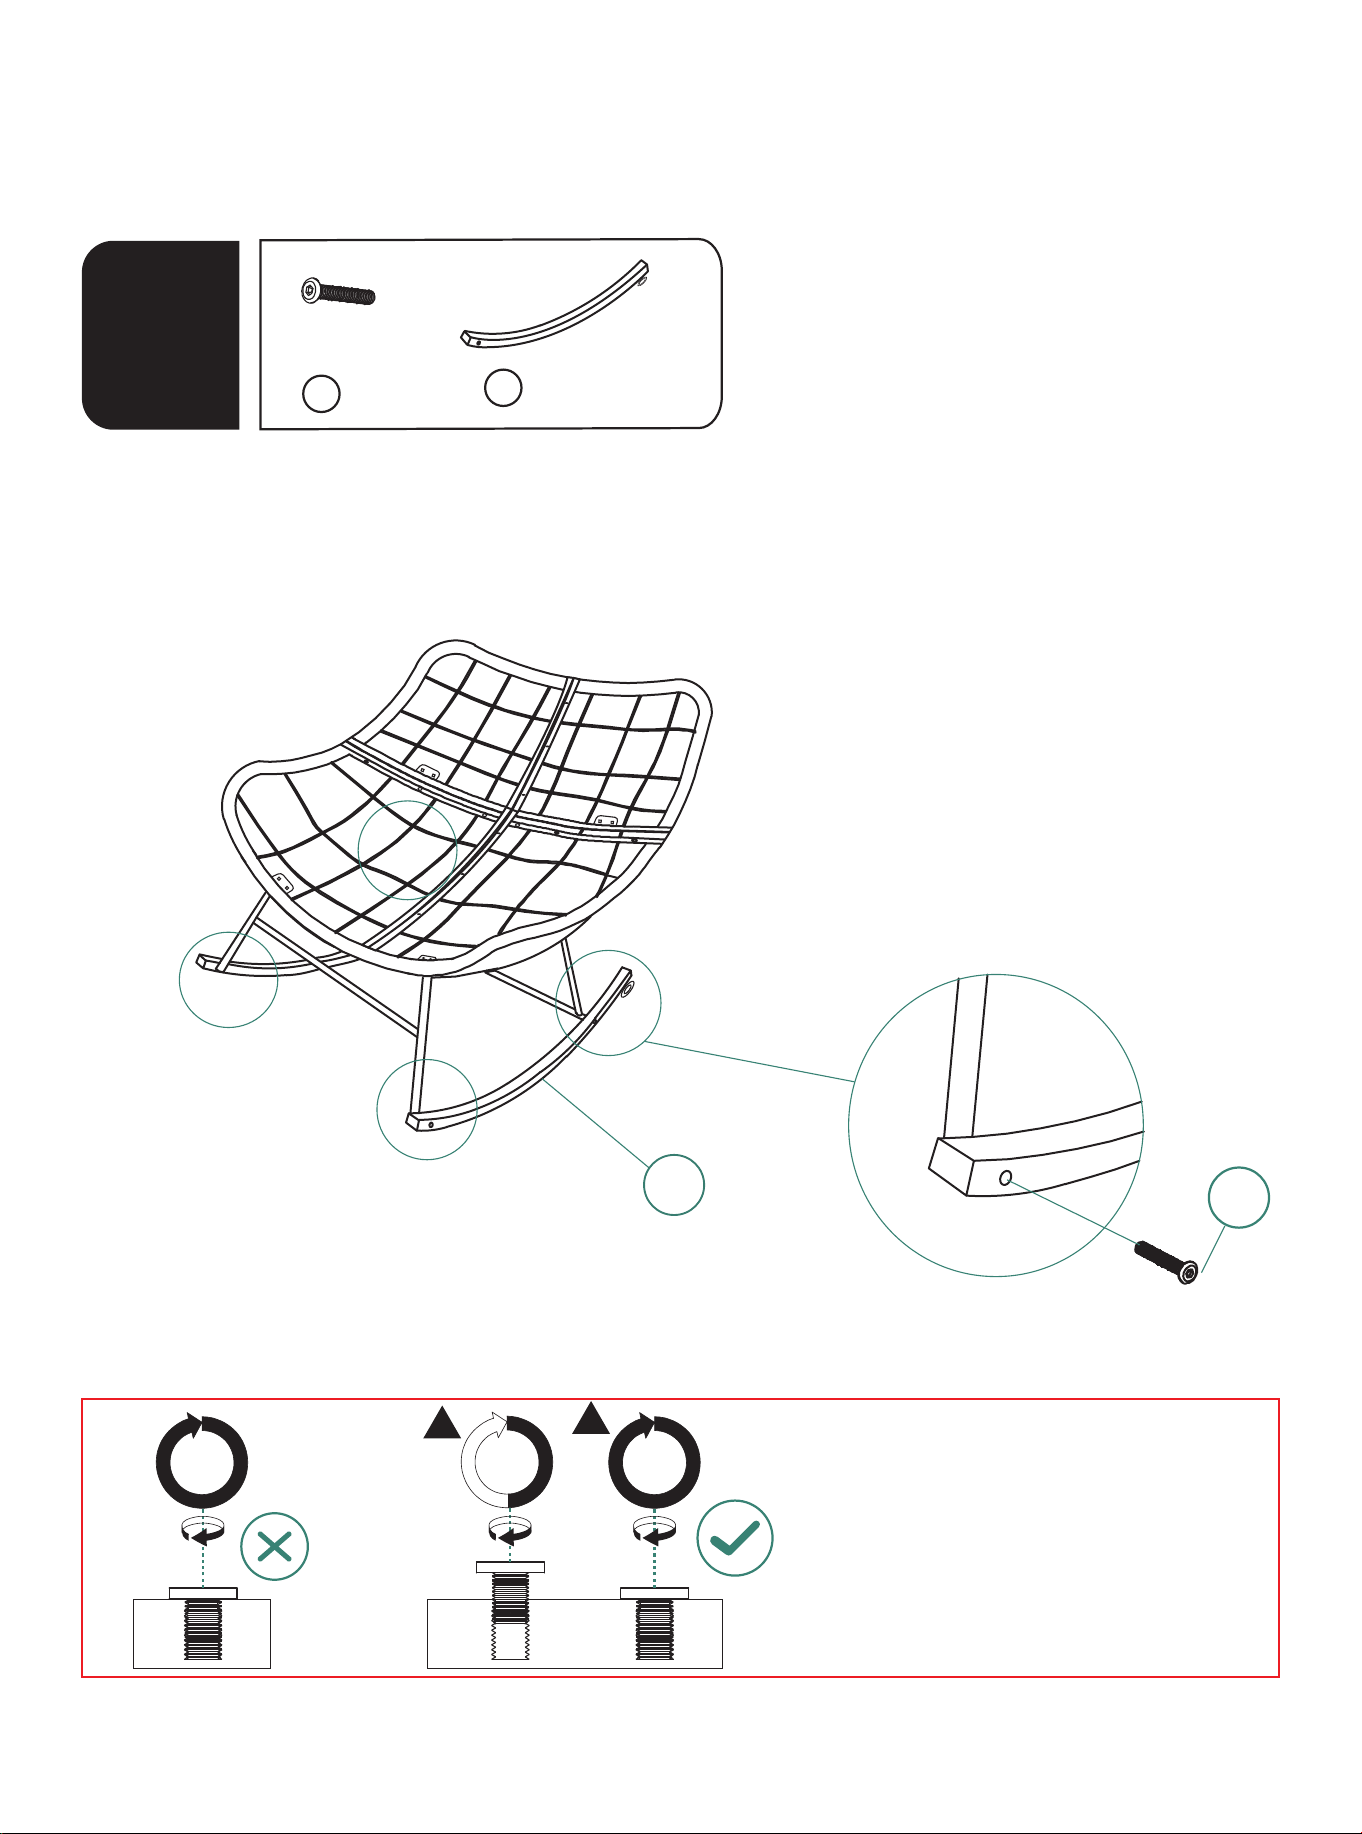
7
6
G
2pcs
M6*60mm
F
4pcs
F
G
1. First, partially tighten all the screws
to about 50% of the full torque, do
not fully tighten them.
2. After all the screws in this step have
been installed, then go back and
fully tighten all the screws one by
one.
50%
100% 100%
1
2

7
H
8
H
8
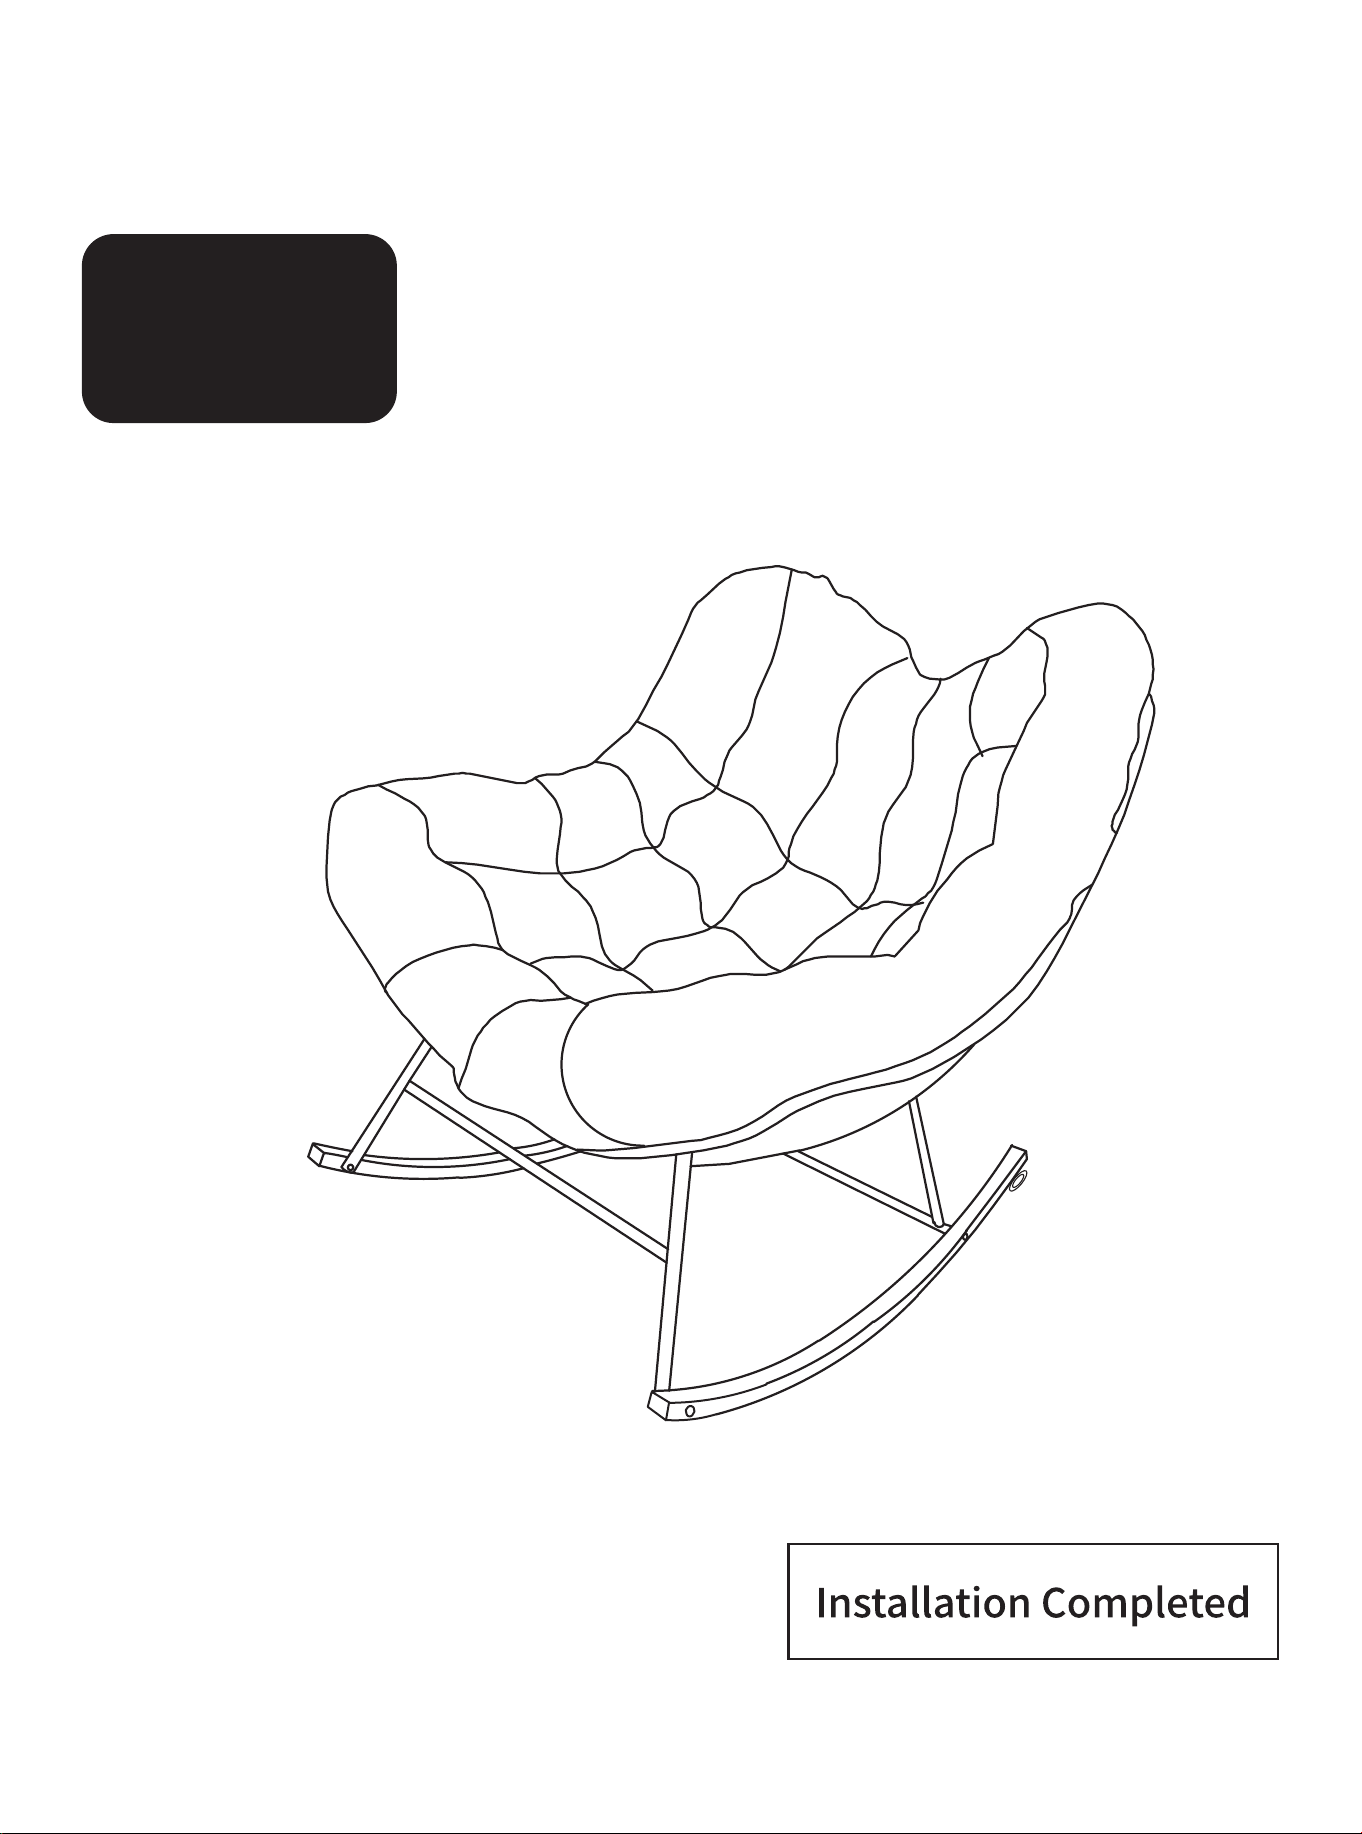
9
