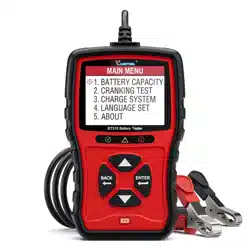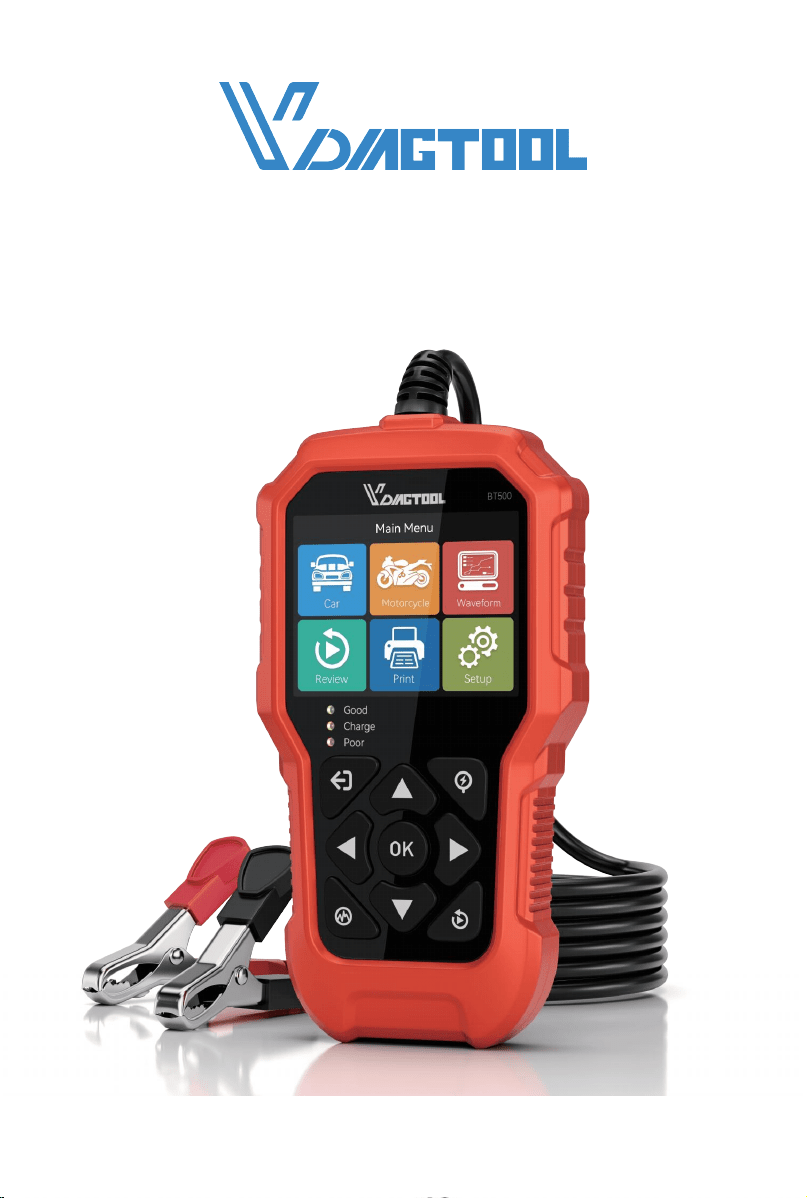
USER MANUAL
BT500 6V & 12V & 24V BATTERY TESTER
FOR CAR & MOTORCYCLE, STARTER ALTERNATOR TESTER
www.vdiagtool.com

Safety Information
To ensure your safety and prevent damage to the device or vehicle, please
carefully read and follow all instructions in this manual before use.
When operating the device, always verify proper testing procedures and
strictly adhere to the instructions provided. As automotive electrical
systems may vary, you must assess potential risks and ensure a safe
testing environment.
Always observe all safety warnings, use appropriate tools, and disconnect
power sources when necessary. Improper operation may result in person-
al injury, equipment damage, or voided warranty.
Safety Messages
Safety messages use standardized signal words to indicate hazard levels
and prevent injuries or equipment damage:
DANGER
Will result in death or serious injury if ignored
Indicates an immediately life-threatening hazard.
WARNING
Could result in death or serious injury if ignored
Indicates a potentially dangerous situation.
Safety Instructions
This manual covers known safety hazards, but cannot anticipate all possi-
ble risks. You are responsible for ensuring safe operating conditions and
procedures.
DANGER
• Always ventilate the service area when engine is running or use building
exhaust removal system if available
• Carbon monoxide is odorless and deadly - can cause loss of conscious-
ness or death

WARNINGS
• Only use the VDIAGTOOL BT500 for testing 6V, 12V, and 24V lead-acid
starting batteries (DC 9V-36V operating range).
• After charging, allow battery voltage to stabilize by turning on head-
lights for 2-3 minutes before testing.
• Always inspect clamp insulation for damage before use - never operate
with exposed wires or damaged housing.
• Avoid high temperatures, humidity, combustible environments, or strong
electromagnetic fields during use or storage.
• Never modify internal circuits - this may cause equipment damage or
personal injury.
• Wear safety goggles during testing to protect against flying debris.
• Maintain proper ventilation to prevent exposure to toxic fumes.
• Keep tester and accessories away from engine/exhaust components
during operation.
• Follow all manufacturer maintenance procedures and precautions.
Legal Information
Trademarks
VDIAGTOOL is a registered trademark of Shenzhen VDIAGTOOL Technol-
ogy Co., Ltd in the United States and other jurisdictions. All other product
names mentioned herein may be trademarks of their respective owners.
Copyright Information
© 2017 Shenzhen VDIAGTOOL Technology Co., Ltd. All rights reserved.
No reproduction, distribution, or transmission of this manual is permitted
without express written authorization from VDIAGTOOL. This prohibition
applies to all forms of copying including electronic, mechanical, photo-
copying, and recording.
Disclaimer & Liability Statement
Product Documentation Notice
All illustrations, specifications, and technical data in this manual are for
reference only and subject to change without notice.
For the latest documentation, visit:
https://www.vdiagtool.com/support/downloads

Limitation of Liability
VDIAGTOOL expressly disclaims all liability for:
• Any direct, indirect, incidental, or consequential damages
• Loss of profits or business interruption
• Product modifications or unauthorized use
This manual does not:
• Modify existing purchase/lease agreements
• Create additional liabilities for VDIAGTOOL
• Constitute additional product warranties
IMPORTANT:
Always consult this manual before operation, with special attention to all
safety warnings. VDIAGTOOL reserves the right to modify product specifi-
cations at any time.
Product Support & Training Resources
Technical Support
• Official Website: www.vdiagtool.com
• Support Email: suppor[email protected]
• US Hotline: +1-213-355-7171
• Online Form: https://www.vdiagtool.com/support/tech-support
Training Videos
1. Visit Training Center:
https://www.vdiagtool.com/support/training-center
2. Select Battery Service category
3. Watch model-specific tutorials

BT500 6V & 12V & 24V BATTERY TESTER
Contents
1. Product Introduction...........................................................................1
1.1 Product Functions.................................................................................... 1
1.2 Technical Specifications......................................................................... 2
1.3 Keypad Introduction.............................................................................. 3
1.4 How to Set Up the Tool......................................................................... 4
1.4.1 Select Language............................................................................. 4
1.4.2 Buzzer: ON/OFF the Buzzer.......................................................5
1.4.3 Equipment test: Key Test/Screen Test....................................... 5
1.4.4 About............................................................................................... 6
2. Car Battery Test................................................................................... 6
2.1 In-Vehicle Battery Test........................................................................... 7
2.1.1 Select Battery Type........................................................................ 8
2.1.2 Select System Standard and Input Rating.............................. 8
2.1.3 Abbreviations................................................................................ 11
2.2 Cranking Test......................................................................................... 12
2.3 Charging Test........................................................................................ 12
2.4 Out-of-Vehicle Battery Test................................................................ 13
3. Motorcycle Battery Test(or 6V Battery Test).............................. 14
4. Waveform........................................................................................... 16
5. Review.................................................................................................. 17
5.1 Review the Last Result ........................................................................18
5.2 Review Waveform................................................................................. 18
5.3 Delete Result.......................................................................................... 19
6. Print...................................................................................................... 19
7. Software Update.............................................................................. 20
8. Warranty.............................................................................................. 21
9. Contact Us.......................................................................................... 22

1
BT500 6V & 12V & 24V BATTERY TESTER
1. Product Introduction
The VDIAGTOOL BT500 employs advanced conductance technology to
precisely measure battery CCA, SOH, and SOC, while diagnosing start-
ing/charging system faults. This all-in-one solution significantly improves
diagnostic efficiency for vehicle maintenance.
1.1 Product Functions
VDIAGTOOL BT500 features the following functions: battery test, crank-
ing test, charging test, test report print and other additional functions.
Battery test mainly aims to analyze the battery healthy status to calcu-
late the actual cold cranking capability of the battery and the aging
extent, which provide reliable analysis evidence for the test and mainte-
nance of the battery.
Cranking test is used to test and analyze the starting motor. Testing the
actual required cranking current and cranking voltage of the starting
motor is helpful to determine whether the starting motor works properly
or not. If the starting motor malfunctions, it may cause an increased
starting loaded torque; or rotor wear may increase internal friction of the
starting motor.
Charging test is to check and analyze the charging system, including
generator, rectifier, rectifier diode and etc., to find out whether the
output voltage of the generator is normal, whether the rectifier diode
works properly. And if the rectifier diode works abnormally, whether it
caused over charge of the battery. Over charge or incomplete charge of
the battery will cause quick damage to the battery and greatly shorten
the life of other loaded appliances.
Main Features:
1. Test all automotive starting lead acid storage battery, including regular
lead acid battery, AGM flat plate battery, AGM spiral battery, and Gel
battery, etc.
2. Detect bad battery.
3. Feature reverse polarity protection; reverse connection may not
damage the tester, the vehicle or battery.
4. Directly test the battery with loss of electricity; fully charge the battery
is not required before testing.
5. Testing standards cover the majority of world's battery standards, such
as CCA, BCI, CA, MCA, JIS, DIN, SAE.

2
BT500 6V & 12V & 24V BATTERY TESTER
Measurement Standard
CCA
BCI
CA
MCA
JIS
DIN
IEC
EN
SAE
Measurement Range
100-2000 (5-3000)
100-2000 (5-3000)
100-2000 (5-3000)
100-2000 (5-3000)
26A17-245H52
100-2000 (5-3000)
100-2000 (5-3000)
100-2000 (5-3000)
100-2000 (5-3000)
6V - 32V DC
-20°C to 70°C (-4°F to 158°F)
Display
Voltage Measurement Range
Operating Temperature
Storage Temperature
Working Environment Temperature
Power Source
LCD Display
0°C to 50°C (32°F to 122°F)
0°C to 50°C (32°F to 122°F)
Provided by Connecting to Car Batte
6. Support multi-languages, customers can select different language
package, which includes: English, Spanish, French, German, Italian,
Portuguese, Polish, Russian, Dutch, Japanese, Korean, Simplified
Chinese.
7. Lifetime free update through BT500 Update Client from:
https://www.vdiagtool.com/support/downloads.
1.2 Technical Specifications
Cold Cranking Amps Measurement Range:
Product Parameters:
(The working environment temperature above is applicable for automo-
tive manufacturers, automotive maintenance and repair workshops,
automotive battery factories, automotive battery distributors, and
educational organizations, etc.)
Product Dimensions:
164mm (6.45")
Length Width Height
85.3mm (3.35") 24.4mm (0.96")

3
BT500 6V & 12V & 24V BATTERY TESTER
Packing List:
• 1 × BT500 Battery Tester
• 1 × Type-C Data Cable
• 1 × User Manual
1.3 Keypad Introduction
①ESC button
• Short press: Returns to previous screen (all modes)
• Long press: Exits waveform interface (waveform mode only)
②Up button
• Navigation: Moves cursor up/previous page
• Adjustment: +50 per press (CCA value)
③Quick Battery Test button
• Quickly enter the battery test
④Left button
• Navigation: Moves to previous page
• Adjustment: -5 per press (CCA value)
⑤OK button
• Short press: Confirms selection (menu mode); Resumes playback
(review mode)
• Long press: Pauses playback (review mode)
⑥Right button
• Navigation: Moves to next page
• Adjustment: +5 per press (CCA value)

4
BT500 6V & 12V & 24V BATTERY TESTER
Setup
Language
Buzzer
Equipment test
About
Language
English
中文
日本語
한국어
Français
Deutsch
⑦Waveform button
• Enters real-time voltage display
⑧Down button
• Navigation: Moves cursor down/next page
• Adjustment: -50 per press (CCA value)
⑨Quick Review button
• Accesses test history
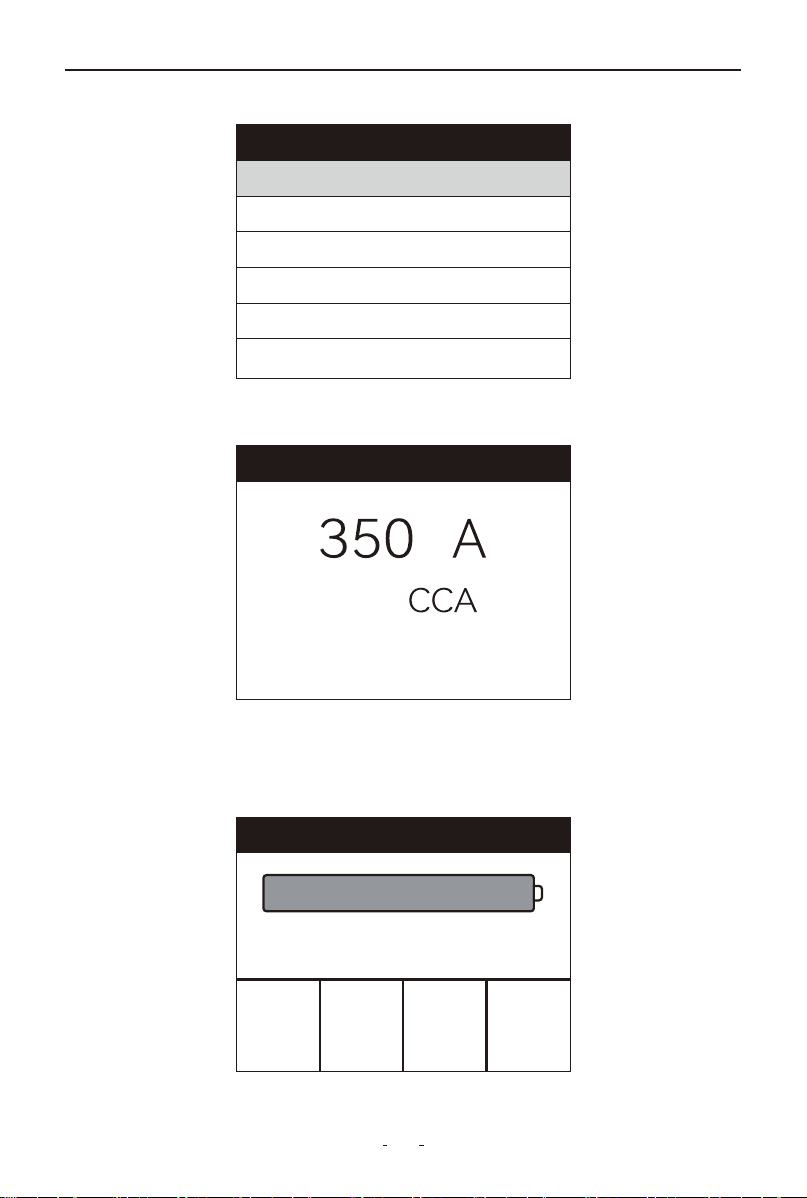
1.4 How to Set Up the Tool
Select the Setup in the main menu and press OK button.
The interface will appear as shown below:
You can make the following adjustments or configure the device as
follows:
1.4.1 Select Language
Choose Language and press OK button.
The interface will appear as shown below:
Press the Up/Down button to select your preferred language, then
press OK to confirm. The system language will change immediately,
updating all interfaces.

5
BT500 6V & 12V & 24V BATTERY TESTER
Buzzer
Open
Close
Equipment test
Key test
Screen test
Key test
ESC exit twice
ESC UP QUICK
LEFT OK RIGHT
WAVE DOWN REVIEW
1.4.2 Buzzer: ON/OFF the Buzzer
Choose Buzzer and press OK button.
The interface will appear as shown below:
Press the OK button to turn the buzzer off or on.
1.4.3 Equipment test: Key Test/Screen Test
Choose Equipment test and press OK button.
The interface will appear as shown below:
Key test - verifies if the buttons are functioning properly.
(1) Use the Up/Down button to select Key test from the Equipment test
menu, and then press the OK button to confirm.
(2) Press any physical button to start the test. When you press a button,
the corresponding button name will appear on the display.
The interface will appear as shown below:
If no display response, the button may be faulty.

6
BT500 6V & 12V & 24V BATTERY TESTER
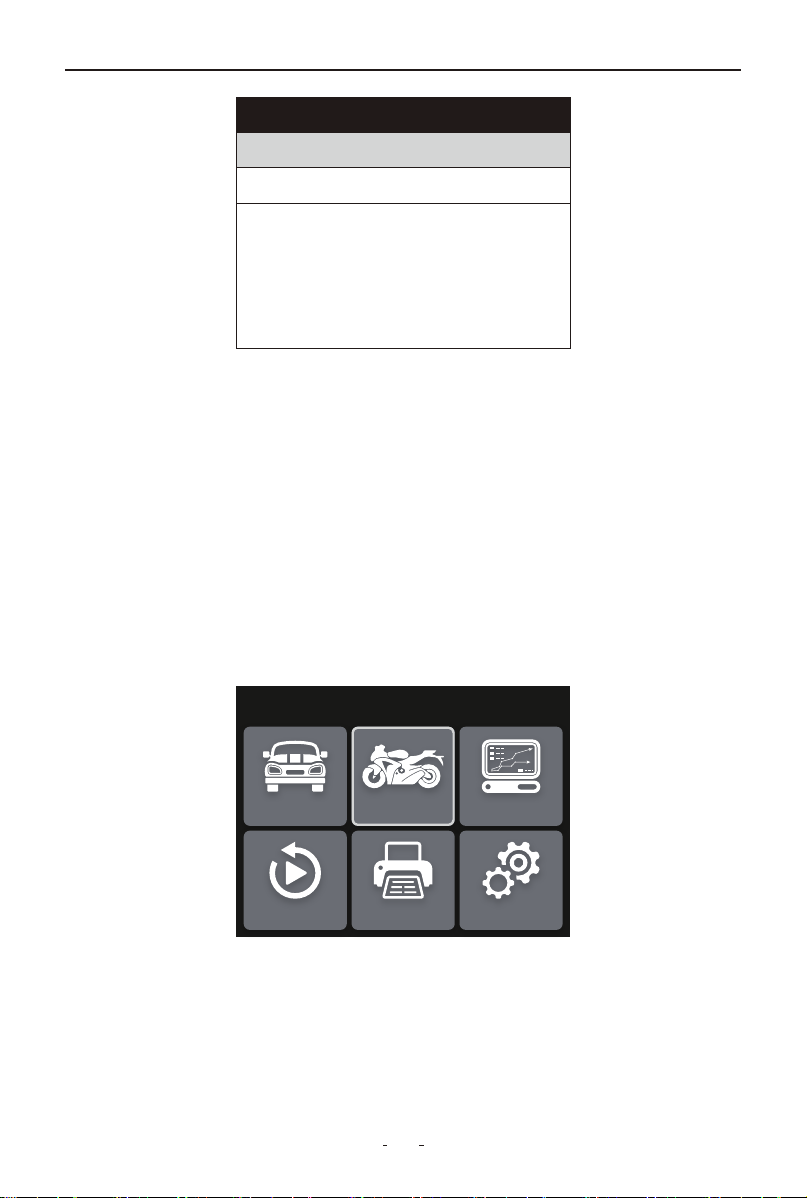
Car Motorcycle Waveform
Review Print Setup
Main Menu
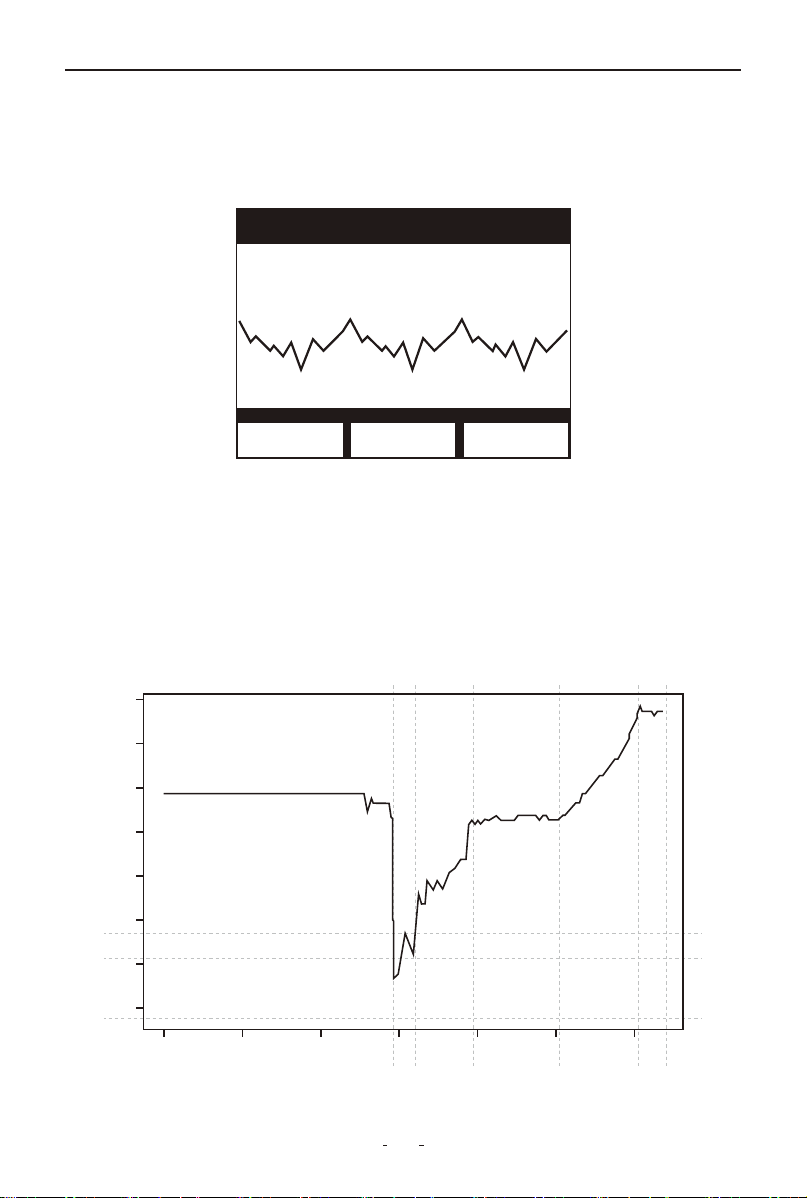
Screen test - checks if the LCD display is working properly.
1. Use the Up/Down button to select Screen test from the Equipment test
menu, and then press the OK button to confirm
2. Inspect the dead/stuck pixels in the colour bar, solid white/black
screens.
3. When completed, press ESC button (one time) to exit the interface.
1.4.4 About
Choose About and press OK button.
The interface will appear as shown below:
2. Car Battery Test
Select the [Car] icon from the main menu and press OK to access the
battery test interface.
Note:
Press ESC twice (double-click) to exit the Key test interface.
About
BRAND: VDIAGTOOL
Model#: BT500
Software Version: V3.2
Hardware version: V2.1
Email: suppor[email protected]

7
BT500 6V & 12V & 24V BATTERY TESTER
Battery Location
In-Vehicle
Out-of-Vehicle
Battery test
1. Check surface charge, turn lights on.
2. Turn headlights on about 10
seconds.
3. Turn lights off.
First select your battery voltage (12V/24V) to proceed to the In-Vehicle
or Out-of-Vehicle test interface.
In-Vehicle or Out-of-Vehicle Test
Select your current battery location and press OK to proceed.
2.1 In-Vehicle Battery Test
To perform an in-vehicle battery test, select "In-Vehicle" then "Battery
Test".
If surface charge is detected, the following prompt will appear:
Select type
12V
24V

8
BT500 6V & 12V & 24V BATTERY TESTER
Select Type
Regular Flooded
AGM Flat Plate
AGM Spiral
Gel
EFB
Turn on headlights when prompted to clear surface charge, then turn
them off and press OK to resume automatic battery testing.
2.1.1 Select Battery Type
Once surface charge is cleared, the tool will prompt you to select your
battery type (Regular Flooded, AGM Flat Plate, AGM Spiral, Gel, or EFB).
The interface will appear as shown below:
Use Up/Down button key to select battery type, then press OK button
to confirm.
2.1.2 Select System Standard and Input Rating
The tool tests batteries based on your selected system standards and
ratings.
Battery Standards:
CCA: Cold Cranking Amps, the most common rating, defined by SAE &
BCI, represents the current the battery can provide at 0°F (-18°C).
BCI: Battery Council International Standard.
CA: Cranking Amps Standard, effective starting current value at
0°C(-18°C).
MCA: Marine Cranking Amps Standard, effective starting current value
at 0°C(-18°C).
JIS: Japan Industrial Standard, displayed on the battery as combination
of the numbers and letters, e.g.55D23,80D26.
DIN: German Auto Industry Committee Standard.
IEC: Internal Electron Technical Commission Standard.
EN: European Automobile Industry Association Standard.
SAE: Society of Automotive Engineers Standard.
9
BT500 6V & 12V & 24V BATTERY TESTER
Select Standard
CCA
IEC
EN
DIN
CA
BCI
Set Battery Rating
↑: +50 →: +5
↓: -50 ←: -5
Battery test
R
3.79
m Ω
CCA
662
A
STD
325
A
VOL
15.08
V
SOH 100%
SOC 100%
GOOD BATTERY
Press Up/Down to select your standard, then press [OK] to confirm.
Then press Up/Down/Left/Right button to input the correct rating, then
press [OK] to start testing. The display will show “Testing, please wait.”
Results will display shortly.
The test may display one of the following 5 possible results:
①GOOD BATTERY
It indicates the battery is in good condition and can continue to be used.
10
BT500 6V & 12V & 24V BATTERY TESTER
Battery test
R
3.57
m Ω
CCA
697
A
STD
700
A
VOL
12.18
V
SOH 99%
SOC 24%
GOOD-RECHARGE
Battery test
R
5.53
m Ω
CCA
479
A
STD
775
A
VOL
14.31
V
SOH 61%
SOC 100%
REPLACE
②GOOD-RECHARGE
It indicates the battery is in good condition but has low charge and
should be recharged before use.
③REPLACE
It indicates the battery has reached or is nearing end-of-life and requires
replacement to ensure safe operation.
11
BT500 6V & 12V & 24V BATTERY TESTER
Battery test
R
86.84
m Ω
CCA
45
A
STD
325
A
VOL
12.89
V
SOH 13%
SOC 100%
BAD CELL
Battery test
R
73.33
m Ω
CCA
52
A
STD
325
A
VOL
12.02
V
SOH 15%
SOC 0%
CHARGE-RETEST
④BAD CELL, REPLACE
It indicates internal battery damage (faulty cells or short circuit), requir-
ing immediate replacement.
ATTENTION:
If “Replace” appears during in-vehicle testing, poor battery connections
may be the cause. Disconnect and retest in out-of-vehicle mode before
replacement.
⑤CHARGE-RETEST
It indicates battery instability, requiring recharge and retest for verifica-
tion. If the condition persists after retesting, it indicates permanent
damage necessitating replacement.
2.1.3 Abbreviations
SOC: State of Charge
SOH: State of Health
STD: Standard rating of the lead acid battery

12
BT500 6V & 12V & 24V BATTERY TESTER
Cranking test
Please turn off the engine before
pressing OK to enter the test
Cranking test
TIME
MAX
MIN
1068ms
15.77V
12.93V
Normal
VOL: Voltage of the lead acid battery
R: Internal resistance of the lead acid battery
2.2 Cranking Test
Select the Cranking test and press OK to access the Cranking test inter-
face.
The tool will instruct you to turn off the engine before proceeding.
Follow the on-screen prompt:
After turning off the engine, press OK to run the test. Results will display
automatically.
Time: Time used to crank the engine
MAX: The maximum voltage while cranking the engine
MIN: The minimum voltage while cranking the engine
Cranking Test Possible Results: Normal, Cranking Voltage, Low
2.3 Charging Test
Select the Charging test and press OK to access the Charging test inter-
face. The display will show “Testing, please wait”.

13
BT500 6V & 12V & 24V BATTERY TESTER
Charging test
Increase the speed to 2500 rpm
and hold for 10 seconds, press OK
to continue.
Charging test
Load
No load
Ripple
8.52V
8.52V
14mV
Output low
Then a new prompt will appear instructing you to increase and maintain
engine speed at 2500 RPM for 10 seconds:
Press OK to confirm. Test results will display in approximately 5 seconds.
Load: Charging voltage when there is vehicle load, like lights, air condi-
tioner etc.
No Load: Charging voltage when there is no vehicle load.
Ripple: Undesirable amount of AC voltage fluctuation from the alterna-
tor.
Charging test possible results: It could show any one of the 5 charging
test results: Normal, Output High, Output Low, No Output, Ripple High.
2.4 Out-of-Vehicle Battery Test
Out-of-Vehicle battery indicates battery is not connected with any of the
vehicle load, i.e. battery is disconnected.
To perform the out-of-vehicle battery test:
(1) Select Out-of-Vehicle to enter out-of-vehicle battery test interface.
14
BT500 6V & 12V & 24V BATTERY TESTER
Battery Location
In-Vehicle
Out-of-Vehicle
Car Motorcycle Waveform
Review Print Setup
Main Menu
(2) Select the battery type, standard, and input rating (refer to sections
2.1.1 & 2.1.2), then interpret the test results per 2.1.2 guidelines.
3. Motorcycle Battery Test(or 6V Battery Test)
This function instantly tests motorcycle lead-acid or 6V batteries, analyz-
ing voltage, CCA, resistance, rated CCA, charge level, and health status
– delivering results in 1 second.
To test motorcycle battery(or 6V battery):
(1) Select [Motorcycle] icon from the main menu and press OK to
access battery test interface.
(2) >Option A (Known CCA Rating)
a. Select Rated Capacity
b. Enter battery's CCA value
c. Press OK to begin test

15
BT500 6V & 12V & 24V BATTERY TESTER
Set Battery Rating
↑: +50 →: +5
↓: -50 ←: -5
Select Standard
12C16A-3B
12N10
12N10-3A
12N10-3A-1
12N10-3A-2
12N10-3B
Page 1/55
>Option B (Known Battery Model)
a. Select Select Standard
b. Browse through 55-page model list (e.g., 12N10-3A, 12C16A-3B, etc.)
c. Press OK to confirm and start test
Note: if model not found:
• Indicates potential incompatibility BUT
• You can still use Rated Capacity to manually enter CCA value
(3) Test results will display automatically (see Section 2.1.2)
16
BT500 6V & 12V & 24V BATTERY TESTER
Waveform
MAX 13.6 MIN 9.6CUR 10.1
18.0 V
3.0 V
0
7 8 9 10 11 12 13 14
1000 2000 3000 4000 5000 6000
Discharge Voltage -
around 12V
(Before Ignition)
Starting Voltage -
around 7.5-9.5V
(Ignition voltage)
Charging Voltage - around 14V
(Alternator Charging Voltage)
4. Waveform
Select the [Waveform] icon from the main menu and press OK, or use
the one-click Waveform shortcut (bottom-left keypad) for instant access.
The screen will display the waveform analysis interface as shown:
MAX: Maximum voltage during ignition
CUR: Current detected battery voltage
MIN: Minimum voltage during ignition
The waveform display remains static unless voltage fluctuations are
detected.
Vehicle Voltage Analysis:

17
BT500 6V & 12V & 24V BATTERY TESTER
Voltage Range
Battery Status
Effects & Measures
<10.8V
Severely Low
Cannot start vehicle
→ Immediate replacement required
10.8V-11.8V Low Charge
Hard to start vehicles
→ Charge immediately
Voltage Range
<13.2V
<13.2V
13.2V-14.8V
Batte Status
Severely Low
Normal
Eects & Measures
Batte may not be charged
→ check alternator or other electrical load
Dangerously High
May damage the batte
→ check alternator stabilizer
No eects
>14.8V
Review
Review the last result
Review waveform
Delete result
• Discharge Voltage: A resting voltage below 11V (measured after 20+
minutes with ignition/engine OFF) indicates both immediate starting
difficulties and chronic battery aging requiring replacement, while
normal systems maintain ~12V.
• Starting Voltage: Represents the minimum voltage during ignition
(typically 7.5-9.5V). Sustained readings below 7.5V indicate depleted
battery capacity requiring replacement.
• Charging Voltage: Maintained at approximately 14V when the engine
is running, reflecting normal alternator charging operation.
Battery Status corresponding with Battery Voltage (Before Ignition)
Battery Status corresponding with Battery Voltage (After Ignition)
Note: If the battery voltage remains at 11.9V after extended driving
despite having a properly functioning alternator, this indicates perma-
nent battery failure and requires immediate replacement.
5. Review
Select [Review] icon from the main menu or press the Quick Review
shortcut to access and view previous test results.
18
BT500 6V & 12V & 24V BATTERY TESTER
Review waveform
Record 2
Record 1
Waveform
MAX 13.6 MIN 9.6CUR 10.1
18.0 V
3.0 V
5.1 Review the Last Result
Select Review the last result and press OK to view battery test record.
The results will display as shown below:
5.2 Review Waveform
(1) Select Review waveform and press OK to view waveform test
records.
The screen will display interface as shown below:
(2) Use the Up/Down buttons to choose a record (e.g., Record 1 or
Record 2), then press OK to view the stored voltage waveform.
The recorded voltage waveform will be displayed as shown below:
Battery test
R
3.57
m Ω
CCA
697
A
STD
700
A
VOL
12.18
V
SOH 99%
SOC 24%
GOOD-RECHARGE

19
BT500 6V & 12V & 24V BATTERY TESTER
V3.2BT500
Note:
• Pause/Resume: Hold OK to pause, press OK again to resume
• Exit During Playback: Hold ESC to immediately exit
• Exit While Paused: Press ESC once to return
5.3 Delete Result
Select Delete result and press OK to delete result records.
Caution: This will permanently erase ALL saved battery test data and
waveforms (no recovery possible).
6. Print
Data Printing supports printing saved battery test results and voltage
waveform records.
PC Printing Procedure
Requirements:
• BT500 battery tester
• Windows PC/laptop with USB ports
• Included Type-C cable
Steps:
(1) Download the latest software from:
www.vdiagtool.com/support/downloads
(2) Connect the BT500 to your PC using the provided Type-C cable
(3) Launch the BT500.exe software on your PC

20
BT500 6V & 12V & 24V BATTERY TESTER
Car Motorcycle Waveform
Review Print Setup
Main Menu
Print
Upload test results
Upload waveform
Delete result
(4) On the BT500 device:
a. Select Print and press OK
b. Choose Upload test results and/or Upload waveform and press OK
(5) In BT500 PC software:
a. View uploaded data
b. Click Print to generate hard copies
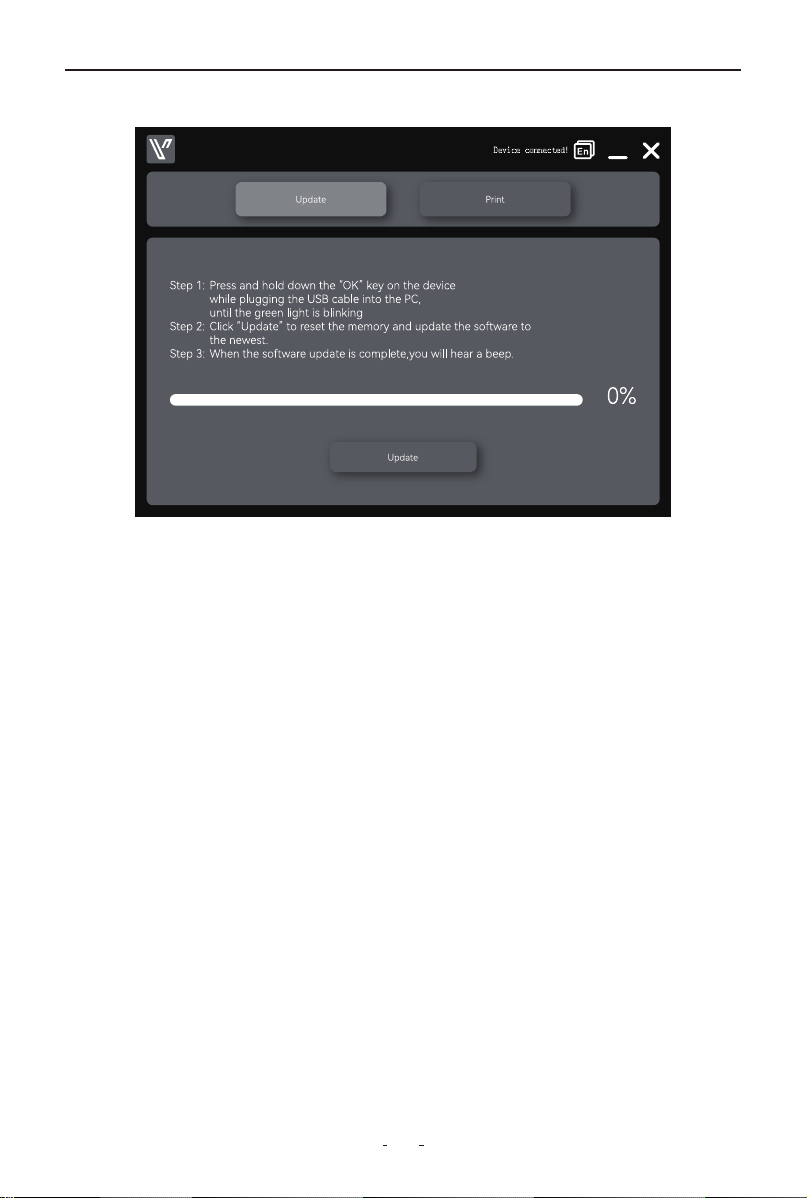
7. Software Update
This function allows you to update the software of the tool.
Requirements:
• BT500 battery tester
• Windows PC/laptop with USB ports
• Included Type-C cable
Update Steps:
(1) Download the latest BT500 update package from:
www.vdiagtool.com/support/downloads
(2) Launch BT500.exe on your Windows computer
(3) Connect the tool to your PC via Type-C cable while holding the OK
button
(4) Release OK when the green LED starts flashing
21
BT500 6V & 12V & 24V BATTERY TESTER
V3.2BT500
(5) Click Update in the software interface
Status Indicators:
• Updating: Yellow LED flashes
• Success: Green LED stays on (3 sec) + 2 quick beeps
• Failure: Red LED lights + continuous 3-sec buzzer
Important Notes:
• Do not disconnect during update
• Ensure stable power supply throughout the process
8. Warranty
Limited Three Years Warranty
VDIAGTOOL warrants the BT500 product against defects in materials
and workmanship for thirty-six (36) months from the date of delivery to
the original purchaser for commercial or business use. This warranty
does not cover damage resulting from misuse, unauthorized modifica-
tion, improper maintenance, or operation outside specified conditions.
VDIAGTOOL's sole liability shall be limited to repair or replacement of
defective components at its discretion.
Consequential, incidental, or other damages are expressly excluded.
Some jurisdictions may not permit certain limitations of liability.

22
BT500 6V & 12V & 24V BATTERY TESTER
9. Contact Us
Warranty & Support
Email: suppor[email protected]
Website: www.vdiagtool.com
For wholesale business or become our distributors:
Email: [email protected]
Invent with us, test products before they hit market, help us make
better products for everyone:
Email: [email protected]
Create social media content, post online and help our community:
Email: [email protected]
Follow Us on Social Media
Facebook Page: Search for "vdiagtool"
Facebook User Group: Search for "VDIAGTOOL OFFICIAL User Group"
Instagram: Search for "vdiagtool_official"
TikTok: Search for "vdiagtool_us"
YouTube: Search for "Vdiagtool Official"