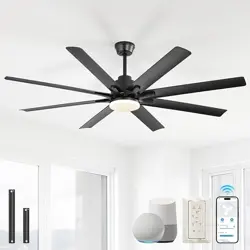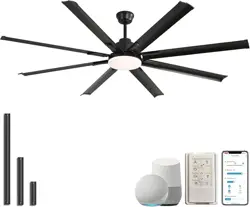
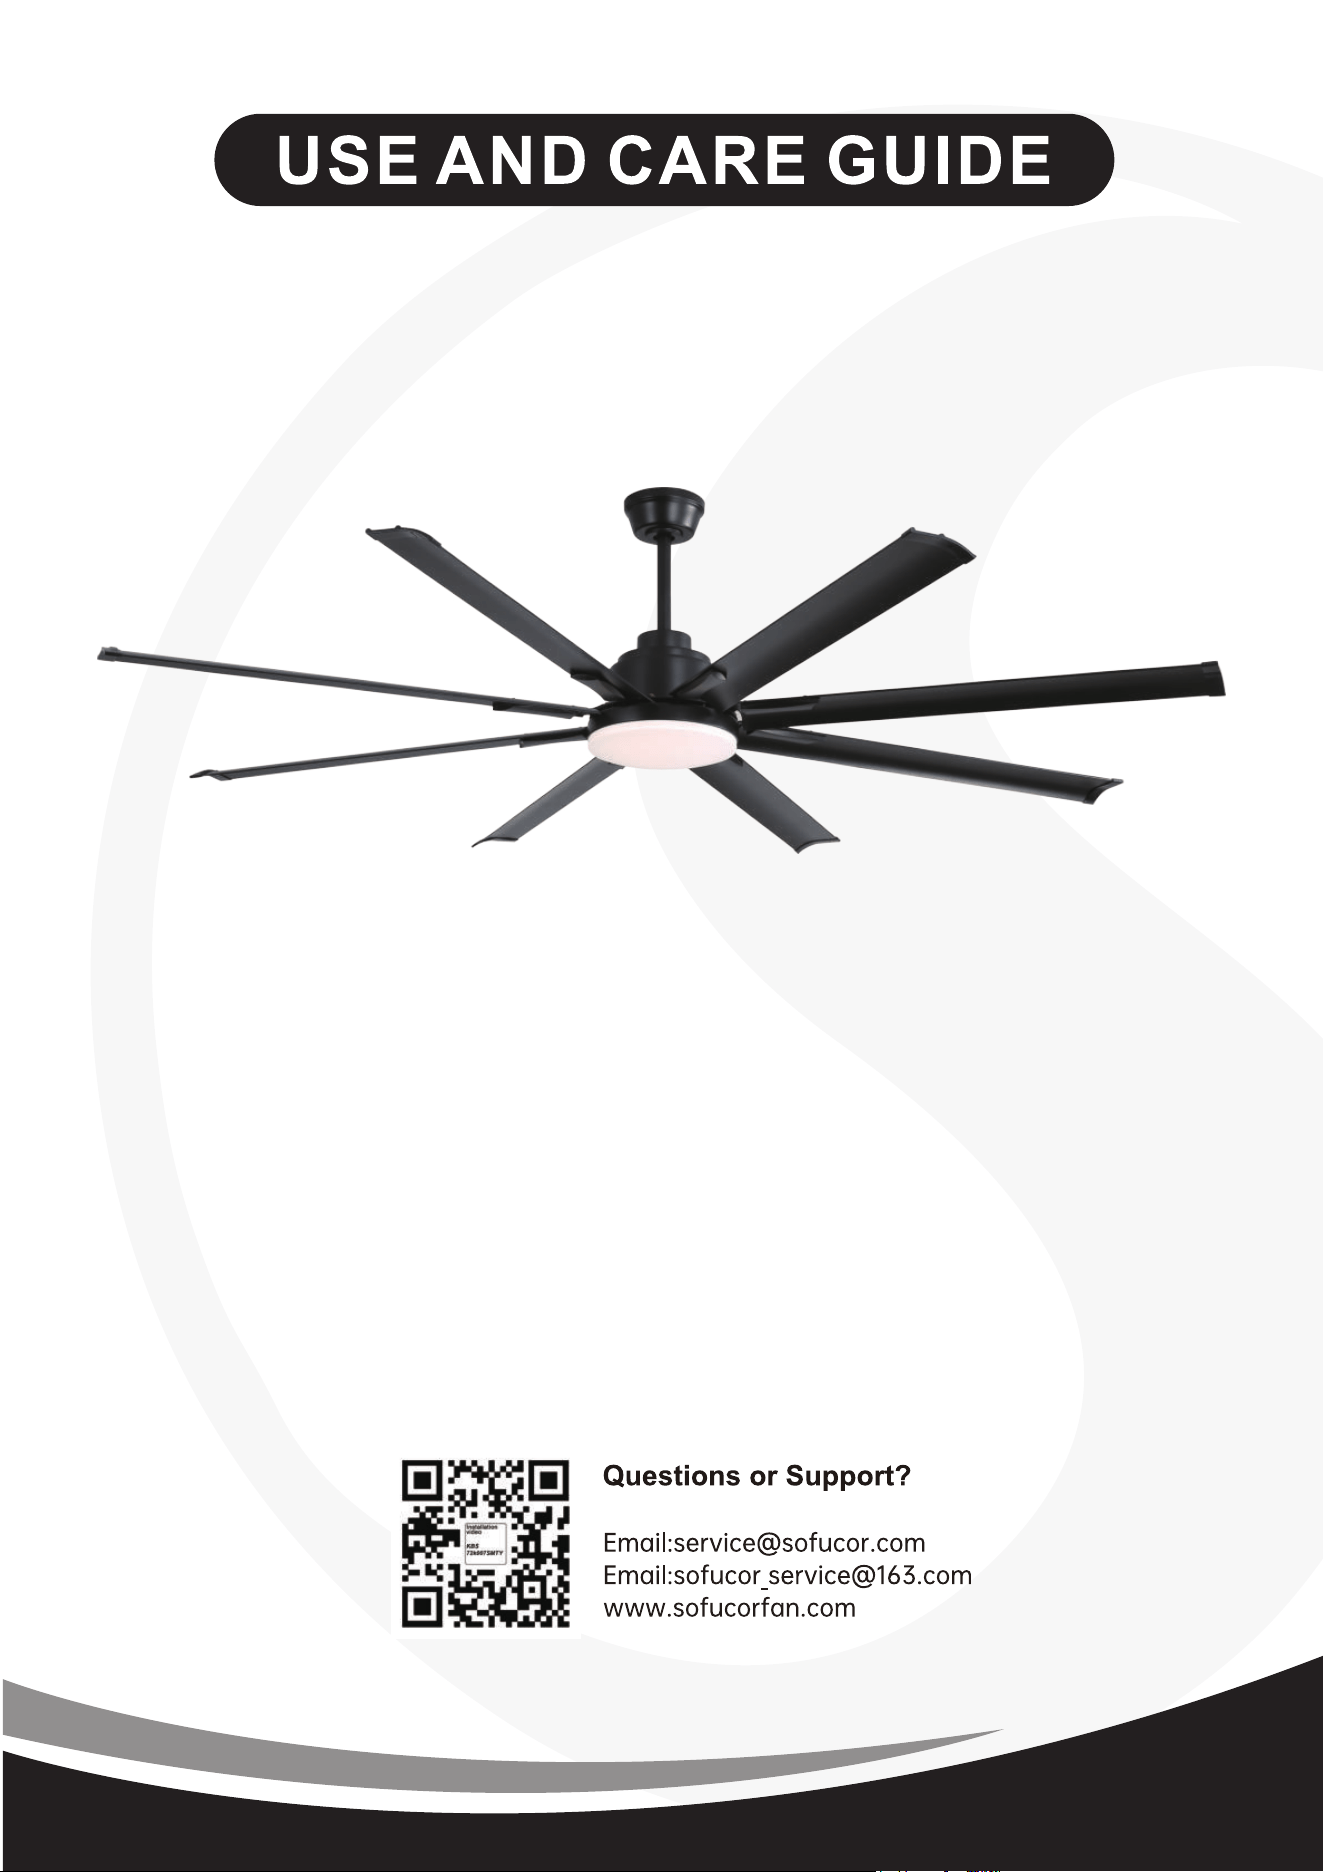
KBS-72K007 SMTY
KBS-84K001 SMTY
Please scan the below QR code to get
the video for easy installation.
2
01
02
02
03
04
05
06
12
13
14
15
15
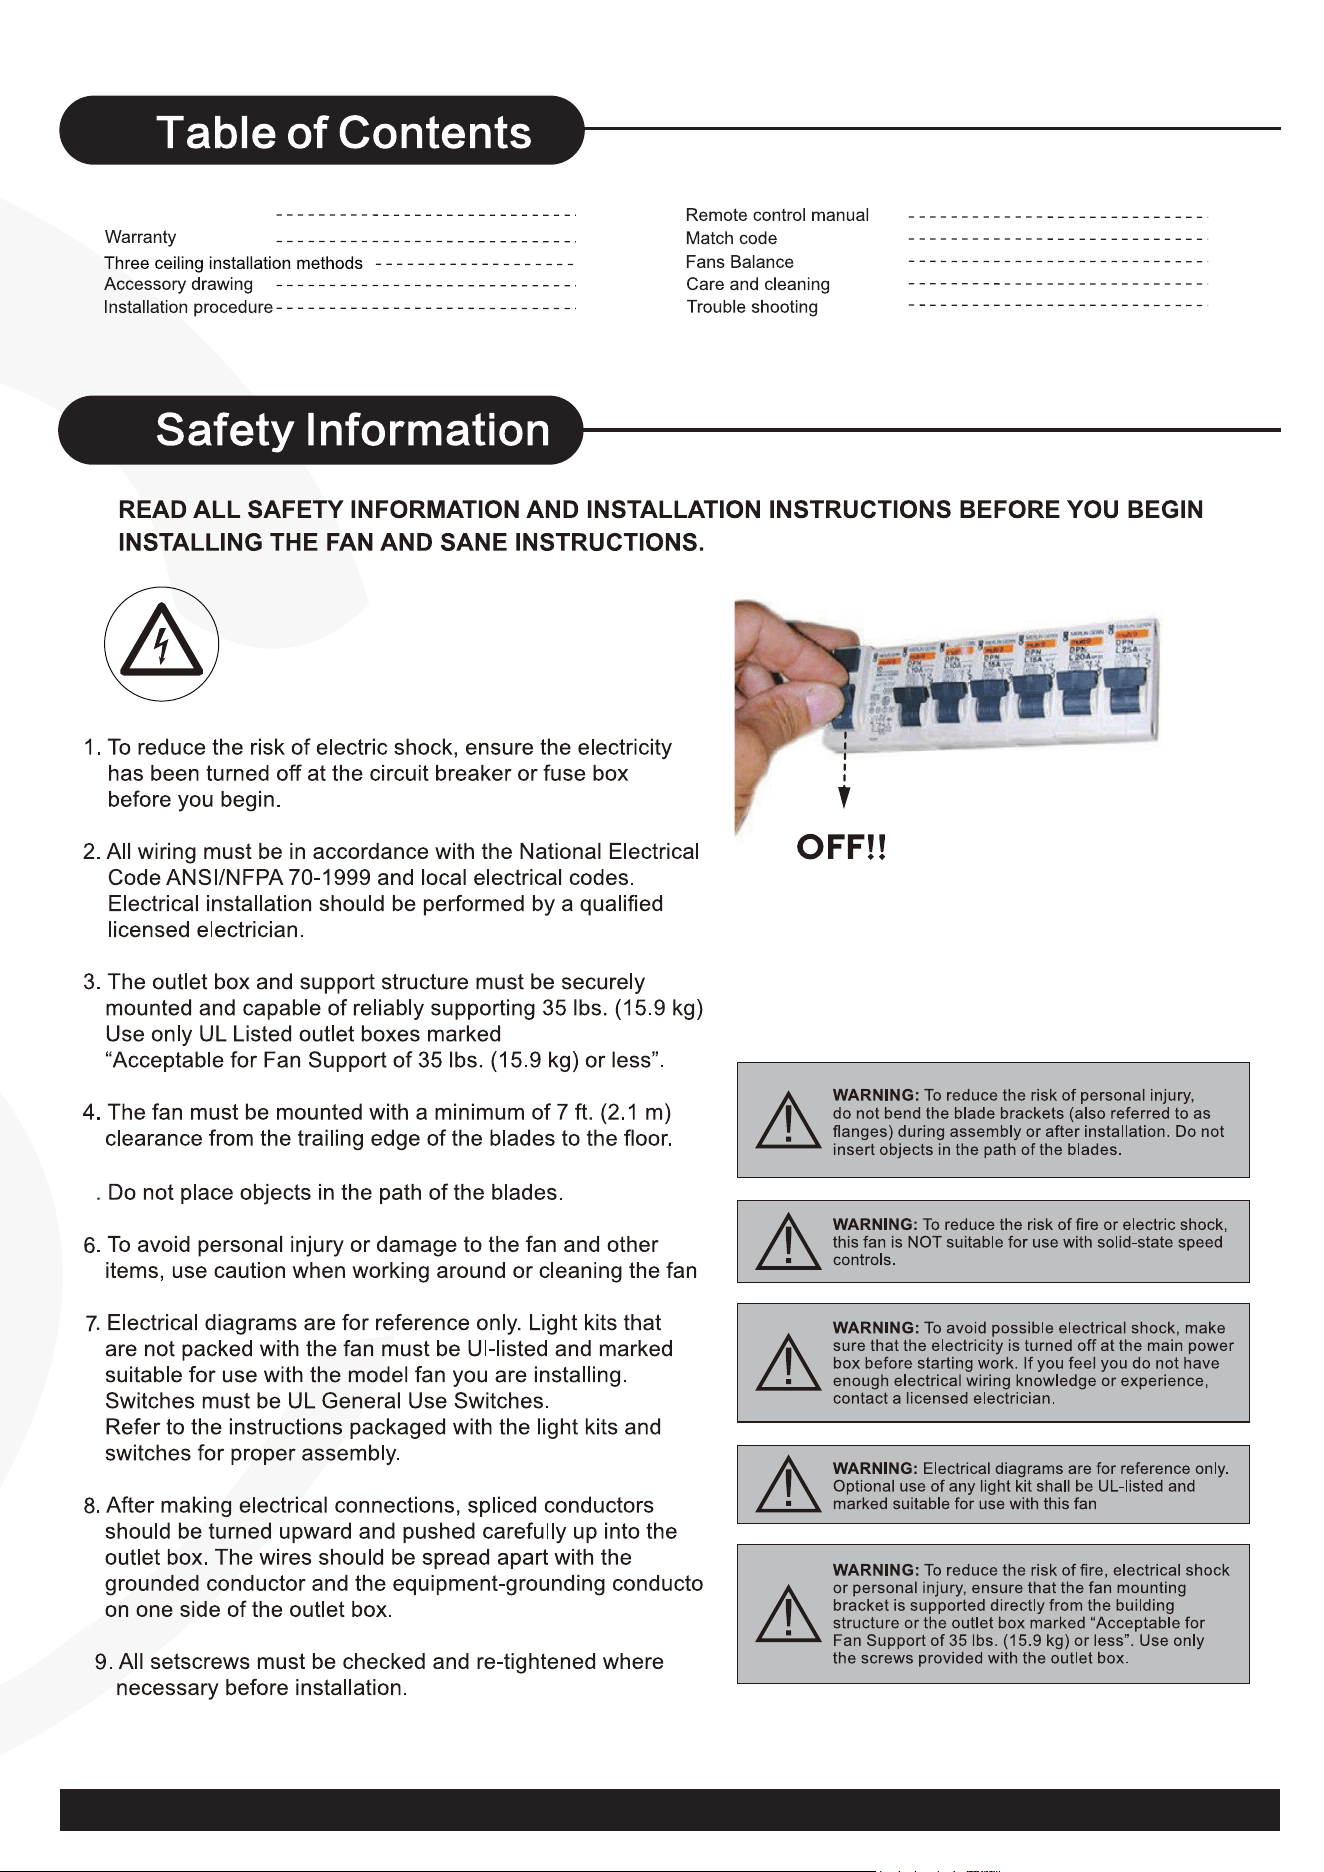
Safety Information
Warning:
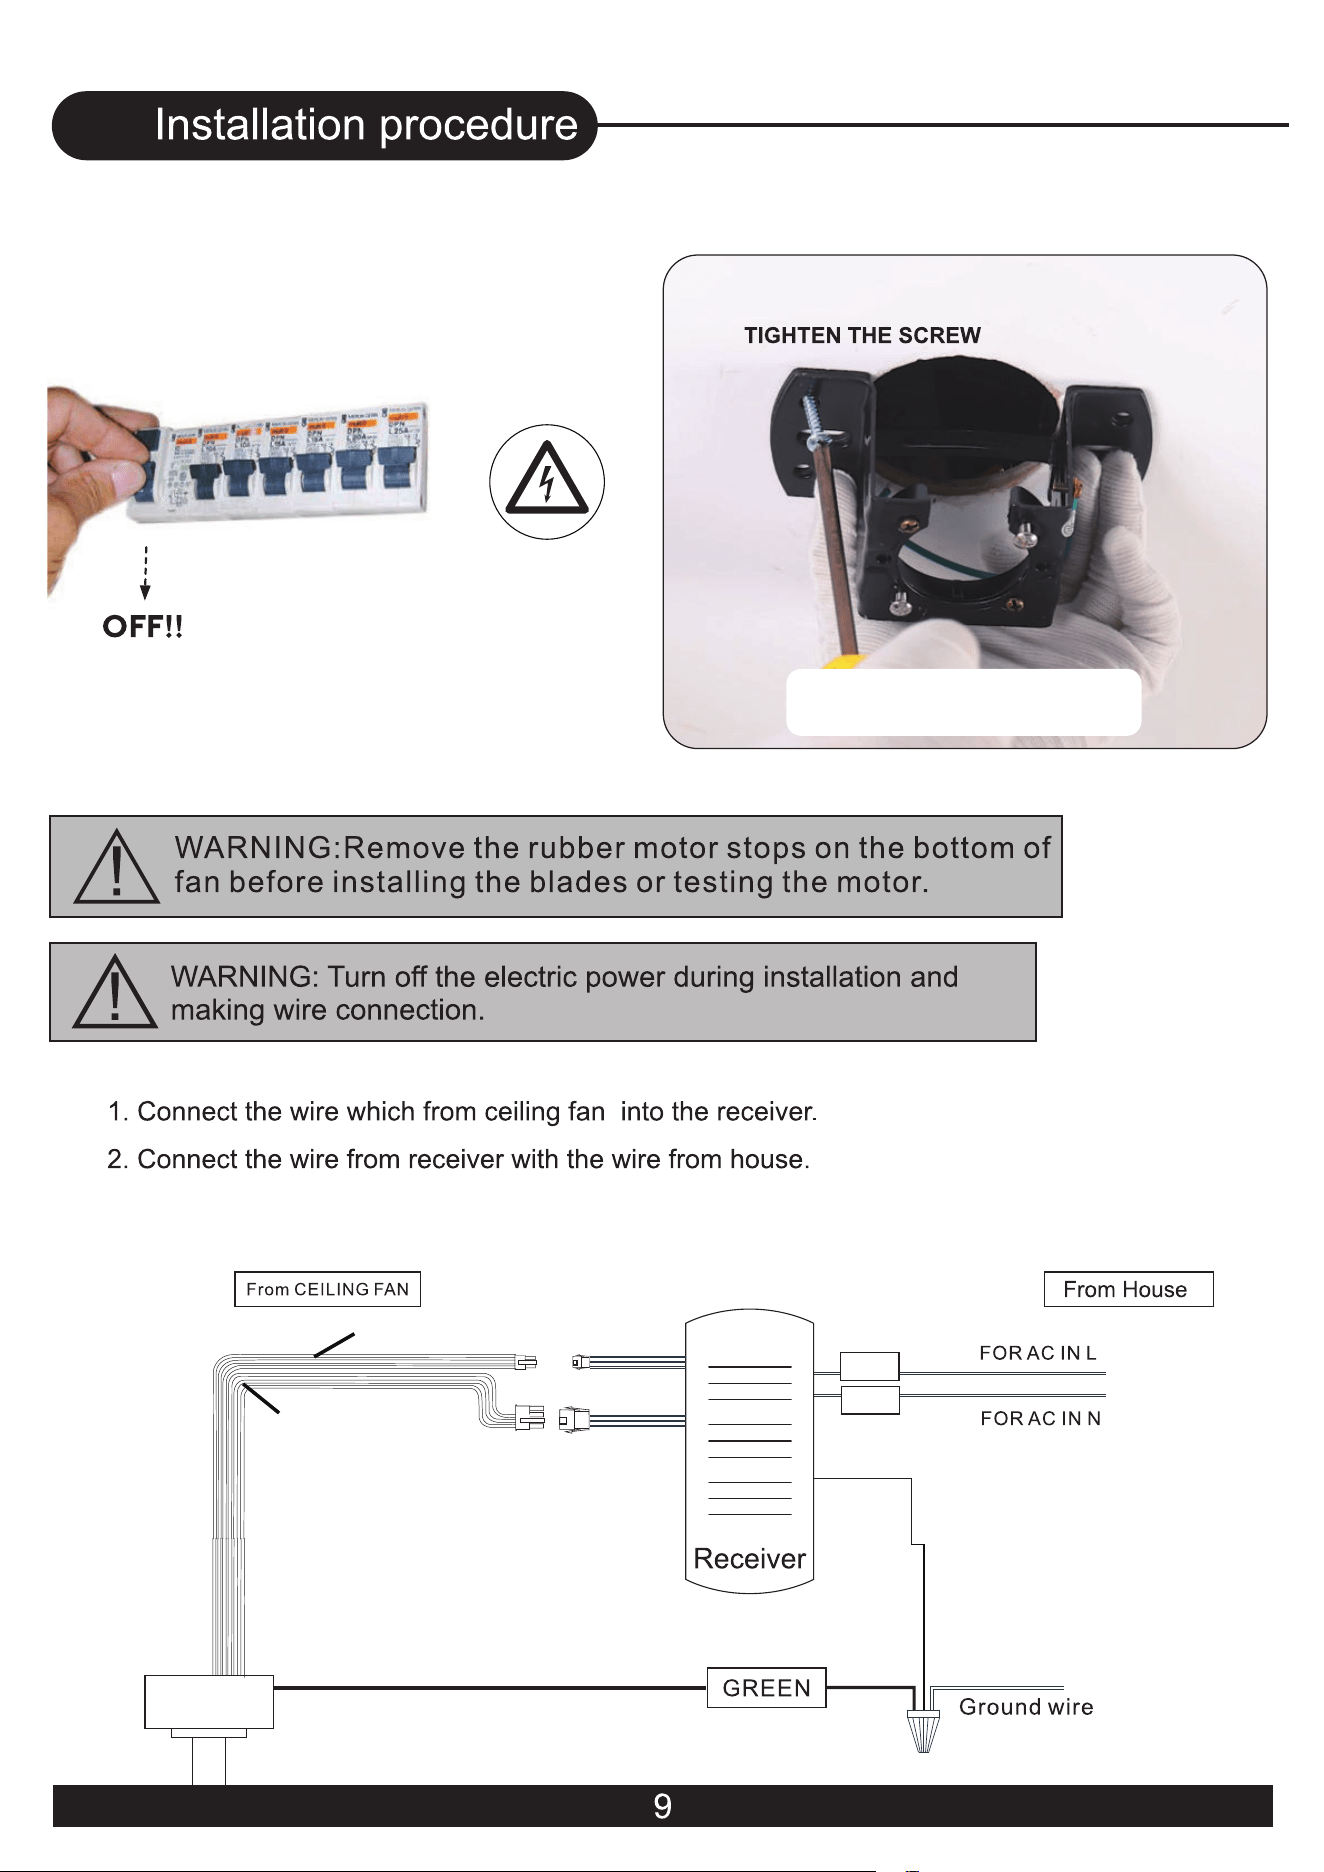
Kindly turn off the power
when connecting cables.
5
r
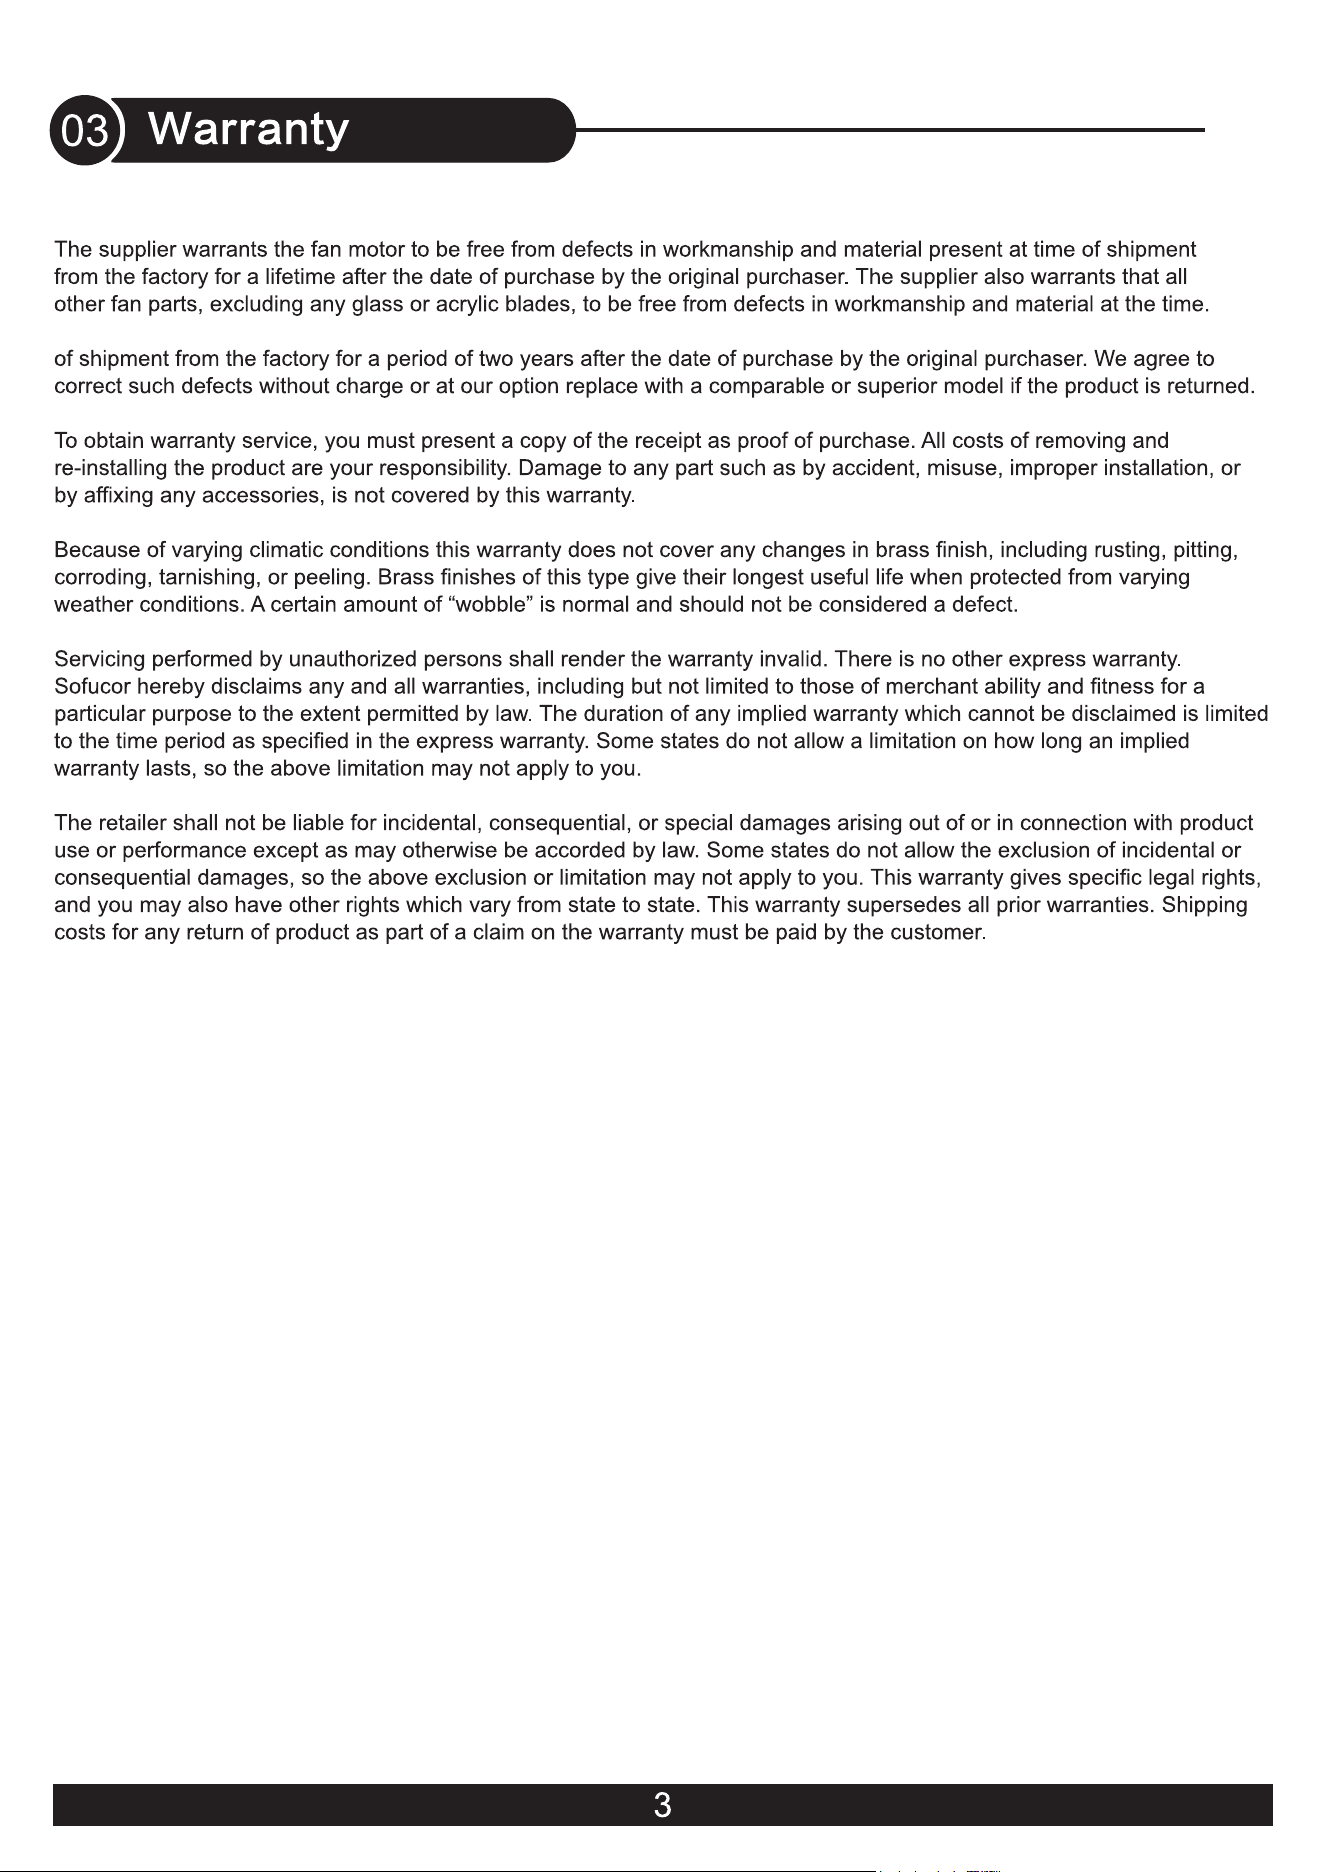
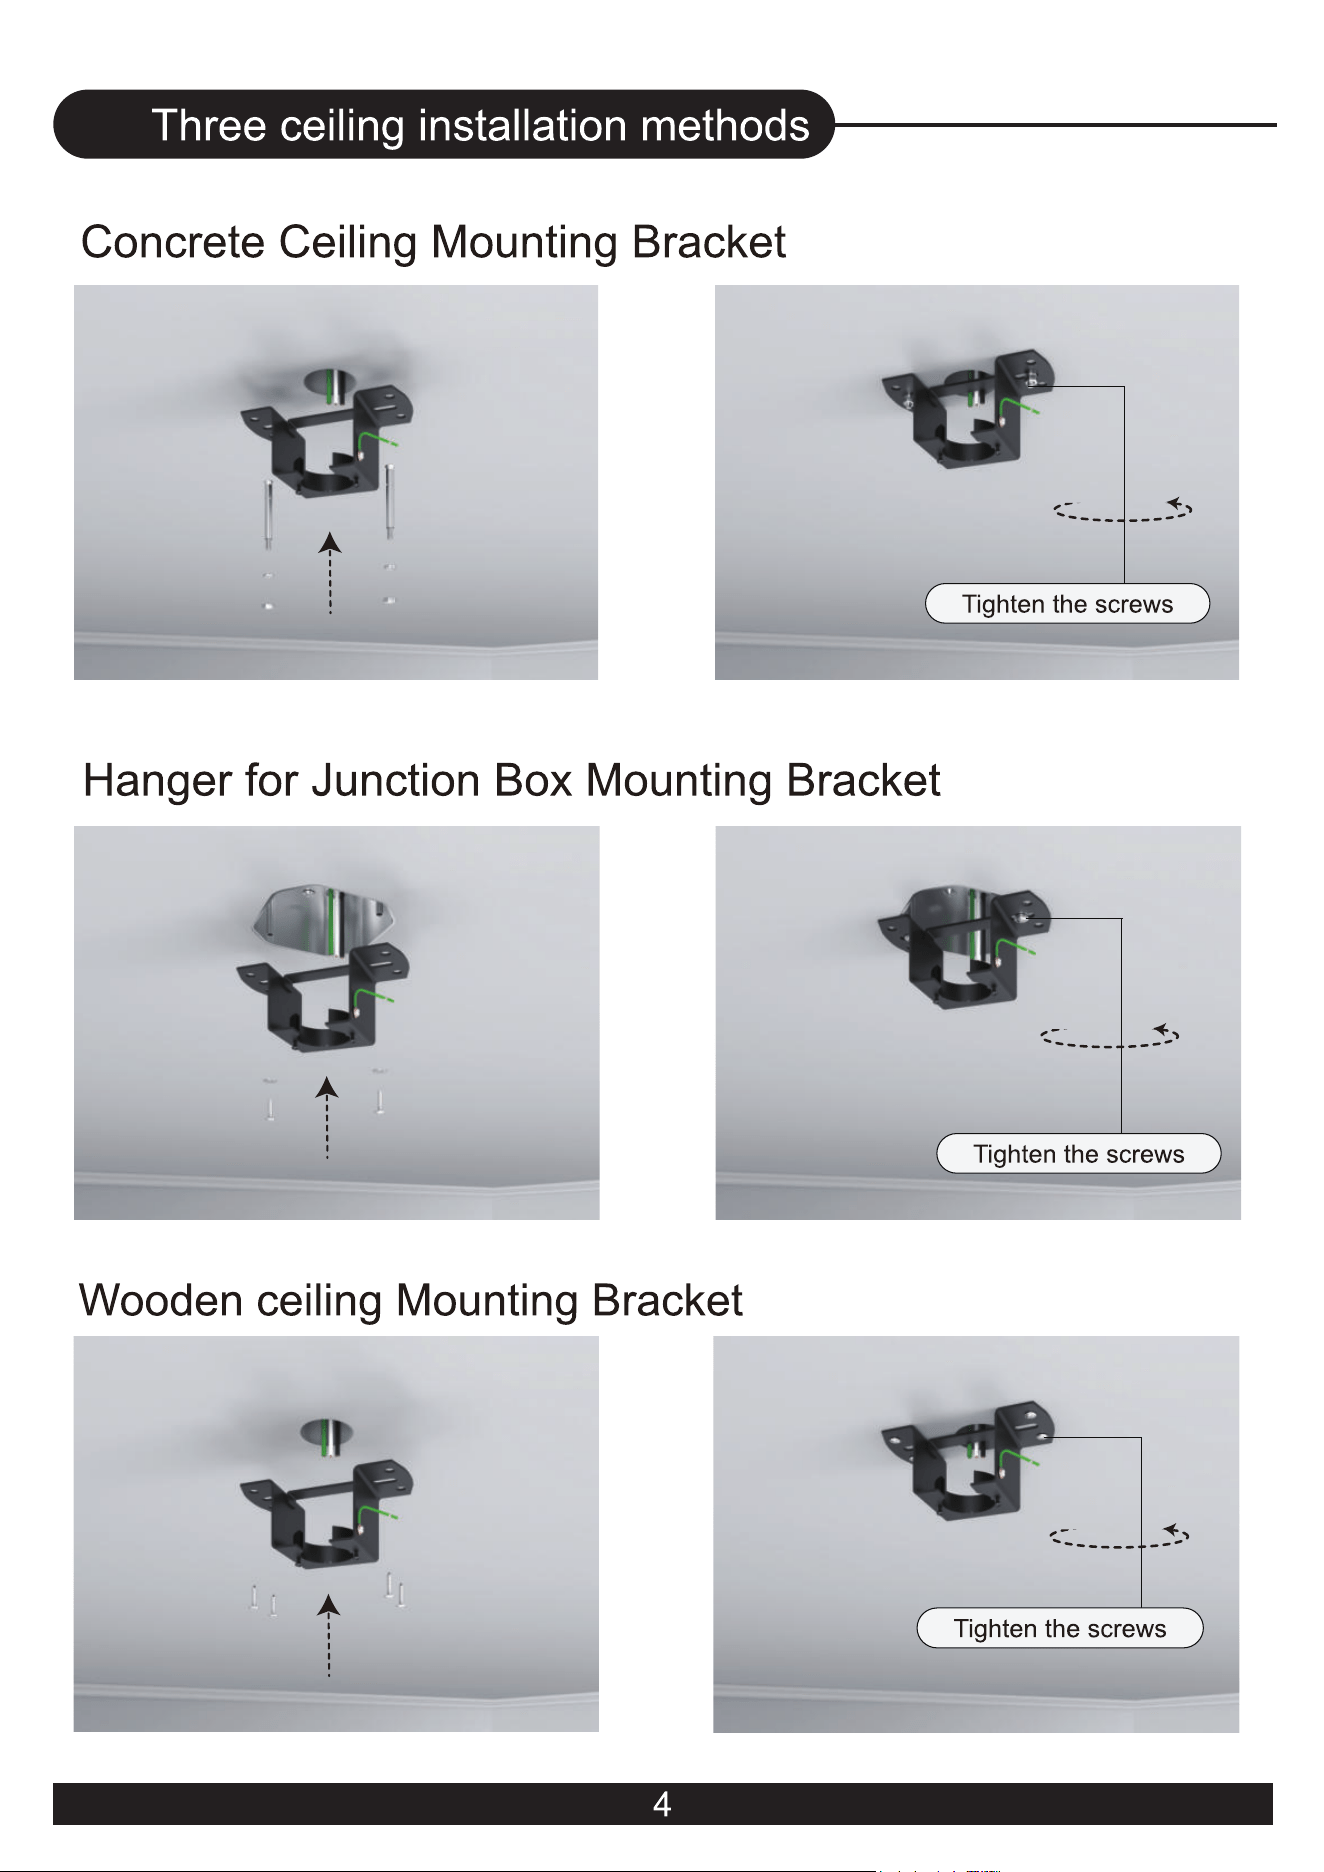
04
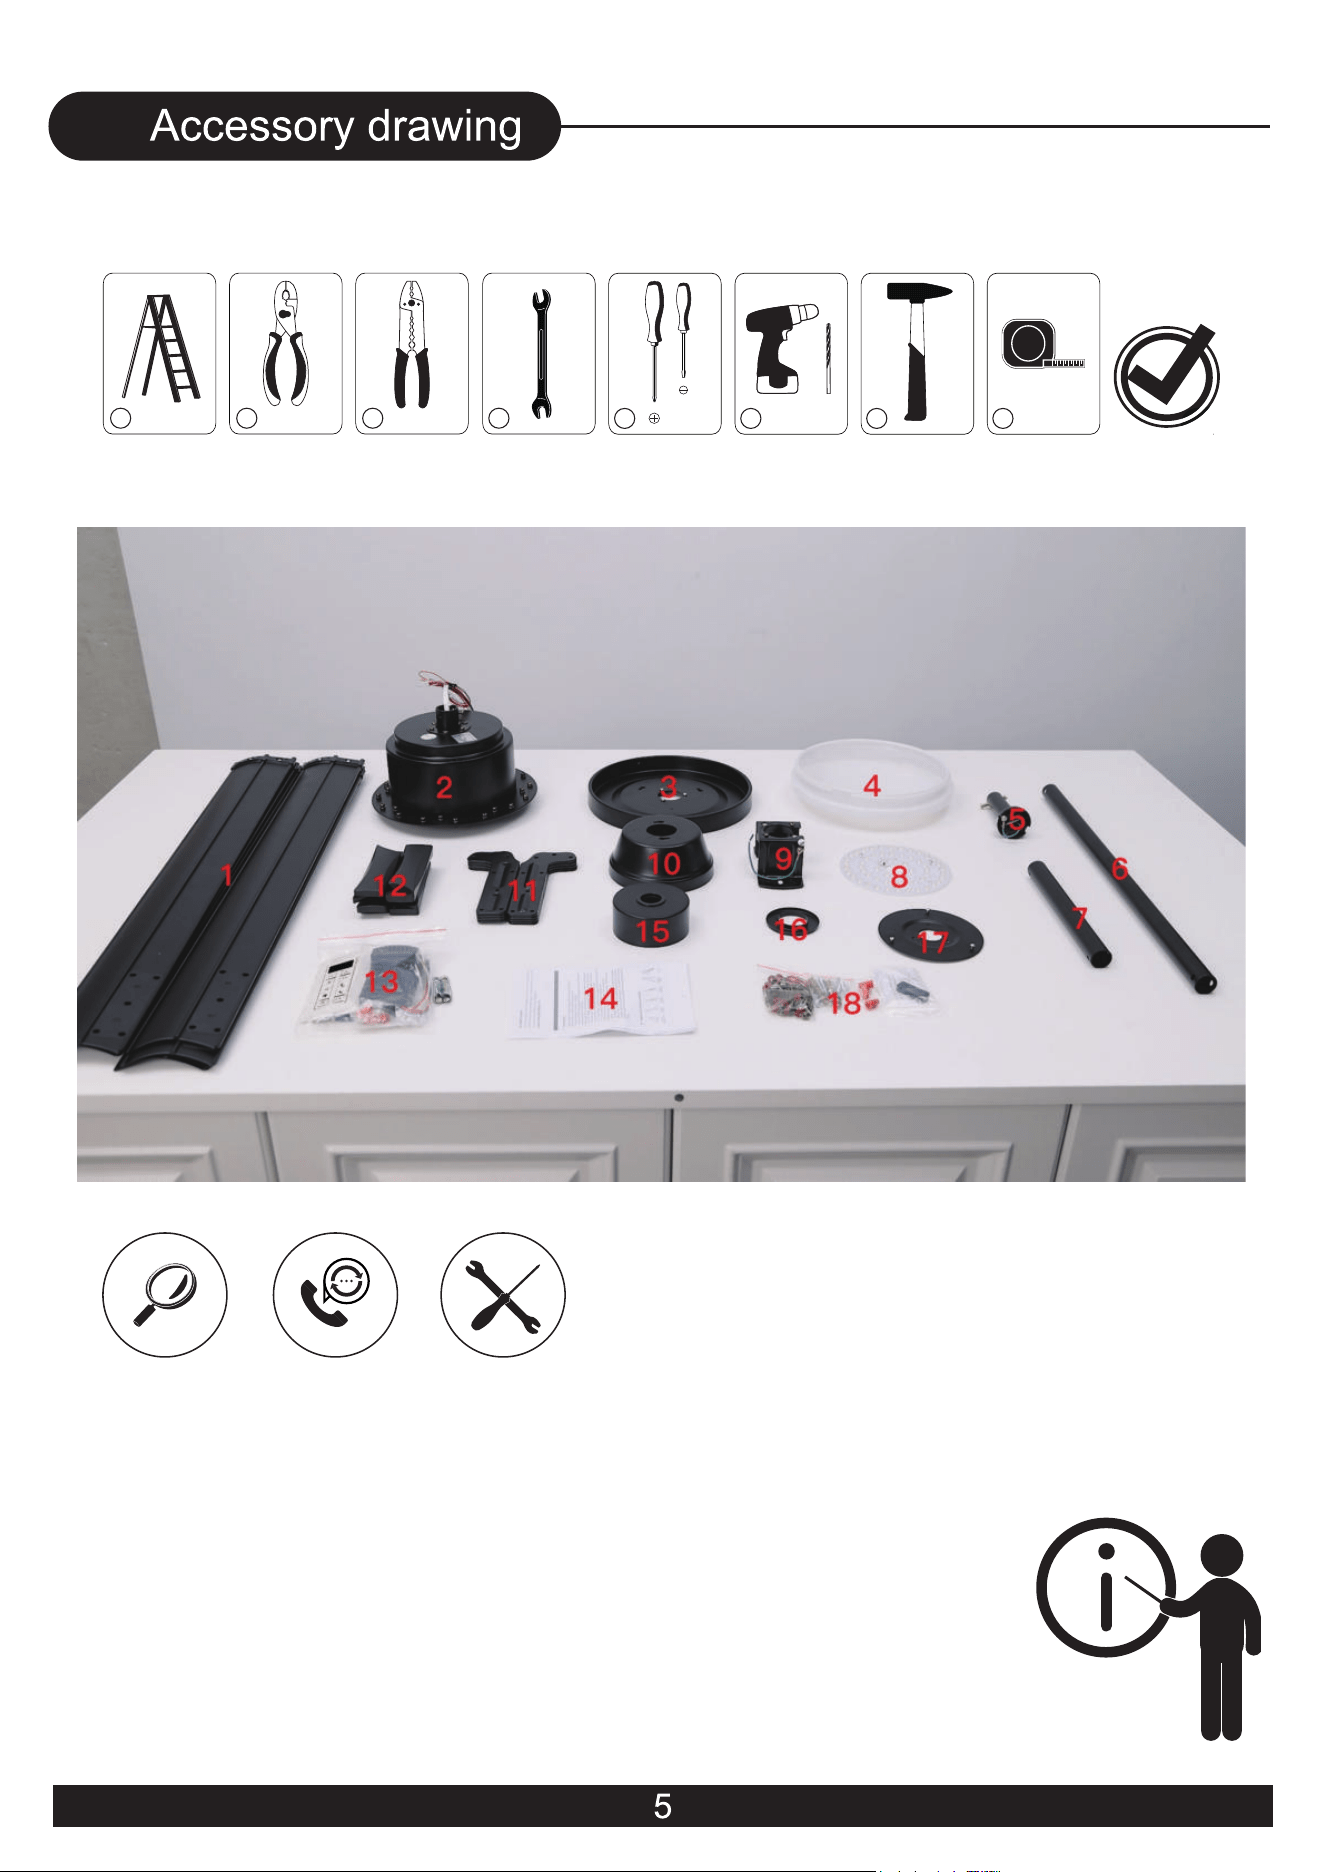
05
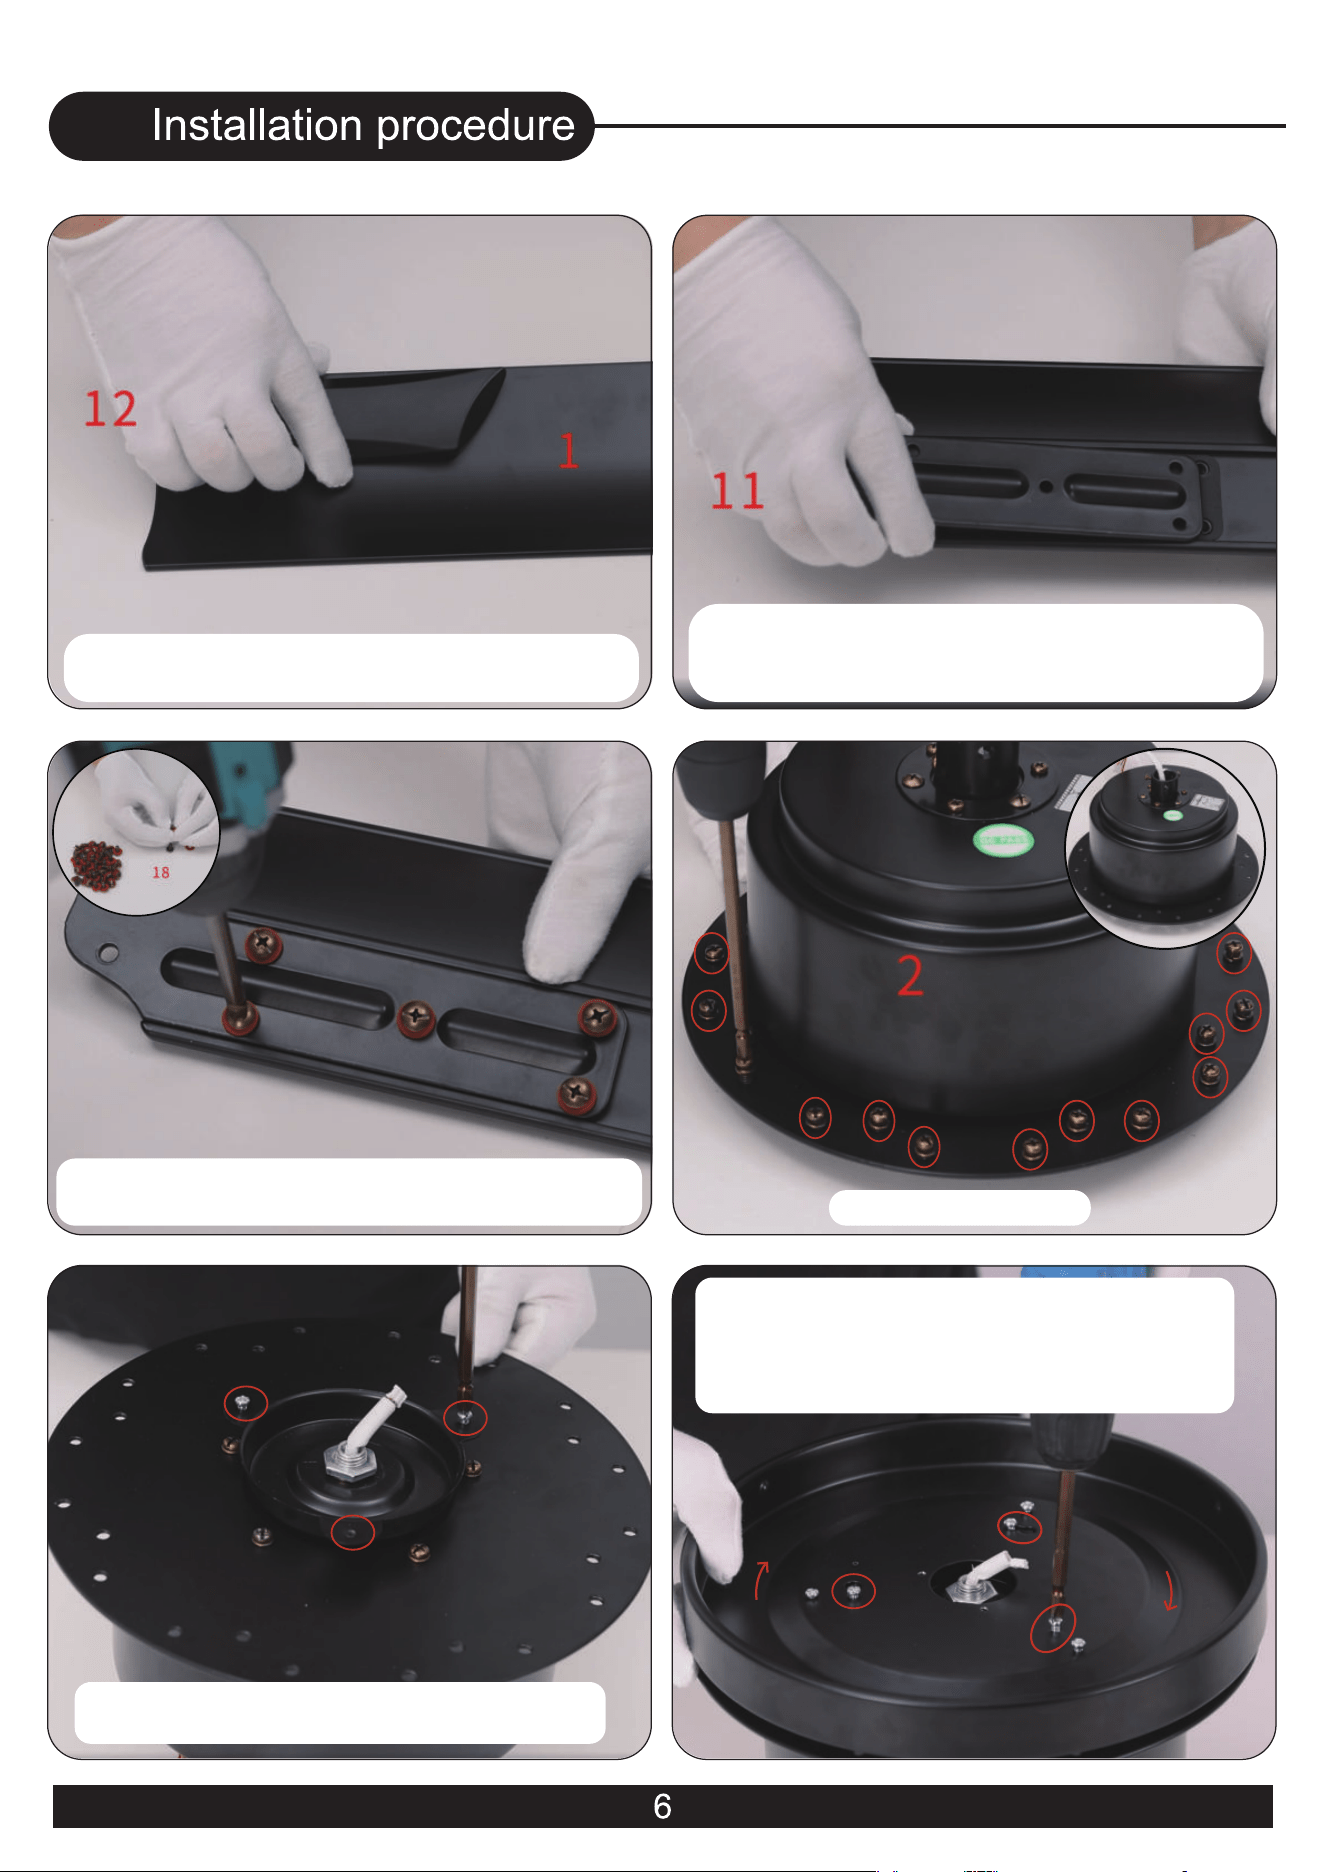
1.Connect the downward side of the fan
blade to 12 and align it with the hole.
06
2.Turn over the fan blade, connect the
upward side of the fan blade to 11
and align it with the hole.
3.Use screws to fix 11, the fan blade and 12,
repeat this operation for the other 7 fan blades.
4.Loosen this screw.
5.Turn 2 upside down, remove one screw,
and loosen the other two screws.
6.Align 3 with the hole and connect it to 2,
rotate 3 to tighten the hole.
Tighten the removed screw together with
the other two screws.
06
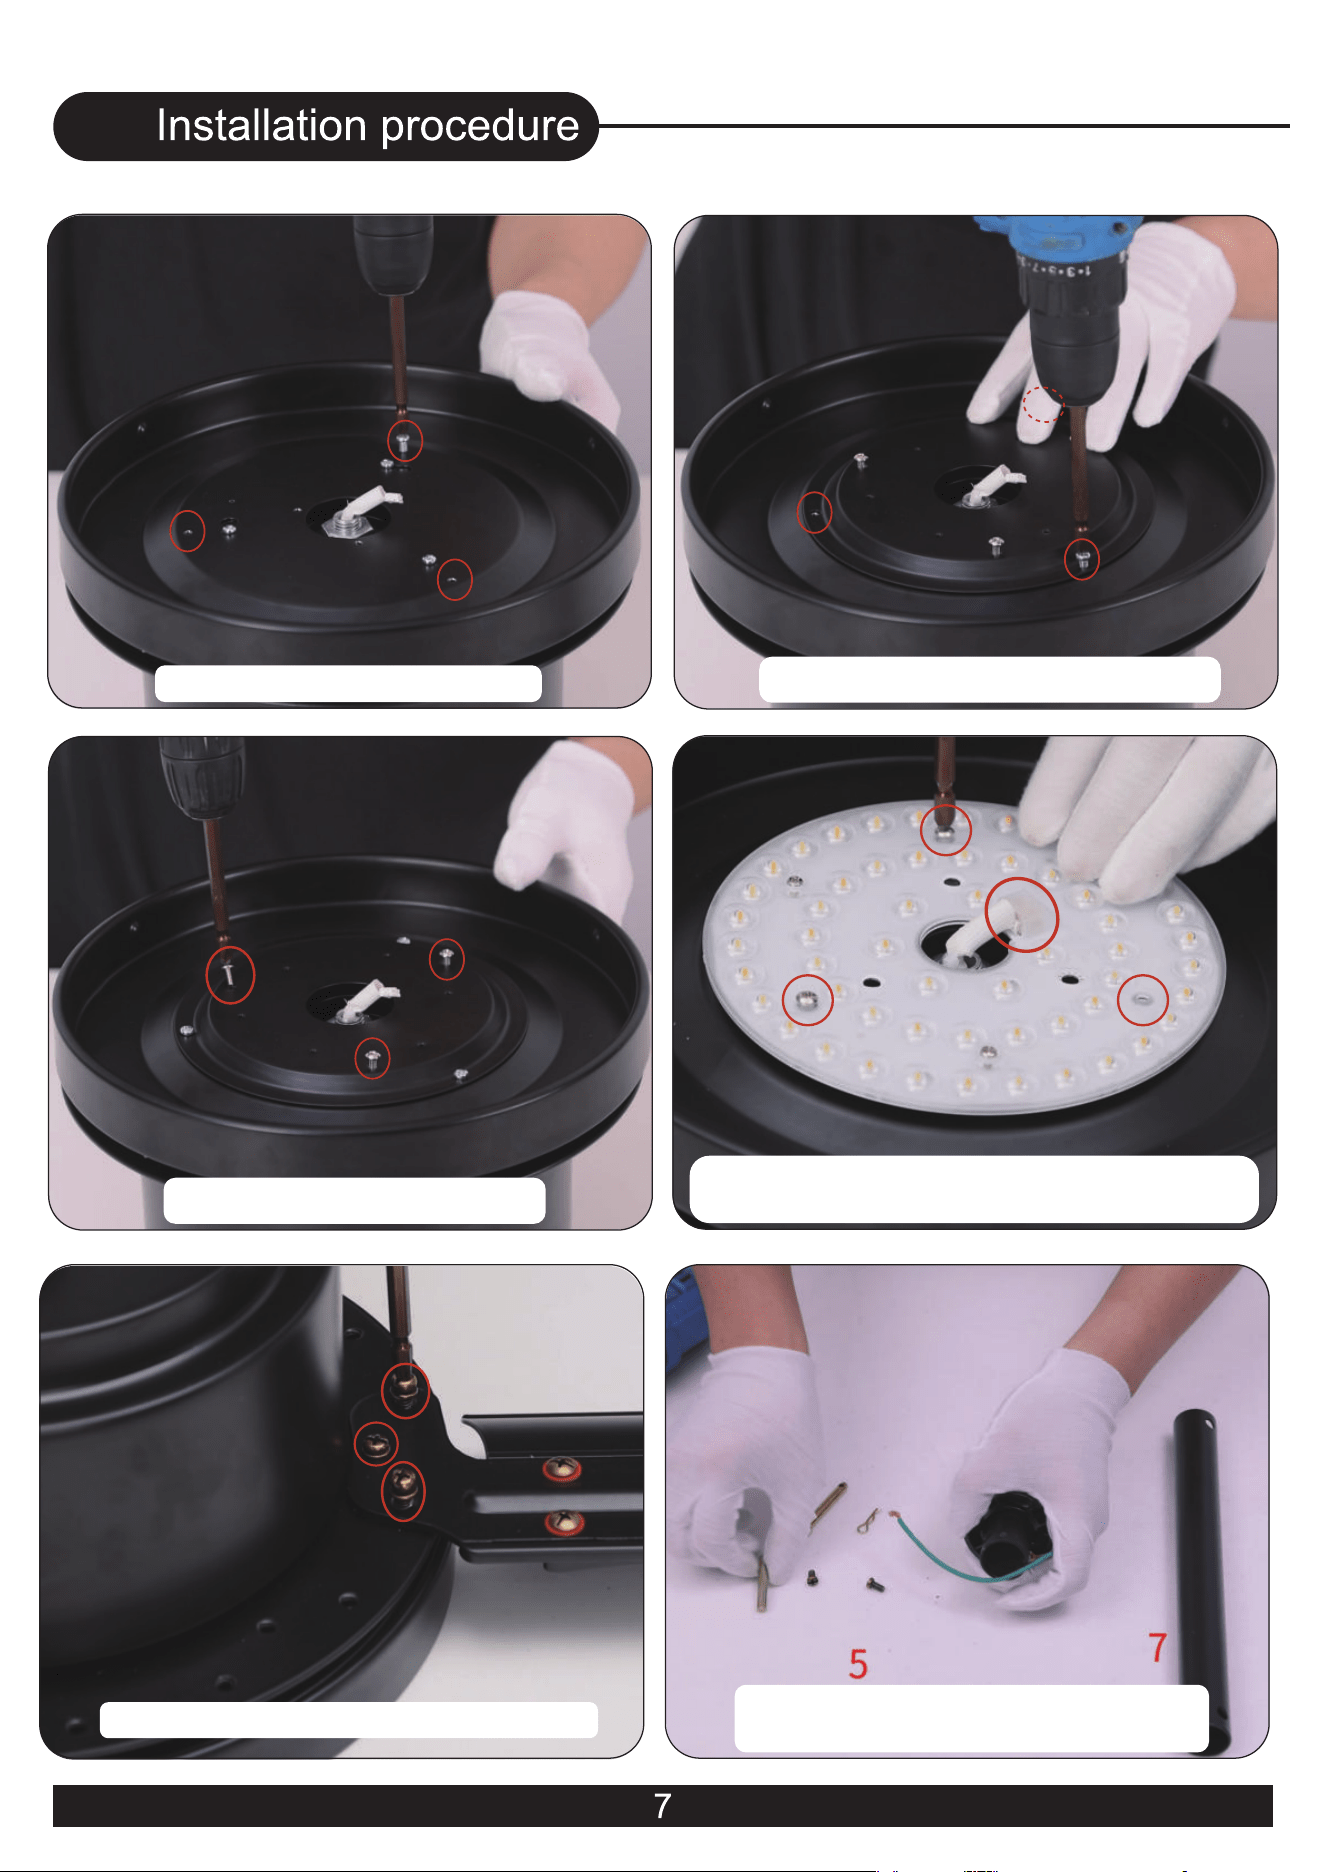
7.Remove these three screws.
8.Put in 17 and tighten the screws.
9.Loosen these three screws.
10.Put 8 in, connect the motor wire to it, and
tighten it with the screws you just removed.
11.Use screws to fix the fan blades on 2
12.Disassemble 5, loosen the screws,
and keep the green wire intact.
06
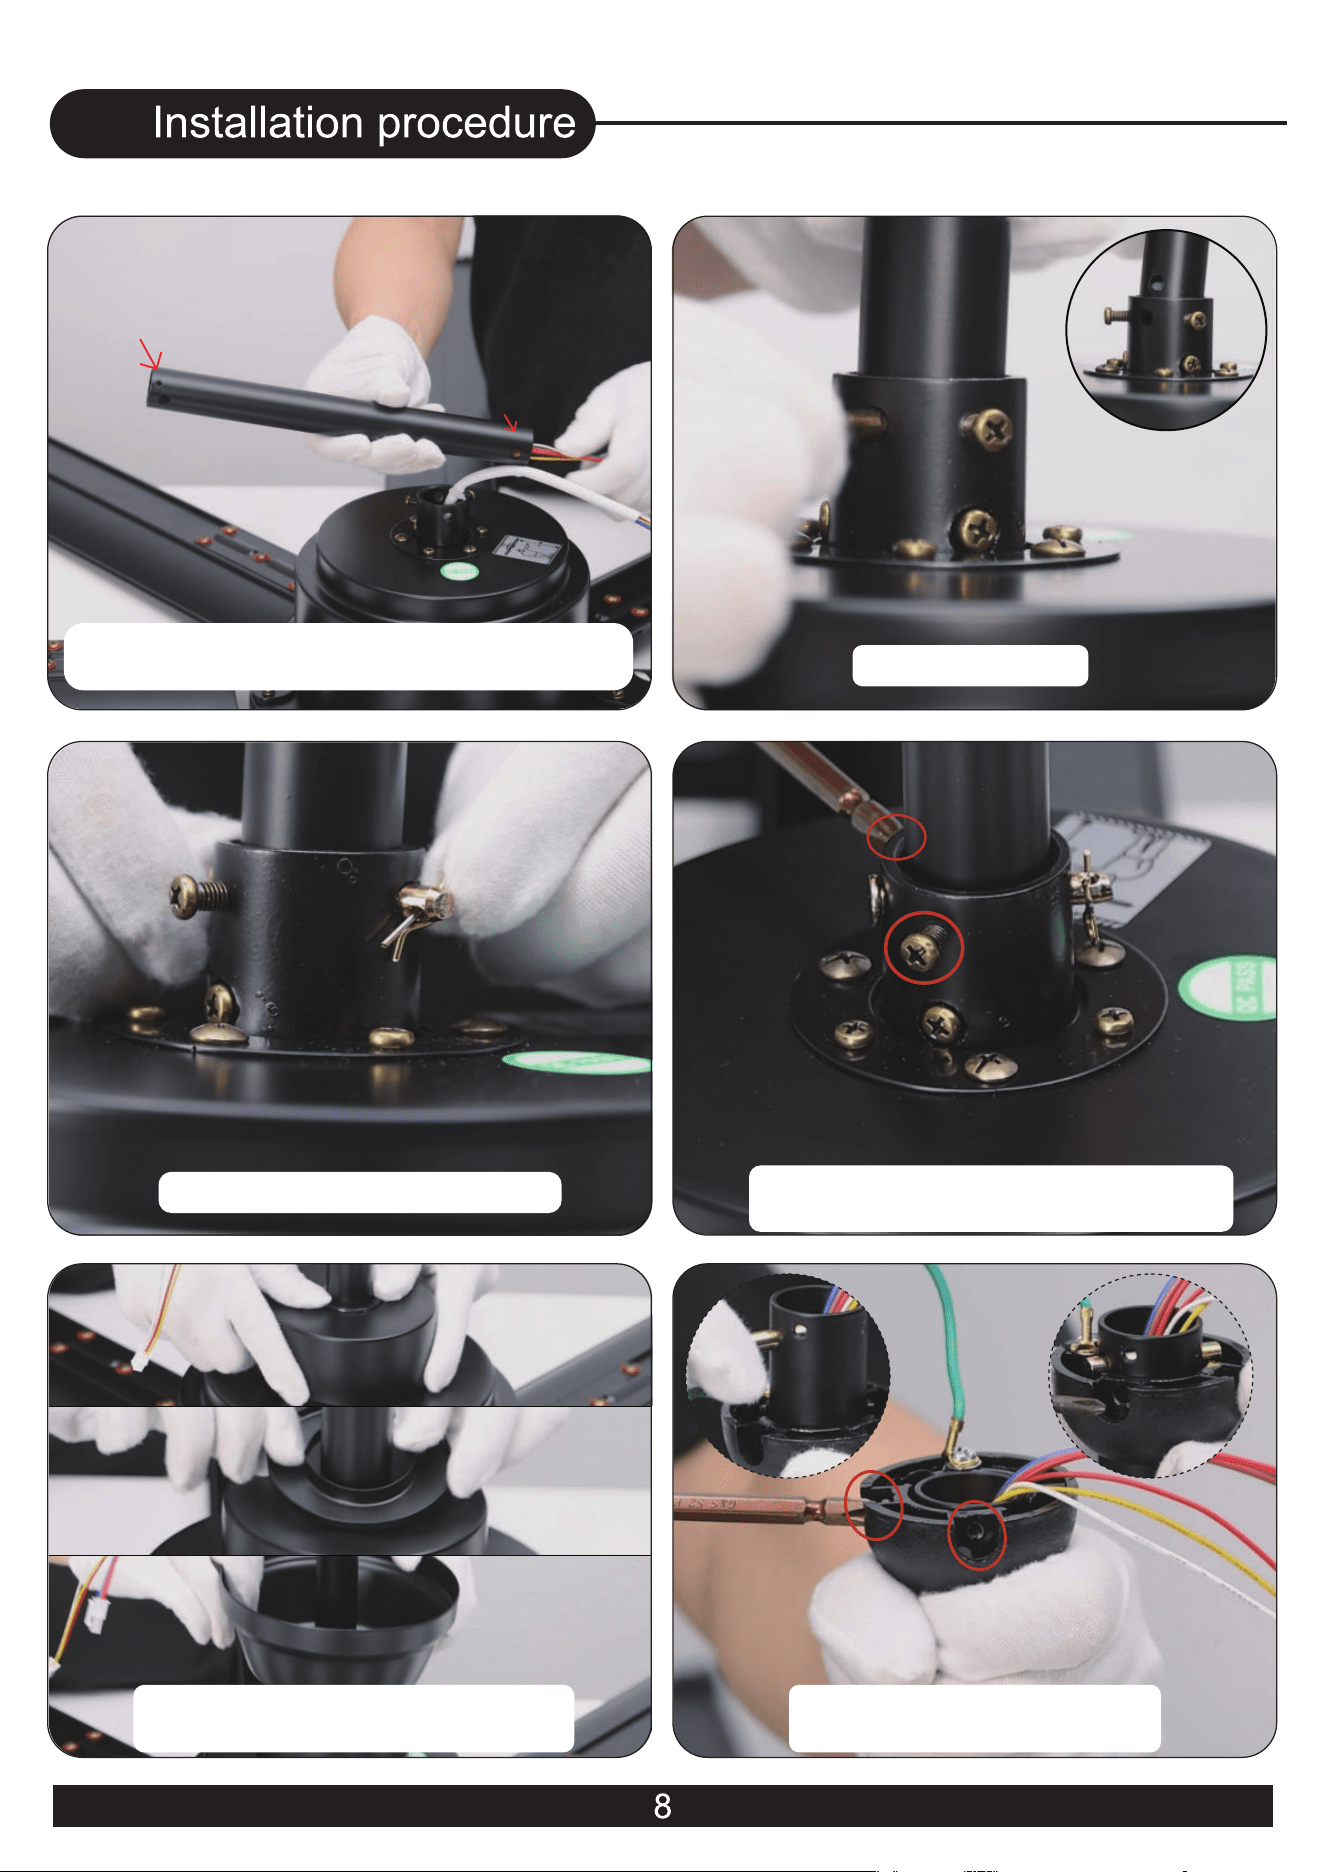
13.Select one downrod and pass all motor
wires through the downrod.
14.Insert the bolt.
15.Fix the bolt with the lock pin.
16.Tighten the 2 screws to prevent fan
shaking during operation.
17.Pass 15, 16 and 10 through the
downrod in sequence.
18.Align the screw hole and
tighten the screw.
2 holes
3 holes
19.Install the mounting
bracket, tighten the screw.
06
Red, White and Black
Red, White and Yellow
Black
White
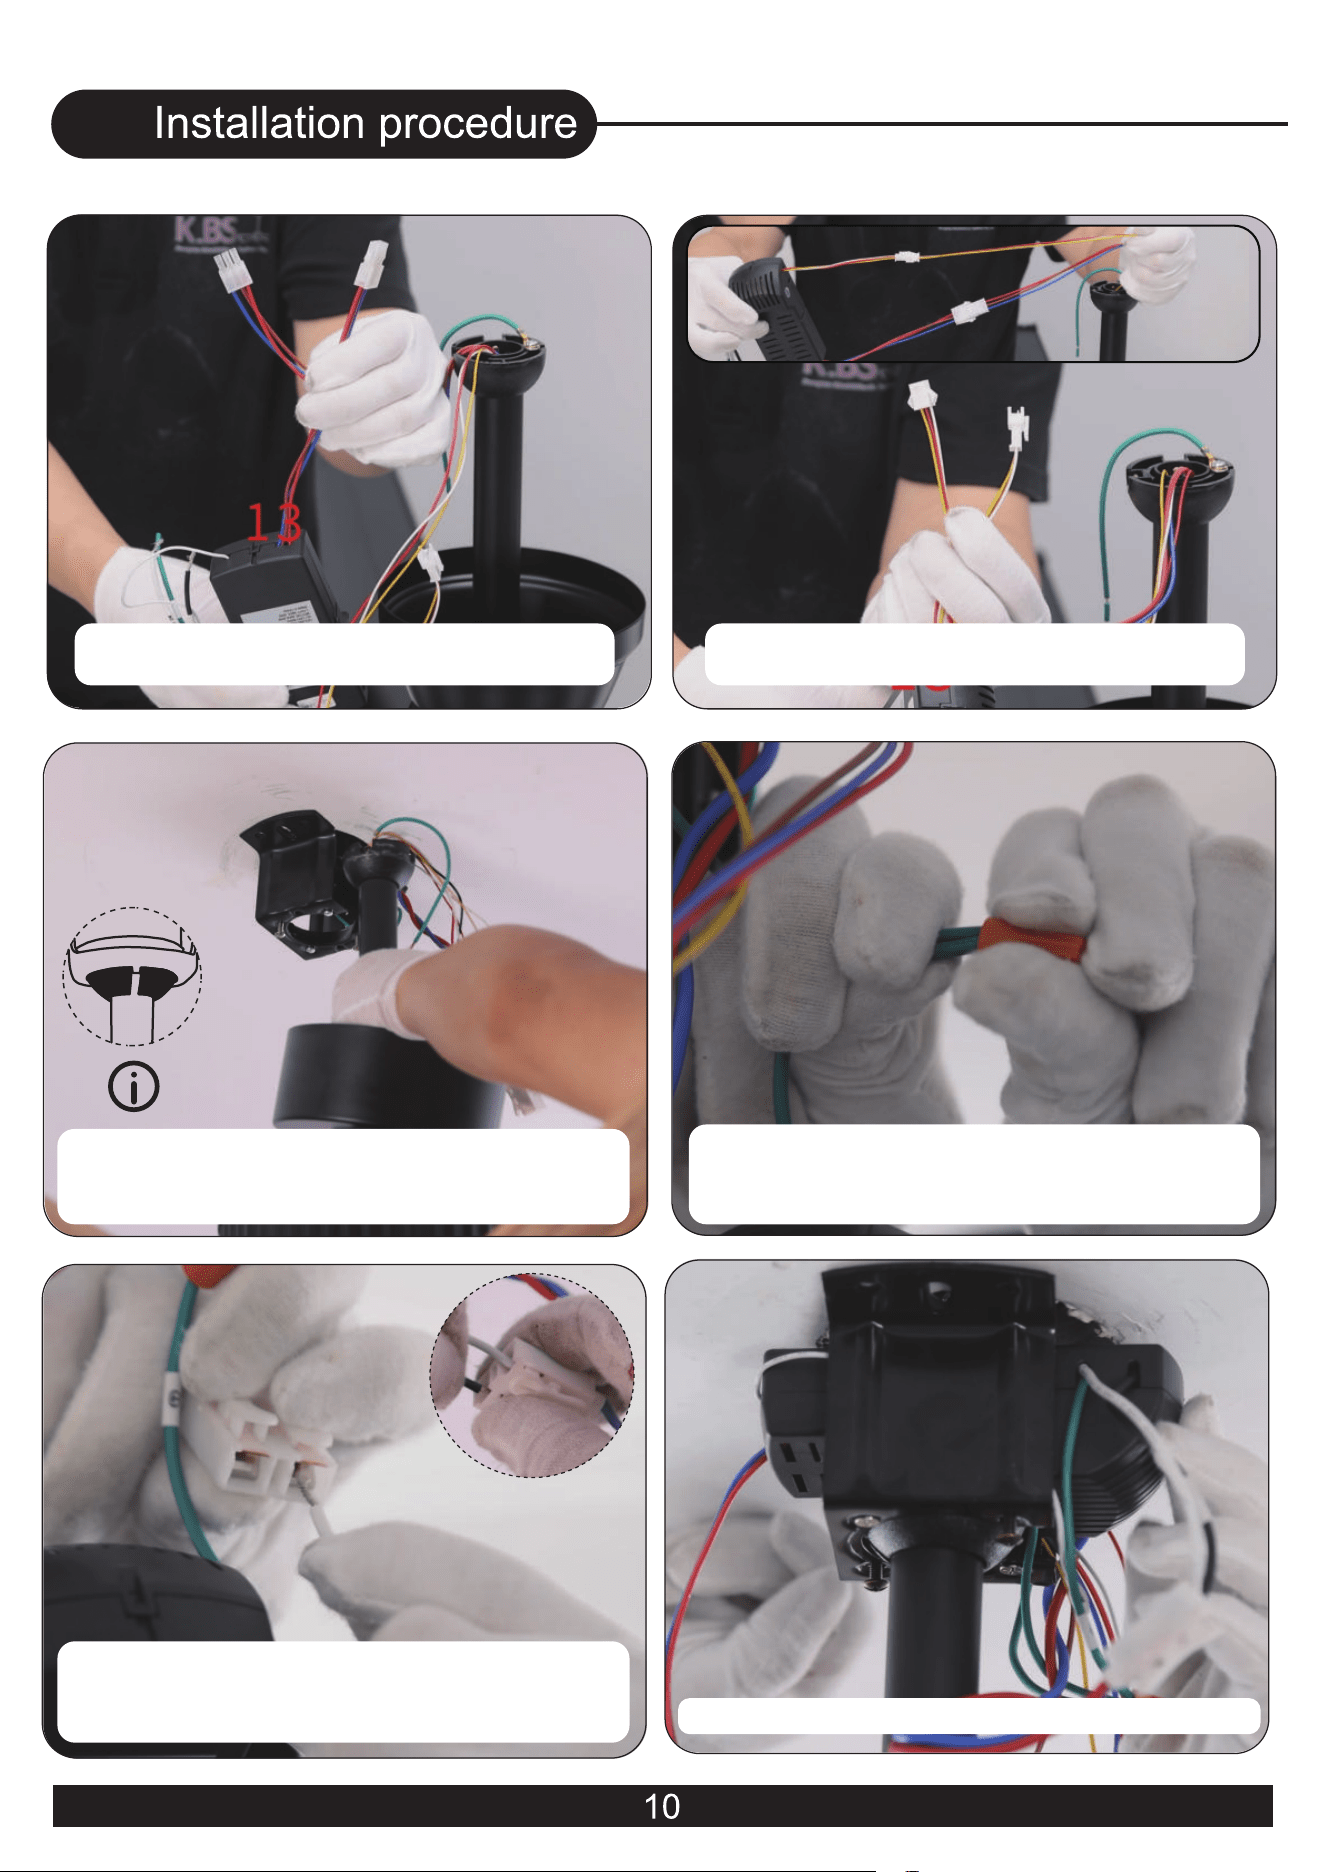
22.Install the downrod(put the rod ball to
the slide-on mounting bracket (both of them
have the gaps, align the gap and jam it.
24.Connect the fan live wire (black) to your
house live wire; Connect the fan neutral
wire (white) to your house neutral wire.
23.Use wire connecting nuts to connect the
two ground wires(green) coming from the
receiver and hanging bracket.
25.Put the receiver into the mounting bracket.
06
20.Connect the wire from the ceiling fan to
the receiver(Red, brown and blue wires).
21.Connect the wire from the ceiling fan to
the receiver(Red, brown and White wires).
06
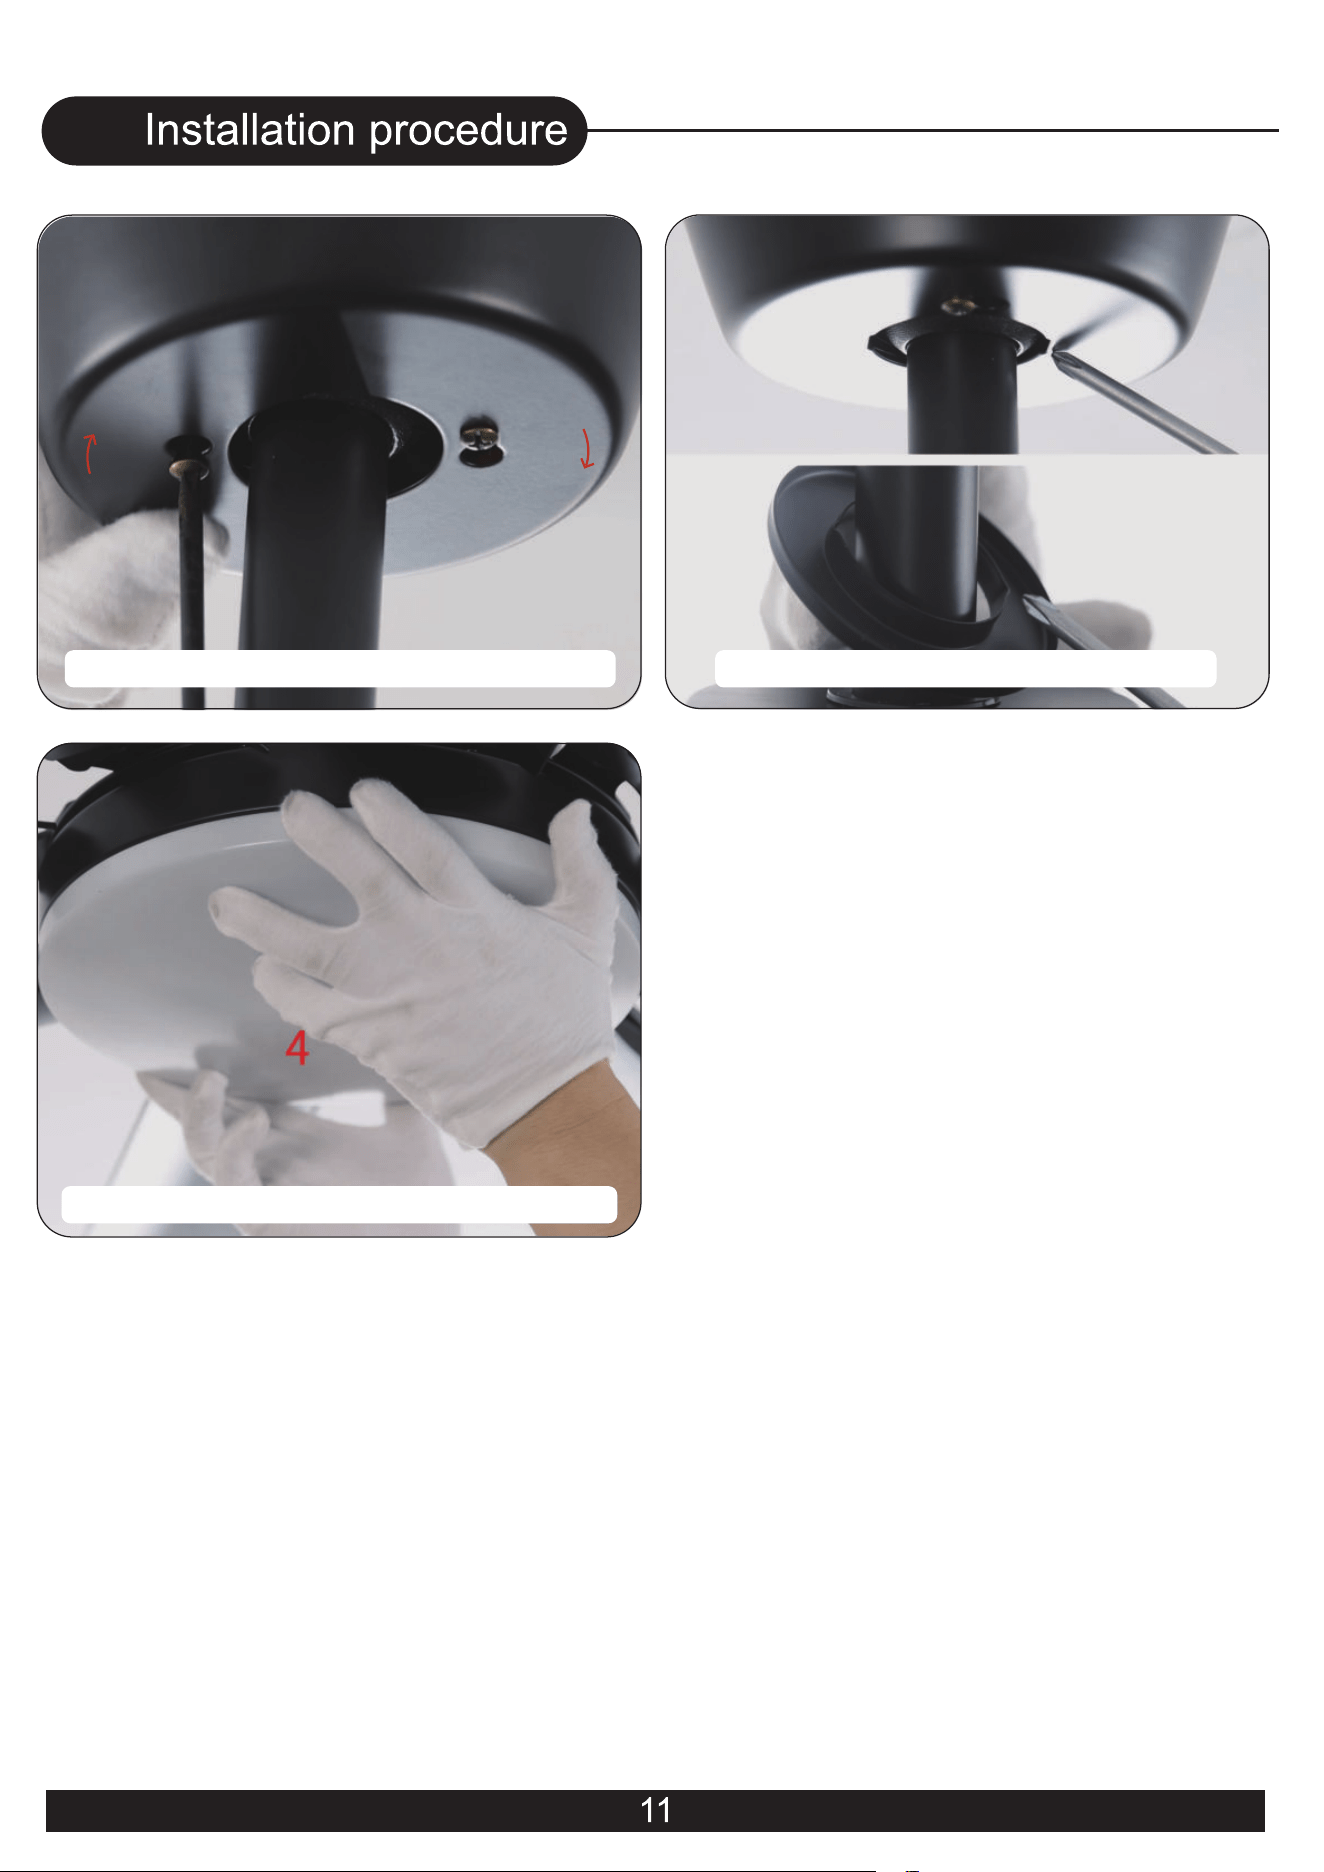
26.Cover the canopy and tighten the screw.
28.Install the lampshade and rotate it to lock.
27.Lift the canopy cover to the canopy.
07
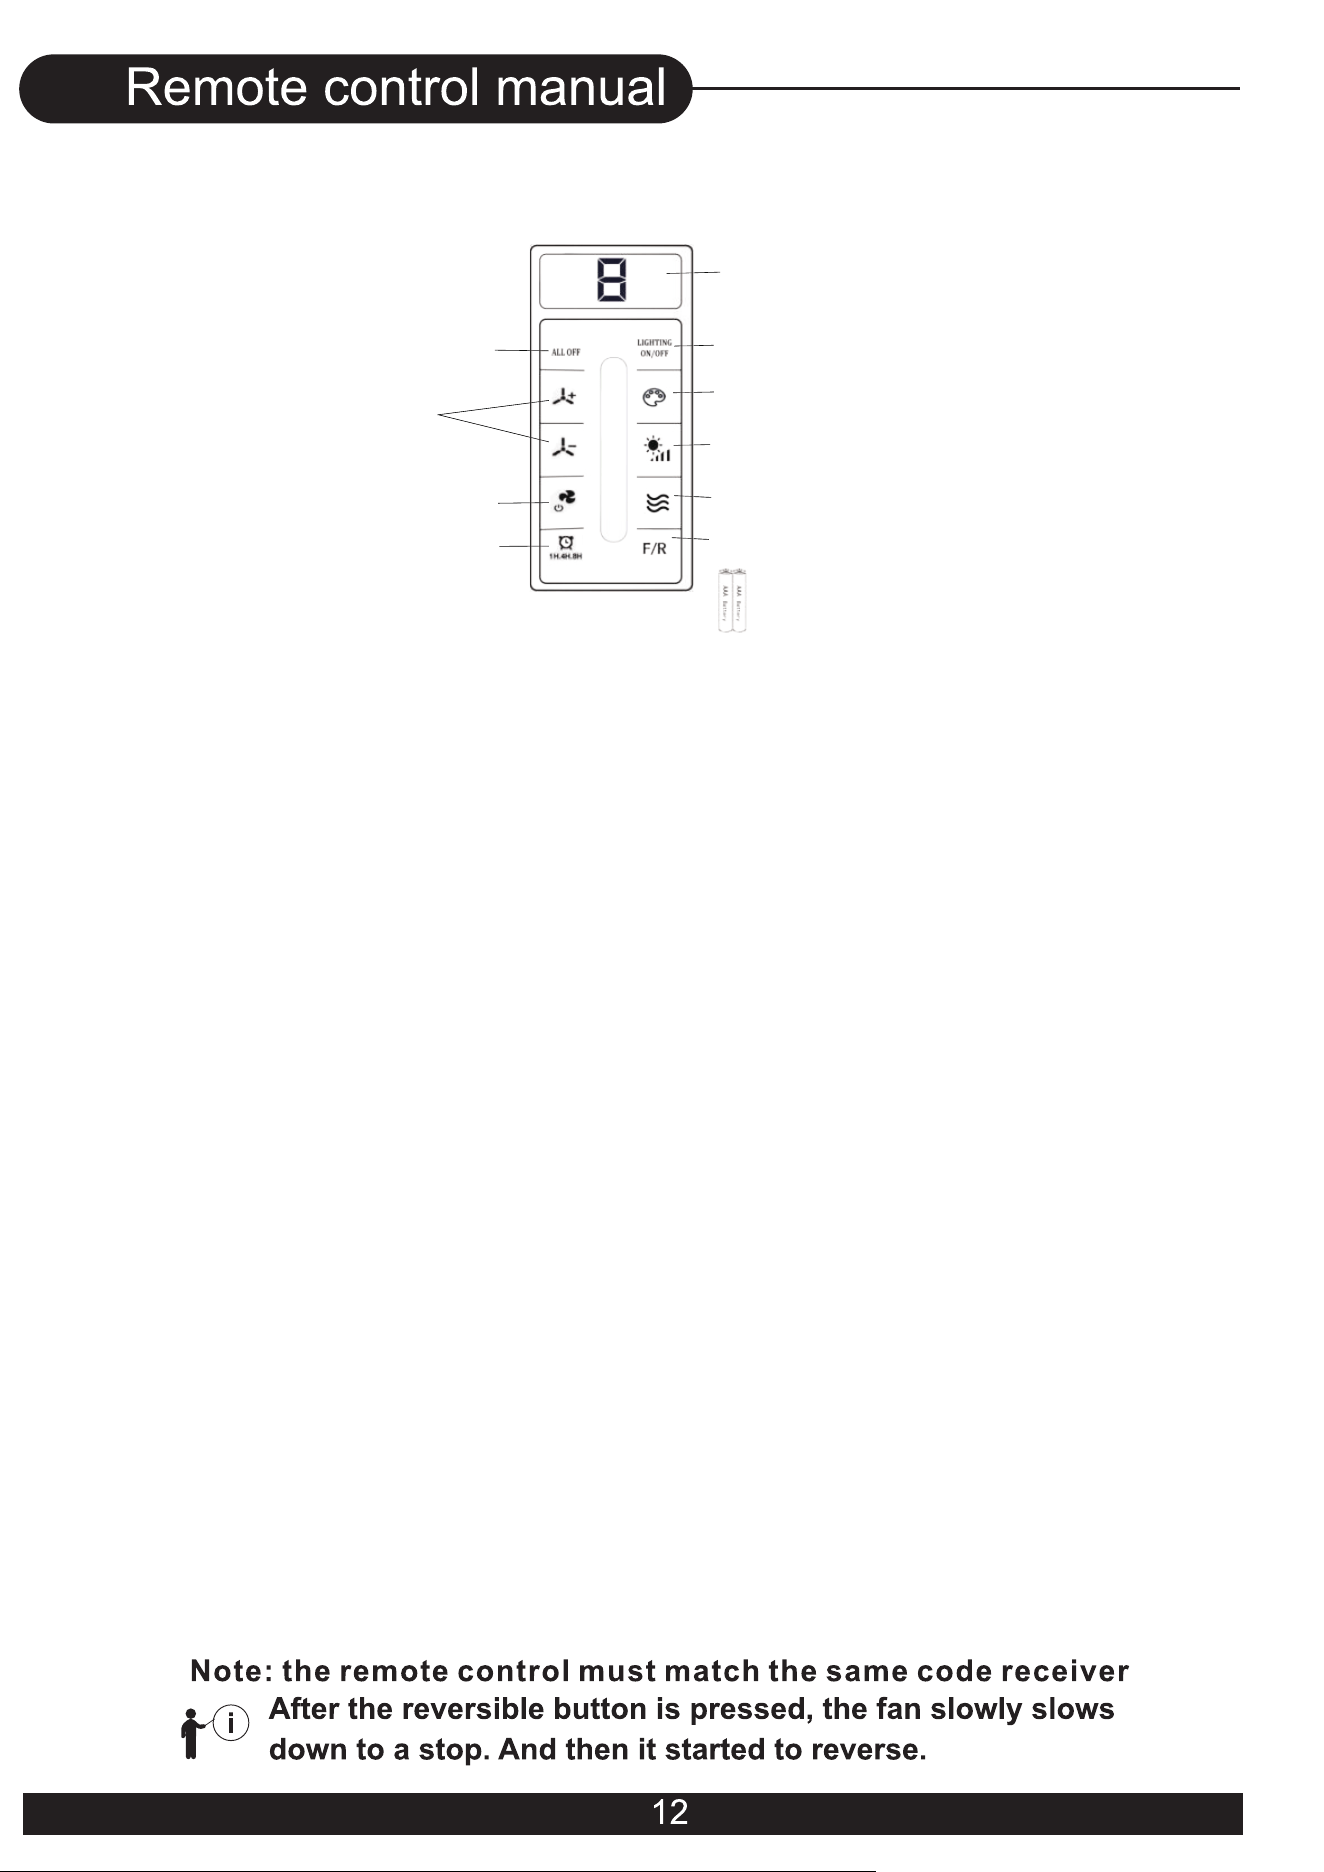
USER MANUAL FOR REMOTE CONTROL TRANSMITTER
(1) Turn OFF the Fan and Light
-Press the key to trun OFF the Fan and Light together.
-Tuya Wi-Fi pairing: Press and hold the key for 4 seconds, you can hear three long beep
sounds, then you can do Tuya Wi-Fi pairing. Please refer to the product manual for the
distribution method.
(2) Fan speed
-Press the key 1-6 to start the fan.
-When the fan in natural wind mode, press the key to cancel natural wind mode.
(3) Fan OFF / Remote control pairing
- Turn OFF the fan.
- Remote control pairing : when AC power on, press and hold the key for 3-5 seconds,
buzzer wrings three times(if buzzer sound enable), then �inish the remote control pairing.
Notice:
The remote controller only needs to be paired once. After the paired product, the controller
will have memory. The products have been paired before leaving the factory. When the
remote control is damaged or lost, it is necessary to implement remote control pairing
before using a new remote control.
(4) Timing control of the Fan and Light
- Press the key to set up the timer at 1hour ,4 hours or 8 hours to set up fan and
lamp timer. At the end of the timing, the fan and lamp will be automatically turned off.
- When the timing function is in effect, you can operate all the functions of the ceiling fan,
and then press any timing button to recalculate the timing time.
- Timer setting cancellation : When timing function is working, press key(1) or (3)to cancel
the timing function.
(5) Turn ON/OFF the Light
(6)Color temperature Switch of the light
Press the key to change LED light color : white-yellow-warm (circulate).
(7) Light dimming
When the light is on, press and hold the key, the light gradually brightened - gradually
dimmed(circulate).
(8) Natural wind
Press the key, the fan speed automatic change between 1 to 6 speed.
(9) Direction of the fan
Press the key to change direction of the fan.
(10) AAA battery * 2
- Please install 2 pieces of AAA batteries before use.
- Please remove the battery when it is not used for a long time.
(11) Fan speed and Timing time indicator
The indicator light will light up when press any key of the remote control.
(1) Turn OFF the Fan and Light
Tuya Wi-Fi pairing
(6) Color temperature switch of the light
(4) Timing control of the Fan & Light
(11) Fan speed / Timing time indicator
(3) Fan OFF /
Remote control pairing
(5) Turn ON/OFF the light
(7) Light dimming
(2) Fan speed
(8) Natural wind
(9) Direction of the fan
(10) AAA battery *2
08
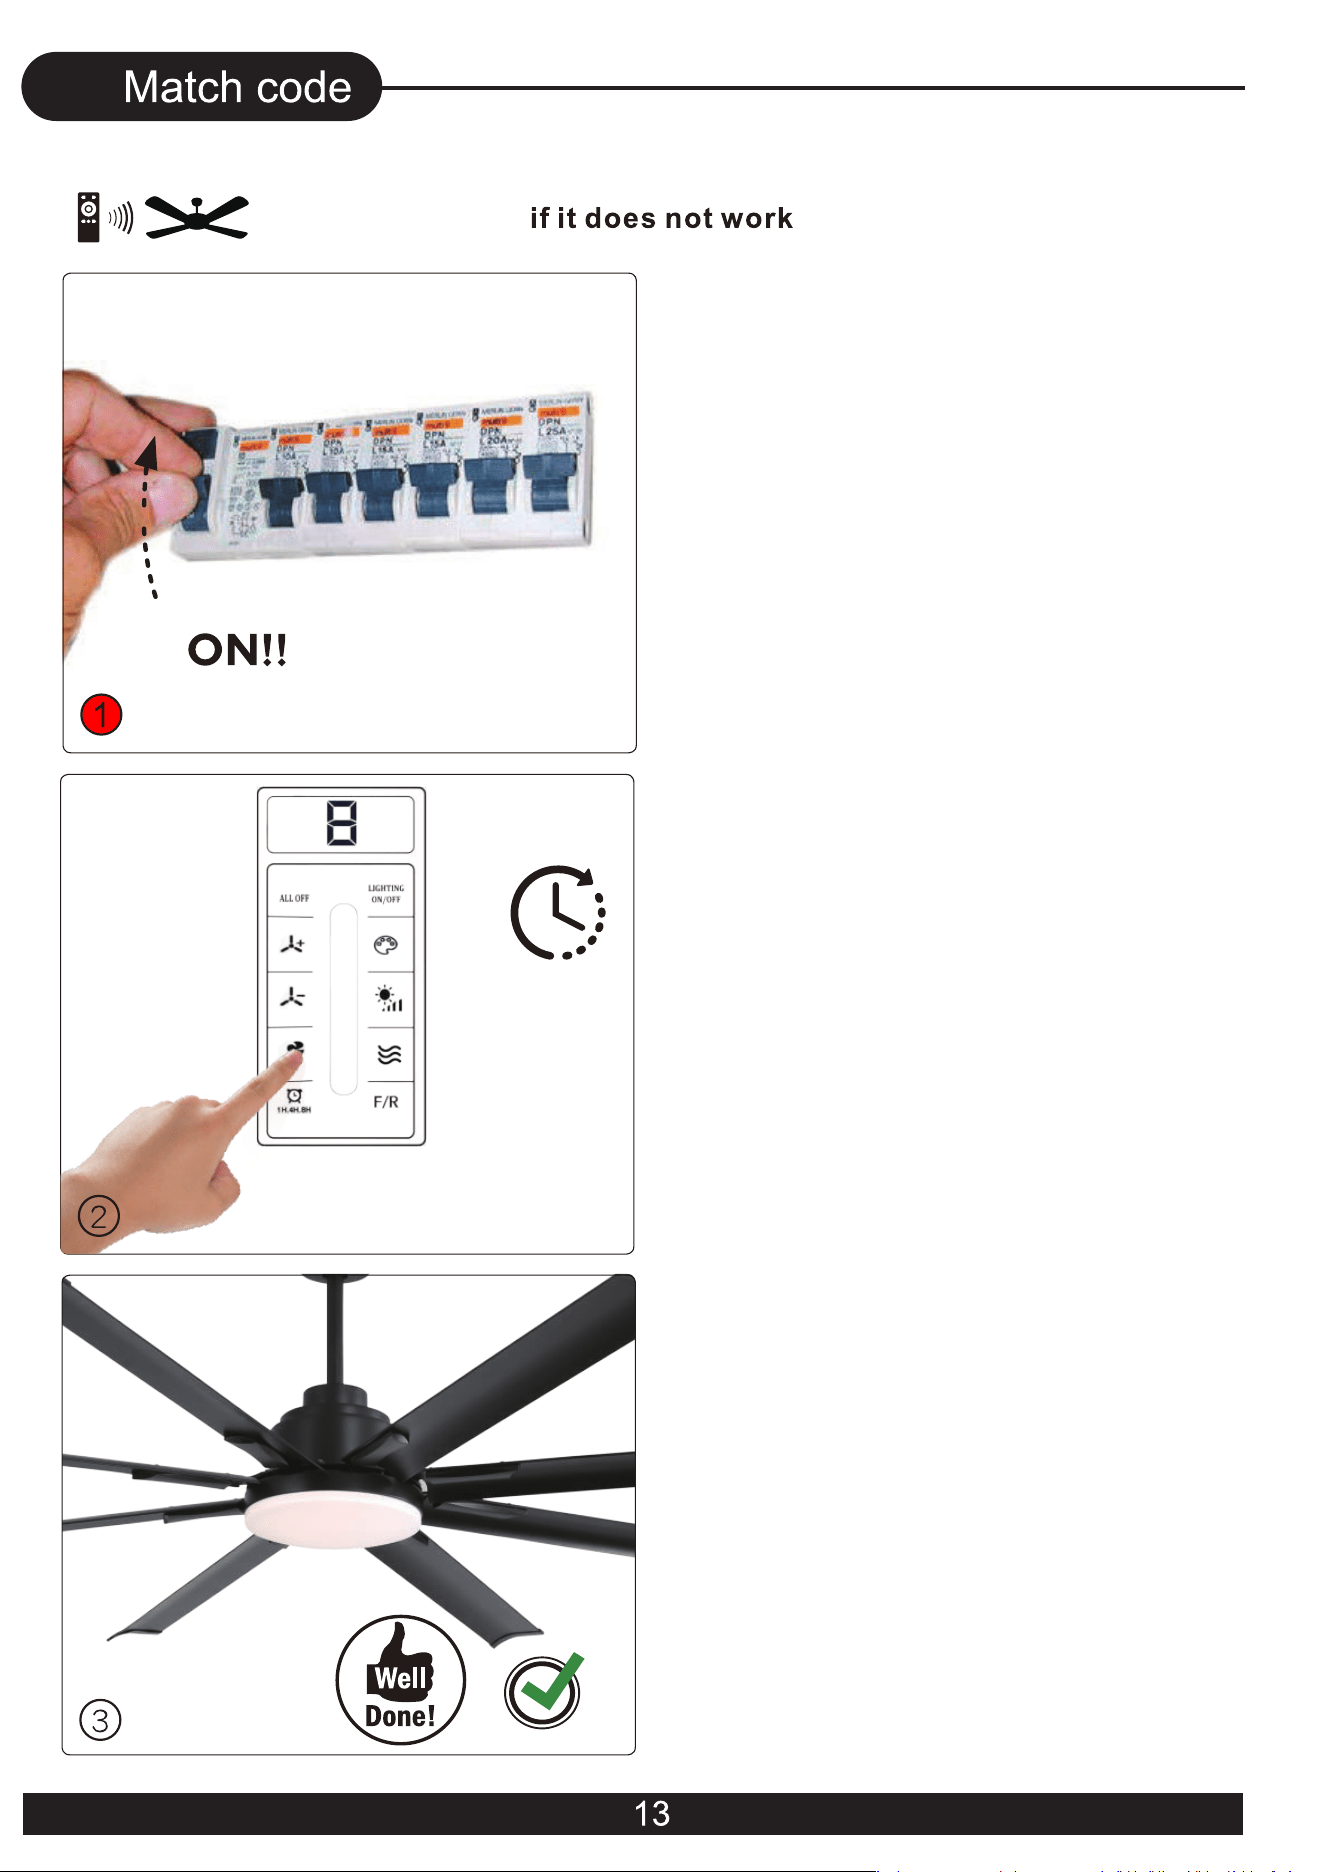
1.Turn on the main switch.
3. The receiver Can remember the
last codes status.
Remote control code matching
successful, the receiver will emit a
buzzing sound.
2. Remote control pairing : when AC
power on, press and hold the key for
3-5 seconds, buzzer wrings three times
(if buzzer sound enable), then finish
the remote control pairing.
3s
09
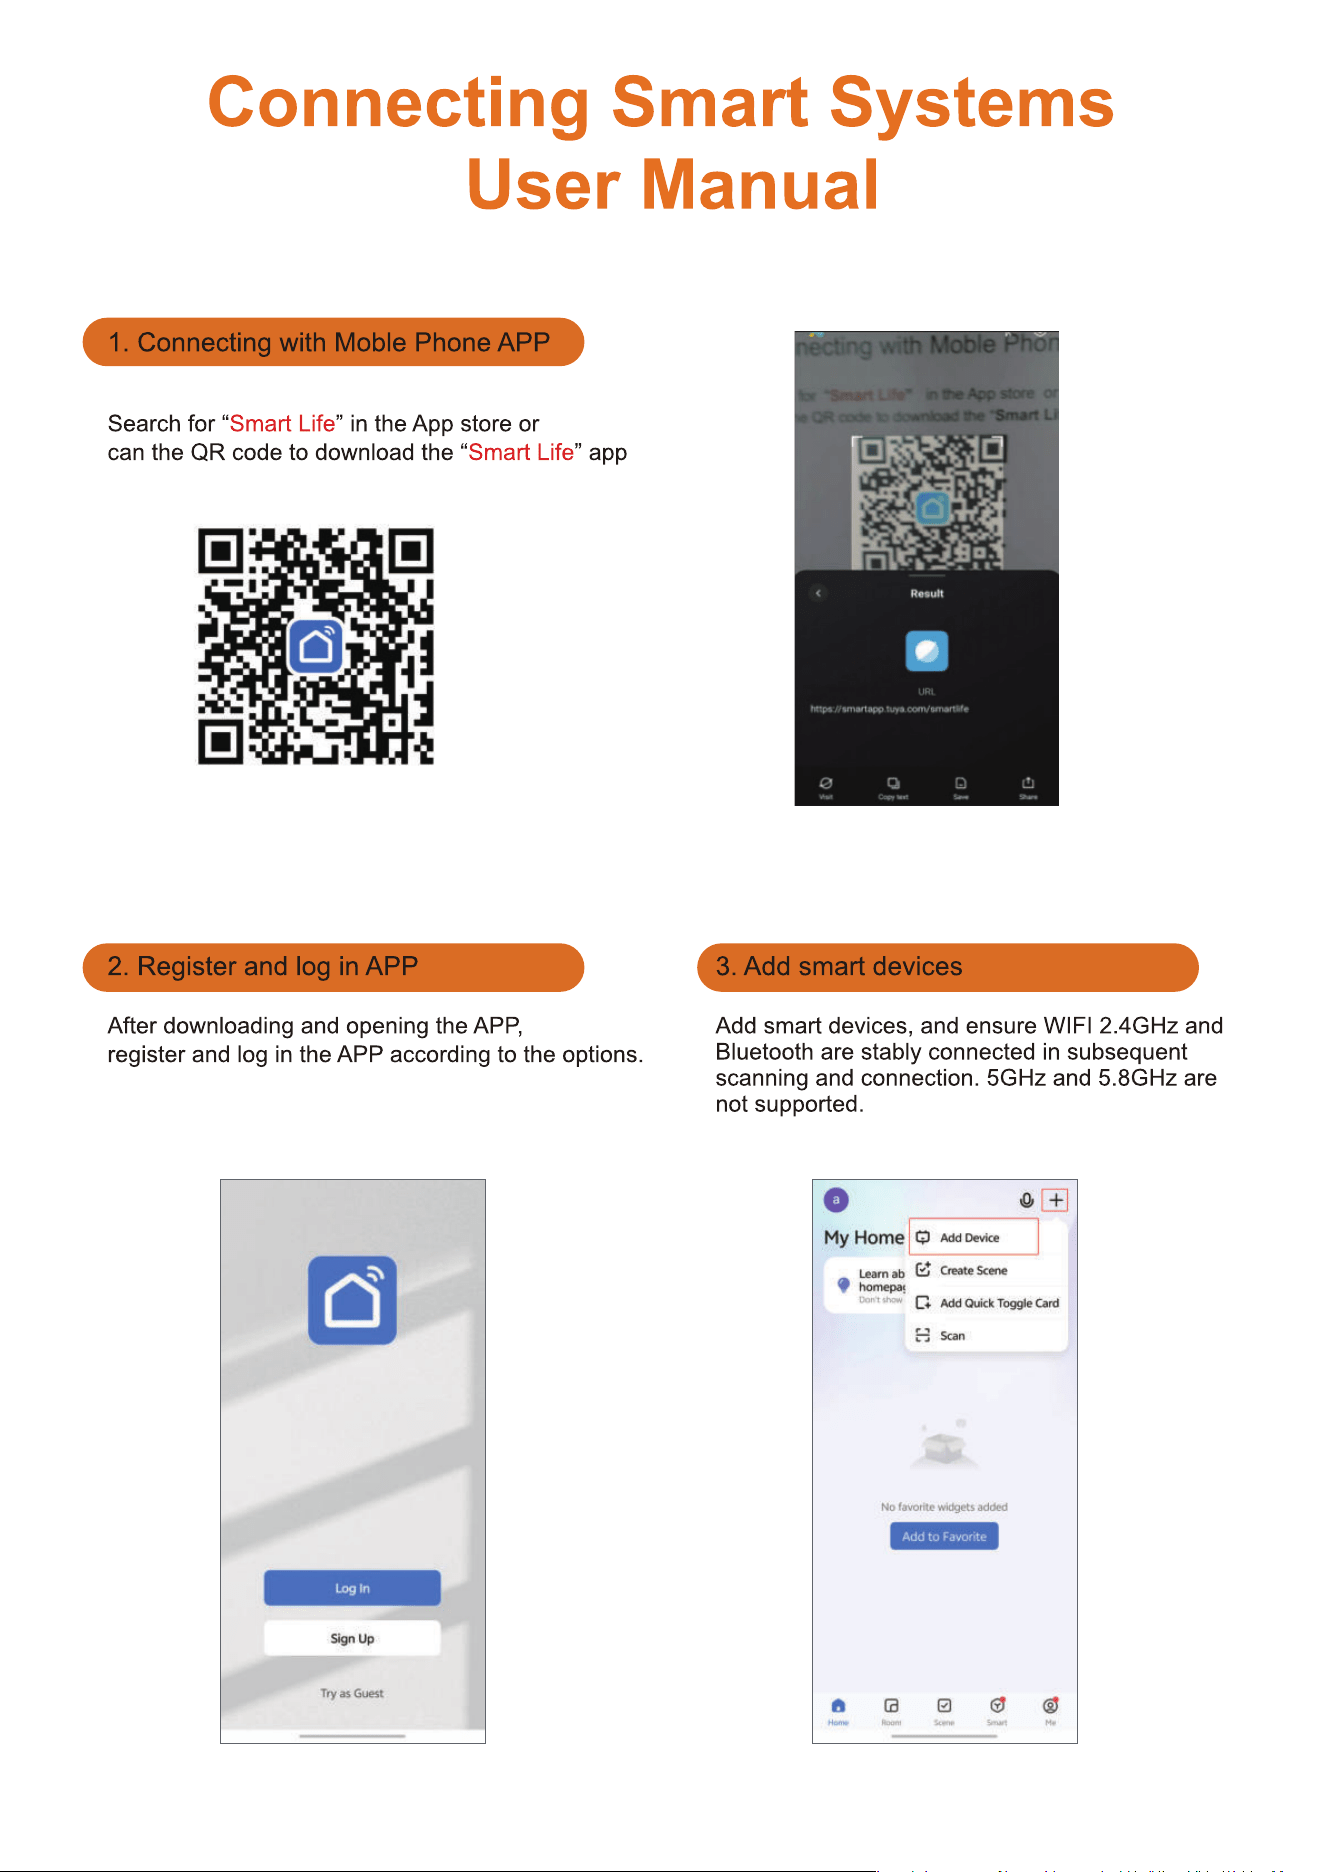
16
17
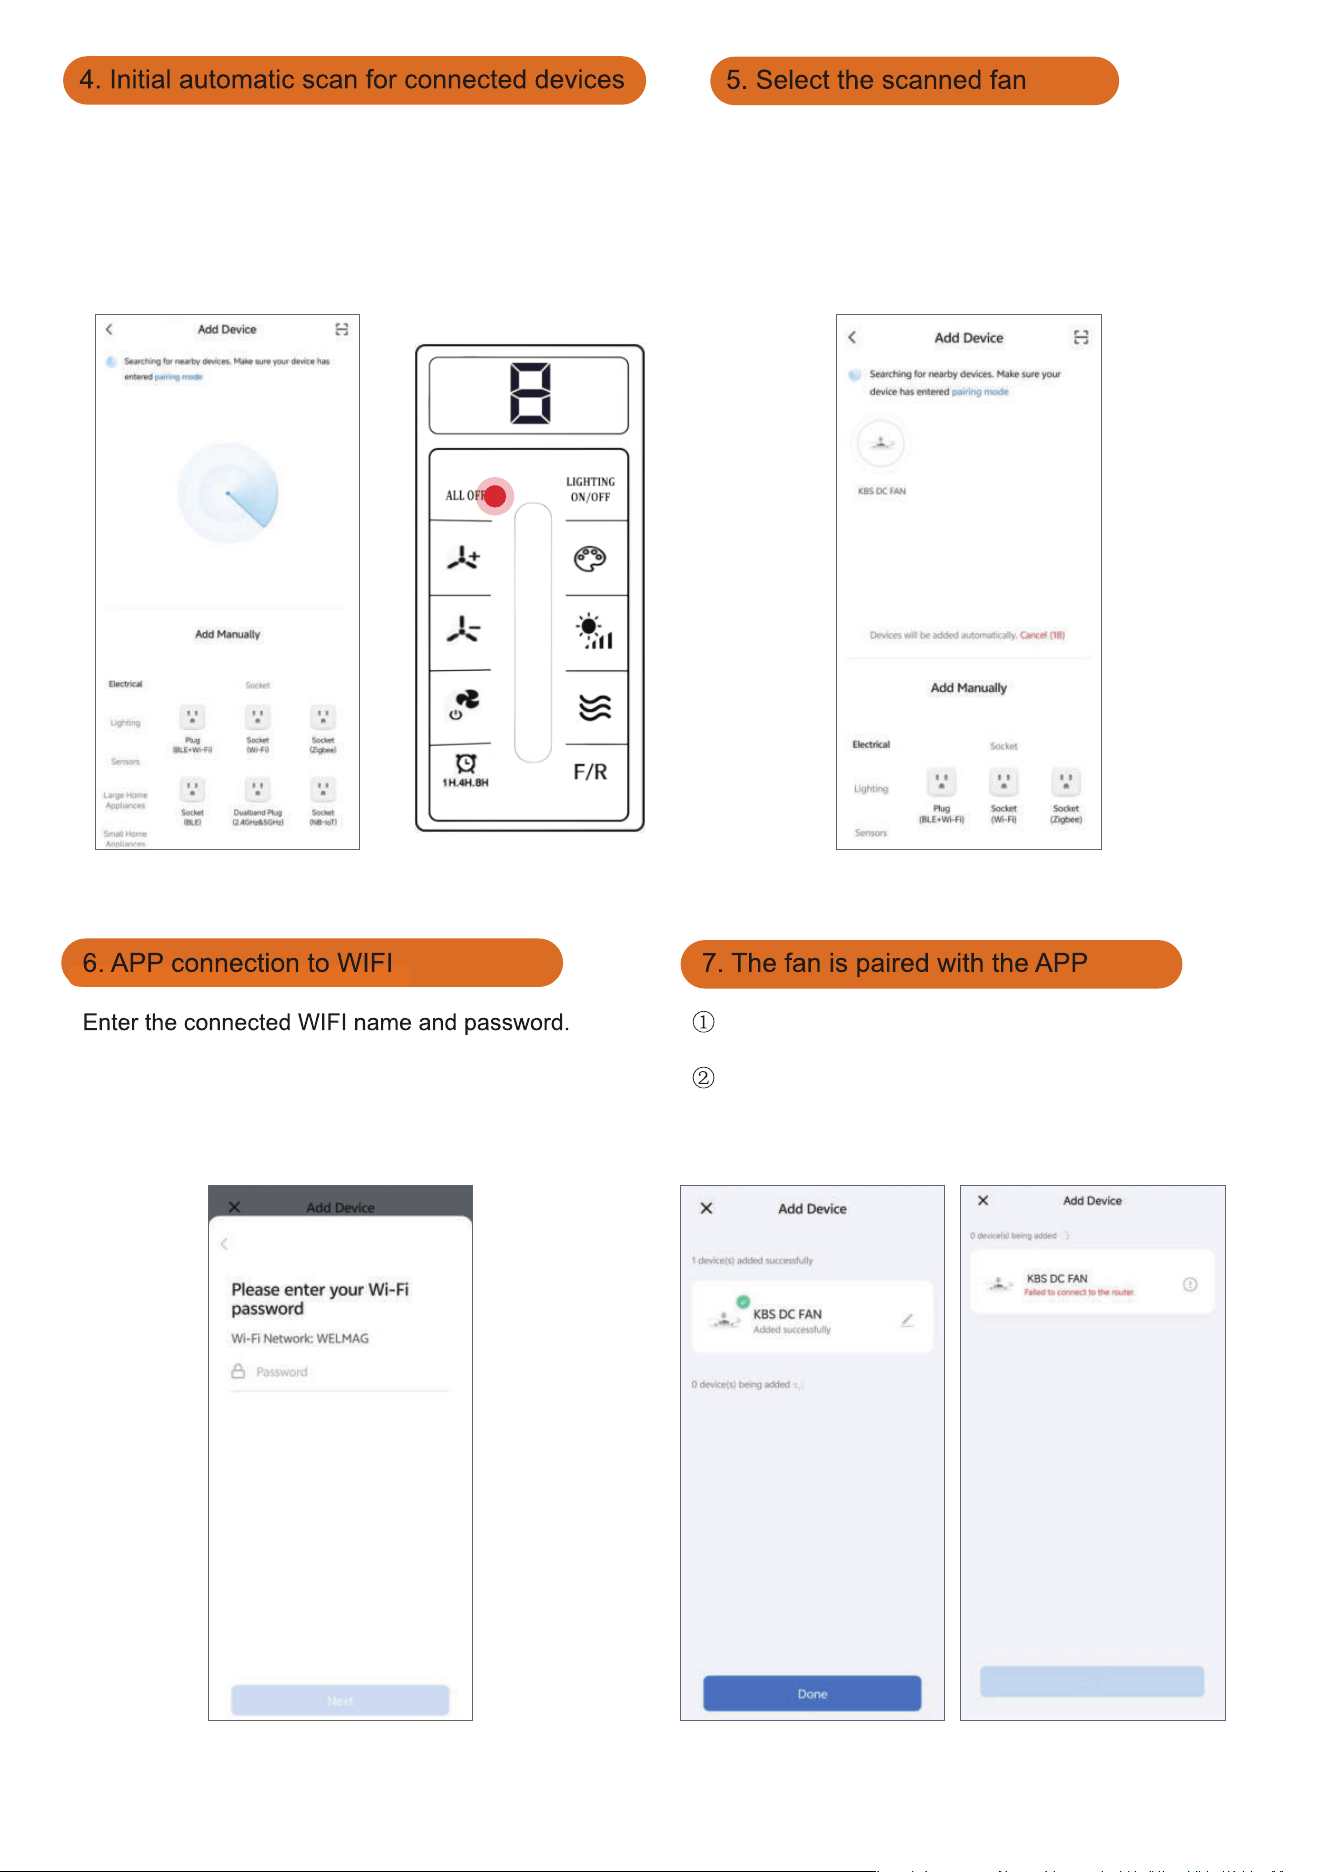
If the fan has been operating for more than 3 minutes, you
will be unable to search for devices. At this point, you need
to reset your fan. Turn off the fan's main power and turn it
back on. Within 30 seconds, press and hold the "ALL OFF"
button on the remote control for 5 seconds. If the reset is
successful, the buzzer will sound three long beeps, then
you can add devices again.
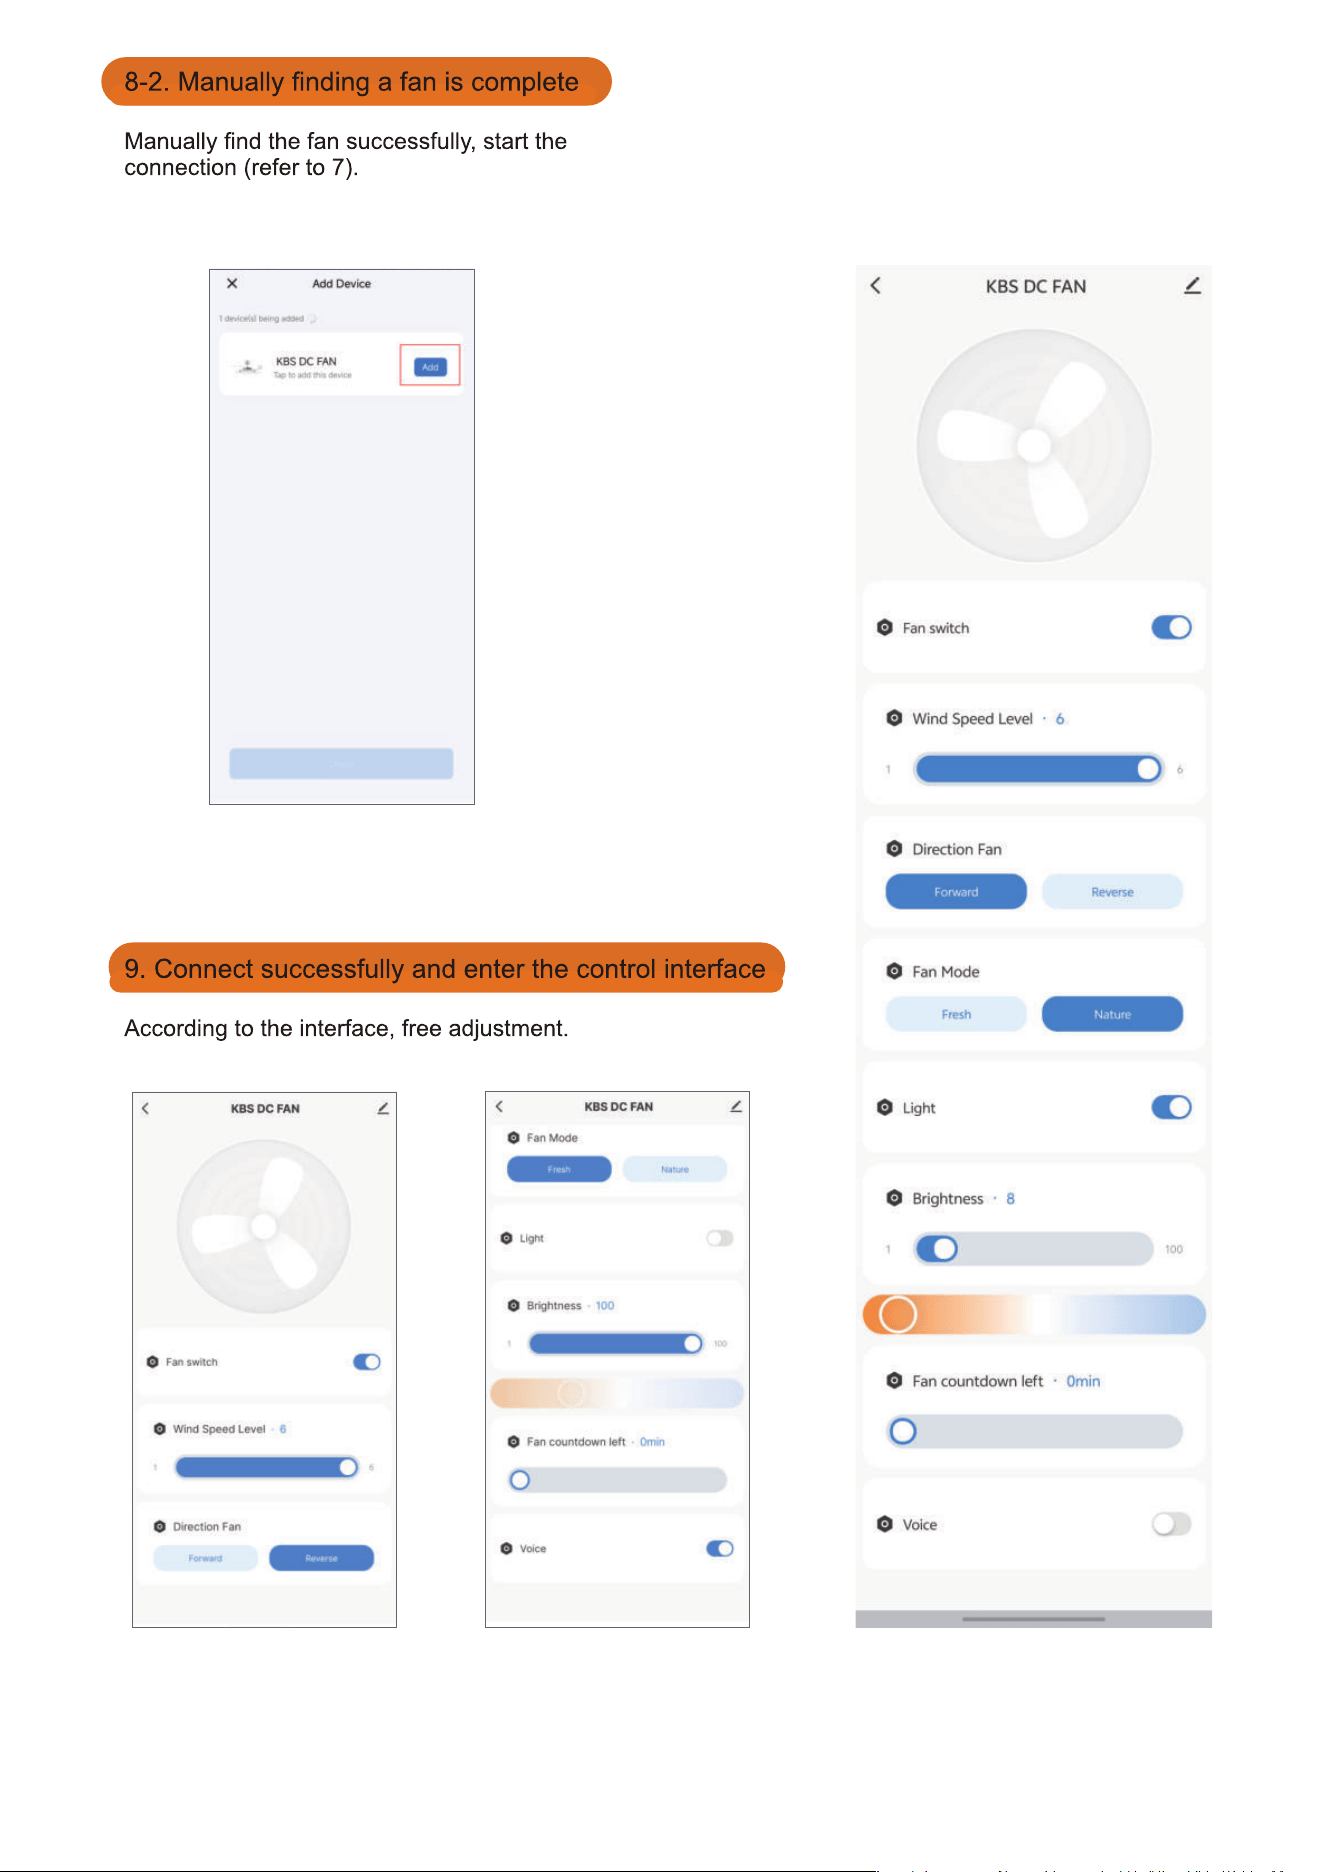
Tap the corresponding icon to connect.
After the pairing is completed, you can customize
the fan's name
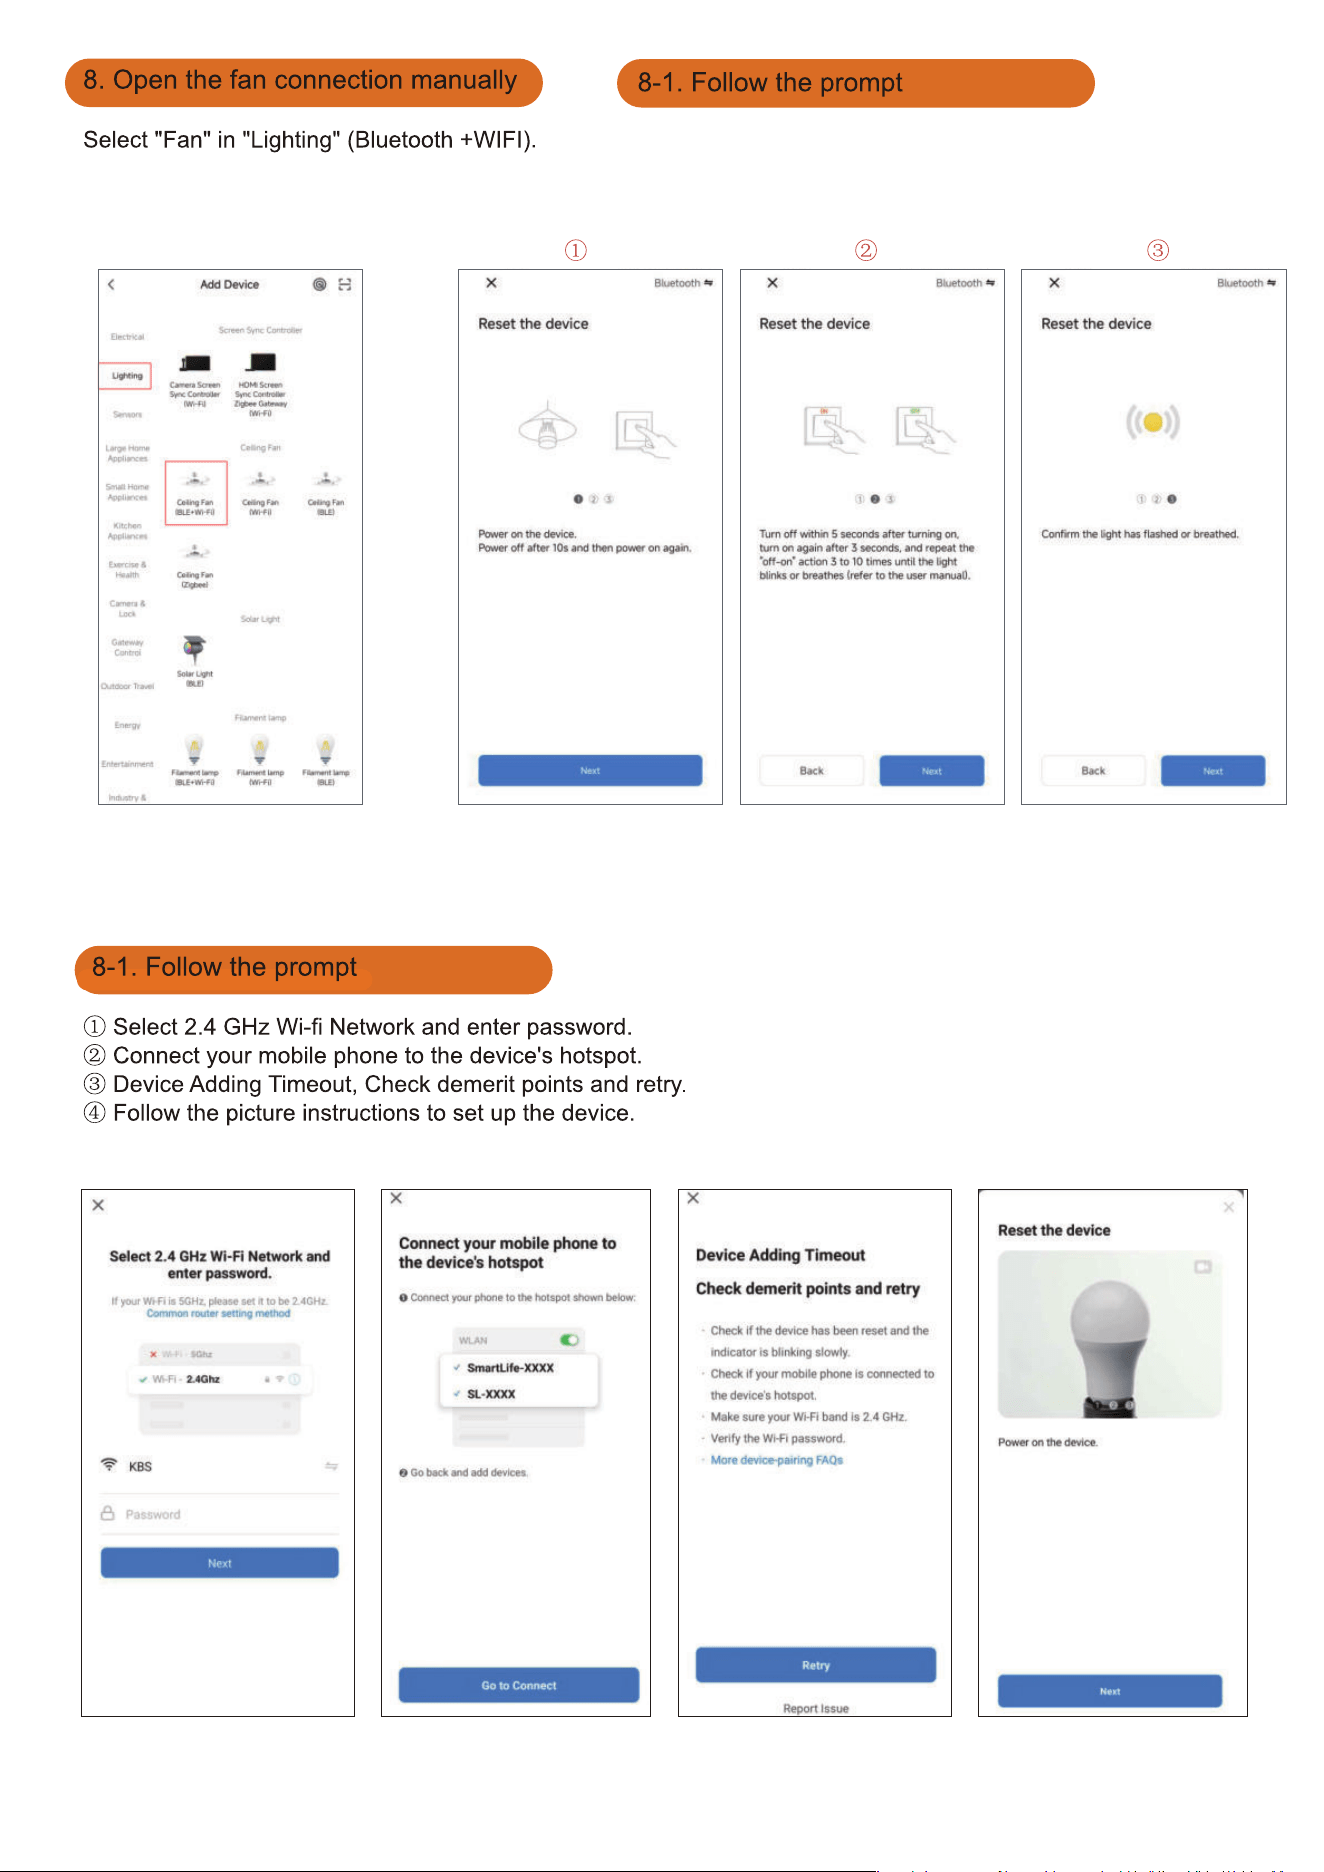
If pairing fails, please check wether the Wifi network
and password are correct. If connection fails after
multiple attempts, try connecting the fan manually as
shown in Step 8 below.
18
After performing Steps ① and ②, once hear three
consecutive beeps from the buzzer, tap "Next" in Step ③ to
proceed to the network pairing procedure.
19
20
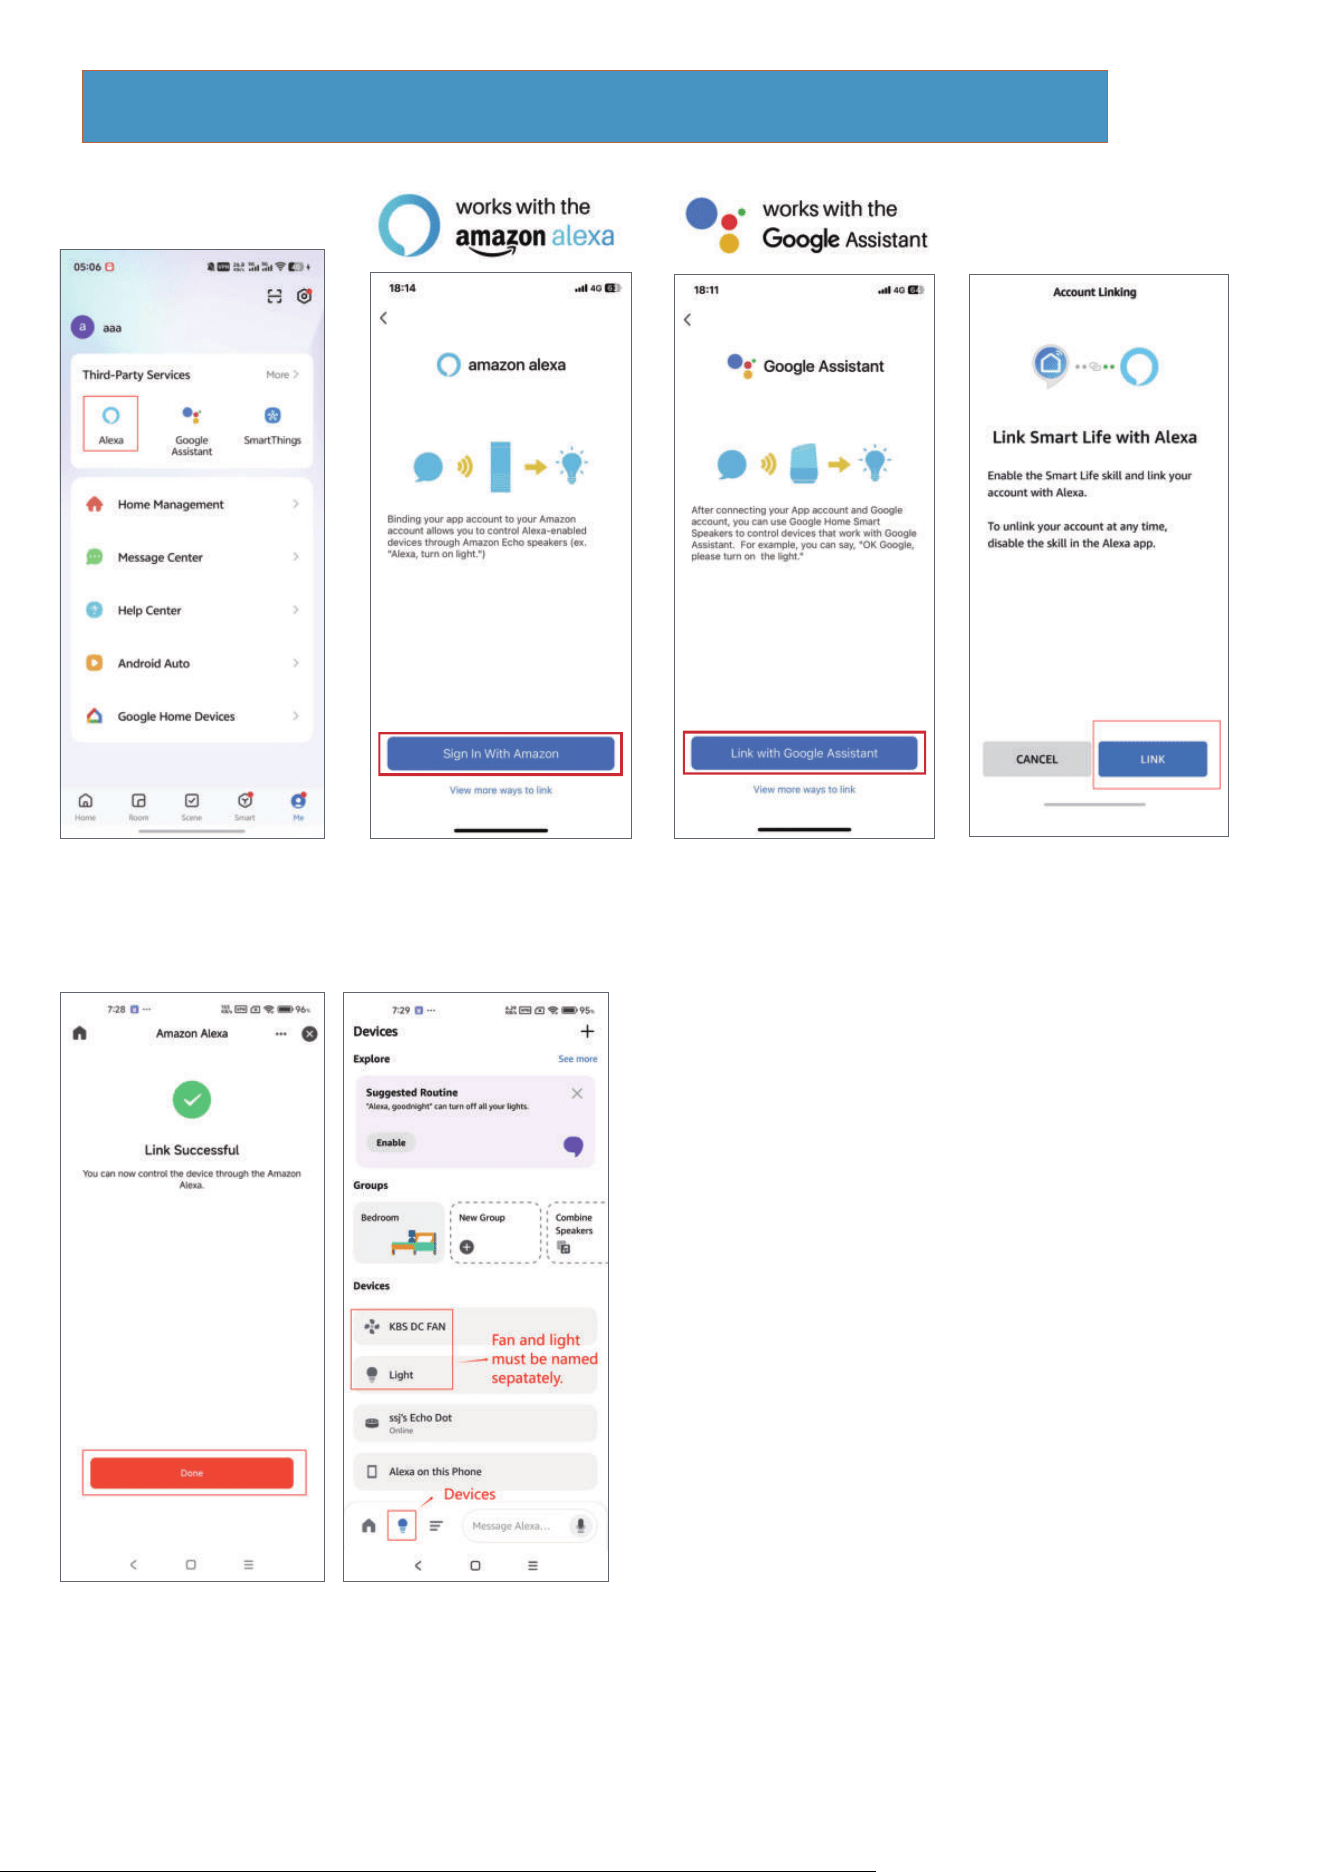
Link skill to the Amazon Echo or Google Assistant
In the App, change the name of the device to an easily identifiable name such
as bedroom light, bedroom fan.
Make sure your Amazon Echo device is powered on and connecting to your
home Wi-Finetwork.
Common commands
△
KBS DC Fan: <DEVICE NAME>
●
Alexa, tum on/off <DEVICE NAME>.
Alexa, what is the <DEVICE NAME> speed?
Alexa, set the <DEVICE NAME> speed to1/2/3/4/5/6.
Alexa, setthe bedroom <DEVICE NAME> speed to max.
Alexa, turn up/decrease the bedroom <DEVICE NAME> speed.
Alexa, set the <DEVICE NAME> to foward/reverse.
Alexa,set the mode on the <DEVICE NAME> to fresh/nature.
Alexa,set the countdown on the <DEVICE NAME> to
cancel/1 hour/2 hour/4 hour/8 hour.
●
●
●
●
●
●
●
△
Light: <device name>
●
Alexa, tum on/off <device name>.
Alexa, set the <device name> to fifty percent.
Alexa, make the <device name> warm white/white/cool white.
Alexa, brighten/dim <device name>.
Alexa, turn on/off response.
●
●
●
●
Note: "Alexa, turn on/off voice" – Controls the buzzer switch.
This function only applies to the buzzer sound for Tuya and Alexa
control; the remote handle is silent by default.
21
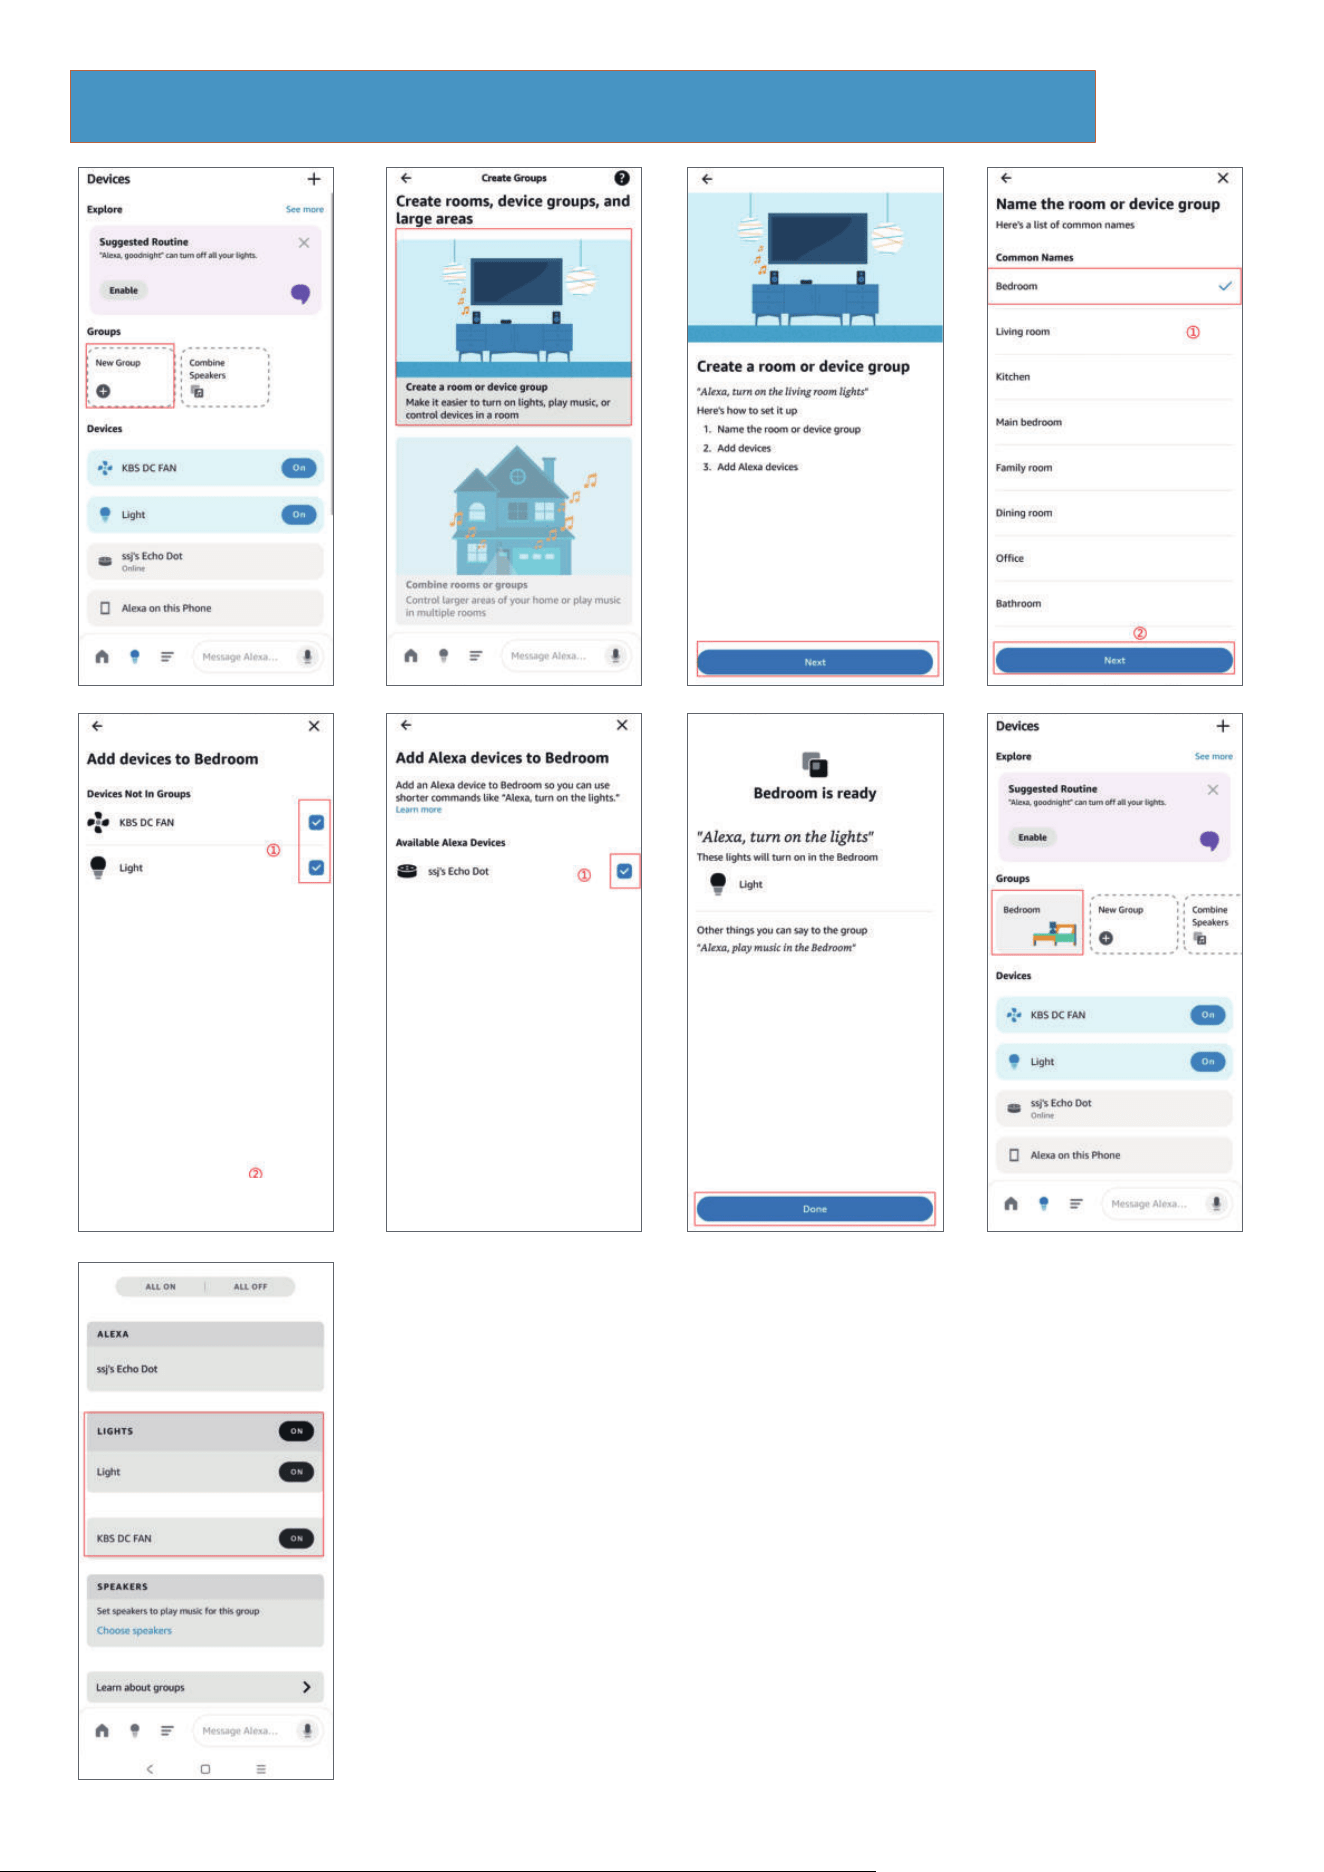
Steps for adding to Alexa as "bedroom"
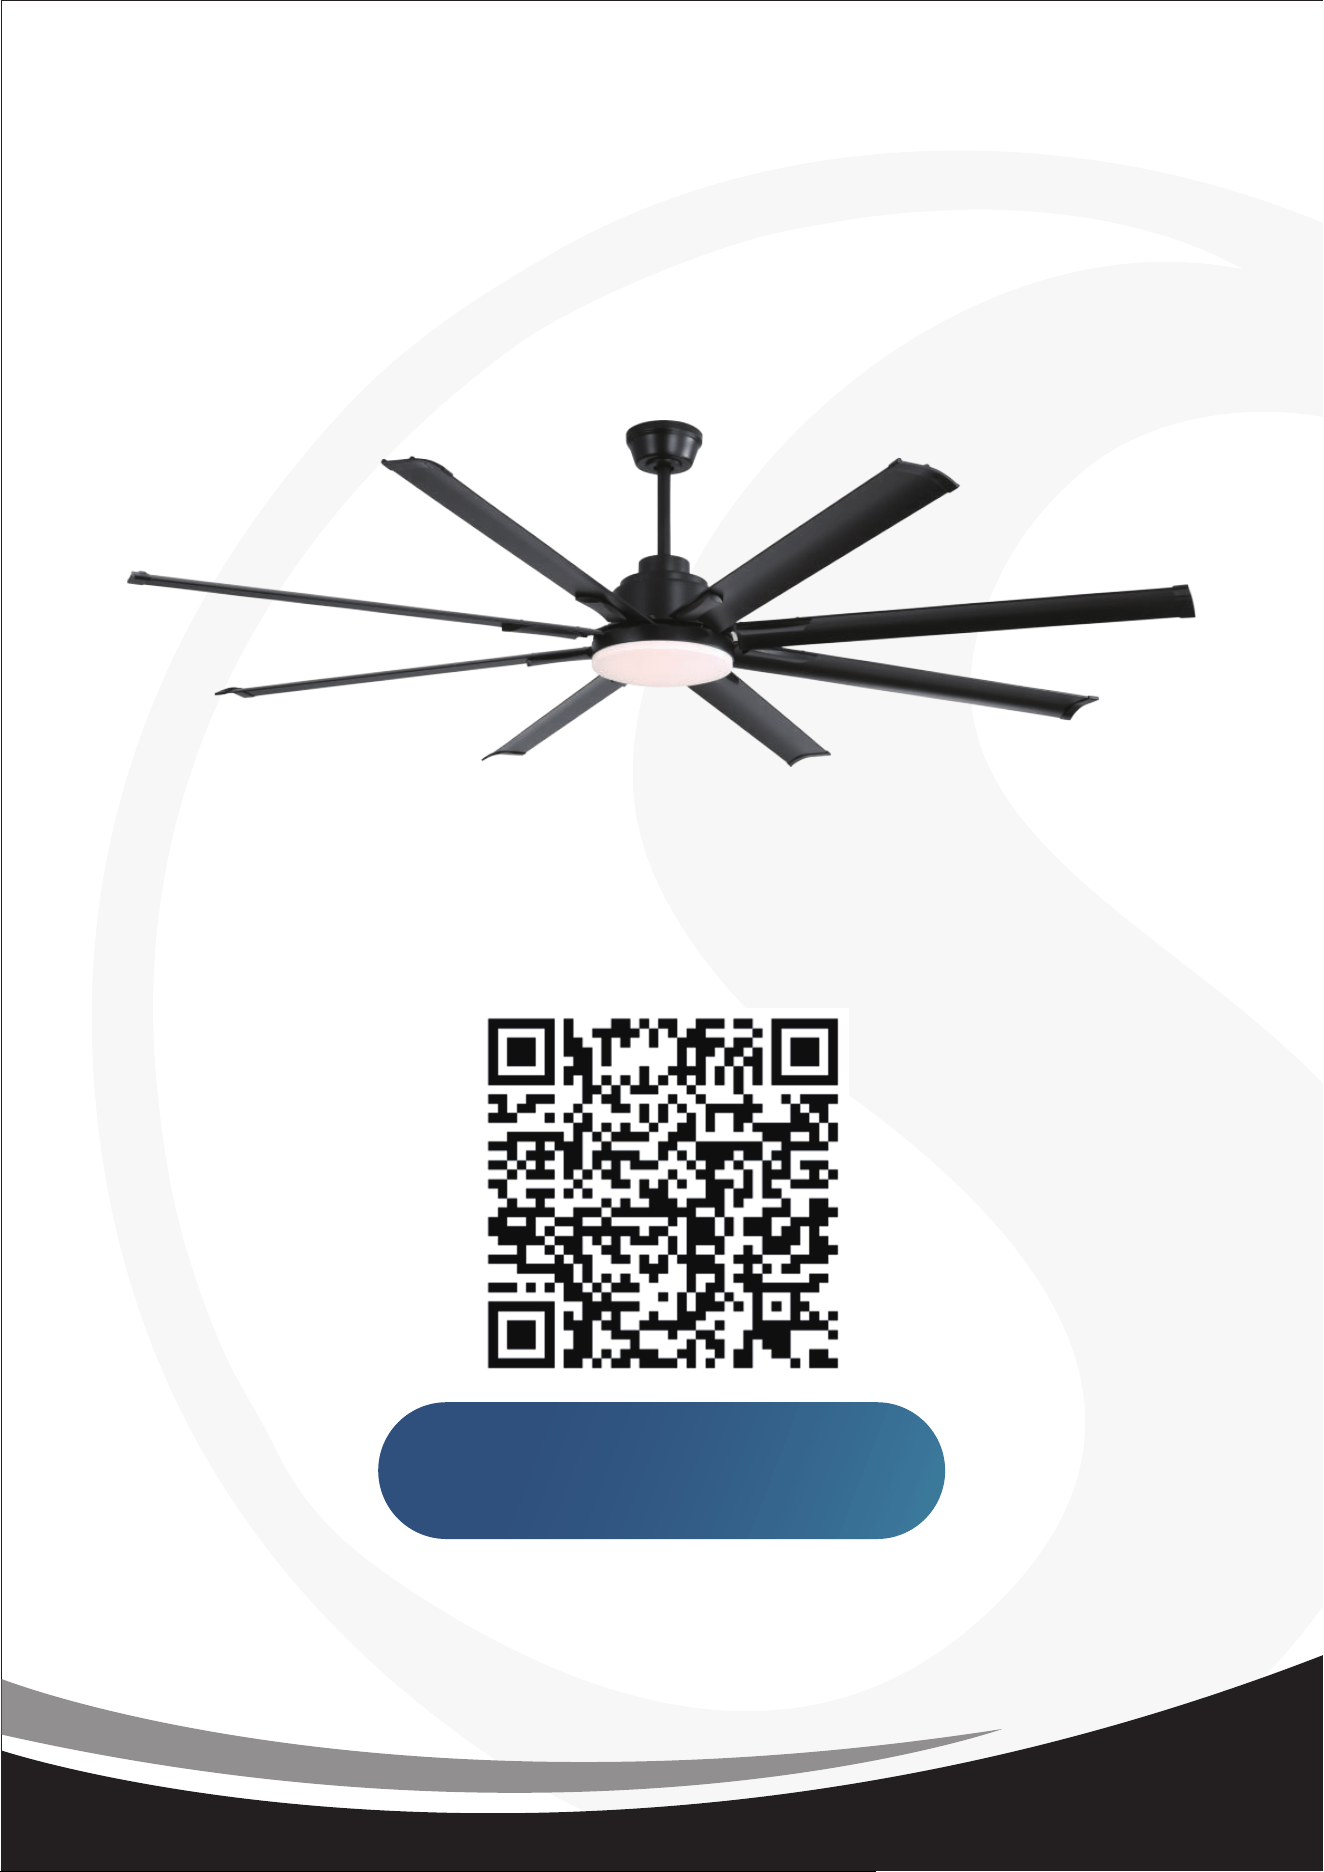
Register for Extended
2 Years Warranty+2 Year Warranty
Within the First 7 days
Scan QR code with your phone