Universal 6 Gang Rocker Switch Kit
921709550
Thank you for choosing Rough Country for all your lighting needs.
Please read instructions before beginning installation. Check the kit hardware against the kit contents
shown below. Be sure you have all needed parts and know where they go.
If question exist, please call us @1-800-222-7023. We will be happy to answer any questions concerning the design,
function, and correct use of our products.
This unit is sold as a Universal kit
. Generally the control box is mounted in a safe location high in the engine compart-
ment with the supplied self tapping screws and the Switch bank is mounted in a dry location the cab with the supplied
screws. Failure to mount these out of harms way could cause issues with product.
Tools Needed:
8mm Socket
10mm Socket
12mm Socket
Ratchet
Phillips Screwdriver
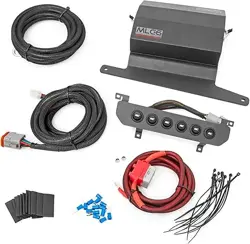
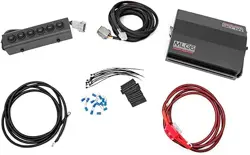
Kit Contents
(1)Switch Pod w/ Wiring Harness
(1) Relay Pod w/ Power & Ground Wires
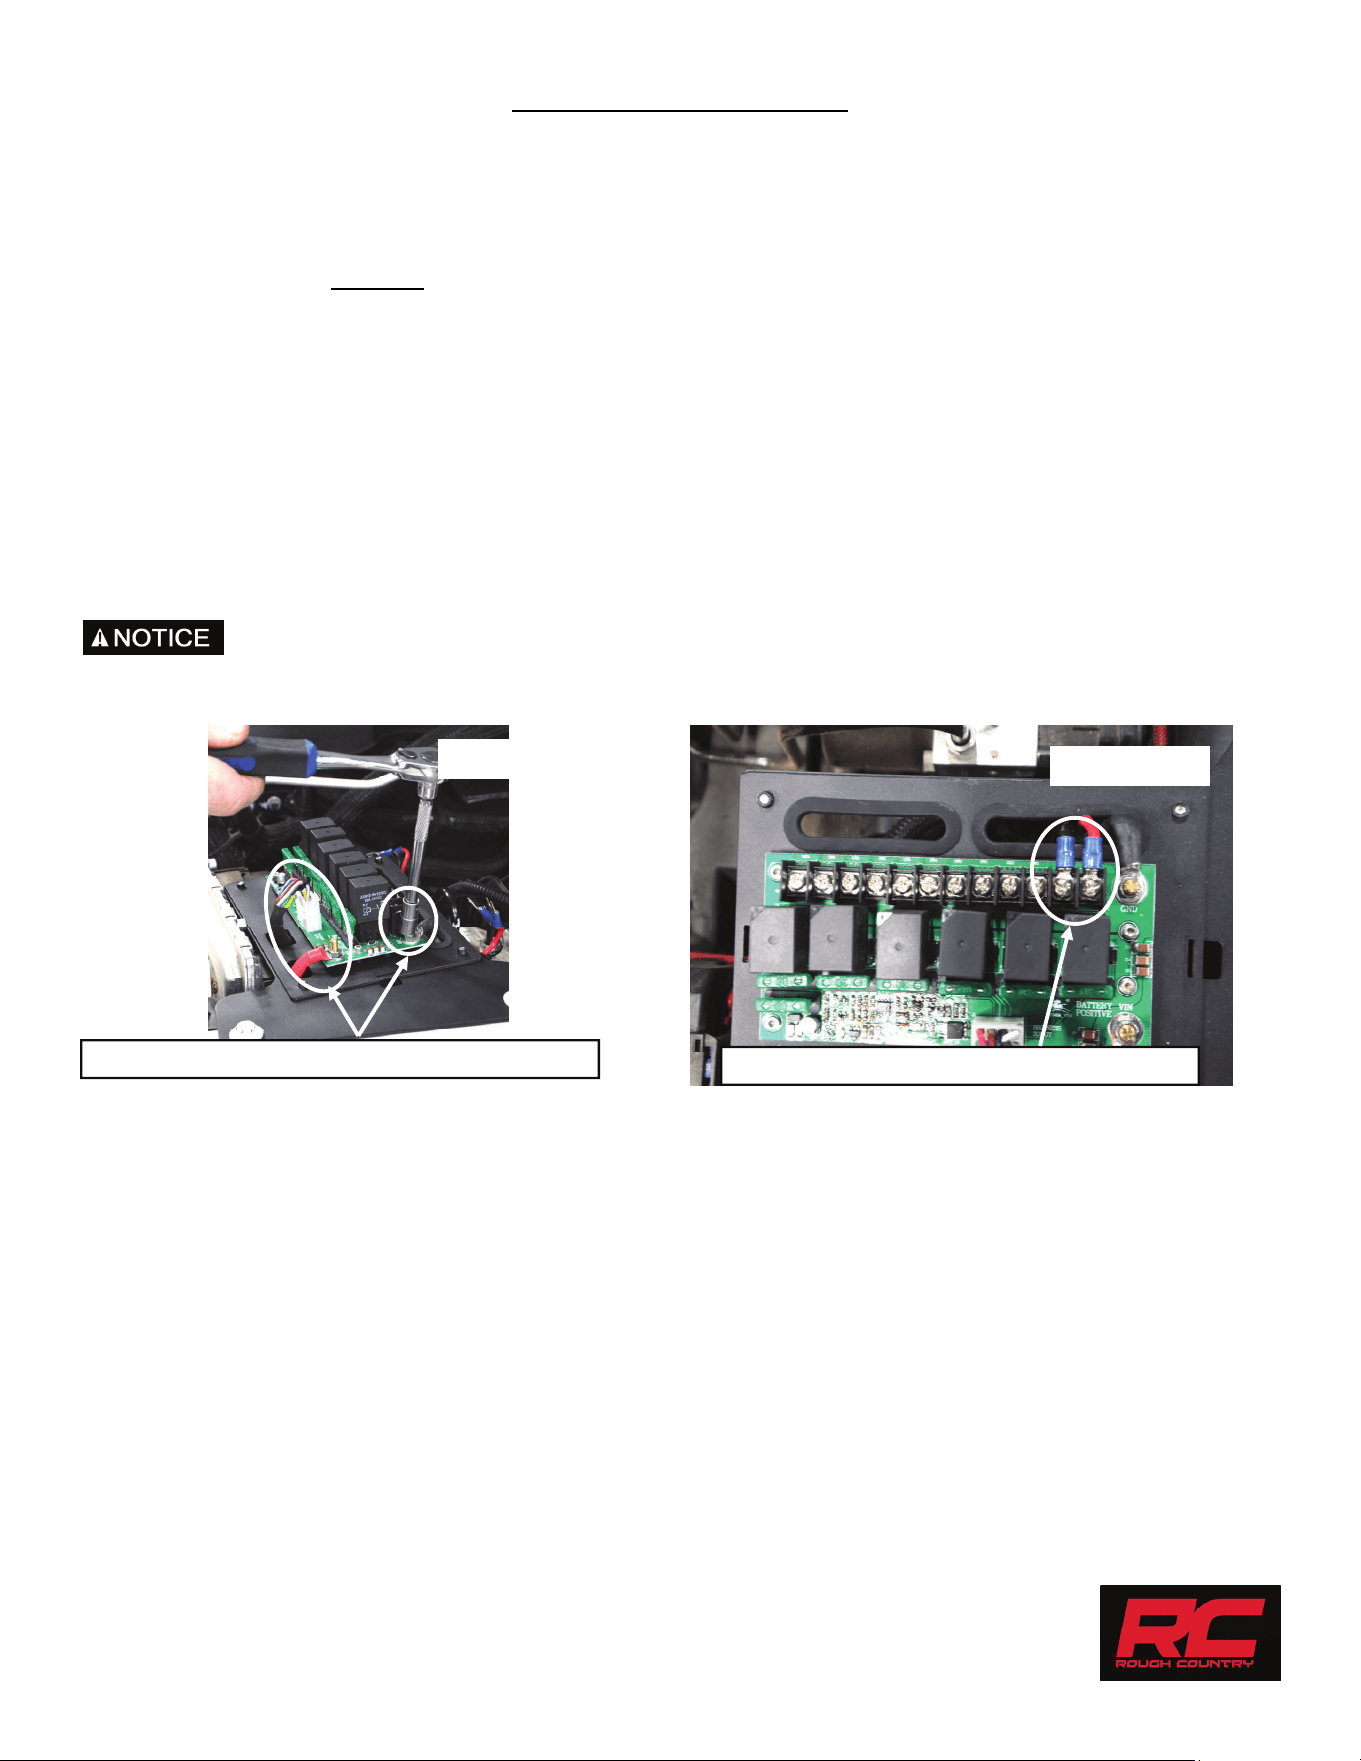
Photo 1
Photo 2
Attach power, ground & wiring harness to pod.
Attach accessory wires to relay pod.
INSTALLATION INSTRUCTIONS
1. Find a suitable mounting position for the universal relay control pod that is easily accessible and out of harms way.
Generally this pod is mounted high in the engine bay away from hazards and potentially wet conditions.
2. Using the supplied self-tapping hardware and an 8mm socket, mount the relay control pod.
3. Route the power and ground wires over to the battery making sure they are clear of any moving parts. Do Not Con-
nect.
4. Attach the power wire using a 10mm and the ground wire using a 12mm, to the relay pod. Plug in the wiring har-
ness. See Photo 1. DO NOT
over-tighten!
5. Attach your accessory wiring to the relay harness. Ground to the GND terminal and power to the SW1-6 terminal.
Tighten with a Phillips head screwdriver. See Photo 2.
6. Locate a suitable mounting position for the switch pod inside the vehicle away from hazards.
7. Remove the switch pod cover from the mounting bracket using a Phillips head screwdriver.
8. Install the mounting bracket using the supplied Phillips head screws.
9. Install the cover on the bracket using a Phillips head screwdriver.
10. Route the wiring harness to the relay pod, making sure the harness is clear of any pinch points, excessive heat, and
moving parts.
11. Plug the wiring harness into the relay pod.
12. Install the cover on the relay pod.
13. Attach the positive and ground wires to the battery.
14. Secure all wires making sure they are clear of any moving parts.
AFTER INSTALLATION, YOU MUST START THE ENGINE TO ACTIVATE THE SYSTEM!
By purchasing any item sold by Rough Country, LLC, the buyer expressly warrants that he/she is in compliance with all
applicable Federal, State, and Local laws and regulations regarding the purchase, ownership, and use of the item. It
shall be the buyers responsibility to comply with all Federal, State and Local laws governing the sales of any items listed,
illustrated or sold. The buyer expressly agrees to indemnify and hold harmless Rough Country, LLC
for all claims resulting directly or indirectly from the purchase, ownership, or use of the items.