MT417 OCTOBER 11
©
Copyright, 2011
Moen Incorporated
MT417
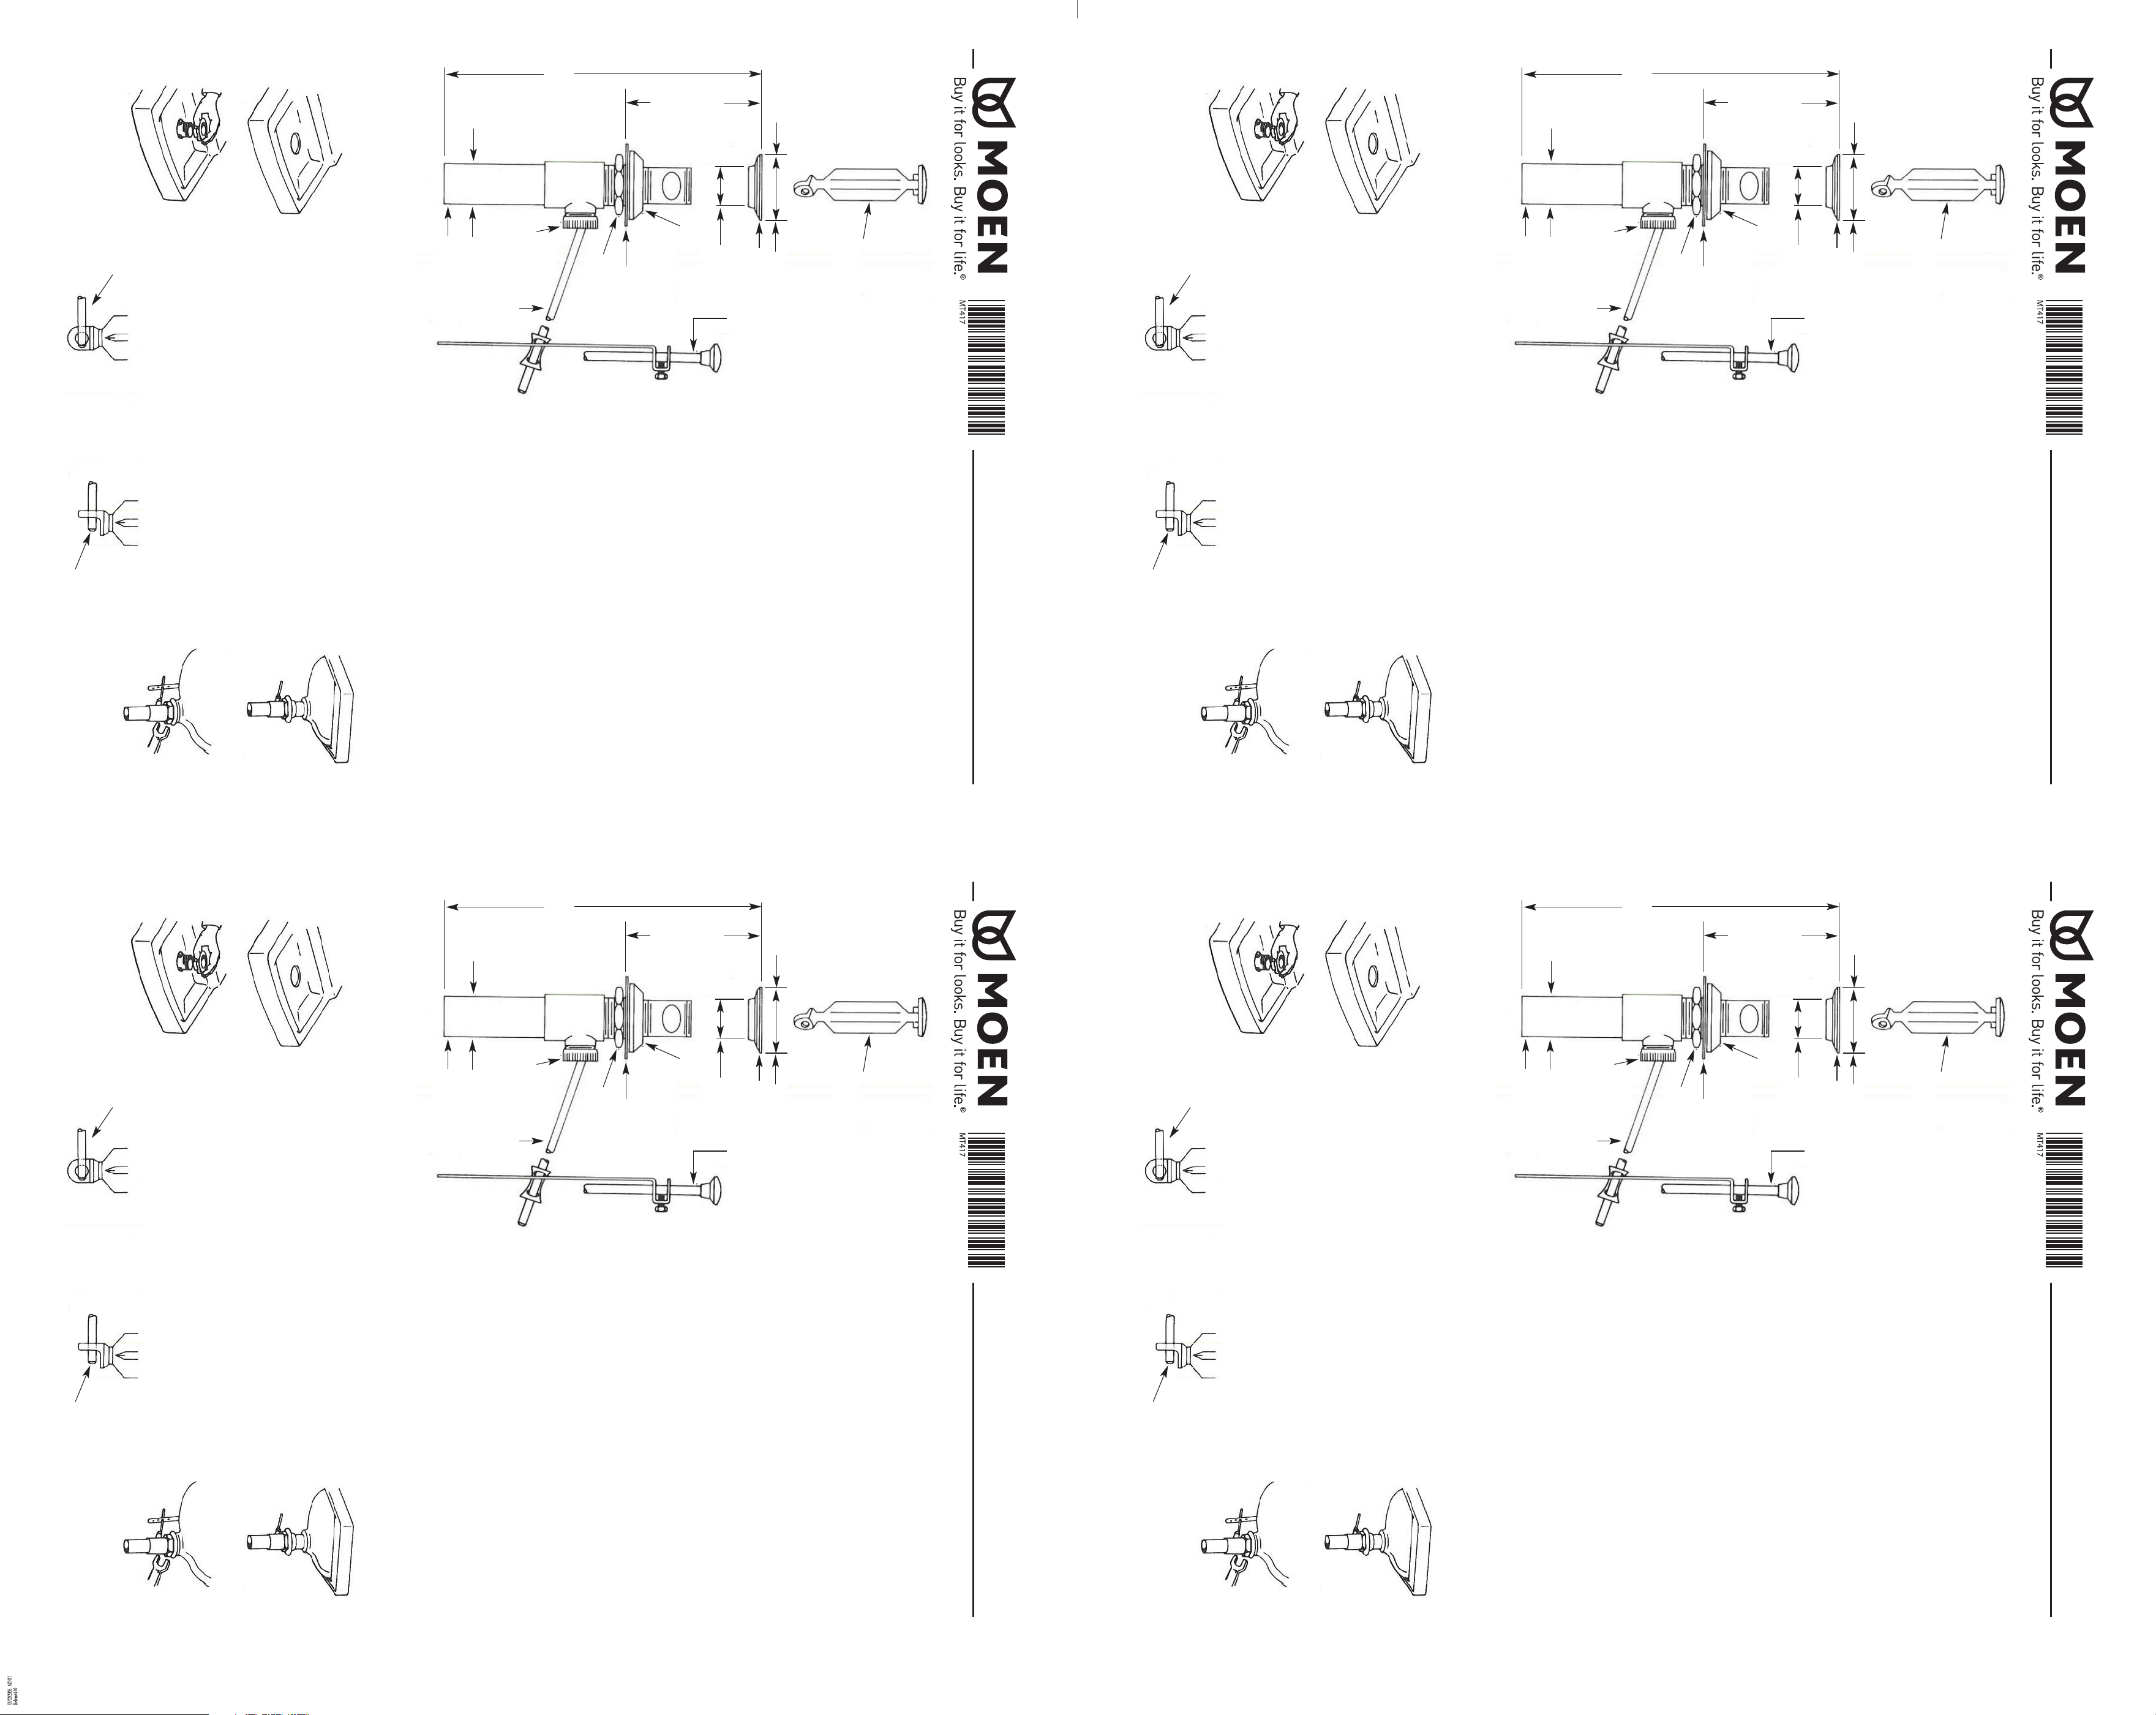
Turn off water supply prior to installation.
1. Throughly clean around drain opening in lavatory.
2. Remove plug and seat from drain and place drain up through opening.
Apply 1/4 inch bead of sealant around bottom of seat.
3. Screw seat on the top of the body.
4. With pivot rod facing rear of sink, tighten mountin nut until waste is
snug and screw tailpiece into bottom of the body. Wipe excess sealant
from the seat area in the bowl. Drop in waste plug and installation is
complete. Hook up drain rod as shown. Make sure knob clears the faucet.
5. Waste plug can be made “vandalproof” by inserting the inside end of
the side rod through the eye in the bottom of the plug.
6. You are now ready to turn on water supply.
LAVATORY POP-UP
WASTE ASSEMBLY
WITH 4 INCH TAILPIECE
WASTE No. 10790 - Chrome Finish
WASTE No. 11760 - Antique Brass
WASTE No. 15950 - Satin Brass
WASTE No. 15955 - Polished Brass
PARTS
LIST
12694 Lift Rod Assembly, 1185 Seat
Chrome Finish 11248 Bottom Gasket
15952 Lift Rod Assembly, 1217 Washer
Satin Brass 1219 Mounting Nut
15958 Lift Rod Assembly, 12689 Pivot Rod & Clip Assy.
Polished Brass 14103 Pivot Rod Seat
15957 Lift Rod Assembly, 14104 Pivot Rod Nut
Antique Brass 1189 Tailpiece
13439 Waste Plug (All Metal),
Chrome Finish
12328 Waste Plug (All Metal), Satin Brass
12327 Waste Plug (All Metal), Antique Brass
12323 Waste Plug (All Metal), Polished Brass
10709 Waste Plug (Plastic w/Metal Cap), Chrome
12736 Waste Plug (Plastic w/Metal Cap), Satin Brass
12737 Waste Plug (Plastic w/Metal Cap), Antique Brass
12738 Waste Plug (Plastic w/Metal Cap), Polished Brass
93837 Waste Plug & Seat (All Metal), Antique Brass
93832 Waste Plug & Seat (All Metal), Satin Brass
93838 Waste Plug & Seat (All Metal), Polished Brass
93457 Waste Plug & Seat (Plastic Plug w/Metal Cap), Antique Brass
93452 Waste Plug & Seat (Plastic Plug w/Metal Cap), Satin Brass
93458 Waste Plug & Seat (Plastic Plug w/Metal Cap), Polished Brass
LAVATORY WASTE INSTALLATION INSTRUCTIONS
1 2
4
3
5
VANDALPROOF
POSITION
FOR EASY
REMOVAL
Waste Plug
Seat
2-1/8”
8”
1-1/2”
Max. 2-1/2”
Min. 1-1/2”
Tailpiece
1-1/4”
Lift Rod
Assembly
Bottom
Gasket
Washer
Mounting
Nut
Pivot
Rod
Pivot Rod
Seat &
Nut
MT417 OCTOBER 11
©
Copyright, 2011
Moen Incorporated
MT417
Turn off water supply prior to installation.
1. Throughly clean around drain opening in lavatory.
2. Remove plug and seat from drain and place drain up through opening.
Apply 1/4 inch bead of sealant around bottom of seat.
3. Screw seat on the top of the body.
4. With pivot rod facing rear of sink, tighten mountin nut until waste is
snug and screw tailpiece into bottom of the body. Wipe excess sealant
from the seat area in the bowl. Drop in waste plug and installation is
complete. Hook up drain rod as shown. Make sure knob clears the faucet.
5. Waste plug can be made “vandalproof” by inserting the inside end of
the side rod through the eye in the bottom of the plug.
6. You are now ready to turn on water supply.
LAVATORY POP-UP
WASTE ASSEMBLY
WITH 4 INCH TAILPIECE
WASTE No. 10790 - Chrome Finish
WASTE No. 11760 - Antique Brass
WASTE No. 15950 - Satin Brass
WASTE No. 15955 - Polished Brass
PARTS
LIST
12694 Lift Rod Assembly, 1185 Seat
Chrome Finish 11248 Bottom Gasket
15952 Lift Rod Assembly, 1217 Washer
Satin Brass 1219 Mounting Nut
15958 Lift Rod Assembly, 12689 Pivot Rod & Clip Assy.
Polished Brass 14103 Pivot Rod Seat
15957 Lift Rod Assembly, 14104 Pivot Rod Nut
Antique Brass 1189 Tailpiece
13439 Waste Plug (All Metal),
Chrome Finish
12328 Waste Plug (All Metal), Satin Brass
12327 Waste Plug (All Metal), Antique Brass
12323 Waste Plug (All Metal), Polished Brass
10709 Waste Plug (Plastic w/Metal Cap), Chrome
12736 Waste Plug (Plastic w/Metal Cap), Satin Brass
12737 Waste Plug (Plastic w/Metal Cap), Antique Brass
12738 Waste Plug (Plastic w/Metal Cap), Polished Brass
93837 Waste Plug & Seat (All Metal), Antique Brass
93832 Waste Plug & Seat (All Metal), Satin Brass
93838 Waste Plug & Seat (All Metal), Polished Brass
93457 Waste Plug & Seat (Plastic Plug w/Metal Cap), Antique Brass
93452 Waste Plug & Seat (Plastic Plug w/Metal Cap), Satin Brass
93458 Waste Plug & Seat (Plastic Plug w/Metal Cap), Polished Brass
LAVATORY WASTE INSTALLATION INSTRUCTIONS
1 2
4
3
5
VANDALPROOF
POSITION
FOR EASY
REMOVAL
Waste Plug
Seat
2-1/8”
8”
1-1/2”
Max. 2-1/2”
Min. 1-1/2”
Tailpiece
1-1/4”
Lift Rod
Assembly
Bottom
Gasket
Washer
Mounting
Nut
Pivot
Rod
Pivot Rod
Seat &
Nut