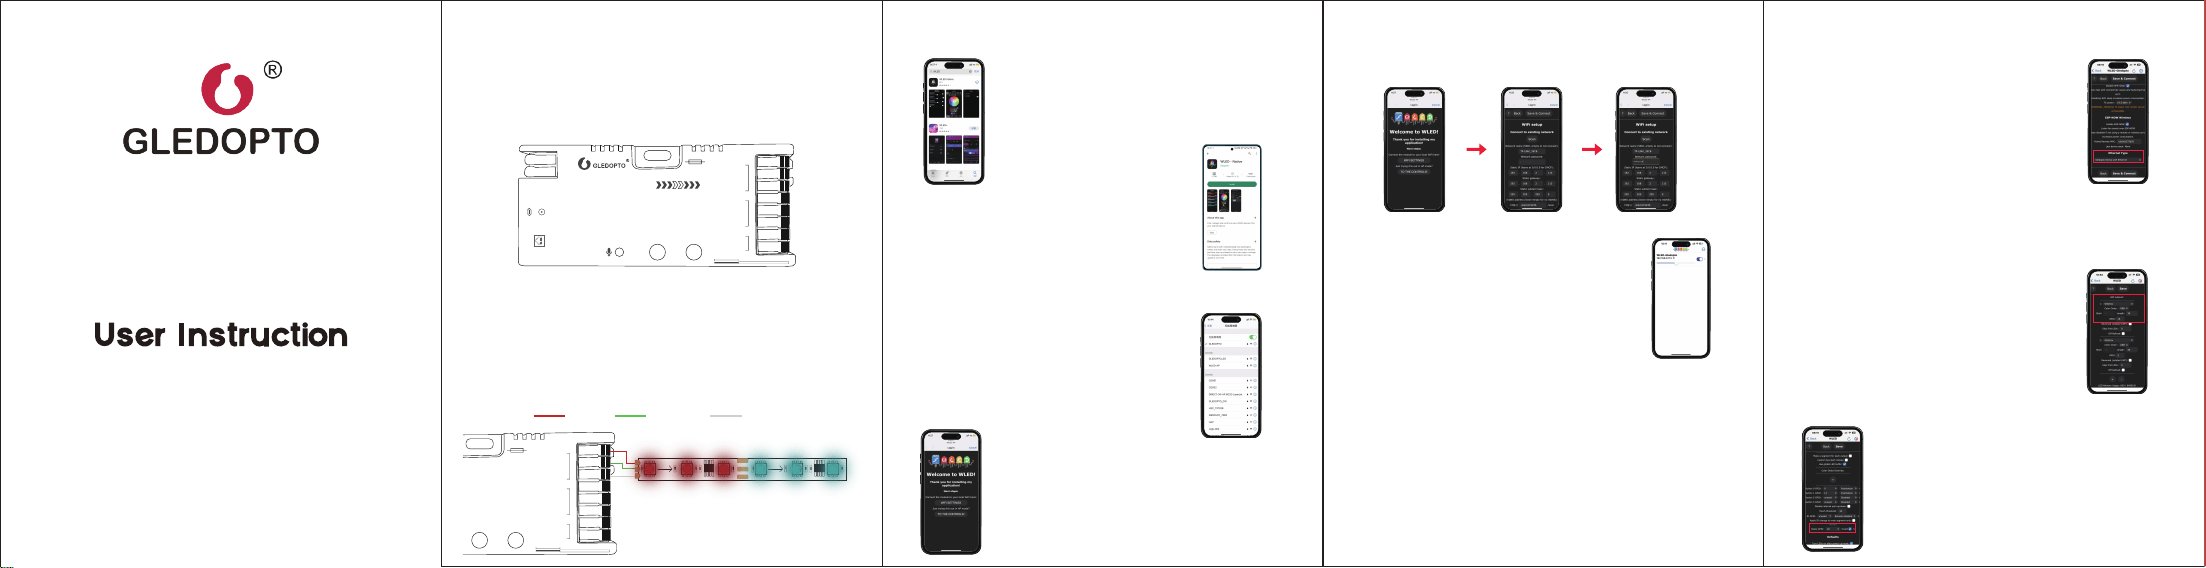
Enter into the WLED control page and click
on the "Config" button in the upper right
corner. Then, select "LED Preferences" and
navigate to "Hardware setup" to configure
the LED strip information.
LED Strip Configuration
4. Click "WIFI SETTINGS", set the WiFi account and password, and
the click"Save & Connect" at the top of the screen to save.
APP Configuration Steps
Ethernet Interface Configuration
APP Download Method
1. Power on the WLED controller.
2. Open the phone settings and enter WiFi
settings, find"WLED-AP" and connect to it
with the password "wled1234".
3. After successful connection, it will
automatically jump to the WLED page
(or enter the website 4.3.2.1 in the browser
to enter the WLED page).
Wiring Terminal Instructions
WLED controller supports connecting up to two digital LED strips.
The output terminals labeled 'V+, GPIO16,GND; V+, GPIO2, GND'
should be connected to the LED strip's 'VCC DATA GND'.
IO13 is an extended GPIO signal port for custom use.
1.
2.
GL-C-616WL
VCC DATA GND
Search for and download WLED Native
in the App Store.
Search for and download WLED Native
in the Google Play Store.
Android
IOS
Product Parameter
Relay Configuration
Keep both your phone and the WLED
controller connected to the same Wi-Fi
network. Then, open the WLED-Native
APP, and the WLED controller will be
displayed in the list.
Enter into the WLED control page, click on
'Config' at the top right corner, select 'WiFi
Setup', scroll down to the bottom of the
screen, find 'Ethernet Type', choose
'Gledopto Series with Ethernet', then click
Save & Connect to use the Ethernet
interface.
5.
note:
1. After the WLED controller disconnects from the router, the chip will restart
and return to the preset state (you can find the hotspot "WLED-AP" in your
phone's WiFi settings).
2. If the WLED controller is not displayed or cannot be found in the APP, you
can open a browser, enter the IP address of the WLED controller, and use the
web interface for control (To find the controller's IP address: Connect to the
Wi-Fi, locate the router's or controller's web address (usually found at the
bottom of the router or on the controller itself), enter this address in the
browser, and then you can view the controller's IP address in the router's
backend interface).
Enter into the WLED control page, click on
the top right corner "Config", select "LED
Preferences", then find "Relay GPIO".
Configure Relay GPIO as 18, check Invert,
and click Save to apply the settings.
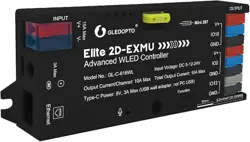
Elite 2D-EXMU
Advanced WLED Controller
__
Elite 2D-EXMU
Advanced WLED Controller
Model No.: GL-C-616WL lnput Voltage: DC 5-12-24V
Total Output Current: 15A MaxOutput Current/Channel: 10A Max
Type-C Power: 5V, 3A Max (USB wall adapter, not PC USB)
INPUT
OUTPUT
15A Max
GND
IO13
GND
GND
IO16
V+
IO2
V+
Function
V+ V-
3A Max
Ethernet
10mm
0.34-4mm² (22-12AWG)
Mini 297
Model: GL-C-616WL Input Voltage: DC 5-12-24V
Total Output Current: 15A Max Output Current/Channel: 10A Max
Type-C Input Voltage: 5V Type-C Input Current: 3A Max
Temperature: -20~45℃
INPUT
OUTPUT
15A Max
GND
IO13
GND
GND
IO16
V+
IO2
V+
V+ V-
3A Max
10mm
0.34-4mm² (22-12AWG)
Mini 297
IP20
GPIO16 Wiring
1. The Ethernet function is configured by default.
2. After connecting the controller to the router with an Ethernet cable, you
can use the app to control it without configuring WiFi.
Note:
Troubleshooting and Solution
GL-C-I-616WL(PDM)
Before turning on the power, please ensure that all connections are correct
and secure, and do not operate while the power is on.
The product should be used under the rated voltage. Using it under excessive
or insufficient voltage may cause damage.
Do not disassemble the product, as it may cause fire and electric shock.
Do not use the product in environments exposed to direct sunlight, moisture,
high temperatures, etc.
Do not use the product in metal shielded areas or around strong magnetic
fields, as this may severely affect the wireless signal transmission of the
product.
The controller is factory-equipped with a 20A fuse, and a spare 5A fuse is also
included for your selection based on actual needs. The fuse's current-carrying
capacity test is conducted at 25ºC, and its lifespan decreases as the ambient
temperature rises. When the operating current approaches or exceeds the
rated value, the temperature will also increase accordingly. It is advisable to
choose a fuse with a nominal current rating that is 1.3 to 1.5 times the
operating current. For example, if the operating current is 10A, a 15A fuse
should be selected.
Our company will update the content of this manual based on the
improvement of product functionality. The updates will be displayed in the
latest version of this manual, without further notice.
Due to our continuous adoption of new technologies, product specifications
may change without further notice.
This manual is provided for reference and guidance only and does not
guarantee complete consistency with the actual product. The actual
application should be based on the actual product.
The components and accessories described in this manual do not represent
the standard configuration of the product. The specific configuration is subject
to the packaging.
All text, tables, and images in this manual are protected by relevant national
laws and may not be used without our permission.
This product may be compatible with third-party products, but our company
does not take responsibility for compatibility issues or partial loss of
functionality caused by changes in third-party products.
1.
2.
3.
4.
5.
6.
1.
2.
3.
4.
5.
6.
Mic Configuration
Enter the WLED control page, click "config" in the upper right
corner, select "Usermods", find "AudioReactive", check
(Enabled), and then configure according to the configuration
information under "Digitalmic". After the configuration is
completed, click "save". After the successful save, turn off the
controller.
note:
1. The relay function is configured by default.
2. When turning off the light via the APP, remote control, or PUSH switch,
the power supply to the output terminal will be cut off to save energy.It
should be noted that this function cannot deactivate the supplementary
power supply.
Note:
1. The Mic function is configured by default.
2. After microphone function configured, it will be only activated after
rebooting the controller again.
Supported Chips
IO13 interface is for DIY use
WS2805, WS2811, WS2811F, WS2812B, WS2814A, WS2815,
SK6812, SM16703, SM16703SP3, FL19038, FW1935, UCS2903B, etc.
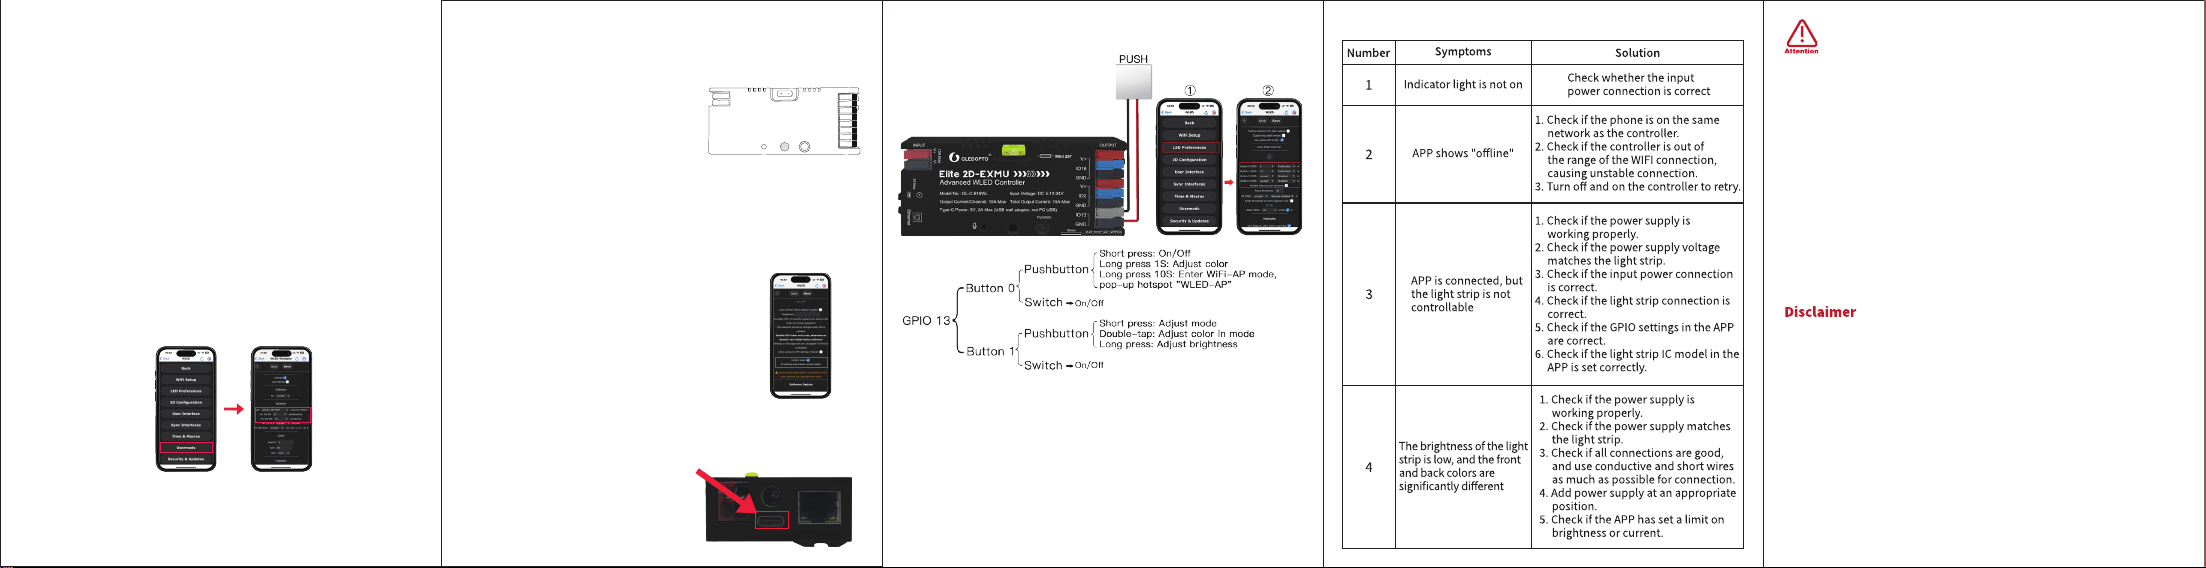
Description of Button Functions
Reset to Factory Settings
Enter into the WLED control page and
click on the top right corner "Config".
Click on "Security & Updates" at the
bottom, and then scroll down to find
"Factory reset" and check the box. Click
"Save" to reset the controller.
1. Button Reset
2. APP Reset
1. Short press: Power on/off.
2. Long press for 1 second: Switch color.
3. Long press for 10 seconds: Reset the WLED
controller and activate the WLED-AP hotspot.
Funciton(GPIO17):
Function
20
Type-C Download Port
Insert the Type-C data cable to
start serial port download.
After downloading is complete,
you can use the controller.
1.
2.
Long press the "Function" button for 10 seconds.
Configuration Information:
1. Type: Generic 12S PDM 2. Pin 12S SD: 32 3. Pin 12S WS: 15
*Function button is GPIO17