www.whirlpool.com.au
www.whirlpool.co.nz
Health
&
Safety,
Use
&
Care,
Installation
Guide
and
Online Warranty Registration Information
Model: WRK6140AUS
WRT6140AUS
WRT6340AUS
WRT9350AUS

CERAMIC COOKTOP USE AND CARE GUIDE
Dear User,
Thank you for choosing our products. We are sure you will find your new
appliance
a pleasure to use. Before you use the appliance, we recommend that
you read through these instructions carefully and retain for future reference.
Design and specification may change due to product development, no prior
notice will be given.
Table of Contents
IMPORTANT
SAFETY
INSTRUCTIONS
INSTALLATIONS
OPERATION INSTRUCTIONS
Large heating area
Child Lock
Stop & Go
Timer
Residual
Heat
Warning
Auto
Shutdown
Over-heat
Protection
Over-flow Protection
Cooking
Guidelines
Cooking Table
Cleaning
and
Maintenance
Troubleshooting
3
5
9
15
15
16
16
19
19
19
19
19
20
21
23
24
After-sales service
25
2
Technical Specifications
IMPORTANT SAFETY INSTRUCTIONS
SAFETY INSTRUCTIONS IMPORTANT TO BE READ AND OBSERVED
Before using the appliance, read these safety instructions. Keep them nearby for future
reference. These instructions and the appliance itself provide important safety warnings, to
be observed at all times. The manufacturer declines any liability for failure to observe these
safety instructions, for inappropriate use of the appliance or incorrect setting of controls.
Download the complete instruction manual on Whirlpool official website or call the phone
number shown on the official website.
WARNING: If the cooktop surface is cracked, do not use the appliance - risk of electric
shock.
WARNING: Danger of fire: Do not store items on the cooking surfaces.
CAUTION: The cooking process has to be supervised. A short cooking process has to be
supervised continuously.
WARNING: Unattended cooking on a cooktop with fat or oil can be dangerous - risk of
fire. Never try to extinguish a fire with water: instead, switch off the appliance and then cover
flame e.g. with a lid or a fire blanket.
Do not use the cooktop as a work surface or support. Keep clothes or other flammable
materials away from the appliance, until all the components have cooled down completely -
risk of fire.
Metallic objects such as knives, forks, spoons and lids should not be placed on
the cooktop surface since they can get hot.
Very young children (0-3 years) should be kept away from the appliance. Young children
(3-8 years) should be kept away from the appliance unless continuously supervised. Children
from 8 years old and above and persons with reduced physical, sensory or mental
capabilities or lack of experience and knowledge can use this appliance only if they are
supervised or have been given instructions on safe use and understand the hazards
involved. Children must not play with the appliance. Cleaning and user maintenance must
not be carried out by children without supervision.
After use, switch off the cooktop element by its control and do not rely on the pan
detector.
WARNING: The appliance and its accessible parts become hot during use. Care should
be taken to avoid touching heating elements. Children less than 8 years of age shall be kept
away unless continuously supervised.
3

PERMITTED USE
CAUTION: the appliance is not intended to be operated by means of an external
switching device, such as a timer, or separate remote controlled system.
This appliance is intended to be used in household and similar applications such as: staff
kitchen areas in shops, offices and other working environments; farm houses; by clients in
hotels, motels, bed & breakfast and other residential environments.
No other use is permitted (e.g. heating rooms).
This appliance is not for professional use. Do not use the appliance outdoors.
INSTALLATION
The appliance must be handled and installed by two or more persons - risk of injury. Use
protective gloves to unpack and install - risk of cuts.
Installation, including water supply (if any), electrical connections and repairs must be
carried out by a qualified technician. Do not repair or replace any part of the appliance
unless specifically stated in the user manual. Keep children away from the installation site.
After unpacking the appliance, make sure that it has not been damaged during transport. In
the event of problems, contact the dealer or your nearest After-sales Service. Once installed,
packaging waste (plastic, styrofoam parts etc.) must be stored out of reach of children - risk
of suffocation. The appliance must be disconnected from the power supply before any
installation operation - risk of electric shock. During installation, make sure the appliance
does not damage the power cable - risk of fire or electric shock. Only activate the appliance
when the installation has been completed.
Carry out all cabinet cutting operations before fitting the appliance and remove all wood
chips and sawdust.
If the appliance is not installed above an oven, a separator panel (not included) must be
installed in the compartment under the appliance.
ELECTRICAL WARNINGS
It must be possible to disconnect the appliance from the power supply by unplugging it if
plug is accessible, or by a multi-pole switch installed upstream of the socket in accordance
with the wiring rules and the appliance must be earthed in conformity with national electrical
safety standards.
Do not use extension leads, multiple sockets or adapters. The electrical components
must not be accessible to the user after installation. Do not use the appliance when you are
wet or barefoot. Do not operate this appliance if it has a damaged power cable or plug, if it is
not working properly, or if it has been damaged or dropped.
If the supply cord is damaged, it must be replaced with an identical one by the
manufacturer, its service agent or similarly qualified persons in order to avoid a hazard - risk
of electric shock.
4
INSTALLATIONS
CLEANING AND MAINTENANCE
WARNING: Ensure that the appliance is switched off and disconnected from the power
supply before performing any maintenance operation; never use steam cleaning equipment -
risk of electric shock.
Do not use abrasive or corrosive products, chlorine-based cleaners or pan scourers.
ENERGY SAVING TIPS
Make the most of your hot plate’s residual heat by switching it off a few minutes before you
finish cooking. The base of your pot or pan should cover the hot plate completely; a
container that is smaller than the hot plate will cause energy to be wasted.
Cover your pots and pans with tight-fitting lids while cooking and use as little water as
possible. Cooking with the lid off will greatly increase energy consumption.
Use only flat-bottomed pots and pans.
NOTE
People with a pacemaker or similar medical device should use care when standing near this
cooktop while it is on. The electromagnetic field may affect the pacemaker or similar device.
Consult your doctor, or the manufacturer of the pacemaker or similar medical device for
additional information about its effects with electromagnetic fields of the cooktop.
The appliance must be installed and connected in accordance with current regulations. After
unpacking the appliance, ensure there is no visible damage. If it has been damaged during
transit, DO NOT USE, contact the "seller/ dealer/ Whirlpool After-Sales Service" immediately.
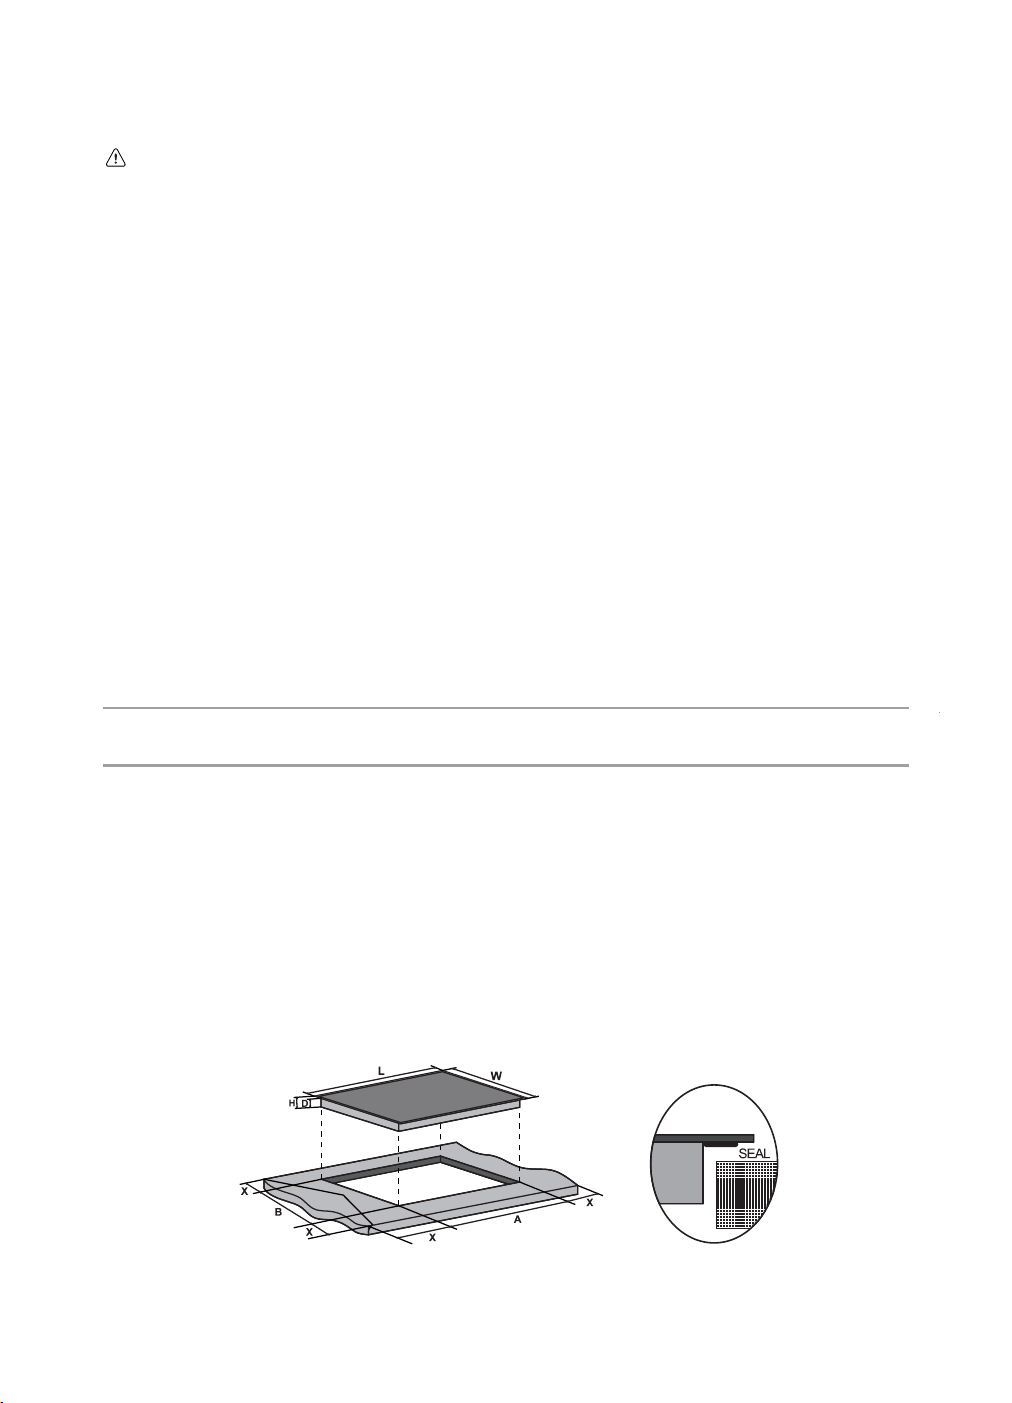
SELECTION OF INSTALLATION EQUIPMENT
- Cut out the work surface according to the sizes shown in the drawing.
- For the purpose of installation and use, a minimum of 5 cm space shall be preserved
around the hole.
- Be sure the thickness of the work surface is at least 30mm. Please select heat resistant
work surface material to avoid larger deformation caused by the heat radiation from the
hotplate.
5
Model L W H D A B X
WRK6140AUS
WRT6140AUS
WRT6340AUS
590 520 51 48 560
490-500
min. 50
WRT9350AUS
900
520
51 48 880
490-500 min. 50
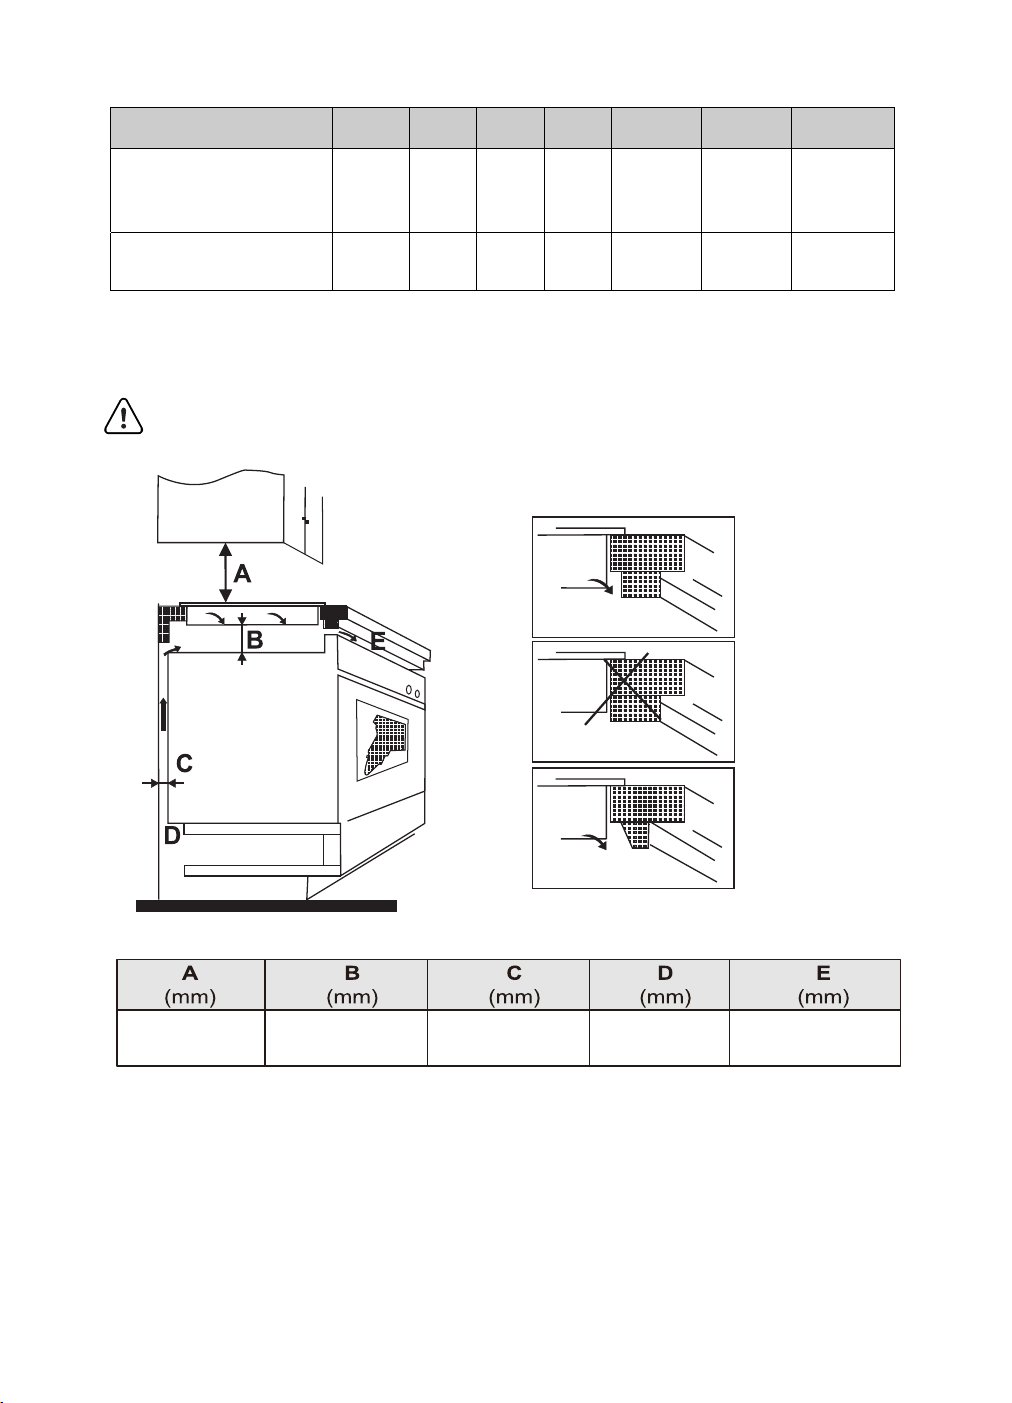
Note:
The safety distance between the cooking zones and the cupboard
above the cooking zones should be at least 760mm.
Under any circumstances, make sure the ceramic cooktop is well ventilated and the air inlet
and outlet are not blocked. Ensure the ceramic cooktop is in a good work state. As shown
below:
6
min. 760
min. 50
min. 20
Air intake
min. 20
Air exit min. 5
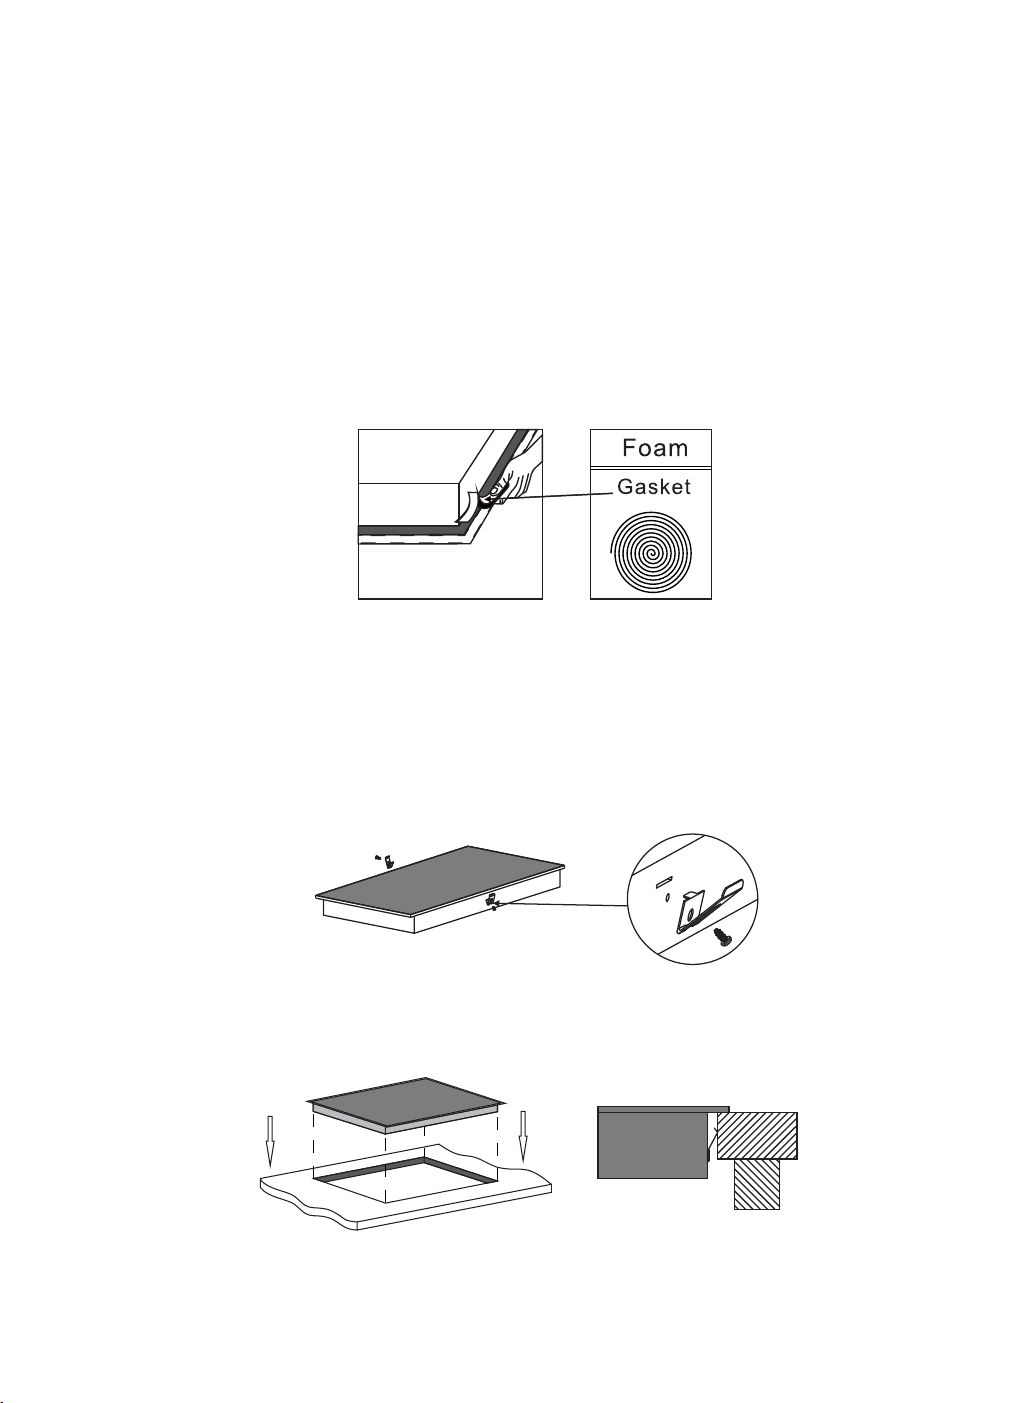
FIX CLIPS TO
COOKTOP
FIX COOKTOP TO CABINET
Insert the cooktop into the cabinet/work surface as below diagrams and the mounted clips on
thesides can secure your cooktop sturdily.
INSTALLING THE FOAM GASKET
Before inserting the cooktop into the cut-out of the kitchen worktop, the supplied foam gasket
(in a plastic bag) must be attached to the bottom side of the ceramic glass. Do not install
the cooktop without the foam gasket.
The gasket should be attached to the cooktop in the following method:
● Remove the protective film from the gasket.
● Attach the gasket to the bottom side of the glass, next to the edge.
● The gasket must be attached along the entire length of the glass edge and should not
overlap at the corners.
● When installing the gasket, make sure that the glass does not come into contact with
any sharp objects.
The unit should be placed on a stable, smooth surface (use the packaging). Do not apply
force onto the controls protruding from the cooktop. There is one easy fit kit package for
each cooktop, including fixing clips and screws (total 2pcs of clips and 2pcs of screws).
Insert the fixing clips into the fixing holes on the 2 sides of the housing. Fix the clip to the
housing with the screw, after which insert the cooktop to the cabinet/work surface.
7
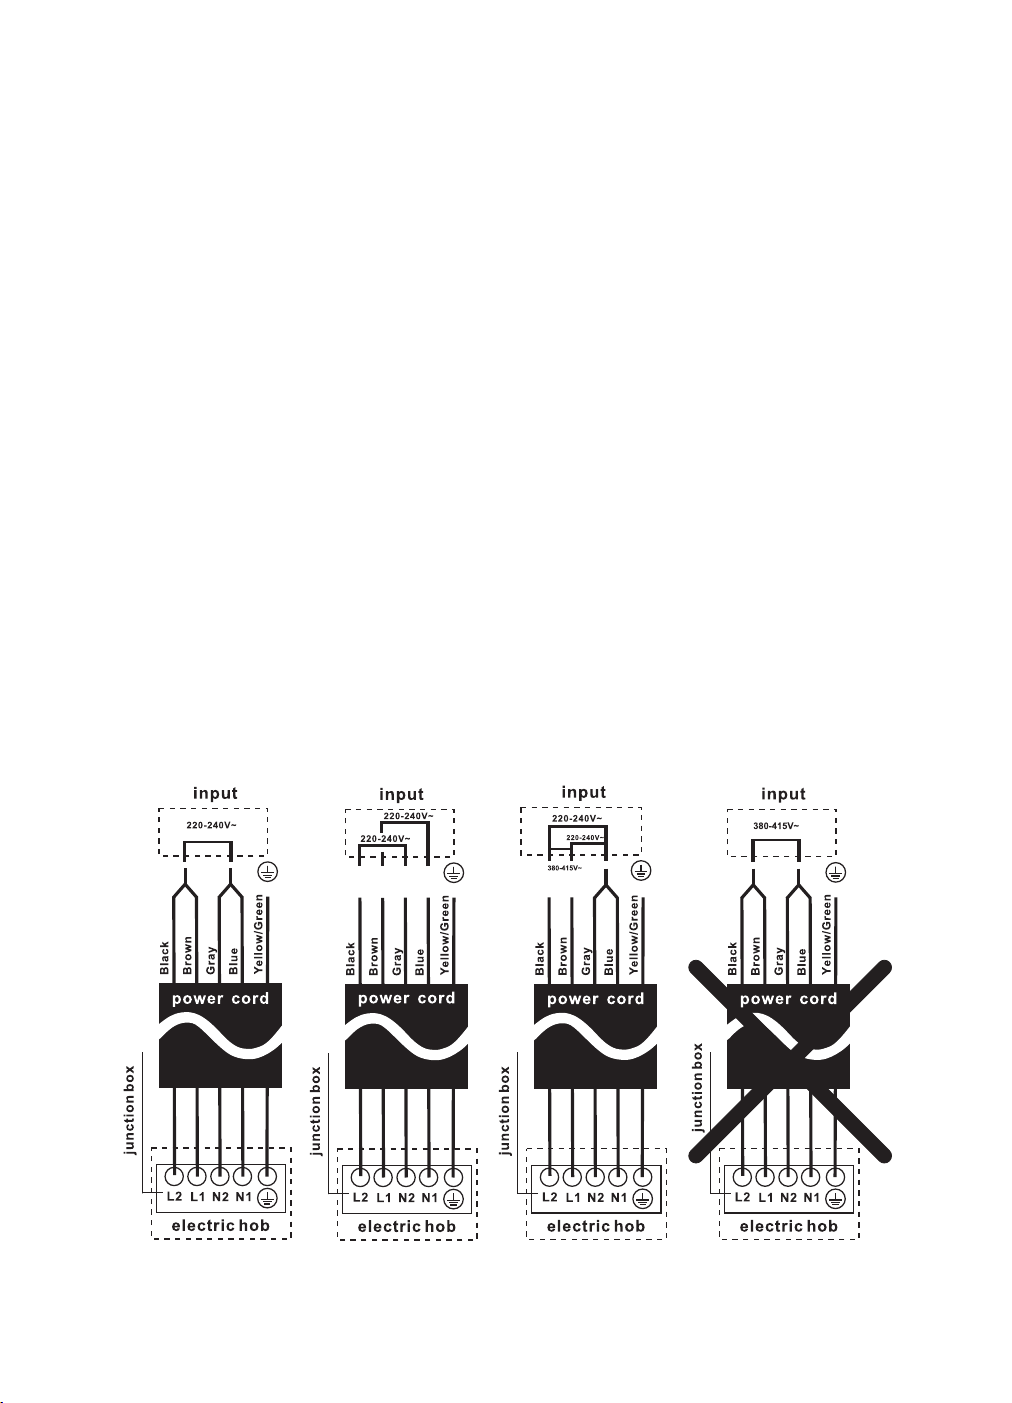
CONNECTION THE COOKTOP TO THE MAINS POWER SUPPLY
The power supply should be connected in compliance with the relevant standard, or a single-
pole circuit breaker. The appliance has a large power rating and must be connected to
electricity by a Qualified Electrician.
Notes:
1. If the cable is damaged or needs replacement, this should be done by an after sales
technician using the proper tools, so as to avoid any accidents.
2. If the appliance is being connected directly to the mains supply, an omni polar circuit
breaker must be installed with a minimum gap of 3mm between the contacts.
3. The installer must ensure that the correct electrical connection has been made and that it
complies with safety regulations.
4. The cable must not be bent or compressed.
5. The cable must be checked regularly and only replaced by a qualified technician.
Cautions
1. The cooktop must be installed by a qualified personnel or technicians. Please never
conduct the operation by yourself.
2. The ceramic cooktop shall not be mounted to any cooling equipment, dishwashers and
rotary dryers.
3. The ceramic cooktop shall be installed such that better heat radiation can be ensured to
enhance its reliability.
4. The wall and induced heating zone above the work surface shall withstand heat.
5. To avoid any damage, the sandwich layer and adhesive must be heat resistant.
6. A steam cleaner is not to be used.
For those model power cord without plug, the method of connections shown below
8
OPERATING INSTRUCTIONS
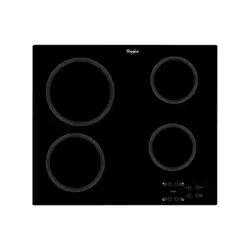
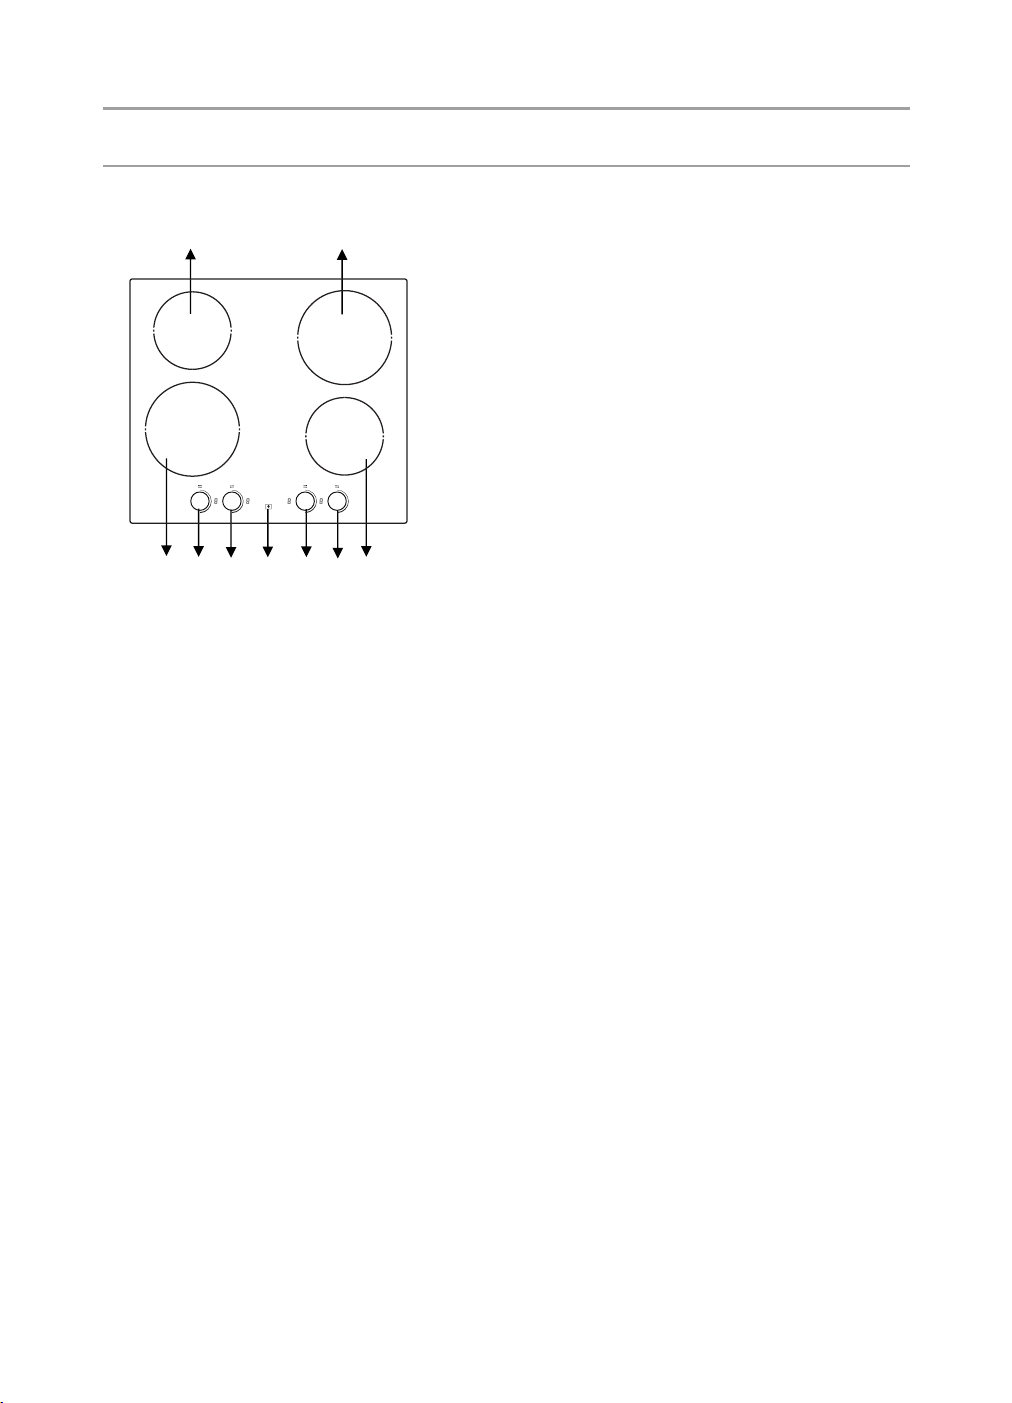
Model: WRK6140AUS
1
3
2
4
5
6
8
9
7
1.(Φ165mm)1200W #1 Cooking Zone
2.(Φ200mm)1800W #2 Cooking Zone
3.(Φ200mm)1800W #3 Cooking Zone
4.(Φ165mm)1200W #4 Cooking Zone
5. ON/OFF Button
6. Knob Control for #1 Cooking Zone
7. Knob Control for #2 Cooking Zone
8. Knob Control for #3 Cooking Zone
9. Knob Control for #4 Cooking Zone
9
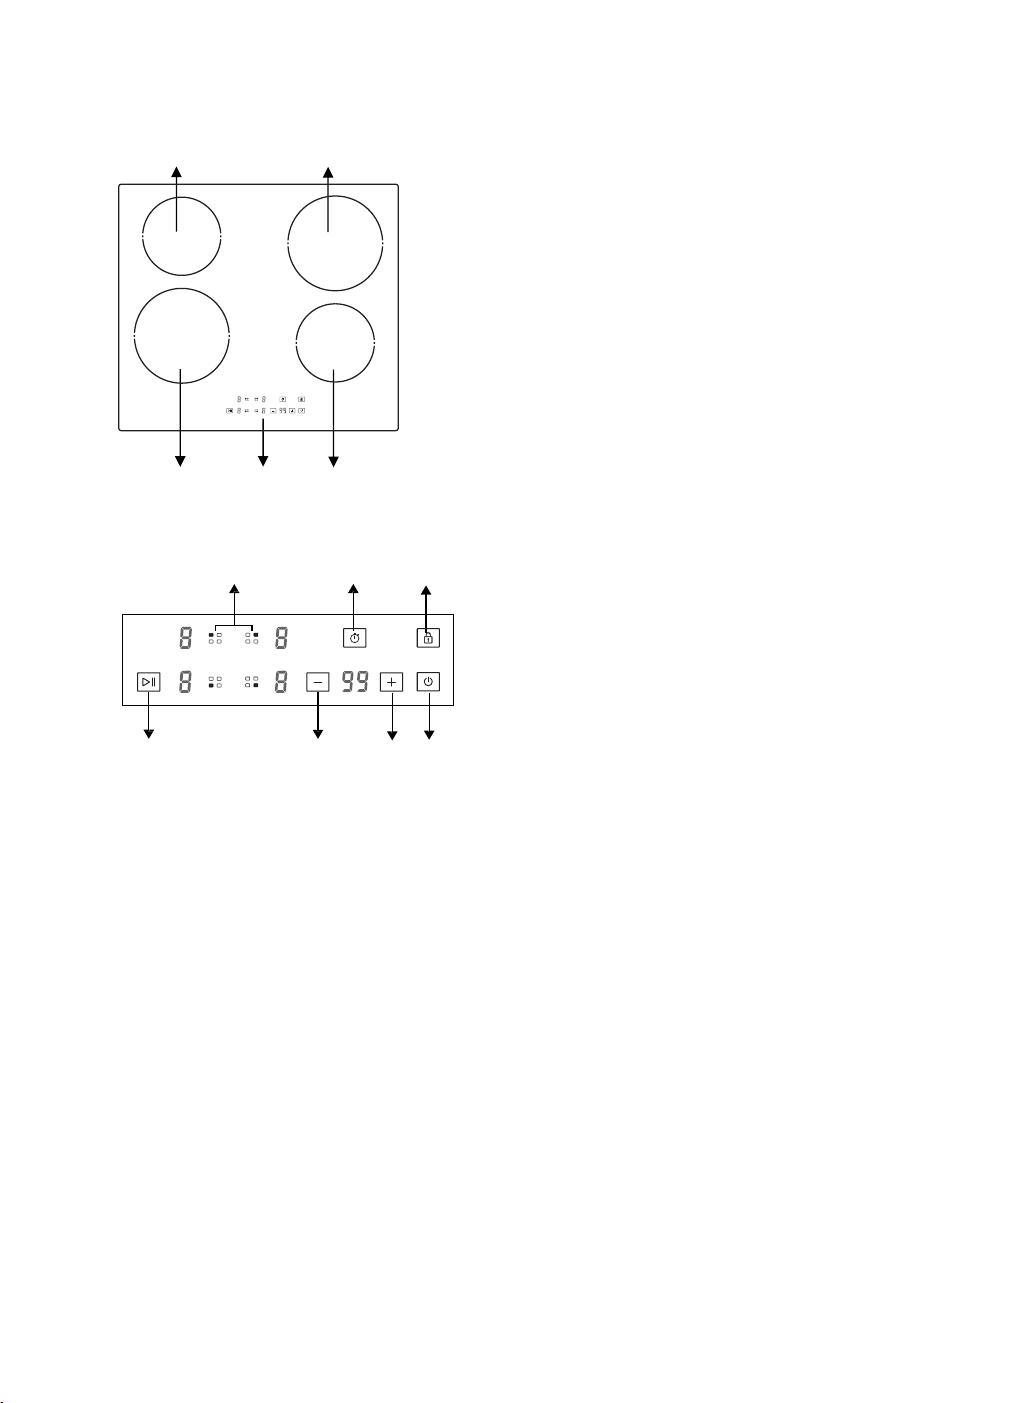
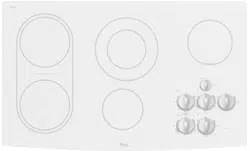
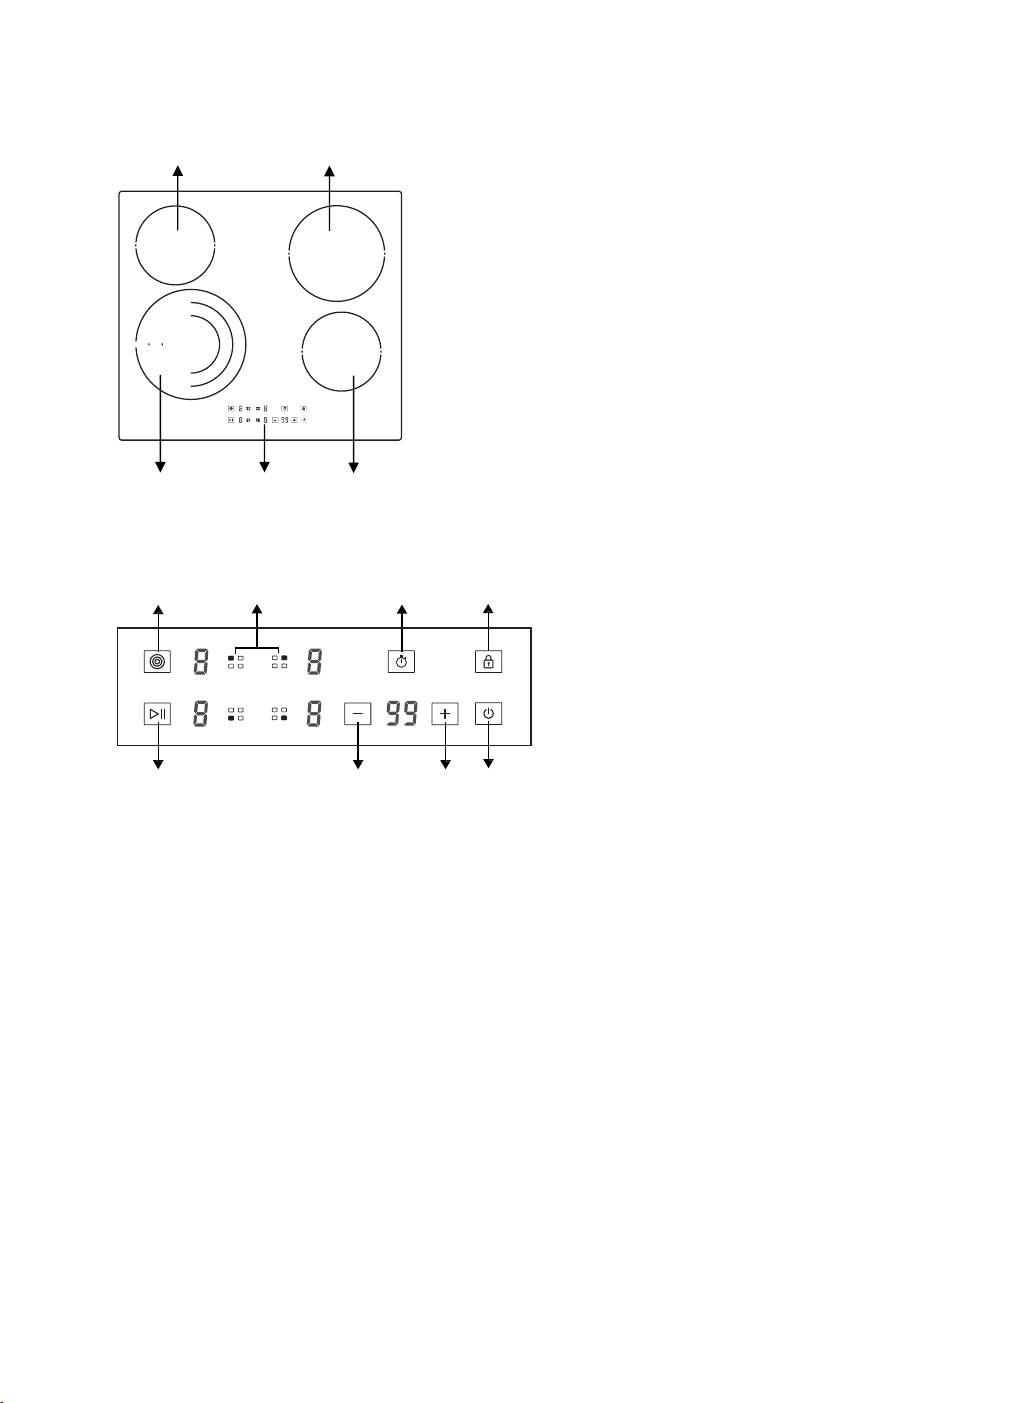
Model: WRT6140AUS
CONTROL PANEL
1
3
2
4
5
2
3
4 5
6
1
7
1.(Φ165mm)1200W #1 Cooking Zone
2.(Φ200mm)1800W #2 Cooking Zone
3.(Φ200mm)1800W #3 Cooking Zone
4.(Φ165mm)1200W #4 Cooking Zone
5. Control Panel
1. Cooking Zone selection button
2. Timer button
3. Child Lock control button
4. Stop & Go control button
5/6. Power/Timer adjustment button
7. ON/OFF button
10
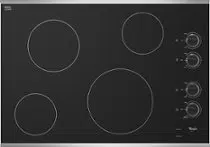
Model: WRT6340AUS
CONTROL PANEL
1
3
2
4
5
3
4
1
2
5 6 7
8
1.(Φ165mm)1200W #1 Cooking Zone
2.(Φ230/175/120mm)2300/1500/700W
#2 Cooking Zone
3. (Φ200mm)1800W #3 Cooking Zone
4.(Φ165mm)1200W #4 Cooking Zone
5. Control Panel
1. Extended zone control button
2. Cooking Zone selection button
3. Timer button
4. Child Lock control button
5. Stop & Go control button
6/7. Power/Timer adjustment button
8. ON/OFF button
11
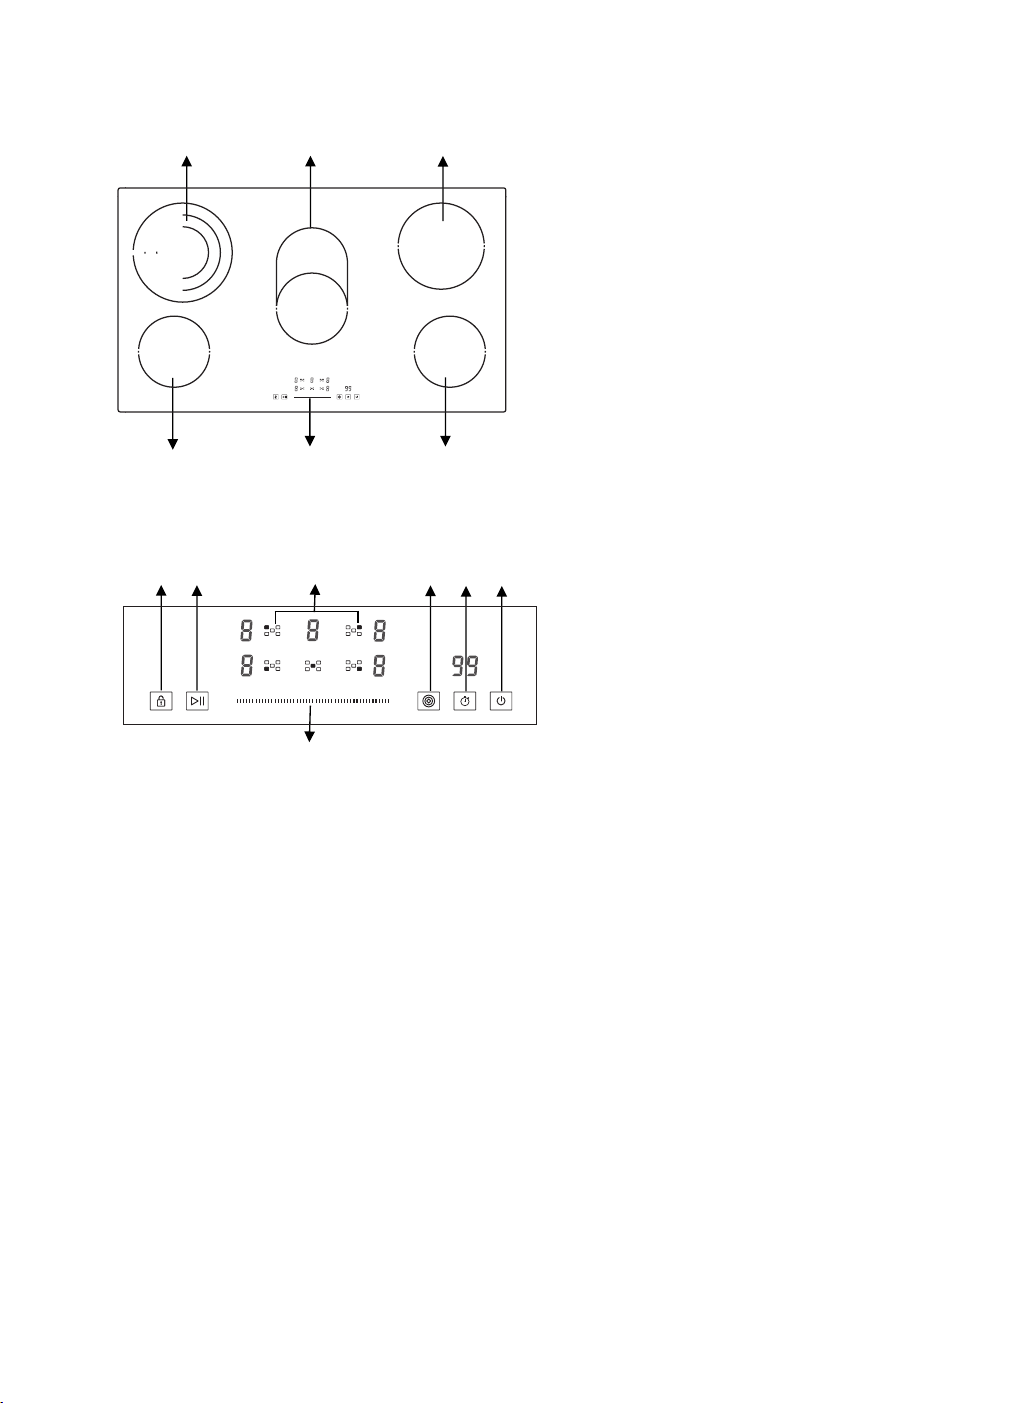
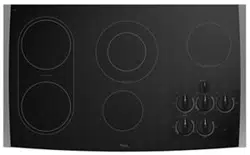
Model: WRT9350AUS
Notes: Product diagrams in the manual for reference only, there might be slightly
difference due to continually product improvements.
1. (Φ230/175/120mm)2300/1500/700W
#1 Cooking Zone
2.(Φ165mm)1200W #2 Cooking Zone
3. (Φ200mm)1800W #3 Cooking Zone
4.(Φ165mm)1200W #4 Cooking Zone
5. (270*165mm)2000/1100W #5 Cooking
Zone
6. Control Panel
1
3
2
4
6
5
2
3
5
6
7
1
4
1. Cooking Zone selection button
2. Child Lock control button
3. Stop & Go control button
4. Heating level/Timer slider control
5. Extended zone control button
6. Timer control button
7. ON/OFF button
12
CONTROL PANEL
BEFORE USING YOUR NEW COOKTOP
● Read this guide, taking special note of the ‘Safety Warnings’ section.
● Remove any protective film that may still be on your new electric cooktop.
USING THE TOUCH CONTROLS
● The controls respond to touch, so you don’t need to apply any pressure.
● Use the ball of your finger, not the tip.
● You will hear a beep each time a touch is registered.
Make sure the controls are always clean and dry, and that there is no object (e.g. a utensil or a
cloth) covering them. Even a thin film of water may make the controls difficult to operate.
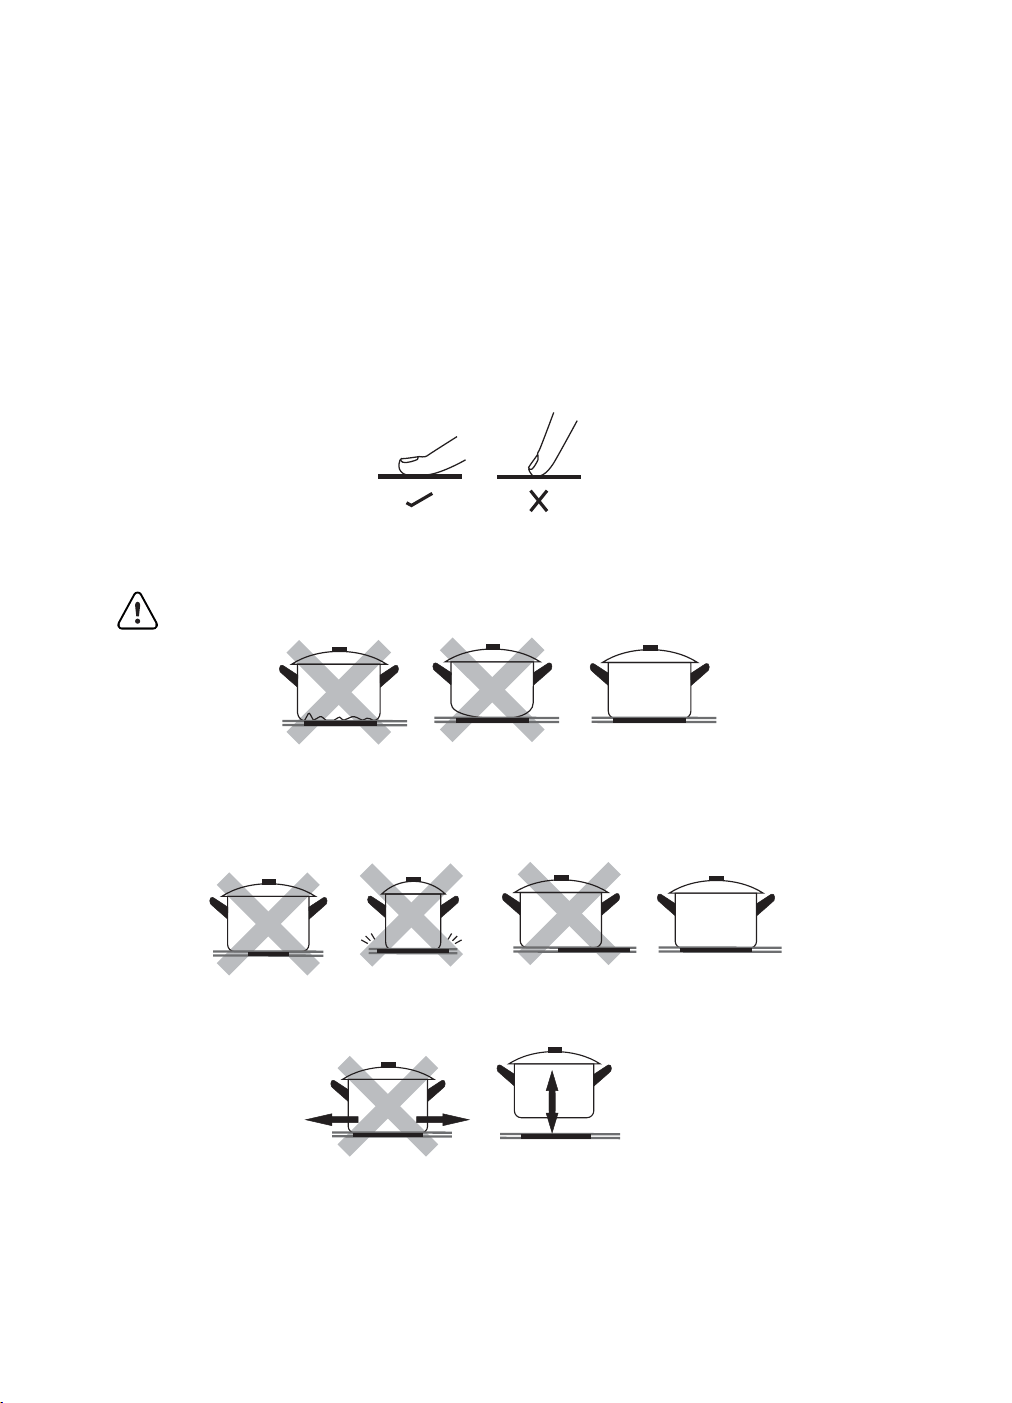
CHOOSE THE RIGHT COOKWARE
Do not use
cookware with
jagged
edges
or a
curved
base.
Make sure
that
the
base
of
your
pan
is
smooth,
sits
flat
against
the
glass,
and
is the same
size as the
cooking
zone.
If
you
use
smaller pot efficiency could be less than expected. Always
centre your pan on the cooking zone.
Always lift pans off the cooktop – do not slide, or they may scratch the glass.
Notes: You can use any kind of pot or pan for Ceramic cooktop.
13
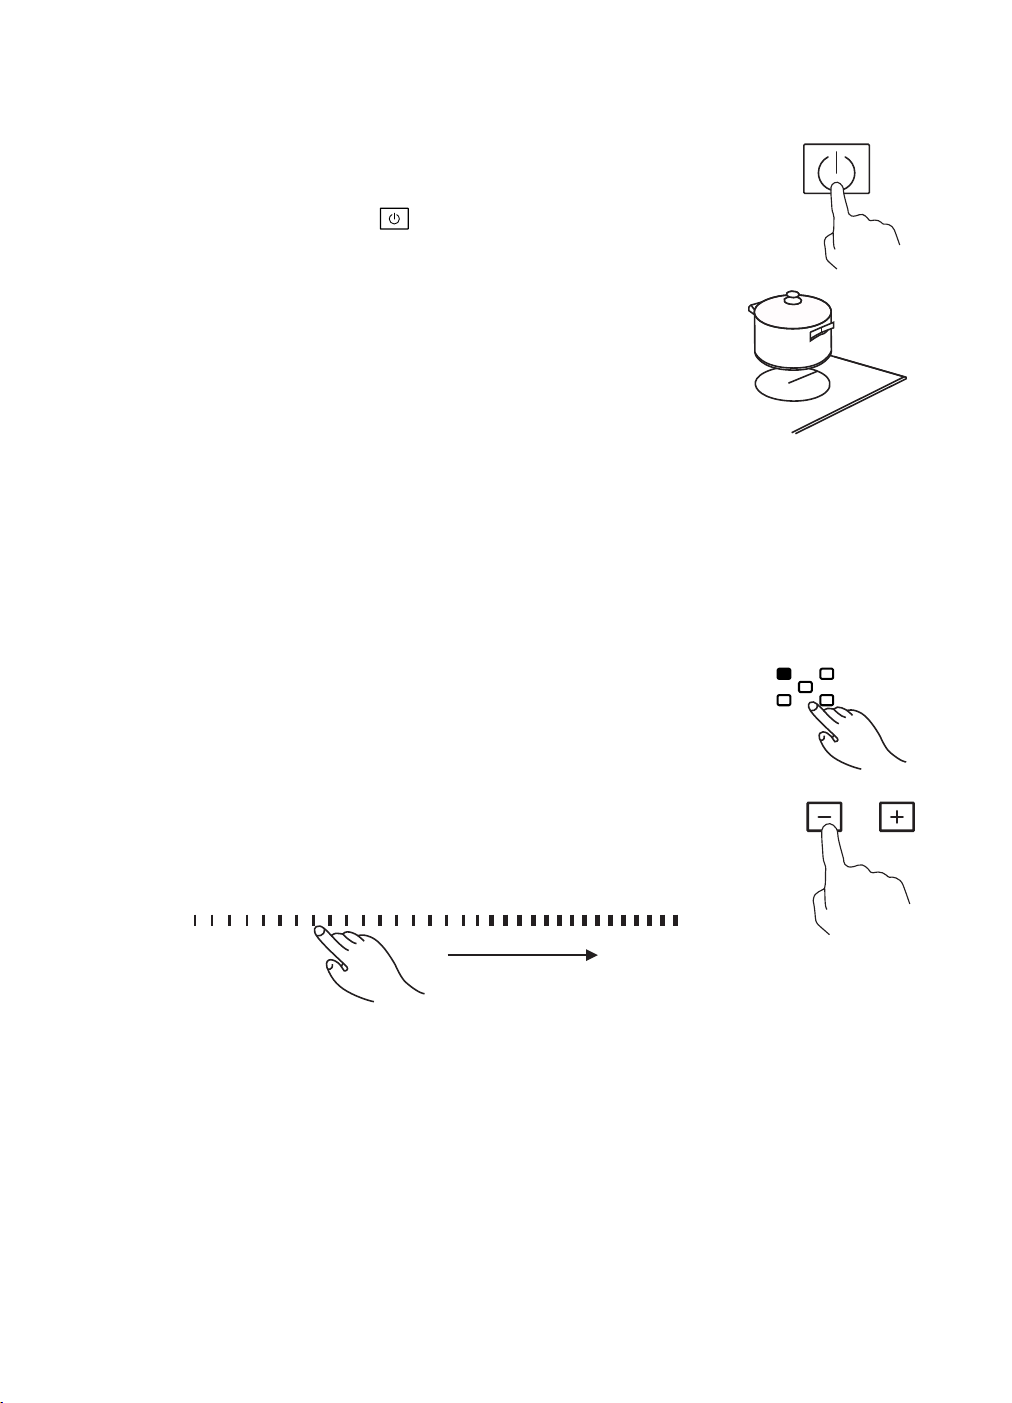
USING YOUR COOKTOP
TO START COOKING
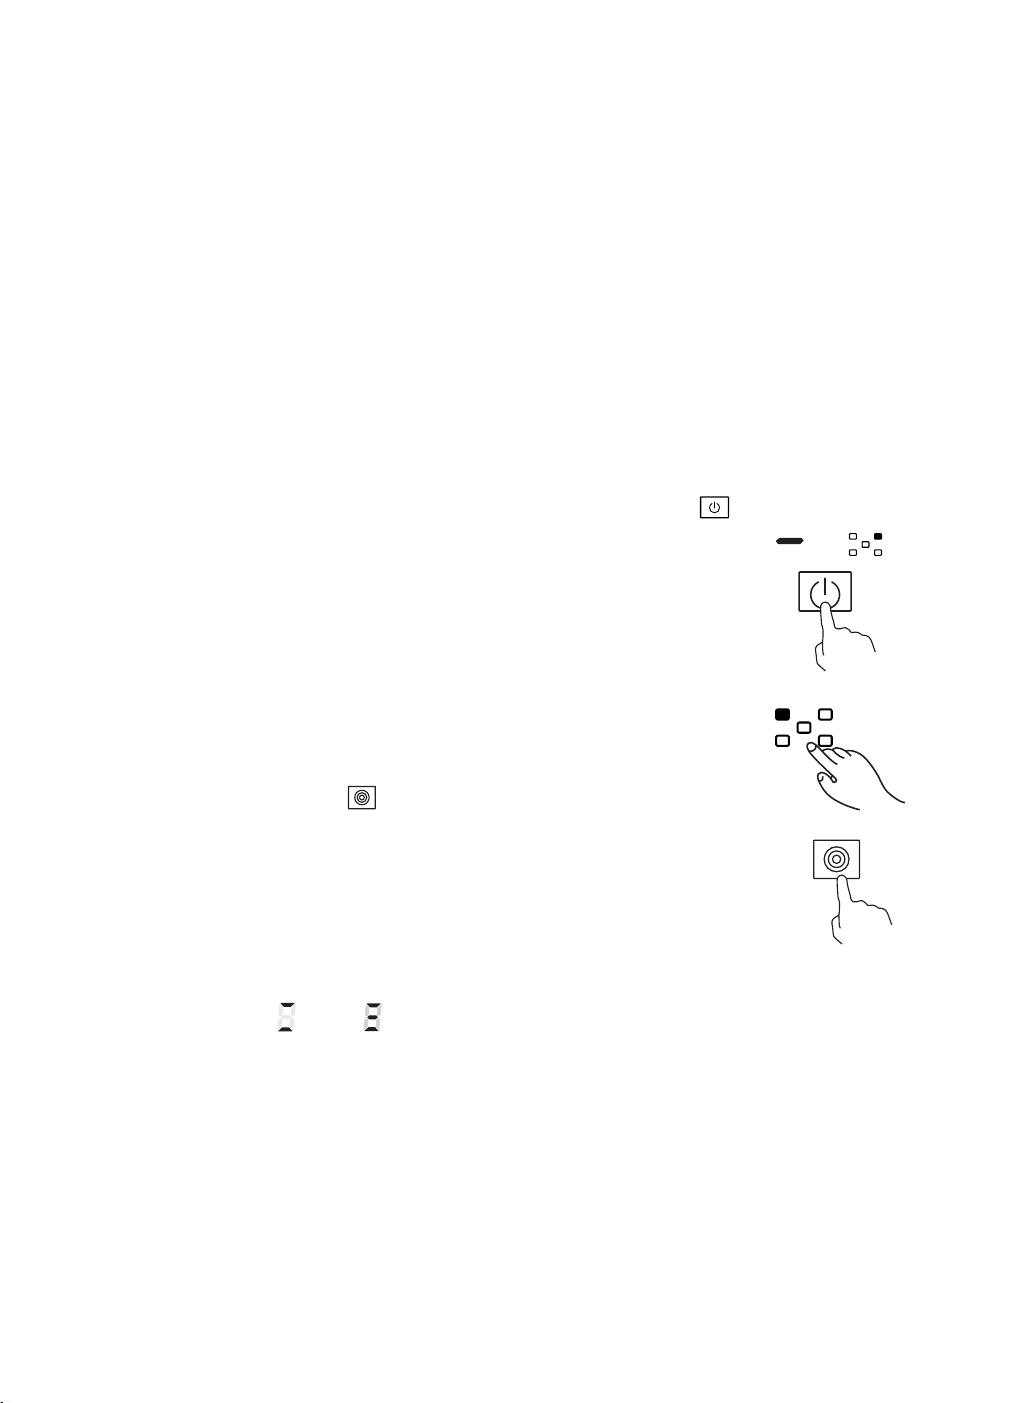
1. After the cooktop is connected to electricity and power on.
2. Press and hold the ON/OFF control button for about 3 seconds till
you hear a “beep” to turn the cooktop on. The cooktop enters into a Standby
mode - all heat setting indicators and timer indicator shows “-”.
3. Place a suitable pan on the cooking zone you wish to use.
Make sure the bottom of the pan and the surface of the cooking zone
are clean and dry.
4. Set the heating level of cooking zone.
*WRK6140AUS
Dedicated knob control mapped for each cooking zone. Set heat setting by
turning the knob control in either direction of the corresponding cooking zone.
• To prevent unintentional heating, the first time of turn each knob control
cannot adjust power level of correspondingly cooking zone.
• By turning the knob control the second time, the value will adjust down
or up rapidly, from 0 to 9 in circle.
*WRT6140AUS, WRT6340AUS
• Select the cooking zone
• Press the “+“ or “−“ button to adjust the power.
• To adjust the value rapidly, press and hold either of the “+” or “-” .
*WRT9350AUS
• Select the cooking zone
• Move your finger horizontally across the scroll keypad to adjust the power.
Power up
14
15
Notes
1. After connecting to electricity, the buzzer of the cooktop will beep once to indicate the
power is on while all indicators will light up for 1 second then go off.
2. When the cooktop is in Standby mode, the electric cooktop will automatically turn off if
there is no practice within 1 minute, followed by the buzzer beeping once.
3. To turn on the cooktop, press the ON/OFF button and hold for about 3 seconds. To turn it
off, press the ON/OFF button.
4. The power level can be adjusted from 0 to 9, default setting is at level 5.
5. The heat setting indicator of the selected zone will flash when adjusting the power. The
setting is confirmed when the value stops flashing after 5 seconds.
TO TURN OFF COOKTOP
1. You can turn the cooking zone off by adjusting the heat setting to 0, which indicator shows
“-“.
control button.2. You can also turn the whole cooktop off by touching the ON/OFF
Note: If there is power cut off during cooking, all setting will be cancelled.
USING LARGE HEATING AREA-CERAMIC COOKTOP
(for WRT6340AUS, WRT9350AUS only)
Extended zones can provide a larger cooking area and additional heat
to fit for different sizes of cooking pan.
To use the extended zone:
1. Select and active the cooking zone which you would like to use extended
zones, for those cooking zone with this feature.
Press the extended zone to activate the extended heating element
2.
to get a larger heating area.
Note:
1. By continuous touch the control button, the extended zones work at below
consequence:
-Oval zone: “Central-Oval-Central-Oval-Central zone…”
-Triple zone: “Central-Dual-Triple-Central-Dual-Triple-Central zone…”
2. When either the Oval/Dual Zone or Triple Zone is active, the LED indicator will show the
power setting and “ ” or “ ” alternately.
CHILD LOCK SAFETY CONTROL
You can lock the controls to prevent any unintended use (for example children accidentally
turning the cooking zones on.
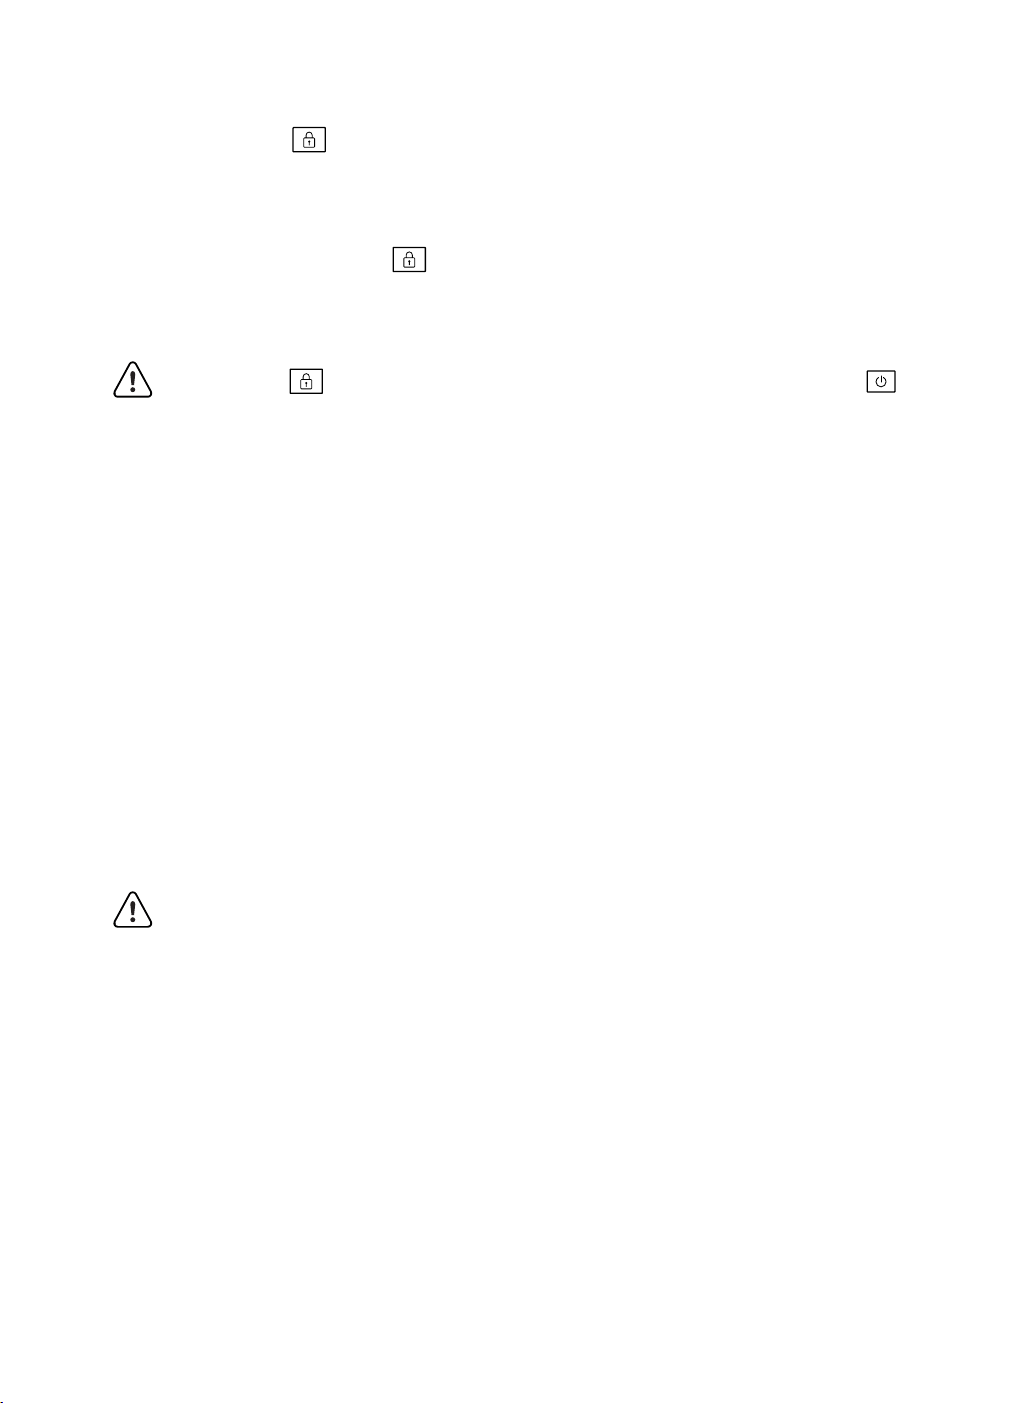
To lock the controls
Press the Child Lock button once. The timer indicator will show “Lo”, the Child Lock
function is activated.
To unlock the controls
1. Make sure the electric cooktop is turned on.
2. Press and hold the Child Lock button for 3 seconds, the buzzer will beep once and
“Lo” disappears in the timer indicator. The Child Lock is deactivated.
3. You may start to use your electric cooktop.
Under the child lock mode, all control buttons are disable except the ON/OFF button
and child lock button. You can always turn the cooktop off with the ON/OFF
button when there’s an emergency. However, you will need to deactivate the child
lock first in order to use it the next time.
Note: WRK6140AUS does not have the Child Lock Safety function.
STOP & GO FUNCTION
When cooking, your doorbell rings, phone rings, or kid shouts from another door. Need to
step out of the kitchen? This means dinner could burn, or take a longer time to prepare if you
switch everything off. The Stop & Go function can turn off all zones. When you are back, the
cooktop restarts at where they were with a touch of the button to carry on cooking.
1. Active Stop & Go function
To activate the Stop & Go function, press the Stop & Go function button. All settings are on
hold and the cooktop stops heating, all heat setting indicators show “P”.
2. Inactive Stop & Go function
To cancel the Stop & Go function, press the Stop & Go function. All settings will resume,
the Stop & Go indicator “P” will disappear from all indicators.
When the Stop & Go function is active, all control buttons are disabled except the ON/OFF
and Stop & Go button.
Note: The cooktop will automatically turn off if the Stop & Go function lasts for more
than 10 minutes. WRK6140AUS does not have the Stop & Go function.
USING THE TIMER
You can use the timer in two different ways:
• As a minute minder: the timer will not turn any cooking zone off when the set time is up.
• As a timer: set it to turn either or more than one cooking zones off.
• Both minute minder/timer can be set up to 99 minutes.
• WRK6140AUS does not have the timer function.
16
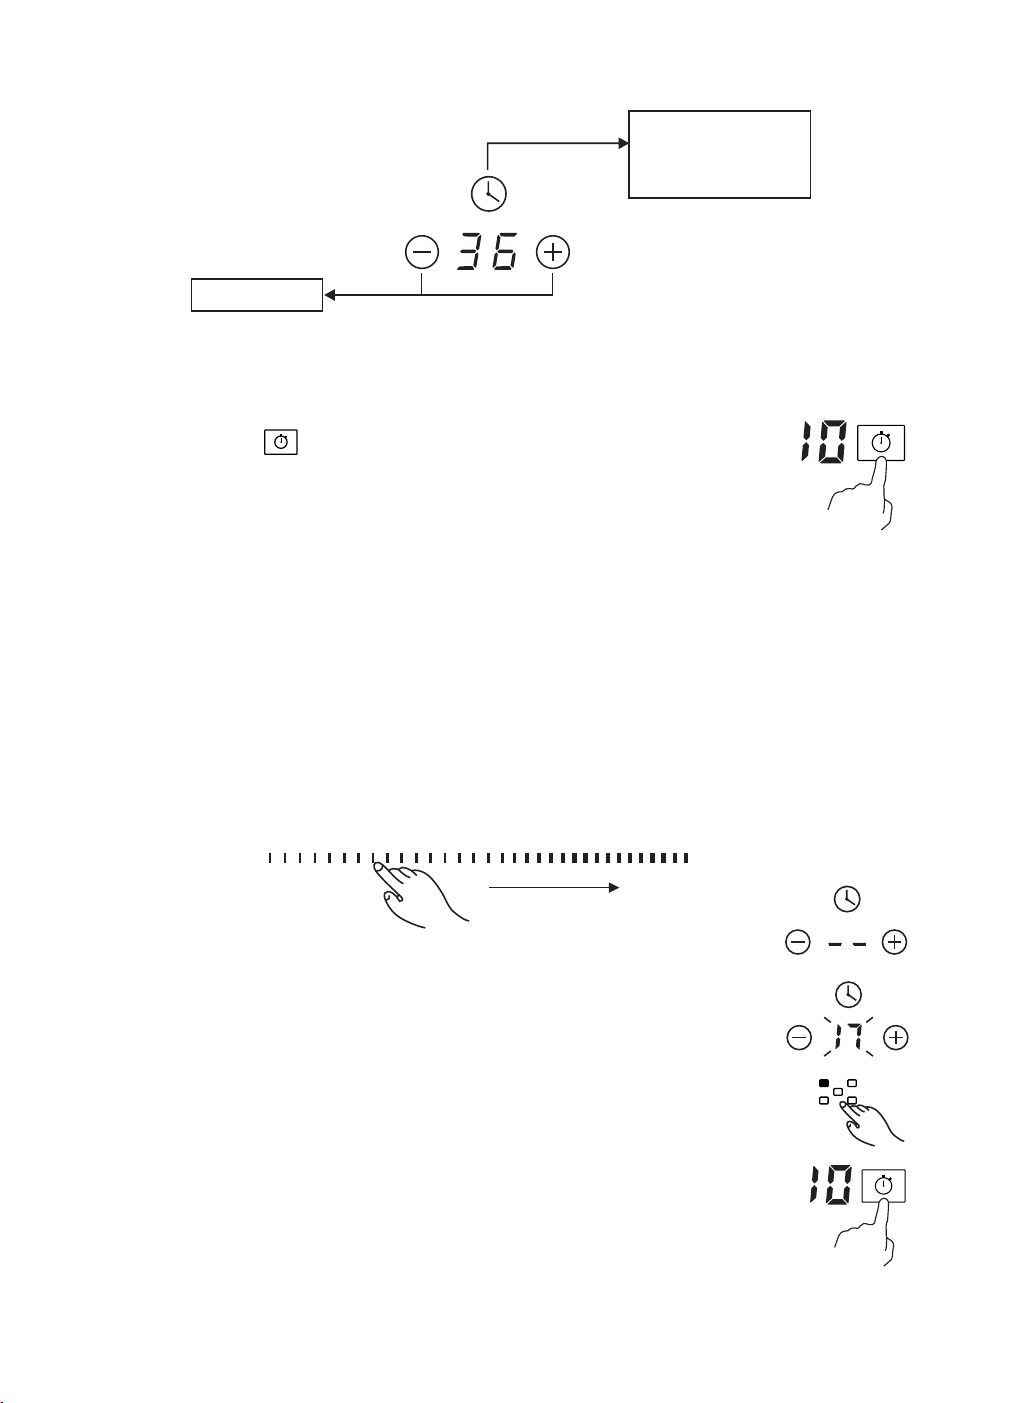
Timer overview
Minute display
shows the number
of minutes
Timer control
USING THE TIMER AS A MINUTE MINDER
If you have not selected any cooking zones
1.Touch the timer button , the number in the timer indicator starts to flash.
2. Adjust the Minute Minder setting follows below:
*For Touch control models: WRT6140AUS, WRT6340AUS
• Press the “+“ or “−“ button to set the desired time
• The value will adjust down or up rapidly in a loop when you press and hold either of the two
buttons.
Note: When the timer indicator flashes, press the timer button another time to confirm the
timer setting.
*For Slider Touch control models: WRT9350AUS
• Adjust the single digit of minute minder settings by sliding the scroll keypad.
• Press the timer button, the number of tens digit in the timer indicator flashes, adjust tens
digit of minute minder setting by sliding the slider control. To confirm, press the timer button.
3. When the minute minder is set, it will begin to count down immediately, the
display will show the remaining time.
4. The buzzer will beep for 30 seconds and the timer indicator shows “- - “
when the time is completed. Any efficient touching of control buttons during it,
would end up the buzzer beeps.
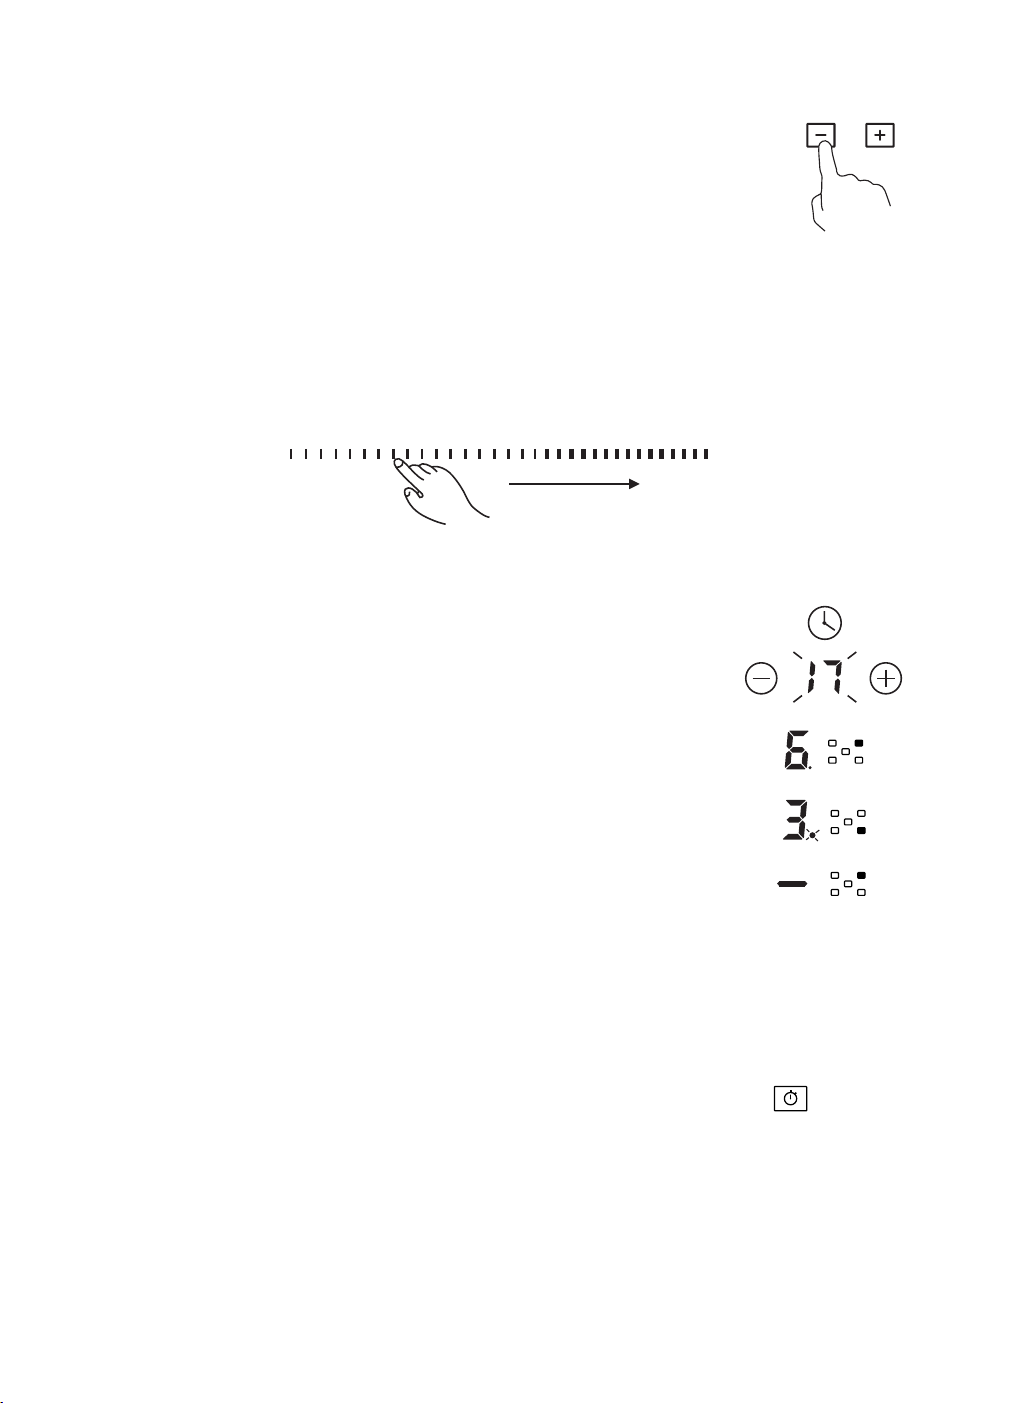
Setting the timer to turn cooking zone off
1. Select the cooking zone you wish to set the timer for.
2. Press the timer button , the number in the timer indicator flashing.
3. Then adjust Timer setting
Timer up
17
Timer up
*For Touch control models: WRT6140AUS, WRT6340AUS
• Press the “+“ or “−“ button to set the desired time
• The value will adjust down or up rapidly in a loop when you press and hold
either of the two buttons.
Note: When the timer indicator flashes, press the timer button to confirm the setting.
*For Slider Touch control models: WRT9350AUS
• Adjust the single digit of minute minder settings by sliding the scroll keypad.
• Press the timer button, the number of tens digit in the timer indicator flashes, adjust tens
digit of minute minder setting by sliding the slider control. To confirm, press the timer button.
4. When the timer is set, it will begin to count down immediately, the display will show the
remaining time.
Note:
• The red dot next to the power level indicator will illuminate for those
zones to be set with a timer. You can check the timer setting of different
cooking zones which are set with a timer, by activating the cooking zone.
• If more than one heating zone has a timer setting, the timer indicator will
show the lowest time. The red dot next to the power level indicator will flash.
5. When the cooking time is up, the corresponding cooking zone will be
switched off automatically.
Note:
• The default setting of minute reminder and timer is 30 minutes.
• The setting is confirmed when the timer indicator will flash for 5 seconds after adjustment
and stop flashing thereafter.
• The minute reminder and timer can be used at same time, the timer indicator shows the
lowest time setting. If the lowest setting is the minute reminder, the red dot next to the timer
indicator will flash. If the lowest setting is the timer setting, the red dot of the corresponding
cooking zone power level indicator will flash.
• If the indicator shows the timer setting of the cooking zone, press the timer
button to
check the minute reminder setting, the indicator will then show the minute reminder setting.
18
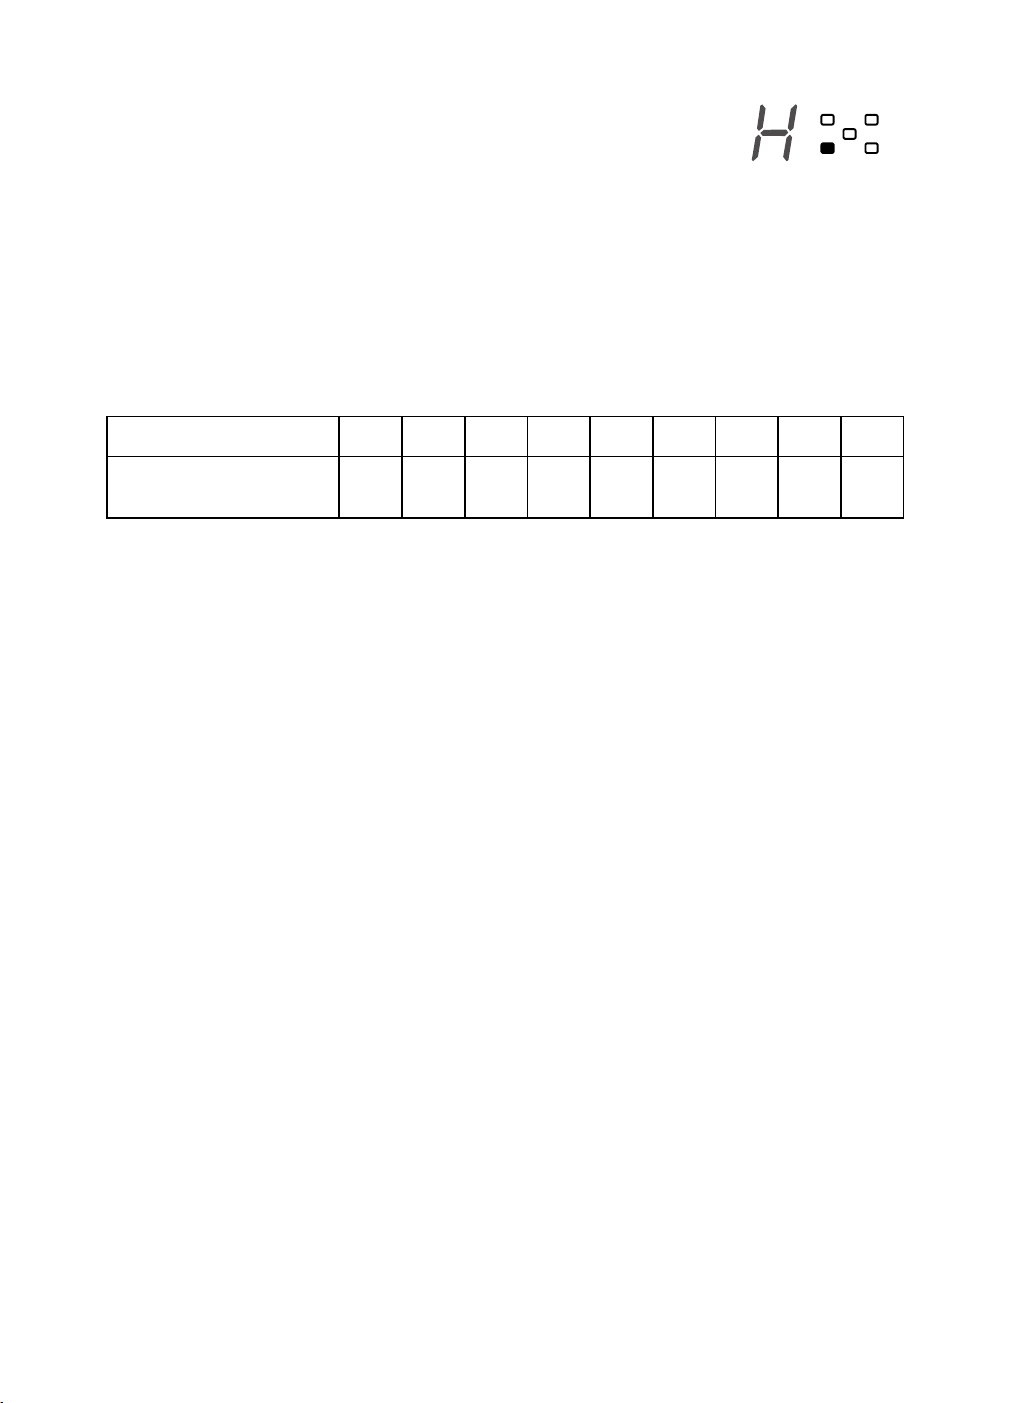
RESIDUAL HEAT WARNING
Beware of hot surfaces
When the cooktop has been operating for some time, there will be some
residual heat. The letter “ H ”appears in the power setting indicator to warn you
to keep away from it. It can also be used as an energy saving function: Use the hotplate that
is still hot to heat the pan further.
AUTO SHUTDOWN
Another safety feature of the cooktop is auto shutdown. This occurs whenever you forget to
switch off a cooking zone. The default shutdown times as below:
OVERHEAT PROTECTION
The temperature sensor can monitor the temperature inside the cooktop. When an
excessive temperature is monitored, the cooktop will automatically stop the operation.
OVERFLOW PROTECTION
For your safety, the cooktop will automatically shut off the power if liquid boiling spilled over
the control panel or wet cloth covering the control panel. All control buttons became invalid
except ON/OFF and Child Lock button, unless you wipe the area of the control panel dry.
Note: WRK6140AUS does not have the overflow protection feature.
COOKING GUIDELINES
Take care when frying as the oil and fat heat up quickly. At extremely high temperatures, the
oil and fat will ignite spontaneously and this presents a risk of fire.
Cooking Tips
• When food comes to the boil, reduce the power setting.
• Using a lid will reduce cooking times and save energy by retaining the heat.
• Minimize the amount of liquid or fat to reduce cooking times.
• Start cooking on a high setting and reduce the setting when the food has heated through.
Simmering, cooking rice
• Simmering, at around 85˚C, occurs below boiling point when bubbles are just rising
occasionally to the surface of the cooking liquid. It is the key to delicious soups and tender
stews because flavors develop without overcooking the food. You should also cook egg-
based and flour thickened sauces below boiling point.
• Some dishes, including cooking rice by the absorption method, may require a setting higher
than the lowest setting to ensure the food is cooked properly in the time recommended.
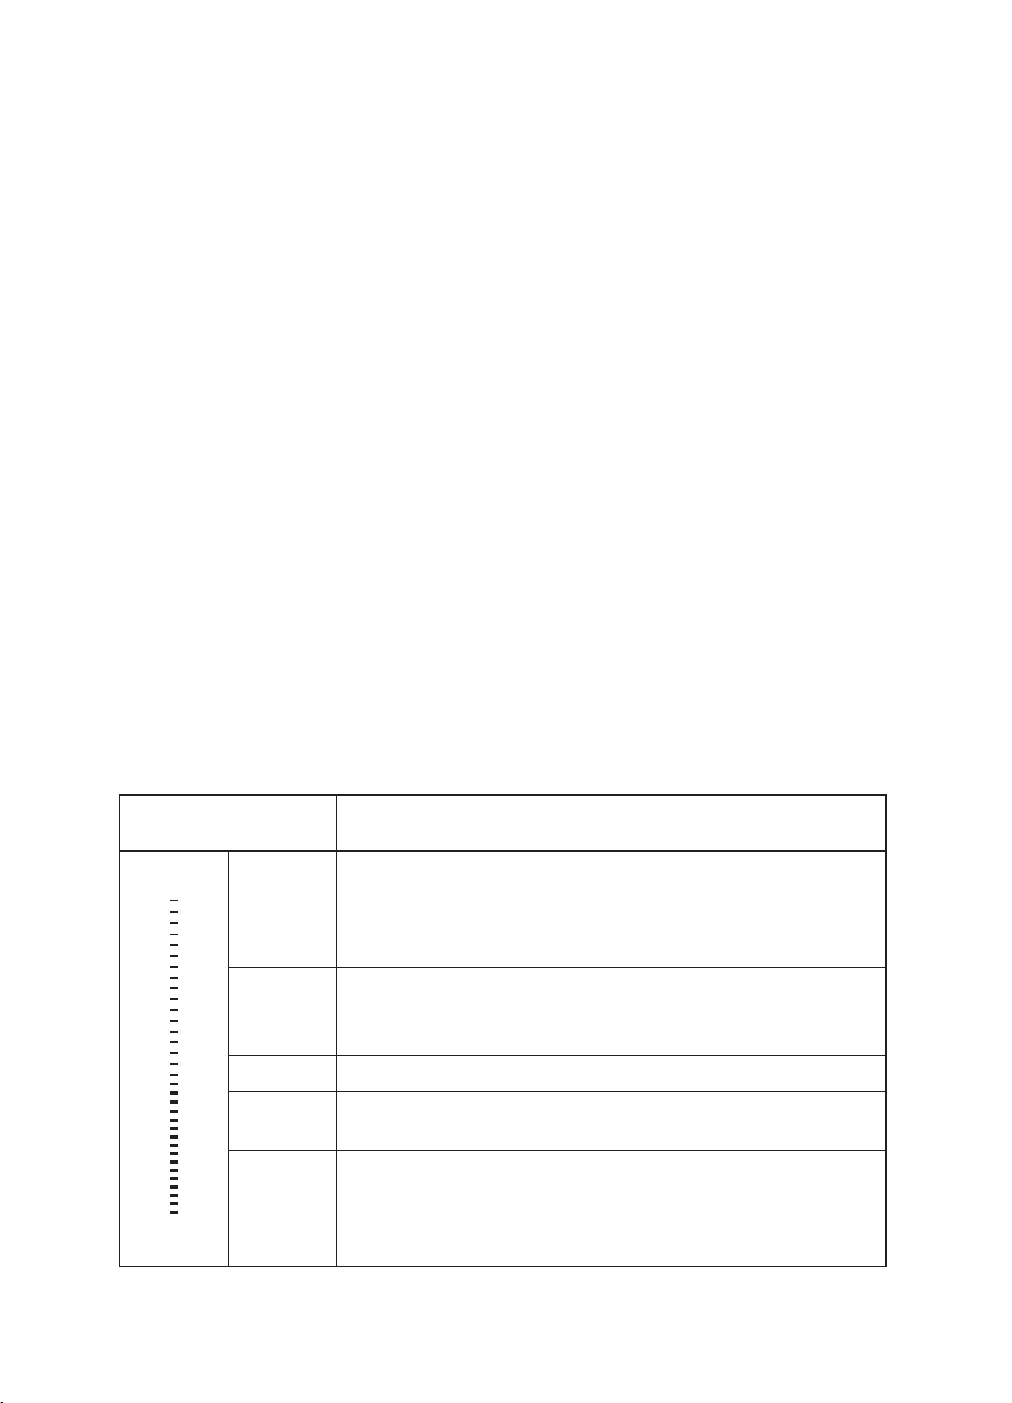
Power Level 1 2 3 4 5 6 7 8 9
Default Working Timer
(Hour)
8 8 8 4
4 4 2
2 2
19
Searing steak
To cook juicy flavorsome steaks:
1. Stand the meat at room temperature for about 20 minutes before cooking.
2. Heat up a heavy-based frying pan.
3. Brush both sides of the steak with oil. Drizzle a small amount of oil into the hot pan and
then lower the meat onto the hot pan.
4. Turn the steak only once during cooking. The exact cooking time will depend on the
thickness of the steak and how cooked you want it. Times may vary from about 2 – 8
minutes per side. Press the steak to gauge how cooked it is – the more firm the meat the
more ‘well done’ it will be.
5. Leave the steak to rest on a warm plate for a few minutes to allow it to relax and become
tender before serving.
For stir-frying
1. Choose a ceramic compatible flat-based wok or a large frying pan.
2. Have all the ingredients and equipment ready. Stir-frying should be quick. If cooking large
quantities, cook the food in several smaller batches.
3. Preheat the pan briefly and add two tablespoons of oil.
4. Cook any meat first, put it aside and keep warm.
5. Stir-fry the vegetables. When they are hot but still crisp, turn the cooking zone to a lower
setting, return the meat to the pan and add your sauce.
6. Stir the ingredients gently to make sure they are heated through.
7. Serve immediately.
COOKING TABLE
The cooking table offers an example of the cooking type for each power level. The actual
delivered power of each power level depends on the cooking zone dimension.
Zero
power
Maximum
power
1- 2
3- 4
5- 6
7- 8
9
Heat setting
LEVEL USE
(indicating cooking experience and habits)
•delicate warming for small amounts of food
•melting chocolate, butter, and foods that burn quickly
•gentle simmering
•slow warming
•reheating
•rapid simmering
•cooking rice
•pancakes
•sautéing
•cooking pasta
•stir-frying
•searing
•bringing soup to the boil
•boiling water
20

CLEANING AND MAINTENANCE
Important: Before any maintenance or cleaning work is carried out, DISCONNECT the
appliance from ELECTRICITY supply and ensure the appliance is completely cool.
CLEANING THE COOKTOP SURFACE
Clean spillages from the cooktop surface as soon as possible after use. Always ensure the
surface is cool enough before cleaning. Use a soft cloth or kitchen paper to clean the surface.
If the spillage has dried on the surface, you may need to use a specialist vitro-ceramic glass
cleaner, which is available for most supermarkets. Do not use other abrasive cleaners and/or
wire wool ect., as it may scratch the ceramic glass surface of your cooktop.
DAMAGE FROM SUGARY SPILLS AND MELTED PLASTIC
Special care should be taken when removing hot substances to avoid permanent damage
to the glass surface. Sugary spillovers (such as jellies, fudge, candy, syrups) or melted
plastics can cause pitting of the surface of your cooktop (not covered by the warranty)
unless the spill is removed while still hot. Special care should be taken when removing hot
substances.
21
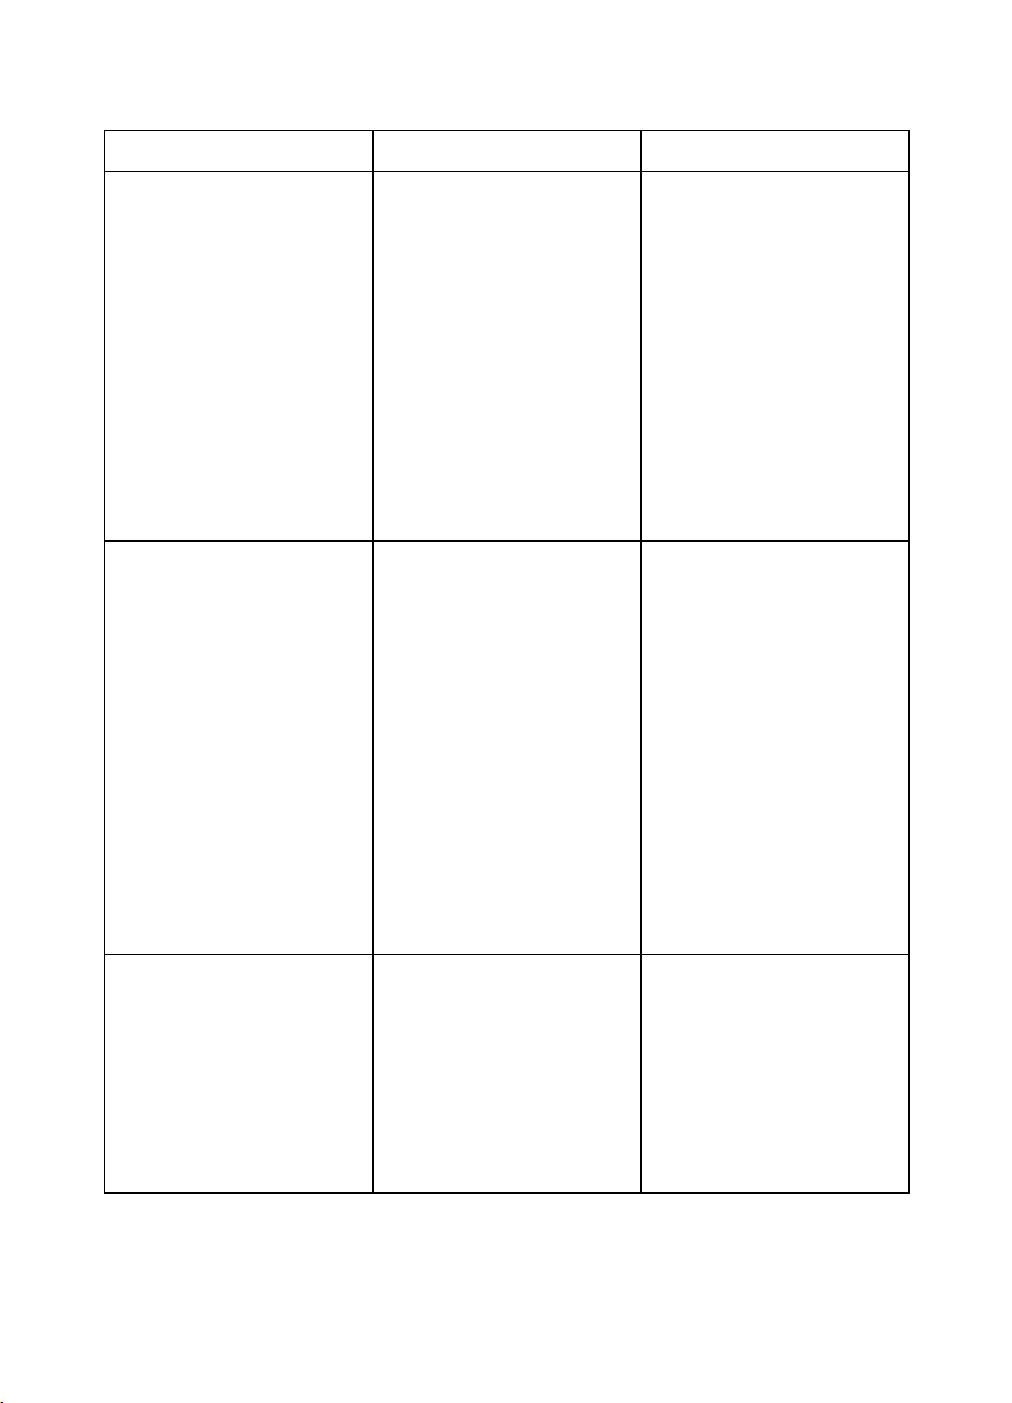
HINTS AND TIPS
What? How? Important!
Everyday soiling on glass
(fingerprints, marks, stains
left by food or non-sugary
spillovers on the glass)
1. Switch off the power
supply.
2. Apply a vitro-ceramic glass
cleaner while the glass is still
warm (but not hot!)
3. Rinse and wipe dry with a
clean cloth or paper towel.
4. Switch on the power
supply to the cooktop
• When turn off the power
supply of cooktop, there will
be no ‘hot surface’ indication
but the cooking zone may still
be hot! Take extreme care.
• Heavy-duty scourers, some
nylon scourers and
harsh/abrasive cleaning
agents may scratch the
glass. Always read the label
to check if your cleaner or
scourer is suitable.
• Never leave cleaning
residue on the cooktop glass
surface: the glass may
become stained.
Boil over, melts, and hot
sugary spills on the glass
Remove these immediately
with a fish slice, palette knife
or razor blade scraper
suitable for ceramic glass of
cooktop, but beware of hot
cooking zone surfaces:
1. Switch off the power
supply.
2. Hold the blade or utensil at
a 30°angle and scrape the
soiling or spill to a cool area of
the cooktop.
3. Clean the soiling or spill
up with a dish cloth or paper
towel.
4. Follow steps 2 to 4 for
‘Everyday soiling on glass’
above.
• Remove stains left by melts
and sugary food or spillovers
as soon as possible. If left to
cool on the glass, they may
be difficult to remove or even
permanently damage the
glass surface.
• Cut hazard: when the safety
cover is retracted, the blade
in a scraper is razor-sharp.
Use with extreme care and
always store safely
Spillovers on the touch
controls
1. Switch off the power
supply.
2. Soak up the spill
3. Wipe the control panel
area with a clean damp
sponge or cloth.
4. Wipe the area completely
dry with a paper towel.
5. Switch on the power
supply to the cooktop
• The cooktop may beep and
turn itself off, and the touch
controls may not function
while there is liquid on them.
Make sure you wipe the
control panel dry before
turning the cooktop back on.
22

MAINTENANCE OF THE COOKTOP
Troubleshooting
1. There is no power to the appliance:
- Check whether there is a power cut of your department;
- Check whether the appliance be connected to electricity properly;
- Has the timer setting elapsed;
- Whether it reaches the longest cooking time setting and auto shut off;
- Whether there is liquid boiling over touch control panel and overflow protection devices
auto shut off;
2. The control panel buttons can’t be activated:
- Whether it’s under “Child Lock”, which there is “Lo” shows in timer indicator;
- Whether liquid spilled or wet cloth cover over the control panel as the overflow protection is
activated;
3. After cooking there is “H” shows on display:
- This is normal. The cooktop is with Residual Heat Warning safety features. It will remain on
until the surface is cool enough for touch.
4. The glass is being scratched:
-Check whether you use unsuitable cookware, like rough-edged cookware.
-Check whether unsuitable, abrasive scourers or cleaning products are being used.
5. The heating element of the ceramic cooktop turns on and off alternately when working:
-This is normal and natural feature for a ceramic cooktop. The programmer of the ceramic
cooktop, together with the thermostat or thermocouple in the heating element, could control
the cooktop settings when at power level and avoid overheating by turning on/off the heating
element alternately.
-If working at the highest power level, the heating element will continue to turn on for a
certain time then on/off alternately.
-If working at a lower power level, the heating element will turn on/off alternately at a certain
frequency from the beginning based on the power setting of the cooking zone.
23
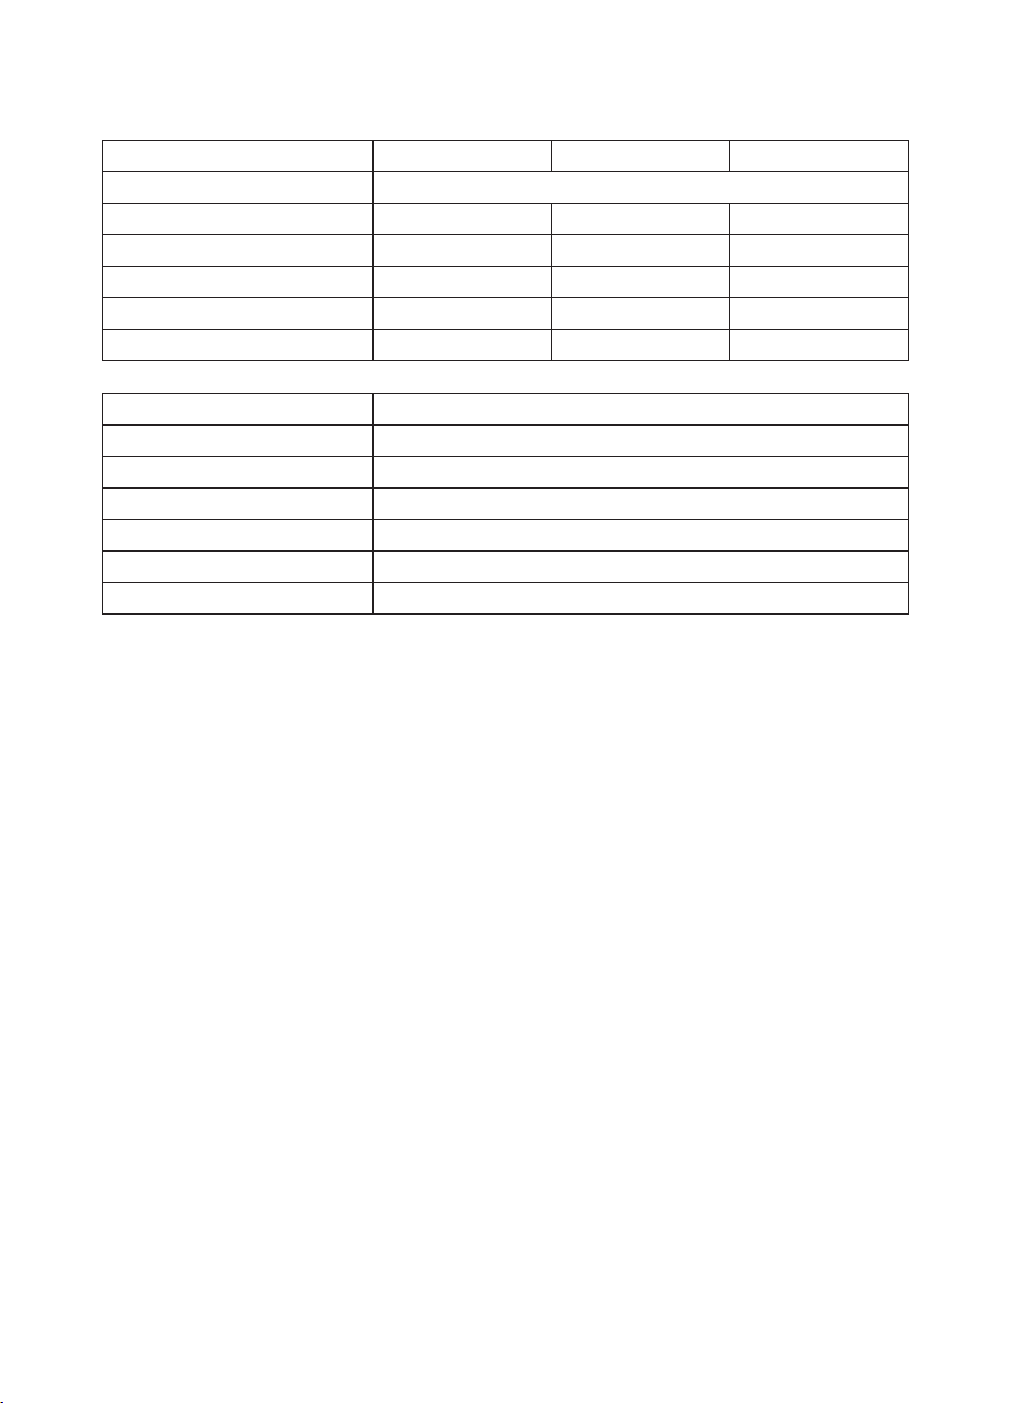
Technical Specifications
Model No.
Rated Voltage & Frequency
Rated Power
Product Size
Carton Size
Net Weight
Gross Weight
WRK6140AUS
220-240V~ or 380-415V 3N~, 50-60Hz
6000W
590×520×51mm
635×568×113mm
8.0 kg
9.7 kg
WRT6140AUS
6000W
590×520×51mm
635×568×113mm
7.8 kg
9.5 kg
WRT6340AUS
6500W
590×520×51mm
635×568×113mm
8.2 kg
9.8 kg
Model No.
Rated Voltage & Frequency
Rated Power
Product Size
Carton Size
Net Weight
Gross Weight
WRT9350AUS
220-240V~ or 380-415V 3N~, 50-60Hz
8500W
900×520×51
1005×120x620mm
12.5 kg
15.3 kg
Weight and Dimensions are approximate. Because we continually strive to improve our
products we may change specifications and designswithout prior notice.
24
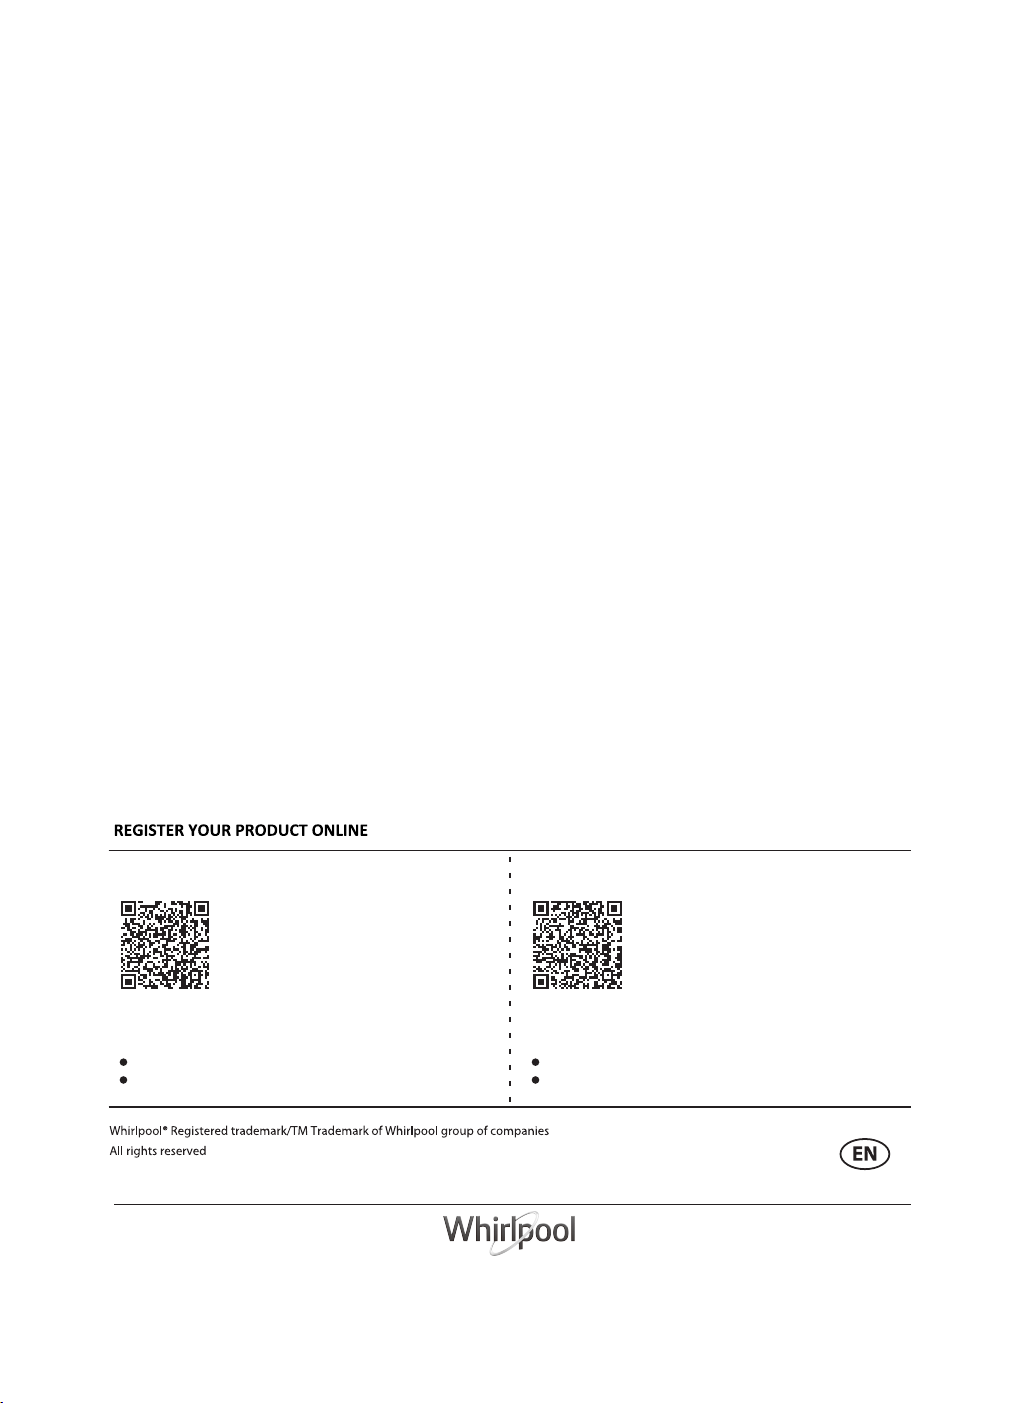
AFTER-SALES SERVICE
To receive complete assistance, please register your product in your local market.
BEFORE CALLING THE AFTER-SALE SERVICE:
1. See if you can solve the problem by yourself with the help of the TROUBLESHOOTING
suggestions.
2. Switch the appliance off and on again to see if the fault persists.
IF AFTER THE ABOVE CHECKS THE FAULT STILL OCCURS, GET IN TOUCH WITH
THE NEAREST AFTER-SALES SERVICE.
To receive assistance, call the number shown on the warranty booklet or follow the
website's instructions.
When contacting our Client After sales service, always specify:
● a brief description of the fault;
● the type and exact model of the appliance;
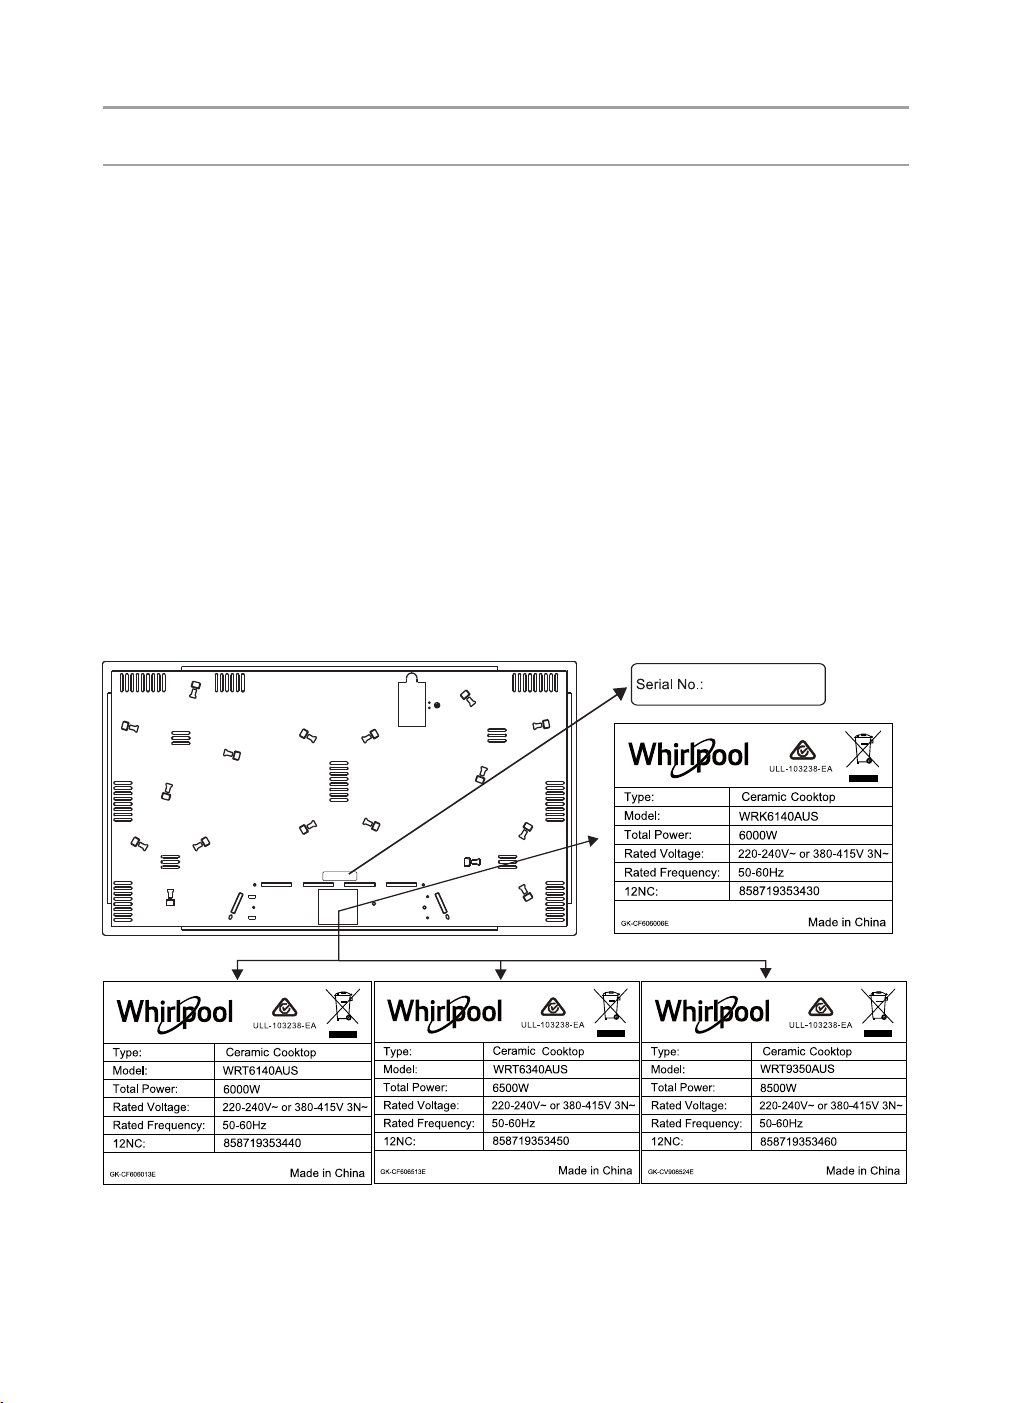
● the serial number(on the rating plate located under the appliance);
● your full address;
● your telephone number.
If any repairs are required, please contact an authorized after-sales service (to guarantee that
original spare parts will be used and repairs carried out correctly).
xxxxxxxxx
25
serial number
Rating Plate
-http://www.whirlpool.com.au
-http://www.whirlpool.co.nz
For Australia Market
Scan QR Code or visit
www.whirlpool.com.au
to register your product warranty online.
This QR Code is only applicable to Australia.
You can download the user manual by
Visiting our website www.whirlpool.com.au
Contracting our Customer Service Center at 1300 363 344
For New Zealand Market
Scan QR Code or visit
www.whirlpool.co.nz
to register your product warranty online.
This QR Code is only applicable to New Zealand.
You can download the user manual by
Visiting our website www.whirlpool.co.nz
Contracting our Customer Service Center at 0800 442 584