Tuya Smart
USER MANUAL
TUYA250201
REC YOUR LIMITS
Scan the QR Code to view the Video
Manual , making it easier to fully
setup and use this device.
LED Indicators
INDICATOR CODE
CONDITION
Flashing-
quickly
Waiting for distribution
network(AP mode, no
video)
Solid
Flashing- slowly
and
both ON
Distribution network
completed
Disconnected from the
network
Long press the reset
button to reset
BLUE
BLUE
BLUE
RED BLUE
APP Download & Login in
1 APP Download
1st Way
Download the “Tuya Smart”
App from Google Play Store
(for Android) or Apple Store
(for IOS )
Scan the QR code to
download the
“Tuya Smart” App
2st Way
2 Register and log in to the APP
Please register an APP account and log in.
If already registered, please log in directly.
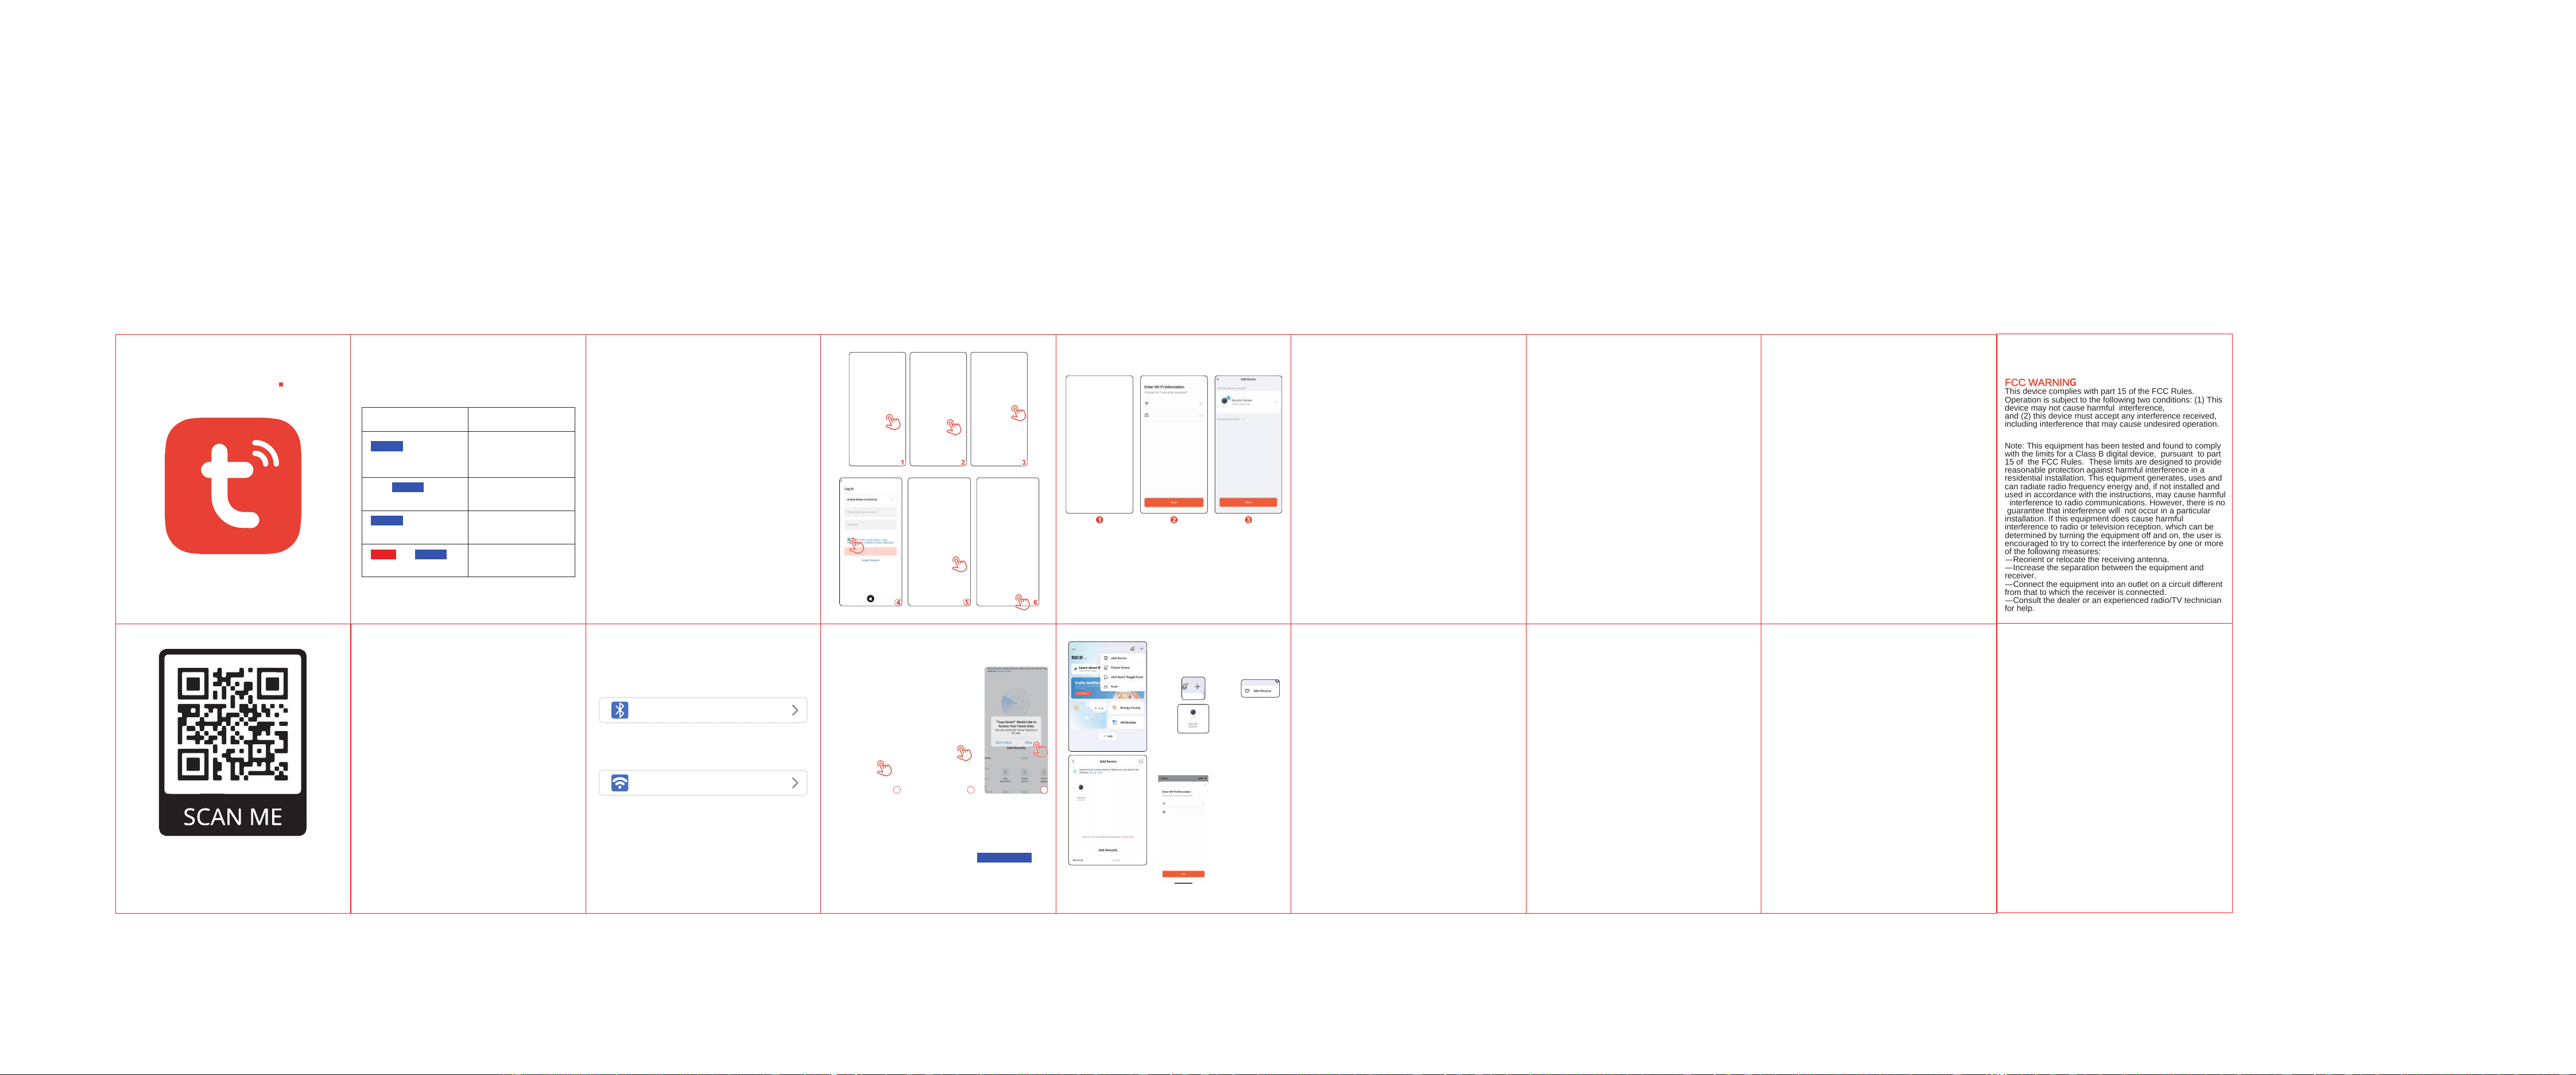
→ Power on the device (BLUE Flashing-quickly)
→ Open your phone “Bluetooth”
→ Open your phone “WLAN” connect to your router’s
“WIFI”
→ Open “TUYA APP” , A “nearby Devices to be added” ,
click add to enter “WI-FI and password” information ,
click “next” to wait Device added successfully .
If there no “nearby device to be added ”, click
“+” to “Add Device“ to find out the “nearby device” .
1st Way
2st Way
Steps:
3 Add device
Tips:
Quick Guide
→ Power on the device (BLUE Flashing-quickly)
→ Open your phone “Bluetooth”
→ Open your phone “WLAN” connect to
your router’s “WIFI” (2.4GHz&5GHz)
→ Register and Login in to the APP account
You need confirm all the permission which appear
using the TUYA APP for the first time , As shown on the
picture below.
Note:
Bluetooth
On
WLAN
Home router-5.8Ghz
Q9: Why doesn't the Wi-Fi name appear when I
connect to Wi-Fi ?
On Apple devices with iOS 13 and above, you need to open
the "Location Permission" of the app in the system settings
and change it to "Allow while using"
Q10: Why does the device always show offline ?
- Low battery or unstable WiFi
- The device is connected to DC 5V2A power supply
- As close to the router as possible
- Turn on the device and check the working mode of the
working indicator light (AP mode: BLUE Flashing-quickly IP
mode: Solid BLUE ,and the blue light flashes slowly that
the network is disconnected)
Q11: How to invite family and friends to use my
camera together ?
Open the APP and select your camera on the home page.
Click "Share Device" on the camera to enter the sharing
page
Q12: How far should the camera be from the router ?
After testing, the Wi-Fi connection distance can normally
reach 150 meters in an open area. But the actual situation
depends on the strength of WiFi and the surrounding
environment (thick walls, electromagnetic equipment, large
metal objects can interfere with the Wi-Fi signal) If the
camera connection signal is weak or unstable, place the
camera as close to the router as possible.
Q13: Why can't the TF card be recognized ?
After inserting the TF card into the TF card slot of the
camera, check whether the capacity of the TF card will be
displayed in the "Settings" and "Recording Settings" of the
device in the APP. If it prompts "Micro SD card not inserted",
it means that the TF card recognition failed.
1. Please use a branded TF card.
2. The TF card can be recognized by the computer
normally..
3. It is recommended that the TF card capacity is between
32-128G.
4. It is recommended to use a high-speed TF card of C10 or
above.
5. Try to plug and unplug the TF card several times.
6. It is recommended to try another TF card.
7. It may take some time for the camera to recognize the TF
card. After inserting the card, wait for about 3 minutes
before observing
Please comply with local laws and regulations,use the
product in a legal and compliant manner.
→ Enter to “TUYA APP” Home Page, A “nearby
Devices to be added” , click “add” to enter
“WI-FI and password” information , click “next”
to wait Device added successfully . (Solid BLUE)
7 8 9
Tips: If there no “nearby device to be added ”,
click “+” to “Add Device“ to find out the “nearby device” .
(steps:1-2-3),click “add” to enter “WI-FI and password”
information , click “next” to wait Device added successfully .
(Solid BLUE)
Note:
If there no “nearby device
to be added ”, click “+” to “Add Device“
to find out the “nearby device” .
(steps:1 steps:2
steps:3 ),click “add” to enter
“WI-FI and password” information ,
click “next” to wait Device added
successfully .(Solid BLUE)
Tipe:
Q7: Unable to add camera for the first time?
Q8: What are the requirements for Wi-Fi ?
(When adding a camera for the first time, make sure the camera
is turned on, and the working status light is BLUE Flashing-quickly )
Please use 2.4GHZ WiFi or 5G WiFi to configure the
network,and please set the WiFi authentication method to
WPA2-PSK or other lower-level security methods, and you
need to set password
1. Make sure the WiFi account and password are correct.
2. When adding a camera, ensure that the network is
smooth, and it is recommended to operate close to the
router.
3. If the above methods still fail to connect to the Internet, it
is recommended to restart the router and try again.
Q3: How could i turn off the working indicator
LED light ?
Q4: Why can't I save to my SD card?
If you are using the SD card for the first time, you must
format it. Wait for 3mins, the format is successful.
Q5: What to do if the equipment fails ?
Press and hold the reset button to reset..Then restart the device.
Q6: Do I want to transfer videos to my computer?
What should I do ?
Enter Camera’s “Playback” in the TUYA APP , download the
video from SD card into your “Phones’ Albums” to
transfer/share videos to your computer.
-In TUYA APP, enter to camera’s live stream choose
more“camera setting menu”>“ Basic Function Setting”>“Sta-
tus Indicator” , choose ON/OFF
FAQ
Q1: Could you turn off the “time display”
if you want a dark room?
How to set the time on a clock with buttons:
Click (SET) to select 24-hour or 12-hour.
Q2: How could i change the 12H/24H Function ?
-Device with “time display” buttons : Press the “ PLUS/SET
”button to active the function .
-Device come without “time display” buttons : In TUYA APP ,
enter to camera’s live stream choose “ time_system “ to
active the function .
When the desired time is displayed, press and hold the SET
button; the time display will switch.
Click (PLUS) and the time will flash; press SET to set the
time.
-Device with “time display” buttons : Long press the “ PLUS
”button 3seconds to turn off the “time display“, Click the “
PLUS” button again to turn on the “time display”.
-Device come without “time display” buttons : In TUYA APP ,
enter to camera’s live stream choose “ Screen Switch “ to
turn on/off the “time display” .
1
2
3
4
5
6
7
8
9
10
11
12
13
14
15
16
17
18
FCC WARNING
This device complies with part 15 of the FCC Rules.
Operation is subject to the following two conditions: (1) This
device may not cause harmful interference,
and (2) this device must accept any interference received,
including interference that may cause undesired operation.
Note: This equipment has been tested and found to comply
with the limits for a Class B digital device, pursuant to part
15 of the FCC Rules. These limits are designed to provide
reasonable protection against harmful interference in a
residential installation. This equipment generates, uses and
can radiate radio frequency energy and, if not installed and
used in accordance with the instructions, may cause harmful
interference to radio communications. However, there is no
guarantee that interference will not occur in a particular
installation. If this equipment does cause harmful
interference to radio or television reception, which can be
determined by turning the equipment off and on, the user is
encouraged to try to correct the interference by one or more
of the following measures:
—Reorient or relocate the receiving antenna.
—Increase the separation between the equipment and
receiver.
—Connect the equipment into an outlet on a circuit different
from that to which the receiver is connected.
—Consult the dealer or an experienced radio/TV technician
for help.
Note: The Grantee is not responsible for any changes or
modifications not expressly approved by the party
responsible for compliance. such modifications could void
the user's authority to operate the equipment.The device
has been evaluated to meet general RF exposure
requirement.
This equipment complies with FCC's RF radiation exposure
limits set forth for an uncontrolled environment. This device
and its antenna(s) must not be co-located or conjunction with
any other antenna or transmitter.The device can be used in
portable exposure conditions without restriction.