Smart Pet Door
RFID Smart Recognition · Four Access Control Modes
Please read the manual before use
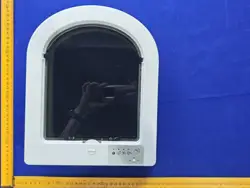
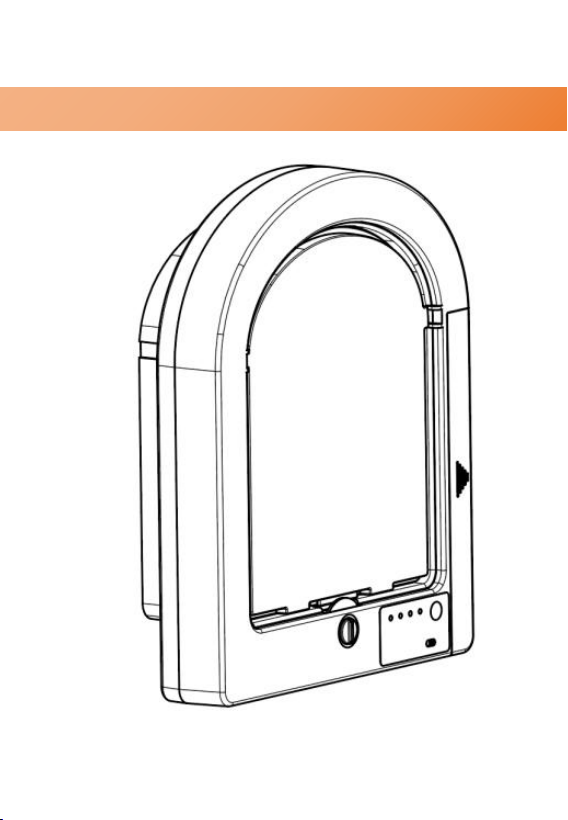
Smart pet door is an intelligent access control device
that uses RFID technology to read the sensing key worn
by pets. Pets that can read keys can open the door, while
animals that cannot read keys will be blocked outside the
door, effectively preventing intruders from entering your
home, suitable for cats and small to medium-sized dogs.
Product Features
Technical Specifications
parameter
items
specification
Product Name
Smart pet door
Identification
technology
RFID Radio Frequency
Identification Technology
Door opening
size
200mm (width) × 241mm
(height)
Installation wall
thickness
5mm~50mm (optimal:
35mm~45mm)
Power supply
4 x non-rechargeable alkaline AA
Intelligent Recognition
Passive Chip
Flexible Installation
Battery Powered
Four Modes
Remote Control Operation
Low battery alert
Perfect Gift
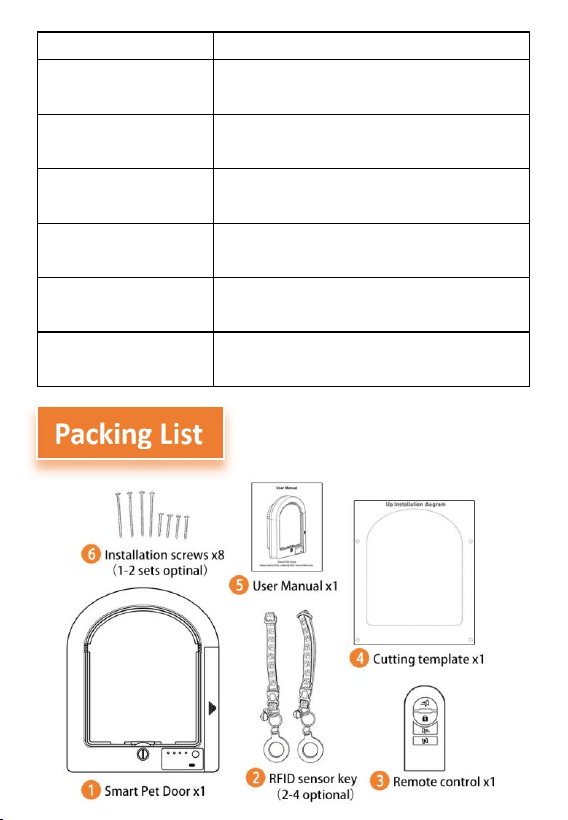
method
batteries (not included)
Battery life
Up to approx. 12 months
(depending on usage frequency)
Low battery
threshold
Alert when battery voltage drops
below 4V
Radar sensing
range
Approx. 1 meter (object proximity
detection)
RFID effective
sensing distance
Approx 20 cm from front
Access control
mode
Locked / Enter Only / Free
Access / Exit Only
Standby Timeout
Enters standby after 15~35
seconds of inactivity
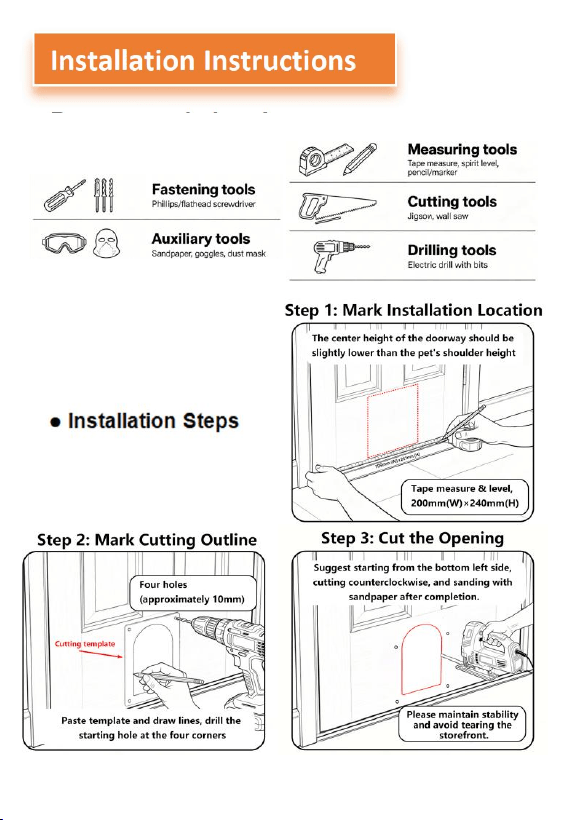
Recommended tools:
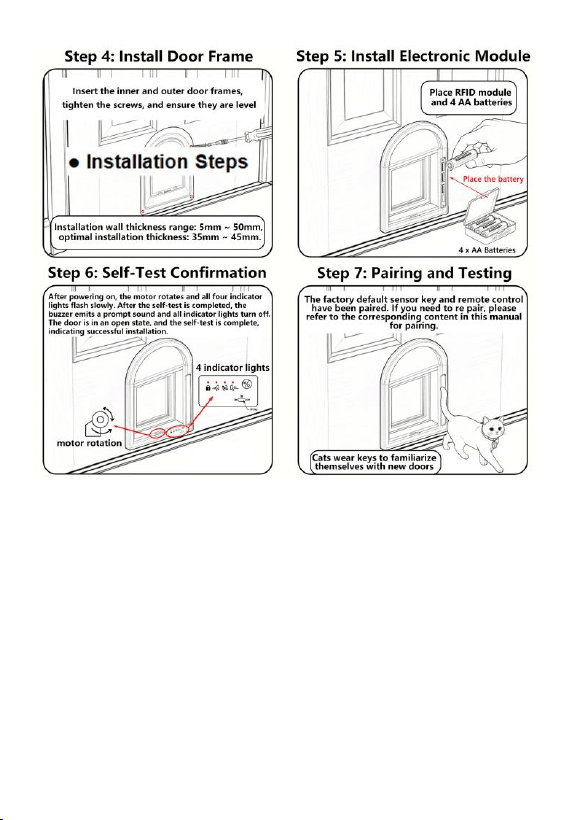
Installation precautions
1. Safety first: Wear goggles and a mask when cutting, and
confirm that the power cord is intact before using electric tools.
2. Accurate Measurement:
Follow the "measure twice, cut
once" principle. Ensure the template is completely level when
using it.
3. Wooden Door Installation:
Be aware of the door's internal
structure. Hollow doors have poor screw-holding capacity; install
carefully to avoid stripped screws.
4. Glass Door Installation:
Tempered glass cannot be cut.
You must purchase a pet door kit designed specifically for glass
doors or custom-order pre-cut glass. Never attempt to cut
tempered glass yourself.
5. Wall Installation:
Only install on non-load-bearing walls.
Before cutting, confirm there are no electrical wires or water pipes
inside the wall. Never cut large holes in load-bearing walls.
6. Electronic Module Protection:
The electronic module
should be installed on the interior side to avoid exposure to sun
and rain. Ensure the battery compartment cover is tightly closed.
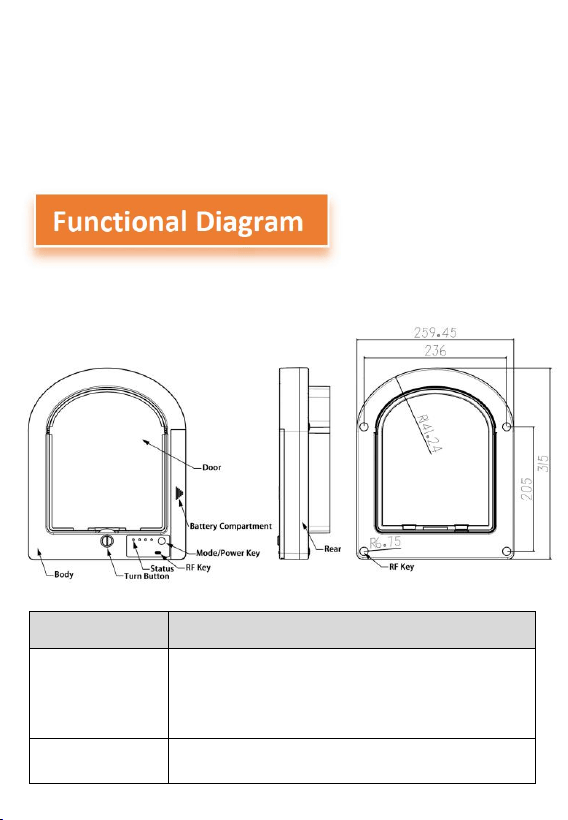
Smart Pet Door
Component
Function Description
Power Button
(M Button)
Long press 2 sec to power on/off; short press
in powered-on state to cycle through 4 access
modes; long press 5 sec to enter key pairing
mode
Indicator
Lights (4)
Display device working status: Slow flashing
indicates self checking, constant light indicates
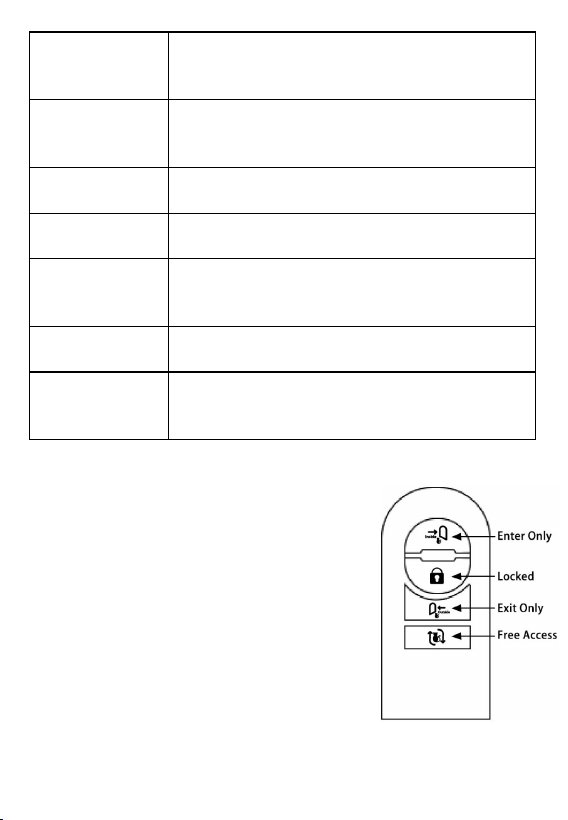
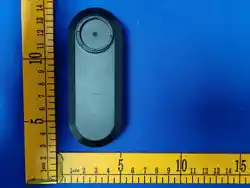
Pet Door Remote
Pet Door Remote Control Function:
Press any ofthe four buttons briefly to
switch the pet door's operating
mode.
Enter Only: Pets are allowed in only.
Locked: Pets are not allowed to
enter or exit.
Exit Only: Pets can only go out.
Free Access: Pets allowed in and out.
corresponding mode working, flash flashing
indicates low battery reminder, and scrolling
through the device indicates pairing status
RFID
Detection
Area
Reads the sensor key worn by your pet;
effective range approx 20 cm from front
Radar Sensor
Detects approaching objects within approx. 1
meter; used to wake the device
Buzzer
Emits beeps for status indication and pairing
confirmation
RF Switch
Set to ON to enable card-swipe function; set to
OFF to disable card-swipe (only button and
remote control available)
Battery
Compartment
Holds 4 non-rechargeable alkaline AA
batteries
Center Knob
When battery is low or device is
non-functional, use a coin to manually rotate
the center knob to adjust access mode
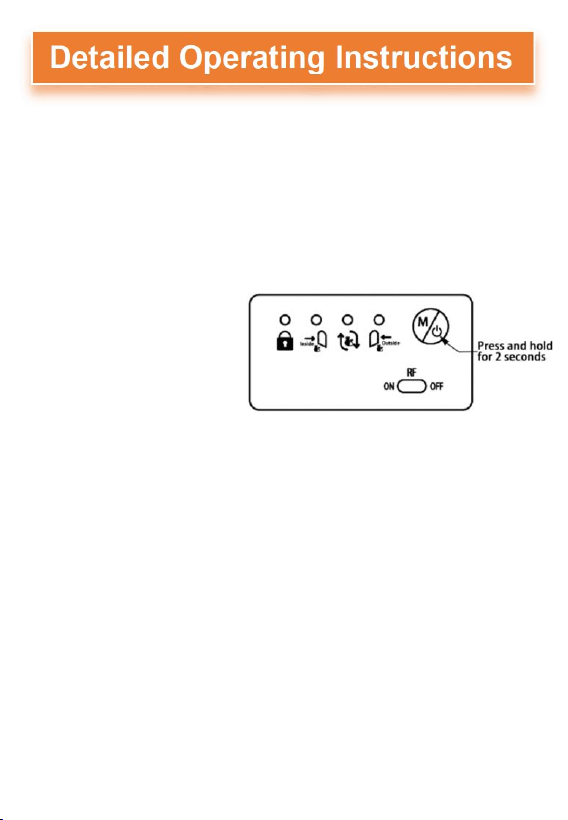
Power-On and Self-Test
After inserting batteries, the pet door enters self-test mode: the
motor rotates and all 4 indicator lights flash slowly. When self-test is
complete, the buzzer emits one beep, all indicator lights turn off, and
the door remains open — self-test is complete.
Four Access Modes
The pet door has four access modes. Long press the power
button for 2 seconds to
power on or off. In the
powered-on state, short
press the button to cycle
through the four modes, or
use the remote control to
switch modes.
Mode 1: Locked (No Entry or Exit)
The default startup mode is Mode 1 (entry and exit prohibited).
In this mode, swiping the card is invalid, the door is in a closed and
locked state, and the corresponding indicator light is constantly on.
If there is no operation, it will enter standby mode after 35 seconds
and the indicator light will turn off.
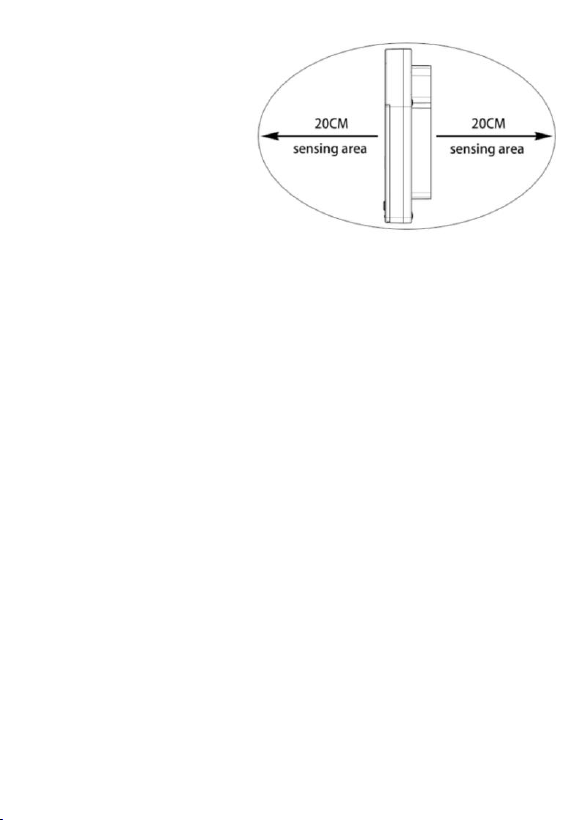
If the radar detects a pet carrying an induction key approaching
(with an effective range of about 20CM), the indicator light will turn
on and wait for mode switching or other operations.
Mode 2: Enter Only
Click the button to switch
to mode two (only in, no
out), the motor rotates to
the state of only in, no out,
and the corresponding
indicator light stays on.
If there is no operation or
object approaching, after
15 seconds, the door will close and lock, the indicator light will turn
off, and enter standby mode.
If the radar detects a pet carrying an induction key approaching,
the indicator light will light up, the card will approach the door
(effective range of about 20CM), the door will open, and the door will
be in a state of only entering and not exiting, waiting for the pet to
enter. After the pet enters, the door returns to the closed position,
senses the magnet, and the motor rotates to close and lock the door.
Mode 3:Free Access
Click the button to switch to mode three (free entry and exit), the
motor rotates to the free entry and exit state, and the corresponding
indicator light stays on.
If there is no operation or object approaching, after 15 seconds,
the door will close and lock, the indicator light will turn off, and enter
standby mode.
If the radar detects a pet carrying an induction key, the indicator
light will turn on, the card will approach the door (with an effective
range of about 20CM), the door will open, and the door will be in a
free entry and exit state, waiting for the pet to enter or exit.
After the pet enters or leaves, the door returns to the closed
position, senses the magnet, and the motor rotates to close and lock
the door.
Mode 4: Exit Only
Short press the button to switch to mode four (only out, not in),
the motor rotates to the state of only out, not in, and the
corresponding indicator light stays on.
If there is no operation or object approaching, after 15 seconds,
the door will close and lock, the indicator light will turn off, and enter
standby mode.
If the radar detects a pet carrying an induction key, the indicator
light will turn on, the card will approach the door (effective range of
about 20CM), the door will open, and the door will be in a state of
only going out and not entering, waiting for the pet to leave.
Note: After the entry or exit action is completed, if there
is no action immediately, it will enter standby mode again after
15 seconds, waiting for wake-up. (Radar sensing range is about
1 meter)
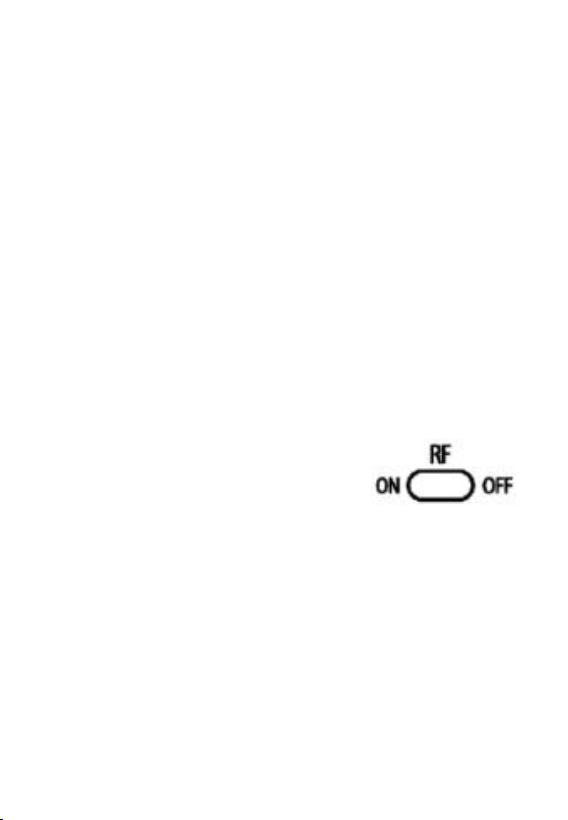
RF Switch Function
Set to ON: the card-swipe function is
enabled, and the pet door can be controlled
by card swipe, remote control, or button.
Set to OFF: the card-swipe function is disabled, and the pet
door can only be controlled by button and remote control.
Pairing Instructions
Each pet door comes with two or four sensor keys and one
remote control, pre-paired at the factory. If you find that the sensor
key or remote control does not work, please follow the methods
below to pair them.
Sensor Key Pairing:Long press the button for 5 seconds;
the buzzer emits three beeps to indicate entry into key recording

mode, which also deletes all previously recorded access information.
Bring the sensor key close to the door; the buzzer emits one beep to
indicate successful recording. Multiple keys can be recorded
simultaneously.
Remote Control Pairing:In key recording mode, bring the
key close to the door and press any button on the remote control.
The door emits two beeps to indicate successful remote control
pairing.
Note: When the indicator lights are in a scrolling state, the device
is in pairing mode. It will automatically exit pairing mode after 10
seconds of no key recording activity.
When the number of recorded cards exceeds 4 and the indicator
light remains in a rolling state without allowing exit, remove the
battery and power it on again to restart.
Low Battery Alert and Manual Operation
When battery voltage drops below 4V, the door returns to the
open position and the two middle indicator lights flash rapidly,
indicating that batteries need to be replaced.
When the battery is insufficient or the device cannot operate,
you can use a coin to manually rotate the center knob to adjust the
access mode.
To ensure proper product use and personal safety, please
strictly observe the following precautions.
1. When using the card-swipe access function, check that the RF
switch is set to ON.
2. If the RFID key cannot be recognized, please re-pair it.

3. When battery voltage is too low, the pet door enters a locked state
and continuously emits alert beeps. Do not restart (or manually
rotate the mode) before replacing the batteries.
4. If the pet door lock cannot open due to rotation deviation, it
indicates insufficient battery power; replace the batteries.
5. When the pet approaches, the corresponding access indicator
light turns on but the door cannot open. Check whether the axle
plate and door flap are properly adhered, causing excessive
resistance that prevents the motor from rotating. After adjustment,
use the button (or remote control) to recalibrate the motor's home
position.
6. When the indicator lights are in a scrolling state, the device is in
pairing mode and will automatically exit after 10 seconds of no key
recording activity.
7. When switching modes, press the M button to wake the device,
then press the M button again to adjust the mode.
8. This device is not waterproof. Do not use it outdoors or in humid
environments.
9. Do not allow children to climb on or play with the pet door, to
prevent pinching injuries or device damage.
10. Do not disassemble the electronic module yourself, to avoid
damage or safety hazards.
11. The effective detection distance of the RFID key is approx. 10 cm
from the front of the pet door. Ensure the key worn by your pet is
close to the detection area.
If the product experiences abnormal conditions, please refer to
the table below for troubleshooting. If you cannot resolve the issue
yourself, please contact after-sales service.

Problem
Possible Cause
Solution
No response to
card swipe
RF switch not set to
ON; battery low;
sensor key not
paired
Set RF switch to ON;
replace batteries;
re-pair sensor key
Sensor key not
recognized
Key damaged or not
paired; foreign
object blocking
detection area
Re-pair key; clean
detection area;
replace key
Door cannot
open
Battery low;
improper adhesion
of axle plate and
door flap causing
excessive resistance
Replace batteries;
check and adjust axle
plate and door flap
adhesion; recalibrate
motor home position
Motor does not
rotate
Battery depleted;
door flap jammed;
circuit malfunction
Replace batteries;
clear debris from door
flap track; contact
after-sales for repair
Indicator lights
flash rapidly
Battery voltage
below 4V
Promptly replace all 4
alkaline AA batteries
with new ones
Remote control
not responding
Remote not paired;
remote battery
depleted
Re-pair remote
control; replace
remote control battery
Door lock
rotation
deviation
Insufficient battery
power causing
inadequate motor
torque
After replacing
batteries, use button
or remote to
recalibrate motor
home position
Device cannot
power on
Batteries not
installed correctly;
batteries completely
depleted
Check battery polarity
orientation; replace
with new batteries

Daily Cleaning
Regularly wipe the pet door surface and door opening edges
with a clean, soft, damp cloth to keep the device clean. Avoid using
corrosive cleaners, alcohol, or organic solvents, as these may
damage the door surface and electronic components. Always turn off
the device power before cleaning.
Regular Inspection
Check screws monthly for looseness; tighten promptly if loose.
Clean dust and pet hair from the detection area, door flap track,
and door flap edges monthly.
Check battery level every 3 to 6 months to prevent battery leakage
from corroding the battery compartment.
After any pet collision or strong pulling, immediately inspect the
door frame for deformation and components for damage.
Regularly check that the axle plate and door flap adhesion is
secure, ensuring normal motor operation.
Battery Maintenance
It is recommended to use high-quality alkaline AA batteries for
longer battery life. When not using the product for an extended
period, remove the batteries for storage to avoid battery leakage
damaging the device. When a low battery alert occurs (two middle
indicator lights flashing rapidly), promptly replace all 4 batteries.
Mixing old and new batteries is not recommended.
Pet Adaptation Guidance
After initial installation, it is recommended to first disable the
RFID lock function and let your pet pass through the door freely
several times to become familiar with it. You can place your pet's
favorite treats on both sides of the door opening to guide them
through. Once your pet is adapted, enable the RFID recognition
function and ensure your pet wears the sensor key correctly.
Warranty Policy
This product comes with a one-year warranty from the date of
purchase. During the warranty period, faults caused by product
quality issues are eligible for free repair or replacement. The
following situations are not covered by the warranty:
Damage caused by unauthorized disassembly, modification, or
improper use.
Damage caused by external factors such as dropping, collision, or
water exposure.
Damage caused by using non-specified batteries or battery
leakage.
Damage caused by natural disasters (lightning, fire, etc.).
Damaged warranty label or altered serial number.
Products beyond the warranty period.
This device complies with Part 15 of the FCC regulations.
The operation must meet the following two conditions:
This device must not cause harmful interference,
This device must accept any interference received, including
interference that may cause accidental operation.

Any changes or modifications made without explicit approval
from the responsible compliance party may render the authority to
operate the device invalid.
Note: After testing, this device complies with the
restrictions of Part 15 of the FCC regulations regarding Class B
digital devices.
These restrictions aim to provide reasonable protection for
residential installations and prevent harmful interference. This device
generates, uses, and may radiate radio frequency energy. If not
installed and used according to instructions, it may cause harmful
interference to radio communication. However, there is no guarantee
that interference will not occur during a specific installation.
If this device does cause harmful interference to broadcast or
television reception (which can be determined by turning off and on
the device), it is recommended that users try one or more of the
following measures to eliminate the interference:
Adjust the direction or position of the receiving antenna again.
Increase the distance between the device and the receiver.
Connect the device to a socket with a different circuit from the
receiver.
Consult with dealers or experienced radio/television technicians
for assistance.
FCC Radiation Exposure Statement
This device complies with the radiation exposure limits set by
FCC for uncontrolled environments.
The installation and operation of this device should ensure that a
distance of at least 20 centimeters is maintained between the
radiator and the human body. (Smart Pet Door)
The device has been evaluated to meet the general RF exposure
requirements. This device can be used without restrictions under
portable exposure conditions. (Remote Control)