
SPR 6300BK
EN
MULTIFUNCTION SLOW COOKER &
GRILL
Translation of the original manual
SPR 6300BK
A
1
2
3
4
5
6
B
TIME POWER
CANCEL
START
SLOW
COOK
HIGH
PRE
HEAT
KEEP
WARM
SLOW
COOK
LOW
SEAR SAUTÉ STEAM MANUAL
1
2
3
4
6
7
5

– 1 –
04/2024
2024, .
EN Multifunction Slow Cooker & Grill
Important Safety Instructions
READ CAREFULLY AND STORE FOR FUTURE USE.
• This appliance may be used by children aged 8 years
and older, provided they are supervised or have been
instructed in the safe use of the appliance and understand
the potential dangers.
• This appliance may be used by persons with physical,
sensory or mental impairments or by inexperienced
persons, if they are properly supervised or have been
informed about how to use of the product in asafe manner
and understand the potential dangers.
• Keep the appliance and its power cord out of reach of
children younger than 8 years of age.
• Children must not play with the appliance.
• Cleaning and maintenance must not be carried out by
children.
• If the power cable is damaged, have it replaced in
aprofessional service centre in order to prevent
adangerous situation. It is forbidden to use the appliance
with the power cable damaged.
• Do not immerse the appliance for cleaning.
• Clean the inner pot with clean water andasoft sponge.
Follow the instructions in the “Cleaning and Maintenance”
section.

– 2 –
04/2024
2024, .
• This appliance is not designed to be controlled using an
external timer switch or aremote control.
CAUTION: Hot Surface
The temperature of accessible surfaces may be
higher if the appliance is in operation.
• This appliance is designed for domestic and indoor use
only. Do not use the product outdoors.
• It is also suitable for personal non-commercial use in
spaces such as:
- kitchenettes in shops, offices and other workplaces;
- spaces in agriculture;
- hotels, motels, andother residential environments where
guests may use it;
- bed and breakfast establishments.
• Cooking appliances should be placed in astable position
with the handles positioned to avoid spillage of hot liquids.
WARNING: Avoid spilling on the plug.
WARNING: Incorrect use may lead to injury.
• The surface of the heating element contains residual heat
after use.
• Always follow the maximum andminimum level line.
• Before connecting the appliance to apower socket, make sure the voltage stated on the product'srating label corresponds to the voltage in the
power socket.
• Connect the appliance only to aproperly earthed socket. Do not use an extension cord.
• Never connect the appliance to the power socket until it is fully assembled.
• Unwind the power cable in full before use.
• Do not connect or disconnect the appliance power cable to or from the power socket with wet hands.
• Make sure that the fork of the power cable does not come into contact with water or moisture.

– 3 –
04/2024
2024, .
• Do not disconnect the appliance from the power socket by pulling the power cable. This could damage the power cable or the power socket.
Disconnect the cable from the power socket by gently pulling the plug of the power cable.
• Do not place heavy objects on the power cable. Make sure that the power cable does not hang over the edge of the table or touch hot surfaces or
sharp objects.
• To avoid the risk of electric shock, never immerse the appliance casing, power cable or plug in water or any other liquid.
• Always switch off and unplug the appliance after use, when left unattended, before moving, cleaning or other maintenance and handling.
• This cooker is designed for classic andslow cooking of food and steaming. Do not use it for any other purposes than those for which it was designed.
• Only use the cooker with the original accessories supplied with it. The use of non-original accessories can lead to adangerous situation.
• Do not use the cooker for indoor heating purposes!
• Do not use the cooker if it malfunctions, has been dropped on the floor, immersed in water or damaged in any way. Take it to an authorised service
centre for inspection or repair.
• Do not switch on the cooker when it is empty.
• Never place any objects between the heating plate inside the cooker and the removable inner pot. Check that the outer bottom of the inner pot is
clean anddry before placing it in the base of the cooker.
• Only the inner pot is designed for food cooking. Never pour water or put food directly into the base of the cooker.
• Use the cooker only on aflat, dry, clean, stable and heat-resistant surface.
• Do not place the cooker on the edge of atable, on the sink draining board, on unstable, tilted or uneven surfaces, on or near electric or gas cookers
and other heat sources.
• Do not use the cooker on asurface that is sensitive to heat, because this could damage such asurface.
• The lid must be properly closed during operation. Do not place any objects (e.g. protective gloves, wipes) on the lid that could cover the steam outlet.
• Adequate space must be ensured for air circulation above and around the pot during operation. Do not cover or block the ventilation openings of the
cooker.
• Make sure that the steam exhaust outlet does not point towards heat sensitive materials or you or other people. Hot steam may cause severe
scalding.
• Do not touch areas where hot steam escapes; there is arisk of burns and scalds.
• Do not leave any cooking utensils (e.g. aspoon for mixing andserving food) in the inner pot when using the Keep Warm function.
• Be careful when lifting the lid and always remove it away from you.
• When opening the lid, make sure that water drips only into the removable cooking container. Water must never drip into the cooker shell.
• Allow the pot and lid to cool completely before cleaning.
• Do not place the heated lid on surfaces that are sensitive to heat.
• Use the lid handle to lift andcarry the lid. For reasons of increased safety, we recommend using oven mitts.
• Use oven mitts when removing the inner pot after cooking.
• Extreme care must be taken when moving the pot if it is filled with hot food and liquids.
• Use plastic or wooden kitchen tools for stirring and scooping food, as metal tools can damage the surface of the cooking pot.
• Regularly clean the cooker after each use according to the instructions in the Cleaning and Maintenance chapter. Follow all instructions inthis
section.
• Do not wash the hot lid and the inner pot in cold water andvice versa. Asudden change in temperature could cause their damage.
• Do not use the appliance if any part of it is damaged, cracked or not working properly. Contact an authorised service centre.
• To avoid the danger of injury by electrical shock, do not repair the appliance yourself or make any adjustments to it. Have all repairs or adjustments
of the appliance performed at an authorised service centre. Tampering with the appliance during the warranty period may void the warranty.
– 4 –
04/2024
2024, .
• Thank you for purchasing our SENCOR product; we hope it will serve
to your satisfaction.
• Before using this appliance, please familiarise yourself with the user
manual, even if you are already familiar with using similar types of
appliances. Use the appliance only as described in this user manual.
Keep the manual for future reference.
• It is recommended to keep the original packaging, packing material,
receipt and confirmation of the extent of the seller'sliability or warranty
certificate at least for the duration of the legal right of defective
performance or quality guarantee. When transporting the appliance,
we recommend packaging it again in the original box provided by the
manufacturer.
. . . . . . . . . . . . . . . . . . . . . . . . . . . . . . . . . . . . . . . . . . . . . . . . . . . . . . . . . . . . . . . . . . . .
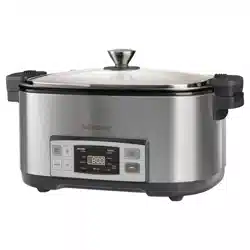
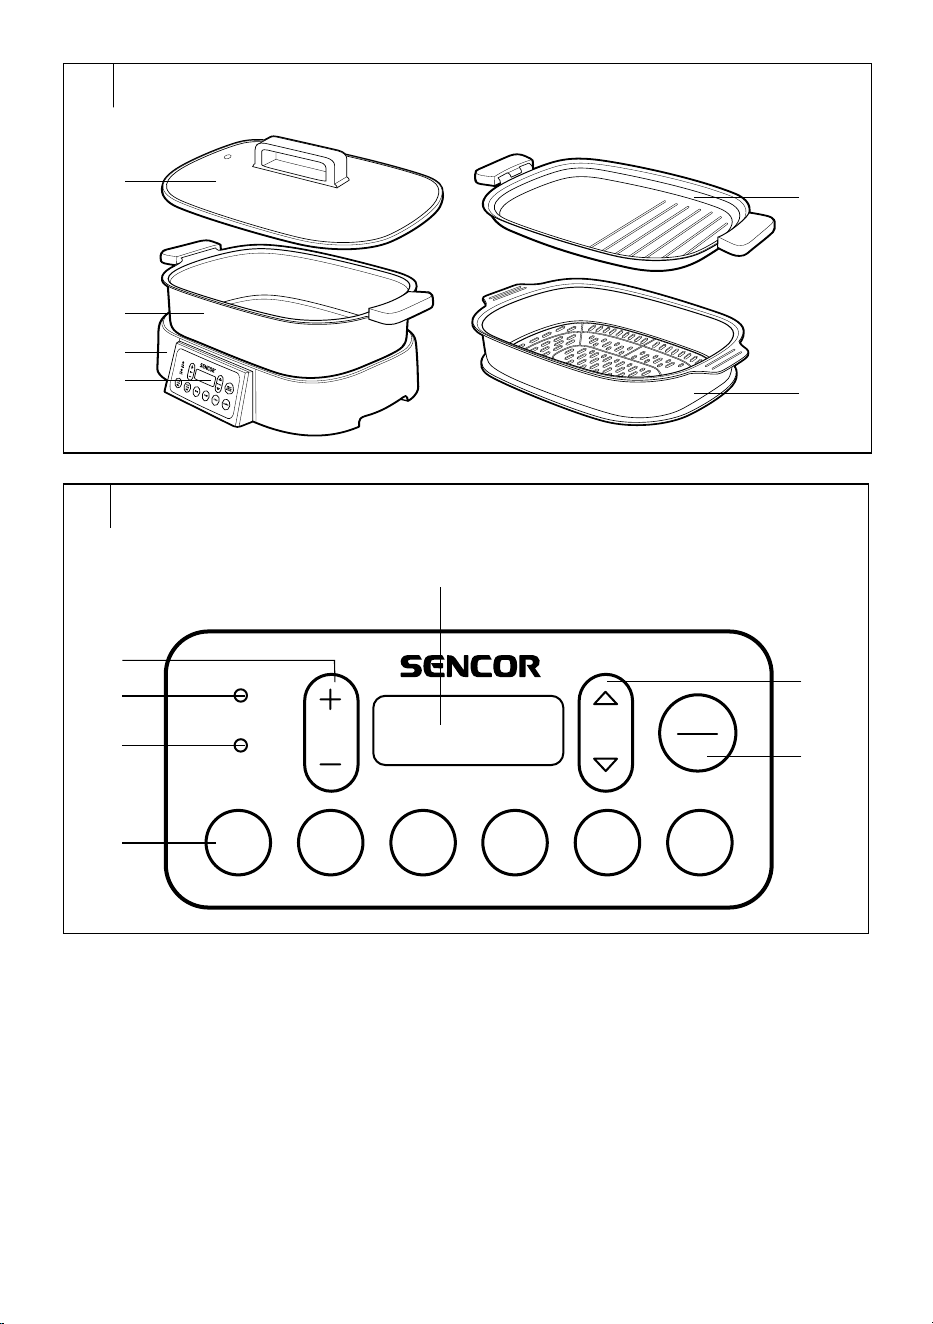
DESCRIPTION OF THE APPLIANCE
A1 Glass lid
A2 Cooking pot
A3 Base
A4 Control panel
A5 Grill plate
A6 Steamer insert
. . . . . . . . . . . . . . . . . . . . . . . . . . . . . . . . . . . . . . . . . . . . . . . . . . . . . . . . . . . . . . . . . . . .
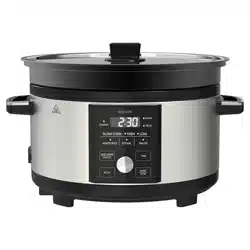
DESCRIPTION OF THE CONTROL PANEL
B1 TIME +/– buttons
B2 PREHEAT indicator light
B3 KEEP WARM indicator light
B4 Cooking programme buttons
B5 Display
B6 POWER / buttons
B7 START/CANCEL button
. . . . . . . . . . . . . . . . . . . . . . . . . . . . . . . . . . . . . . . . . . . . . . . . . . . . . . . . . . . . . . . . . . . .
PURPOSE OF USE
• The Sencor SPR 6300BK multifunction cooker is designed for
cooking food. The multifunction cooker is equipped with slow cooking,
browning, frying or steaming functions.
. . . . . . . . . . . . . . . . . . . . . . . . . . . . . . . . . . . . . . . . . . . . . . . . . . . . . . . . . . . . . . . . . . . .
BEFORE FIRST USE
• Before first use, remove the appliance and its accessories form the
packaging and discard all promotional labels and tags. Check that
neither the appliance nor any of its components is damaged. Wash the
cooking pot, grill plate, steamer insert and glass lid in warm water with
alittle dishwashing liquid. Rinse and wipe dry.
• Wipe the base of the multifunction cooker with aslightly dampened
soft sponge. Wipe with adry cloth.
• Use only the grill plate for grilling.
• Only use the steamer insert together with the cooking pot. Pour
asufficient amount of water into the cooking pot and check it regularly.
Warning:
Always make sure the outside of the cast iron pot is
clean anddry before placing it on the base.
. . . . . . . . . . . . . . . . . . . . . . . . . . . . . . . . . . . . . . . . . . . . . . . . . . . . . . . . . . . . . . . . . . . .
PLACING THE MULTIFUNCTION COOKER
• Place the multifunction cooker on afirm, flat andheat-resistant
surface and in aplace well away from the power socket. The
multifunction cooker is designed to be free-standing and must not be
placed in acabinet when in use.
• Make sure to leave sufficient space around the base of the cooker to
allow air to circulate freely around it. Do not cover the vents that are
located at the bottom of the base.
• Place the multifunction cooker at asufficient distance from flammable
materials, such as curtains or drapes, andfrom heat andsteam
sensitive materials.
• It is not recommended to place the multifunction cooker under the
upper kitchen cabinets.
. . . . . . . . . . . . . . . . . . . . . . . . . . . . . . . . . . . . . . . . . . . . . . . . . . . . . . . . . . . . . . . . . . . .
USING THE SLOW COOKER
Standard Use
1. Plug the fork of the power cord into aproperly grounded power
socket.
2. An audible warning will sound, all the lights andbuttons will light
briefly. This signals that the multifunction cooker is ready foruse.
3. Press the button of one of theprogrammes. The display shows the
default temperature and/or power (P1 to P5). Power is available for
the “SEAR” and “SAUTÉ” programmes, where “P1” represents the
lowest power, while “P5” represents the highest power.
4. You can change the cooking time as needed – more in thenext part
of the user'smanual.
5. You can change the power level as needed – more in thenext part of
the user'smanual.
6. Press the START/CANCEL button to start the selected cooking
programme.
7. The PREHEAT indicator light will illuminate to indicate that the
multifunction cooker is heating up.
8. Once the cooker is sufficiently preheated, the indicator light will go
off, three short beeps will sound, and the numeric display will show
the cooking time counting down.
9. Periodically check the state of cooking, stir the contents of the
cooker if necessary.
10. When the set cooking time has elapsed, an acoustic warning will
be given three times and the multifunction cooker will switch to
warming mode. The WARM indicator light will illuminate and the
display will begin to read the heating time. The maximum heating
time is 4 hours. The multifunction cooker will then switch off
automatically.
11. If you need to cancel the cooking or end the Keep Warm function,
press the START/CANCEL button for along time.
12. Disconnect the power cord from the power socket.
Note:
The pre-heating phase and switching to heating mode are
only available for some programmes. For more information,
please refer to the “Table of Cooking Programmes” below.
Warning:
Pay extra attention when removing the lid during
andafter preparation. Under the lid, high-temperature
steam may accumulate and, if improperly handled,
severe scalding may occur. Always hold the lid by the
handle. First, slightly lift the rear part of the lid so that
the steam can escape before lifting it completely.
Warning: HOT SURFACE!
The lids, the inner pot and the base of the cooker are
heated to ahigh temperature during use andremain
hot evenafter cooking. Be careful not to burn yourself.
If handled incorrectly, there is arisk of serious burns.
Use protective oven mitts and use the lid handle and
handle on the cooker.
Note:
You may hear afaint clicking sound when the multifunction
cooker is in use. This is anormal occurrence.
EN
Multifunction Slow Cooker & Grill
User Manual
– 5 –
04/2024
2024, .
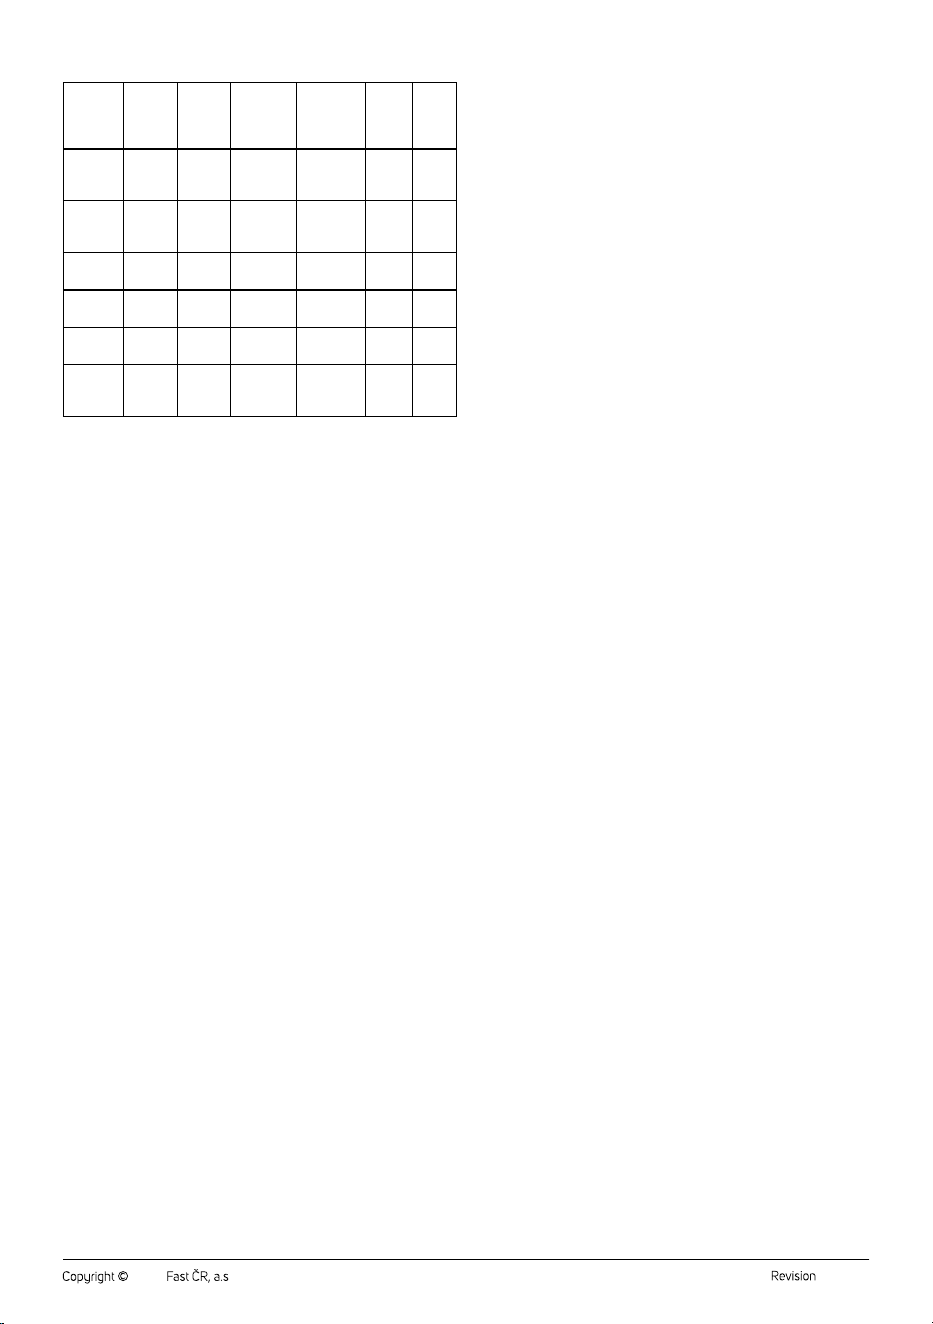
Table of Cooking Programmes
Cooking
pro-
gramme
Default
power
level
Power
Setting
Default
cooking
time
Setting
the
Cooking
Time
Keep
Warm
Func-
tion
Pre-
heat-
ing
SLOW
COOK
HIGH
-- -- 4 hours 2-8 hours Yes No
SLOW
COOK
LOW
-- -- 8 hours 2-12 hours Yes No
SEAR
P5 P3–P5 10
minutes
1–30
minutes
-- Yes
SAUTÉ
P4 P1–P5 10
minutes
1 minutes
to 1 hour
-- Yes
STEAM
-- -- 15
minutes
1 minutes
to 1 hour
-- Yes
MANU-
AL
80°C 40–
200
°C
1 hour 1 minutes
to
24 hours
Yes --
Cooking Time Adjustment
If you need to adjust the cooking time, do the following:
1. Press the button of one of theprogrammes. The display will show
the default cooking time.
2. Use the TIME +/– buttons to set the preparation time.
3. You set the cooking time after 1 minute until 00:30, after 5 minutes
from 00:30 to 02:00 and after 30 minutes from 02:00 or more.
4. Press the START/CANCEL button to start the selected cooking
programme.
Power Adjustment
If you need to adjust the performance of the “SEAR” and “SAUTÉ”
programmes, proceed as follows:
1. Press the button of one of theprogrammes. The display will show
the default power.
2. Use the POWER / buttons to adjust the power.
3. Press the START/CANCEL button to start the selected cooking
programme.
Manual Settings
1. Press the MANUAL button.
2. Use the POWER / buttons to set the desired temperature and
the TIME +/– buttons to adjust the cooking time.
3. Temperature andtime are linked to each other as follows:
- at atemperature of 40°C to 70°C, you can set the cooking time
from 00:01 to 24:00;
- at atemperature of 71°C to 100°C, you can set the cooking time
from 00:01 to 12:00;
- at atemperature of 100°C and above, you can set the cooking time
between 00:01 and 01:00.
4. Press the START/CANCEL button to start the selected cooking
programme.
. . . . . . . . . . . . . . . . . . . . . . . . . . . . . . . . . . . . . . . . . . . . . . . . . . . . . . . . . . . . . . . . . . . .
SLOW COOK
• Most foods are suitable for slow cooking, however, here are some tips
that will help you achieve optimal results.
• All the ingredients you will use should be completely thawed.
• Cut the ingredients (meat, vegetables) into approximately the same-
sized pieces.
• Place the root vegetables (carrot, celery, parsley) on the bottom of the
inner pot and pour water or broth over the ingredients.
• Cut off the excess fatty parts of the meat. Slow cooking does not
evaporate the fat.
• If you prepare food according to arecipe that is normally cooked
inapot on astove/hob, we recommend reducing the amount of
liquids (water or broth). Slow cooking does not evaporate the water.
• Do not leave cooked food inthe cooker at room temperature for an
extended period of time.
• We recommend soaking the legumes in water overnight before
cooking them. This will shorten their cooking time.
• To make sure that the meat is cooked, you can use ameat
thermometer.
• Do not use the slow cooking programme to warm food.
• The total amount of ingredients you use should fill the inner pot about
two-thirds full. Cut larger pieces of meat into smaller pieces.
• Cover the ham or pork belly with about two-thirds water. Pour about
one third of the beef, pork or chicken.
• After cooking, leave the cooker covered by the lid. This will keep the
food warm.
• Pour the ingredients with water or broth during the cooking phase.
• You can roast pieces of meat in apan before placing them in the inner
pot. This will reduce the amount of fat in thefinished meal.
• We recommend adding foods such as pasta, seafood, milk or cream
before you finish cooking. They are not primarily intended for long
cooking times inaslow cooker.
. . . . . . . . . . . . . . . . . . . . . . . . . . . . . . . . . . . . . . . . . . . . . . . . . . . . . . . . . . . . . . . . . . . .
STEAM PREPARATION
• Pour enough water into the cooker (1 to 1.5 litres is recommended).
• Spread the food over the entire surface of the steamer insert, place it
on the cooking pot and cover with the lid. Select “STEAM” programme
andset the desired cooking time.
• Do not lift the lid too often during cooking so that the steam does not
escape unnecessarily.
• Cut the food into evenly sized pieces to ensure they are evenly
cooked. Keep in mind that the small pieces will be cooked before the
big ones.
• Spread the food in asingle layer. If foods were stacked in multiple
layers, they might not cook properly.
• Season the fish or chicken before you start cooking. If you want the
meat to be dark in colour, sear it briefly in apan first.
• Remove any excess fat, sinew or skin from the meat.
• We recommend placing smaller pieces of food on baking paper,
which you spread out on the steamer insert and pierce with askewer
or scissors.
• See the table below for recommended cooking times.
– 6 –
04/2024
2024, .
Food Cooking
Time
Number Note
Fresh vegeta-
bles (broccoli,
cauliflower)
3–6 minutes 250 g Clean andcut into
uniform sized slices.
Frozen vegeta-
bles (peas)
4–8 minutes 1 cup Spread the frozen
vegetables evenly over
the entire surface of the
steamer insert.
Corn
6–12 minutes 2 cobs Split the large cobs as
required.
Root vegetables
10–18
minutes
200–400 g Clean andcut into
uniform sized slices.
Chicken breast
10–20
minutes
250 g Spread out evenly. Make
sure the pieces do not
overlap.
Chicken thighs
15–30
minutes
Chicken strips
20–40
minutes
Fish fillets
8–20
minutes
250 g Cook until the meat
comes off the bones
easily.
Whole fish
15–25
minutes
Fish steaks
10–20
minutes
Frozen dump-
lings
10–15
minutes
One layer
Fresh dump-
lings
12–18
minutes
One layer Sprinkle lightly with
water.
. . . . . . . . . . . . . . . . . . . . . . . . . . . . . . . . . . . . . . . . . . . . . . . . . . . . . . . . . . . . . . . . . . . .
GRILL
• Place the grill plate on the base of the appliance andplace the
food on it. Select the “SEAR” or “SAUTÉ” programme and set the
desired temperature and cooking time. After starting the programme
andreaching the operating temperature, the appliance automatically
starts counting down the set cooking time.
. . . . . . . . . . . . . . . . . . . . . . . . . . . . . . . . . . . . . . . . . . . . . . . . . . . . . . . . . . . . . . . . . . . .
CLEANING AND MAINTENANCE
• Before cleaning, unplug the power cable from the socket and allow the
appliance to cool down.
• Do not use abrasive cleaning agents, solvents, or any substances to
clean any parts of the appliance that could damage the surface of the
appliance.
Warning:
To prevent the risk of electric shock, do not immerse
the appliance, power cable, or
plug into water or any other liquid.
Glass Lid, Inner Pot, Steamer Insert, Grill Plate
• Wash the glass lid, inner pot, steamer insert and grill plate in warm
water with alittle dishwashing liquid. Rinse and wipe dry.
• If the inner pot is burnt, pour alittle warm water into it andadd
washing-up liquid. Leave for awhile andthen clean it.
• The cooking pot, grill plate andglass lid can be washed in the
dishwasher. However, in order to prolong the life of the non-stick
surface of the cooker and grill plate, we recommend washing in the
dishwasher only in exceptional cases.
Cooker Base
• Wipe the base of the cooker with aslightly dampened soft sponge.
Wipe with adry cloth.
Storage
• If you are not going to use the appliance for an extended period of
time, disconnect the plug from the power socket, allow the appliance
to cool down, and clean it according to the instructions in the
“Cleaning and Maintenance” section.
• Before storing, ensure that the appliance and all accessories are
thoroughly clean and dry.
• Store the appliance in adry, clean, and well-ventilated place away
from extreme temperatures and out of the reach of children or pets.
. . . . . . . . . . . . . . . . . . . . . . . . . . . . . . . . . . . . . . . . . . . . . . . . . . . . . . . . . . . . . . . . . . . .
TECHNICAL SPECIFICATIONS
Rated voltage range ............................................................................220−240 V~
Rated frequency ........................................................................................ 50−60 Hz
Rated power input ..............................................................................1,150–1,360 W
Cast iron pot volume ................................................................................................. 6 l
We reserve the right to change the text and technical specifications.
. . . . . . . . . . . . . . . . . . . . . . . . . . . . . . . . . . . . . . . . . . . . . . . . . . . . . . . . . . . . . . . . . . . .
INSTRUCTIONS AND INFORMATION ON DISPOSAL OF USED
PACKAGING MATERIAL
Dispose of used packaging material in the designated waste disposal area
determined by the municipality.
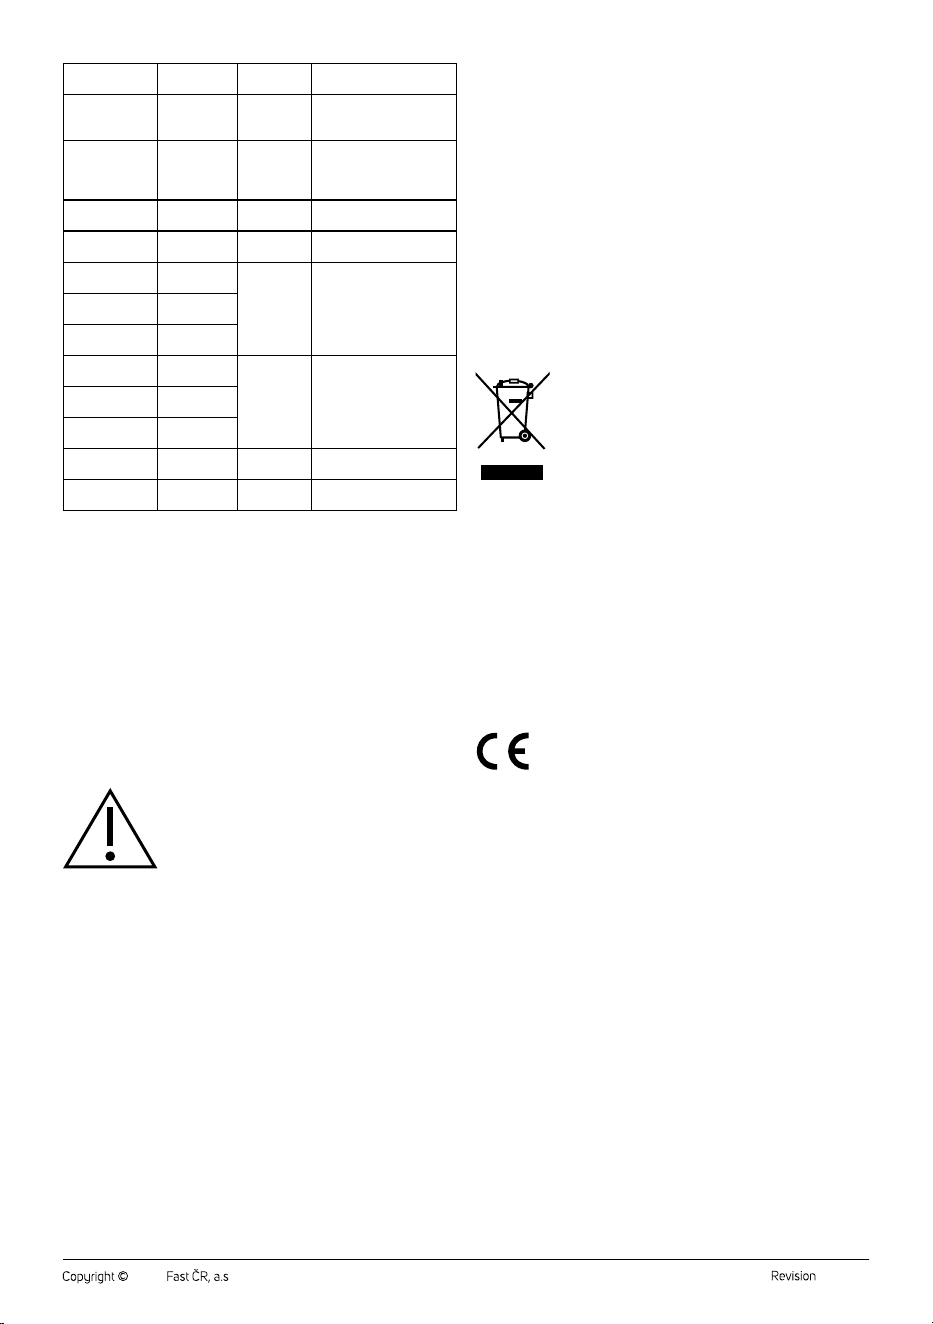
DISPOSAL OF USED ELECTRICAL AND ELECTRONIC EQUIPMENT
This symbol on the products or accompanying documents
indicates that used electrical and electronic products
should not be disposed of with regular municipal waste.
For proper disposal and recycling of these products, deliver
them to designated collection points. Alternatively, in some
European Union states or other European countries the
products can be returned to the local retailer when buying
an equivalent new product. By properly disposing of this
product, you help preserve valuable natural resources and contribute to
preventing potential negative impacts on the environment and human
health resulting from improper waste disposal. For further details, contact
your local authorities or the nearest collection point. Fines may be
imposed for improper disposal of this type of waste in accordance with
national regulations.
For Business Entities in European Union States
If you want to dispose of electric or electronic devices, ask your retailer or
supplier for the necessary information.
Disposal in Other Countries Outside the European Union
This symbol is valid in the European Union. To dispose of this product
elsewhere, request necessary information on the correct disposal method
from local authorities or your retailer.
This product complies with all the essential requirements of
the applicable EU directives.