1 1
1:1
K
A
1
2
4
6
3
5
1
2
4
6
3
5
B
C
D
E
F
G
H
A
B
C
D
E
F
G
H
技术要求(版本号:C,2025-02)
2.该说明书的幅面大小为: A5 ,未注直线尺寸公差应符合GB/T1804-v;
4.说明书警语及认证标志应满足CE/UL标准,CE:警语部分大写字母高度不低于3mm,CE标志不低于5mm,WEEE标志不低于7mm;
UL:大写字母字高不小于1/12”(2.11mm),小写字母字高不小于1/16”(1.6mm),“IMPORTANT SAFEGUARDS”,“SAVE
THESE INSTRUCTIONS”等词,其字高不小于3/16”(4.8mm),IMPORTANT SAFEGUARDS 必须在最前面。
5.产品应符合QMG-J53.021《产品说明书技术条件》的有关要求。
6.有ROHS指令要求的物料应符合美的企业标准QML-J11.006《产品中限制使用有害物质的技术标准》。
1.文字图案印刷颜色为: 黑色 ,印刷字体需清晰可见,文字不能粘到一起;
广东美的生活电器制造有限公司
会 签
郭迁强 李艳
古广君
古广君
2025-12-02
制 图
设 计
校 对
审 核
标准化
审 定
日 期
标记
处数 更改文件号 签 字 日 期
电风扇
说明书
重点
校对项
1.物料编码
2.版面尺寸
3.材质标注
4.颜色标注
5.客户型号
6.产品名称
7.产品参数
8.电压功率
-----
-----
-----
9.单位符号
10.认证标志
16.商标LOGO
11.回型标志
15.目录及
页码
12.ROHS标志
13.警语警语
及字高
14.控制面板
及功能
3.该说明书的装订方式为: 钉装 ;[70P以下为钉装,70P以上为胶装(特殊要求除外)]
MIDEA-FG15-26JRW(MSFAT06W5SB)-0501
16161000A32835
材料: 80g双胶纸
认证图标
单位表述
产地表述
变更要求
000000
0000000
UL只有C+US或无ETL有C或US或C+US大于5mm
说明书、保修卡类
交流电: 频率: 功率: 容量: 电流: 压强:V~
MADE IN CHINA Made in China Made in P.R.C
Hz W mL/L A Pa/kPa/MPa 长度:mm/cm/m 时间:s/min/h重量:kg直流电:
大于5mm 大于5mm 大于5mm 大于7mm GS图标无高度要求,印刷可见即可
标准元素核对表(此表仅用于印刷品制作过程核对标准内容,非印刷内容)
PAP
22
图纸变更须确认变更点,同步检讨涉及的物料和MO单(含92),注意拉通到采购、供方、进货检,尤其注意新单编码的变更场景
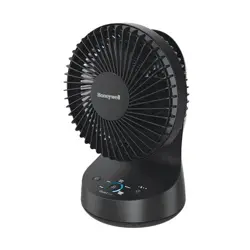
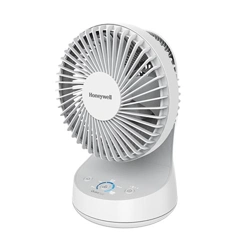
USER MANUAL
AIR CIRCULATION FAN
Warning notices: Before using this product, please read this manual carefully and keep it for future
reference. The design and specifications are subject to change without prior notice for product
improvement. Consult with your dealer or manufacturer for details.
The diagram above is just for reference. Please take the appearance of the actual product as the standard.
EN English
ES Spanish
MSFAT06W5SB

01
THANK YOU LETTER ------------------------------------------------------------------------------01
SAFETY INSTRUCTIONS
-----------------------------------------------------------------------02
SPECIFICATIONS
--------------------------------------------------------------------------------------05
PRODUCT OVERVIEW
---------------------------------------------------------------------------06
OPERATION INSTRUCTIONS
-------------------------------------------------------------07
APP SETUP AND OPERATION
----------------------------------------------------------14
CLEANING AND MAINTENANCE
-----------------------------------------------------15
TROUBLESHOOTING
------------------------------------------------------------------------------20
TRADEMARKS, COPYRIGHTS AND LEGAL STATEMENT
---21
DATA PROTECTION NOTICE
--------------------------------------------------------------21
1 YEAR LIMITED WARRANTY
--------------------------------------------------------------22
CONTENTS
THANK YOU LETTER
Thank you for choosing Midea! Before using your new Midea product, please read
this manual thoroughly to ensure that you know how to operate the features and
functions that your new appliance offers in a safe way.
02
SAFETY INSTRUCTIONS
Intended Use
The following safety guidelines are intended to prevent unforeseen risks or damage from
unsafe or incorrect operation of the appliance. Please check the packaging and appliance
on arrival to make sure everything is intact to ensure safe operation. If you find any damage,
please contact the retailer or dealer. Please note modifications or alterations to the appliance
are not allowed for your safety concern. Unintended use may cause hazards and loss of
warranty claims.
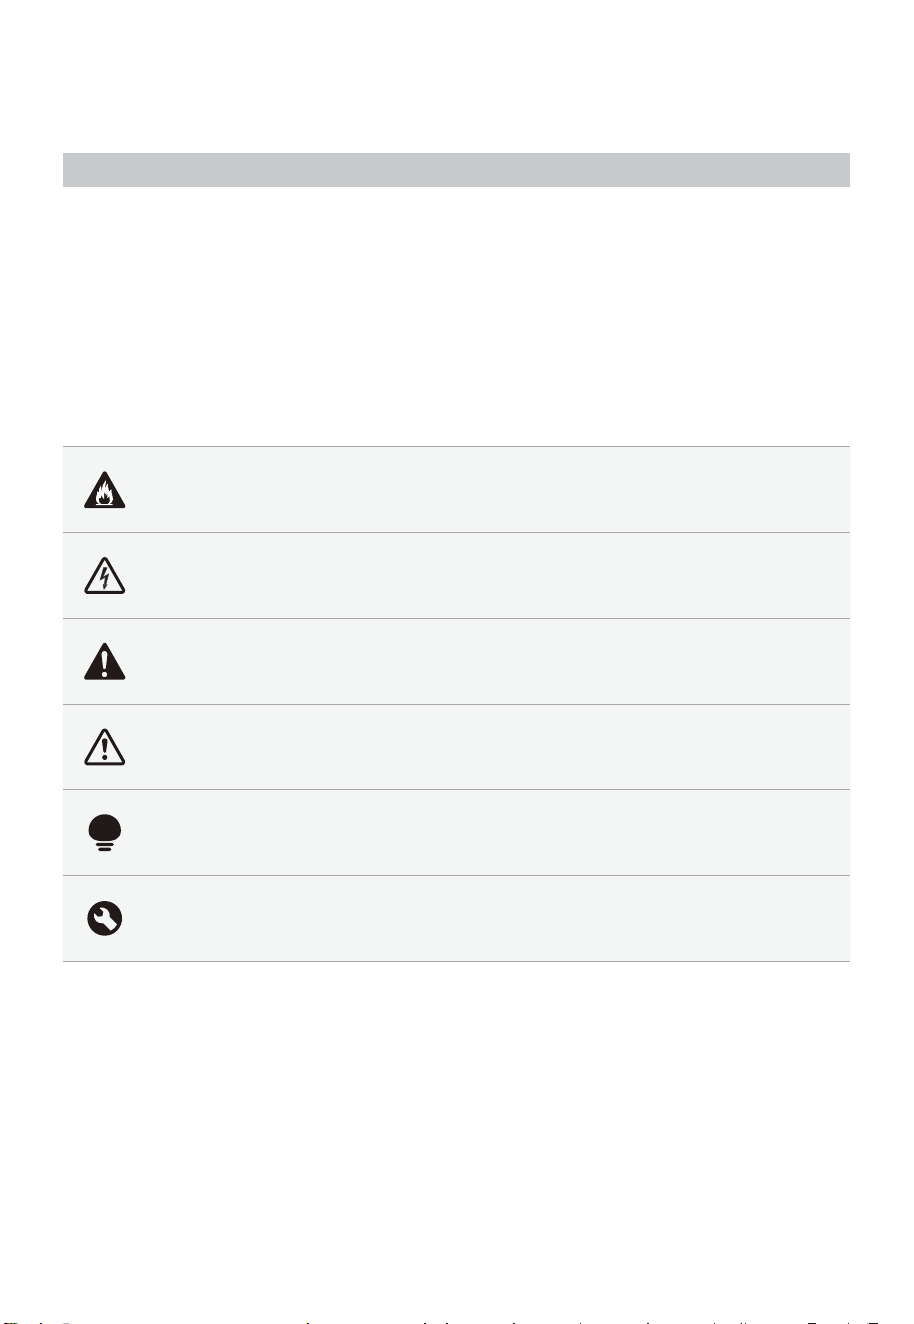
Explanation of Symbols
Danger
This symbol indicates that there are dangers to the life and health of persons
due to extremely flammable gas.
Warning of electrical voltage
This symbol indicates that there is a danger to life and health of persons due
to voltage.
Warning
The signal word indicates a hazard with a medium level of risk which, if not
avoided, may result in death or serious injury.
Caution
The signal word indicates a hazard with a low degree of risk which, if not
avoided, may result in minor or moderate injury.
Attention
The signal word indicates important information (e.g., damage to property),
but not danger.
Observe instructions
This symbol indicates that a service technician should only operate and
maintain this appliance in accordance with the operating instructions.
Read these operating instructions carefully and attentively before using/commissioning
the unit and keep them in the immediate vicinity of the installation site or unit for later use!

03
READ AND SAVE THESE
INSTRUCTIONS
CAUTION
• Read rules for safe operation and instructions carefully. This appliance
is not intended for use by persons (including children) with reduced
physical, sensory or mental capabilities, or lack of experience and
knowledge, unless they have been given supervision or instruction
concerning use of the appliance by a person responsible for their safety.
Children should be supervised to ensure that they do not play with the
appliance.
Never insert fingers, pencils, or any other object through the grille
when fan is running.
• Disconnect fan when moving from one location to another. Be sure fan is
on a stable surface when operating to avoid overturning.
• Keep electrical appliances out of reach from children or infirm
persons. Do not let them use the appliances without supervision.
• Household use only.
WARNING
• If the supply cord is damaged, it must be replaced bymanufacturer
or its service agent or a similarly qualified person in order to avoid a
hazard.
• To protect against the risk of electrical shock, do not immerse the
unit, cord or plug in water or other liquid.
• When the appliance is not in use and before cleaning, unplug the
appliance from the outlet.
• When the fan was assembled, the rotor blade guard shall not be
taken off anymore.
• This appliance has a polarized plug (one blade is wider than the
other). To reduce the risk of electric shock, this plug is intended to
fit in a polarized outlet only one way. If the plug does not fit fully in
the outlet, reverse the plug. If it still does not fit, contact a qualified
electrician. Do not attempt to defeat this safety feature.
• WARNING—To reduce the risk of fire or electric shock, do not use this
fan with any solid-state speed control device.
• Do not leave the fan running unattended.

04
• To Reduce The Risk Of Fire, Electric Shock Or Injury To Persons, Do
Not Use Replacement Parts That Have Not Been Recommended By
The Manufacturer (e.g.Parts Made At Home Using A 3D Printer).
• Do not operate any fan with a damaged cord or plug.
• Discard fan or return to an authorized service facility for examination
and/or repair.
• Do not run cord under carpeting. Do not cover cord with throw rugs,
runners, or similar coverings. Do not route cord under furniture or
appliances. Arrange cord away from traffic area and where it will not
be tripped over.
• This product employs overload protection (fuse).
A blown fuse indicates an overload or short-circuit situation. If the
fuse blows, unplug the product from the outlet. Replace the fuse as
per the user servicing instructions (follow product marking for proper
fuse rating) and check the product. If the replacement fuse blows, a
short-circuit may be present and the product should be discarded
or returned to an authorized service facility for examination and/or
repair.
• The fan shall not be modified by user. such as by adding
supplemental filters to fans not intended to be used for air cleaning
purposes.
FCC STATEMENT
• This device complies with Part 15 of the FCC Rules. Operation is
subject to the following two conditions:
This device may not cause harmful interference, and
This device must accept any interference received, including
interference that may cause undesired operation.
Caution: The user is cautioned that changes or modifications not
expressly approved by the party responsible for compliance could
void the user's authority to operate the equipment.
Note: This equipment has been tested and found to comply with
the limits for a Class B digital device, pursuant to part 15 of the FCC
Rules. These limits are designed to provide reasonable protection
against harmful interference in a residential installation.
This equipment generates uses and can radiate radio frequency
energy and, if not installed and used in accordance with
the instructions, may cause harmful interference to radio
communications. However, there is no guarantee that interference will
not occur in a particular installation.

05
• If this equipment does cause harmful interference to radio or
television reception, which can be determined by turning the
equipment off and on, the user is encouraged to try to correct the
interference by one or more of the following measures:
-- Reorient or relocate the receiving antenna.
-- Increase the separation between the equipment and receiver.
-- Connect the equipment into an outlet on a circuit different from
that to which the receiver is connected.
-- Consult the dealer or an experienced radio/TV technician for help.
Midea America Corp.
Parsippany, NJ 07054
TEL : 1-866-646-4332
SPECIFICATIONS
Product Model MSFAT06W5SB
Voltage 120V~
Frequency 60Hz
Power 40W
06
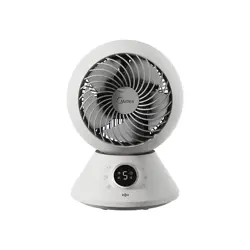
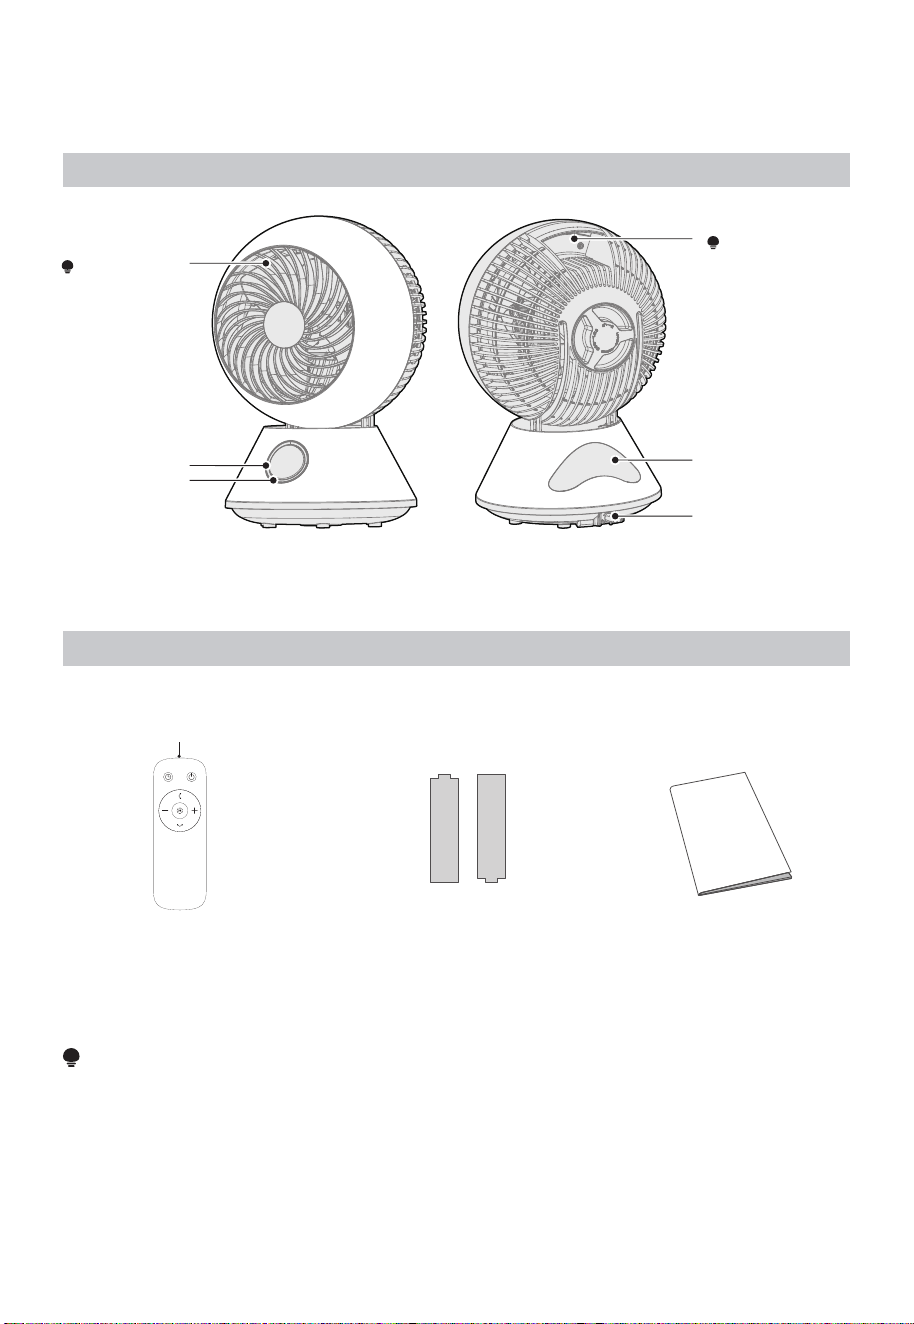
PRODUCT OVERVIEW
Name of Part
Front Guard
NOTE
Do Not Block.
Handle
NOTE
When moving, do
not hold the handle
in a blade-up
position.
Operating
Part
Remote Control
Placement
Location
Power Cable
Receiving
Part
Front Back
Part List
NOTE
The air circulation fan adopts a structure that enhances the straightness of the wind so that the air
can be circulated and stirred. Therefore, compared with ordinary electric fans, the sound of blowing
air will be slightly louder.
User Manual × 1
Battery x 2Remote Control x 1
Transmitting part
07
OPERATION INSTRUCTIONS
How to Use
Operations on the main body operating part are explained.
You can also perform the same operation with the remote control.
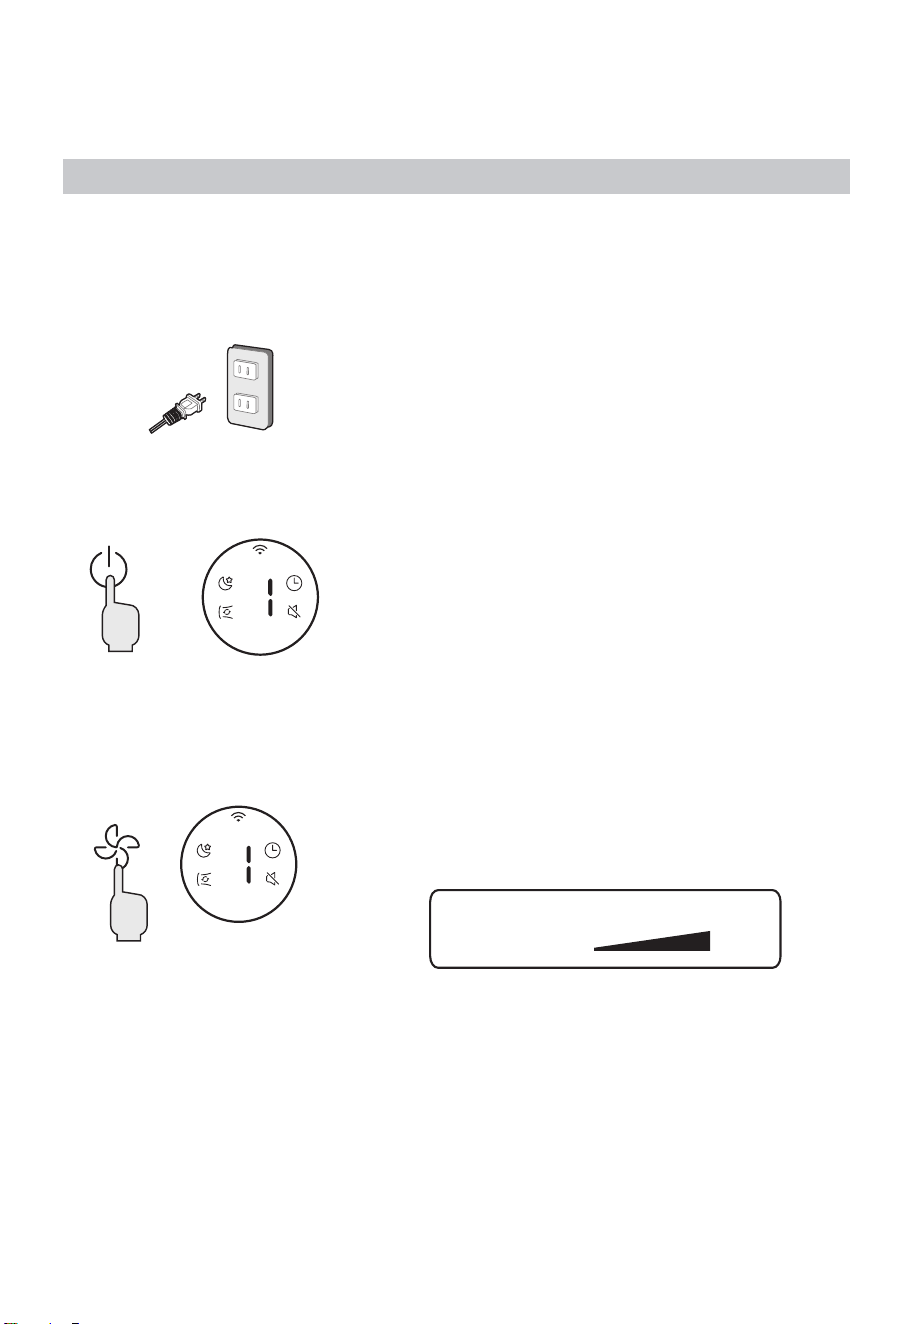
1. Insert the power plug into the socket
Please insert it all the way in.
• The buzzer sounds, and all the indicators light up for
about 1 second.
2. Press the power button to start running
(Example)
Air volume 1
The air volume indicator lights up and the air blows.
Press the power button again to stop.
3. Adjust the air volume
(Example)
Air volume 1
Each time you press the air volume button, you can
switch the blowing intensity in 5 levels, and the air
volume indicator light corresponding to the air volume
will light up.
1 2 3 4 5
Wind
strength
Weak
Strong
08
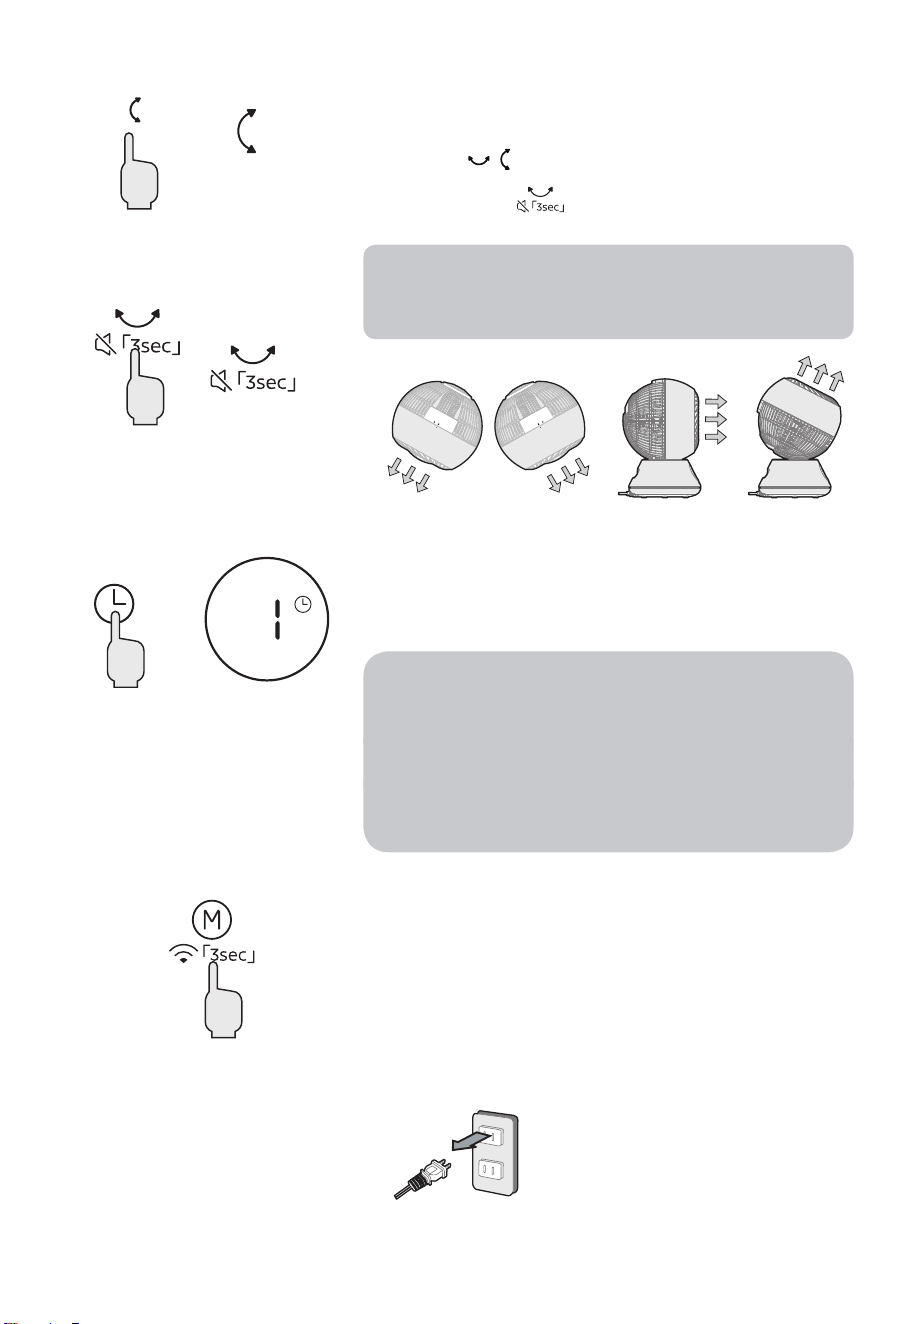
4. Up/down left/right oscillator
(Example)
up/down
(Example)
left/right
Each time you press the oscillator button, you can
switch the oscillator direction.
• Press the
button on the remote control.
• Press and hold
button for 3 seconds to mute
the device.
When the oscillator is running, there will be click
sound. This is the unique sound of the oscillator
motor, and it does not mean that the product is
abnormal.
5. Schedule off operation setting time: 1-9 hours
(Example)
1 hour
Press the schedule off button during operation to set
the schedule off (the time can be set to 1-9h hours).
The indicator light corresponding to the set time lights
up.
• If you want to cancel the schedule off setting,
please press the schedule off button to turn off the
schedule off indicator.
Or press the power button to stop, turn on and
restart.
• When schedule off isn’t turned on, functions
cannot be set in power-off state.
• Press and hold this button to quickly adjust the set
time.
6. Select wind mode
Press the mode button to select normal mode, sleep
mode, cycle wind mode circulating between the three
wind classes.
7. After use, use the power button to stop the operation, and pull out the power plug
from the socket.
09
Forced Stop
• If the fan runs continuously for 24 hours without any operation, it will automatically
enter off mode.
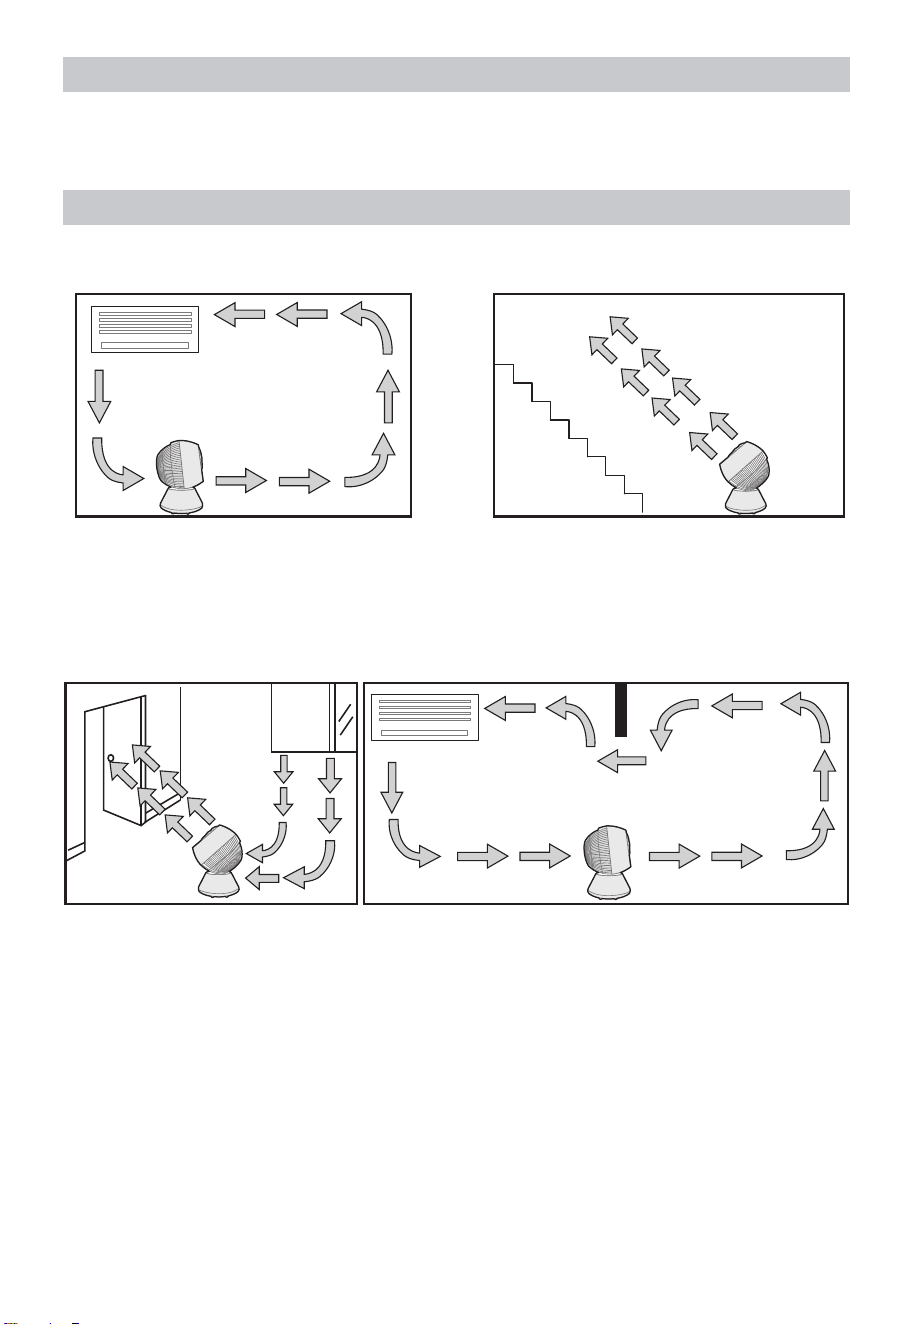
Setting Place
Please install it on a level floor or table without obstacles.
During cooling
Diffuses the cold air accumulated on the
floor and circulates repeatedly in the
room.
During heating
Sends air to the roof and recirculates the
upper heating in the room.
For ventilation (stationary operation) Dual room circulation (stationary
operation)
• If a wide range of air supply is required, it will be more effective to use the oscillator
operation.
10
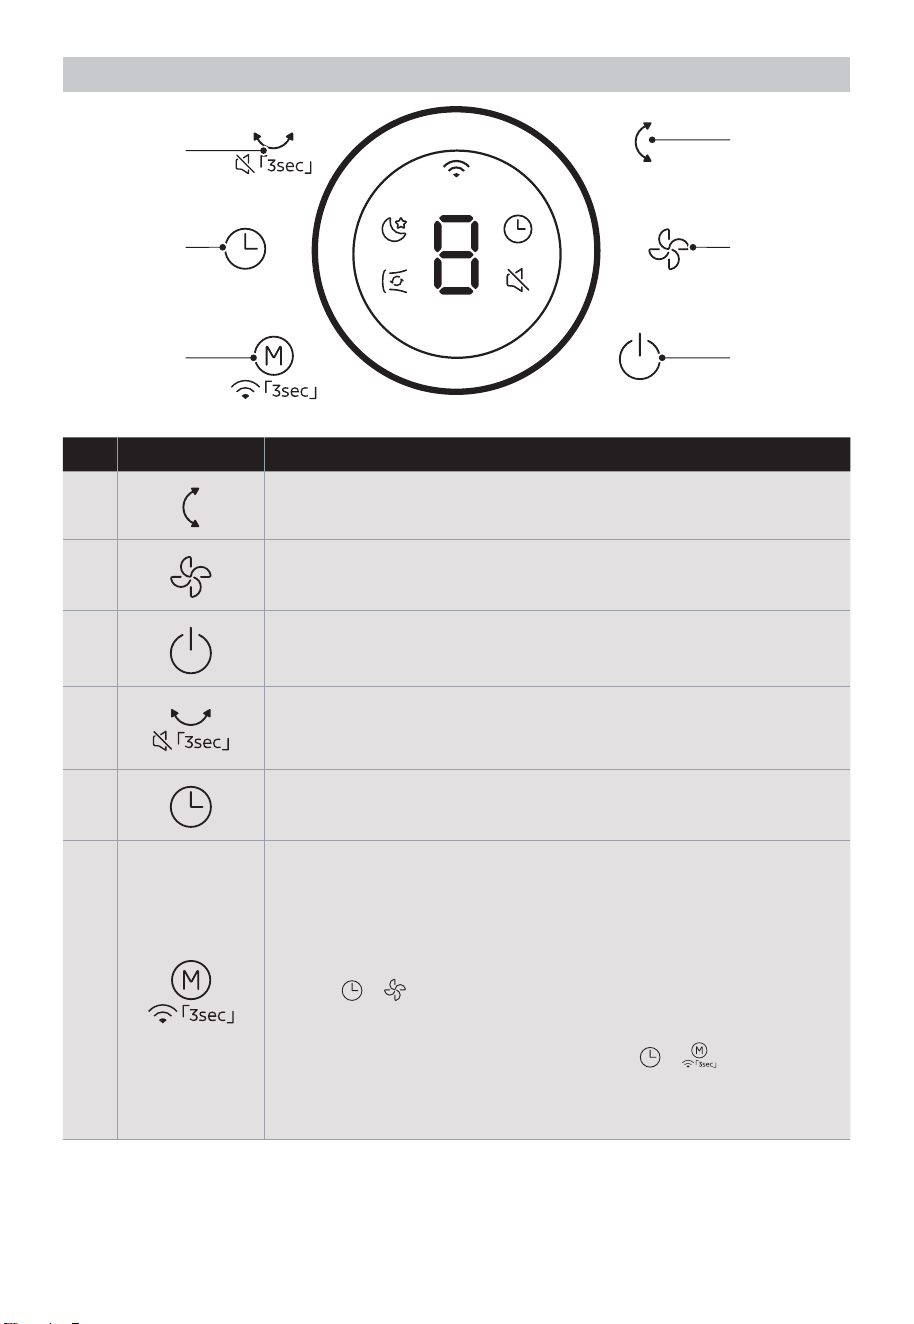
Operating Part
1
2
3
4
5
6
No Button Function Description
1
• Press the button to turn on/off vertical swing.
2
• Tap to change the wind speed from 1 (low) to 5 (high)
3
• Tap to turn the fan on/off.
4
• Turn on/off horizontal swing.
• Press and hold the button for 3s until there is a long beep to
turn on/off the mute function.
5
• Press this timer key repeatedly to set the time for air delivery.
Increase in increments up to “1-2-3-4-...-9” hours
6
• When the machine is on, short press this button to Select
normal mode, sleep mode, cycle wind mode circulating
between the three wind classes.
• Press and hold this key for 3 seconds to connect to wireless
networks and trigger APP networking.
• Within 5 minutes of powering on and in the shutdown state,
press
+ simultaneously for 3 seconds to toggle wireless
networks module on or off. When the wireless networks
module is turned off, the wireless networks become inactive.
• Within 5 minutes of powering on, press
+
simultaneously for 3 seconds to reset the wireless networks
module to its factory settings, and disconnect from the
network.
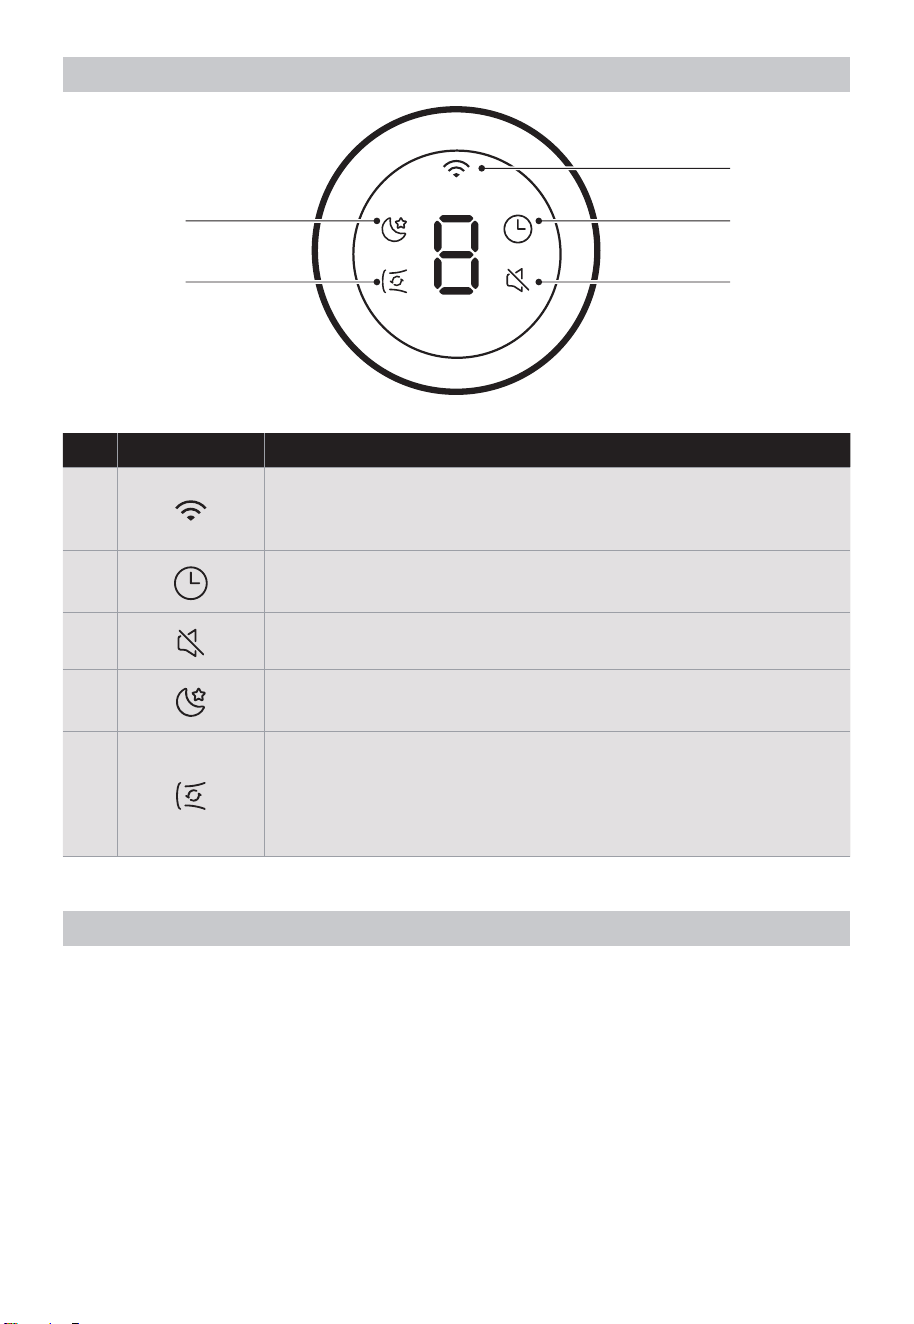
11
Operating Part
1
2
3
4
5
No Light Function Description
1
• The lights are on, Wireless network is connected;
• The lights are blinking and the Wireless network is
disconnected or being connected
2
• This light stays on continuously after setting the timer.
3 • The light is on in mute mode.
4
• Light on, start the sleep wind mode; In sleep wind mode, the
keys are on mute.
5
• The fan automatically adjusts to maximum wind speed and
enables oscillation, ensuring powerful and wide airflow during
cycle wind mode.
• In this mode, the middle single 8-tube displays like a running
light.
About Oscillator Function
• The oscillator mechanism is composed of a special motor and other connecting parts.
When the oscillator is running, there will be a motor operation sound (squeak or click
sound), but this is not a problem of the product.
• If there is an abnormal sound, please contact the place of purchase or the customer
service center.
• During the oscillator operation, please do not move the main unit.
A load may be applied to the connection part or the motor, resulting in failure.

12
About Memory Function
• Power-off memory function
When the power of the fan is turned off, it will automatically remember the speed and
mode settings used last time. The fan will automatically restore to the previous setting
state the next time it is turned on.
When the fan unexpectedly shuts down due to sudden power failure or other reasons,
this product can automatically record the fan speed and mode settings from the last
use. When the fan is turned on again, it will automatically restore to the previous
setting state, without the need to reset.
Precautions For Long-term Use
Fans that have been used for many years may cause deterioration of internal parts due
to the influence of heat, moisture, dust, etc., which may cause smoke and fire. If the
following situations occur during use, please immediately turn off the operation switch,
pull out the power plug from the socket, and contact the store where you purchased the
product or the Customer Service registered in the terms of after-sales service.
• The impeller does not rotate when the switch is turned on.
• Impeller rotates but very slowly and irregularly.
• Abnormal vibrations or noises are generated when rotating (there are friction noises,
contact noises, knocking noises, impeller deflection vibrations, etc.)
• The motor part is abnormally hot and produces a burnt smell.
• The power cord is bent and damaged.
• When touching the power cord, the impeller may rotate or not rotate in an unstable
state.
If any abnormality occurs, please stop using it immediately!
Immediately pull out the power plug from the socket, and contact the store where you
purchased the product or the Customer Service regis
tered in the terms of after-sales
service.
13
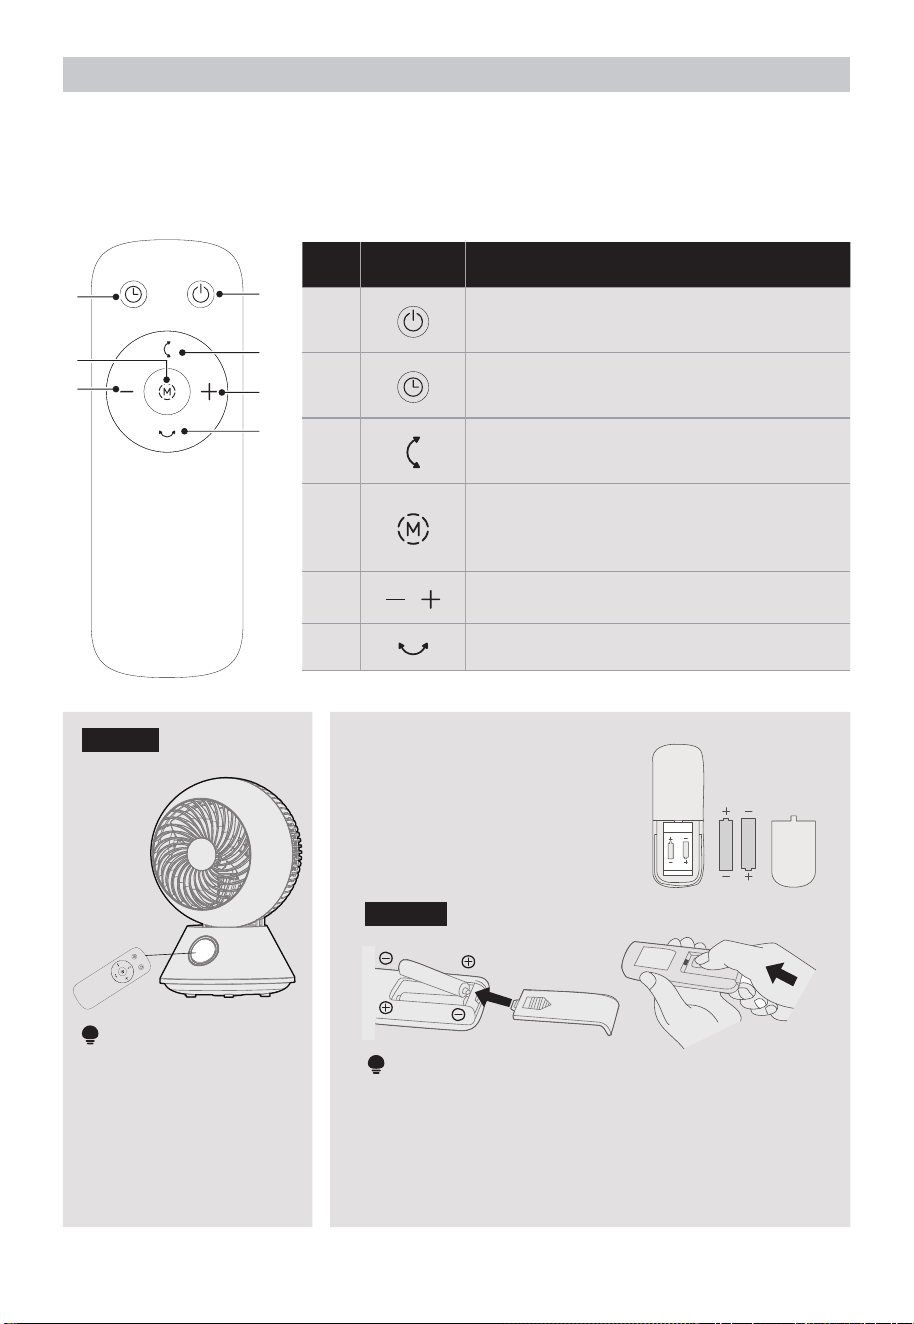
Rmote Controller
• Point the remote controller at the receptor on body of the fan and press the desired
button. The remote controller will work at distances of up to roughly 5 meters and the
angle of 30 degree included between right and left from the receptor.
• The batteries must be removed from the remote controller before it is scrapped and
that they are disposed of safely.
2
4
5
1
3
5
6
No Button Function Description
1
• Tap to turn the fan on/off.
2
• Set timing off timer.
3
• Start/stop up and down oscillator.
4
• Tap the “MODE” Button repeatedly to
cycle through “Normal mode – Sleep
mode -cycle wind mode”.
5
• Increase/decrease speed and timer.
6
• Start/stop left and right oscillator.
Figure 1
NOTE
Please aim the remote
control at the panel to
use it.
Battery Installation
• Slide the battery compartment
cover.
• Insert the batteries, and make
sure that the batteries are
placed as shown in the Figure 2.
• Slide back the battery cover.
Figure 2
NOTE
• Do not dispose of batteries in fire, batteries may
explode or leak.
• Do not mix old and new batteries.
• Do not mix alkaline, standard (carbon-zinc) or
rechargeable (nickel-cadmium) batteries.
• Pay attention to poles (+ and -) of the batteries.
AAA Battery. 1.5V
Battery
14
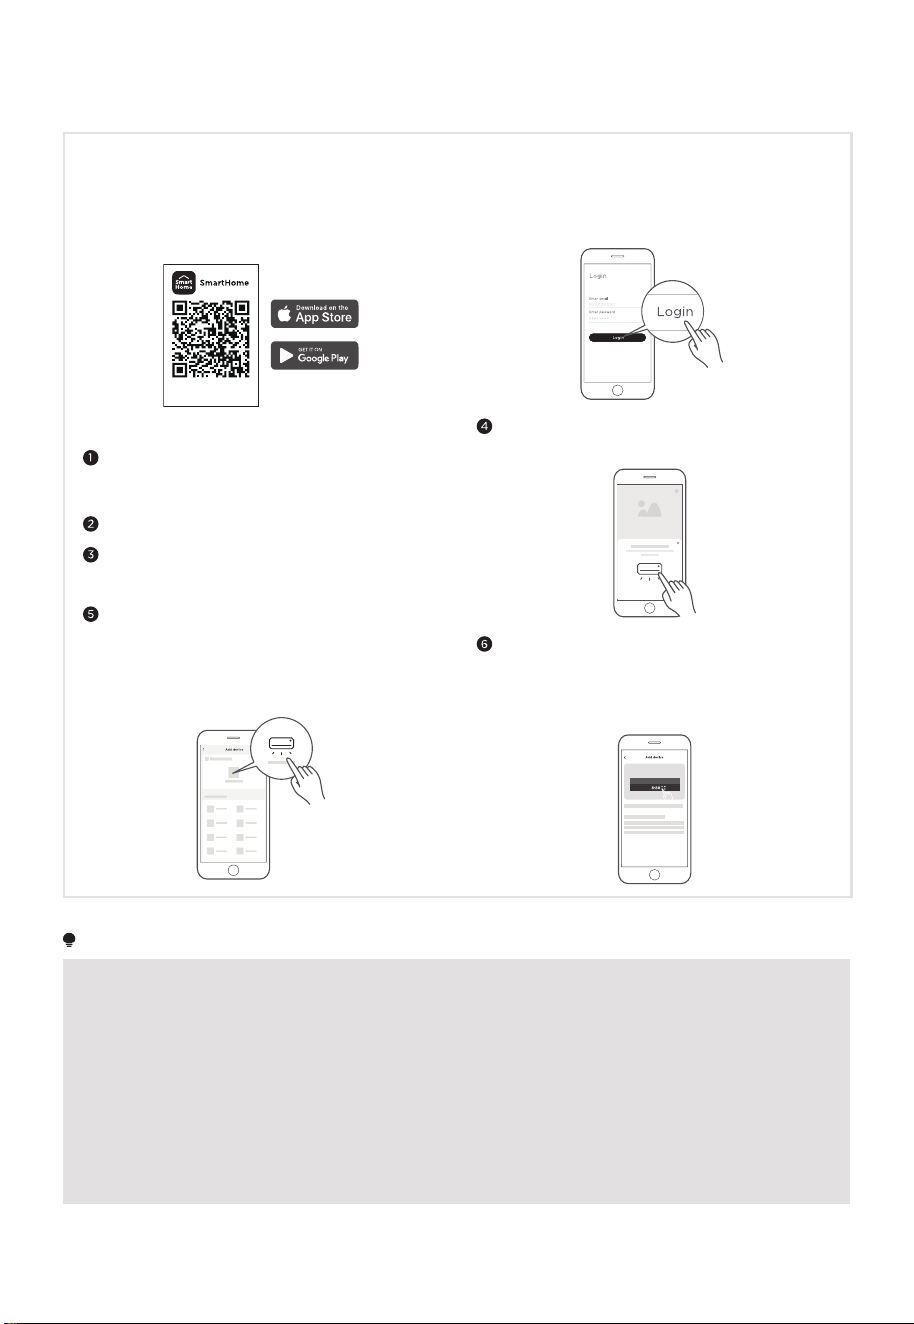
APP SETUP AND OPERATION
Download the SmartHome app
On an app market (Google Play Store, Apple
App Store), search for SmartHome* and find the
SmartHome app. Download and install it on your
phone. You can also download the app by scanning
the QR code below.
Download the app
& activate product
Connect your devices to SmartHome
Please make sure your mobile phone is connected
to a wireless network. If it is not, go to Settings
and enable wireless networks and Bluetooth.
Please power on your devices.
Open SmartHome app on your phone.
If no message appears, select "+" on the page and
select your device in the list of nearby devices
available. If your device is not listed, please add
your device manually by the device category and
device model.
Register and log in
Open the SmartHome app, and create a new account
to start (you can also register through a third-party
account). If you already have an existing account, use
the account to log in.
If a message of "Smart devices discovered nearby"
appears, click to add.
Washing machine
Connect your device to the wireless network
following the app's instructions. If the connection
fails, refer to the app's guidance to proceed. If
the device is working abnormally, disconnect the
wireless network by unplugging the power cord.
NOTE
• Make sure your devices are powered on.
• Keep your mobile phone close enough to your device when you are connecting your device to the network.
• Connect your mobile phone to the wireless network at home, and make sure you know the password of the
wireless network.
• Check if your wireless router supports 2.4 GHz band and turn it on. If you are not sure whether the router
supports 2.4 GHz band, please contact the router manufacturer.
• The device cannot connect to the wireless network that requires authentication, and it usually appears in
public areas such as hotels, restaurants, etc. Please connect to a wireless network that does not require
authentication.
• Turn off the WLAN+ (Android) or WLAN Assistant (iOS) function of your mobile phone when connecting your
device to the network.
• In the case that your device connected to a wireless network before but it needs to reconnect, please click
“+” on the app Home page, and add your device again by the device category and model according to the
instructions on app.
15
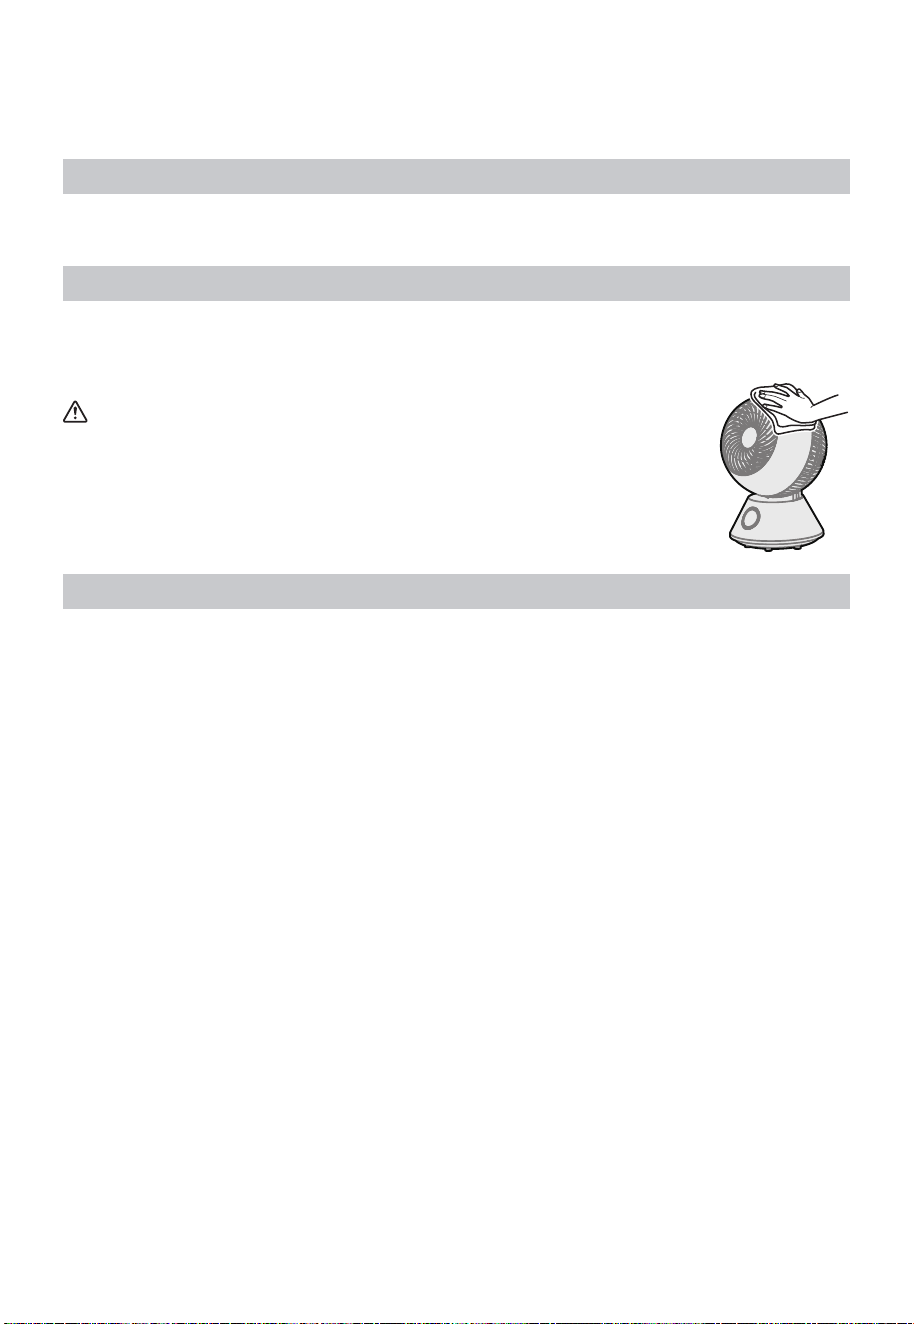
CLEANING AND MAINTENANCE
Maintenance
During maintenance, the power plug must be pulled out from the socket.
Main Unit
Wipe clean with a soft cotton cloth.
If the stain is difficult to remove, please soak the cotton cloth with neutral detergent,
then wring it out to wipe off the stain, and finally dry the unit gently.
CAUTION
• Do not use thinner, alcohol, or detergents containing benzene. It may
cause deterioration, discoloration, etc.
• When using chemical wipes, follow precautions.
• Do not use sprays (insecticides, fragrances, etc.).
It may cause deterioration, discoloration, etc.
Guard Cleaning
• Regularly use the vacuum cleaner to vacuum up the dust and so on. Once dust
accumulates, it may cause the motor to overheat or produce abnormal noise.
• If there is too much dirt, please remove the front guard, rear guard and impeller for
maintenance.
• After maintenance, please install the front guard, rear guard and impeller in place.
• The overall cleaning can be carried out after the front guard, rear guard, impeller,
rotary fastener, nut and motor bridge are removed. After cleaning with water, it should
be fully dried before being installed in place.
16
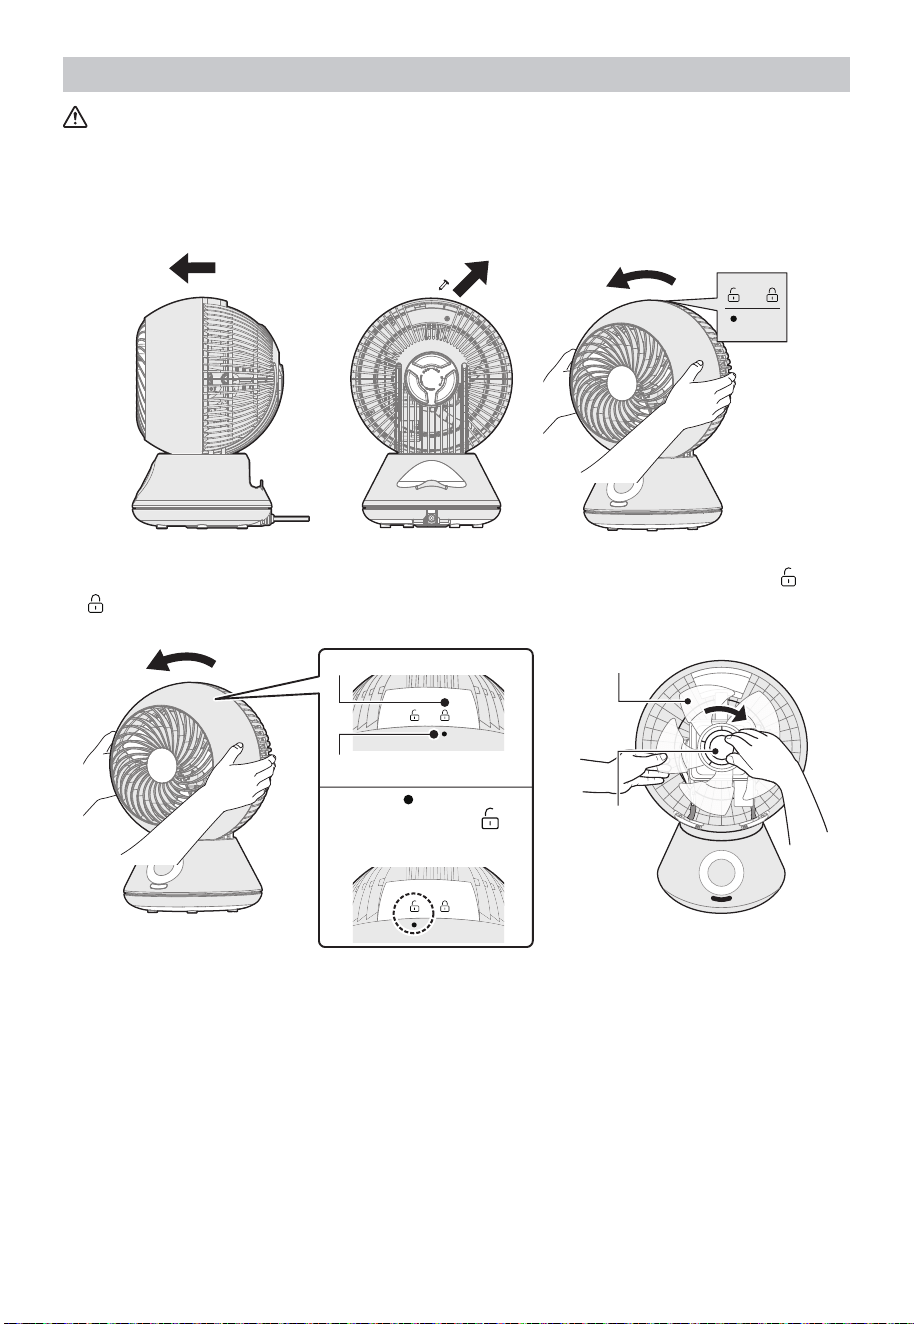
Removal Method
CAUTION
Do not operate with the guard removed. There is a possibility of personal injury.
1 The impeller is horizontal .Remove the screws before rotating open the front mesh
cover.
2 Turn the rotary fastener to the right to remove the fastener and impeller. Align with
on the top surface of the front grille, and remove the front grille.
Rear grille mark
Front grille mark
Align the “ ” mark on the
front grille with the “
” on
the rear grille and unlock it
Fan blade
Rotator
3 Open the front guard lock rod outward and turn it to the back of the body. Then
support the rear grille with one hand, rotate the grille fastening nut in the “Unlock”
(counterclockwise) direction and remove it. Hold the rear grille with both hands, and
be careful not to hang the rear grille lock rod on the body. Pull the rear grille toward
you and remove it.

17
Rear grille
Lock rod receiver
Rear grille lock rod
Open the rear grille lock rod
Support the rear
grille with one hand Grille fastening nut
CAUTION
Paste lubricant is applied around the motor part. Please do not touch it.
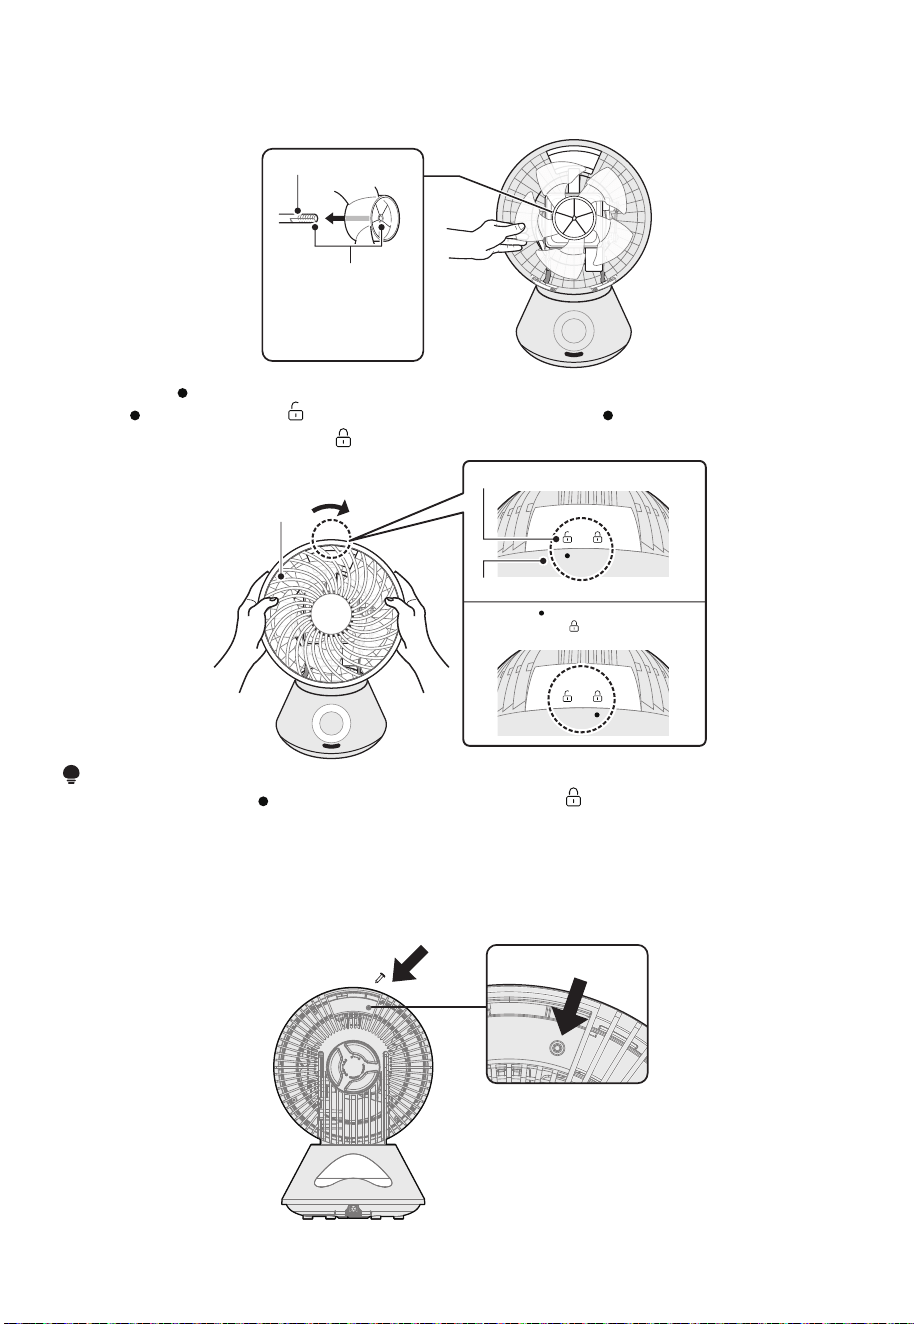
Installation Method
1 Place the back of the body facing the front. Open the rear grille to the state where
the rear grille lock rod is open. Hold the rear grille with both hands, and be careful
not to touch the main body. When inserting the main body, align the hole of the rear
grille with the grille nut interface of the main body and install it. Turn the grille nut
clockwise to the “Lock” position to ensure that the rear grille is firmly fixed.
Put your fingers on the grille
lock rod to keep it open
Support the
rear grille with
one hand
Grille fastening
nut
2 Place the front of the body facing up. Close the rear grille lock rod to ensure that the
rear grille is locked.
Lock rod receiver
Close rear grille
Rear grille lock rodRear grille
18
3 Align the notch of the motor shaft with the D-shaped hole shape in the center of
the blade and insert the blade to the bottom. The feather below refers to the blade.
Remember to correct it.
Motor shaft blade
Align the D-shaped
notch of the motor
shaft with the
D-shaped hole of the
blade.
4 With the “ ” mark on the front grille facing up, hold it with both hands, and align
the “
” mark with the “ ” mark of the rear grille. Turn the “ ” mark on the front grille
clockwise to align with the “ ” mark of the rear grille.
Rear grille mark
Front grille
Align the “
” mark on the front
grille with the “
” mark of the rear
grille and lock it
Front grille
NOTE
• Make sure that the “
” mark of the front grille and the “ ” mark of the rear grille are
correctly aligned.
• The grille may fall off during operation.
• After cleaning, wait for the body to dry before using it.
5 Finally, use screws to secure the front and rear mesh covers at the handle of the
fuselage.
screw hole
19
Storage
After cleaning, pay attention to the following points and store it properly.
• Please carefully wipe off the dirt and grease on the body and blades. Resin can cause
discoloration and breakage.
• Please put it in a box or pack it in a plastic bag when purchasing and keep it properly.
• Please store it in a place without direct sunlight and with low humidity.
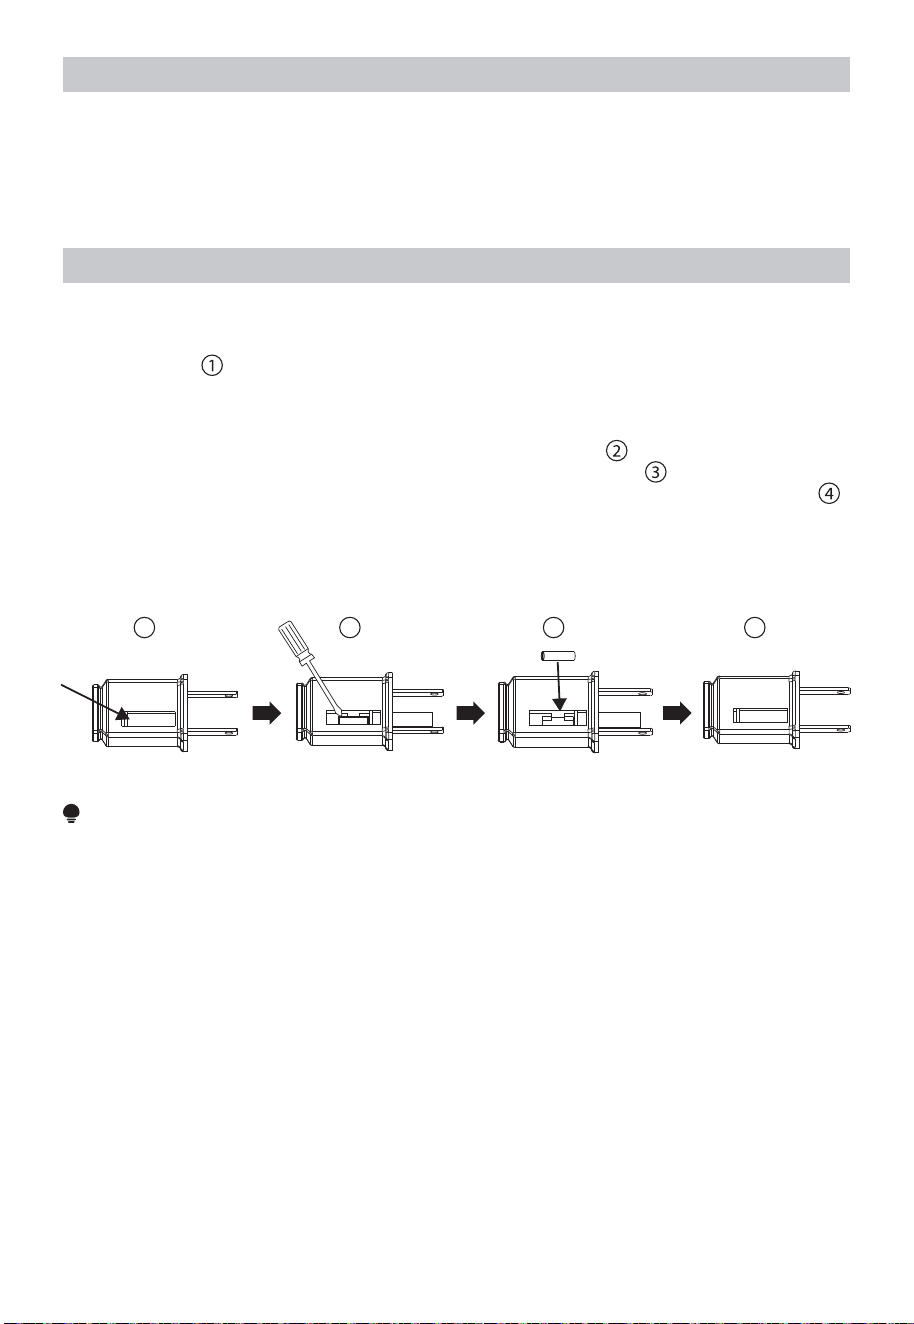
User Servicing Instructions
a) Grasp plug and remove from the receptacle or other outlet device. Do not unplug by
pulling on cord.
b) Open fuse cover. Slide open fuse access cover on top of attachment plug towards
blades. (Fig.
)
c) Remove fuse carefully. Insert the tip of your tool into fuse slot(close with the terminal),
then pry the fuse gradually and slowly, but do not overexert. If you feel resistance, you
can try it at several times and pry the fuse little by little. When one side of the fuse has
been released, then you can get the fuse out entirely. (Fig.
)
d) Risk of fire. Replace fuse only with 2.5 Amp, 125 Volt fuse. (Fig.
)
e) Close fuse cover. Slide closed the fuse access cover on top of attachment plug. (Fig.
)
f) Risk of fire. Do not replace attachment plug. Contains a safety device(fuse)that should
not be removed. Discard product if the attachment plug is damaged.
g) If the fan suddenly does not work during normal operation, please check whether it is
a problem with the fuse.
3
41
2
NOTE
• When you replace the fuse, please don't operate suddenly or overexert, or else the
product will be damaged or cause accident.
• When you feel it hard to be operated, please make sure you have got the right way.
• Risk of fire. Do not replace attachment plug. Contains a safety device (fuse) that
should not be removed. Discard product if the attachment plug is damaged.

20
TROUBLESHOOTING
Operation of your appliance can lead to errors and malfunctions. The following tables
contain possible causes and notes for resolving an error message or malfunction. It is
recommended to read the tables carefully below in order to save your time and money
that may cost for calling to the service center.
Fault Measures
Operation failure
• Is the power plug inserted into the outlet?
- Insert the plug fully into the socket.
Cannot operate
with the remote
control
• Are the batteries exhausted?
- Reload the battery.
• Is the transmitting part facing the main unit? Or are there any
obstacles?
- The operation can only be carried out within the angle range
of about 90° left and right at a distance of about 3m without
obstacles.
• Has the protective film on the battery been removed?
- When the product leaves the factory, a protective film is
inserted to prevent the battery of the remote control from being
consumed. Please remove it before use.
Loud blowing
noise
• Is there any dust or stains on the guard?
- Clean up the dirt with a vacuum cleaner, etc.
If the following problems 2 and 3 occur on the power cord and power plug, or if the
stains cannot be cleaned in the case of 1, it may cause electric shock or fire. Please
contact the store where you purchased the product.
1. Is there any dirt, rust or dust attached to the power plug?
- Clean up stains, rust, dust, etc.
2. Is the power cord damaged?
3. During the operation, is there any power failure when moving the power cord?

21
TRADEMARKS, COPYRIGHTS AND
LEGAL STATEMENT
logo, word marks, trade name, trade dress and all versions there of are valuable
assets of Midea Group and/or its affiliates (“Midea”), to which Midea owns trademarks,
copyrights and other intellectual property rights, and all goodwill derived from using any
part of an Midea trademark. Use of Midea trademark for commercial purposes without
the prior written consent of Midea may constitute trademark infringement or unfair
competition in violation of relevant laws.
This manual is created by Midea and Midea reserves all copyrights thereof. No entity or
individual may use, duplicate, modify, distribute in whole or in part this manual, or bundle
or sell with other products without the prior written consent of Midea.
All the described functions and instructions were up to date at the time of printing this
manual. However, the actual product may vary due to improved functions and designs.
DATA PROTECTION NOTICE
For the provision of the services agreed with the customer,
we agree to comply without restriction with all stipulations of applicable data protection
law, in line with agreed countries within which services to the customer will be delivered,
as well as, where applicable, the EU General Data Protection Regulation (GDPR).
Generally, our data processing is to fulfil our obligation under contract with you and
for product safety reasons, to safeguard your rights in connection with warranty and
product registration questions. In some cases, but only if appropriate data protection
is ensured, personal data might be transferred to recipients located outside of the
European Economic Area.
Further information is provided on request. You can contact our Data Protection
Officer via MideaDPO@midea.com. To exercise your rights such as right to object your
personal data being processed for direct marketing purposes, please contact us via
MideaDPO@midea.com. To find further information, please follow the QR Code.
1 YEAR LIMITED WARRANTY
Midea America Crop. makes no further warranties or representations, express or
implied except those contained herein. No representative or dealer is authorized to
assume any other liability regarding the
product
. The duration of the implied warranty
granted under State law, including warranties of merchantability and fitness for particular
purpose are limited in duration should the duration of the express warranty grant it
hereunder. Midea America Crop. shall in no event be liable for direct, indirect,
special or consequential damages.
on your product).
Midea America Crop. warrants as limited herein to the original purchaser of retail that
each new product, shall be free of defects in material and workmanship for a period of
one (1) year from the date of delivery. This one (1) year warranty is limited to the
Motor and Electric Element. The date of delivery establishes the warranty period,
should service be required.
In the event of malfunctions or failure of your product, simply deliver or send the
product, postage prepaid along with PROOF OF PURCHASE, within the warranty of
one(1) year, to Midea America Crop.. Midea America Crop. reserves the right to inspect
the claimed defective part or parts to determine if the defect or malfunction complaint is
covered by this warranty. Midea America Crop. shall, within sixty (60) days after receipt
of the product, at its option, repair and/or replace the defective part or parts free of
charge. This warranty shall only cover defects arising from normal usage. Midea America
Crop. assumes no responsability whatsoever if the product should fail during the
warranty period by reason of:
Midea America Corp.
300 Kimball Drive Parsippany, NJ 07054
TEL:1-866-646-4332
22

www.midea.com
© Midea 2022 all rights reserved