Operating Instructions / Owner’s Manual
<Complete Guide>
Digital Camera
Model No.
DC-GH6
Please read these instructions carefully before using this product.
Register online at
http://shop.panasonic.com/support
(U.S. customers only)
DVQP2441ZE
F0222MR4064
A firmware update has been made available to improve camera capabilities and to
add functionality.
•
For information about functions that have been added or modified, refer to the
pages for “Firmware Update”.
2
About Operating Instructions
This document, “Operating Instructions / Owner’s Manual <Complete
Guide>”, includes detailed explanations of all the functions and operations
of the camera.
Symbols Used in This Document
Black icons show conditions in which functions can be used, and gray icons show
conditions in which functions cannot be used.
Example:
Pictures/Videos
Recording mode
Operating symbols
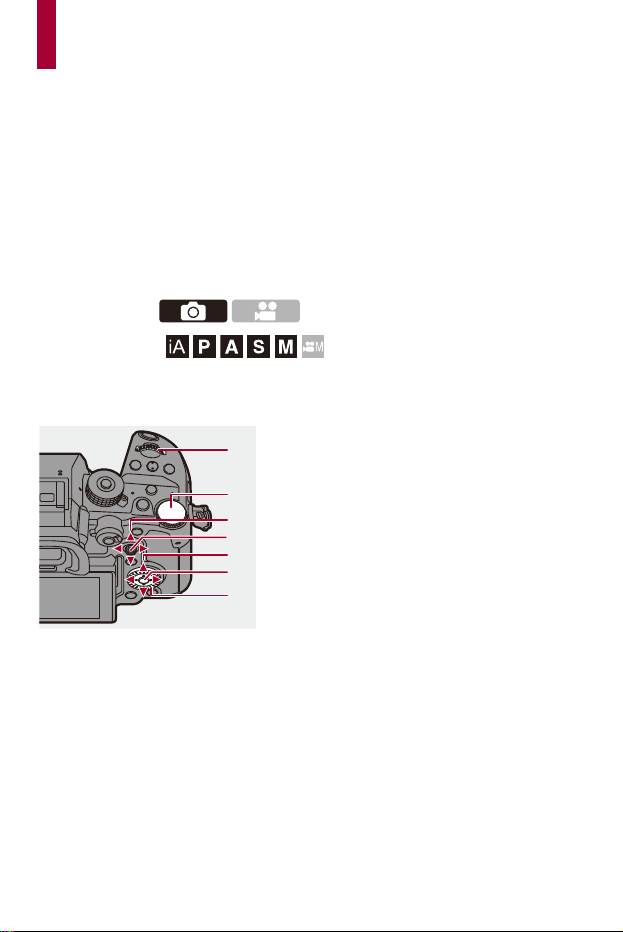
In this document, camera operation is explained using the following symbols:
(A)
(B)
(C)
(C)
(D)
(E)
(F)
About Operating Instructions
3
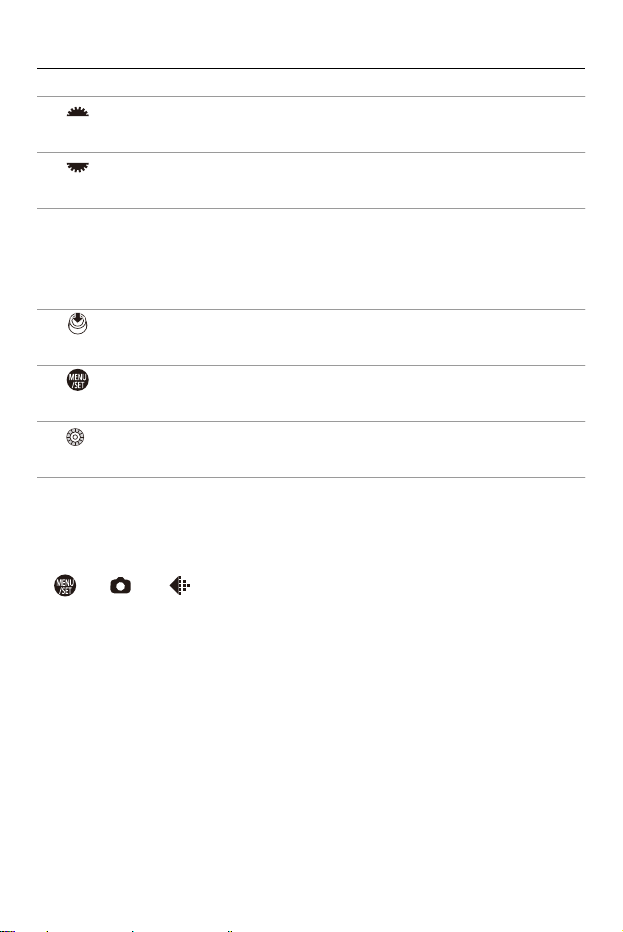
(A) :
Front dial
(B) :
Rear dial
(C) 3421:
Cursor button up/down/left/right
or
Joystick up/down/left/right
(D) :
Press the center of the joystick
(E) :
[MENU/SET] button
(F) :
Control dial
• Other symbols, such as icons shown on the camera screen, are also used in
explanations.
• This document describes the procedure for selecting menu items as follows:
Example) Set [Picture Quality] of the [Photo] ([Image Quality]) menu to [STD.].
¨ [ ] ¨ [ ] ¨ [Picture Quality] ¨ Select [STD.]

About Operating Instructions
4
Notification classification symbols
In this document, notifications are classified and described using the following
symbols:
: To confirm prior to using the function
: Hints for better use of the camera and tips for recording
: Notifications and supplementary items regarding specifications
: Related functions and information
• Images and illustrations used in this document are for explaining the functions.
• Description in this document is based on the interchangeable lens (H-ES12060).

5
Contents
About Operating Instructions 2
Introduction 17
Before Use.................................................................................18
Standard Accessories................................................................21
Lenses That Can Be Used.........................................................23
Memory Cards That Can Be Used.............................................24
Names of Parts ..........................................................................27
Camera.............................................................................................. 27
Supplied Lens.................................................................................... 35
Viewfinder/Monitor Displays .............................................................. 37
Getting Started 39
Attaching a Shoulder Strap........................................................40
Charging the Battery..................................................................42
Charging with the Charger ................................................................ 44
Battery Insertion ................................................................................ 47
Inserting a Battery into the Camera for Charging .............................. 49
Using the Camera While Supplying It with Power
(Supplying Power/Charging).............................................................. 53
Notifications Regarding Charging/Power Supply............................... 55
[Power Save Mode] ........................................................................... 57
Inserting Cards (Optional)..........................................................60
Attaching a Lens........................................................................64
Attaching a Lens Hood ...................................................................... 67
Adjusting the Monitor Direction and Angle.................................70
Setting the Clock (When Turning On for the First Time)............72

Contents
6
Basic Operations 76
How to Hold the Camera ...........................................................77
Selecting the Recording Mode...................................................79
Camera Setting Operations .......................................................80
Monitor/Viewfinder Display Settings ..........................................87
Setting the Viewfinder ....................................................................... 87
Switching Between the Monitor and Viewfinder ................................ 88
Switching the Display Information ..................................................... 91
Quick Menu................................................................................94
Control Panel .............................................................................96
Menu Operation Methods ..........................................................99
[Reset] ............................................................................................. 104
Entering Characters.................................................................105
Intelligent Auto Mode ...............................................................106
Recording Using Touch Functions...........................................112
Touch AF/Touch Shutter ................................................................. 112
Touch AE......................................................................................... 115
Taking Pictures 117
Basic Picture Operations .........................................................118
[Aspect Ratio] ..........................................................................120
[Picture Size]............................................................................121
[Picture Quality] .......................................................................123
Recording Videos 125
Basic Video Operations ...........................................................126
[System Frequency].................................................................132
[Rec. File Format] ....................................................................134

Contents
7
[Rec Quality] ............................................................................136
[Image Area of Video]..............................................................150
Focus / Zoom 152
Selecting the Focus Mode .......................................................153
Using AF ..................................................................................155
[AF Custom Setting(Photo)] ............................................................ 160
[Focus Limiter]................................................................................. 163
[AF Assist Light] .............................................................................. 165
[1-Area AF Moving Speed] .............................................................. 166
Selecting the AF Mode ............................................................167
Automatic Detection ........................................................................ 170
[Tracking]......................................................................................... 173
[Full Area AF] .................................................................................. 175
[Zone(Horizontal/Vertical)]/[Zone].................................................... 179
[1-Area+]/[1-Area]............................................................................ 182
[Pinpoint] ......................................................................................... 184
AF Area Movement Operation .................................................187
Moving the AF Area by Touch ......................................................... 190
Moving the AF Area Position with the Touch Pad ........................... 192
[Focus Switching for Vert / Hor]....................................................... 194
Record Using MF.....................................................................195
[Focus Peaking]............................................................................... 202
Recording with Zoom...............................................................204
Extended Tele Conversion .............................................................. 206
[Power Zoom Lens] ......................................................................... 208
Drive / Shutter / Image Stabilizer 209
Selecting the Drive Mode.........................................................210
Taking Burst Pictures...............................................................212

Contents
8
High Resolution mode .............................................................220
Recording with Time Lapse Shot.............................................225
Recording with Stop Motion Animation....................................232
Time Lapse Shot/Stop Motion Animation Videos ....................236
Recording Using the Self-timer................................................238
Bracket Recording ...................................................................242
[Silent Mode]............................................................................250
[Shutter Type] ..........................................................................252
[Long Exposure NR] ........................................................................ 256
[Min. Shutter Speed]........................................................................ 257
[Shutter Delay]................................................................................. 258
Image Stabilizer .......................................................................259
Image Stabilizer Settings................................................................. 262
Metering / Exposure / ISO Sensitivity 267
[Metering Mode].......................................................................268
Program AE Mode ...................................................................270
Program Shift .................................................................................. 272
Aperture-Priority AE Mode.......................................................274
Shutter-Priority AE Mode .........................................................277
Manual Exposure Mode...........................................................280
Available Shutter Speeds (Sec.) ..................................................... 283
[B] (Bulb) ......................................................................................... 284
Preview Mode ..........................................................................285
Exposure Compensation .........................................................287
[Vignetting Comp.]........................................................................... 290
[Diffraction Compensation] .............................................................. 291
Locking Focus and Exposure (AF/AE Lock) ............................292
ISO Sensitivity .........................................................................294

Contents
9
[ISO Sensitivity (photo)]................................................................... 298
White Balance / Image Quality 299
White Balance (WB) ................................................................300
Adjusting the White Balance ........................................................... 305
[Photo Style] ............................................................................307
[Filter Settings].........................................................................317
[Simultaneous Record w/o Filter]..................................................... 322
Flash 323
Using an External Flash (Optional)..........................................324
Removing the Hot Shoe Cover........................................................ 325
Setting Flash............................................................................328
[Flash Mode].................................................................................... 329
[Firing Mode]/[Manual Flash Adjust.] ............................................... 332
[Flash Adjust.].................................................................................. 334
[Flash Synchro] ............................................................................... 335
[Auto Exposure Comp.] ................................................................... 336
Recording Using a Wireless Flash...........................................337
Video Settings 344
Creative Video Mode ...............................................................345
Displays Suited to Video Recording ................................................ 346
Recording with Creative Video ........................................................ 347
[CreativeVideo Combined Set.] ....................................................... 351
Using AF (Video) .....................................................................353
[Continuous AF]............................................................................... 353
[AF Custom Setting(Video)]............................................................. 355
[Enlarged Live Display(Video)] ........................................................ 356
Video Brightness and Coloring ................................................358

Contents
10
[Luminance Level] ........................................................................... 358
[Master Pedestal Level]................................................................... 359
Recording While Controlling Overexposure (Knee)......................... 360
[ISO Sensitivity (video)] ................................................................... 362
[Dynamic Range Boost]................................................................... 363
Audio Settings..........................................................................364
[Sound Rec Level Disp.].................................................................. 365
[Mute Sound Input] .......................................................................... 366
[Sound Rec Gain Level] .................................................................. 367
[Sound Rec Level Adj.].................................................................... 368
[Sound Rec Quality] ........................................................................ 369
[Sound Rec Level Limiter] ............................................................... 370
[Wind Noise Canceller].................................................................... 371
[Lens Noise Cut].............................................................................. 372
[Audio Information] .......................................................................... 373
External Microphones (Optional) .............................................374
Setting the Sound Pickup Range (DMW-MS2: Optional) ................ 377
Reduction of Wind Noise................................................................. 378
XLR Microphone Adaptor (Optional)........................................379
[4ch Mic Input] ................................................................................. 381
Headphones ............................................................................382
[Sound Monitoring Channel] ............................................................ 384
Time Code ...............................................................................386
Setting the Time Code..................................................................... 387
Synchronizing the Time Code with an External Device ...........390
Preparations for Time Code Synchronization.................................. 391
Synchronize the Time Code of the External Device with That of
the Camera (TC OUT)..................................................................... 393
Synchronize the Time Code of the Camera with That of the
External Device (TC IN)................................................................... 395
Main Assist Functions..............................................................398

Contents
11
[Flicker Decrease (Video)]............................................................... 399
[SS/Gain Operation] ........................................................................ 400
[WFM/Vector Scope] ....................................................................... 402
[Luminance Spot Meter] .................................................................. 406
[Zebra Pattern] ................................................................................ 408
[Frame Marker]................................................................................ 410
Color Bars/Test Tone ...................................................................... 412
Special Video Recording 414
Variable Frame Rate................................................................415
High Frame Rate Video ...........................................................420
[Focus Transition] ....................................................................425
Log Recording .........................................................................430
[V-Log View Assist] ......................................................................... 433
HLG Videos .............................................................................435
[HLG View Assist]............................................................................ 438
Anamorphic Recording ............................................................439
[Anamorphic Desqueeze Display] ................................................... 441
[Synchro Scan] ........................................................................443
[Loop Recording (video)] .........................................................445
[Segmented File Recording] ....................................................448
List of Recording Qualities That Enable Special Videos to be
Recorded .................................................................................449
HDMI Output (Video) 457
Connecting HDMI Devices.......................................................458
Attaching the Cable Holder ............................................................. 459
HDMI Output Image Quality.....................................................462
Images Output via HDMI ................................................................. 462

Contents
12
Settings for Down-Converting.......................................................... 465
HDMI Output Settings..............................................................470
Outputting the Camera Information Display via HDMI..................... 471
Outputting Control Information to an External Recorder ................. 472
Outputting Audio via HDMI.............................................................. 473
Outputting the Enlarged Live Display (Video) via HDMI.................. 473
Playing Back and Editing of Images 474
Playing Back Pictures ..............................................................475
Playing Back Videos................................................................477
Video Repeat Playback ................................................................... 481
Extracting a Picture ......................................................................... 483
[Video Divide] .................................................................................. 484
Switching the Display Mode.....................................................486
Enlarged Display ............................................................................. 487
Thumbnail Screen ........................................................................... 489
Calendar Playback .......................................................................... 491
Group Images ..........................................................................492
Deleting Images.......................................................................494
[RAW Processing]....................................................................496
[Playback] Menu ......................................................................504
How to Select an Image(s) in the [Playback] Menu......................... 504
[Playback] ([Playback Mode]) .......................................................... 506
[Playback] ([Process Image])........................................................... 509
[Playback] ([Add/Delete Info.])......................................................... 510
[Playback] ([Edit Image]) ................................................................. 511
[Playback] ([Others])........................................................................ 515
Camera Customization 516
Fn Buttons ...............................................................................517

Contents
13
Register Functions to the Fn Buttons .............................................. 520
Use the Fn Buttons.......................................................................... 531
[Dial Operation Switch] ............................................................532
Register Functions to the Dials........................................................ 532
Temporarily Change Dial Operation ................................................ 534
Quick Menu Customization......................................................535
Register to the Quick Menu ............................................................. 535
Custom Mode ..........................................................................542
Register in Custom Mode................................................................ 543
Using Custom Mode........................................................................ 545
Calling Up Settings.......................................................................... 546
[Custom] Menu ........................................................................547
[Custom] menu ([Image Quality])..................................................... 548
[Custom] menu ([Focus/Shutter]) .................................................... 552
[Custom] menu ([Operation]) ........................................................... 558
[Custom] menu ([Monitor / Display (Photo)]) ................................... 565
[Custom] menu ([Monitor / Display (Video)]) ................................... 575
[Custom] menu ([IN/OUT])............................................................... 579
[Custom] menu ([Lens / Others]) ..................................................... 581
[Setup] Menu ...........................................................................585
[Setup] menu ([Card/File]) ............................................................... 586
[Setup] menu ([Monitor / Display]) ................................................... 594
[Setup] menu ([IN/OUT]) ................................................................. 598
[Setup] menu ([Setting]) .................................................................. 604
[Setup] menu ([Others])................................................................... 606
My Menu ..................................................................................609
Registration in My Menu.................................................................. 609
Edit My Menu .................................................................................. 610
List of Menu 611
[Photo] menu ...........................................................................612

Contents
14
[Video] menu............................................................................614
[Custom] menu ........................................................................617
[Setup] menu ...........................................................................620
[My Menu] ................................................................................622
[Playback] menu ......................................................................623
Wi-Fi / Bluetooth 624
Connecting to a Smartphone ...................................................626
Installing “LUMIX Sync” .................................................................. 627
Connecting to a Smartphone (Bluetooth Connection) ..................... 628
Connecting to a Smartphone ([Wi-Fi connection])........................... 634
Sending Images on the Camera to a Smartphone with Simple
Operations....................................................................................... 640
Operating the Camera with a Smartphone ..............................642
[Remote shooting] ........................................................................... 644
[Shutter Remote Control]................................................................. 646
[Import images]................................................................................ 649
[Auto Transfer]................................................................................. 651
[Location Logging] ........................................................................... 653
[Remote Wakeup]............................................................................ 655
[Auto Clock Set]............................................................................... 657
[Camera settings copy].................................................................... 658
Sending Images from the Camera...........................................659
[PC] ................................................................................................. 662
[Printer]............................................................................................ 665
Wi-Fi Connections ...................................................................666
[Via Network] ................................................................................... 667
[Direct] ............................................................................................. 671
Connect to Wi-Fi Using Previously Saved Settings......................... 673
Send Settings and Selecting Images.......................................675

Contents
15
Image Send Settings ....................................................................... 675
Selecting Images............................................................................. 676
[Wi-Fi Setup] Menu ..................................................................677
Connecting to Other Devices 679
Connecting...............................................................................680
Viewing on a TV.......................................................................682
Importing Images to a PC ........................................................686
Copying Images to a PC ................................................................. 687
Installing Software ........................................................................... 691
Storing on a Recorder..............................................................692
Tethered Recording .................................................................693
Installing Software ........................................................................... 694
Operating the Camera from a PC.................................................... 695
Printing.....................................................................................696
Materials 700
Digital Camera Accessory System ..........................................701
Using Optional Accessories.....................................................702
Shutter Remote Control (Optional) .................................................. 703
Tripod Grip (Optional)...................................................................... 705
AC Adaptor (Optional)/DC Coupler (Optional)................................. 706
Monitor/Viewfinder Displays ....................................................707
Recording Screen............................................................................ 707
Playback Screen ............................................................................. 723
Message Displays....................................................................728
Troubleshooting .......................................................................732
Power, Battery................................................................................. 732
Recording ........................................................................................ 733

Contents
16
Video ............................................................................................... 738
Playback.......................................................................................... 739
Monitor/Viewfinder........................................................................... 740
Flash................................................................................................ 741
Wi-Fi Function ................................................................................. 742
TV, PC, Printer ................................................................................ 745
Others.............................................................................................. 746
Cautions for Use ......................................................................747
Number of Pictures That Can Be Taken and Available
Recording Time with the Battery..............................................761
Number of Pictures That Can Be Taken and Video
Recording Time with Cards .....................................................770
List of Default Settings/Custom Saving/Settings Available for
Copying....................................................................................779
List of Functions That Can Be Set in Each Recording Mode...804
Specifications...........................................................................811
Trademarks and Licenses .......................................................826


Introduction – Before Use
18
Before Use
Firmware of Your Camera/Lens
Firmware updates may be provided in order to improve camera capabilities or to add
functionality.
Make sure that the firmware of the camera/lens you purchased is the latest version.
We recommend using the latest firmware version.
• To check the firmware version of the camera/lens, attach the lens to the camera and
select [Firmware Version] in the [Setup] ([Others]) menu. You can also update the
firmware in [Firmware Version]. (Î[Firmware Version]: 608)
• For the latest information on the firmware or to download/update the firmware,
visit the following support site:
https://panasonic.jp/support/global/cs/dsc/download/index.html
(English only)
Handling of the Camera
When using the camera, take care not to drop it, bump it, or apply undue force.
These may cause malfunction or damage to the camera and lens.
If sand, dust, or liquid gets on the monitor, wipe it off with a dry soft cloth.
– Touch operations may be incorrectly recognized.
When using in low temperatures (−10 oC to 0 oC (14 oF to 32 oF))
– Before use, attach a Panasonic lens with a minimum recommended operating
temperature of −10 oC (14 oF).
Do not place a hand inside the camera mount.
This may cause a failure or damage because the sensor is a precision device.
If you shake the camera while turning the camera off, a sensor may operate or a
rattling sound may be heard. This is caused by the image stabilizer mechanism
in the body. It is not a malfunction.

Introduction – Before Use
19
Splash Resistant
Splash Resistant is a term used to describe an extra level of protection this
camera offers against exposure to a minimal amount of moisture, water or dust.
Splash Resistant does not guarantee that damage will not occur if this camera is
subjected to direct contact with water.
In order to minimize the possibility of damage please be sure the following
precautions are taken:
– Splash Resistant works in conjunction with the lenses that were specifically
designed to support this feature.
– Securely close the doors, socket caps, etc.
– When the lens or cap is removed or a door is open, do not allow sand, dust, and
moisture to enter inside.
– If liquid gets on the camera, wipe it off with a dry soft cloth.
Condensation (When the Lens, the Viewfinder or Monitor
is Fogged Up)
• Condensation occurs when there are temperature or humidity differences. Take care
as this may lead to soiling, mold, and malfunctions in the lens, viewfinder, and
monitor.
• If condensation occurs, turn off the camera and leave it for approx. 2 hours. The fog
will disappear naturally when the temperature of the camera becomes close to the
ambient temperature.
Be Sure to Perform Trial Recording in Advance
Perform trial recording in advance of an important event (wedding, etc.) to check that
recording can be performed normally.
No Compensation Regarding Recording
Please note that compensation cannot be provided in the event that recording could
not be performed due to a problem with the camera or a card.

Introduction – Before Use
20
Be Careful with Regard to Copyrights
Under copyright law, you may not use the images and audio you have recorded for
other than personal enjoyment without the permission of the copyright holder.
Be careful because there are cases where restrictions apply to recording even for the
purpose of personal enjoyment.
Also Read “Cautions for Use” (ÎCautions for Use: 747)

Introduction – Standard Accessories
21
Standard Accessories
Check that all the accessories are supplied before using the camera.
•
The accessories and their shape will differ depending on the country or area where
the camera was purchased.
For details on the accessories, refer to “Operating Instructions / Owner’s Manual
<Quick Start Guide>” (supplied).
*1 This is attached to the camera at the time of purchase.
≥Digital camera body
(This is referred to as camera in this document.)
≥Battery pack
(This is referred to as battery pack or battery in this document.)
• Charge the battery before use.
≥Battery charger
(This is referred to as battery charger or charger in this document.)
≥AC adaptor
•
This is used for charging and power supply.
≥USB connection cable
≥BNC conversion cable (for TC IN/OUT)
≥Cable holder
≥Shoulder strap
≥Body cap
*1
≥Eye cup
*1
≥Hot shoe cover
*1
≥Flash synchro socket cap
*1

Introduction – Standard Accessories
22
*2 This is attached to the lens at the time of purchase.
• The memory card is optional.
• Consult the dealer or Panasonic if you lose the supplied accessories. (You can
purchase the accessories separately.)
Items Supplied with DC-GH6L (Lens Kit Product)
≥Interchangeable lens:
H-ES12060 “LEICA DG VARIO-ELMARIT 12-60mm/F2.8-4.0
ASPH./POWER O.I.S.”
•
Dust and splash resistant
• The recommended operating temperature is from −10 oC to 40 oC (14 oF to
104 oF)
≥Lens hood
≥Lens cap
*2
≥Lens rear cap
*2
Items Supplied with DC-GH6M (Lens Kit Product)
≥Interchangeable lens:
H-FS12060 “LUMIX G VARIO 12-60mm/F3.5-5.6 ASPH./POWER
O.I.S.”
•
Dust and splash resistant
• The recommended operating temperature is from 0 oC to 40 oC (32 oF to
104 oF)
≥Lens hood
≥Lens cap
*2
≥Lens rear cap
*2
Introduction – Lenses That Can Be Used
23
Lenses That Can Be Used
The camera can use the dedicated lenses that comply with the Micro Four
Thirds™ system lens mount specification (Micro Four Thirds mount).
You can also use the Leica M Mount interchangeable lens by attaching the
M Mount Adaptor (DMW-MA2M: optional).
About the Lens and Functions
Depending on the lens used, certain functions, such as focus, image
stabilizer, and zoom functions, may be disabled or operate differently.
•
Refer to catalogs/websites for information regarding supported lenses.
https://panasonic.jp/support/global/cs/dsc/connect/index.html
(English only)
• The focal lengths marked on a Micro Four Thirds lens are equivalent to twice
those of a 35 mm film camera.
(The focal lengths will be equivalent to those of a 100 mm lens in 35 mm terms
when a 50 mm lens is used.)
Introduction – Memory Cards That Can Be Used
24
Memory Cards That Can Be Used
You can use CFexpress cards and SD memory cards with this camera.
The memory cards that can be used are described below (As of January
2022).
•
SD memory card, SDHC memory card, and SDXC memory card are referred to by
the generic name of SD card in this document.
• When not differentiating between a CFexpress card and SD card, a card is referred
to as simply card.
• For information on memory cards with confirmed operation, check the
following support site:
https://panasonic.jp/support/global/cs/dsc/connect/index.html
(English only)
Card slot 1: CFexpress card
Card slot 2: SD memory card
• The camera supports UHS-I/UHS-II UHS Speed Class 3 standard and UHS-II Video
Speed Class 90 standard SD cards.
CFexpress card (CFexpress Ver.2.0 Type B) (64 GB to 512 GB)
SD memory card/SDHC memory card/SDXC memory card (Maximum 256 GB)
Introduction – Memory Cards That Can Be Used
25
SD Cards That Can Be Used with This Camera
When using the following functions, use cards that have the correct SD
Speed Class, UHS Speed Class, and Video Speed Class.
•
Speed classes are for SD card standards to guarantee the minimum speed
necessary for continuous writing.
[Video Record]
• The following types of video cannot be recorded to SD cards. Use CFexpress cards.
– [Apple ProRes] video with resolution of 4K or more
– [MOV] video with bit rate of 800 Mbps or more
– Variable frame rate video with a recording quality with image compression mode
ALL-Intra
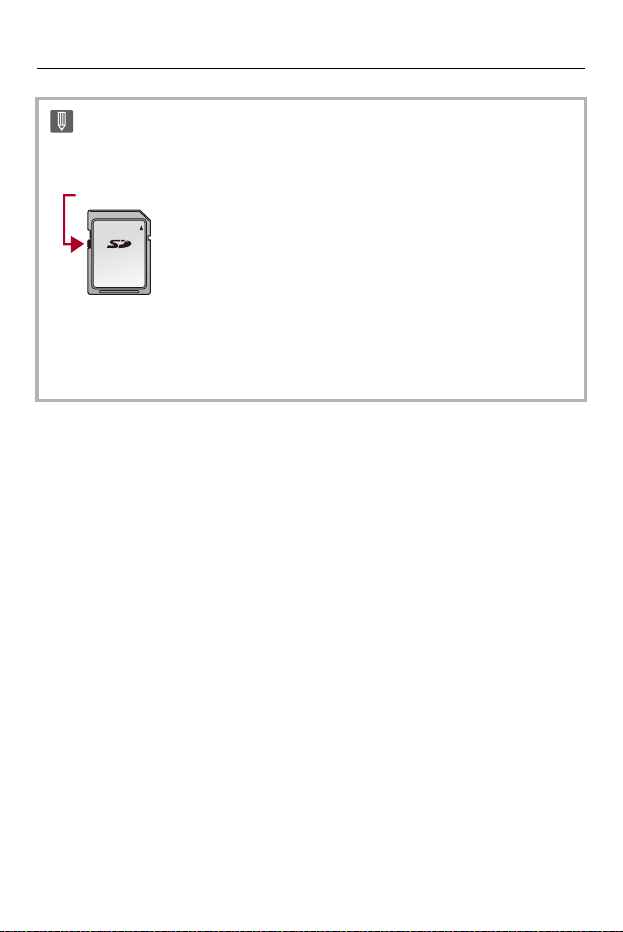
Bit rate of the
recording quality
Speed Class
Example of
indication
72 Mbps or less
Class 10
UHS Speed Class 1 or higher
Video Speed Class 10 or higher
200 Mbps or less
UHS Speed Class 3
Video Speed Class 30 or higher
400 Mbps or less Video Speed Class 60 or higher
600 Mbps or less Video Speed Class 90
Introduction – Memory Cards That Can Be Used
26
• You can prevent the writing and deleting of data by setting the write-protect
switch (A) on the SD card to “LOCK”.
• The data stored on a card may be damaged due to electromagnetic waves, static
electricity or a failure of the camera or card. We recommend backing up
important data.
• Keep the memory card out of reach of children to prevent swallowing.
(A)
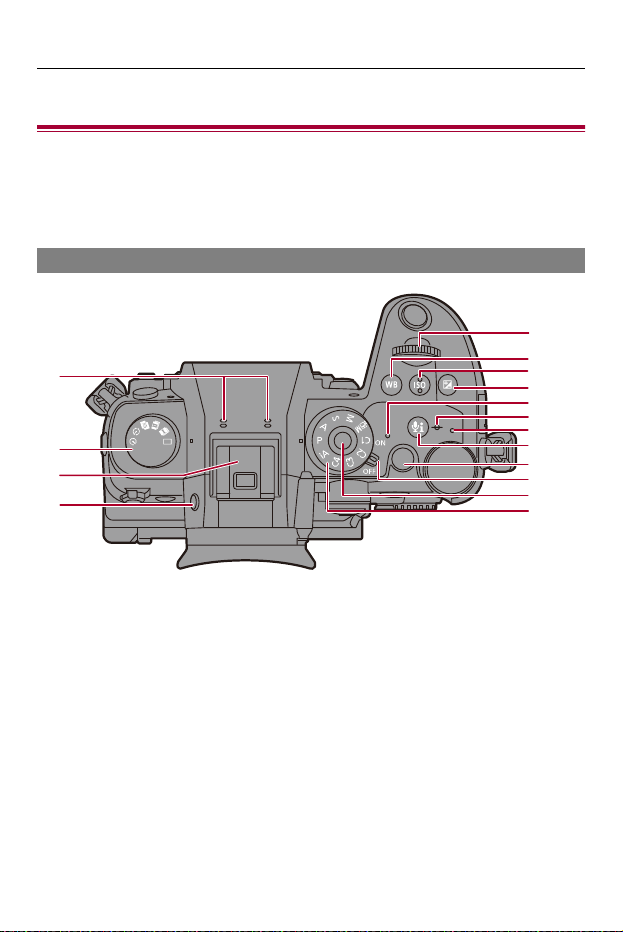

Introduction – Names of Parts
28
(1) Stereo microphone (ÎAudio Settings: 364)
• Do not block the microphone with a finger. Audio will be difficult to record.
(2) Drive mode dial (ÎSelecting the Drive Mode: 210)
(3) Hot shoe (hot shoe cover) (ÎRemoving the Hot Shoe Cover: 325)
• Keep the hot shoe cover out of reach of children to prevent swallowing.
(4) [LVF] button (ÎSwitching Between the Monitor and Viewfinder: 88)
(5) Front dial (ÎFront Dial/Rear Dial: 81)
(6) [WB] (White balance) button (ÎWhite Balance (WB): 300)
(7) [ISO] (ISO sensitivity) button (ÎISO Sensitivity: 294)
(8) [ ] (Exposure compensation) button (ÎExposure Compensation: 287)
(9) Power indicator (ÎSetting the Clock (When Turning On for the First Time): 72)
(10) [ ] (Recording distance reference mark) (ÎOperations on the MF Assist
Screen: 199)
(11) Charging light (ÎCharging Light Indications: 50)/
Network connection light (ÎChecking operation of the Wi-Fi and Bluetooth
functions: 624)
(12) [ ] (Audio information) button (Î[Audio Information]: 373)
(13) Video rec. button (ÎBasic Video Operations: 126)
(14) Camera on/off switch (ÎSetting the Clock (When Turning On for the First Time):
72)
(15) Mode dial lock button (ÎSelecting the Recording Mode: 79)
(16) Mode dial (ÎSelecting the Recording Mode: 79)
Introduction – Names of Parts
29
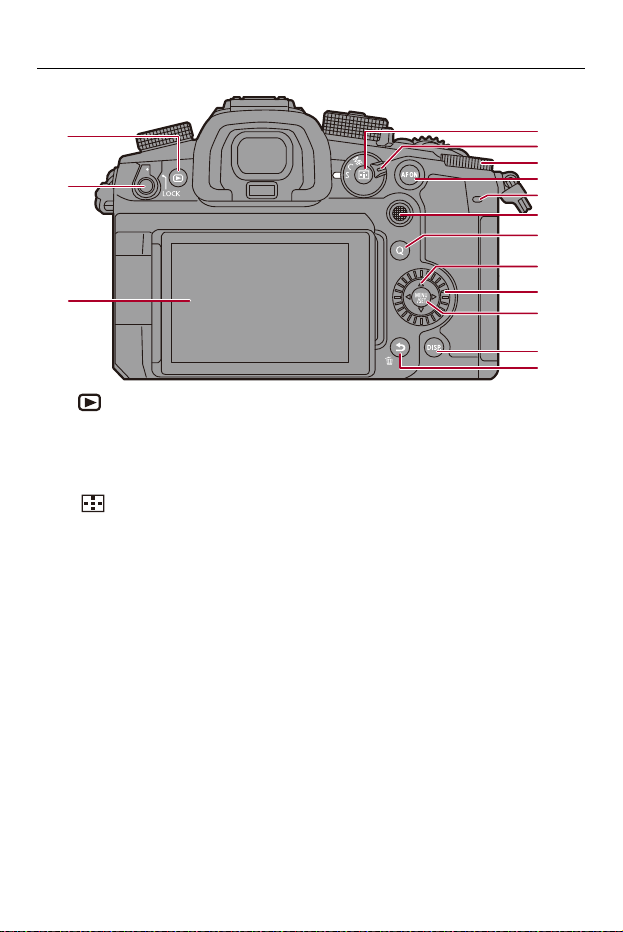
(17) [ ] (Playback) button (ÎPlaying Back and Editing of Images: 474)
(18) Operation lock lever (ÎOperation Lock Lever: 86)
(19) Monitor (ÎViewfinder/Monitor Displays: 37, Monitor/Viewfinder Displays: 707)/
Touch screen (ÎTouch Screen: 84)
(20) [ ] (AF mode) button (ÎSelecting the AF Mode: 167)
(21) Focus mode lever (ÎSelecting the Focus Mode: 153, Using AF: 155, Record
Using MF: 195)
(22) Rear dial (ÎFront Dial/Rear Dial: 81)
(23) [AF ON] button (Î[AF ON] button: 157)
(24) Rear tally lamp (ÎBasic Video Operations: 126)
(25) Joystick (ÎJoystick: 83)/
Fn buttons (ÎFn Buttons: 517)
Center: Fn9, 3: Fn10, 1: Fn11, 4: Fn12, 2: Fn13
(21)
(30)
(31)
(26)
(28)
(29)
(27)
(20)
(23)
(25)
(19)
(18)
(17)
(24)
(22)

Introduction – Names of Parts
30
(26) [Q] (Quick menu) button (ÎQuick Menu: 94)
(27) Cursor buttons (ÎCursor Buttons: 82)/
Fn buttons (ÎFn Buttons: 517)
3: Fn14, 1: Fn15, 4: Fn16, 2:Fn17
(28) Control dial (ÎControl Dial: 81)
(29) [MENU/SET] button (Î[MENU/SET] Button: 82, Menu Operation Methods: 99)
(30) [DISP.] button (ÎSwitching the Display Information: 91)
(31) [ ] (Cancel) button (ÎMenu Operation Methods: 99)/
[ ] (Delete) button (ÎDeleting Images: 494)/
Fn button (Fn1) (ÎFn Buttons: 517)
Introduction – Names of Parts
31
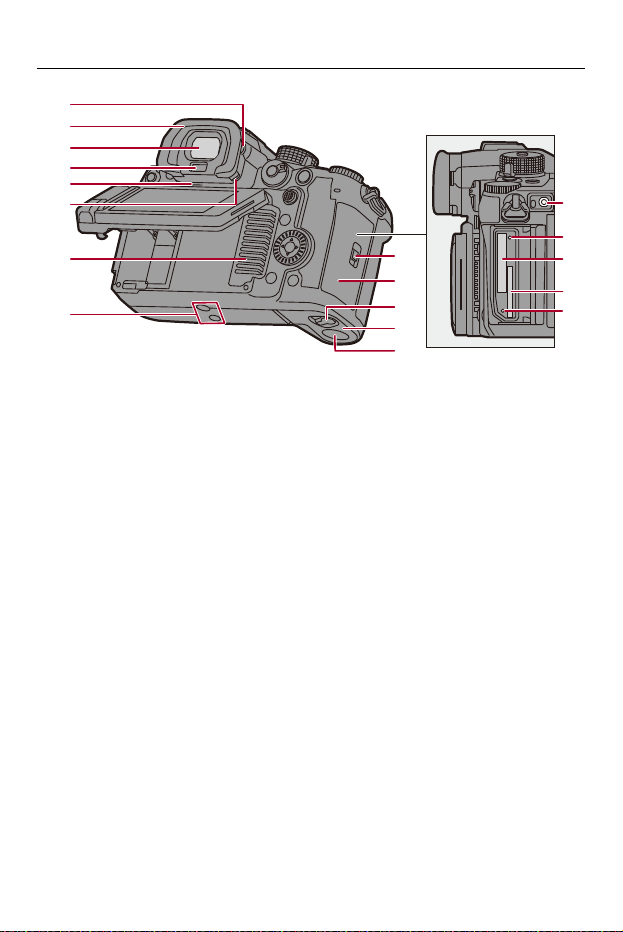
(32) Diopter adjustment dial (ÎAdjusting the Viewfinder Diopter: 87)
(33) Eye cup (ÎCleaning the Viewfinder: 752)
• Keep the eye cup out of reach of children to prevent swallowing.
(34) Viewfinder (ÎViewfinder/Monitor Displays: 37, Switching Between the Monitor
and Viewfinder: 88, Monitor/Viewfinder Displays: 707)
(35) Eye sensor (ÎSwitching Between the Monitor and Viewfinder: 88)
(36) Speaker (Î[Beep]: 598)
(37) Eye cup lock lever (ÎCleaning the Viewfinder: 752)
(38) Fan inlet (Î[Fan Mode]: 580)
• The fan inlet for the cooling fan.
• Do not obstruct this unit’s ventilation openings with newspapers, tablecloths,
curtains, and similar items.
(39) Tripod mount (ÎTripod: 759)
• If you attempt to attach a tripod with a screw length of 5.5 mm (0.22 inch) or
more, you may not be able to securely fix it in place or it may damage the
camera.
(42)
(40)
(43)
(34)
(37)
(33)
(35)
(38)
(39)
(45)
(47)
(49)
(46)
(48)
(41)
(44)
(36)
(32)

Introduction – Names of Parts
32
(40) [REMOTE] socket (ÎShutter Remote Control (Optional): 703)
(41) Card access light 1 (ÎCard Access Indications: 62)
(42) Card slot 1 (ÎInserting Cards (Optional): 60)
(43) Card slot 2 (ÎInserting Cards (Optional): 60)
(44) Card access light 2 (ÎCard Access Indications: 62)
(45) Card door lock lever (ÎInserting Cards (Optional): 60)
(46) Card door (ÎInserting Cards (Optional): 60)
(47) Battery door release lever (ÎBattery Insertion: 47)
(48) Battery door (ÎBattery Insertion: 47)
(49) DC Coupler cover (ÎAC Adaptor (Optional)/DC Coupler (Optional): 706)
• When using an AC adaptor, ensure that the Panasonic DC Coupler
(DMW-DCC17: optional) and AC Adaptor (DMW-AC10: optional) are used.
• Always use a genuine Panasonic AC Adaptor (DMW-AC10: optional).
• When using an AC Adaptor (optional), use the AC cable/AC mains lead
supplied with the AC Adaptor (optional).
Introduction – Names of Parts
33
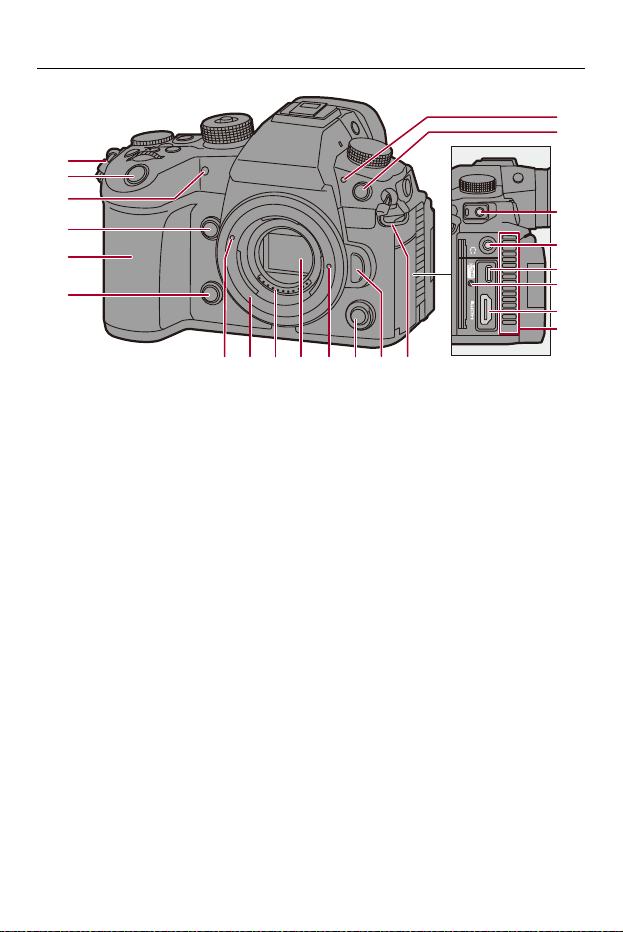
(50) Shoulder strap eyelet (ÎAttaching a Shoulder Strap: 40)
(51) Shutter button (ÎBasic Picture Operations: 118)
(52) Self-timer light (ÎRecording Using the Self-timer: 238)/
AF assist light (Î[AF Assist Light]: 165)
(53) Enlarged live display (video) button (Î[Enlarged Live Display(Video)]: 356)/
Fn button (Fn2) (ÎFn Buttons: 517)
(54) Grip
(55) Preview button (ÎPreview Mode: 285)/
Fn button (Fn3) (ÎFn Buttons: 517)
(56) Front tally lamp (ÎBasic Video Operations: 126)
(57) Flash synchro socket (flash synchro socket cap) (ÎConnecting a Synchro Cable
to the Flash Synchro Socket: 326)
• Use the flash with a synchronization voltage of 250 V or less.
• Connect the supplied BNC conversion cable (for TC IN/OUT) when
synchronizing the time code with an external device. (ÎSynchronizing the
Time Code with an External Device: 390)
• Keep the flash synchro socket cap out of reach of children to prevent
swallowing.
(53)
(54)
(55)
(66) (70)(65) (69)
(51)
(63)
(62)
(60)
(59)
(56)
(50)
(58)
(52)
(57)
(64) (67) (68)
(61)
(50)

Introduction – Names of Parts
34
(58) [MIC] socket (ÎExternal Microphones (Optional): 374)
(59) Headphone socket (ÎHeadphones: 382)
• Excessive sound pressure from earphones and headphones can cause
hearing loss.
(60) USB port (ÎInserting a Battery into the Camera for Charging: 49, USB port: 681)
(61) Cable holder mount (ÎAttaching the Cable Holder: 459)
(62) HDMI socket (ÎConnecting HDMI Devices: 458, HDMI socket: 680)
(63) Fan outlet (Î[Fan Mode]: 580)
• The fan outlet for the cooling fan.
• Do not obstruct this unit’s ventilation openings with newspapers, tablecloths,
curtains, and similar items.
(64) Lens fitting mark (ÎAttaching a Lens: 64)
(65) Mount
(66) Contact points
(67) Sensor
(68) Lens lock pin
(69) Sub video rec. button (ÎBasic Video Operations: 126)
(70) Lens release button (ÎRemoving a Lens: 65)
Introduction – Names of Parts
35
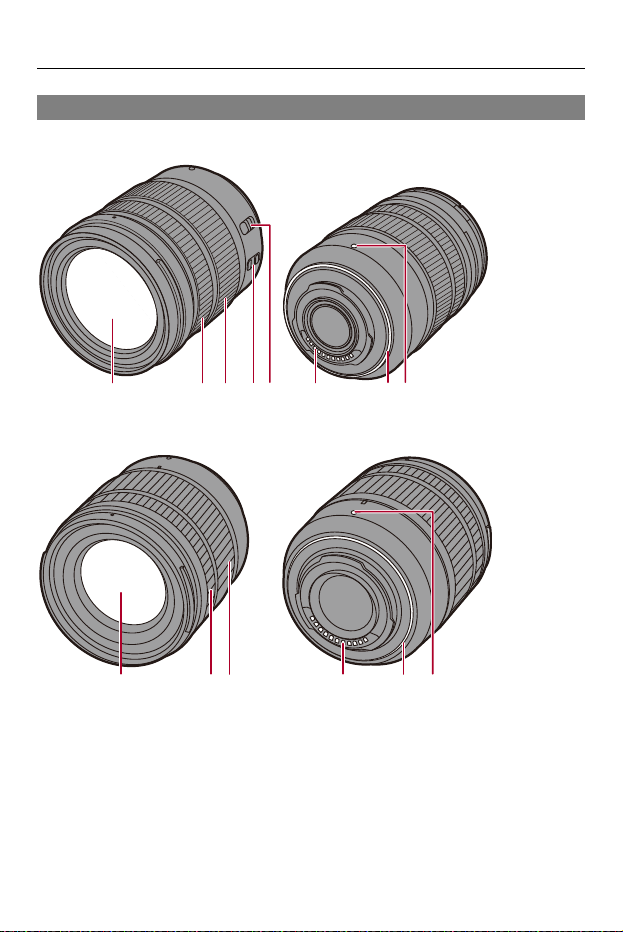
Supplied Lens
H-ES12060
H-FS12060
(4)
(6) (7)(1) (2) (3) (5) (8)
(6) (7)(1) (2) (3) (8)

Introduction – Names of Parts
36
(1) Lens surface
(2) Focus ring (ÎRecord Using MF: 195)
(3) Zoom ring (ÎRecording with Zoom: 204)
(4) O.I.S. switch (ÎImage Stabilizer: 259)
(5) [AF/MF] switch (ÎUsing AF: 155, Record Using MF: 195)
• You can switch between AF and MF.
If [MF] is set on either the lens or camera, operation will be with MF.
(6) Contact points
(7) Lens mount rubber
(8) Lens fitting mark (ÎAttaching a Lens: 64)
Introduction – Names of Parts
37
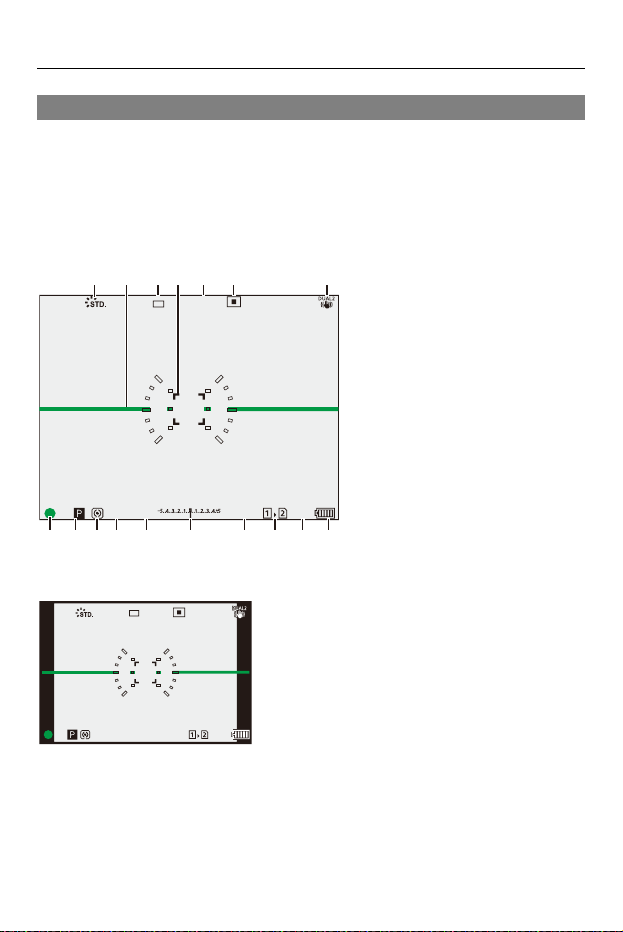
Viewfinder/Monitor Displays
At the time of purchase, the viewfinder/monitor displays the following
icons.
•
For information about the icons other than those described here (ÎMonitor/
Viewfinder Displays: 707)
Viewfinder
Monitor
999
ISO100
F
2.860
L
FINE
AFSAFS
(8) (9)(10)(11)(12) (13) (14) (15) (16)(17)
(1) (2) (4)(3) (5) (6) (7)
999
ISO
100F2.860
±
0
AFSAFS
L
FINE

Introduction – Names of Parts
38
(1) Photo Style (Î[Photo Style]: 307)
(2) Level gauge (Î[Level Gauge]: 573)
(3) Picture quality (Î[Picture Quality]: 123)/
Picture size (Î[Picture Size]: 121)
(4) AF area (ÎAF Area Movement Operation: 187)
(5) Focus mode (ÎSelecting the Focus Mode: 153, Using AF: 155, Record Using
MF: 195)
(6) AF mode (ÎSelecting the AF Mode: 167)
(7) Image stabilizer (ÎImage Stabilizer: 259)
(8) Focus (green) (ÎBasic Picture Operations: 118, Using AF: 155)/
Recording state (red) (ÎBasic Video Operations: 126, High Resolution mode:
220)
(9) Recording mode (ÎSelecting the Recording Mode: 79)
(10) Metering mode (Î[Metering Mode]: 268)
(11) Shutter speed (ÎBasic Picture Operations: 118, Shutter-Priority AE Mode: 277)
(12) Aperture value (ÎBasic Picture Operations: 118, Aperture-Priority AE Mode:
274)
(13) Exposure compensation value (ÎExposure Compensation: 287)/
Manual Exposure Assist (ÎManual Exposure Assist: 282)
(14) ISO sensitivity (ÎISO Sensitivity: 294)
(15) Card slot (ÎInserting Cards (Optional): 60)/
Double card slot function (Î[Double Card Slot Function]: 587)
(16) Number of pictures that can be taken (ÎNumber of Pictures That Can Be Taken
and Video Recording Time with Cards: 770)/
Number of pictures that can be taken continuously (ÎNumber of Pictures That
Can Be Taken Continuously: 216)
(17) Battery indication (ÎPower Indications: 55)
• Press [ ] to switch between display/hide of the level gauge.

Getting Started – Attaching a Shoulder Strap
40
Attaching a Shoulder Strap
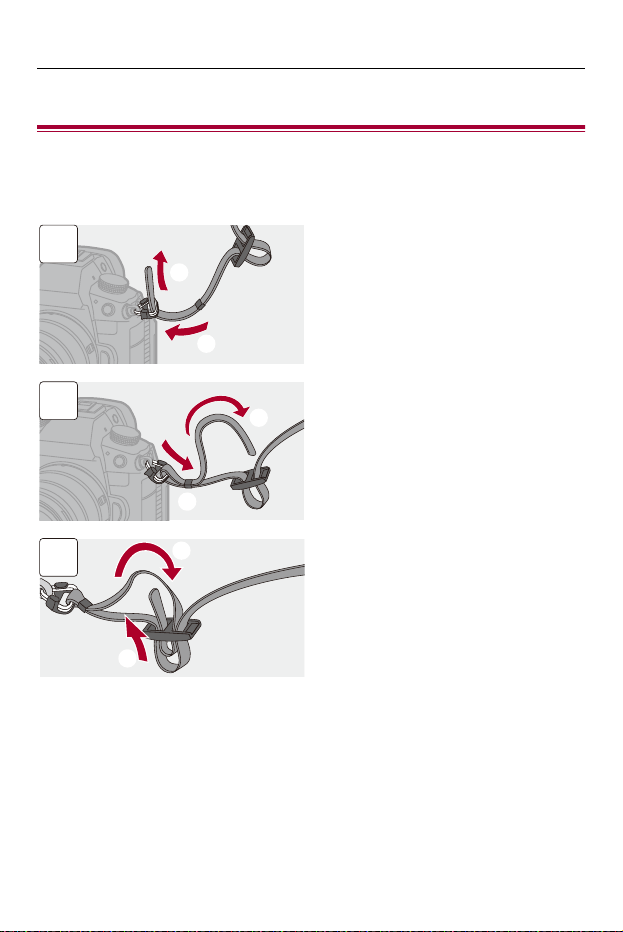
Attach a shoulder strap to the camera with the following procedure to
prevent it from dropping.
1
2
3
Getting Started – Attaching a Shoulder Strap
41
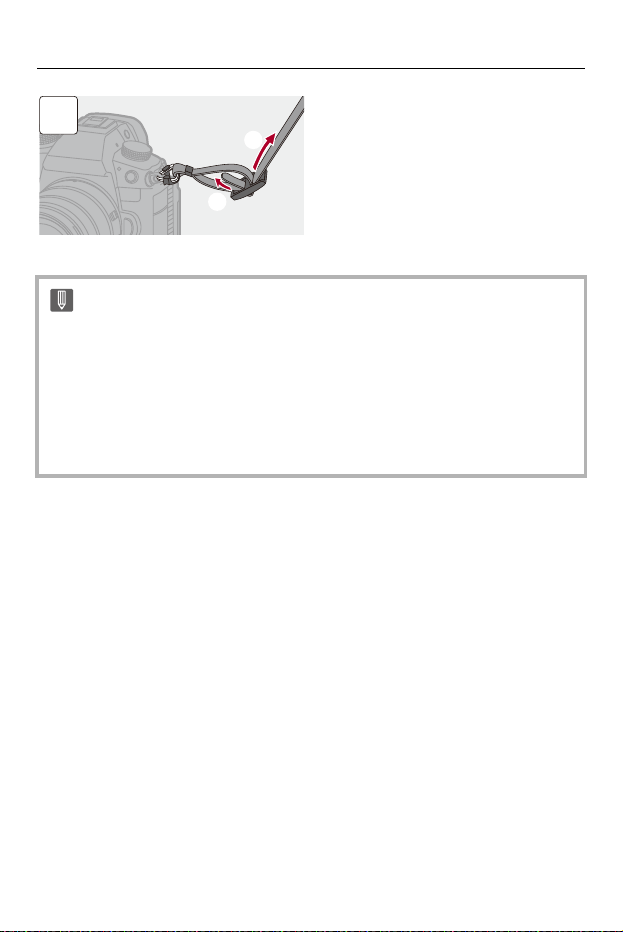
• Pull the shoulder strap and check that it will not come out.
• Attach the opposite end of the shoulder strap with the same procedure.
• Use the shoulder strap around your shoulder.
– Do not wrap the strap around your neck.
It may result in injury or accident.
• Do not leave the shoulder strap where an infant can reach it.
– It may result in an accident by mistakenly wrapping around the neck.
4

Getting Started – Charging the Battery
42
Charging the Battery
≥Charging with the Charger: 44
≥Battery Insertion: 47
≥Inserting a Battery into the Camera for Charging: 49
≥Using the Camera While Supplying It with Power (Supplying Power/
Charging): 53
≥Notifications Regarding Charging/Power Supply: 55
≥[Power Save Mode]: 57
You can charge the battery either using the supplied charger, or in the
camera body.
You can also turn on the camera and supply power from an electrical
outlet.
You can also use the Battery Charger (DMW-BTC15: optional).
• The battery that can be used with the camera is DMW-BLK22. (As of
January 2022)
Getting Started – Charging the Battery
43
Optional battery DMW-BLF19
You can also use DMW-BLF19 (optional), but there are the following
limitations:
• The following functions cannot be used:
– [Rec Quality] exceeding a resolution of C4K
– [Rec Quality] with a high frame rate video exceeding a recording frame rate of
60.00p
– [Variable Frame Rate] exceeding a frame rate of 60 fps
• The battery capacity is low, so this reduces the number of pictures that
can be taken and the available recording time.
• There will be 4 remaining battery charge indicators.
We recommend using DMW-BLK22 (supplied/optional).
• The battery is not charged at the time of purchase. Charge the battery before
use.
Getting Started – Charging the Battery
44
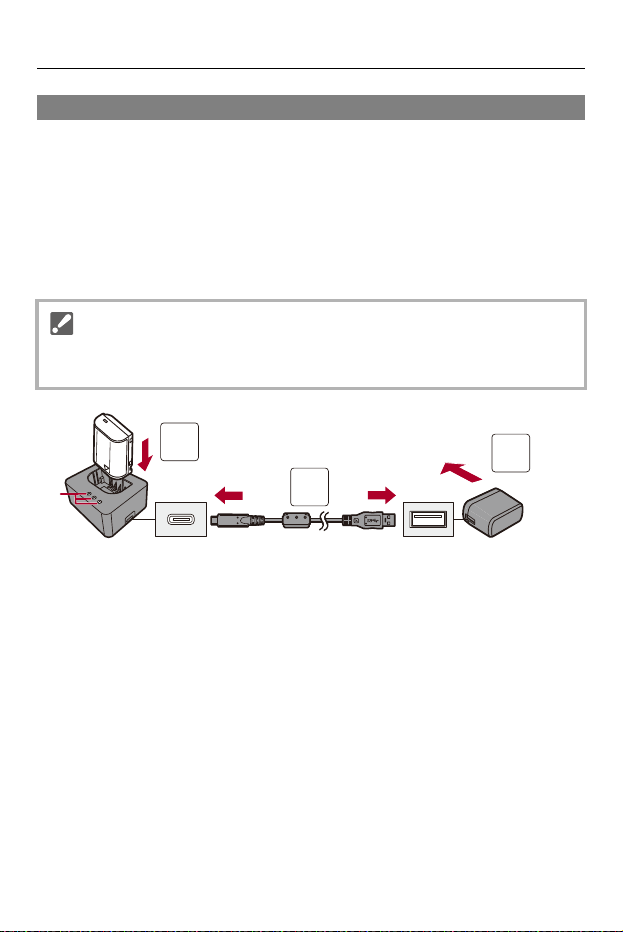
Charging with the Charger
Charging time: Approx. 230 min
•
Use the supplied charger and AC adaptor.
• The indicated charging time is for when the battery has been discharged completely.
The charging time may vary depending on how the battery has been used.
The charging time for the battery in hot/cold environments or a battery that has not
been used for a long time may be longer than normal.
1
Connect the charger and the AC adaptor with the USB
connection cable.
• Check the direction of the terminals and plug in/out straight holding onto the
plug.
(Inserting these at an angle may cause deformation or malfunction)
2
Connect the AC adaptor to an electrical outlet.
• Use the products supplied with the camera for charging.
• Use the charger indoors.
1
2
3
(A)

Getting Started – Charging the Battery
45
3
Insert the battery.
≥The charging lights ([CHARGE]) (A) blink and charging begins.
•
Do not use any other USB connection cables except the supplied one.
This may cause malfunction.
• Do not use any other AC adaptors except the supplied one.
This may cause malfunction.
Getting Started – Charging the Battery
46
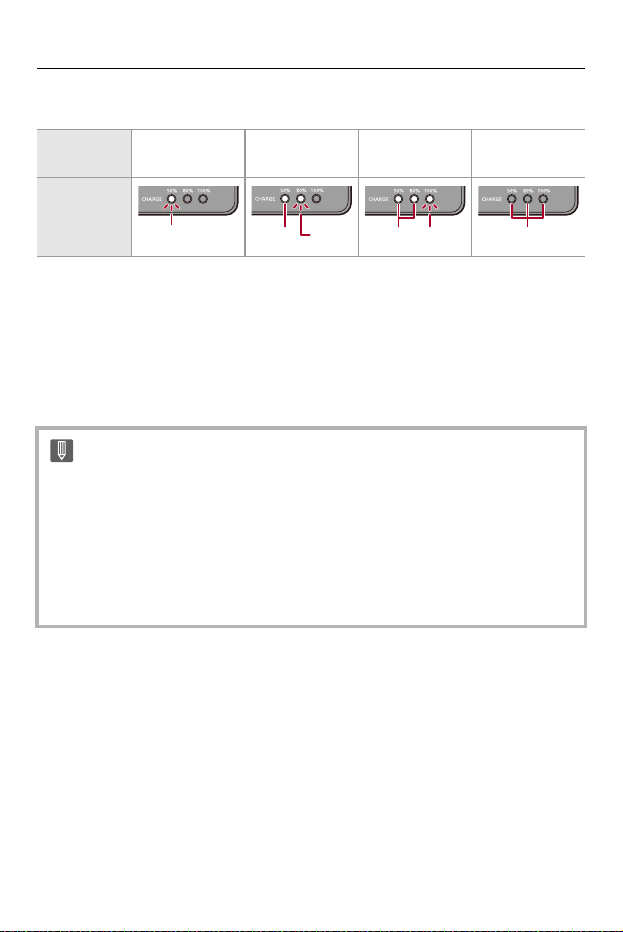
Charging Lights Indications
(B) Blinking
(C) On
(D) Off
• When the battery is inserted while the charger is not connected to the power source,
the charging lights turn on for a certain period to allow you to confirm the battery
level.
Charging
status
0 % to 49 % 50 % to 79 % 80 % to 99 % 100 %
Charging
lights
• After charging, disconnect the power source connection and remove the battery.
• If the [50%] light is blinking quickly, then charging is not occurring.
– The temperature of the battery or surroundings is either too high or too low.
Try charging at an ambient temperature between 10 °C and 30 °C (50 oF and
86 oF).
– The terminals of the charger or the battery are dirty.
Remove the connection to the power source, and wipe with a dry cloth.
(B)
(C) (B)
(C) (B) (D)
Getting Started – Charging the Battery
47
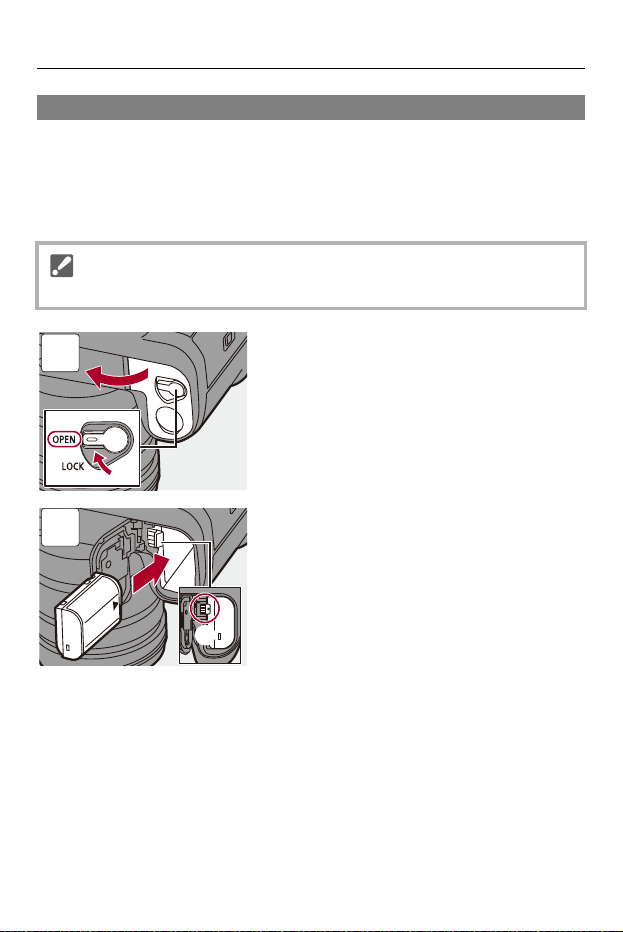
Battery Insertion
• Always use genuine Panasonic batteries (DMW-BLK22).
– You can also use DMW-BLF19 (optional), but there are limitations. (ÎOptional
battery DMW-BLF19: 43)
• If you use other batteries, we cannot guarantee the quality of this product.
• Check that the lever (E) is holding the battery in place.
• Check that the camera on/off switch is set to [OFF].
1
2
(E)
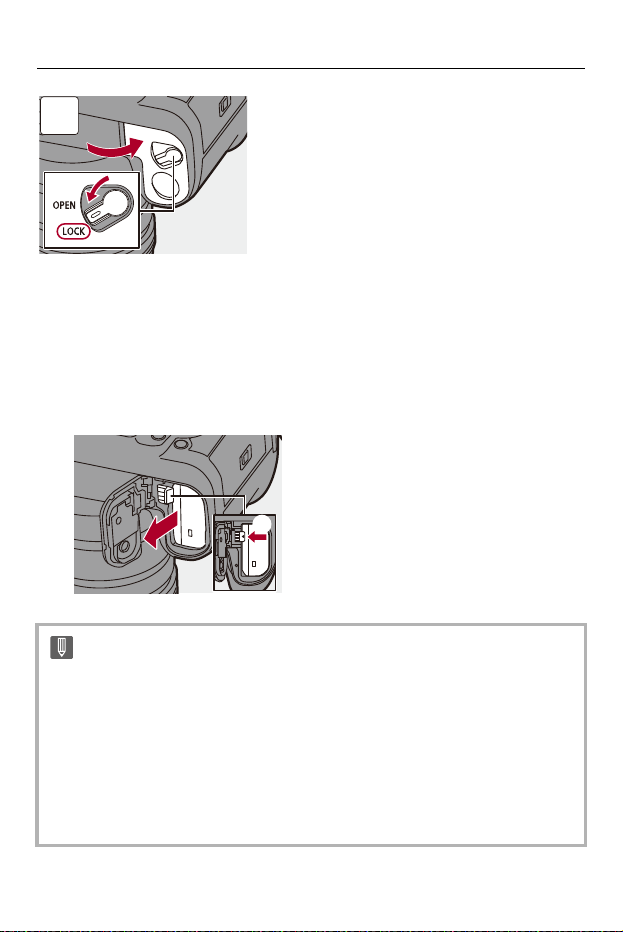
Getting Started – Charging the Battery
48
Removing the Battery
1 Set the camera on/off switch to [OFF].
2 Open the battery door.
3 Push the lever (E) in the direction of the arrow and then remove the battery.
• Check that the card access lights are off before removing the battery. (ÎCard
Access Indications: 62)
• Ensure that no foreign objects are adhering to the inner side (rubber seal) of the
battery door.
• Remove the battery after use.
(The battery will drain if left inserted in the camera for a long period of time.)
• The battery becomes warm after use, during charging, and immediately after
charging.
The camera also becomes warm during use. This is not a malfunction.
• Be careful when removing the battery as the battery will jump out.
3
(E)
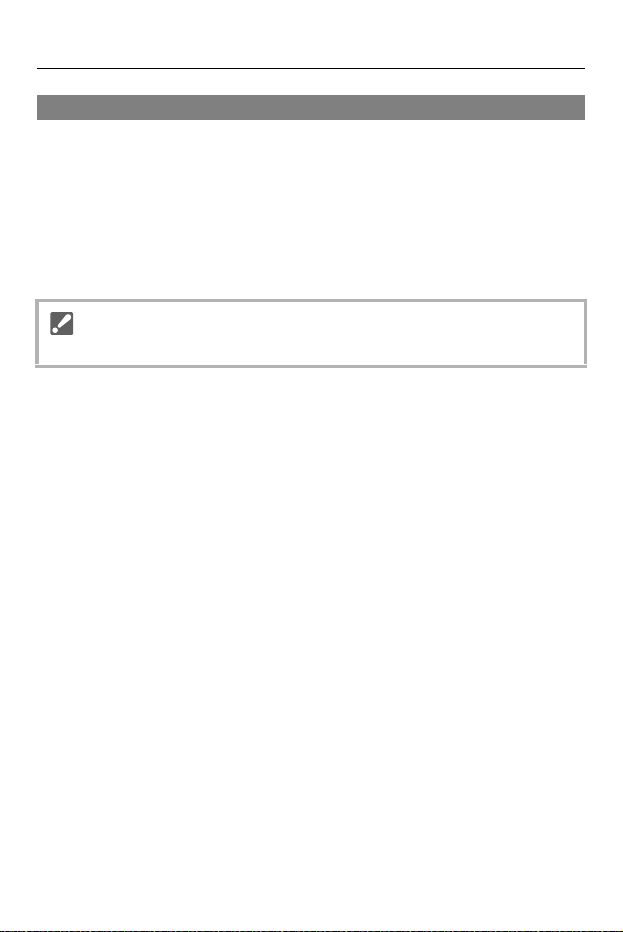
Getting Started – Charging the Battery
49
Inserting a Battery into the Camera for Charging
Charging time: Approx. 220 min
•
Using the camera body and the supplied AC adaptor.
• The indicated charging time is for when the battery has been discharged completely.
The charging time may vary depending on how the battery has been used.
The charging time for the battery in hot/cold environments or a battery that has not
been used for a long time may be longer than normal.
• Use the products supplied with the camera for charging.
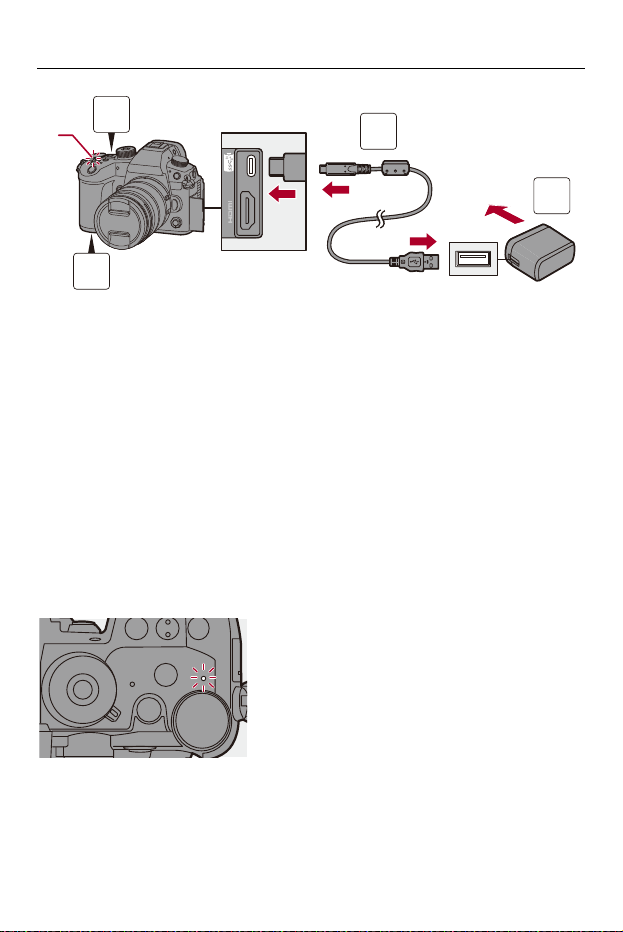
Getting Started – Charging the Battery
50
1
Set the camera on/off switch to [OFF].
2
Insert the battery into the camera.
3
Connect the camera USB port and the AC adaptor using
the USB connection cable.
• Check the direction of the terminals and plug in/out straight holding onto the
plug.
(Inserting these at an angle may cause deformation or malfunction)
4
Connect the AC adaptor to an electrical outlet.
• The charging light (F) turns red and charging begins.
Charging Light Indications
Charging light (red)
On: Charging.
Off: Charging has completed.
Blinking: Charging error.
3
4
1
2
(F)

Getting Started – Charging the Battery
51
• You can also charge the battery by connecting a USB device (PC, etc.) and the
camera with the USB connection cable.
In that case, charging may take a while.
• Do not use any other USB connection cables except the supplied one.
This may cause malfunction.
• Do not use any other AC adaptors except the supplied one.
This may cause malfunction.
• After charging, disconnect the connection to the power source.
• While the charging light is blinking red, charging is not possible.
– The temperature of the battery or surroundings is either too high or too low.
Try charging at an ambient temperature between 10 °C and 30 °C (50 oF and
86 oF).
– The terminals of the battery are dirty.
Remove the battery and wipe off the dirt with a dry cloth.
• Even when the camera on/off switch is set to [OFF] thus turning the camera off, it
consumes power.
When the camera will not be used for a long time, remove the power plug from
the electrical outlet in order to save power.
Getting Started – Charging the Battery
52
Power Supply
When the battery is inserted into the camera for charging and the camera
is turned on, you can record while the camera is being supplied with power.
•
[ ] is displayed in the screen while power is being supplied.
• You can also supply power by using a USB connection cable to connect the
camera and a USB device (PC, etc.).
• The battery cannot be charged while power is being supplied.
• Turn off the camera before connecting or disconnecting the AC adaptor.
• Remaining charge in the battery may decrease depending on usage conditions.
When the battery level is depleted, the camera will turn off.
• Depending on the power supply capabilities of the connected device, it may not
be possible to supply power.
• For information about the high temperature display (ÎFor information
about the high temperature display: 130)
Getting Started – Charging the Battery
53
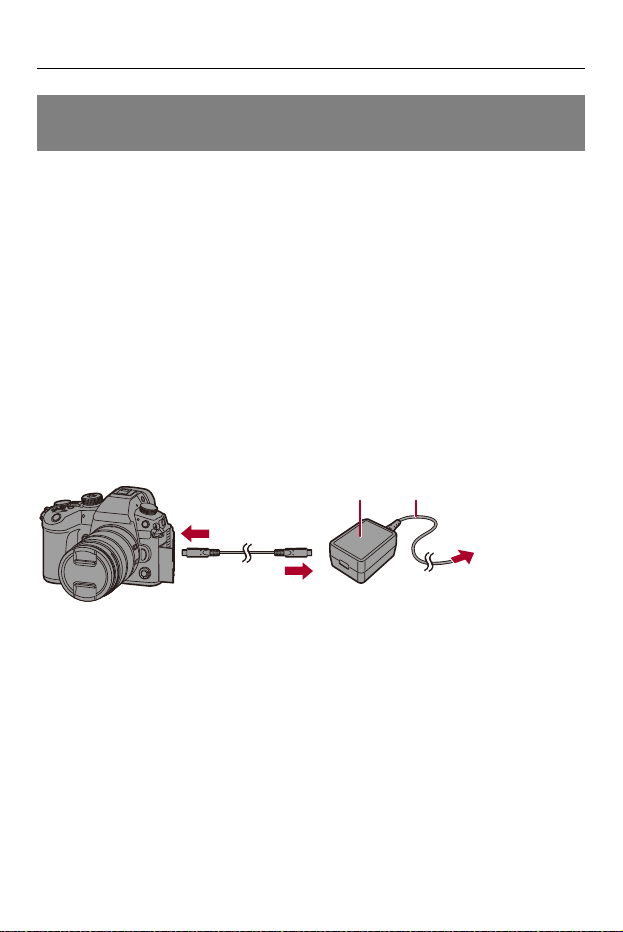
Using the Camera While Supplying It with Power
(Supplying Power/Charging)
Since this camera and the items supplied with the Battery Charger
(DMW-BTC15: optional) are compatible with USB PD (USB Power
Delivery), you can charge while the camera is being supplied with power.
Connect the USB connection cable, AC adaptor and AC cable/AC mains
lead of the Battery Charger (DMW-BTC15: optional) to the camera.
Charging time: Approx. 170 min
•
Use the camera body and the AC adaptor supplied with the Battery Charger
(DMW-BTC15: optional). The camera is turned off.
• The indicated charging time is for when the battery has been discharged completely.
The charging time may vary depending on how the battery has been used.
The charging time for the battery in hot/cold environments or a battery that has not
been used for a long time may be longer than normal.
(G) USB connection cable
(H) AC adaptor
(I) AC cable/AC mains lead
(G)
(H) (I)

Getting Started – Charging the Battery
54
• Insert the battery into the camera.
• Connect using the USB connection cable of the Battery Charger (DMW-BTC15:
optional).
• When the camera is on, charging will take longer than when the camera is off.
• Even when connecting with devices that support USB PD, you may not be able
to charge while using the camera.
• If connecting with devices (PC, etc.) that do not support USB PD and turning the
camera on, then this will supply power only.
• Turn off the camera before connecting or disconnecting the power plug.
• Remaining charge in the battery may decrease depending on usage conditions.
When the battery level is depleted, the camera will turn off.
• Depending on the power supply capabilities of the connected device, it may not
be possible to supply power.
Getting Started – Charging the Battery
55
Notifications Regarding Charging/Power Supply
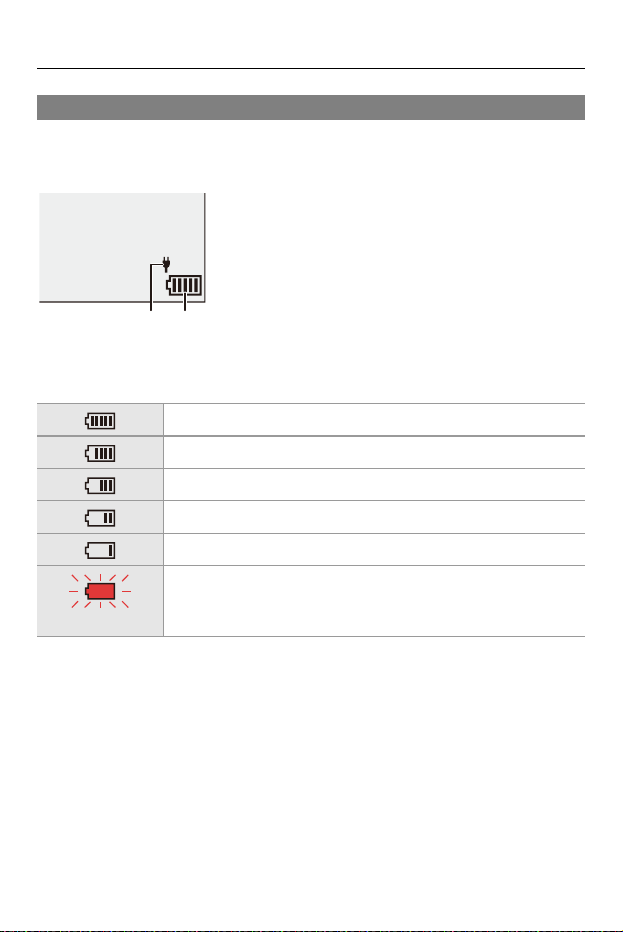
Power Indications
Indication on monitor
(J) USB connection cable supplying power
(K) Battery indication
• The battery level indicated on the screen is approximate.
The exact level varies depending on the environment and the operating conditions.
80 % or higher
60 % to 79 %
40 % to 59 %
20 % to 39 %
19 % or below
Blinking in red
Low battery (The power indicator also blinks)
• Charge or replace the battery.
(J) (K)

Getting Started – Charging the Battery
56
• We recommend that genuine Panasonic batteries are used.
There is a possibility that the use of non-genuine batteries can cause
accidents or malfunctions that may lead to fire or explosion.
Please be advised that we are not liable for any accident or failure resulting
from the use of non-genuine batteries.
• Do not leave any metal items (such as clips) near the contact areas of the power
plug.
Otherwise, a fire and/or electric shocks may be caused by short-circuiting or the
resulting heat generated.
• Do not use the AC adaptor or USB connection cable on other devices.
This may cause a malfunction.
• Do not use USB extension cables or USB conversion adaptors.
• The battery can be charged even when it still has some charge left, but it is not
recommended that the battery charge be frequently topped up while the battery
is fully charged.
(Since characteristic swelling may occur.)
• If there is a power outage or other problem with the electrical outlet, then
charging may not complete successfully.
Reconnect the power plug.
• Do not connect to keyboard or printer USB ports, or to USB hubs.
• If the connected PC enters sleep status, then charging/power supply may stop.
• If the battery indication does not go to [ ] even when charging is complete,
the battery may be deteriorating.
Try not to use that battery.
Getting Started – Charging the Battery
57
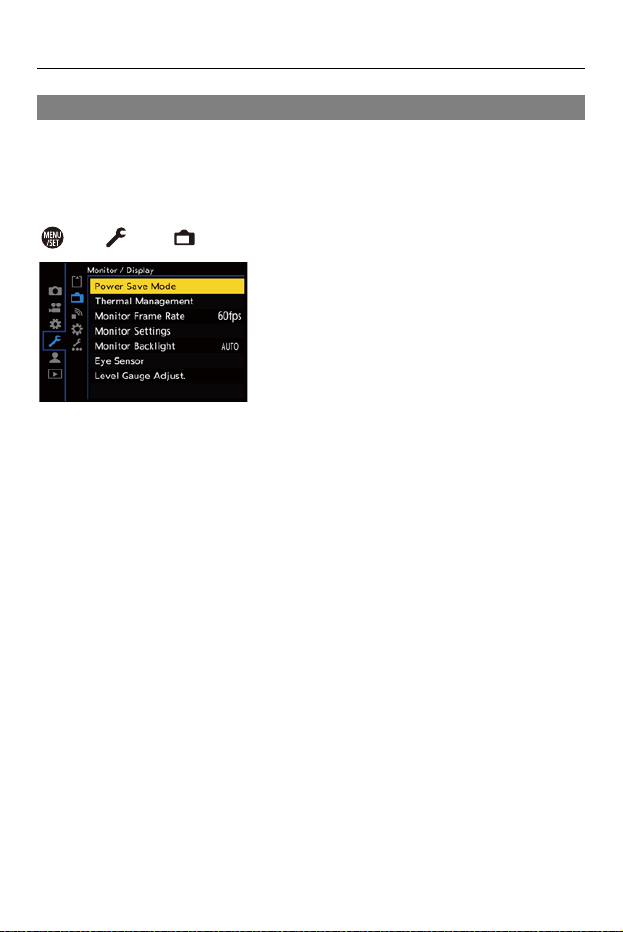
[Power Save Mode]
This is a function to automatically turn the camera to sleep (power save)
status or turn off the viewfinder/monitor if no operation is performed for a
set time. Reduces battery consumption.
¨ [ ] ¨ [ ] ¨ Select [Power Save Mode]

Getting Started – Charging the Battery
58
• To recover from [Sleep Mode], [Sleep Mode(Wi-Fi)], or [Power Save LVF Shooting],
perform one of the following operations:
– Press the shutter button halfway.
– Set the camera on/off switch to [OFF] and then [ON] again.
• To recover from [Auto LVF/Monitor Off], press any button.
[Sleep Mode] Sets the amount of time until the camera is put to sleep.
[Sleep
Mode(Wi-Fi)]
Sets the camera to sleep 15 minutes after being disconnected
from Wi-Fi.
[Auto LVF/
Monitor Off]
Sets the amount of time it takes for the viewfinder/monitor to turn
off.
(The camera is not turned off.)
[Power Save
LVF Shooting]
Puts the camera to sleep when the recording screen is being
displayed on the monitor when automatic viewfinder/monitor
switching is active.
[Time to Sleep]
Sets the amount of time until the camera is
put to sleep.
[Method of
Activation]
Sets the screen where the camera is put to
sleep.
[Only Control Panel]: Puts the camera to
sleep only when the control panel (ÎControl
Panel: 96) is displayed.
[While Recording Standby]: Puts the
camera to sleep from any screen during
recording standby.

Getting Started – Charging the Battery
59
• [Power Save Mode] is not available in the following cases:
– While connected to a PC or printer
– During video recording/video playback
– During a [Time Lapse Shot]
– When recording with [Stop Motion Animation] (when [Auto Shooting] is set)
– When recording with [Focus Transition]
– During a [Slide Show]
– During HDMI output for recording
Getting Started – Inserting Cards (Optional)
60
Inserting Cards (Optional)
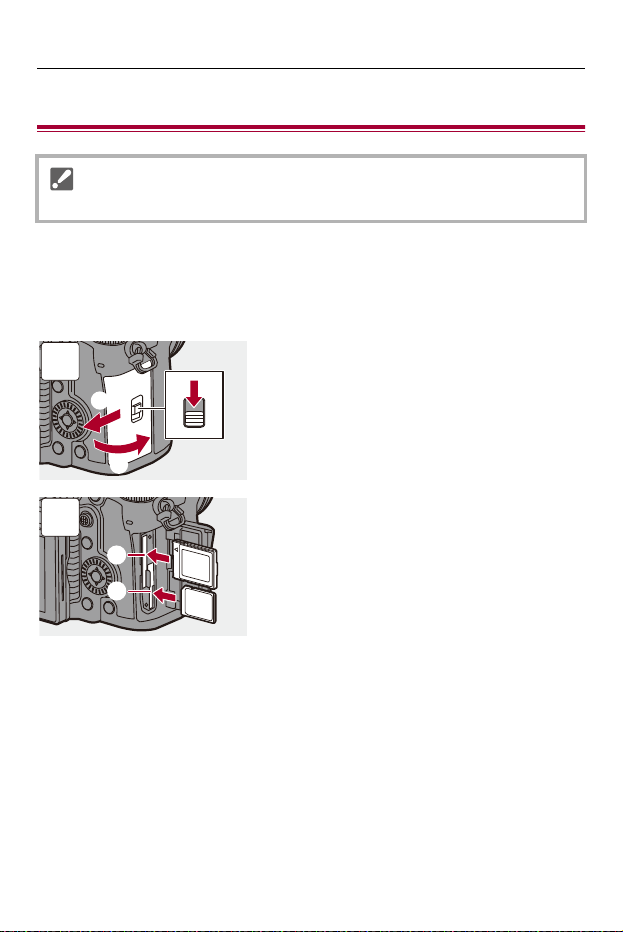
This camera supports the double card slot function.
When two cards are used, relay recording, backup recording, and
allocation recording are available.
•
Format the cards with the camera before use. (Î[Card Format]: 586)
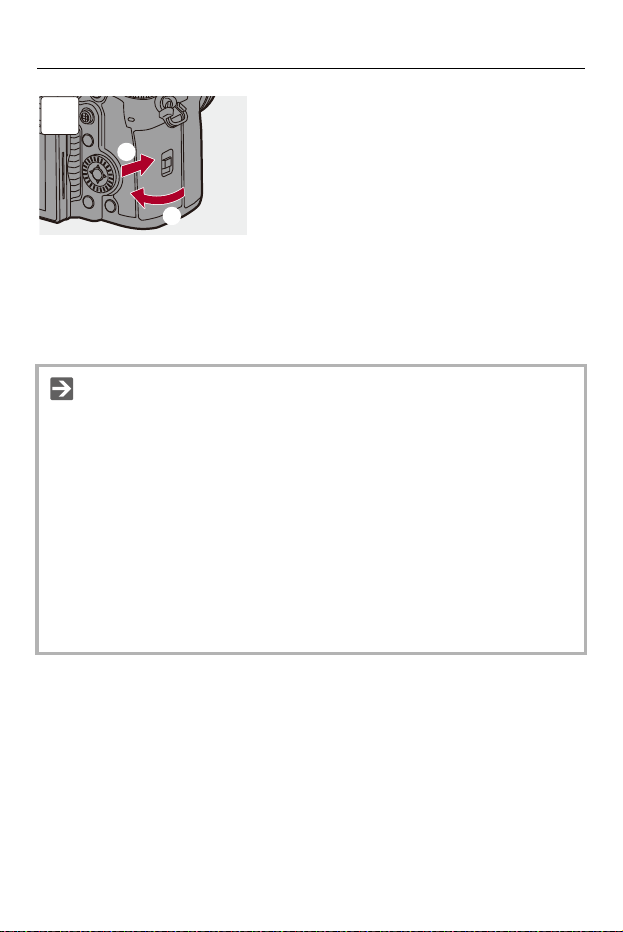
1
2
(A)
(B)
Getting Started – Inserting Cards (Optional)
61
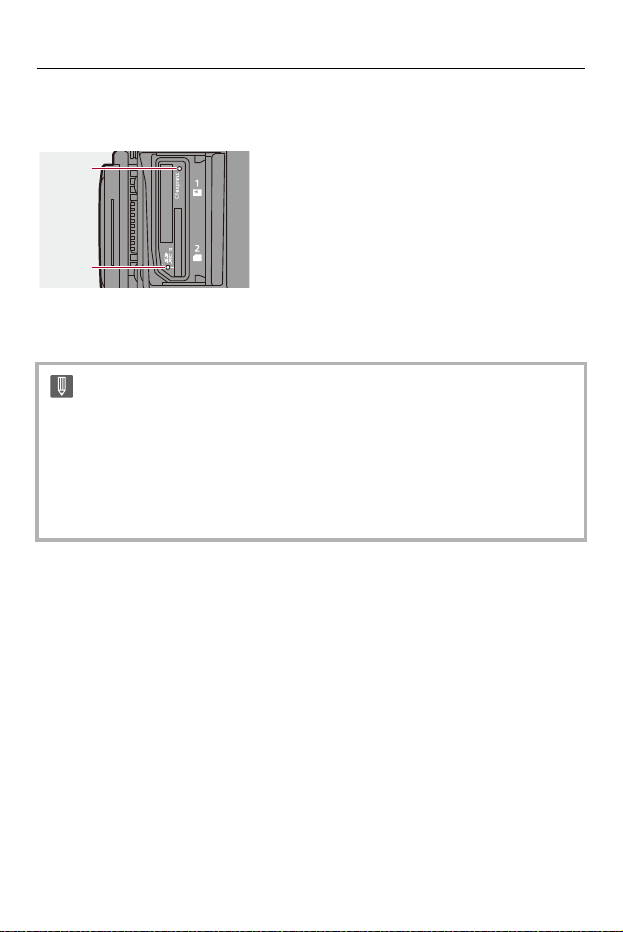
(A) Card slot 1: CFexpress card
(B) Card slot 2: SD card
• Match the orientation of the cards as shown in the figure and then insert them firmly
until they click.
• You can set the way to record to card slots 1 and 2:
(Î[Double Card Slot Function]: 587)
• You can set the folder and file names used for images saved within the DCIM
folder:
(Î[Folder / File Settings]: 591)
• You can switch the file name used when saving video to cards to CINE Style (the
folder saved to is also switched):
(Î[Video File Name]: 588)
• You can set the volume labels for cards when [Video File Name] is set to [CINE
Style]:
(Î[CINE Style File Setting]: 590)
3
Getting Started – Inserting Cards (Optional)
62
Card Access Indications
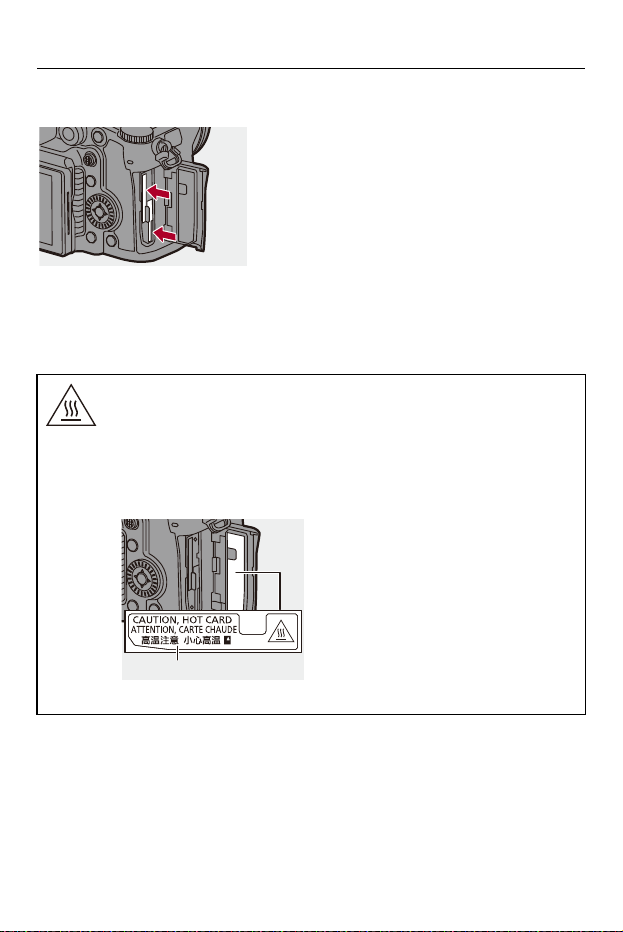
The card access light turns on while the card is being accessed.
(C) Card access light for card slot 1
(D) Card access light for card slot 2
• Do not perform the following operations during access.
The camera may operate incorrectly or the card and recorded images may
be damaged.
– Turn off the camera.
– Remove the battery or card or disconnect the power plug.
– Subject the camera to vibration, impacts, or static electricity.
(C)
(D)
Getting Started – Inserting Cards (Optional)
63
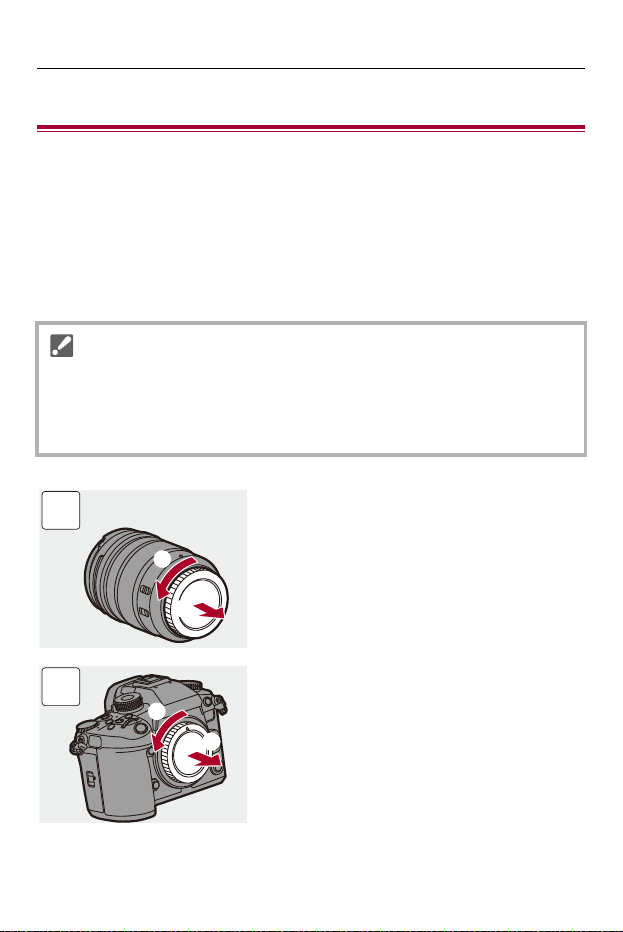
Removing a Card
1 Open the card door.
2 Push the card until it clicks and then pull the card out straight.
• Check that the card access lights are off before removing the card.
CAUTION, HOT CARD
•
As indicated on the inside of the card door, the card may be hot just after
the camera has been used. Be careful when removing.
When a high temperature caution message is displayed on the screen,
do not remove the card immediately, but rather wait for it to cool down
and the message to disappear.
(E) CAUTION, HOT CARD
(E)
Getting Started – Attaching a Lens
64
Attaching a Lens
≥Attaching a Lens Hood: 67
The camera can use the dedicated lenses that comply with the Micro Four
Thirds™ system lens mount specification (Micro Four Thirds mount).
For information about the lens that can be used (ÎLenses That Can Be
Used: 23)
•
Check that the camera on/off switch is set to [OFF].
• Change the lens in a location where there is not a lot of dirt and dust.
If dirt or dust gets on the lens (ÎDirt on the Image Sensor: 751)
• Change the lens while the lens cap is attached.
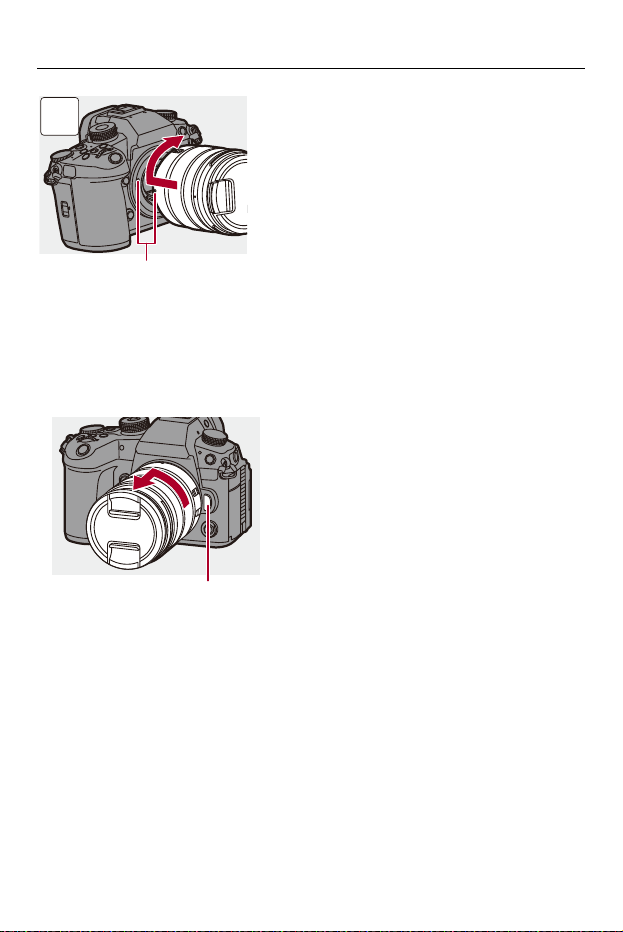
1
2
Getting Started – Attaching a Lens
65
(A) Lens fitting marks
Removing a Lens
• While pressing the lens release button (B), rotate the lens in the direction of the
arrow until it stops and then remove it.
(A)
3
(B)

Getting Started – Attaching a Lens
66
• When you have attached a lens that does not have a communication function
with this camera, after turning on the camera, a message asking for confirmation
of the lens information is displayed. You can register the focal length for the lens
when you select [Yes]. (Î[Lens Information]: 266)
• You can change the settings so that the confirmation message is not displayed:
(Î[Lens Info. Confirmation]: 584)
• Insert the lens straight in.
Inserting this at an angle to attach it may damage the camera lens mount.
• After removing the lens, be sure to attach the body cap and the lens rear cap.
Getting Started – Attaching a Lens
67
Attaching a Lens Hood
For recording against strong backlight, a lens hood can reduce the
inclusion of unwanted light in images and drop in contrast resulting from
the irregular reflection of light that occurs within the lens.
It allows you take more beautiful pictures by cutting out excess light.
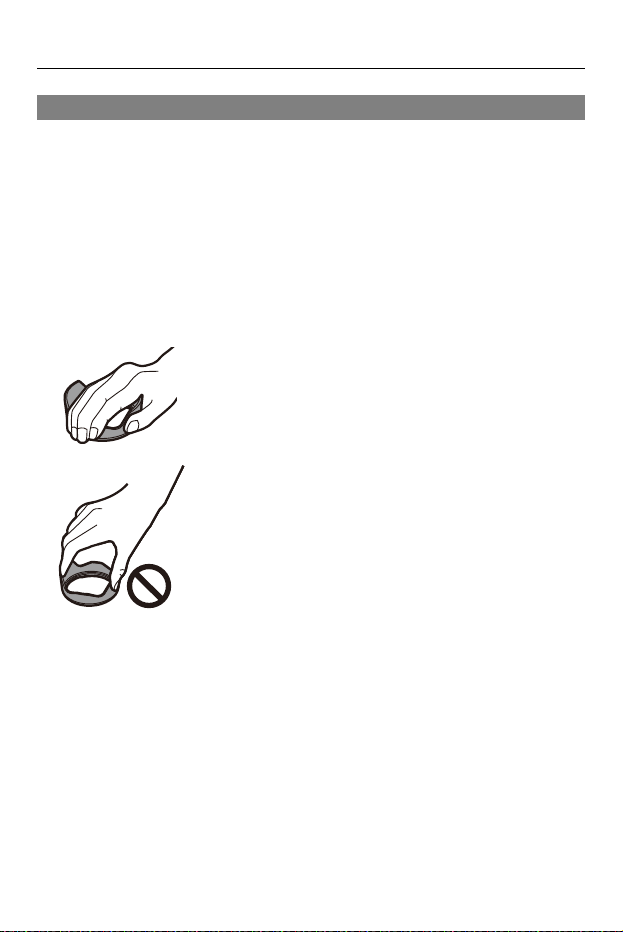
When attaching the lens hood (flower shape) supplied with the
interchangeable lens (H-ES12060/H-FS12060)
• Hold the lens hood by placing your fingers as shown in the figure.
• Do not hold the lens hood in such a way that it will become bent.
Getting Started – Attaching a Lens
68
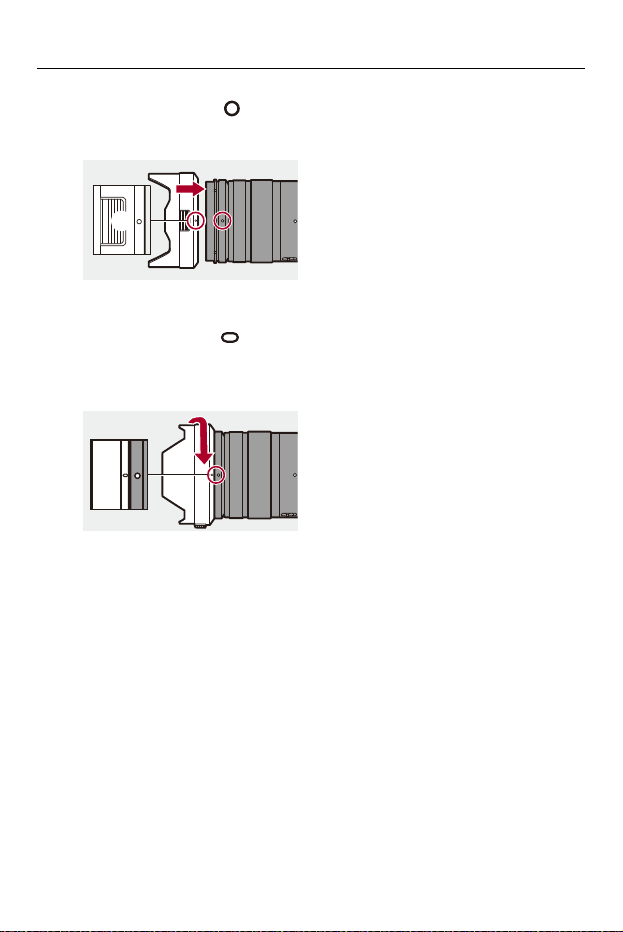
1
Align mark (C) ( ) on the lens hood with the mark on
the tip of the lens.
2
Rotate the lens hood in the direction of the arrow to
align mark (D) ( ) on the lens hood with the mark on
the tip of the lens.
≥Attach the lens hood by rotating it until it clicks.
(C)
(D)
Getting Started – Attaching a Lens
69
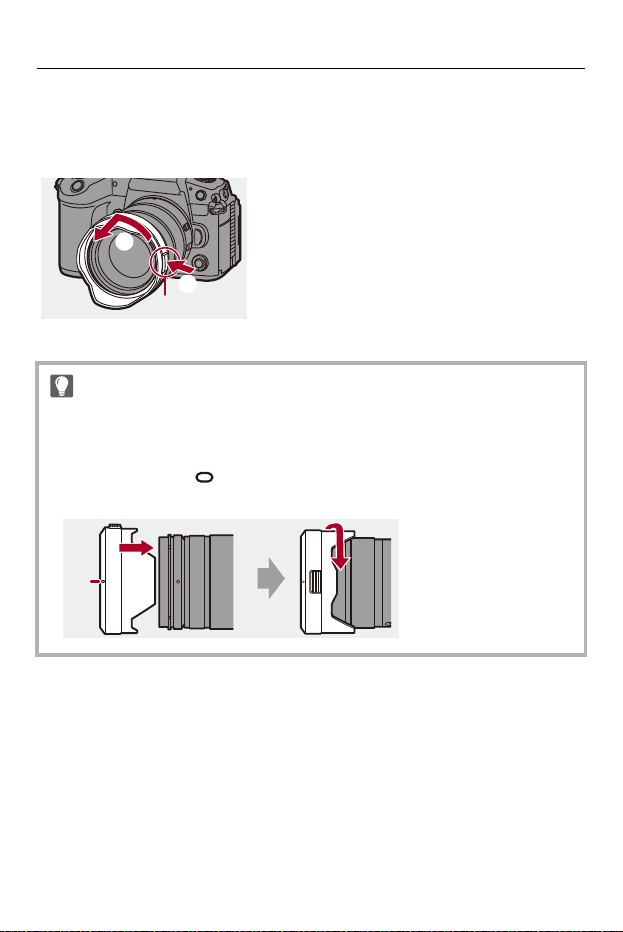
Removing the Lens Hood (H-ES12060)
While pressing the lens hood button (E), rotate the lens hood in the
direction of the arrow and then remove it.
•
The lens hood can be attached in the reverse direction when carrying the
camera.
Example) H-ES12060
1 Align mark (D) ( ) on the lens hood with the mark on the tip of the lens.
2 Attach the lens hood by rotating it in the direction of the arrow until it clicks.
(E)
(D)
Getting Started – Adjusting the Monitor Direction and Angle
70
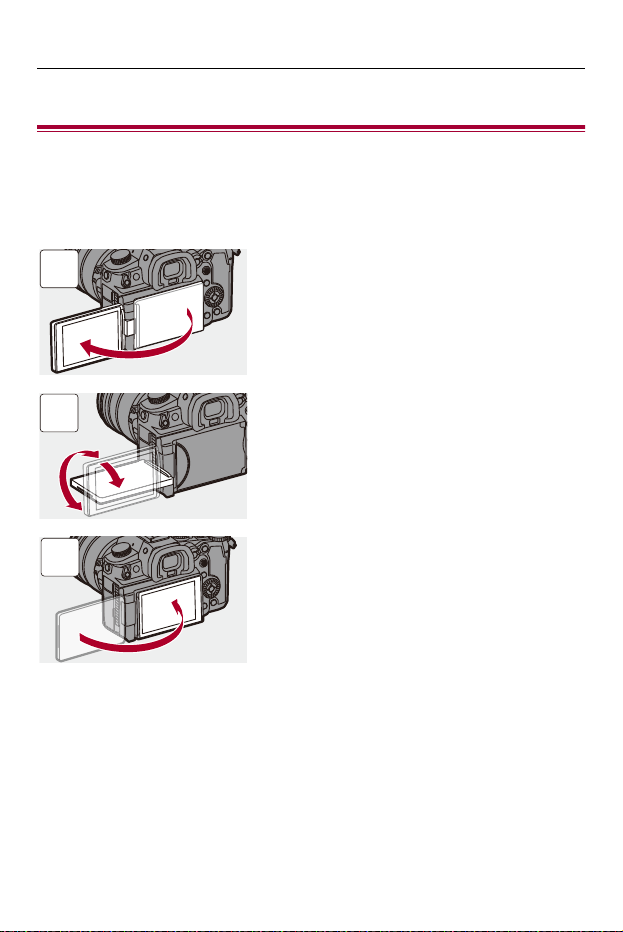
Adjusting the Monitor Direction and Angle
The monitor on this camera has angling and tilting that you can adjust in
combinations to freely change the orientation and angle.
At the time of purchase, the monitor is stowed in the camera body.
180°
1
90°
180°
2
3
Getting Started – Adjusting the Monitor Direction and Angle
71
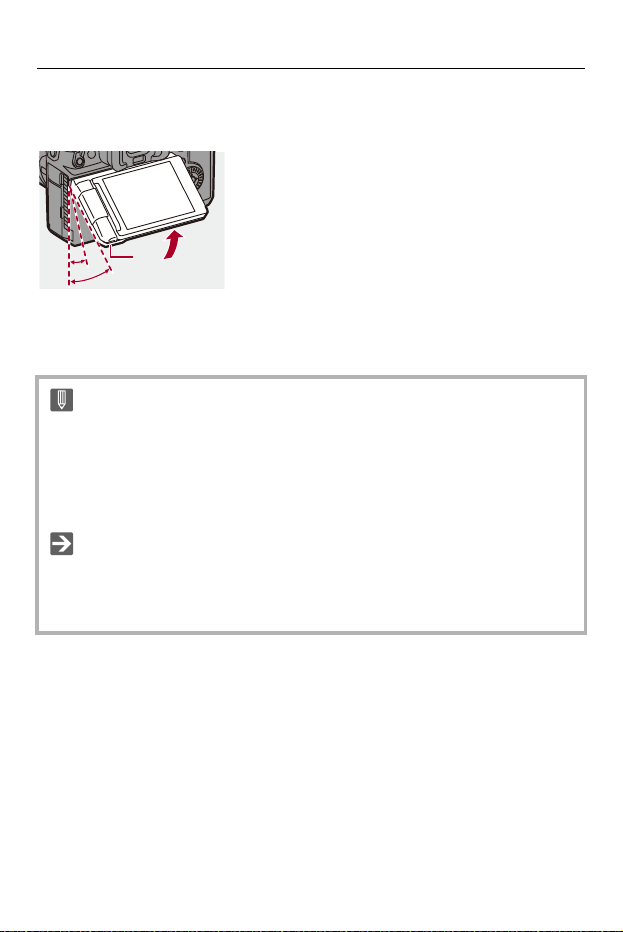
Tilt
Put your finger on (A) and push the monitor up in the direction of the arrow.
•
The monitor of this camera can be tilted in two stages.
• The monitor can still be opened when tilted to 28°.
• The angles of adjustment are guides only.
• Take care not to trap a finger in the monitor.
• Do not apply an excessive force to the monitor. This may cause damage or
malfunction.
• When not using the camera, close the monitor with the monitor surface facing in.
• You can set whether the screen flips or not depending on the facing or angle of
the monitor during recording:
(Î[LVF/Monitor Disp. Set]: 569)
50°
28°
(A)
Getting Started – Setting the Clock (When Turning On for the First Time)
72
Setting the Clock (When Turning On for the
First Time)
When you turn the camera on for the first time, a screen to set the time
zone and clock appears.
Be sure to set these settings before use to ensure images are recorded
with the correct date and time information.
1
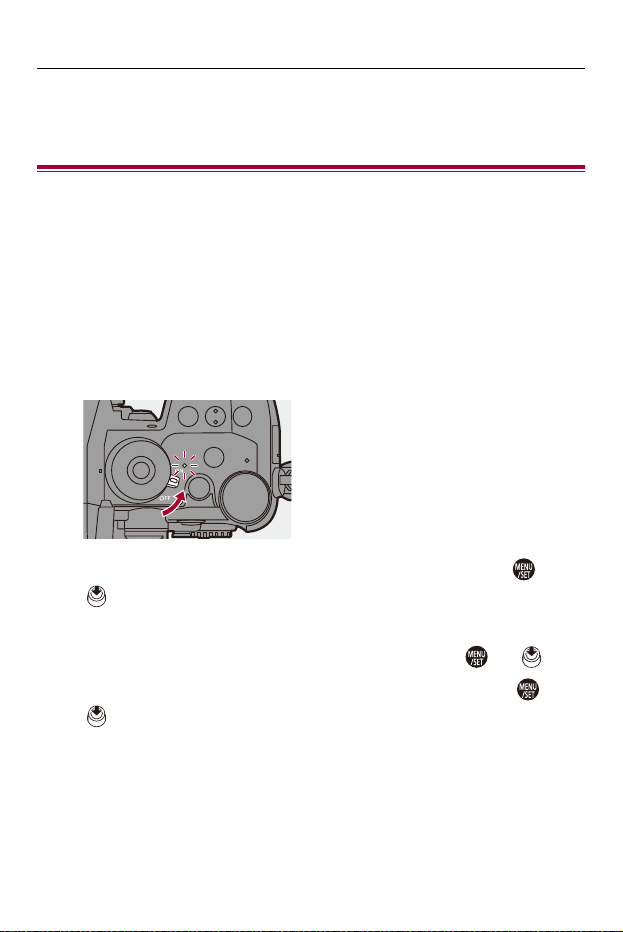
Set the camera on/off switch to [ON].
≥The power indicator lights.
≥If the language select screen is not displayed, proceed to Step
4
.
2
When [Please set the language] appears, press or
.
3
Set the language.
≥Press 34 to select the language and then press or .
4
When [Please set the time zone] appears, press or
.
Getting Started – Setting the Clock (When Turning On for the First Time)
73
5
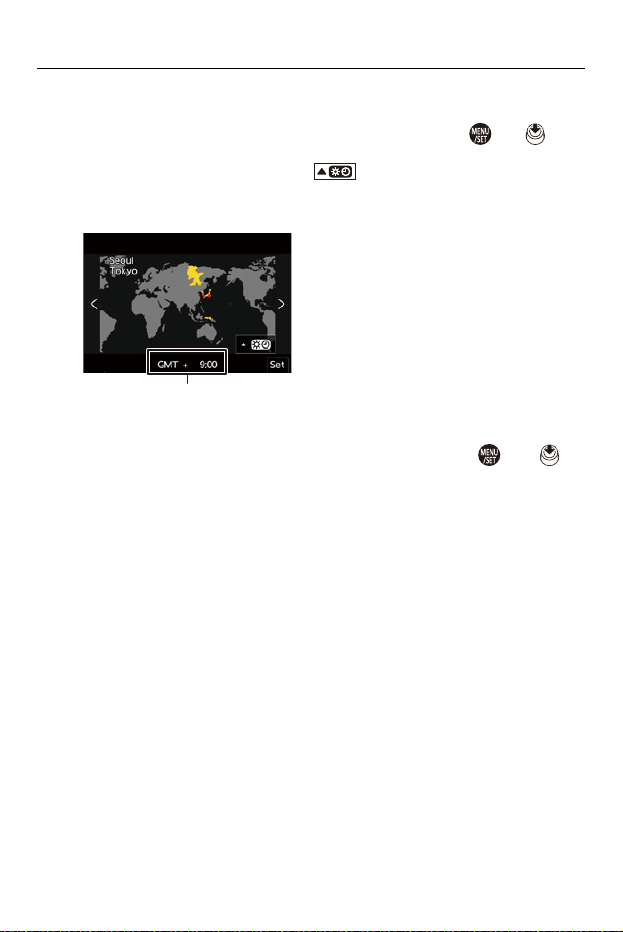
Set the time zone.
≥Press 21 to select the time zone and then press or .
•
If you are using Daylight Savings [ ], press 3. (The time will move
forward by 1 hour.)
To return to the normal time, press 3 again.
(A) Time difference from GMT (Greenwich Mean Time)
6
When [Please set the clock] appears, press or .
(A)
Getting Started – Setting the Clock (When Turning On for the First Time)
74
7
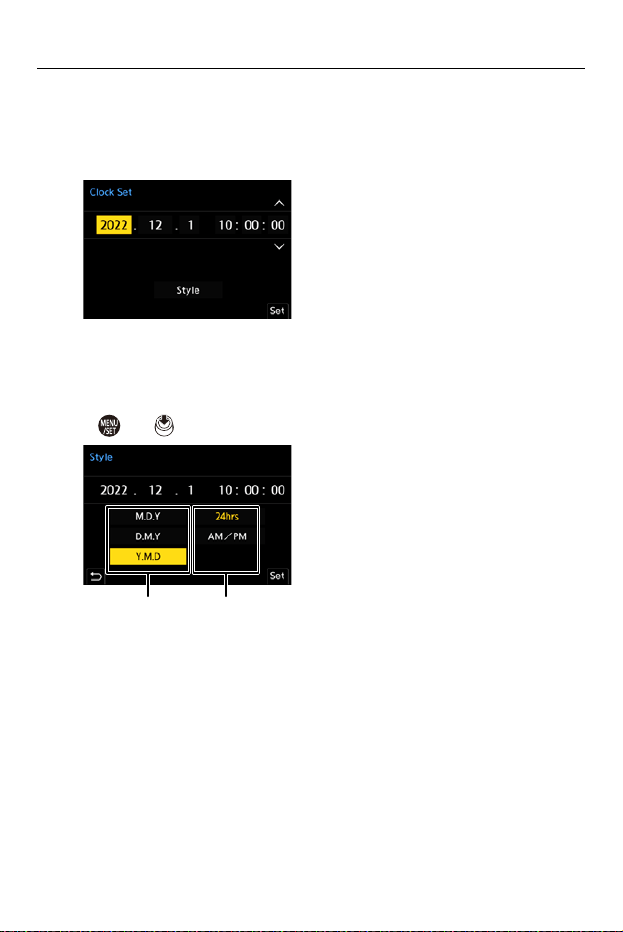
Set the clock.
21: Select an item (year, month, day, hour, minute, or second).
34: Select a value.
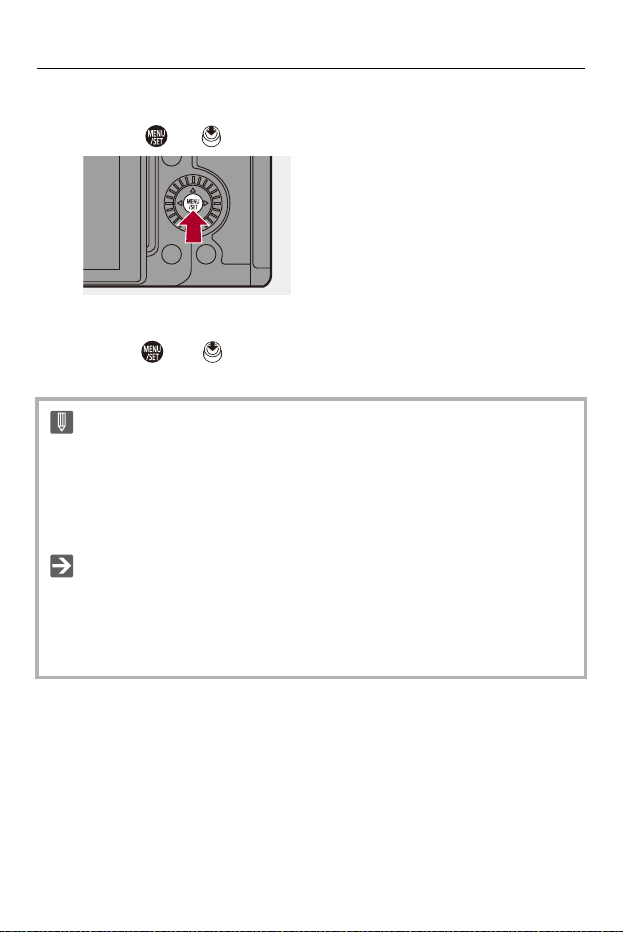
To set the display order and time display format
≥To display the screen for setting the display order (B) and time
display format (C), select [Style] by pressing 21 and then press
or .
(B) (C)
Getting Started – Setting the Clock (When Turning On for the First Time)
75
8
Confirm your selection.
≥Press or .
9
When [The clock setting has been completed.] appears,
press or .
• If the camera is used without setting the clock, it will be set to “0:00:00 1/1/2022”.
• Clock settings are maintained for approx. 3 months using the built-in clock
battery even without the battery.
(Leave the fully-charged battery in the camera for approx. 24 hours to charge the
built-in battery.)
• [Time Zone] and [Clock Set] can be changed from the menu:
(Î[Time Zone]: 606, [Clock Set]: 606)
• You can set so that the power indicator does not light:
(Î[Power/Network Indicator]: 603)

76
Basic Operations
This chapter describes basic camera operations and the Intelligent Auto
mode which helps you start recording immediately.
≥How to Hold the Camera: 77
≥Selecting the Recording Mode: 79
≥Camera Setting Operations: 80
≥Monitor/Viewfinder Display Settings: 87
≥Quick Menu: 94
≥Control Panel: 96
≥Menu Operation Methods: 99
≥Entering Characters: 105
≥Intelligent Auto Mode: 106
≥Recording Using Touch Functions: 112
Basic Operations – How to Hold the Camera
77
How to Hold the Camera
To minimize camera shake, hold the camera so that it will not move during
recording.
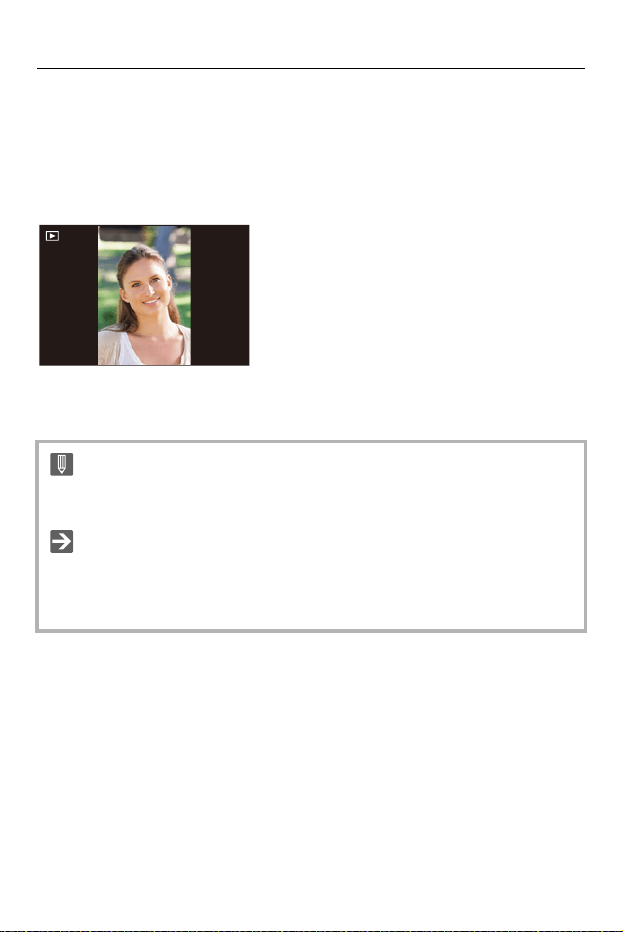
Hold the camera with both hands, keep your arms still at your
side, and stand with your feet shoulder width apart.
≥Hold the camera firmly by wrapping your right hand around the camera
grip.
≥Support the lens from below with your left hand.
•
Do not cover the AF assist light (A) or microphone (B) with your fingers or other
objects.
• Do not cover the fan inlet (C) and fan outlet (D) of the cooling fan with your hand, etc.
(A)
(B)
(D)(C)
Basic Operations – How to Hold the Camera
78
Vertical Orientation Detection Function
This function detects when pictures were recorded with the camera held
vertically orientated.
With the default settings, pictures are automatically played back vertically
oriented.
•
If you set [Rotate Disp.] to [OFF], pictures will be played back without being rotated.
(Î[Rotate Disp.]: 507)
• When the camera is tilted significantly up or down, the vertical orientation
detection function may not work correctly.
• You can set whether or not to record the camera’s vertical orientation information
during video recording:
(Î[Vertical Position Info (Video)]: 584)
Basic Operations – Selecting the Recording Mode
79
Selecting the Recording Mode
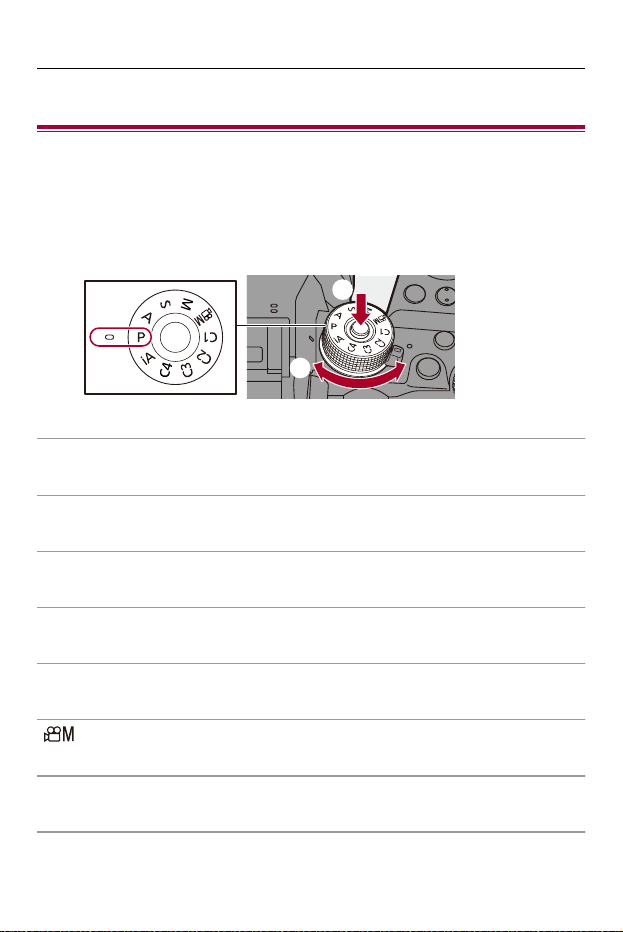
1
Press the mode dial lock button (1) to release the lock.
• The dial is locked if the mode dial lock button is depressed. Each
press locks/unlocks the dial.
2
Rotate the mode dial (2) and adjust the recording mode.
[iA]
Intelligent Auto mode (ÎIntelligent Auto Mode: 106)
[P]
Program AE mode (ÎProgram AE Mode: 270)
[A]
Aperture-Priority AE mode (ÎAperture-Priority AE Mode: 274)
[S]
Shutter-Priority AE mode (ÎShutter-Priority AE Mode: 277)
[M]
Manual Exposure mode (ÎManual Exposure Mode: 280)
[]
Creative Video mode (ÎCreative Video Mode: 345)
[C1]/[C2]/[C3]/[C4]
Custom mode (ÎCustom Mode: 542)
(2)
(1)
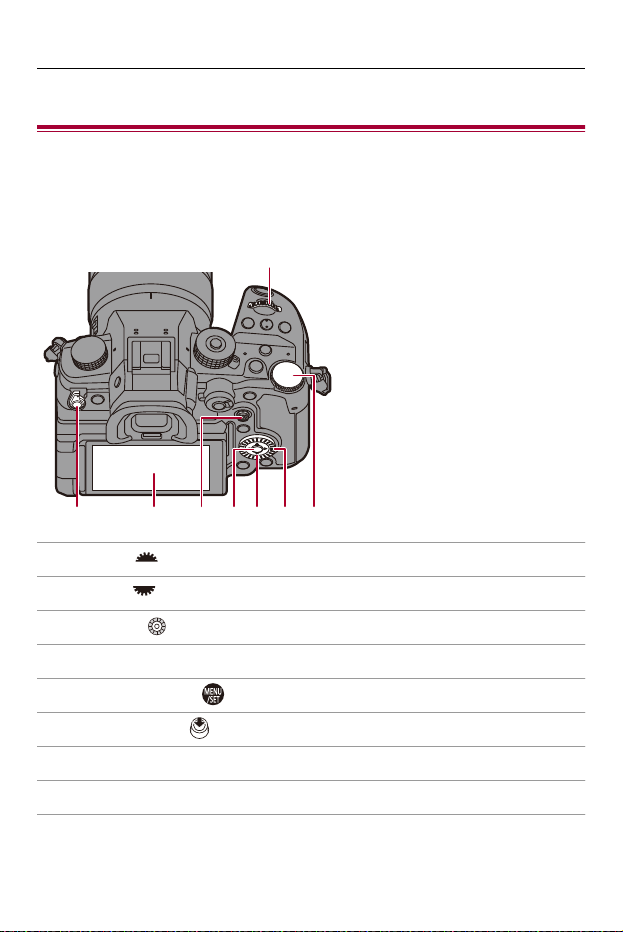
Basic Operations – Camera Setting Operations
80
Camera Setting Operations
When changing the camera settings, operate the camera using the
following operation parts.
To prevent accidental operation, you can disable operation with the
operation lock lever.
(A) Front dial ( ) (ÎFront Dial/Rear Dial: 81)
(B) Rear dial ( ) (ÎFront Dial/Rear Dial: 81)
(C) Control dial ( ) (ÎControl Dial: 81)
(D) Cursor buttons (3421) (ÎCursor Buttons: 82)
(E) [MENU/SET] button ( ) (Î[MENU/SET] Button: 82)
(F) Joystick (3421/) (ÎJoystick: 83)
(G) Touch screen (ÎTouch Screen: 84)
(H) Operation lock lever (ÎOperation Lock Lever: 86)
(H) (G) (F) (E) (D) (C) (B)
(A)
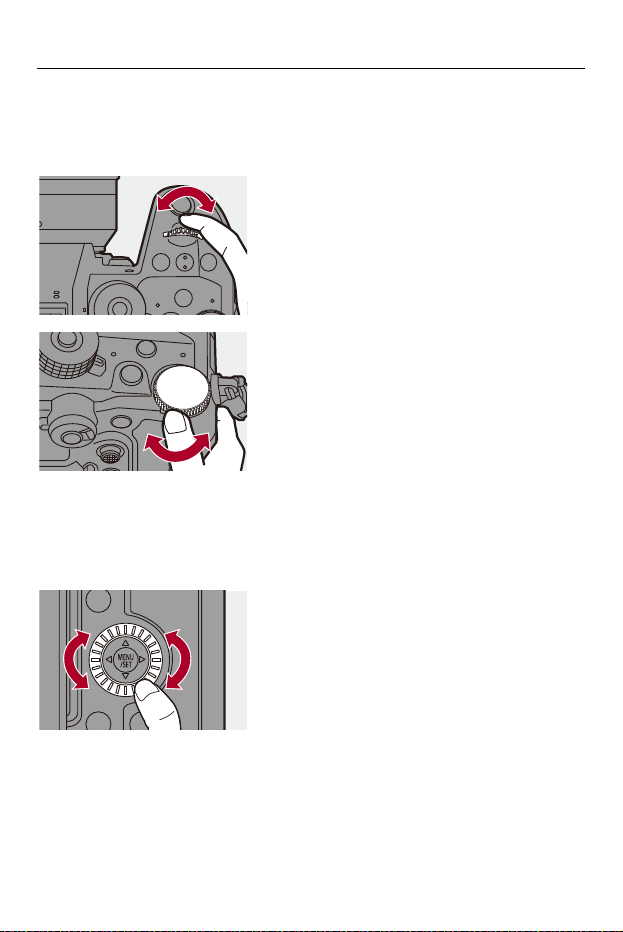
Basic Operations – Camera Setting Operations
81
Front Dial/Rear Dial
Rotate:
Selects an item or numeric value.
Control Dial
Rotate:
Selects an item or numeric value.
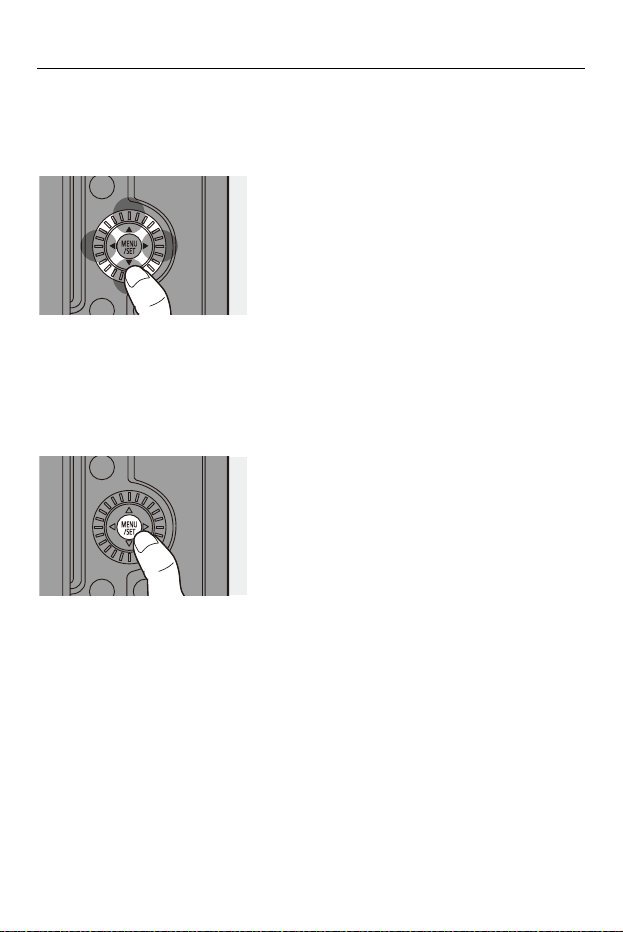
Basic Operations – Camera Setting Operations
82
Cursor Buttons
Press:
Selects an item or numeric value.
[MENU/SET] Button
Press:
Confirms a setting.
•
Displays the menu during recording and playback.
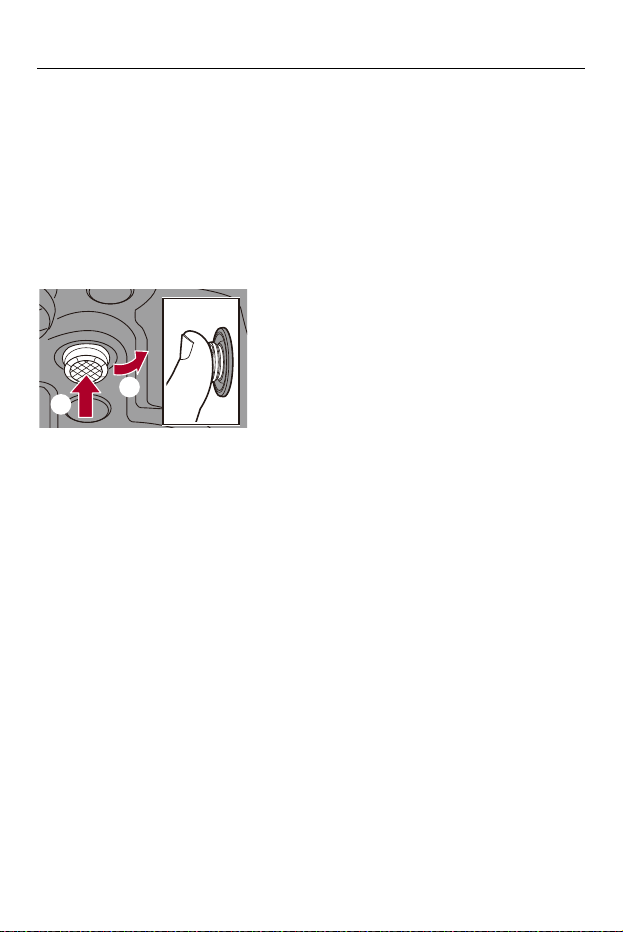
Basic Operations – Camera Setting Operations
83
Joystick
The joystick can be operated in 8 directions by tilting it up, down, left, right
and diagonally and by pressing the center part.
(I) Tilt: Selects an item or numeric value, or moves a position.
•
Place your finger on the center of the joystick before tilting. The joystick may not
work as expected when the sides are pressed.
(J) Press: Confirms a setting.
(I)
(J)
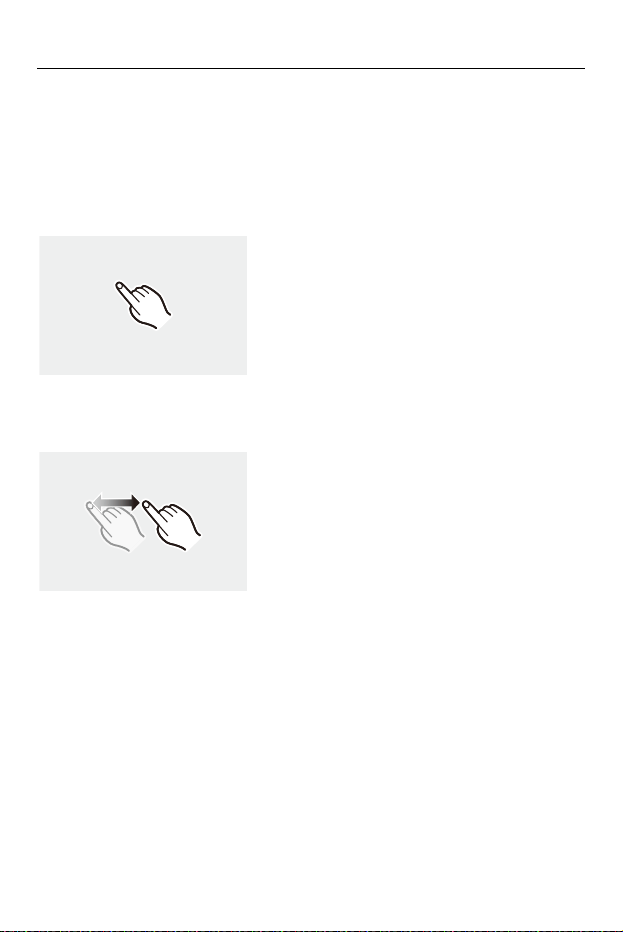
Basic Operations – Camera Setting Operations
84
Touch Screen
Operations can be performed by touching the icons, slide bars, menus,
and other items displayed on the screen.
Touch
Operation of touching and then lifting your finger from the touch screen.
Drag
Operation of moving a finger while it touches the touch screen.
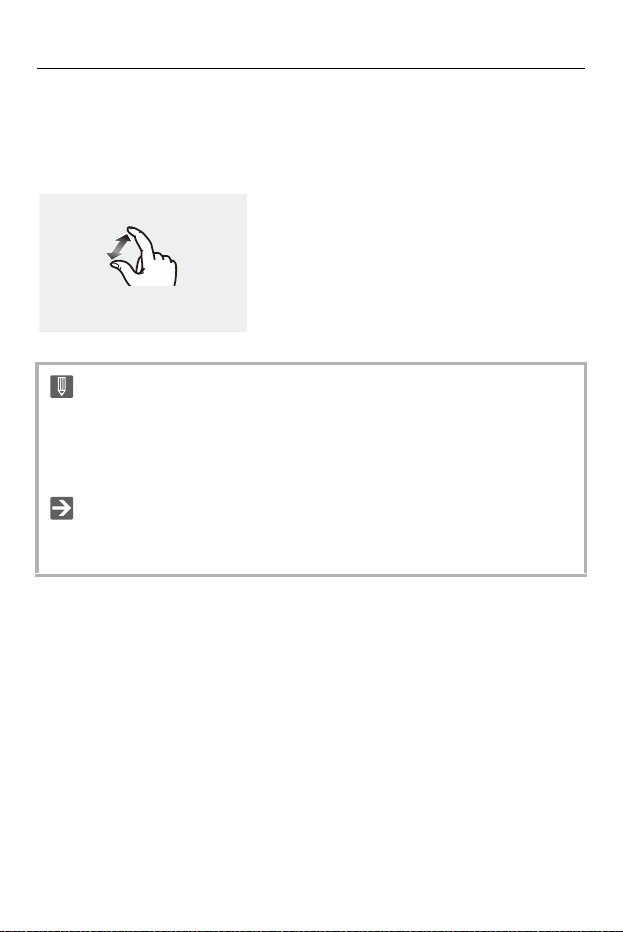
Basic Operations – Camera Setting Operations
85
Pinch (widen/narrow)
Operations of widening the distance between two fingers (pinch out) and
narrowing the distance between two fingers (pinch in) while they are
touching the touch screen.
•
If you will use a commercially available monitor protection sheet, observe the
precautions for the sheet.
(Visibility and operability may be impaired depending on the type of monitor
protection sheet.)
• Touch operations can be disabled:
(Î[Touch Settings]: 558)

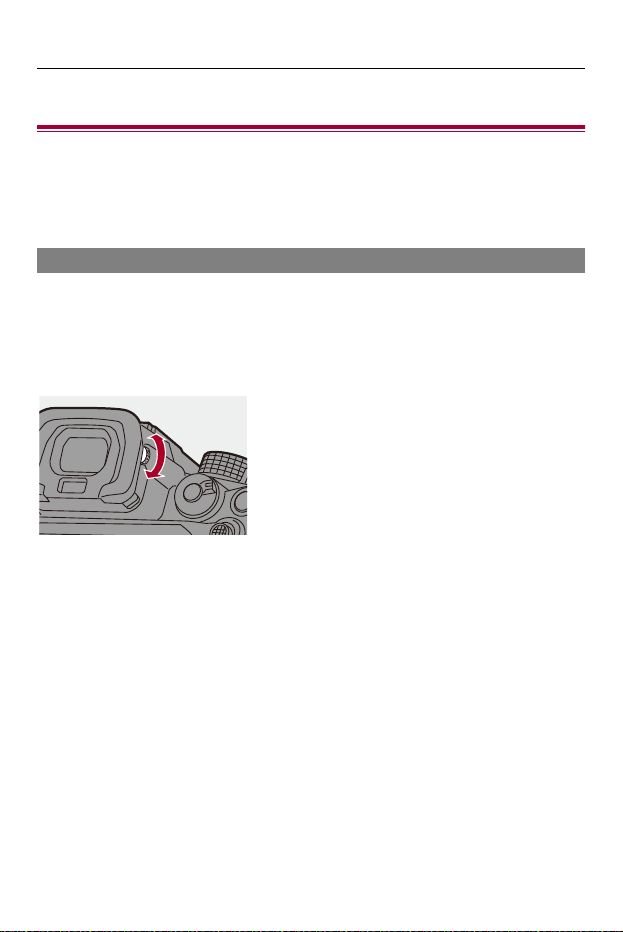
Basic Operations – Monitor/Viewfinder Display Settings
87
Monitor/Viewfinder Display Settings
≥Setting the Viewfinder: 87
≥Switching Between the Monitor and Viewfinder: 88
≥Switching the Display Information: 91
Setting the Viewfinder
Adjusting the Viewfinder Diopter
Rotate the diopter adjustment dial while looking through the
viewfinder.
•
Adjust until you can clearly see the text on the viewfinder.
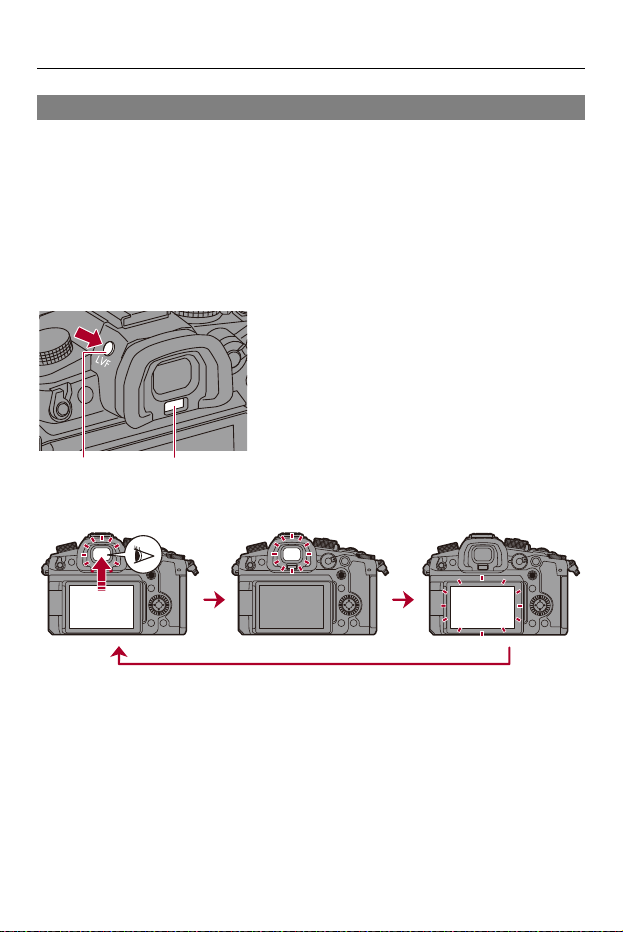
Basic Operations – Monitor/Viewfinder Display Settings
88
Switching Between the Monitor and Viewfinder
With the default settings, automatic viewfinder/monitor switching is set.
When you look through the viewfinder, the eye sensor (A) works and the
camera switches from monitor display to viewfinder display.
You can switch to viewfinder display or monitor display with [LVF] button
(B).
Press [LVF].
(C) Automatic viewfinder/monitor switching
(D) Viewfinder display
(E) Monitor display
(A)(B)
(C) (D) (E)
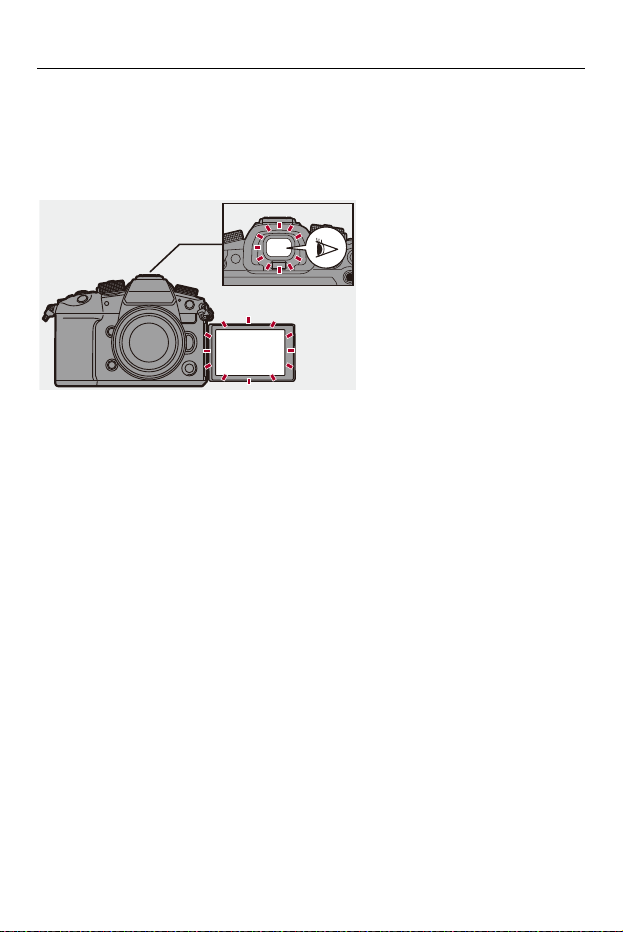
Basic Operations – Monitor/Viewfinder Display Settings
89
Simultaneous Display on the Monitor and Viewfinder
When automatic viewfinder/monitor switching (C), if the monitor is rotated
towards the lens, the recording screen seen when looking through the
viewfinder is also displayed on the monitor.

Basic Operations – Monitor/Viewfinder Display Settings
90
• The eye sensor does not work while the monitor is tilted.
• The eye sensor may not work correctly due to the shape of eyeglasses, the way
the camera is held, or bright light shining around the eyepiece.
• During video playback or slide show, automatic viewfinder/monitor switching
does not work.
• To focus when looking through the viewfinder:
(Î[Eye Sensor AF]: 556)
• The sensitivity of the eye sensor can be changed:
(Î[Eye Sensor]: 597)
• You can set the display speed for live view on the monitor when recording
pictures:
(Î[Monitor Frame Rate]: 595)
• You can adjust the brightness, coloring, red or blue tints, etc., of the monitor/
viewfinder:
(Î[Monitor Settings]/[Viewfinder]: 596)
• You can adjust monitor/viewfinder luminance:
(Î[Monitor Backlight]/[LVF Luminance]: 596)
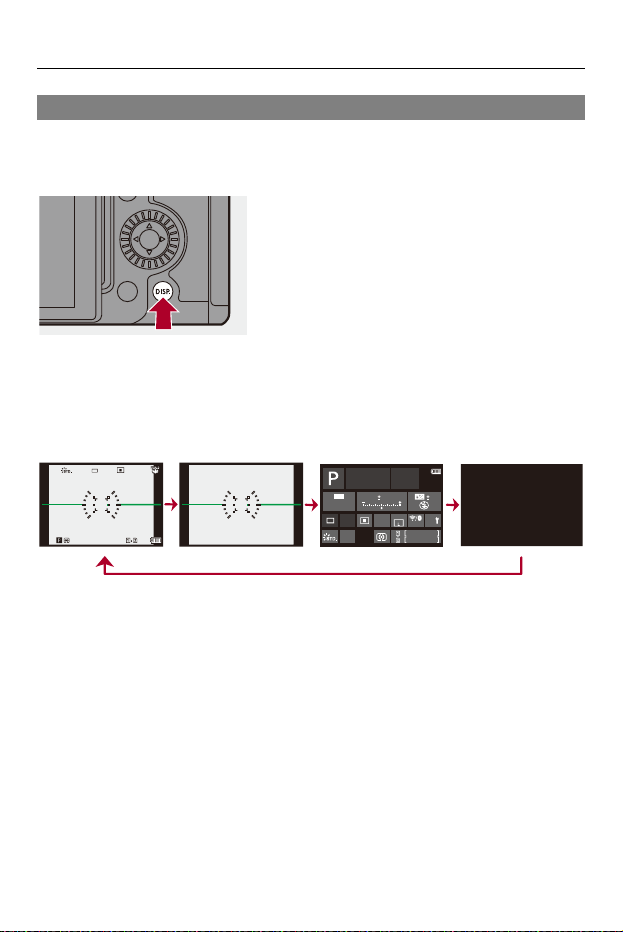
Basic Operations – Monitor/Viewfinder Display Settings
91
Switching the Display Information
Press [DISP.].
≥The display information is switched.
Recording Screen
Monitor
(F) With information
(G) Without information
(H) Control panel
(I) Turned off (black)
999
±
0
AFSAFS
L
FINE
999
999
AWB
Fn
ISO
AUTO
0 0
0
AFS FINE
4:3
OFF
ISO
AUTO
(F) (G) (H) (I)
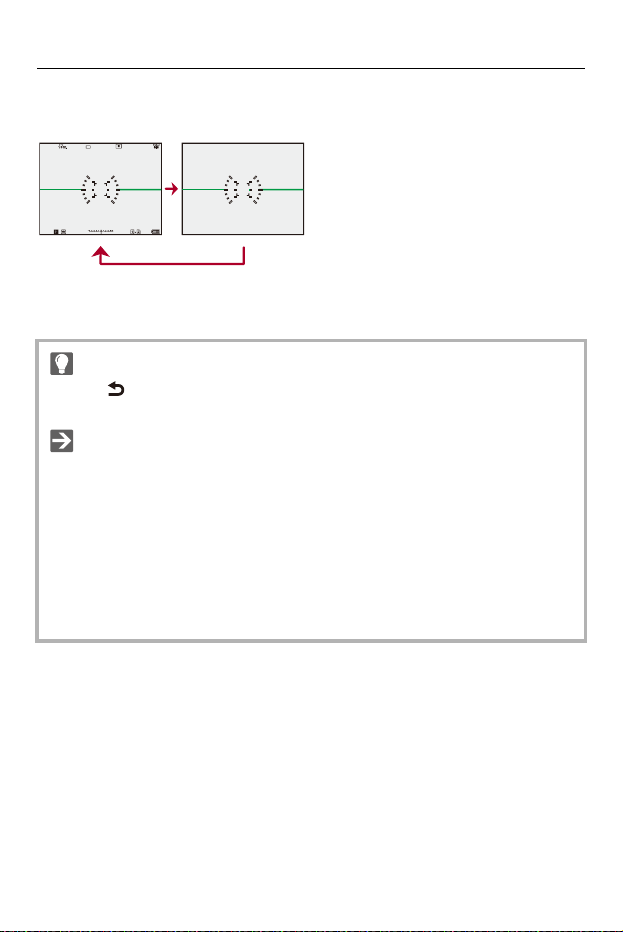
Basic Operations – Monitor/Viewfinder Display Settings
92
Viewfinder
(J) With information
(K) Without information
• Press [ ] to switch between display/hide of the level gauge.
This can also be set by using [Level Gauge]. (Î[Level Gauge]: 573)
• Control panel operation (ÎControl Panel: 96)
• You can hide the control panel and black screen:
(Î[Show/Hide Monitor Layout]: 574)
• The display can be changed so that live view and display information do not
overlap:
(Î[LVF/Monitor Disp. Set]: 569)
• You can display the outline for the live view:
(Î[Framing Outline]: 573)
999
L
FINE
AFSAFS
(J) (K)
ISO
AUTO
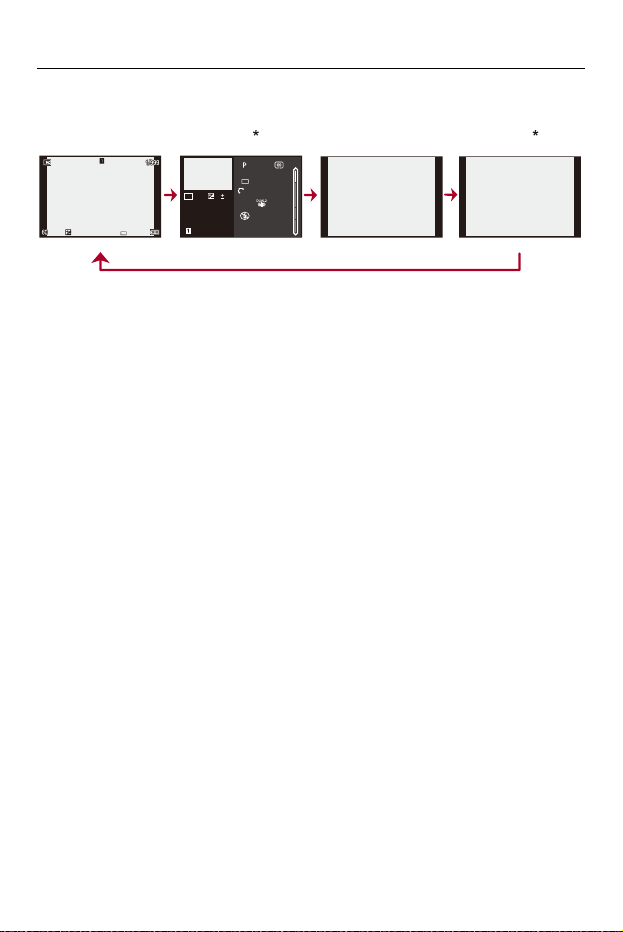
Basic Operations – Monitor/Viewfinder Display Settings
93
Playback Screen
(L) With information
(M) Detailed information display
(N) Without information
(O) Without blinking highlights
*1 Pressing 34 switches the display information. (ÎDetailed information display:
726)
*2 This is a screen without blinking highlights display that is shown when [Blinking
Highlights] of the [Custom] ([Monitor / Display (Photo)]) is set to [ON].
In other than this screen, overexposed parts of the screen will blink. (Î[Blinking
Highlights]: 571)
2022.12.1 10:00 100-0001
ISO
100
F
2.8
±
0
L
FINE
100
100-0001
ISO
0
F2.8
60
2022.12. 1 10:00
s
RGB
1/5
FINE
AFS
STD.
L
4:3
AWB
(L) (M) (N) (O)
1 2
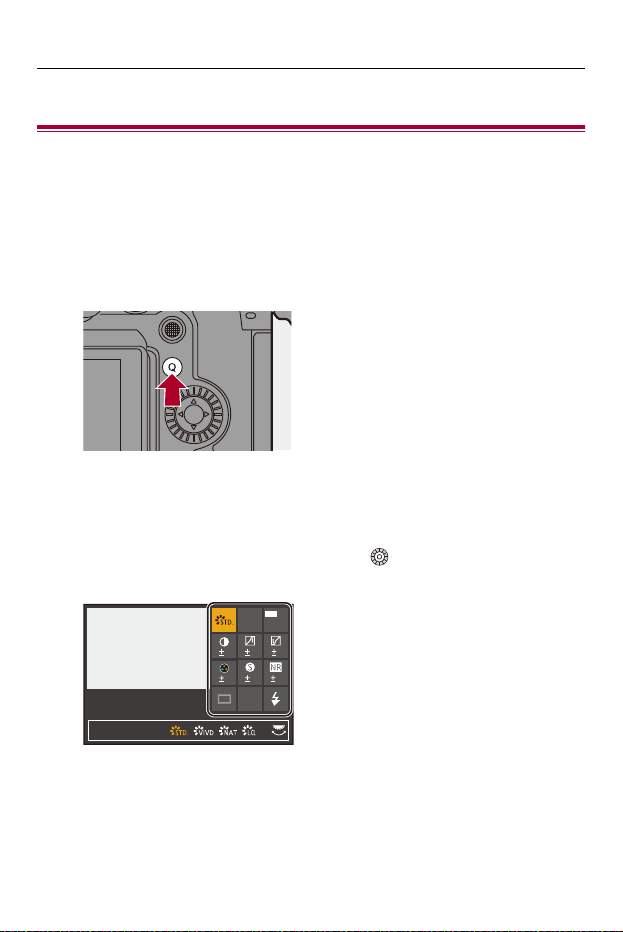
Basic Operations – Quick Menu
94
Quick Menu
This menu enables you to quickly set functions that are frequently used
during recording without calling up the menu screen. You can also change
the Quick menu display method and the items to display.
1
Display the Quick menu.
≥Press [Q].
2
Select a menu item.
≥Press 3421.
≥Directions on the diagonal can also be selected using the joystick.
≥Selection is also possible by rotating .
≥Selection is also possible by touching a menu item.
00 0
AWB
4:3
0 0
0
AUTO
ISO
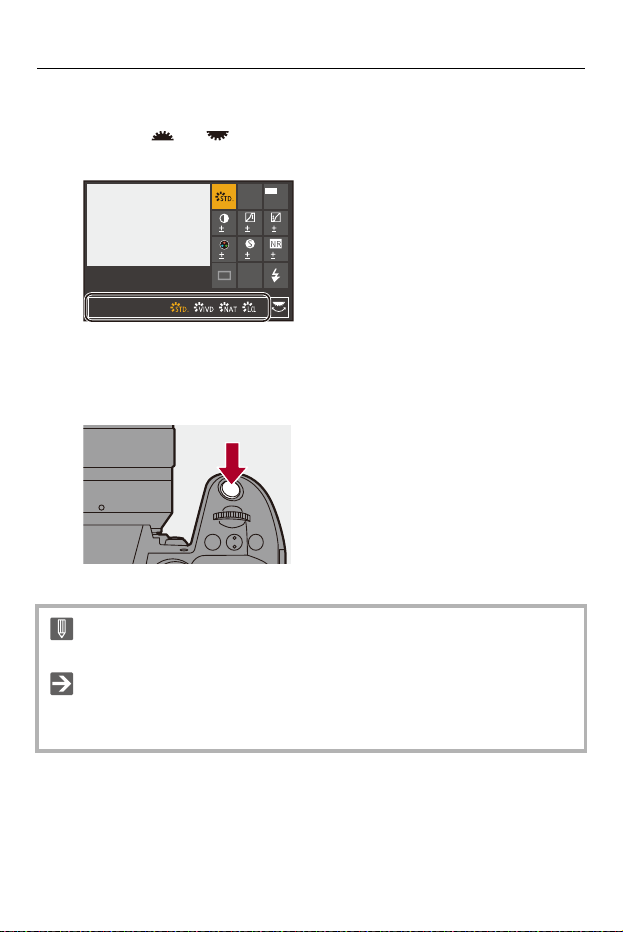
Basic Operations – Quick Menu
95
3
Select a setting item.
≥Rotate or .
≥Selection is also possible by touching a setting item.
4
Close the Quick menu.
≥Press the shutter button halfway.
≥You can also close the menu by pressing [Q].
•
Some items cannot be set depending on the recording mode or camera settings.
• The Quick menu can be customized:
(ÎQuick Menu Customization: 535)
00 0
AWB
4:3
0 0
0
AUTO
ISO
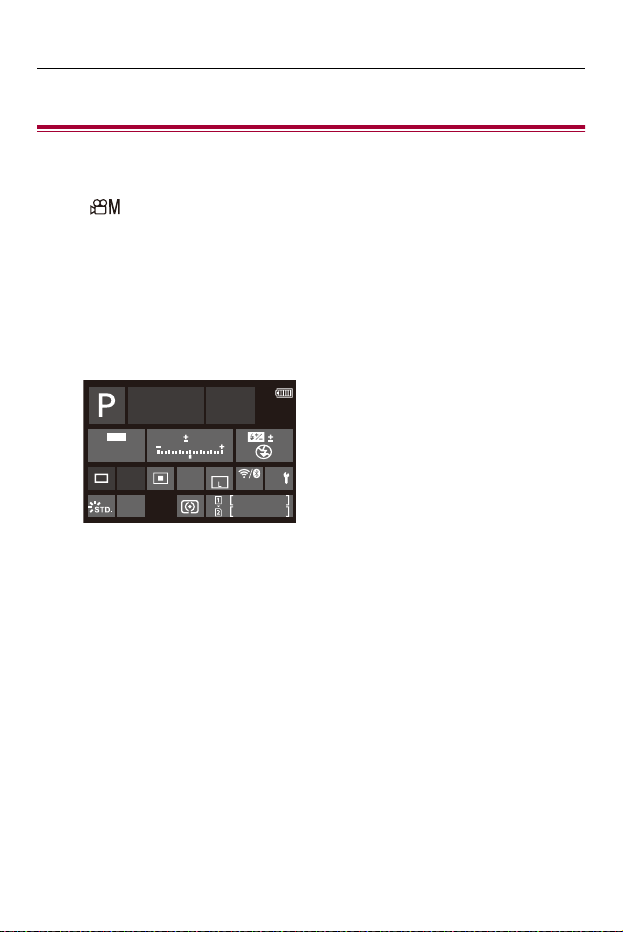
Basic Operations – Control Panel
96
Control Panel
This screen allows you to view the current recording settings on the
monitor. You can also touch the screen to change the settings.
In the [ ] mode (Creative Video mode), the display changes to one
especially for video.
•
For information about the screen (ÎControl Panel: 715, Control Panel (Creative
Video Mode): 718)
1
Display the control panel.
≥Press [DISP.] several times.
2
Touch the items.
≥The setting screens for each of the items are displayed.
999
999
AWB
Fn
ISO
AUTO
0 0
0
AFS
FINE
4:3
OFF
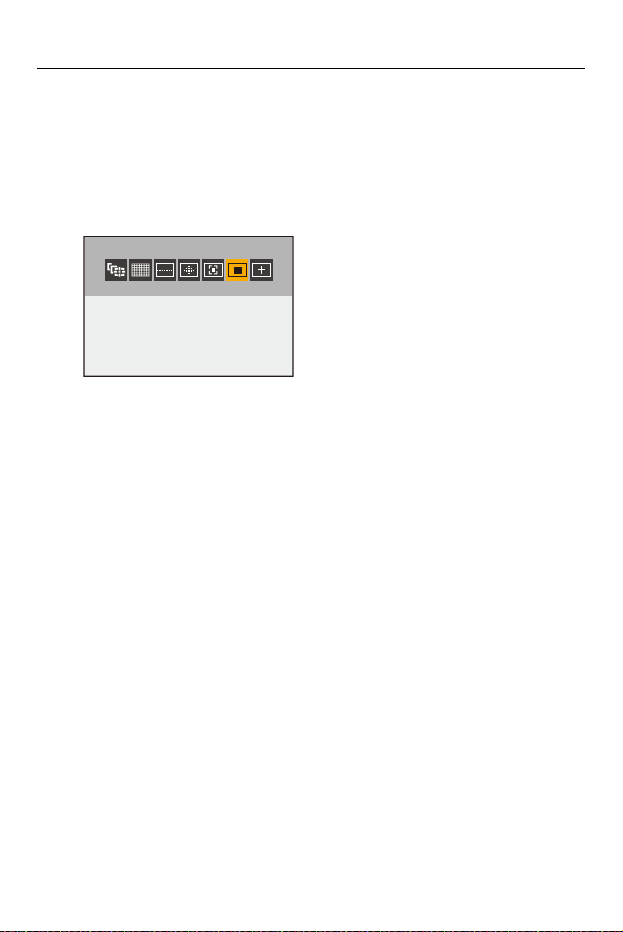
Basic Operations – Control Panel
97
3
Change the setting.
Example) Changing the AF mode
≥Touch the setting item.
•
Refer to the pages explaining each item for information on how to change the
settings.
4
Touch [Set].
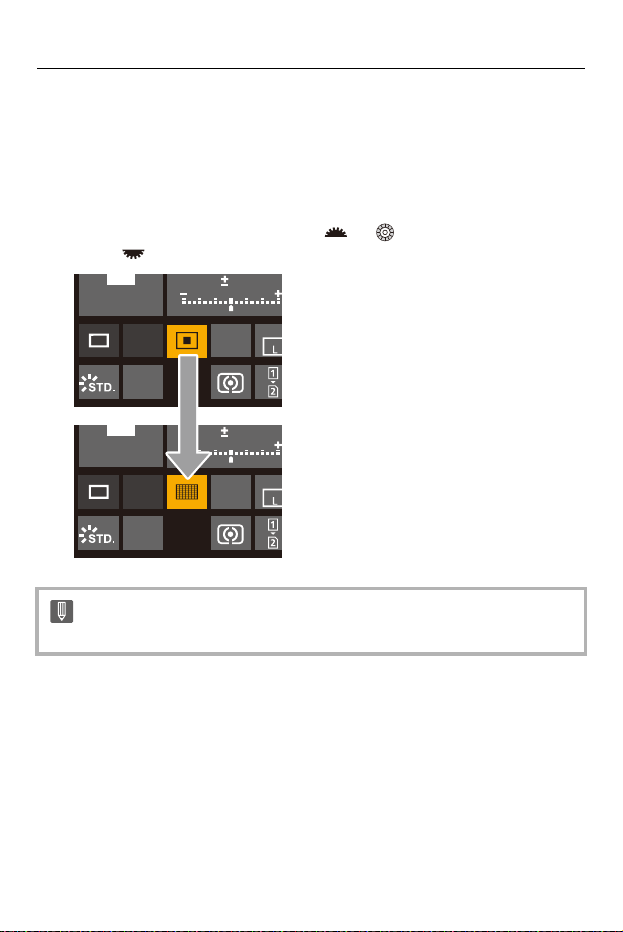
Basic Operations – Control Panel
98
Changing Directly Using the Dial
Steps
2
to
4
can also be changed using the following operations.
1 Press one of 3421 to enable selection of items.
• Selected items are displayed in yellow.
2 Press 3421 to select an item.
• Selection is also possible by rotating or .
3 Rotate to change the settings values.
• Some items cannot be set depending on the recording mode or camera settings.
AWB
ISO
AUTO
0
0
AFS
FINE
4:3
AWB
ISO
AUTO
0
0
AFS
FINE
4:3
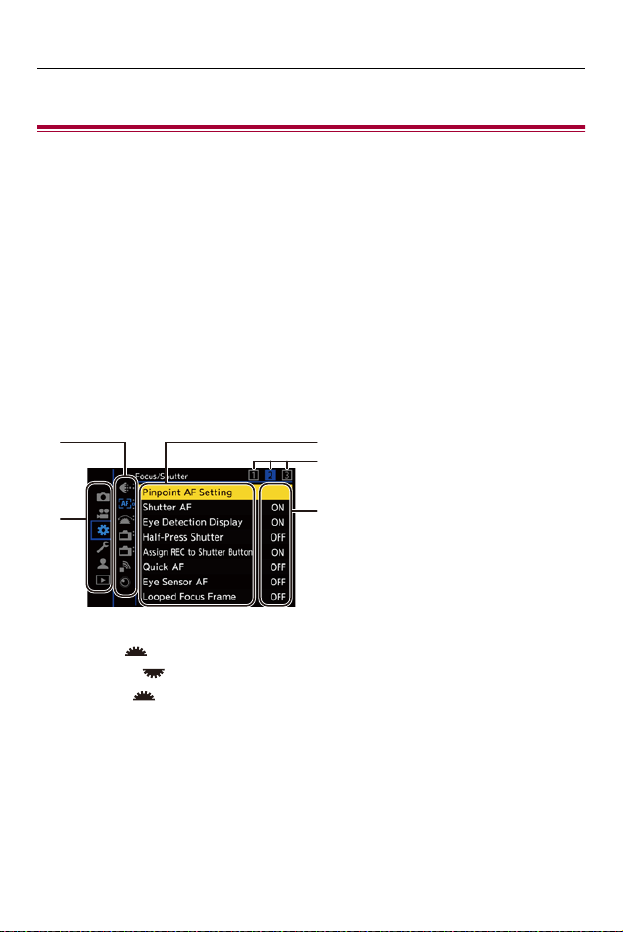
Basic Operations – Menu Operation Methods
99
Menu Operation Methods
≥[Reset]: 104
In this camera, the menu is used for setting a wide variety of functions and
performing camera customizations.
Menu operations can be performed using the cursors, joystick, dial, or by
touch.
Configuration and operation parts of the menu
The menu can be operated by pressing 21 to move between menu screens.
Use the operation parts indicated below to operate the main tab, the sub tab, the page
tab, and menu items without moving to the corresponding menu levels.
• You can also operate by touching the icons, menu items, and setting items.
(A) Main tab ([Q] button)
(B) Sub tab ( )
(C) Menu item ( )
(D) Page tab ( )
(E) Setting item
(C)
(D)
(E)
(A)
(B)
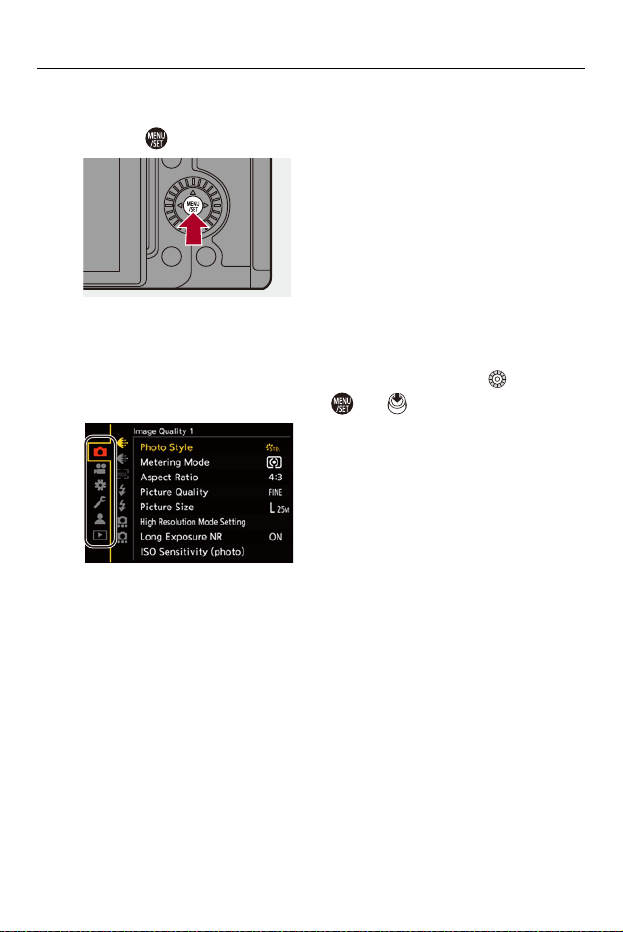
Basic Operations – Menu Operation Methods
100
1
Display the menu.
≥Press .
2
Select a main tab.
≥Press 34 to select a main tab and then press 1.
≥You can also perform the same operation by rotating to select
the main tab and then pressing or .
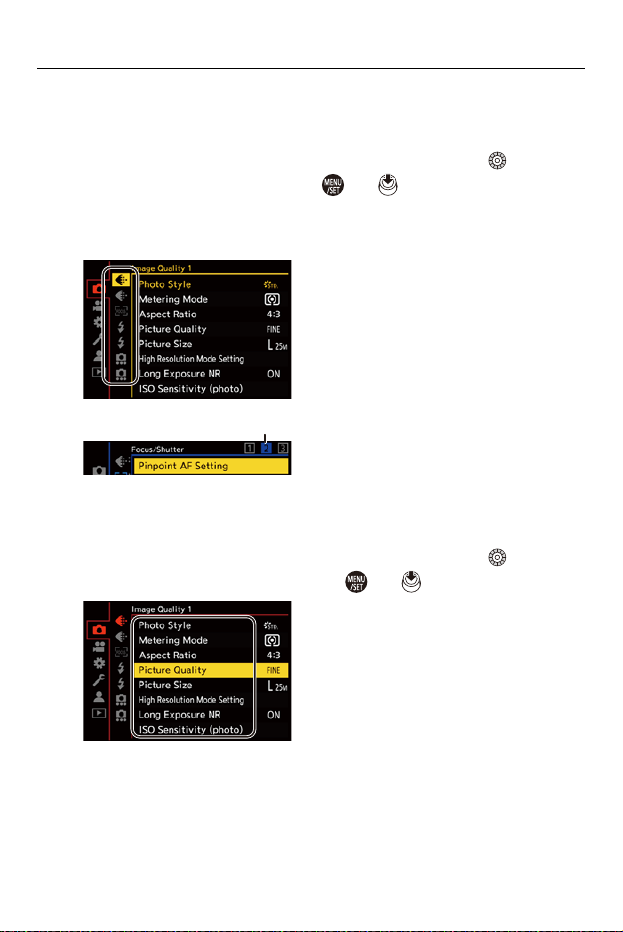
Basic Operations – Menu Operation Methods
101
3
Select a sub tab.
≥Press 34 to select a sub tab and then press 1.
≥You can also perform the same operation by rotating to select
the sub tab and then pressing or .
•
If there are page tabs (D), then after the page tabs have finished switching,
the next sub tab is switched to.
4
Select a menu item.
≥Press 34 to select a menu item and then press 1.
≥You can also perform the same operation by rotating to select
the menu item and then pressing or .
(D)
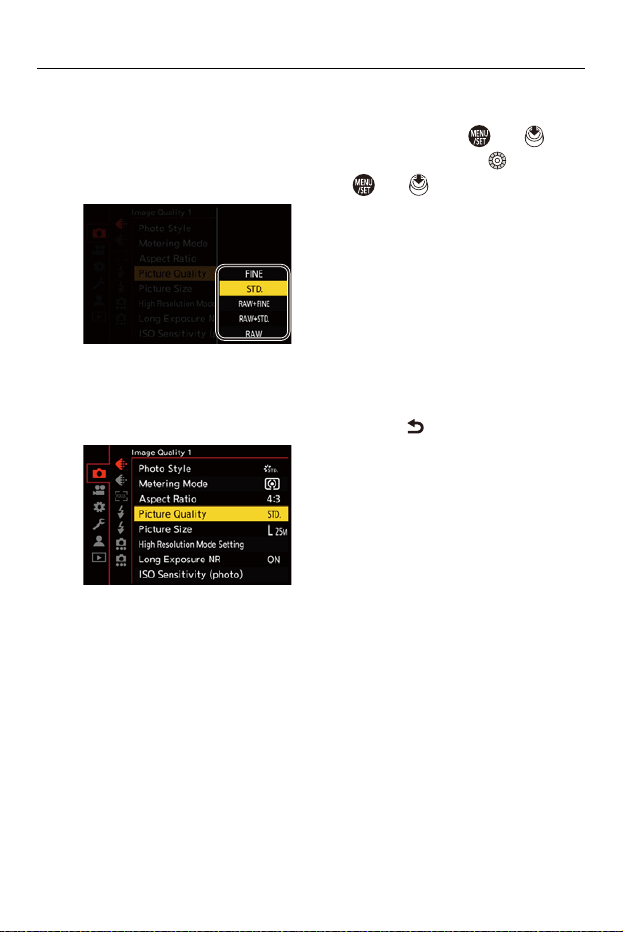
Basic Operations – Menu Operation Methods
102
5
Select a setting item and then confirm your selection.
≥Press 34 to select a setting item and then press or .
≥You can also perform the same operation by rotating to select
the setting item and then pressing or .
6
Close the menu.
≥Press the shutter button halfway.
≥You can also close the menu by pressing [ ] several times.
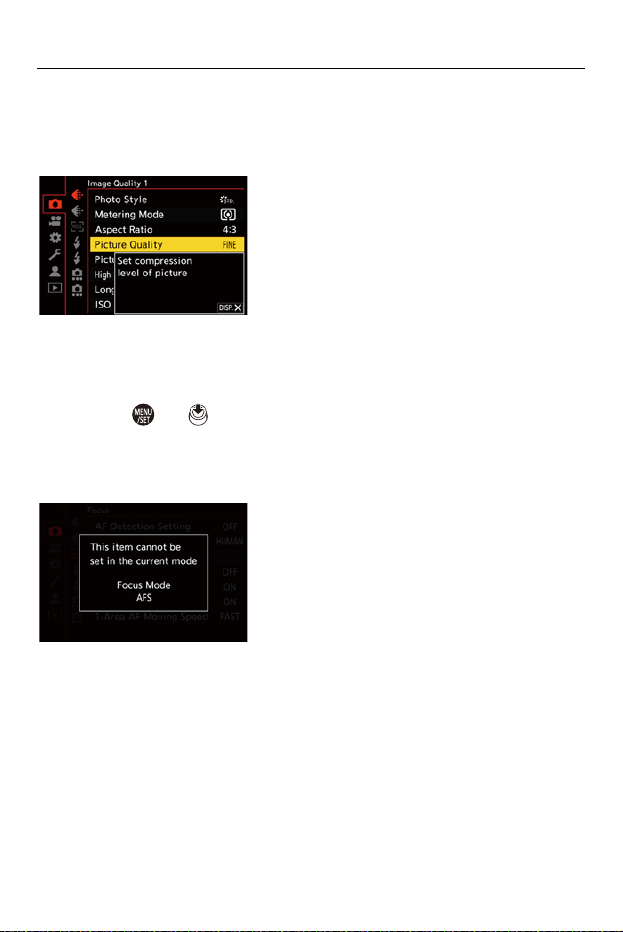
Basic Operations – Menu Operation Methods
103
Displaying Descriptions About Menu Items and Settings
If you press [DISP.] while a menu item or setting item is selected, a
description about the item is displayed on the screen.
Grayed Out Menu Items
Menu items that cannot be set are displayed grayed out.
If you press or while a grayed out menu item is selected, the
reason why it cannot be set is displayed.
•
The reason why a menu item cannot be set may not be displayed depending on the
menu item.
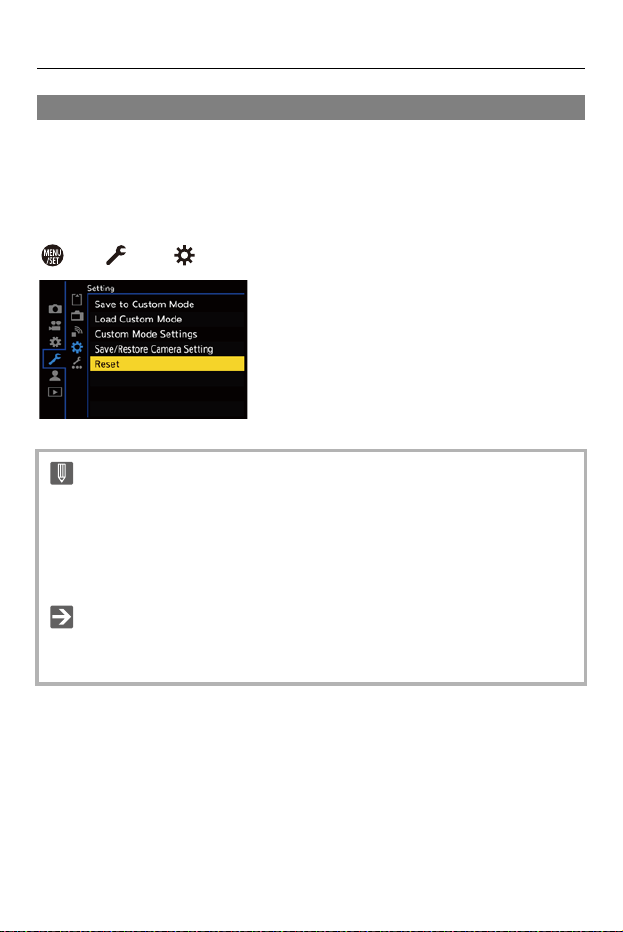
Basic Operations – Menu Operation Methods
104
[Reset]
Return each of the following settings to the default setting:
•
Recording settings
• Network settings (settings of [Wi-Fi Setup] and [Bluetooth])
• Setup and custom settings (other than [Wi-Fi Setup] and [Bluetooth])
¨ [ ] ¨ [ ] ¨ Select [Reset]
• If the setup and custom settings are reset, the [Playback] menu is also reset.
• If the setup and custom settings are reset, [Lens Information] in [Image Stabilizer]
in the [Photo] ([Others (Photo)]) menu/[Video] ([Others (Video)]) menu is also
returned to the default setting.
• The folder numbers and clock settings are not reset.
• List of default settings and settings that can be reset (ÎList of Default Settings/
Custom Saving/Settings Available for Copying: 779)
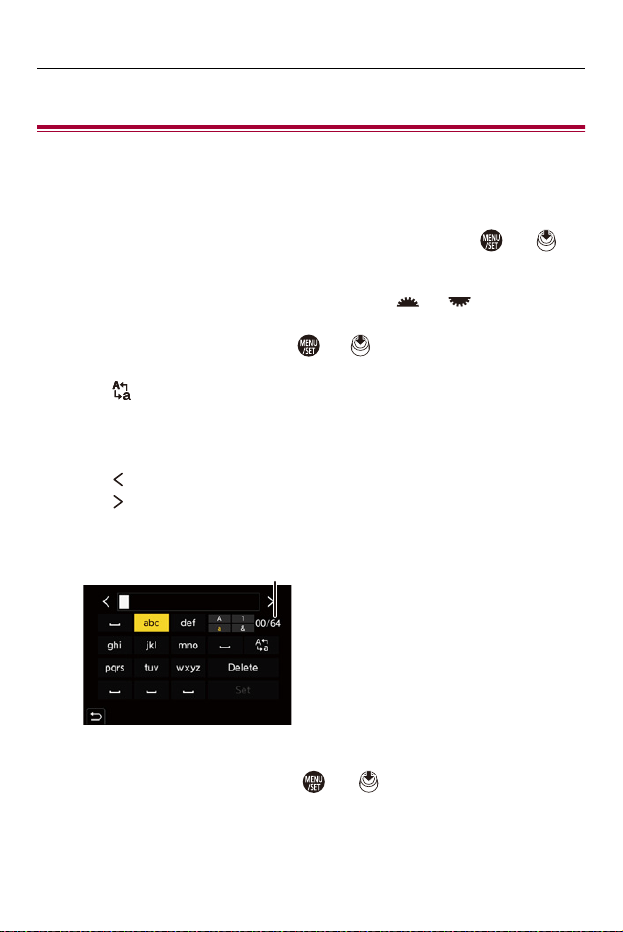
Basic Operations – Entering Characters
105
Entering Characters
Follow the steps below when the character entry screen is displayed.
1
Enter characters.
≥Press 3421 to select characters and then press or
until the character to enter is displayed. (Repeat this)
•
To repeatedly enter the same character, rotate or to the right to
move the entry position cursor.
• If you select an item and press or , you can perform the following
operations:
– [ ]: Change the character type to [A] (upper case characters), [a] (lower
case characters), [1] (numbers), and [&] (special characters)
–[] ]: Enter a blank
– [Delete]: Delete a character
– [ ]: Move the entry position cursor to the left
– [ ]: Move the entry position cursor to the right
• When entering a password, (A) shows the number of characters you have
entered and the number of characters you can enter.
2
Complete entering.
≥Select [Set] and then press or .
(A)
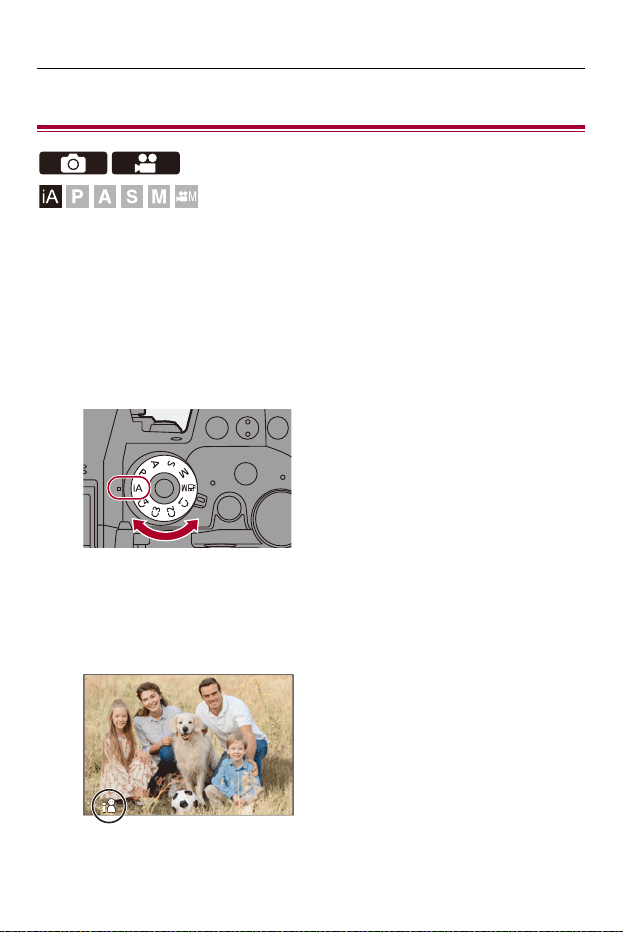
Basic Operations – Intelligent Auto Mode
106
Intelligent Auto Mode
The [iA] mode (Intelligent Auto mode) can record images using settings
automatically selected by the camera.
The camera detects the scene to set the optimal recording settings
automatically to match the subject and recording conditions.
1
Set the recording mode to [iA].
≥Set the mode dial. (ÎSelecting the Recording Mode: 79)
2
Aim the camera at the subject.
≥When the camera detects the scene, the recording mode icon
changes.
(Automatic Scene Detection)
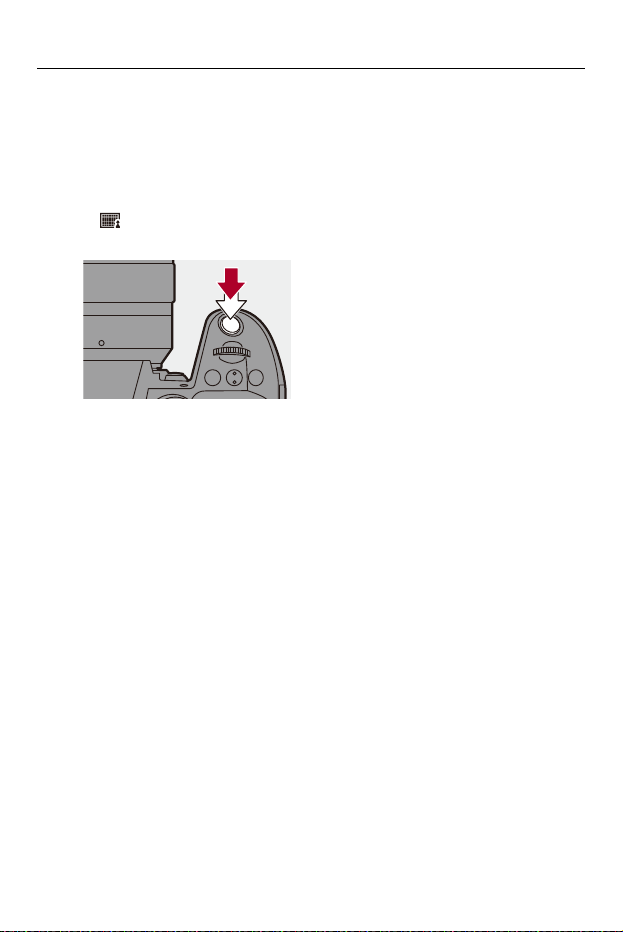
Basic Operations – Intelligent Auto Mode
107
3
Adjust the focus.
≥Press the shutter button halfway.
≥Once the subject is in focus, the focus icon lights.
(When the subject is not in focus, the indication blinks.)
•
[ ] of the AF mode works and the AF area is displayed aligned to any
humans.
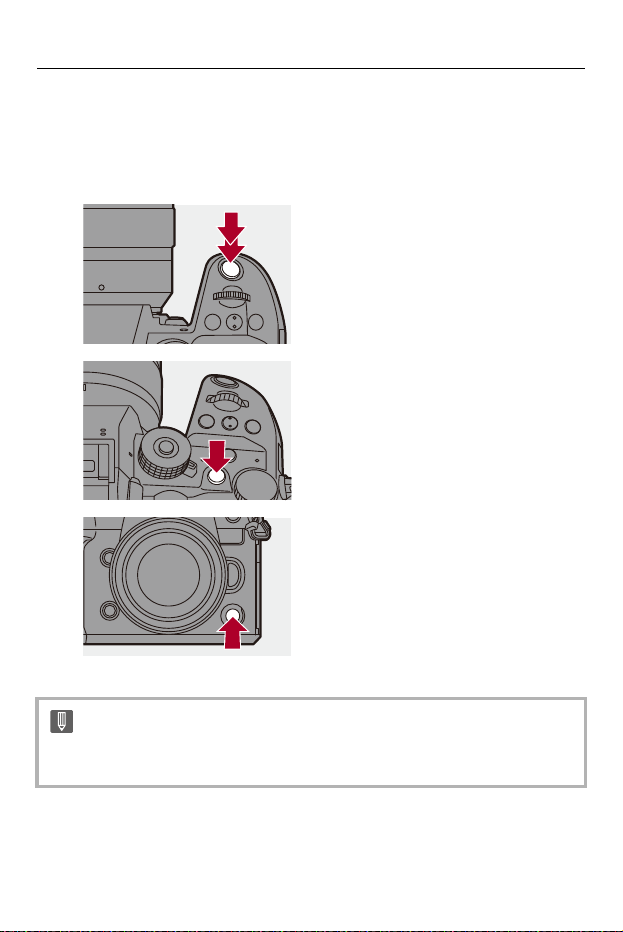
Basic Operations – Intelligent Auto Mode
108
4
Start recording.
≥Press the shutter button fully to take pictures.
≥Press either the video rec. button or the sub video rec. button to
record videos.
•
Backlight compensation operates automatically to prevent subjects from
appearing dark when there is a backlight.
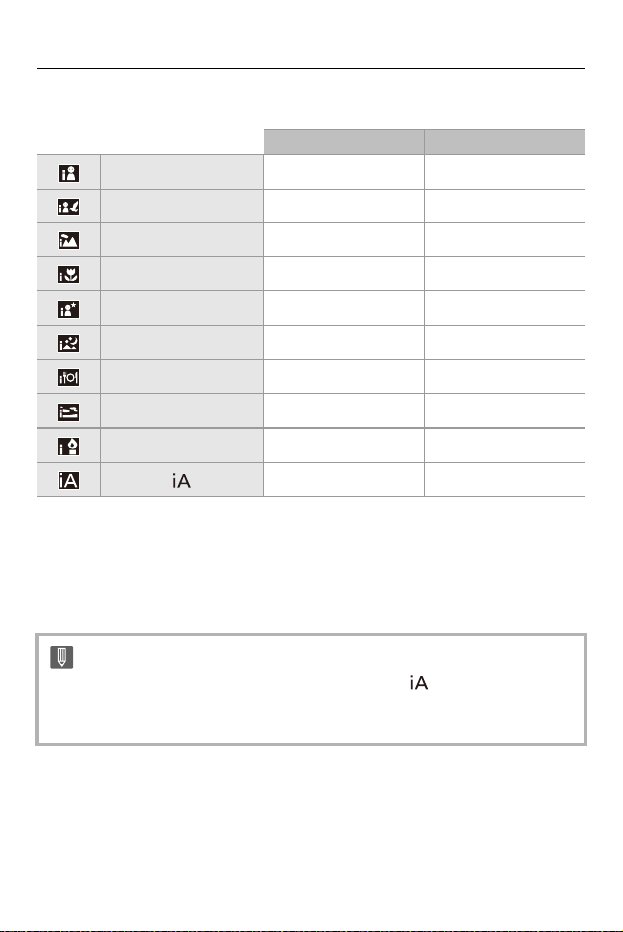
Basic Operations – Intelligent Auto Mode
109
Types of Automatic Scene Detection
*1 Detected when [Detecting Subject] in the [Photo] ([Focus]) menu is set to
[HUMAN] or [FACE/EYE].
*2 Detected when [Detecting Subject] in the [Photo] ([Focus]) menu is set to
[ANIMAL+HUMAN].
*3 Detected when using an external flash.
Taking pictures Recording video
i-Portrait
*1
33
i-Portrait & Animal
*2
33
i-Scenery 33
i-Macro 33
i-Night Portrait
*3
3
i-Night Scenery 3
i-Food 3
i-Sunset 3
i-Low Light 3
33
• If none of the scenes are applicable, recording is with [ ] (standard setting).
• Different scene types may be selected for the same subject depending on the
recording conditions.
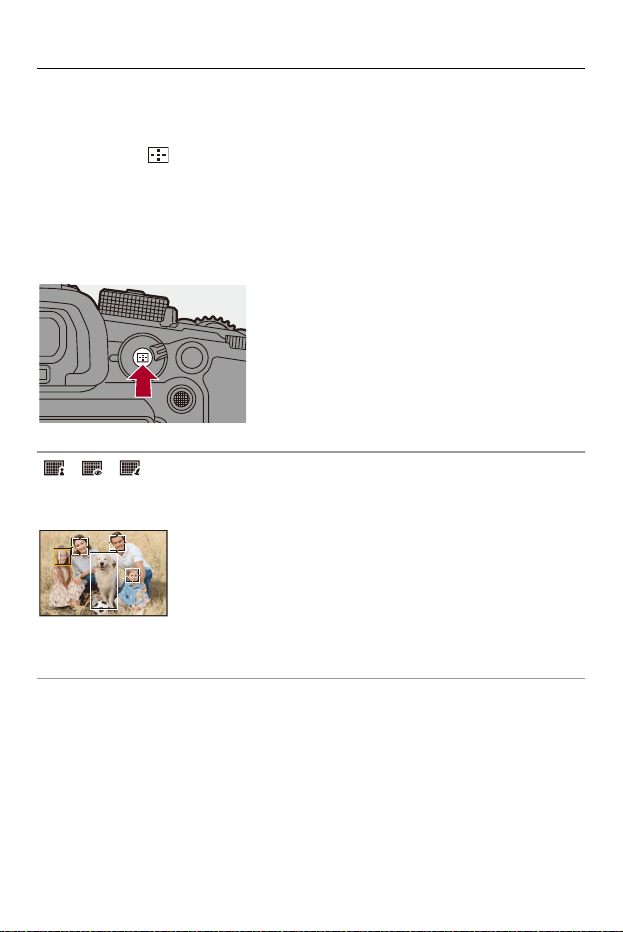
Basic Operations – Intelligent Auto Mode
110
AF Mode
Changing the AF mode.
•
Each press of [ ] changes the AF mode.
• The mode can also be changed by touching the screen or pressing and holding the
joystick.
• [AF Detection Setting] is fixed to [ON].
• The [Detecting Subject] setting is maintained for any recording mode other than [iA]
mode. (ÎAutomatic Detection: 170)
[ ]/[ ]/[ ] ([Full Area AF])
The camera detects a person’s face, eyes, and body (entire body or upper half of the
body) and the body of animals, and adjusts the focus.
• You can switch the human, animal, or eye to be focused by either touching the white
AF area or moving the joystick 3421.
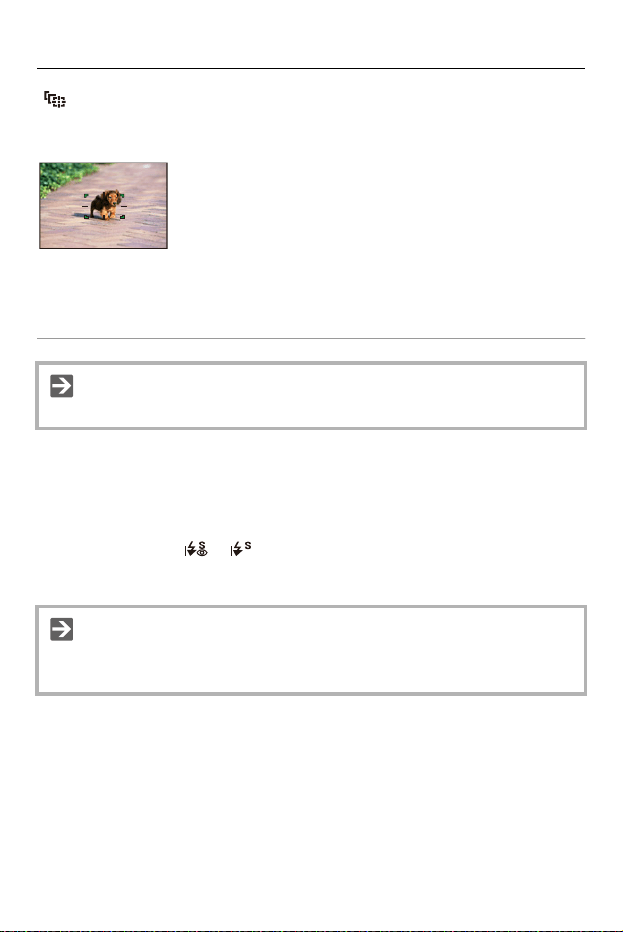
Basic Operations – Intelligent Auto Mode
111
[ ] ([Tracking])
When the focus mode is set to [AFC], the AF area follows the movement of the
subject, maintaining focusing.
Aim the AF area over the subject and then press and hold the shutter button
halfway.
• The camera will track the subject while the shutter button is pressed halfway or fully.
Flash
When recording using a flash, the camera switches to the appropriate flash
mode for the recording conditions.
When Slow Sync. ([ ], [ ]), be careful with regard to camera shake
because the shutter speed becomes slow.
•
For information about AF modes (ÎAutomatic Detection: 170, [Tracking]: 173)
• For information about external flashes (ÎUsing an External Flash (Optional):
324)
Basic Operations – Recording Using Touch Functions
112
Recording Using Touch Functions
≥Touch AF/Touch Shutter: 112
≥Touch AE: 115
Touch AF/Touch Shutter
Touch functions allow you to focus on the point that you touch, release the
shutter, etc.
•
With the default settings, the Touch Tab is not displayed.
Set [Touch Tab] to [ON] in [Touch Settings] in the [Custom] ([Operation]) menu.
(Î[Touch Settings]: 558)
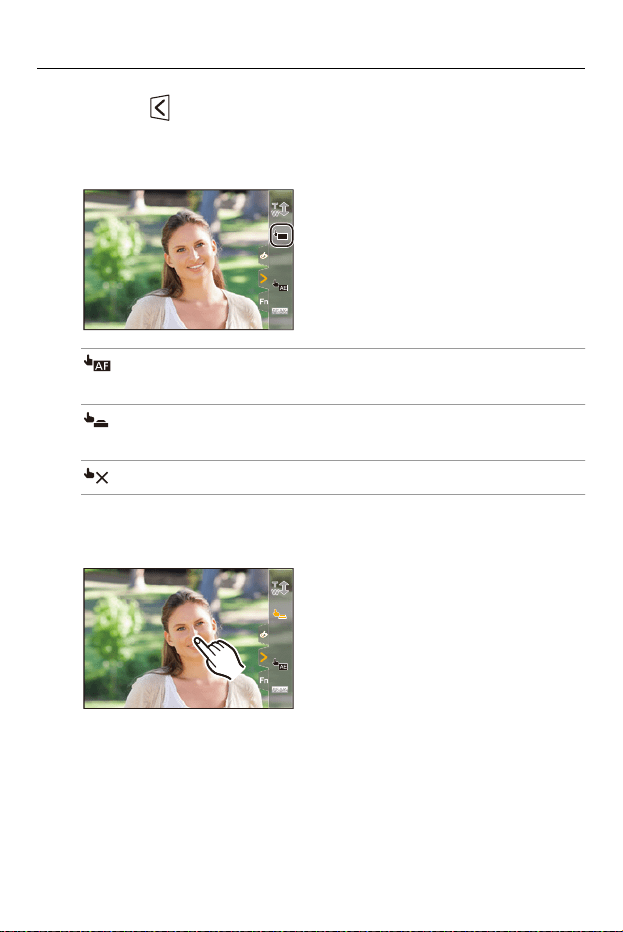
Basic Operations – Recording Using Touch Functions
113
1
Touch [ ].
2
Touch the icon.
≥The icon switches each time you touch it.
(Touch AF)
Focus on the touched position.
(Touch Shutter)
Record with focus on the touched position.
(OFF)
3
(When set to anything other than OFF) Touch the
subject.
AF

Basic Operations – Recording Using Touch Functions
114
• When the Touch Shutter fails, the AF area first turns red and then disappears.
• For information about operations to move the AF area (ÎOperations on the AF
area movement screen: 183)
• It is also possible to optimize the focus and brightness on the touched position:
(ÎMoving the AF Area by Touch: 190)
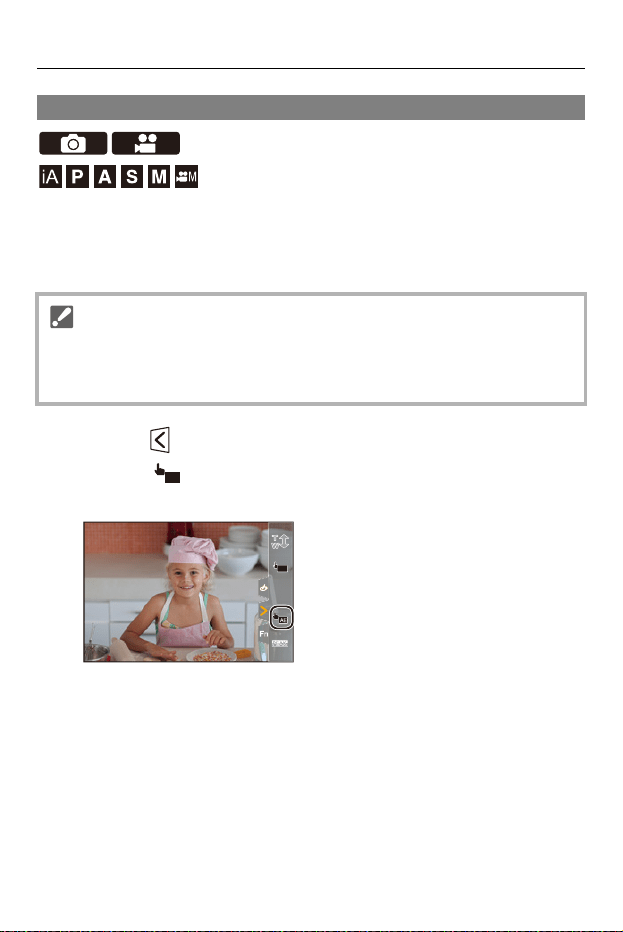
Basic Operations – Recording Using Touch Functions
115
Touch AE
This function adjusts the brightness according to a touched position.
When a subject’s face appears dark, you can make the screen brighter to
match the face.
1
Touch [ ].
2
Touch [ ].
≥The Touch AE settings screen appears.
•
With the default settings, the Touch Tab is not displayed.
Set [Touch Tab] to [ON] in [Touch Settings] in the [Custom] ([Operation]) menu.
(Î[Touch Settings]: 558)
AE
AF
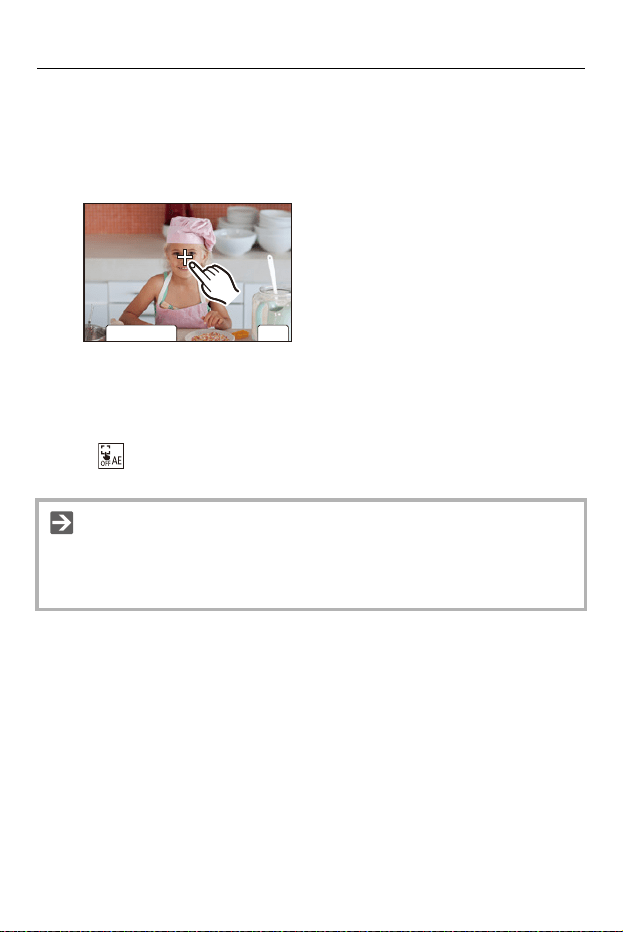
Basic Operations – Recording Using Touch Functions
116
3
Touch the subject to which you wish to adjust the
brightness.
• To return the position to which to adjust the brightness to the center, touch
[Reset].
4
Touch [Set].
How to Disable Touch AE
Touch [ ].
•
You can also adjust both the focus and brightness to those of the position you
touch. (At this time, Touch AE is not available):
(ÎFocus on and Adjust Brightness for the Touched Position ([AF+AE]): 191)
ュリヴヱハ
6HW
5HVHW

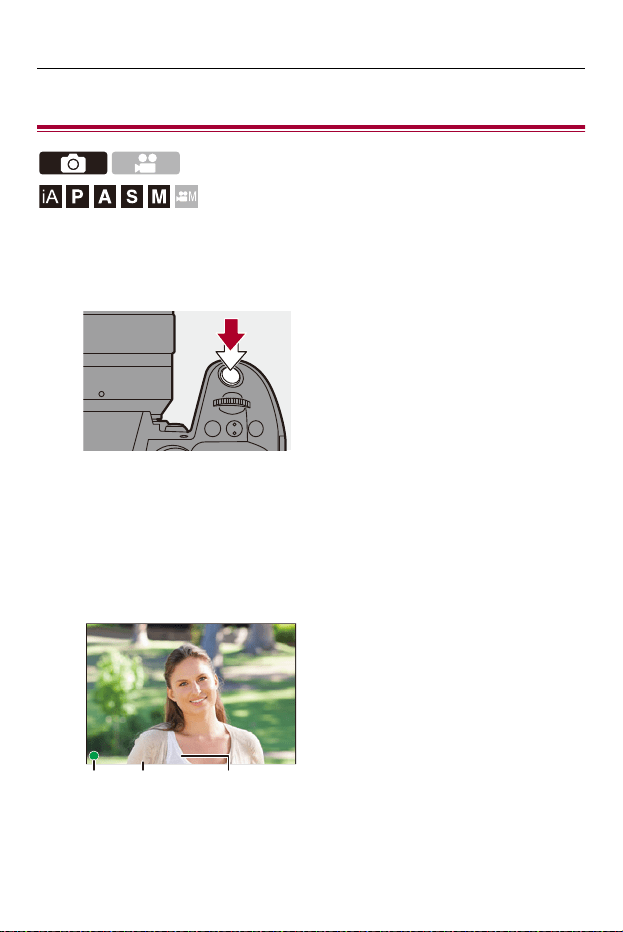
Taking Pictures – Basic Picture Operations
118
Basic Picture Operations
1
Adjust the focus.
≥Press the shutter button halfway (press it gently).
≥The aperture value (A) and shutter speed (B) are displayed.
(When the correct exposure cannot be obtained, the indications
blink in red.)
≥Once the subject is in focus, the focus icon (C) lights.
(When the subject is not in focus, the indication blinks.)
•
You can also perform the same operation by pressing [AF ON].
(C)
F2.8
F2.8
F2.860
60
60
(A)(B)
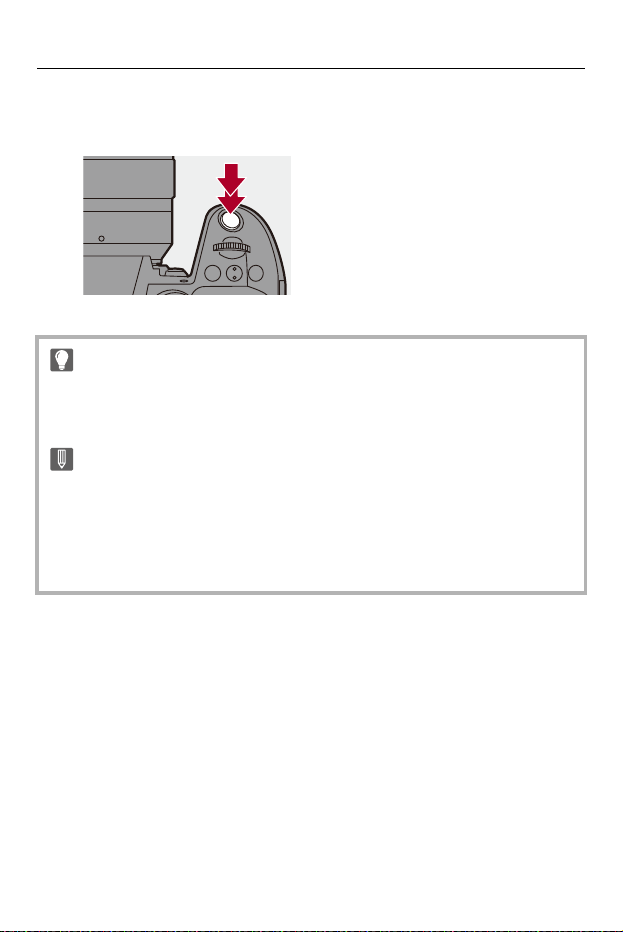
Taking Pictures – Basic Picture Operations
119
2
Start recording.
≥Press the shutter button fully (press it further).
•
Recorded pictures can be displayed automatically by setting [Auto Review] of the
[Custom] ([Monitor / Display (Photo)]) menu. You can also change the picture
display duration to your preferred setting. (Î[Auto Review]: 565)
• With the default settings, you cannot take a picture until the subject is
brought into focus.
If you set [Focus/Shutter Priority] in the [Custom] ([Focus/Shutter]) menu
to [BALANCE] or [RELEASE], you will be able to take a picture even when
the subject is not in focus. (Î[Focus/Shutter Priority]: 552)
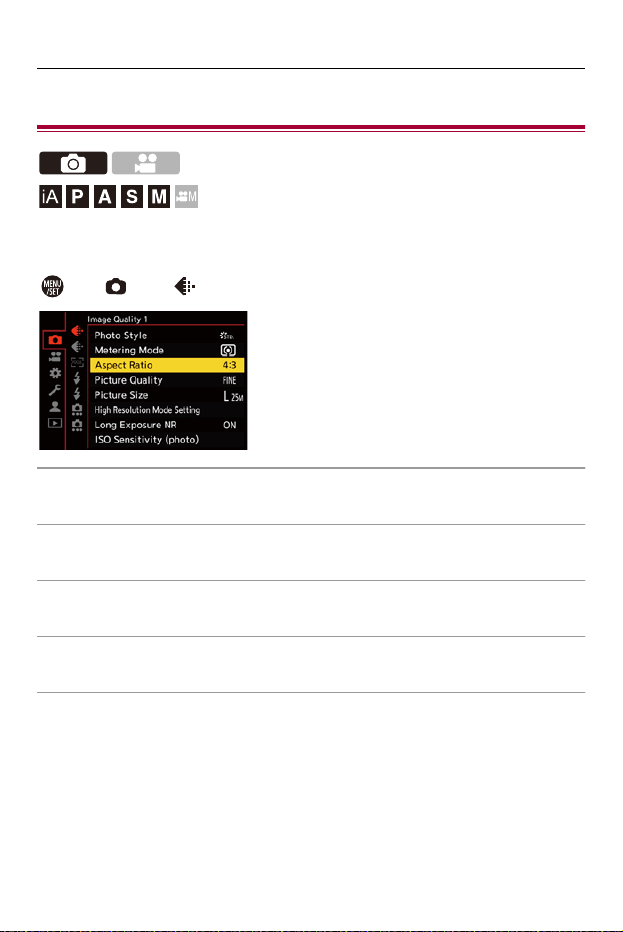
Taking Pictures – [Aspect Ratio]
120
[Aspect Ratio]
You can select the image aspect ratio.
¨ [ ] ¨ [ ] ¨ Select [Aspect Ratio]
[4:3]
Aspect ratio of a 4:3 monitor
[3:2]
Aspect ratio of a standard film camera
[16:9]
Aspect ratio of a 16:9 TV
[1:1]
Square aspect ratio
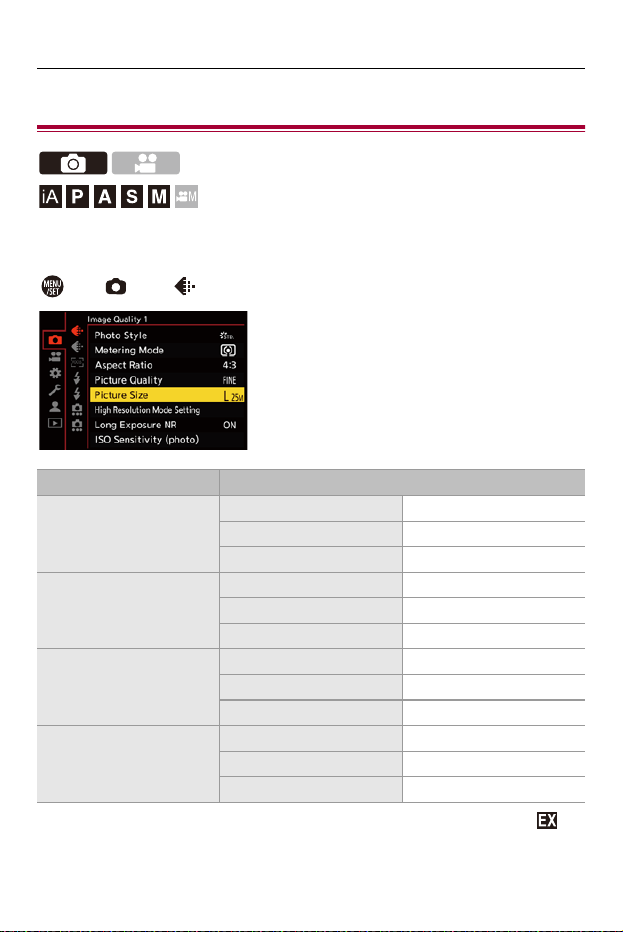
Taking Pictures – [Picture Size]
121
[Picture Size]
Sets the picture’s image size.
¨ [ ] ¨ [ ] ¨ Select [Picture Size]
• When [Ex. Tele Conv.] is set, the [M] and [S] image sizes are indicated with [ ].
[Aspect Ratio] Picture size
[4:3]
[L] (25M) 5776×4336
[M] (12.5M) 4096×3072
[S] (6.5M) 2944×2208
[3:2]
[L] (22M) 5776×3848
[M] (11M) 4096×2728
[S] (5.5M) 2944×1960
[16:9]
[L] (18.5M) 5776×3248
[M] (9.5M) 4096×2304
[S] (5M) 2944×1656
[1:1]
[L] (19M) 4336×4336
[M] (9.5M) 3072×3072
[S] (5M) 2208×2208

Taking Pictures – [Picture Size]
122
• When the following functions are being used, [Picture Size] is not available:
– [RAW] ([Picture Quality])
– High Resolution mode
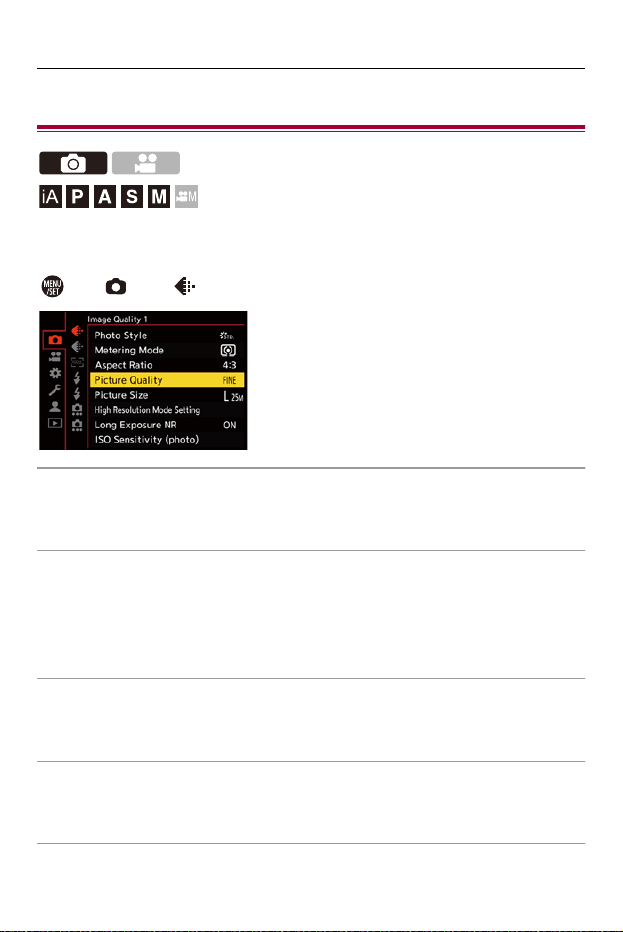
Taking Pictures – [Picture Quality]
123
[Picture Quality]
Set the compression rate used for storing pictures.
¨ [ ] ¨ [ ] ¨ Select [Picture Quality]
[FINE]
JPEG images that give priority to image quality.
File format: JPEG
[STD.]
JPEG images of standard image quality.
This is useful for increasing the number of recordable pictures without changing the
picture size.
File format: JPEG
[RAW+FINE]/[RAW+STD.]
This records RAW and JPEG images ([FINE] or [STD.]) simultaneously.
File format: RAW+JPEG
[RAW]
This records RAW images.
File format: RAW
Taking Pictures – [Picture Quality]
124
Note on RAW
RAW format refers to a data format of images that have not been processed on the
camera.
Playback and editing of RAW images require the camera or the dedicated
software.
• You can process RAW images on the camera. (Î[RAW Processing]: 496)
• Use software (“SILKYPIX Developer Studio” by Ichikawa Soft Laboratory) to
process and edit RAW files on a PC. (ÎSILKYPIX Developer Studio SE: 691)
• RAW images are always recorded in the [L] size of the [4:3] aspect ratio.
• When you delete an image recorded with [RAW+FINE] or [RAW+STD.] on the
camera, both the RAW and JPEG images will be deleted simultaneously.
• When the following function is being used, [Picture Quality] is not available:
– High Resolution mode
• You can assign the function that records a RAW image and a JPEG image
simultaneously once only to an Fn button:
(Î[1 Shot RAW+JPG]: 523)
• Selects a Color Space setting from [sRGB] or [AdobeRGB]:
(Î[Color Space]: 550)

125
Recording Videos
These are the basic operations and settings for recording videos.
•
Please also refer to the following chapters for more detailed information about
recording videos:
– Video Settings: 344
– Special Video Recording: 414
– HDMI Output (Video): 457
≥Basic Video Operations: 126
≥[System Frequency]: 132
≥[Rec. File Format]: 134
≥[Rec Quality]: 136
≥[Image Area of Video]: 150
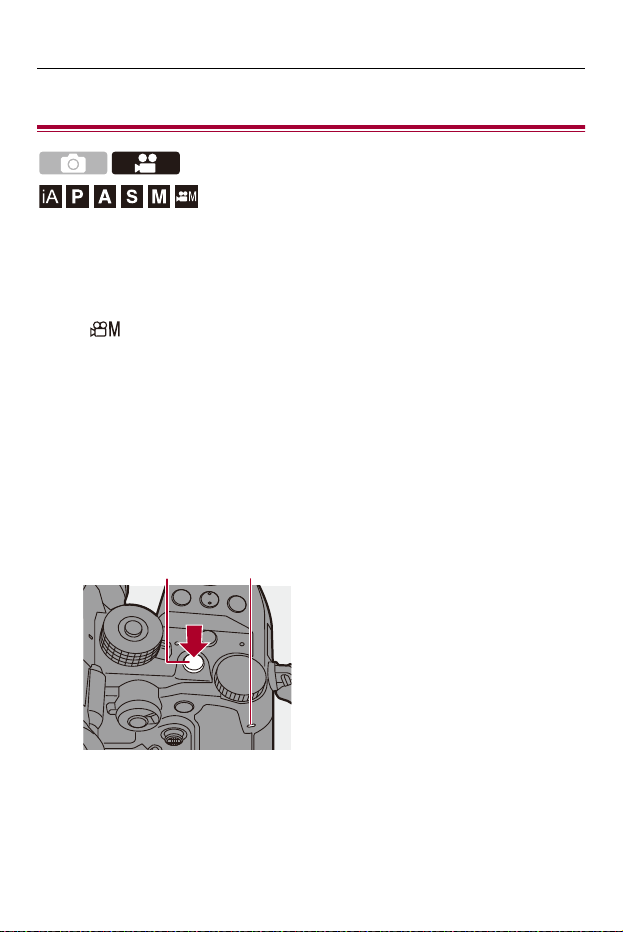
Recording Videos – Basic Video Operations
126
Basic Video Operations
It is possible to record video with a maximum resolution of 5.8K
(5760×4320) on this camera.
It also supports switching of the system frequency and 3 types of recording
file format; MP4, MOV, and Apple ProRes.
In the [ ] mode (Creative Video mode), which is specifically for video
recording, you can use all of the video functions.
1
Start recording.
≥Press the video rec. button (A).
≥You can also perform the same operation by pressing the sub
video rec. button (B).
•
Release the video rec. button right after you press it.
• During video recording, the front tally lamp (C) and rear tally lamp (D) light.
(A) (D)
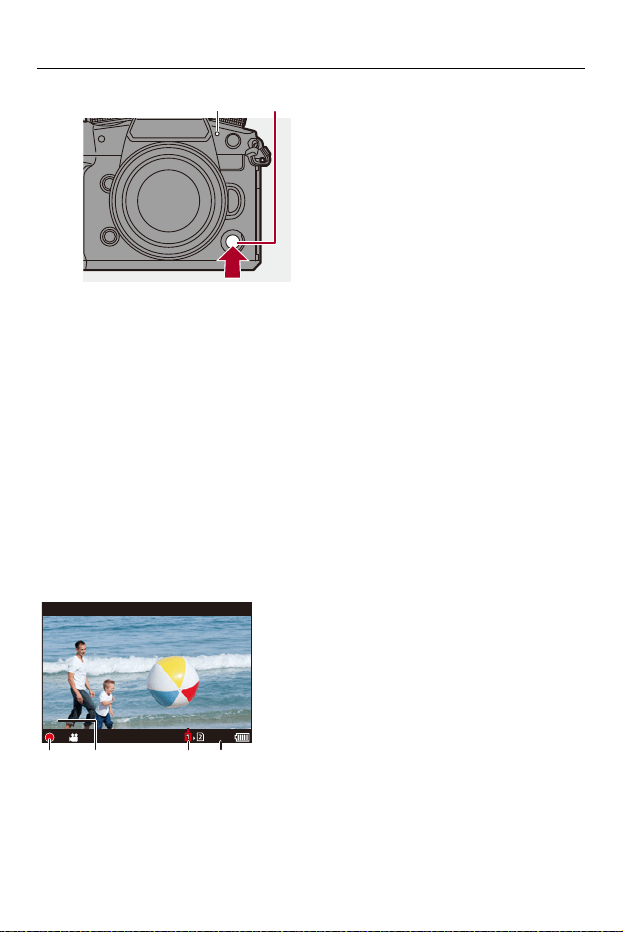
Recording Videos – Basic Video Operations
127
2
Stop recording.
≥Press the video rec. button (A) again.
≥You can also perform the same operation by pressing the sub
video rec. button (B).
Screen Displays While Video Recording
The live view angle of view changes to the angle of view for video
recording, and video recording time (E) and elapsed recording time (F) are
displayed.
•
“h” is an abbreviation for hour, “m” for minute and “s” for second.
• The recording state indication (G) and card access indication (H) turn red while
videos are being recorded.
(C) (B)
24
m
59
s
24
m
59
s
24
m
59
s
3
s
3
s
3
s
(G) (F) (H) (E)
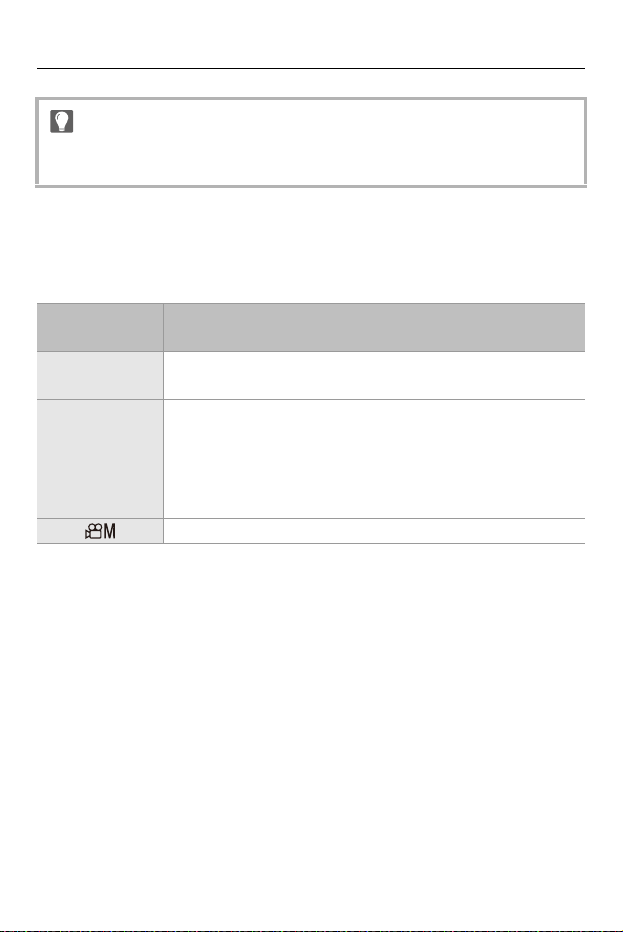
Recording Videos – Basic Video Operations
128
Exposure Control While Video Recording
Videos will be recorded using the aperture value, shutter speed, and ISO
sensitivity settings below.
•
If maintaining focus on the subject is difficult during video recording with AF,
press the shutter button halfway to re-adjust the focus.
Recording
mode
Aperture value/shutter speed/ISO sensitivity
[iA]
The camera automatically makes the settings to suit the scene.
(ÎTypes of Automatic Scene Detection: 109)
[P]/[A]/[S]/[M]
The settings vary depending on the [Auto Exposure in P/A/S/M]
in the [Custom] ([Image Quality]) menu. The default setting is
[ON]. (Î[Auto Exposure in P/A/S/M]: 550)
[ON]: Records with values set automatically by the camera.
[OFF]: Records with the values set in the [P]/[A]/[S]/[M] modes.
[] Records with manually set values.
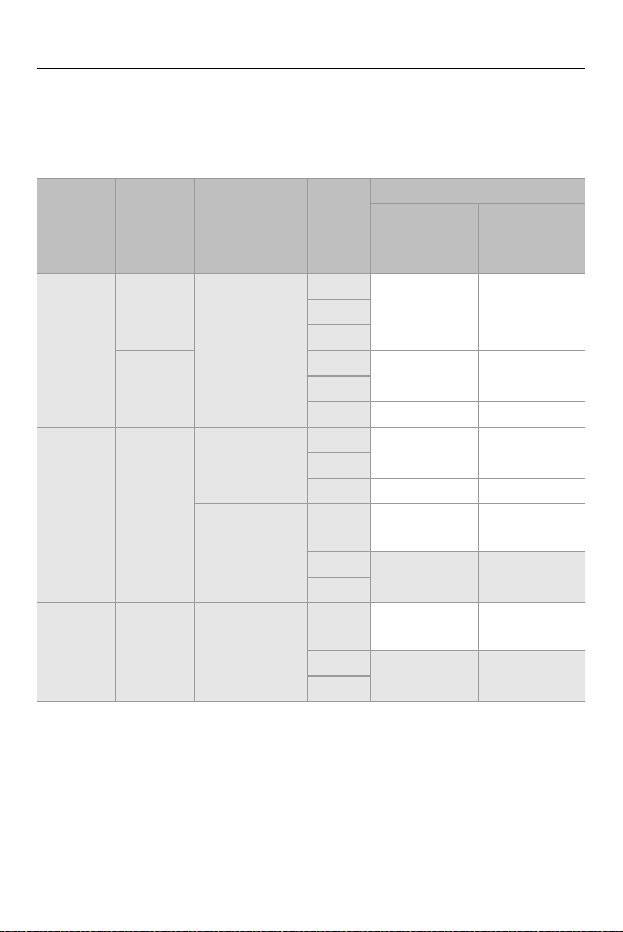
Recording Videos – Basic Video Operations
129
Size Interval for Dividing Files
A new file will be created to continue recording if the continuous recording
time or the file size exceeds the following conditions.
(A) Using a CFexpress card
(B) Using an SDXC memory card
(C) Using an SDHC memory card
[Rec. File
Format]
[Rec
Quality]
Bit rate
Card
used
File division
Continuous
recording
time
File size
[MP4]
[FHD]
All
(A)
30 minutes 4 GB
(B)
(C)
[4K]
(A)
3 hours
4 minutes
96 GB
(B)
(C) 30 minutes 4 GB
[MOV] All
600 Mbps or
less
(A)
3 hours
4 minutes
192 GB
(B)
(C) 30 minutes 4 GB
800 Mbps or
more
(A)
3 hours
4 minutes
640 GB
(B)
(C)
[Apple
ProRes]
[5.7K] All
(A)
3 hours
4 minutes
640 GB
(B)
(C)

Recording Videos – Basic Video Operations
130
• When the remaining capacity of the battery or card gets low during video
recording, the tally lamps blink at long intervals. When there is no remaining
capacity in the battery or card, video recording is stopped and the tally lamps
blink at short intervals.
• If an operation such as a zoom or button operation is performed during video
recording, that operation sound may be recorded.
• The lens operation sound (AF and image stabilizer) may be recorded to video.
• If the operation sound of pressing the video rec. button or sub video rec. button to
end recording bothers you, try the following:
– Record the video about 3 seconds longer, and then divide the last part of the
video using [Video Divide] in the [Playback] ([Edit Image]) menu.
– Use the Shutter Remote Control (DMW-RS2: optional) for recording.
• Depending on the type of card, the card access indication may appear for a while
after video recording. This is not a malfunction.
• Even when playback is performed on a supported device, situations may occur
where image or sound quality is poor, recording information is not displayed
correctly, or playback is not possible, for example.
If you experience any of these, play them back on the camera.
• Video recording is not possible while you are using the following functions:
– [Time Lapse Shot]
– [Stop Motion Animation]
• For information about the high temperature display
When the temperature of the camera or card rises, [ ] appears blinking on the
screen. If you continue to use the camera, a message indicating that the camera
or card cannot be used is displayed on the screen and recording and HDMI
output will be stopped. Wait for the camera or card to cool down and for the
message indicating that they can be used again. When the message indicating
that they can be used again is displayed, turn the camera off then on again.

Recording Videos – Basic Video Operations
131
• You can set the temperature during video recording at which the camera
automatically stops recording:
(Î[Thermal Management]: 595)
• You can switch the recording screen display to suit video recording just as with
the [ ] mode:
(Î[Video-Priority Display]: 578)
• You can set whether to have the tally lamps light or turn off. You can also change
the brightness of the tally lamps:
(Î[Tally Lamp]: 580)
• You can display a red frame on the recording screen that indicates that video is
being recorded:
(Î[Red REC Frame Indicator]: 578)
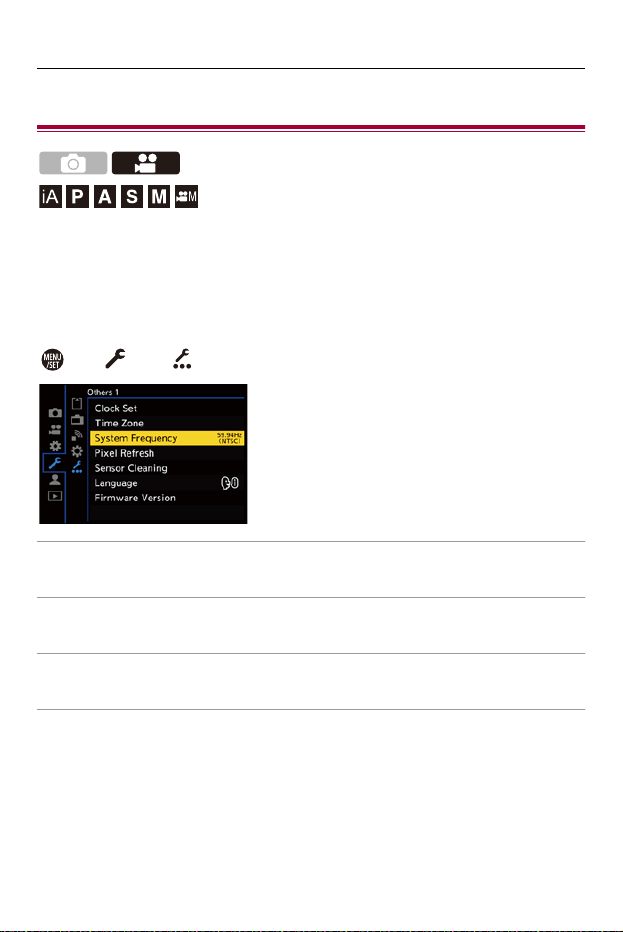
Recording Videos – [System Frequency]
132
[System Frequency]
This changes the system frequency of videos that are recorded and played
back with the camera.
The default setting is for the system frequency to be set to the TV
broadcast system for the region where the camera was purchased.
¨ [ ] ¨ [ ] ¨ Select [System Frequency]
[59.94Hz (NTSC)]
System frequency for regions using the NTSC broadcasting system
[50.00Hz (PAL)]
System frequency for regions using the PAL broadcasting system
[24.00Hz (CINEMA)]
System frequency for producing cinema film

Recording Videos – [System Frequency]
133
• After changing the setting, turn the camera off and on.
• If you record using a system frequency that differs from the broadcasting system
of your region, it may not be possible for you to properly play back videos on your
TV.
We recommend using the setting as it was at the time of purchase if you are
unsure about broadcasting systems or if you will not be involved in producing
cinema film.
• After changing the setting, it is recommended to insert another card and format it
with this camera.
– Make the [System Frequency] setting the same for when you are recording and
playing back.
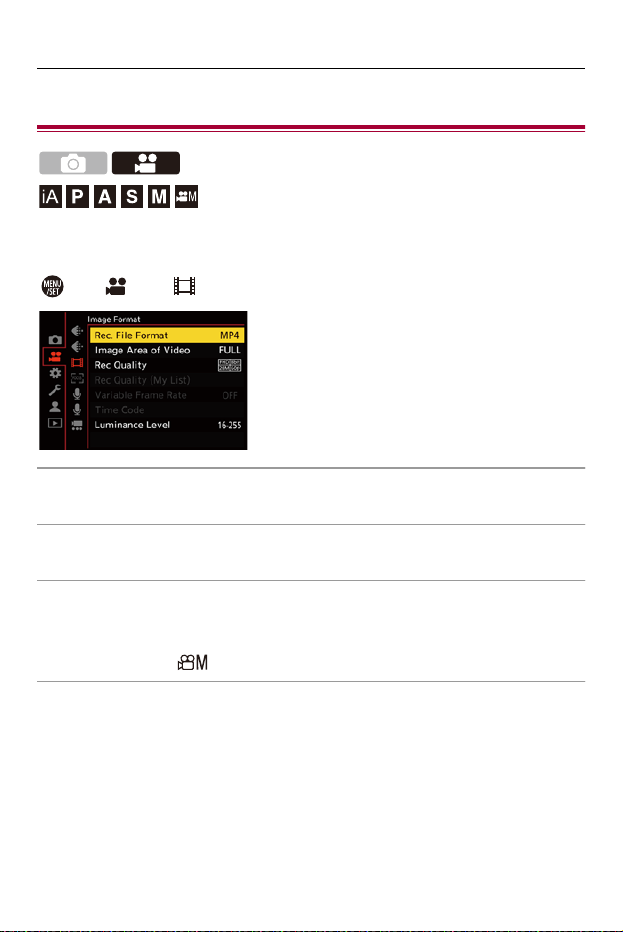
Recording Videos – [Rec. File Format]
134
[Rec. File Format]
Sets the recording file format of videos to be recorded.
¨ [ ] ¨ [ ] ¨ Select [Rec. File Format]
[MP4]
This file format is suitable for playback on PCs.
[MOV]
This file format is suitable for image editing.
[Apple ProRes]
Records using the Apple ProRes codec.
This file format is suitable for image editing.
• This is available in [ ] mode.

Recording Videos – [Rec. File Format]
135
• The following types of video cannot be recorded to SD cards. Use CFexpress
cards.
– [MOV] video with bit rate of 800 Mbps or more
– [Apple ProRes] video with resolution of 4K or more
– Variable frame rate video with a recording quality with image compression
mode ALL-Intra
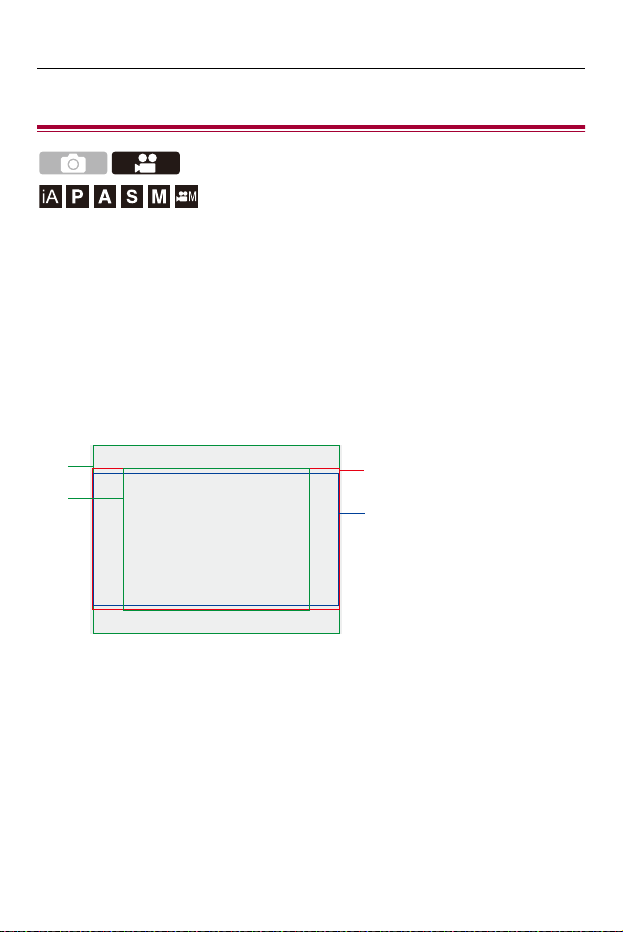
Recording Videos – [Rec Quality]
136
[Rec Quality]
Sets the image quality of videos to be recorded.
The image qualities you can select depend on the recording mode,
[System Frequency], and [Rec. File Format] settings.
The [Image Area of Video] setting items you can select depend on the [Rec
Quality] settings.
[Rec Quality] settings can also be made using [Filtering] (Î[Filtering]: 147)
to display only items that meet your conditions and [add to list] (Î[add to
list]: 148) to register recording qualities you use often.
•
The above shows some of the recording qualities available.
[16:9]
4K, FHD
[17:9]
5.7K,
C4K
4.4K
5.8K
[4:3]
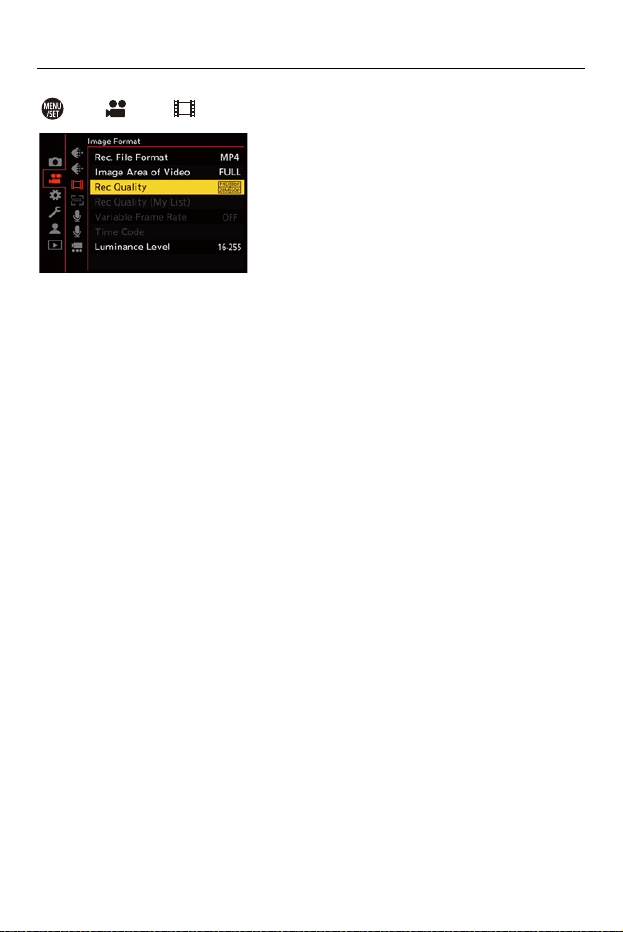
Recording Videos – [Rec Quality]
137
¨ [ ] ¨ [ ] ¨ Select [Rec Quality]
• To record video with a bit rate of 72 Mbps or more, you require an SD card with the
corresponding Speed Class.
• Video with a bit rate of 800 Mbps or more cannot be recorded to an SD card. Use a
CFexpress card.
• [Apple ProRes] video with a resolution of 4K or more cannot be recorded to an SD
card. Use a CFexpress card.
• For information about the cards that can be used (ÎSD Cards That Can Be Used
with This Camera: 25)
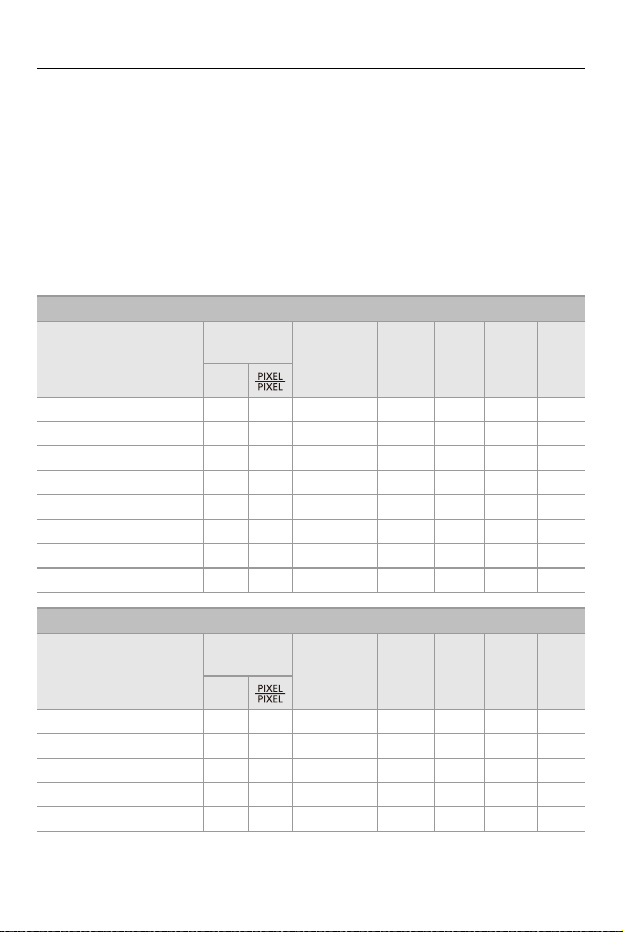
Recording Videos – [Rec Quality]
138
[Rec. File Format]: [MP4]
• YUV, Bit value, Image compression:
– [10bit] recording quality: 4:2:0, 10 bit, Long GOP
– [8bit] recording quality: 4:2:0, 8 bit, Long GOP
• Audio format: AAC (2ch)
(A) Recording frame rate
(B) Bit rate (Mbps)
(C) Video compression format (HEVC: H.265/HEVC, AVC: H.264/MPEG-4 AVC)
[System Frequency]: [59.94Hz (NTSC)]
[Rec Quality]
[Image Area
of Video]
Resolution
Aspect
ratio
(A) (B) (C)
FULL
[4K/10bit/100M/60p] 333840×2160 16:9 59.94p 100 HEVC
[4K/10bit/72M/30p] 333840×2160 16:9 29.97p 72 HEVC
[4K/8bit/100M/30p] 333840×2160 16:9 29.97p 100 AVC
[4K/10bit/72M/24p] 333840×2160 16:9 23.98p 72 HEVC
[4K/8bit/100M/24p] 333840×2160 16:9 23.98p 100 AVC
[FHD/8bit/28M/60p] 331920×1080 16:9 59.94p 28 AVC
[FHD/8bit/20M/30p] 331920×1080 16:9 29.97p 20 AVC
[FHD/8bit/24M/24p] 331920×1080 16:9 23.98p 24 AVC
[System Frequency]: [50.00Hz (PAL)]
[Rec Quality]
[Image Area
of Video]
Resolution
Aspect
ratio
(A) (B) (C)
FULL
[4K/10bit/100M/50p] 333840×2160 16:9 50.00p 100 HEVC
[4K/10bit/72M/25p] 333840×2160 16:9 25.00p 72 HEVC
[4K/8bit/100M/25p] 333840×2160 16:9 25.00p 100 AVC
[FHD/8bit/28M/50p] 331920×1080 16:9 50.00p 28 AVC
[FHD/8bit/20M/25p] 331920×1080 16:9 25.00p 20 AVC
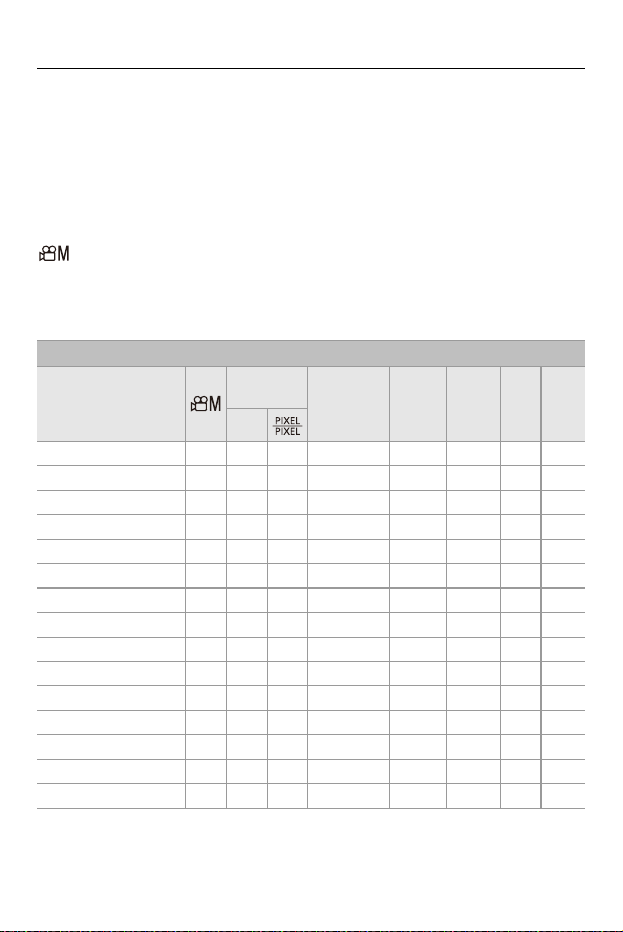
Recording Videos – [Rec Quality]
139
[Rec. File Format]: [MOV]
• YUV, Bit value, Image compression:
– [422/10-I] recording quality: 4:2:2, 10 bit, ALL-Intra
– [422/10-L] recording quality: 4:2:2, 10 bit, Long GOP
– [420/10-L] recording quality: 4:2:0, 10 bit, Long GOP
• Audio format: LPCM (4ch)
*1
: Available in Creative Video mode.
(A) Recording frame rate
(B) Bit rate (Mbps)
(C) Video compression format (HEVC: H.265/HEVC, AVC: H.264/MPEG-4 AVC)
[System Frequency]: [59.94Hz (NTSC)]
[Rec Quality]
[Image Area
of Video]
Resolution
Aspect
ratio
(A) (B) (C)
FULL
[5.8K/30p/420/10-L] 33 5760×4320 4:3 29.97p 200 HEVC
[5.8K/24p/420/10-L] 33 5760×4320 4:3 23.98p 200 HEVC
[5.7K/60p/420/10-L] 33 5728×3024 17:9 59.94p 300 HEVC
[5.7K/48p/420/10-L] 33 5728×3024 17:9 47.95p 300 HEVC
[5.7K/30p/420/10-L] 33 5728×3024 17:9 29.97p 200 HEVC
[5.7K/24p/420/10-L] 33 5728×3024 17:9 23.98p 200 HEVC
[4.4K/60p/420/10-L] 33 4352×3264 4:3 59.94p 300 HEVC
[4.4K/48p/420/10-L] 33 4352×3264 4:3 47.95p 300 HEVC
[C4K/120p/420/10-L] 3334096×2160 17:9 119.88p 300 HEVC
[C4K/60p/422/10-I(H)]
*
2
334096×2160 17:9 59.94p 800 AVC
[C4K/60p/422/10-I(L)]
*
2
334096×2160 17:9 59.94p 600 AVC
[C4K/60p/422/10-L] 334096×2160 17:9 59.94p 200 AVC
[C4K/60p/420/10-L] 334096×2160 17:9 59.94p 200 HEVC
[C4K/48p/422/10-I(H)]
*
2
334096×2160 17:9 47.95p 800 AVC
[C4K/48p/422/10-I(L)]
*
2
334096×2160 17:9 47.95p 600 AVC

Recording Videos – [Rec Quality]
140
[C4K/48p/422/10-L] 334096×2160 17:9 47.95p 200 AVC
[C4K/48p/420/10-L] 334096×2160 17:9 47.95p 200 HEVC
[C4K/30p/422/10-I] 334096×2160 17:9 29.97p 400 AVC
[C4K/30p/422/10-L] 334096×2160 17:9 29.97p 150 AVC
[C4K/30p/420/10-L] 334096×2160 17:9 29.97p 150 HEVC
[C4K/24p/422/10-I] 334096×2160 17:9 23.98p 400 AVC
[C4K/24p/422/10-L] 334096×2160 17:9 23.98p 150 AVC
[C4K/24p/420/10-L] 334096×2160 17:9 23.98p 150 HEVC
[4K/120p/420/10-L] 3333840×2160 16:9 119.88p 300 HEVC
[4K/60p/422/10-I(H)]
*
2
333840×2160 16:9 59.94p 800 AVC
[4K/60p/422/10-I(L)]
*
2
333840×2160 16:9 59.94p 600 AVC
[4K/60p/422/10-L] 333840×2160 16:9 59.94p 200 AVC
[4K/60p/420/10-L] 333840×2160 16:9 59.94p 200 HEVC
[4K/48p/422/10-I(H)]
*
2
333840×2160 16:9 47.95p 800 AVC
[4K/48p/422/10-I(L)]
*
2
333840×2160 16:9 47.95p 600 AVC
[4K/48p/422/10-L] 333840×2160 16:9 47.95p 200 AVC
[4K/48p/420/10-L] 333840×2160 16:9 47.95p 200 HEVC
[4K/30p/422/10-I] 333840×2160 16:9 29.97p 400 AVC
[4K/30p/422/10-L] 333840×2160 16:9 29.97p 150 AVC
[4K/30p/420/10-L] 333840×2160 16:9 29.97p 150 HEVC
[4K/24p/422/10-I] 333840×2160 16:9 23.98p 400 AVC
[4K/24p/422/10-L] 333840×2160 16:9 23.98p 150 AVC
[4K/24p/420/10-L] 333840×2160 16:9 23.98p 150 HEVC

Recording Videos – [Rec Quality]
141
[FHD/240p/422/10-I] 33 1920×1080 16:9 239.76p 800 AVC
[FHD/240p/422/10-L] 33 1920×1080 16:9 239.76p 200 AVC
[FHD/240p/420/10-L] 33 1920×1080 16:9 239.76p 200 HEVC
[FHD/120p/422/10-I] 3331920×1080 16:9 119.88p 400 AVC
[FHD/120p/422/10-L] 3331920×1080 16:9 119.88p 150 AVC
[FHD/120p/420/10-L] 3331920×1080 16:9 119.88p 150 HEVC
[FHD/60p/422/10-I] 331920×1080 16:9 59.94p 200 AVC
[FHD/60p/422/10-L] 331920×1080 16:9 59.94p 100 AVC
[FHD/60p/420/10-L] 331920×1080 16:9 59.94p 100 HEVC
[FHD/60i/422/10-I] 331920×1080 16:9 59.94i 100 AVC
[FHD/60i/422/10-L] 331920×1080 16:9 59.94i 50 AVC
[FHD/48p/422/10-I] 331920×1080 16:9 47.95p 200 AVC
[FHD/48p/422/10-L] 331920×1080 16:9 47.95p 100 AVC
[FHD/48p/420/10-L] 331920×1080 16:9 47.95p 100 HEVC
[FHD/30p/422/10-I] 331920×1080 16:9 29.97p 200 AVC
[FHD/30p/422/10-L] 331920×1080 16:9 29.97p 100 AVC
[FHD/30p/420/10-L] 331920×1080 16:9 29.97p 100 HEVC
[FHD/24p/422/10-I] 331920×1080 16:9 23.98p 200 AVC
[FHD/24p/422/10-L] 331920×1080 16:9 23.98p 100 AVC
[FHD/24p/420/10-L] 331920×1080 16:9 23.98p 100 HEVC
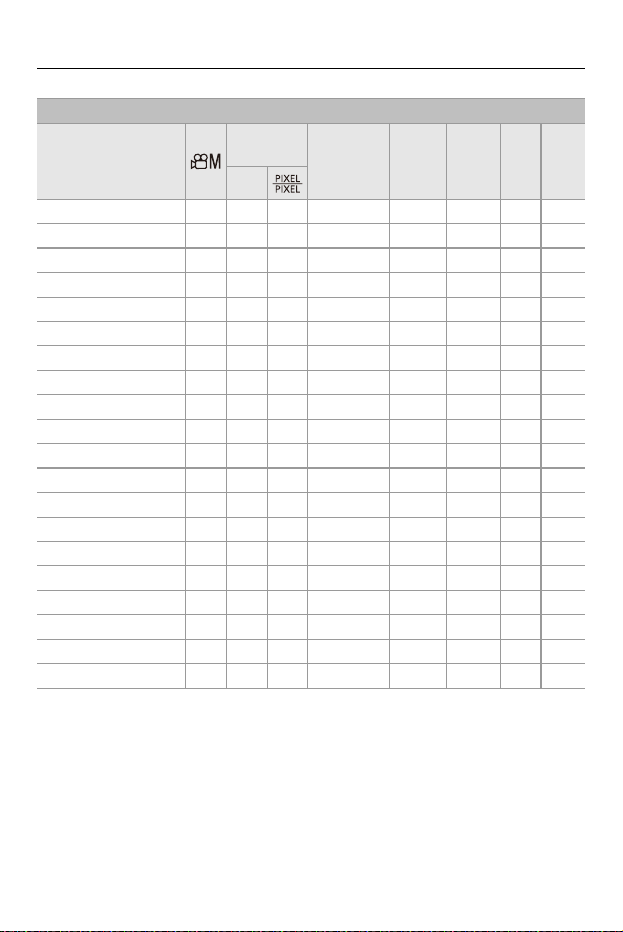
Recording Videos – [Rec Quality]
142
[System Frequency]: [50.00Hz (PAL)]
[Rec Quality]
[Image Area
of Video]
Resolution
Aspect
ratio
(A) (B) (C)
FULL
[5.8K/25p/420/10-L] 33 5760×4320 4:3 25.00p 200 HEVC
[5.7K/50p/420/10-L] 33 5728×3024 17:9 50.00p 300 HEVC
[5.7K/25p/420/10-L] 33 5728×3024 17:9 25.00p 200 HEVC
[4.4K/50p/420/10-L] 33 4352×3264 4:3 50.00p 300 HEVC
[C4K/100p/420/10-L] 3334096×2160 17:9 100.00p 300 HEVC
[C4K/50p/422/10-I(H)]
*
2
334096×2160 17:9 50.00p 800 AVC
[C4K/50p/422/10-I(L)]
*
2
334096×2160 17:9 50.00p 600 AVC
[C4K/50p/422/10-L] 334096×2160 17:9 50.00p 200 AVC
[C4K/50p/420/10-L] 334096×2160 17:9 50.00p 200 HEVC
[C4K/25p/422/10-I] 334096×2160 17:9 25.00p 400 AVC
[C4K/25p/422/10-L] 334096×2160 17:9 25.00p 150 AVC
[C4K/25p/420/10-L] 334096×2160 17:9 25.00p 150 HEVC
[4K/100p/420/10-L] 3333840×2160 16:9 100.00p 300 HEVC
[4K/50p/422/10-I(H)]
*
2
333840×2160 16:9 50.00p 800 AVC
[4K/50p/422/10-I(L)]
*
2
333840×2160 16:9 50.00p 600 AVC
[4K/50p/422/10-L] 333840×2160 16:9 50.00p 200 AVC
[4K/50p/420/10-L] 333840×2160 16:9 50.00p 200 HEVC
[4K/25p/422/10-I] 333840×2160 16:9 25.00p 400 AVC
[4K/25p/422/10-L] 333840×2160 16:9 25.00p 150 AVC
[4K/25p/420/10-L] 333840×2160 16:9 25.00p 150 HEVC

Recording Videos – [Rec Quality]
143
[FHD/200p/422/10-I] 33 1920×1080 16:9 200.00p 800 AVC
[FHD/200p/422/10-L] 33 1920×1080 16:9 200.00p 200 AVC
[FHD/200p/420/10-L] 33 1920×1080 16:9 200.00p 200 HEVC
[FHD/100p/422/10-I] 3331920×1080 16:9 100.00p 400 AVC
[FHD/100p/422/10-L] 3331920×1080 16:9 100.00p 150 AVC
[FHD/100p/420/10-L] 3331920×1080 16:9 100.00p 150 HEVC
[FHD/50p/422/10-I] 331920×1080 16:9 50.00p 200 AVC
[FHD/50p/422/10-L] 331920×1080 16:9 50.00p 100 AVC
[FHD/50p/420/10-L] 331920×1080 16:9 50.00p 100 HEVC
[FHD/50i/422/10-I] 331920×1080 16:9 50.00i 100 AVC
[FHD/50i/422/10-L] 331920×1080 16:9 50.00i 50 AVC
[FHD/25p/422/10-I] 331920×1080 16:9 25.00p 200 AVC
[FHD/25p/422/10-L] 331920×1080 16:9 25.00p 100 AVC
[FHD/25p/420/10-L] 331920×1080 16:9 25.00p 100 HEVC
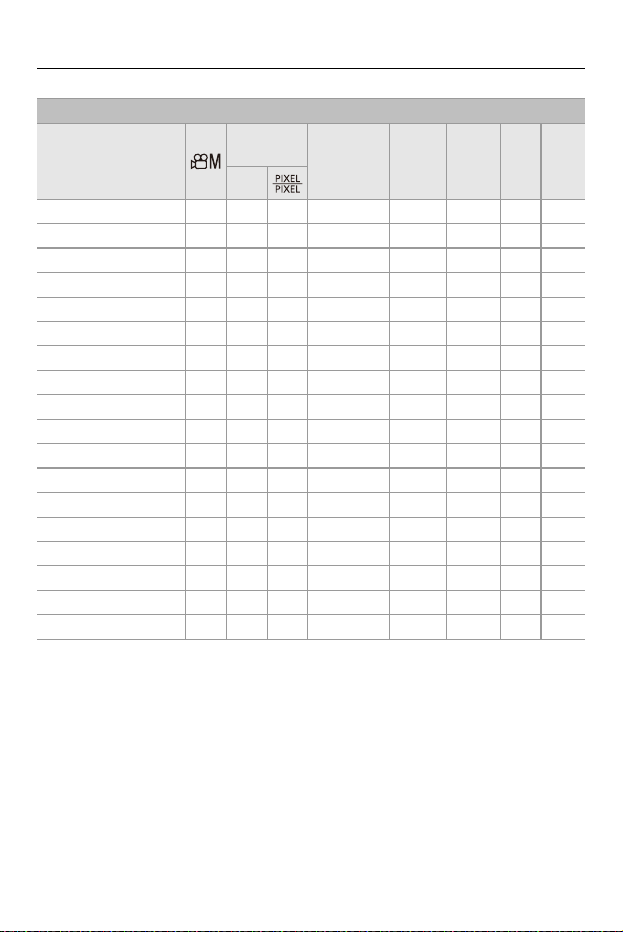
Recording Videos – [Rec Quality]
144
*1 Even if [4ch Mic Input] is set to [OFF], 4 channels are recorded to the audio tracks
of the video.
*2 [Rec Quality] [(H)] indicates a bit rate of 800 Mbps and [(L)] indicates a bit rate of
600 Mbps.
[(H)] video cannot be recorded to SD cards.
[System Frequency]: [24.00Hz (CINEMA)]
[Rec Quality]
[Image Area
of Video]
Resolution
Aspect
ratio
(A) (B) (C)
FULL
[5.8K/24p/420/10-L] 33 5760×4320 4:3 24.00p 200 HEVC
[5.7K/48p/420/10-L] 33 5728×3024 17:9 48.00p 300 HEVC
[5.7K/24p/420/10-L] 33 5728×3024 17:9 24.00p 200 HEVC
[4.4K/48p/420/10-L] 33 4352×3264 4:3 48.00p 300 HEVC
[C4K/120p/420/10-L] 3334096×2160 17:9 120.00p 300 HEVC
[C4K/24p/422/10-I] 334096×2160 17:9 24.00p 400 AVC
[C4K/24p/422/10-L] 334096×2160 17:9 24.00p 150 AVC
[C4K/24p/420/10-L] 334096×2160 17:9 24.00p 150 HEVC
[4K/120p/420/10-L] 3333840×2160 16:9 120.00p 300 HEVC
[4K/24p/422/10-I] 333840×2160 16:9 24.00p 400 AVC
[4K/24p/422/10-L] 333840×2160 16:9 24.00p 150 AVC
[4K/24p/420/10-L] 333840×2160 16:9 24.00p 150 HEVC
[FHD/120p/422/10-I] 3331920×1080 16:9 120.00p 400 AVC
[FHD/120p/422/10-L] 3331920×1080 16:9 120.00p 150 AVC
[FHD/120p/420/10-L] 3331920×1080 16:9 120.00p 150 HEVC
[FHD/24p/422/10-I] 331920×1080 16:9 24.00p 200 AVC
[FHD/24p/422/10-L] 331920×1080 16:9 24.00p 100 AVC
[FHD/24p/420/10-L] 331920×1080 16:9 24.00p 100 HEVC
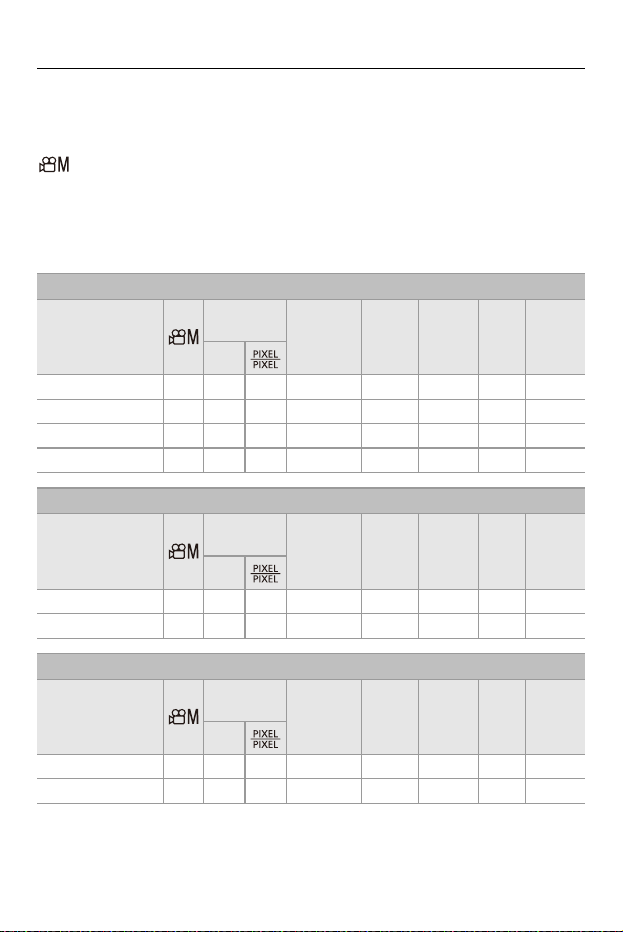
Recording Videos – [Rec Quality]
145
[Rec. File Format]: [Apple ProRes]
• Audio format: LPCM (4ch)
*
: Available in Creative Video mode.
(A) Recording frame rate
(B) Bit rate (Gbps)
(C) Video compression format (422 HQ: Apple ProRes 422 HQ, 422: Apple ProRes
422)
* Even if [4ch Mic Input] is set to [OFF], 4 channels are recorded to the audio tracks
of the video.
[System Frequency]: [59.94Hz (NTSC)]
[Rec Quality]
[Image Area
of Video]
Resolution
Aspect
ratio
(A) (B) (C)
FULL
[5.7K/30p/422 HQ] 33 5728×3024 17:9 29.97p 1.9 422 HQ
[5.7K/30p/422] 33 5728×3024 17:9 29.97p 1.3 422
[5.7K/24p/422 HQ] 33 5728×3024 17:9 23.98p 1.5 422 HQ
[5.7K/24p/422] 33 5728×3024 17:9 23.98p 1.0 422
[System Frequency]: [50.00Hz (PAL)]
[Rec Quality]
[Image Area
of Video]
Resolution
Aspect
ratio
(A) (B) (C)
FULL
[5.7K/25p/422 HQ] 33 5728×3024 17:9 25.00p 1.6 422 HQ
[5.7K/25p/422] 33 5728×3024 17:9 25.00p 1.1 422
[System Frequency]: [24.00Hz (CINEMA)]
[Rec Quality]
[Image Area
of Video]
Resolution
Aspect
ratio
(A) (B) (C)
FULL
[5.7K/24p/422 HQ] 33 5728×3024 17:9 24.00p 1.5 422 HQ
[5.7K/24p/422] 33 5728×3024 17:9 24.00p 1.0 422
Recording Videos – [Rec Quality]
146
• In this document, videos are indicated as follows according to their resolution:
– 5.8K (5760×4320) video: 5.8K video
– 5.7K (5728×3024) video: 5.7K video
– 4.4K (4352×3264) video: 4.4K video
– C4K (4096×2160) video: C4K video
– 4K (3840×2160) video: 4K video
– Full High Definition (1920×1080) video: FHD video
• Since the camera employs the VBR recording format, the bit rate is changed
automatically depending on the subject to record. As a result, video recording
time is shortened when a fast-moving subject is recorded.
• Videos in ALL-Intra and 4:2:2 10-bit formats and videos whose [Rec. File Format]
is [Apple ProRes] are intended for editing on a PC used for video production.
• You can register a combination of [System Frequency], [Rec. File Format],
[Image Area of Video], and [Rec Quality] to My List. (Î[add to list]: 148)
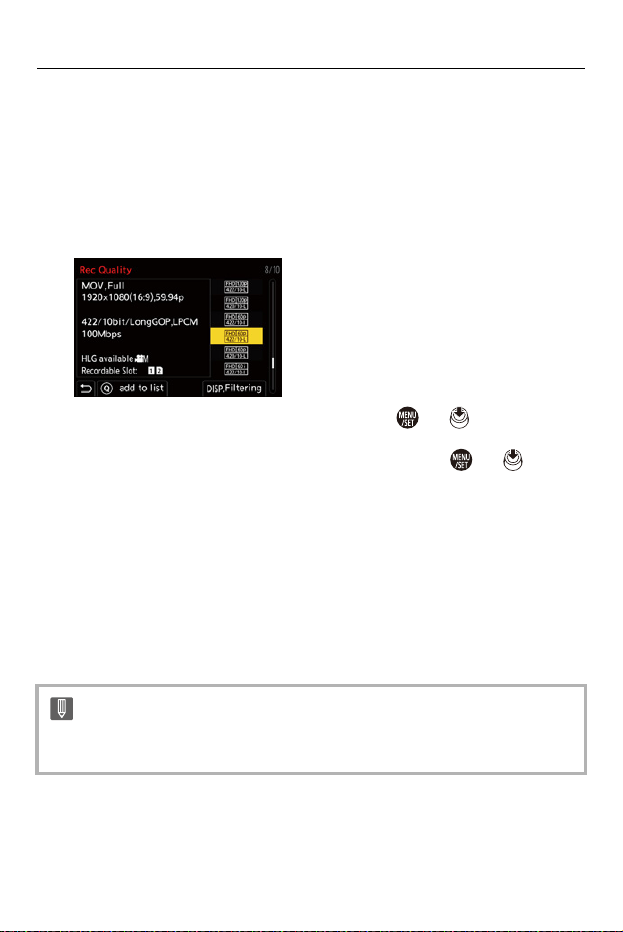
Recording Videos – [Rec Quality]
147
[Filtering]
When [Rec. File Format] is set to [MOV] or [Apple ProRes], you can
specify items such as frame rate, number of pixels (resolution), and
compression format (YUV, bit value, image compression), and just display
recording qualities that meet those conditions.
1 In the [Rec Quality] setting screen, press [DISP.].
2 Press 34 to select a setting item and then press or .
• Settings: [Frame Rate]/[Resolution]/[Codec]/[Variable Frame Rate]
3 Press 34 to select the filtering conditions and then press or .
4 Press [DISP.] to confirm the setting.
• You are returned to the [Rec Quality] setting screen.
Clearing the filtering conditions
Select [ANY] in Step 3.
• The filtering conditions are also cleared when you do the following:
– Change the [Rec. File Format]
– Change the [System Frequency]
– Select a recording quality from [Rec Quality (My List)]
• When you change recording quality using a filter, the current filtering conditions
are stored.
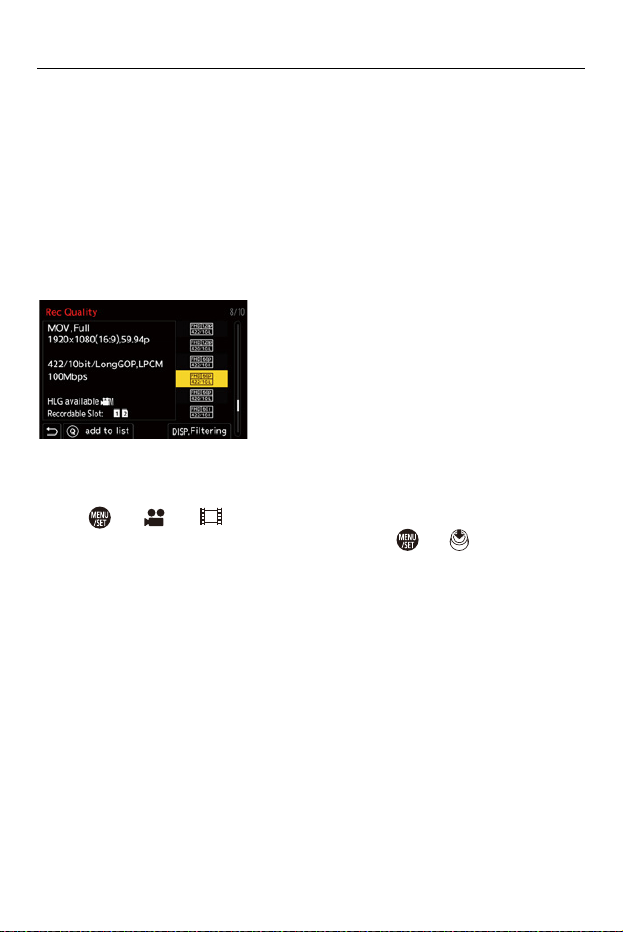
Recording Videos – [Rec Quality]
148
[add to list]
Select a recording quality and register it in My List. The recording quality
you register can be set in [Rec Quality (My List)].
In the [Rec Quality] setting screen, press [Q].
•
The following settings are also registered at the same time:
– [System Frequency]
– [Rec. File Format]
– [Image Area of Video]
Setting or deleting in My List
1 Select [Rec Quality (My List)].
• ¨ [ ] ¨ [ ] ¨ [Rec Quality (My List)]
2 Press 34 to select a setting item and then press or .
• You cannot select setting items that have different system frequencies.
• To delete from My List, select the item and press [Q].
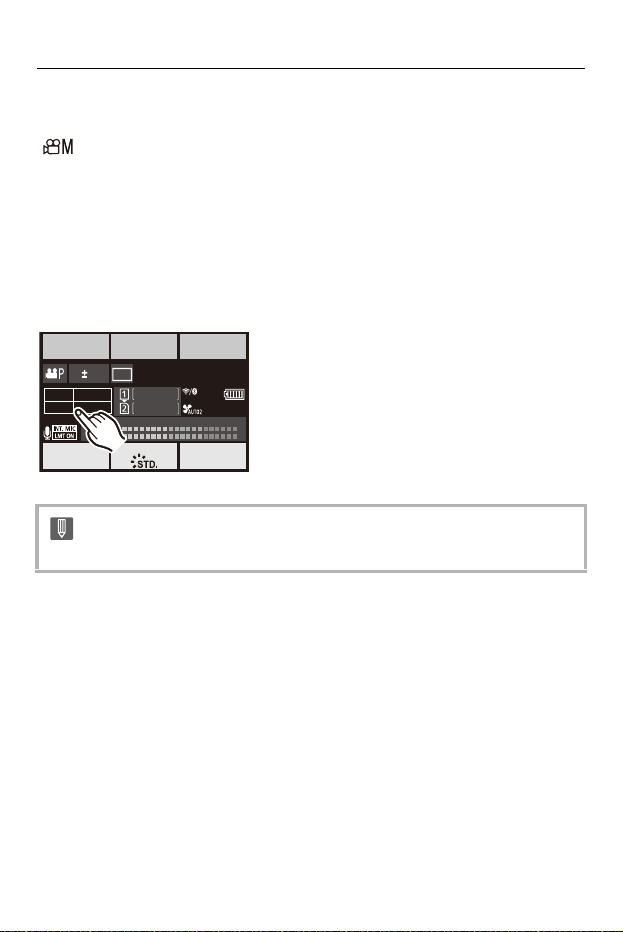
Recording Videos – [Rec Quality]
149
Setting from the control panel
It is possible to display the My List of recording qualities from the control panel in
[ ] mode or when [Video-Priority Display] is set.
Touch the recording quality item.
• When already registered in My List, the [Rec Quality (My List)] setting screen is
displayed.
When not yet registered, the [Rec Quality] setting screen is displayed.
• [Rec Quality (My List)] and [Rec Quality] switch each time you press the [DISP.]
button.
• The next time the setting screen is displayed, the screen last used is displayed.
• Up to 12 types of recording quality can be registered.
0
FPS
60
F2.8
1/60
100
AWB
IRISSHUTTER
ISO WBPHOTO STYLE
FULL
FHD 59.94
p
422/10-L
MOV
AUTO
-2
-36 -12 -6-24 0
-6
CH2
CH1
TC
DF
00:00:00.00
48kHz/24bit
24m59s
24m59s
OFF
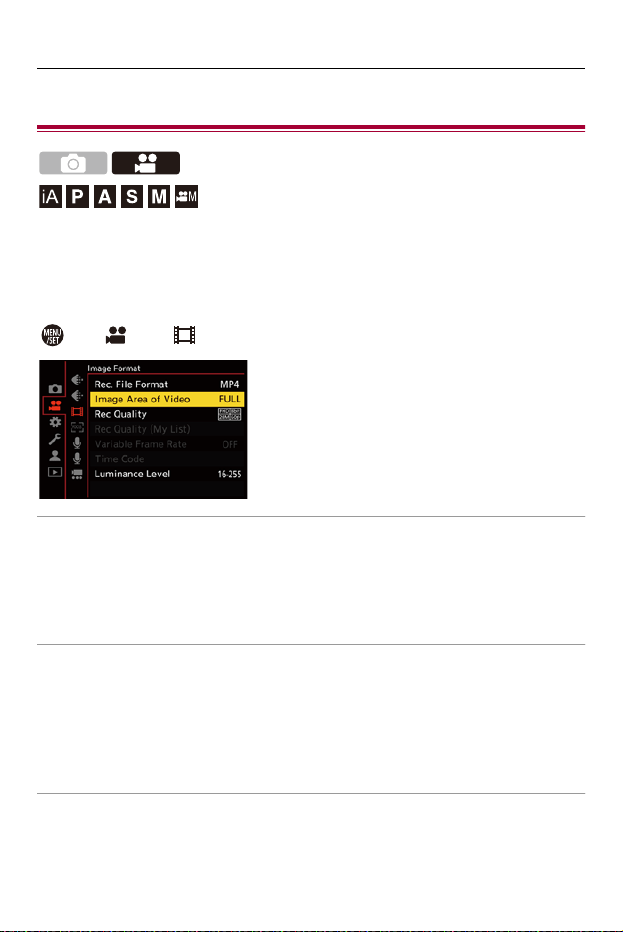
Recording Videos – [Image Area of Video]
150
[Image Area of Video]
Set the image area during video recording. The angle of view differs
depending on the image area. Narrowing the image area allows you to
achieve a telescopic effect without image deterioration.
¨ [ ] ¨ [ ] ¨ Select [Image Area of Video]
[FULL]
Records according to the range that corresponds to the image circle of the lens that is
for Micro Four Thirds.
Angle of view: Wide
Telescopic effect: Not possible
[PIXEL/PIXEL]
Records with one pixel on the sensor, which is equal to one pixel of the video.
Records a range corresponding to the resolution range in [Rec Quality]. (Î[Rec
Quality]: 136)
Angle of view: Narrow
Telescopic effect: Possible
• The [Image Area of Video] settings you can select differ depending on the [Rec
Quality] setting. (Î[Rec Quality]: 136)

Recording Videos – [Image Area of Video]
151
Image area (Ex.: FHD video)
FULL
PIXEL/PIXEL

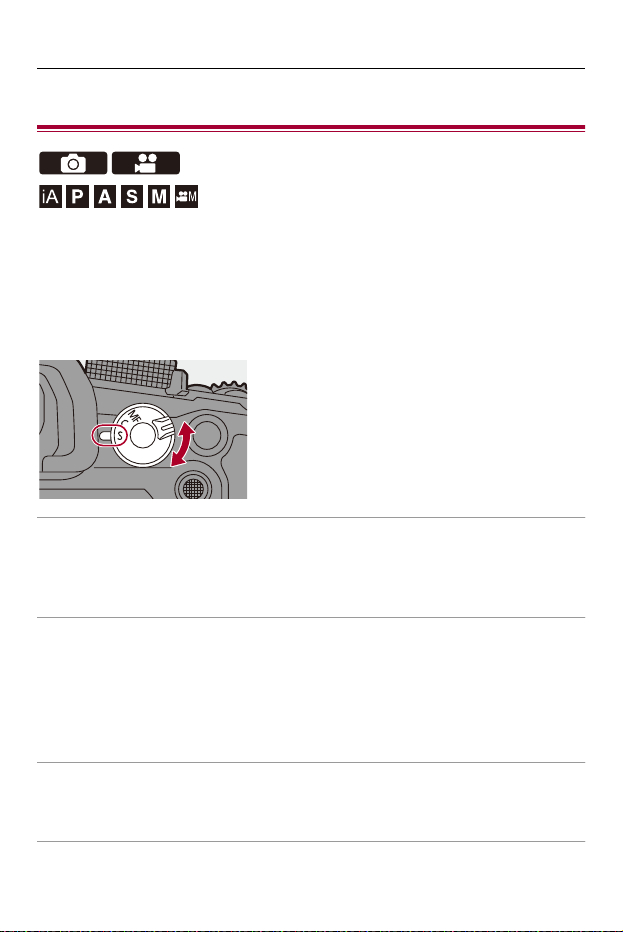
Focus / Zoom – Selecting the Focus Mode
153
Selecting the Focus Mode
Select the focusing method (focus mode) to match subject movement.
It is also possible to customize the AF tracking features with [AFC]. (Î[AF
Custom Setting(Photo)]: 160)
Set the focus mode lever.
[S] ([AFS])
This is suitable for recording still subjects.
When the shutter button is pressed halfway, the camera focuses once.
The focus stays locked while the shutter button is pressed halfway.
[C] ([AFC])
This is suitable for recording moving subjects.
While the shutter button is pressed halfway, the focus is constantly adjusted according
to the movement of the subject.
• This predicts the movement of the subject, maintaining focusing. (Movement
prediction)
[MF]
Manual focusing. Use this when you want to fix the focus or avoid activating AF.
(ÎRecord Using MF: 195)
Focus / Zoom – Selecting the Focus Mode
154
• In the following cases, [AFC] works the same as [AFS] when the shutter button is
pressed halfway:
– [ ] mode
– During video recording
– In low light situations
• When the following functions are being used, [AFC] switches to [AFS]:
– SH burst recording
– High Resolution mode
Focus / Zoom – Using AF
155
Using AF
≥[AF Custom Setting(Photo)]: 160
≥[Focus Limiter]: 163
≥[AF Assist Light]: 165
≥[1-Area AF Moving Speed]: 166
AF (Auto Focus) refers to automatic focusing.
Select the focus mode and the AF mode appropriate for the subject and
scene.
1
Set the focus mode to [AFS] or [AFC].
≥Set the focus mode lever. (ÎSelecting the Focus Mode: 153)
2
Select the AF mode.
≥Press [ ] to display the AF mode selection screen, and set
using or . (ÎSelecting the AF Mode: 167)
•
In [iA] mode, each press of [ ] switches between [ ] and [ ]. (ÎAF
Mode: 110)
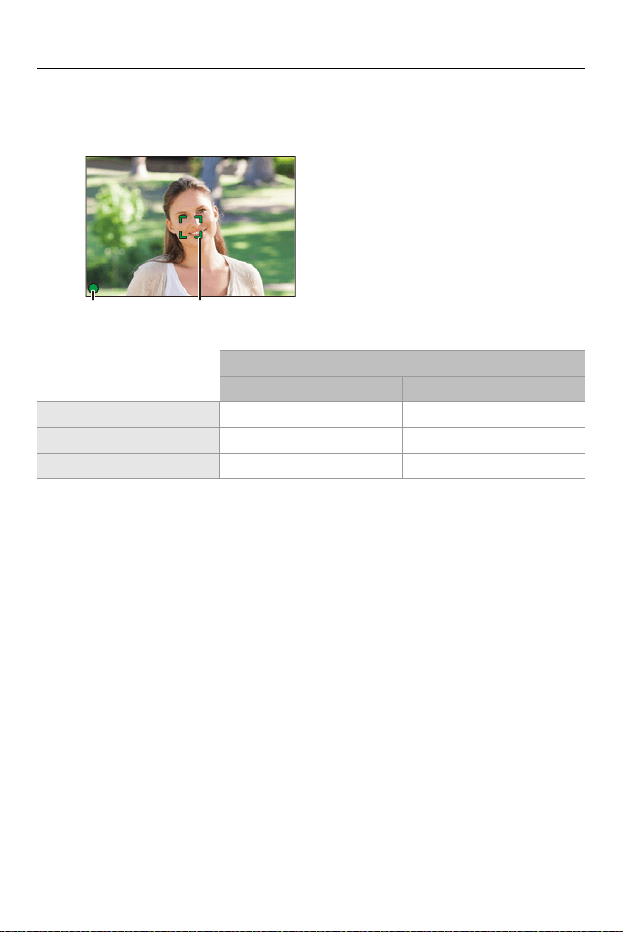
Focus / Zoom – Using AF
156
3
Press the shutter button halfway.
≥The AF operates.
Focus
In focus Not in focus
Focus icon (A) Lights Blinking
AF area (B) Green Red
AF beep Two beeps —
(A) (B)

Focus / Zoom – Using AF
157
Low illumination AF
•
In dark environments, low illumination AF automatically operates, and the focus icon
is indicated as [ ].
• Achieving focus may take more time than usual.
Starlight AF
•
If the camera detects stars in the night sky after determining low illumination AF, then
Starlight AF will be activated.
When focus is achieved, the focus icon will display [ ], and the AF area will be
displayed on the area in focus.
• Edges of the screen cannot detect Starlight AF.
[AF ON] button
You can also activate AF by pressing [AF ON].
LOW
STAR

Focus / Zoom – Using AF
158
• Subjects and recording conditions that make focusing difficult with AF
mode
– Fast-moving subjects
– Extremely bright subjects
– Subjects without contrast
– Subjects recorded through windows
– Subjects near shiny objects
– Subjects in very dark locations
– When recording subjects both distant and near
• When the following operations are performed while recording with [AFC], it may
take some time for the camera to focus:
– When zooming from the wide-angle end to the telephoto end
– When the subject is suddenly changed from one far away to one close by
• If using the zoom after achieving focus, the focus may be erroneous. In that
case, re-adjust the focus.

Focus / Zoom – Using AF
159
• You can restrict the range for AF to work:
(Î[Focus Limiter]: 163)
• When camera shake reduces, it is possible to focus automatically:
(Î[Quick AF]: 556)
• You can change the settings so that AF does not function when the shutter button
is pressed halfway:
(Î[Half-Press Shutter]: 555)
• The AF beep volume and sound can be changed:
(Î[Beep]: 598)
• You can assign the function that makes AF work so that it prioritizes subjects
close by to an Fn button.
This function is useful when the camera mistakenly focuses on the background:
(Î[AF-ON : Near Shift]: 524)
• You can assign the function that makes AF work so that it prioritizes subjects far
away to an Fn button.
This function is useful when taking pictures through fences or nets:
(Î[AF-ON : Far Shift]: 524)
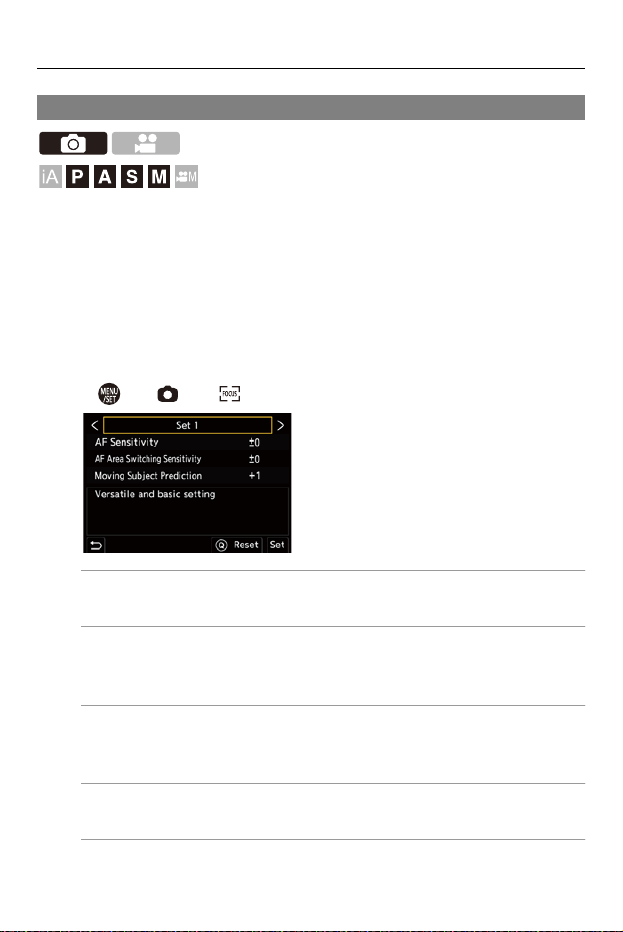
Focus / Zoom – Using AF
160
[AF Custom Setting(Photo)]
You can select features of AF operation when taking pictures with [AFC]
that are appropriate for the subject and scene.
Each of these features can be further customized.
1
Set the focus mode to [AFC].
≥Set the focus mode lever. (ÎSelecting the Focus Mode: 153)
2
Set [AF Custom Setting(Photo)].
≥ ¨ [ ] ¨ [ ] ¨ [AF Custom Setting(Photo)]
[Set 1]
Basic general-purpose setting.
[Set 2]
Suggested for situations where the subject moves at a constant speed in one
direction.
[Set 3]
Suggested when the subject moves randomly, and other objects may be in the
scene.
[Set 4]
Suggested for situations where the speed of the subject changes significantly.
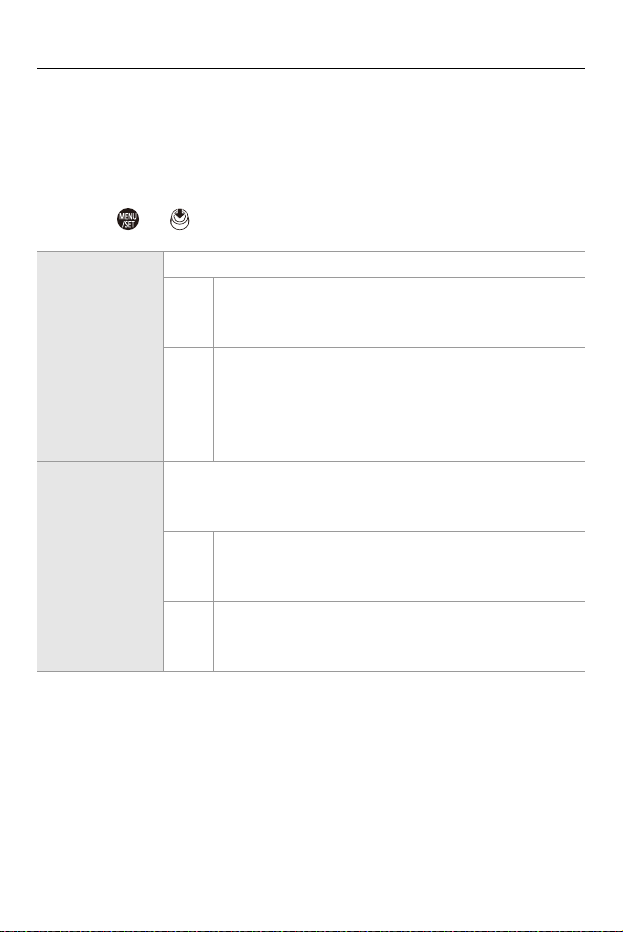
Focus / Zoom – Using AF
161
Adjusting AF Custom Settings
1 Press 21 to select the AF Custom setting type.
2 Press 34 to select items and press 21 to adjust.
• A description of the item is displayed on the screen when you press [DISP.].
• To reset settings to the default, press [Q].
3 Press or .
[AF Sensitivity]
Sets the tracking sensitivity for the movement of subjects.
[+]
When the distance to the subject changes drastically,
the camera re-adjusts the focus immediately. You can
bring different subjects into focus one after another.
[−]
When the distance to the subject changes drastically,
the camera waits for a short period of time before
re-adjusting the focus. This allows you to prevent the
focus from being accidentally re-adjusted when, for
example, an object moves across the image.
[AF Area
Switching
Sensitivity]
Sets the sensitivity for switching the AF area to match subject
movement.
(When AF mode is set to Full Area AF)
[+]
When the subject moves out of the AF area, the camera
immediately switches the AF area to keep the subject in
focus.
[−]
The camera switches the AF area at a gradual pace.
Effects caused by a slight movement of the subject or by
obstacles in front of the camera will be minimized.
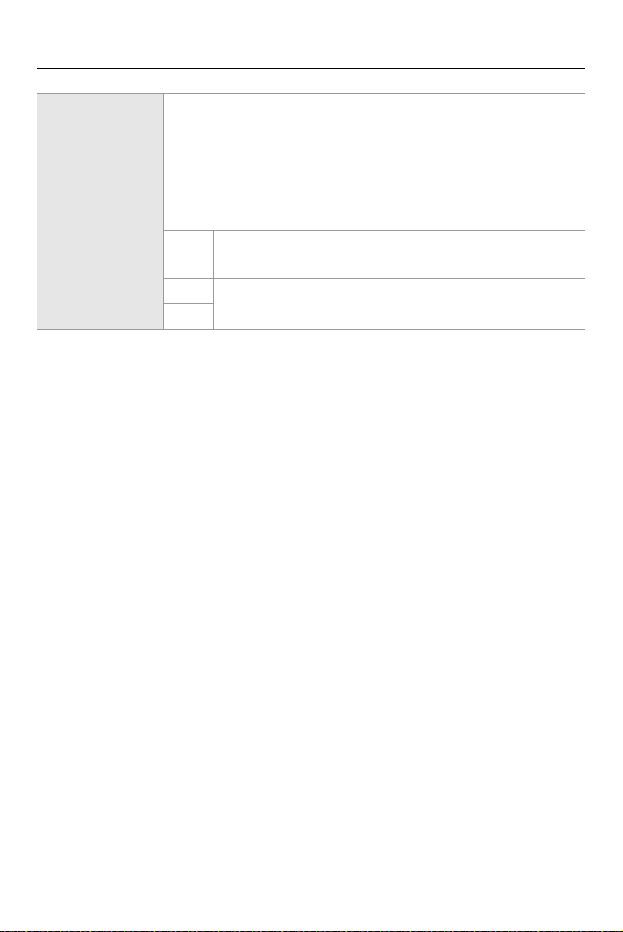
Focus / Zoom – Using AF
162
[Moving Subject
Prediction]
Sets the tracking method for changes in the speed of subject
movement.
• At larger setting values, the camera tries to maintain focus by
responding even to sudden movements of the subject.
However, the camera becomes more sensitive to slight
movements of the subject, so focusing may become unstable.
[0]
This is suited to a subject with minimal changes in
speed.
[+1]
These are suited to a subject that changes its speed.
[+2]
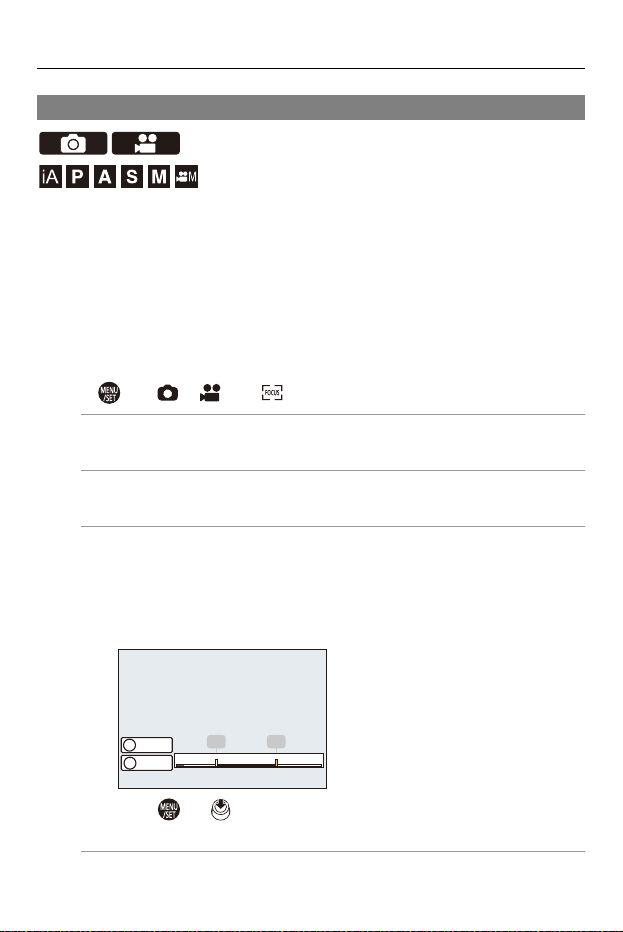
Focus / Zoom – Using AF
163
[Focus Limiter]
You can restrict the range for AF to work.
The focusing speed of AF increases when you limit the range where AF
works.
1
Set the focus mode to [AFS] or [AFC].
≥Set the focus mode lever. (ÎSelecting the Focus Mode: 153)
2
Set [Focus Limiter].
≥ ¨ [ ]/[ ] ¨ [ ] ¨ [Focus Limiter]
[ON]
Enables the following settings.
[OFF]
Disables the following settings.
[SET]
1 Use the same procedure as MF (ÎRecord Using MF: 195) to check the
focus, then press [WB] or [ISO] to set the range of operation for AF.
• This can also be set by touching [Limit1]/[Limit2].
• [Limit1]/[Limit2] can be set from either.
2 Press or to confirm the setting.
• Press [DISP.] to return the operation range to the default setting.
∞
1(m) 0.5 0.3
1 2
Limit1
Limit2
WB
ISO

Focus / Zoom – Using AF
164
• This can be set when using a lens with a focus ring or a focus lever.
• It cannot be set if the focusing distance range selector switch of the lens has
been used to limit the operation range.
• The setting values are reset when the lens is replaced.
• When [Focus Limiter] is working, [ ]/[ ] is displayed on the screen.
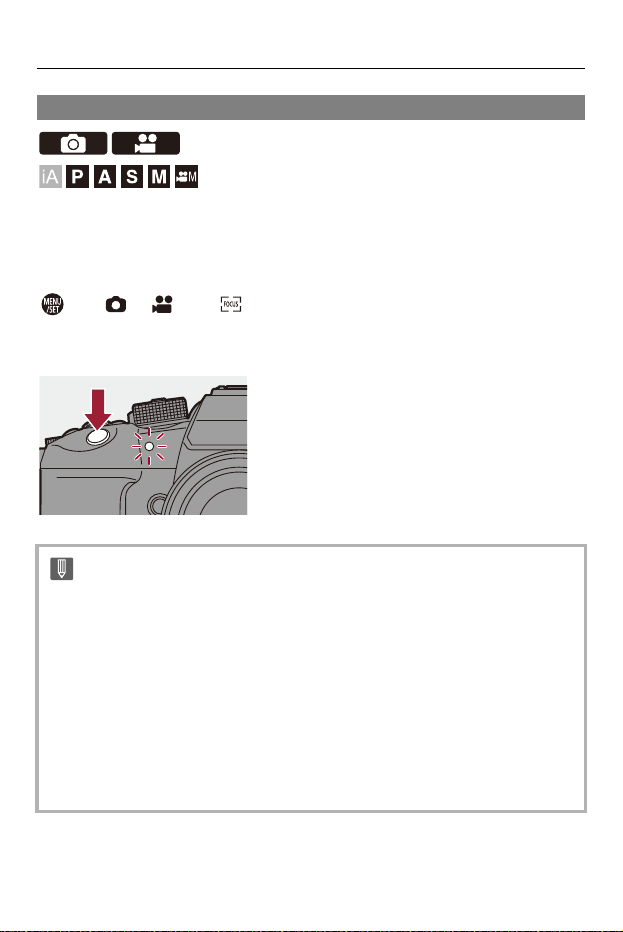
Focus / Zoom – Using AF
165
[AF Assist Light]
When recording in low light conditions, the AF assist light turns on when
you press the shutter button halfway, making it easier for the camera to
focus.
¨ [ ]/[ ] ¨ [ ] ¨ Select [AF Assist Light]
Settings: [ON]/[OFF]
•
The effective range of the AF assist light is different depending on the lens used.
– When the interchangeable lens (H-ES12060) is attached and at wide-angle
end.
Approx. 1.0 m (3.3 feet) to 3.5 m (11 feet)
– When the interchangeable lens (H-FS12060) is attached and at wide-angle
end.
Approx. 1.0 m (3.3 feet) to 3.0 m (9.8 feet)
• Remove the lens hood.
• The AF assist light may be greatly blocked, and it may become harder to focus
when a lens with large diameter is used.

Focus / Zoom – Using AF
166
[1-Area AF Moving Speed]
Sets the speed when moving a single AF area.
¨ [ ]/[ ] ¨ [ ] ¨ Select [1-Area AF Moving Speed]
Settings: [FAST]/[NORMAL]
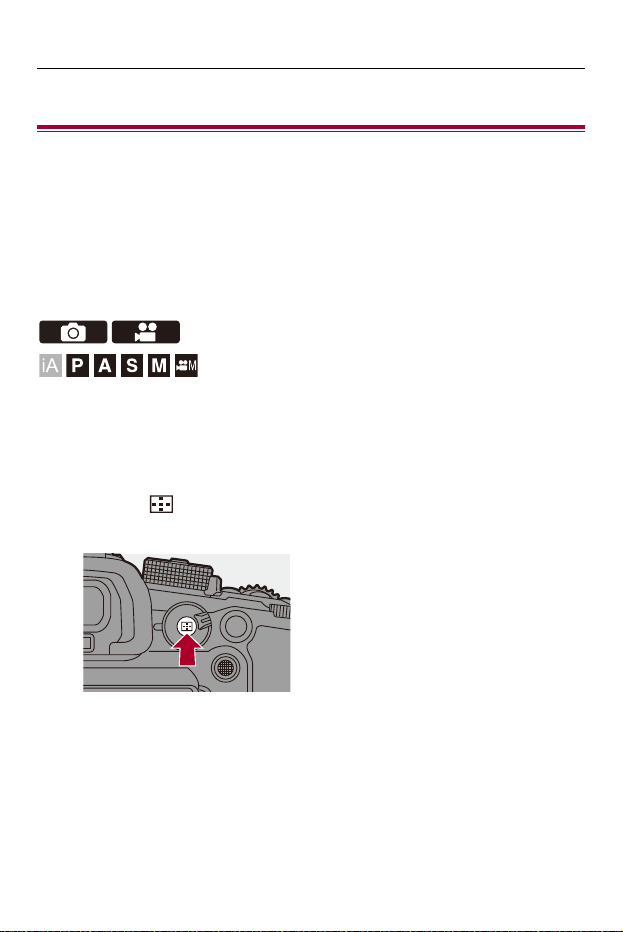
Focus / Zoom – Selecting the AF Mode
167
Selecting the AF Mode
≥Automatic Detection: 170
≥[Tracking]: 173
≥[Full Area AF]: 175
≥[Zone(Horizontal/Vertical)]/[Zone]: 179
≥[1-Area+]/[1-Area]: 182
≥[Pinpoint]: 184
Select the focusing method to match the position and number of subjects.
In an AF mode other than Pinpoint, you can automatically focus by
detecting humans and animals.
1
Press [ ].
≥The AF mode selection screen appears.
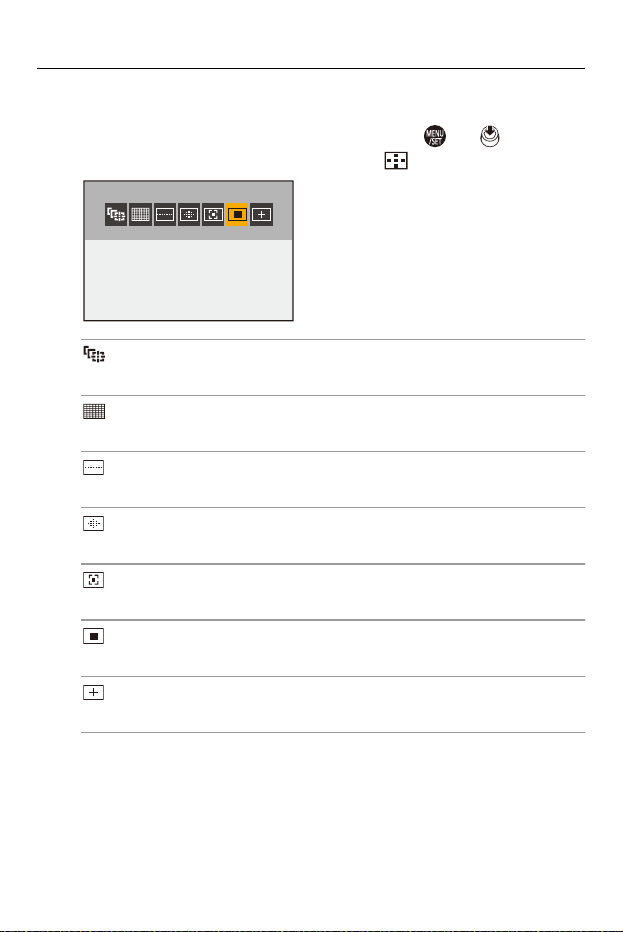
Focus / Zoom – Selecting the AF Mode
168
2
Select the AF mode.
≥Press 21 to select an item and then press or .
≥Selection is also possible by pressing [ ].
[Tracking]
(Î[Tracking]: 173)
[Full Area AF]
(Î[Full Area AF]: 175)
[Zone(Horizontal/Vertical)]
(Î[Zone(Horizontal/Vertical)]: 179)
[Zone]
(Î[Zone]: 180)
[1-Area+]
(Î[1-Area+]: 182)
[1-Area]
(Î[1-Area]: 182)
[Pinpoint]
(Î[Pinpoint]: 184)

Focus / Zoom – Selecting the AF Mode
170
Automatic Detection
When automatic detection is enabled, humans and animals are detected
and the camera automatically focuses.
You can set the target for detection.
1
Set [AF Detection Setting] to [ON].
≥ ¨ [ ]/[ ] ¨ [ ] ¨ [AF Detection Setting] ¨ [ON]
•
You can also press 3 in the AF mode selection screen to switch automatic
detection [ON]/[OFF].
2
Select [Detecting Subject].
≥ ¨ [ ]/[ ] ¨ [ ] ¨ [Detecting Subject]
•
It is also possible to select by pressing [DISP.] in the AF mode selection
screen.
[HUMAN]
Detects human faces, eyes, and bodies.
• [ ] is displayed on the AF mode icon.
[FACE/EYE]
Detects only human faces and eyes.
• [ ] is displayed on the AF mode icon.
[ANIMAL+HUMAN]
Detects humans and animals.
Animals that can be detected are birds, canines (including wolves, etc.), and
felines (including lions, etc.).
• [ ] is displayed on the AF mode icon.
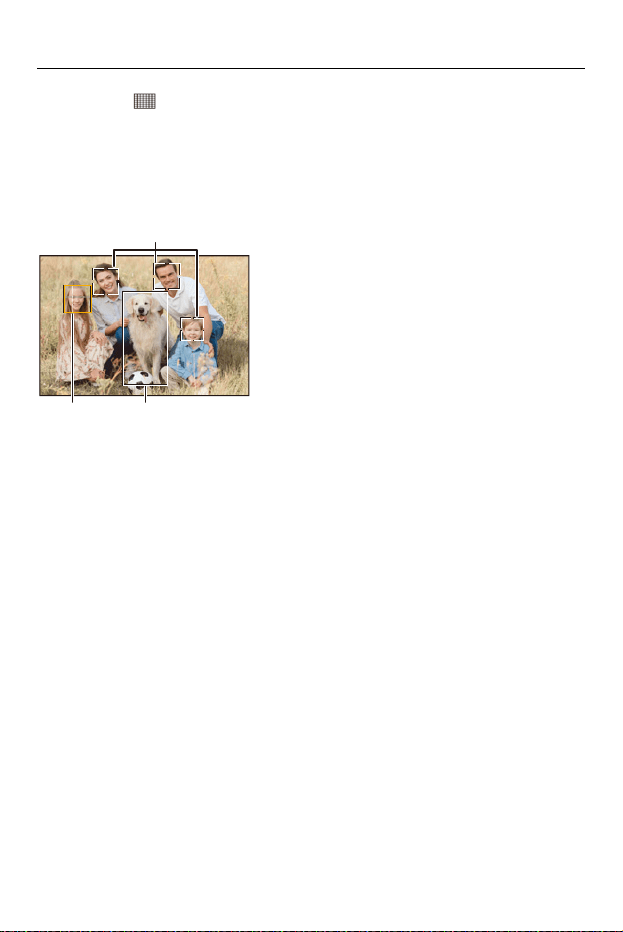
Focus / Zoom – Selecting the AF Mode
171
When [ ]
When the camera detects a person’s face (A)/(B) or body or an animal’s
body (C), an AF area is displayed.
If multiple subjects are detected, multiple AF areas are also displayed, and
you can select the subject you want to focus on from amongst these.
Yellow
AF area to be brought into focus.
The camera selects this automatically.
• Eye detection works only for the eyes inside the yellow frame (A).
White
Displayed when multiple subjects are detected.
(B)
(C)(A)
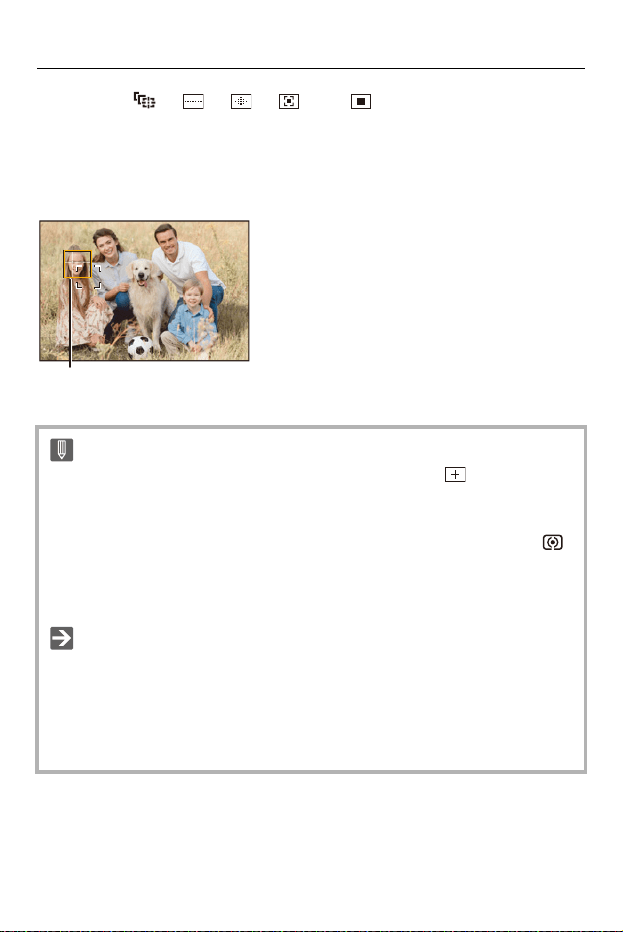
Focus / Zoom – Selecting the AF Mode
172
When [ ], [ ], [ ], [ ], or [ ]
If even part of a human or animal enters the AF area, these are
automatically detected and focused.
•
If eyes are detected inside the AF area, eye detection (D) works.
It is not possible to change the eye to focus on.
• [AF Detection Setting] is applied to all AF modes excluding [ ].
• When a person’s eyes are detected, the eye closer to the camera will be brought
into focus.
The exposure will be adjusted to the face. (When [Metering Mode] is set to [ ])
• The camera can detect the faces of up to 15 people.
• The camera can detect a combined total of up to 3 human and animal bodies.
• Automatic detection may not be available due to the camera settings.
• You can make it so the metering range for automatic exposure is not prioritized
on the face and eyes when automatic detection works:
(Î[Face Priority In Multi Metering]: 549)
• You can make the cross for face/eye detection disappear:
(Î[Eye Detection Display]: 555)
(D)
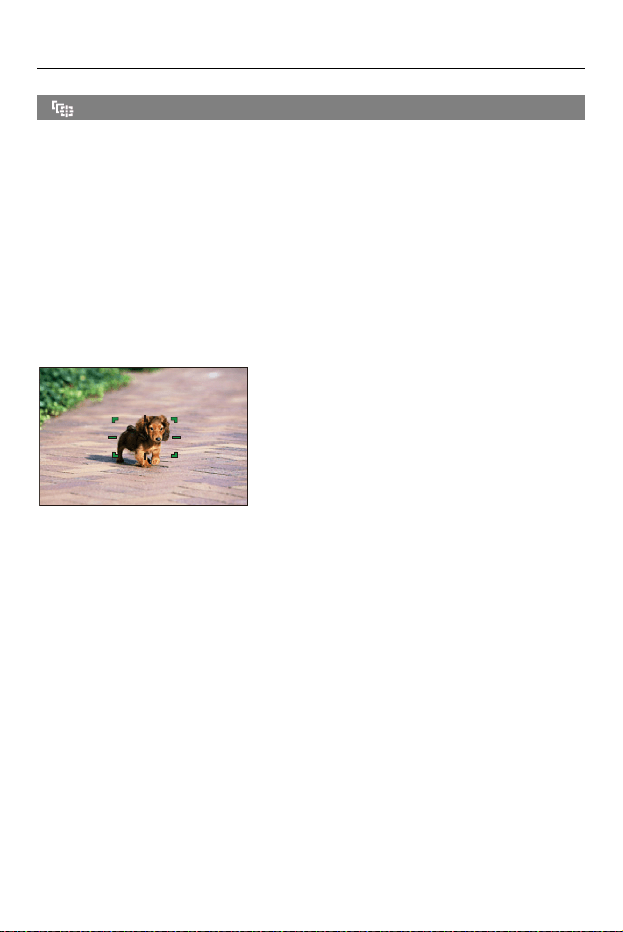
Focus / Zoom – Selecting the AF Mode
173
[Tracking]
When the focus mode is set to [AFC], the AF area follows the movement of
the subject, maintaining focusing.
Start tracking.
≥Aim the AF area over the subject, and press the shutter button halfway.
The camera will track the subject while the shutter button is pressed
halfway or pressed fully.
•
If tracking fails, the AF area blinks red.
• When set to [AFS], the focus will be on the AF area position. Tracking will not work.
Focus / Zoom – Selecting the AF Mode
174
Move the Position of the AF Area
1 Press [ ] to display the AF mode selection screen.
2 Select [ ] and then press 4.
3 Press 3421 to move the position of the AF area.
• Positions can be moved to the diagonal directions using the joystick.
• You can also move the AF area by touching.
• To return the position back to the center, press [DISP.].
4 Press .
• In [ ] mode and while recording video, tracking will continue even if the
shutter button is released.
To cancel tracking, press or , or touch [ ].
Tracking is also available with [AFS].
• When automatic detection is working, the detected subject is tracked.
• Set [Metering Mode] to [ ] to continue to adjust the exposure as well.
• In the following, [ ] operates as [ ]:
– [Monochrome]/[L.Monochrome]/[L.Monochrome D]/[L.Monochrome S] ([Photo
Style])
– [Sepia] ([Filter Settings])
• [ ] may not be available due to the camera settings.
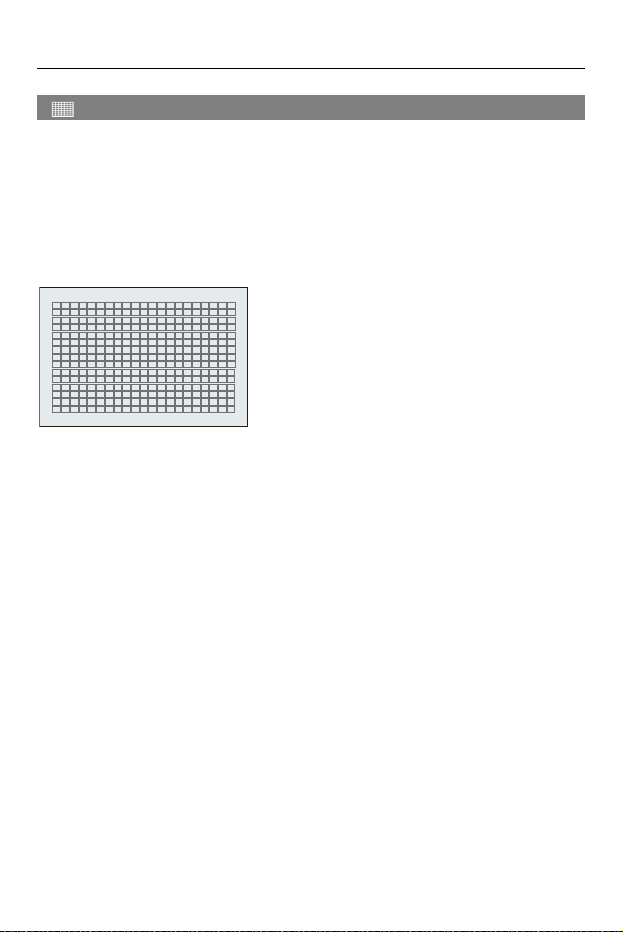
Focus / Zoom – Selecting the AF Mode
175
[Full Area AF]
The camera selects the most optimal AF area to focus from 315 areas.
When multiple AF areas are selected, all selected AF areas will be brought
into focus.
When the focus mode is set to [AFC], you can ensure that the focus stays
on the subject by recording while keeping the subject within the Full Area
AF area.
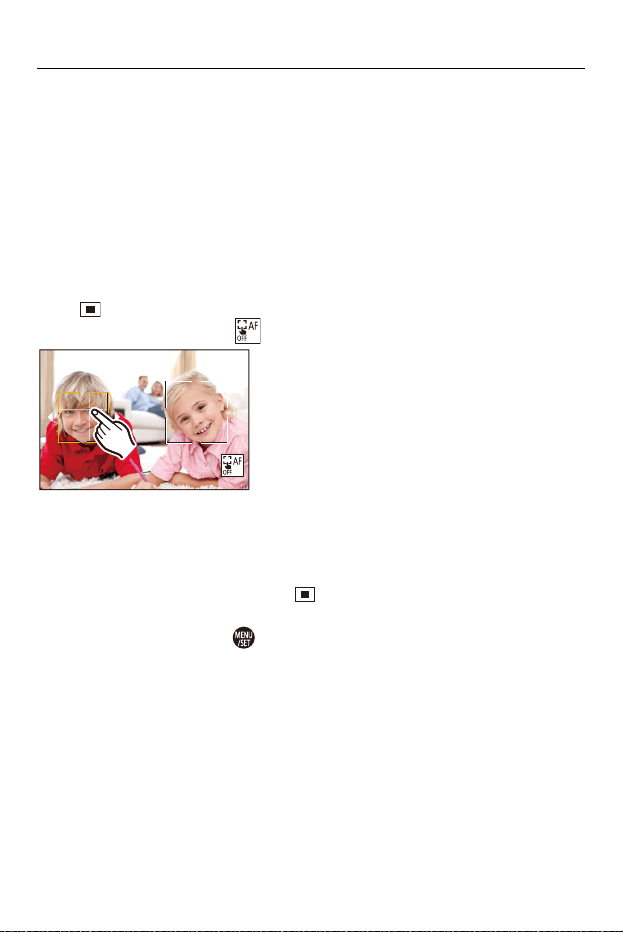
Focus / Zoom – Selecting the AF Mode
176
Specify the Person, Animal, or Eye to Bring into Focus
When automatic detection is [ON], multiple subjects are detected.
When the person or animal to be brought into focus is shown using the
white AF area, you can change this to a yellow AF area.
≥Touch operations
Touch the person, animal or eye indicated with the white AF area.
•
The AF area will change to yellow.
• Touching outside the AF area displays the AF area setting screen. Touch [Set] to set
the [ ] AF area at the position touched.
• To cancel the setting, touch [ ].
≥Operations with the joystick
Tilt the joystick to
3421.
•
Each tilt to 3421 switches the person, animal or eye to be brought into focus.
• Press and hold the joystick to set the [ ] AF area to the center of the screen.
Press and hold the joystick again to return to automatic detection.
• To cancel the setting, press .
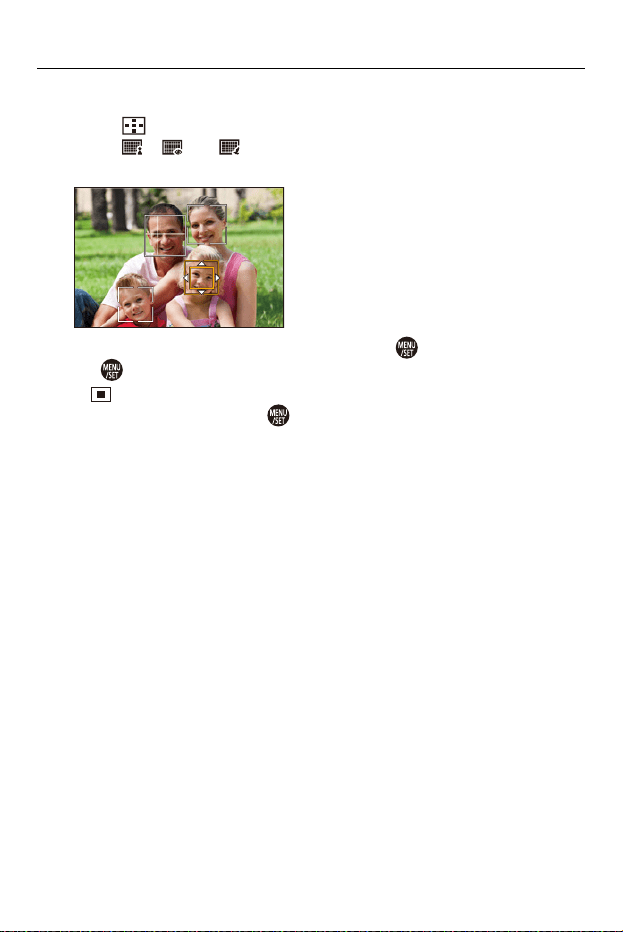
Focus / Zoom – Selecting the AF Mode
177
≥Button operations
1 Press [ ] to display the AF mode selection screen.
2 Select [ ], [ ], or [ ] and then press 4.
3 Press 3421 to move the position of the AF area.
4 When the white AF area changes to yellow, press .
• If is pressed in a position outside an AF area for humans or animals, the
[ ] AF area is set.
• To cancel the setting, press .
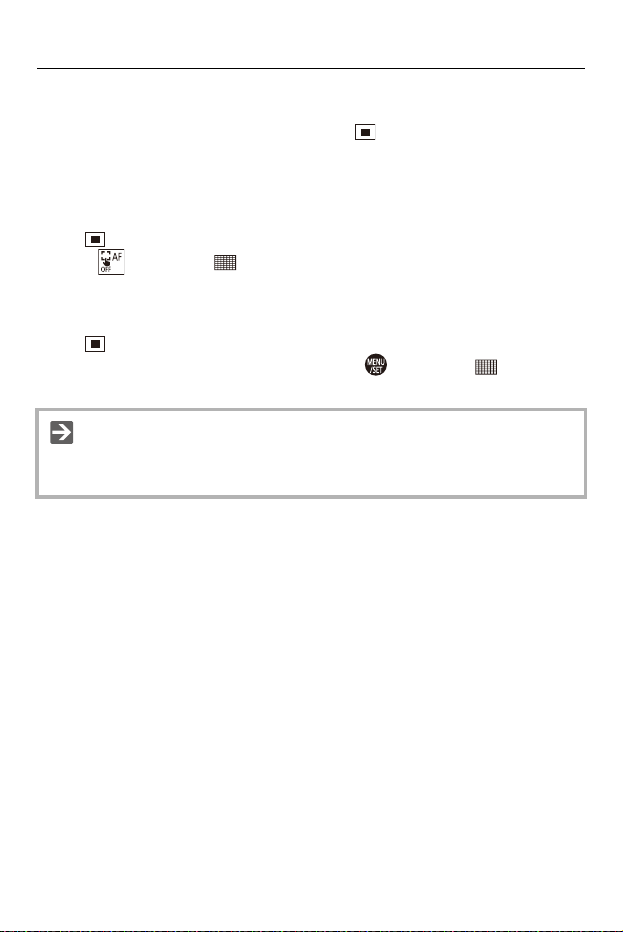
Focus / Zoom – Selecting the AF Mode
178
Setting the AF Area in Any Position
When [AF Detection Setting] is [OFF], the [ ] AF area can be set in any
position.
≥Touch operations
Touch any position on the recording screen and then touch [Set].
• The [ ] AF area is set.
• Touch [ ] to return to [ ].
≥Operations with the joystick
Press and hold the joystick.
•
The [ ] AF area is set in the center of the screen.
• Either press and hold the joystick again or press to return to [ ].
• You can move and change the size of the set AF area:
(ÎOperations on the AF area movement screen: 183)
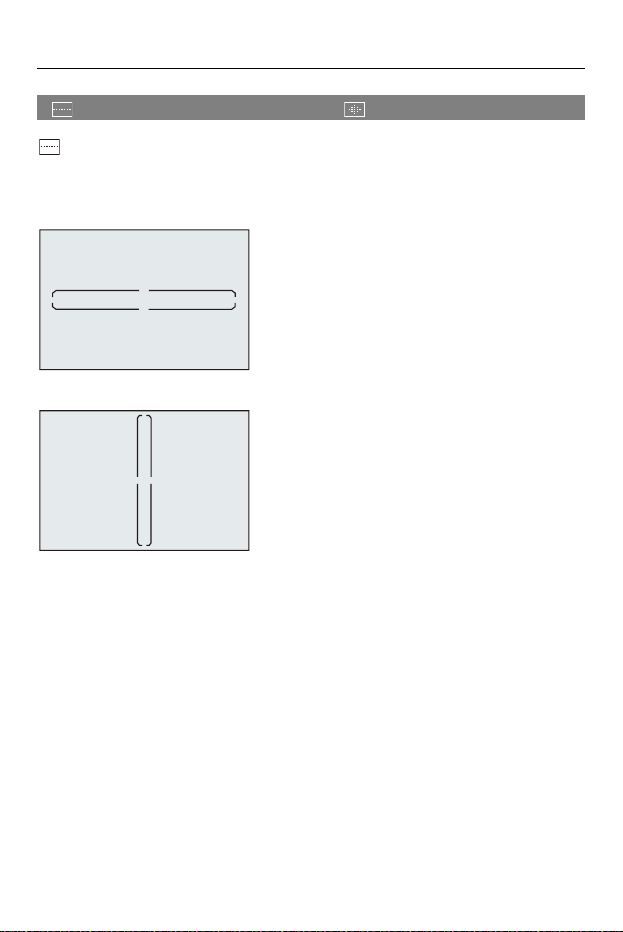
Focus / Zoom – Selecting the AF Mode
179
[Zone(Horizontal/Vertical)]/ [Zone]
[Zone(Horizontal/Vertical)]
Within the full area, vertical and horizontal zones can be focused.
Horizontal pattern
Vertical pattern
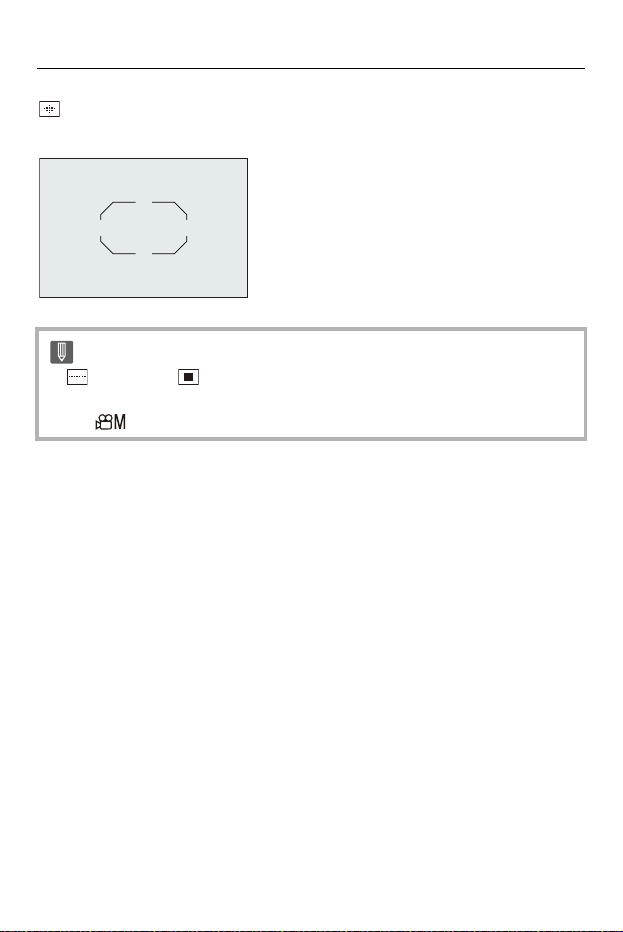
Focus / Zoom – Selecting the AF Mode
180
[Zone]
Within the full area, a central oval zone can be focused.
•
[ ] changes to [ ] in the following cases:
– During video recording
– In [ ] mode
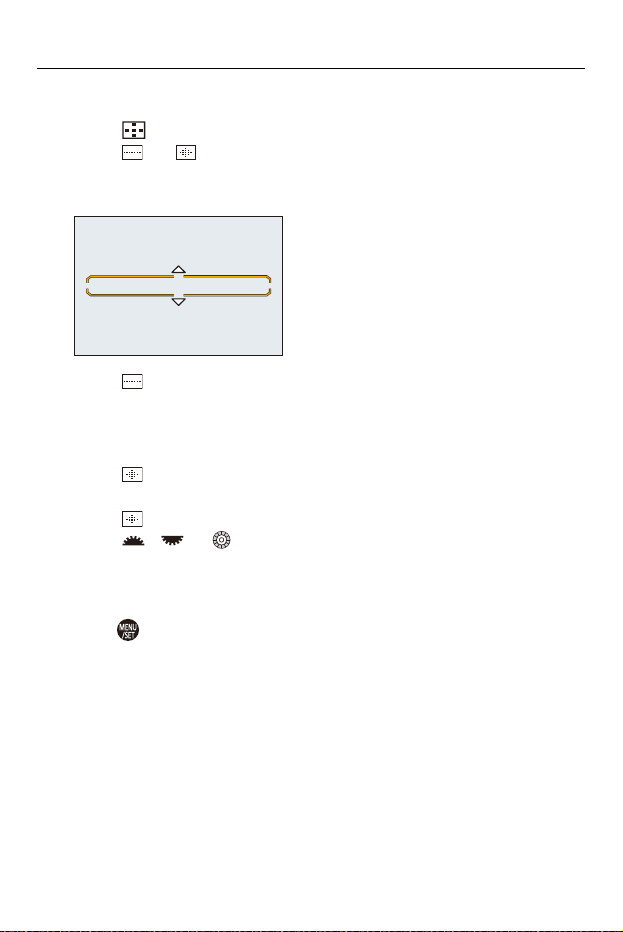
Focus / Zoom – Selecting the AF Mode
181
Move and Change the Size of the AF Area
1 Press [ ] to display the AF mode selection screen.
2 Select [ ] or [ ] and then press 4.
3 Press 3421 to move the position of the AF area.
• You can also move the AF area by touching.
When [ ] is selected
• Press 34 to switch to a horizontal pattern AF area.
• Press 21 to switch to a vertical pattern AF area.
• Press [DISP.] to return the AF area position to the center.
When [ ] is selected
• Positions can be moved to the diagonal directions using the joystick.
4 When [ ] is selected
Rotate , or to change the size of the AF area.
• You can also pinch out/pinch in the AF area to change the size.
• The first press of [DISP.] returns the AF area position to the center. The second
press returns the size of the AF area to the default.
5 Press .
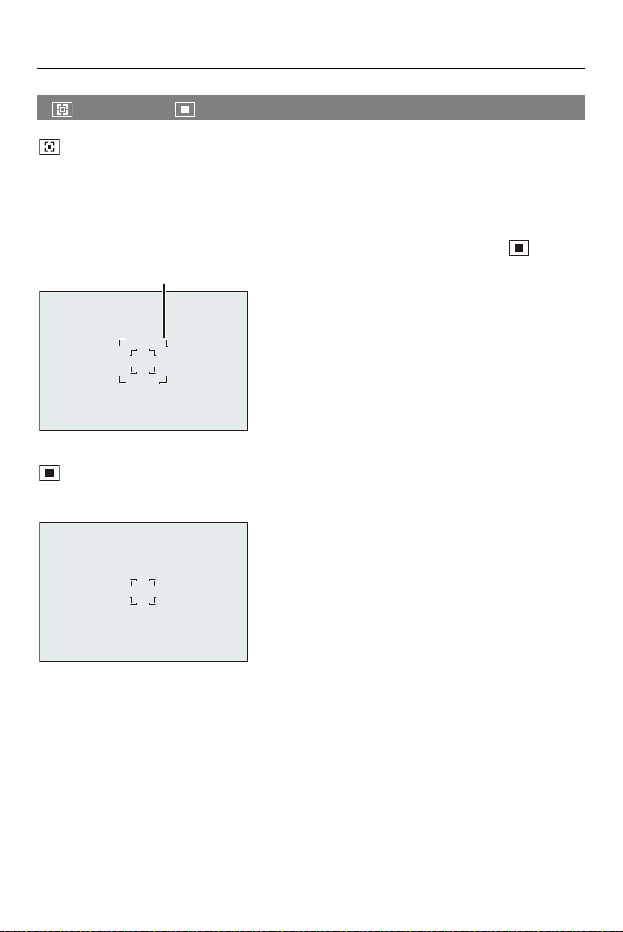
Focus / Zoom – Selecting the AF Mode
182
[1-Area+]/ [1-Area]
[1-Area+]
Emphasis within a single AF area can be focused.
Even when the subject moves out of the single AF area, the subject
remains focused in a supplementary AF area (E).
•
Effective when recording moving subjects that are difficult to track with [ ].
[1-Area]
Specify the point to be brought into focus.
(E)
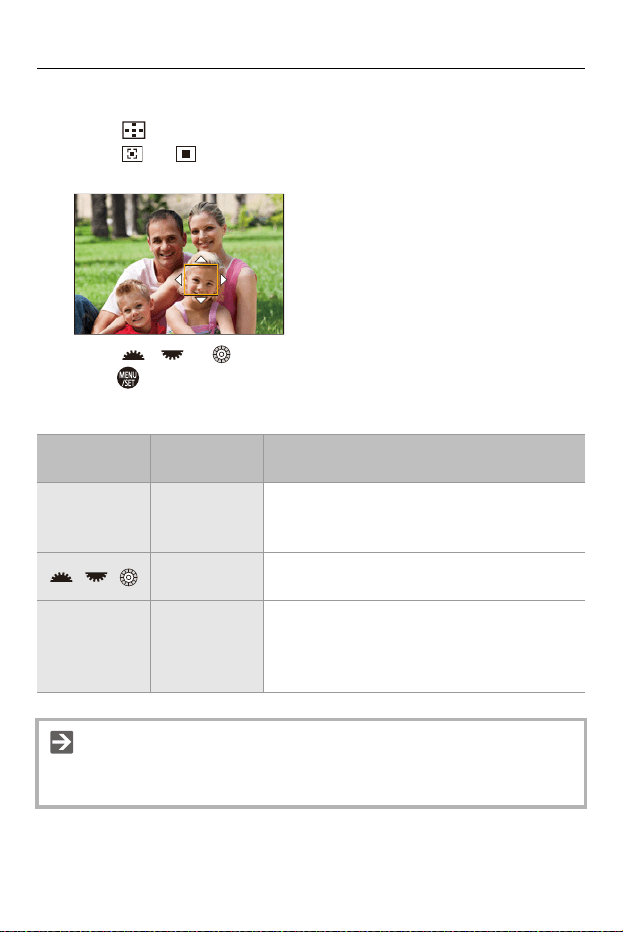
Focus / Zoom – Selecting the AF Mode
183
Move and Change the Size of the AF Area
1 Press [ ] to display the AF mode selection screen.
2 Select [ ] or [ ] and then press 4.
3 Press 3421 to move the position of the AF area.
4 Rotate , or to change the size of the AF area.
5 Press .
Operations on the AF area movement screen
Button
operations
Touch
operations
Description of operation
3421 Touch
Moves the AF area.
• Positions can be moved to the diagonal
directions using the joystick.
//
Pinch out/
pinch in
Enlarges/reduces the AF area.
[DISP.] [Reset]
First time: Returns the AF area position to the
center.
Second time: Returns the AF area size to the
default setting.
• Change the movement speed of a single AF area:
(Î[1-Area AF Moving Speed]: 166)
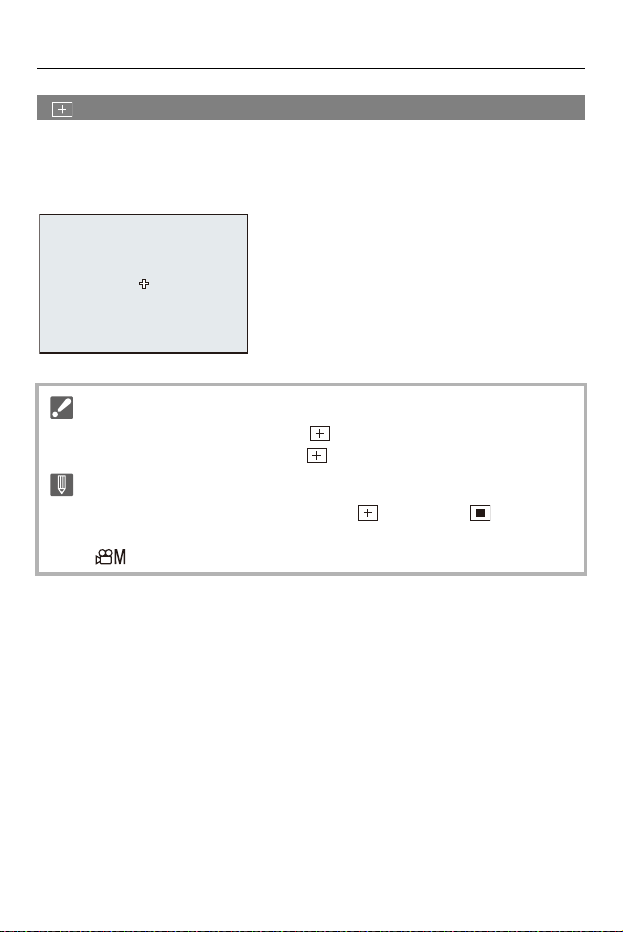
Focus / Zoom – Selecting the AF Mode
184
[Pinpoint]
You can achieve a more precise focus on a small point.
If you press the shutter button halfway, the screen that lets you check the
focus will be enlarged.
•
When the focus mode is set to [AFC], [ ] is not available.
• Automatic detection does not work in [ ].
• When the following functions are being used, [ ] switches to [ ]:
– During video recording
– In [ ] mode
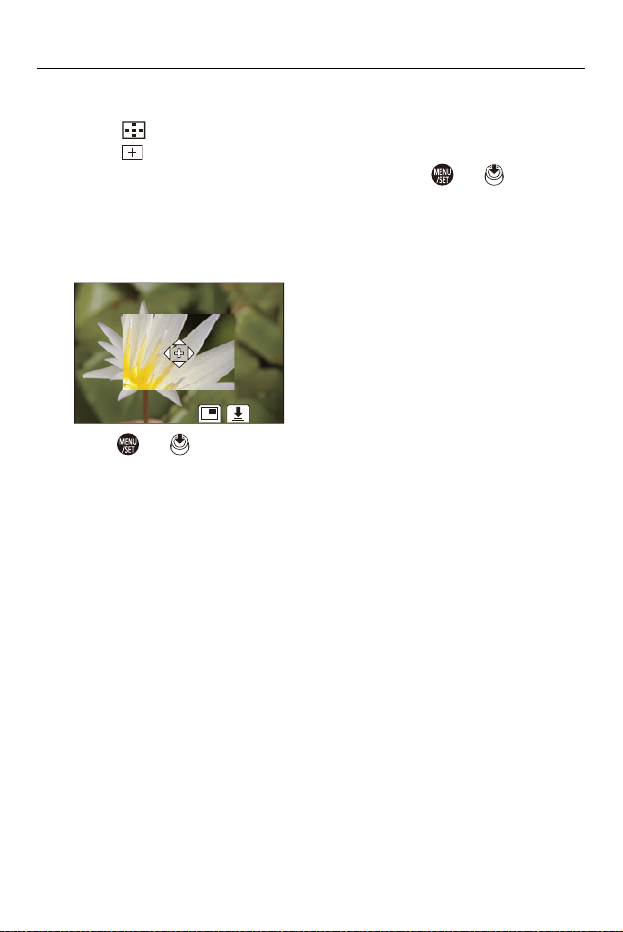
Focus / Zoom – Selecting the AF Mode
185
Move the Position of the AF Area
1 Press [ ] to display the AF mode selection screen.
2 Select [ ] and then press 4.
3 Press 3421 to set the position of [+] and then press or .
• Positions can be moved to the diagonal directions using the joystick.
• The selected position on the screen will be enlarged.
• The AF area cannot be moved to the edge of the screen.
4 Press 3421 to fine-adjust the position of [+].
5 Press or .
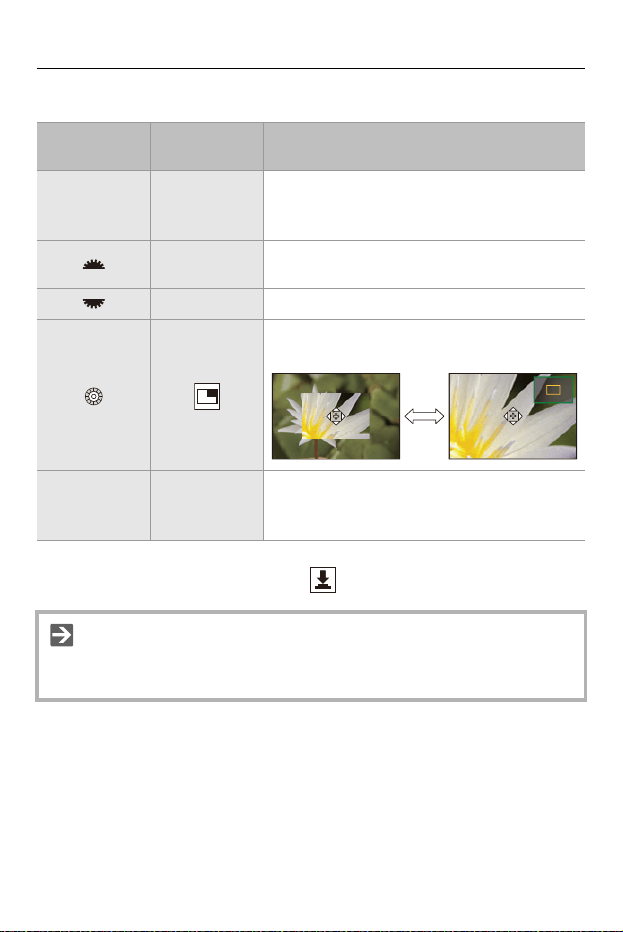
Focus / Zoom – Selecting the AF Mode
186
Operations on the Magnification Window
•
You can enlarge by approx. 3× to 6×.
• You can also take a picture by touching [ ].
Button
operations
Touch
operations
Description of operation
3421 Touch
Moves [+].
• Positions can be moved to the diagonal
directions using the joystick.
Pinch out/
pinch in
Enlarges/reduces the screen in small steps.
— Enlarges/reduces the screen.
Switches magnification window (windowed
mode/full screen mode).
[DISP.] [Reset]
First time: Returns to the screen in Step 3.
Second time: Returns the AF area position to the
center.
• You can change the display method of the magnified screen:
(Î[Pinpoint AF Setting]: 554)
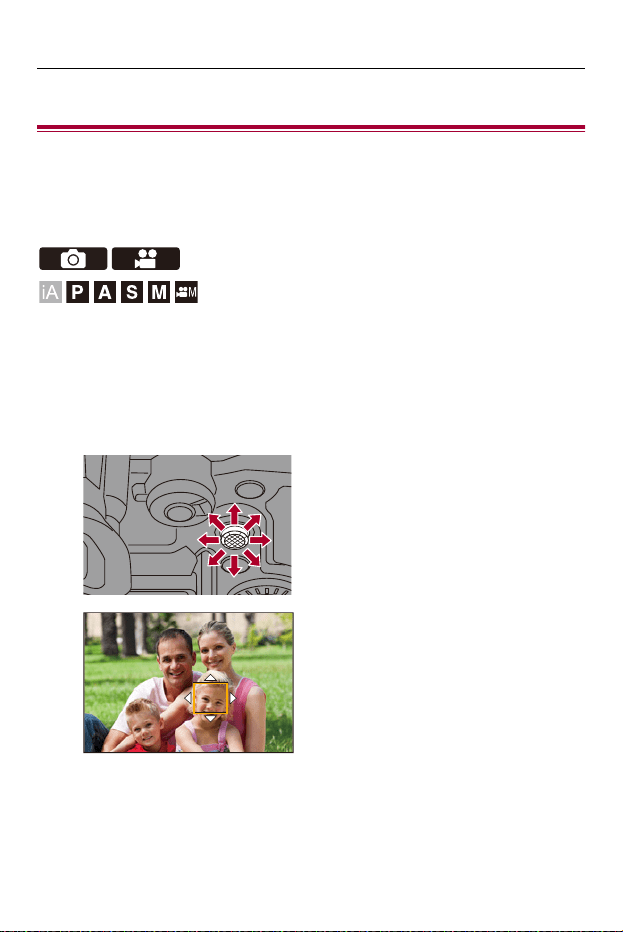
Focus / Zoom – AF Area Movement Operation
187
AF Area Movement Operation
≥Moving the AF Area by Touch: 190
≥Moving the AF Area Position with the Touch Pad: 192
≥[Focus Switching for Vert / Hor]: 194
In default settings, you can use the joystick to directly move and change
the size of the AF area when recording.
1
Move the position of the AF area.
≥On the recording screen, tilt the joystick.
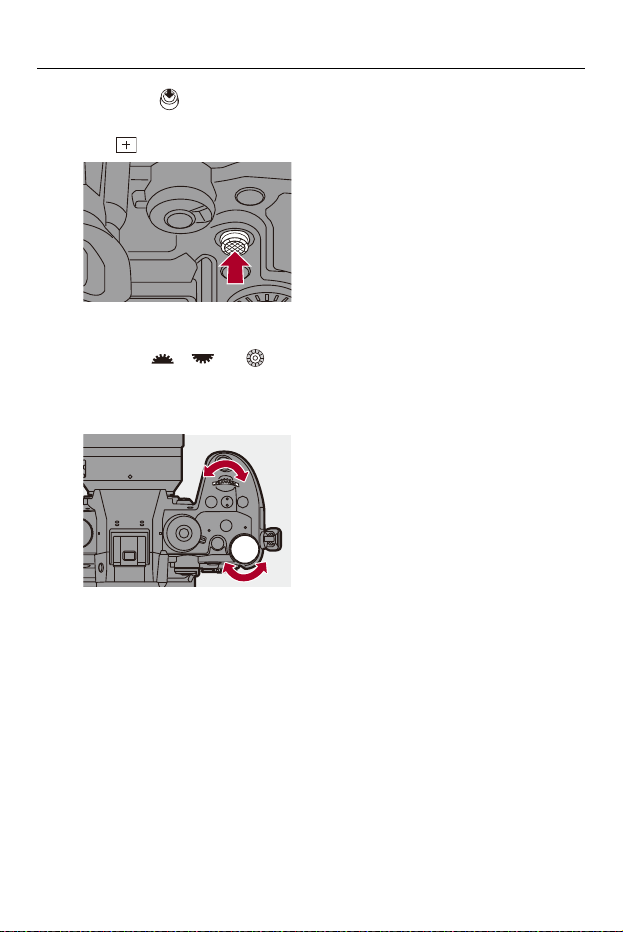
Focus / Zoom – AF Area Movement Operation
188
• Pressing enables switching between the default and set AF area
positions.
In [ ], this operation displays the enlarged screen.
2
Change the size of the AF area.
≥Rotate , or .
•
The first press of [DISP.] returns the AF area position to the center. The
second press returns the size of the AF area to the default.
3
Confirm your selection.
≥Press the shutter button halfway.
≥This will return you to the recording screen.
Focus / Zoom – AF Area Movement Operation
189
• When [Metering Mode] is [ ], the metering target also moves together with the
AF area.
• In [ ], [ ], and [ ], the size of the AF area cannot be changed.
• You can set the AF area to loop when moved:
(Î[Looped Focus Frame]: 556)
• You can assign the function that displays the AF area/MF Assist movement
screens to an Fn button:
(Î[Focus Area Set]: 524)
Focus / Zoom – AF Area Movement Operation
190
Moving the AF Area by Touch
You can move the AF area to a touched position on the monitor.
You can also change the size of the AF area.
¨ [ ] ¨ [ ] ¨ [Touch Settings] ¨ Select [Touch AF]
[AF]
This focuses on the touched subject.
[AF+AE]
This focuses on and adjusts brightness for the touched subject.
• The default setting is [AF].
Focus on the Touched Position ([AF])
1 Touch the subject.
• The AF area moves to the touched position.
2 Pinch out/pinch in to change the AF area size.
• The first touch of [Reset] returns the AF area position to the center.
The second touch returns the size of the AF area to the default.
3 Touch [Set].
• In [ ], touch [Exit].
• For [ ], the AF area setting is canceled if you touch [ ] on the recording
screen.
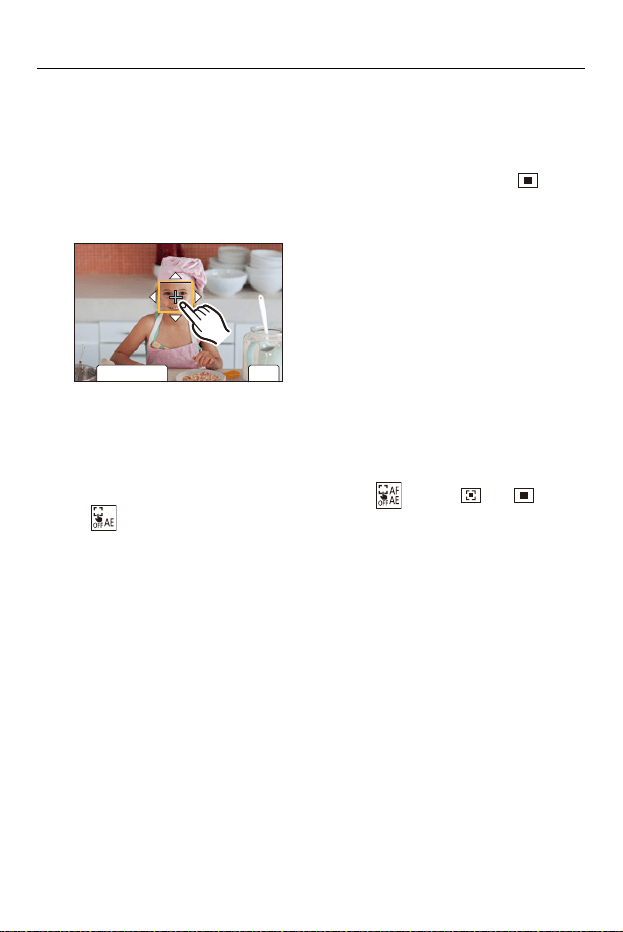
Focus / Zoom – AF Area Movement Operation
191
Focus on and Adjust Brightness for the Touched Position
([AF+AE])
1 Touch the subject to which you wish to adjust the brightness.
• At the touched position, an AF area that works in the same way as [ ] is
displayed.
This places a point to adjust brightness at the center of the AF area.
2 Pinch out/pinch in to change the AF area size.
• The first touch of [Reset] returns the AF area position to the center. The second
touch returns the size of the AF area to the default.
3 Touch [Set].
• The [AF+AE] setting is canceled if you touch [ ] (when [ ] or [ ] is set:
[ ]) on the recording screen.
6HW
ュリヴヱハ
5HVHW
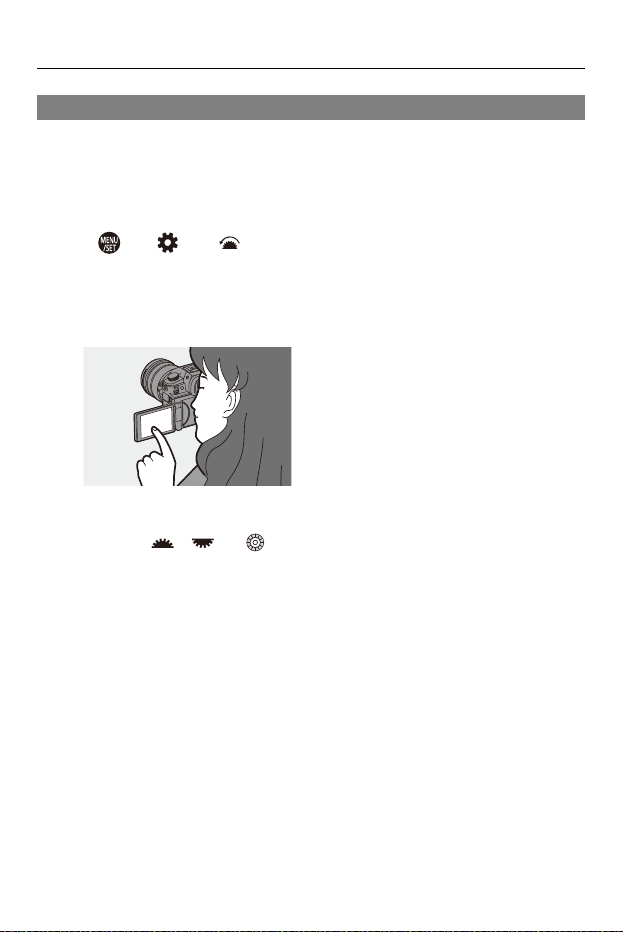
Focus / Zoom – AF Area Movement Operation
192
Moving the AF Area Position with the Touch Pad
During viewfinder display, you can touch the monitor to change the position
and size of the AF area.
1
Set [Touch Pad AF].
≥ ¨ [ ] ¨ [ ] ¨ [Touch Settings] ¨ [Touch Pad AF] ¨
[EXACT]/[OFFSET1] to [OFFSET7]
2
Move the position of the AF area.
≥During viewfinder display, touch the monitor.
3
Change the size of the AF area.
≥Rotate , or .
•
The first press of [DISP.] returns the AF area position to the center. The
second press returns the size of the AF area to the default.
4
Confirm your selection.
≥Press the shutter button halfway.
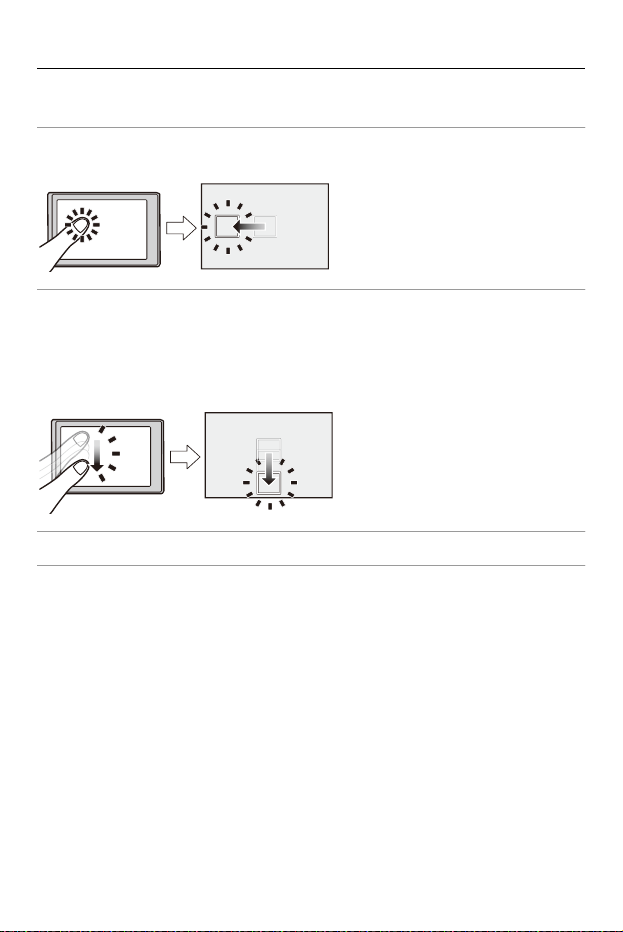
Focus / Zoom – AF Area Movement Operation
193
Setting Items ([Touch Pad AF])
[EXACT]
Moves the AF area of the viewfinder by touching a desired position on the touch pad.
[OFFSET1] (entire area)/[OFFSET2] (right half)/[OFFSET3] (upper right)/[OFFSET4]
(lower right)/[OFFSET5] (left half)/[OFFSET6] (upper left)/[OFFSET7] (lower left)
Moves the AF area of the viewfinder according to the distance you drag your finger on
the touch pad.
Select the range to be detected with the drag operation.
[OFF]
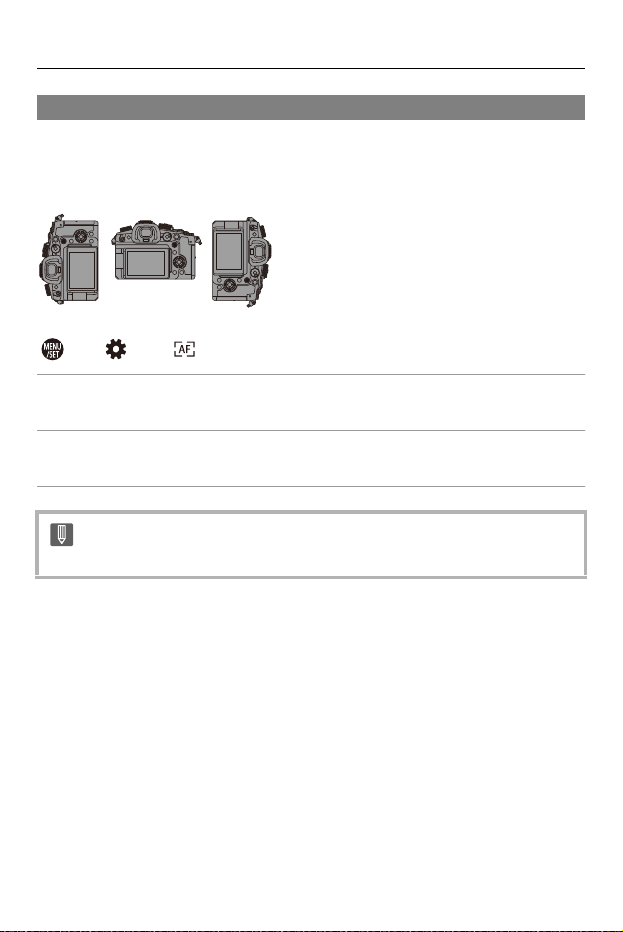
Focus / Zoom – AF Area Movement Operation
194
[Focus Switching for Vert / Hor]
Memorizes separate positions for AF areas for when the camera is
vertically aligned and for when it is horizontally aligned.
Two vertical orientations, left and right, are available.
¨ [ ] ¨ [ ] ¨ Select [Focus Switching for Vert / Hor]
[ON]
Memorizes separate positions for vertical and horizontal orientations.
[OFF]
Sets the same position for vertical and horizontal orientations.
• In MF, this memorizes the MF Assist position.
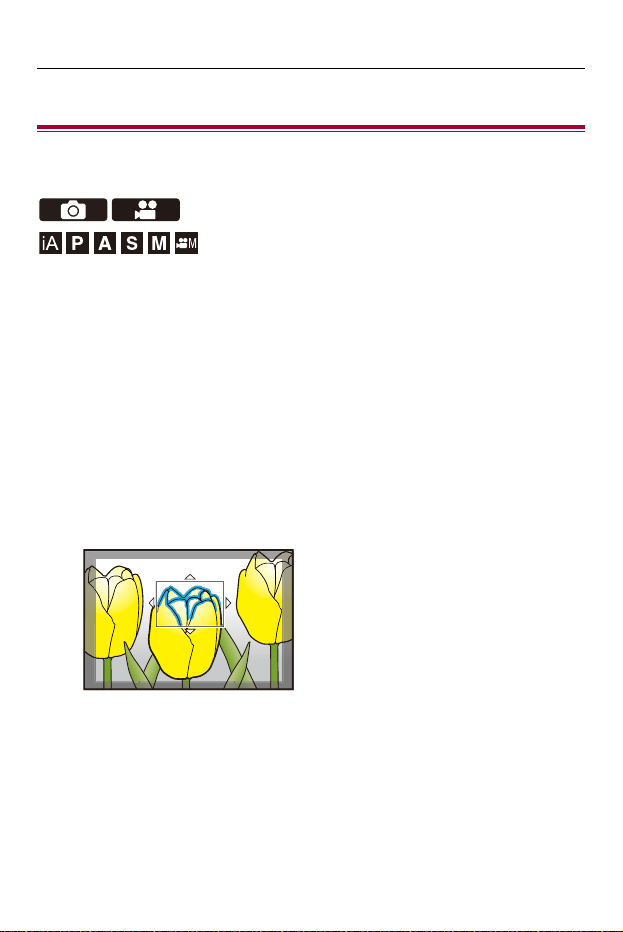
Focus / Zoom – Record Using MF
195
Record Using MF
≥[Focus Peaking]: 202
MF (Manual Focus) refers to manual focusing.
Use this function when you want to fix the focus or when the distance
between the lens and the subject is determined and you do not want to
activate AF.
1
Set the focus mode to [MF].
≥Set the focus mode lever. (ÎSelecting the Focus Mode: 153)
2
Select the focus point.
≥Tilt the joystick to select the focus point.
•
To return the point to be brought into focus to the center, press [DISP.].
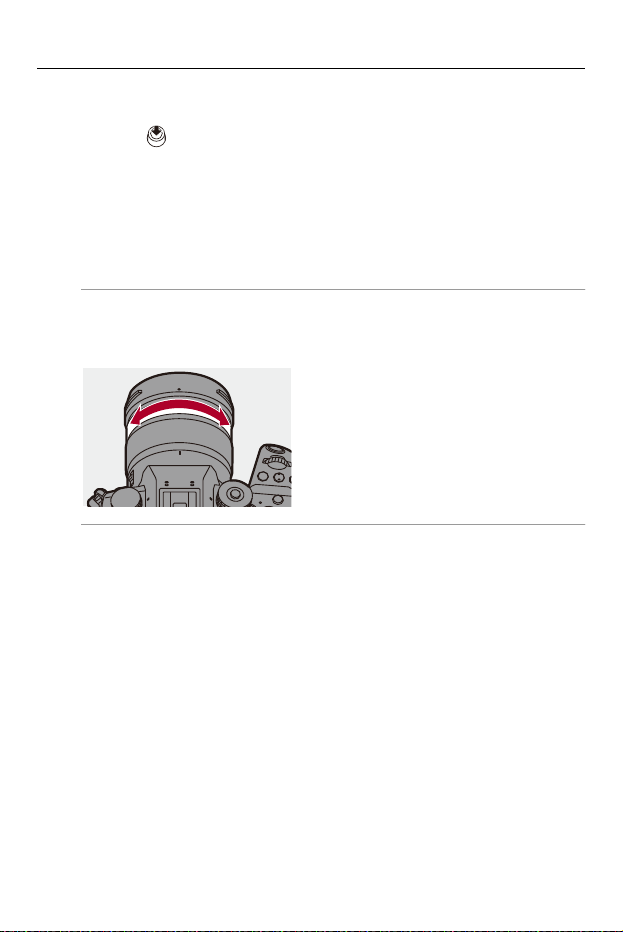
Focus / Zoom – Record Using MF
196
3
Confirm your selection.
≥Press .
≥This switches to the MF Assist screen, and shows an enlarged
display.
4
Adjust the focus.
≥The operations used to focus manually differ depending on the
lens.
When using an interchangeable lens with a focus ring
Rotate to (A) side: Focuses on a nearby subject
Rotate to (B) side: Focuses on a distant subject
(B)
(A)
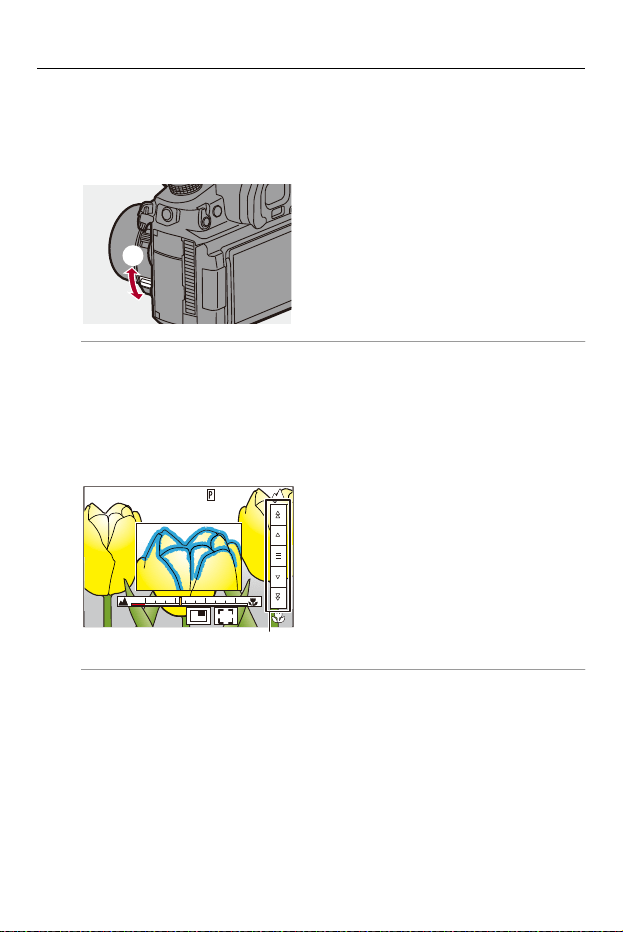
Focus / Zoom – Record Using MF
197
When using the interchangeable lens with a focus lever
Move to (C) side: Focuses on a nearby subject
Move to (D) side: Focuses on a distant subject
• The focusing speed varies depending on how far you move the focus lever.
When using an interchangeable lens with no focus ring
Press 1: Focuses on a nearby subject
Press 2: Focuses on a distant subject
• Pressing and holding 21 will increase the focus speed.
• Focus can also be adjusted by dragging the slide bar (E).
• The enlarged display position can be moved by pressing 4.
(D)
(C)
AF
(E)
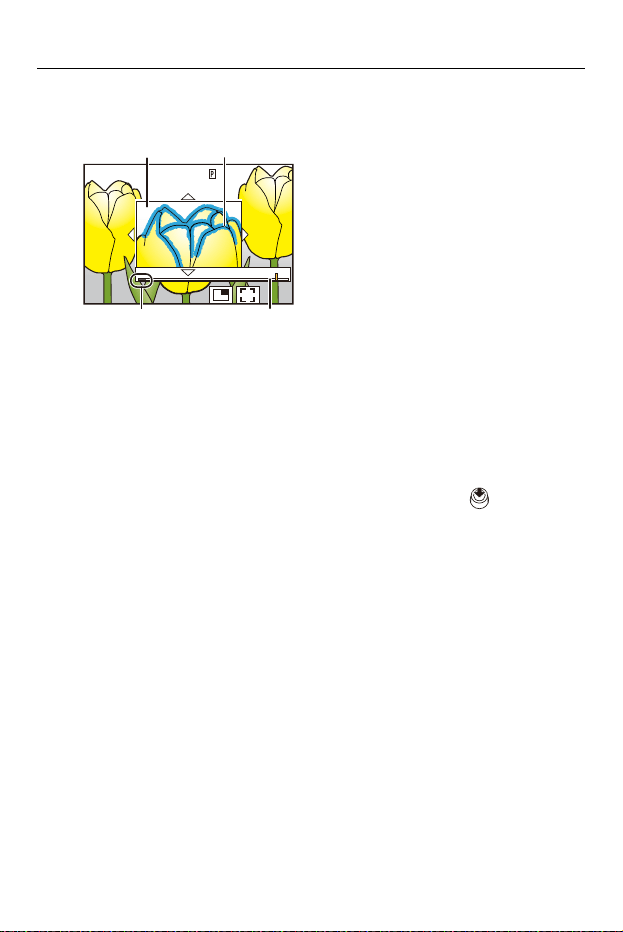
Focus / Zoom – Record Using MF
198
• This will display the in-focus portion highlighted with color. (Focus Peaking)
• A recording distance guideline is displayed. (MF Guide)
(F) MF Assist (enlarged screen)
(G) Focus Peaking
(H) MF Guide
(I) Indicator for ¶ (infinity)
5
Close the MF Assist screen.
≥Press the shutter button halfway.
≥This operation can also be performed by pressing .
6
Start recording.
≥Press the shutter button fully.
AF
∞
(m) 10.50.3
(H)
(I)
(G)(F)
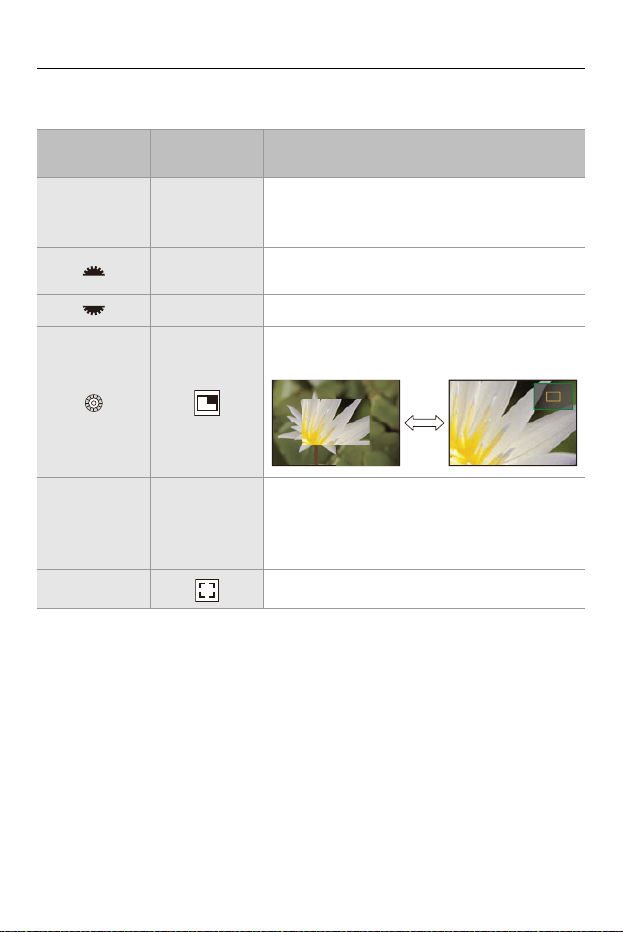
Focus / Zoom – Record Using MF
199
Operations on the MF Assist Screen
* When using an interchangeable lens with no focus ring, operation is possible by
pressing 4 to display the enlarged position setting screen.
• You can enlarge by approx. 3× to 6×.
Button
operations
Touch
operations
Description of operation
3421
*
Drag
Moves the enlarged display position.
• Positions can be moved to the diagonal
directions using the joystick.
Pinch out/
pinch in
Enlarges/reduces the screen in small steps.
— Enlarges/reduces the screen.
Switches magnification window (windowed
mode/full screen mode).
[DISP.]
*
[Reset]
*
First time: Returns the MF Assist position to the
center.
Second time: Returns the MF Assist
magnification to the default setting.
[AF ON] The AF operates.
AF
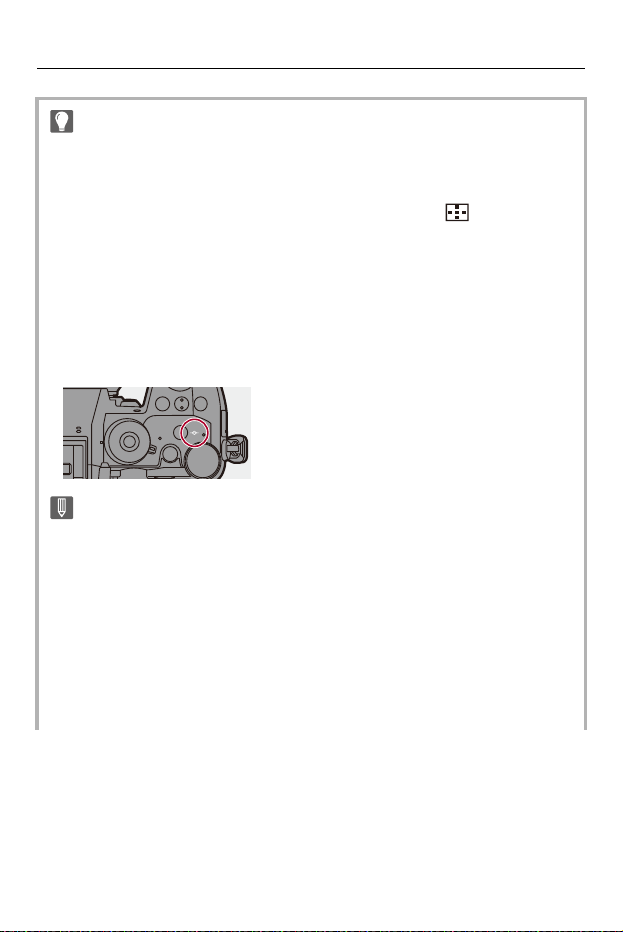
Focus / Zoom – Record Using MF
200
• On the recording screen, you can rotate the focus ring to display the MF Assist
screen. If the focus ring has been rotated to enlarge the display, the assist screen
will be exited a short time after you cease the operation.
• You can also display the MF Assist screen by pressing the [ ].
• MF Assist and MF Guide may not display depending on the lens used. You can,
however, display MF Assist by directly operating the camera using the touch
screen or a button.
• During MF, pressing [AF ON] will activate AF.
• The MF Assist screen can also be displayed during video recording.
• The recording distance reference mark indicates the position of the imaging
surface. This becomes the reference when measuring the recording distance.
• The distance guides in the MF Guide differ depending on the lens and zoom
position.
• If the lens does not support the display of distance guides, only the MF Guide
distance marks are displayed.
• During video recording using the following functions, the MF Assist screen
cannot be displayed:
– [Rec Quality] with a high frame rate video exceeding a recording frame rate of
60.00p
– [Variable Frame Rate]

Focus / Zoom – Record Using MF
201
• You can change the Focus Peaking sensitivity and the display method:
(Î[Focus Peaking]: 202)
• You can memorize the MF Assist position separately for vertical and horizontal
orientations:
(Î[Focus Switching for Vert / Hor]: 194)
• You can change the display method of the magnified screen:
(Î[MF Assist]: 553)
• You can change the MF Guide display units:
(Î[MF Guide]: 553)
• You can disable focus ring operation:
(Î[Focus Ring Lock]: 554)
• You can set the movement of the MF Assist position to loop:
(Î[Looped Focus Frame]: 556)
• The camera memorizes the focus point when you turn it off:
(Î[Lens Focus Resume]: 581)
• The amount of focus movement can be set:
(Î[Focus Ring Control]: 583)
• You can assign the function that displays the AF area/MF Assist movement
screens to an Fn button:
(Î[Focus Area Set]: 524)
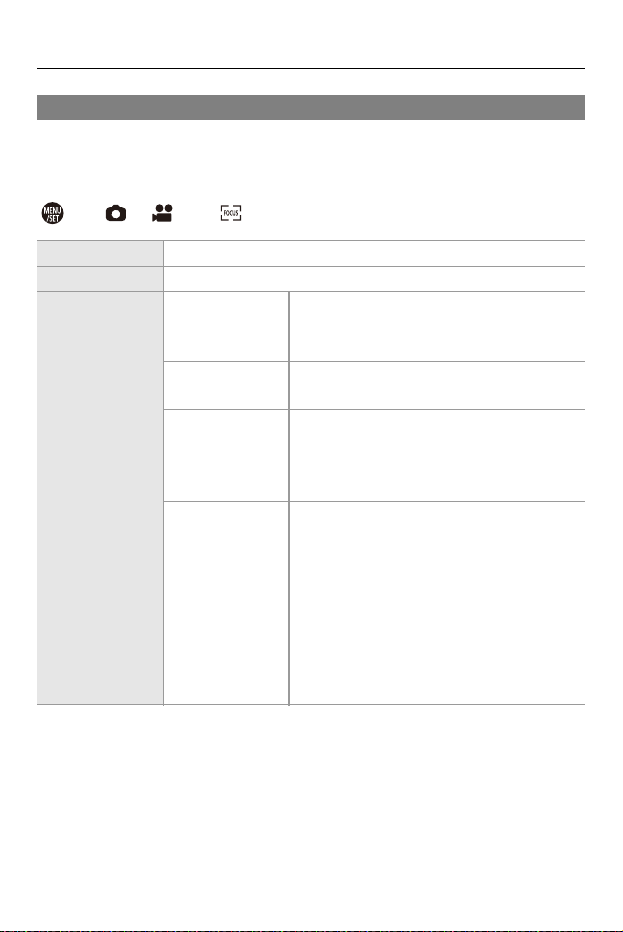
Focus / Zoom – Record Using MF
202
[Focus Peaking]
During MF operation, in-focus portions (portions on the screen with clear
outlines) are highlighted with color.
¨ [ ]/[ ] ¨ [ ] ¨ Select [Focus Peaking]
[ON] Focus Peaking display is performed.
[OFF] —
[SET]
[Focus Peaking
Sensitivity]
If adjusted to the negative direction, portions
to be highlighted are reduced, allowing you
to achieve a more precise focus.
[Display Color]
You can set the display color of the in-focus
portion.
[Display During
AFS]
When set to [ON], the Focus Peaking
display is also possible when the shutter
button is pressed halfway in the [AFS] focus
mode.
[Display During
MF]
[While In Live View]: Focus Peaking is
displayed in the recording screen.
[While Live View Is Enlarged]: Focus
Peaking is displayed in the MF Assist screen
and the video enlarged display of live view
screen.
[When Shutter Is Pressed]: When set to
[OFF], Focus Peaking is hidden when the
shutter is pressed.
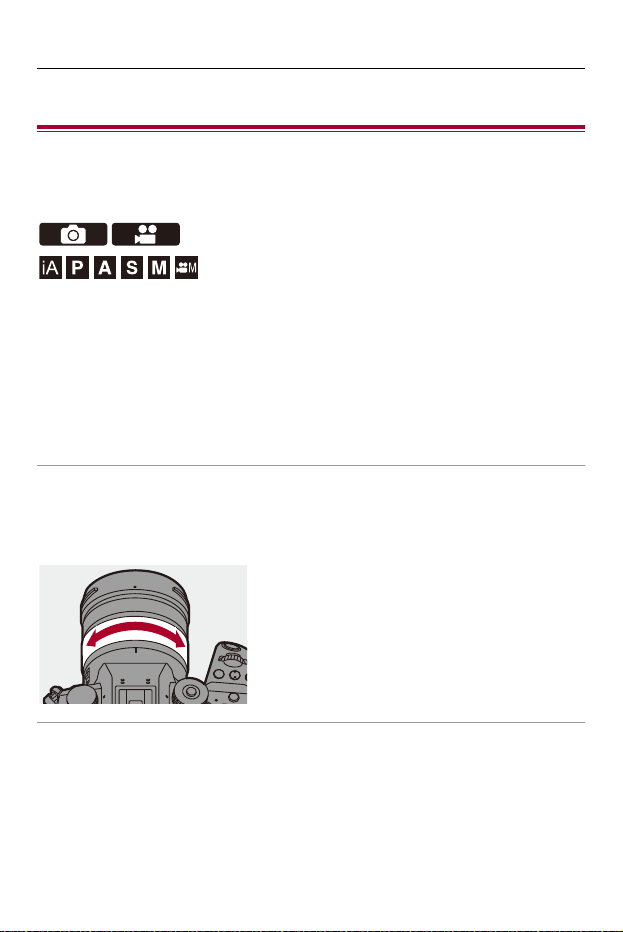
Focus / Zoom – Recording with Zoom
204
Recording with Zoom
≥Extended Tele Conversion: 206
≥[Power Zoom Lens]: 208
Use the optical zoom of the lens to zoom to telephoto or wide-angle.
When taking pictures, use [Ex. Tele Conv.] to increase a telescopic effect
without image deterioration.
When recording videos, use [Image Area of Video] to obtain the same
telescopic effect as [Ex. Tele Conv.].
•
For details about [Image Area of Video] (Î[Image Area of Video]: 150)
Interchangeable lens with a zoom ring
Rotate the zoom ring.
(T): Telephoto
(W): Wide-angle
(W)
(T)
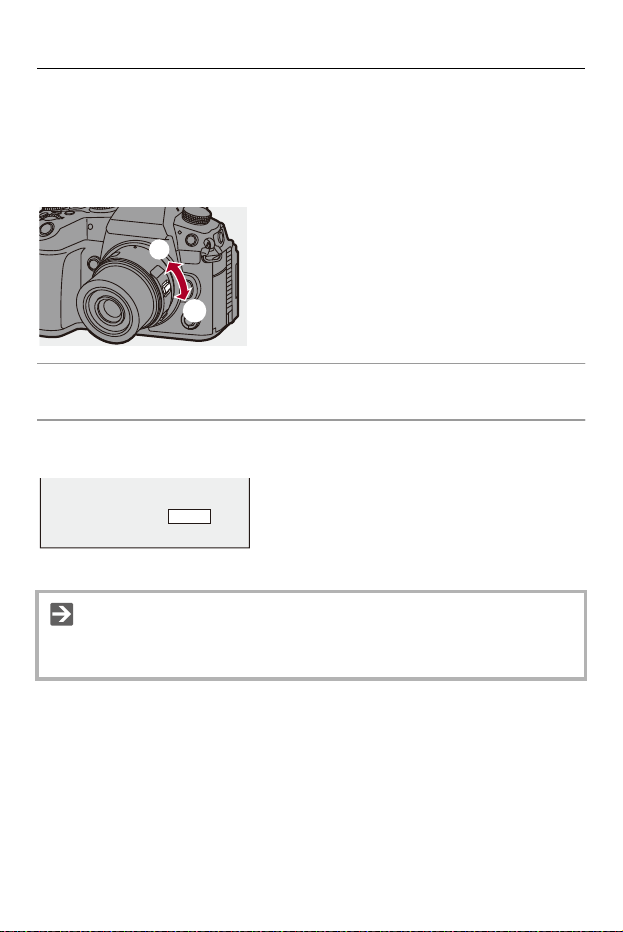
Focus / Zoom – Recording with Zoom
205
Interchangeable lens that supports power zoom (electronic zoom)
Move the zoom lever.
(The zoom speed varies depending on how far you move the lever.)
• If you assign [Zoom Control] to an Fn button, you can operate optical zoom slowly by
pressing 21 or fast by pressing 34. (ÎFn Buttons: 517)
Interchangeable lens that does not support zoom
Optical zoom is not available.
≥The focal length is displayed on the recording screen.
•
The focal length display can be hidden:
(Î[Focal Length]: 571)
(W)
(T)
35mm
Focus / Zoom – Recording with Zoom
206
Extended Tele Conversion
[Ex. Tele Conv.] enables you to take pictures that are further enlarged
beyond what is available with the optical zoom, without any deterioration in
image quality.
•
The [Ex. Tele Conv.] maximum magnification ratio differs depending on the [Picture
Size] set in the [Photo] ([Image Quality]) menu.
– Set to [ M]: 1.4×
– Set to [ S]: 2.0×
1
Set [Picture Size] to [M] or [S].
≥ ¨ [ ] ¨ [ ] ¨ [Picture Size] ¨ [M]/[S]
2
Set [Ex. Tele Conv.].
≥ ¨ [ ] ¨ [ ] ¨ [Ex. Tele Conv.]
[TELE CONV.]
Fixes the zoom magnification at the maximum.
[OFF]

Focus / Zoom – Recording with Zoom
207
• When displaying the [Ex. Tele Conv.] setting screen using the Fn button, pressing
[DISP.] allows you to change the [Picture Size] setting.
• When the following functions are being used, [Ex. Tele Conv.] is not available:
– [RAW] ([Picture Quality])
– High Resolution mode
Focus / Zoom – Recording with Zoom
208
[Power Zoom Lens]
This sets the zoom operation when using a lens that supports power zoom
(motorized zoom).
•
This is available when using a supported interchangeable lens.
¨ [ ] ¨ [ ] ¨ Select [Power Zoom Lens]
[Step Zoom]
When you operate the zoom with this setting [ON], the zoom will
stop at preset focal length positions.
• This is not possible during video recording.
[Zoom Speed]
You can set the zoom speed for zoom operations.
• If you set [Step Zoom] to [ON], the zoom speed will not
change.
[Photo]
[H] (High speed)/[M] (Medium speed)/[L]
(Low speed)
[Video]
[H] (High speed)/[M] (Medium speed)/[L]
(Low speed)
[Zoom Ring]
This can be selected when a lens compatible with power zoom
that has a zoom lever and zoom ring is mounted on the camera.
The operations with the zoom ring are disabled when set to
[OFF] to prevent erroneous operation.

209
Drive / Shutter / Image Stabilizer
This chapter describes functions for recording in drive mode and the image
stabilizer function.
≥Selecting the Drive Mode: 210
≥Taking Burst Pictures: 212
≥High Resolution mode: 220
≥Recording with Time Lapse Shot: 225
≥Recording with Stop Motion Animation: 232
≥Time Lapse Shot/Stop Motion Animation Videos: 236
≥Recording Using the Self-timer: 238
≥Bracket Recording: 242
≥[Silent Mode]: 250
≥[Shutter Type]: 252
≥Image Stabilizer: 259
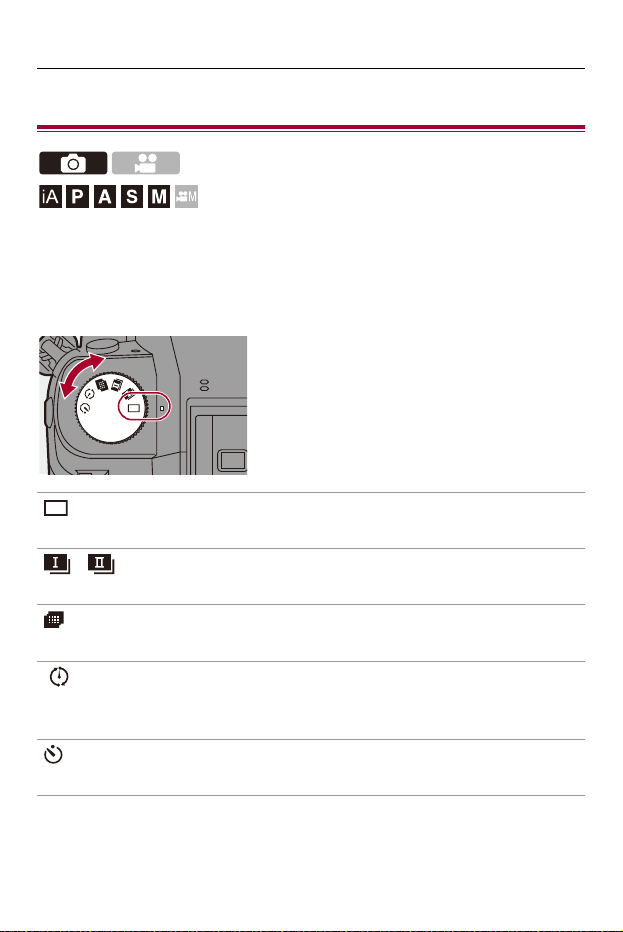
Drive / Shutter / Image Stabilizer – Selecting the Drive Mode
210
Selecting the Drive Mode
You can switch the drive mode to Single, Burst, etc. to match the recording
conditions.
Rotating the drive mode dial.
[ ] (Single)
Takes one picture each time the shutter button is pressed.
[ ]/[ ] (Burst) (ÎTaking Burst Pictures: 212)
Takes pictures continuously while the shutter button is pressed and held.
[ ] (High Resolution mode) (ÎHigh Resolution mode: 220)
This merges pictures with a high resolution from multiple recorded images.
[ ] (Time Lapse Shot/Stop Motion Animation) (ÎRecording with Time Lapse
Shot: 225, Recording with Stop Motion Animation: 232)
Takes pictures with Time Lapse Shot or Stop Motion Animation.
[ ] (Self-timer) (ÎRecording Using the Self-timer: 238)
Takes pictures when the set time elapses after the shutter button is pressed.

Drive / Shutter / Image Stabilizer – Selecting the Drive Mode
211
• The detailed setting screens for each drive mode can be called up with an Fn
button:
[] ¨ [ ] ¨ [Fn Button Set] ¨ [Setting in REC mode] ¨ [Drive Mode
Setting]
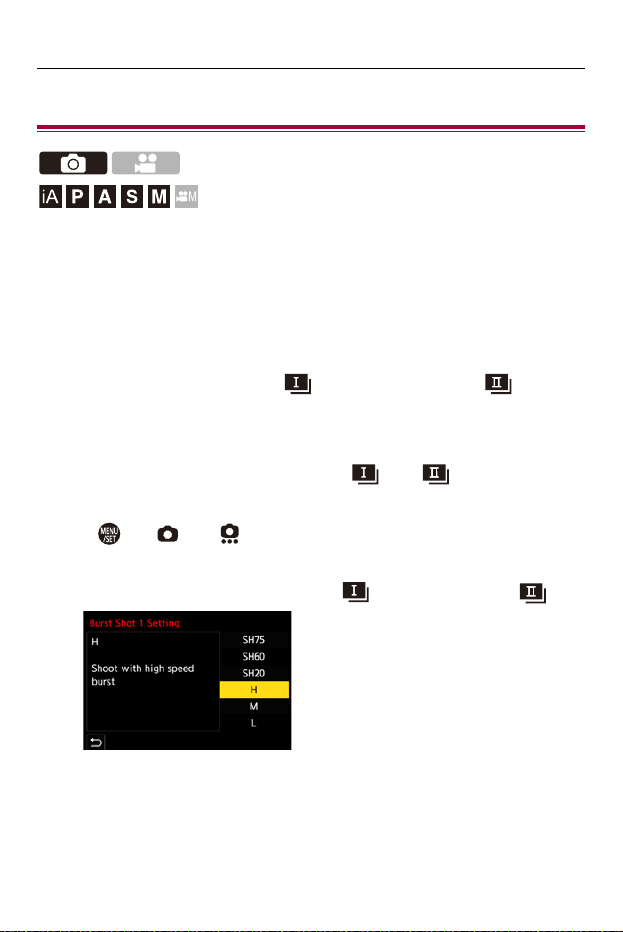
Drive / Shutter / Image Stabilizer – Taking Burst Pictures
212
Taking Burst Pictures
Takes pictures continuously while the shutter button is pressed and held.
You can select burst recording settings to suit the recording conditions,
including [H], [M], and [L] which enable burst recording with high image
quality, and SH burst recording which takes burst pictures at ultra high
speeds using an electronic shutter.
1
Set the drive mode to [ ] (Burst Shot 1) or [ ] (Burst
Shot 2).
≥Set the drive mode dial. (ÎSelecting the Drive Mode: 210)
•
Configure the burst settings for each of [ ] and [ ].
2
Select the burst rate.
≥ ¨ [ ] ¨ [ ] ¨ [Burst Shot Setting] ¨ [Burst Shot 1
Setting]/[Burst Shot 2 Setting]
•
With the default settings, [H] is set for [ ] and [SH75] is set for [ ].

Drive / Shutter / Image Stabilizer – Taking Burst Pictures
213
[SH75]
Takes burst pictures at ultra high speed with the electronic shutter, 75 frames/
second.
[SH60]
Takes burst pictures at ultra high speed with the electronic shutter, 60 frames/
second.
[SH20]
Takes burst pictures at ultra high speed with the electronic shutter, 20 frames/
second.
[H]
Takes high-speed burst pictures.
[M]
Takes medium-speed burst pictures.
[L]
Takes low-speed burst pictures.
3
Close the menu.
≥Press the shutter button halfway.
4
Start recording.
• Takes burst pictures while the shutter button is pressed fully.

Drive / Shutter / Image Stabilizer – Taking Burst Pictures
214
Burst Rate
• The burst rate may be lower depending on the settings for recording such as [Picture
Size] and focus mode.
Mechanical
shutter, electronic
front curtain
Electronic shutter
Live View when
taking burst
pictures
[SH75] — 75 frames/second None
[SH60] — 60 frames/second None
[SH20] — 20 frames/second None
[H]
(High speed)
14 frames/second
([AFS]/[MF])
8 frames/second
([AFC])
14 frames/second
([AFS]/[MF])
7 frames/second
([AFC])
None ([AFS]/[MF])
Available ([AFC])
[M]
(Medium speed)
6 frames/second ([AFS]/[MF])
5 frames/second ([AFC])
Available
[L]
(Low speed)
2 frames/second Available
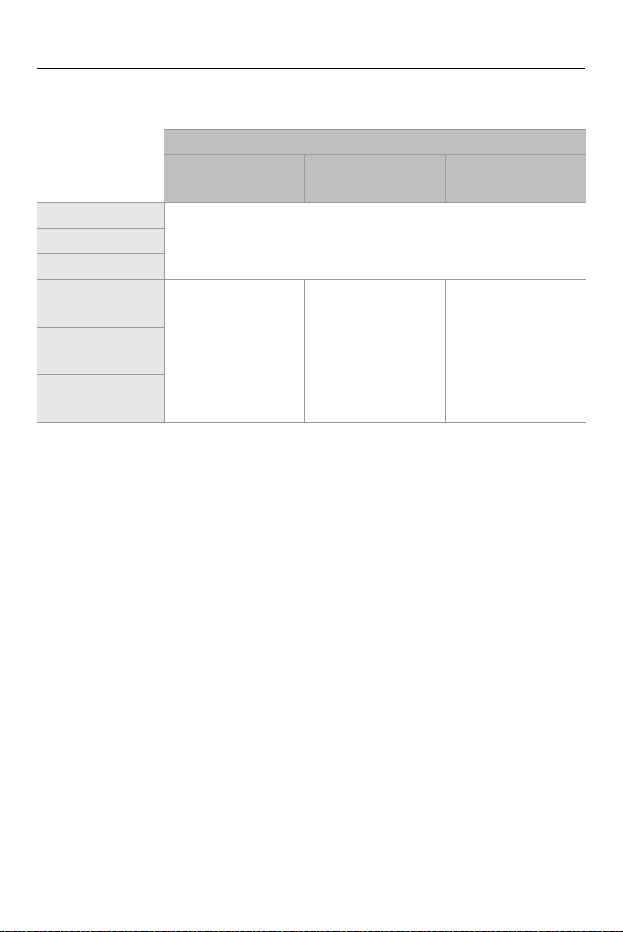
Drive / Shutter / Image Stabilizer – Taking Burst Pictures
215
Maximum Number of Frames Recordable
• When recording under the test conditions specified by Panasonic.
Recording conditions may reduce the maximum number of frames recordable.
*1 Recording stops when the maximum number of frames recordable is reached.
*2 The burst rate will become lower during recording but pictures can continue to be
taken until the card becomes full.
*3 Using a CFexpress Type B card
*4 Using an SDXC memory card compliant with UHS-II UHS Speed Class 3
[Picture Quality]
[FINE]/[STD.]
[RAW+FINE]/
[RAW+STD.]
[RAW]
[SH75]
200 frames
*1
[SH60]
[SH20]
[H]
(High speed)
95 frames or
more
*2, 3
/
90 frames or
more
*2, 4
40 frames or more
*2
65 frames or
more
*2, 3
/
50 frames or
more
*2, 4
[M]
(Medium speed)
[L]
(Low speed)

Drive / Shutter / Image Stabilizer – Taking Burst Pictures
216
Number of Pictures That Can Be Taken Continuously
When you press the shutter button halfway, the number of pictures that can
be taken continuously will appear on the recording screen.
Example) When 20 frames: [r20]
• Once recording starts, the number of pictures that can be taken continuously will
decrease.
– During [H]/[M]/[L] burst recording: When [r0] appears, the burst rate decreases.
– During SH burst recording: When [r0] appears, the burst recording stops.
• When [r99+] is displayed on the recording screen, you can take 100 or more burst
pictures.
r20
ISO
100
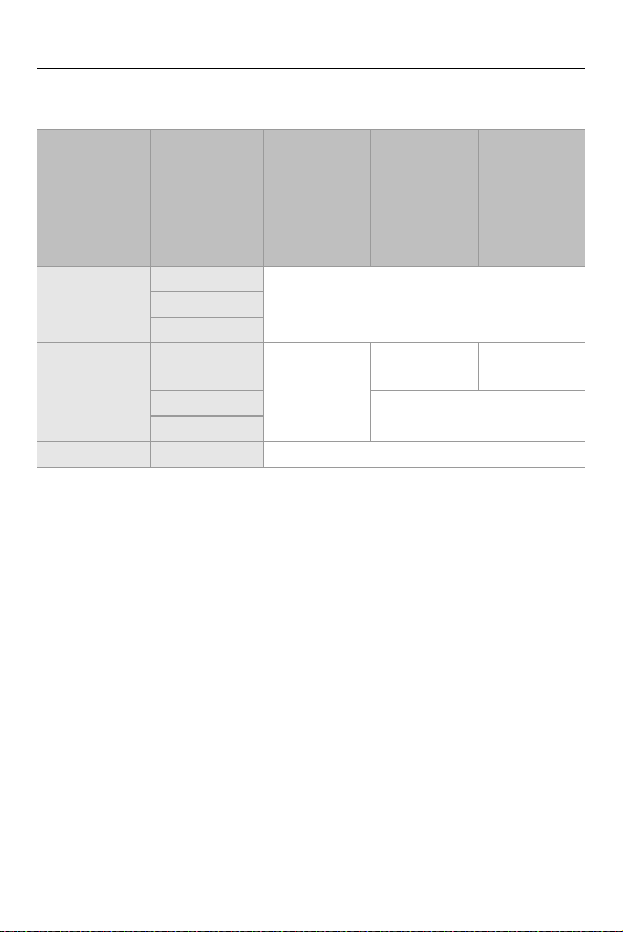
Drive / Shutter / Image Stabilizer – Taking Burst Pictures
217
Focus when Taking Burst Pictures
• When the subject is dark with [AFC], the focus is fixed to that of the first frame.
• With estimated focus, the burst rate takes priority and the focus is estimated to the
extent possible.
• With normal focus, the burst rate may become slow.
Focus mode
[Focus/
Shutter
Priority]
(Î[Focus/
Shutter
Priority]: 552)
[SH75]/
[SH60]/
[SH20]
[H] [M]/[L]
[AFS]
[FOCUS]
Fixed to the focus of the first frame
[BALANCE]
[RELEASE]
[AFC]
[FOCUS]
—
Estimated
focus
Normal focus
[BALANCE]
Estimated focus
[RELEASE]
[MF] — Focus set with manual focus

Drive / Shutter / Image Stabilizer – Taking Burst Pictures
218
Exposure when Taking Burst Pictures
Focus mode
[SH75]/
[SH60]/
[SH20]
[H] [M]/[L]
[AFS] Fixed to the exposure of the first frame
The exposure is
adjusted for each
frame
[AFC] —
The exposure is
adjusted for each
frame
[MF] Fixed to the exposure of the first frame

Drive / Shutter / Image Stabilizer – Taking Burst Pictures
219
• It may take a while to save burst pictures.
If you continue to take burst pictures while saving is in progress, the maximum
number of frames recordable will be reduced.
When taking burst pictures, we recommend using a high-speed card.
• For information about the high temperature display (ÎFor information
about the high temperature display: 130)
Notes on SH burst recording
• [AFC] focus mode switches to [AFS].
• [Shutter Type] is fixed to [ELEC.].
• There are limits on the shutter speed you can set during SH burst recording.
– [SH75]: To a minimum of 1/80
– [SH60]: To a minimum of 1/60
– [SH20]: To a minimum of 1/20
• The aperture will be fixed during burst recording.
• [Auto Review] is not available.
• The images recorded will be saved as a set of burst group pictures. (ÎGroup
Images: 492)
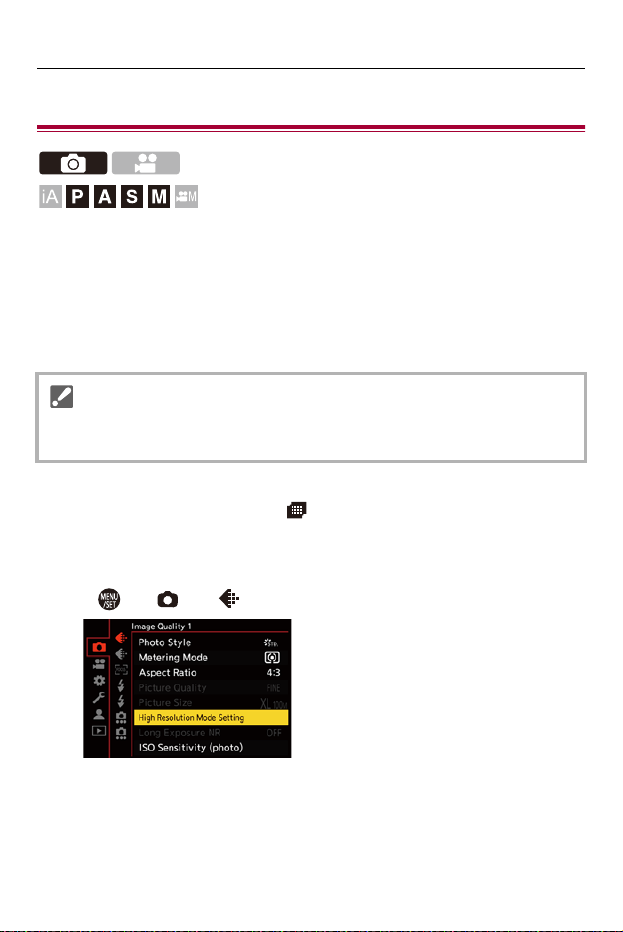
Drive / Shutter / Image Stabilizer – High Resolution mode
220
High Resolution mode
This merges pictures with a high resolution from multiple recorded images.
This function is suitable for recording subjects that do not move.
When [Handheld High-Res] is set to on, you can record pictures with a
higher resolution without using a tripod.
The picture after merging can be saved in RAW or JPEG format.
1
Set the drive mode to [ ] (High resolution).
≥Set the drive mode dial. (ÎSelecting the Drive Mode: 210)
2
Set the recording settings.
≥ ¨ [ ] ¨ [ ] ¨ [High Resolution Mode Setting]
•
When recording with [Handheld High-Res] set to [OFF], use a tripod to
minimize camera shake.

Drive / Shutter / Image Stabilizer – High Resolution mode
221
[Handheld High-Res]
You can record without using a tripod. Turn on the image stabilizer function.
• When [OFF], the image stabilizer function is not available.
[Picture Quality]
Set the compression rate at which the pictures are to be stored.
[COMBINED]/[FINE]/[RAW+FINE]/[RAW]
• When set to [COMBINED], recording is with the same settings as [Picture
Quality] in the [Photo] ([Image Quality]) menu. (However, [STD.] changes to
[FINE].)
[Picture Size]
Sets the image size after merging.
When the [Aspect Ratio] is [4:3].
[XL] (100 M): 11552×8672
[LL] (50.5 M): 8192×6144
When the [Aspect Ratio] is [3:2].
[XL] (89 M): 11552×7696
[LL] (44.5 M): 8192×5464
When the [Aspect Ratio] is [16:9].
[XL] (75 M): 11552×6496
[LL] (37.5 M): 8192×4608
When the [Aspect Ratio] is [1:1].
[XL] (75 M): 8672×8672
[LL] (37.5 M): 6144×6144
• RAW images are always recorded in the [4:3] (11552×8672) aspect ratio.

Drive / Shutter / Image Stabilizer – High Resolution mode
222
[Simul Record Normal Shot]
Simultaneously takes pictures that are not merged when [ON] is set. The first
picture will be saved with [Picture Size] set to [L].
[Shutter Delay]
Sets the delay time from when the shutter button is pressed until the shutter is
released.
[30 SEC]/[15 SEC]/[8 SEC]/[4 SEC]/[2 SEC]/[1 SEC]/[1/2 SEC]/[1/4 SEC]/[1/8
SEC]/[Off]
[Motion Blur Processing]
Sets the correction method to use when the subject moved.
[MODE1]: This gives priority to High Resolution mode, therefore subject blur
appears as an afterimage in the picture.
[MODE2]: This reduces afterimage from subject blur, but cannot obtain the
same High Resolution mode effect in the corrected range.
• When [Handheld High-Res] is [ON], [Motion Blur Processing] is fixed to
[MODE2].
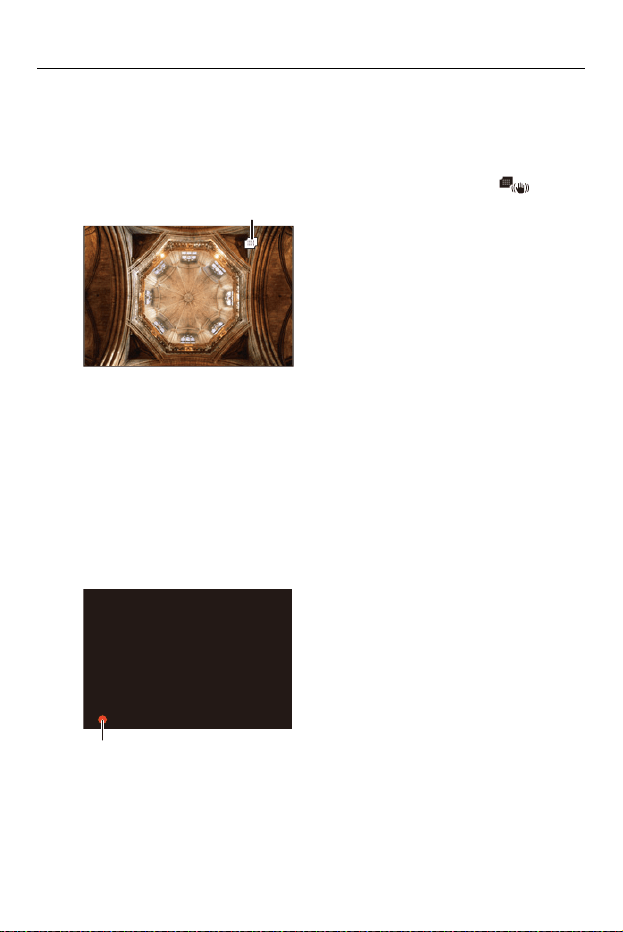
Drive / Shutter / Image Stabilizer – High Resolution mode
223
3
Decide on the composition and then fix the camera in
place.
• If blurring is detected, the High Resolution mode icon (A) blinks.
• When [Handheld High-Res] is set to [ON], the icon changes to [ ].
4
Start recording.
≥Press the shutter button fully.
•
With the default settings, [Shutter Delay] is activated, so there will be a gap in
time from when the shutter button is pressed until the shutter is released.
• The screen goes dark during recording.
• The recording state indication (red) (B) blinks.
Do not move the camera while it is blinking.
• You can continue recording when the merging process ends.
(A)
(B)

Drive / Shutter / Image Stabilizer – High Resolution mode
224
• In High Resolution mode, recording will be performed using the following
settings:
– [Shutter Type]: Fixed to [ELEC.]
– Minimum aperture value: F11
– Shutter speed: 1 second to 1/32000 of a second
– ISO sensitivity: Upper limit to [1600]
– Focus mode: [AFS]/[MF]
• Hold the camera firmly during handheld recording so that the camera does not
shake. Recording may fail if there is a lot of shaking.
• Image merging can take a long time with handheld recording.
• When you record in an extremely bright location or under lighting such as
fluorescent or LED lighting, the coloring or brightness of the image may change
or horizontal stripes may appear on the screen.
Lowering the shutter speed may reduce the effect of horizontal stripes.
• Devices other than this camera may not be able to play back images recorded
using High Resolution mode.
• You can display the reference point and check the camera shake status:
(Î[I.S. Status Scope]: 572)
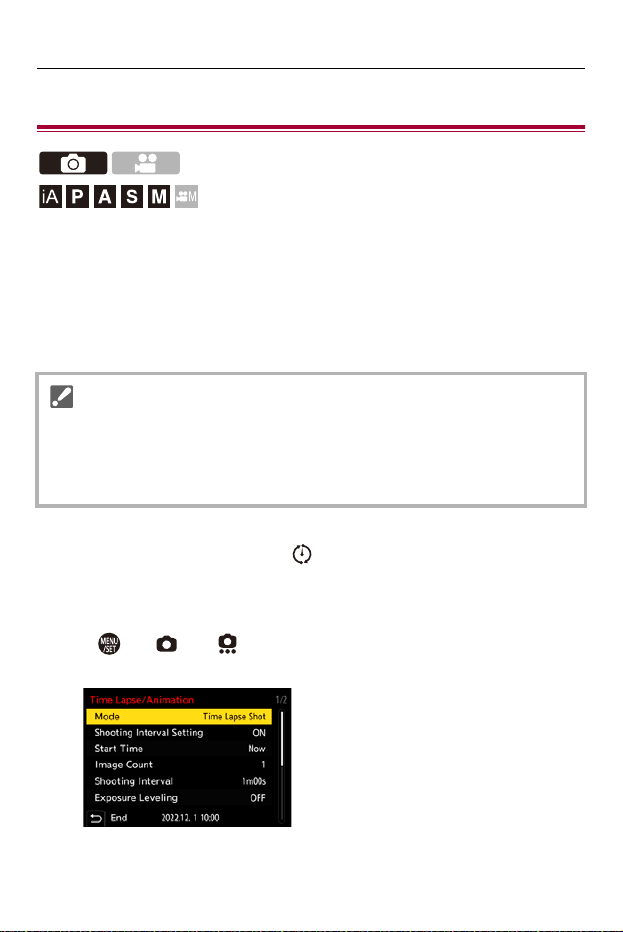
Drive / Shutter / Image Stabilizer – Recording with Time Lapse Shot
225
Recording with Time Lapse Shot
Pictures are taken automatically at a set recording interval.
This feature is ideal for keeping track of changes over time in subjects such
as animals and plants.
The pictures taken will be saved as a set of group images that can also be
combined into a video. (ÎGroup Images: 492)
1
Set the drive mode to [ ].
≥Set the drive mode dial. (ÎSelecting the Drive Mode: 210)
2
Set [Mode] to [Time Lapse Shot].
≥ ¨ [ ] ¨ [ ] ¨ [Time Lapse/Animation] ¨ [Mode] ¨ [Time
Lapse Shot]
•
Check that the clock is set correctly. (ÎSetting the Clock (When Turning On for
the First Time): 72)
• For long recording intervals, we recommend setting [Lens Focus Resume] to
[ON] in the [Custom] ([Lens / Others]) menu.

Drive / Shutter / Image Stabilizer – Recording with Time Lapse Shot
226
3
Set the recording settings.
[Mode]
Switches between Time Lapse Shot and Stop Motion Animation.
[Shooting Interval Setting]
[ON]: Sets the interval before the next recording takes place.
[OFF]: Takes pictures without leaving recording intervals.
[Start Time]
[Now]: Starts recording when the shutter button is pressed fully.
[After 2 Seconds]: Starts recording 2 seconds after the shutter button is
pressed fully.
[Start Time Set]: Starts recording at the set time.
[Image Count]/[Shooting Interval]
Sets the number of pictures and the recording interval to be taken.
The number of pictures and the recording interval to be taken can be
automatically calculated and set. (ÎSetting Assistant for Time Lapse Shot
Recording: 228)
• [Shooting Interval] is not available when [Shooting Interval Setting] is set to
[OFF].
[Exposure Leveling]
Adjusts the exposure automatically to prevent large changes in brightness
between adjacent frames.
[Create New Folder At Rec]
[Create a New Folder]: When set to [ON], a new folder is created each time
that Time Lapse Shot recording is started.
[File Number Reset]: When set to [ON], the file number is reset each time a
new folder is created.

Drive / Shutter / Image Stabilizer – Recording with Time Lapse Shot
227
4
Close the menu.
≥Press the shutter button halfway.
5
Start recording.
≥Press the shutter button fully.
•
When [Start Time Set] is set, the camera will enter into sleep status until the
start time is reached.
• During recording standby, the camera enters into sleep status when no
operation is performed for a certain period of time.
• The recording will stop automatically.
6
Create a video. (ÎTime Lapse Shot/Stop Motion
Animation Videos: 236)
• After the recording has stopped, select [Yes] on the confirmation screen to
proceed to create a video.
Even if you select [No], you can still create a video with [Time Lapse Video] in
the [Playback] ([Process Image]) menu. (Î[Time Lapse Video]: 509)
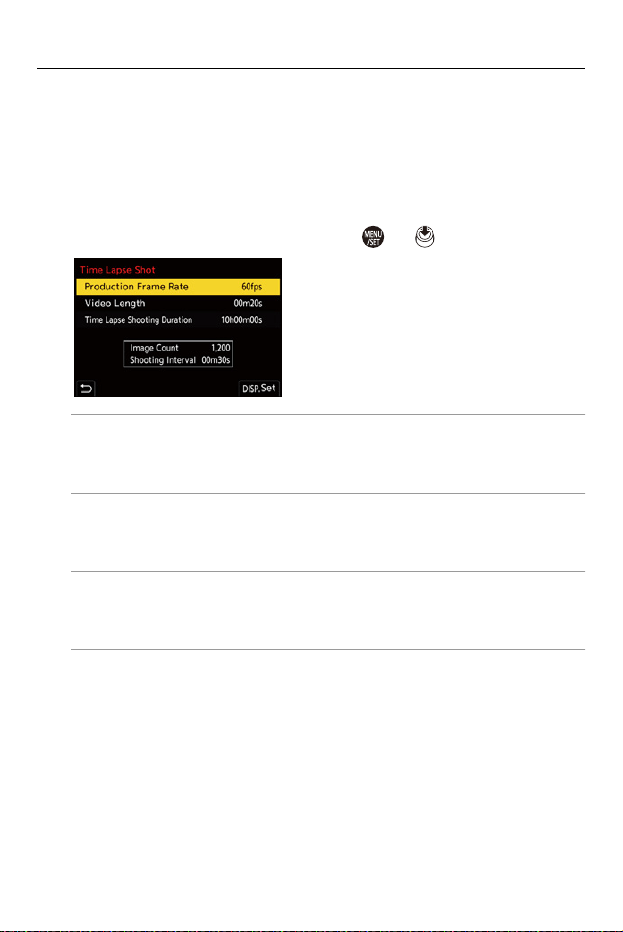
Drive / Shutter / Image Stabilizer – Recording with Time Lapse Shot
228
Setting Assistant for Time Lapse Shot Recording
When [DISP.] is pressed in the [Image Count]/[Shooting Interval] setting
screen, [Image Count] and [Shooting Interval] can be set by automatically
calculating them from the frame rate, time, and recording duration of the
video to be created.
1 Press 34 to select the item and then press or .
[Production Frame Rate]
Sets the frame rate of videos to be created.
It can be set in the range between 1 fps and 99 fps.
[Video Length]
Sets the playback time of videos to be created.
It can be set in the range between 00m01s and 99m59s.
[Time Lapse Shooting Duration]
Sets the Time Lapse Shot duration.
It can be set in the range between 00h00m01s and 99h59m59s.
2 Press [DISP.] to confirm.
• The settings are reflected when you select [Yes].

Drive / Shutter / Image Stabilizer – Recording with Time Lapse Shot
229
• [Image Count] can be set in the range between 1 and 9999.
• [Shooting Interval] is set in the range between 00m01s and 99m59s.
Decimal places are rounded down if the number is not evenly divisible.
• When the setting is one where recording is not possible, [Image Count] or
[Shooting Interval] is displayed in red letters.
• When [Shooting Interval Setting] is [OFF], the Time Lapse Shot settings cannot
be automatically calculated.

Drive / Shutter / Image Stabilizer – Recording with Time Lapse Shot
230
Operations during Time Lapse Shot Recording
Pressing the shutter button halfway during sleep status will turn on the
camera.
•
You can perform the following operations by pressing [Q] during Time Lapse Shot
recording.
[Continue]
Returns to the recording. (Only during recording)
[Pause]
Pauses the recording. (Only during recording)
[Resume]
Resumes the recording. (Only while paused)
• You can also press the shutter button to resume.
[End]
Stops the Time Lapse Shot recording.

Drive / Shutter / Image Stabilizer – Recording with Time Lapse Shot
231
• Pictures recorded to more than one card cannot be combined into a single video.
• The camera gives priority to achieving the standard exposure, so it may not take
pictures at the set interval or take the set number of pictures.
Furthermore, it may not end at the end time displayed on the screen.
• Time Lapse Shot is paused in the following cases.
– When the charge on the battery runs out
– When you set the camera on/off switch to [OFF]
You can set the camera on/off switch to [OFF] and replace the battery or card.
Set the camera on/off switch to [ON] and then press the shutter button fully to
resume recording.
(Note that the images recorded after replacing the card will be saved as a
separate set of group images.)
• [Exposure Leveling] is not available if ISO sensitivity is set to other than [AUTO]
in [M] mode.
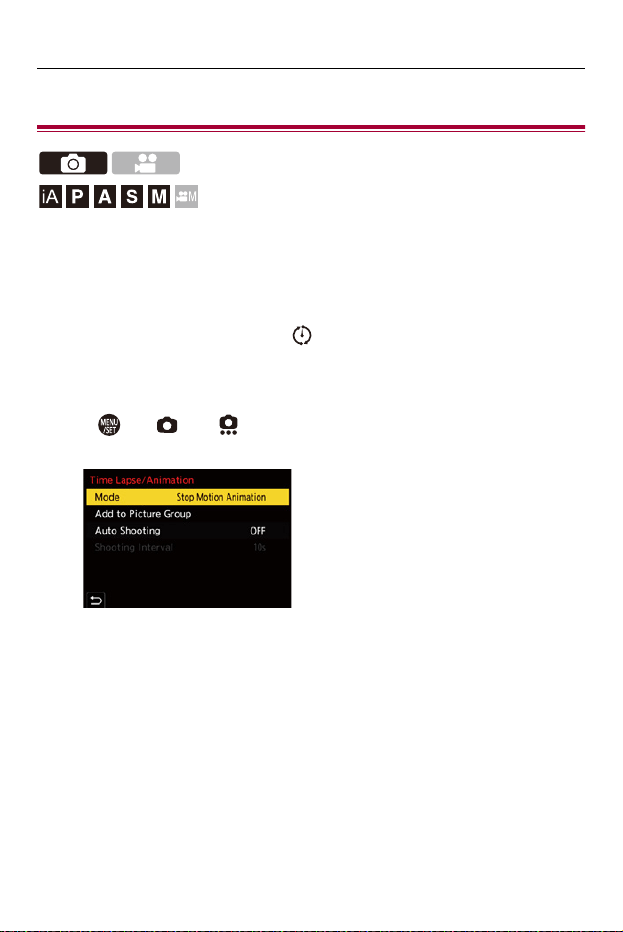
Drive / Shutter / Image Stabilizer – Recording with Stop Motion Animation
232
Recording with Stop Motion Animation
Take pictures while moving the subject little by little.
The pictures taken will be saved as a set of group images that can be
combined into a stop motion video. (ÎGroup Images: 492)
1
Set the drive mode to [ ].
≥Set the drive mode dial. (ÎSelecting the Drive Mode: 210)
2
Set [Mode] to [Stop Motion Animation].
≥ ¨ [ ] ¨ [ ] ¨ [Time Lapse/Animation] ¨ [Mode] ¨ [Stop
Motion Animation]

Drive / Shutter / Image Stabilizer – Recording with Stop Motion Animation
233
3
Set the recording settings.
[Mode]
Switches between Time Lapse Shot and Stop Motion Animation.
[Add to Picture Group]
Allows you to continue recording for a set of stop motion images that have
already been recorded.
• Select an image and proceed to Step
5
.
[Auto Shooting]
[ON]: Takes pictures automatically at a set recording interval.
[OFF]: This is for taking pictures manually, frame by frame.
[Shooting Interval]
Sets the recording interval for [Auto Shooting].
4
Close the menu.
≥Press the shutter button halfway.
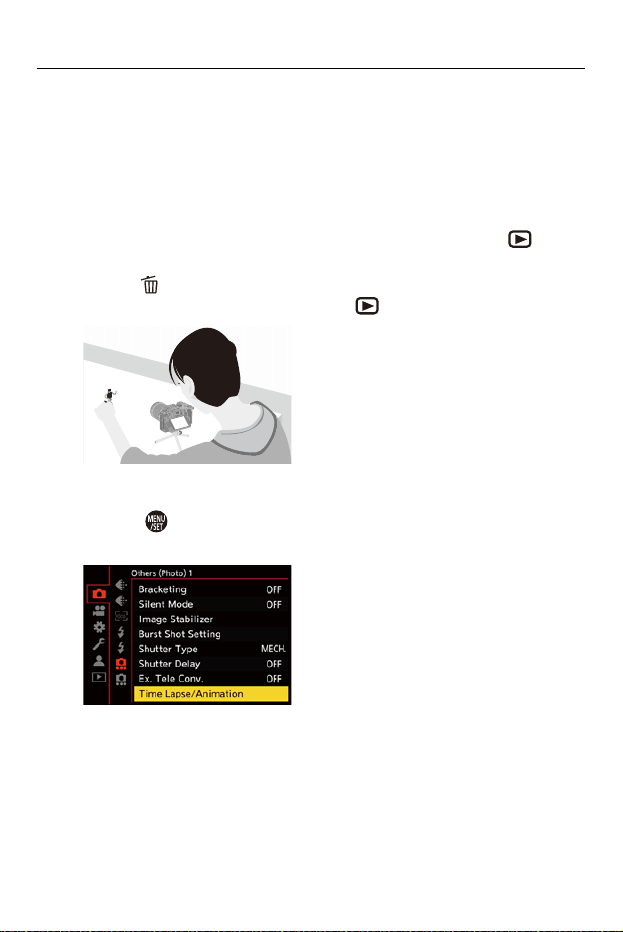
Drive / Shutter / Image Stabilizer – Recording with Stop Motion Animation
234
5
Start recording.
≥Press the shutter button fully.
≥Take pictures repeatedly while moving the subject little by little.
•
The recording screen displays up to two pictures taken previously. Use them
as reference for the amount of movement.
• You can play back the recorded stop motion images by pressing [ ] during
recording.
Press [ ] to delete unnecessary images.
To return to the recording screen, press [ ] again.
6
Stop recording.
≥Press and then select [Time Lapse/Animation] from the
[Photo] menu to stop recording.

Drive / Shutter / Image Stabilizer – Recording with Stop Motion Animation
235
7
Create a video. (ÎTime Lapse Shot/Stop Motion
Animation Videos: 236)
• After the recording has stopped, select [Yes] on the confirmation screen to
proceed to create a video.
Even if you select [No], you can still create a video with [Stop Motion Video] in
the [Playback] ([Process Image]) menu. (Î[Stop Motion Video]: 509)
• Up to 9999 frames can be recorded.
• If the camera is turned off while recording, a message for resuming the recording
is displayed when it is turned on. Selecting [Yes] allows you to continue the
recording from the interruption point.
• The camera gives priority to achieving the standard exposure, so it may not take
pictures at the set interval when the flash, etc. is used for recording.
• A picture cannot be selected from [Add to Picture Group] when it is the only one
that was taken.

Drive / Shutter / Image Stabilizer – Time Lapse Shot/Stop Motion Animation Videos
236
Time Lapse Shot/Stop Motion Animation
Videos
After performing Time Lapse Shot or stop motion recording, you can
proceed to create a video.
•
Refer to the sections below about these recording functions.
– Recording with Time Lapse Shot: 225
– Recording with Stop Motion Animation: 232
• You can also create videos with [Time Lapse Video] (Î[Time Lapse Video]: 509) or
[Stop Motion Video] (Î[Stop Motion Video]: 509) in the [Playback] menu.
1
Select [Yes] on the confirmation screen that appears
after recording.
2
Set the options for creating a video.
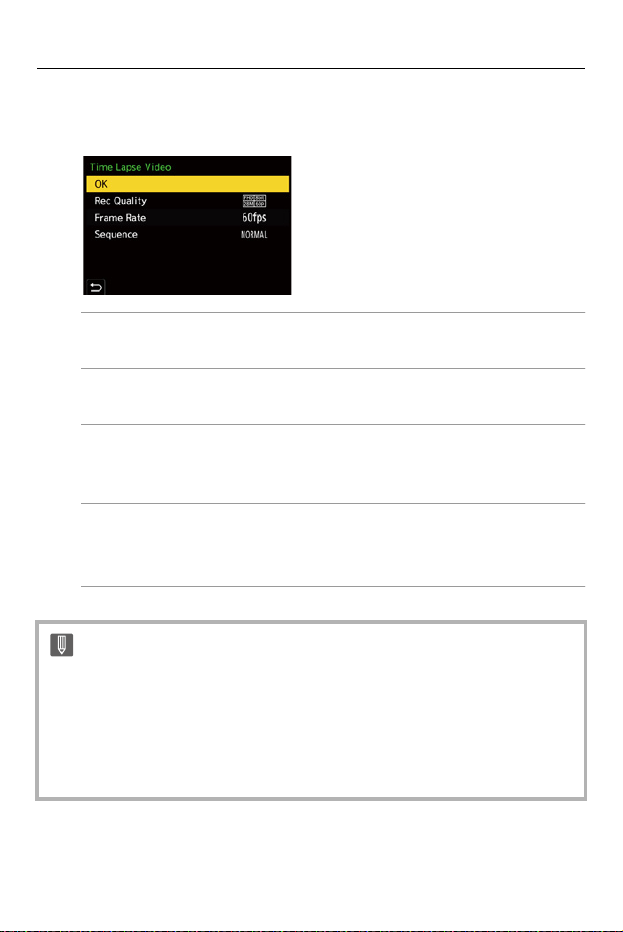
Drive / Shutter / Image Stabilizer – Time Lapse Shot/Stop Motion Animation Videos
237
3
Select [OK].
≥A video will be created in the [MP4] recording file format.
[OK]
Creates a video.
[Rec Quality]
Sets the video image quality.
[Frame Rate]
Sets the number of frames per second.
The larger the number is, the smoother the video will be.
[Sequence]
[NORMAL]: Splices pictures together in recording order.
[REVERSE]: Splices pictures together in reverse recording order.
• Videos cannot be created when the [System Frequency] is set to [24.00Hz
(CINEMA)].
• Videos cannot be created if the recording time exceeds 30 minutes.
• In the following cases, videos cannot be created if the file size exceeds 4 GB:
– When an SDHC memory card is being used and a 4K [Rec Quality] is set
– When an FHD [Rec Quality] is set
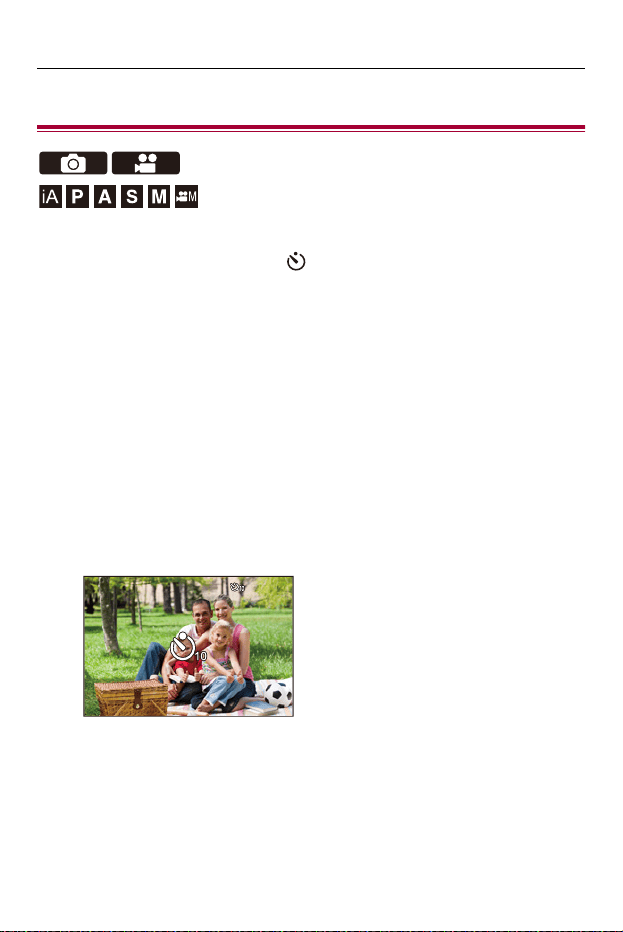
Drive / Shutter / Image Stabilizer – Recording Using the Self-timer
238
Recording Using the Self-timer
1
Set the drive mode to [ ].
≥Set the drive mode dial. (ÎSelecting the Drive Mode: 210)
2
Set the self-timer time. (ÎSetting the Self-timer Time:
240)
• When recording videos, set [Self Timer For Video] in [Self Timer
Setting] of the [Video] ([Others (Video)]) menu to [ON].
3
Close the menu.
≥Press the shutter button halfway.
4
Decide on the composition and then adjust the focus.
≥Press the shutter button halfway.
•
The focus and exposure are fixed when the shutter button is pressed halfway.
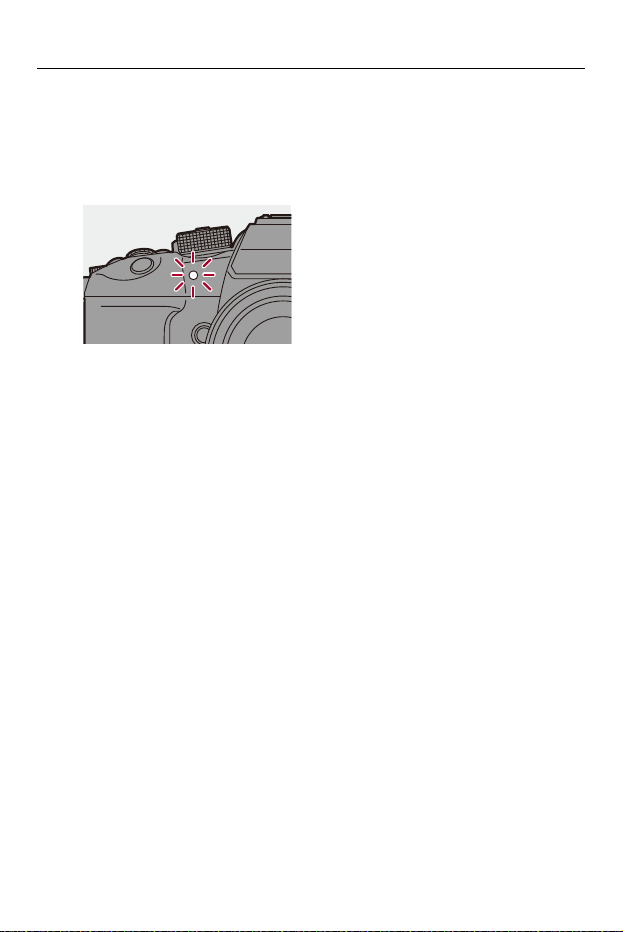
Drive / Shutter / Image Stabilizer – Recording Using the Self-timer
239
5
Start recording.
≥Press the shutter button, video rec. button, or sub video rec.
button.
≥After the self-timer light blinks, shooting or video recording starts.
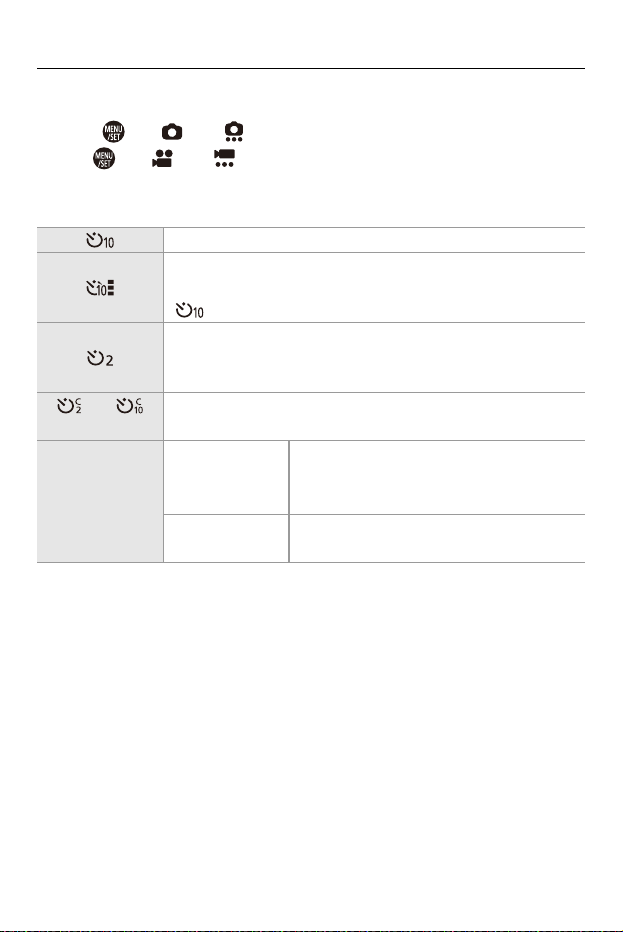
Drive / Shutter / Image Stabilizer – Recording Using the Self-timer
240
Setting the Self-timer Time
Picture: ¨ [ ] ¨ [ ] ¨ Select [Self Timer]
Video: ¨ [ ] ¨ [ ] ¨ [Self Timer Setting] ¨ Select [Self Timer]
*
* This can be set by setting [Self Timer For Video] to [ON] in [Self Timer Setting] in
the [Video] ([Others (Video)]) menu.
[] Takes a picture after 10 seconds.
[]
Takes 3 pictures at approx. 2 second intervals after 10 seconds.
(When recording video, it will be the same operation with
[ ].)
[]
Takes a picture after 2 seconds.
• This setting is a convenient way to avoid camera shake
caused by pressing the shutter button.
[ ] to [ ]
(Custom)
Takes a picture after the time selected with [Custom Time].
[SET]
[Custom Time]
Sets the time until recording starts.
[10SEC]/[9SEC]/[8SEC]/[7SEC]/[6SEC]/
[5SEC]/[4SEC]/[3SEC]/[2SEC]
[Display
Countdown]
A countdown is displayed on the recording
screen when the self-timer is Custom.

Drive / Shutter / Image Stabilizer – Recording Using the Self-timer
241
• We recommend using a tripod when recording with the self-timer.
• [Self Timer] in the [Photo] ([Others (Photo)]) menu and [Self Timer] in the [Self
Timer Setting] ([Video] ([Others (Video)]) menu) work together.
• When the following functions are being used, [ ] is not available:
– [Simultaneous Record w/o Filter] ([Filter Settings])
– [Bracketing]
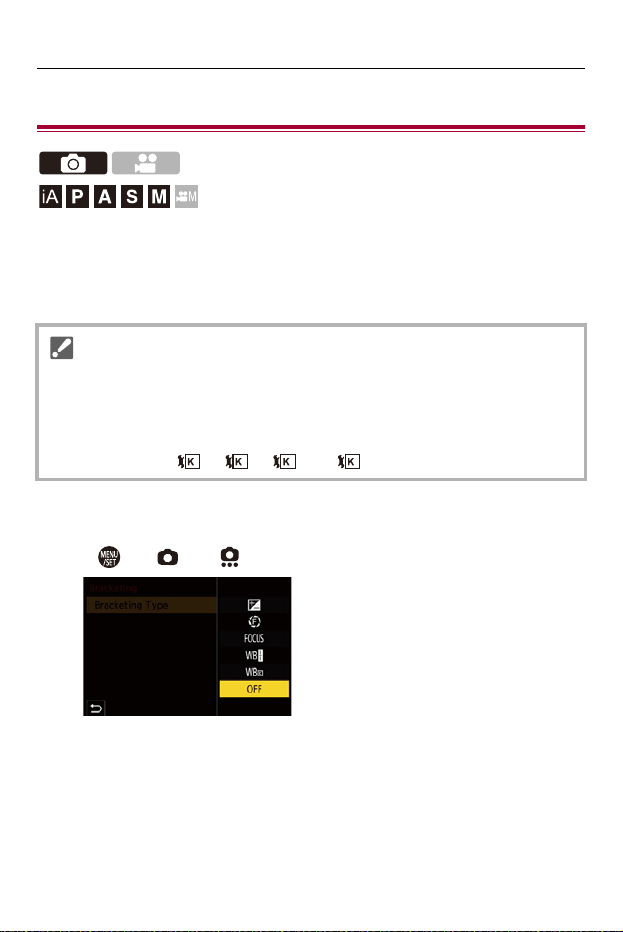
Drive / Shutter / Image Stabilizer – Bracket Recording
242
Bracket Recording
When the shutter button is pressed, the camera can record multiple
images while automatically changing the setting value for exposure,
aperture, focus or white balance (adjustment value or color temperature).
1
Set [Bracketing Type].
≥ ¨ [ ] ¨ [ ] ¨ [Bracketing] ¨ [Bracketing Type]
•
Aperture Bracket can be selected in the following modes:
– [A] mode
– [M] mode (when ISO sensitivity is set to [AUTO])
• White Balance Bracket (Color Temperature) can be selected when the white
balance is set to [ ], [ ], [ ], or [ ].
1 2 3 4
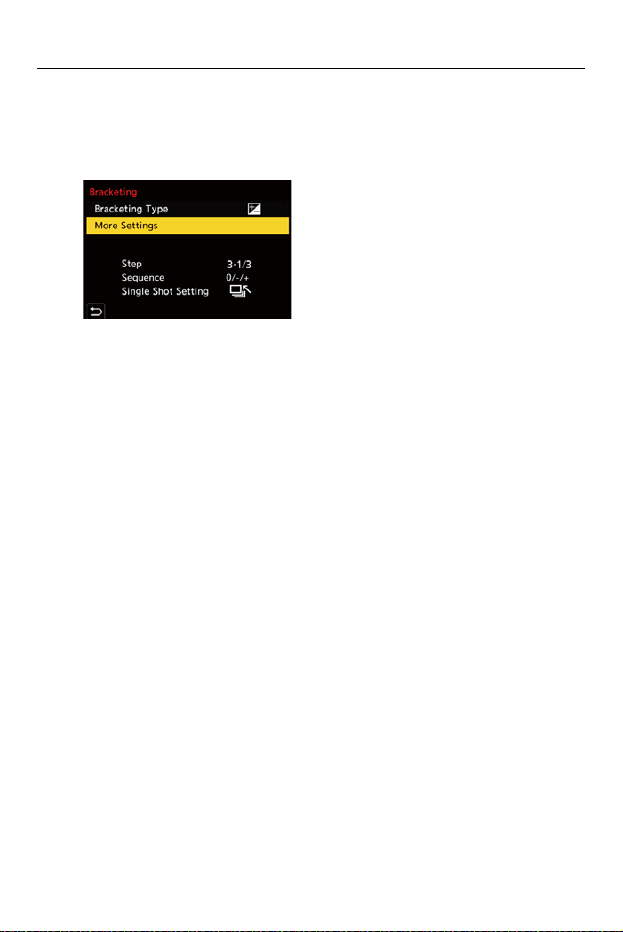
Drive / Shutter / Image Stabilizer – Bracket Recording
243
2
Set [More Settings].
≥For information about [More Settings], refer to page for each
bracketing method.
3
Close the menu.
≥Press the shutter button halfway.
4
Focus on the subject and then take pictures.
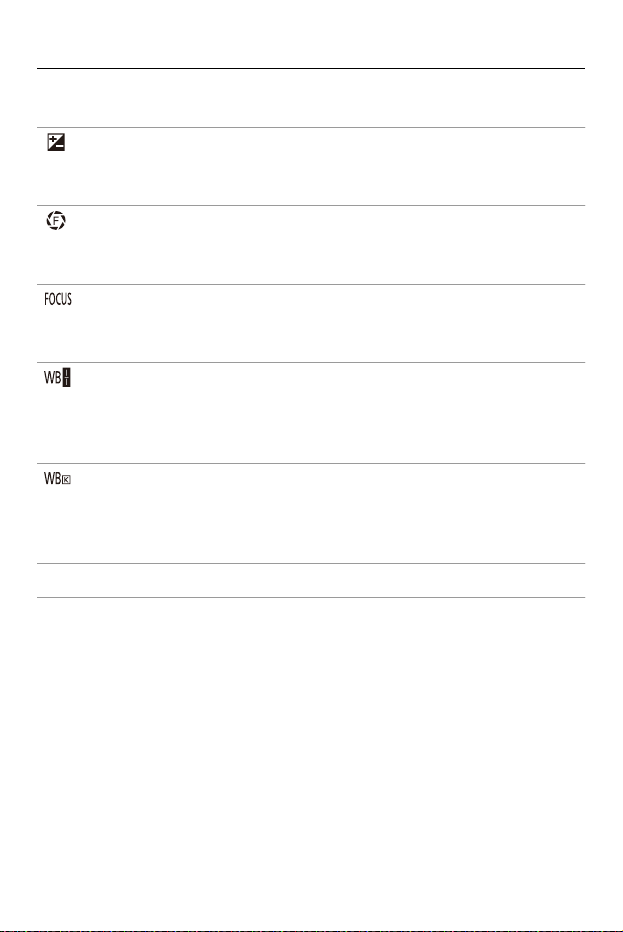
Drive / Shutter / Image Stabilizer – Bracket Recording
244
Setting Items ([Bracketing Type])
[ ] (Exposure Bracket)
When the shutter button is pressed, the camera records while changing the exposure.
(Î[More Settings] (Exposure Bracket): 246)
[ ] (Aperture Bracket)
When the shutter button is pressed, the camera records while changing the aperture
value. (Î[More Settings] (Aperture Bracket): 247)
[ ] (Focus Bracket)
When the shutter button is pressed, the camera records while changing the focus
point. (Î[More Settings] (Focus Bracket): 248)
[ ] (White Balance Bracket)
When the shutter button is pressed once, the camera automatically records three
images with the different white balance adjustment values. (Î[More Settings] (White
Balance Bracket): 249)
[ ] (White Balance Bracket (Color Temperature))
When the shutter button is pressed once, the camera automatically records three
images with the different white balance color temperatures. (Î[More Settings] (White
Balance Bracket (Color Temperature)): 249)
[OFF]
How to Cancel Bracketing
Select [OFF] in Step
1
.

Drive / Shutter / Image Stabilizer – Bracket Recording
245
• White Balance Bracket and White Balance Bracket (Color Temperature) are not
available when using the following functions:
– [iA] mode
– Taking burst pictures
– [RAW+FINE]/[RAW+STD.]/[RAW] ([Picture Quality])
– [Filter Settings]
• Bracket recording is not available while you are using the following functions:
– SH burst recording
– [Time Lapse Shot]
– [Stop Motion Animation] (when [Auto Shooting] is set)
– High Resolution mode
Drive / Shutter / Image Stabilizer – Bracket Recording
246
[More Settings] (Exposure Bracket)
[Step]
Sets the image count and exposure compensation step.
[3•1/3] (record 3 images in 1/3 EV steps) to [7•1] (record 7 images in 1 EV steps)
[Sequence]
Sets the order in which images are recorded.
[Single Shot Setting]
[]: Takes only one image each time the shutter button is pressed.
[]: Takes all of the set number of images when the shutter button is pressed once.
• The [BKT] icon blinks until all of the set number of pictures is taken.
• When you record images with Exposure Bracket after setting the exposure
compensation value, the images recorded are based on the selected exposure
compensation value.

Drive / Shutter / Image Stabilizer – Bracket Recording
247
[More Settings] (Aperture Bracket)
[Image Count]
[3]/[5]: Records the set number of images while alternately setting the aperture value
in the sequence of one before and then one after using the initial aperture value as the
reference.
[ALL]: Records images using all aperture values.
Example when the initial position is set to F8.0 (H-ES12060)
(1) 1st image, (2) 2nd image, (3) 3rd image ... (7) 7th image
4.02.8 5.6 8.0 11 16 22
(1)(6) (4) (2) (3) (5) (7)
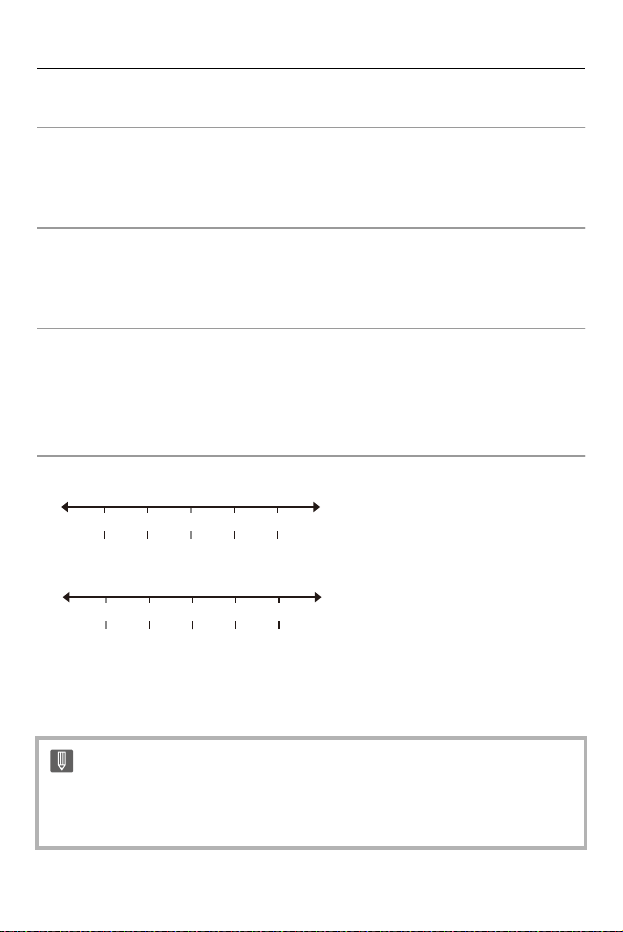
Drive / Shutter / Image Stabilizer – Bracket Recording
248
[More Settings] (Focus Bracket)
[Step]
Sets the focus adjustment step.
• The distance that the focus point is moved becomes shorter if the initial focus point is
close, and longer if it is far away.
[Image Count]
Sets the image count.
• This cannot be set when taking burst pictures.
Burst pictures are taken while the shutter button is pressed.
[Sequence]
[0/−/+]: Records while alternately moving the focus point in the sequence of forward
and then backward using the initial focus point as the reference.
[0/+]: Records while moving the focus point toward the far side using the initial focus
point as the reference.
Example when [Sequence]: [0/−/+] is set
Example when [Sequence]: [0/+] is set
(A) Focus: closer
(B) Focus: more distant
(1) 1st image, (2) 2nd image ... (5) 5th image ...
• When [Focus Limiter] is set, recording is within the set range where AF works.
• Pictures recorded with Focus Bracket are displayed as images of one group.
(ÎGroup Images: 492)
・・・ ・・・
(A) (B)
(1) (3) (5)(2)(4)
・・・
(A) (B)
(3) (4) (5)(2)(1)
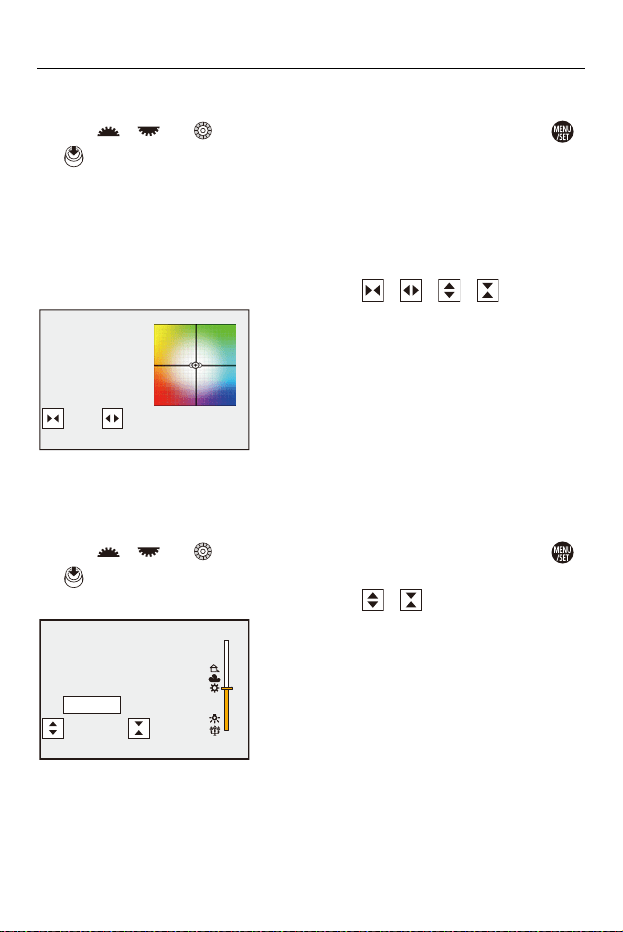
Drive / Shutter / Image Stabilizer – Bracket Recording
249
[More Settings] (White Balance Bracket)
Rotate , or to set the correction step and then press
or .
Rotate to the right:
Horizontal direction ([A] - [B])
Rotate to the left:
Vertical direction ([G] - [M])
• The correction step can also be set by touching [ ]/[ ]/[ ]/[ ].
[More Settings] (White Balance Bracket (Color
Temperature))
Rotate , or to set the correction step and then press
or .
•
The correction step can also be set by touching [ ]/[ ].
GGGGGGG
AAAAAABBBBBBB
MMMMMM
±300K
5500K5500K5500K
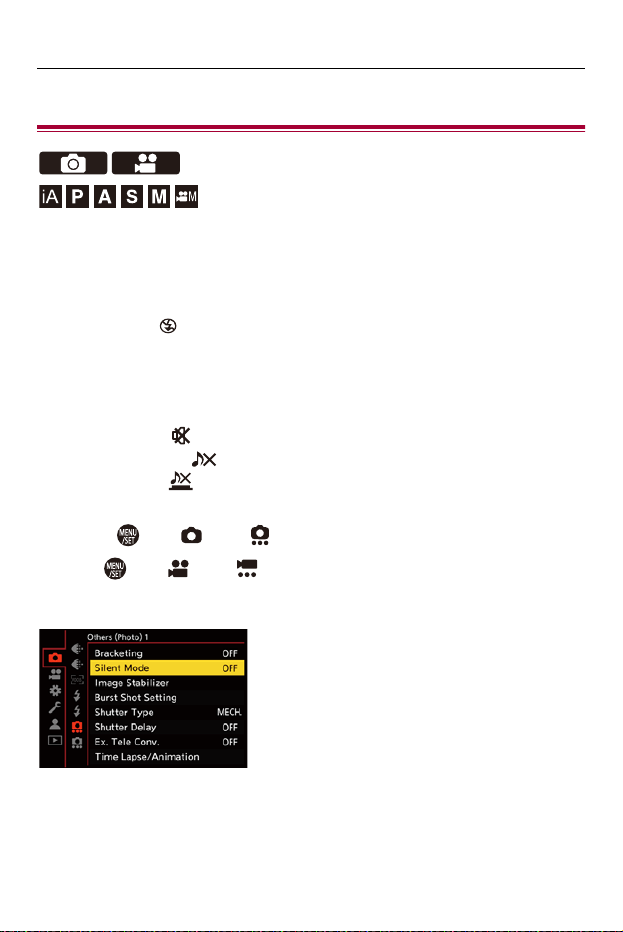
Drive / Shutter / Image Stabilizer – [Silent Mode]
250
[Silent Mode]
This disables all operation sounds and light output at once.
The audio from the speaker will be muted and the flash and the AF assist
light will be set to forced off mode.
•
The following settings are fixed:
– [Flash Mode]: [ ] (Forced Flash Off)
– [AF Assist Light]: [OFF]
– [Shutter Type]: [ELEC.]
– [Front Tally Lamp]: [OFF]
– [Rear Tally Lamp]: [OFF]
– [Beep Volume]: [ ] (OFF)
– [AF Beep Volume]: [ ] (OFF)
– [E-Shutter Vol]: [ ] (OFF)
Picture: ¨ [ ] ¨ [ ] ¨ Select [Silent Mode]
Video: ¨ [ ] ¨ [ ] ¨ Select [Silent Mode]
Settings: [ON]/[OFF]

Drive / Shutter / Image Stabilizer – [Silent Mode]
251
• Even when [ON] is set, the following functions light/blink:
– Power indicator
– Charging light/Network connection light
– Card access lights
– Self-timer light
• Use this function at your own responsibility sufficiently considering the privacy,
portrait, and other rights of subjects.
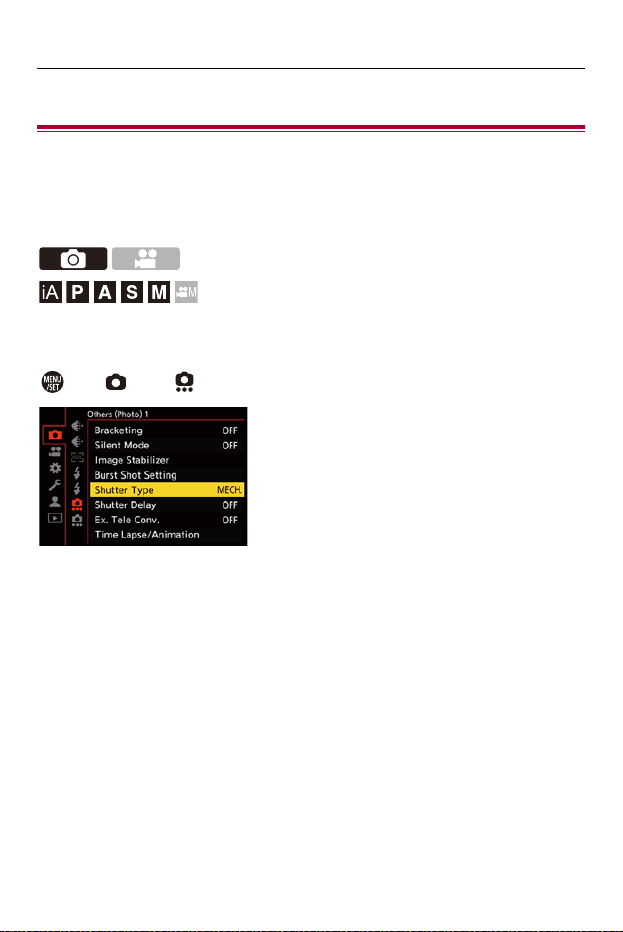

Drive / Shutter / Image Stabilizer – [Shutter Type]
253
[AUTO]
Switches the shutter type automatically depending on the recording conditions and
shutter speed.
[MECH.]
Records with the mechanical shutter type.
[EFC]
Records with the electronic front curtain type.
[ELEC.]
Records with the electronic shutter type.
[ELEC.+NR]
Records with the electronic shutter type.
When pictures are taken at slower shutter speeds, the shutter is closed after recording
to perform long shutter noise reduction.

Drive / Shutter / Image Stabilizer – [Shutter Type]
254
*1 This setting is available only in [M] mode.
*2 The electronic shutter sound can be set in [E-Shutter Vol] and [E-Shutter Tone] in
[Beep] of the [Setup] ([IN/OUT]) menu. (Î[Beep]: 598)
• The electronic front curtain type reduces blur caused by the shutter because the
amount of vibration from the shutter is small compared to the mechanical shutter
type.
• The electronic shutter type allows you to record without vibration from the shutter.
Mechanical
shutter type
Electronic front
curtain type
Electronic shutter
type
Mechanism
This type starts and
ends exposure with
the mechanical
shutter.
This type starts
exposure
electronically and
ends it with the
mechanical shutter.
This type starts and
ends exposure
electronically.
Flash 33—
Shutter speed
(sec.)
[B] (Bulb, max.
approx.
30 minutes)
*1
,
60 to 1/8000
[B] (Bulb, max.
approx.
30 minutes)
*1
,
60 to 1/2000
[B] (Bulb, max.
approx.
60 seconds)
*1
,
60 to 1/32000
Shutter sound
Mechanical shutter
sound
Mechanical shutter
sound
Electronic shutter
sound
*2
Drive / Shutter / Image Stabilizer – [Shutter Type]
255
• To reduce shutter-induced blur, you can set the shutter to release a few seconds
after the shutter button is pressed:
(Î[Shutter Delay]: 258)
• When [ ] is displayed on the screen, recording will be with the electronic
shutter type.
• When a moving subject is recorded using the electronic shutter, the subject may
appear distorted in the picture.
• When you record using the electronic shutter under lighting such as fluorescent
or LED lighting, horizontal stripes may be recorded. In such a case, lowering the
shutter speed may reduce the effect of horizontal stripes.
Drive / Shutter / Image Stabilizer – [Shutter Type]
256
[Long Exposure NR]
The camera automatically removes noise generated when recording
images with a slow shutter speed.
¨ [ ] ¨ [ ] ¨ Select [Long Exposure NR]
Settings: [ON]/[OFF]
•
Recording is not possible during noise reduction.
• When the following functions are being used, [Long Exposure NR] is not
available:
– Video recording/SH burst recording
– [ELEC.] (Excluding [ELEC.+NR])/[Silent Mode]
– High Resolution mode
Drive / Shutter / Image Stabilizer – [Shutter Type]
257
[Min. Shutter Speed]
Sets the minimum shutter speed when the ISO sensitivity is set to [AUTO].
¨ [ ] ¨ [ ] ¨ Select [Min. Shutter Speed]
[AUTO]
The camera automatically sets the minimum shutter speed.
[1/32000] to [1/1]
• The shutter speed may become slower than the set value in recording situations
where correct exposure cannot be achieved.
Drive / Shutter / Image Stabilizer – [Shutter Type]
258
[Shutter Delay]
To reduce camera shake and shutter-induced blur, the shutter is released
after the specified time has passed since the shutter button was pressed.
¨ [ ] ¨ [ ] ¨ Select [Shutter Delay]
Settings: [8SEC]/[4SEC]/[2SEC]/[1SEC]/[OFF]
•
When the following functions are being used, [Shutter Delay] is not available:
– Video recording/SH burst recording
– High Resolution mode

Drive / Shutter / Image Stabilizer – Image Stabilizer
259
Image Stabilizer
≥Image Stabilizer Settings: 262
This camera can use both the in-body image stabilizer and the in-lens
image stabilizer.
It is compatible with the Dual I.S.2 system that is an effective combination
of the 2 image stabilizers.
Furthermore, during video recording, you can use the 5-Axis Hybrid Image
Stabilizer that incorporates electronic stabilization.
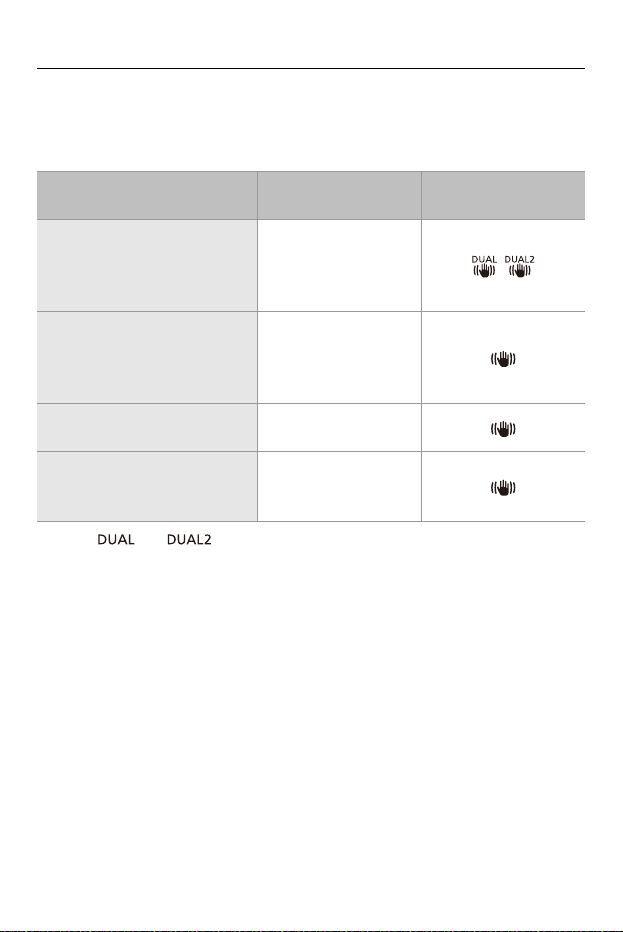
Drive / Shutter / Image Stabilizer – Image Stabilizer
260
Combinations of lenses and image stabilizers (As of January 2022)
Image stabilizers that can be used will differ depending on the attached
lens.
* If the [ ] or [ ] icon is not displayed on the recording screen even when
a compatible lens is used, update the lens firmware to the latest version.
(ÎFirmware of Your Camera/Lens: 18)
• The 5-Axis Hybrid Image Stabilizer (Î[E-Stabilization (Video)]: 262) can be used
with any lenses.
Attached lens
Available image
stabilizer
Example of icon
Panasonic lenses compatible
with Dual I.S. mode
(Based on the Micro Four
Thirds system standard)
*
Body+Lens
(Dual I.S./Dual I.S.2)
/
Lenses compatible with the
image stabilizer function
(Based on the Micro Four
Thirds system standard)
Body or Lens
Lenses without image
stabilizer function
Body
Lenses without function to
communicate with this
camera
Body
Drive / Shutter / Image Stabilizer – Image Stabilizer
261
Using the Image Stabilizer
• When using a lens with an O.I.S. switch, set the switch on the lens to [ON].
• When using a lens that does not have a communication function with this camera,
after turning on the camera, a message asking for confirmation of the lens
information is displayed.
Correctly operating the image stabilization function requires that the focal length be
set to match the attached lens.
Set the focal length in accordance as prompted by the message.
This can also be set using the menu. (Î[Lens Information]: 266)
• When the shutter button is pressed halfway, the camera shake alert icon [ ]
may be displayed on the recording screen.
If this is displayed, we recommend using a tripod, the self timer or the Shutter
Remote Control (DMW-RS2: optional).
• We recommend turning off the image stabilizer function when using a tripod.
• The image stabilizer may cause vibration or produce operational sound during
operation, but these are not malfunctions.
• The 5-Axis Hybrid Image Stabilizer function is not available when using the
following function:
– [Variable Frame Rate]
• When using a lens that does not have a communication function with this
camera, you can hide the message asking for confirmation of the lens
information that is displayed after turning on the camera:
(Î[Lens Info. Confirmation]: 584)
• You can display the reference point and check the camera shake status:
(Î[I.S. Status Scope]: 572)
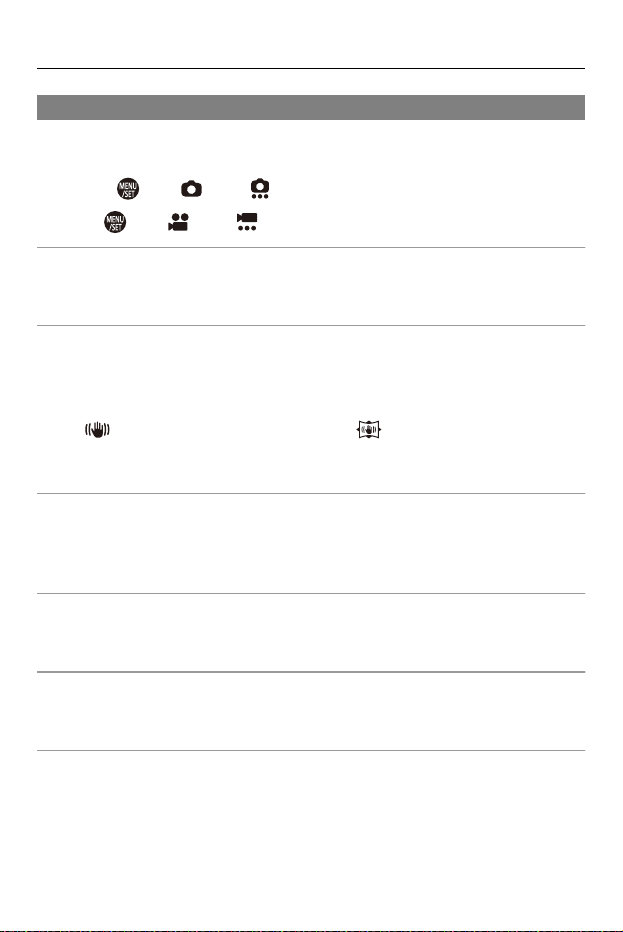
Drive / Shutter / Image Stabilizer – Image Stabilizer
262
Image Stabilizer Settings
Set the image stabilizer operation to match the recording situation.
Picture: ¨ [ ] ¨ [ ] ¨ Select [Image Stabilizer]
Video: ¨ [ ] ¨ [ ] ¨ Select [Image Stabilizer]
[Operation Mode]
Sets the stabilization movement (blur) to match the recording method (normal,
panning). (Î[Operation Mode]: 264)
[E-Stabilization (Video)]
Camera shake during video recording is corrected along the vertical, horizontal, roll,
pitch, and yaw axes through the combined use of the in-lens, in-body, and electronic
image stabilizers. (5-Axis Hybrid Image Stabilizer)
• The [ ] on the recording screen changes to [ ] while [E-Stabilization (Video)]
is functioning.
• The angle of view may become narrower if set to [ON].
[Boost I.S. (Video)]
Increases the effectiveness of the image stabilizer during video recording.
This effect can help provide a stable composition when you want to perform recording
from a fixed perspective. (Î[Boost I.S. (Video)]: 265)
[Anamorphic (Video)]
You can switch to an image stabilizer that suits anamorphic recording. (Î[Anamorphic
(Video)]: 265)
[Lens Information]
When using a lens that does not have a communication function with the camera,
register the lens information in the camera. (Î[Lens Information]: 266)

Drive / Shutter / Image Stabilizer – Image Stabilizer
263
• When the following function is being used, [E-Stabilization (Video)] is not
available:
– [Variable Frame Rate]
Drive / Shutter / Image Stabilizer – Image Stabilizer
264
[Operation Mode]
Set the stabilization movement (blur) to match the recording method
(normal, panning).
[Normal]
Corrects vertical, horizontal, and rotational camera shake.
This function is suitable for normal recording.
[Panning (Left/Right)]
Corrects vertical camera shake.
This is suitable for horizontal panning.
[Panning (Up/Down)]
Corrects horizontal camera shake.
This is suitable for vertical panning.
[OFF]
Turns the image stabilization function OFF.
• The [Operation Mode] that can be used differ depending on the lens used.
• [Operation Mode] is fixed to [ ] ([Normal]) when using other manufacturers’
lenses with an image stabilization function.
• When using lenses with an O.I.S. switch, the camera’s operation mode cannot be
set to [OFF]. Set the switch on the lens to [OFF].
• When the following functions are being used, [Operation Mode] switches to [ ]
([Normal]):
– [ ] mode
– Video recording
Drive / Shutter / Image Stabilizer – Image Stabilizer
265
[Boost I.S. (Video)]
Increase the effectiveness of the image stabilizer during video recording.
This effect can help provide a stable composition when you want to
perform recording from a fixed perspective.
Settings: [ON]/[OFF]
•
When [Boost I.S. (Video)] is operating, [ ] is displayed on the recording screen.
• To change composition while recording, first set this to [OFF] before moving the
camera.
To set this to [OFF] during recording, use the Fn button. (ÎFn Buttons: 517)
• Longer focal lengths will result in weaker stabilization.
[Anamorphic (Video)]
You can switch to an image stabilizer that suits anamorphic recording.
Settings:
[ ]([2.0×])/[ ]([1.8×])/[ ]([1.5×])/[ ]([1.33×])/[ ]([1.30×])/
[OFF]
•
Make settings to suit the magnification of the anamorphic lens you are using.
• While [Anamorphic (Video)] is functioning, the set magnification appears on the
image stabilizer icons on the recording screen, as shown by [ ] and [ ].
• When [Boost I.S. (Video)] is set, [Boost I.S. (Video)] is prioritized.
• Image stabilizer functions on your lens may not work correctly. Turn off the image
stabilizer function on your lens if this is the case.
Drive / Shutter / Image Stabilizer – Image Stabilizer
266
[Lens Information]
Register the information for lenses that cannot communicate with the
camera.
Match the in-body image stabilizer with the information of the lens you
register.
Press 34 to select the lens information to use and then press or
.
•
In the default setting, the lens information for 6 lenses with a focal length of between
24 mm and 135 mm is registered.
The lens information for up to 12 lenses can be registered.
Registering, modifying, and deleting lens information
1 Press 34 to select the lens information and then press [DISP.].
• If lens information that has not been registered is selected, press or
to proceed to Step 3.
2 Press 34 to select [Edit], [Sorting], or [Delete] and then press or .
• You can change the display order of lens information by selecting [Sorting].
• The lens information is deleted when you select [Delete].
• You cannot delete the lens information for a lens that is being used.
3 Enter the lens Information.
• The lens information changes if the lens information has already been
registered.
4 (If lens information that has not been registered is selected) Press [DISP.] to
register the lens information.
[Focal Length]
Enter the focal length.
• The live view images can be enlarged for display when you rotate .
[Lens Name]
Register the lens.
• For information on how to enter characters (ÎEntering Characters: 105)
• Up to a maximum of 30 characters can be entered.

267
Metering / Exposure / ISO
Sensitivity
This chapter describes recording modes for determining exposure and ISO
sensitivity.
≥[Metering Mode]: 268
≥Program AE Mode: 270
≥Aperture-Priority AE Mode: 274
≥Shutter-Priority AE Mode: 277
≥Manual Exposure Mode: 280
≥Preview Mode: 285
≥Exposure Compensation: 287
≥Locking Focus and Exposure (AF/AE Lock): 292
≥ISO Sensitivity: 294
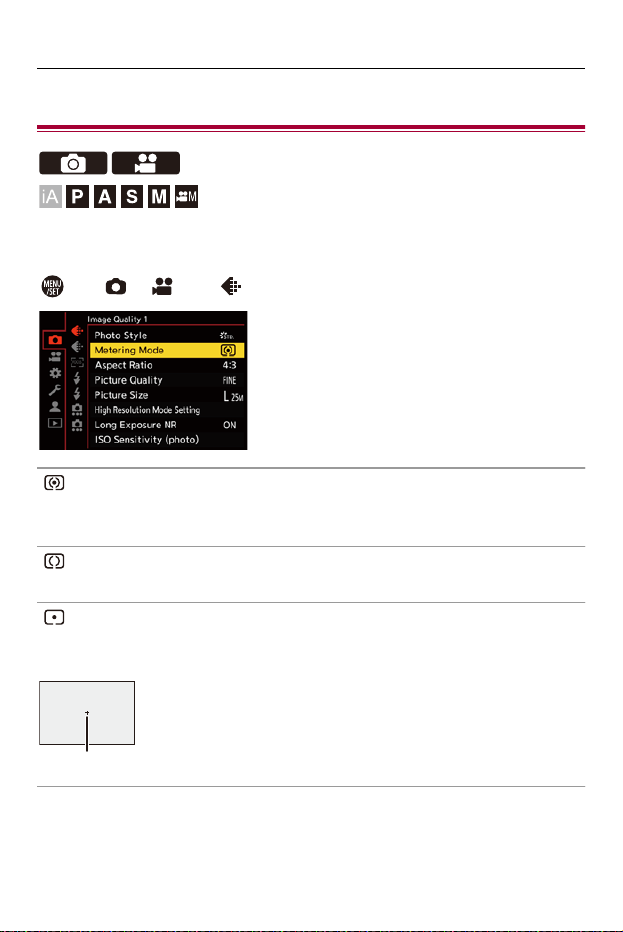
Metering / Exposure / ISO Sensitivity – [Metering Mode]
268
[Metering Mode]
Type of optical measurement to measure brightness can be changed.
¨ [ ]/[ ] ¨ [ ] ¨ Select [Metering Mode]
[ ] (Multi-metering)
Method in which the most suitable exposure is measured by judging the allocation of
brightness on the whole screen.
[ ] (Center-weighted)
Method used to perform measuring which focuses on the center of the screen.
[ ] (Spot)
Method used to measure the extremely small part around the spot-metering target (A).
• When you move the AF area, the spot metering target also moves to match.
(A)
Metering / Exposure / ISO Sensitivity – [Metering Mode]
269
[ ] (Highlight-weighted)
Method used to perform measuring which focuses on the highlighted parts of the
screen to prevent overexposure.
This is suitable for theatre photography, etc.
• The standard value for standard exposure can be adjusted:
(Î[Exposure Offset Adjust.]: 549)
• You can assign the function that records with the metering mode set to [ ]
(Spot) once only to an Fn button:
(Î[1 Shot Spot Metering]: 523)
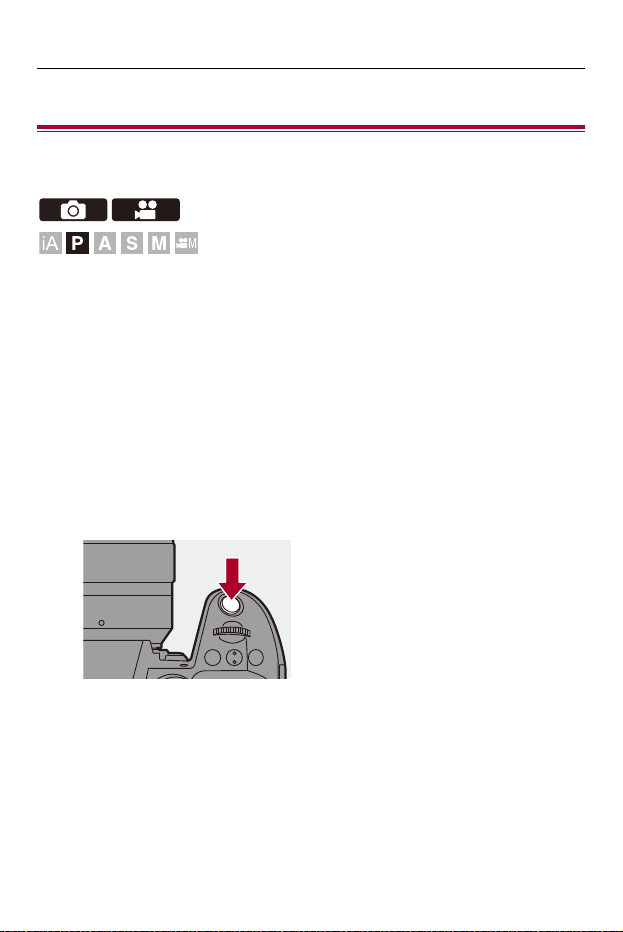
Metering / Exposure / ISO Sensitivity – Program AE Mode
270
Program AE Mode
≥Program Shift: 272
In [P] mode (Program AE mode), the camera automatically sets the shutter
speed and aperture value for the brightness of the subject.
You can also use Program Shift to change combinations of shutter speed
and aperture values while keeping the same exposure.
1
Set the recording mode to [P].
≥Set the mode dial. (ÎSelecting the Recording Mode: 79)
2
Press the shutter button halfway.
≥This displays the aperture value and shutter speed value on the
recording screen.

Metering / Exposure / ISO Sensitivity – Program AE Mode
271
• If the correct exposure is not achieved, the aperture value (A) and shutter
speed (B) blink red.
3
Start recording.
F2.860
(A)(B)
Metering / Exposure / ISO Sensitivity – Program AE Mode
272
Program Shift
You can change the shutter speed and aperture value combination set
automatically by the camera while maintaining the same exposure.
With this, you can, for example, make the background more defocused by
decreasing the aperture value or capture a moving subject more
dynamically by slowing the shutter speed.
1
Press the shutter button halfway.
• This displays the aperture value and shutter speed value on the recording
screen. (Approx. 10 seconds)
2
Rotate or while the values are displayed.
• This displays the Program Shift icon (C) on the recording screen.
3
Start recording.
Canceling Program Shift
•
Set the camera on/off switch to [OFF].
• Rotate or until the Program Shift icon disappears.
F5.630
(C)
Metering / Exposure / ISO Sensitivity – Program AE Mode
273
• Program Shift is not available when using the following function:
–Flash
• You can customize dial operations:
(Î[Dial Set.]: 562)
• The recording screen can display an exposure meter indicating the relationship
between aperture value and shutter speed:
(Î[Expo.Meter]: 571)
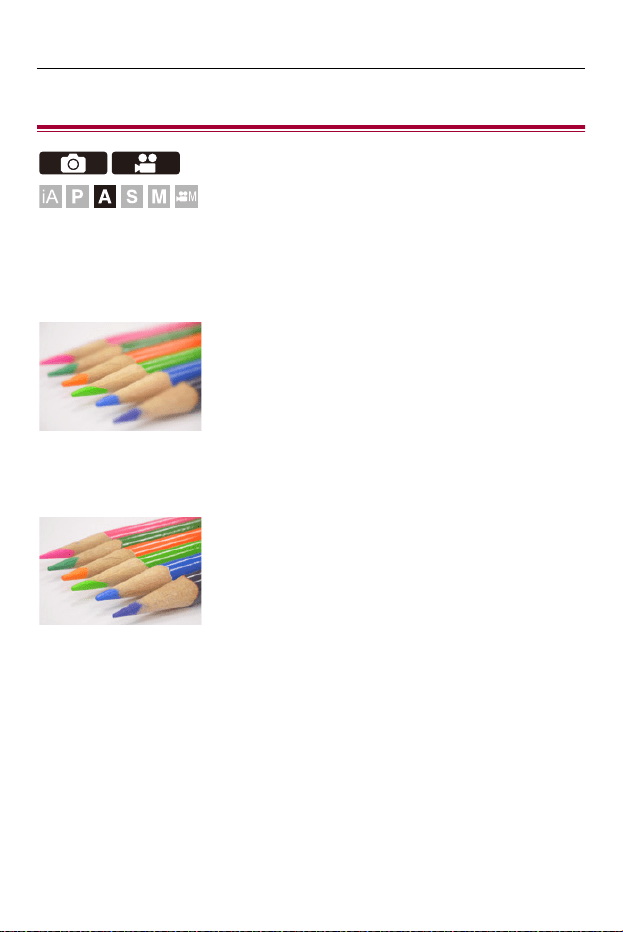
Metering / Exposure / ISO Sensitivity – Aperture-Priority AE Mode
274
Aperture-Priority AE Mode
In [A] mode (Aperture-Priority AE mode), you can set the aperture value
before recording.
The shutter speed will be automatically set by the camera.
Smaller aperture values
It becomes easier to defocus the background.
Larger aperture values
It becomes easier to bring everything into focus including the background.
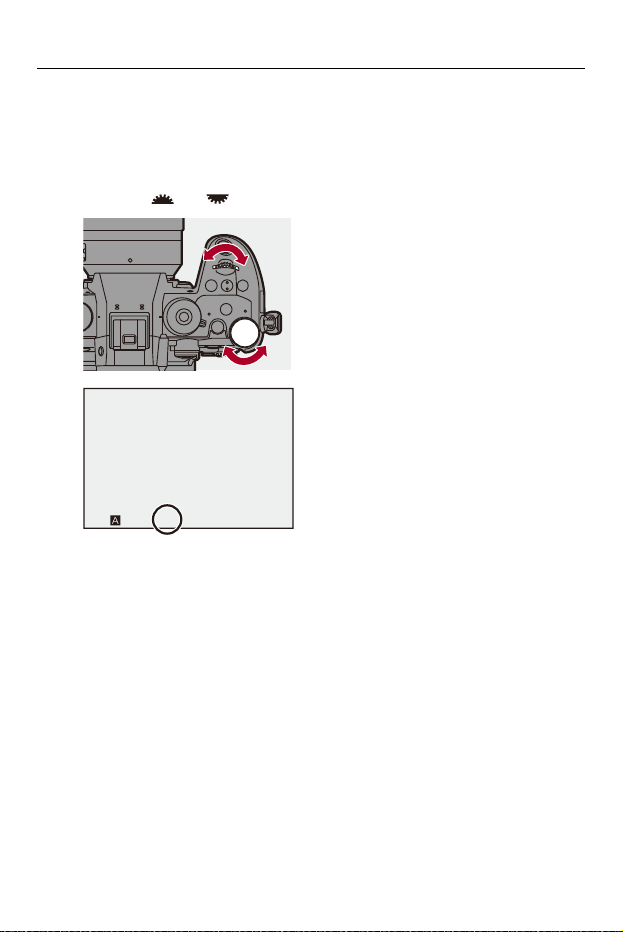
Metering / Exposure / ISO Sensitivity – Aperture-Priority AE Mode
275
1
Set the recording mode to [A].
≥Set the mode dial. (ÎSelecting the Recording Mode: 79)
2
Set the aperture value.
≥Rotate or .
3
Start recording.
• If the correct exposure is not achieved when the shutter button is pressed
halfway, the aperture value and the shutter speed blink red.
F8.0
F8.0
F8.0
Metering / Exposure / ISO Sensitivity – Aperture-Priority AE Mode
276
Depth of Field Characteristics
Aperture value Small Large
Focal length of lens Telephoto Wide-angle
Distance to subject Near More distant
Depth of field
(area in sharp focus)
Shallow (narrow)
Example: When you want
to take a image with a
defocused background.
Deep (wide)
Example: When you want
to take a image with focus
as far as the background.
• The effects of the set aperture value and shutter speed will not be visible on the
recording screen.
To check the effects on the recording screen, use [Preview]. (ÎPreview Mode:
285)
You can set the preview of the aperture effect to constantly operate in [A] mode
to check the depth of field while recording:
(Î[Constant Preview]: 565)
• The brightness of the recording screen and of actual recorded images may differ.
Check the images on the playback screen.
• When using a lens with an aperture ring, set the position of the aperture ring to
other than [A] to use the aperture value of the lens.
• You can customize dial operations:
(Î[Dial Set.]: 562)
• The recording screen can display an exposure meter indicating the relationship
between aperture value and shutter speed:
(Î[Expo.Meter]: 571)
• When a lens with an aperture ring is being used, stops for setting the aperture
value with the aperture ring can be changed:
(Î[Aperture Ring Increment]: 582)
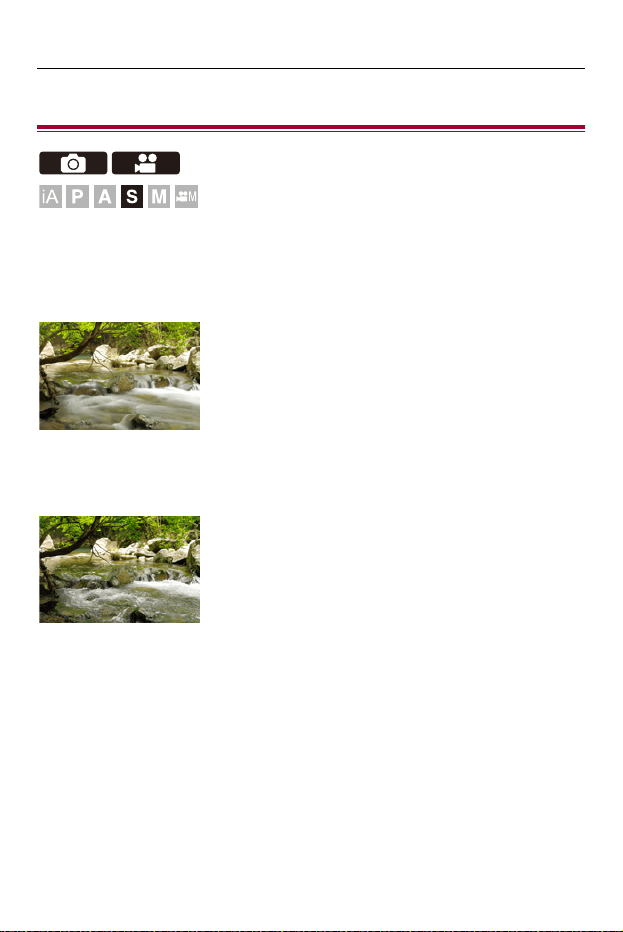
Metering / Exposure / ISO Sensitivity – Shutter-Priority AE Mode
277
Shutter-Priority AE Mode
In [S] mode (Shutter-Priority AE mode), you can set the shutter speed
before recording.
The aperture value will be automatically set by the camera.
Slower shutter speeds
It becomes easier to capture motion
Faster shutter speeds
It becomes easier to freeze motion
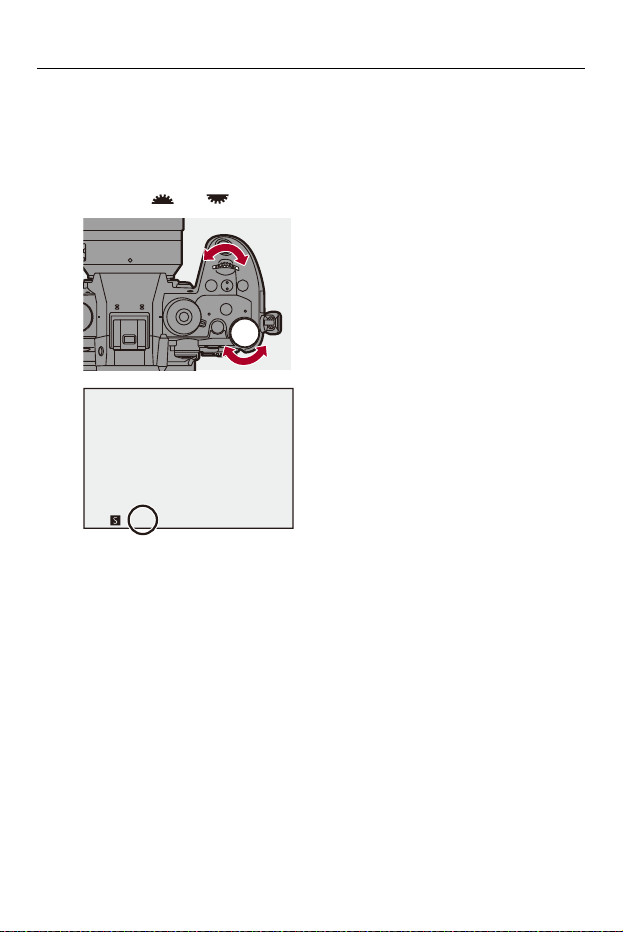
Metering / Exposure / ISO Sensitivity – Shutter-Priority AE Mode
278
1
Set the recording mode to [S].
≥Set the mode dial. (ÎSelecting the Recording Mode: 79)
2
Set the shutter speed.
≥Rotate or .
3
Start recording.
• If the correct exposure is not achieved when the shutter button is pressed
halfway, the aperture value and the shutter speed blink red.
250
250
250
Metering / Exposure / ISO Sensitivity – Shutter-Priority AE Mode
279
• The effects of the set aperture value and shutter speed will not be visible on the
recording screen.
To check the effects on the recording screen, use [Preview]. (ÎPreview Mode:
285)
• The brightness of the recording screen and of actual recorded images may differ.
Check the images on the playback screen.
• Shutter speeds faster than 1/250 of a second are not available when recording
using a flash. (ÎShutter Speeds for Flash Modes: 331)
• You can customize dial operations:
(Î[Dial Set.]: 562)
• The recording screen can display an exposure meter indicating the relationship
between aperture value and shutter speed:
(Î[Expo.Meter]: 571)

Metering / Exposure / ISO Sensitivity – Manual Exposure Mode
280
Manual Exposure Mode
≥Available Shutter Speeds (Sec.): 283
≥[B] (Bulb): 284
In [M] mode (Manual Exposure mode), you can record by manually setting
the aperture value and shutter speed.
In default settings, the ISO sensitivity is set to [AUTO].
As a result, the ISO sensitivity will be adjusted according to the aperture
value and shutter speed.
Exposure compensation can also be used when ISO sensitivity is set to
[AUTO].
1
Set the recording mode to [M].
≥Set the mode dial. (ÎSelecting the Recording Mode: 79)
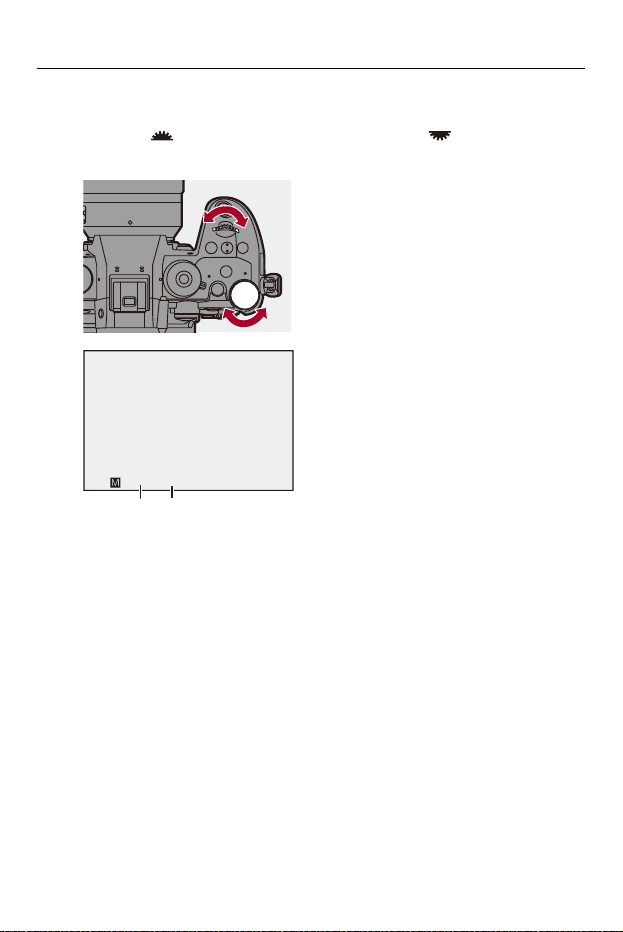
Metering / Exposure / ISO Sensitivity – Manual Exposure Mode
281
2
Set the aperture value and shutter speed.
≥Rotate to set the aperture value (A), and to set the shutter
speed (B).
3
Start recording.
• If the correct exposure is not achieved when the shutter button is pressed
halfway, the aperture value and the shutter speed blink red.
F5.630
30
30
(A)(B)

Metering / Exposure / ISO Sensitivity – Manual Exposure Mode
282
Manual Exposure Assist
When ISO sensitivity is set to other than [AUTO], Manual Exposure Assist
(example: ) will be displayed on the recording screen.
You can check the difference between the current exposure value and the
standard exposure (±0) measured by the camera.
•
Use Manual Exposure Assist as a guide.
We recommend checking the images on the playback screen when recording.

Metering / Exposure / ISO Sensitivity – Manual Exposure Mode
283
Available Shutter Speeds (Sec.)
• [MECH.]
[B] (Bulb, max. approx. 30 minutes), 60 to 1/8000
• [EFC]
[B] (Bulb, max. approx. 30 minutes), 60 to 1/2000
• [ELEC.]
[B] (Bulb, max. approx. 60 seconds), 60 to 1/32000
• The effects of the set aperture value and shutter speed will not be visible on the
recording screen.
To check the effects on the recording screen, use [Preview]. (ÎPreview Mode:
285)
You can set the preview of the aperture effect and the shutter speed effect to
constantly operate in [M] mode to check the depth of field and movement of the
subject while recording:
(Î[Constant Preview]: 565)
• The brightness of the recording screen and of actual recorded images may differ.
Check the images on the playback screen.
• When using a lens with an aperture ring, set the position of the aperture ring to
other than [A] to use the aperture value of the lens.
• Shutter speeds faster than 1/250 of a second are not available when recording
using a flash. (ÎShutter Speeds for Flash Modes: 331)
• You can customize dial operations:
(Î[Dial Set.]: 562)
• The recording screen can display an exposure meter indicating the relationship
between aperture value and shutter speed:
(Î[Expo.Meter]: 571)
Metering / Exposure / ISO Sensitivity – Manual Exposure Mode
284
[B] (Bulb)
If you set the shutter speed to [B] (Bulb), the shutter stays open while the
shutter button is pressed fully. (up to approx. 30 minutes)
The shutter closes when the shutter button is released.
Use this when you want to keep the shutter open for a long time to record
images of fireworks, night scenery or a starry sky.
•
We recommend using a tripod or the Shutter Remote Control (DMW-RS2:
optional) during bulb recording.
• Bulb recording may create noticeable noise.
If you are concerned about noise, we recommend that you set [Long Exposure
NR] (Î[Long Exposure NR]: 256) to [ON] in the [Photo] ([Image Quality]) menu
before recording.
• Bulb is not available when using the following functions:
– SH burst recording
– [Time Lapse Shot]
– [Stop Motion Animation] (when set to [Auto Shooting])
– High Resolution mode
– [Bracketing]
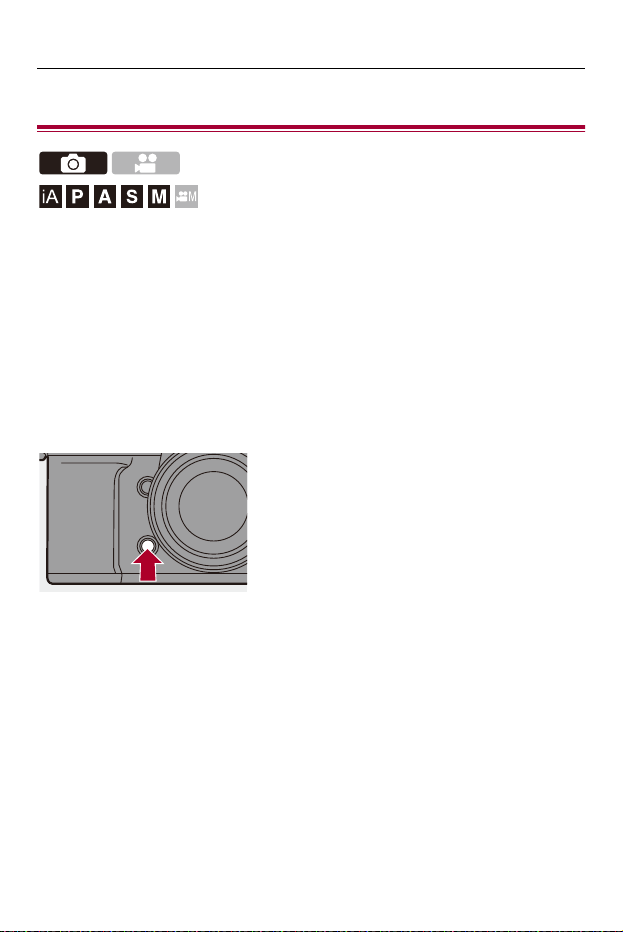
Metering / Exposure / ISO Sensitivity – Preview Mode
285
Preview Mode
You can check the effects of aperture on the recording screen by physically
closing the aperture blades of the lens to the aperture value set for actual
recording.
In addition to the effects of aperture, you can check the effects of shutter
speed at the same time.
•
You can also perform the same operation by pressing the Fn button registered with
[Preview]. (ÎFn Buttons: 517)
Press the preview button.
• Each press of the button switches between the effect preview screens.
Aperture effect: OFF
Shutter speed effect: OFF
ª
Aperture effect: ON
Shutter speed effect: OFF
ª
Aperture effect: ON
Shutter speed effect: ON

Metering / Exposure / ISO Sensitivity – Preview Mode
286
• It is possible to record in preview mode.
• Range for shutter speed effect check is 8 seconds to 1/32000 of a second.
• Depending on the [Constant Preview] setting, there are preview screens that
cannot be displayed.
• You can always confirm the effects of aperture on the recording screen when in
[A]/[M] mode:
(Î[Constant Preview]: 565)
• You can assign the function that enables you to view the aperture effect just while
the button is being pressed to an Fn button:
(Î[Preview Aperture Effect]: 527)
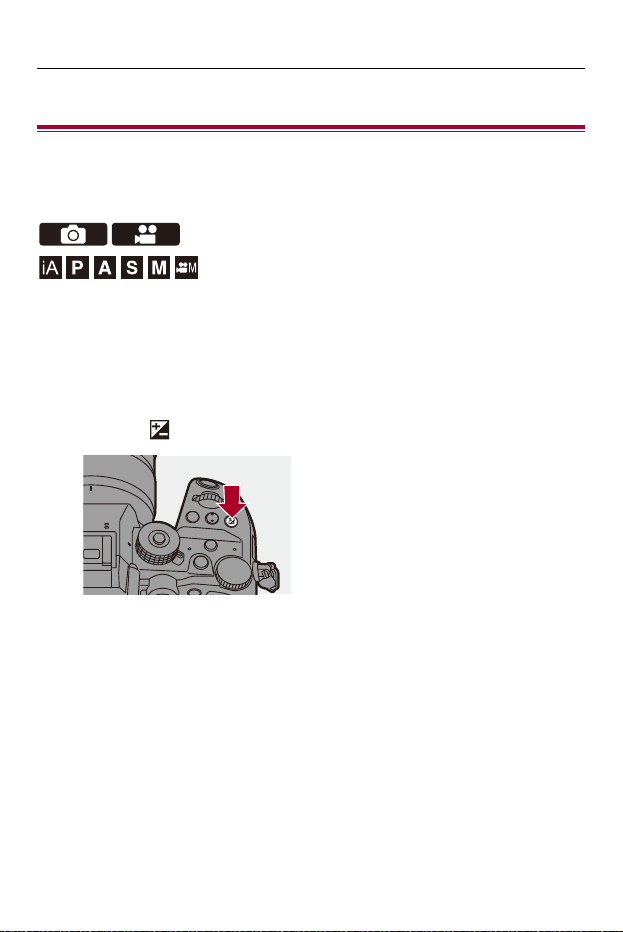
Metering / Exposure / ISO Sensitivity – Exposure Compensation
287
Exposure Compensation
≥[Vignetting Comp.]: 290
≥[Diffraction Compensation]: 291
You can compensate the exposure when the standard exposure
determined by the camera is too bright or too dark.
You can adjust the exposure in 1/3 EV steps in a range of ±5 EV.
When recording videos, the range changes to ±3 EV.
1
Press [ ].
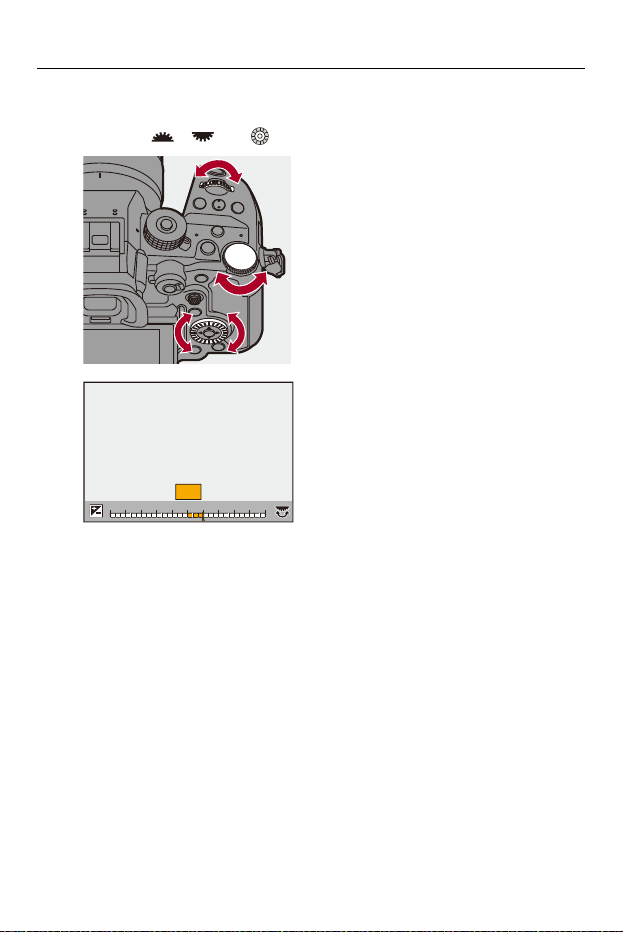
Metering / Exposure / ISO Sensitivity – Exposure Compensation
288
2
Compensate the exposure.
≥Rotate , , or .
3
Confirm your selection.
≥Press the shutter button halfway.
+3+3+1+1 +2+2 +3+3
-
5
-
5
-
4
-
4
-
3
-
3
-
2
-
2
-
1
-
100
+5+5+4+4
+
+
1

Metering / Exposure / ISO Sensitivity – Exposure Compensation
289
• In [M] mode, you can compensate the exposure by setting the ISO sensitivity to
[AUTO].
• When the exposure compensation value falls below or exceeds ±3 EV, the
brightness of the recording screen will no longer change.
Press the shutter button halfway or use AE Lock to reflect the value on the
recording screen.
• The set exposure compensation value is stored even if you turn off the camera.
• The standard value for standard exposure can be adjusted:
(Î[Exposure Offset Adjust.]: 549)
• You can set the exposure compensation value to be reset when the camera is
turned off:
(Î[Exposure Comp. Reset]: 550)
• You can change the operation of the [ ] button:
(Î[WB/ISO/Expo. Button]: 561)
• Exposure Bracket can be set and flash output can be adjusted on the exposure
compensation screen:
(Î[Exposure Comp. Disp. Setting]: 561)
• You can assign the function that matches the aperture value and shutter speed to
the standard exposure to an Fn button:
(Î[One Push AE]: 523)
Metering / Exposure / ISO Sensitivity – Exposure Compensation
290
[Vignetting Comp.]
When the screen periphery darkens as a result of the lens characteristics,
you can record pictures with the brightness of the screen periphery
corrected.
¨ [ ]/[ ] ¨ [ ] ¨ Select [Vignetting Comp.]
Settings: [ON]/[OFF]
•
Compensation effect may not be achieved depending on the recording
conditions.
• Noise in the periphery of the picture may stand out with higher ISO sensitivity.
• When the following function is being used, [Vignetting Comp.] in the [Photo]
([Image Quality]) menu is not available:
– [Ex. Tele Conv.]
• When the following functions are being used, [Vignetting Comp.] in the [Video]
([Image Quality]) menu is not available:
– [PIXEL/PIXEL] ([Image Area of Video])
– [Variable Frame Rate]
Metering / Exposure / ISO Sensitivity – Exposure Compensation
291
[Diffraction Compensation]
The camera raises the image resolution by correcting the blurriness
caused by diffraction when the aperture is closed.
¨ [ ]/[ ] ¨ [ ] ¨ Select [Diffraction Compensation]
Settings: [AUTO]/[OFF]
•
Compensation effect may not be achieved depending on the recording
conditions.
• Noise may stand out with higher ISO sensitivity.
Metering / Exposure / ISO Sensitivity – Locking Focus and Exposure (AF/AE Lock)
292
Locking Focus and Exposure (AF/AE Lock)
Lock the focus and exposure in advance to take pictures with the same
focus and exposure settings while changing the composition.
This is useful when you want to bring an edge of the screen into focus or
there is a backlight, for example.
1
Register [AE LOCK], [AF LOCK], or [AF/AE LOCK] to the
Fn button. (ÎFn Buttons: 517)
• These cannot be registered to [Fn4] to [Fn8].
[AE LOCK]
The exposure is locked.
[AF LOCK]
The focus is locked.
[AF/AE LOCK]
Both focus and exposure are locked.
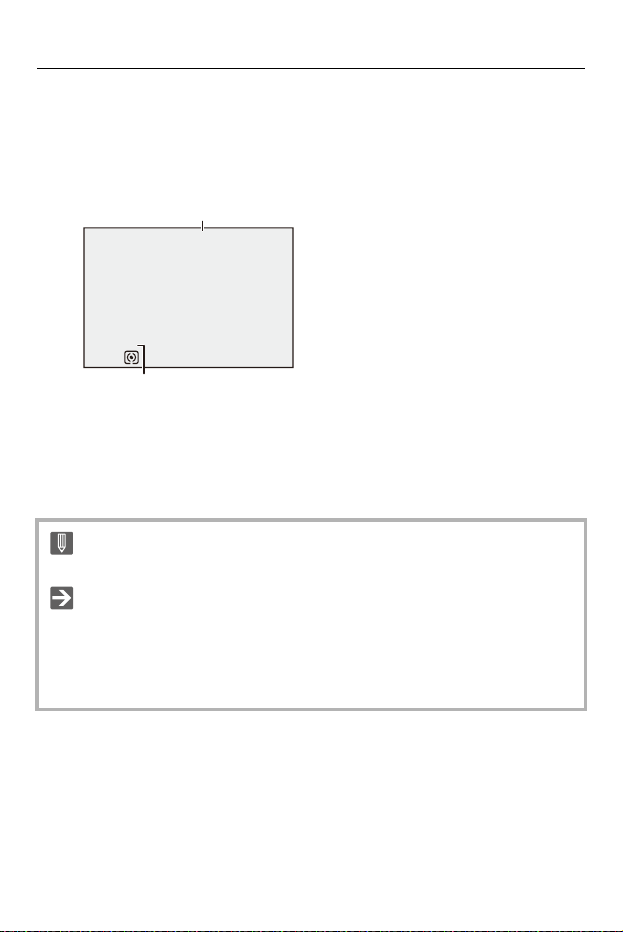
Metering / Exposure / ISO Sensitivity – Locking Focus and Exposure (AF/AE Lock)
293
2
Lock focus and exposure.
≥Press and hold the Fn button.
≥If focus is locked, then the AF lock icon (A) will be displayed.
≥If exposure is locked, then the AE lock icon (B) will be displayed.
3
Hold the Fn button to decide on the composition and
then perform recording.
≥Press the shutter button fully.
•
Program Shift can be set even when AE is locked.
• You can maintain lock even without pressing and holding the Fn button:
(Î[AF/AE Lock Hold]: 552)
• You can make fine manual adjustments to the focus during AF Lock:
(Î[AF+MF]: 553)
AFLAFL
AELAEL
(A)
(B)
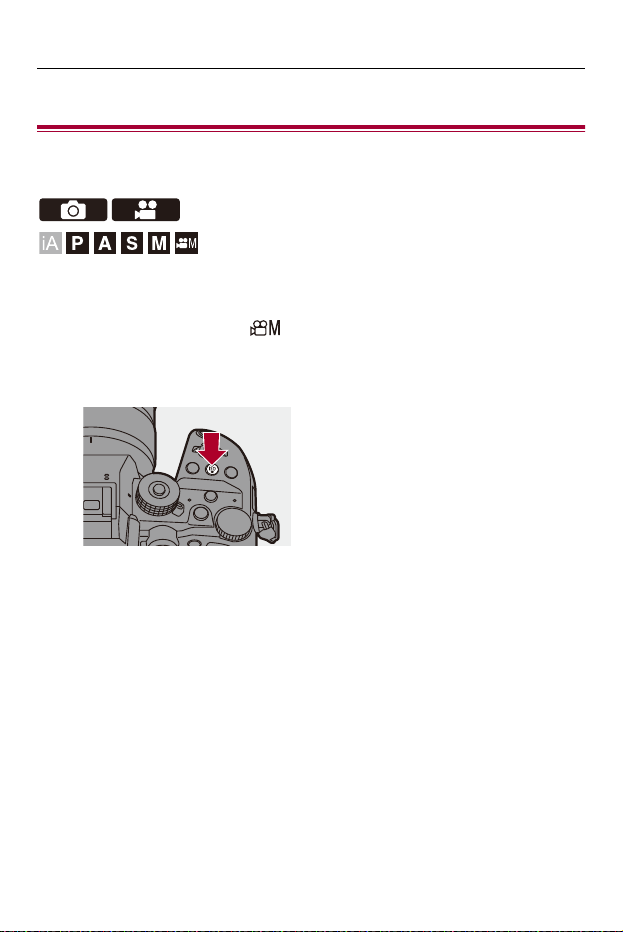
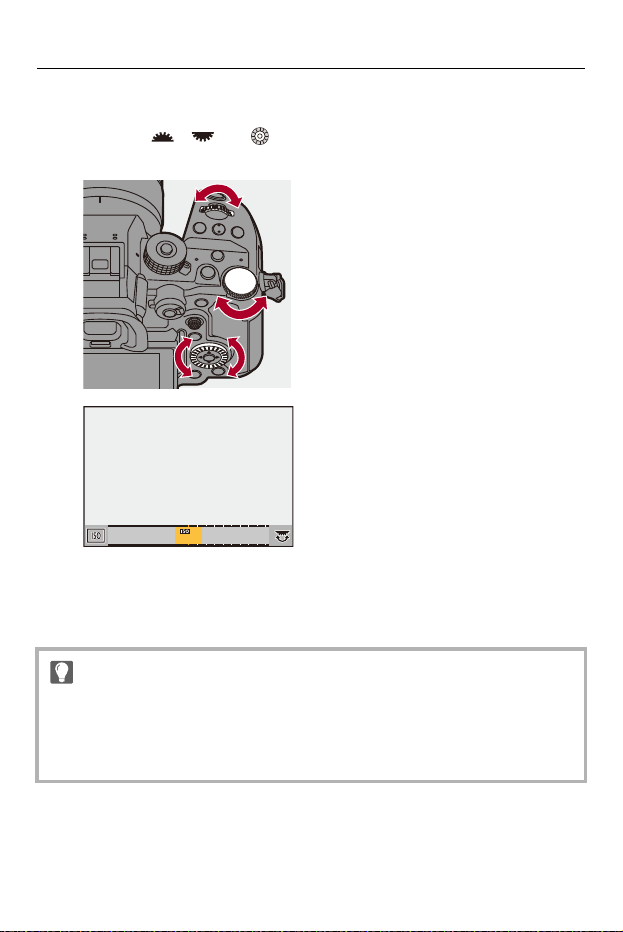
Metering / Exposure / ISO Sensitivity – ISO Sensitivity
295
2
Select ISO sensitivity.
≥Rotate , , or .
≥Selection is also possible by pressing [ISO].
3
Confirm your selection.
≥Press the shutter button halfway.
Characteristics of the ISO Sensitivity
By increasing the ISO sensitivity, the shutter speed can be increased in dark places
to prevent camera shake and subject blur. However, higher ISO sensitivities also
increase the amount of noise in the recorded images.
1
00
1
00
2
00
2
00
4
0
4
0
AUTO
AUTO

Metering / Exposure / ISO Sensitivity – ISO Sensitivity
296
Setting Items (ISO Sensitivity)
[AUTO]
The ISO sensitivity is automatically adjusted according to the brightness.
• Taking picture: Maximum [3200]
*1
• Video recording: Maximum [6400]
*2
[100] to [25600]
(In [ ] mode: [100] to [12800])
The ISO sensitivity is fixed at the selected value.
• By setting [Extended ISO] (Î[Extended ISO]: 549) to [ON] in the [Custom] ([Image
Quality]) menu, the ISO sensitivity can be extended to a lower limit of [50].
*1 Default setting. The upper limit can be changed with [ISO Sensitivity (photo)].
*2 Default setting. The upper limit can be changed with [ISO Sensitivity (video)].
• When the following functions are being used, the ISO sensitivity that can be set is
restricted.
– High Resolution mode: Up to an upper limit of [1600]
– [Dynamic Range Boost]: Down to a lower limit of [800]
– [Filter Settings]: Up to an upper limit of [3200]
– [Like709] ([Photo Style]): Down to a lower limit of [100]
– [V-Log] ([Photo Style]): Down to a lower limit of [250]
(The lower limit changes to [125] when [Extended ISO] is set, and [2000] when
[Dynamic Range Boost] is set.)
– [Hybrid Log Gamma] ([Photo Style]): Down to a lower limit of [250]
(The lower limit changes to [2000] when [Dynamic Range Boost] is set.)

Metering / Exposure / ISO Sensitivity – ISO Sensitivity
297
• You can set upper and lower limits for ISO Auto:
(Î[ISO Sensitivity (photo)]: 298, [ISO Sensitivity (video)]: 362)
• You can change the intervals between ISO sensitivity settings values:
(Î[ISO Increments]: 548)
• The setting range of ISO sensitivity can be extended:
(Î[Extended ISO]: 549)
• You can set the lower limit for shutter speed for ISO Auto:
(Î[Min. Shutter Speed]: 257)
• You can change the operation of the [ISO] button:
(Î[WB/ISO/Expo. Button]: 561)
• You can set the upper limit for ISO Auto on the ISO sensitivity settings screen:
(Î[ISO Displayed Setting]: 561)
• You can change the units for sensitivity to dB when recording video:
(Î[SS/Gain Operation]: 400)
Metering / Exposure / ISO Sensitivity – ISO Sensitivity
298
[ISO Sensitivity (photo)]
Sets the lower and upper limits for ISO sensitivity when ISO sensitivity is
set to [AUTO].
¨ [ ] ¨ [ ] ¨ Select [ISO Sensitivity (photo)]
[ISO Auto Lower Limit Setting]
Sets the lower limit for ISO sensitivity when ISO sensitivity is [AUTO].
• Set in the range between [100] and [12800].
[ISO Auto Upper Limit Setting]
Sets the upper limit for ISO sensitivity when ISO sensitivity is [AUTO].
• Set to [AUTO] or in the range between [200] and [25600].

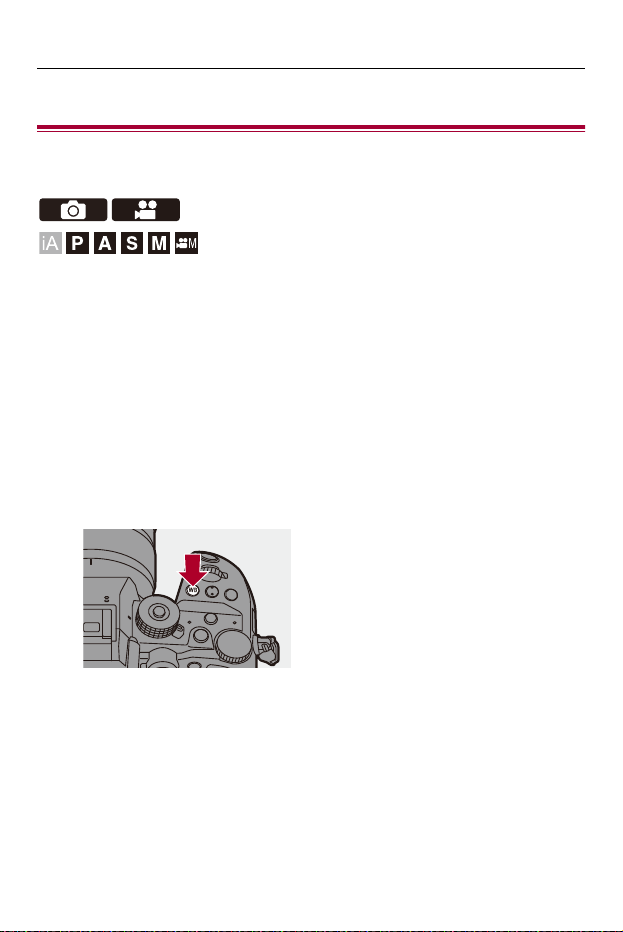
White Balance / Image Quality – White Balance (WB)
300
White Balance (WB)
≥Adjusting the White Balance: 305
White balance (WB) is a function that corrects the color cast produced by
the light illuminating the subject.
It corrects the colors so that white objects appear in white to make the
overall color closer to what is seen by the eye.
Normally, you can use auto ([AWB], [AWBc] or [AWBw]) to obtain the
optimal white balance.
Set this function when the coloring of the image is different from what you
expected, or you want to change the coloring to capture the ambience.
1
Press [WB].
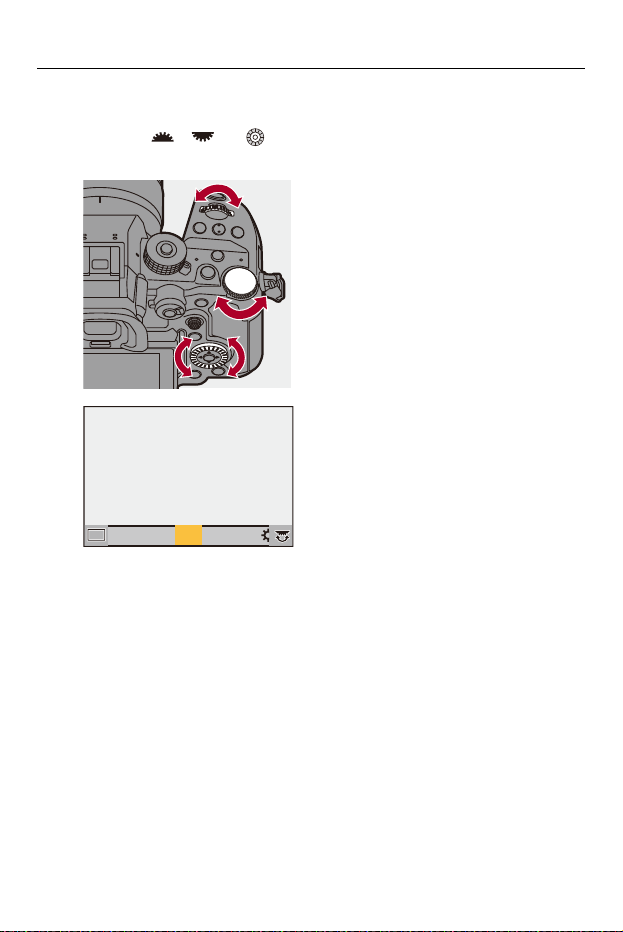
White Balance / Image Quality – White Balance (WB)
301
2
Select the white balance.
≥Rotate , or .
≥Selection is also possible by pressing [WB].
3
Confirm your selection.
≥Press the shutter button halfway.
AWBc
AWBc
AWBw
AWBw
WB
WBWBWB
WBWBWBWBWBWBWB
AWB
AWB
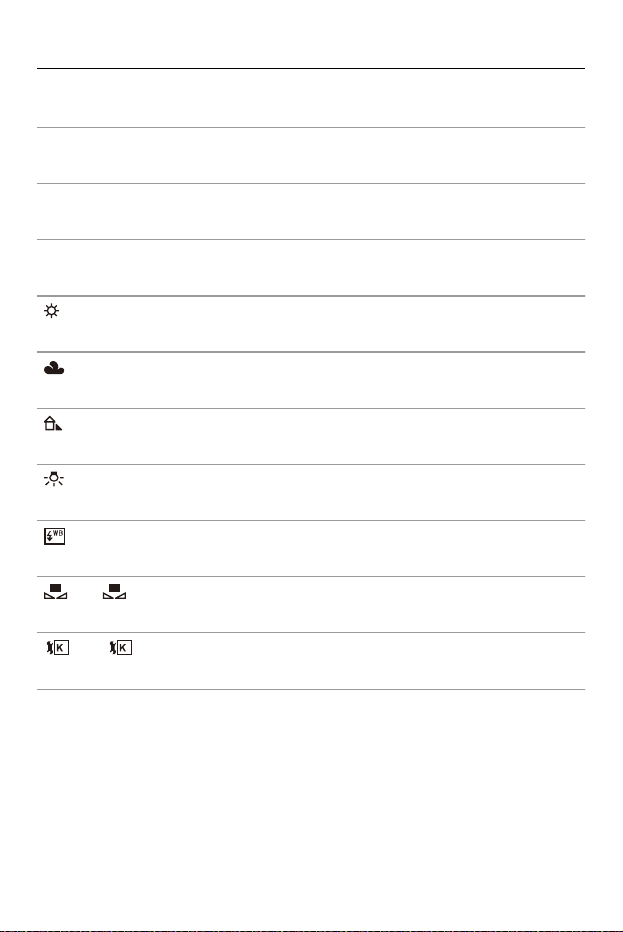
White Balance / Image Quality – White Balance (WB)
302
Setting Items (White Balance)
[AWB]
Auto
[AWBc]
Auto (Reduces the reddish hue under an incandescent light source)
[AWBw]
Auto (Leaves the reddish hue under an incandescent light source)
[]
Clear sky
[]
Cloudy sky
[]
Shade under a clear sky
[]
Incandescent light
[]
*
Flash
[ ] to [ ]
Set mode 1 to 4 (ÎRegistering the White Set: 304)
[ ] to [ ]
Color temperatures 1 to 4 (ÎColor Temperature Setting: 304)
* It operates as [AWB] during video recording.
1
4
1
4
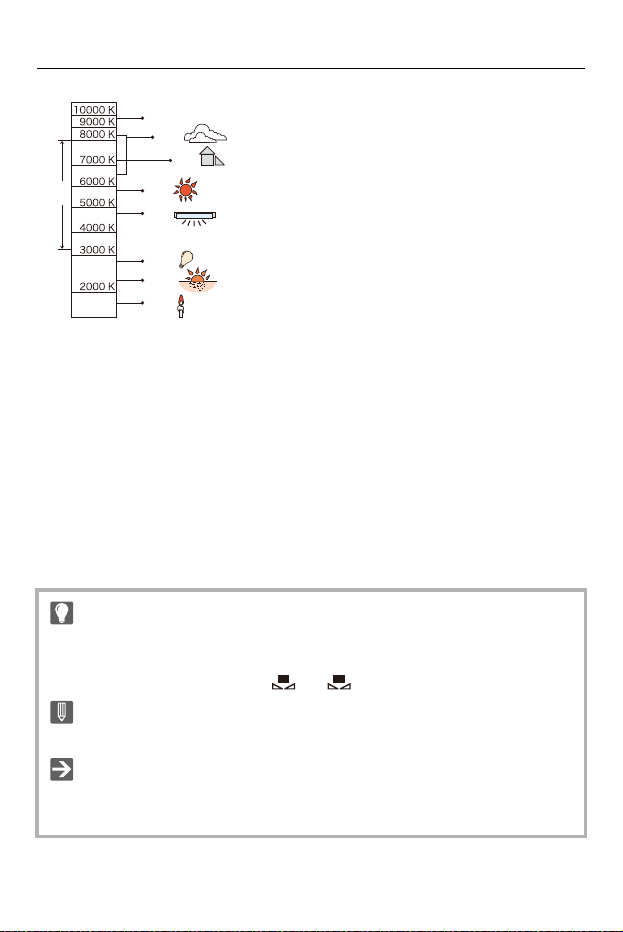
White Balance / Image Quality – White Balance (WB)
303
(1) [AWB] will work within this range.
(2) Blue sky
(3) Cloudy sky (Rain)
(4) Shade
(5) Sunlight
(6) White fluorescent light
(7) Incandescent light bulb
(8) Sunrise and sunset
(9) Candlelight
K=Kelvin Color Temperature
• Under lighting such as fluorescent or LED lighting, the appropriate white balance
will vary depending on the lighting type.
Use [AWB], [AWBc], [AWBw] or [ ] to [ ].
• The white balance is fixed to [AWB] while [Filter Settings] is being used.
• You can change the operation of the [WB] button:
(Î[WB/ISO/Expo. Button]: 561)
(1)
(5)
(6)
(7)
(8)
(9)
(4)
(3)
(2)
1
4
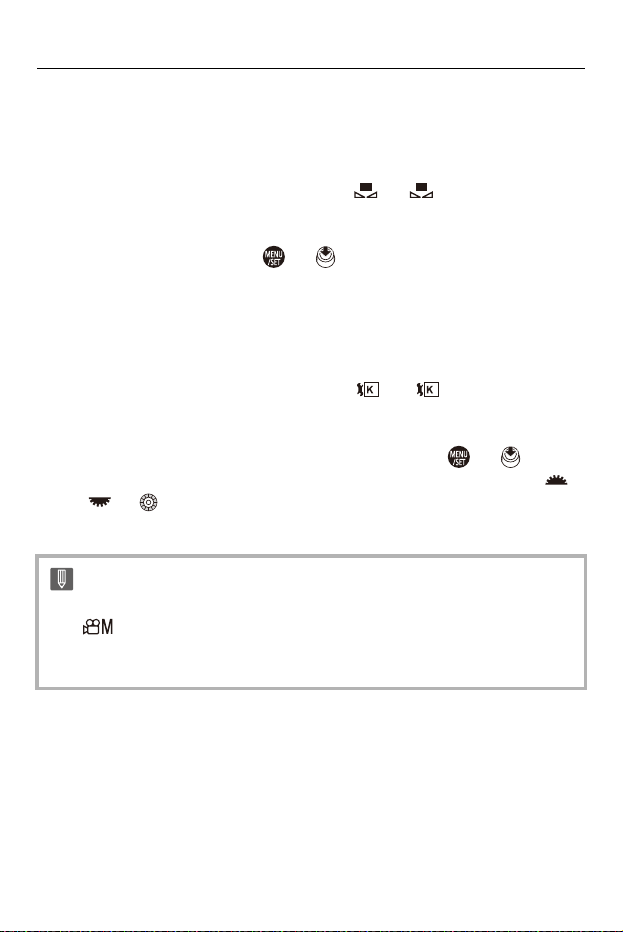
White Balance / Image Quality – White Balance (WB)
304
Registering the White Set
Take pictures of a white object under the light source of the recording
location to adjust the white balance until it appears white.
1 Press [WB] and then select any value from [ ] to [ ].
2 Press 3.
3 Aim the camera at a white object so that it appears inside the frame at the center
of the screen and then press or .
• This will set the white balance and return you to the recording screen.
Color Temperature Setting
Set the numeric value for the white balance color temperature.
1 Press [WB] and then select any value from [ ] to [ ].
2 Press 3.
• The color temperature setting screen is displayed.
3 Press 34 to select the color temperature and then press or .
• You can set the White Balance Bracket (Color Temperature) by rotating ,
or . (Î[More Settings] (White Balance Bracket (Color Temperature)):
249)
• You can set a color temperature from [2500K] to [10000K].
• In [ ] mode or when [Video-Priority Display] in the [Custom] ([Monitor /
Display (Video)]) menu is set to [ON], the kelvin values are displayed on the
recording screen.
1
4
1
4
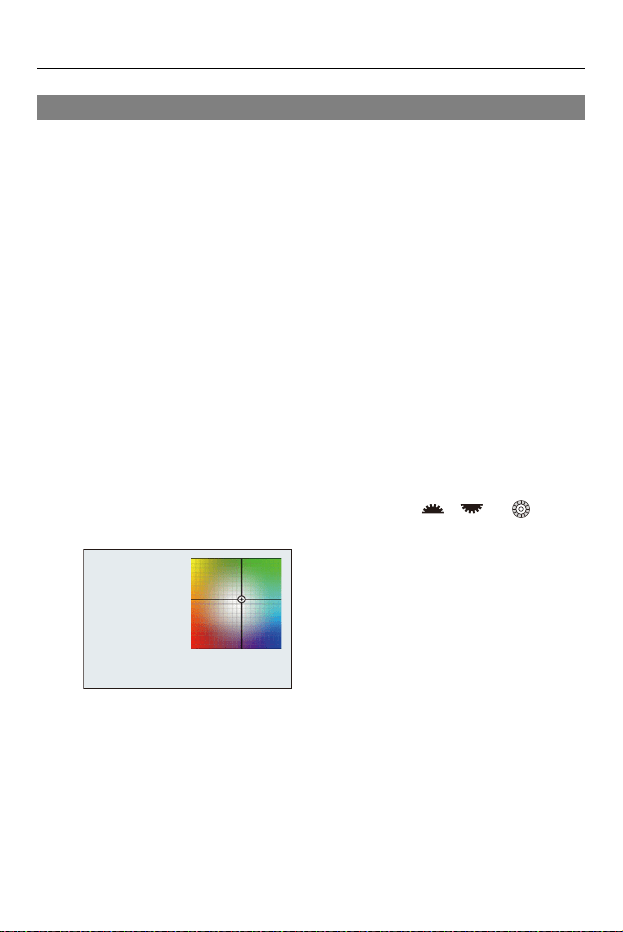
White Balance / Image Quality – White Balance (WB)
305
Adjusting the White Balance
You can adjust the coloring even when the coloring you want to apply is not
produced by the selected white balance.
1
Press [WB].
2
Select the white balance and then press 4.
≥The adjustment screen is displayed.
3
Adjust the coloring.
2: [A] (AMBER: ORANGE)
3: [G] (GREEN: GREENISH)
1: [B] (BLUE: BLUISH)
4: [M] (MAGENTA: REDDISH)
• You can also make adjustments in diagonal directions by using the joystick.
• You can also touch the graph to make adjustments.
• Press [DISP.] to return to the unadjusted state.
• You can set the White Balance Bracket by rotating , or .
(Î[More Settings] (White Balance Bracket): 249)
GGGGGG
MMMMMM
AAAAAABBBBBBB

White Balance / Image Quality – White Balance (WB)
306
4
Confirm your selection.
≥Press the shutter button halfway.
•
When the white balance is adjusted, the color of its recording screen icon
changes to the adjusted color.
Adjusting toward the [G] side will display [+], while adjusting toward the [M] side
will display [−].
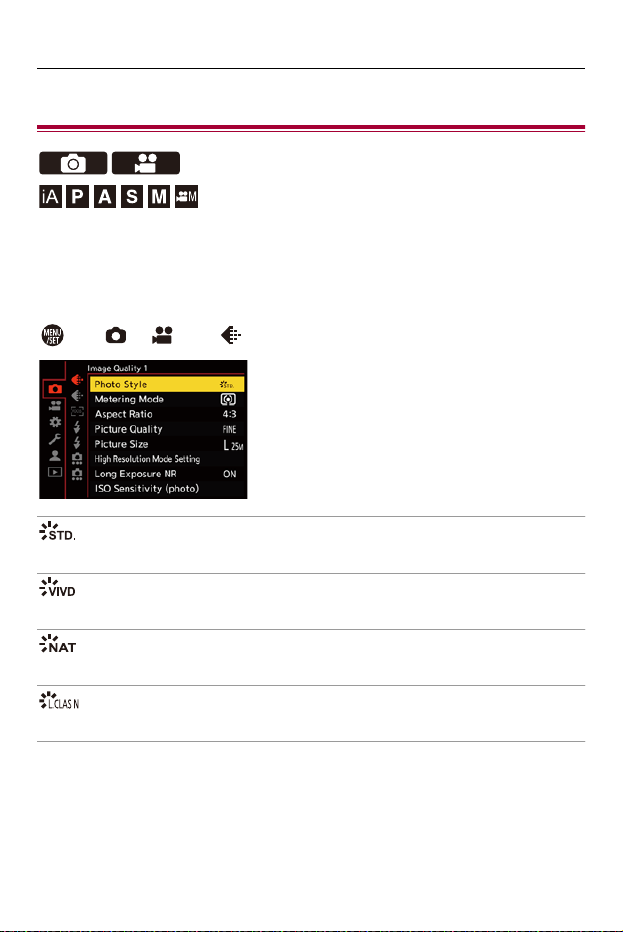
White Balance / Image Quality – [Photo Style]
307
[Photo Style]
You can select the finishing settings of images to suit your subjects and
expression styles.
The image quality can be adjusted for each Photo Style.
¨ [ ]/[ ] ¨ [ ] ¨ Select [Photo Style]
[Standard]
The standard setting.
[Vivid]
A setting that produces a more vivid quality with higher saturation and contrast.
[Natural]
A setting that produces a softer quality with lower contrast.
[L.ClassicNeo]
A setting for a film-like effect that has a nostalgic, soft coloring.
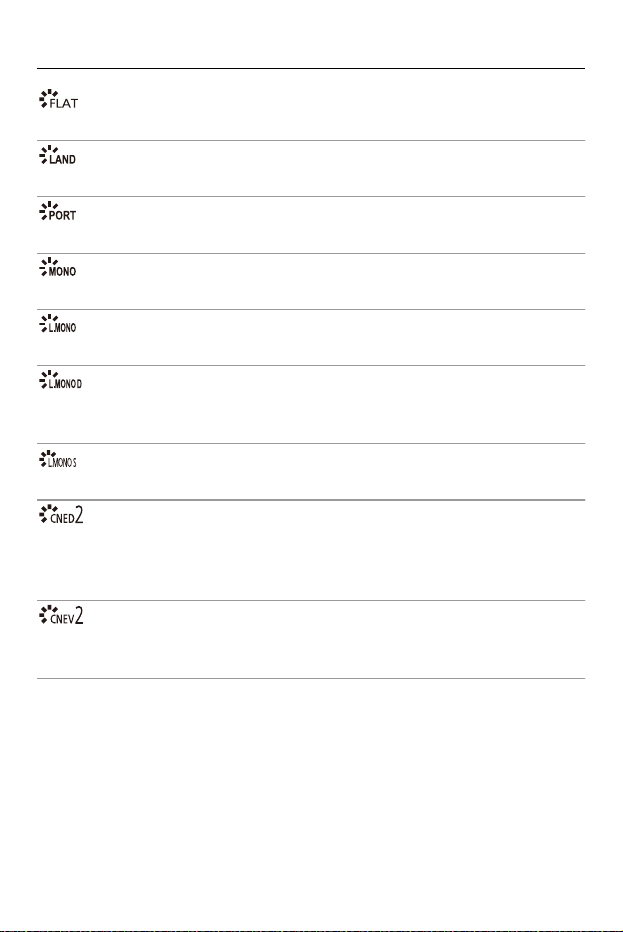
White Balance / Image Quality – [Photo Style]
308
[Flat]
A setting that produces a flatter image quality with lower saturation and contrast.
[Landscape]
A setting suited for sceneries with vivid blue skies and greens.
[Portrait]
A setting suited for portraits with a healthy and beautiful skin tone.
[Monochrome]
A monochrome setting with no color shades.
[L.Monochrome]
A monochrome setting with rich gradation and crisp black accents.
[L.Monochrome D]
A monochrome setting that creates a dynamic impression with enhanced highlights
and shadows.
[L.Monochrome S]
A setting for a monochrome effect with a gentle touch suited to portraits.
[Cinelike D2]
A setting that creates a film-like finishing touch using a gamma curve and gives priority
to the dynamic range.
• This function is suitable for video editing processes.
[Cinelike V2]
A setting that creates a film-like finishing touch using a gamma curve that gives priority
to the contrast.
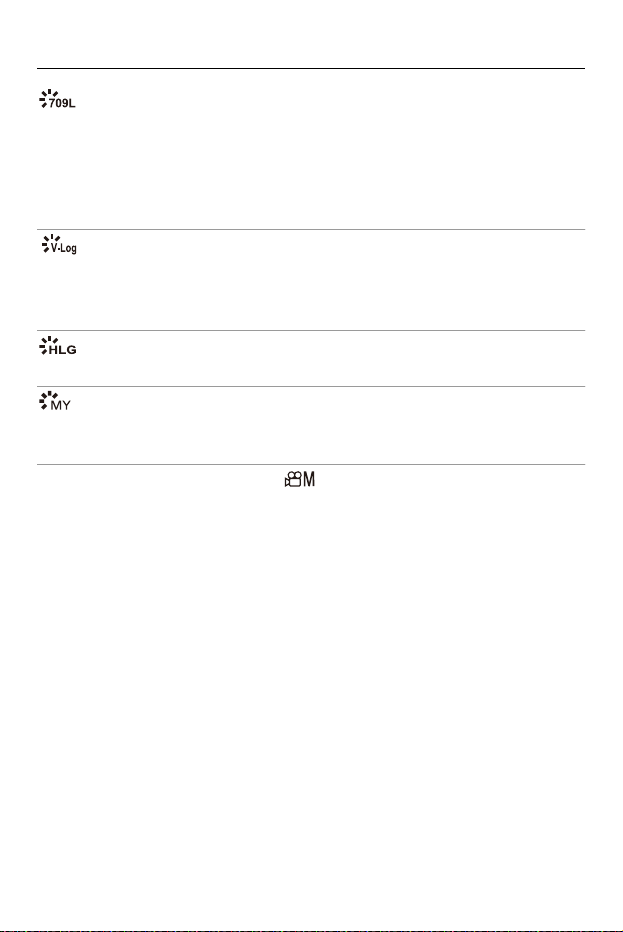
White Balance / Image Quality – [Photo Style]
309
[Like709]
A setting that minimizes overexposure by applying a gamma curve correction
equivalent to Rec.709 to perform compression (knee adjustment) of high-luminance
areas. (ÎRecording While Controlling Overexposure (Knee): 360)
• Rec.709 is an abbreviation of “ITU-R Recommendation BT.709”, a standard for
high-definition broadcasting.
[V-Log]
A gamma curve setting intended for post-production processing. (ÎLog Recording:
430)
• It allows you to add rich gradation to images during post-production editing.
[Hybrid Log Gamma]
*1
A setting used to record HLG format video. (ÎHLG Videos: 435)
[MY PHOTO STYLE 1]
*2
to [MY PHOTO STYLE 10]
*2
Adjusts the image quality of Photo Style items to your preferred settings and registers
these as My Photo Style items. (ÎRegistering Settings in My Photo Style: 316)
*1 Can only be selected when in the [ ] mode and set to a 10-bit [Rec Quality].
(Î[Rec Quality]: 136)
*2 Effects up to [MY PHOTO STYLE 4] are displayed with the default settings. You
can set the items to display in the menu with [Show/Hide Photo Style] in [Photo
Style Settings]. (Î[Photo Style Settings]: 548)
White Balance / Image Quality – [Photo Style]
310
• In [iA] mode, operation differs from that in other recording modes.
– [Standard] or [Monochrome] can be set.
– The setting will be reset to [Standard] when the camera is switched to another
recording mode or it is turned off.
– Image quality cannot be adjusted.
• The range of available ISO sensitivities is different when [Photo Style] is set to
the following (ÎSetting Items (ISO Sensitivity): 296):
– [Like709]/[V-Log]/[Hybrid Log Gamma]
• You can set the knee mode with [Like709]. (ÎRecording While Controlling
Overexposure (Knee): 360)
• When [Filter Settings] is being used, [Photo Style] is not available.
• You can make detailed Photo Style settings:
(Î[My Photo Style Settings]: 548)
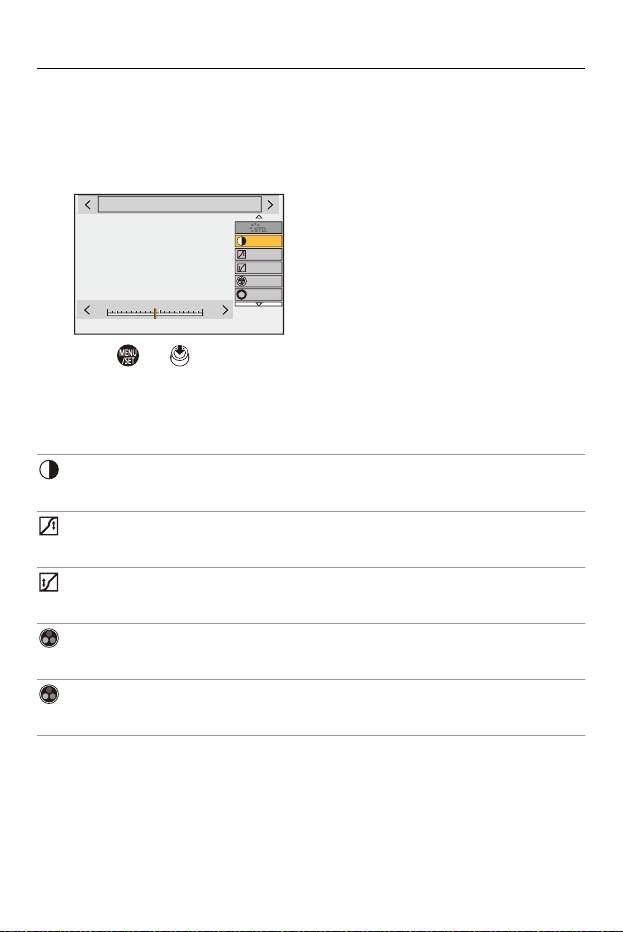
White Balance / Image Quality – [Photo Style]
311
Adjusting Image Quality
1 Press 21 to select the type of Photo Style.
2 Press 34 to select an item and then press 21 to adjust.
• Adjusted items are indicated with [¢].
3 Press or .
• When the image quality is adjusted, the Photo Style icon on the recording
screen is indicated with [¢].
Settings Items (Image Quality Adjustment)
[Contrast]
Adjusts the contrast in the image.
[Highlight]
Adjusts the brightness of bright areas.
[Shadow]
Adjusts the brightness of dark areas.
[Saturation]
Adjusts the vividness of colors.
[Color Tone]
Adjusts blue and yellow tints.
-
5
-
500
+5+5
±0
±0
±0
±0
±0
6WDQGDUG
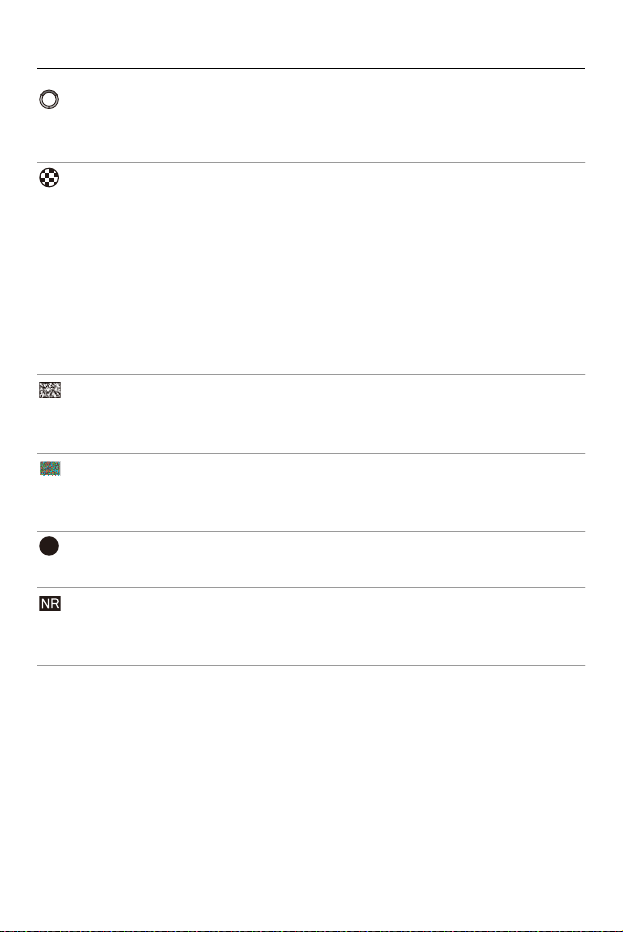
White Balance / Image Quality – [Photo Style]
312
[Hue]
Assuming that the reference point is red, this rotates the hue toward violet/magenta or
yellow/green to adjust the coloring of the entire image.
[Filter Effect]
[Yellow]: Enhances the contrast. (Effect: weak) Records the sky with a clear blue.
[Orange]: Enhances the contrast. (Effect: medium) Records the sky with a darker
blue.
[Red]: Enhances the contrast. (Effect: strong) Records the sky with a much darker
blue.
[Green]: Skin and lips of people appear in natural tones. Green leaves appear brighter
and more enhanced.
[Off]
[Grain Effect]
[Low]/[Standard]/[High]: Sets the grain effect level.
[Off]
[Color Noise]
[On]: Adds color to the grain effect.
[Off]
[Sharpness]
Adjusts the outlines in the image.
[Noise Reduction]
Adjusts the noise reduction effect.
• Increasing the effect may cause a slight drop in picture resolution.
S

White Balance / Image Quality – [Photo Style]
313
[Sensitivity]
*
Sets the ISO sensitivity. (ÎISO Sensitivity: 294)
[White Balance]
*
Sets the white balance. (ÎWhite Balance (WB): 300)
• While [WB] is selected, press [ ] to display the white balance setting screen.
Press [ ] again to return to the original screen.
* Available when the following is set while [MY PHOTO STYLE 1] to [MY PHOTO
STYLE 10] are selected:
[] ¨ [ ] ¨ [Photo Style Settings] ¨ [My Photo Style Settings] ¨ [Add
Effects] ¨ [Sensitivity]/[White Balance] ¨ [ON]
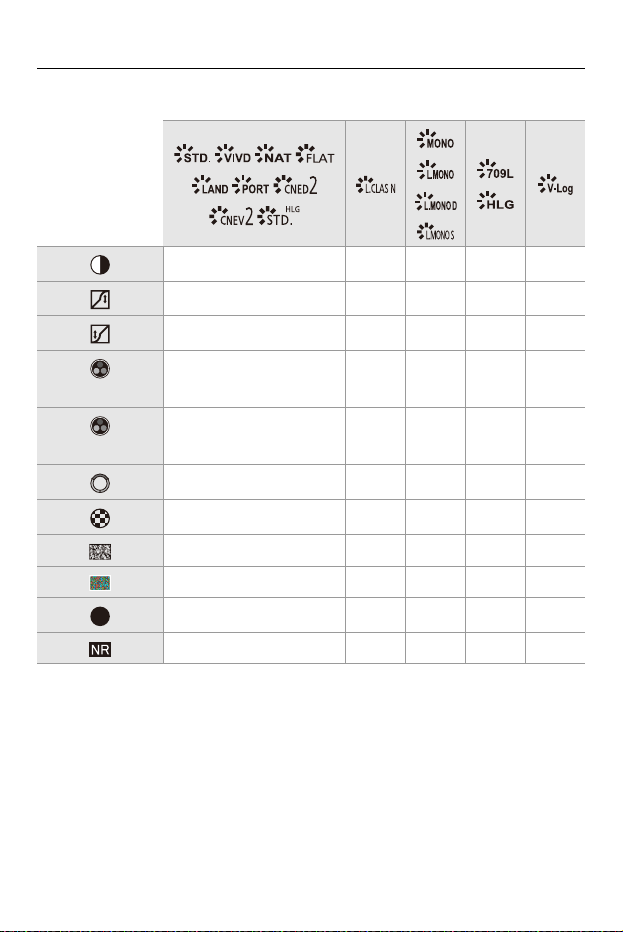
White Balance / Image Quality – [Photo Style]
314
• The items that you can adjust the image quality for depend on the Photo Style type.
* Can be set when [Grain Effect] is one of [Low], [Standard], or [High].
333
333
333
([Saturation])
333
([Color Tone])
3
333
3
33
3
*
33333
33333
S

White Balance / Image Quality – [Photo Style]
315
• The effects of [Grain Effect] and [Color Noise] cannot be checked on the
recording screen.
• [Grain Effect] and [Color Noise] are not available when using the following
functions:
– Video recording
– SH burst recording
White Balance / Image Quality – [Photo Style]
316
Registering Settings in My Photo Style
1 Press 21 to select the type of Photo Style.
2 Adjust the image quality.
• My Photo Style displays the types of Photo Style at the top of image quality
adjustment.
Select the base Photo Style.
3 Press [DISP.].
4 (When [MY PHOTO STYLE 1] to [MY PHOTO STYLE 10] is selected)
Press 34 to select [Save Current Setting] and then press or .
5 Press 34 to select the registration destination number and then press or
.
• A confirmation screen will be displayed.
On the confirmation screen, press [DISP.] to change the My Photo Style name.
Up to 22 characters may be entered. Double-byte characters are treated as 2
characters.
How to enter characters (ÎEntering Characters: 105)
Changing the Registered Contents of My Photo Style
1 Select any value from [MY PHOTO STYLE 1] to [MY PHOTO STYLE 10].
2 Press [DISP.] and then set the item.
[Load Preset Setting]
[Save Current Setting]
[Edit Title]
[Restore to Default]
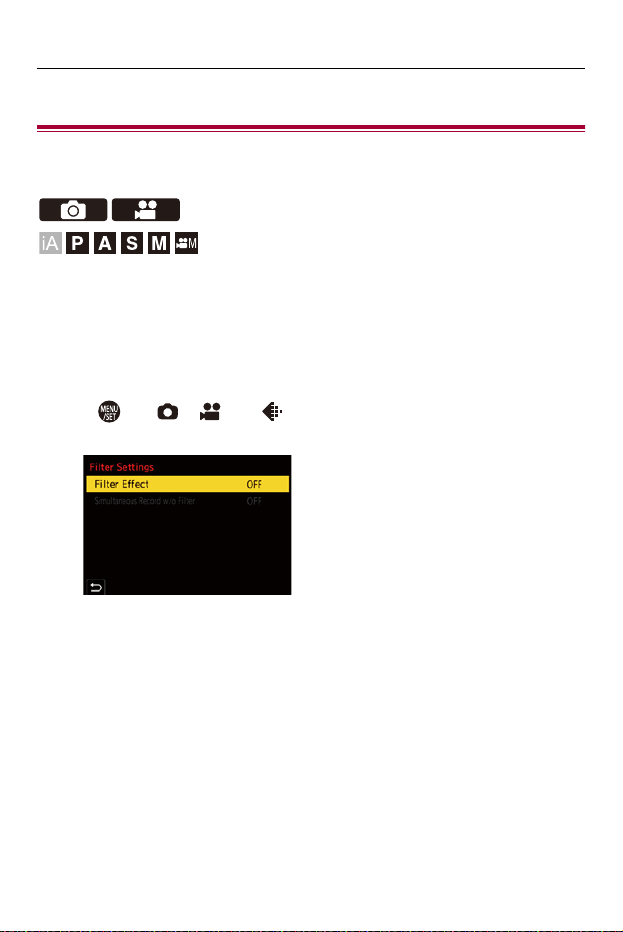
White Balance / Image Quality – [Filter Settings]
317
[Filter Settings]
≥[Simultaneous Record w/o Filter]: 322
This mode records with additional image effects (filters).
You can adjust the effect for each filter.
In addition, you can simultaneously take pictures without effects.
1
Set the [Filter Effect].
≥ ¨ [ ]/[ ] ¨ [ ] ¨ [Filter Settings] ¨ [Filter Effect] ¨
[SET]
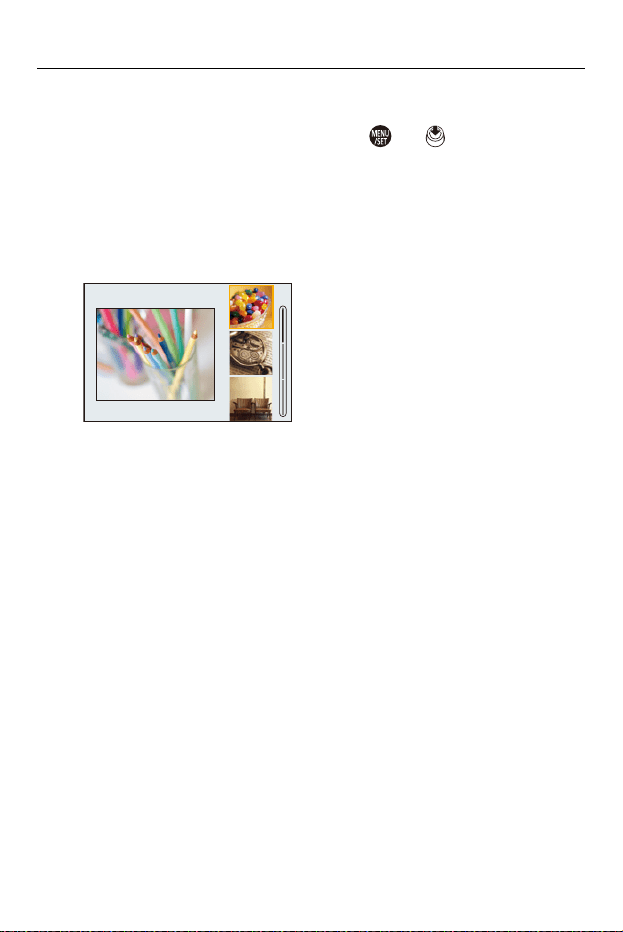
White Balance / Image Quality – [Filter Settings]
318
2
Select the filter.
≥Press 34 to select, and then press or .
≥You can also select the image effect (filter) by touching the sample
picture.
•
Press [DISP.] to switch the screen in the order of normal display and guide
display.
The guide display shows the description of each filter.
1/3
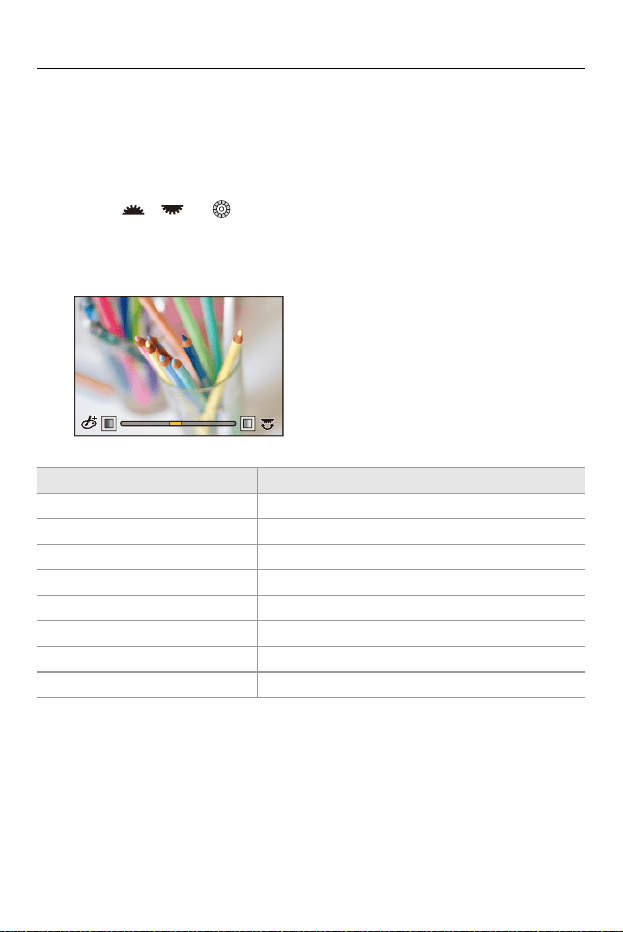
White Balance / Image Quality – [Filter Settings]
319
Adjusting the Filter Effect
You can adjust the filter effect.
1 Select the filter.
2 On the recording screen, press [WB].
3 Rotate , or to set.
• To return to the recording screen, press [WB] again.
• When the filter effect is adjusted, the filter icon on the recording screen is
indicated with [¢].
Filter Items that can be adjusted
[Expressive] Vividness
[Retro] Coloring
[Old Days] Contrast
[High Key] Coloring
[Low Key] Coloring
[Sepia] Contrast
[Cross Process] Coloring
[Bleach Bypass] Contrast
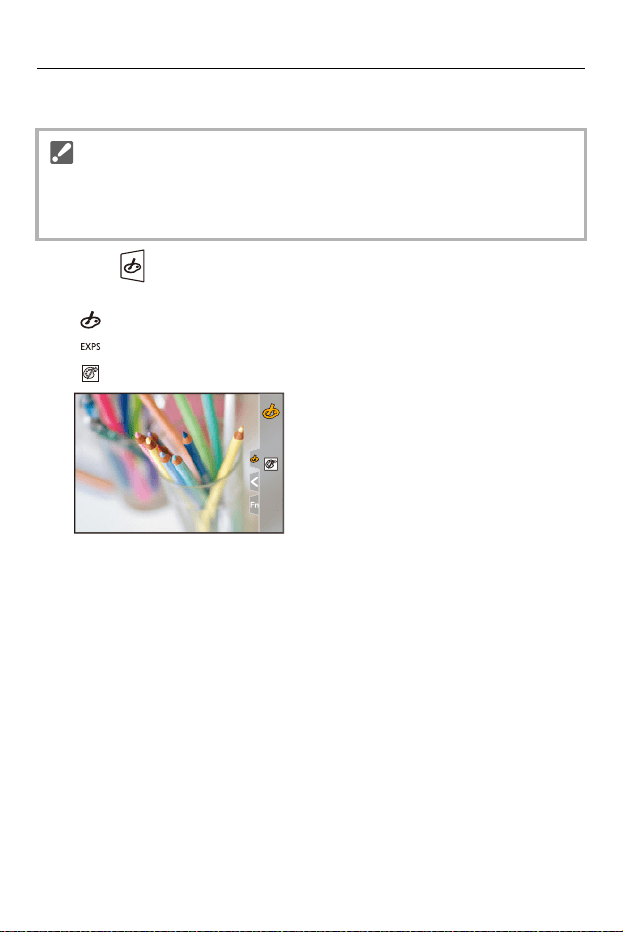
White Balance / Image Quality – [Filter Settings]
320
Setting a Filter with Touch Operation
1 Tou ch [ ].
2 Touch the item to set.
[ ]: Filter on/off
[ ]: Filter
[ ]: Filter effect adjustment
• The default settings are for the Touch Tab to not be displayed.
Set [Touch Tab] to [ON] in [Touch Settings] in the [Custom] ([Operation]) menu.
(Î[Touch Settings]: 558)
EXPSEXPSEXPS
EXPSEXPSEXPS
White Balance / Image Quality – [Filter Settings]
321
• White balance will be fixed to [AWB] and the flash will be fixed to [ ] (Forced
Flash Off).
• The upper limit to ISO sensitivity is [3200].
• Depending on the filter, the recording screen may seem as if frames are missed.
• [Filter Effect] is not available when using the following function:
– High Resolution mode
• When displaying the [Filter Effect] setting screen using the Fn button, pressing
[DISP.] displays the filter selection screen.
White Balance / Image Quality – [Filter Settings]
322
[Simultaneous Record w/o Filter]
You can simultaneously take pictures with no added filter effects.
¨ [ ]/[ ] ¨ [ ] ¨ [Filter Settings] ¨ Select
[Simultaneous Record w/o Filter]
Settings: [ON]/[OFF]
•
[Simultaneous Record w/o Filter] is not available when using the following
functions:
– Burst recording
– [Time Lapse Shot]
– [Stop Motion Animation]
– [RAW+FINE]/[RAW+STD.]/[RAW] ([Picture Quality])
– [Bracketing]

323
Flash
If you attach the Flash (DMW-FL580L/DMW-FL360L/DMW-FL200L:
optional) to the hot shoe, you can record using the flash.
You can also use a commercially available external flash by connecting a
synchro cable to the flash synchro socket.
Furthermore, by attaching an external flash that supports wireless flash
recording, you can wirelessly control an external flash that is in a position
separate from the camera.
• Please also refer to the operating instructions for the Flash.
≥Using an External Flash (Optional): 324
≥Setting Flash: 328
≥Recording Using a Wireless Flash: 337
Flash – Using an External Flash (Optional)
324
Using an External Flash (Optional)
≥Removing the Hot Shoe Cover: 325
•
Remove the lens hood to prevent vignetting.
• Flash recording is not possible when the following functions are being used:
– [ELEC.]/[Silent Mode]
– High Resolution mode
– [Filter Settings]
– SH burst recording
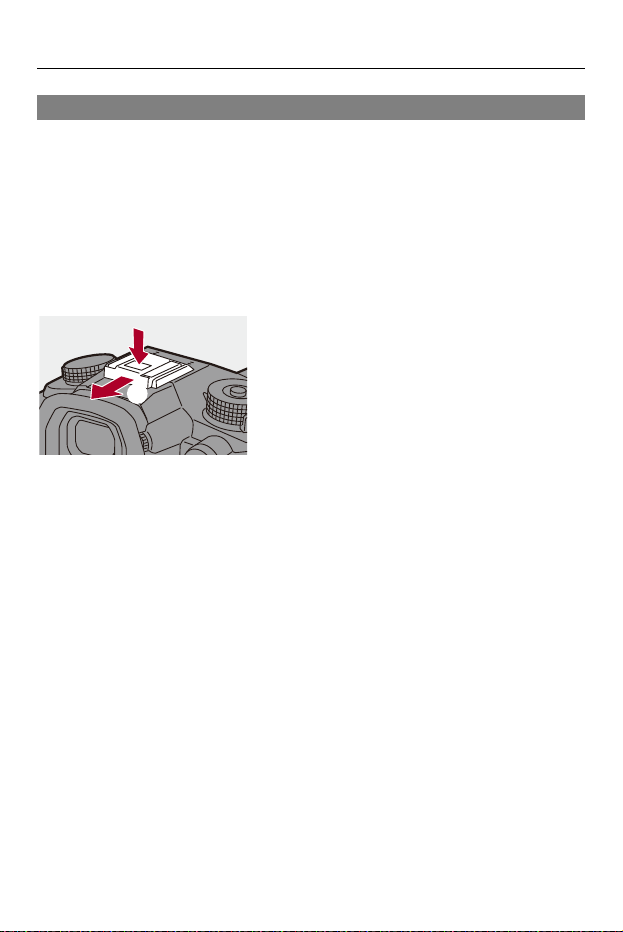
Flash – Using an External Flash (Optional)
325
Removing the Hot Shoe Cover
Before attaching the Flash (optional), remove the hot shoe cover.
Refer to the operating instructions for the Flash for details about how to
attach it.
Remove the hot shoe cover by pulling it in the direction
indicated by arrow (2) while pressing it in the direction
indicated by arrow (1).
(1)
(2)
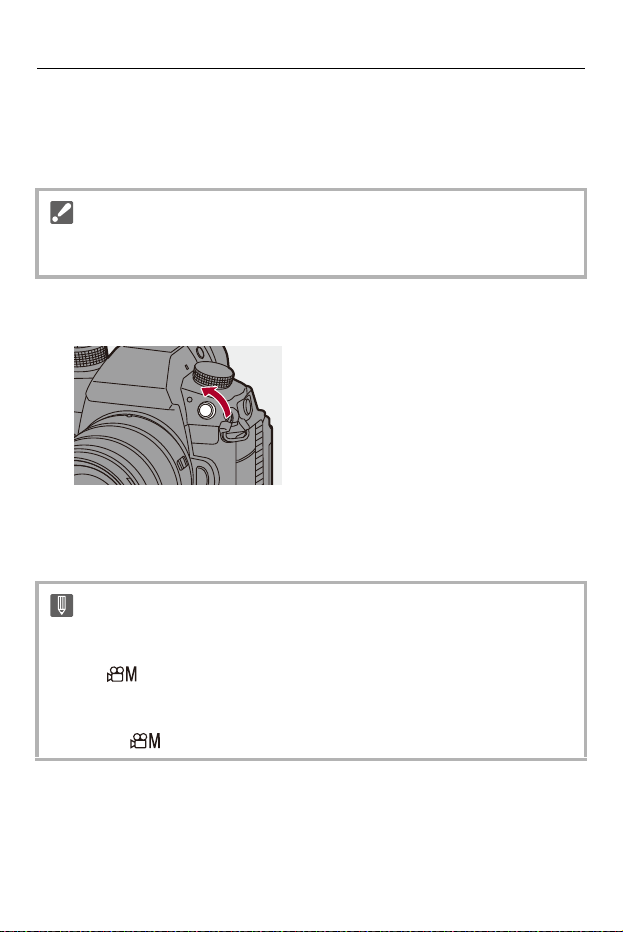
Flash – Using an External Flash (Optional)
326
Connecting a Synchro Cable to the Flash Synchro Socket
You can use a commercially available external flash by connecting a
synchro cable to the flash synchro socket.
1 Rotate the flash synchro socket cap in the direction of the arrow to remove.
• Be careful not to lose the flash synchro socket cap.
2 Connect the synchro cable to the flash synchro socket.
• The socket has a lock screw to prevent the cable from falling off.
• For the connection, refer to the operating instructions for the synchro cable.
• Use an external flash with a synchronization voltage of 250 V or less.
• Do not use the synchro cables with the length of 3 m (9.8 feet) or more.
• The flash synchro socket has no polarity. You can use a synchro cable
regardless of its polarity.
• In the [ ] mode, the flash synchro socket is used to synchronize time codes
with an external device. (ÎSynchronizing the Time Code with an External
Device: 390) Do not connect an external flash to the flash synchro socket when
set to the [ ] mode. Doing so may cause a malfunction in the camera.
Flash – Using an External Flash (Optional)
327
Notes on Flash Recording
• Do not bring any object near the flash. Heat or light may cause the object to
deform or discolor.
• If you record repeatedly, time may be needed to charge the flash.
While the flash is charging, images will be recorded without the flash firing.
• When an external flash is attached, do not carry the camera by holding only the
external flash. It may become detached.
• When using a commercially available external flash, do not use one with
reversed polarity or function for communicating with a camera.
It may cause the camera to malfunction, or it may not operate correctly.
• Refer to the operating instructions for the external flash for details.
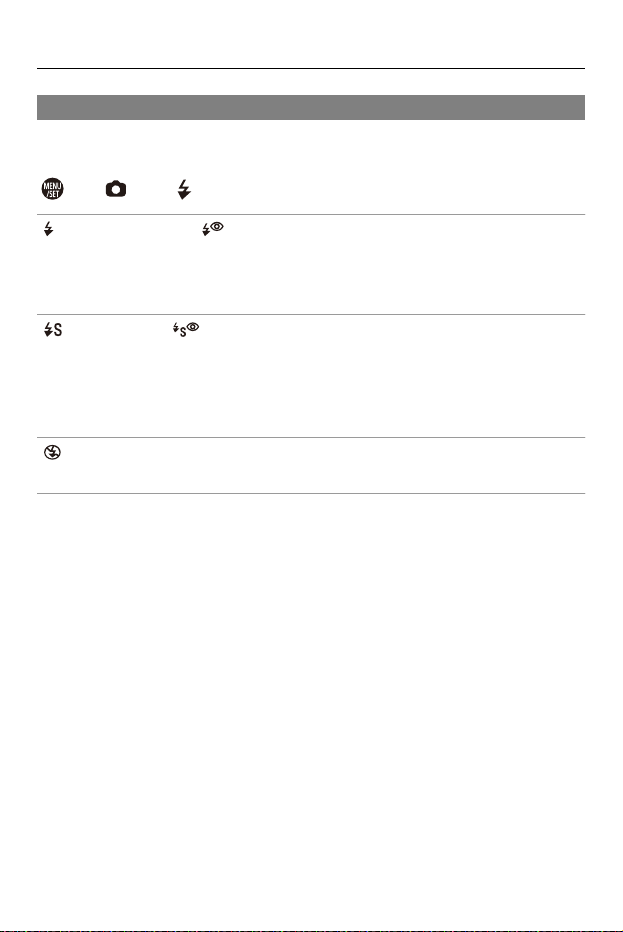
Flash – Setting Flash
329
[Flash Mode]
Sets the flash mode.
¨ [ ] ¨ [ ] ¨ Select [Flash Mode]
[ ] (Forced Flash On)/[ ] (Forced On/Red-Eye)
The flash fires every time regardless of the recording conditions.
This is suitable for recording when there is backlighting or under lighting such as
fluorescent lighting.
[ ] (Slow Sync.)/[ ] (Slow Sync./Red-Eye)
When recording images against a nightscape, this will slow the shutter speed when
the flash fires to make not only the subject but also the nightscape appear brighter.
• Slower shutter speeds may result in blurry images. To avoid this, we recommend
using a tripod.
[ ] (Forced Flash Off)
The flash does not fire.
Flash – Setting Flash
330
• The flash fires twice.
The interval between the first and second firings is longer when [ ] or [ ]
is set. The subject should not move until the second firing has finished.
• [ ] and [ ] cannot be used when the following are set:
– [Firing Mode]: [MANUAL]
– [Flash Synchro]: [2ND]
– [Wireless]: [ON]
• Some flash modes may not be available depending on the settings on the
external flash.
• The effectiveness of red-eye reduction varies from person to person.
The effect, which is influenced by factors such as distance to the subject and
whether the subject is looking at the camera when the preliminary flash is fired,
may not be very noticeable in some cases.
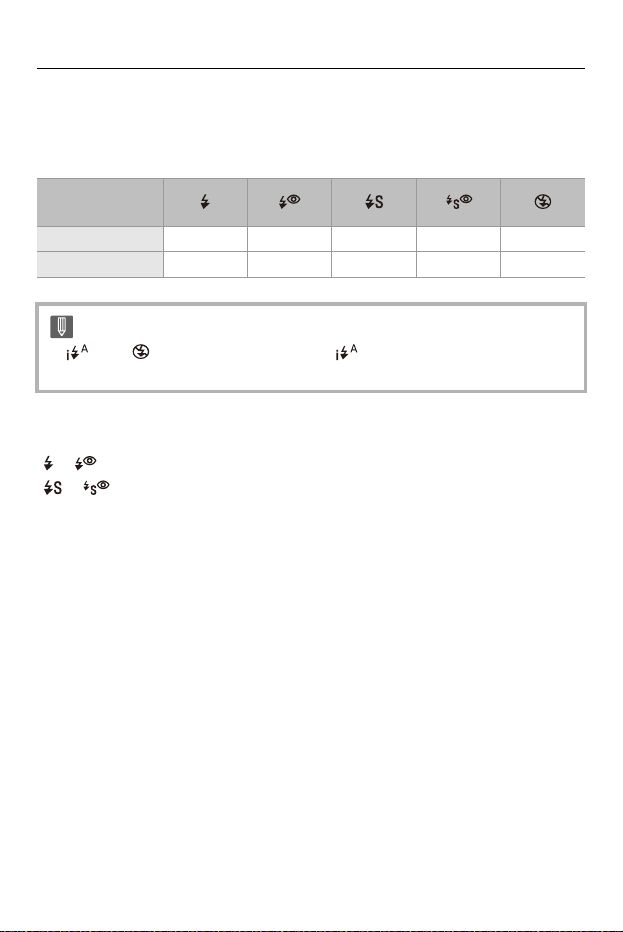
Flash – Setting Flash
331
Available Flash Settings by Recording Mode
The available flash settings depend on the recording mode.
(3: Available, —: Not available)
Shutter Speeds for Flash Modes
[ ]/[ ]: 1/60 of a second
*
to 1/250 of a second
[ ]/[ ]: 1 second to 1/250 of a second
* In [S] mode, this will be 60 seconds and in [M] mode it will be [B] (Bulb).
Recording
mode
[] [] [] [] []
[P]/[A] 33333
[S]/[M] 33—— 3
• [ ] and [ ] can be set in [iA] mode. In [ ], the flash mode switches to one
suited to the recording situation.
Flash – Setting Flash
332
[Firing Mode]/[Manual Flash Adjust.]
You can select whether to set the flash output automatically or manually.
1
Set the [Firing Mode].
≥ ¨ [ ] ¨ [ ] ¨ [Firing Mode]
[TTL]
Sets flash output to be set automatically by the camera.
[MANUAL]
Sets the flash output manually.
• With [TTL], you can record the images you want even when recording dark
scenes where the flash output tends to become greater.
• The flash output ([1/1], etc.) is displayed on the flash icon of the recording
screen.
• The settings made here are enabled when some flashes from other
manufacturers are attached.
Set on the flash when a Flash (DMW-FL580L/DMW-FL360L/DMW-FL200L:
optional) is attached.
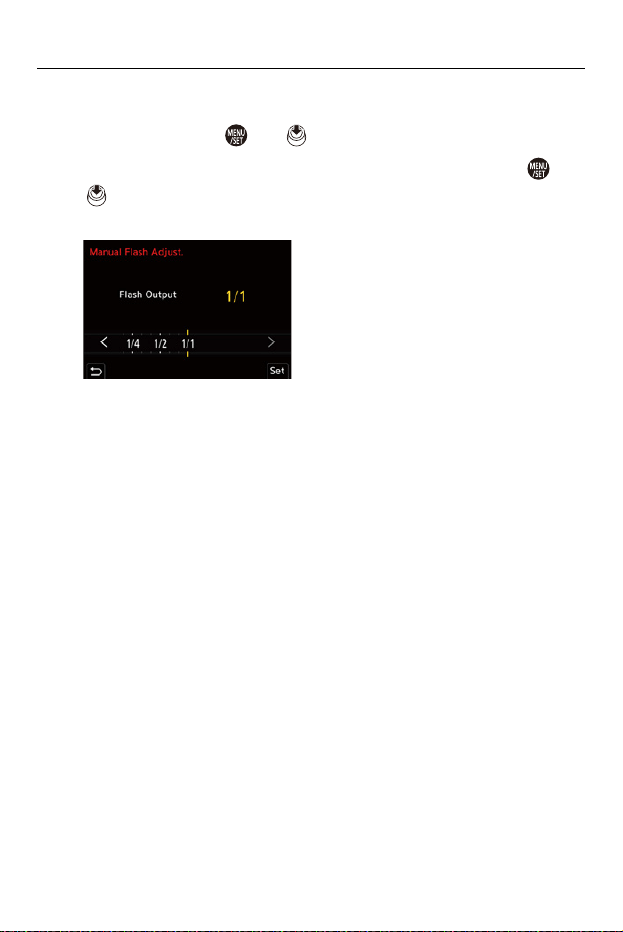
Flash – Setting Flash
333
2
(When set to [MANUAL]) Select [Manual Flash Adjust.]
and then press or .
3
Press 21 to set the flash output and then press or
.
• It can be set within the range of [1/1] (full flash output) to [1/128] in 1/3 steps.
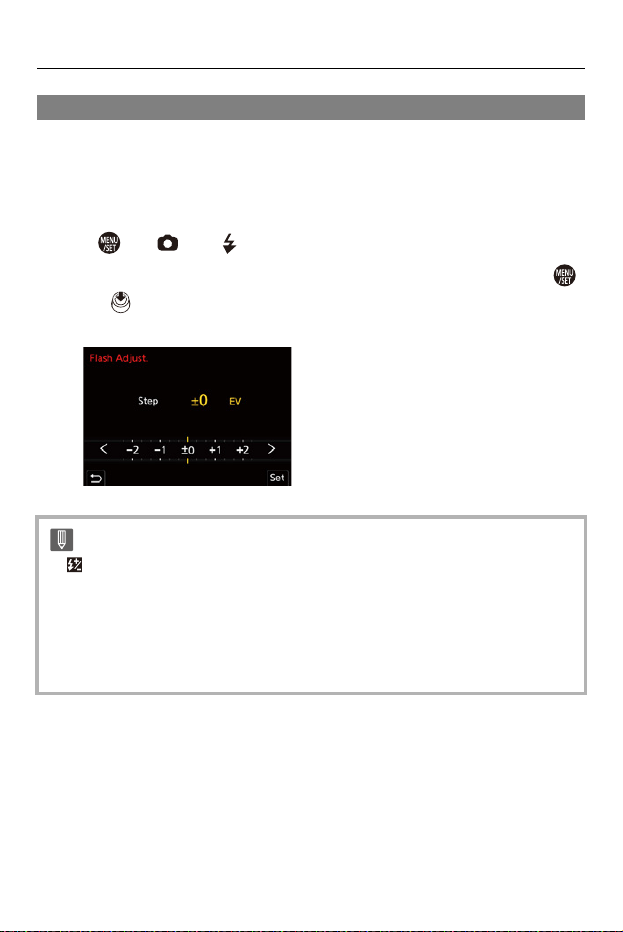
Flash – Setting Flash
334
[Flash Adjust.]
You can adjust the flash output when taking pictures with the flash in TTL
output mode.
1
Select [Flash Adjust.].
≥ ¨ [ ] ¨ [ ] ¨ [Flash Adjust.]
2
Press 21 to adjust the flash output and then press
or .
• It can be adjusted within the range of [−3 EV] to [+3 EV] in 1/3 EV steps.
• [ ] is displayed on the recording screen.
• For information about adjusting the flash output when recording using a wireless
flash (Î[Flash Adjust.]: 341)
• [Flash Adjust.] cannot be used when the following are set:
– [Firing Mode]: [MANUAL]
– [Wireless]: [ON]
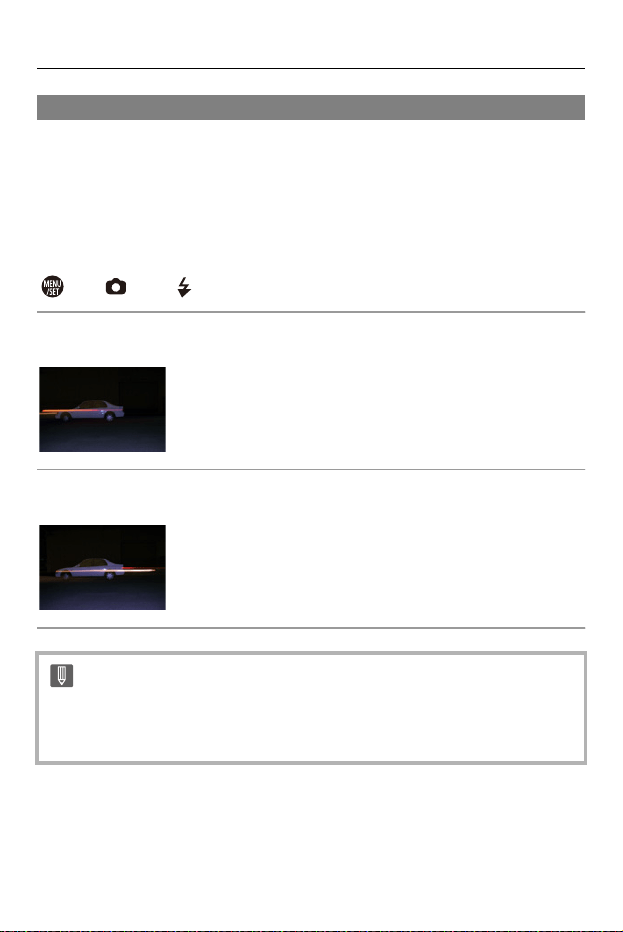
Flash – Setting Flash
335
[Flash Synchro]
When a moving subject is recorded at night using a slow shutter and flash,
a trail of light may appear in front of the subject.
If you set [Flash Synchro] to [2ND], you can take a dynamic picture with a
trail of light appearing behind the subject by firing the flash immediately
before the shutter closes.
¨ [ ] ¨ [ ] ¨ Select [Flash Synchro]
[1ST]
This is the normal method for recording with the Flash.
[2ND]
The light source appears behind the subject and the picture becomes dynamic.
• When [2ND] is set, [2nd] is displayed on the flash icon of the recording screen.
• When [Wireless] is set to [ON], this is fixed to [1ST].
• The effect may not be adequately achieved at faster shutter speeds.


Flash – Recording Using a Wireless Flash
337
Recording Using a Wireless Flash
You can use a Flash (DMW-FL580L/DMW-FL360L/DMW-FL200L:
optional) to record using a wireless flash.
You can separately control the firing of three flash groups and the flash
attached to the hot shoe of the camera.
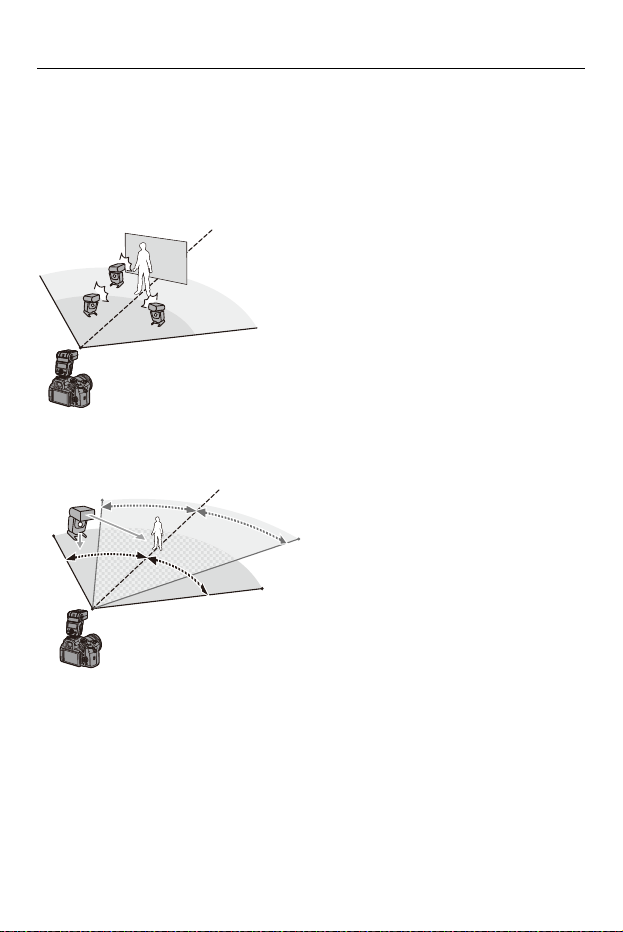
Flash – Recording Using a Wireless Flash
338
Placing a Wireless Flash
Place the wireless flash with its wireless sensor facing the camera.
Placement example
When (C) is placed to erase the shadow in the background of the subject that the flash
groups (A) and (B) will create
Placement range
When DMW-FL360L is attached
(D) 5 m (16 feet)
(E) 7 m (23 feet)
(A)
(B)
(C)
(D)
(D)
(E)
(E)
50°50°
50°50°
30°30°
30°30°
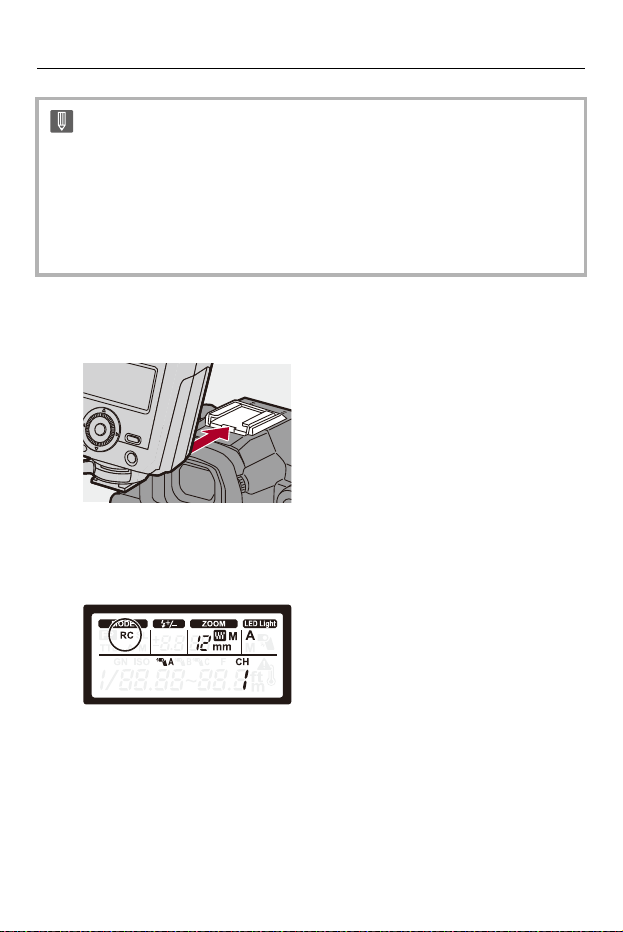
Flash – Recording Using a Wireless Flash
339
1
Attach an external flash to the camera. (ÎRemoving the
Hot Shoe Cover: 325)
2
Set the wireless flashes to [RC] mode and then place
them.
• Set the channel and group for the wireless flashes.
• The placement range serves as a guide for when recording with the camera held
horizontally. The range differs depending on the surrounding environment.
• We recommend using a maximum of three wireless flashes in each group.
• If the subject is too close, communication light may affect the exposure.
You can reduce the effect by setting [Communication Light] to [LOW] or lowering
the output with a diffuser or similar device. (Î[Communication Light]: 343)
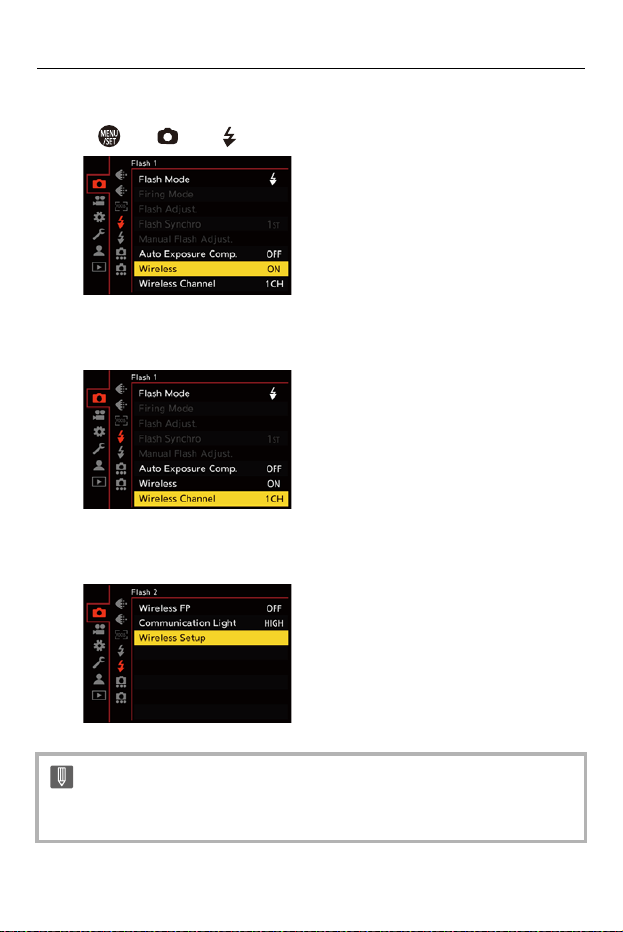
Flash – Recording Using a Wireless Flash
340
3
Enable the wireless flash function of the camera.
≥ ¨ [ ] ¨ [ ] ¨ [Wireless] ¨ [ON]
4
Set [Wireless Channel].
• Select the same channel as on the wireless flash side.
5
Set [Wireless Setup].
• Set the firing mode and flash output.
• When [Wireless] is set, [WL] is displayed on the flash icon of the recording
screen.
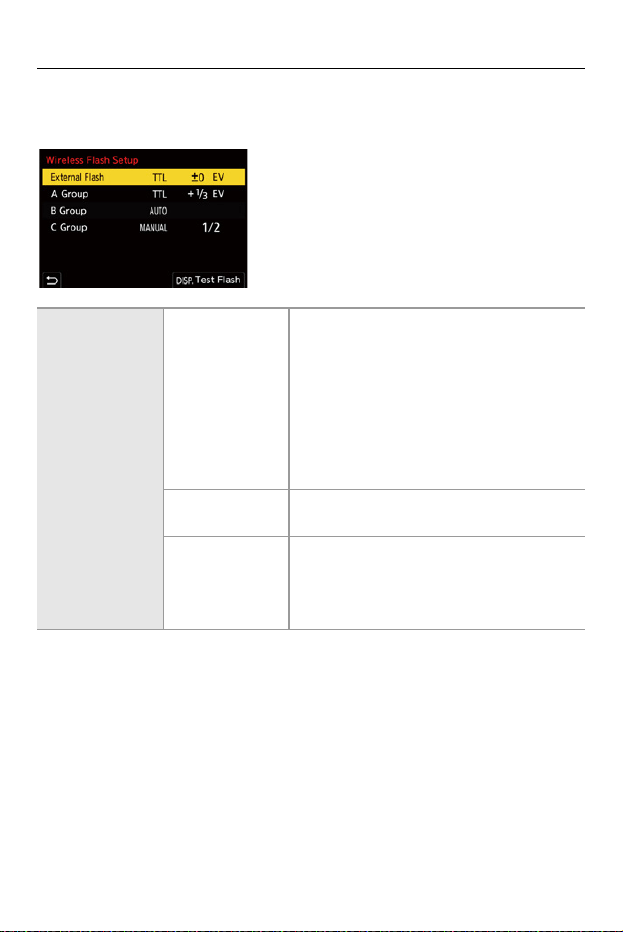
Flash – Recording Using a Wireless Flash
341
Setting Items ([Wireless Setup])
• To fire a test flash, press [DISP.].
[External
Flash]
*1
[Firing Mode]
[TTL]: The camera automatically sets the
flash output.
[AUTO]
*2
: Sets the flash output on the
external flash side.
[MANUAL]: Sets the flash output of the
external flash manually.
[OFF]: The external flash outputs only
communication light.
[Flash Adjust.]
Adjusts the flash output of the external flash
manually when [Firing Mode] is set to [TTL].
[Manual Flash
Adjust.]
Sets the flash output of the external flash
when [Firing Mode] is set to [MANUAL].
• It can be set within the range of [1/1] (full
flash output) to [1/128] in 1/3 steps.

Flash – Recording Using a Wireless Flash
342
*1 This cannot be selected when [Wireless FP] is set.
*2 This cannot be set when using the Flash (DMW-FL200L: optional).
[A Group]/
[B Group]/
[C Group]
[Firing Mode]
[TTL]: The camera automatically sets the
flash output.
[AUTO]
*1
: Sets the flash output on the
wireless flash side.
[MANUAL]: Sets the flash output of the
wireless flash manually.
[OFF]: The wireless flashes of the specified
group will not fire.
[Flash Adjust.]
Adjusts the flash output of the wireless flash
manually when [Firing Mode] is set to [TTL].
[Manual Flash
Adjust.]
Sets the flash output of the wireless flash
when [Firing Mode] is set to [MANUAL].
• It can be set within the range of [1/1] (full
flash output) to [1/128] in 1/3 steps.

Flash – Recording Using a Wireless Flash
343
[Wireless FP]
The external flash performs FP firing (repeated high-speed firing of the
flash) during wireless recording, enabling recording using the Flash even
at fast shutter speeds.
¨ [ ] ¨ [ ] ¨ Select [Wireless FP]
Settings: [ON]/[OFF]
[Communication Light]
Set the strength of communication light.
¨ [ ] ¨ [ ] ¨ Select [Communication Light]
Settings: [HIGH]/[STANDARD]/[LOW]

344
Video Settings
This chapter describes the Creative Video mode, a recording mode
especially for video, and settings available when recording videos.
≥Creative Video Mode: 345
≥Using AF (Video): 353
≥Video Brightness and Coloring: 358
≥Audio Settings: 364
≥External Microphones (Optional): 374
≥XLR Microphone Adaptor (Optional): 379
≥Headphones: 382
≥Time Code: 386
≥Synchronizing the Time Code with an External Device: 390
≥Main Assist Functions: 398
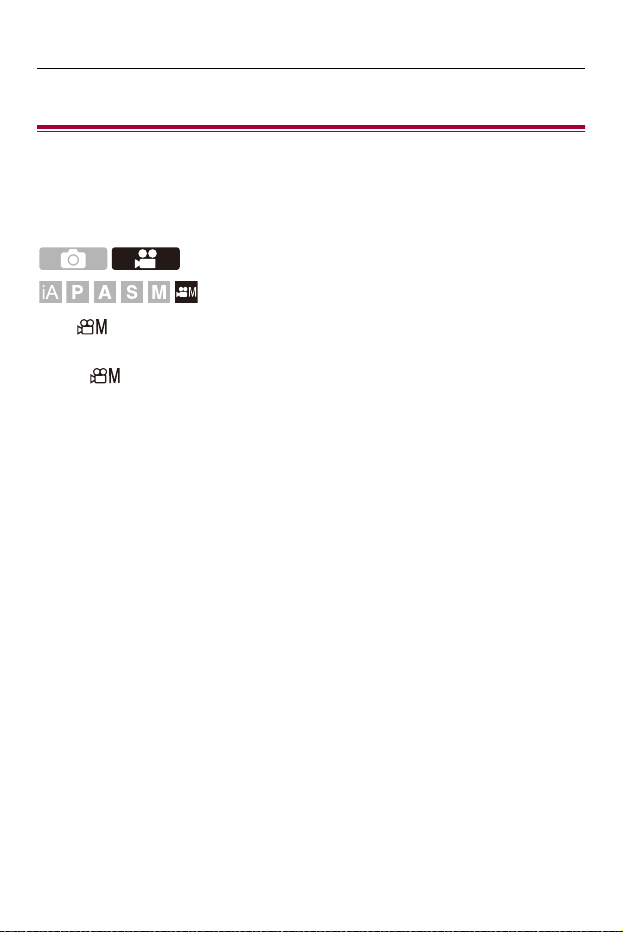
Video Settings – Creative Video Mode
345
Creative Video Mode
≥Displays Suited to Video Recording: 346
≥Recording with Creative Video: 347
≥[CreativeVideo Combined Set.]: 351
The [ ] mode (Creative Video mode) is a recording mode specifically
for video recording in which you can use all video functions.
In the [ ] mode, the recording screen switch to displays suited to video
recording.
You can start and stop video recording with the shutter button.
Change the exposure and audio settings with touch operation to prevent
operation sounds from being recorded.
Settings such as exposure and white balance can be changed
independent of picture taking settings.
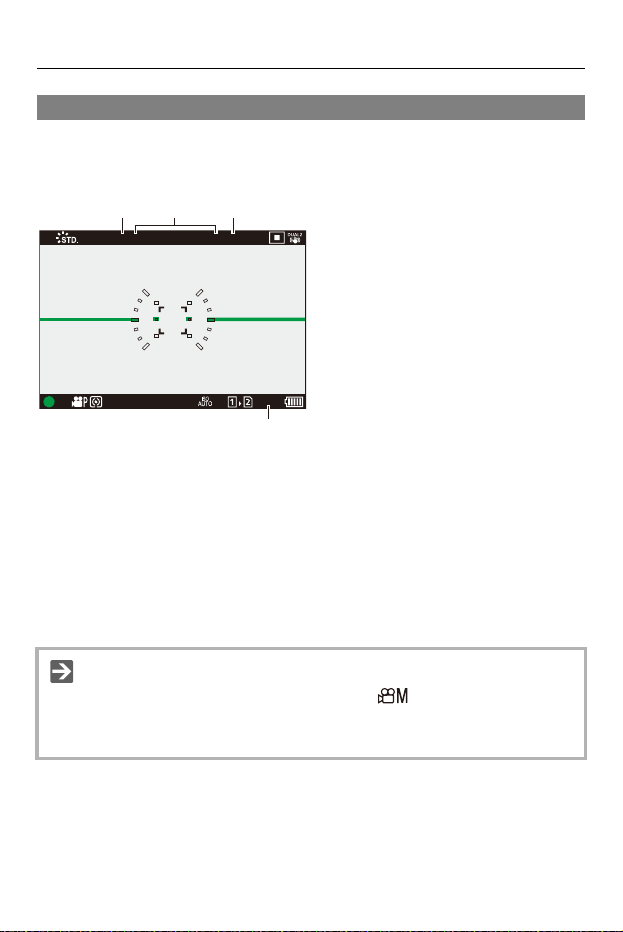
Video Settings – Creative Video Mode
346
Displays Suited to Video Recording
In the recording screen, the following parts switch to displays suited to
video recording.
(1) Recording file format (Î[Rec. File Format]: 134)
(2) Recording quality (Î[Rec Quality]: 136)
(3) Image area of video (Î[Image Area of Video]: 150)
(4) Video recording time (ÎVideo Recording Time: 771)
• Examples of displays at the time of purchase.
For information about the icons other than those described here (ÎMonitor/
Viewfinder Displays: 707)
• Even in the [iA]/[P]/[A]/[S]/[M] modes, as with the [ ] mode, you can switch to
the display suited to video recording:
(Î[Video-Priority Display]: 578)
24m59s
100
F
2.860
±
0
AFSAFS
FULLFULLMP4MP4 FHDFHD 420/8-L420/8-L
59.94
p
59.94
p
(4)
(1) (3)
(2)
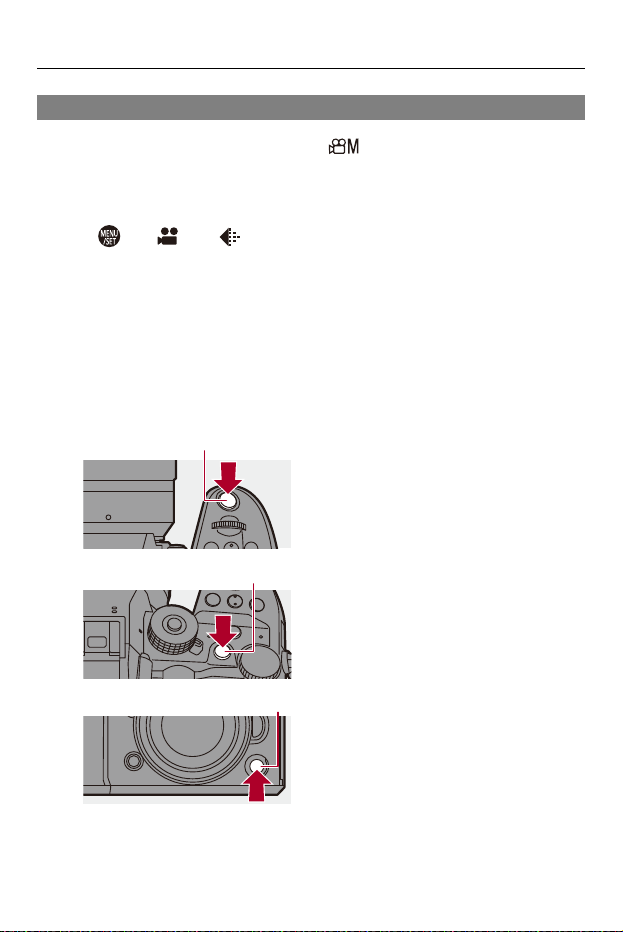
Video Settings – Creative Video Mode
347
Recording with Creative Video
1
Set the recording mode to [ ].
≥Set the mode dial. (ÎSelecting the Recording Mode: 79)
2
Set the exposure mode.
≥ ¨ [ ] ¨ [ ] ¨ [Exposure Mode] ¨ [P]/[A]/[S]/[M]
•
You can perform the same exposure operations as the [P]/[A]/[S]/[M] modes.
3
Close the menu.
≥Press the shutter button halfway.
4
Start recording.
≥Press the shutter button (A), video rec. button (B), or sub video rec.
button (C).
(A)
(B)
(C)
Video Settings – Creative Video Mode
348
5
Stop recording.
≥Press the shutter button, video rec. button, or sub video rec. button
again.
•
You can disable the recording start/stop operations using the shutter button:
(Î[Assign REC to Shutter Button]: 555)
• You can assign the function that starts/ends video recording only in the [ ]
mode to an Fn button:
(Î[Video Record(Creative Video)]: 526)
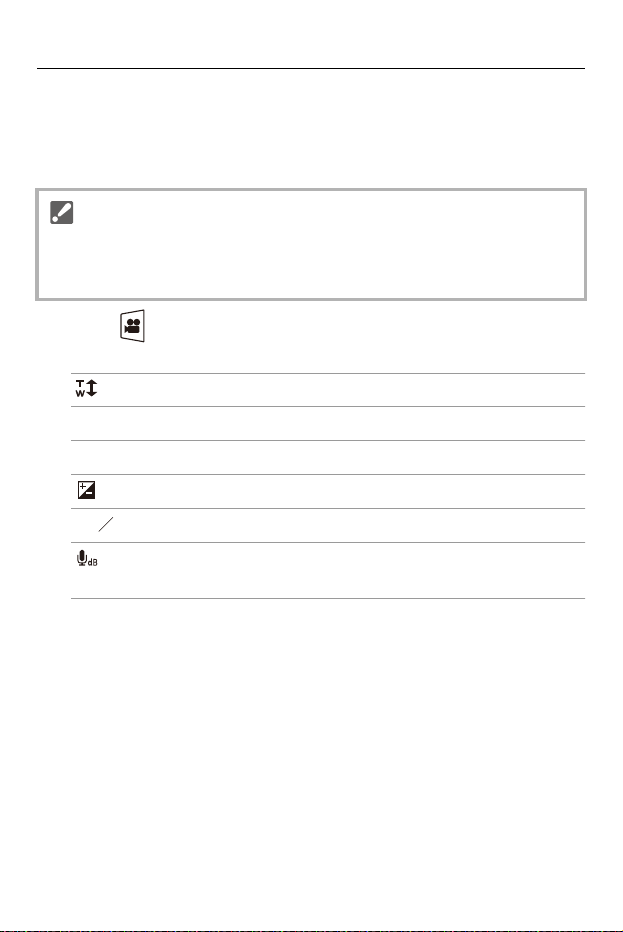
Video Settings – Creative Video Mode
349
Operations During Video Recording
Change the exposure and audio settings with touch operation to prevent
operation sounds from being recorded.
1 Tou ch [ ].
2 Touch an icon.
Zoom
Aperture value
Shutter speed
Exposure compensation
ISO sensitivity/Gain (dB)
Sound recording level adjustment
(Î[Sound Rec Level Adj.]: 368)
• With the default settings, the Touch Tab is not displayed.
Set [Touch Tab] to [ON] in [Touch Settings] in the [Custom] ([Operation]) menu.
(Î[Touch Settings]: 558)
F
SS
ISO
GAIN
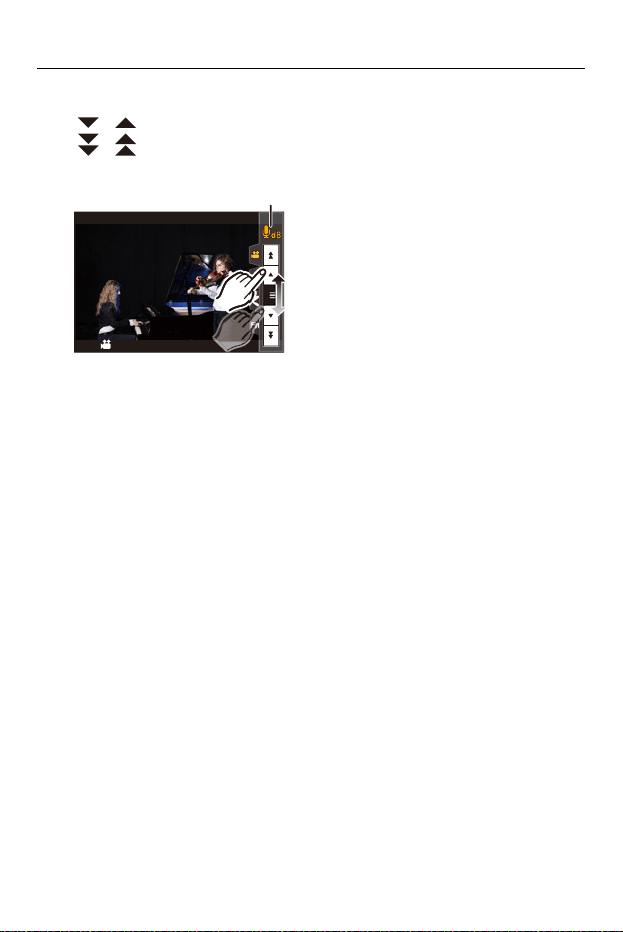
Video Settings – Creative Video Mode
350
3 Drag the slide bar to set the item.
[ ]/[ ]: Changes the setting slowly.
[ ]/[ ]: Changes the setting quickly.
• If you touch icon (D), the screen of Step 2 is redisplayed.
(D)
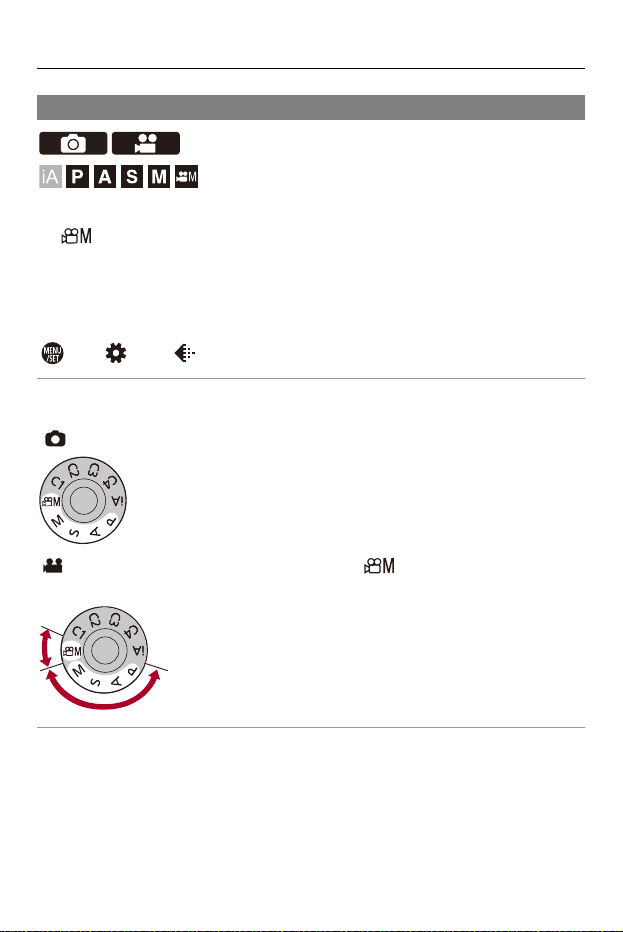
Video Settings – Creative Video Mode
351
[CreativeVideo Combined Set.]
In default settings, settings such as exposure and white balance changed
in [ ] mode are also reflected in picture recording in [P]/[A]/[S]/[M]
modes.
From the [CreativeVideo Combined Set.] menu, you can separate settings
for video recording and for picture recording.
¨ [ ] ¨ [ ] ¨ Select [CreativeVideo Combined Set.]
[F/SS/ISO/Exposure Comp.]/[White Balance]/[Photo Style]/[Metering Mode]/[AF
Mode]
[ ]: The recording settings are linked across recording modes.
[ ]: Recording settings can be separated by the [ ] mode and the [P]/[A]/[S]/[M]
mode.

Video Settings – Creative Video Mode
352
• The [iA] mode uses the optimum recording settings for the camera automatically,
so the recording settings will be independent, irrespective of the settings made
with this function.
Video Settings – Using AF (Video)
353
Using AF (Video)
≥[Continuous AF]: 353
≥[AF Custom Setting(Video)]: 355
≥[Enlarged Live Display(Video)]: 356
[Continuous AF]
You can select how to set the focus in AF when recording videos.
¨ [ ] ¨ [ ] ¨ Select [Continuous AF]
[MODE1]
The camera continues to automatically focus only during recording.
[MODE2]
The camera automatically keeps focusing on subjects during recording standby and
during recording.
• This is available in [ ] mode.
[OFF]
The camera maintains the focus point at the start of recording.
Video Settings – Using AF (Video)
354
• In the [iA] mode, the camera automatically keeps focusing during recording
standby, irrespective of the [Continuous AF] setting.
• Depending on the recording conditions or lens used, the AF operation sound
may be recorded during video recording.
If the operation sound bothers you, we recommend recording with [Continuous
AF] set to [OFF].
• If the zoom is operated while recording videos, the subject may take a while to
come into focus.
• [MODE1] switches to [MODE2] when outputting via HDMI in the [ ] mode.
• [MODE2] does not work during recording standby in the following case:
– In low light situations
Video Settings – Using AF (Video)
355
[AF Custom Setting(Video)]
You can fine-adjust the focusing method for video recording using
[Continuous AF].
¨ [ ] ¨ [ ] ¨ Select [AF Custom Setting(Video)]
• A description of the item is displayed on the screen when you press [DISP.].
[ON] Enables the following settings.
[OFF] Disables the following settings.
[SET]
[AF Speed]
[+] side: Focus moves at a faster speed.
[−] side: Focus moves at a slower speed.
[AF Sensitivity]
[+] side: When the distance to the subject
changes significantly, the camera
immediately readjusts the focus.
[−] side: When the distance to the subject
changes significantly, the camera waits for a
little before readjusting the focus.
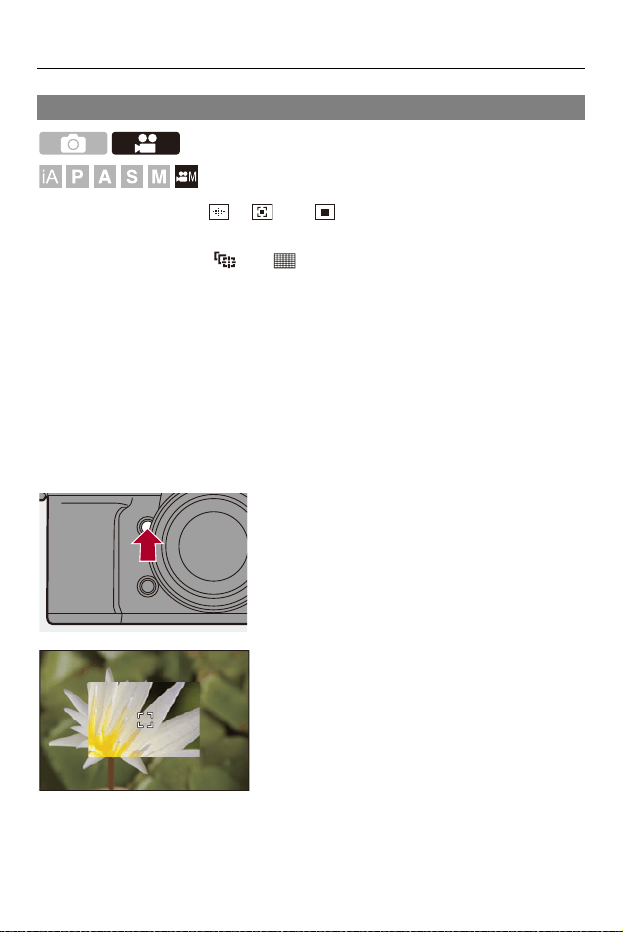
Video Settings – Using AF (Video)
356
[Enlarged Live Display(Video)]
When the AF mode is [ ], [ ], or [ ], or when recording with MF, the
focus point can be enlarged for display.
(When the AF mode is [ ] or [ ], the center of the screen is enlarged
for display.)
The focus point can also be enlarged for checking when recording videos.
•
You can also perform the same operation by pressing the Fn button registered with
[Enlarged Live Display(Video)]. (ÎFn Buttons: 517)
Press the enlarged live display (video) button to enlarge
display of the focus point.
• The operations on the enlarged display screen are the same as the MF Assist
screen operations. (ÎOperations on the MF Assist Screen: 199)

Video Settings – Using AF (Video)
357
• Depending on the lens used, the video enlarged display of live view screen may
not be displayed.
• During video recording using the following functions, the video enlarged display
of live view screen cannot be displayed:
– [Rec Quality] with a high frame rate video exceeding a recording frame rate of
60.00p
– [Variable Frame Rate]
• When an interchangeable lens with no focus ring is attached, while you are using
the following function, the video enlarged display of live view screen cannot be
displayed:
– [Variable Frame Rate]
• You can change the display method of the enlarged display screen:
(Î[Enlarged Live Display(Video)]: 557)
• You can set whether to output the enlarged display to an external device
connected via HDMI:
(ÎOutputting the Enlarged Live Display (Video) via HDMI: 473)
Video Settings – Video Brightness and Coloring
358
Video Brightness and Coloring
≥[Luminance Level]: 358
≥[Master Pedestal Level]: 359
≥Recording While Controlling Overexposure (Knee): 360
≥[ISO Sensitivity (video)]: 362
≥[Dynamic Range Boost]: 363
[Luminance Level]
You can set the luminance range to suit the purpose of video recording.
You can set to [16-235] or [16-255], the standard for video, or to [0-255],
which covers the entire range of luminance, the same as pictures.
¨ [ ] ¨ [ ] ¨ Select [Luminance Level]
Settings: [0-255]/[16-235]/[16-255]
•
When set to a 10-bit [Rec Quality], the setting items change to [0-1023], [64-940],
and [64-1023].
• When [Photo Style] is set to [V-Log], this is fixed to [0-255] ([0-1023]).
• When [Photo Style] is set to [Hybrid Log Gamma], this is fixed to [64-940].
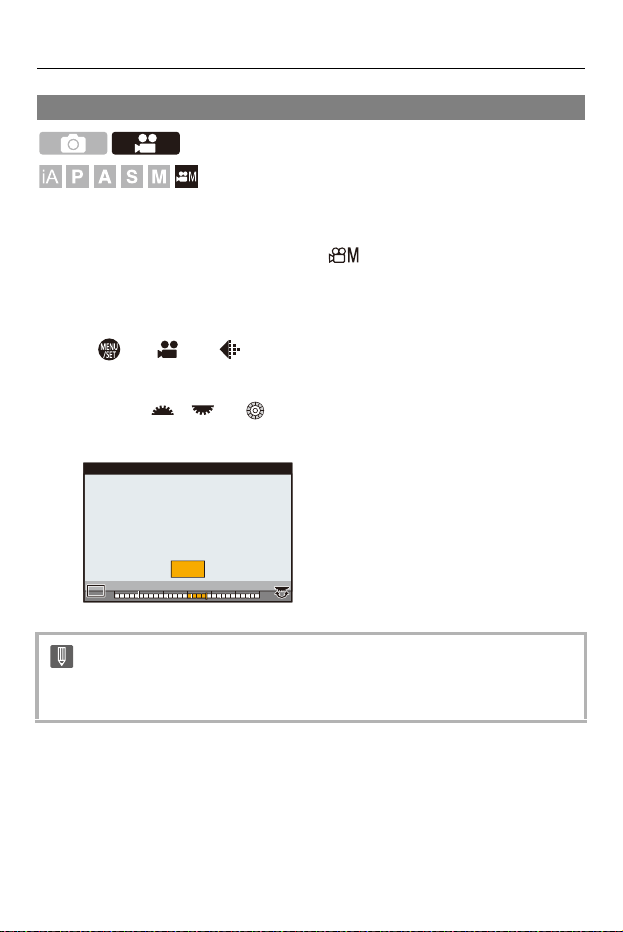
Video Settings – Video Brightness and Coloring
359
[Master Pedestal Level]
You can adjust the black level, which serves as the reference for images.
1
Set the recording mode to [ ].
≥Set the mode dial. (ÎSelecting the Recording Mode: 79)
2
Select [Master Pedestal Level].
≥ ¨ [ ] ¨ [ ] ¨ [Master Pedestal Level]
3
Adjust master pedestal.
≥Rotate , or .
•
Set in the range between −15 and +15.
• [Master Pedestal Level] is not available when using the following function:
– [V-Log] ([Photo Style])
101055
-
15
-
15
-
5
-
5
-
10
-
10 00
1515
MPL
MPLMPLMPL
MPLMPLMPLMPLMPLMPLMPL
+4
+4
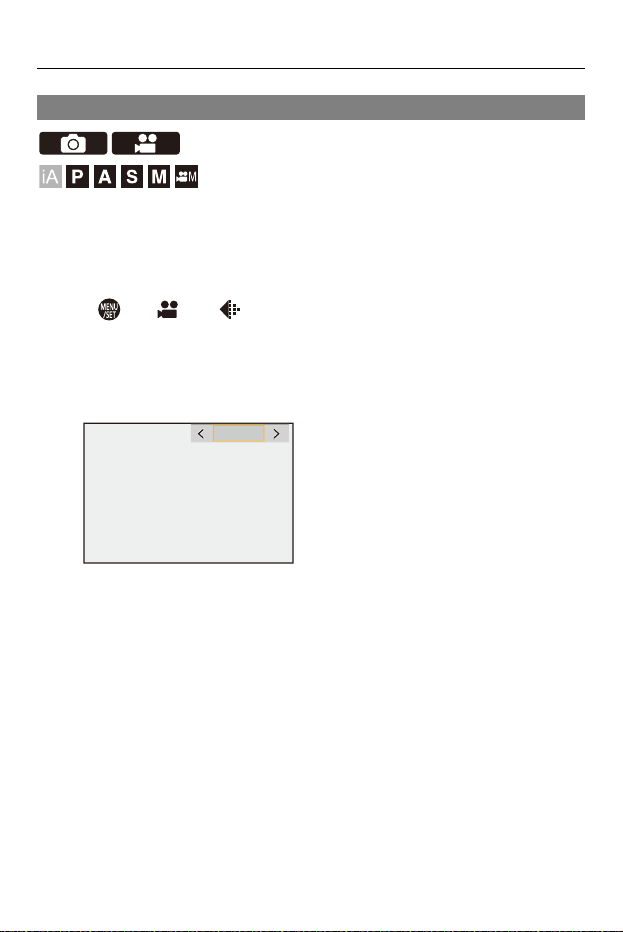
Video Settings – Video Brightness and Coloring
360
Recording While Controlling Overexposure (Knee)
When [Photo Style] is set to [Like709], you can adjust the knee so that
recording can be performed with minimal overexposure.
1
Set [Photo Style] to [Like709].
≥ ¨ [ ] ¨ [ ] ¨ [Photo Style] ¨ [Like709]
2
Press [Q].
3
Select a knee setting.
≥Press 21 to select a setting item.
$872

Video Settings – Video Brightness and Coloring
361
[AUTO]
Adjusts the compression levels of high-luminance areas automatically.
[MANUAL]
You can set the luminance where compression starts (knee master point) and
the intensity of compression (knee master slope).
Press 34 to select an item and then press 21 to adjust.
[POINT]: Master knee point
[SLOPE]: Master knee slope
• Rotate to adjust the knee master point, and to adjust the knee
master slope.
• Values within the following ranges can be set:
– Master knee point: 80.0 to 107.0
– Master knee slope: 0 to 99
[Off]
4
Confirm your selection.
≥Press or .
Video Settings – Video Brightness and Coloring
362
[ISO Sensitivity (video)]
Sets the lower and upper limits for ISO sensitivity when ISO sensitivity is
set to [AUTO].
1
Set the recording mode to [ ].
≥Set the mode dial. (ÎSelecting the Recording Mode: 79)
2
Set [ISO Sensitivity (video)].
≥ ¨ [ ] ¨ [ ] ¨ [ISO Sensitivity (video)]
Setting Items ([ISO Sensitivity (video)])
[ISO Auto Lower Limit Setting]
Sets the lower limit for ISO sensitivity when ISO sensitivity is [AUTO].
• Set in the range between [100] and [6400].
[ISO Auto Upper Limit Setting]
Sets the upper limit for ISO sensitivity when ISO sensitivity is [AUTO].
• Set to [AUTO] or in the range between [200] and [12800].
Video Settings – Video Brightness and Coloring
363
[Dynamic Range Boost]
Outputs a signal with a wide dynamic range from the image sensor.
This allows recording of video with a wider dynamic range.
1
Set the recording mode to [ ].
≥Set the mode dial. (ÎSelecting the Recording Mode: 79)
2
Set [Dynamic Range Boost] to [ON].
≥ ¨ [ ] ¨ [ ] ¨ [Dynamic Range Boost] ¨ [ON]
•
[ ] is displayed on the recording screen.
• When [Dynamic Range Boost] is being used, the lower limit of available ISO
sensitivities changes to [800] (when [V-Log]/[Hybrid Log Gamma] is set in [Photo
Style], the lower limit changes to [2000]).
• When [Dynamic Range Boost] is set, the following functions are not available:
– [Rec Quality] with a high frame rate video exceeding a recording frame rate of
60.00p
– [Variable Frame Rate] exceeding a frame rate of 60 fps
Video Settings – Audio Settings
365
[Sound Rec Level Disp.]
The sound recording level is displayed on the recording screen.
¨ [ ] ¨ [ ] ¨ Select [Sound Rec Level Disp.]
[ON] Sound recording level displayed on the recording screen.
[OFF] —
[SET]
Sets the display size of sound recording level.
[Displaying
Size]
[LARGE]/[SMALL]
• When [Sound Rec Level Limiter] is set to [OFF], [Sound Rec Level Disp.] is fixed
to [ON].
Video Settings – Audio Settings
366
[Mute Sound Input]
This mutes audio input.
¨ [ ] ¨ [ ] ¨ Select [Mute Sound Input]
Settings: [ON]/[OFF]
•
[ ] is displayed on the recording screen.
Video Settings – Audio Settings
367
[Sound Rec Gain Level]
This switches the gain of audio input.
¨ [ ] ¨ [ ] ¨ Select [Sound Rec Gain Level]
[STANDARD]
This is the standard input gain setting. (0 dB)
[LOW]
Audio input is reduced for recording in environments with loud noises. (−12 dB)
• When [4ch Mic Input] is set to [ON], the sound recording gain of CH3/CH4 can be
adjusted. (Î[4ch Mic Input]: 381)
• [Sound Rec Gain Level] is not available when [Mic Socket] is set to [ ] and
an external audio device is connected.
Video Settings – Audio Settings
368
[Sound Rec Level Adj.]
Manually adjust the sound recording level.
¨ [ ] ¨ [ ] ¨ Select [Sound Rec Level Adj.]
• Press 21 to adjust the sound recording level and then press or .
Settings: [MUTE]/[−18dB] to [+12dB]
•
You can adjust by 1 dB increments.
• This can also be set during video recording.
• Displayed dB values are approximate.
• When set to [MUTE], [ ] is displayed in the recording screen.
• When [4ch Mic Input] is set to [ON], the sound recording level of CH3/CH4 can
be adjusted. (Î[4ch Mic Input]: 381)
Video Settings – Audio Settings
369
[Sound Rec Quality]
Sound quality for video can be set when the [Rec. File Format] is [MOV] or
[Apple ProRes].
¨ [ ] ¨ [ ] ¨ Select [Sound Rec Quality]
[96kHz/24bit]
Audio is recorded using 96kHz/24bit high resolution audio.
• This can be set when an XLR Microphone Adaptor (DMW-XLR1: optional), Stereo
Shotgun Microphone (DMW-MS2: optional), or Stereo Microphone (VW-VMS10:
optional) is connected. (ÎXLR Microphone Adaptor (Optional): 379, External
Microphones (Optional): 374)
[48kHz/24bit]
Audio is recorded using 48kHz/24bit high quality audio.
• The setting is fixed to [48kHz/16bit] in the following case:
– When [Rec. File Format] is set to [MP4]

Video Settings – Audio Settings
370
[Sound Rec Level Limiter]
The sound recording level is adjusted automatically to minimize sound
distortion (crackling noise).
¨ [ ] ¨ [ ] ¨ Select [Sound Rec Level Limiter]
Settings: [ON]/[OFF]
Video Settings – Audio Settings
371
[Wind Noise Canceller]
This reduces the wind noise coming into the built-in microphone while
maintaining sound quality.
¨ [ ] ¨ [ ] ¨ Select [Wind Noise Canceller]
[HIGH]
This effectively reduces the wind noise by reducing the low-pitched sound when a
strong wind is detected.
[STANDARD]
This reduces wind noise without loss of sound quality by filtering out only wind noise.
[OFF]
Turns the function off.
• You may not see the full effect depending on the recording conditions.
• This function works only with the built-in microphone.
When an external microphone is connected, [Wind Cut] is displayed.
(ÎReduction of Wind Noise: 378)
Video Settings – Audio Settings
372
[Lens Noise Cut]
When using a lens compatible with power zoom, this reduces the sounds
made by the zoom when it operates during video recording.
¨ [ ] ¨ [ ] ¨ Select [Lens Noise Cut]
Settings: [ON]/[OFF]
•
When this function is used, the sound quality may differ from that during normal
operation.
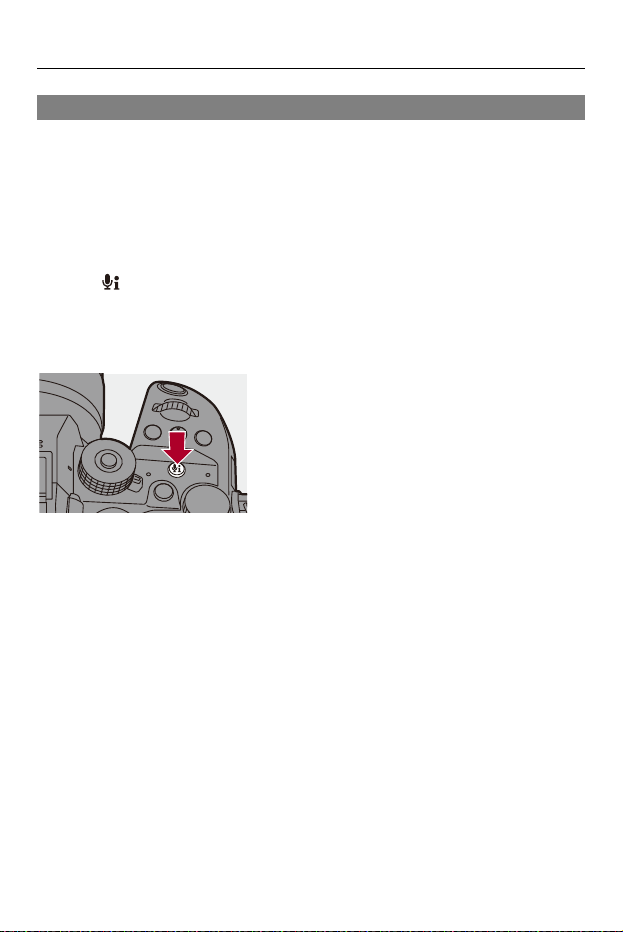
Video Settings – Audio Settings
373
[Audio Information]
This screen enables you to view audio settings and the status of recording
all at once.
You can also touch the screen to change the settings.
•
The operations on the audio information display screen are the same as the control
panel operations. (ÎControl Panel: 96)
Press [ ].
• You can also display it by touching the audio display area on the control panel
(Creative Video mode).
• For information about the screen (ÎAudio Information Display: 721)
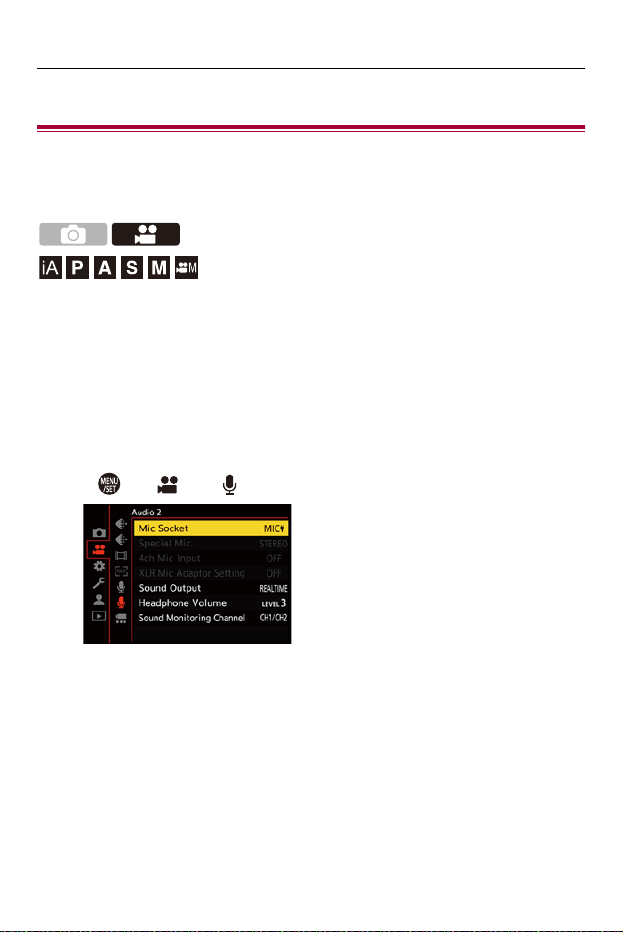
Video Settings – External Microphones (Optional)
374
External Microphones (Optional)
≥Setting the Sound Pickup Range (DMW-MS2: Optional): 377
≥Reduction of Wind Noise: 378
With a Stereo Shotgun Microphone (DMW-MS2: optional) or Stereo
Microphone (VW-VMS10: optional), you can record higher-quality high
resolution audio compared to the built-in microphone.
•
Some optional accessories may not be available in some countries.
1
Set the [Mic Socket] that suits the device to be
connected.
≥ ¨ [ ] ¨ [ ] ¨ [Mic Socket]

Video Settings – External Microphones (Optional)
375
([Mic Input (Plug-in Power)])
When connecting an external microphone that requires a power supply from the
camera [MIC] socket.
([Mic Input])
When connecting an external microphone that does not require a power supply
from the camera [MIC] socket.
([Line Input])
When connecting an external audio device for line output.
• The setting will be fixed to [ ] when a Stereo Shotgun Microphone
(DMW-MS2: optional) is connected.
• When using [ ], if you connect an external microphone that does not
require power supply, the connected external microphone may malfunction.
Check the device before connecting.
2
Set the camera on/off switch to [OFF].
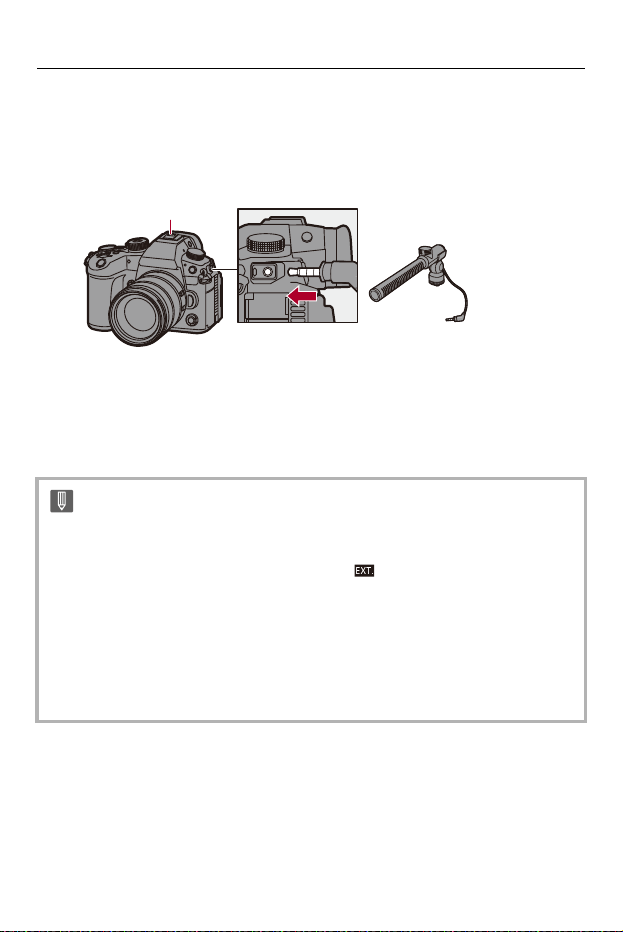
Video Settings – External Microphones (Optional)
376
3
Connect the external microphone to the camera and
then turn on the camera.
• If mounting the external microphone on the camera hot shoe (A), remove the
hot shoe cover. (ÎRemoving the Hot Shoe Cover: 325)
4
Make settings for the sound quality of the audio to be
recorded in [Sound Rec Quality] (
Î[Sound Rec Quality]:
369).
• Do not use the stereo microphone cables with the length of 3 m (9.8 feet) or
more.
• While the external microphone is connected, [ ] is displayed on the screen.
• When an external microphone is connected, [Sound Rec Level Disp.]
automatically turns [ON], and the recording level is displayed on the screen.
• When the external microphone is attached, do not carry the camera by holding
the external microphone. It may become detached.
• If noises are recorded when using the AC adaptor, use the battery.
• For details, refer to the operating instructions for the external microphone.
(A)
Video Settings – External Microphones (Optional)
377
Setting the Sound Pickup Range (DMW-MS2:
Optional)
When using the Stereo Shotgun Microphone (DMW-MS2: optional), you
can set the microphone sound pickup range.
¨ [ ] ¨ [ ] ¨ Select [Special Mic.]
[STEREO]
Picks up sound over a wide area.
[SHOTGUN]
Helps prevent picking up background noise, and records sound from a specific
direction.
Video Settings – External Microphones (Optional)
378
Reduction of Wind Noise
This reduces wind noise when an external microphone is connected.
¨ [ ] ¨ [ ] ¨ Select [Wind Cut]
Settings: [HIGH]/[STANDARD]/[LOW]/[OFF]
•
Setting [Wind Cut] may alter the usual sound quality.
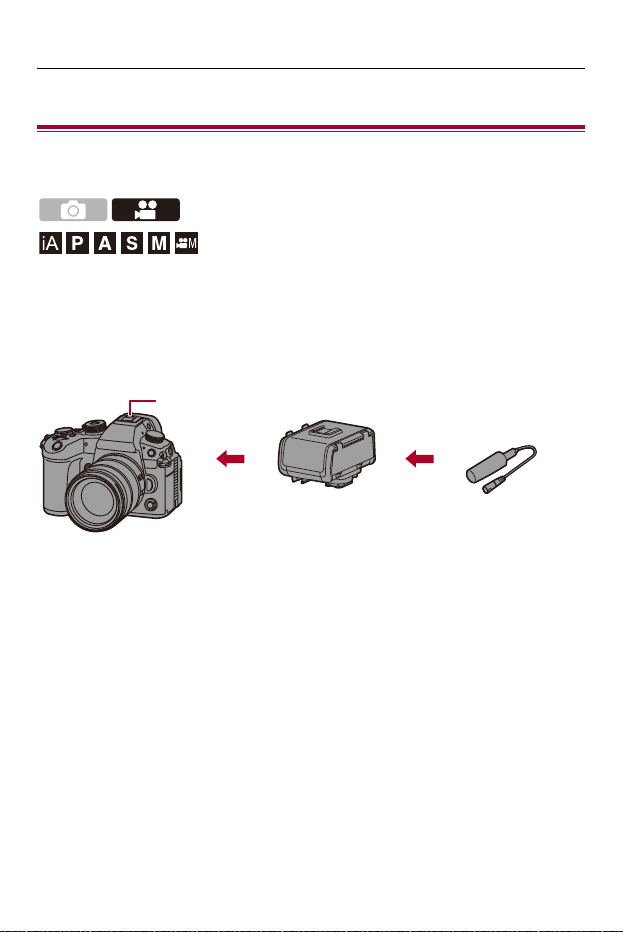
Video Settings – XLR Microphone Adaptor (Optional)
379
XLR Microphone Adaptor (Optional)
≥[4ch Mic Input]: 381
By attaching an XLR Microphone Adaptor (DMW-XLR1: optional), you can
use a commercially available XLR microphone to enable the recording of
superior-quality high-res audio and 4-channel audio. (Î[4ch Mic Input]:
381)
(A) Hot shoe
(B) Commercially available XLR microphone
Getting started:
• Turn off the camera, and remove the hot shoe cover. (ÎRemoving the Hot Shoe
Cover: 325)
(B)
(A)
Video Settings – XLR Microphone Adaptor (Optional)
380
1
Attach the XLR Microphone Adaptor to the hot shoe,
and then turn on the camera.
≥ ¨ [ ] ¨ [ ] ¨ [XLR Mic Adaptor Setting]
•
When the XLR Microphone Adaptor is attached, [XLR Mic Adaptor Setting]
automatically turns [ON].
[ON]
Records audio using the XLR microphone.
[OFF]
Records audio using the built-in microphone of the camera.
2
Make settings for the sound quality of the audio to be
recorded in [Sound Rec Quality] (
Î[Sound Rec Quality]:
369).
• While an XLR Microphone Adaptor is attached, [ ] is displayed on the screen.
• When [XLR Mic Adaptor Setting] is set to [ON] and [4ch Mic Input] is [OFF], the
following settings are fixed:
– [Sound Rec Level Limiter]: [OFF]
– [Wind Noise Canceller]: [OFF]
– [Sound Output]: [REC SOUND]
• When [XLR Mic Adaptor Setting] is set to [ON] and [4ch Mic Input] is [OFF],
[Sound Rec Gain Level] and [Sound Rec Level Adj.] are not available.
• When the XLR Microphone Adaptor is attached, [Sound Rec Level Disp.]
automatically turns [ON], and the recording level is displayed on the screen.
• When the XLR Microphone Adaptor is attached, do not carry the camera by
holding the XLR Microphone Adaptor. It may become detached.
• If noises are recorded when using the AC adaptor, use the battery.
• For details, refer to the operating instructions for the XLR Microphone Adaptor.
Video Settings – XLR Microphone Adaptor (Optional)
381
[4ch Mic Input]
To record 4-channel audio, use a commercially available XLR microphone
connected to an XLR Microphone Adaptor (DMW-XLR1: optional) together
with the built-in microphone.
By combining a Stereo Shotgun Microphone (DMW-MS2: optional) or a
Stereo Microphone (VW-VMS10: optional) instead of using the built-in
microphone, it is also possible to record 4-channel 96 kHz/24-bit
high-resolution audio. (ÎExternal Microphones (Optional): 374)
¨ [ ] ¨ [ ] ¨ Select [4ch Mic Input]
Settings: [ON]/[OFF]
•
When [4ch Mic Input] is set to [ON], it is displayed as [4ch] on the screen.
• The audio from the XLR microphone is recorded to CH1/CH2, and the audio from
the built-in microphone or external microphone is recorded to CH3/CH4.
• 4-channel audio is output to external devices connected via HDMI when [4ch Mic
Input] is set to [ON].
• This cannot be set when [Rec. File Format] is [MP4].
• This cannot be set when [XLR Mic Adaptor Setting] is [OFF].
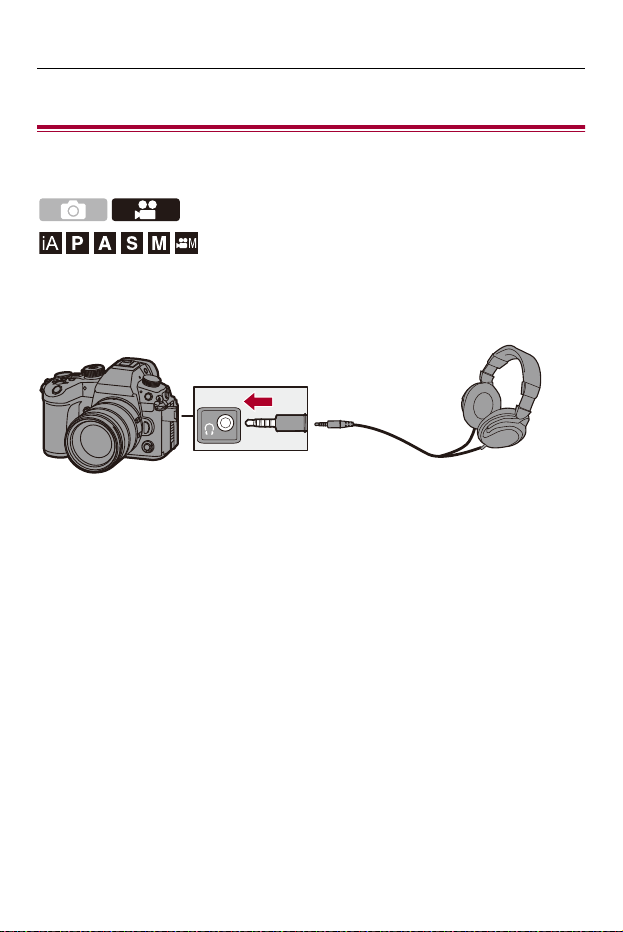
Video Settings – Headphones
382
Headphones
≥[Sound Monitoring Channel]: 384
You can record videos while monitoring their sound by connecting
commercially available headphones to the camera.
•
Do not use the headphone cables with the length of 3 m (9.8 feet) or more.
• When headphones are connected, beep sounds, AF beep, and electronic shutter
sounds are muted.
Video Settings – Headphones
383
Switching the Sound Output Method
¨ [ ] ¨ [ ] ¨ Select [Sound Output]
[REALTIME]
Audio without time lag.
It may differ from the sound recorded in videos.
[REC SOUND]
Audio to be recorded in videos.
Output sound may be delayed from actual sound.
Adjusting the Headphone Volume
Connect the headphones and rotate .
: Reduces the volume.
: Increases the volume.
To adjust the volume using the menu:
1 Select [Headphone Volume].
• ¨ [ ] ¨ [ ] ¨ [Headphone Volume]
2 Press 34 to adjust the headphone volume and then press or .
• It can be adjusted in a range of [0] to [LEVEL15].
• The setting is fixed to [REC SOUND] in the following case:
– When using an XLR Microphone Adaptor (DMW-XLR1: optional)
(When [4ch Mic Input] is set to [OFF])
Video Settings – Headphones
384
[Sound Monitoring Channel]
You can set the audio channel output to the headphones when recording.
For information about the audio channel settings during playback
(Î[Sound Monitoring Channel(Play)]: 599)
¨ [ ] ¨ [ ] ¨ Select [Sound Monitoring Channel]
[CH1/CH2]
Outputs CH1 (L)/CH2 (R).
[CH3/CH4]
Outputs CH3 (L)/CH4 (R).
[CH1+CH2/CH3+CH4]
Outputs CH1+CH2 (L)/CH3+CH4 (R).
[CH1]
Outputs CH1.
[CH2]
Outputs CH2.
[CH3]
Outputs CH3.
[CH4]
Outputs CH4.
[CH1+CH2]
Outputs a mix of CH1 and CH2.
[CH3+CH4]
Outputs a mix of CH3 and CH4.
[CH1+CH2+CH3+CH4]
Outputs a mix of CH1, CH2, CH3, and CH4.

Video Settings – Headphones
385
• This can also be set during video recording.

Video Settings – Time Code
387
Setting the Time Code
Sets the recording, display, and output of the time code.
1
Set [Rec. File Format] to [MOV] or [Apple ProRes].
≥ ¨ [ ] ¨ [ ] ¨ [Rec. File Format] ¨ [MOV]/[Apple
ProRes]
2
Select [Time Code].
≥ ¨ [ ] ¨ [ ] ¨ [Time Code]
[Time Code Display]
Displays the time code on the recording screen/playback screen.
• During video recording using the following function, the time code count
cannot be displayed on the recording screen:
– [Rec Quality] with a high frame rate video exceeding a recording frame rate
of 60.00p
• While you are using the following functions, the time code count cannot be
displayed on the recording screen:
– HDMI output
– Wi-Fi connection with a smartphone
– Tethered recording
[Count Up]
[REC RUN]: Counts the time code only when recording videos.
[FREE RUN]: Counts the time code also when video recording is stopped and
when the camera is turned off.
• When the following function is being used, [Count Up] is fixed to [REC RUN]:
– [Variable Frame Rate]

Video Settings – Time Code
388
[Time Code Value]
[Reset]: Sets to 00:00:00:00 (hour: minute: second: frame)
[Manual Input]: Manually input hour, minute, second and frame.
[Current Time]: Sets hour, minute and second to current time and sets frame to
00.
[Time Code Mode]
[DF]: Drop Frame. The camera modifies the difference between recorded time
and time code.
• Seconds and frames are separated by “.”. (Example: 00:00:00.00)
[NDF]: Non-Drop Frame. Records the time code without drop frame.
• Seconds and frames are separated by “:”. (Example: 00:00:00:00)
• When the following functions are being used, [Time Code Mode] is fixed to
[NDF]:
– [50.00Hz (PAL)]/[24.00Hz (CINEMA)] ([Synchro Scan])
– 47.95p or 23.98p [Rec Quality]
[HDMI Time Code Output]
Time code information is added to images output via HDMI when recording with
the [ ] mode.
• The time code can also be output via HDMI by setting the mode dial to [ ]
during playback. In the [Setup] ([IN/OUT]) menu, set [Output
Resolution(Playback)] in [HDMI Connection] to [AUTO]. (Î[Output
Resolution(Playback)]: 602)
• The device screen may go dark depending on the connected device.
[External TC Setting]
Synchronize the time code default value with an external device that supports
time code input and output. (ÎSynchronizing the Time Code with an External
Device: 390)
[TC Synchronization]: Selects the input and output for time code signals.
[TC Output Reference]: Sets the timing for time code signal output.

Video Settings – Time Code
389
• When using the following functions, updating of the information display on the
screen may get slower due to the load being placed on the internal processing in
the camera, but this is not a malfunction and there will be no change to the
images recorded:
– [Rec Quality] with a high frame rate video exceeding a recording frame rate of
60.00p
– HDMI output
– Wi-Fi connection with a smartphone
– Tethered recording
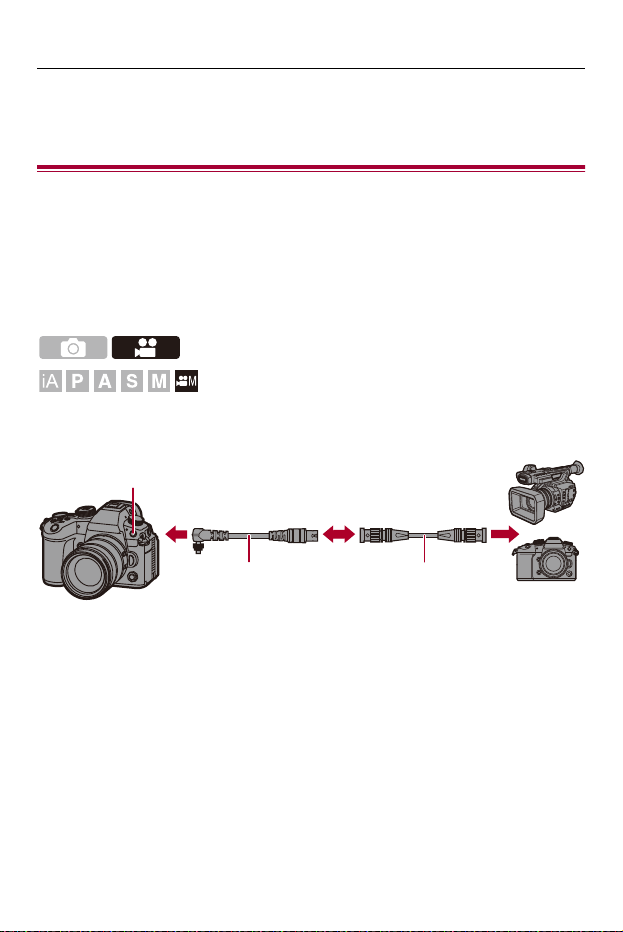
Video Settings – Synchronizing the Time Code with an External Device
390
Synchronizing the Time Code with an
External Device
≥Preparations for Time Code Synchronization: 391
≥Synchronize the Time Code of the External Device with That of the
Camera (TC OUT): 393
≥Synchronize the Time Code of the Camera with That of the External
Device (TC IN): 395
Synchronize the time code default value with an external device that
supports time code signal input and output.
(A) Flash synchro socket
(B) BNC conversion cable (for TC IN/OUT) (supplied)
(C) BNC cable (commercially available)
(D) External devices
(A)
(D)
(B) (C)
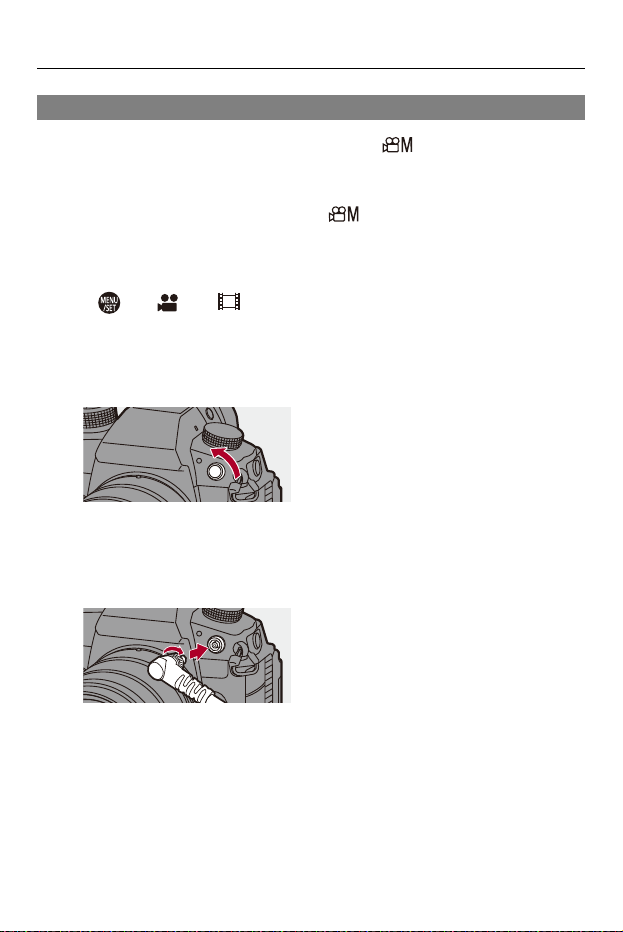
Video Settings – Synchronizing the Time Code with an External Device
391
Preparations for Time Code Synchronization
When [Count Up] is set to [FREE RUN] in the [ ] mode, you can
synchronize the initial value of the time code with an external device.
1
Set the recording mode to [ ].
≥Set the mode dial. (ÎSelecting the Recording Mode: 79)
2
Set [Count Up] to [FREE RUN].
≥ ¨ [ ] ¨ [ ] ¨ [Time Code] ¨ [Count Up] ¨ [FREE RUN]
3
Rotate the flash synchro socket cap in the direction of
the arrow to remove.
• Be careful not to lose the flash synchro socket cap.
4
Insert the BNC conversion cable (for TC IN/OUT), and
then rotate the locking screw in the direction of the
arrow to attach the cable.

Video Settings – Synchronizing the Time Code with an External Device
392
5
Connect the BNC conversion cable (for TC IN/OUT) and
the external device with the BNC cable.
• Do not use any other BNC conversion cables (for TC IN/OUT) except the
supplied one.
• Do not use the BNC cables with the length of 2.8 m (9.2 feet) or more.
• We recommend using a 5C-FB equivalent double-shielded BNC cables.
Video Settings – Synchronizing the Time Code with an External Device
393
Synchronize the Time Code of the External Device
with That of the Camera (TC OUT)
The initial time code value of the external device is synchronized according
to the time code signal (LTC signal) of the camera.
1
Prepare for time code synchronizing. (ÎPreparations
for Time Code Synchronization: 391)
2
Select [TC Output Reference].
≥ ¨ [ ] ¨ [ ] ¨ [Time Code] ¨ [External TC Setting] ¨ [TC
Output Reference]
[REC]
Outputs the time code signal for the images that you record.
[HDMI]
When connected with an external device (external recorder, etc.) via HDMI, the
time code signal output is delayed slightly to match the HDMI images.
3
Set [TC Synchronization] to [TC OUT].
≥ ¨ [ ] ¨ [ ] ¨ [Time Code] ¨ [External TC Setting] ¨ [TC
Synchronization] ¨ [TC OUT]
≥The time code signal is output according to the recording frame
rate of the [Rec Quality] and the [Time Code Mode] ([DF]/[NDF])
setting.
4
Operate the external device to synchronize the time
code.

Video Settings – Synchronizing the Time Code with an External Device
394
Outputting the Time Code Signal Again
By setting as follows, the time code signal (LTC signal) can be output just
by connecting with the external device with the BNC cable:
•
[ ] mode
• [Count Up] ([Time Code]): [FREE RUN]
• [TC Synchronization] ([External TC Setting] in [Time Code]): [TC OUT]
Video Settings – Synchronizing the Time Code with an External Device
395
Synchronize the Time Code of the Camera with That
of the External Device (TC IN)
The initial time code value of the camera is synchronized according to the
time code signal (LTC signal) of the external device.
1
Prepare for time code synchronizing. (ÎPreparations
for Time Code Synchronization: 391)
2
Set [TC Synchronization] to [TC IN].
≥ ¨ [ ] ¨ [ ] ¨ [Time Code] ¨ [External TC Setting] ¨ [TC
Synchronization] ¨ [TC IN]
3
Operate the external device to output the time code
signal.
≥Set the time code count method of the external device to free run,
and output the signal.
≥When synchronized with the time code of an external device, this
camera is in a slave state, and the [ ] of the time code shown
on the screen switches to [ ].
•
In advance, change the [System Frequency] (Î[System Frequency]: 132), [Rec
Quality] (Î[Rec Quality]: 136), and [Time Code Mode] (Î[Time Code Mode]:
388) to match the external device.
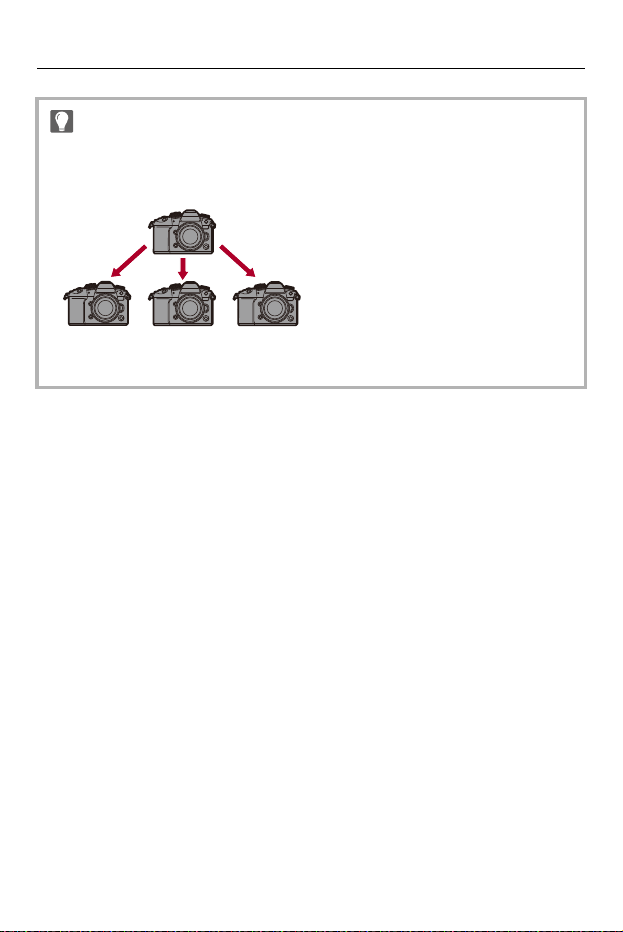
Video Settings – Synchronizing the Time Code with an External Device
396
• When multiple units of this camera are synchronized, the time code and
exposure timings are synchronized so you can match the timings for starting
exposure between cameras.
• The exposure timing can only be synchronized the first time after [TC
Synchronization] is set to [TC IN].
Video Settings – Synchronizing the Time Code with an External Device
397
Maintaining, Releasing, and Restoring the Slave State
Even if you disconnect the BNC cable, the camera will remain in slave
state.
•
Perform one of the following operations to release the camera from the slave state.
– Operate the camera on/off switch
– Switch the recording mode
– Change the [System Frequency]
– Set the [Variable Frame Rate]
– Switch the [Rec Quality] between 239.76p/119.88p/59.94p/59.94i/29.97p and a
different recording frame rate
– Change the following [Time Code] setting items
[Count Up], [Time Code Value], [Time Code Mode], [TC Synchronization]
• To restore the slave state, reconnect the BNC cable to the external device while set
as follows.
The time code signal (LTC signal) can be input just by connecting.
– [ ] mode
– [Count Up] ([Time Code]): [FREE RUN]
– [TC Synchronization] ([External TC Setting] in [Time Code]): [TC IN]
• Even when the system frequency differs between the camera and the external
device, their initial time code values may be synchronized. Bear in mind,
however, that the time codes lose sync as they count up.
Video Settings – Main Assist Functions
398
Main Assist Functions
≥[Flicker Decrease (Video)]: 399
≥[SS/Gain Operation]: 400
≥[WFM/Vector Scope]: 402
≥[Luminance Spot Meter]: 406
≥[Zebra Pattern]: 408
≥[Frame Marker]: 410
≥Color Bars/Test Tone: 412
•
The [Custom] ([Monitor / Display (Video)]) menu has display assist functions
such as the center marker and safety zone marker:
(Î[Custom] menu ([Monitor / Display (Video)]): 575)
Video Settings – Main Assist Functions
399
[Flicker Decrease (Video)]
The shutter speed can be fixed to reduce the flicker or striping in the video.
¨ [ ] ¨ [ ] ¨ Select [Flicker Decrease (Video)]
[1/50]/[1/60]/[1/100]/[1/120]
[OFF]
• This can be set when [Auto Exposure in P/A/S/M] is [ON]. (Î[Auto Exposure in
P/A/S/M]: 550)
Video Settings – Main Assist Functions
400
[SS/Gain Operation]
You can switch the units of shutter speed values and gain (sensitivity)
values.
¨ [ ] ¨ [ ] ¨ Select [SS/Gain Operation]
[SEC/ISO]
Displays the shutter speed in seconds and the gain in ISO.
[ANGLE/ISO]
Displays the shutter speed in degrees and the gain in ISO.
• The angle can be set in a range between 11° and 357°.
(when [Synchro Scan] is set to [OFF])
• When recording with [Variable Frame Rate], the angle can be set in the following
ranges, according to the frame rate setting:
– 1 fps: 11° to 45°
– 2 fps: 11° to 90°
– 12 fps or more: 11° to 355°
[SEC/dB]
Displays the shutter speed in seconds and the gain in dB.
• The setting items for gain (sensitivity) are as follows:
– Normal: [AUTO], [0dB] to [42dB]
– When [Extended Gain Setting] is set: [−6dB] to [42dB]
– When [Dynamic Range Boost] is set: [0dB] to [24dB]
• [0dB] in gain (sensitivity) equates to the following in ISO sensitivity:
– Normal: ISO100 (when [Dynamic Range Boost] is set: ISO800)
– When [V-Log]/[Hybrid Log Gamma] is set in [Photo Style]: ISO250 (when [Dynamic
Range Boost] is set: ISO2000)

Video Settings – Main Assist Functions
401
• When [SS/Gain Operation] is set to [SEC/dB], menu names change as shown
below:
– [ISO Sensitivity (video)] ¨ [Gain Setting]
– [ISO Auto Lower Limit Setting] ¨ [Auto Gain Lower Limit Setting]
– [ISO Auto Upper Limit Setting] ¨ [Auto Gain Upper Limit Setting]
– [Extended ISO] ¨ [Extended Gain Setting]
– [ISO Displayed Setting] ¨ [Gain Displayed Setting]
Video Settings – Main Assist Functions
402
[WFM/Vector Scope]
This displays the waveform monitor or the vector scope on the recording
screen. You can change the size of the waveform display.
1
Set the recording mode to [ ].
≥Set the mode dial. (ÎSelecting the Recording Mode: 79)
2
Set [WFM/Vector Scope].
≥ ¨ [ ] ¨ [ ] ¨ [WFM/Vector Scope]
[WAVE]
Displays a waveform.
[VECTOR]
Displays the vector scope.
[OFF]
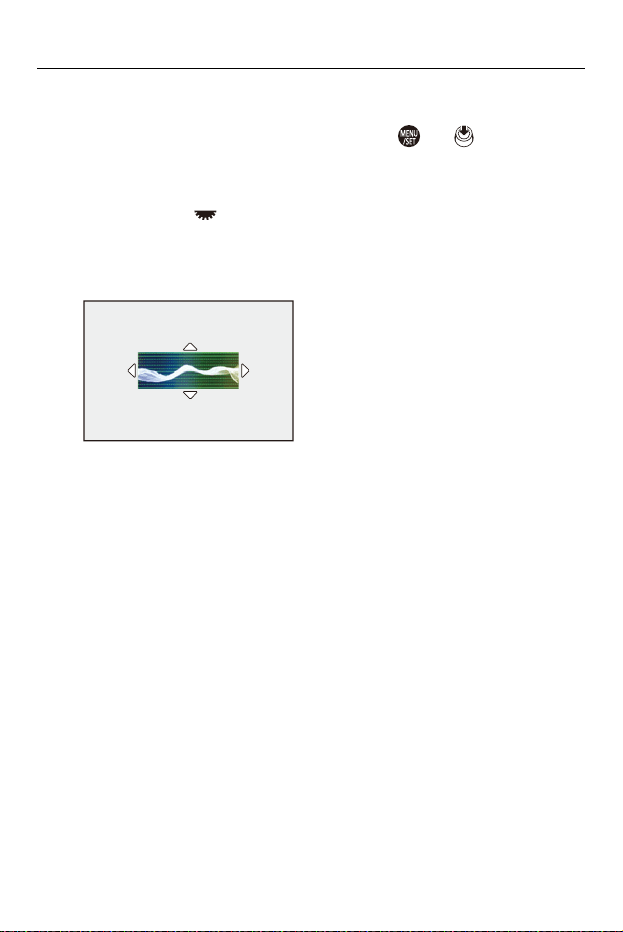
Video Settings – Main Assist Functions
403
3
Select the position to display.
≥Press 3421 to select and then press or .
•
Positions can be moved to the diagonal directions using the joystick.
• You can also move using touch operations.
• You can rotate to change the size of the waveform.
• To return the waveform or vector scope position back to the center, press
[DISP.]. With waveform, pressing [DISP.] once again returns the size to the
default setting.
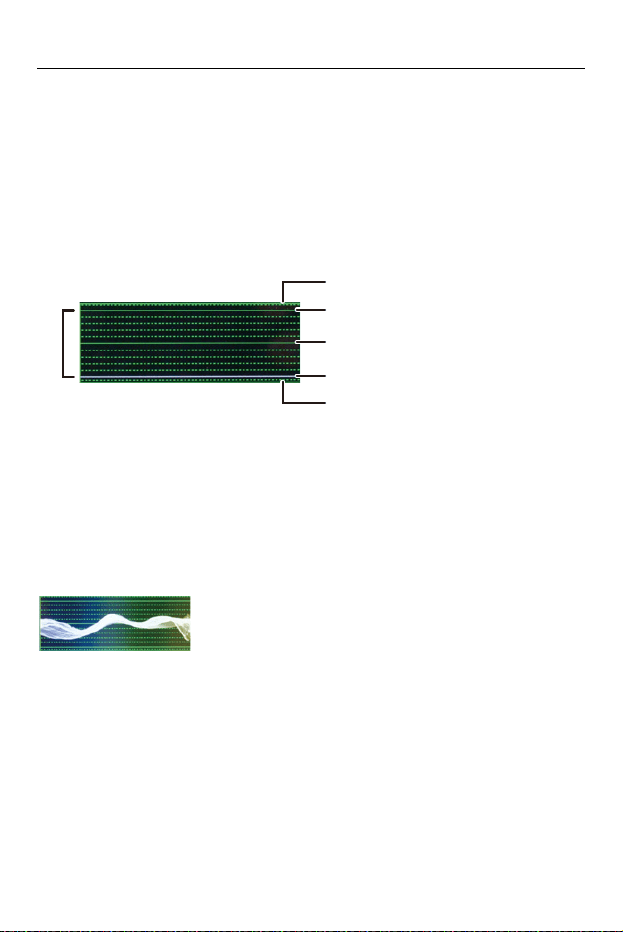
Video Settings – Main Assist Functions
404
Screen Displays
Waveform
•
The waveform displayed on the camera indicates the luminance as values based on
the conversions below:
0 % (IRE
*
): Luminance value 16 (8 bit)
100 % (IRE
*
): Luminance value 235 (8 bit)
* IRE: Institute of Radio Engineers
(A) 109 % (IRE) (Dotted line)
(B) 100 % (IRE)
(C) 50 % (IRE)
(D) 0 % (IRE)
(E) −4 % (IRE) (Dotted line)
(F) The range between 0 % and 100 % shows dotted lines at intervals of 10 %.
Display example)
(A)
(F)
(B)
(C)
(D)
(E)
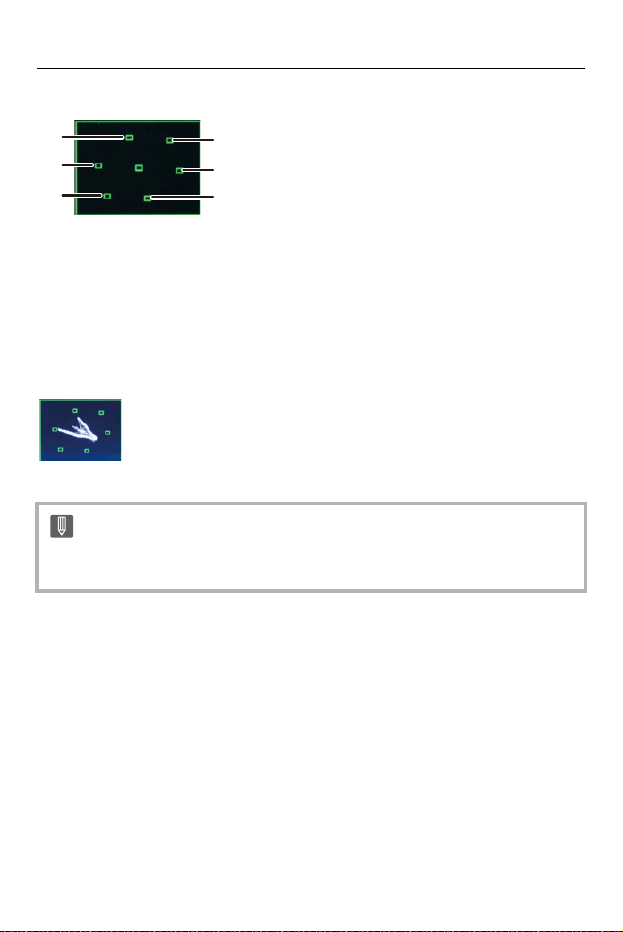
Video Settings – Main Assist Functions
405
Vector scope
(G) R (Red)
(H) YL (Yellow)
(I) G (Green)
(J) MG (Magenta)
(K) B (Blue)
(L) CY (Cyan)
Display example)
• You can also change the position by dragging on the recording screen.
• The waveform and vector scope are not output through HDMI.
(J)
(K)
(L)
(G)
(H)
(I)
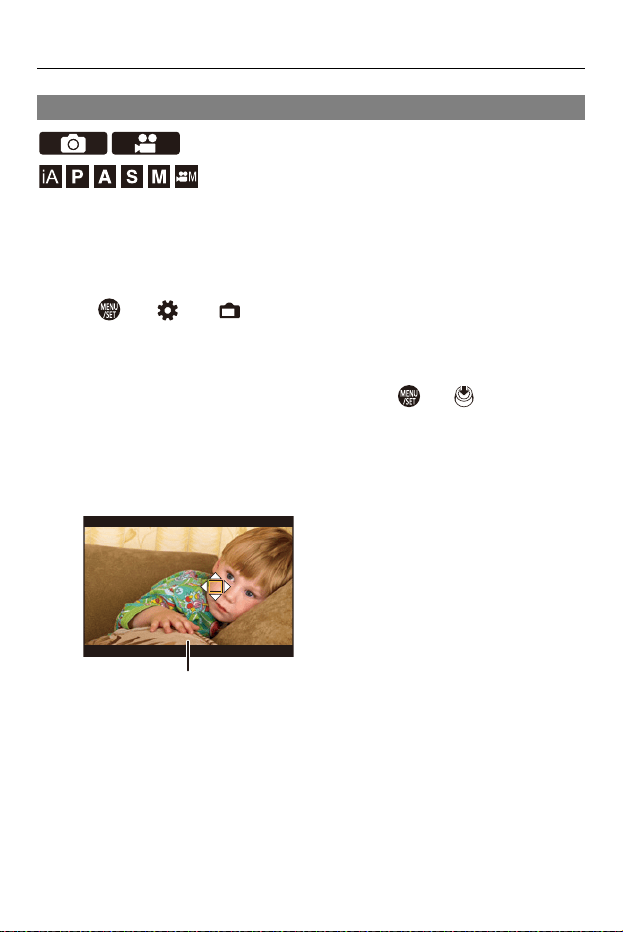
Video Settings – Main Assist Functions
406
[Luminance Spot Meter]
Specify any spot on the subject to measure the luminance over a small
area.
1
Set [Luminance Spot Meter].
≥ ¨ [ ] ¨ [ ] ¨ [Luminance Spot Meter] ¨ [ON]
2
Select the position where you want to measure the
luminance.
≥Press 3421 to select and then press or .
•
Positions can be moved to the diagonal directions using the joystick.
• You can also change the position by dragging the frame on the recording
screen.
• To return the position back to the center, press [DISP.].
(M) Luminance value
65%
65%
65%
(M)

Video Settings – Main Assist Functions
407
Measurement Range
Measuring is possible in the range −7 % to 109 % (IRE).
•
When [Photo Style] is set to [V-Log], this can be measured with “Stop” units.
(Calculated as “0 Stop”=42 % (IRE))
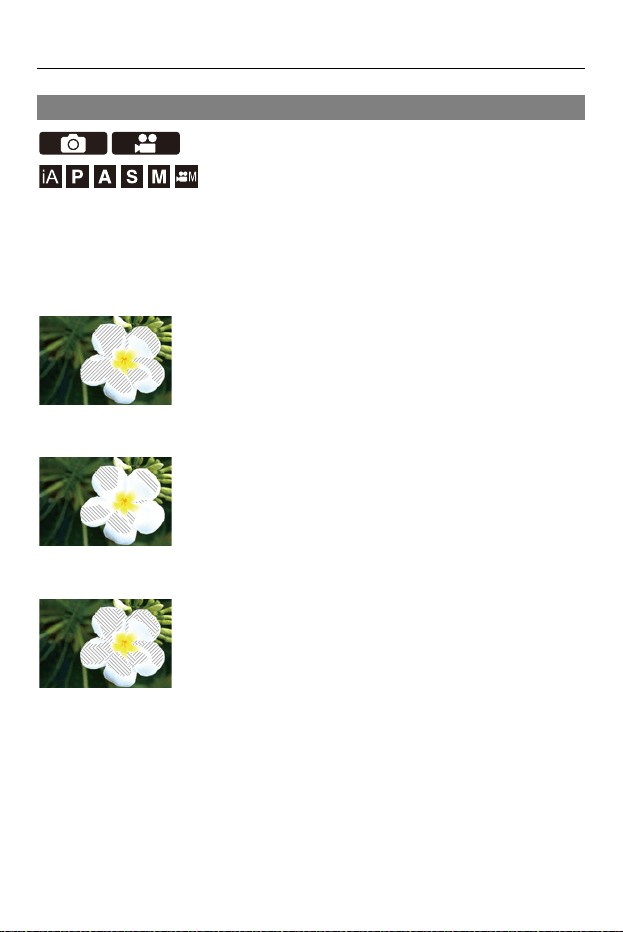
Video Settings – Main Assist Functions
408
[Zebra Pattern]
Parts that are brighter than the base value are displayed with stripes.
You can also set the base value and the breadth of the range so that the
stripes are displayed on parts that are within the range of brightness you
specify.
[ZEBRA1]
[ZEBRA2]
[ZEBRA1+2]
Video Settings – Main Assist Functions
409
¨ [ ] ¨ [ ] ¨ Select [Zebra Pattern]
When [BASE/RANGE] Was Selected with [SET]
Centered on the brightness set with [Base Level], parts with the brightness
in the range set in [Range] are displayed with the stripes.
≥[Base Level] can be set in the range between 0 % and 109 % (IRE).
≥[Range] can be set in the range between ±1 % and ±10 % (IRE).
•
When [Photo Style] is set to [V-Log], these are set at “Stop” units.
(Calculated as “0 Stop”=42 % (IRE))
[ZEBRA1]
Parts that are brighter than the base value are displayed with
[ZEBRA1] stripes.
[ZEBRA2]
Parts that are brighter than the base value are displayed with
[ZEBRA2] stripes.
[ZEBRA1+2] Both [ZEBRA1] and [ZEBRA2] are displayed.
[OFF] —
[SET]
Sets the base brightness.
[Zebra 1] [50%] to [105%]/[BASE/RANGE]
[Zebra 2] [50%] to [105%]/[BASE/RANGE]
• [ZEBRA1+2] cannot be selected while you are setting [BASE/RANGE].
Video Settings – Main Assist Functions
410
[Frame Marker]
A frame with the set aspect ratio is displayed on the recording screen. This
allows you to see during recording the angle of view that will be achieved
with trimming (cropping) in post-processing.
¨ [ ] ¨ [ ] ¨ Select [Frame Marker]
[ON] Displays the Video Frame Marker on the recording screen.
[OFF] —
[SET]
[Frame Aspect]
Sets the aspect ratio of the Video Frame
Marker.
[2.39:1]/[2.35:1]/[2.00:1]/[1.85:1]/[16:9]/
[4:3]/[5:4]/[1:1]/[4:5]/[9:16]/[CUSTOM]
[Frame Color] Sets the color of the Video Frame Marker.
[Frame Mask]
Sets the opacity of the outside of the Video
Frame Marker.
[100%]/[75%]/[50%]/[25%]/[OFF]
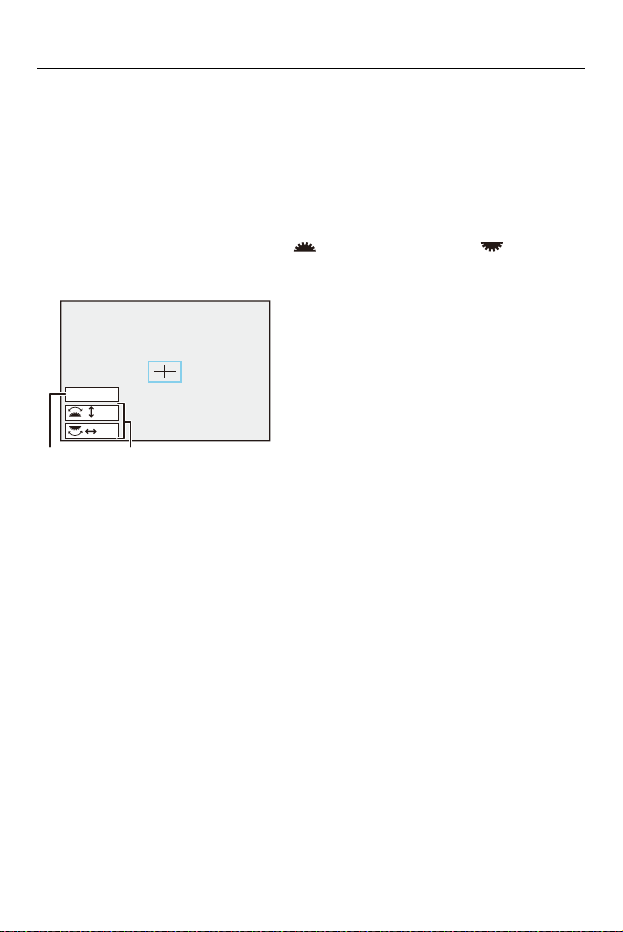
Video Settings – Main Assist Functions
411
When [CUSTOM] Is Selected with [Frame Aspect] in [SET]
You can freely set the aspect ratio of the frame.
≥Press
3421 to move the center position.
•
Positions can be moved to the diagonal directions using the joystick.
• You can also change the position by dragging the frame on the recording screen.
≥Set the height of the frame with [ ], and the width with [ ].
•
You can also pinch out/pinch in the frame to change the size.
(N) Center coordinates (0 being the center of the screen)
(O) Height and width of the frame
• The aspect ratio can be set in the range between 1 % to 100 %.
• The first press of [DISP.] returns the frame position to the center.
The second press returns the frame size to the default.
X,Y=(±0,±0)
13%
13%
(N) (O)
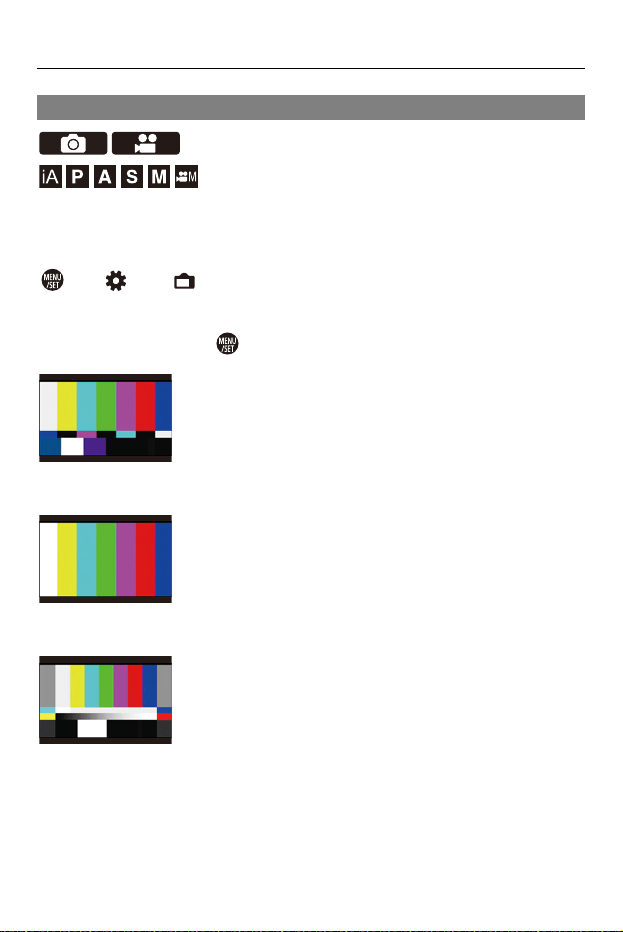
Video Settings – Main Assist Functions
412
Color Bars/Test Tone
The color bars are displayed on the recording screen.
A test tone is output while the color bars are being displayed.
¨ [ ] ¨ [ ] ¨ Select [Color Bars]
Settings: [SMPTE]/[EBU]/[ARIB]
•
To end the display, press .
[SMPTE]
[EBU]
[ARIB]
Video Settings – Main Assist Functions
413
Adjusting the Test Tone
There are 4 levels ([−12dB], [−18dB], [−20dB], and [MUTE]) of test tone to
select.
Rotate , or to select the test tone level.
•
The color bars and test tone will be recorded on the video if video recording is
started while the color bars are being displayed.
• The brightness and coloring that appear on the camera’s monitor or viewfinder
may differ from those that appear on another device such as an external monitor.

414
Special Video Recording
This chapter describes advanced video recording applications such as
slow motion/quick motion video and Log recording.
≥Variable Frame Rate: 415
≥High Frame Rate Video: 420
≥[Focus Transition]: 425
≥Log Recording: 430
≥HLG Videos: 435
≥Anamorphic Recording: 439
≥[Synchro Scan]: 443
≥[Loop Recording (video)]: 445
≥[Segmented File Recording]: 448
≥List of Recording Qualities That Enable Special Videos to be Recorded:
449
Special Video Recording – Variable Frame Rate
415
Variable Frame Rate
You can record smooth slow motion video and quick motion video by using
a frame rate for recording that differs from the recording frame rate.
Slow Motion Video (Overcrank Recording)
Set a number of frames that is higher than the recording frame rate of the [Rec
Quality].
For example: When recording at 48 fps when set to a 24.00p [Rec Quality], the speed
is halved.
Quick Motion Video (Undercrank Recording)
Set a number of frames that is lower than the recording frame rate of the [Rec Quality].
For example: When recording at 12 fps when set to a 24.00p [Rec Quality], the speed
is doubled.
• Variable frame rate video with a recording quality with the ALL-Intra image
compression system cannot be recorded to SD cards. Use CFexpress cards.
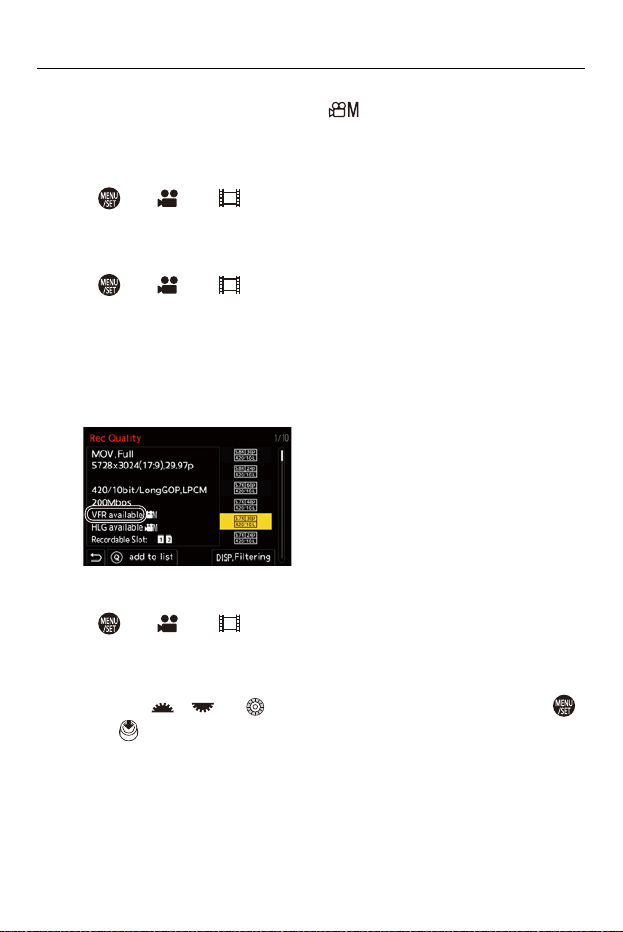
Special Video Recording – Variable Frame Rate
416
1
Set the recording mode to [ ].
≥Set the mode dial. (ÎSelecting the Recording Mode: 79)
2
Set [Rec. File Format] to [MOV].
≥ ¨ [ ] ¨ [ ] ¨ [Rec. File Format] ¨ [MOV]
3
Select a recording quality with which you can use
[Variable Frame Rate] recording.
≥ ¨ [ ] ¨ [ ] ¨ [Rec Quality]
•
Items with which you can use [Variable Frame Rate] are indicated as [VFR
available].
• Recording qualities with which you can use [Variable Frame Rate] recording
(Î List of Recording Qualities That Enable Special Videos to be Recorded:
449)
4
Set [Variable Frame Rate].
≥ ¨ [ ] ¨ [ ] ¨ [Variable Frame Rate] ¨ [ON]
≥Press 21 to switch between [ON] and [OFF].
5
Set the frame rate.
≥Rotate , or to select a numeric value, then press
or .
Special Video Recording – Variable Frame Rate
417
Available Frame Rate Setting Ranges
The frame rate you can set differs depending on the [Rec Quality] settings.
[Rec Quality] Frame rate
C4K/4K video that uses the Long GOP
image compression system
1 fps to 120 fps
5.7K video/C4K/4K video that use the
ALL-Intra image compression system
1 fps to 60 fps
FHD video that uses the Long GOP
image compression system
1 fps to 300 fps
FHD video that uses the ALL-Intra
image compression system
1 fps to 240 fps

Special Video Recording – Variable Frame Rate
418
Shutter Speeds When Recording Variable Frame Rate
Video
When recording variable frame rate video, the minimum shutter speed
changes depending on the set frame rate.
Frame rate Minimum shutter speed
1fps to 2fps 1/8 of a second
12 fps 1/13 of a second
15 fps 1/15 of a second
20 fps 1/20 of a second
21 fps to 25 fps 1/25 of a second
26 fps to 30 fps 1/30 of a second
32 fps to 37 fps 1/40 of a second
45 fps to 50 fps 1/50 of a second
52 fps to 60 fps 1/60 of a second
62 fps to 75 fps 1/80 of a second
84 fps to 100 fps 1/100 of a second
105 fps to 125 fps 1/125 of a second
132 fps to 156 fps 1/160 of a second
165 fps to 200 fps 1/200 of a second
204 fps to 240 fps 1/250 of a second
250 fps to 300 fps 1/320 of a second

Special Video Recording – Variable Frame Rate
419
• You can filter to show just the recording qualities where [Variable Frame Rate]
can be used. (Î[Filtering]: 147)
• We recommend using a tripod when recording images with [Variable Frame
Rate].
• Focus mode switches to MF.
(When using an interchangeable lens with no focus ring, you cannot set focus
with MF.)
• The camera automatically focuses when [AF ON] is pressed, but only before
starting recording.
• Audio will not be recorded during variable frame rate recording.
• When set to a frame rate exceeding 60 fps, there may be some deterioration in
recording quality.
• When [Dynamic Range Boost] is set to [ON], a frame rate exceeding 60 fps
cannot be set.
• When [Image Area of Video] is set to [PIXEL/PIXEL], a frame rate exceeding
120 fps cannot be set.
• When [Synchro Scan] is set to [ON], a frame rate exceeding 240 fps cannot be
set.
• When the following function is being used, [Variable Frame Rate] is not available:
– [Filter Settings]
Special Video Recording – High Frame Rate Video
420
High Frame Rate Video
[MOV] video with high frame rates can be recorded to cards. By converting
it with the compatible software, it is possible to produce slow motion video.
AF recording and audio recording, not possible with [Variable Frame Rate],
also become possible.
1
Set [Rec. File Format] to [MOV].
≥ ¨ [ ] ¨ [ ] ¨ [Rec. File Format] ¨ [MOV]
2
Select a recording quality for high frame rate video.
≥ ¨ [ ] ¨ [ ] ¨ [Rec Quality]
•
The following recording qualities are available in [ ] mode:
– [Rec Quality] exceeding a resolution of C4K
– [Rec Quality] with a high frame rate video exceeding a recording frame rate
of 60.00p
• By filtering the [Rec Quality] by the frame rate, you can display just those
recording qualities that match the frame rate conditions. (Î[Filtering]: 147)

Special Video Recording – High Frame Rate Video
421
Recording Qualities for High Frame Rate Video
[System Frequency] [Rec Quality] Recording frame rate
[59.94Hz (NTSC)]
[5.7K/48p/420/10-L]
[4.4K/48p/420/10-L]
[C4K/48p/422/10-I(H)]
[C4K/48p/422/10-I(L)]
[C4K/48p/422/10-L]
[C4K/48p/420/10-L]
[4K/48p/422/10-I(H)]
[4K/48p/422/10-I(L)]
[4K/48p/422/10-L]
[4K/48p/420/10-L]
[FHD/48p/422/10-I]
[FHD/48p/422/10-L]
[FHD/48p/420/10-L]
47.95p
[C4K/120p/420/10-L]
[4K/120p/420/10-L]
[FHD/120p/422/10-I]
[FHD/120p/422/10-L]
[FHD/120p/420/10-L]
119.88p
[FHD/240p/422/10-I]
[FHD/240p/422/10-L]
[FHD/240p/420/10-L]
239.76p

Special Video Recording – High Frame Rate Video
422
[50.00Hz (PAL)]
[C4K/100p/420/10-L]
[4K/100p/420/10-L]
[FHD/100p/422/10-I]
[FHD/100p/422/10-L]
[FHD/100p/420/10-L]
100.00p
[FHD/200p/422/10-I]
[FHD/200p/422/10-L]
[FHD/200p/420/10-L]
200.00p
[24.00Hz (CINEMA)]
[5.7K/48p/420/10-L]
[4.4K/48p/420/10-L]
48.00p
[C4K/120p/420/10-L]
[4K/120p/420/10-L]
[FHD/120p/422/10-I]
[FHD/120p/422/10-L]
[FHD/120p/420/10-L]
120.00p
Special Video Recording – High Frame Rate Video
423
Shutter Speeds When Recording High Frame Rate Video
When recording high frame rate video, the minimum shutter speed
changes depending on the recording frame rate of the video.
* Can be set in [M] mode ([Auto Exposure in P/A/S/M] is set to [OFF]) or [ ] mode
([Exposure Mode] is set to [M])
Recording frame rate of the video
Minimum shutter speed
[AFS]/[AFC] [MF]
47.95p 1/30 of a second
1/8 of a second
*
48.00p 1/25 of a second
100.00p 1/100 of a second
119.88p/120.00p 1/125 of a second
200.00p 1/200 of a second
239.76p 1/250 of a second
Special Video Recording – High Frame Rate Video
424
• When outputting via HDMI, the resolution and frame rate may be
down-converted for output. (ÎSettings for Down-Converting: 465)
• When [Dynamic Range Boost] is set to [ON], you cannot set a [Rec Quality]
whose recording frame rate exceeds 60.00p.
Notice regarding AF when recording high frame rate video
• When set to a [Rec Quality] where the recording frame rate is 200.00p or more,
there is a limitation on the lenses on which AF is possible.
For supported lenses, refer to “AF and AE in Motion picture recording” in
“Compatibilities for Digital Camera”.
https://panasonic.jp/support/global/cs/dsc/connect/index.html
(English only)
• When set to a [Rec Quality] where the recording frame rate is 200.00p or more,
AF operation will be as follows:
– AF mode is fixed to [ ]. By pressing the shutter button halfway or pressing
[AF ON], focusing is in the AF area of [ ].
– Automatic detection is not available.
– [Continuous AF] is not available.
– [Quick AF] is not available.
– [Eye Sensor AF] is not available.
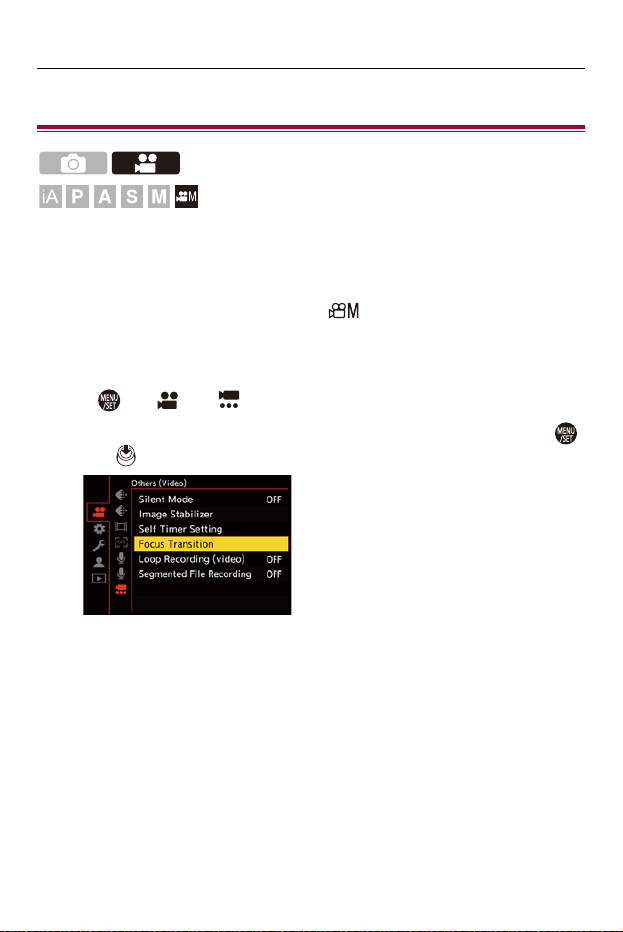
Special Video Recording – [Focus Transition]
425
[Focus Transition]
Smoothly transitions the focus position from the current position to a
position registered in advance.
1
Set the recording mode to [ ].
≥Set the mode dial. (ÎSelecting the Recording Mode: 79)
2
Select [Focus Transition].
≥ ¨ [ ] ¨ [ ] ¨ [Focus Transition]
•
If the [Please set the focus position.] message is displayed, press either
or .
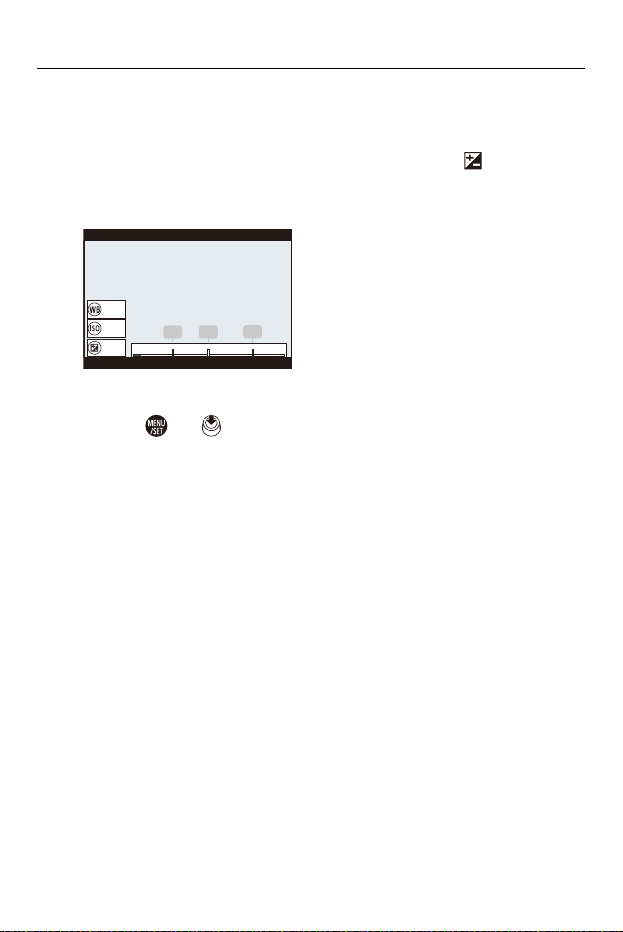
Special Video Recording – [Focus Transition]
426
3
Set focus positions.
≥Check the focus using the same procedure as MF (ÎRecord
Using MF: 195), and then press [WB], [ISO], and [ ] to set focus
positions.
≥You can also touch [POS1] to [POS3] to set focus positions.
4
Register the focus positions.
≥Press or to register the focus positions.
5
Start recording.
≥Press the video rec. button.
•
The advanced setting screen is displayed when you press [DISP.] before
recording. (ÎSetting Items ([Focus Transition]): 428)
• If you have enabled [Focus Transition Rec], Focus Transition will start when
you start recording a video.
∞
(m) 10.50.3
1 2
3
POS1
POS2
POS3
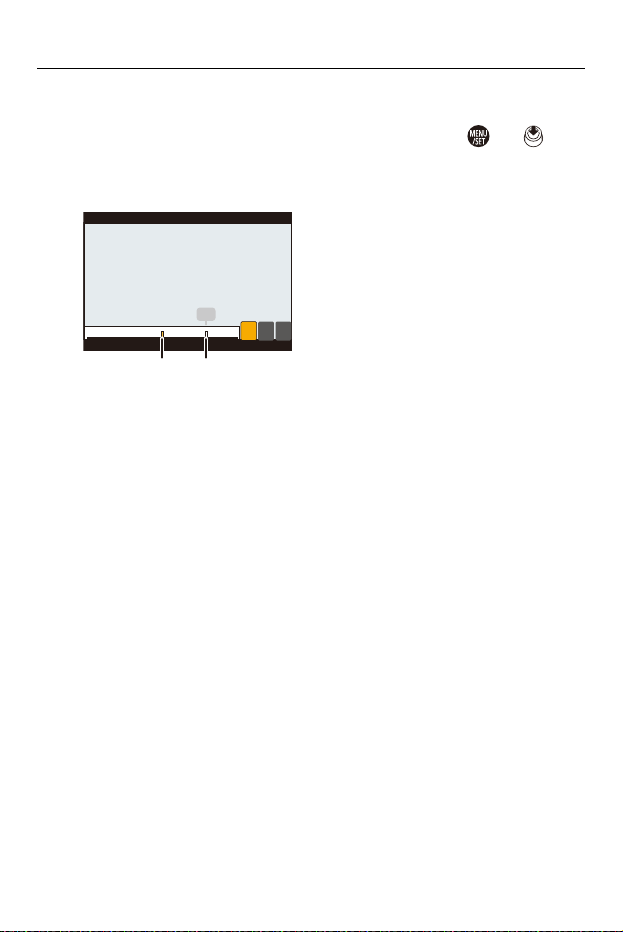
Special Video Recording – [Focus Transition]
427
6
Start Focus Transition.
≥Press 21 to select [1], [2], or [3], and then press or .
•
When [Focus Transition Wait] is set, Focus Transition starts after the set time
has elapsed.
(A) Current focus position
(B) Registered focus position
7
End Focus Transition.
≥Press [Q].
8
Stop recording.
≥Press the video rec. button once again.
∞
(m) 10.50.3
1 23
1
(A) (B)

Special Video Recording – [Focus Transition]
428
Setting Items ([Focus Transition])
[Focus Position Setting]
Registers focus positions.
[Focus Transition Speed]
Sets the moving speed of focus.
• Moving speed: [SH] (fast) to [SL] (slow)
[Focus Transition Rec]
Starts Focus Transition when recording starts.
• Select the position registered with [Focus Position Setting].
[Focus Transition Wait]
Sets the wait time before the start of Focus Transition.
• The recording screen is displayed when you press [ ].

Special Video Recording – [Focus Transition]
429
• Maintain the same distance to the subject after setting focus positions.
• The moving speed of focus varies depending on the lens being used.
• The moving speed of focus slows as it approaches the closest focusing distance
of the lens or infinity.
• While using [Focus Transition], it is not possible to focus on anything other than
one of the registered focus positions.
• Any of the operations below will clear the focus position settings.
– Operating the camera on/off switch
– Zoom operation
– Switching the focus mode
– Switching the recording mode
– Replacing the lens
• When the following function is being used, [Focus Transition] is not available:
– [Variable Frame Rate]
• [Focus Transition] cannot be used when using an interchangeable lens that does
not support the focus mode [AFC].
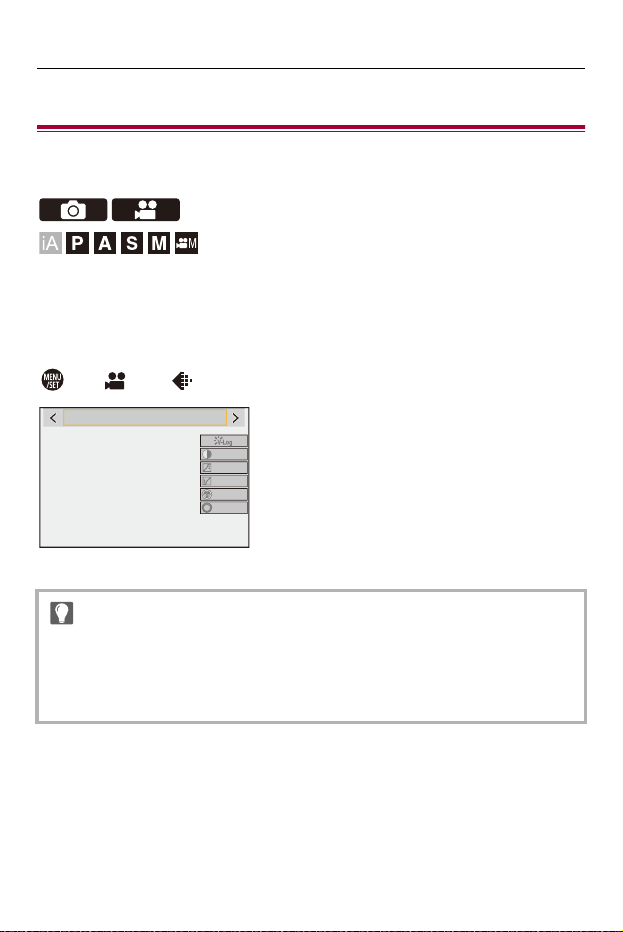
Special Video Recording – Log Recording
430
Log Recording
≥[V-Log View Assist]: 433
Setting [Photo Style] to [V-Log] enables Log recording.
Images finished with rich gradation can be created through post-production
processing.
¨ [ ] ¨ [ ] ¨ [Photo Style] ¨ Select [V-Log]
ISO Sensitivity When [V-Log] Is Set
The lower limit of available ISO sensitivities is [250] (when [Extended ISO]
is set: [125]; when [Dynamic Range Boost] is set: [2000]).
•
Post-production processing is enabled by utilizing LUT (Look-Up Table).
You can download LUT data from the following support site:
https://panasonic.jp/support/global/cs/dsc/download/index3.html
(English only)
9/RJ
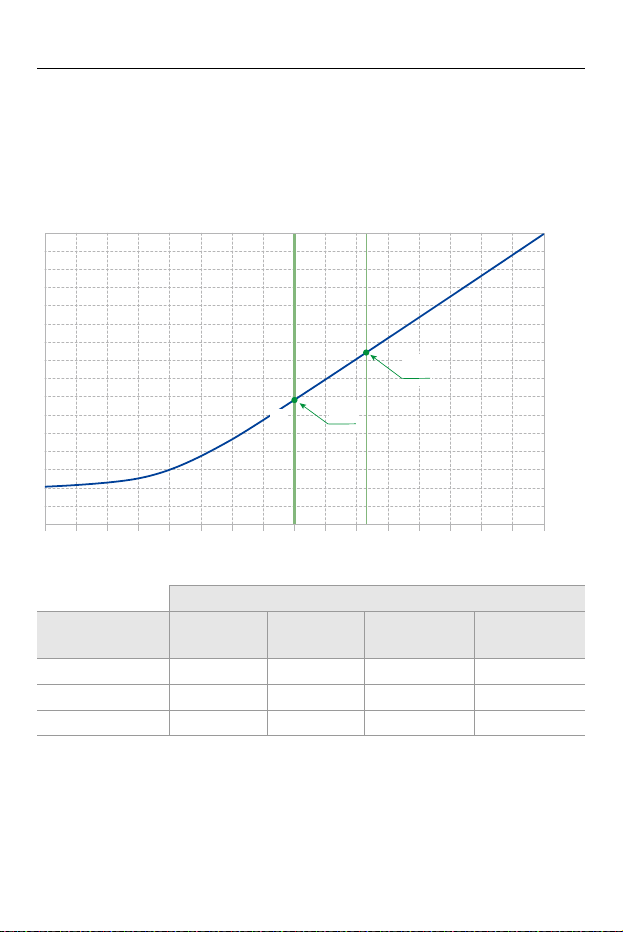
Special Video Recording – Log Recording
431
Exposure When [V-Log] Is Set
The [V-Log] curve characteristics comply with “V-Log/V-Gamut
REFERENCE MANUAL Rev.1.0”. When set to [V-Log], the standard
exposure when gray with a reflectance ratio of 18 % is imaged is IRE 42 %.
•
When luminance is to be displayed by “Stop” units, this camera calculates IRE 42 %
to “0 Stop”.
When [Photo Style] is set to [V-Log]
Reflectance ratio
(%)
IRE (%) Stop
10 bit code
value
12 bit code
value
0 7.3 — 128 512
(1) 18 42 0.0 433 1732
(2) 90 61 2.3 602 2408
-
8
-
8
-
7
-
7
-
6
-
6
-
5
-
5
-
4
-
4
-
3
-
3
-
2
-
2
-
1
-
1001122334455667788
(Stop)(Stop)
(10bitcodevalue)(10bitcodevalue)
00
6464
128128
192192
256256
320320
384384
448448
512512
576576
640640
704704
768768
832832
896896
960960
10241024
(1)
(2)

Special Video Recording – Log Recording
433
[V-Log View Assist]
When [Photo Style] is set to [V-Log], the recording screen and images
output via HDMI will darken. Using [V-Log View Assist] means you can
show images with LUT data applied on the monitor/viewfinder and output
them via HDMI.
¨ [ ] ¨ [ ] ¨ Select [V-Log View Assist]
[Read LUT File]
Reads LUT data from the card.
[LUT Select]
Selects the LUT data to be applied from among the preset ([Vlog_709]) and registered
LUT data.
[LUT View Assist (Monitor)]
Displays the images with LUT data applied on the monitor/viewfinder of the camera.
[LUT View Assist (HDMI)]
Applies LUT data to images output over HDMI.
• When applying the LUT data, [LUT] is displayed on the recording screen.
• Up to 4 LUT data files can be registered.
Special Video Recording – Log Recording
434
Reading LUT Files
1 Insert a card on which LUT data is saved into the camera.
2 Select [Read LUT File].
• ¨ [ ] ¨ [ ] ¨ [V-Log View Assist] ¨ [Read LUT File] ¨ [Card Slot
1(CFexpress)]/[Card Slot 2(SD)]
3 Press 34 to select the LUT data to read and then press or .
4 Press 34 to select the location to register the data, and then press or
.
• When registered items are selected, they will be overwritten.
• The following LUT data can be used:
– The “.vlt” format, which meets the requirements specified in the “VARICAM
3DLUT REFERENCE MANUAL Rev.1.0”
– The “.cube” format
• The “.cube” format LUT files are compatible with 17 point and 33 point 3D LUT.
• The number of characters that can be used in a file name differs depending on
the file system of the card.
(Use alphanumeric characters for the file name)
FAT32 (SD card/SDHC card): Up to 8 characters (excluding extension).
exFAT (CFexpress card/SDXC card): Up to 255 characters (including
extension).
• Save the LUT data with a file extension of “.vlt” or “.cube” in the root directory of
the card (the folder opened when the card is opened on a PC).

Special Video Recording – HLG Videos
435
HLG Videos
≥[HLG View Assist]: 438
Record videos with the wide dynamic range of the HLG format. You can
record in very bright light where overexposure can occur or in dark areas
where underexposure can occur, maintaining the rich yet subtle colors you
can see with your naked eye.
You can view the video that you record by outputting via HDMI to devices
(TVs, etc.) that support the HLG format, or playing back directly on
supporting devices.
•
“HLG (Hybrid Log Gamma)” is an international standard (ITU-R BT.2100) HDR
format.
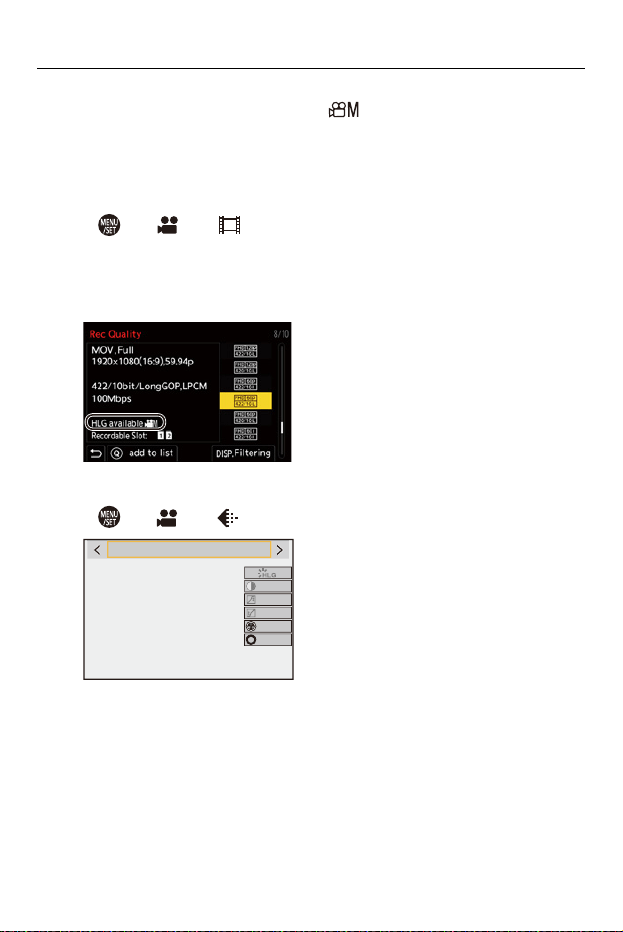
Special Video Recording – HLG Videos
436
1
Set the recording mode to [ ].
≥Set the mode dial. (ÎSelecting the Recording Mode: 79)
2
Select a recording quality with which you can record
HLG video.
≥ ¨ [ ] ¨ [ ] ¨ [Rec Quality]
•
Items available for recording with HLG video are indicated as [HLG available].
• Recording qualities with which you can record HLG video (ÎList of
Recording Qualities That Enable Special Videos to be Recorded: 449)
3
Set [Photo Style] to [Hybrid Log Gamma].
≥ ¨ [ ] ¨ [ ] ¨ [Photo Style] ¨ [Hybrid Log Gamma]
+\EULG/RJ*DPPD
±0
±0
Special Video Recording – HLG Videos
437
ISO Sensitivity When [Hybrid Log Gamma] Is Set
The lower limit of available ISO sensitivities is [250] (when [Dynamic
Range Boost] is set: [2000]).
•
The monitor and viewfinder on this camera do not support display of HLG format
images.
With [Monitor] in [HLG View Assist] in the [Custom] ([Monitor / Display (Video)])
menu, you can display the images converted for monitoring on the monitor/
viewfinder of this camera. (Î[HLG View Assist]: 438)
• HLG images are shown dark on devices that do not support the HLG format.
With [HDMI] in [HLG View Assist] in the [Custom] ([Monitor / Display (Video)])
menu, you can set the conversion method for images displayed for monitoring.
(Î[HLG View Assist]: 438)

Special Video Recording – HLG Videos
438
[HLG View Assist]
At recording or playback of HLG video, this displays images with converted
color gamut and brightness on the camera monitor/viewfinder, or outputs
these over HDMI.
¨ [ ] ¨ [ ] ¨ [HLG View Assist] ¨ [Monitor] or
[HDMI]
[AUTO]
*
Converts images before outputting them via HDMI while applying the effect of
[MODE2]. This conversion setting works only when the camera is connected to a
device that does not support HDR (HLG format).
[MODE1]
Converts with an emphasis on bright areas such as sky.
• [MODE1] is displayed on the recording screen.
[MODE2]
Converts with an emphasis on the brightness of a main subject.
• [MODE2] is displayed on the recording screen.
[OFF]
Displays without converting color gamut and brightness.
• HLG images appear darker on devices that do not support the HLG format.
* Can only be set while [HDMI] is selected.

Special Video Recording – Anamorphic Recording
439
Anamorphic Recording
≥[Anamorphic Desqueeze Display]: 441
This camera can record video with a resolution of 5.8K/4.4K (anamorphic
(4:3) video) that is compatible with anamorphic recording with an aspect
ratio of 4:3. You can select a recording quality that suits anamorphic
recording from a variety of different video formats (recording qualities).
During anamorphic recording, it is also possible to display desqueezed
images and the angle of view when cropping after desqueeze editing. It is
also possible to switch to an image stabilizer that suits anamorphic
recording.
•
For information about image stabilizers suited to anamorphic recording
(Î[Anamorphic (Video)]: 265)
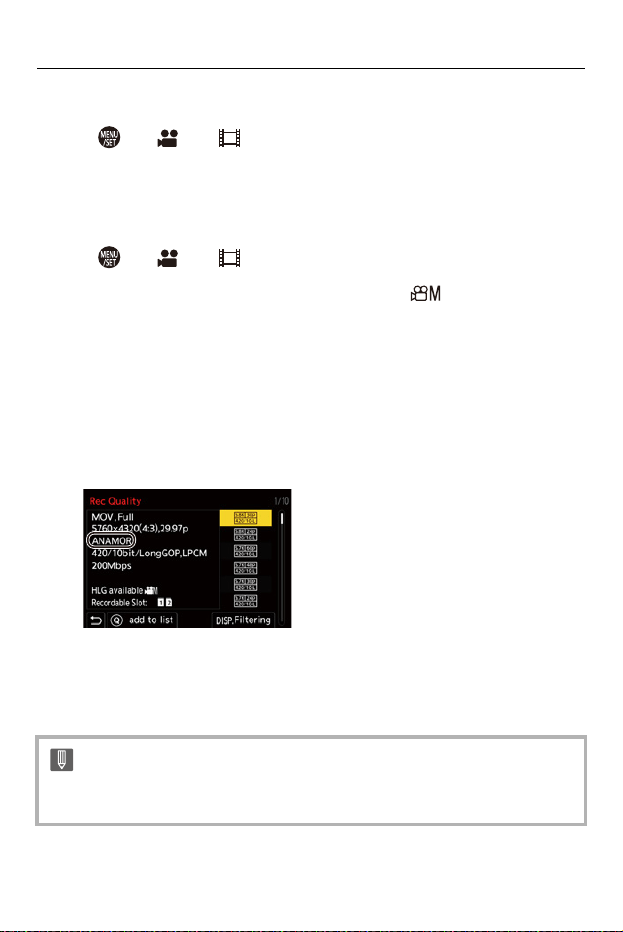
Special Video Recording – Anamorphic Recording
440
1
Set [Rec. File Format].
≥ ¨ [ ] ¨ [ ] ¨ [Rec. File Format]
•
When recording anamorphic (4:3) videos, set to [MOV].
2
Select a recording quality suited to anamorphic
recording.
≥ ¨ [ ] ¨ [ ] ¨ [Rec Quality]
•
The following recording qualities are available in [ ] mode:
– [Rec Quality] exceeding a resolution of C4K
– [Rec Quality] with a high frame rate video exceeding a recording frame rate
of 60.00p
• When [Rec. File Format] is set to [MOV] or [Apple ProRes], by filtering [Rec
Quality] by the number of pixels, you can display just those recording qualities
with resolutions and aspect ratios that meet the conditions. (Î[Filtering]: 147)
• Anamorphic (4:3) video is displayed as [ANAMOR] in the [Rec Quality] setting
screen.
• Recording qualities for anamorphic recording with an aspect ratio of 4:3
(ÎList of Recording Qualities That Enable Special Videos to be Recorded:
449)
• This camera is not compatible with desqueeze editing of video recorded with
anamorphic recording. Use compatible software.
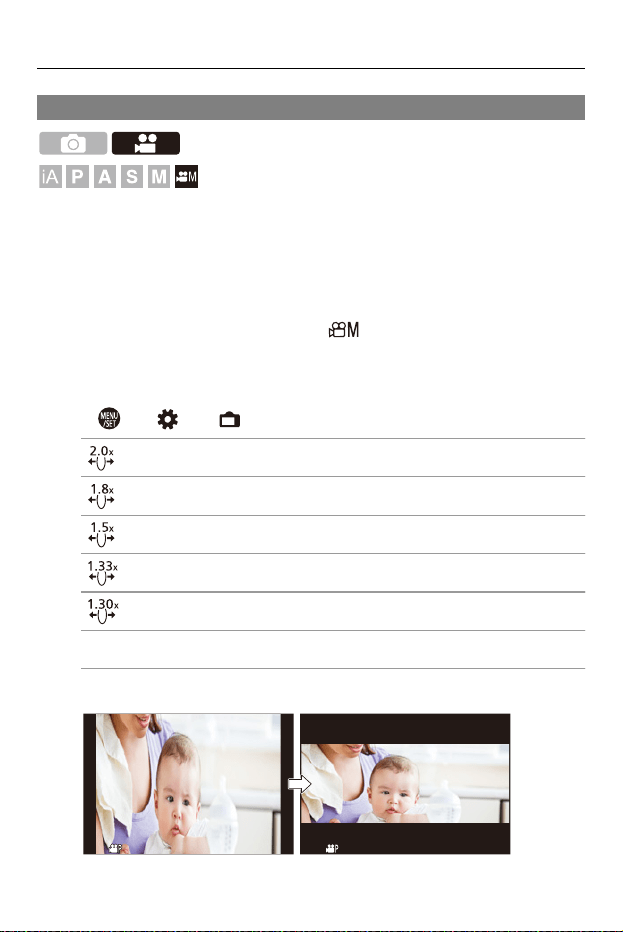
Special Video Recording – Anamorphic Recording
441
[Anamorphic Desqueeze Display]
Display the desqueezed images suited to the magnification of the
anamorphic lens on this camera.
Using the [Frame Marker], it is also possible to superimpose on display the
frame of the angle of view when cropping after desqueeze editing.
1
Set the recording mode to [ ].
≥Set the mode dial. (ÎSelecting the Recording Mode: 79)
2
Set [Anamorphic Desqueeze Display].
≥ ¨ [ ] ¨ [ ] ¨ [Anamorphic Desqueeze Display]
[ ] ([2.0×])
[ ] ([1.8×])
[ ] ([1.5×])
[ ] ([1.33×])
[ ] ([1.30×])
[OFF]
• Make settings to suit the magnification of the anamorphic lens you are using.
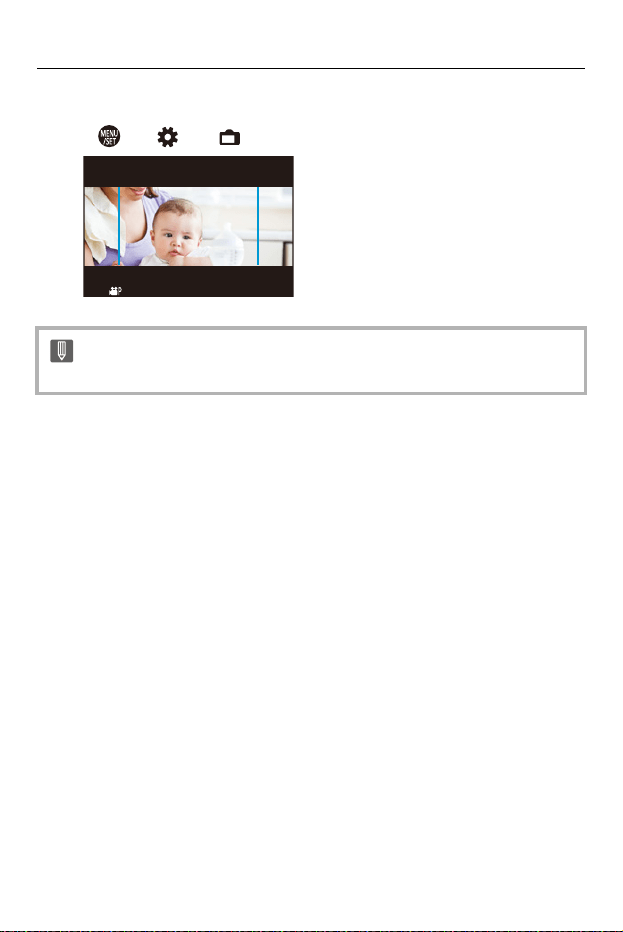
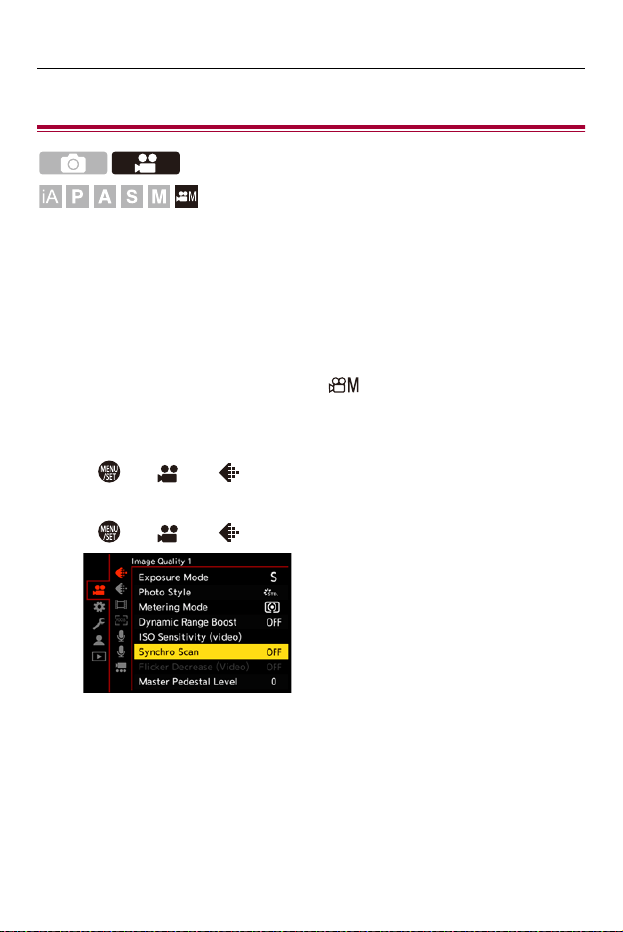
Special Video Recording – [Synchro Scan]
443
[Synchro Scan]
Fine-adjust the shutter speed to reduce flickering and horizontal stripes.
The shutter speed set in Synchro Scan is saved separately from the
shutter speed used for normal recording.
In the Synchro Scan setting screen you can call up the current shutter
speed for normal recording and adjust it.
1
Set the recording mode to [ ].
≥Set the mode dial. (ÎSelecting the Recording Mode: 79)
2
Set the exposure mode to [S] or [M].
≥ ¨ [ ] ¨ [ ] ¨ [Exposure Mode] ¨ [S]/[M]
3
Set [Synchro Scan].
≥ ¨ [ ] ¨ [ ] ¨ [Synchro Scan] ¨ [ON]
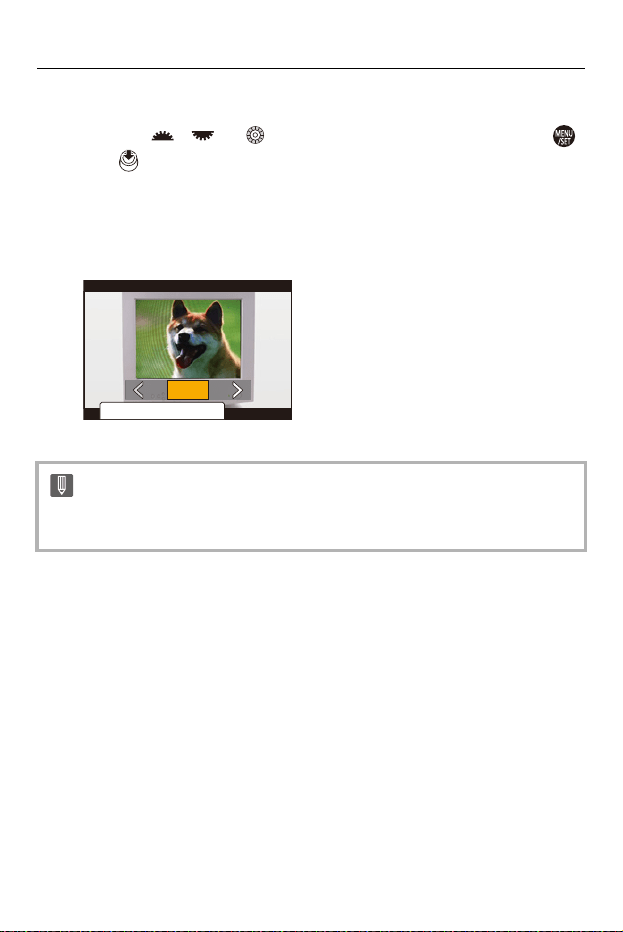
Special Video Recording – [Synchro Scan]
444
4
Set the shutter speed.
≥Rotate , or to select a numeric value, then press
or .
•
You can call up the current shutter speed for normal recording by pressing
[DISP.].
• Adjust the shutter speed while looking at the screen so that flickering and
horizontal stripes will be minimized.
• When you set [Synchro Scan] to [ON], the available shutter speed range
becomes narrower.
&XUUHQWVKXWWHUVSHHG
ュリヴヱハ
60.160.1
Special Video Recording – [Loop Recording (video)]
445
[Loop Recording (video)]
Recording continues until the card becomes full, while dividing videos into
short periods.
When the card becomes full, recording continues while deleting the old
data.
This is a convenient function for recording over long periods that might
exceed the capacity of the card.
•
Recording and deleting occur at the same time, so you will need a card with a
writing speed equivalent to double the bit rate of the recording quality used for
recording.
If the writing speed on the card is insufficient, recording may stop.
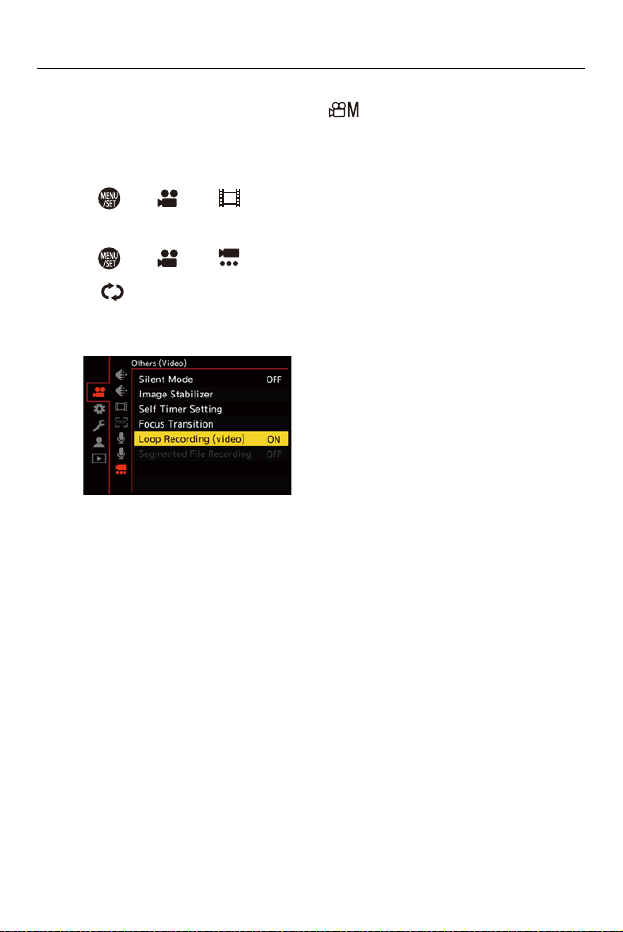
Special Video Recording – [Loop Recording (video)]
446
1
Set the recording mode to [ ].
≥Set the mode dial. (ÎSelecting the Recording Mode: 79)
2
Set [Rec. File Format] to [MOV].
≥ ¨ [ ] ¨ [ ] ¨ [Rec. File Format] ¨ [MOV]
3
Set [Loop Recording (video)].
≥ ¨ [ ] ¨ [ ] ¨ [Loop Recording (video)] ¨ [ON]
•
[ ] is displayed on the recording screen.
• When the recording fills the card to capacity, loop recording starts and video
recording time is no longer displayed.

Special Video Recording – [Loop Recording (video)]
447
• Make sure the camera does not turn off during recording.
• Loop recording cannot start if there is insufficient available capacity on the card.
• When the recording time exceeds 12 hours, recording continues with data being
deleted in order from the point where recording started.
• When [Video File Name] is set to [CINE Style], recording stops when the number
of folders and number of files reach the maximum.
If loop recording is to be done over long periods, we recommend setting [Video
File Name] to [Same As Photo(DCF Standard)].
• When the following functions are being used, [Loop Recording (video)] is not
available:
– [Rec Quality] with a bit rate of 400 Mbps or more
– [Variable Frame Rate]
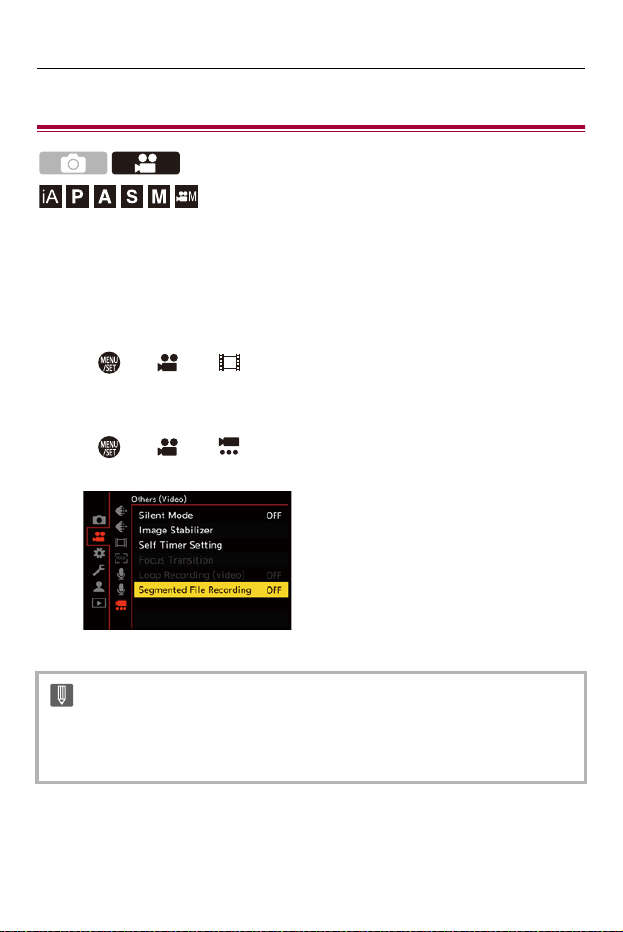
Special Video Recording – [Segmented File Recording]
448
[Segmented File Recording]
To avoid video loss due to unforeseen interruptions to the power supply,
recorded video is segmented at set intervals while being recorded.
•
The segmented videos are saved as one group image. (ÎGroup Images: 492)
1
Set [Rec. File Format] to [MOV] or [Apple ProRes].
≥ ¨ [ ] ¨ [ ] ¨ [Rec. File Format] ¨ [MOV]/[Apple
ProRes]
2
Set [Segmented File Recording].
≥ ¨ [ ] ¨ [ ] ¨ [Segmented File Recording] ¨ [10MIN.]/
[5MIN.]/[3MIN.]/[1MIN.]
•
When the following function is being used, [Segmented File Recording] is not
available:
– [Loop Recording (video)]
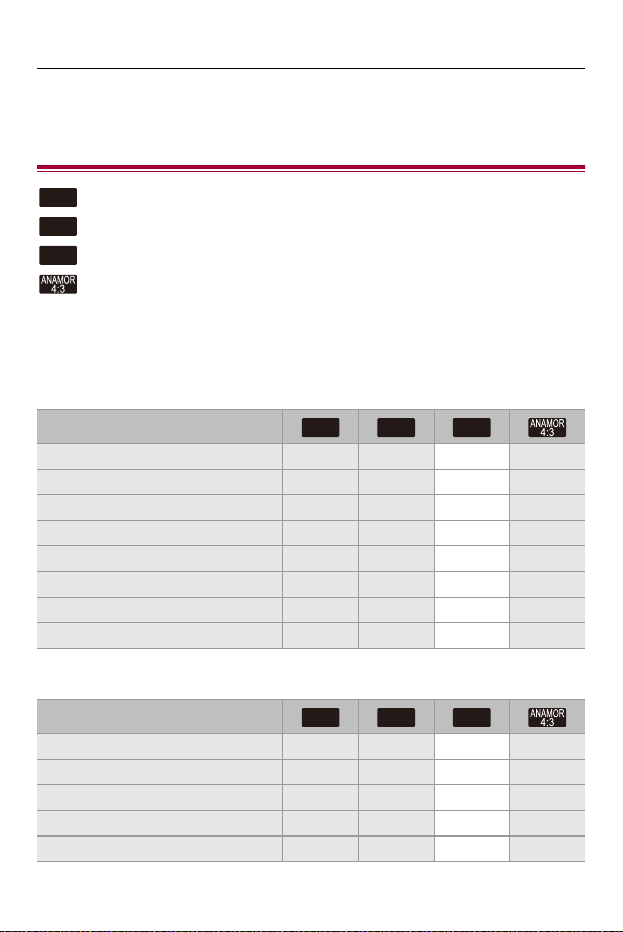
Special Video Recording – List of Recording Qualities That Enable Special Videos to be Recorded
449
List of Recording Qualities That Enable
Special Videos to be Recorded
: Recording qualities that enable use of [Variable Frame Rate]
: Recording qualities for High Frame Rate video
: Recording qualities with which you can record HLG video
: Recording qualities for anamorphic recording with an aspect ratio of
4:3
[Rec. File Format]: [MP4]
[System Frequency]: [59.94Hz (NTSC)]
[System Frequency]: [50.00Hz (PAL)]
[Rec Quality]
[4K/10bit/100M/60p] 3
[4K/10bit/72M/30p] 3
[4K/8bit/100M/30p]
[4K/10bit/72M/24p] 3
[4K/8bit/100M/24p]
[FHD/8bit/28M/60p]
[FHD/8bit/20M/30p]
[FHD/8bit/24M/24p]
[Rec Quality]
[4K/10bit/100M/50p] 3
[4K/10bit/72M/25p] 3
[4K/8bit/100M/25p]
[FHD/8bit/28M/50p]
[FHD/8bit/20M/25p]
VFR
HFR
HLG
VFR
HFR
HLG
VFR
HFR
HLG
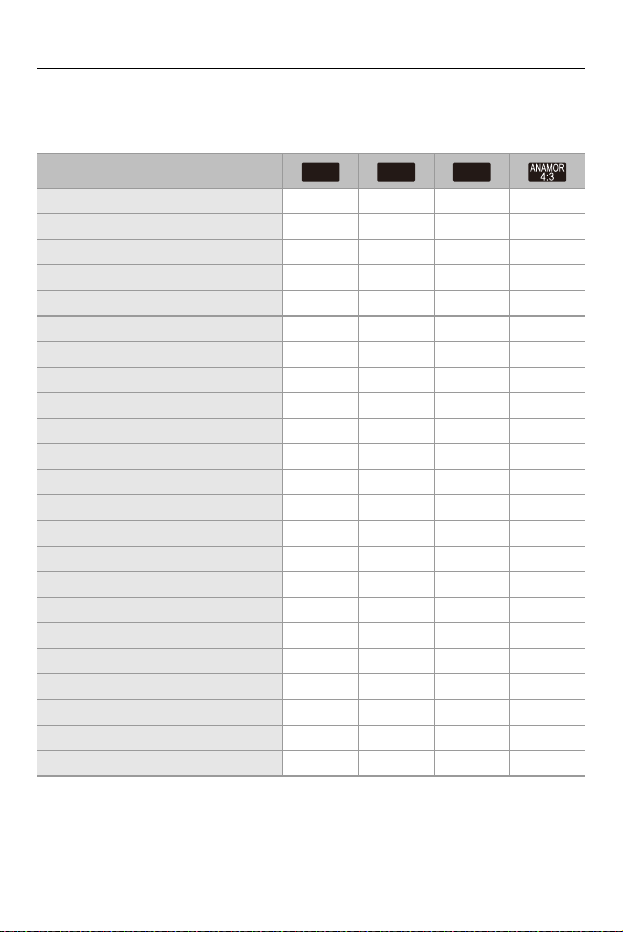
Special Video Recording – List of Recording Qualities That Enable Special Videos to be Recorded
450
[Rec. File Format]: [MOV]
[System Frequency]: [59.94Hz (NTSC)]
[Rec Quality]
[5.8K/30p/420/10-L] 33
[5.8K/24p/420/10-L] 33
[5.7K/60p/420/10-L] 3
[5.7K/48p/420/10-L] 33
[5.7K/30p/420/10-L] 33
[5.7K/24p/420/10-L] 33
[4.4K/60p/420/10-L] 33
[4.4K/48p/420/10-L] 333
[C4K/120p/420/10-L] 33
[C4K/60p/422/10-I(H)] 3
[C4K/60p/422/10-I(L)] 3
[C4K/60p/422/10-L] 3
[C4K/60p/420/10-L] 33
[C4K/48p/422/10-I(H)] 33
[C4K/48p/422/10-I(L)] 33
[C4K/48p/422/10-L] 33
[C4K/48p/420/10-L] 33
[C4K/30p/422/10-I] 33
[C4K/30p/422/10-L] 3
[C4K/30p/420/10-L] 33
[C4K/24p/422/10-I] 33
[C4K/24p/422/10-L] 3
[C4K/24p/420/10-L] 33
VFR
HFR
HLG

Special Video Recording – List of Recording Qualities That Enable Special Videos to be Recorded
451
[4K/120p/420/10-L] 33
[4K/60p/422/10-I(H)] 3
[4K/60p/422/10-I(L)] 3
[4K/60p/422/10-L] 3
[4K/60p/420/10-L] 33
[4K/48p/422/10-I(H)] 33
[4K/48p/422/10-I(L)] 33
[4K/48p/422/10-L] 33
[4K/48p/420/10-L] 33
[4K/30p/422/10-I] 33
[4K/30p/422/10-L] 3
[4K/30p/420/10-L] 33
[4K/24p/422/10-I] 33
[4K/24p/422/10-L] 3
[4K/24p/420/10-L] 33
[FHD/240p/422/10-I] 33
[FHD/240p/422/10-L] 33
[FHD/240p/420/10-L] 33
[FHD/120p/422/10-I] 33
[FHD/120p/422/10-L] 33
[FHD/120p/420/10-L] 33
[FHD/60p/422/10-I] 33
[FHD/60p/422/10-L] 3
[FHD/60p/420/10-L] 33
[FHD/60i/422/10-I] 3
[FHD/60i/422/10-L] 3

Special Video Recording – List of Recording Qualities That Enable Special Videos to be Recorded
452
[FHD/48p/422/10-I] 33
[FHD/48p/422/10-L] 33
[FHD/48p/420/10-L] 33
[FHD/30p/422/10-I] 33
[FHD/30p/422/10-L] 3
[FHD/30p/420/10-L] 33
[FHD/24p/422/10-I] 33
[FHD/24p/422/10-L] 3
[FHD/24p/420/10-L] 33
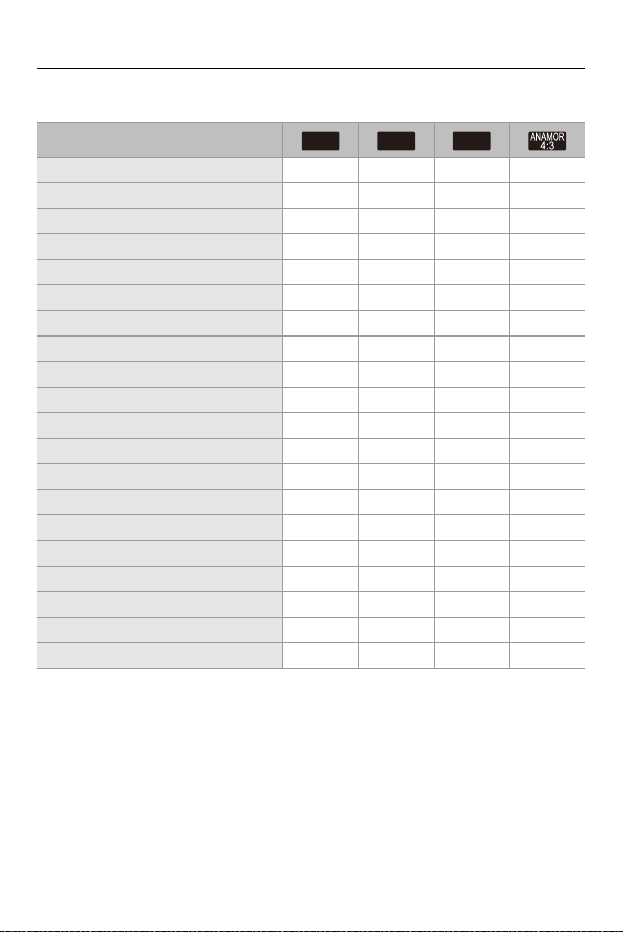
Special Video Recording – List of Recording Qualities That Enable Special Videos to be Recorded
453
[System Frequency]: [50.00Hz (PAL)]
[Rec Quality]
[5.8K/25p/420/10-L] 33
[5.7K/50p/420/10-L] 3
[5.7K/25p/420/10-L] 33
[4.4K/50p/420/10-L] 33
[C4K/100p/420/10-L] 33
[C4K/50p/422/10-I(H)] 3
[C4K/50p/422/10-I(L)] 3
[C4K/50p/422/10-L] 3
[C4K/50p/420/10-L] 33
[C4K/25p/422/10-I] 33
[C4K/25p/422/10-L] 3
[C4K/25p/420/10-L] 33
[4K/100p/420/10-L] 33
[4K/50p/422/10-I(H)] 3
[4K/50p/422/10-I(L)] 3
[4K/50p/422/10-L] 3
[4K/50p/420/10-L] 33
[4K/25p/422/10-I] 33
[4K/25p/422/10-L] 3
[4K/25p/420/10-L] 33
VFR
HFR
HLG

Special Video Recording – List of Recording Qualities That Enable Special Videos to be Recorded
454
[FHD/200p/422/10-I] 33
[FHD/200p/422/10-L] 33
[FHD/200p/420/10-L] 33
[FHD/100p/422/10-I] 33
[FHD/100p/422/10-L] 33
[FHD/100p/420/10-L] 33
[FHD/50p/422/10-I] 33
[FHD/50p/422/10-L] 3
[FHD/50p/420/10-L] 33
[FHD/50i/422/10-I] 3
[FHD/50i/422/10-L] 3
[FHD/25p/422/10-I] 33
[FHD/25p/422/10-L] 3
[FHD/25p/420/10-L] 33
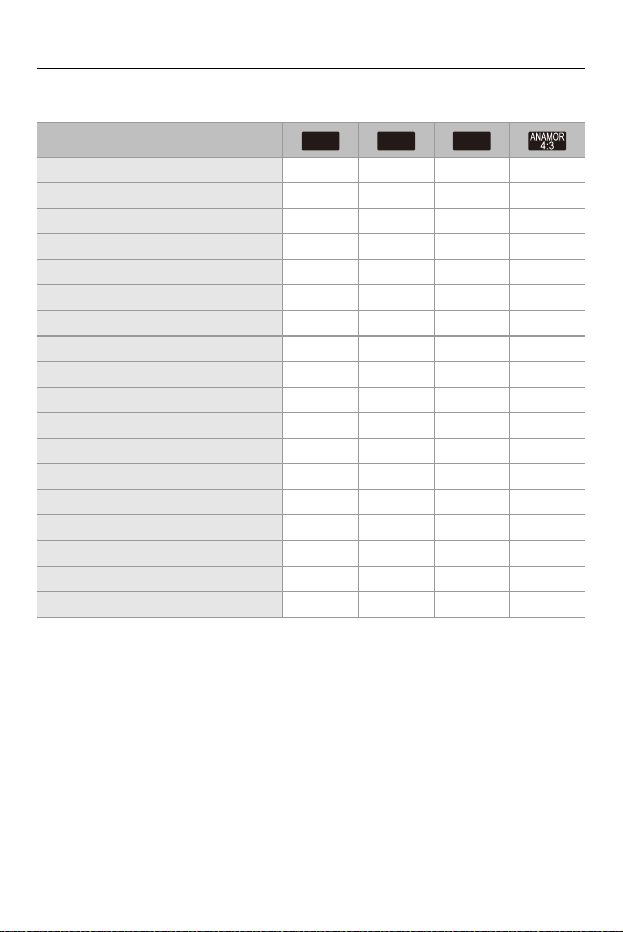
Special Video Recording – List of Recording Qualities That Enable Special Videos to be Recorded
455
[System Frequency]: [24.00Hz (CINEMA)]
[Rec Quality]
[5.8K/24p/420/10-L] 33
[5.7K/48p/420/10-L] 33
[5.7K/24p/420/10-L] 33
[4.4K/48p/420/10-L] 333
[C4K/120p/420/10-L] 33
[C4K/24p/422/10-I] 33
[C4K/24p/422/10-L] 3
[C4K/24p/420/10-L] 33
[4K/120p/420/10-L] 33
[4K/24p/422/10-I] 33
[4K/24p/422/10-L] 3
[4K/24p/420/10-L] 33
[FHD/120p/422/10-I] 33
[FHD/120p/422/10-L] 33
[FHD/120p/420/10-L] 33
[FHD/24p/422/10-I] 33
[FHD/24p/422/10-L] 3
[FHD/24p/420/10-L] 33
VFR
HFR
HLG
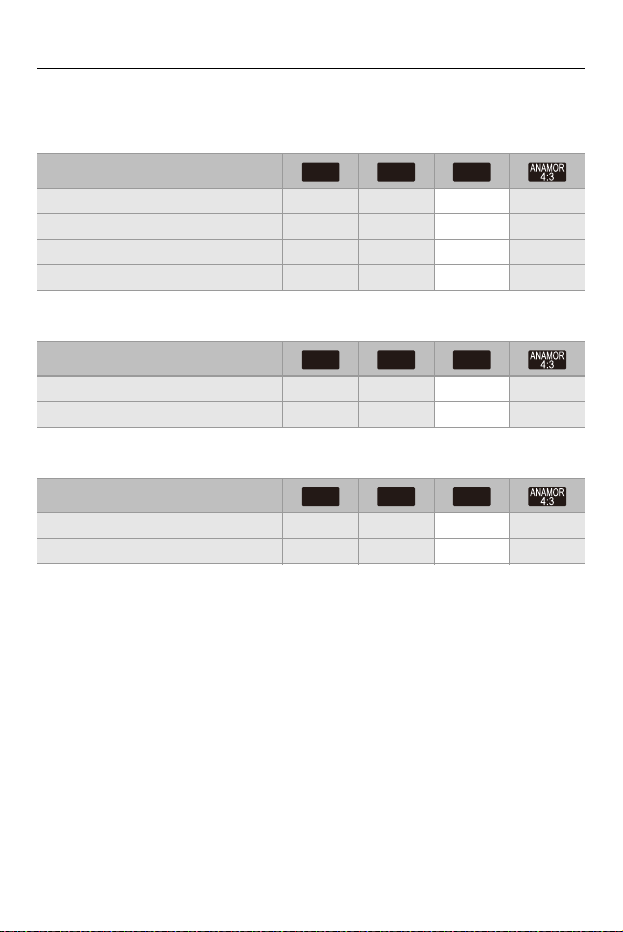
Special Video Recording – List of Recording Qualities That Enable Special Videos to be Recorded
456
[Rec. File Format]: [Apple ProRes]
[System Frequency]: [59.94Hz (NTSC)]
[System Frequency]: [50.00Hz (PAL)]
[System Frequency]: [24.00Hz (CINEMA)]
[Rec Quality]
[5.7K/30p/422 HQ] 3
[5.7K/30p/422] 3
[5.7K/24p/422 HQ] 3
[5.7K/24p/422] 3
[Rec Quality]
[5.7K/25p/422 HQ] 3
[5.7K/25p/422] 3
[Rec Quality]
[5.7K/24p/422 HQ] 3
[5.7K/24p/422] 3
VFR
HFR
HLG
VFR
HFR
HLG
VFR
HFR
HLG

457
HDMI Output (Video)
You can record while outputting the camera images to an external monitor
or external recorder connected with an HDMI cable.
•
HDMI output control differs between during recording and during playback.
For HDMI output settings during playback (Î[HDMI Connection]: 602)
≥Connecting HDMI Devices: 458
≥HDMI Output Image Quality: 462
≥HDMI Output Settings: 470
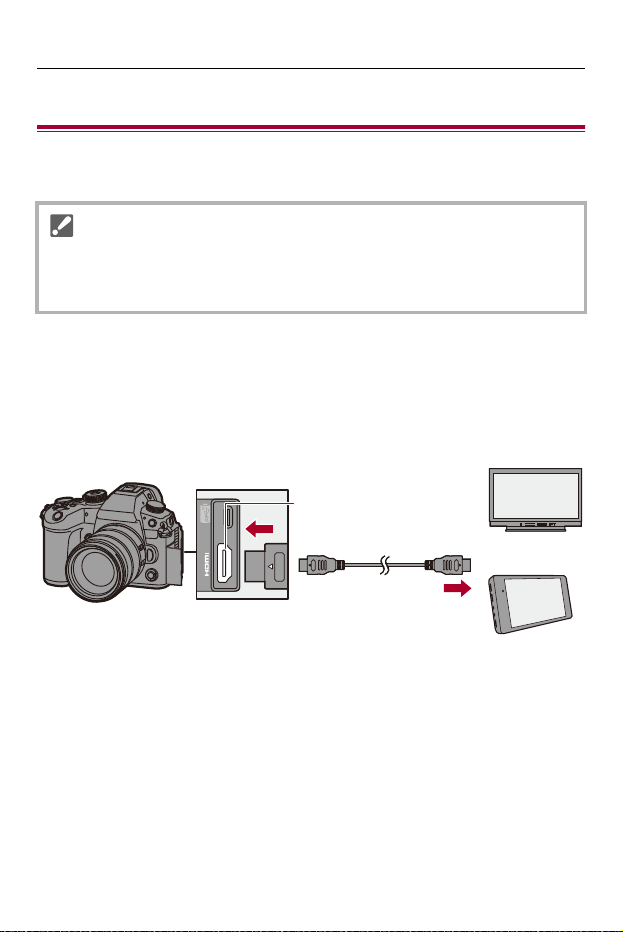
HDMI Output (Video) – Connecting HDMI Devices
458
Connecting HDMI Devices
≥Attaching the Cable Holder: 459
Getting started:
• Turn off the camera and the external monitor/external recorder.
Connect the camera and an external monitor or external
recorder with a commercially available HDMI cable.
(A) HDMI socket (Type A)
(B) External monitor
(C) External recorder
• Use an Ultra High Speed HDMI cable (Type A–Type A plug, up to 1.5 m (4.9 feet)
long).
• Check the direction of the terminals and plug in/out straight holding onto the plug.
(Inserting at an angle can deform the terminal and cause malfunction.)
• Do not connect the cable to the wrong terminals. This may cause a malfunction.
(B)
(C)
(A)
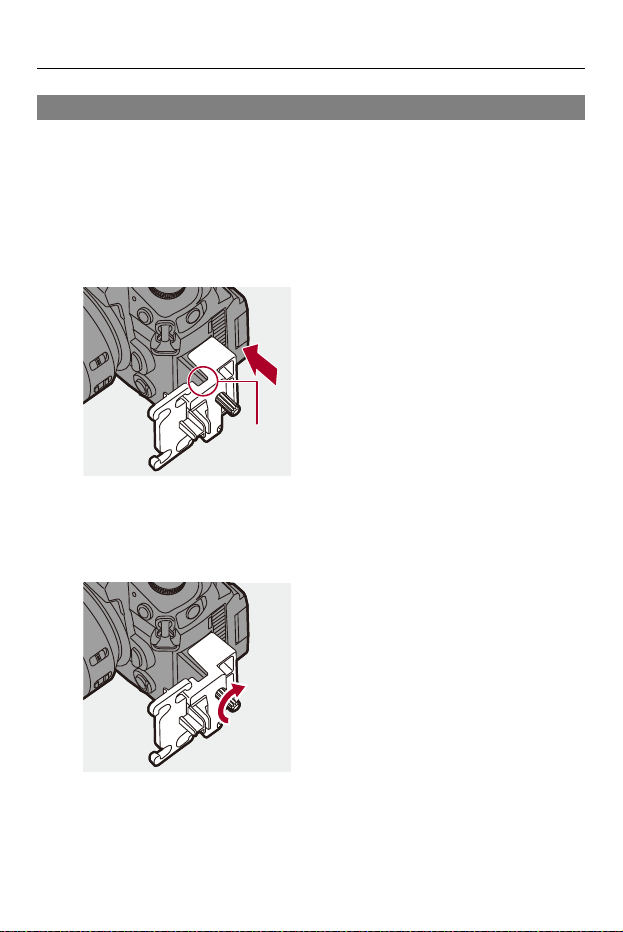
HDMI Output (Video) – Connecting HDMI Devices
459
Attaching the Cable Holder
Use of the supplied cable holder prevents detachment of the cable and
damage to the terminals.
•
Put the camera on a stable surface to perform this task.
1
Open the door of the terminal section and slide the door
into the part marked (D).
2
Loosely mount the cable holder to the mount on the
camera, and then rotate the screws in the direction of
the arrows to secure the cable holder. (E)
(D)
(E)
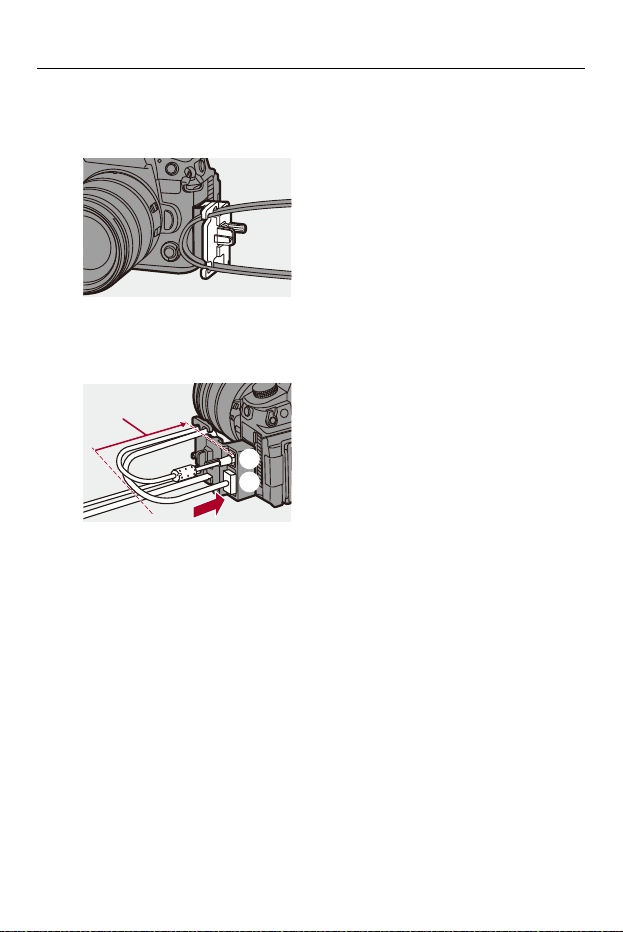
HDMI Output (Video) – Connecting HDMI Devices
460
3
Fit the USB connection cable and the HDMI cable to the
clamp on the cable holder.
4
Connect the USB connection cable to the USB port (F).
5
Connect the HDMI cable to the HDMI socket (G).
(H) Leave some slack so that this section has a length of at least 10 cm
(0.33 feet).
Removing the cable holder
To remove the cable holder, follow the steps for attaching it in the reverse
order.
(H)
(F)
(G)
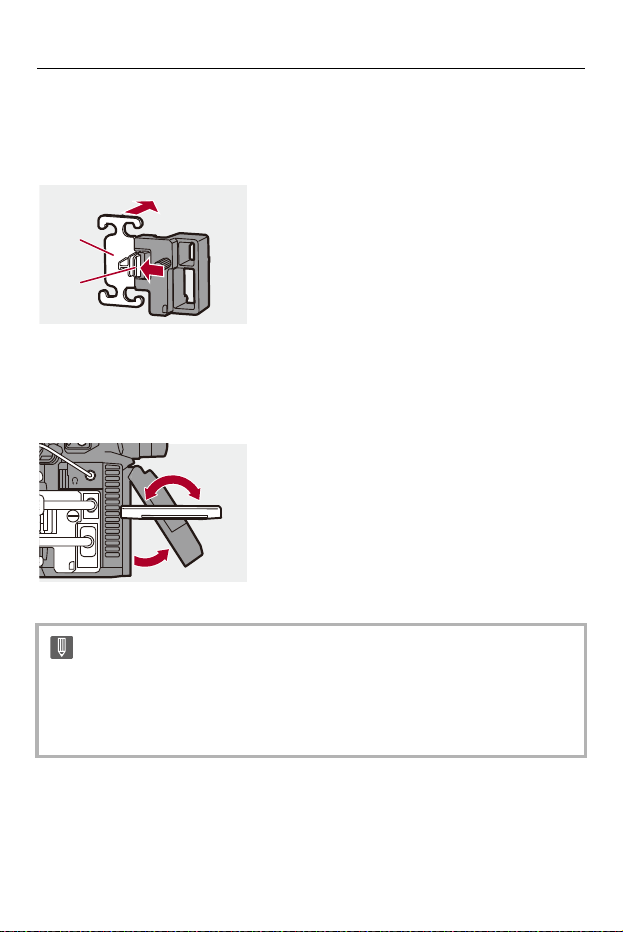
HDMI Output (Video) – Connecting HDMI Devices
461
Removing the clamp
You can remove the clamp on the cable holder.
While pushing (I), slide the clamp portion (J) of the cable holder to remove it.
Adjusting the Monitor Angle
You can adjust the angle of the monitor while it is tilted (ÎTilt: 71) by
rotating it, without interfering with the connection cables.
• Do not use any other USB connection cables except the supplied one.
• We recommend using an HDMI cable with a thickness diameter of 6.5 mm
(0.26 inch) or less.
• It may not be possible to attach HDMI cables of certain shapes.
(I)
(J)
HDMI Output (Video) – HDMI Output Image Quality
462
HDMI Output Image Quality
≥Images Output via HDMI: 462
≥Settings for Down-Converting: 465
Images Output via HDMI
The images output via HDMI during recording differ depending on the
recording mode.
[ ] Mode
Aspect ratio, resolution, and frame rate output is according to the [Rec
Quality] settings in the [Video] ([Image Format]) menu. Resolution and
frame rate can be down-converted for output according to the application.
The YUV and bit value are output with YUV changed to 4:2:2 as shown
below.
If the connected device is not compatible with the output system, output
changes to match the connected device.
Recording to card HDMI output
4:2:2 10 bit 4:2:2 10 bit
4:2:0 10 bit 4:2:2 10 bit
4:2:0 8 bit 4:2:2 8 bit
HDMI Output (Video) – HDMI Output Image Quality
463
Resolution, frame rate
• Resolution and frame rate output is according to the following menu combinations:
– [Rec Quality] in the [Video] ([Image Format]) menu.
– [Down Convert] in [HDMI Rec Output] in the [Custom] ([IN/OUT]) menu.
• Video with a resolution exceeding 4K is output as C4K/4K resolution.
• When set to a [Rec Quality] for high frame rate video, the resolution and frame rate
may be down-converted for output.
• For details (ÎImage Quality When Outputting via HDMI: 466)
[iA]/[P]/[A]/[S]/[M] Mode
Output is the same as [ ] mode during video recording.
Output is with a 16:9 aspect ratio during recording standby. Resolution,
frame rate, YUV, and bit value output matches the connected device.
•
When set to a [Rec Quality] other than 16:9 or 17:9, bands are added to the
images and they are output with a 16:9 aspect ratio.
• When set to any [Aspect Ratio] other than 16:9, bands are added to the images
and they are output with a 16:9 aspect ratio.

HDMI Output (Video) – HDMI Output Image Quality
464
Notice Regarding HDMI Output
• It may take some time for the output method to change.
• When you use the HDMI output during recording, the image may be displayed with a
time lag.
• Beep sounds, AF beep, and electronic shutter sounds are muted during HDMI
output.
• When you check the image and audio from the TV connected to the camera, the
microphone of the camera may pick up the sound from the speakers of the TV,
producing an abnormal sound (audio feedback).
If this occurs, move the camera away from the TV or lower the volume on the TV.
• Certain setting screens are not output via HDMI.
• For information about the high temperature display (ÎFor information about
the high temperature display: 130)
HDMI Output (Video) – HDMI Output Image Quality
465
Settings for Down-Converting
Make settings for the down-conversion of resolution for HDMI output in the
[ ] mode.
¨ [ ] ¨ [ ] ¨ [HDMI Rec Output] ¨ Select [Down
Convert]
[AUTO]
Outputs by down-converting to match the connected device.
[C4K/4K]
Outputs by down-converting resolution to C4K/4K.
[1080p]
Down-converts resolution to FHD (1080), and outputs as progressive.
[1080i]
Down-converts resolution to FHD (1080), and outputs as interlaced.
[OFF]
Outputs at the resolution and recording frame rate of the [Rec Quality].
• The items you can select depend on the [System Frequency] setting.
• When set to a [Rec Quality] that is for high frame rate video with a resolution of
4K or more, the resolution and frame rate may be down-converted for output.
• If down-converting, AF may take longer than usual for focusing, and the
performance of continuous focus tracking may deteriorate.
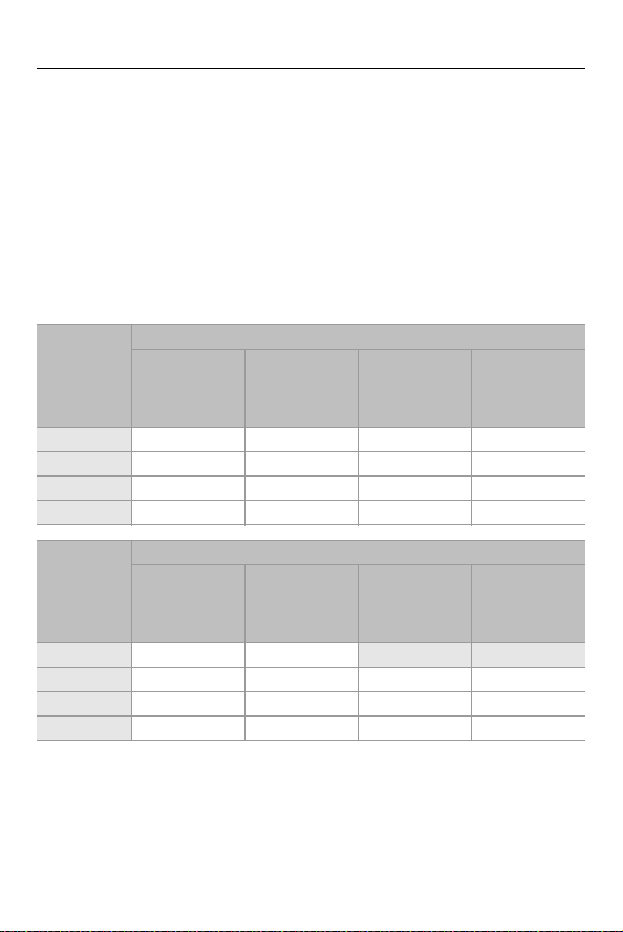
HDMI Output (Video) – HDMI Output Image Quality
466
Image Quality When Outputting via HDMI
Output is with the resolution and frame rate according to the combinations
of the [Rec Quality] and [Down Convert] settings.
•
When [Down Convert] is set to [AUTO], the output matches the connected device.
The maximum resolution and frame rate output when [AUTO] is set are the same as
when [OFF] is selected.
• There is no HDMI output when setting combinations result in a [—] in the below
tables.
[System Frequency]: [59.94Hz (NTSC)]
[Down
Convert]
Resolution and recording frame rate of the [Rec Quality]
5.8K/29.97p
4K/29.97p
5.8K/23.98p
4.4K/47.95p
4K/47.95p
4K/23.98p
4.4K/59.94p
4K/59.94p
5.7K/59.94p
C4K/59.94p
[C4K/4K] 4K/29.97p 4K/23.98p 4K/59.94p
*2
C4K/59.94p
*2, 4
[1080p] 1080/29.97p
*1
1080/23.98p 1080/59.94p
*2
1080/59.94p
*2
[1080i] 1080/59.94i — 1080/59.94i 1080/59.94i
[OFF] 4K/29.97p 4K/23.98p 4K/59.94p C4K/59.94p
[Down
Convert]
Resolution and recording frame rate of the [Rec Quality]
5.7K/47.95p
5.7K/23.98p
C4K/47.95p
C4K/23.98p
5.7K/29.97p
C4K/29.97p
C4K/119.88p 4K/119.88p
[C4K/4K] C4K/23.98p
*4
C4K/29.97p
*4
[1080p] 1080/23.98p 1080/29.97p
*1
1080/59.94p
*2
1080/59.94p
*2
[1080i] — 1080/59.94i 1080/59.94i 1080/59.94i
[OFF] C4K/23.98p C4K/29.97p 1080/59.94p 1080/59.94p
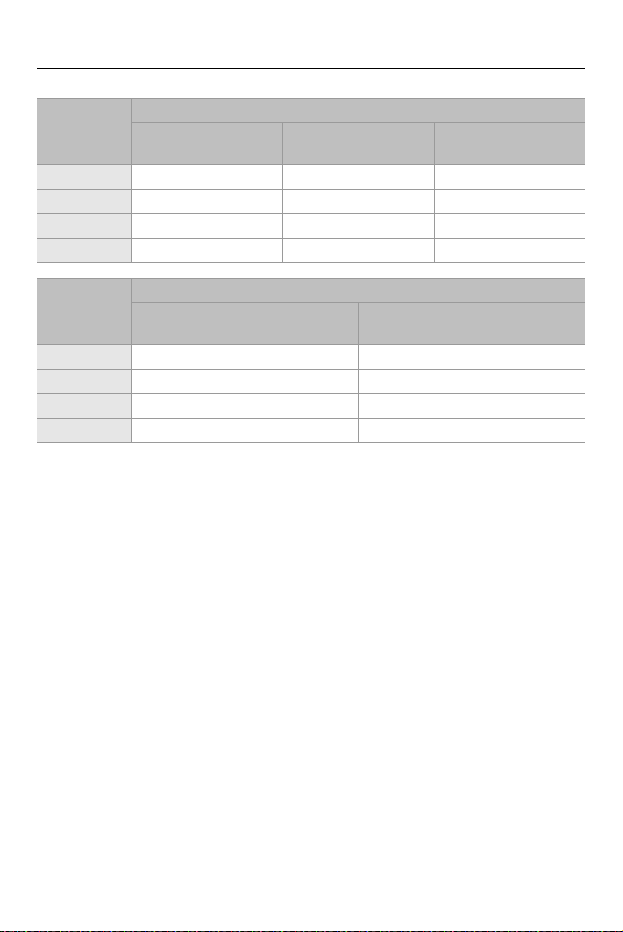
HDMI Output (Video) – HDMI Output Image Quality
467
*1 Output is 59.94p if the connected device is not compatible with 29.97p.
*2 Output is 29.97p if the connected device is not compatible with 59.94p.
*3 Output is 59.94p or 29.97p if the connected device is not compatible with 119.88p.
*4 Output is 4K if the connected device is not compatible with C4K.
[Down
Convert]
Resolution and recording frame rate of the [Rec Quality]
1080/239.76p
1080/119.88p
1080/59.94p 1080/59.94i
[C4K/4K] ———
[1080p] 1080/119.88p
*3
1080/59.94p
*2
—
[1080i] 1080/59.94i 1080/59.94i 1080/59.94i
[OFF] 1080/119.88p 1080/59.94p 1080/59.94i
[Down
Convert]
Resolution and recording frame rate of the [Rec Quality]
1080/47.95p
1080/23.98p
1080/29.97p
[C4K/4K] ——
[1080p] 1080/23.98p 1080/29.97p
*1
[1080i] — 1080/59.94i
[OFF] 1080/23.98p 1080/29.97p
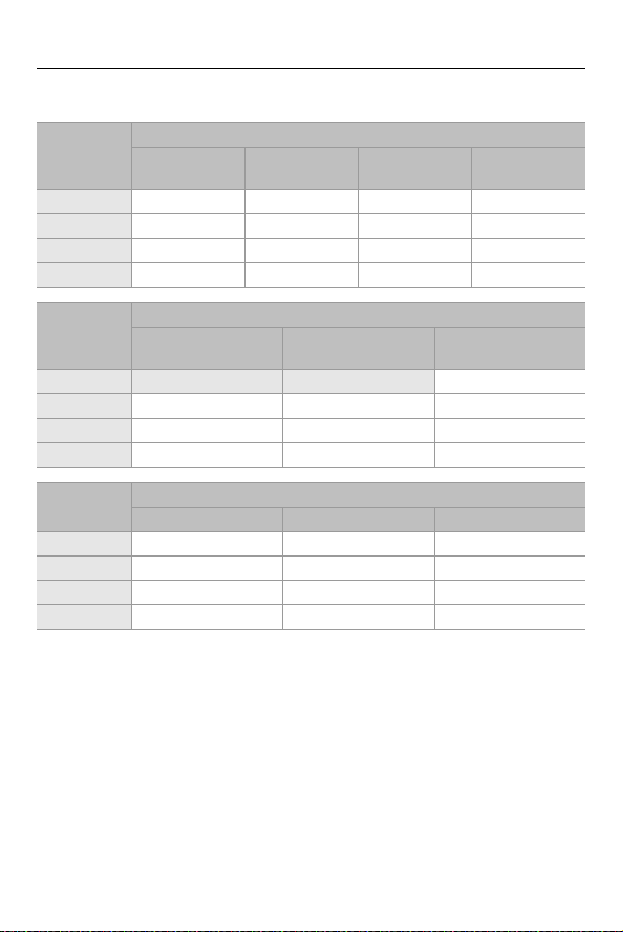
HDMI Output (Video) – HDMI Output Image Quality
468
[System Frequency]: [50.00Hz (PAL)]
*1 Output is 50.00p if the connected device is not compatible with 25.00p.
*2 Output is 25.00p if the connected device is not compatible with 50.00p.
*3 Output is 50.00p or 25.00p if the connected device is not compatible with 100.00p.
*4 Output is 4K if the connected device is not compatible with C4K.
[Down
Convert]
Resolution and recording frame rate of the [Rec Quality]
5.8K/25.00p
4K/25.00p
4.4K/50.00p
4K/50.00p
5.7K/50.00p
C4K/50.00p
5.7K/25.00p
C4K/25.00p
[C4K/4K] 4K/25.00p 4K/50.00p
*2
C4K/50.00p
*2, 4
C4K/25.00p
*4
[1080p] 1080/25.00p
*1
1080/50.00p
*2
1080/50.00p
*2
1080/25.00p
*1
[1080i] 1080/50.00i 1080/50.00i 1080/50.00i 1080/50.00i
[OFF] 4K/25.00p 4K/50.00p C4K/50.00p C4K/25.00p
[Down
Convert]
Resolution and recording frame rate of the [Rec Quality]
C4K/100.00p 4K/100.00p
1080/200.00p
1080/100.00p
[C4K/4K] —
[1080p] 1080/50.00p
*2
1080/50.00p
*2
1080/100.00p
*3
[1080i] 1080/50.00i 1080/50.00i 1080/50.00i
[OFF] 1080/50.00p 1080/50.00p 1080/100.00p
[Down
Convert]
Resolution and recording frame rate of the [Rec Quality]
1080/50.00p 1080/50.00i 1080/25.00p
[C4K/4K] ———
[1080p] 1080/50.00p
*2
— 1080/25.00p
*1
[1080i] 1080/50.00i 1080/50.00i 1080/50.00i
[OFF] 1080/50.00p 1080/50.00i 1080/25.00p

HDMI Output (Video) – HDMI Output Image Quality
469
[System Frequency]: [24.00Hz (CINEMA)]
*1 Output is 4K if the connected device is not compatible with C4K.
*2 Output is 24.00p if the connected device is not compatible with 120.00p.
[Down
Convert]
Resolution and recording frame rate of the [Rec Quality]
5.8K/24.00p
4.4K/48.00p
5.7K/48.00p
5.7K/24.00p
C4K/24.00p
C4K/120.00p
[C4K/4K] 4K/24.00p C4K/24.00p
*1
[1080p] 1080/24.00p 1080/24.00p 1080/24.00p
[OFF] 4K/24.00p C4K/24.00p 1080/24.00p
[Down
Convert]
Resolution and recording frame rate of the [Rec Quality]
4K/120.00p 4K/24.00p
[C4K/4K] 4K/24.00p
[1080p] 1080/24.00p 1080/24.00p
[OFF] 1080/24.00p 4K/24.00p
[Down
Convert]
Resolution and recording frame rate of the [Rec Quality]
1080/120.00p 1080/24.00p
[C4K/4K] ——
[1080p] 1080/120.00p
*2
1080/24.00p
[OFF] 1080/120.00p 1080/24.00p

HDMI Output (Video) – HDMI Output Settings
471
Outputting the Camera Information Display via HDMI
Output the camera information display to an external device connected by
HDMI.
¨ [ ] ¨ [ ] ¨ [HDMI Rec Output] ¨ Select [Info
Display]
Settings: [ON]/[OFF]
•
There are the following restrictions when connected via HDMI and [Info Display]
is set to [ON]:
– Information is not displayed on the recording screen of the camera.
– [Touch Tab] is not available.
• There are the following restrictions when connected via HDMI and [Info Display]
is set to [ON] and then a Wi-Fi connection with a smartphone or tethered
recording is attempted:
– Information is not displayed on the recording screen of the camera.
– Some information is not displayed on the recording screens output to external
devices.
– [Sound Rec Level Disp.]/[Touch Tab]/[Histogram]/[Luminance Spot Meter]/
[WFM/Vector Scope] are not available.

HDMI Output (Video) – HDMI Output Settings
472
Outputting Control Information to an External
Recorder
Recording start and stop control information is output to an external
recorder connected by HDMI.
¨ [ ] ¨ [ ] ¨ [HDMI Rec Output] ¨ Select [HDMI
Recording Control]
Settings: [ON]/[OFF]
•
[HDMI Recording Control] can be set when [HDMI Time Code Output] is set to [ON]
in [ ] mode. (Î[HDMI Time Code Output]: 388)
• Control information is output when pressing the video rec. button or shutter button,
even if the video cannot be recorded (such as when there is no card inserted into the
camera).
• Only compatible external devices can be controlled.
HDMI Output (Video) – HDMI Output Settings
473
Outputting Audio via HDMI
Output audio to an external device connected by HDMI.
¨ [ ] ¨ [ ] ¨ [HDMI Rec Output] ¨ Select [Sound
Output (HDMI)]
Settings: [ON]/[OFF]
Outputting the Enlarged Live Display (Video) via
HDMI
Output the enlarged screens from [MF Assist] or [Enlarged Live
Display(Video)] to an external device connected by HDMI.
¨ [ ] ¨ [ ] ¨ [HDMI Rec Output] ¨ Select [Enlarged
Live Display]
[MODE1]
Enlarged display of live view is output during standby for video recording.
• Resolution and frame rate output are the same as those set at [Down Convert].
[MODE2]
Enlarged display of live view is output during standby for video recording and during
video recording.
• The resolution and frame rate of the video output via HDMI will be FHD/60p or less.
• When [Down Convert] is set to [C4K/4K] or [OFF], [MODE2] is not available.
[OFF]
Enlarged display of live view is not output.
• When the monitor/viewfinder of the camera is displaying the enlarged display, the
camera information display is not output via HDMI.

474
Playing Back and Editing of Images
This chapter explains how to play back and delete pictures and videos.
•
Images recorded on devices other than this one may not be played back or edited
correctly on this camera.
≥Playing Back Pictures: 475
≥Playing Back Videos: 477
≥Switching the Display Mode: 486
≥Group Images: 492
≥Deleting Images: 494
≥[RAW Processing]: 496
≥[Playback] Menu: 504
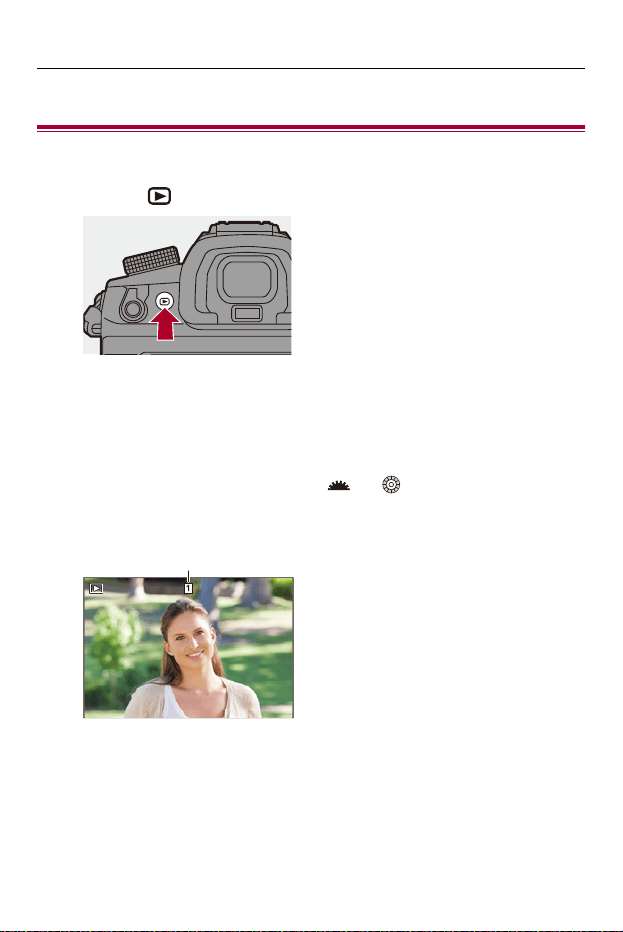
Playing Back and Editing of Images – Playing Back Pictures
475
Playing Back Pictures
1
Display the playback screen.
≥Press [ ].
2
Select a picture.
≥Select the pictures by pressing 21.
≥You can move continuously through images by pressing and
holding 21.
≥You can also select by rotating or .
≥You can also move through images by dragging the screen
horizontally.
(A) Card slot
(A)
1/999
1/999
1/999
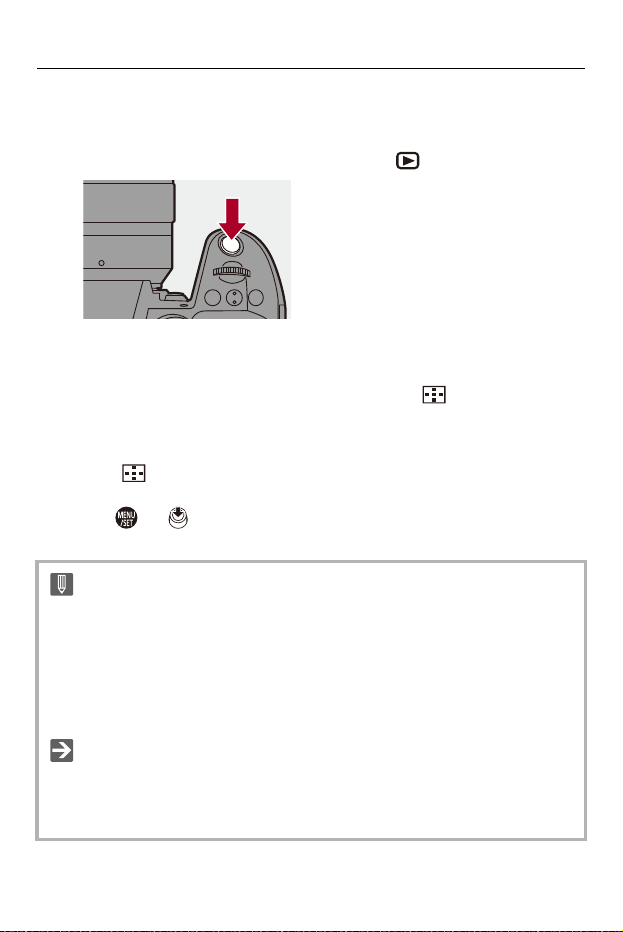
Playing Back and Editing of Images – Playing Back Pictures
476
3
Stop playback.
≥Press the shutter button halfway.
≥You can also stop playback by pressing [ ].
Switching the Card to Display
You can switch the card displayed just by pressing [ ] during playback.
•
You can also perform the same operation by pressing the Fn button assigned with
[Card Slot Change]. (ÎFn Buttons: 517)
1 Press [ ].
2 Press 34 to select [Card Slot 1(CFexpress)] or [Card Slot 2(SD)] and then
press or .
• This camera complies with the “Design rule for Camera File system” (DCF) and
“Exchangeable Image File Format” (Exif) standards established by “Japan
Electronics and Information Technology Industries Association” (JEITA).
The camera cannot play back files that do not comply with the DCF standard.
Exif is a file format for pictures which allows recording information, etc. to be
added.
• You can assign switching of the recording screen/playback screen to an Fn
button:
(Î[Rec / Playback Switch]: 526, [Rec / Playback Switch]: 529)
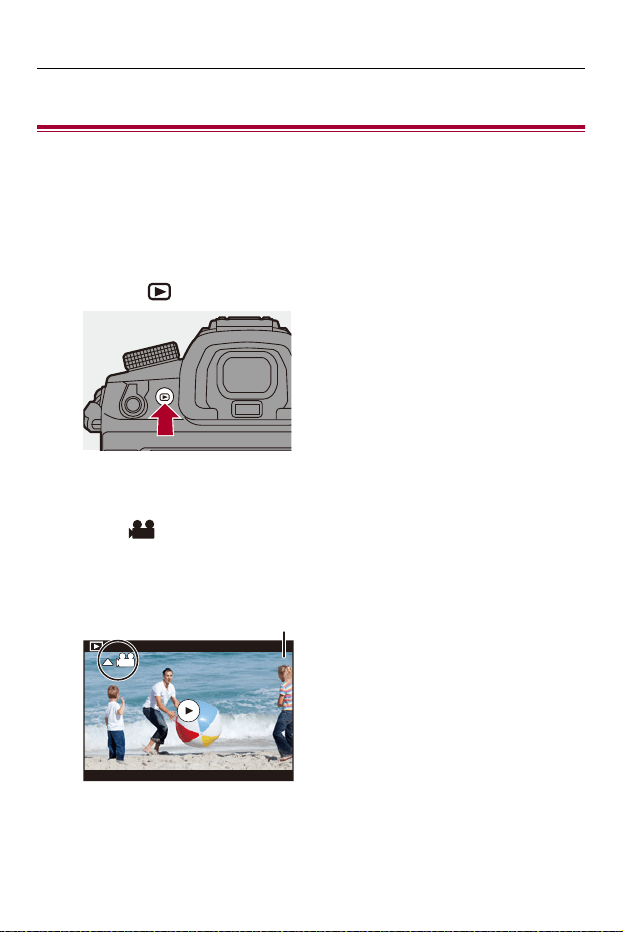
Playing Back and Editing of Images – Playing Back Videos
477
Playing Back Videos
≥Video Repeat Playback: 481
≥Extracting a Picture: 483
≥[Video Divide]: 484
1
Display the playback screen.
≥Press [ ].
2
Select a video.
• For information about how to select images (ÎPlaying Back Pictures: 475)
• The [ ] video icon is displayed for a video.
• The video recording time is displayed on the screen.
Example) When 8 minutes 30 seconds: 8m30s
• h: hour, m: minute, s: second
(A) Video recording time
8m30s
8m30s
8m30s
(A)
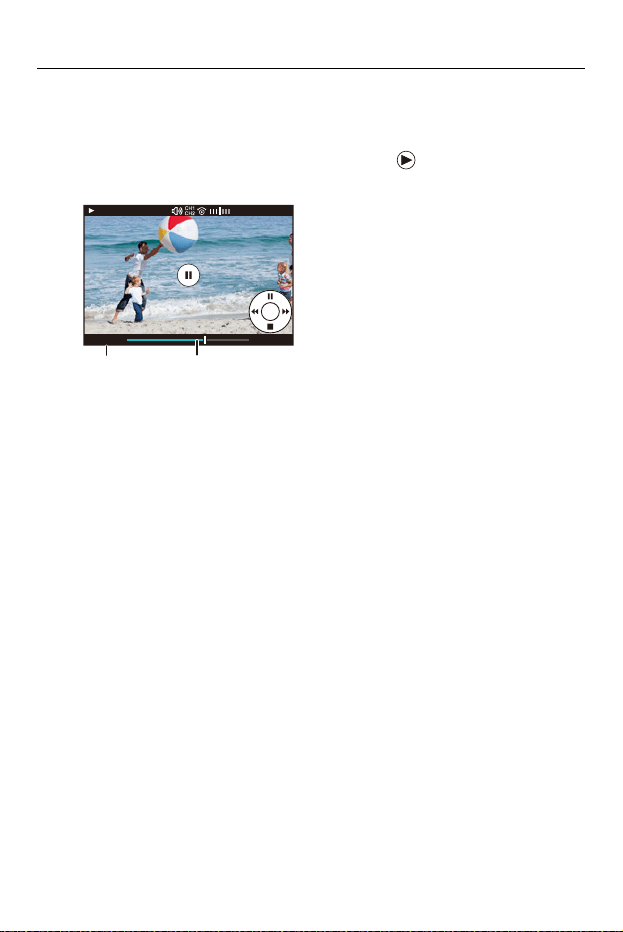
Playing Back and Editing of Images – Playing Back Videos
478
3
Play back the video.
≥Press 3.
≥You can also start playback by touching [ ] at the center of the
screen.
(B) Elapsed playback time
(C) Playback bar
4
Stop playback.
≥Press 4.
00:05:50
00:05:50
00:05:50
00:08:30
00:08:30
00:08:30
(B) (C)
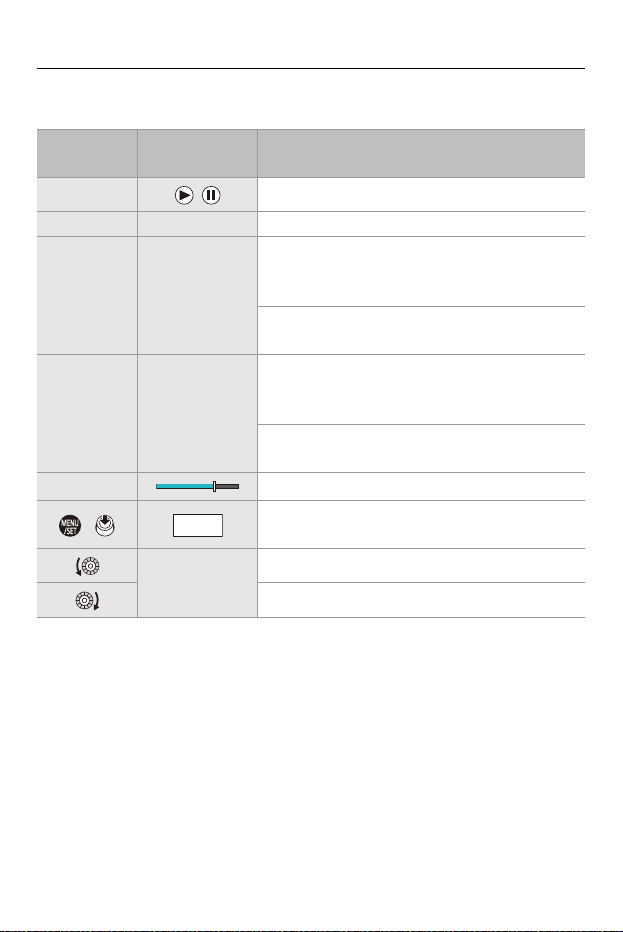
Playing Back and Editing of Images – Playing Back Videos
479
Operations During Video Playback
Button
operations
Touch
operations
Description of operation
3
/
Plays/pauses.
4 — Stops.
2 —
Performs fast-rewind playback.
• If you press 2 again, the fast-rewind speed
increases.
Performs frame-by-frame rewinding (while
paused).
1 —
Performs fast-forward playback.
• If you press 1 again, the fast-forward speed
increases.
Performs frame-by-frame forwarding (while
paused).
— Selects the frame to display.
/
Extracts a picture (while paused). (ÎExtracting a
Picture: 483)
—
Reduces the volume.
Increases the volume.
6DYH

Playing Back and Editing of Images – Playing Back Videos
480
• The camera can play back videos in MP4, MOV, and Apple ProRes formats.
• The videos in the PRIVATE folder that were recorded with [Video File Name] set
to [CINE Style] are also played back.
• Video recorded with a [System Frequency] setting that is different to the current
one cannot be played back.
• If the reading speed of the card is slow, playback may pause or it may not be
possible to play back smoothly.
• You can set the operation for when playback of video finishes:
(Î[Behavior After Video Playback]: 508)
• You can assign switching of the recording screen/playback screen to an Fn
button:
(Î[Rec / Playback Switch]: 526, [Rec / Playback Switch]: 529)
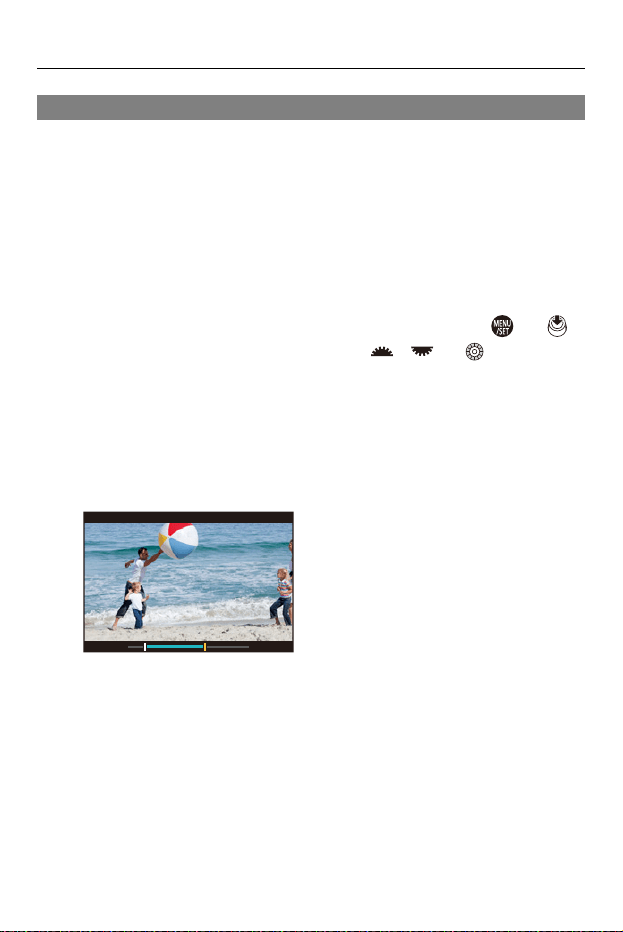
Playing Back and Editing of Images – Playing Back Videos
481
Video Repeat Playback
You can play back a part of a video repeatedly.
1
Display the screen for setting the part to repeat.
≥Press [Q] while paused.
≥The screen for setting the part to repeat is also displayed when you
touch [Repeat Playback] while paused.
2
Set the position to start the repeat.
≥Press 21 to select the start position and then press or .
≥Selection is also possible by rotating , or .
≥You can also select the start position by touching the playback bar.
3
Set the position to end the repeat.
≥Set using the same procedure as
2
.
•
The position cannot be set if the position to start the repeat and the position to
end the repeat are too close.
00:05:50
00:05:50
00:05:50
00:08:30
00:08:30
00:08:30
Playing Back and Editing of Images – Playing Back Videos
482
4
Start playback.
• The operations during repeat playback are the same as “Operations During
Video Playback”. (ÎOperations During Video Playback: 479)
• End repeat playback by pressing 4 to stop playback or by pressing [Q] while
paused.
• Repeat playback is not possible if the recording time is short.
• The positions set for the repeated part may shift from the position where the
video is paused.
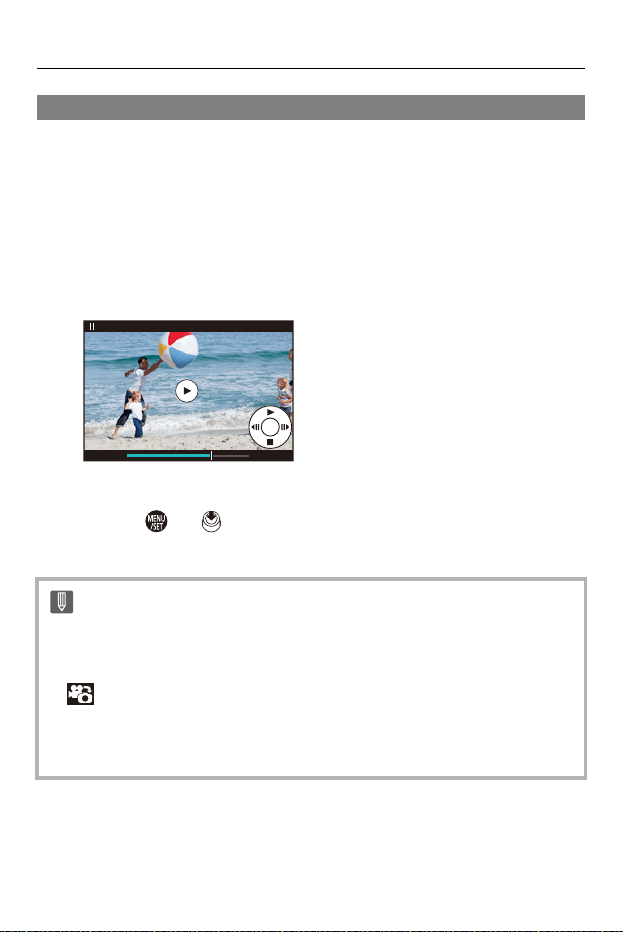
Playing Back and Editing of Images – Playing Back Videos
483
Extracting a Picture
Extract one frame of a video and save it as a JPEG image.
1
Pause playback at the position you wish to extract a
picture.
≥Press 3.
•
To fine-adjust the position, press 21 (rewind frame-by-frame or forward
frame-by-frame).
2
Save the picture.
≥Press or .
≥You can also save the picture by touching [Save].
•
The picture created from the video is saved with a [FINE] picture quality.
The picture is saved with a size according to the resolution of the [Rec Quality].
• The image quality of a picture created from a video may be coarser than normal.
• [ ] is displayed on the detailed information display screen for a picture
created from a video.
• It is not possible to save pictures from video that was recorded when [Rec. File
Format] was [Apple ProRes].
00:06:10
00:06:10
00:06:10 00:08:30
00:08:30
00:08:30
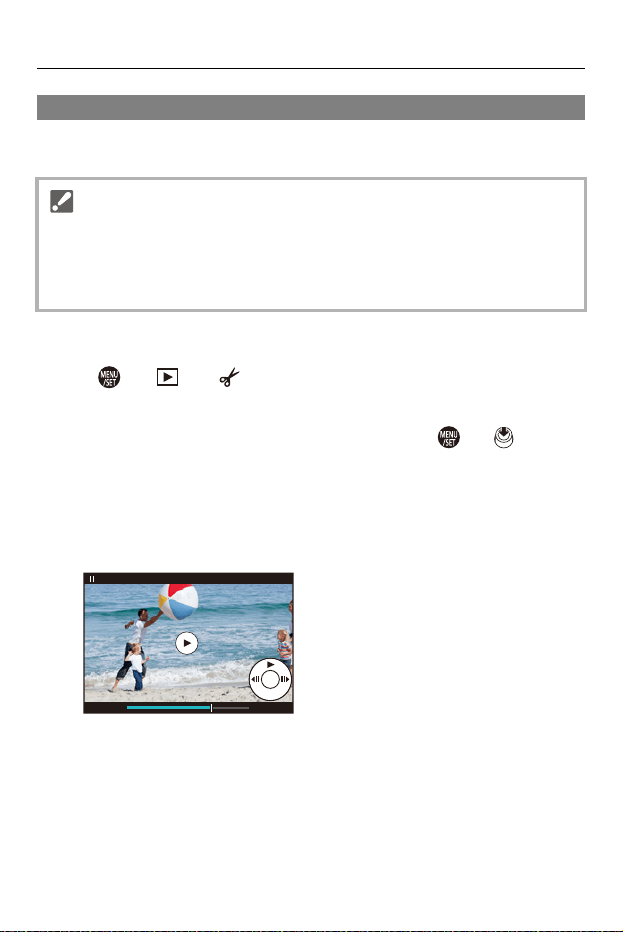
Playing Back and Editing of Images – Playing Back Videos
484
[Video Divide]
Divide a recorded video into two.
1
Select [Video Divide].
≥ ¨ [ ] ¨ [ ] ¨ [Video Divide]
2
Select and play the image.
≥Press 21 to select an image and then press or .
3
Pause playback at the position you wish to divide.
≥Press 3.
•
To fine-adjust the position, press 21 (frame-by-frame rewind or
frame-by-frame forward).
• Images cannot be returned to their original state once they have been divided.
Carefully confirm the images before performing the divide operation.
• Do not remove the card or battery from the camera during the divide process.
The images may be lost.
00:06:1000:06:1000:06:10 00:08:3000:08:3000:08:30
Playing Back and Editing of Images – Playing Back Videos
485
4
Divide the video.
≥Press or .
≥You can also divide the video by touching [Divide].
•
It is not possible to divide video that was recorded when [Rec. File Format] was
[Apple ProRes].
• Dividing the video at a point close to the start or end may not be possible.
• Videos with a short recording time cannot be divided.
• [Video Divide] cannot be used on images recorded using [Segmented File
Recording].

Playing Back and Editing of Images – Switching the Display Mode
486
Switching the Display Mode
≥Enlarged Display: 487
≥Thumbnail Screen: 489
≥Calendar Playback: 491
You can use features to do things like enlarge recorded images for display
and switch to thumbnail display to display multiple images at once
(multi-playback).
You can also switch to calendar display to show images of a selected
recording date.
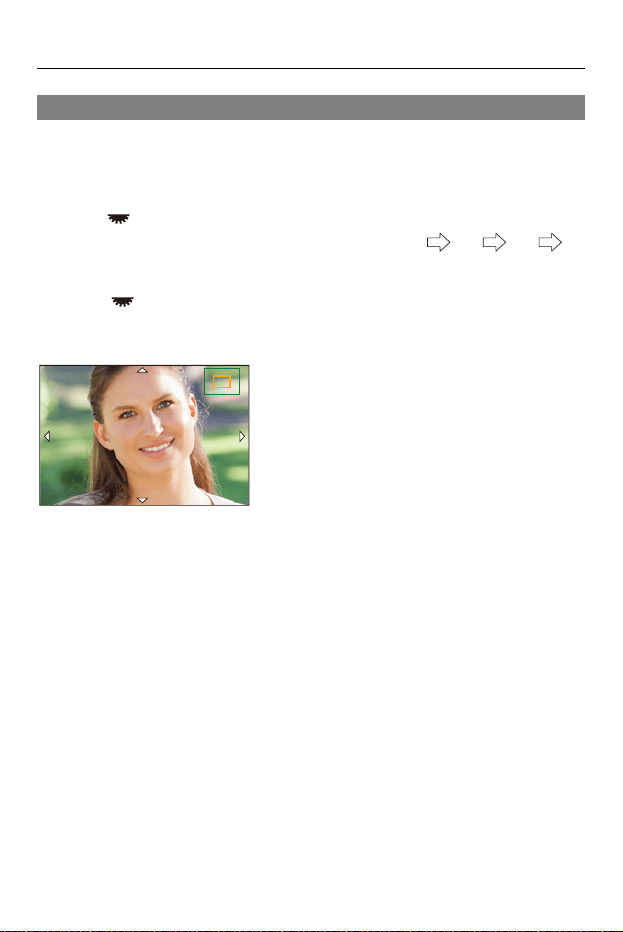
Playing Back and Editing of Images – Switching the Display Mode
487
Enlarged Display
Playback images can be displayed enlarged (Playback Zoom).
Enlarging the playback screen.
≥Rotate to the right.
≥The playback screen is enlarged in the order of 2× 4× 8×
16×.
•
Rotating to the left returns to the previous display size.
• Enlarged display to 16× is not possible with FHD video or with pictures extracted
from FHD video.
2.0X2.0X2.0X
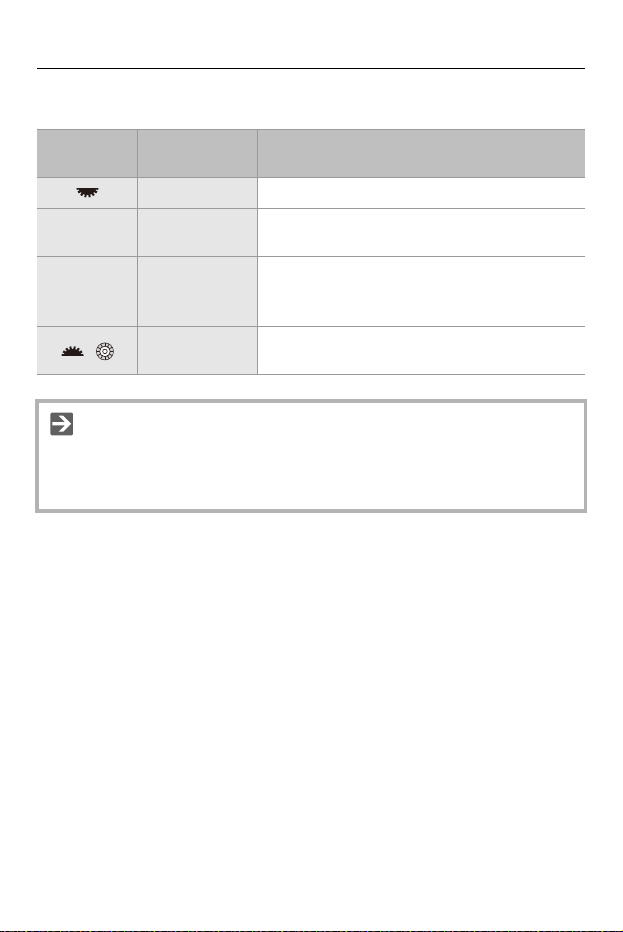
Playing Back and Editing of Images – Switching the Display Mode
488
Operations During Enlarged Display
Button
operations
Touch
operations
Description of operation
— Enlarges/reduces the screen.
—
Pinch out/
pinch in
Enlarges/reduces the screen in small steps.
3421 Drag
Moves the enlarged display position.
Positions can be moved to the diagonal
directions using the joystick.
/
—
Forwards or rewinds images while maintaining
the same zoom magnification and zoom position.
• You can display the point focused with AF. You can enlarge the display from that
point:
(Î[Magnify from AF Point]: 507)
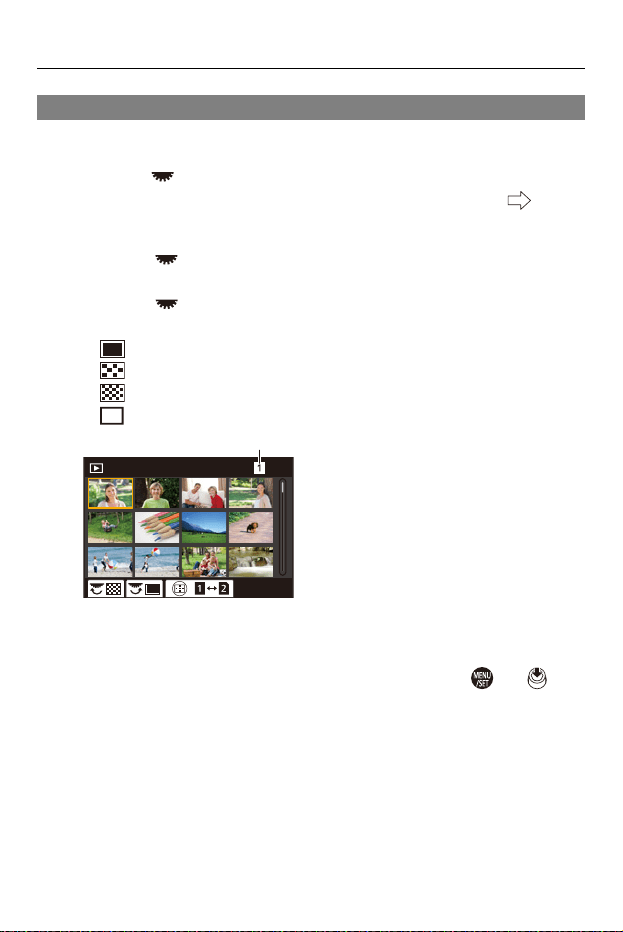
Playing Back and Editing of Images – Switching the Display Mode
489
Thumbnail Screen
1
Switch to thumbnail display.
≥Rotate to the left.
≥The display is switched in the order of 12-image screen
30-image screen.
•
Rotating to the left during 30-image screen display switches to calendar
display. (ÎCalendar Playback: 491)
• Rotating to the right returns to the previous display.
• You can also switch the display by touching an icon.
[ ]: 1-image screen
[ ]: 12-image screen
[ ]: 30-image screen
[ ]: Calendar (ÎCalendar Playback: 491)
(A) Card slot
2
Select an image.
≥Press 3421 to select an image and then press or .
CAL
1/999
(A)
Playing Back and Editing of Images – Switching the Display Mode
490
• When you press [ ] while a thumbnail is being displayed, you can switch to
the card being displayed.
• You can scroll the screen by dragging the thumbnail display up or down.
• Images indicated with [ ] cannot be played back.
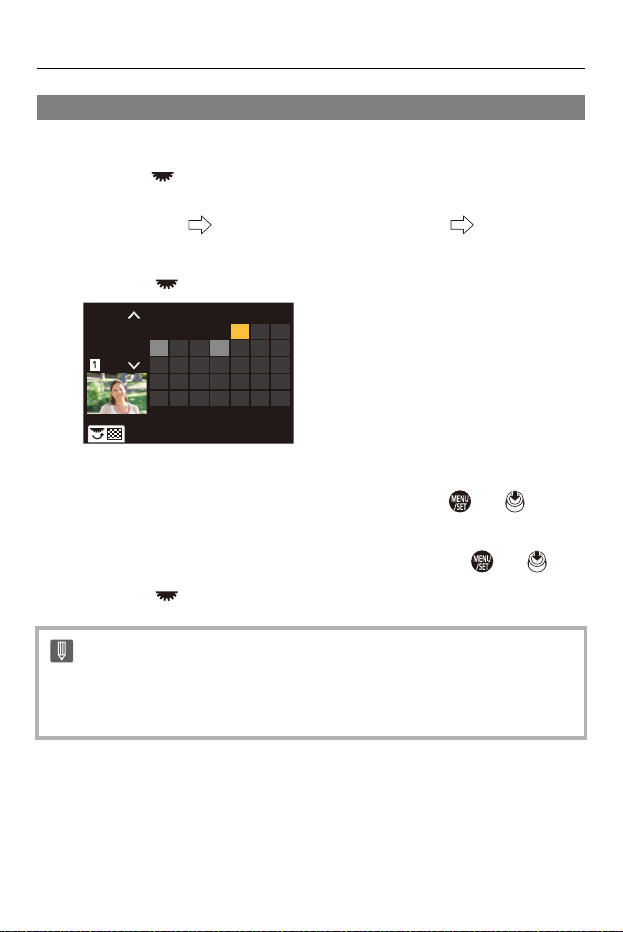
Playing Back and Editing of Images – Switching the Display Mode
491
Calendar Playback
1
Switch to calendar playback.
≥Rotate to the left.
≥The display is switched in the order of thumbnail screen
(12 images) Thumbnail screen (30 images) Calendar
playback.
• Rotating to the right returns to the previous display.
2
Select the recording date.
≥Press 3421 to select a date and then press or .
3
Select an image.
≥Press 3421 to select an image and then press or .
•
Rotating to the left returns to calendar playback.
• The card to display cannot be switched during calendar display.
• The range that the calendar can be displayed is January 2000 to December
2099.
32
1
10987654
17161514131211
2423222120
27
1918
SUN SATFRITHUWEDTUEMON
2625
2022
12
302928 31
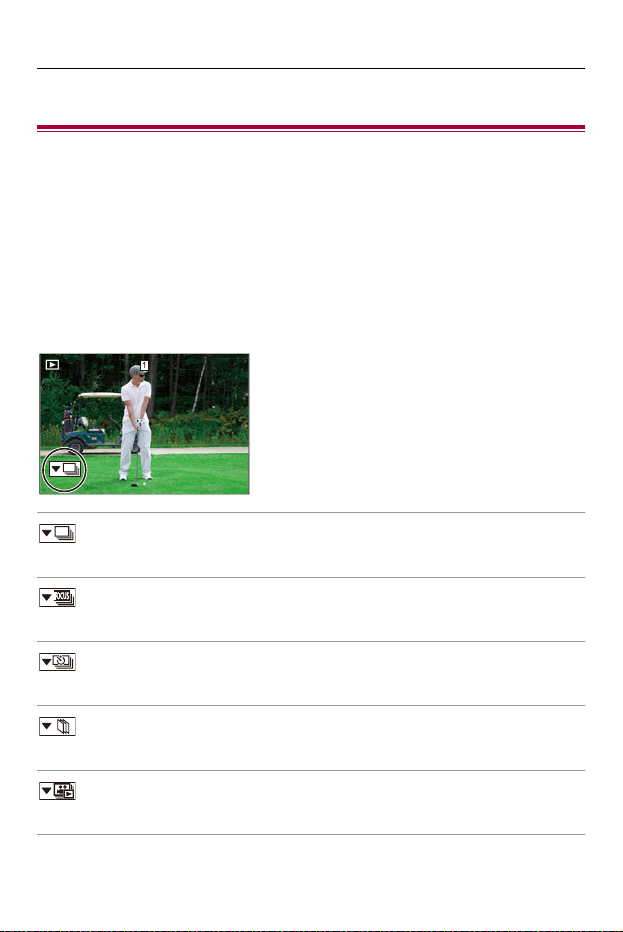
Playing Back and Editing of Images – Group Images
492
Group Images
Images recorded with Time Lapse Shot or Stop Motion Shooting are
handled as group images in the camera, and can be deleted and edited on
a group basis.
(For example, if you delete a group image, all images in the group are
deleted.)
You can also delete and edit each image in a group individually.
Images Handled as Group Images by the Camera
Group images recorded with SH burst recording.
Group images recorded with Focus Bracket.
Group images recorded with Time Lapse Shot.
Group images recorded with Stop Motion Shooting.
Group images recorded with [Segmented File Recording].
1/9991/9991/999
SLFSLFSLF

Playing Back and Editing of Images – Group Images
493
Playing and Editing the Images in a Group One by One
Operations such as displaying thumbnails and deleting images are
available with images in groups just as with normal playback.
1 Select the group image in the playback state. (ÎPlaying Back Pictures: 475)
2 Press 4 to display the images in the group.
• You can also perform the same operation by touching the group image icon.
3 Press 21 to select an image.
• To return to the normal playback screen, press 4 or touch [ ] again.
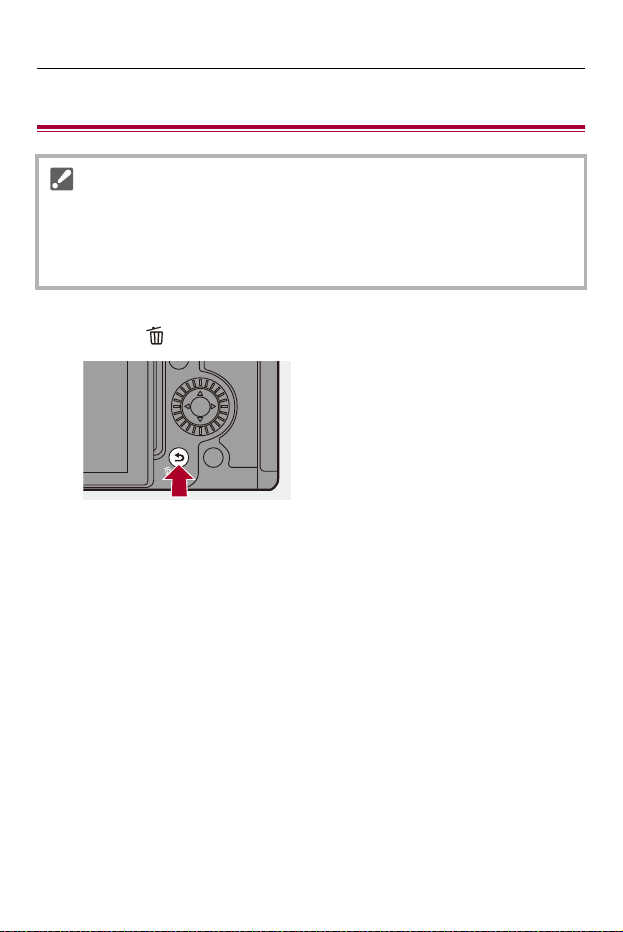
Playing Back and Editing of Images – Deleting Images
494
Deleting Images
1
Press [ ] in playback state.
• Images cannot be restored once they have been deleted. Carefully confirm the
images before deletion.
• You can only delete the images in the card of the selected card slot.
• If you delete a group image, all images in the group are deleted.
Playing Back and Editing of Images – Deleting Images
495
2
Press 34 to select the deletion method and then press
or .
[Delete Single]
Deletes the selected image.
[Delete Multi]
Selecting and deleting multiple images.
1 Press 3421 to select the image to delete and then press or .
• [ ] is displayed for the selected image.
• If you press or again, the selection is canceled.
• Up to 100 images can be selected.
2 Press [DISP.] to delete the selected image.
• To switch the card selected for deleting images, press [ ] and then select the
card slot.
• Depending on the number of images to be deleted, it may take some time to
delete them.
• You can set which of [Yes] and [No] is selected initially in the confirmation screen
when deleting:
(Î[Delete Confirmation]: 515)
• All images on the card can be deleted:
(Î[Delete All Images]: 515)
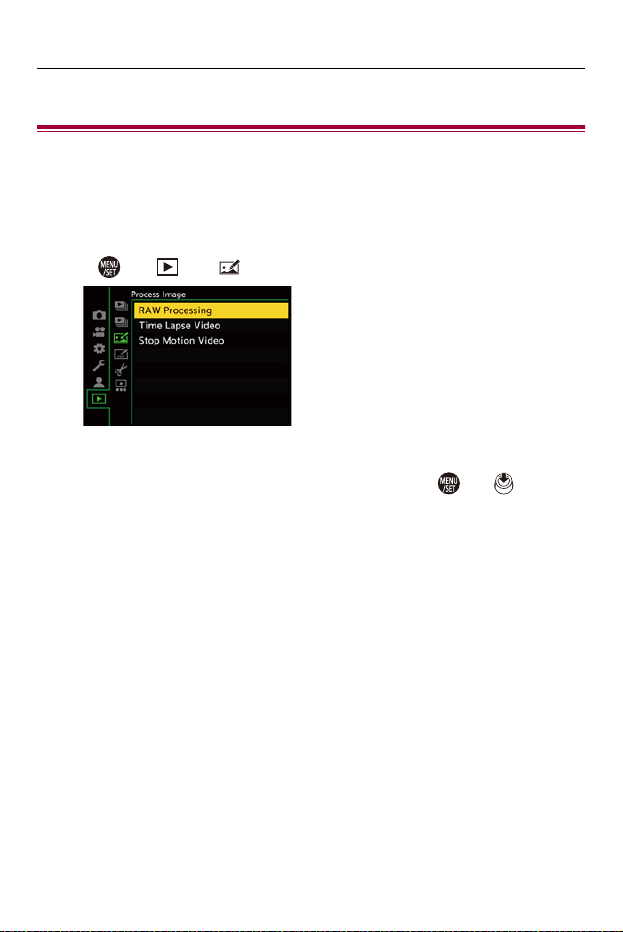
Playing Back and Editing of Images – [RAW Processing]
496
[RAW Processing]
This processes pictures taken in RAW format on the camera and saves
them in JPEG format.
1
Select [RAW Processing].
≥ ¨ [ ] ¨ [ ] ¨ [RAW Processing]
2
Select the RAW image.
≥Press 21 to select an image and then press or .
•
When group images are selected, press 4 and then select an image in the
group.
Press 4 again to return to the normal selection screen.
• The settings from the time of recording are reflected in displayed images.
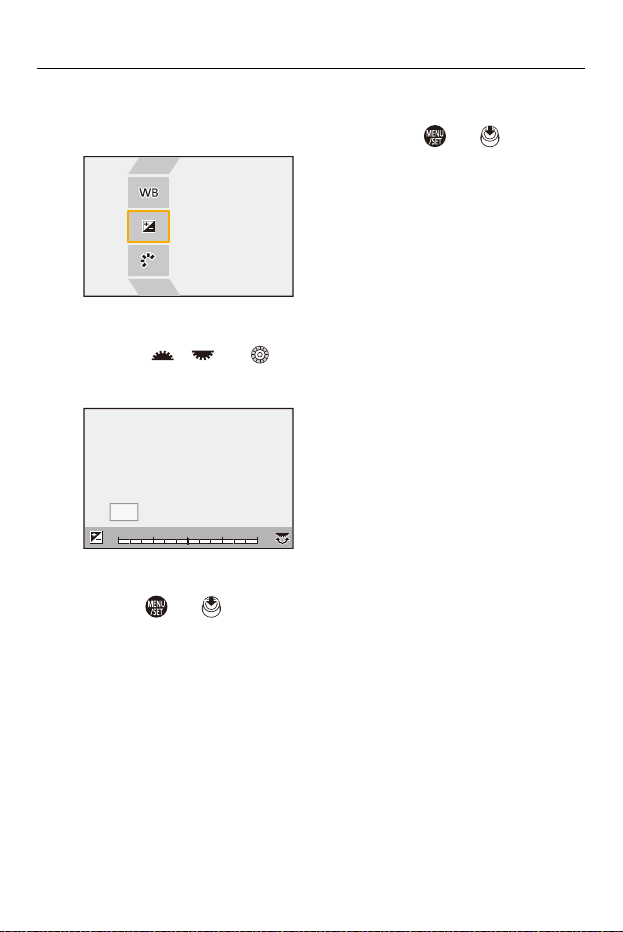
Playing Back and Editing of Images – [RAW Processing]
497
3
Select a setting item.
≥Press 34 to select an item and then press or .
4
Change the setting.
≥Rotate , , or .
•
The image can be enlarged/reduced by pinching out/pinching in the screen.
5
Confirm the setting.
≥Press or .
≥The screen of Step
3
reappears.
To set another item, repeat Steps
3
to
5
.
+1+1 +2+2
-
2
-
2
-
1
-
100
DISP.
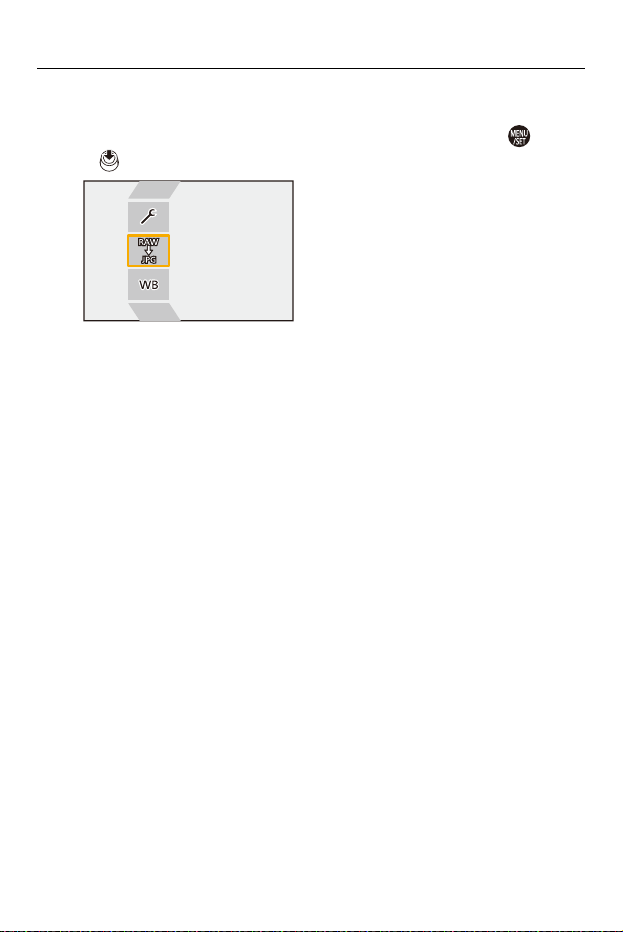
Playing Back and Editing of Images – [RAW Processing]
498
6
Save the image.
≥Press 34 to select [Begin Processing] and then press or
.
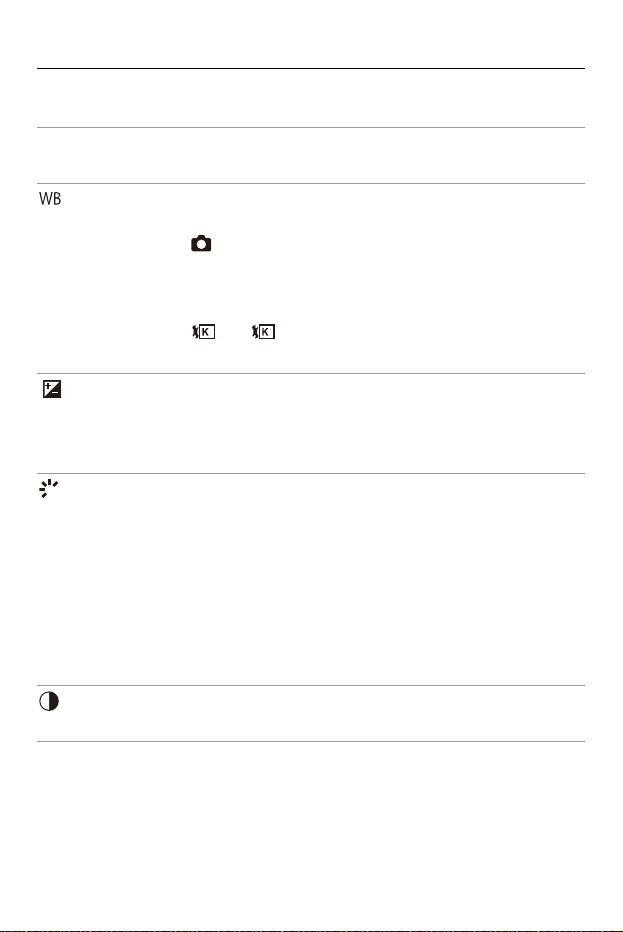
Playing Back and Editing of Images – [RAW Processing]
499
Setting Items ([RAW Processing])
[Begin Processing]
Saves the image.
[White Balance]
Selects and adjusts the white balance.
Selecting the item with [ ] enables processing with the same setting as at the time
of recording.
• If you press 4 in the [White Balance] selection screen, the white balance adjustment
screen appears. (ÎAdjusting the White Balance: 305)
• If you press 3 while [ ] to [ ] is selected, the color temperature setting
screen appears. (ÎColor Temperature Setting: 304)
[Brightness correction]
Corrects the brightness.
• The [Brightness correction] effect differs from the effect of exposure compensation
during recording.
[Photo Style] (Î[Photo Style]: 307)
Selects a Photo Style.
• If you press [Q] while [Like709] is selected, the knee setting screen appears.
(ÎRecording While Controlling Overexposure (Knee): 360)
• You cannot select a Photo Style for images recorded with [V-Log]. You cannot select
[V-Log] for images not recorded with [V-Log].
• You cannot select a Photo Style other than [Cinelike D2] or [Cinelike V2] for images
recorded with [Cinelike D2] or [Cinelike V2]. You cannot select [Cinelike D2] or
[Cinelike V2] for images not recorded with Photo Style [Cinelike D2] or [Cinelike V2].
[Contrast]
Adjusts the contrast.
1
4
Playing Back and Editing of Images – [RAW Processing]
500
[Highlight]
Adjusts the brightness of bright portions.
[Shadow]
Adjusts the brightness of dark portions.
[Saturation]/[Color Tone]
Adjusts the saturation or color tone.
[Hue]
Adjusts the hue.
[Filter Effect]
Selects filter effects.
[Grain Effect]
Selects a grain effect setting.
• You cannot set this for images recorded in High Resolution mode.
[Color Noise]
Adds color to the grain effect.
[Noise Reduction]
Sets noise reduction.
[Sharpness]
Adjusts the sharpness.
[More Settings]
[Revert To Original]: Returns the settings to the ones from the time of recording.
[Color Space]: Selects a Color Space setting from [sRGB] or [AdobeRGB]. (Î[Color
Space]: 550)
[Picture Size]: Selects the size for storing images.
[Destination Card Slot]: You can select the card slot to which to save images
processed with RAW. When [AUTO] is selected, the image is saved to the same card
slot as the RAW format image to be processed.
S
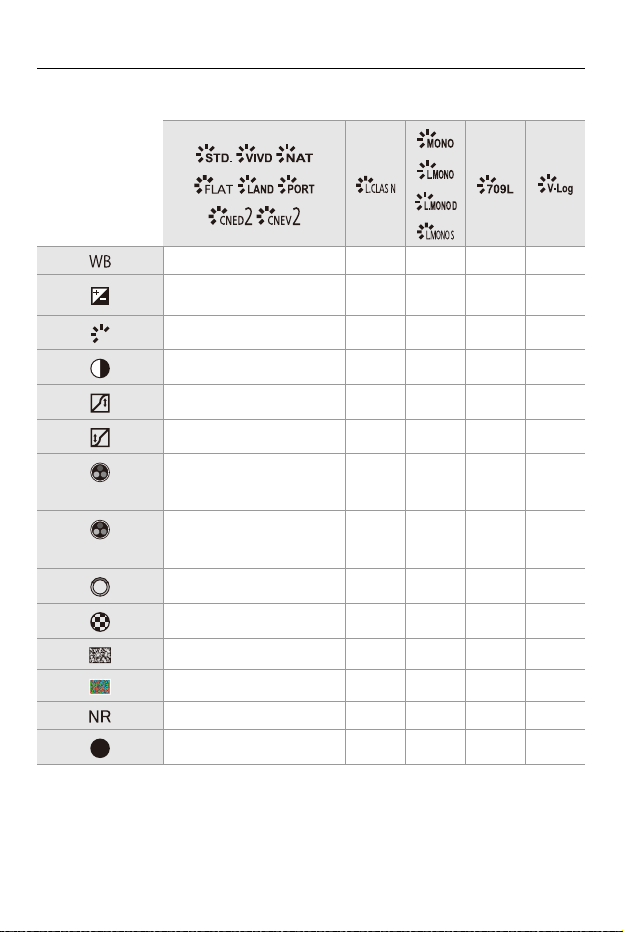
Playing Back and Editing of Images – [RAW Processing]
501
• The items that can be adjusted depend on the selected [Photo Style].
* Can be set when [Grain Effect] is one of [Low], [Standard], or [High].
33333
33333
3333
333
333
333
([Saturation])
333
([Color Tone])
3
333
3
33
3
*
33333
33333
S
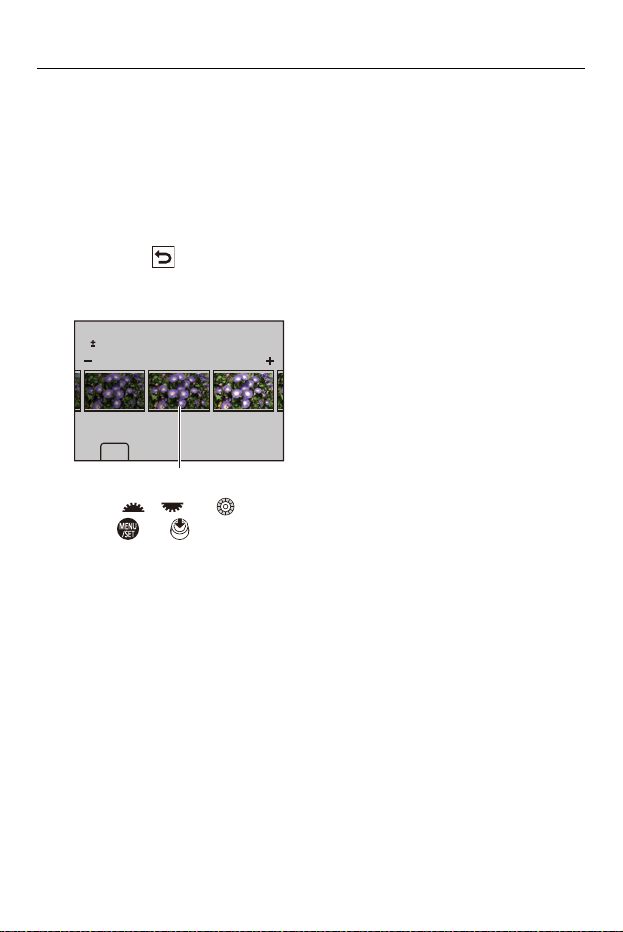
Playing Back and Editing of Images – [RAW Processing]
502
Displaying a Comparison Screen
You can change a setting while checking the effect by displaying images
with the applied setting value side by side.
1 Press [DISP.] in the screen of Step
4
.
• The image with the current setting (A) is displayed at the center.
• Touching the image with the current setting enlarges it.
Touching [ ] returns to the original display.
• A comparison screen cannot be displayed while [Noise Reduction] or
[Sharpness] is selected.
2 Rotate , , or to change the setting.
3 Press or to confirm the setting.
DISP.
0
(A)

Playing Back and Editing of Images – [RAW Processing]
503
• It may take a while for the comparison screen to be displayed.
• RAW images recorded with the camera are always recorded in the [L] size of
[4:3].
(However, RAW images recorded in High Resolution mode are recorded in the
[XL] size of [4:3])
• With this function, images are processed with the aspect ratio and the angle of
view of [Ex. Tele Conv.] from the time of recording.
• [Picture Quality] is processed as [FINE] with this function.
• The results of RAW processing with this function and with the “SILKYPIX
Developer Studio” software do not completely match.
• RAW processing is not possible while you are using the following function:
– HDMI output
Playing Back and Editing of Images – [Playback] Menu
504
[Playback] Menu
≥How to Select an Image(s) in the [Playback] Menu: 504
≥[Playback] ([Playback Mode]): 506
≥[Playback] ([Process Image]): 509
≥[Playback] ([Add/Delete Info.]): 510
≥[Playback] ([Edit Image]): 511
≥[Playback] ([Others]): 515
How to Select an Image(s) in the [Playback] Menu
Follow the steps below when the image selection screen is displayed.
•
Images are displayed separately by card slot.
• You can only select images on one card at a time.
When [Single] Has Been Selected
1 Press 21 to select the image.
2 Press or .
• If [Set/Cancel] is displayed at the right bottom of the screen, the setting is
canceled when or is pressed again.
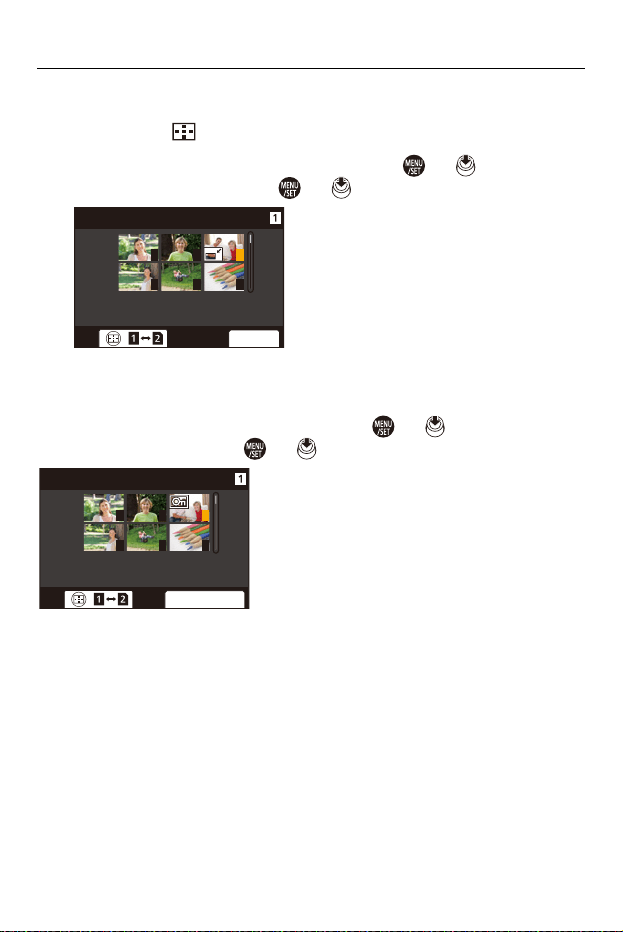
Playing Back and Editing of Images – [Playback] Menu
505
When [Multi] Has Been Selected
When you press [ ], the card that is displayed is switched.
1 Press 3421 to select the image and then press or (repeat).
• The setting is canceled when or is pressed again.
2 Press [DISP.] to execute.
When [Protect] is selected
Press 3421 to select the image, and then press or to set (repeat).
• The setting is canceled when or is pressed again.
321
654
2.
ュリヴヱハ
321
654
6HW&DQFHO
Playing Back and Editing of Images – [Playback] Menu
506
[Playback] ([Playback Mode])
[Playback Mode]
[Slide Show]
`: Default settings
`[Normal Play] / [Picture Only] / [Video Only] / [Rating]
Filters the type of images to play back.
• When you have set [Rating], put a check mark in the rating level you want to
display, then press [DISP.].
[All] / [Picture Only] / [Video Only] / [Rating]
Selects image types and plays them back at regular intervals in order.
• When you have set [Rating], put a check mark in the rating level you want to
display, then press [DISP.].
[Start]: Starts slide show playback.
[Duration]: Sets repeat playback.
[Repeat]: Sets repeat playback.
Operations during slide show
3: Plays/pauses (You can also perform the same operation by touching [ ] or
[])
2: Move to the previous image
1: Move to the next image
4: Ends the slide show
: Adjusts the volume
• When [Video Only] is set, [Duration] is not available.

Playing Back and Editing of Images – [Playback] Menu
507
[Rotate Disp.]
[Picture Sort]
[Magnify from AF Point]
[LUT View Assist (Monitor)]
`[ON] / [OFF]
Automatically displays pictures vertically if they were recorded when holding the
camera vertically.
[FILE NAME] / `[DATE/TIME]
This sets the order in which the camera displays images during playback.
[FILE NAME]: Displays images by folder name/file name.
[DATE/TIME]: Displays images by recording date.
• If you insert another card, it may take some time to read all data, therefore pictures
may not be displayed in the set order.
[ON] / `[OFF]
Displays the point focused with AF.
Enlarges the AF focus location when enlarging the image.
• The center of the image is enlarged for RAW images recorded in the High
Resolution mode or when the image is not focused.
[ON] / `[OFF]
When playing back images recorded with [Photo Style] set to [V-Log], this displays
the images with LUT data applied on the monitor/viewfinder.
• This functions in tandem with [LUT View Assist (Monitor)] in [V-Log View Assist] in
the [Custom] ([Monitor / Display (Video)]) menu. (Î[V-Log View Assist]: 433)
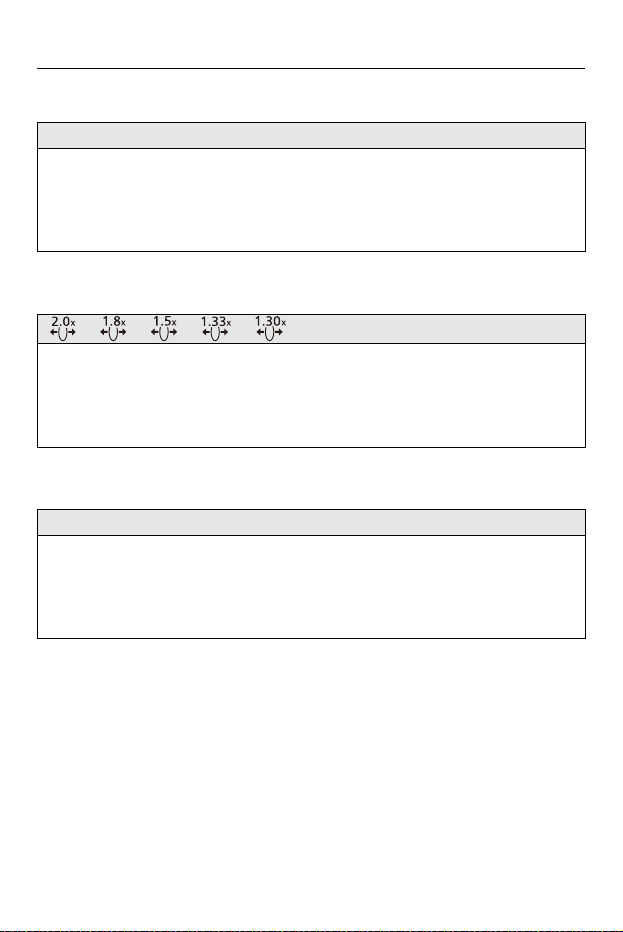
Playing Back and Editing of Images – [Playback] Menu
508
[HLG View Assist (Monitor)]
[Anamorphic Desqueeze Display]
[Behavior After Video Playback]
[MODE1] / `[MODE2] / [OFF]
At recording or playback of HLG video, this converts their color gamut and
brightness for display.
• This functions in tandem with [Monitor] in [HLG View Assist] in the [Custom]
([Monitor / Display (Video)]) menu. (Î[HLG View Assist]: 438)
[ ] / [ ] / [ ] / [ ] / [ ] / `[OFF]
This displays the desqueezed images suited to the magnification of the anamorphic
lens on this camera.
• This is linked with [Anamorphic Desqueeze Display] under the [Custom] ([Monitor /
Display (Video)]) menu. (Î[Anamorphic Desqueeze Display]: 441)
`[End Playback] / [Pause At Last Frame]
Sets the operation for when playback of video finishes.
[End Playback]: Ends video playback and returns to the image selection screen.
[Pause At Last Frame]: Does not end video playback, but pauses on the final
frame. To end video playback, press 4.
Playing Back and Editing of Images – [Playback] Menu
509
[Playback] ([Process Image])
[RAW Processing]
[Time Lapse Video]
[Stop Motion Video]
Processes pictures taken in RAW format on the camera and saves them in JPEG
format.
(Î[RAW Processing]: 496)
This creates videos from group images recorded with [Time Lapse Shot].
1 Press 21 to select a [Time Lapse Shot] group and then press or .
2 Select the options for creating a video to combine the pictures into a video.
(ÎTime Lapse Shot/Stop Motion Animation Videos: 236)
• When [System Frequency] is set to [24.00Hz (CINEMA)], [Time Lapse Video] is
not available.
This creates videos from group images recorded with [Stop Motion Animation].
1 Press 21 to select the Stop Motion Animation group and then press or
.
2 Select the options for creating a video to combine the pictures into a video.
(ÎTime Lapse Shot/Stop Motion Animation Videos: 236)
• When [System Frequency] is set to [24.00Hz (CINEMA)], [Stop Motion Video] is
not available.
Playing Back and Editing of Images – [Playback] Menu
510
[Playback] ([Add/Delete Info.])
[Protect]
[Rating]
[Single] / [Multi] / [Cancel]
You can set protection for images so that they will not be deleted by mistake.
However, if you format the card, the protected images will also be deleted.
• For information about how to select images (ÎHow to Select an Image(s) in the
[Playback] Menu: 504)
• Be careful because the [Protect] setting may be disabled on a device other than
this camera.
[Single] / [Multi] / [Cancel]
If you set any of the five different rating levels for images, you can do the following:
• Deleting all images except for those with ratings.
• Check the rating level in the file details display in operating systems such as
Windows 10, Windows 8.1, and Windows 8. (JPEG images only)
1 Select an image. (ÎHow to Select an Image(s) in the [Playback] Menu: 504)
2 Press 21 to select a rating level (1 to 5) and then press or .
• When [Multi] is selected, repeat Steps 1 and 2.
• To cancel the setting, set the rating level to [OFF].
Playing Back and Editing of Images – [Playback] Menu
511
[Playback] ([Edit Image])
[Resize]
`: Default settings
[Single] / [Multi]
Reduce the picture size of JPEG images and save them as different images to
enable them to be easily used for web pages or sent as email attachments.
• For information about how to select images (ÎHow to Select an Image(s) in the
[Playback] Menu: 504)
– When [Single] is selected, after choosing the image, press 34 to select the
size, then press or .
– When [Multi] is selected, before choosing the images, press 34 to select the
size, then press or .
• You can set up to 100 images at once with [Multi].
• The image quality of the resized image becomes lower.
• [Resize] is not available for images recorded using the following functions:
– Video recording
– Group images
– [RAW] ([Picture Quality])
– Pictures created from [C4K] video
– [S] ([Picture Size])

Playing Back and Editing of Images – [Playback] Menu
512
[Rotate]
[Video Divide]
Rotate images manually in 90o steps.
[]: Rotates 90o clockwise.
[]: Rotates 90o counter-clockwise.
• For information about how to select images (ÎHow to Select an Image(s) in the
[Playback] Menu: 504)
• When [Rotate Disp.] is [OFF], [Rotate] is not available.
Divide a recorded video into two.
(Î[Video Divide]: 484)
Playing Back and Editing of Images – [Playback] Menu
513
[Copy]
[Copy Direction] `[ ] / [ ]
[Select Copy] / [Copy All in Folder] / [Copy All in Card]
You can copy the images in one of the cards to the other card.
• Copied images will be saved in a new folder.
[Select Copy]: Copies selected images.
1 Select the copy origin folder (DCIM folder/PRIVATE folder (CINE Style)).
2 Select the folder containing the images to copy.
3 Select the images. (ÎHow to Select an Image(s) in the [Playback] Menu: 504)
[Copy All in Folder]: Copies all images in a folder.
1 Select the copy origin folder (DCIM folder/PRIVATE folder (CINE Style)).
2 Select the folder to copy.
3 Check the images to be copied and then press or to execute
copying.
[Copy All in Card]: Copies all images in the card.
• The images in the DCIM folder are saved to the DCIM folder in the copy
destination and the images in the PRIVATE folder are saved to the PRIVATE folder
in the copy destination.
Using the Fn button to copy images
If you press the Fn button with [Copy] assigned while playing back images one at a
time, the image currently being played back will be copied to the other card. (ÎFn
Buttons: 517)
• Select the copy destination folder from the following options. In the case of group
images, [Create a New Folder] is selected automatically.
[Same Folder Number as Source]: Copies to a folder with the same name as the
folder of the image to be copied.
[Create a New Folder]: Creates a new folder with an incremented folder number
and then copies the image to it.
[Select Folder]: Selects a folder to store the image and then copies the image to
it.

Playing Back and Editing of Images – [Playback] Menu
514
• If the copy source is a PRIVATE folder, only [Create a New Folder] can be
selected.
• You can set up to 100 images at once with [Select Copy].
• The [Protect] setting is not copied.
• Copying may take a while.
• When using the following combinations of cards, video copying is not available:
– Copying from CFexpress cards to SD/SDHC memory cards
Playing Back and Editing of Images – [Playback] Menu
515
[Playback] ([Others])
[Delete Confirmation]
[Delete All Images]
`: Default settings
["Yes" first] / `["No" first]
This sets which option, [Yes] or [No], will be highlighted first when the confirmation
screen for deleting an image is displayed.
["Yes" first]: [Yes] is highlighted first.
["No" first]: [No] is highlighted first.
`[Card Slot 1(CFexpress)] / [Card Slot 2(SD)]
Deleting all images in a card.
• Images cannot be restored once they have been deleted. Carefully confirm the
images before deletion.
• If you select [Delete All Non-rating], all images except those with a rating set are
deleted.
• [Delete All Images] can be used when [Playback Mode] is set to [Normal Play].

516
Camera Customization
This chapter describes the customization function with which you can
configure the camera to your preferred settings.
It also describes the [Custom] menu where you can make advanced
settings for the camera operations and screen displays, and the [Setup]
menu where you can make basic settings for the camera.
≥Fn Buttons: 517
≥[Dial Operation Switch]: 532
≥Quick Menu Customization: 535
≥Custom Mode: 542
≥[Custom] Menu: 547
≥[Setup] Menu: 585
≥My Menu: 609
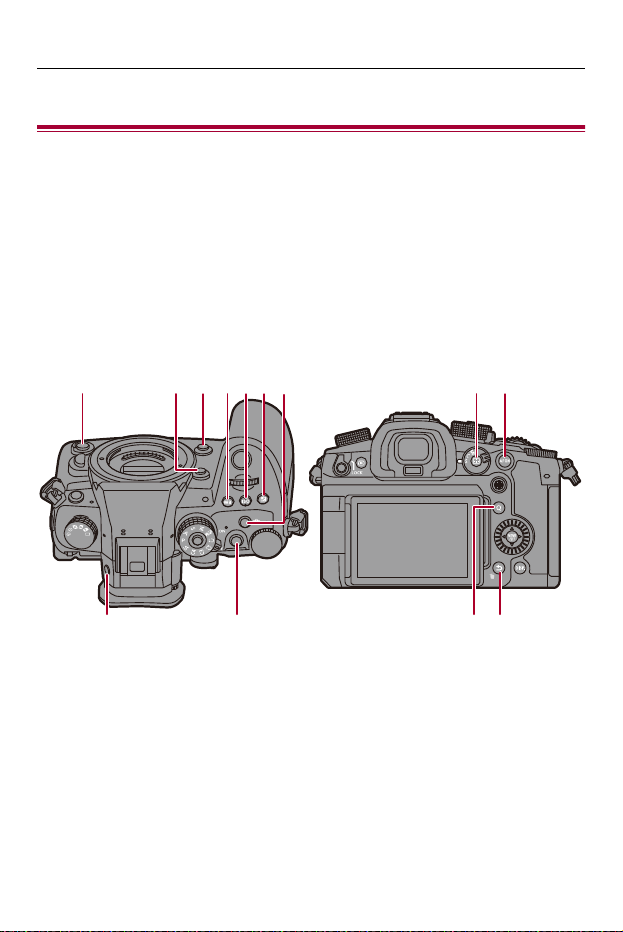
Camera Customization – Fn Buttons
517
Fn Buttons
≥Register Functions to the Fn Buttons: 520
≥Use the Fn Buttons: 531
You can register functions to the Fn (Function) buttons. Additionally, you
can register other functions to specialized buttons such as [WB] button, in
the same way as with the Fn buttons.
Different functions can be set for both during recording and playback.
Fn Button Default Settings
(3)(1)
(8) (9) (13)(12)
(2) (4)(5)(6) (10) (11)(7)
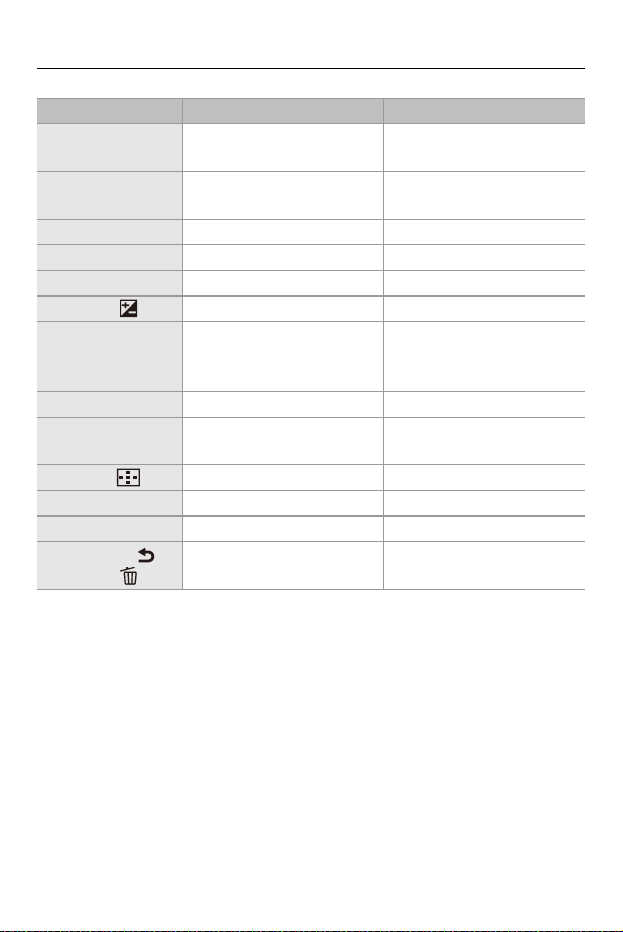
Camera Customization – Fn Buttons
518
Fn buttons [Setting in REC mode] [Setting in PLAY mode]
(1)
Sub video rec.
button
[Video Record] [Video Record]
(2) [Fn2]
[Enlarged Live
Display(Video)]
[No Setting]
(3) [Fn3] [Preview] [No Setting]
(4) [WB] [White Balance] [No Setting]
(5) [ISO] [Sensitivity] [No Setting]
(6) [] [Exposure Comp.] [No Setting]
(7)
Audio
information
button
[Audio Information] [No Setting]
(8) [LVF] [LVF/Monitor Switch] [LVF/Monitor Switch]
(9)
Video rec.
button
[Video Record] [Video Record]
(10) [] [AF Mode] [Card Slot Change]
(11) [AF ON] [AF-ON] [Rating¿3]
(12) [Q] [Q.MENU] [Send Image (Smartphone)]
(13)
[Fn1]/[ ]/
[]
[Level Gauge]
• Cannot be used as Fn
buttons during playback.
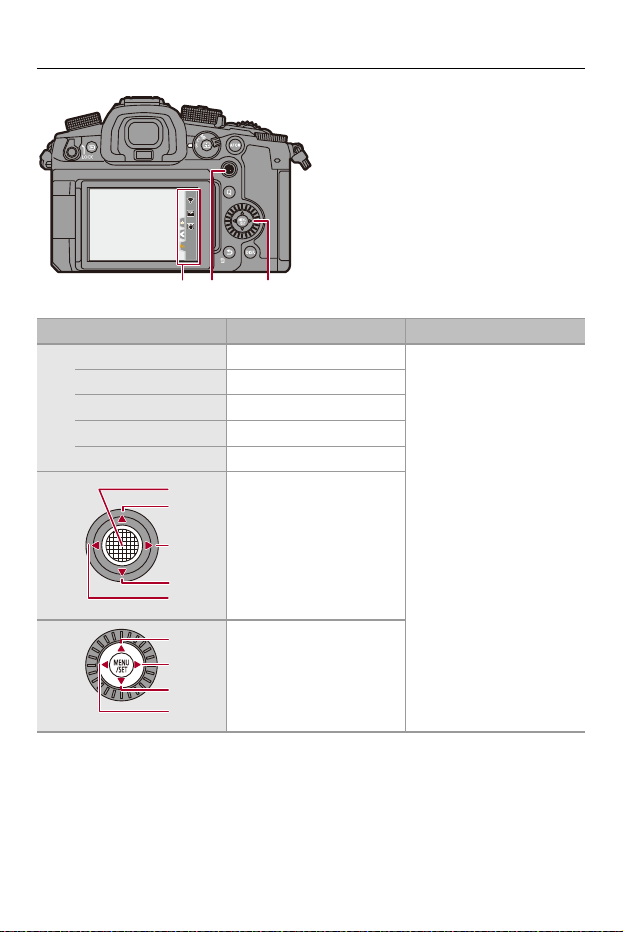
Camera Customization – Fn Buttons
519
Fn buttons [Setting in REC mode] [Setting in PLAY mode]
(14)
[Fn4] [Wi-Fi]
• Cannot be used as Fn
buttons during playback.
[Fn5] [Histogram]
[Fn6] [Boost I.S. (Video)]
[Fn7] [No Setting]
[Fn8] [No Setting]
(15) [No Setting]
(16) [No Setting]
Fn5Fn5Fn5
Fn4Fn4Fn4
Fn8Fn8Fn8
OFFOFFOFF
Fn7Fn7Fn7
OFFOFFOFF
Fn6Fn6Fn6
(14) (16)(15)
[Fn10]
[Fn9]
[Fn11]
[Fn12]
[Fn13]
[Fn15]
[Fn14]
[Fn16]
[Fn17]
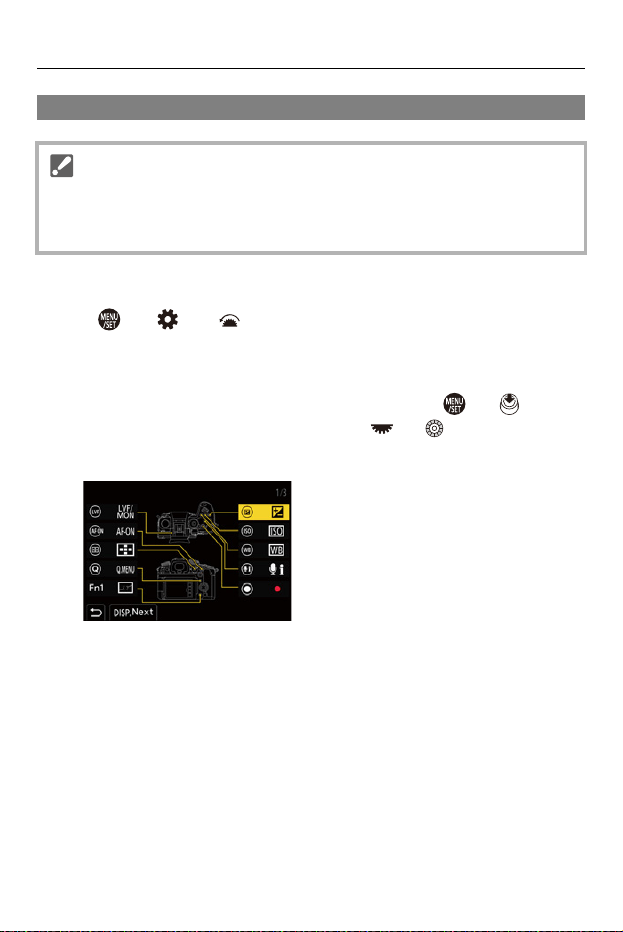
Camera Customization – Fn Buttons
520
Register Functions to the Fn Buttons
1
Select [Fn Button Set].
≥ ¨ [ ] ¨ [ ] ¨ [Fn Button Set] ¨ [Setting in REC mode]/
[Setting in PLAY mode]
2
Select the button.
≥Press 34 to select the button and then press or .
≥Selection is also possible by rotating or .
•
Press [DISP.] to change the page.
• With default settings, [Fn9] to [Fn13] on the joystick cannot be used.
When using functions, set the [Joystick Setting] in the [Custom] ([Operation])
menu to [Fn]. (Î[Joystick Setting]: 563)
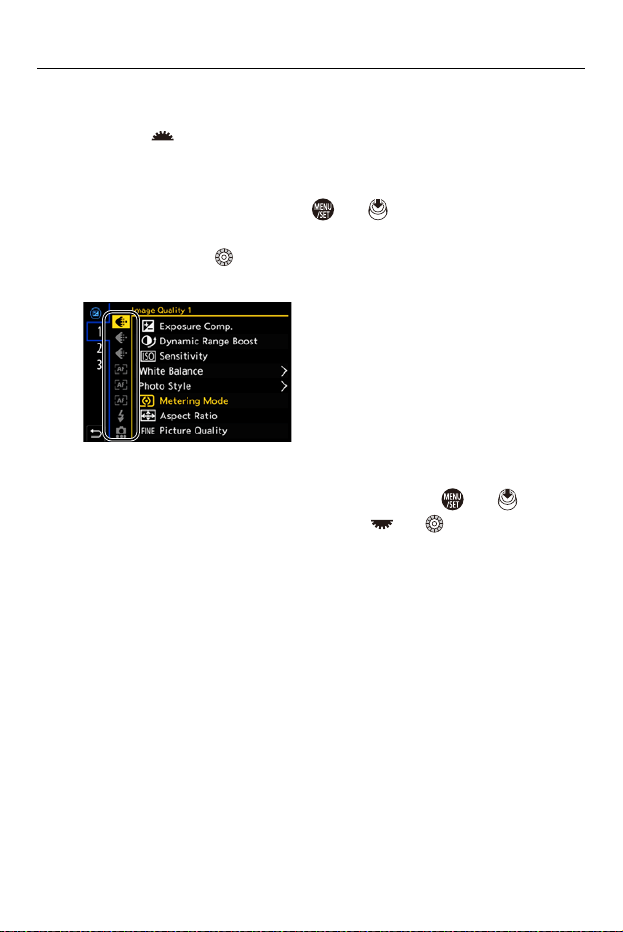
Camera Customization – Fn Buttons
521
3
Find the function to register.
≥Rotate to select the sub tab where the function to register is
categorized (ÎSetting Items ([Fn Button Set]/[Setting in REC
mode]): 523, Setting Items ([Fn Button Set]/[Setting in PLAY
mode]): 529) and then press or .
≥You can also select by pressing 2 to select the sub tab, pressing
34 or rotating , and then pressing 1.
≥Switch the [1] to [3] tabs by pressing [Q].
4
Register the function.
≥Press 34 to select a function and then press or .
≥Selection is also possible by rotating or .
•
Select items with [>] by selecting the item again.
• Depending on the button, some functions cannot be registered.
Camera Customization – Fn Buttons
522
• You can also touch [ ] on the control panel (ÎControl Panel: 715) to display
the screen in Step
2
.
• You can also press and hold the Fn button (2 sec.) to display the screen in
Step
4
.
(This may not be displayed depending on the registered function and on the
button type.)
• You can assign a function to the focus button of an interchangeable lens:
(Î[Lens Fn Button Setting]: 582)
Fn

Camera Customization – Fn Buttons
523
Setting Items ([Fn Button Set]/[Setting in REC mode])
[1] tab
[Image Quality]
• [Exposure Comp.] (ÎExposure Compensation: 287)
• [Dynamic Range Boost] (Î[Dynamic Range Boost]: 363)
• [Sensitivity] (ÎISO Sensitivity: 294)
• [White Balance] (ÎWhite Balance (WB): 300)
• [Photo Style] (Î[Photo Style]: 307)
• [Metering Mode] (Î[Metering Mode]: 268)
• [Aspect Ratio] (Î[Aspect Ratio]: 120)
• [Picture Quality] (Î[Picture Quality]: 123)
• [Picture Size] (Î[Picture Size]: 121)
• [1 Shot Spot Metering]
– Records with the metering mode set to [ ] (Spot metering) once only.
(Î[Metering Mode]: 268)
• [Long Exposure NR] (Î[Long Exposure NR]: 256)
• [Min. Shutter Speed] (Î[Min. Shutter Speed]: 257)
• [1 Shot RAW+JPG]
– Records a RAW image and a JPEG image simultaneously once only. (Î[Picture
Quality]: 123)
• [Filter Effect] (Î[Filter Settings]: 317)
• [One Push AE]
– Adjusts the aperture value and shutter speed to the settings suited for the standard
exposure determined by the camera. (ÎExposure Compensation: 287)
• [Touch AE] (ÎTouch AE: 115)
• [Exposure Mode] (ÎRecording with Creative Video: 347)
• [Synchro Scan] (Î[Synchro Scan]: 443)

Camera Customization – Fn Buttons
524
[Focus/Shutter]
• [AF Mode] (ÎSelecting the AF Mode: 167)
• [AF Detection Setting] (ÎAutomatic Detection: 170)
• [Detecting Subject] (ÎAutomatic Detection: 170)
• [AF Custom Setting(Photo)] (Î[AF Custom Setting(Photo)]: 160)
• [AF Custom Setting(Video)] (Î[AF Custom Setting(Video)]: 355)
• [Focus Limiter] (Î[Focus Limiter]: 163)
• [Focus Limiter Range Set] (Î[Focus Limiter]: 163)
• [Focus Peaking] (Î[Focus Peaking]: 202)
• [Focus Peaking Sensitivity] (Î[Focus Peaking]: 202)
• [1-Area AF Moving Speed] (Î[1-Area AF Moving Speed]: 166)
• [Focus Ring Lock] (Î[Focus Ring Lock]: 554)
• [AE LOCK] (ÎLocking Focus and Exposure (AF/AE Lock): 292)
• [AF LOCK] (ÎLocking Focus and Exposure (AF/AE Lock): 292)
• [AF/AE LOCK] (ÎLocking Focus and Exposure (AF/AE Lock): 292)
• [AF-ON] (Î[AF ON] button: 157)
• [AF-ON : Near Shift]
– AF operates giving priority to close-up subjects. (ÎUsing AF: 155)
• [AF-ON : Far Shift]
– AF operates giving priority to distant subjects. (ÎUsing AF: 155)
• [Focus Area Set]
– Displays the AF area/MF Assist movement screens. (ÎAF Area Movement
Operation: 187, Operations on the MF Assist Screen: 199)
• [Enlarged Live Display(Video)] (Î[Enlarged Live Display(Video)]: 356)
[Flash]
• [Flash Mode] (Î[Flash Mode]: 329)
• [Flash Adjust.] (Î[Flash Adjust.]: 334)
• [Wireless Flash Setup] (ÎRecording Using a Wireless Flash: 337)

Camera Customization – Fn Buttons
525
[Others (Photo)]
• [Drive Mode Setting] (ÎSelecting the Drive Mode: 210)
• [Bracketing] (ÎBracket Recording: 242)
• [Silent Mode] (Î[Silent Mode]: 250)
• [Image Stabilizer] (Î[Operation Mode]: 264)
• [Shutter Type] (Î[Shutter Type]: 252)
• [Ex. Tele Conv.] (ÎExtended Tele Conversion: 206)
[2] tab
[Image Format]
• [Rec. File Format] (Î[Rec. File Format]: 134)
• [Rec Quality] (Î[Rec Quality]: 136)
• [Rec Quality (My List)] (ÎSetting or deleting in My List: 148)
• [Variable Frame Rate] (ÎVariable Frame Rate: 415)
• [Time Code Display] (ÎTime Code: 386)
[Audio]
• [Audio Information] (Î[Audio Information]: 373)
• [Sound Rec Level Disp.] (Î[Sound Rec Level Disp.]: 365)
• [Mute Sound Input] (Î[Mute Sound Input]: 366)
• [Sound Rec Level Adj.] (Î[Sound Rec Level Adj.]: 368)
• [Sound Rec Quality] (Î[Sound Rec Quality]: 369)
• [Sound Rec Level Limiter] (Î[Sound Rec Level Limiter]: 370)
• [4ch Mic Input] (Î[4ch Mic Input]: 381)
• [XLR Mic Adaptor Setting] (ÎXLR Microphone Adaptor (Optional): 379)
• [Sound Monitoring Channel] (Î[Sound Monitoring Channel]: 384)

Camera Customization – Fn Buttons
526
[Others (Video)]
• [Image Stabilizer] (Î[Operation Mode]: 264)
• [E-Stabilization (Video)] (Î[E-Stabilization (Video)]: 262)
• [Boost I.S. (Video)] (Î[Boost I.S. (Video)]: 262)
• [Image Area of Video] (Î[Image Area of Video]: 150)
• [Focus Transition] (Î[Focus Transition]: 425)
[Operation]
• [Q.MENU] (ÎQuick Menu: 94)
• [Rec / Playback Switch]
– Switches to the playback screen. (ÎPlaying Back Pictures: 475, Playing Back
Videos: 477)
• [Video Record] (ÎBasic Video Operations: 126)
• [Video Record(Creative Video)]
– Video recording is started or stopped only in the [ ] mode. (ÎRecording with
Creative Video: 347)
• [LVF/Monitor Switch] (ÎSwitching Between the Monitor and Viewfinder: 88)
• [Dial Operation Switch] (ÎTemporarily Change Dial Operation: 534)

Camera Customization – Fn Buttons
527
[Monitor / Display]
• [Preview] (ÎPreview Mode: 285)
• [Preview Aperture Effect]
– The aperture effect can be previewed while the Fn button is being pressed.
(ÎPreview Mode: 285)
• [Constant Preview] (Î[Constant Preview]: 565)
• [Level Gauge] (Î[Level Gauge]: 573)
• [Histogram] (Î[Histogram]: 566)
• [Luminance Spot Meter] (Î[Luminance Spot Meter]: 406)
• [Frame Marker] (Î[Frame Marker]: 410)
• [Photo Grid Line] (Î[Photo Grid Line]: 567)
• [Live View Boost] (Î[Live View Boost]: 567)
• [Monochrome Live View] (Î[Monochrome Live View]: 576)
• [Night Mode] (Î[Night Mode]: 568)
• [LVF/Monitor Disp. Set]
– Switches the displayed monitor or viewfinder display style. (Î[LVF/Monitor Disp.
Set]: 569)
• [Video-Priority Display] (Î[Video-Priority Display]: 578)
• [Zebra Pattern] (Î[Zebra Pattern]: 408)
• [LUT View Assist (Monitor)] (Î[LUT View Assist (Monitor)]: 433)
• [LUT View Assist (HDMI)] (Î[LUT View Assist (HDMI)]: 433)
• [LUT Select] (Î[LUT Select]: 433)
• [HLG View Assist (Monitor)] (Î[HLG View Assist]: 438)
• [HLG View Assist (HDMI)] (Î[HLG View Assist]: 438)
• [Sheer Overlay] (Î[Sheer Overlay]: 572)
• [I.S. Status Scope] (Î[I.S. Status Scope]: 572)
• [WFM/Vector Scope] (Î[WFM/Vector Scope]: 402)
• [Anamorphic Desqueeze Display] (Î[Anamorphic Desqueeze Display]: 441)
• [Color Bars] (ÎColor Bars/Test Tone: 412)

Camera Customization – Fn Buttons
528
[3] tab
[Lens / Others]
• [Focus Ring Control] (Î[Focus Ring Control]: 583)
• [Zoom Control] (ÎInterchangeable lens that supports power zoom (electronic
zoom): 205)
• [Step Zoom] (Î[Step Zoom]: 208)
• [Zoom Speed] (Î[Zoom Speed]: 208)
• [Lens Information] (Î[Lens Information]: 266)
[Card/File]
• [Destination Card Slot]
– Changes the priority of cards for recording. This can be used if [Double Card Slot
Function] (Î[Double Card Slot Function]: 587) is set to [Relay Rec].
[IN/OUT]
• [Wi-Fi] (ÎWi-Fi / Bluetooth: 624)
• [Fan Mode] (Î[Fan Mode]: 580)
[Setting]
• [Save to Custom Mode] (ÎRegistering Instant Customization: 543)
[Others]
• [No Setting]
– Set when not using as an Fn button.
• [Off (Disable Press and Hold)]
– The button does not work as an Fn button. The function registering screen is not
displayed when you press and hold (2 seconds) the Fn button.
• [Restore to Default]
– Restore the default settings for the Fn button. (ÎFn Button Default Settings: 517)

Camera Customization – Fn Buttons
529
Setting Items ([Fn Button Set]/[Setting in PLAY mode])
[1] tab
[Playback Mode]
• [Magnify from AF Point] (Î[Magnify from AF Point]: 507)
• [LUT View Assist (Monitor)] (Î[LUT View Assist (Monitor)]: 507)
• [HLG View Assist (Monitor)] (Î[HLG View Assist (Monitor)]: 508)
• [Anamorphic Desqueeze Display] (Î[Anamorphic Desqueeze Display]: 441)
[Process Image]
• [RAW Processing] (Î[RAW Processing]: 496)
[Add/Delete Info.]
• [Delete Single] (ÎDeleting Images: 494)
• [Protect] (Î[Protect]: 510)
• [Rating¿1] (Î[Rating]: 510)
• [Rating¿2] (Î[Rating]: 510)
• [Rating¿3] (Î[Rating]: 510)
• [Rating¿4] (Î[Rating]: 510)
• [Rating¿5] (Î[Rating]: 510)
[Edit Image]
• [Copy] (Î[Copy]: 513)
[Operation]
• [Rec / Playback Switch]
– Switches to the recording screen. (ÎBasic Picture Operations: 118, Basic Video
Operations: 126)
• [LVF/Monitor Switch] (ÎSwitching Between the Monitor and Viewfinder: 88)
• [Video Record] (ÎBasic Video Operations: 126)
• [Video Record(Creative Video)]
– Video recording is started or stopped only in the [ ] mode. (ÎRecording with
Creative Video: 347)

Camera Customization – Fn Buttons
530
[Monitor / Display]
• [Night Mode] (Î[Night Mode]: 568)
[Card/File]
• [Card Slot Change] (ÎSwitching the Card to Display: 476)
[IN/OUT]
• [Sound Monitoring Channel(Play)]
• [Wi-Fi] (ÎWi-Fi / Bluetooth: 624)
• [Fan Mode] (Î[Fan Mode]: 580)
• [Send Image (Smartphone)] (ÎSending Images on the Camera to a Smartphone
with Simple Operations: 640)
• [LUT View Assist (HDMI)] (Î[V-Log View Assist]: 433)
• [HLG View Assist (HDMI)] (Î[HLG View Assist]: 438)
[2] tab
[Others]
• [No Setting]
– Set when not using as an Fn button.
• [Off (Disable Press and Hold)]
– The button does not work as an Fn button. The function registering screen is not
displayed when you press and hold (2 seconds) the Fn button.
• [Restore to Default]
– Restore the default settings for the Fn button. (ÎFn Button Default Settings: 517)
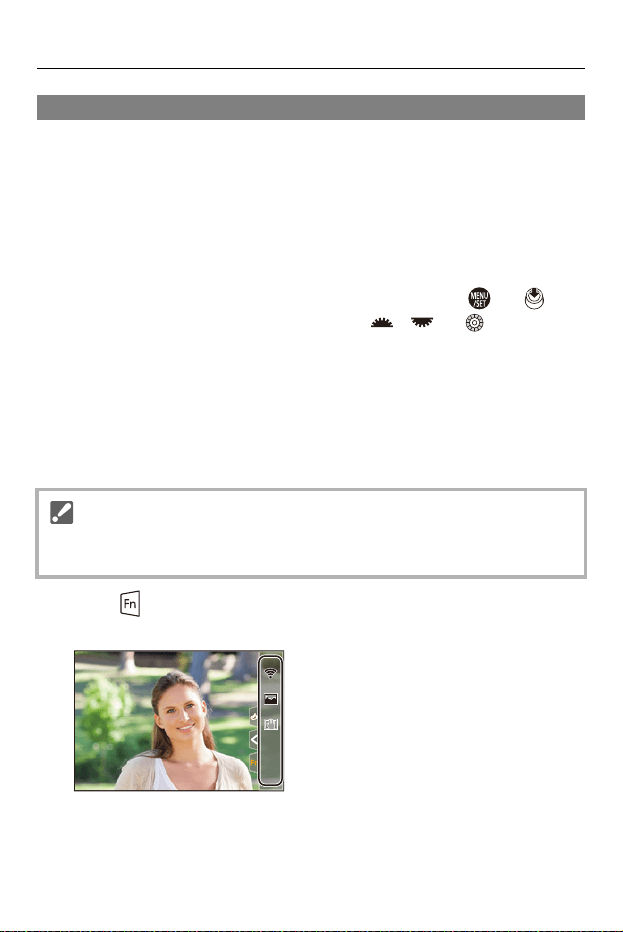
Camera Customization – Fn Buttons
531
Use the Fn Buttons
During recording, pressing the Fn buttons enables usage of the functions
registered in [Setting in REC mode], and during playback, usage of the
functions registered in [Setting in PLAY mode].
1
Press the Fn button.
2
Select a setting item.
≥Press 21 to select a setting item and then press or .
≥Selection is also possible by rotating , or .
•
Display and selection methods of a setting item differ depending on the menu
item.
Use [Fn4] to [Fn8] (Touch Icons)
During recording, you can use the Fn buttons within the Touch Tab.
1 Tou ch [ ].
2 Touch one of [Fn4] to [Fn8].
• With the default settings, the Touch Tab is not displayed. Set [Touch Tab] to [ON]
in [Touch Settings] in the [Custom] ([Operation]) menu. (Î[Touch Settings]: 558)
Fn5Fn5Fn5
Fn4Fn4Fn4
Fn8Fn8Fn8
OFFOFFOFF
Fn7Fn7Fn7
OFFOFFOFF
Fn6Fn6Fn6
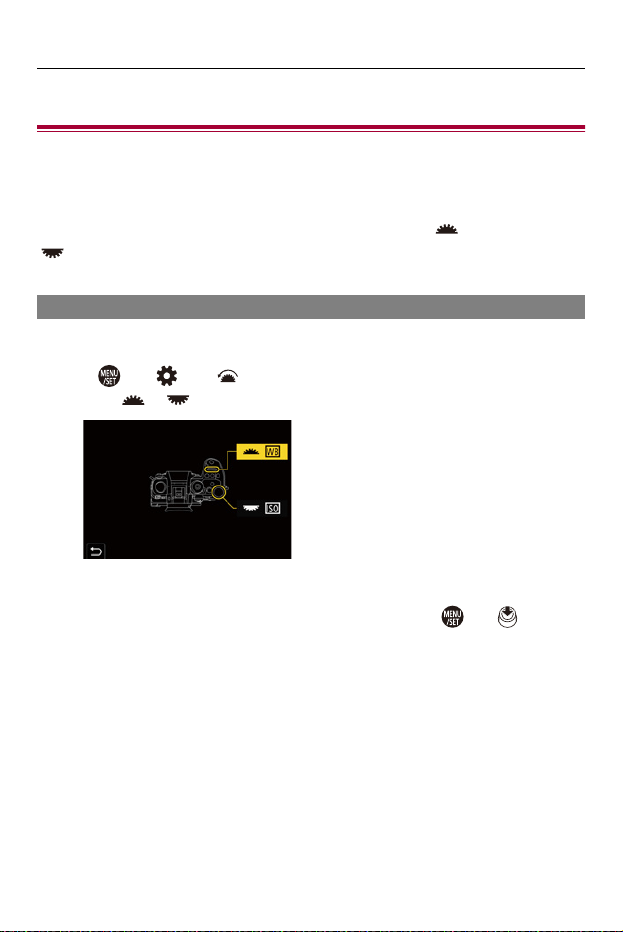
Camera Customization – [Dial Operation Switch]
532
[Dial Operation Switch]
≥Register Functions to the Dials: 532
≥Temporarily Change Dial Operation: 534
This temporarily changes the functions operated with (front dial) and
(rear dial).
Register Functions to the Dials
1
Select [Dial Operation Switch Setup].
≥ ¨ [ ] ¨ [ ] ¨ [Dial Set.] ¨ [Dial Operation Switch Setup]
¨ [ ]/[ ]
2
Register the function.
≥Press 34 to select a function and then press or .

Camera Customization – [Dial Operation Switch]
533
Functions That Can Be Registered
• [Exposure Comp.] (ÎExposure Compensation: 287)
• [Sensitivity]
*1
(ÎISO Sensitivity: 294)
• [White Balance]
*2
(ÎWhite Balance (WB): 300)
• [Photo Style] (Î[Photo Style]: 307)
• [Aspect Ratio] (Î[Aspect Ratio]: 120)
• [Filter Effect] (Î[Filter Settings]: 317)
• [AF Mode] (ÎSelecting the AF Mode: 167)
• [Flash Mode] (Î[Flash Mode]: 329)
• [Flash Adjust.] (Î[Flash Adjust.]: 334)
*1 default setting
*2 default setting
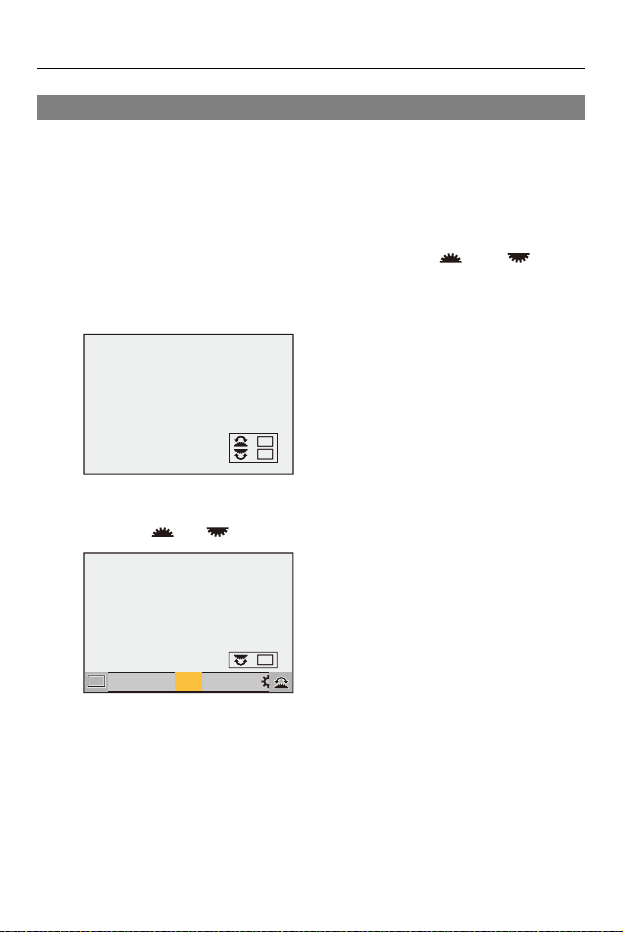
Camera Customization – [Dial Operation Switch]
534
Temporarily Change Dial Operation
1
Set [Dial Operation Switch] to the Fn button. (ÎFn
Buttons: 517)
2
Switch dial operation.
≥Press the Fn button set in Step
1
.
≥A guide will display the functions registered to and .
•
If no operations are performed, then several seconds later, the guide
disappears.
3
Set the registered function.
≥Rotate or while the guide is displayed.
4
Confirm your selection.
≥Press the shutter button halfway.
ISOISOISOISO
WBWBWBWB
AWBc
AWBc
AWBw
AWBw
WBWBWBWBWBWBWBWBWBWBWB
AWBAWB
ISOISOISOISO
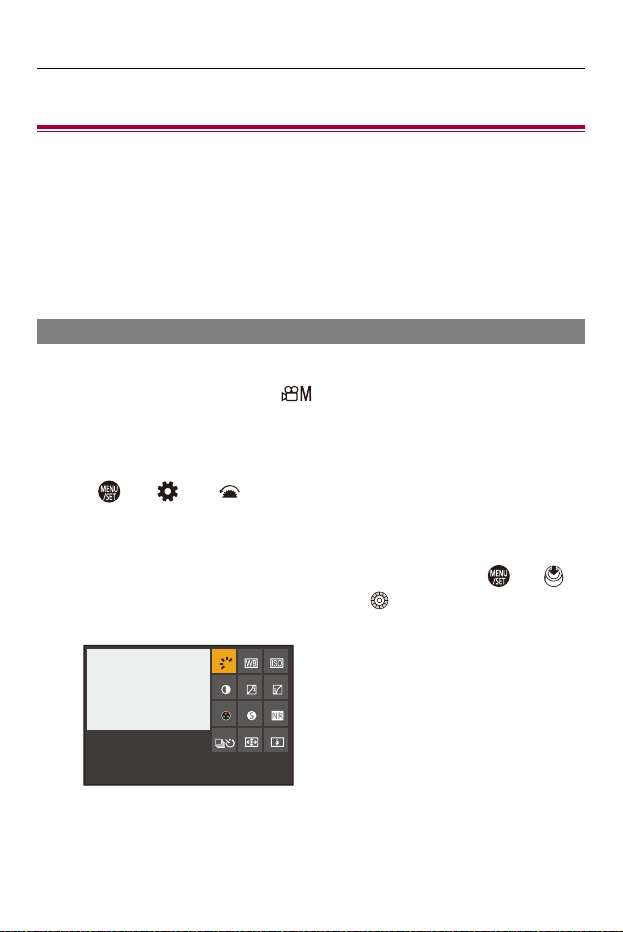
Camera Customization – Quick Menu Customization
535
Quick Menu Customization
≥Register to the Quick Menu: 535
You can change Quick menu items depending on the recording mode.
Additionally, you can change the items to display on the Quick menu and
their order to suit your preferences.
For information about Quick menu operation methods (ÎQuick Menu: 94)
Register to the Quick Menu
Change the menus to be displayed in the Quick menu.
These can be set separately for [ ] mode (Video) and for other
recording modes (Photo).
1
Select [Q.MENU Settings].
≥ ¨ [ ] ¨ [ ] ¨ [Q.MENU Settings] ¨ [Item Customize
(Photo)]/[Item Customize (Video)]
2
Select the item position (1 to 12).
≥Press 3421 to select the position and then press or .
≥Selection is also possible by rotating .
≥Directions on the diagonal can also be selected using the joystick.
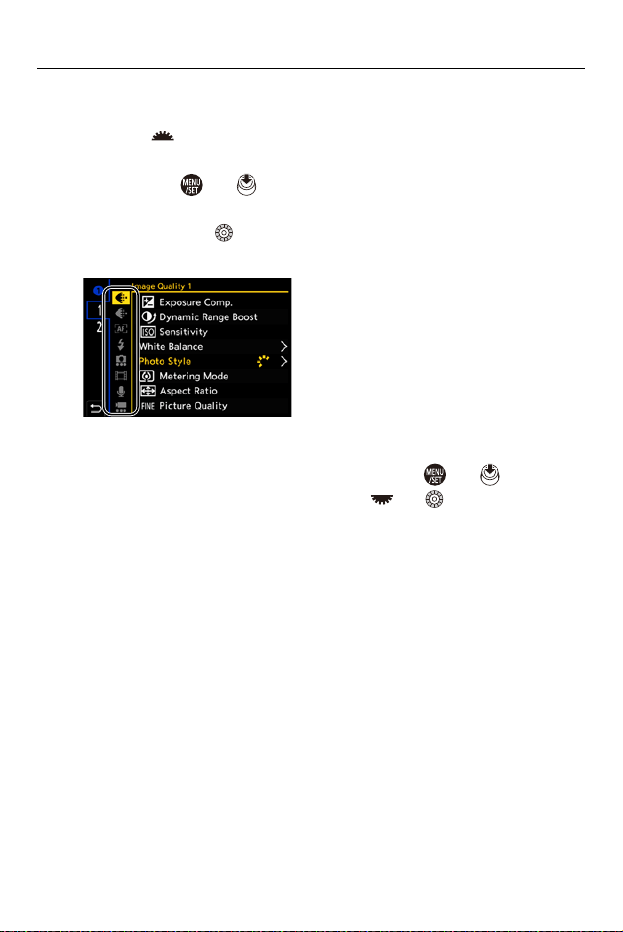
Camera Customization – Quick Menu Customization
536
3
Find the function to register.
≥Rotate to select the sub tab where the function to register is
categorized (ÎMenu Items That Can Be Registered: 537) and
then press or .
≥You can also select by pressing 2 to select the sub tab, pressing
34 or rotating , and then pressing 1.
≥Each press of [Q] switches between tabs [1] and [2].
4
Register menu items.
≥Press 34 to select an item and then press or .
≥Selection is also possible by rotating or .
•
Select items with [>] by selecting the item again.

Camera Customization – Quick Menu Customization
537
Menu Items That Can Be Registered
[1] tab
[Image Quality]
• [Exposure Comp.] (ÎExposure Compensation: 287)
• [Dynamic Range Boost] (Î[Dynamic Range Boost]: 363)
• [Sensitivity] (ÎISO Sensitivity: 294)
• [White Balance] (ÎWhite Balance (WB): 300)
• [Photo Style] (Î[Photo Style]: 307)
• [Metering Mode] (Î[Metering Mode]: 268)
• [Aspect Ratio] (Î[Aspect Ratio]: 120)
• [Picture Quality] (Î[Picture Quality]: 123)
• [Picture Size] (Î[Picture Size]: 121)
• [Long Exposure NR] (Î[Long Exposure NR]: 256)
• [Min. Shutter Speed] (Î[Min. Shutter Speed]: 257)
• [Filter Effect] (Î[Filter Settings]: 317)
• [Exposure Mode] (ÎRecording with Creative Video: 347)
• [Synchro Scan] (Î[Synchro Scan]: 443)
[Focus/Shutter]
• [AF Mode] (ÎSelecting the AF Mode: 167)
• [AF Detection Setting] (ÎAutomatic Detection: 170)
• [Detecting Subject] (ÎAutomatic Detection: 170)
• [AF Custom Setting(Photo)] (Î[AF Custom Setting(Photo)]: 160)
• [AF Custom Setting(Video)] (Î[AF Custom Setting(Video)]: 355)
• [Focus Peaking] (Î[Focus Peaking]: 202)
• [Focus Peaking Sensitivity] (Î[Focus Peaking]: 202)
• [1-Area AF Moving Speed] (Î[1-Area AF Moving Speed]: 166)

Camera Customization – Quick Menu Customization
538
[Flash]
• [Flash Mode] (Î[Flash Mode]: 329)
• [Flash Adjust.] (Î[Flash Adjust.]: 334)
• [Wireless Flash Setup] (ÎRecording Using a Wireless Flash: 337)
[Others (Photo)]
• [Drive Mode Setting] (ÎSelecting the Drive Mode: 210)
• [Bracketing] (ÎBracket Recording: 242)
• [Silent Mode] (Î[Silent Mode]: 250)
• [Image Stabilizer] (Î[Operation Mode]: 264)
• [Shutter Type] (Î[Shutter Type]: 252)
• [Ex. Tele Conv.] (ÎExtended Tele Conversion: 206)
[Image Format]
• [Rec. File Format] (Î[Rec. File Format]: 134)
• [Rec Quality] (Î[Rec Quality]: 136)
• [Rec Quality (My List)] (Î[add to list]: 148)
• [Variable Frame Rate] (ÎVariable Frame Rate: 415)
• [Time Code Display] (ÎTime Code: 386)
[Audio]
• [Audio Information] (Î[Audio Information]: 373)
• [Sound Rec Level Disp.] (Î[Sound Rec Level Disp.]: 365)
• [Sound Rec Level Adj.] (Î[Sound Rec Level Adj.]: 368)
• [Sound Rec Quality] (Î[Sound Rec Quality]: 369)
• [Sound Rec Level Limiter] (Î[Sound Rec Level Limiter]: 370)
• [4ch Mic Input] (Î[4ch Mic Input]: 381)
• [XLR Mic Adaptor Setting] (ÎXLR Microphone Adaptor (Optional): 379)
• [Sound Monitoring Channel] (Î[Sound Monitoring Channel]: 384)

Camera Customization – Quick Menu Customization
539
[Others (Video)]
• [Image Stabilizer] (Î[Operation Mode]: 264)
• [E-Stabilization (Video)] (Î[E-Stabilization (Video)]: 262)
• [Boost I.S. (Video)] (Î[Boost I.S. (Video)]: 262)
• [Image Area of Video] (Î[Image Area of Video]: 150)
• [Focus Transition] (Î[Focus Transition]: 425)
[2] tab
[Monitor / Display]
• [Constant Preview] (Î[Constant Preview]: 565)
• [Level Gauge] (Î[Level Gauge]: 573)
• [Histogram] (Î[Histogram]: 566)
• [Luminance Spot Meter] (Î[Luminance Spot Meter]: 406)
• [Frame Marker] (Î[Frame Marker]: 410)
• [Photo Grid Line] (Î[Photo Grid Line]: 567)
• [Live View Boost] (Î[Live View Boost]: 567)
• [Monochrome Live View] (Î[Monochrome Live View]: 576)
• [Night Mode] (Î[Night Mode]: 568)
• [LVF/Monitor Disp. Set] (Î[LVF/Monitor Disp. Set]: 569)
• [Video-Priority Display] (Î[Video-Priority Display]: 578)
• [Zebra Pattern] (Î[Zebra Pattern]: 408)
• [LUT View Assist (Monitor)] (Î[LUT View Assist (Monitor)]: 433)
• [LUT View Assist (HDMI)] (Î[LUT View Assist (HDMI)]: 433)
• [HLG View Assist (Monitor)] (Î[HLG View Assist]: 438)
• [HLG View Assist (HDMI)] (Î[HLG View Assist]: 438)
• [Sheer Overlay] (Î[Sheer Overlay]: 572)
• [I.S. Status Scope] (Î[I.S. Status Scope]: 572)
• [WFM/Vector Scope] (Î[WFM/Vector Scope]: 402)
• [Anamorphic Desqueeze Display] (Î[Anamorphic Desqueeze Display]: 441)
• [Color Bars] (ÎColor Bars/Test Tone: 412)

Camera Customization – Quick Menu Customization
540
[Lens / Others]
• [Focus Ring Control] (Î[Focus Ring Control]: 583)
• [Step Zoom] (Î[Step Zoom]: 208)
• [Zoom Speed] (Î[Zoom Speed]: 208)
• [Lens Information] (Î[Lens Information]: 266)
[Card/File]
• [Destination Card Slot] (ÎSwitching the Card to Display: 476)
[IN/OUT]
• [Wi-Fi] (ÎWi-Fi / Bluetooth: 624)
• [Fan Mode] (Î[Fan Mode]: 580)
[Others]
• [No Setting]
– Set when not using.
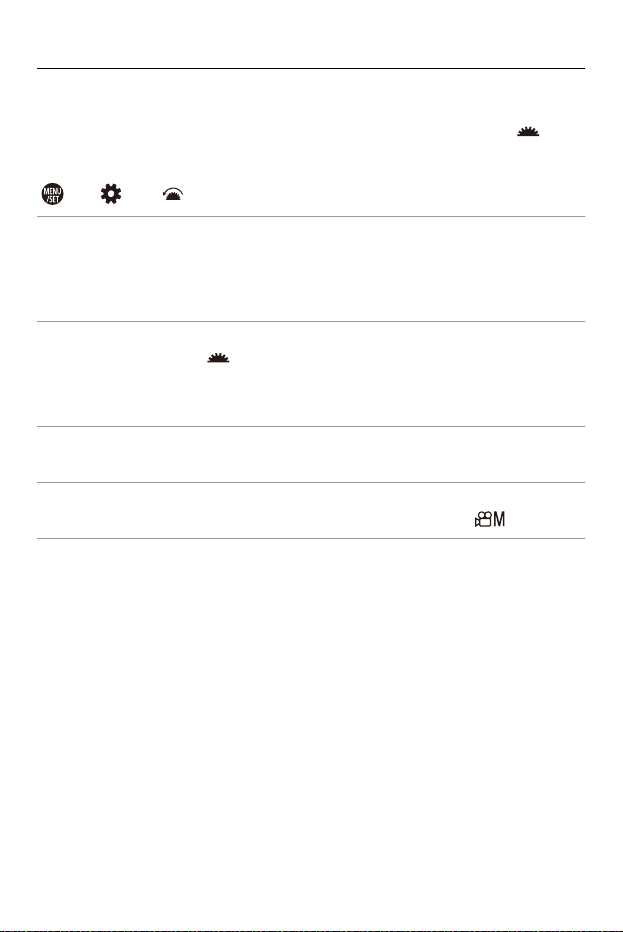
Camera Customization – Quick Menu Customization
541
Quick Menu Detailed Settings
Change the appearance of the Quick menu and the operation of
during menu display.
¨ [ ] ¨ [ ] ¨ Select [Q.MENU Settings]
[Layout Style]
Changes the appearance of the Quick menu.
[MODE1]: Displays the live view and the menu simultaneously.
[MODE2]: Displays the menu in full screen.
[Front Dial Assignment]
Changes the operation of in the Quick menu.
[Item]: Selects menu items.
[Value]: Selects setting values.
[Item Customize (Photo)]
Customizes the Quick menu to display when the mode dial is set to [iA]/[P]/[A]/[S]/[M].
[Item Customize (Video)]
Customizes the Quick menu to display when the mode dial is set to [ ].

Camera Customization – Custom Mode
542
Custom Mode
≥Register in Custom Mode: 543
≥Using Custom Mode: 545
≥Calling Up Settings: 546
Recording modes and menu settings that match your preferences can be
registered in Custom mode. You can use registered settings by switching
the mode dial to [C1] to [C4] modes.
Camera Customization – Custom Mode
543
Register in Custom Mode
You can register the currently set information of the camera.
At the time of purchase, the default settings of the [P] mode menus are
registered with all Custom modes.
1
Set to recording mode and menu settings of the state
you wish to save.
2
Select [Save to Custom Mode].
≥ ¨ [ ] ¨ [ ] ¨ [Save to Custom Mode]
3
Register.
≥Select the save-to number and then press or .
•
A confirmation screen will be displayed. Press [DISP.] to change the Custom
mode name.
How to enter characters (ÎEntering Characters: 105)
Registering Instant Customization
When you press the Fn button registered with [Save to Custom Mode] in
the recording standby screen, you can quickly register the current
recording settings in the Custom mode. (ÎFn Buttons: 517)
•
You cannot register [iA] mode in Custom mode.
• List of settings that can be registered in Custom mode (ÎList of Default Settings/
Custom Saving/Settings Available for Copying: 779)

Camera Customization – Custom Mode
544
Custom Mode Detailed Settings
You can create additional Custom mode sets, and how long to retain
temporarily changed settings details.
¨ [ ] ¨ [ ] ¨ Select [Custom Mode Settings]
[Limit No. of Custom Mode]
Sets the number of Custom modes that can be registered in [C4].
A maximum of 10 sets can be registered; 3 sets are available as default settings.
[Edit Title]
Changes the Custom mode name.
A maximum of 22 characters can be entered. A two-byte character is treated as two
characters.
• How to enter characters (ÎEntering Characters: 105)
[How to Reload Custom Mode]
Sets the timing at which to return the settings that were changed temporarily while the
Custom mode was being used to their registered settings.
[Change Recording Mode]/[Return from Sleep Mode]/[Turn the Power ON]
[Select Loading Details]
Sets the types of settings to call up with [Load Custom Mode].
[F / SS / ISO Sensitivity]: Enables calling up of aperture value, shutter speed, and
ISO sensitivity settings.
[White Balance]: Enables calling up of white balance settings.
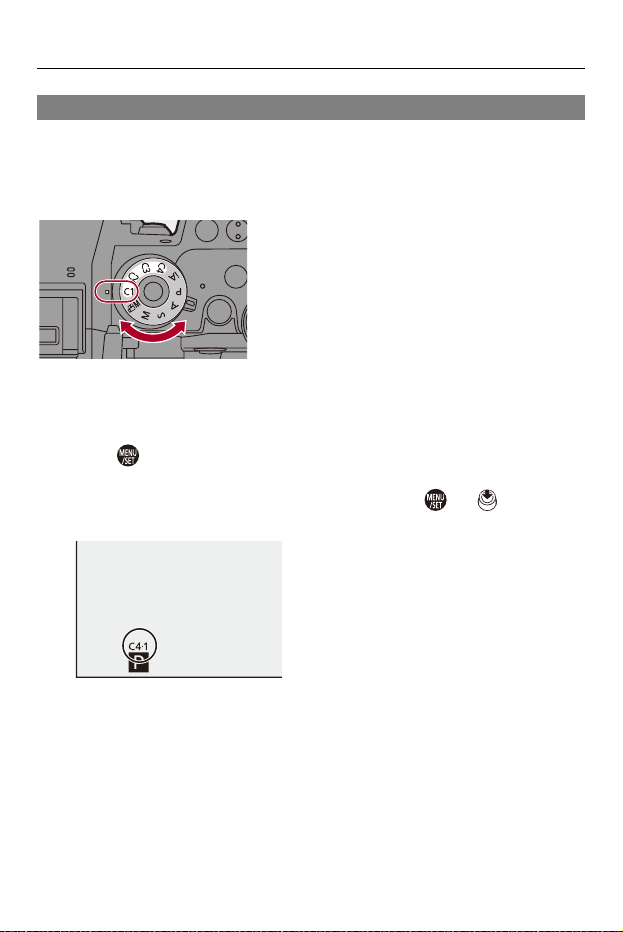
Camera Customization – Custom Mode
545
Using Custom Mode
Set the recording mode to [C1] to [C4].
≥Set the mode dial. (ÎSelecting the Recording Mode: 79)
≥If [C4], the last-used Custom mode will be called up.
[C4] Custom Mode Selection
1 Set the recording mode to [C4].
2 Press .
• The Custom mode selection menu appears.
3 Press 34 to select the Custom mode and then press or .
• The selected Custom mode icon will be displayed on the recording screen.
Changing Registered Details
Registered settings do not change even if you change the camera settings
temporarily with the mode dial set to [C1] to [C4].
To change the registered details, overwrite them by using [Save to Custom
Mode] in the [Setup] ([Setting]) menu.
Camera Customization – Custom Mode
546
Calling Up Settings
Call up registered Custom mode settings to the selected recording mode
and overwrite the current settings with these.
1
Set to the recording mode to be used.
≥Set the mode dial. (ÎSelecting the Recording Mode: 79)
2
Select [Load Custom Mode].
≥ ¨ [ ] ¨ [ ] ¨ [Load Custom Mode]
3
Select the Custom mode to call up.
≥Select the Custom mode and then press or .
•
Calling up of Custom modes is not possible between those created from [P]/[A]/
[S]/[M] modes and those created from [ ] mode.

Camera Customization – [Custom] Menu
547
[Custom] Menu
≥[Custom] menu ([Image Quality]): 548
≥[Custom] menu ([Focus/Shutter]): 552
≥[Custom] menu ([Operation]): 558
≥[Custom] menu ([Monitor / Display (Photo)]): 565
≥[Custom] menu ([Monitor / Display (Video)]): 575
≥[Custom] menu ([IN/OUT]): 579
≥[Custom] menu ([Lens / Others]): 581
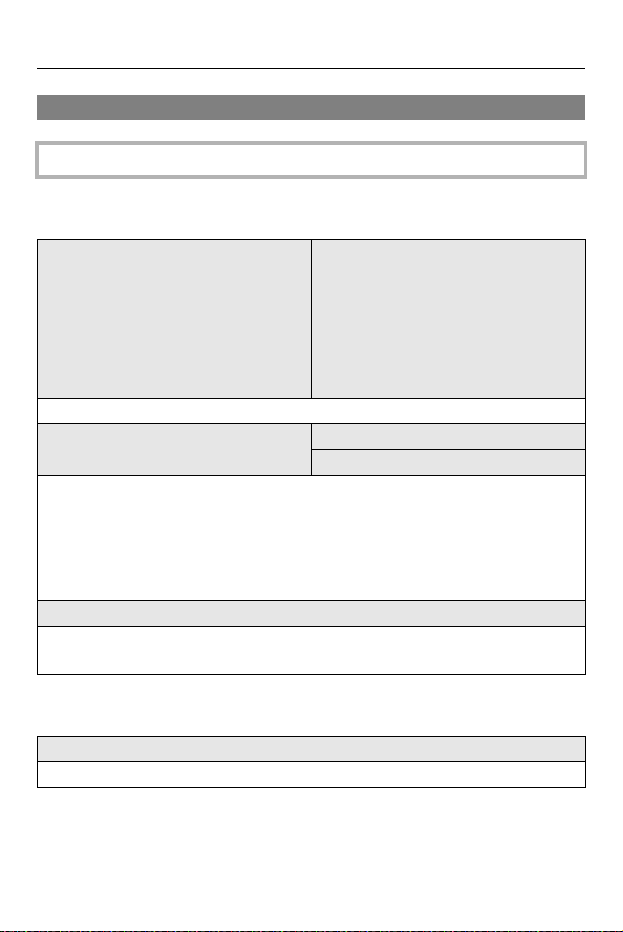
Camera Customization – [Custom] Menu
548
[Custom] menu ([Image Quality])
[Photo Style Settings]
[ISO Increments]
`: Default settings
[Show/Hide Photo Style]
[Vivid] / [Natural] / [L.ClassicNeo] /
[Flat] / [Landscape] / [Portrait] /
[L.Monochrome] / [L.Monochrome D] /
[L.Monochrome S] / [Cinelike D2] /
[Cinelike V2] / [Like709] / [V-Log] /
[Hybrid Log Gamma] / [MY PHOTO
STYLE 1] to [MY PHOTO STYLE 10]
Sets Photo Style items to be displayed on the menu.
[My Photo Style Settings]
[Add Effects]
[Load Preset Setting]
Enables detailed image quality adjustment settings for My Photo Style.
[Add Effects]: Enables [Sensitivity] and [White Balance] settings in image quality
adjustment.
[Load Preset Setting]: Sets the timing at which image quality adjustment values
changed in My Photo Style are returned to their registered state.
[Reset Photo Style]
Returns details changed in [Photo Style] and [Photo Style Settings] to their default
settings.
`[1/3 EV] / [1 EV]
Changes the intervals between ISO sensitivity adjustment values.
Camera Customization – [Custom] Menu
549
[Extended ISO]
[Exposure Offset Adjust.]
[Face Priority In Multi Metering]
[ON] / `[OFF]
Setting of ISO sensitivity to a minimum of [ISO50] is possible.
[Multi Metering] [−1EV] to [+1EV] (`[±0EV])
[Center Weighted] [−1EV] to [+1EV] (`[±0EV])
[Spot] [−1EV] to [+1EV] (`[±0EV])
[Highlight Weighted] [−1EV] to [+1EV] (`[±0EV])
Adjusts the exposure level that is the standard exposure for each setting item of
[Metering Mode].
Adds the adjustment value from this function to the exposure compensation value
(ÎExposure Compensation: 287) when recording.
• For video recording, it is not possible to add an adjustment value of a range that
exceeds ±3 EV.
`[ON] / [OFF]
When [Metering Mode] is set to [ ] (Multi-metering), the metering range for
automatic exposure is prioritized on the face and eyes.
When set to [OFF], the change to exposure caused by the [FACE/EYE] automatic
detection function can be avoided.
Camera Customization – [Custom] Menu
550
[Color Space]
[Exposure Comp. Reset]
[Auto Exposure in P/A/S/M]
`[sRGB] / [AdobeRGB]
This sets the method for correcting the color reproduction of the recorded images on
the screens of a PC or on a device such as a printer.
[sRGB]: This is widely used in PCs and similar devices.
[AdobeRGB]: AdobeRGB is mainly used for business purposes such as
professional printing because it has a greater range of reproducible colors than
sRGB.
• Set to [sRGB] if you are not very familiar with AdobeRGB.
• When the following functions are being used, the setting is fixed to [sRGB]:
– Video recording
– [Like709]/[V-Log] ([Photo Style])
– [Filter Settings]
[ON] / `[OFF]
This resets the exposure value when you change the recording mode or turn off the
camera.
`[ON] / [OFF]
Selects the setting method for aperture value, shutter speed, and ISO sensitivity
when recording video in the [P]/[A]/[S]/[M] modes.
[ON]: Records with values set automatically by the camera.
[OFF]: Records with the values set in the [P]/[A]/[S]/[M] modes.

Camera Customization – [Custom] Menu
551
[CreativeVideo Combined Set.]
[F/SS/ISO/Exposure Comp.] `[ ] / [ ]
[White Balance] `[ ] / [ ]
[Photo Style] `[ ] / [ ]
[Metering Mode] `[ ] / [ ]
[AF Mode] `[ ] / [ ]
Content set in [ ] mode can be separated from when taking pictures.
(Î[CreativeVideo Combined Set.]: 351)
Camera Customization – [Custom] Menu
552
[Custom] menu ([Focus/Shutter])
[Focus/Shutter Priority]
[Focus Switching for Vert / Hor]
[AF/AE Lock Hold]
`: Default settings
[AFS] `[FOCUS] / [BALANCE] / [RELEASE]
[AFC] [FOCUS] / `[BALANCE] / [RELEASE]
This sets whether to give priority to focus or shutter release during AF.
[FOCUS]: Disables recording when focus is not achieved.
[BALANCE]: Performs recording while controlling the balance between focusing
and shutter release timing.
[RELEASE]: Enables recording even when focus is not achieved.
[ON] / `[OFF]
This stores separate AF area positions (MF positions for MF Assist) for when the
camera is held vertically and when it is held horizontally.
(Î[Focus Switching for Vert / Hor]: 194)
[ON] / `[OFF]
This sets button operations for AF/AE Lock.
Turning this [ON] maintains the lock after releasing the button until it is pressed
again.
Camera Customization – [Custom] Menu
553
[AF+MF]
[MF Assist]
[MF Guide]
[ON] / `[OFF]
When the focus mode is set to [AFS], you can fine-adjust the focus manually during
AF Lock.
• When the shutter button is pressed halfway
• When [AF ON] is pressed
• When locked using the Fn button [AF LOCK] or [AF/AE LOCK]
[Focus Ring]
(When an interchangeable lens with a
focus ring is attached)
`[ON] / [OFF]
[AF Mode] `[ON] / [OFF]
[Press Joystick] [ON] / `[OFF]
[MF Assist Display] [FULL] / `[PIP]
This sets the display method of MF Assist (enlarged screen).
[Focus Ring]: The screen is enlarged by focusing with the lens.
[AF Mode]: The screen is enlarged by pressing [ ].
[Press Joystick]: Press the joystick to enlarge the display. (if [Joystick Setting] is
set to [D.FOCUS Movement]) (Î[Joystick Setting]: 563)
[MF Assist Display]: Sets the display method (full screen mode/windowed mode) of
MF Assist (enlarged screen).
[ ] / [ ] / [OFF]
* Default setting specifications vary depending on the country or area where the
camera was purchased.
During MF, MF Guide, which acts as a guide to recording distance, is displayed on
the screen. You can select from meters or feet for the display unit.
Camera Customization – [Custom] Menu
554
[Focus Ring Lock]
[Show/Hide AF Mode]
[Pinpoint AF Setting]
[ON] / `[OFF]
This disables the focus ring operation during MF to lock the focus.
• [MFL] is displayed on the recording screen while the focus ring is locked.
[Tracking] `[ON] / [OFF]
[Full Area AF] `[ON] / [OFF]
[Zone(Horizontal/Vertical)] `[ON] / [OFF]
[Zone] `[ON] / [OFF]
[1-Area+] `[ON] / [OFF]
[Pinpoint] `[ON] / [OFF]
Sets the AF mode items to be displayed on the AF mode selection screen.
[Pinpoint AF Time] [LONG] / `[MID] / [SHORT]
[Pinpoint AF Display] [FULL] / `[PIP]
Changes enlarged screen settings displayed when AF mode is [ ].
[Pinpoint AF Time]: Sets the time for which the screen is enlarged when the shutter
button is pressed halfway.
[Pinpoint AF Display]: Sets the display method (full screen mode/windowed mode)
of the enlarged screen.
Camera Customization – [Custom] Menu
555
[Shutter AF]
[Eye Detection Display]
[Half-Press Shutter]
[Assign REC to Shutter Button]
`[ON] / [OFF]
This adjusts focus automatically when you press the shutter button halfway.
`[ON] / [OFF]
When set to [OFF], you can make the cross for eye/face detection disappear when
focus is aligned by pressing the shutter button halfway, etc.
[ON] / `[OFF]
You can release the shutter quickly by pressing the shutter button halfway.
`[ON] / [OFF]
Use the shutter button for the start/stop operation of video recording in the [ ]
mode.
The start/stop operation of video recording using the shutter button can be disabled
when set to [OFF].
Camera Customization – [Custom] Menu
556
[Quick AF]
[Eye Sensor AF]
[Looped Focus Frame]
[ON] / `[OFF]
When the amount of camera shake becomes small, the camera will automatically
adjust the focus and focus adjustment will then be quicker when the shutter button is
pressed.
• The battery will drain faster than usual.
• This function is not available in the following cases:
– In preview mode
– In low light situations
[ON] / `[OFF]
When looking through the viewfinder, if the eye sensor operates, then AF will
function.
• [Eye Sensor AF] may not work in low light situations.
[ON] / `[OFF]
When moving the AF area, MF Assist, or video enlarged display of live view, this
enables looping from one edge to the opposite edge of the screen.

Camera Customization – [Custom] Menu
557
[Enlarged Live Display(Video)]
[Keep Enlarged Display] `[ON] / [OFF]
[PIP Display] [FULL] / `[PIP]
Sets the operation of the function for enlarging the video live view (Î[Enlarged Live
Display(Video)]: 356).
[Keep Enlarged Display]
[ON]: Enlarges display after releasing the Fn button until the button is pressed
again.
[OFF]: Enlarges display just while the Fn button is being pressed.
[PIP Display]
Sets the way the enlarged screen is displayed (full screen mode/windowed mode).
Camera Customization – [Custom] Menu
558
[Custom] menu ([Operation])
[Q.MENU Settings]
[Touch Settings]
`: Default settings
[Layout Style] `[MODE1] / [MODE2]
[Front Dial Assignment] [Item] / `[Value]
[Item Customize (Photo)]
[Item Customize (Video)]
Customizes the Quick menu.
(ÎQuick Menu Customization: 535)
[Touch Screen] `[ON] / [OFF]
[Touch Tab] [ON] / `[OFF]
[Touch AF] `[AF] / [AF+AE]
[Touch Pad AF]
[EXACT] / [OFFSET1] to [OFFSET7] /
`[OFF]
Enables touch operation on the monitor display.
[Touch Screen]: All touch operations.
[Touch Tab]: Operations of tabs, such as [ ] on the right side of the screen.
[Touch AF]: Operation to optimize the focus ([AF]) for a touched subject.
Alternatively, operation to optimize both the focus and brightness ([AF+AE]).
(ÎMoving the AF Area by Touch: 190)
[Touch Pad AF]: Touch pad operation during viewfinder display. (ÎMoving the AF
Area Position with the Touch Pad: 192)
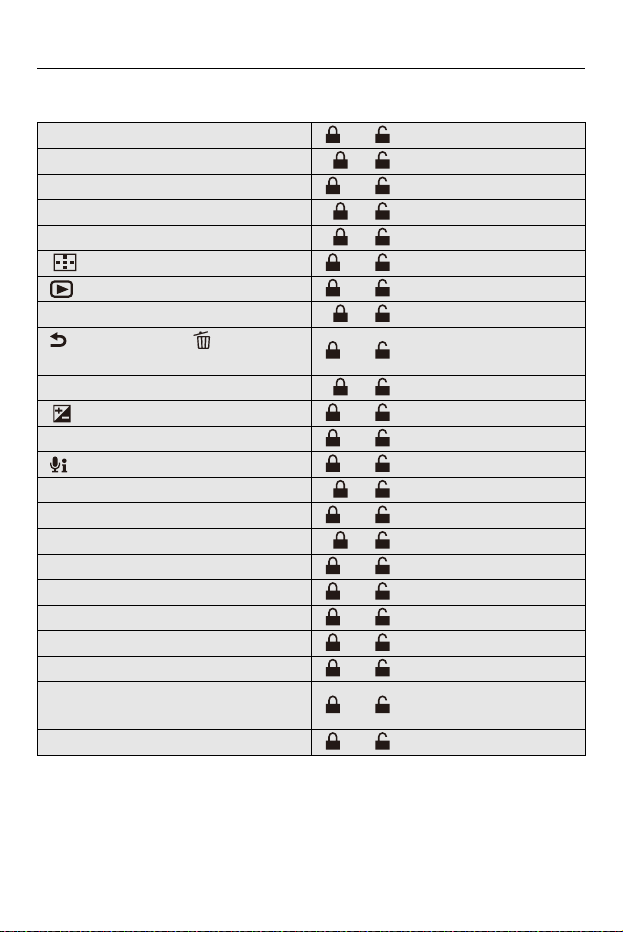
Camera Customization – [Custom] Menu
559
[Lock Lever Setting]
[AF ON] button []/ `[]
Joystick `[]/ []
[Q] button []/ `[]
Cursor buttons / [MENU/SET] button `[]/ []
Control dial `[]/ []
[ ] (AF mode) button []/ `[]
[ ] (Playback) button []/ `[]
Touch screen `[]/ []
[ ] (Cancel) button / [ ] (Delete)
button / Fn button (Fn1)
[]/ `[]
[DISP.] button `[]/ []
[ ] (Exposure compensation) button []/ `[]
[ISO] button []/ `[]
[ ] (Audio information) button []/ `[]
Rear dial `[]/ []
Video rec. button []/ `[]
Front dial `[]/ []
[WB] button []/ `[]
[LVF] button []/ `[]
Shutter button []/ `[]
Sub video rec. button []/ `[]
Lens []/ `[]
Enlarged live display (video) button / Fn
button (Fn2)
[]/ `[]
Preview button / Fn button (Fn3) []/ `[]
Camera Customization – [Custom] Menu
560
[Fn Button Set]
Sets the operations to be disabled with the operation lock lever. (Only for recording
screen)
• The lock is applied or released each time you press .
• Press [DISP.] to change the page.
• The default settings are restored when you press [Q].
• [ ] is displayed on the screen when you try to operate an operation part that is
locked.
• Operation parts locked by “Lens” depend on the lens. Lens switches are not
locked.
• Even if the lens is operated while “Lens” is locked, [ ] does not get displayed
on the screen.
After locking with the “Lens” setting, test whether the lock is working by trying to
operate the lens.
[Setting in REC mode]
[Setting in PLAY mode]
Registers a function to the Fn button.
(ÎRegister Functions to the Fn Buttons: 520)
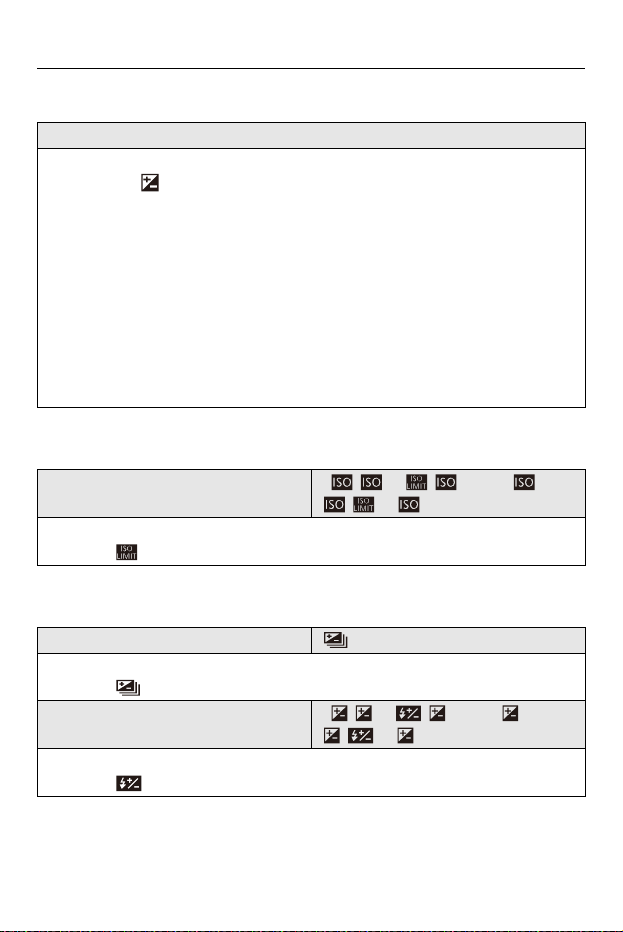
Camera Customization – [Custom] Menu
561
[WB/ISO/Expo. Button]
[ISO Displayed Setting]
[Exposure Comp. Disp. Setting]
[WHILE PRESSING] / [AFTER PRESSING1] / `[AFTER PRESSING2]
This sets the operation to be performed when [WB] (White balance), [ISO] (ISO
sensitivity) or [ ] (Exposure compensation) is pressed.
[WHILE PRESSING]: Allows you to change the setting while pressing and holding
the button. Release the button to confirm the settings value, and to return to the
recording screen.
[AFTER PRESSING1]: Press the button to change settings. Press the button again
to confirm the settings value, and to return to the recording screen.
[AFTER PRESSING2]: Press the button to change settings. Each press of the
button switches the settings value. (Except that of exposure compensation) To
confirm your selection and return to the recording screen, press the shutter button
halfway.
[Front/Rear Dials]
`[ / ] / [ / ] / [OFF/ ] /
[ / ] / [ /OFF]
This sets the operations of the dials in the setting screen for ISO sensitivity.
Assigning [ ] lets you change [ISO Auto Upper Limit Setting].
[Cursor Buttons (Up/Down)] []/ `[OFF]
This sets the operations of the 34 buttons in the exposure compensation screen.
Assigning [ ] lets you set exposure bracketing.
[Front/Rear Dials]
`[ / ] / [ / ] / [OFF/ ] /
[ / ] / [ /OFF]
This sets the operations of the dials in the exposure compensation screen.
Assigning [ ] lets you adjust flash output.
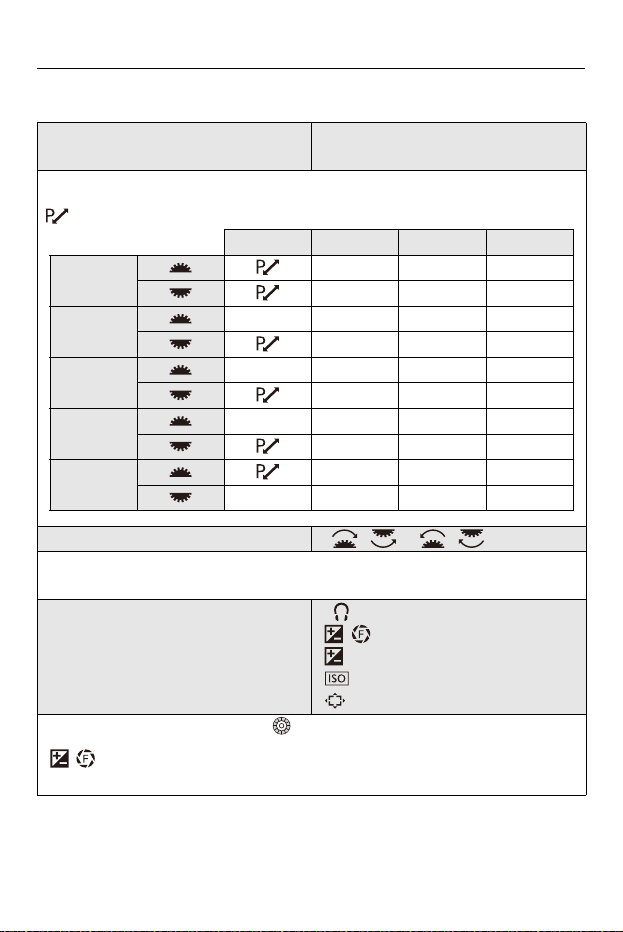
Camera Customization – [Custom] Menu
562
[Dial Set.]
[Assign Dial (F/SS)]
`[SET1] / [SET2] / [SET3] / [SET4] /
[SET5]
Sets the operations to be assigned to the dials in [P]/[A]/[S]/[M] modes.
: Program Shift, F: Aperture value, SS: Shutter speed
[P] [A] [S] [M]
[SET1]
FSSF
FSSSS
[SET2]
—F—F
—SSSS
[SET3]
— — SS SS
F—F
[SET4]
——— F
FSSSS
[SET5]
FSSF
———SS
[Rotation (F/SS)] `[ ] / [ ]
Changes the rotational directions of the dials for aperture value and shutter speed
adjustment.
[Control Dial Assignment]
`[ ] ([Headphone Volume]) /
[ / ] ([Exposure / Aperture]) /
[ ] ([Exposure Comp.]) /
[ ] ([Sensitivity]) /
[ ] ([Focus Frame Size])
Sets the function to be assigned to on the recording screen.
[/]: In [M] mode, this assigns the operation to adjust the aperture value. In
other than [M] mode, this assigns the operation of exposure compensation.
Camera Customization – [Custom] Menu
563
[Joystick Setting]
[Exposure Comp.] [ ] / [ ] / `[OFF]
Assigns exposure compensation to or . (Except in [M] mode)
• The [Assign Dial (F/SS)] setting takes priority.
[Dial Operation Switch Setup]
[]
[]
In the Fn button [Dial Operation Switch], this sets the functions to be registerd
temporarily to or . (ÎRegister Functions to the Dials: 532)
[Rotation (Menu Operation)]
`[ ] / [ ] /
[]/ []
Changes the rotational direction of the dials when operating menus.
`[D.FOCUS Movement] / [Fn] / [MENU] / [OFF]
Sets the joystick movement on the recording screen.
[D.FOCUS Movement]: Moves the AF area and MF Assist. (ÎAF Area Movement
Operation: 187, Record Using MF: 195)
[Fn]: Operates as Fn buttons.
[MENU]: Operates as . Operations that can be performed by moving the
joystick are disabled.
[OFF]: Disables the joystick.

Camera Customization – [Custom] Menu
565
[Custom] menu ([Monitor / Display (Photo)])
[Auto Review]
[Constant Preview]
`: Default settings
[Duration Time (photo)] [HOLD] / [5SEC] to [0.5SEC] / `[OFF]
[Playback Operation Priority] [ON] / `[OFF]
This displays an image immediately after it is recorded.
[Duration Time (photo)]: Sets the Auto Review when taking pictures.
[Playback Operation Priority]: When this is set to [ON], you can toggle the
playback screen during Auto Review, or delete pictures.
• If you set [Duration Time (photo)] to [HOLD], the image recorded stays displayed
until the shutter button is pressed halfway.
[Playback Operation Priority] will be fixed to [ON].
• When the following function is being used, [Auto Review] is not available:
– SH burst recording
[ON] / `[OFF]
[SET]
[Effect]
[Preview While MF Assist]
You can always confirm the effects of aperture on the recording screen when in [A]/
[M] mode.
You can also confirm the shutter speed at the same time when in [M] mode.
• You can set the combination of the aperture effect and the shutter speed effect in
[Effect].
• Preview also operates in the MF Assist screen when [Preview While MF Assist] is
set to [ON].
• The preview of the shutter speed effect does not work when using a flash.
Camera Customization – [Custom] Menu
566
[Histogram]
[ON] / `[OFF]
This displays the histogram.
Turning this [ON] displays the histogram transition screen.
Press 3421 to set the position.
Positions can be moved to the diagonal directions using the joystick.
• You can also move the position by dragging the histogram on the recording
screen.
• A histogram is a graph that displays brightness along the horizontal axis, and the
number of pixels at each brightness level on the vertical axis.
By looking at the distribution of the graph, you can determine the current
exposure.
(A) Dark
(B) Bright
• When the recorded image and the histogram do not match each other under the
following conditions, the histogram is displayed in orange:
– During exposure compensation
– When the flash fires
– When the standard exposure is not achieved, such as in low light situations.
• When the following function is being used, the [Histogram] is not available:
– [WFM/Vector Scope]
• The histogram is an approximation in the recording mode.
(A) (B)
Camera Customization – [Custom] Menu
567
[Photo Grid Line]
[Live View Boost]
[ ]/ [ ]/ [ ]/ `[OFF]
Sets the grid line pattern to be displayed on the recording screen.
When using [ ], you can press 3421 to set the position.
Positions can be moved to the diagonal directions using the joystick.
• When using [ ], you can also drag [ ] on the grid lines on the recording
screen to move the position.
[MODE1] / [MODE2] / `[OFF]
[SET] [P/A/S/M] / `[M]
Displays the screen brighter to make it easier to check subjects and compositions
even in low-light environment.
[MODE1]: Setting for low brightness, with priority given to a soft display.
[MODE2]: Setting for high brightness, with priority given to image visibility.
• You can change the recording mode in which [Live View Boost] works by using
[SET].
• This mode does not affect recorded images.
• Noise may be more noticeable in the screen than in the recorded image.
• This function does not work in the following cases:
– When adjusting the exposure (when the shutter button is pressed halfway, for
example)
– When recording a video
– When using [Filter Settings]
– When displaying the shutter speed effect of [Constant Preview]
Camera Customization – [Custom] Menu
568
[Night Mode]
[Monitor] [ON] / `[OFF]
[LVF] [ON] / `[OFF]
Displays the monitor and viewfinder in red.
In dark environments, this reduces brightness of the screen that can make the
surroundings difficult to see.
You can also set the luminance of the red display.
1 Press 3421 to select [ON] on the monitor or viewfinder (LVF).
2 Press [DISP.] to display the brightness adjustment screen.
• Display the monitor to adjust the monitor, and display the viewfinder to adjust
the viewfinder.
3 Press 21 to adjust luminance and then press or .
• This effect is not applied to images output via HDMI.
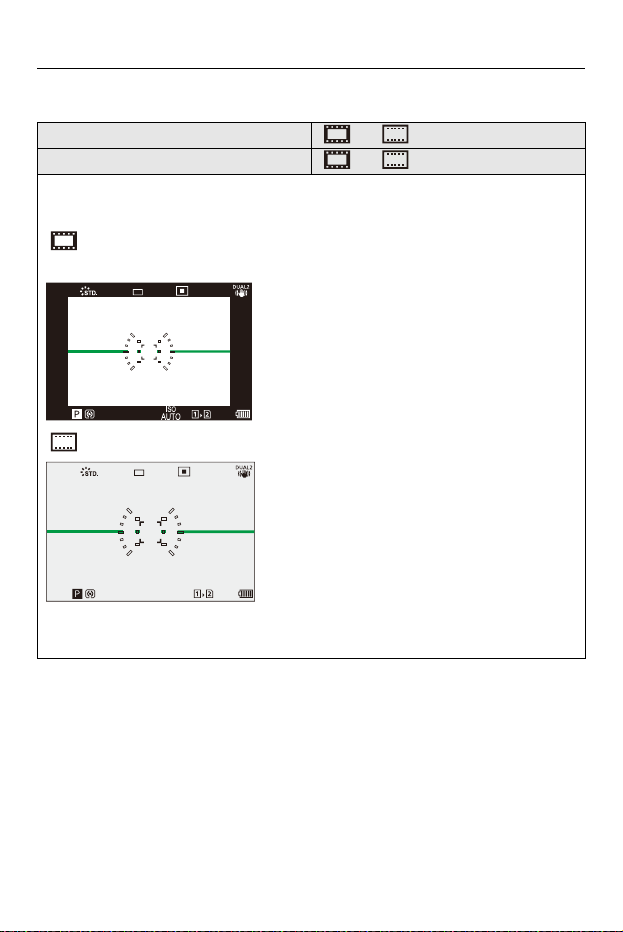
Camera Customization – [Custom] Menu
569
[LVF/Monitor Disp. Set]
[LVF Disp. Set] []/ `[]
[Monitor Disp. Set] []/ `[]
Selects whether to show the live view without covering the information display, or to
display over the entire screen.
[]: Scales down images slightly so you can better review the composition of the
images.
[]: Scales images to fill the entire screen so you can see their details.
• You can assign the function that switches the currently displayed monitor or
viewfinder display style to an Fn button. (Î[LVF/Monitor Disp. Set]: 527)
999
±
0
AFSAFS
L
FINE
999
±
0
L
AFSAFS
FINE
ISO
AUTO

Camera Customization – [Custom] Menu
570
[Horizontal Image Flip(Monitor)] `[AUTO] / [ON] / [OFF]
[Vertical Image Flip(Monitor)] `[AUTO] / [ON] / [OFF]
You can set whether the screen flips or not depending on the facing or angle of the
monitor during recording.
[Horizontal Image Flip(Monitor)]
[AUTO]: The screen automatically flips horizontally according to the angle to which
the monitor is opened or closed.
[ON]: The screen is flipped horizontally all the time.
[OFF]: Screen is not flipped.
[Vertical Image Flip(Monitor)]
[AUTO]: The screen automatically flips vertically according to the angle to which the
monitor is rotated.
[ON]: The screen is flipped vertically all the time.
[OFF]: Screen is not flipped.
• The settings for this function are not reflected in the playback screen.
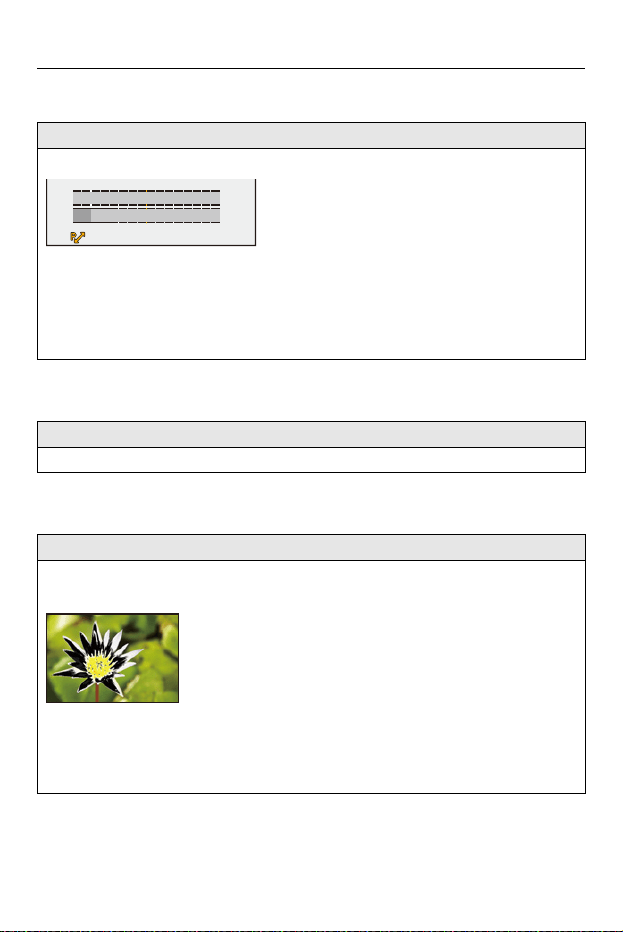
Camera Customization – [Custom] Menu
571
[Expo.Meter]
[Focal Length]
[Blinking Highlights]
[ON] / `[OFF]
This displays the exposure meter.
• Set to [ON] to display the exposure meter when performing Program Shift, setting
aperture, and setting shutter speed.
• If no operations are performed for a certain period of time, the exposure meter
disappears.
`[ON] / [OFF]
Displays the focal length on the recording screen during zoom control.
[ON] / `[OFF]
Overexposed areas appear blinking in black and white during Auto Review or
playback.
• The display without the highlights is added to the display shown when [DISP.] is
pressed in the playback screen.
Use this to delete the highlight display. (ÎPlayback Screen: 93)
F5.630
SSSS
FF
8 15 30 60 125
5.64.0 8.0 112.8
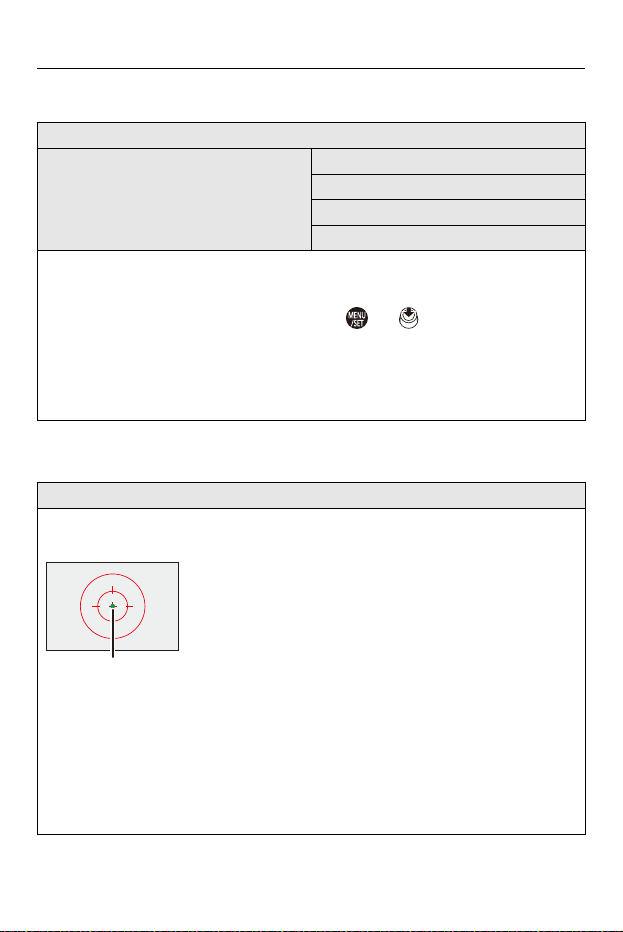
Camera Customization – [Custom] Menu
572
[Sheer Overlay]
[I.S. Status Scope]
[ON] / `[OFF]
[SET]
[Transparency]
[Image Select]
[Reset at Power Off]
[Disp. Image (shutter-press)]
Displays recorded pictures by overlapping on the recording screen.
• Use [Image Select] to select the pictures to be displayed.
Press 21 to select pictures and then press or to confirm.
• If you set [Disp. Image (shutter-press)] to [OFF], [Sheer Overlay] is canceled while
the shutter button is being pressed halfway or pressed fully.
• When the following function is being used, [Sheer Overlay] is not available:
– Video recording
[ON] / `[OFF]
Displays a reference point (C) on the recording screen in order to let you check for
camera shake.
• [I.S. Status Scope] does not work in the following cases:
– When [Operation Mode] in [Image Stabilizer] is set to [OFF]
– When the O.I.S. switch on the lens is [OFF]
• When the following functions are being used, [I.S. Status Scope] is not available:
– Video recording
– High Resolution mode (when [Handheld High-Res] is set to [OFF])
(C)
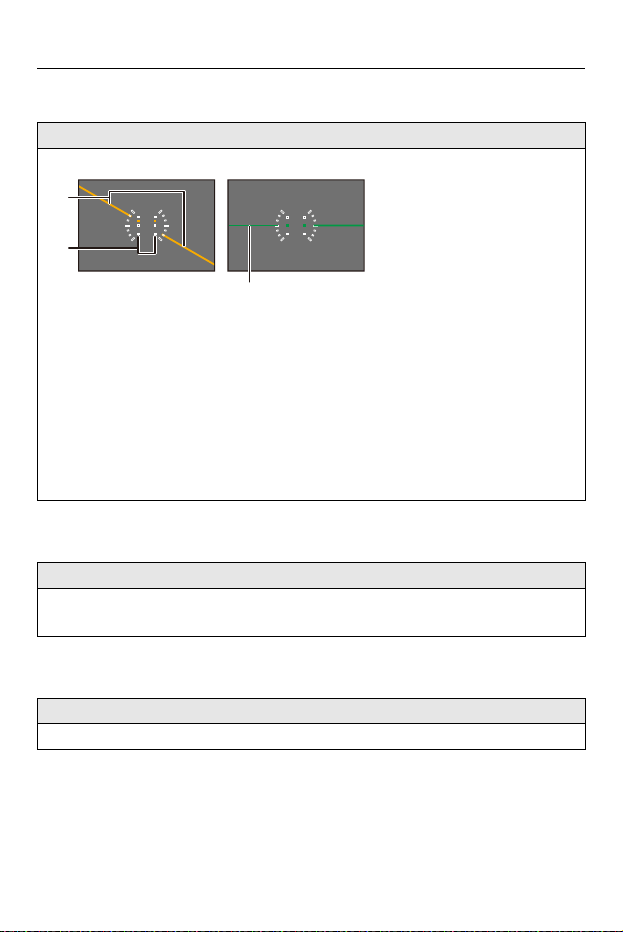
Camera Customization – [Custom] Menu
573
[Level Gauge]
[Luminance Spot Meter]
[Framing Outline]
`[ON] / [OFF]
Displays the level gauge which is useful in correcting camera tilt.
(D) Horizontal
(E) Vertical
(F) Green (no tilt)
• Even after correcting the tilt, there may still be an error of approx. ±1o.
• When the camera is tilted significantly upwards or downwards, the level gauge
may not be displayed correctly.
• You can adjust the level gauge and reset the adjusted values in [Level Gauge
Adjust.] in the [Setup] ([Monitor / Display]) menu. (Î[Level Gauge Adjust.]: 597)
[ON] / `[OFF]
Specify any spot on the subject to measure the luminance over a small area.
(Î[Luminance Spot Meter]: 406)
[ON] / `[OFF]
Displays the outline for the live view.
(D)
(E)
(F)

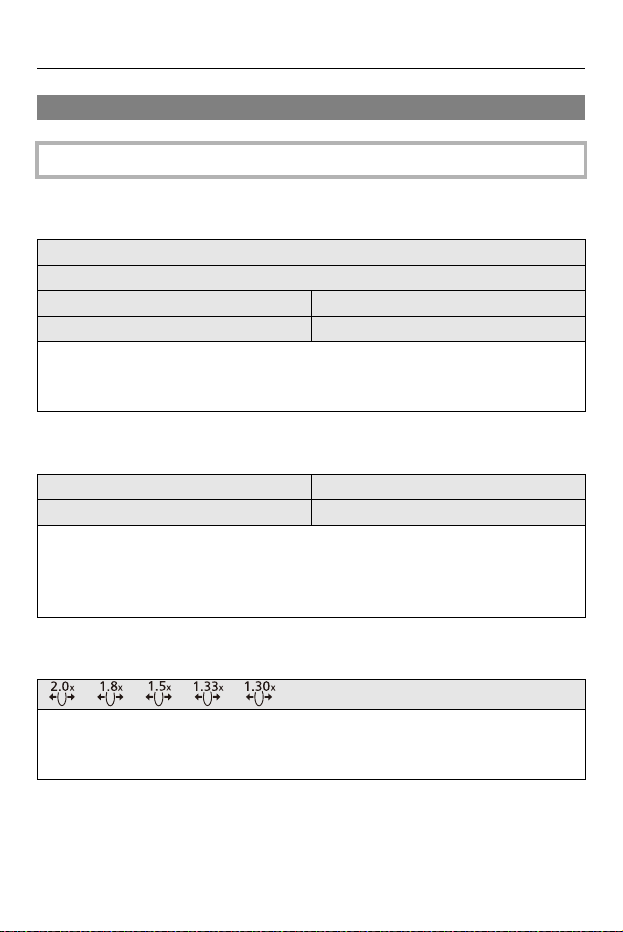
Camera Customization – [Custom] Menu
575
[Custom] menu ([Monitor / Display (Video)])
[V-Log View Assist]
[HLG View Assist]
[Anamorphic Desqueeze Display]
`: Default settings
[Read LUT File]
[LUT Select]
[LUT View Assist (Monitor)] [ON] / `[OFF]
[LUT View Assist (HDMI)] [ON] / `[OFF]
You can show images with LUT data applied on the monitor/viewfinder, or output
them via HDMI.
(Î[V-Log View Assist]: 433)
[Monitor] [MODE1] / `[MODE2] / [OFF]
[HDMI] `[AUTO] / [MODE1] / [MODE2] / [OFF]
At recording or playback of HLG video, this displays images with converted color
gamut and brightness on the camera monitor/viewfinder, or outputs these over
HDMI.
(Î[HLG View Assist]: 438)
[ ] / [ ] / [ ] / [ ] / [ ] / `[OFF]
This displays the desqueezed images suited to the magnification of the anamorphic
lens on this camera.
(Î[Anamorphic Desqueeze Display]: 441)
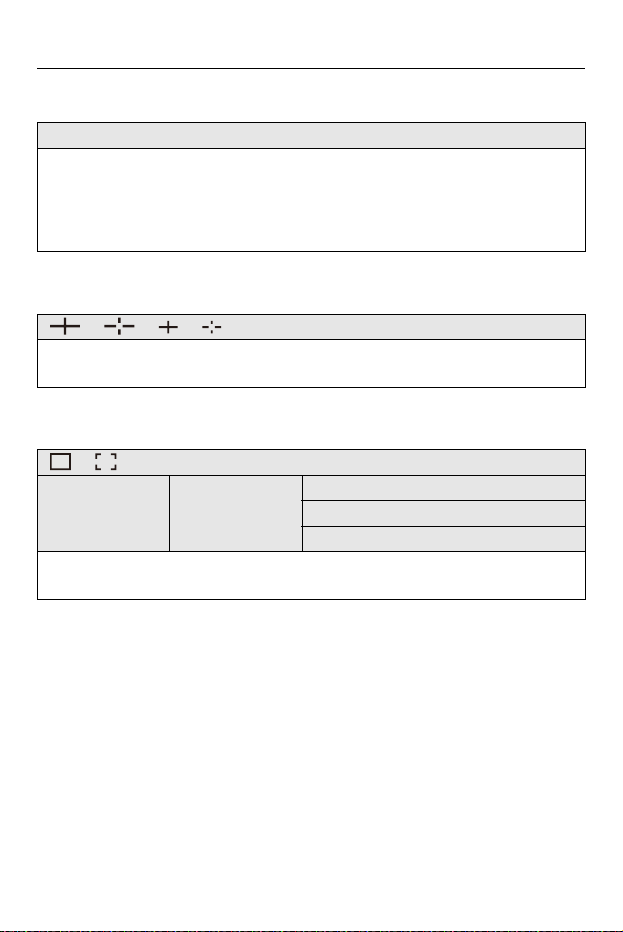
Camera Customization – [Custom] Menu
576
[Monochrome Live View]
[Center Marker]
[Safety Zone Marker]
[ON] / `[OFF]
You can display the recording screen in black and white.
• If you use the HDMI output during recording, the output image will not be
displayed in black and white.
• [Monochrome Live View] is not available when [Night Mode] is used.
[ ] / [ ] / [ ] / [ ] / `[OFF]
The center of the recording screen will be displayed as [+].
The shape of the marker can be changed.
[ ] / [ ] / `[OFF]
[SET] [Size]
[95%]
[90%]
[80%]
This displays the safety zone, which shows a guide to the area that would be shown
on a household TV, on the recording screen.
Camera Customization – [Custom] Menu
577
[Frame Marker]
[Zebra Pattern]
[WFM/Vector Scope]
[ON] / `[OFF]
[SET]
[Frame Aspect]
[Frame Color]
[Frame Mask]
A frame with the set aspect ratio is displayed on the recording screen.
[Frame Aspect] can also be customized.
(Î[Frame Marker]: 410)
[ZEBRA1] / [ZEBRA2] / [ZEBRA1+2] / `[OFF]
[SET]
[Zebra 1]
[Zebra 2]
Parts that are brighter than the base value are displayed with stripes.
(Î[Zebra Pattern]: 408)
[WAVE] / [VECTOR] / `[OFF]
This displays the waveform monitor or the vector scope on the recording screen.
(Î[WFM/Vector Scope]: 402)
Camera Customization – [Custom] Menu
578
[Color Bars]
[Video-Priority Display]
[Red REC Frame Indicator]
[SMPTE] / [EBU] / [ARIB]
The color bars are displayed on the recording screen.
(ÎColor Bars/Test Tone: 412)
[ON] / `[OFF]
When in [iA]/[P]/[A]/[S]/[M] modes, switch the recording screen display and the
control panel to suit video recording, as with the [ ] mode.
The playback screen also switches to a display that prioritizes video.
• When set to a setting where video recording is not available, [Video-Priority
Display] is fixed to [OFF].
• [Video-Priority Display] works only during video recording when using the following
functions:
– [Time Lapse Shot]
– [Stop Motion Animation]
[ON] / `[OFF]
A red frame is displayed on the recording screen that indicates that video is being
recorded.
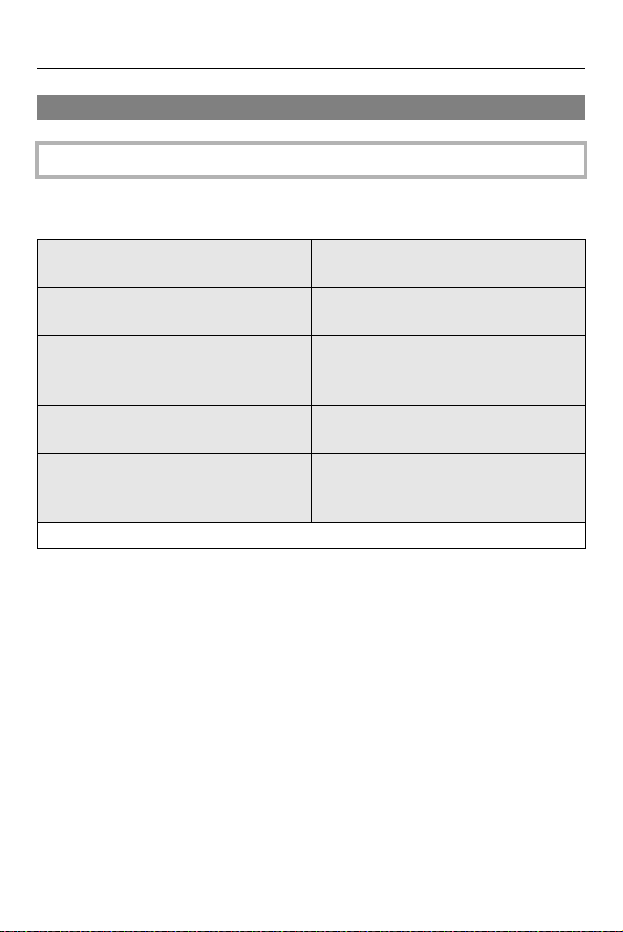
Camera Customization – [Custom] Menu
579
[Custom] menu ([IN/OUT])
[HDMI Rec Output]
`: Default settings
[Info Display] (ÎOutputting the Camera
Information Display via HDMI: 471)
[ON] / `[OFF]
[Down Convert] (ÎHDMI Output Image
Quality: 462)
`[AUTO] / [C4K/4K] / [1080p] / [1080i] /
[OFF]
[HDMI Recording Control] (ÎOutputting
Control Information to an External
Recorder: 472)
[ON] / `[OFF]
[Sound Output (HDMI)] (ÎOutputting
Audio via HDMI: 473)
`[ON] / [OFF]
[Enlarged Live Display] (ÎOutputting the
Enlarged Live Display (Video) via HDMI:
473)
[MODE1] / [MODE2] / `[OFF]
Sets HDMI output during recording.

Camera Customization – [Custom] Menu
580
[Fan Mode]
[Tally Lamp]
[AUTO1] / `[AUTO2] / [FAST] / [NORMAL] / [SLOW] / [OFF]
Sets fan operation.
[AUTO1]: The camera switches [SLOW]/[NORMAL] automatically according to the
temperature of the camera. This setting prioritizes controlling rises in temperature in
the camera.
[AUTO2]: The camera switches [OFF]/[SLOW]/[NORMAL] automatically according
to the temperature of the camera.
[FAST]: The fan operates constantly at fast speed.
[NORMAL]: The fan operates constantly at a standard speed.
[SLOW]: The fan operates constantly at low speed.
[OFF]: The fan does not operate.
• [OFF] can be set when in [iA]/[P]/[A]/[S]/[M] mode.
• When the following functions are being used, [SLOW] is not available.
When the following functions are used while set to [SLOW], the setting switches to
[AUTO1]:
– [Rec Quality] exceeding a resolution of C4K
– [Rec Quality] with a high frame rate video exceeding a recording frame rate of
60.00p
– [Variable Frame Rate] exceeding a frame rate of 60 fps
[Front Tally Lamp] `[H] / [L] / [OFF]
[Rear Tally Lamp] [H] / `[L] / [OFF]
Sets how the tally lamps turn on while recording video and their brightness.
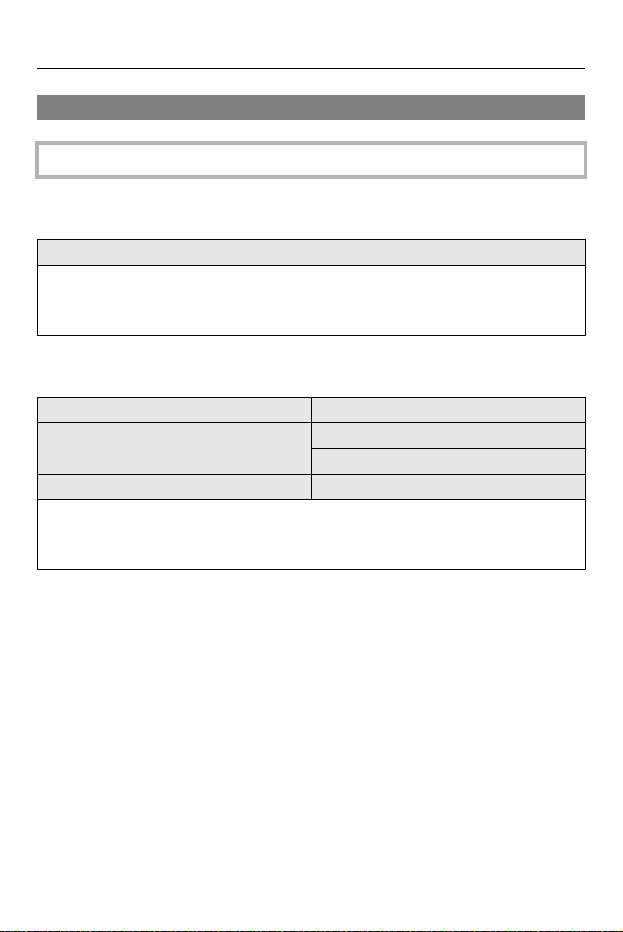
Camera Customization – [Custom] Menu
581
[Custom] menu ([Lens / Others])
[Lens Focus Resume]
[Power Zoom Lens]
`: Default settings
[ON] / `[OFF]
The camera saves the focus position when you turn it off.
When using an interchangeable lens compatible with power zoom, the zoom
position is also saved.
[Step Zoom] [ON] / `[OFF]
[Zoom Speed]
[Photo]: [H] / `[M] / [L]
[Video]: [H] / `[M] / [L]
[Zoom Ring] `[ON] / [OFF]
This sets the zoom operation when using a lens that supports power zoom
(motorized zoom).
(Î[Power Zoom Lens]: 208)

Camera Customization – [Custom] Menu
582
[Lens Fn Button Setting]
[Aperture Ring Increment]
`[Focus Stop] / [AF Mode] / [AF Detection Setting] / [Detecting Subject] / [Focus
Ring Lock] / [AE LOCK] / [AF LOCK] / [AF/AE LOCK] / [AF-ON] / [AF-ON : Near
Shift] / [AF-ON : Far Shift] / [Focus Area Set] / [Enlarged Live Display(Video)] /
[Image Stabilizer] / [Preview] / [Preview Aperture Effect] / [No Setting] / [Off (Disable
Press and Hold)] / [Restore to Default]
Register a function to the focus button of an interchangeable lens.
• When [Focus Stop] is set, focus is fixed while the focus button is being pressed.
[SMOOTH] / `[1/3EV]
Stops for setting the aperture value with the aperture ring can be changed.
[SMOOTH]: You can finely adjust the aperture value.
[1/3EV]: You can set the aperture value at 1/3 EV stops.
• This can be used when a lens compatible with a clickless aperture ring (H-X1025/
H-X2550: optional) is attached. (As of January 2022)
• When taking pictures, this setting will take effect if the aperture ring is set to a
position other than [A].
• If the position of the aperture ring is set to [A], the aperture value set by the
camera will take effect and can be adjusted like with [1/3EV].
• During video recording, fine adjustments can be made like with [SMOOTH].
• When [SMOOTH] is set, fractions of aperture values are not displayed on the
screen.

Camera Customization – [Custom] Menu
583
[Focus Ring Control]
`[NON-LINEAR] / [LINEAR]
[SET] [90°] to [1080°] (`[300°]) / [Maximum]
Sets the amount of movement for focusing using the focus ring. (When using
supported lenses)
[NON-LINEAR]: Focus responds by accelerating according to rotation speed of the
focus ring.
[LINEAR]: Focus responds at a constant amount according to the rotational angle of
the focus ring.
• When using lenses equipped with focus clutch mechanisms, set the lens to AF
and the camera to MF.
[SET]: Sets the rotational angle of the focus ring for when [LINEAR] is selected.
• Angles that cannot be set with the attached lens are not displayed.
• For information on lenses that support focus ring control, refer to the following
support site:
https://panasonic.jp/support/global/cs/dsc/connect/index.html
(English only)

Camera Customization – [Custom] Menu
584
[Lens Information]
[Lens Info. Confirmation]
[Vertical Position Info (Video)]
[Lens1] to [Lens12] (`[Lens1])
When using a lens that does not have a communication function with the camera,
register the lens information in the camera.
• This is linked with [Lens Information] in [Image Stabilizer] under the [Photo]
([Others (Photo)]) menu. (Î[Lens Information]: 266)
`[ON] / [OFF]
When you have attached a lens that does not have a communication function with
this camera, a message asking for confirmation of the lens information is displayed
when you turn on the camera.
`[ON] / [OFF]
You can set whether or not to record the camera’s vertical orientation information
during video recording.
[ON]: Records vertical orientation information. Videos recorded with the camera held
vertically will be automatically played back vertically on the PC, smartphone, etc.
during playback.
[OFF]: Does not record vertical orientation information.
• On the playback screen of the camera, only the thumbnail display is played in
vertical orientation.


Camera Customization – [Setup] Menu
586
[Setup] menu ([Card/File])
[Card Format]
`: Default settings
[Card Slot 1(CFexpress)] / [Card Slot 2(SD)]
Formats the card (initialization).
Format the cards with the camera before use.
Low level formatting of CFexpress cards
When formatting CFexpress cards, you can select whether to perform a low level
format.
If the writing speed of the card has started to drop, we recommend performing a low
level format.
1 Select [Card Slot 1(CFexpress)].
2 Press [DISP.] and put a check mark next to [Low Level Format].
3 Select [Yes].
• When a card is formatted, all of the data stored in the card is erased and
cannot be restored.
Save a backup of necessary data before formatting the card.
• Do not turn off the camera or perform another operation during formatting.
• Take care not to turn off the camera while formatting is in progress.
• If the card has been formatted with a PC or other device, format it again with the
camera.
• You can format the card while keeping the camera settings information stored on
the card. (Î[Save/Restore Camera Setting]: 605)
• When formatting, depending on the [Video File Name] setting, the volume label of
the card may be changed. (Î[Video File Name]: 588)
– When it is [Same As Photo(DCF Standard)]: “LUMIX”
– When it is [CINE Style]: The volume label set in [CINE Style File Setting]
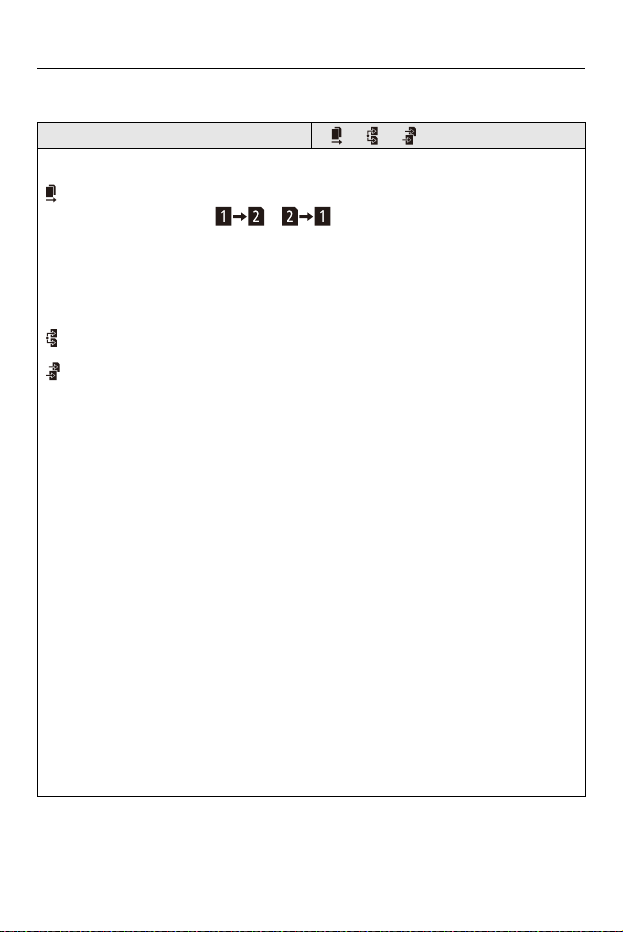
Camera Customization – [Setup] Menu
587
[Double Card Slot Function]
[Recording Method] `[ ] / [ ] / [ ]
This sets the way recording to the card slots 1 and 2 is performed.
[Relay Rec]: Selects the priority of card slots for recording.
[Destination Card Slot]: [ ]/[ ]
Relays recording to the card in the other card slot after the first card runs out of free
space.
• You can assign the function that changes the card which is prioritized for recording
to an Fn button. (Î[Destination Card Slot]: 528)
[Backup Rec]: Records the same images to both cards simultaneously.
[Allocation Rec]: Allows you to specify the card slot to be used for recording for
different image formats.
[JPEG Destination]/[RAW Destination]/[Video Destination]
• The double card slot function does not work when [Rec. File Format] or [Rec
Quality] settings are made that cannot be recorded to SD cards.
Notes about relay recording
• The following video cannot be continued to be recorded on another card:
– [Loop Recording (video)]
Notes about Backup Recording
• We recommend using cards with the same capacity.
If the card Speed Class or capacity is insufficient when video recording, recording
to both cards stops.
• Backup recording is not available with the following video. They can only be
recorded on a single card:
– [Loop Recording (video)]
• When using the following combinations of cards, backup recording for videos is
not available:
– SD/SDHC memory cards and CFexpress cards

Camera Customization – [Setup] Menu
588
[Video File Name]
`[Same As Photo(DCF Standard)] / [CINE Style]
The folder name and file name used when saving video to cards are switched to
CINE Style.
[Same As Photo(DCF Standard)]: Video files are saved using the same naming
convention as pictures. The storage destination is within the DCIM folder.
[CINE Style]: The naming convention for video files is switched to CINE Style. The
storage destination is within the PRIVATE folder.
Naming conventions when set to [CINE Style]
Folder name
(1) Folder number (3 numeric characters, 001 to 999)
(2) Fixed to “A”
(3) Frame rate
A: 59.94p / B: 50.00p / C: 29.97p/59.94i / D: 25.00p/50.00i / E: 24.00p / F:
23.98p / G: 48.00p / H: 47.95p / J: 239.76p / K: 200.00p / L: 120.00p / M:
119.88p / N: 100.00p
(4) Video format
J: Interlace recording (MOV, LPCM) / P: Progressive recording (MP4, AAC) /
Q: Progressive recording (MOV, LPCM) / Y: Progressive recording (Apple
ProRes, LPCM)
(5) Fixed to “A”
(6) Recording setting
During relay recording/allocation recording:
M: Card slot 1 / M: Card slot 2
During backup recording:
M: Card slot 1 / T: Card slot 2
001A A P A M
(1) (2)(3)(4)(5) (6)

Camera Customization – [Setup] Menu
589
File name
(7) Camera index (1 alphabetic character, A to Z)
(8) Card number (3 numeric characters, 001 to 999)
(9) Clip number (4 alphanumeric characters, C001 to C999)
(10) Year, month, day (YYMMDD)
(11) Hash value (4 alphanumeric characters)
(12) Extension
• Use a card with a capacity of 48 GB or greater to set to [CINE Style].
• Up to 999 files can be stored in each folder.
• Clip numbers are assigned sequentially from C001 to C999 in the order of
recording.
If you change the storage folder, a number continuing on from the last clip number
will be assigned.
• In the following cases, a new folder with an incremented folder number will be
created automatically when the next file is saved:
– The clip number reaches 999
– Any of the settings (3), (4), or (6) are changed
• New folders cannot be created when the folder number reaches 999.
We recommend backing up your data and formatting the card.
• The following files are saved in the DCIM folder even if you select [CINE Style]:
– Video created from [Time Lapse Shot]/[Stop Motion Animation]
– Pictures extracted from video
A001C001_221201_E125.MOV
(7) (9) (10) (11) (12)(8)

Camera Customization – [Setup] Menu
590
[CINE Style File Setting]
`[Camera Index] / [Next Card Number]
When [Video File Name] is set to [CINE Style], volume labels can be set for cards.
The volume label will be the [Camera Index]+[Next Card Number] set by the
following.
[Camera Index]: The camera index of the volume label can be set in the range
between A and Z.
[Next Card Number]: The card number of the volume label can be set in the range
between 001 and 999.
• The volume label changes at the following times:
– When a card is formatted
– When a video is recorded
• How to enter characters (ÎEntering Characters: 105)

Camera Customization – [Setup] Menu
591
[Folder / File Settings]
[Select Folder] / [Create a New Folder] / [File Name Setting]
Sets the folder and file names used for images saved within the DCIM folder.
Folder name
(1) Folder number (3 numeric characters, 100 to 999)
(2) 5-character user-defined segment
File name
(3) Color space ([P]: sRGB, [ _ ]: AdobeRGB)
(4) 3-character user-defined segment
(5) File number (4 numeric characters, 0001 to 9999)
(6) Extension
[Select Folder]: Selects a folder for storing images.
[Create a New Folder]: Creates a new folder with an incremented folder number.
• If there are no recordable folders in the card, a screen for resetting the folder
number is displayed.
[OK]:
Increments the folder number without changing the 5-character user-defined
segment ((2) above).
[Change]:
Changes the 5-character user-defined segment ((2) above). This will also increment
the folder number.
100ABCDE
(1) (2)
PABC0001.JPG
(3) (5) (6)(4)

Camera Customization – [Setup] Menu
592
[File Name Setting]
[Folder Number Link]:
Uses the 3-character user-defined segment ((4) above) to set the folder number
((1) above).
[User Setting]:
Changes the 3-character user-defined segment ((4) above).
• Follow the steps on “Entering Characters” when the character entry screen is
displayed. (ÎEntering Characters: 105)
Available characters: alphabetic characters (upper-case), numerals, [ _ ]
• Each folder can store up to 1000 files.
• File numbers are assigned sequentially from 0001 to 9999 in the order of
recording.
If you change the storage folder, a number continuing on from the last file number
will be assigned.
• In the following cases, a new folder with an incremented folder number will be
created automatically when the next file is saved:
– The number of files in the current folder reaches 1000.
– The file number reaches 9999.
• New folders cannot be created when there are folders numbered from 100 all the
way up to 999.
We recommend backing up your data and formatting the card.
• [Select Folder] is not available when [Backup Rec] in [Double Card Slot Function]
is being used.
Camera Customization – [Setup] Menu
593
[File Number Reset]
[Copyright Information]
[Card Slot 1(CFexpress)] / [Card Slot 2(SD)]
Refresh the folder number within the DCIM folder and reset the file number to 0001.
• When the folder number reaches 999, the file number cannot be reset.
We recommend backing up your data and formatting the card.
• To reset the folder number to 100:
1 Perform [Card Format] to format the card. (Î[Card Format]: 586)
2 Perform [File Number Reset] to reset the file number.
3 Select [Yes] on the folder number reset screen.
• To reset the folder number and file number inside the PRIVATE folder to 001,
format the card. (Î[Card Format]: 586)
[Artist] [ON] / `[OFF] / [SET]
[Copyright Holder] [ON] / `[OFF] / [SET]
[Display Copyright Info.]
Records the names of the artist and the copyright holder in the image Exif data.
• You can register names from [SET] in [Artist] and [Copyright Holder].
How to enter characters (ÎEntering Characters: 105)
• Up to 63 characters may be entered.
• You can confirm registered copyright information in [Display Copyright Info.].
Camera Customization – [Setup] Menu
594
[Setup] menu ([Monitor / Display])
[Power Save Mode]
`: Default settings
[Sleep Mode]
[10MIN.] / `[5MIN.] / [2MIN.] / [1MIN.] /
[OFF]
[Sleep Mode(Wi-Fi)] `[ON] / [OFF]
[Auto LVF/Monitor Off] `[5MIN.] / [2MIN.] / [1MIN.] / [OFF]
[Power Save LVF Shooting]
[Time to Sleep]
[Method of Activation]
This is a function to automatically turn the camera to sleep (power save) status or
turn off the viewfinder/monitor if no operation is performed for a set time.
(Î[Power Save Mode]: 57)

Camera Customization – [Setup] Menu
595
[Thermal Management]
[Monitor Frame Rate]
[Recording Max Temperature] [HIGH] / `[STANDARD]
This sets the temperature during video recording at which the camera automatically
stops recording.
When set to [HIGH], recording continues even if the camera temperature rises.
[Recording Max Temperature]
[HIGH]: Sets the temperature at which recording is stopped due to the camera
temperature rising to a higher temperature.
• You can record for a longer time, but the camera body will become hot.
Use a tripod, etc., because recording with a handheld camera for long periods can
cause low temperature burns.
[STANDARD]: Recording stops when the camera temperature rises.
• Set to [STANDARD] when recording with a handheld camera.
[30fps] / `[60fps]
Sets the display speed for live view on the monitor when recording pictures.
[30fps]: Reduces the power consumption for a longer operating time.
[60fps]: Enables smooth display of movements.
• When the following function is being used, [Monitor Frame Rate] is not available:
– HDMI output

Camera Customization – [Setup] Menu
596
[Monitor Settings]/[Viewfinder]
[Monitor Backlight]/[LVF Luminance]
[Brightness] / [Contrast] / [Saturation] / [Red Tint] / [Blue Tint]
This adjusts the brightness, coloring, and red or blue tints of the monitor/viewfinder.
1 Press 34 to select the setting item, and press 21 to adjust.
2 Press or to confirm the setting.
• It will adjust the monitor when the monitor is in use, and the viewfinder when the
viewfinder is in use.
`[AUTO] / [−3] to [+3]
Adjusts monitor/viewfinder luminance.
[AUTO]: The brightness is adjusted automatically depending on how bright it is
around the camera.
• Adjusts the monitor luminance when displaying the monitor, and the viewfinder
luminance when displaying the viewfinder.
• When either [AUTO] is set, or the adjusted value is set to positive side, the usage
period will shorten.
• When [Night Mode] is being used, [Monitor Backlight]/[LVF Luminance] are not
available.
Camera Customization – [Setup] Menu
597
[Eye Sensor]
[Level Gauge Adjust.]
[Sensitivity] `[HIGH] / [LOW]
This will set the sensitivity of the eye sensor.
[LVF/Monitor Switch]
`[LVF/MON AUTO] (automatic
viewfinder/monitor switching) / [LVF]
(viewfinder) / [MON] (monitor)
This will set the method for switching between the viewfinder and monitor.
• If you press [LVF] to switch the display, the [LVF/Monitor Switch] setting will also
switch.
[Adjust.]
Hold the camera in a horizontal position, and press or . The level gauge
will be adjusted.
[Level Gauge Value Reset]
Restores the default level gauge setting.
Camera Customization – [Setup] Menu
598
[Setup] menu ([IN/OUT])
[Beep]
[Headphone Volume]
`: Default settings
[Beep Volume] [ ] (High) / `[ ] (Low) / [ ] (Off)
[AF Beep Volume] [ ] (High) / `[ ] (Low) / [ ] (Off)
[AF Beep Tone]
`[ ] (Pattern 1) / [ ] (Pattern 2) /
[ ] (Pattern 3)
[E-Shutter Vol] [ ] (High) / `[ ] (Low) / [ ] (Off)
[E-Shutter Tone]
`[ ] (Pattern 1) / [ ] (Pattern 2) /
[ ] (Pattern 3)
Sets the beep sounds, AF beep, and electronic shutter sounds.
[0] to [LEVEL15] (`[LEVEL3])
Adjusts the volume when headphones are connected.
(ÎAdjusting the Headphone Volume: 383)
• This functions in tandem with [Headphone Volume] in the [Video] ([Audio]) menu.
Camera Customization – [Setup] Menu
599
[Sound Monitoring Channel(Play)]
[Wi-Fi]
`[COMBINED WITH REC] / [CH1/CH2] / [CH3/CH4] / [CH1+CH2/CH3+CH4] /
[CH1] / [CH2] / [CH3] / [CH4] / [CH1+CH2] / [CH3+CH4] / [CH1+CH2+CH3+CH4]
During video playback, this selects the audio channel output to the speaker on the
camera or the headphones.
For information about output audio (Î[Sound Monitoring Channel]: 384)
[COMBINED WITH REC]: Outputs audio with the same settings as [Sound
Monitoring Channel] in the [Video] ([Audio]) menu.
• You cannot change settings during video playback.
• The L channel and R channel are mixed for audio output from the camera’s
speaker.
[Wi-Fi Function] (ÎConnecting to a Smartphone ([Wi-Fi connection]): 634, Wi-Fi
Connections: 666)
[Wi-Fi Setup] (Î[Wi-Fi Setup] Menu: 677)

Camera Customization – [Setup] Menu
600
[Bluetooth]
[Bluetooth] (ÎConnecting to a Smartphone (Bluetooth Connection): 628)
[Send Image (Smartphone)] (ÎUsing the menu to transfer easily: 641)
[Remote Wakeup] (Î[Remote Wakeup]: 655)
[Returning from Sleep Mode] (ÎShortening the Return Time from [Sleep Mode]:
648)
[Auto Transfer] (Î[Auto Transfer]: 651)
[Location Logging] (Î[Location Logging]: 653)
[Auto Clock Set] (Î[Auto Clock Set]: 657)
[Wi-Fi network settings]
[Wi-Fi network settings]: Registers the Wi-Fi access point. Wireless access points
used to connect the camera to Wi-Fi networks will be registered automatically.
Camera Customization – [Setup] Menu
601
[USB]
[USB Mode]
`[ ] [Select on connection] / [ ]
[PC(Storage)] / [ ] [PC(Tether)] / [ ]
[PictBridge(PTP)]
This sets the communication method to be used when the USB connection cable is
connected.
[ ] [Select on connection]: Select this setting to select the USB communication
system when connecting to another device. (ÎUSB port: 681)
[ ] [PC(Storage)]: Select this setting to export images to a connected PC.
(ÎImporting Images to a PC: 686)
[ ] [PC(Tether)]: Select this setting to control the camera from a PC installed with
“LUMIX Tether”. (ÎTethered Recording: 693)
[ ] [PictBridge(PTP)]: Select this setting when connecting to a printer that
supports PictBridge. (ÎPrinting: 696)
[USB Power Supply] `[ON] / [OFF]
Provides power from the USB connection cable.
• Even if this item is set to [OFF], power will be supplied when the AC adaptor is
connected.

Camera Customization – [Setup] Menu
602
[HDMI Connection]
[Output Resolution(Playback)]
`[AUTO] / [C4K/120p] / [C4K/100p] /
[C4K/60p] / [C4K/50p] / [C4K/30p] /
[C4K/25p] / [C4K/24p] / [4K/120p] / [4K/
100p] / [4K/60p] / [4K/50p] / [4K/30p] /
[4K/25p] / [4K/24p] / [1080/120p] / [1080/
100p] / [1080p] / [1080i] / [720p] /
[576p] / [480p]
Sets the HDMI output resolution for playback.
[AUTO]: Outputs with a resolution suited to the connected external device. When
playing back pictures, output is at a maximum resolution of 8K.
• The items you can select depend on the [System Frequency] setting.
• If no image appears on the external device with [AUTO], switch to a setting other
than [AUTO] to set a format supported by your external device.
(Please also refer to the operating instructions for the external device.)
• It may not be possible to play back video, depending on the external device
connected.
[LUT View Assist (HDMI)] [ON] / `[OFF]
Images with LUT (Look-Up Table) data applied are output when you play back
videos recorded with [Photo Style] set to [V-Log].
• This is linked with [LUT View Assist (HDMI)] in [V-Log View Assist] under the
[Custom] ([Monitor / Display (Video)]) menu. (Î[V-Log View Assist]: 433)
Camera Customization – [Setup] Menu
603
[Power/Network Indicator]
[HLG View Assist (HDMI)] `[AUTO] / [MODE1] / [MODE2] / [OFF]
At recording or playback of HLG video, this converts their color gamut and
brightness for display.
• This is linked with [HDMI] in [HLG View Assist] under the [Custom] ([Monitor /
Display (Video)]) menu. (Î[HLG View Assist]: 438)
[VIERA Link (CEC)] [ON] / `[OFF]
You can use the device remote control to operate the camera when it is connected to
a VIERA Link compatible device using an HDMI cable.
(ÎUsing VIERA Link: 684)
[Background Color(Playback)] []/ `[]
Sets the color of the bands displayed on the top and bottom or the left and right of
images output on an external device.
• We recommend setting to [ ] to prevent burn-in on the screen of the output
destination.
[Photo Luminance Level] [0-255] / `[16-255]
Sets the level of luminance when outputting pictures to external devices.
`[ON] / [OFF]
This will turn on the power indicator and network connection light.
Camera Customization – [Setup] Menu
604
[Setup] menu ([Setting])
[Save to Custom Mode]
[Load Custom Mode]
[Custom Mode Settings]
[C1] / [C2] / [C3] / [C4-1] to [C4-10]
You can register the currently set information of the camera.
(ÎRegister in Custom Mode: 543)
[C1] / [C2] / [C3] / [C4-1] to [C4-10]
Calls up registered Custom mode settings to the selected recording mode and
overwrites the current settings with these.
(ÎCalling Up Settings: 546)
[Limit No. of Custom Mode]
[Edit Title]
[How to Reload Custom Mode]
[Select Loading Details]
Sets the ease of use of Custom mode.
(ÎCustom Mode Detailed Settings: 544)

Camera Customization – [Setup] Menu
605
[Save/Restore Camera Setting]
[Reset]
[Save] / [Load] / [Delete] / [Keep Settings While Format]
Saves the camera’s settings information to the card.
Saved settings information can be loaded to the camera, letting you set the same
settings on multiple cameras.
[Save]: Saves the camera’s settings information to the card.
• If saving new data, then select [New File], and if overwriting an existing file, select
that existing file.
• When [New File] is selected, a screen to select the file name to save as is
displayed.
[OK]:
Saves using the file name on the screen.
[Change the file name]:
Changes the file name and saves the file.
• Available characters: alphabetic characters (upper-case), numerals, up to
8 characters
• How to enter characters (ÎEntering Characters: 105)
[Load]: Loads the settings information on the card and copies it to the camera.
[Delete]: Deletes settings information on the card.
[Keep Settings While Format]: When formatting the card, formats the card while
keeping camera settings information stored on the card.
• Only settings information from the same model can be loaded.
• Up to 10 instances of settings information can be saved on one card.
• List of functions for which saving of settings information is possible (ÎList of
Default Settings/Custom Saving/Settings Available for Copying: 779)
Returns the camera to its default settings.
(Î[Reset]: 104)
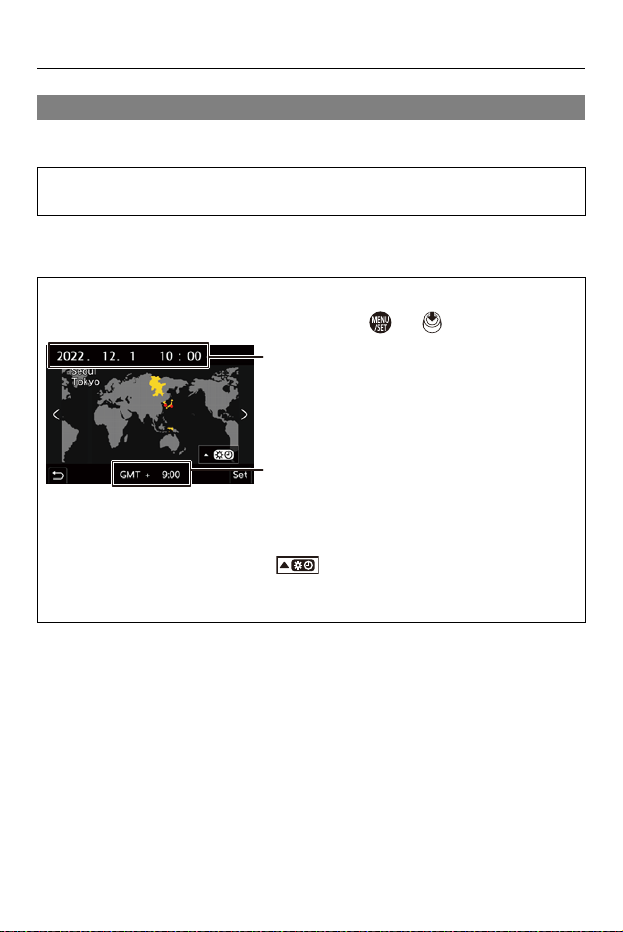
Camera Customization – [Setup] Menu
606
[Setup] menu ([Others])
[Clock Set]
[Time Zone]
Sets the date and time.
(ÎSetting the Clock (When Turning On for the First Time): 72)
Sets the time zone.
Press 21 to select the time zone and then press or to confirm.
(A) Current time
(B) Time difference from GMT (Greenwich Mean Time)
• If you are using Daylight Savings [ ], press 3. (The time will move forward
by 1 hour.)
To return to the normal time, press 3 again.
(A)
(B)
Camera Customization – [Setup] Menu
607
[System Frequency]
[Pixel Refresh]
[Sensor Cleaning]
[Language]
[59.94Hz (NTSC)] / [50.00Hz (PAL)] / [24.00Hz (CINEMA)]
* Default setting specifications vary depending on the country or area where the
camera was purchased.
This changes the system frequency of videos that are recorded and played back
with the camera.
(Î[System Frequency]: 132)
This optimizes the image sensor and image processing.
• The image sensor and image processing are optimized when the camera is
purchased. Use this function when bright spots that do not exist in the subject get
recorded.
• Turn the camera off and on after the pixels are corrected.
Dust reduction to blow off the debris and dust that have affixed to the front of the
image sensor is performed.
• You can use this function when the dust is particularly noticeable.
• Turn the camera off and on when finished.
This set the language displayed on the screen.
• If you set a different language by mistake, select [ ] from the menu icons to set
the desired language.
Camera Customization – [Setup] Menu
608
[Firmware Version]
[Approved Regulations]
[Firmware Update] / [Software info]
You can check the firmware versions of the camera and lens.
In addition, you can update the firmware, and display information about the camera
software.
[Firmware Update]: Updates firmware.
1 Download the firmware. (ÎFirmware of Your Camera/Lens: 18)
2 Save the firmware to the root directory of the card (the first folder that appears
when you access the card on your PC), and then insert the card into the
camera.
3 Select [Firmware Update], press or , and then select [Yes] to update
the firmware.
[Software info]: Displays information about the camera software.
• When a supported optional item (XLR Microphone Adaptor, etc.) is attached to the
camera, you can also check its firmware version.
Displays the certification number for radio regulations.
* Depending on the country or area where the camera was purchased, this is not
displayed due to differences in specifications.
Camera Customization – My Menu
609
My Menu
≥Registration in My Menu: 609
≥Edit My Menu: 610
Register frequently-used menus in My Menu.
A maximum of 23 items can be registered.
Registered menus can be called up from [ ] to [ ].
Registration in My Menu
1
Select [Add].
≥ ¨ [ ] ¨ [ ] ¨ [Add]
2
Register.
≥Select the menu to register and then press or .
Calling up My Menu
Call up the menus registered in My Menu.
¨ [ ] ¨ [ ]/[ ]/[ ] ¨ Registered menus

Camera Customization – My Menu
610
Edit My Menu
You can reorder the display order of My Menu, and delete unnecessary
menus.
¨ [ ] ¨ Select [ ]
[Add]
Selects and registers the menus to be displayed in My Menu.
[Sorting]
Changes the order of My Menu.
Select the menu to change, then set the destination.
[Delete]
Deletes menus that are registered to My Menu.
[Delete Item]: Selects the menu, then deletes.
[Delete All]: Deletes all menus registered in My Menu.
[Display from My Menu]
Displays My Menu first when displaying a menu.
[ON]: Displays My Menu.
[OFF]: Displays the last-used menu.

611
List of Menu
Camera customization and many function settings are performed with
menus on this camera.
This chapter introduces all of the menu items in a list format.
≥[Photo] menu: 612
≥[Video] menu: 614
≥[Custom] menu: 617
≥[Setup] menu: 620
≥[My Menu]: 622
≥[Playback] menu: 623
•
For information about menu operation methods (ÎMenu Operation Methods: 99)
• Refer to the “Materials” chapter for the following lists:
– List of Default Settings/Custom Saving/Settings Available for Copying: 779
– List of Functions That Can Be Set in Each Recording Mode: 804
List of Menu – [Photo] menu
612
[Photo] menu
[Image Quality]
≥[Photo Style] (Î[Photo Style]: 307)
≥[Metering Mode] (Î[Metering Mode]: 268)
≥[Aspect Ratio] (Î[Aspect Ratio]: 120)
≥[Picture Quality] (Î[Picture Quality]: 123)
≥[Picture Size] (Î[Picture Size]: 121)
≥[High Resolution Mode Setting] (ÎHigh Resolution mode: 220)
≥[Long Exposure NR] (Î[Long Exposure NR]: 256)
≥[ISO Sensitivity (photo)] (Î[ISO Sensitivity (photo)]: 298)
≥[Min. Shutter Speed] (Î[Min. Shutter Speed]: 257)
≥[Vignetting Comp.] (Î[Vignetting Comp.]: 290)
≥[Diffraction Compensation] (Î[Diffraction Compensation]: 291)
≥[Filter Settings] (Î[Filter Settings]: 317)
[Focus]
≥[AF Detection Setting] (ÎAutomatic Detection: 170)
≥[Detecting Subject] (ÎAutomatic Detection: 170)
≥[AF Custom Setting(Photo)] (Î[AF Custom Setting(Photo)]: 160)
≥[Focus Limiter] (Î[Focus Limiter]: 163)
≥[AF Assist Light] (Î[AF Assist Light]: 165)
≥[Focus Peaking] (Î[Focus Peaking]: 202)
≥[1-Area AF Moving Speed] (Î[1-Area AF Moving Speed]: 166)
: Menu items common to the [Photo] menu and [Video] menu. Their settings
are synchronized.

List of Menu – [Photo] menu
613
[Flash]
≥[Flash Mode] (Î[Flash Mode]: 329)
≥[Firing Mode] (Î[Firing Mode]/[Manual Flash Adjust.]: 332)
≥[Flash Adjust.] (Î[Flash Adjust.]: 334)
≥[Flash Synchro] (Î[Flash Synchro]: 335)
≥[Manual Flash Adjust.] (Î[Firing Mode]/[Manual Flash Adjust.]: 332)
≥[Auto Exposure Comp.] (Î[Auto Exposure Comp.]: 336)
≥[Wireless] (ÎRecording Using a Wireless Flash: 337)
≥[Wireless Channel] (ÎRecording Using a Wireless Flash: 337)
≥[Wireless FP] (Î[Wireless FP]: 343)
≥[Communication Light] (Î[Communication Light]: 343)
≥[Wireless Setup] (ÎSetting Items ([Wireless Setup]): 341)
[Others (Photo)]
≥[Bracketing] (ÎBracket Recording: 242)
≥[Silent Mode] (Î[Silent Mode]: 250)
≥[Image Stabilizer] (ÎImage Stabilizer: 259)
≥[Burst Shot Setting] (ÎTaking Burst Pictures: 212)
≥[Shutter Type] (Î[Shutter Type]: 252)
≥[Shutter Delay] (Î[Shutter Delay]: 258)
≥[Ex. Tele Conv.] (ÎExtended Tele Conversion: 206)
≥[Time Lapse/Animation] (ÎRecording with Time Lapse Shot: 225,
Recording with Stop Motion Animation: 232)
≥[Self Timer] (ÎRec
ording Using the Self-timer: 238)
List of Menu – [Video] menu
614
[Video] menu
[Image Quality]
≥[Exposure Mode] (ÎRecording with Creative Video: 347)
≥[Photo Style] (Î[Photo Style]: 307)
≥[Metering Mode] (Î[Metering Mode]: 268)
≥[Dynamic Range Boost] (Î[Dynamic Range Boost]: 363)
≥[ISO Sensitivity (video)] (Î[ISO Sensitivity (video)]: 362)
≥[Synchro Scan] (Î[Synchro Scan]: 443)
≥[Flicker Decrease (Video)] (Î[Flicker Decrease (Video)]: 399)
≥[Master Pedestal Level] (Î[Master Pedestal Level]: 359)
≥[SS/Gain Operation] (Î[SS/Gain Operation]: 400)
≥[Vignetting Comp.] (Î[Vignetting Comp.]: 290)
≥[Diffraction Compensation] (Î[Diffraction Compensation]: 291)
≥[Filter Settings] (Î[Filter Settings]: 317)
[Image Format]
≥[Rec. File Format] (Î[Rec. File Format]: 134)
≥[Image Area of Video] (Î[Image Area of Video]: 150)
≥[Rec Quality] (Î[Rec Quality]: 136)
≥[Rec Quality (My List)] (Î[add to list]: 148)
≥[Variable Frame Rate] (ÎVariable Frame Rate: 415)
≥[Time Code] (ÎSetting the Time Code: 387)
≥[Luminance Level] (Î[Luminance Level]: 358)
: Menu items common to the [Photo] menu and [Video] menu. Their settings
are synchronized.

List of Menu – [Video] menu
615
[Focus]
≥[AF Detection Setting] (ÎAutomatic Detection: 170)
≥[Detecting Subject] (ÎAutomatic Detection: 170)
≥[AF Custom Setting(Video)] (Î[AF Custom Setting(Video)]: 355)
≥[Focus Limiter] (Î[Focus Limiter]: 163)
≥[Continuous AF] (Î[Continuous AF]: 353)
≥[AF Assist Light] (Î[AF Assist Light]: 165)
≥[Focus Peaking] (Î[Focus Peaking]: 202)
≥[1-Area AF Moving Speed] (Î[1-Area AF Moving Speed]: 166)
[Audio]
≥[Sound Rec Level Disp.] (Î[Sound Rec Level Disp.]: 365)
≥[Mute Sound Input] (Î[Mute Sound Input]: 366)
≥[Sound Rec Gain Level] (Î[Sound Rec Gain Level]: 367)
≥[Sound Rec Level Adj.] (Î[Sound Rec Level Adj.]: 368)
≥[Sound Rec Quality] (Î[Sound Rec Quality]: 369)
≥[Sound Rec Level Limiter] (Î[Sound Rec Level Limiter]: 370)
≥[Wind Noise Canceller] (Î[Wind Noise Canceller]: 371)
≥[Wind Cut] (ÎReduction of Wind Noise: 378)
≥[Lens Noise Cut] (Î[Lens Noise Cut]: 372)
≥[Mic Socket] (ÎExternal Microphones (Optional): 374)
≥[Special Mic.] (ÎSetting the Sound Pickup Range (DMW-MS2:
Optional): 377)
≥[4ch Mic Input] (Î[4ch Mic Input]: 381)
≥[X
LR Mic Adaptor Setting] (ÎXLR Microphone Adaptor (Optional): 379)
≥[Sound Output] (ÎSwitching the Sound Output Method: 383)
≥[Headphone Volume] (ÎAdjusting the Headphone Volume: 383)
≥[Sound Monitoring Channel] (Î[Sound Monitoring Channel]: 384)

List of Menu – [Video] menu
616
[Others (Video)]
≥[Silent Mode] (Î[Silent Mode]: 250)
≥[Image Stabilizer] (ÎImage Stabilizer: 259)
≥[Self Timer Setting] (ÎRecording Using the Self-timer: 238)
≥[Focus Transition] (Î[Focus Transition]: 425)
≥[Loop Recording (video)] (Î[Loop Recording (video)]: 445)
≥[Segmented File Recording] (Î[Segmented File Recording]: 448)

List of Menu – [Custom] menu
617
[Custom] menu
[Image Quality] (Î[Custom] menu ([Image Quality]): 548)
≥[Photo Style Settings] (Î[Photo Style Settings]: 548)
≥[ISO Increments] (Î[ISO Increments]: 548)
≥[Extended ISO] (Î[Extended ISO]: 549)
≥[Exposure Offset Adjust.] (Î[Exposure Offset Adjust.]: 549)
≥[Face Priority In Multi Metering] (Î[Face Priority In Multi Metering]: 549)
≥[Color Space] (Î[Color Space]: 550)
≥[Exposure Comp. Reset] (Î[Exposure Comp. Reset]: 550)
≥[Auto Exposure in P/A/S/M] (Î[Auto Exposure in P/A/S/M]: 550)
≥[CreativeVideo Combined Set.] (Î[CreativeVideo Combined Set.]: 551)
[Focus/Shutter] (Î[Custom] menu ([Focus/Shutter]): 552)
≥[Focus/Shutter Priority] (Î[Focus/Shutter Priority]: 552)
≥[Focus Switching for Vert / Hor] (Î[Focus Switching for Vert / Hor]: 552)
≥[AF/AE Lock Hold] (Î[AF/AE Lock Hold]: 552)
≥[AF+MF] (Î[AF+MF]: 553)
≥[MF Assist] (Î[MF Assist]: 553)
≥[MF Guide] (Î[MF Guide]: 553)
≥[Focus Ring Lock] (Î[Focus Ring Lock]: 554)
≥[Show/Hide AF Mode] (Î[Show/Hide AF Mode]: 554)
≥[Pinpoint AF Setting] (Î[Pinpoint AF Setting]: 554)
≥[Shutter AF] (Î[Shutter AF]: 555)
≥[
Eye Detection Display] (Î[Eye Detection Display]: 555)
≥[Half-Press Shutter] (Î[Half-Press Shutter]: 555)
≥[Assign REC to Shutter Button] (Î[Assign REC to Shutter Button]: 555)
≥[Quick AF] (Î[Quick AF]: 556)
≥[Eye Sensor AF] (Î[Eye Sensor AF]: 556)
≥[Looped Focus Frame] (Î[Looped Focus Frame]: 556)
≥[Enlarged Live Display(Video)] (Î[Enlarged Live Display(Video)]: 557)

List of Menu – [Custom] menu
618
[Operation] (Î[Custom] menu ([Operation]): 558)
≥[Q.MENU Settings] (Î[Q.MENU Settings]: 558)
≥[Touch Settings] (Î[Touch Settings]: 558)
≥[Lock Lever Setting] (Î[Lock Lever Setting]: 559)
≥[Fn Button Set] (Î[Fn Button Set]: 560)
≥[WB/ISO/Expo. Button] (Î[WB/ISO/Expo. Button]: 561)
≥[ISO Displayed Setting] (Î[ISO Displayed Setting]: 561)
≥[Exposure Comp. Disp. Setting] (Î[Exposure Comp. Disp. Setting]: 561)
≥[Dial Set.] (Î[Dial Set.]: 562)
≥[Joystick Setting] (Î[Joystick Setting]: 563)
≥[Video Rec. Button (Remote)] (Î[Video Rec. Button (Remote)]: 564)
[Monitor / Display (Photo)] (Î[Custom] menu ([Monitor / Display
(Photo)]): 565)
≥[Auto Review] (Î[Auto Review]: 565)
≥[Constant Preview] (Î[Constant Preview]: 565)
≥[Histogram] (Î[Histogram]: 566)
≥[Photo Grid Line] (Î[Photo Grid Line]: 567)
≥[Live View Boost] (Î[Live View Boost]: 567)
≥[Night Mode] (Î[Night Mode]: 568)
≥[LVF/Monitor Disp. Set] (Î[LVF/Monitor Disp. Set]: 569)
≥[Expo.Meter] (Î[Expo.Meter]: 571)
≥[Focal Length] (Î[F
ocal Length]: 571)
≥[Blinking Highlights] (Î[Blinking Highlights]: 571)
≥[Sheer Overlay] (Î[Sheer Overlay]: 572)
≥[I.S. Status Scope] (Î[I.S. Status Scope]: 572)
≥[Level Gauge] (Î[Level Gauge]: 573)
≥[Luminance Spot Meter] (Î[Luminance Spot Meter]: 573)
≥[Framing Outline] (Î[Framing Outline]: 573)
≥[Show/Hide Monitor Layout] (Î[Show/Hide Monitor Layout]: 574)

List of Menu – [Custom] menu
619
[Monitor / Display (Video)] (Î[Custom] menu ([Monitor / Display
(Video)]): 575)
≥[V-Log View Assist] (Î[V-Log View Assist]: 575)
≥[HLG View Assist] (Î[HLG View Assist]: 575)
≥[Anamorphic Desqueeze Display] (Î[Anamorphic Desqueeze Display]:
575)
≥[Monochrome Live View] (Î[Monochrome Live View]: 576)
≥[Center Marker] (Î[Center Marker]: 576)
≥[Safety Zone Marker] (Î[Safety Zone Marker]: 576)
≥[Frame Marker] (Î[Frame Marker]: 577)
≥[Zebra Pattern] (Î[Zebra Pattern]: 577)
≥[WFM/Vector Scope] (Î[WFM/Vector Scope]: 577)
≥[Color Bars] (Î[Color Bars]: 578)
≥[Video-Priority Display] (Î[Video-Priority Display]: 578)
≥[Red REC Frame Indicator] (Î[Red REC Frame Indicator]: 578)
[IN/OUT] (Î[Custom] menu ([IN/OUT]): 579)
≥[HDMI Rec Output] (Î[HDMI Rec Output]: 579)
≥[Fan Mode] (Î[Fan Mode]: 580)
≥[Tally Lamp] (Î[Tally Lamp]: 580)
[Lens / Others] (Î[Custom] menu ([Lens / Others]): 581)
≥[Lens Focus Resume] (Î[Lens Focus Resume]: 581)
≥[Power Zoom Lens] (Î[Power Zoom Lens]: 581)
≥[Lens Fn Button Setting] (Î[L
ens Fn Button Setting]: 582)
≥[Aperture Ring Increment] (Î[Aperture Ring Increment]: 582)
≥[Focus Ring Control] (Î[Focus Ring Control]: 583)
≥[Lens Information] (Î[Lens Information]: 584)
≥[Lens Info. Confirmation] (Î[Lens Info. Confirmation]: 584)
≥[Vertical Position Info (Video)] (Î[Vertical Position Info (Video)]: 584)

List of Menu – [Setup] menu
620
[Setup] menu
[Card/File] (Î[Setup] menu ([Card/File]): 586)
≥[Card Format] (Î[Card Format]: 586)
≥[Double Card Slot Function] (Î[Double Card Slot Function]: 587)
≥[Video File Name] (Î[Video File Name]: 588)
≥[CINE Style File Setting] (Î[CINE Style File Setting]: 590)
≥[Folder / File Settings] (Î[Folder / File Settings]: 591)
≥[File Number Reset] (Î[File Number Reset]: 593)
≥[Copyright Information] (Î[Copyright Information]: 593)
[Monitor / Display] (Î[Setup] menu ([Monitor / Display]): 594)
≥[Power Save Mode] (Î[Power Save Mode]: 594)
≥[Thermal Management] (Î[Thermal Management]: 595)
≥[Monitor Frame Rate] (Î[Monitor Frame Rate]: 595)
≥[Monitor Settings]/[Viewfinder] (Î[Monitor Settings]/[Viewfinder]: 596)
≥[Monitor Backlight]/[LVF Luminance] (Î[Monitor Backlight]/[LVF
Luminance]: 596)
≥[Eye Sensor] (Î[Eye Sensor]: 597)
≥[Level Gauge Adjust.] (Î[Level Gauge Adjust.]: 597)
[IN/OUT] (Î[Setup] menu ([IN/OUT]): 598)
≥[Beep] (Î[Beep]: 598)
≥[Headphone Volume] (Î[Headphone Volume]: 598)
≥[Sound Monitoring Channel(Play)] (Î[Sound Monitoring Channel(Play)]:
599)
≥[Wi-Fi] (Î[W
i-Fi]: 599)
≥[Bluetooth] (Î[Bluetooth]: 600)
≥[USB] (Î[USB]: 601)
≥[HDMI Connection] (Î[HDMI Connection]: 602)
≥[Power/Network Indicator] (Î[Power/Network Indicator]: 603)

List of Menu – [Setup] menu
621
[Setting] (Î[Setup] menu ([Setting]): 604)
≥[Save to Custom Mode] (Î[Save to Custom Mode]: 604)
≥[Load Custom Mode] (Î[Load Custom Mode]: 604)
≥[Custom Mode Settings] (Î[Custom Mode Settings]: 604)
≥[Save/Restore Camera Setting] (Î[Save/Restore Camera Setting]: 605)
≥[Reset] (Î[Reset]: 605)
[Others] (Î[Setup] menu ([Others]): 606)
≥[Clock Set] (Î[Clock Set]: 606)
≥[Time Zone] (Î[Time Zone]: 606)
≥[System Frequency] (Î[System Frequency]: 607)
≥[Pixel Refresh] (Î[Pixel Refresh]: 607)
≥[Sensor Cleaning] (Î[Sensor Cleaning]: 607)
≥[Language] (Î[Language]: 607)
≥[Firmware Version] (Î[Firmware Version]: 608)
≥[Approved Regulations] (Î[Approved Regulations]: 608)
*
* Depending on the country or area where the camera was purchased, this is not
displayed due to differences in specifications.

List of Menu – [Playback] menu
623
[Playback] menu
[Playback Mode] (Î[Playback] ([Playback Mode]): 506)
≥[Playback Mode] (Î[Playback Mode]: 506)
≥[Slide Show] (Î[Slide Show]: 506)
≥[Rotate Disp.] (Î[Rotate Disp.]: 507)
≥[Picture Sort] (Î[Picture Sort]: 507)
≥[Magnify from AF Point] (Î[Magnify from AF Point]: 507)
≥[LUT View Assist (Monitor)] (Î[LUT View Assist (Monitor)]: 507)
≥[HLG View Assist (Monitor)] (Î[HLG View Assist (Monitor)]: 508)
≥[Anamorphic Desqueeze Display] (Î[Anamorphic Desqueeze Display]:
508)
≥[Behavior After Video Playback] (Î[Behavior After Video Playback]: 508)
[Process Image] (Î[Playback] ([Process Image]): 509)
≥[RAW Processing] (Î[RAW Processing]: 509)
≥[Time Lapse Video] (Î[Time Lapse Video]: 509)
≥[Stop Motion Video] (Î[Stop Motion Video]: 509)
[Add/Delete Info.] (Î[Playback] ([Add/Delete Info.]): 510)
≥[Protect] (Î[Protect]: 510)
≥[Rating] (Î[Rating]: 510)
[Edit Image] (Î[Playback] ([Edit Image]): 511)
≥[Resize] (Î[Resize]: 511)
≥[Rotate] (Î[Rotate]: 512)
≥[Video Divide] (Î[Video Divide]: 512)
≥[C
opy] (Î[Copy]: 513)
[Others] (Î[Playback] ([Others]): 515)
≥[Delete Confirmation] (Î[Delete Confirmation]: 515)
≥[Delete All Images] (Î[Delete All Images]: 515)
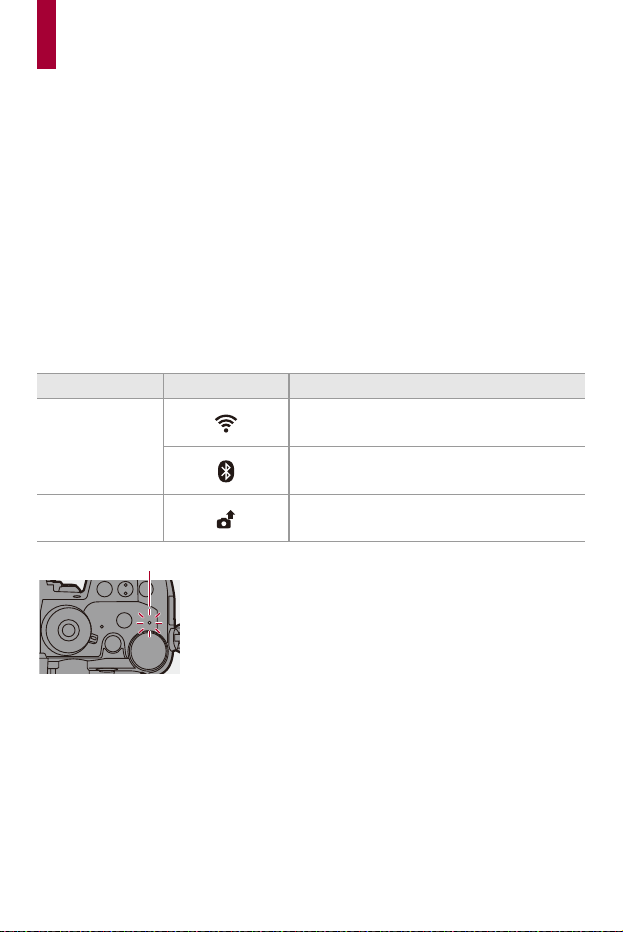
624
Wi-Fi / Bluetooth
This chapter explains the Wi-Fi
®
and Bluetooth
®
functions of the camera.
•
This document refers to both smartphones and tablets as smartphones.
≥Connecting to a Smartphone: 626
≥Operating the Camera with a Smartphone: 642
≥Sending Images from the Camera: 659
≥Wi-Fi Connections: 666
≥Send Settings and Selecting Images: 675
≥[Wi-Fi Setup] Menu: 677
Checking operation of the Wi-Fi and Bluetooth functions
(A) Network connection light
Light (blue) Monitor Operation
Lit
The Wi-Fi function is set to on, or there is a
connection.
The Bluetooth function is set to on, or there
is a connection.
Blinking
When image data is sent using a camera
operation.
(A)

Wi-Fi / Bluetooth
625
• Do not remove the card or battery or move to an area without any reception while
sending images.
• The camera cannot be used to connect to a public wireless LAN connection.
• We strongly recommend that you set an encryption to maintain information
security.
• We recommend that you use a sufficiently charged battery when sending
images.
• When the remaining battery level is low, it may not be possible to connect to or
maintain communication with other devices.
(A message such as [Communication error] is displayed.)
• Images may not be completely sent depending on radio wave conditions.
If the connection is terminated while sending images, images with missing parts
may be sent.
• You can set so that the network connection light does not turn on:
(Î[Power/Network Indicator]: 603)

Wi-Fi / Bluetooth – Connecting to a Smartphone
626
Connecting to a Smartphone
≥Installing “LUMIX Sync”: 627
≥Connecting to a Smartphone (Bluetooth Connection): 628
≥Connecting to a Smartphone ([Wi-Fi connection]): 634
≥Sending Images on the Camera to a Smartphone with Simple
Operations: 640
Connect with a smartphone which has the “Panasonic LUMIX Sync”
(below: “LUMIX Sync”) smartphone app installed.
Use “LUMIX Sync” for remote recording and image transfers.
Wi-Fi / Bluetooth – Connecting to a Smartphone
627
Installing “LUMIX Sync”
“LUMIX Sync” is an application for smartphones provided by Panasonic.
1
Connect the smartphone to a network.
2
(Android) Select “Google Play™ Store”.
(iOS) Select “App Store”.
3
Enter “LUMIX” or “panasonic lumix sync” into the
search box.
4
Select and install the “Panasonic LUMIX Sync” .
Supported OS
Android™: Android 7 or higher
iOS: iOS 12 or higher
• Use the latest version.
• Supported OSs are current as of January 2022 and are subject to change.
• Read the [Help] in the “ LUMIX Sync” menu for further details on how to operate.
• The app may not operate correctly depending on your smartphone.
For information on the “LUMIX Sync”, refer to the following support site:
https://panasonic.jp/support/global/cs/dsc/
(English only)
Wi-Fi / Bluetooth – Connecting to a Smartphone
628
Connecting to a Smartphone (Bluetooth
Connection)
Follow a simple connection setup procedure (pairing) to connect to a
smartphone that supports Bluetooth Low Energy.
When pairing is set up, the camera also automatically connects to the
smartphone via Wi-Fi.
•
For the first-time connection, pairing settings are required.
For information about connecting for the second and subsequent times
(ÎConnecting to a Paired Smartphone: 632)
Supported smartphones
Android™: Android 7 or higher with Bluetooth 4.0 or higher (excluding those that
do not support Bluetooth Low Energy)
iOS: iOS 12 or higher
• Turn on the Bluetooth function on the smartphone beforehand.
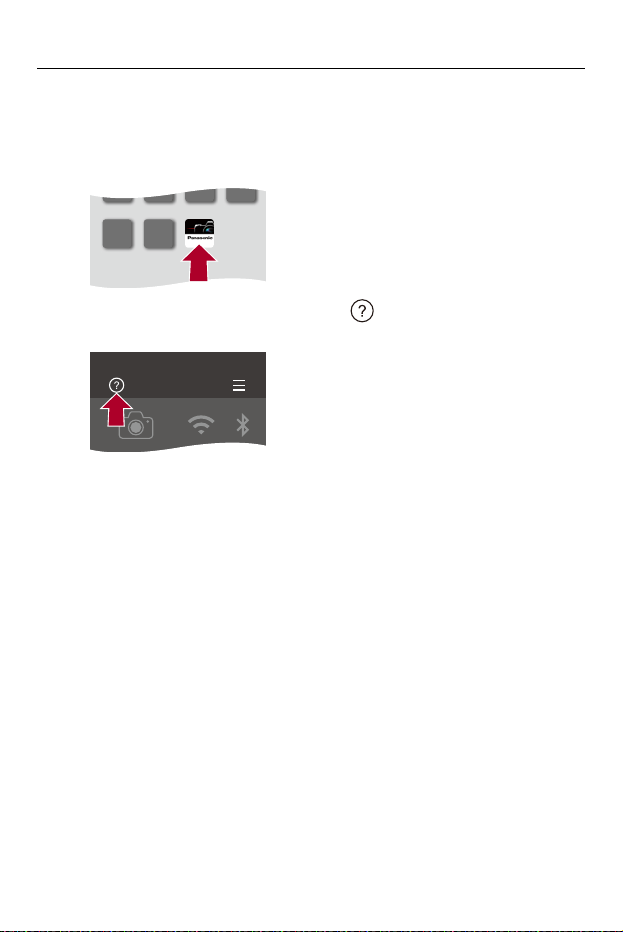
Wi-Fi / Bluetooth – Connecting to a Smartphone
629
1
On the smartphone, start up “LUMIX Sync”.
≥A message regarding device (camera) registration is displayed.
Select [Next].
•
If you have closed the message, select [ ], then register the camera using
[Camera registration (pairing)].
2
Check the content in the displayed guide and select
[Next] until the screen to register the camera is
displayed.
LUMIX Sync
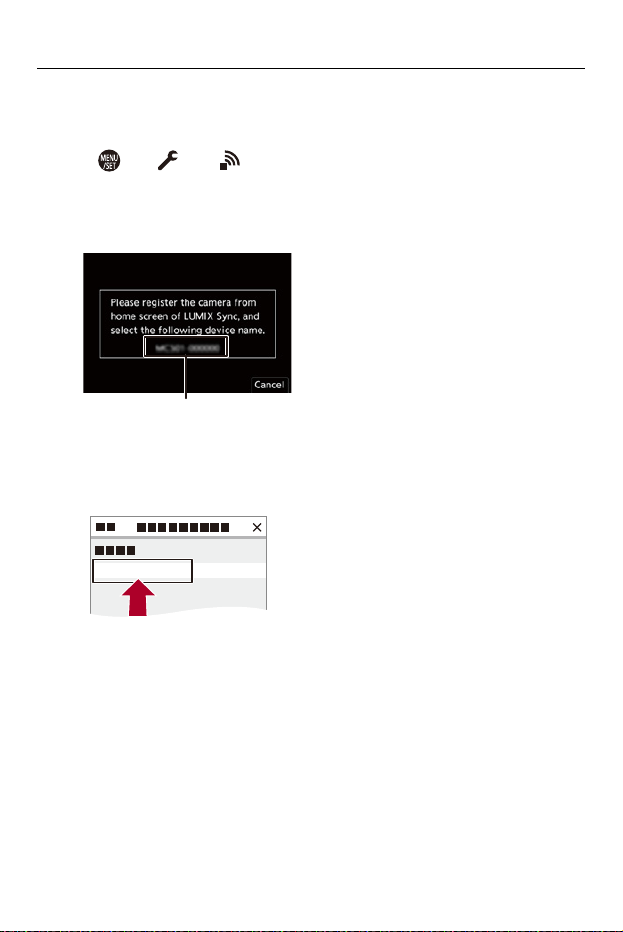
Wi-Fi / Bluetooth – Connecting to a Smartphone
630
Operating the camera in accordance with the smartphone guide.
3
Set the camera to Bluetooth pairing standby state.
≥ ¨ [ ] ¨ [ ] ¨ [Bluetooth] ¨ [Bluetooth] ¨ [SET] ¨
[Pairing]
≥The camera enters pairing standby state and the device name (A)
is displayed.
4
On the smartphone, select the camera’s device name.
• (iOS devices) When a message to confirm the change of destination is
displayed, select [Join].
(A)
XXXXXXXXXXXX
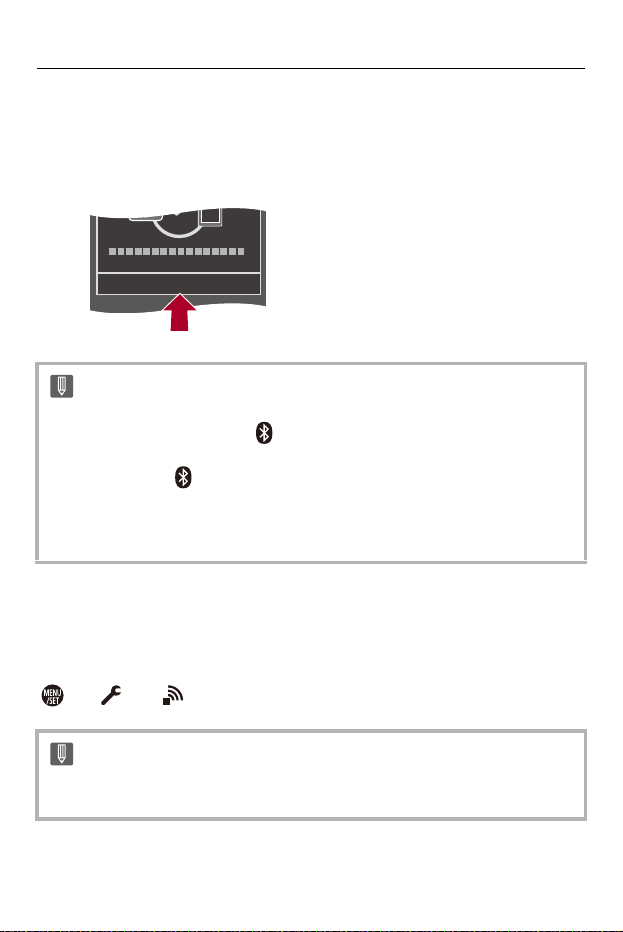
Wi-Fi / Bluetooth – Connecting to a Smartphone
631
5
When a message indicating that device registration is
complete, select [OK].
≥A Bluetooth connection between the camera and the smartphone
will be made.
End Bluetooth Connection
To terminate the Bluetooth connection, turn off the Bluetooth function of the
camera.
¨ [ ] ¨ [ ] ¨ [Bluetooth] ¨ [Bluetooth] ¨ Select [OFF]
•
The paired smartphone is registered as a paired device.
• During Bluetooth connection, [ ] is displayed in the recording screen.
When the Bluetooth function is enabled, but a connection is not established with
the smartphone, [ ] appears translucent.
• Up to 16 smartphones can be registered.
If you try to register more than 16 smartphones, the registration information will
be deleted from the oldest first.
• Even if you terminate the connection, the pairing information for it will not be
deleted.
OK
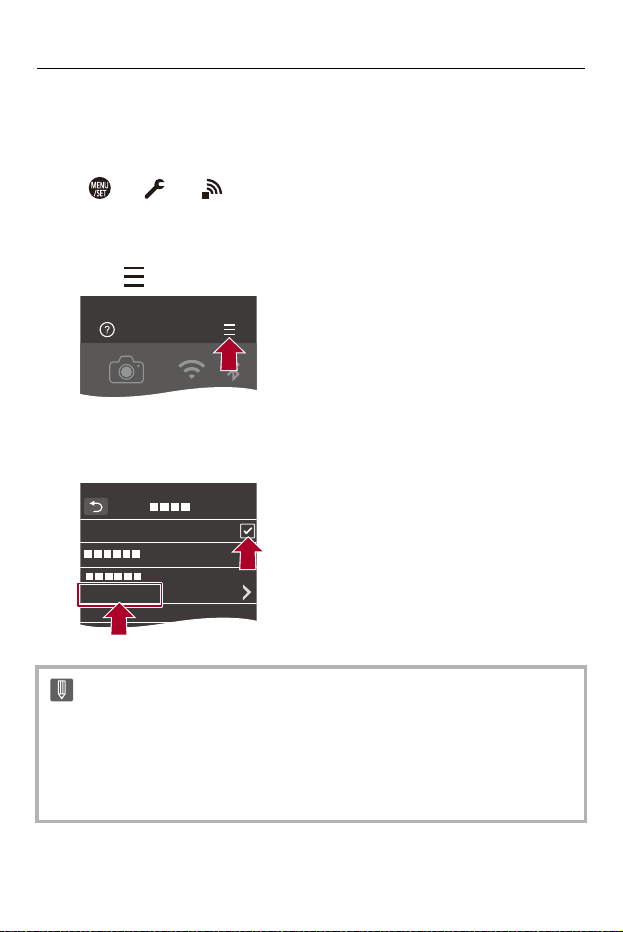
Wi-Fi / Bluetooth – Connecting to a Smartphone
632
Connecting to a Paired Smartphone
Connect paired smartphones using the following procedure.
1 Enable the Bluetooth function of the camera.
• ¨ [ ] ¨ [ ] ¨ [Bluetooth] ¨ [Bluetooth] ¨ [ON]
2 On the smartphone, start up “LUMIX Sync ”.
• If a message is displayed indicating that the smartphone is searching for
cameras, close the message.
3 Select [ ].
4 Select [Bluetooth Setup].
5 Turn Bluetooth ON.
6 From [Registered camera(s)] items, select the camera’s device name.
• Even if you set up pairing with more than one smartphone, you can only connect
to one smartphone at a time.
• When pairing takes some time, canceling the pairing settings on both the
smartphone and camera and re-establishing the connection may result in the
camera being detected correctly.
LUMIX Sync
Bluetooth
XXXXXXXX
Wi-Fi / Bluetooth – Connecting to a Smartphone
633
Canceling Pairing
1 Cancel the pairing setting of the camera.
• ¨ [ ] ¨ [ ] ¨ [Bluetooth] ¨ [Bluetooth] ¨ [SET] ¨ [Delete]
2 Select the smartphone for which to cancel the pairing.
• Also cancel the pairing setting on the smartphone.
• When [Reset] in the [Setup] ([Setting]) menu is used to reset the network
settings, the information for registered devices is deleted.
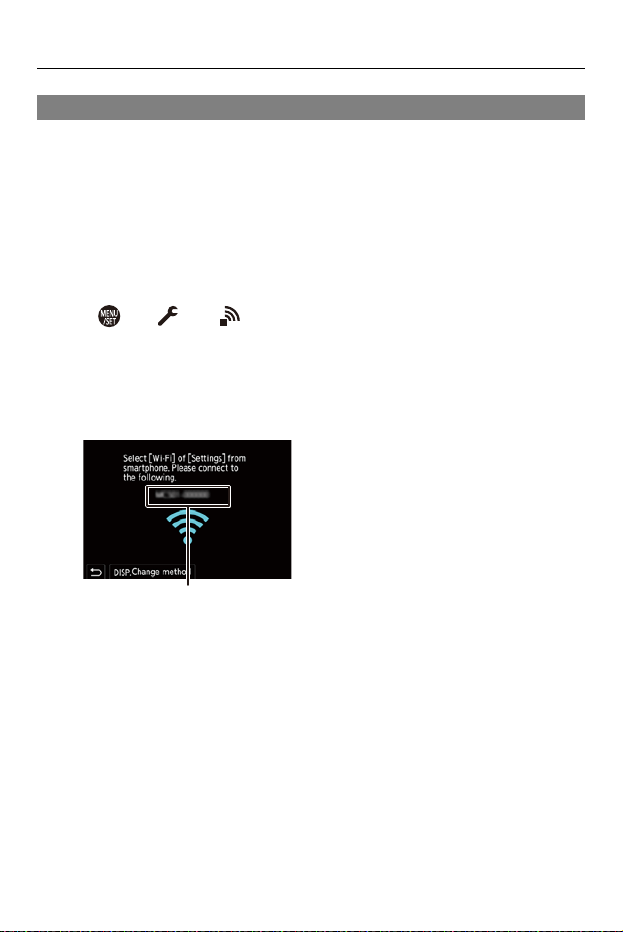
Wi-Fi / Bluetooth – Connecting to a Smartphone
634
Connecting to a Smartphone ([Wi-Fi connection])
Use Wi-Fi to connect the camera and a smartphone.
With default settings, simple connection with smartphones is possible
without entering a password.
You can also use password authentication for enhanced connection
security.
1
Set the camera to Wi-Fi connection standby status.
≥ ¨ [ ] ¨ [ ] ¨ [Wi-Fi] ¨ [Wi-Fi Function] ¨ [New
Connection] ¨ [Control With Smartphone]
≥The SSID (B) of the camera is displayed on the screen.
•
You can also perform the same operation by pressing the Fn button assigned
with [Wi-Fi]. (ÎFn Buttons: 517)
2
In the setting menu of the smartphone, turn the Wi-Fi
function ON.
(B)
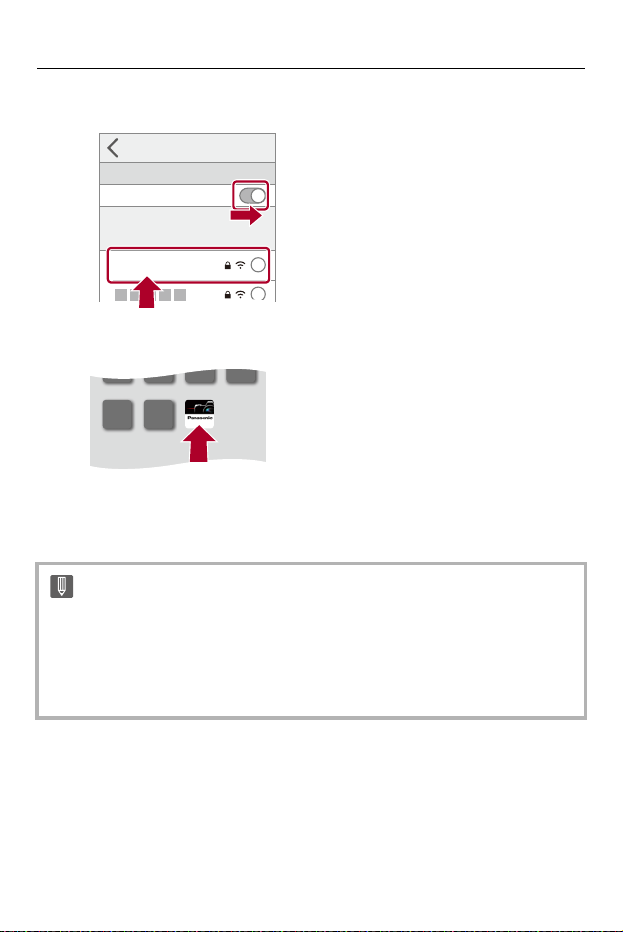
Wi-Fi / Bluetooth – Connecting to a Smartphone
635
3
Select the SSID displayed on the camera.
4
On the smartphone, start up “LUMIX Sync”.
5
(At the first connection) Confirm the device name
displayed on the camera and then select [Yes].
• When a device different than the one you want to connect to is displayed, the
camera will automatically connect to that device if you select [Yes].
If there are other Wi-Fi connection devices nearby, we recommend using either
QR code or manual password input to connect with password authentication.
(ÎUsing Password Authentication to Connect: 636)
Wi-Fi
Wi-Fi
XXXXXXXX
i
i
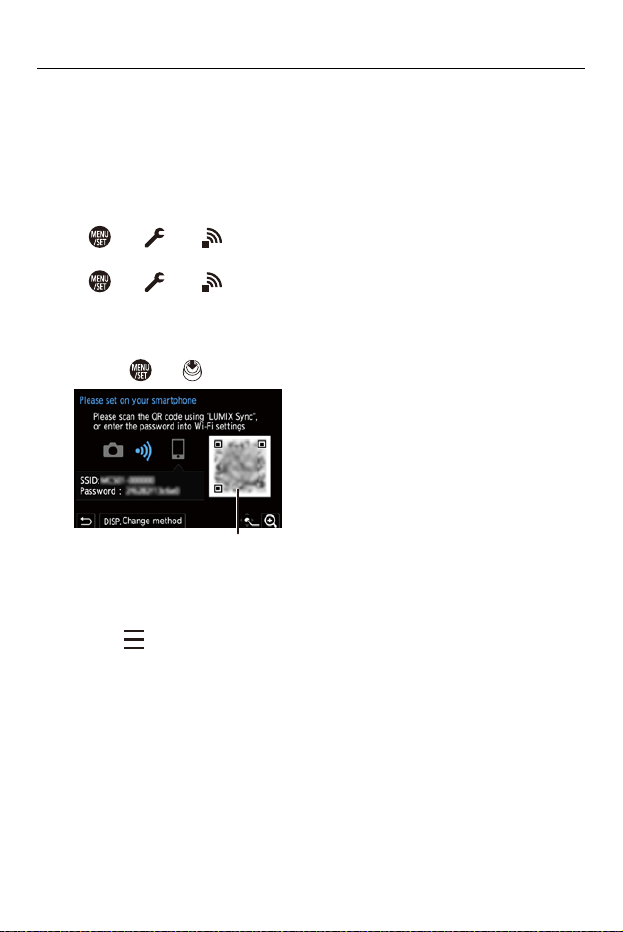
Wi-Fi / Bluetooth – Connecting to a Smartphone
636
Using Password Authentication to Connect
You can enhance Wi-Fi connection security by using password
authentication through either QR code or manual input.
Scanning QR code to connect
1 Set [Wi-Fi Password] on the camera to [ON].
• ¨ [ ] ¨ [ ] ¨ [Wi-Fi] ¨ [Wi-Fi Setup] ¨ [Wi-Fi Password] ¨ [ON]
2 Display the QR code (C).
• ¨ [ ] ¨ [ ] ¨ [Wi-Fi] ¨ [Wi-Fi Function] ¨ [New Connection] ¨
[Control With Smartphone]
• You can also perform the same operation by pressing the Fn button assigned
with [Wi-Fi]. (ÎFn Buttons: 517)
• Press or to enlarge the QR code.
3 On the smartphone, start up “LUMIX Sync ”.
• If a message is displayed indicating that the smartphone is searching for
cameras, close the message.
4 Select [ ].
5 Select [Wi-Fi connection].
6 Select [QR code].
7 Scan the QR code displayed on the screen of the camera using “ LUMIX Sync ”.
• (iOS devices) When a message to confirm the change of destination is
displayed, select [Join].
(C)
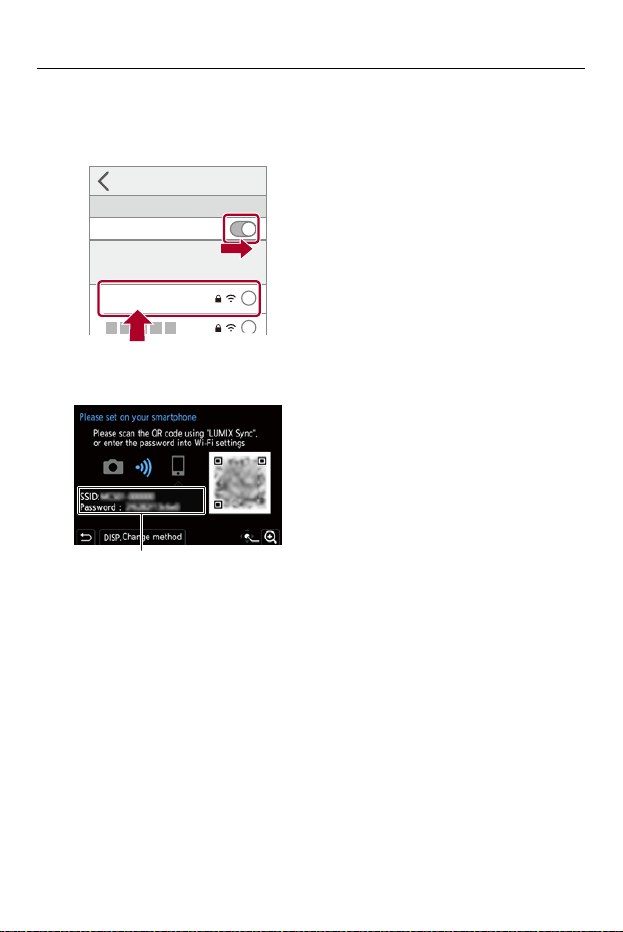
Wi-Fi / Bluetooth – Connecting to a Smartphone
637
Manually entering a password to connect
1 Display the screen in Step 2 (ÎScanning QR code to connect: 636).
2 In the setting menu of the smartphone, turn the Wi-Fi function ON.
3 On the Wi-Fi setup screen, select the SSID (D) displayed on the camera.
4 (At the first connection) Enter the password (D) displayed on the camera.
5 On the smartphone, start up “LUMIX Sync ”.
Wi-Fi
Wi-Fi
XXXXXXXX
i
i
(D)

Wi-Fi / Bluetooth – Connecting to a Smartphone
638
Connection Methods Other Than the Default Settings
When connecting with [Via Network], or [WPS Connection] in [Direct],
follow the steps below:
1 Display the connection method setting screen for the camera.
• ¨ [ ] ¨ [ ] ¨ [Wi-Fi] ¨ [Wi-Fi Function] ¨ [New Connection] ¨
[Control With Smartphone]
2 Press [DISP.].
Connecting via network
1 Select [Via Network] and then press or .
• Connect the camera to a wireless access point. (Î[Via Network]: 667)
2 In the setting menu of the smartphone, turn the Wi-Fi function ON.
3 Connect the smartphone to the wireless access point that the camera is
connected to.
4 On the smartphone, start up “LUMIX Sync ”.
Connecting directly
1 Select [Direct] and then press or .
• Select [WPS Connection] to connect the camera to a smartphone. (Î[Direct]:
671)
2 On the smartphone, start up “LUMIX Sync ”.

Wi-Fi / Bluetooth – Connecting to a Smartphone
639
Terminating the Wi-Fi Connection
To end the Wi-Fi connection between the camera and smartphone, follow
the steps below.
1 Press the shutter button halfway to put the camera in recording mode.
2 Terminate the Wi-Fi connection.
• ¨ [ ] ¨ [ ] ¨ [Wi-Fi] ¨ [Wi-Fi Function] ¨ [Yes]
• You can also perform the same operation by pressing the Fn button assigned
with [Wi-Fi]. (ÎFn Buttons: 517)
3 On the smartphone, close the “LUMIX Sync”.

Wi-Fi / Bluetooth – Connecting to a Smartphone
640
Sending Images on the Camera to a Smartphone
with Simple Operations
You can transfer pictures to a smartphone connected by Bluetooth just by
pressing [Q] during playback.
You can also use the menu to connect easily.
•
You can also perform the same operation by pressing the Fn button registered with
[Send Image (Smartphone)]. (ÎFn Buttons: 517)
Getting started:
• Install “LUMIX Sync” on your smartphone. (ÎInstalling “LUMIX Sync”: 627)
• Connect the camera to a smartphone by Bluetooth. (ÎConnecting to a Smartphone
(Bluetooth Connection): 628)
• Press [ ] on the camera to display the playback screen.
Send a single image
1 Press 21 to select the image.
2 Press [Q].
3 Select [Single Select].
• To change the send settings of images, press [DISP.]. (ÎImage Send Settings:
675)
4 On the smartphone, select [Yes] (for Android devices) or [Join] (for iOS devices).
• This connects automatically using Wi-Fi.
Wi-Fi / Bluetooth – Connecting to a Smartphone
641
Send multiple images
1 Press [Q].
2 Select [Multi Select].
• To change the send settings of images, press [DISP.]. (ÎImage Send Settings:
675)
3 Select the images and then transfer.
21: Select images
or : Set/Cancel
[DISP.]: Transfer
4 On the smartphone, select [Yes] (for Android devices) or [Join] (for iOS devices).
• This connects automatically using Wi-Fi.
Using the menu to transfer easily
¨ [ ] ¨ [ ] ¨ [Bluetooth] ¨ [Send Image (Smartphone)]
Settings: [Single Select]/[Multi Select]
•
If [Single Select], press 21 to select the image and then press or to
execute.
• If [Multi Select], use the same operation as with “Send multiple images”. (ÎSend
multiple images: 641)
• This function is not available when [Auto Transfer] in [Bluetooth] is set to [ON].

Wi-Fi / Bluetooth – Operating the Camera with a Smartphone
642
Operating the Camera with a Smartphone
≥[Remote shooting]: 644
≥[Shutter Remote Control]: 646
≥[Import images]: 649
≥[Auto Transfer]: 651
≥[Location Logging]: 653
≥[Remote Wakeup]: 655
≥[Auto Clock Set]: 657
≥[Camera settings copy]: 658
This explains the functions for operating the camera from a smartphone.
Functions described in this document with the ( ) symbol require
a smartphone that supports Bluetooth Low Energy.
Bluetooth
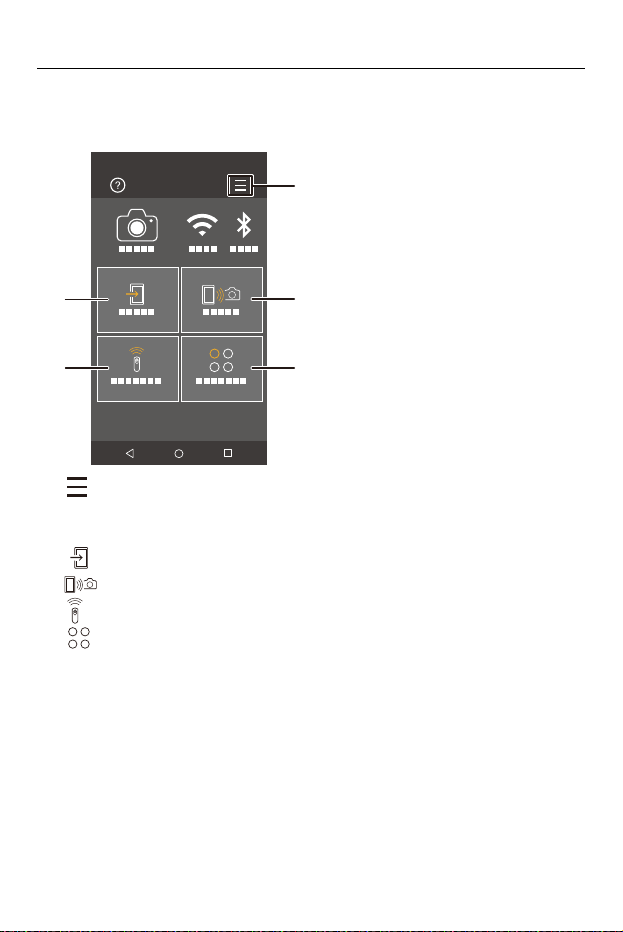
Wi-Fi / Bluetooth – Operating the Camera with a Smartphone
643
Home Screen
When you start up “LUMIX Sync”, the home screen is displayed.
(A) : App settings (ÎConnecting to a Paired Smartphone: 632, Using Password
Authentication to Connect: 636, [Remote Wakeup]: 655)
This allows connection settings, camera power operations, and displays Help.
(B) : [Import images] (Î[Import images]: 649)
(C) : [Remote shooting] (Î[Remote shooting]: 644)
(D) : [Shutter Remote Control] (Î[Shutter Remote Control]: 646)
(E) : [Others] ([Camera settings copy]) (Î[Camera settings copy]: 658)
LUMIX Sync
(A)
(C)
(E)
(B)
(D)
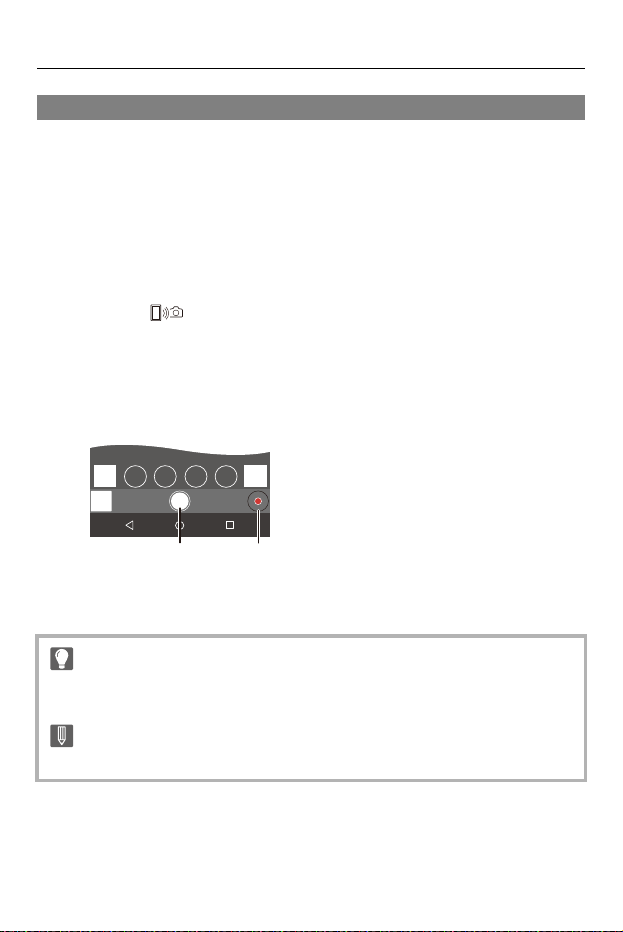
Wi-Fi / Bluetooth – Operating the Camera with a Smartphone
644
[Remote shooting]
You can use the smartphone to record from a remote location while
viewing the live view images from the camera.
Getting started:
• Connect the camera to a smartphone. (ÎConnecting to a Smartphone (Bluetooth
Connection): 628, Connecting to a Smartphone ([Wi-Fi connection]): 634)
• On the smartphone, start up “LUMIX Sync”.
1
Select [ ] ([Remote shooting]) in the home screen.
• (iOS devices) When a message to confirm the change of destination is
displayed, select [Join].
2
Start recording.
• The recorded image is saved on the camera.
(F) Takes a picture
(G) Starts/ends the video recording
• When used in combination with [Auto Transfer], it is possible to automatically
transfer the remotely recorded images to a smartphone. (Î[Auto Transfer]: 651)
• Certain features, including some settings, may not be available.
(F) (G)
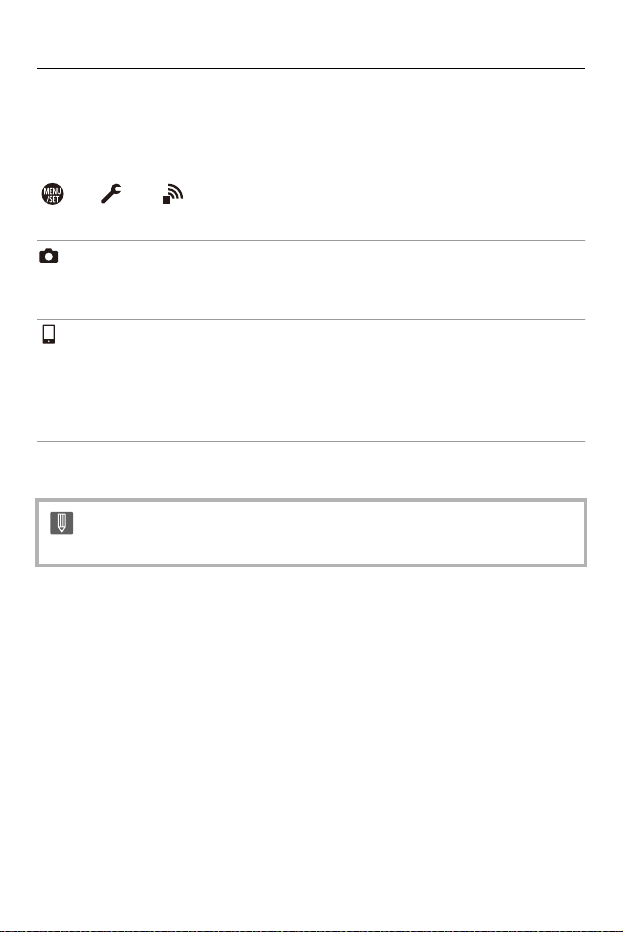
Wi-Fi / Bluetooth – Operating the Camera with a Smartphone
645
Operation Method During Remote Recording
Set either the camera or the smartphone as the priority control device to be
used during remote recording.
¨ [ ] ¨ [ ] ¨ [Wi-Fi] ¨ [Wi-Fi Setup] ¨ Select [Priority of
Remote Device]
[Camera]
Operation is possible on both the camera and the smartphone.
• The camera’s dial settings, etc. cannot be changed with the smartphone.
[Smartphone]
Operation is possible only on the smartphone.
• The camera’s dial settings, etc. can be changed with the smartphone.
• To end remote recording, press any of the buttons on the camera to turn on the
screen, and select [End].
• The default setting is [Camera].
• The setting of this function cannot be changed while the connection is active.
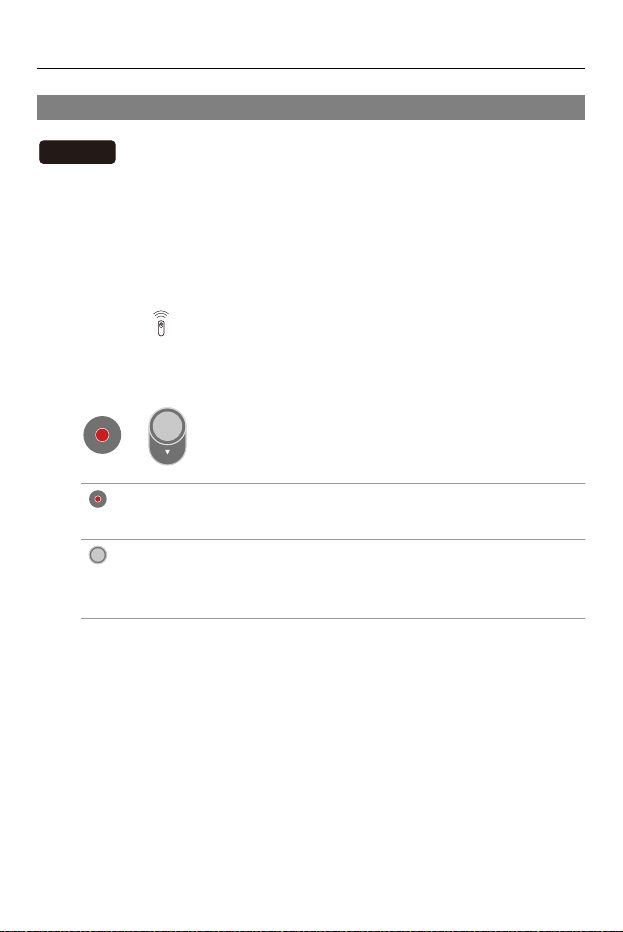
Wi-Fi / Bluetooth – Operating the Camera with a Smartphone
646
[Shutter Remote Control]
You can use the smartphone as a remote control for the shutter.
Getting started:
• Connect the camera to a smartphone by Bluetooth. (ÎConnecting to a Smartphone
(Bluetooth Connection): 628)
• On the smartphone, start up “LUMIX Sync”.
1
Select [ ] ([Shutter Remote Control]) in the home
screen.
2
Start recording.
Starts/ends the video recording
Takes a picture
• Bulb Recording: 647
Bluetooth
LOCK

Wi-Fi / Bluetooth – Operating the Camera with a Smartphone
647
Bulb Recording
The shutter can be kept open from the start to end of recording, which is
useful for recording of starry skies or night scenery.
Getting started:
• Set the camera to [M] mode. (ÎManual Exposure Mode: 280)
• Set the camera shutter speed to [B] (Bulb). (Î[B] (Bulb): 284)
1 Touch [ ] to start recording (keep touching, without removing your finger).
2 Remove your finger from [ ] to end recording.
• Slide [ ] in the direction of [LOCK] to record with the shutter button locked
in a fully-pressed state.
(Slide [ ] back to its original position or press the camera shutter button to
end recording)
• During [B] (Bulb) recording, if the Bluetooth connection is broken, then carry
out Bluetooth connection again, then end recording from the smartphone.
Wi-Fi / Bluetooth – Operating the Camera with a Smartphone
648
Shortening the Return Time from [Sleep Mode]
You can shorten the time it takes for the camera to return from [Sleep
Mode] when the [Shutter Remote Control] is used.
Getting started:
• Connect the camera to a smartphone by Bluetooth. (ÎConnecting to a Smartphone
(Bluetooth Connection): 628)
• Set [Remote Wakeup] in [Bluetooth] to [ON]. (Î[Remote Wakeup]: 655)
¨ [ ] ¨ [ ] ¨ [Bluetooth] ¨ Select [Returning from Sleep Mode]
[Import / Remote Priority]
Shortens the time to return when using [Import images] or [Remote shooting].
[Remote Shutter Priority]
Shortens the time to return when using [Shutter Remote Control].
• To use the [Shutter Remote Control] to cancel [Sleep Mode] on the camera, set
[Bluetooth] in the [Setup] ([IN/OUT]) menu as follows, then connect via Bluetooth:
– [Remote Wakeup]: [ON] (Î[Remote Wakeup]: 655)
– [Auto Transfer]: [OFF] (Î[Auto Transfer]: 651)
• The camera cannot be turned on by using [Shutter Remote Control].
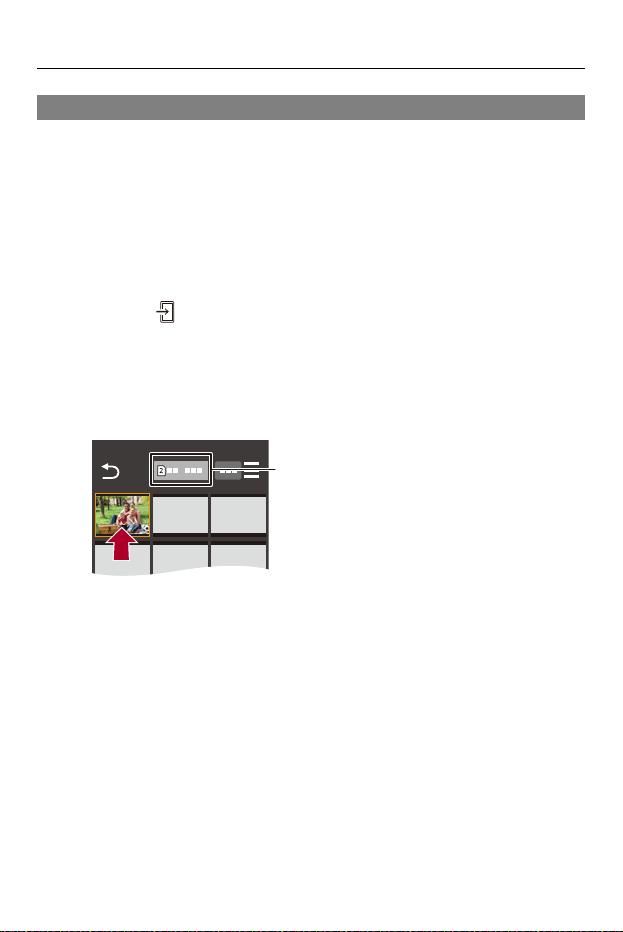
Wi-Fi / Bluetooth – Operating the Camera with a Smartphone
649
[Import images]
Transfer an image stored on the card to the smartphone connected via
Wi-Fi.
Getting started:
• Connect the camera to a smartphone. (ÎConnecting to a Smartphone (Bluetooth
Connection): 628, Connecting to a Smartphone ([Wi-Fi connection]): 634)
• On the smartphone, start up “LUMIX Sync”.
1
Select [ ] ([Import images]) in the home screen.
• (iOS devices) When a message to confirm the change of destination is
displayed, select [Join].
2
Select the image to transfer.
• You can switch the card displayed by touching (H).
(H)
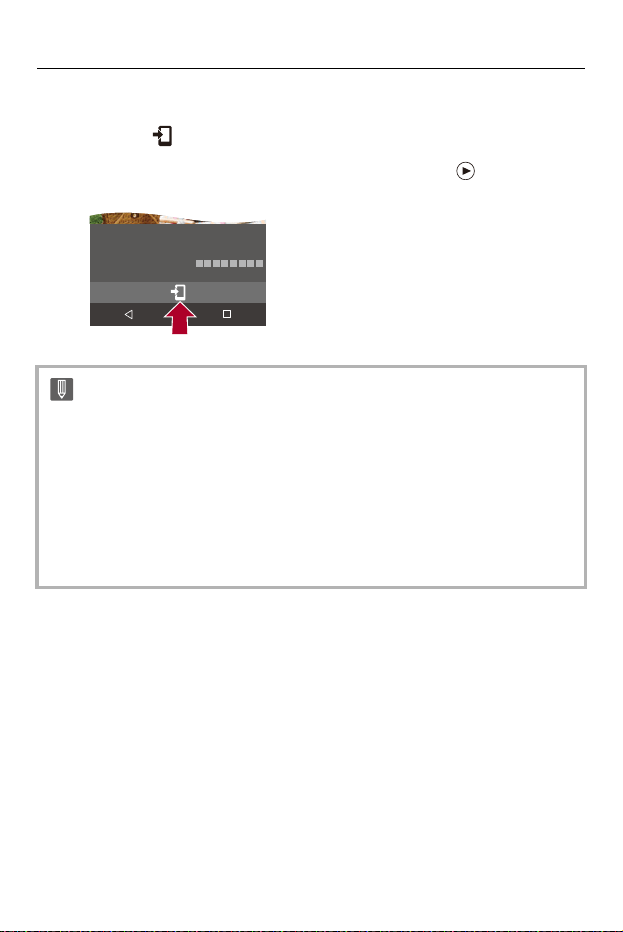
Wi-Fi / Bluetooth – Operating the Camera with a Smartphone
650
3
Transfer the image.
≥Select [ ].
•
If the image is a video, you can play it back by touching [ ] at the center of
the screen.
• When a video is played back, this has a small data size and is transmitted using
“LUMIX Sync”, therefore its image quality will differ from that of the actual video
recording.
Depending on the smartphone and on the usage conditions, the image quality
may deteriorate or the sound may skip during video or picture playback.
• It is not possible to transfer images with file sizes exceeding 4 GB.
• Images recorded using the following functions cannot be transferred:
– [MOV] videos, [Apple ProRes] videos
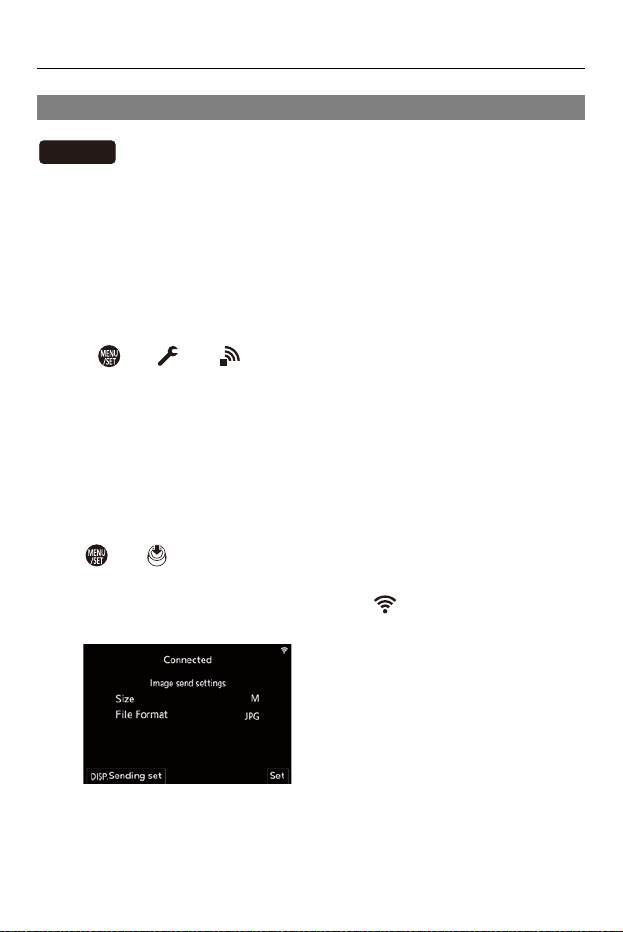
Wi-Fi / Bluetooth – Operating the Camera with a Smartphone
651
[Auto Transfer]
You can automatically transfer recorded pictures to a smartphone as they
are taken.
Getting started:
• Connect the camera to a smartphone by Bluetooth. (ÎConnecting to a Smartphone
(Bluetooth Connection): 628)
1
Enable [Auto Transfer] on the camera.
≥ ¨ [ ] ¨ [ ] ¨ [Bluetooth] ¨ [Auto Transfer] ¨ [ON]
•
If a confirmation screen is displayed on the camera asking you to terminate
the Wi-Fi connection, select [Yes] to terminate it.
2
On the smartphone, select [Yes] (for Android devices) or
[Join] (for iOS devices).
• The camera automatically makes a Wi-Fi connection.
3
Check the send settings on the camera and then press
or .
• To change the send setting, press [DISP.]. (ÎImage Send Settings: 675)
• Automatic image transfer is possible when [ ] is displayed on the camera
recording screen.
Bluetooth
Wi-Fi / Bluetooth – Operating the Camera with a Smartphone
652
4
Record with the camera.
• [ ] is displayed in the recording screen of the camera while a file is being
sent.
To Stop the Automatic Transfer of Images
¨ [ ] ¨ [ ] ¨ [Bluetooth] ¨ [Auto Transfer] ¨ Select [OFF]
≥A confirmation screen is displayed, asking you to terminate the Wi-Fi
connection.
•
If the [Bluetooth] and [Auto Transfer] settings of the camera are [ON], the camera
automatically connects to the smartphone via Wi-Fi and Bluetooth when you turn
on the camera.
Start up the “LUMIX Sync” on the smartphone to connect to the camera.
• Images are not transferred while the recording screen of the camera is displayed
on the smartphone in [Remote shooting].
• When [Auto Transfer] is set to [ON], [Wi-Fi Function] cannot be used.
• If the camera is turned off during image transfer, and the file sending is
interrupted, then turn on the camera to restart the sending.
– If the storage status of unsent files changes, then sending of files may no
longer be possible.
– If there are many unsent files, then sending of all files may not be possible.
• Images recorded with the following function cannot be transferred automatically:
– Video recording

Wi-Fi / Bluetooth – Operating the Camera with a Smartphone
653
[Location Logging]
The smartphone sends its location information to the camera via Bluetooth,
and the camera performs recording while writing the acquired location
information.
Getting started:
• Enable the GPS function on the smartphone.
• Connect the camera to a smartphone by Bluetooth. (ÎConnecting to a Smartphone
(Bluetooth Connection): 628)
1
Enable [Location Logging] on the camera.
≥ ¨ [ ] ¨ [ ] ¨ [Bluetooth] ¨ [Location Logging] ¨ [ON]
•
The camera will enter a mode where location information can be recorded
and [ ] is displayed in the recording screen of the camera.
2
Record images with the camera.
• Location information will be written to the recorded images.
Bluetooth
GPS

Wi-Fi / Bluetooth – Operating the Camera with a Smartphone
654
• When [ ] on the recording screen appears translucent, location information
cannot be acquired, therefore data cannot be written.
Smartphone GPS positioning may not be possible if the smartphone is within a
building, a bag, or similar. Move the smartphone to a position affording a wide
view of the sky to improve positioning performance.
In addition, refer to the operating instructions of your smartphone.
• Images with location information are indicated with [ ].
• Be sure to pay special attention to the privacy, the likeness rights, etc. of the
subject when you use this function. Use at your own risk.
• The smartphone drains its battery faster while acquiring location information.
GPS
GPS

Wi-Fi / Bluetooth – Operating the Camera with a Smartphone
655
[Remote Wakeup]
Even when the camera is turned off, the smartphone can be used to start
the camera and record images, or check the recorded images.
Getting started:
1 Connect to a smartphone using Bluetooth. (ÎConnecting to a Smartphone
(Bluetooth Connection): 628)
2 Enable [Remote Wakeup] on the camera.
• ¨ [ ] ¨ [ ] ¨ [Bluetooth] ¨ [Remote Wakeup] ¨ [ON]
3 Set the camera on/off switch to [OFF].
4 On the smartphone, start up “LUMIX Sync ”.
Turning On the Camera
Select [Remote shooting] in the “LUMIX Sync” home screen.
•
(iOS devices) When a message to confirm the change of destination is displayed,
select [Join].
• The camera turns on, and automatically connects using Wi-Fi.
Turning Off the Camera
1 Select [ ] in the “LUMIX Sync” home screen.
2 Select [Turn off the camera].
3 Select [Power OFF].
Bluetooth

Wi-Fi / Bluetooth – Operating the Camera with a Smartphone
656
• When [Auto Transfer] is set to [ON], images recorded while remote operation is
running are automatically transferred to a smartphone.
If [Power OFF] is selected while there are still unsent images, sending is
resumed when the camera is next turned on.
• When [Remote Wakeup] has been set, the Bluetooth function continues to work
even if the camera on/off switch is set to [OFF], so the battery will drain.

Wi-Fi / Bluetooth – Operating the Camera with a Smartphone
657
[Auto Clock Set]
Synchronize the clock and the time zone setting of the camera with those
of a smartphone.
Getting started:
• Connect the camera to a smartphone by Bluetooth. (ÎConnecting to a Smartphone
(Bluetooth Connection): 628)
Enable [Auto Clock Set] on the camera.
≥ ¨ [ ] ¨ [ ] ¨ [Bluetooth] ¨ [Auto Clock Set] ¨ [ON]
Bluetooth
Wi-Fi / Bluetooth – Operating the Camera with a Smartphone
658
[Camera settings copy]
This saves the camera’s settings information to the smartphone.
Saved settings information can be loaded to the camera, letting you set the
same settings on multiple cameras.
Getting started:
• Connect the camera to a smartphone by Bluetooth. (ÎConnecting to a Smartphone
(Bluetooth Connection): 628)
1
Select [ ] ([Others]) ¨ [ ] ([Camera settings copy])
in the “LUMIX Sync” home screen.
2
Save or load settings information.
• Read the [Help] in the “LUMIX Sync” menu for further details on how to
operate the “LUMIX Sync ”.
• Only settings information from the same model can be loaded.
• When transferring settings information, a Wi-Fi connection is automatically
created.
(iOS devices) When a message to confirm the change of destination is
displayed, select [Join].
• You can save or load the settings information of items that are the same as those
in [Save/Restore Camera Setting] under the [Setup] ([Setting]) menu. (ÎList of
Default Settings/Custom Saving/Settings Available for Copying: 779)
Bluetooth

Wi-Fi / Bluetooth – Sending Images from the Camera
659
Sending Images from the Camera
≥[PC]: 662
≥[Printer]: 665
Operate the camera to send recorded images to a device connected by
Wi-Fi.
Refer to the following pages for the steps common to all devices.
•
Wi-Fi connections: [Via Network] (Î[Via Network]: 667)/[Direct] (Î[Direct]: 671)
• Image send settings (ÎImage Send Settings: 675)
• Selecting images (ÎSelecting Images: 676)
• When recording, recording is prioritized so it will take time for sending to
complete.
• If the camera is turned off, or the Wi-Fi is disconnected before sending is
completed, then sending will not restart.
• You may not be able to delete files or use the [Playback] menu while sending.
• When [Auto Transfer] in [Bluetooth] is set to [ON], [Wi-Fi Function] is not
available.
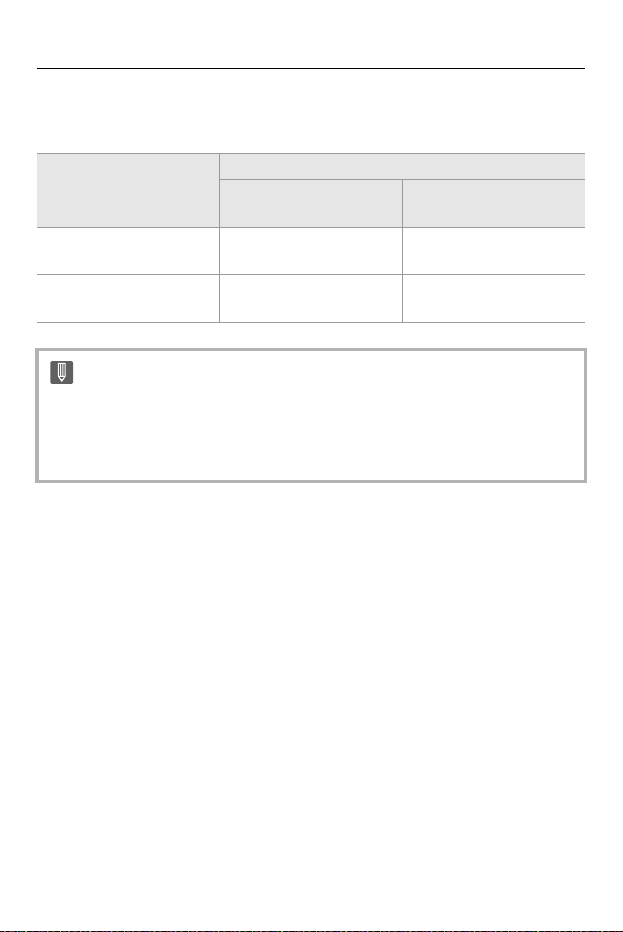
Wi-Fi / Bluetooth – Sending Images from the Camera
660
Images That Can be Sent
Images that can be sent differ depending on the destination device.
Destination device
Images that can be sent
[Send Images to PC
While Recording]
[Send Images Stored in
the Camera]
[PC] (Î[PC]: 662) JPEG/RAW
JPEG/RAW/MP4/MOV/
Apple ProRes
[Printer] (Î[Printer]:
665)
— JPEG
• Depending on the OS version, these may not be displayed correctly.
• Sending may not be possible depending on your device.
• It may not be possible to send images recorded with devices other than this
camera, or images edited or processed on a PC.
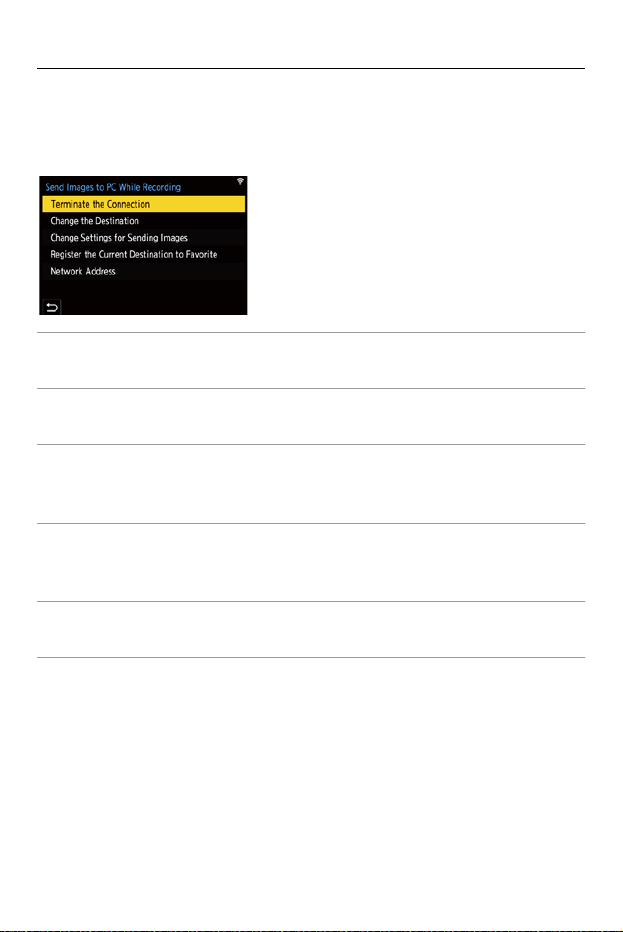
Wi-Fi / Bluetooth – Sending Images from the Camera
661
Fn Button Assigned with [Wi-Fi]
You can perform the following operations by pressing the Fn button
assigned with [Wi-Fi] after connecting to Wi-Fi. (ÎFn Buttons: 517)
[Terminate the Connection]
Terminates the Wi-Fi connection.
[Change the Destination]
Terminates the Wi-Fi connection, and allows you to select a different Wi-Fi connection.
[Change Settings for Sending Images]
Sets the image size, file format, and other items for sending recorded images.
(ÎImage Send Settings: 675)
[Register the Current Destination to Favorite]
Registers the current connection destination or method so that you can easily connect
with the same connection settings next time.
[Network Address]
Displays the MAC address and IP address of the camera. (Î[Network Address]: 678)
• Depending on the Wi-Fi function being used or the connection destination, you may
not be able to perform some of these operations.

Wi-Fi / Bluetooth – Sending Images from the Camera
662
[PC]
Send recorded images to the PC connected with Wi-Fi.
Getting started:
• Turn on the PC.
• Create a destination folder for images.
• If the workgroup of the destination PC has been changed from the standard setting,
change the corresponding setting of the camera in [PC Connection]. (Î[PC
Connection]: 677)
Create a Destination Folder for Images
When using Windows (Example for Windows 10)
1 Select the destination folder and then right-click.
2 Select [Properties] and then enable folder sharing.
When using Mac (Example for macOS 10.14)
1 Select the destination folder and then click the items in the following order.
[File] ¨ [Get Info]
2 Enable folder sharing.
Supported OS
Windows: Windows 10
Mac: macOS 10.13, 10.14, 10.15.3 to 10.15.7, 11.0 to 11.4
Wi-Fi / Bluetooth – Sending Images from the Camera
663
1
Select the method for sending images on the camera.
≥ ¨ [ ] ¨ [ ] ¨ [Wi-Fi] ¨ [Wi-Fi Function] ¨ [New
Connection] ¨ [Send Images to PC While Recording]/[Send
Images Stored in the Camera]
2
(When [Send Images Stored in the Camera] is selected)
Set the destination to [PC].
3
Connect the camera and PC by Wi-Fi.
≥Select [Via Network] (Î[Via Network]: 667) or [Direct] (Î[Direct]:
671), and then connect.
4
Enter the computer name of the PC name you want to
connect to (for Mac, the NetBIOS name).
• How to enter characters (ÎEntering Characters: 105)
• Create a PC account name (up to 254 characters) and password (up to
32 characters) consisting of alphanumeric characters.
A destination folder may not be created if the account name includes
non-alphanumeric characters.
• When the computer name (NetBIOS name for Mac) contains a space (blank
character), etc., it may not be recognized.
In that case, we recommend changing the name to one consisting only of 15 or
less alphanumeric characters.
• Refer to the operating instructions for your PC or Help on the OS for detailed
setting procedures.
Wi-Fi / Bluetooth – Sending Images from the Camera
664
5
Select a folder for storing images.
• Folders sorted by sent date will be created in the selected folder, and images
will be saved there.
6
Check the send settings and then press or .
• To change the send setting, press [DISP.]. (ÎImage Send Settings: 675)
7
(When [Send Images to PC While Recording] is
selected) Take pictures.
• [ ] is displayed in the recording screen of the camera while a file is being
sent.
• To end the connection, follow the steps below:
¨ [ ] ¨ [ ] ¨ [Wi-Fi] ¨ [Wi-Fi Function] ¨ [Yes]
(When [Send Images Stored in the Camera] is selected)
Select an image.
• To end the connection, select [Exit].
• If the screen for a user account and password entry appears, enter the one you
set on your PC.
• When the firewall of the OS, security software, etc. is enabled, connecting to the
PC may not be possible.
Wi-Fi / Bluetooth – Sending Images from the Camera
665
[Printer]
You can send images to a PictBridge (wireless LAN)
*
-supported printer
connected by Wi-Fi for printing.
* DPS over IP standard-compliant
1
Select the method for sending images on the camera.
≥ ¨ [ ] ¨ [ ] ¨ [Wi-Fi] ¨ [Wi-Fi Function] ¨ [New
Connection] ¨ [Send Images Stored in the Camera]
2
Set the destination to [Printer].
3
Connect the camera to a printer by Wi-Fi.
≥Select [Via Network] (Î[Via Network]: 667) or [Direct] (Î[Direct]:
671), and then connect.
4
Select the destination printer.
5
Select and print images.
• The procedure for selecting images is the same as the one for when the USB
connection cable is connected. (ÎPrinting: 696)
• To terminate the connection, press [ ].
• For details about PictBridge (wireless LAN-compatible) printers, contact their
manufacturers.
• When [Auto Transfer] in [Bluetooth] is set to [ON], [Wi-Fi Function] is not
available.

Wi-Fi / Bluetooth – Wi-Fi Connections
666
Wi-Fi Connections
≥[Via Network]: 667
≥[Direct]: 671
≥Connect to Wi-Fi Using Previously Saved Settings: 673
When [New Connection] has been selected in [Wi-Fi Function] in [Wi-Fi] of
the [Setup] ([IN/OUT]) menu, select the connection method from either [Via
Network] or [Direct] to connect.
On the other hand, when you use [Select a destination from History] or
[Select a destination from Favorite], the camera connects to the selected
device with the previously-used settings.
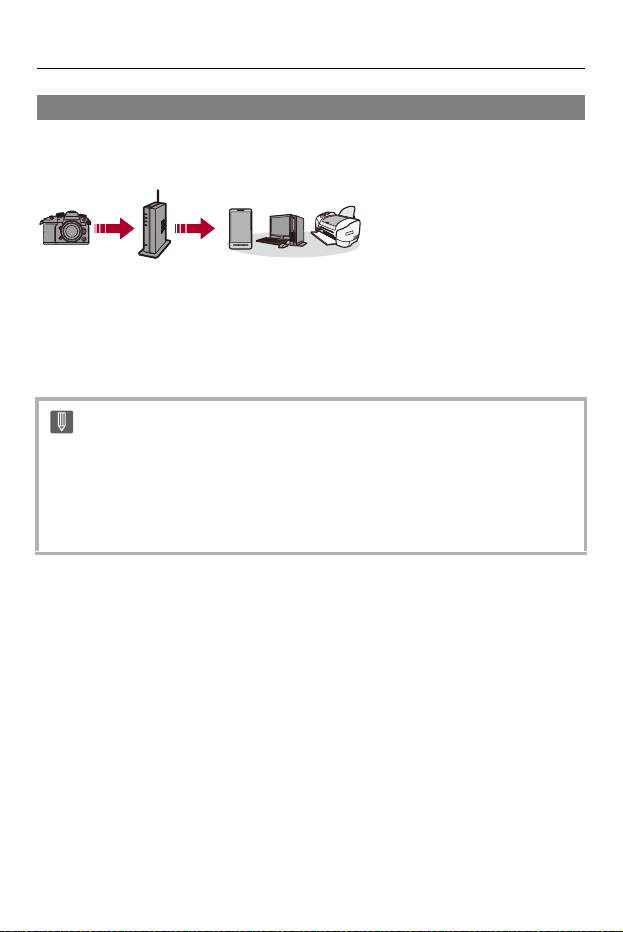
Wi-Fi / Bluetooth – Wi-Fi Connections
667
[Via Network]
Connect the camera and destination device through the wireless access
point.
Select the method for connecting to a wireless access point.
Settings: [WPS (Push-Button)]/[WPS (PIN code)]/[From List] (Î[WPS
(Push-Button)]: 668, [WPS (PIN code)]: 668, [From List]: 669)
•
After selecting [Via Network] once, the camera will connect to the
previously-used wireless access point.
To change the wireless access point used for connection, press [DISP.] and
change the connection destination.
• Check the operating instructions and settings of the wireless access point.
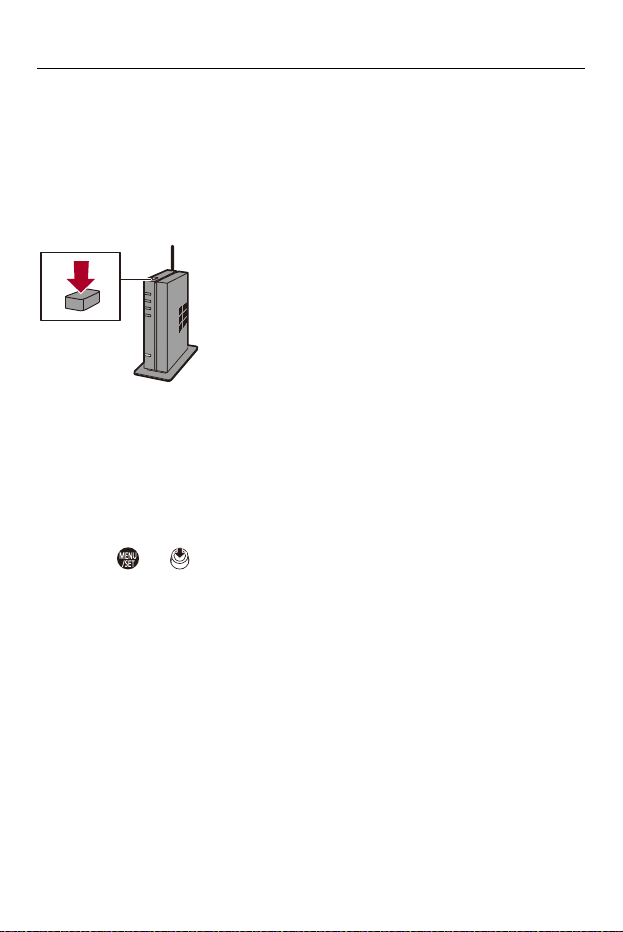
Wi-Fi / Bluetooth – Wi-Fi Connections
668
[WPS (Push-Button)]
Press the WPS button on the wireless access point to set up a connection.
Press the wireless access point WPS button until it switches to WPS
mode.
Example)
[WPS (PIN code)]
Enter a PIN code into the wireless access point to set up a connection.
1 On the camera screen, select the wireless access point you are connecting to.
2 Enter the PIN code displayed on the camera screen into the wireless access
point.
3 Press or of the camera.

Wi-Fi / Bluetooth – Wi-Fi Connections
669
[From List]
Searches for a wireless access point to use, and connects to this.
1 Select the wireless access point you are connecting to.
• Press [DISP.] to run a wireless access point search again.
• If no wireless access point is found (ÎConnecting by Manual Input: 670)
2 (If network authentication is encrypted) Enter the encryption key.
• How to enter characters (ÎEntering Characters: 105)
• Confirm the encryption key of the wireless access point.
Wi-Fi / Bluetooth – Wi-Fi Connections
670
Connecting by Manual Input
1 In the screen in Step 1 of “[From List]”, select [Manual Input]. (Î[From List]: 669)
2 Enter the SSID of the wireless access point you are connecting to, and then
select [Set].
• How to enter characters (ÎEntering Characters: 105)
3 Select the network authentication.
[WPA3-SAE]/[WPA2-PSK]/[WPA2/WPA-PSK]
Supported encryption: [TKIP], [AES]
[No Encryption]
4 (When other than [No Encryption] is selected) Enter the encryption key and then
select [Set].
• Check the SSID, network authentication, encryption, and encryption key of the
wireless access point you are using.
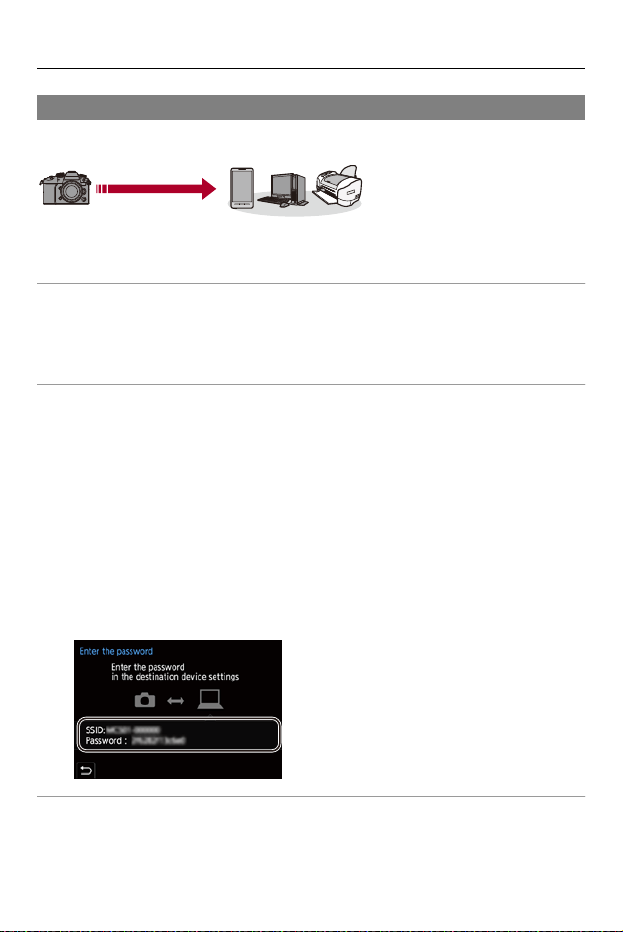
Wi-Fi / Bluetooth – Wi-Fi Connections
671
[Direct]
Directly connect the camera and the destination device.
Select the method for connecting with the destination device.
[WPS Connection]
[WPS (Push-Button)]: Press the WPS button on the destination device to connect.
• On the camera, press [DISP.] to extend the connection wait time.
[WPS (PIN code)]: Enter the PIN code into the camera, and connect.
[Manual Connection]
Search for the camera on the destination device to connect.
1 Select the network authentication.
[WPA3]/[WPA3/WPA2]
• If [Wi-Fi Password] in [Wi-Fi Setup] is [OFF], this is not displayed if the
connected device is [Smartphone].
2 Enter the SSID and password displayed on the camera into the device.
• If [Wi-Fi Password] in [Wi-Fi Setup] is [OFF], the password is not displayed if
the connected device is [Smartphone].
Select the SSID to establish a connection. (ÎConnecting to a Smartphone
([Wi-Fi connection]): 634)

Wi-Fi / Bluetooth – Wi-Fi Connections
672
• Please also refer to the operating instructions for the device to be connected.

Wi-Fi / Bluetooth – Wi-Fi Connections
673
Connect to Wi-Fi Using Previously Saved Settings
Use the Wi-Fi connection history to connect using the same settings as
previously.
1
Display the Wi-Fi connection history.
≥ ¨ [ ] ¨ [ ] ¨ [Wi-Fi] ¨ [Wi-Fi Function] ¨ [Select a
destination from History]/[Select a destination from Favorite]
2
Select the History item to connect to.
• Press [DISP.] to confirm details of the connection history.
Register to Favorite
You can register the Wi-Fi connection history to Favorite.
1 Display the Wi-Fi connection history.
• ¨ [ ] ¨ [ ] ¨ [Wi-Fi] ¨ [Wi-Fi Function] ¨ [Select a destination
from History]
2 Select the History item to register and then press 1.
3 Enter a registration name and then select [Set].
• How to enter characters (ÎEntering Characters: 105)
• A maximum of 30 characters can be entered. A two-byte character is treated
as two characters.
Wi-Fi / Bluetooth – Wi-Fi Connections
674
Editing Items Registered in Favorite
1 Display items registered to Favorite.
• ¨ [ ] ¨ [ ] ¨ [Wi-Fi] ¨ [Wi-Fi Function] ¨ [Select a destination
from Favorite]
2 Select the History item to edit in Favorite and then press 1.
[Remove from Favorite]
[Change the Order in Favorite]
Specify the destination location of the desired item to change the display order.
[Change the Registered Name]
Enter characters to change the registered name.
• How to enter characters (ÎEntering Characters: 105)
• The number of items that can be saved in History is limited. Register
frequently-used connection settings to Favorite.
• When [Reset] in the [Setup] ([Setting]) menu is used to reset the network
settings, the content registered in History and Favorite is deleted.
• If the device you want to connect to (PC, etc.) is connected to a wireless access
point other than the camera, you cannot connect the device to the camera using
[Direct].
Change the Wi-Fi settings of the device you want to connect to so that the
access point to be used is set to the camera. You can also select [New
Connection] and reconnect the devices. (ÎSending Images from the Camera:
659)
• It may be difficult to connect to networks to which many devices are connected.
In these cases, connect using [New Connection].
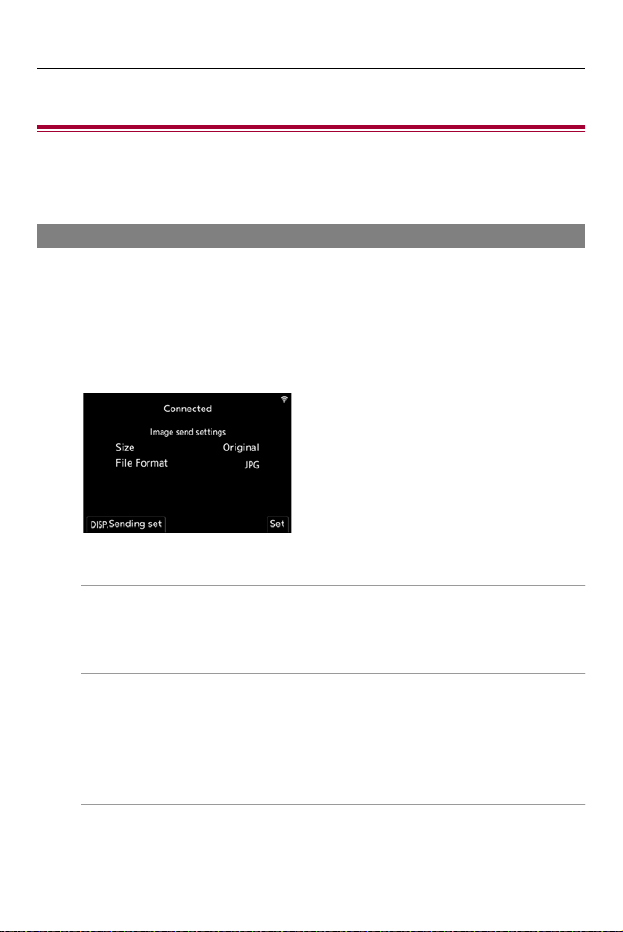
Wi-Fi / Bluetooth – Send Settings and Selecting Images
675
Send Settings and Selecting Images
≥Image Send Settings: 675
≥Selecting Images: 676
Image Send Settings
Set the size, file format, and other items for sending the image to the
destination device.
1
After Wi-Fi connection, the send settings confirmation
screen will be displayed, so press [DISP.].
2
Change the send settings.
[Size]
Resize the image to send.
[Original]/[Change] ([L], [M], [S], or [VGA])
[File Format]
Sets the file format of images to send.
[JPG]/[RAW+JPG]/[RAW]
• This setting is possible when the destination supports the sending of RAW
images from this camera. (ÎImages That Can be Sent: 660)
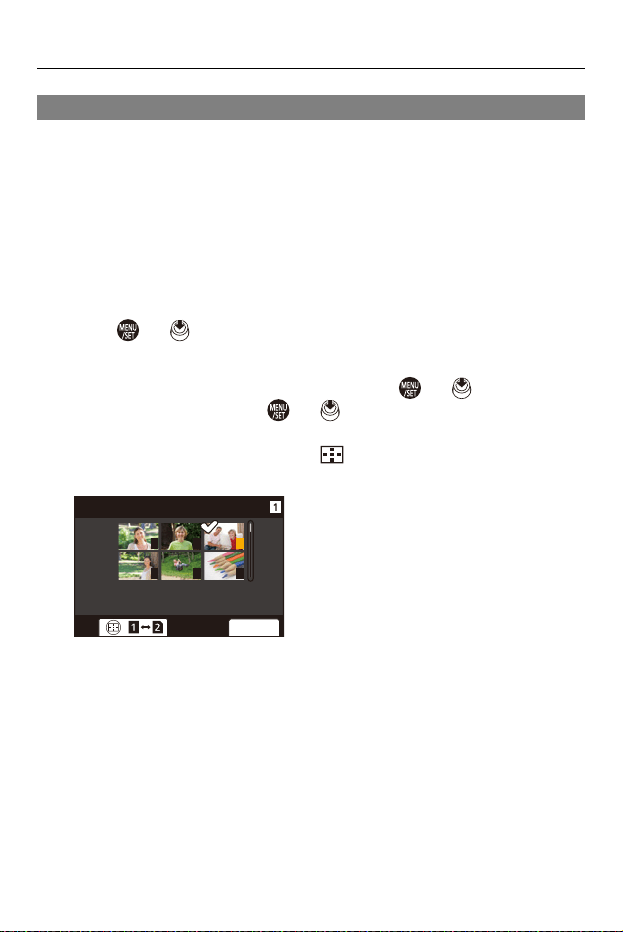
Wi-Fi / Bluetooth – Send Settings and Selecting Images
676
Selecting Images
When sending by [Send Images Stored in the Camera], select the images
using the following procedure.
1
Select [Single Select] or [Multi Select].
2
Select the image.
[Single Select] setting
1 Press 21 to select an image.
2 Press or .
[Multi Select] setting
1 Press 3421 to select an image and then press or . (Repeat this)
• To cancel the setting, press or again.
• Images are displayed separately by card slot.
To switch the card to display, press [ ].
• Selecting images at once is possible only for the images in a single card.
2 Press [DISP.] to execute.
321
654
2.
ュリヴヱハ
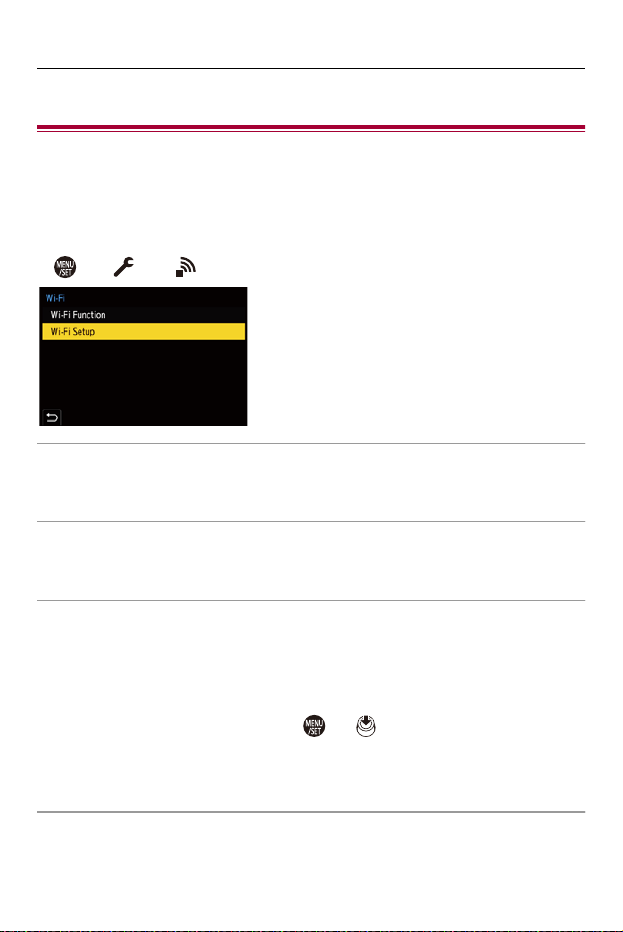
Wi-Fi / Bluetooth – [Wi-Fi Setup] Menu
677
[Wi-Fi Setup] Menu
This configures the settings required for the Wi-Fi function.
The settings cannot be changed when connected to Wi-Fi.
Displaying the [Wi-Fi Setup] menu.
≥ ¨ [ ] ¨ [ ] ¨ [Wi-Fi] ¨ [Wi-Fi Setup]
[Priority of Remote Device]
This sets either the camera or the smartphone as the priority control device to be used
during remote recording. (ÎOperation Method During Remote Recording: 645)
[Wi-Fi Password]
You can use a password to connect for enhanced security. (ÎUsing Password
Authentication to Connect: 636)
[PC Connection]
You can set the workgroup.
To send images to a PC, you need to connect to the same workgroup as the
destination PC.
(The default setting is “WORKGROUP”.)
• To change the workgroup name, press or and enter the new workgroup
name.
How to enter characters (ÎEntering Characters: 105)
• To return to the default settings, press [DISP.].

Wi-Fi / Bluetooth – [Wi-Fi Setup] Menu
678
[Device Name/Password]
You can change the camera name (SSID) and password.
• Press [DISP.] to change the device name and password.
How to enter characters (ÎEntering Characters: 105)
• Enter up to 32 characters for the device name and 63 characters for the password.
[Wi-Fi Function Lock]
To prevent incorrect operation and use of the Wi-Fi function by a third party and to
protect personal information in the camera and included with images, protect the Wi-Fi
function with a password.
[Setup]: Enter any 4-digit numbers as the password.
• How to enter characters (ÎEntering Characters: 105)
[Cancel]: Cancel the password.
• Once a password is set, you are required to enter it each time you use the Wi-Fi
function.
• If you forget your password, you can use [Reset] in the [Setup] ([Setting]) menu to
reset the network settings and thereby reset the password.
[Network Address]
Displays the MAC address and IP address of the camera.

679
Connecting to Other Devices
This chapter describes connections with other devices, for example, HDMI
devices, such as TVs, and PCs.
Connect using either the HDMI socket or the USB port on the camera.
≥Connecting: 680
≥Viewing on a TV: 682
≥Importing Images to a PC: 686
≥Storing on a Recorder: 692
≥Tethered Recording: 693
≥Printing: 696
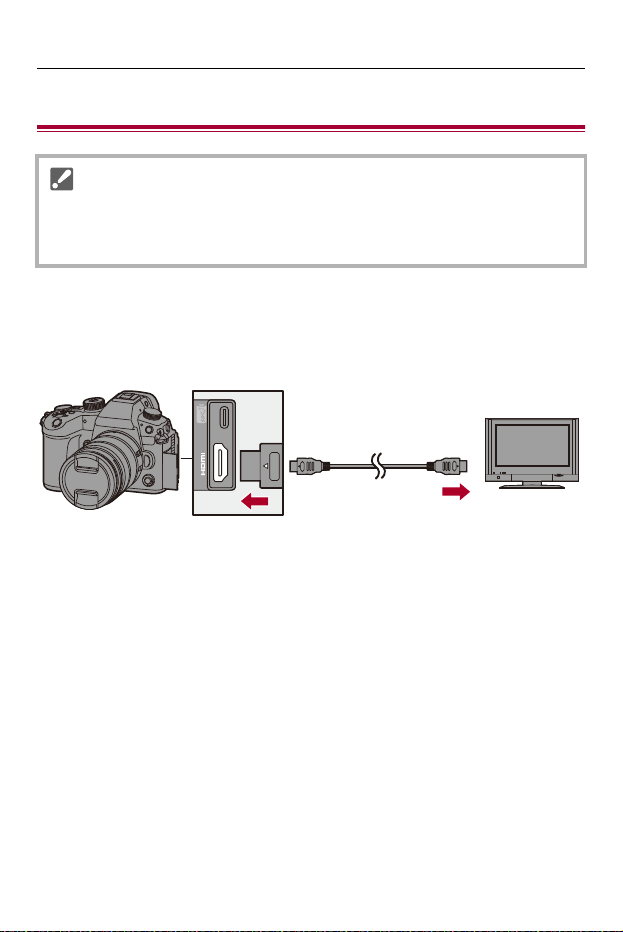
Connecting to Other Devices – Connecting
680
Connecting
HDMI socket
Connect the camera and HDMI device (TV, etc.) with a
commercially available HDMI cable.
• Use an Ultra High Speed HDMI cable (Type A–Type A plug, up to 1.5 m (4.9 feet)
long).
• Check the direction of the terminals and plug in/out straight holding onto the plug.
(Inserting these at an angle may cause deformation or malfunction)
• Do not connect the cable to the wrong terminals. This may cause a malfunction.
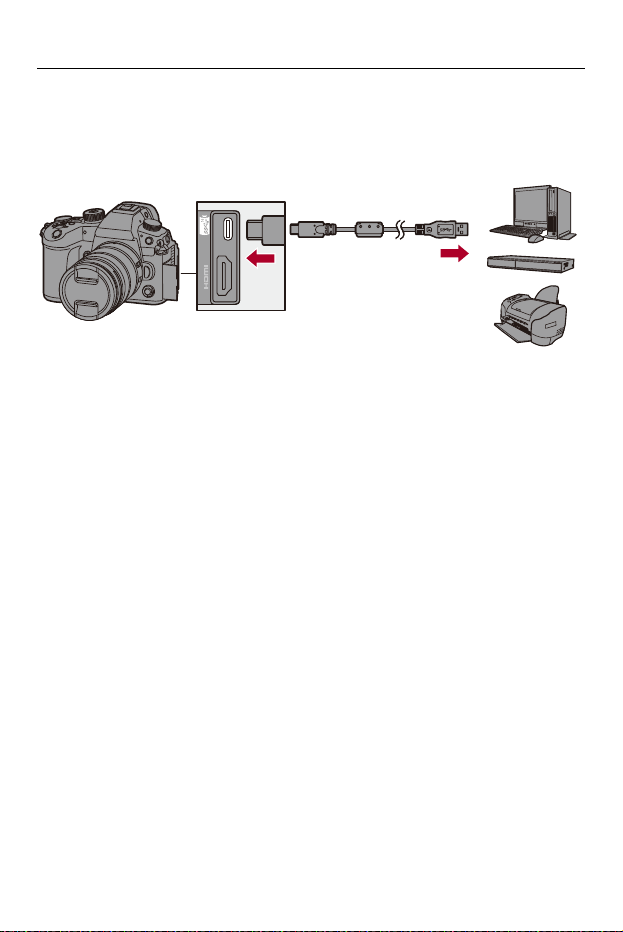
Connecting to Other Devices – Connecting
681
USB port
Use a USB connection cable to connect the camera to a PC,
recorder, or printer.
• Do not use any other USB connection cables except the supplied one.

Connecting to Other Devices – Viewing on a TV
682
Viewing on a TV
You can connect the camera to a TV or external monitor to view recorded
pictures and videos.
Getting started:
• Turn off the camera and TV.
1
Connect the camera and TV with a commercially
available HDMI cable. (ÎHDMI socket: 680)
2
Turn on the TV.
3
Switch the TV input to HDMI input.
4
Turn on the camera.
5
Display the playback screen.
≥Press [ ].
≥The recorded images are displayed on the camera and TV.

Connecting to Other Devices – Viewing on a TV
683
• With the default settings, pictures are output at the optimal resolution for the
connected TV.
The output resolution can be changed in [Output Resolution(Playback)].
(Î[Output Resolution(Playback)]: 602)
• Depending on the aspect ratio, gray bands may be displayed on the top and
bottom or the left and right of images.
You can change the band color in [Background Color(Playback)] in [HDMI
Connection] of the [Setup] ([IN/OUT]) menu. (Î[Background Color(Playback)]:
603)
• HDMI output is not possible if you connect a USB connection cable at the same
time while [USB Mode] is set to [PC(Storage)] or [PictBridge(PTP)].
• The audio of video recorded with [4ch Mic Input] set to [ON] cannot be output to
an external device connected via HDMI if the device is not compatible with
4-channel audio or high-resolution audio.
• Change the screen mode on your TV if images are displayed with the top or
bottom cut off.
• Please also refer to the operating instructions for the TV.
Connecting to Other Devices – Viewing on a TV
684
Using VIERA Link
VIERA Link (HDAVI Control™) is a function that allows you to use your
remote control for the Panasonic TV for easy operations when the camera
has been connected to a VIERA Link compatible device using an HDMI
cable for automatic linked operations.
(Not all operations are possible.)
1 Connect the camera to a Panasonic TV compatible with VIERA Link using a
commercially available HDMI cable. (ÎHDMI socket: 680)
2 Turn on the camera.
3 Turn on the VIERA Link.
• ¨ [ ] ¨ [ ] ¨ [HDMI Connection] ¨ [VIERA Link (CEC)] ¨ [ON]
4 Display the playback screen.
• Press [ ].
• The recorded images are displayed on the TV. (The monitor and viewfinder of
the camera will turn off.)
5 Operate with the remote control for the TV.
Power off link
If you turn off the TV with its remote control, the camera will also turn off.
Automatic input switching
If you turn on the camera and then press [ ], the input of the TV automatically
switches to input to which this camera is connected.
Furthermore, when the TV power is in the standby state, it turns on automatically.
(When “Power on link” on the TV is set to “Set”)
• To use VIERA Link, you need to also configure the settings on the TV.
For the setting procedure, refer to the operating instructions for the TV.

Connecting to Other Devices – Viewing on a TV
685
• VIERA Link is a unique Panasonic function built on an HDMI control function
using the standard HDMI CEC (Consumer Electronics Control) specification.
Linked operations with HDMI CEC compatible devices made by other companies
are not guaranteed.
• The camera supports “VIERA Link Ver.5”. “VIERA Link Ver.5” is the standard for
Panasonic’s VIERA Link compatible devices. This standard is compatible with
Panasonic’s conventional VIERA Link devices.
• Operation using the buttons on the camera will be limited.

Connecting to Other Devices – Importing Images to a PC
686
Importing Images to a PC
≥Copying Images to a PC: 687
≥Installing Software: 691
If you connect the camera to a PC, you can copy the recorded images to
the PC.
You will need to use software that is compatible with the recorded video
format in order to play back or edit video on the PC.
You can also use software for processing and editing RAW images.
(ÎInstalling Software: 691)

Connecting to Other Devices – Importing Images to a PC
687
Copying Images to a PC
After connecting to the PC, you can copy the recorded images by dragging
files and folders on this camera to the PC.
•
The camera can be connected to a PC running any of the following OSs which
can detect mass storage devices.
Supported OS
Windows: Windows 10
Mac: macOS 10.13, 10.14, 10.15.3 to 10.15.7, 11.0 to 11.4
• Mac:
Supported by “Final Cut Pro X”.
For details on “Final Cut Pro X”, please contact Apple Inc.

Connecting to Other Devices – Importing Images to a PC
688
Getting started:
• Turn on the camera and PC.
1
Connect the camera and PC with the USB connection
cable. (ÎUSB port: 681)
2
Press 34 to select [PC(Storage)] and then press or
.
≥Windows: The drive (“LUMIX” or the volume label of the card set
with [CINE Style File Setting]) is displayed in [This PC].
≥Mac: The drive (“LUMIX” or the volume label of the card set with
[CINE Style File Setting]) is displayed on the desktop.
3
Drag the files and folders from the camera to the PC.
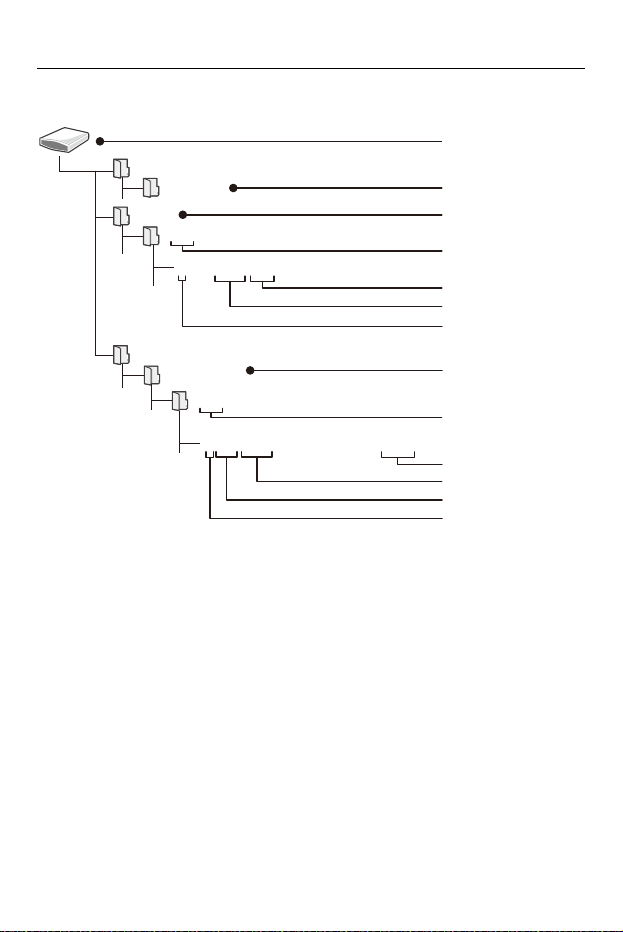
Connecting to Other Devices – Importing Images to a PC
689
Folder Structure Inside Card
(A) Volume label
When [Video File Name] is set to [Same As Photo(DCF Standard)]: LUMIX
When [Video File Name] is set to [CINE Style]: The volume label of the card set in
[CINE Style File Setting]
(B) The camera’s setup information
(C) Images
(D) Folder number
CAMSET
(A)
AD_LUMIX
PANA_GRP
DCIM
(B)
100XXXXX
PXXX0001.JPG
(C)
(E)
(F)
(G)
PRIVATE
(D)
001AXXAX
(D)
A001C001_XXXXXX_XXXX.MOV
(F)
(I)
(H)
(E)
(J)
Connecting to Other Devices – Importing Images to a PC
690
(E) JPG: JPEG format pictures
RW2: RAW format pictures
MP4: MP4 videos
MOV: MOV videos, Apple ProRes videos
(F) File number
(G) Color space
P: sRGB
_: AdobeRGB
(H) CINE Style video
(I) Card number
(J) Camera index
• If [USB Mode] is set to [PC(Storage)] in the [Setup] ([IN/OUT]) menu, the camera
will be automatically connected to the PC without the [USB Mode] selection
screen being displayed. (Î[USB Mode]: 601)
• Take care not to turn off the camera while images are being imported.
• After importing of the images is completed, perform the operation to safely
remove the USB connection cable on the PC.
• Turn off the camera and disconnect the USB connection cable before removing
the card from the camera. Otherwise, the recorded data may be damaged.

Connecting to Other Devices – Importing Images to a PC
691
Installing Software
Install the software to process and edit RAW images.
SILKYPIX Developer Studio SE
This software processes and edits RAW images.
Edited images can be saved in a format (JPEG, TIFF, etc.) that can be
displayed on a PC.
Check the following site and then download and install the software:
http://www.isl.co.jp/SILKYPIX/english/p/
Operating environment
≥ Supported OS
Windows: Windows 10, Windows 8.1 (64 bit recommended)
Mac: macOS 10.13 to 10.15, 11
• For more information such as how to use “SILKYPIX Developer Studio”, refer to the
Help or the Ichikawa Soft Laboratory’s support site.
• To download the software, your PC needs to be able to connect to the internet.
• Supported OSs are current as of January 2022 and are subject to change.
Connecting to Other Devices – Storing on a Recorder
692
Storing on a Recorder
By connecting the camera to a Panasonic Blu-ray disc recorder or DVD
recorder, you can store the pictures and videos.
Getting started:
• Turn on the camera and recorder.
• Insert a card into card slot 1.
1
Connect the camera and recorder with the USB
connection cable. (ÎUSB port: 681)
2
Press 34 to select [PC(Storage)] and then press or
.
3
Operate the recorder to store the images.
• If [USB Mode] is set to [PC(Storage)] in the [Setup] ([IN/OUT]) menu, the camera
will be automatically connected to the recorder without the [USB Mode] selection
screen being displayed. (Î[USB Mode]: 601)
• Take care not to turn off the camera while storage is in progress.
• Images such as 4K videos may not be supported depending on your recorder.
• Turn off the camera and disconnect the USB connection cable before removing
the card from the camera. Otherwise, the recorded data may be damaged.
• For the storage and playback procedures, refer to the operating instructions for
the recorder.

Connecting to Other Devices – Tethered Recording
693
Tethered Recording
≥Installing Software: 694
≥Operating the Camera from a PC: 695
If you install the “LUMIX Tether” camera control software on your PC, you
can connect the camera to the PC via USB and then control the camera
from the PC and record while checking the live view on the PC screen
(tethered recording).
In addition, you can output via HDMI to an external monitor or TV during
tethered recording.
Connecting to Other Devices – Tethered Recording
694
Installing Software
“LUMIX Tether”
This software is for controlling the camera from a PC.
It allows you to change various settings and to record remotely and then
save the images to the PC.
Check the following site and then download and install the software:
https://panasonic.jp/support/global/cs/soft/download/d_lumixtether.html
(English only)
Operating environment
≥ Supported OS
Windows: Windows 10 (64 bit)
Mac: macOS 10.13, 10.14, 10.15.3 to 10.15.7, 11.0 to 11.4
≥ Interface
USB port (SuperSpeed USB (USB 3.1))
• Supported OSs are current as of January 2022 and are subject to change.
• To download the software, your PC needs to be able to connect to the internet.
• For how to operate the software, refer to the operation guide for “LUMIX Tether”.
Connecting to Other Devices – Tethered Recording
695
Operating the Camera from a PC
Getting started:
• Turn on the camera and PC.
• Install “LUMIX Tether ” on PC.
1
Connect the camera and PC with the USB connection
cable. (ÎUSB port: 681)
2
Press 34 to select [PC(Tether)] and then press or
.
≥[ ] is displayed on the camera’s screen.
3
Use “LUMIX Tether” to operate the camera from the PC.
• If [USB Mode] is set to [PC(Tether)] in the [Setup] ([IN/OUT]) menu, the camera
will be automatically connected to the PC without the [USB Mode] selection
screen being displayed. (Î[USB Mode]: 601)
• The Wi-Fi/Bluetooth functions are not available while there is a PC connection
with [PC(Tether)].
Connecting to Other Devices – Printing
696
Printing
If you connect the camera to a printer that supports PictBridge, you can
select pictures on the camera’s monitor and then print them.
Getting started:
• Turn on the camera and printer.
• Set the print quality and other settings on the printer.
1
Play back the card that contains the picture you want to
print.
≥Press [ ].
≥After pressing [ ], press 34 to select [Card Slot 1(CFexpress)]
or [Card Slot 2(SD)], and then press or .
•
The card for printing cannot be changed after connecting to the printer.
2
Connect the camera and printer with the USB
connection cable. (ÎUSB port: 681)
3
Press 34 to select [PictBridge(PTP)] and then press
or .
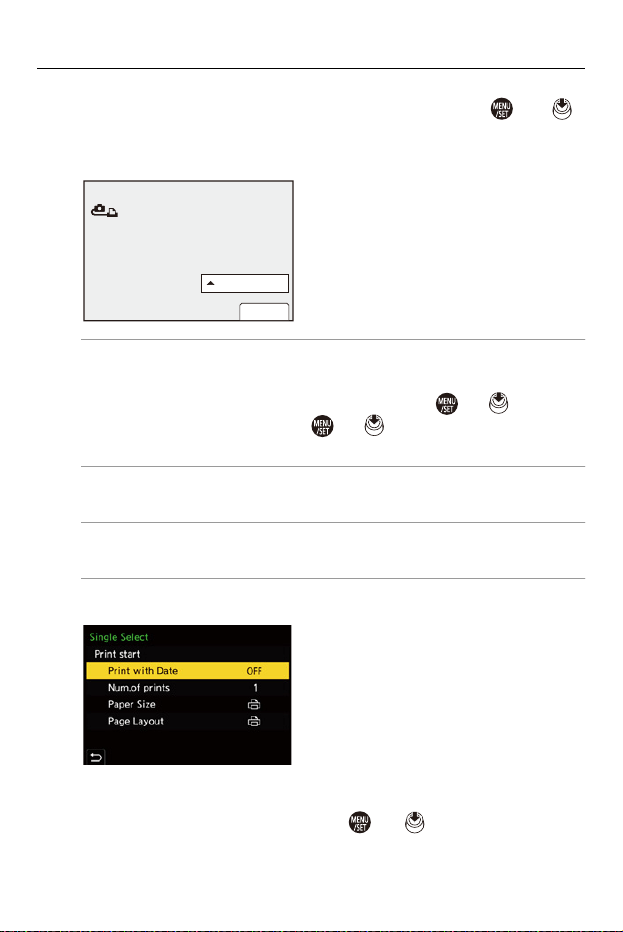
Connecting to Other Devices – Printing
697
4
Press 21 to select a picture and then press or .
≥To print multiple pictures, press 3, set the picture selection
method, and then select pictures.
[Multi Select]
Selects the picture to print.
1 Press 3421 to select a picture and then press or .
• To cancel the setting, press or again.
2 Press [DISP.] to end selection.
[Select All]
Prints all the stored pictures.
[Rating]
Prints all pictures with [Rating] levels from [¿1] to [¿5].
5
Set the print settings.
6
Start printing.
≥Select [Print start] and then press or .
PictBridge
0XOWL3ULQW
3ULQW

Connecting to Other Devices – Printing
698
Setting Items (Print Settings)
[Print start]
Starts printing.
[Print with Date]
Sets printing with date.
• If the printer does not support printing with date, the date cannot be printed.
[Num.of prints]
Sets the number of prints to be printed (up to 999).
[Paper Size]
Sets the paper size.
[Page Layout]
Sets whether to add borders and how many images to be printed on each sheet of
paper.
Connecting to Other Devices – Printing
699
• If [USB Mode] is set to [PictBridge(PTP)] in the [Setup] ([IN/OUT]) menu, the
camera will be automatically connected to the printer without the [USB Mode]
selection screen being displayed. (Î[USB Mode]: 601)
• Take care not to turn off the camera while printing is in progress.
• When connecting with the printer is not possible, set [USB Power Supply] to
[OFF] and then try connecting again. (Î[USB Power Supply]: 601)
• Do not disconnect the USB connection cable while [ ] (Cable disconnect
prohibit icon) is displayed.
• Disconnect the USB connection cable after printing.
• Turn off the camera and disconnect the USB connection cable before removing
the card from the camera. Otherwise, the recorded data may be damaged.
• To print images with paper size and layout settings not supported by the camera,
set the [Paper Size] and [Page Layout] to [ ] and then select the desired
settings on the printer.
(For details, refer to the operating instructions for your printer.)
• If a yellow [¥] is displayed, the camera is receiving an error message from the
printer. Check that there is no problem with the printer.
• If the number of prints is high, the pictures may be printed in batches. In this
case, the remaining number of prints indicated may differ from the number set.
• RAW images cannot be printed.
• Images recorded with the following function cannot be printed:
– Video recording

700
Materials
This chapter describes procedures to try when there is a problem and
provides information about the specifications for your reference.
≥Digital Camera Accessory System: 701
≥Using Optional Accessories: 702
≥Monitor/Viewfinder Displays: 707
≥Message Displays: 728
≥Troubleshooting: 732
≥Cautions for Use: 747
≥Number of Pictures That Can Be Taken and Available Recording Time
with the Battery: 761
≥Number of Pictures That Can Be Taken and Video Recording Time with
Cards: 770
≥List of Default Settings/Custom Saving/Settings Available for Copying:
779
≥List of Functions That Can Be Set in Each Recording Mode: 804
≥Specifications: 811
≥Trademarks and Licenses: 826

Materials – Digital Camera Accessory System
701
Digital Camera Accessory System
(Product numbers correct as of January 2022.)
*1 Supplied with an AC adaptor, an AC cable/AC mains lead and a USB connection
cable.
*2 The AC Adaptor (optional) can only be used with the designated Panasonic DC
Coupler (optional).
The AC Adaptor (optional) cannot be used by itself.
*3 Use if the attached lens interferes with the tripod head.
• Some optional accessories may not be available in some countries.
• For lens-related optional accessories such as compatible lenses and filters, refer to
our catalogs/website, etc.
• For the latest information on optional accessories, refer to our catalogs/website, etc.
Product name Product number
Battery Pack DMW-BLK22
Battery Charger
*1
DMW-BTC15
AC Adaptor
*2
DMW-AC10
DC Coupler
*2
DMW-DCC17
Flash
DMW-FL580L, DMW-FL360L,
DMW-FL200L
LED Video Light VW-LED1
Stereo Shotgun Microphone DMW-MS2
Stereo Microphone VW-VMS10
XLR Microphone Adaptor DMW-XLR1
Shutter Remote Control DMW-RS2
Tripod Grip DMW-SHGR1
Tripod Adaptor
*3
DMW-TA1
Mount Adaptor DMW-MA2M
Body Cap DMW-BDC1
Shoulder Strap DMW-SSTG9

Materials – Using Optional Accessories
702
Using Optional Accessories
≥Shutter Remote Control (Optional): 703
≥Tripod Grip (Optional): 705
≥AC Adaptor (Optional)/DC Coupler (Optional): 706
•
For information on the external flash (ÎUsing an External Flash (Optional): 324)
• For information on the external microphone (ÎExternal Microphones (Optional):
374)
• For information on the XLR Microphone Adaptor (ÎXLR Microphone Adaptor
(Optional): 379)
• Some optional accessories may not be available in some countries.
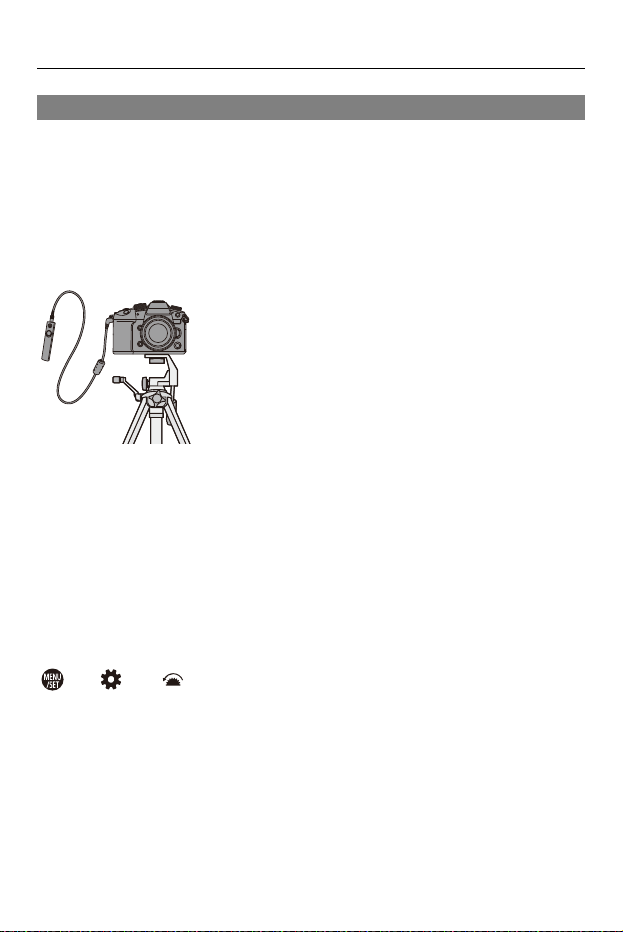
Materials – Using Optional Accessories
703
Shutter Remote Control (Optional)
You can connect the Shutter Remote Control (DMW-RS2: optional) to use
the camera as follows:
•
Fully pressing the shutter button without camera shake
• Securing the shutter button during bulb recording and burst recording
• Start/end the video recording
• Using the functions registered in the video rec. button of the Shutter Remote Control
Registering Functions to the Video Rec. Button
You can register a favorite function to the video rec. button on a Shutter
Remote Control.
The functions that can be registered are the same as the functions that can
be registered to the Fn buttons for recording (ÎSetting Items ([Fn Button
Set]/[Setting in REC mode]): 523).
[Video Record] is registered in the default setting.
¨ [ ] ¨ [ ] ¨ Select [Video Rec. Button (Remote)]
•
Register functions using the same operations as [Fn Button Set]. (ÎRegister
Functions to the Fn Buttons: 520)

Materials – Using Optional Accessories
704
• Always use a genuine Panasonic Shutter Remote Control (DMW-RS2: optional).
• Refer to the operating instructions for the Shutter Remote Control for details.
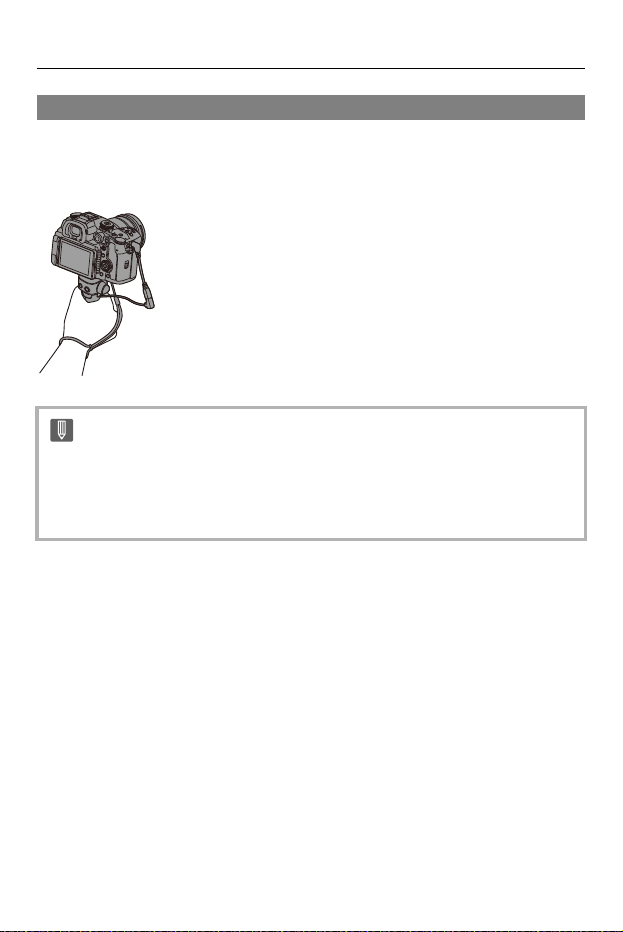
Materials – Using Optional Accessories
705
Tripod Grip (Optional)
Attach a Tripod Grip (DMW-SHGR1: optional) to use it as a grip for
recording while walking, a tripod, or a Shutter Remote Control.
•
Connect the grip cable to the [REMOTE] socket on the camera.
• Always use a genuine Panasonic Tripod Grip (DMW-SHGR1: optional).
• The [Video Rec. Button (Remote)] menu does not work with the Tripod Grip.
• Do not carry just by holding the hand strap when the camera is attached.
• For details, refer to the operating instructions for the Tripod Grip.

Materials – Using Optional Accessories
706
AC Adaptor (Optional)/DC Coupler (Optional)
With an AC Adaptor (DMW-AC10: optional) and DC Coupler
(DMW-DCC17: optional), you can perform recording and playback without
worrying about the remaining battery charge.
•
Be sure to purchase both an AC Adaptor and a DC Coupler as a set.
They cannot be used independently of one another.
• When the DC Coupler is being mounted, the DC Coupler cover opens, so the
structure ceases to be dust and splash resistant.
Do not allow sand, dust and water droplets to adhere to or enter the camera.
After use, confirm that no foreign objects are adhering to the DC Coupler cover,
then firmly close the cover.
• For details, refer to the operating instructions for the AC Adaptor and DC
Coupler.
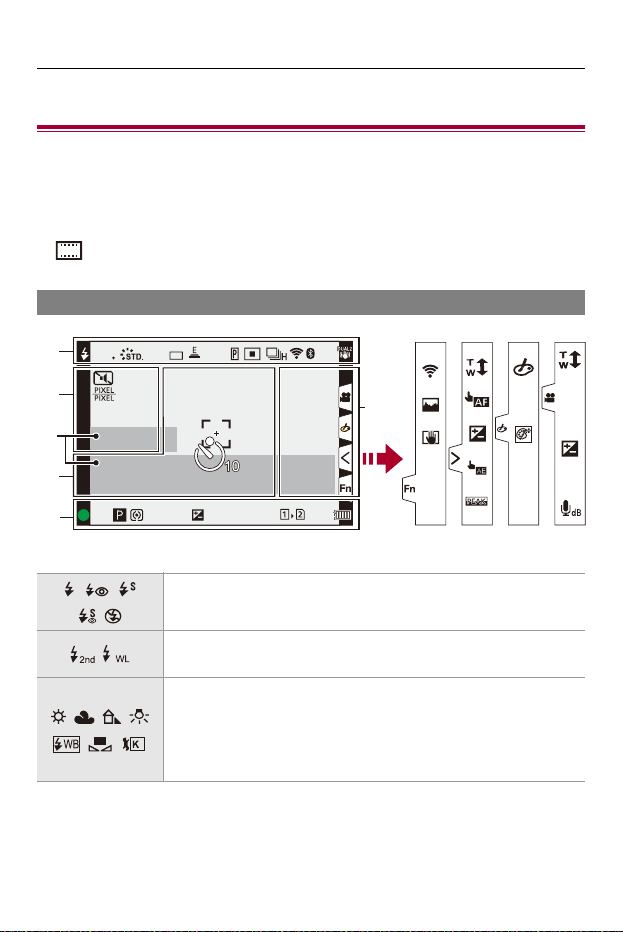
Materials – Monitor/Viewfinder Displays
707
Monitor/Viewfinder Displays
≥Recording Screen: 707
≥Playback Screen: 723
•
The screen is an monitor display example of when [LVF/Monitor Disp. Set] is set to
[].
Recording Screen
(1)
Flash mode (Î[Flash Mode]: 329)
Flash setting (Î[Flash Synchro]: 335, Recording Using a
Wireless Flash: 337)
AWBc AWBw
2500K
White balance (ÎWhite Balance (WB): 300)/
Color Temperature (ÎColor Temperature Setting: 304)
Fn8Fn8
Fn5Fn5
Fn4Fn4
Fn6Fn6
Fn7Fn7
OFFOFF
OFFOFF
ISO
SS
FF
(1)
(2)
(3)
(4)
(5)
(6)
EXPS
AWB
BKT
AEL BKT
AFSAFS
999
ISO
100F2.860
24m59s24m59s
GPS
L
FINE
RAW
+
+
1
/
3
WL
1
1
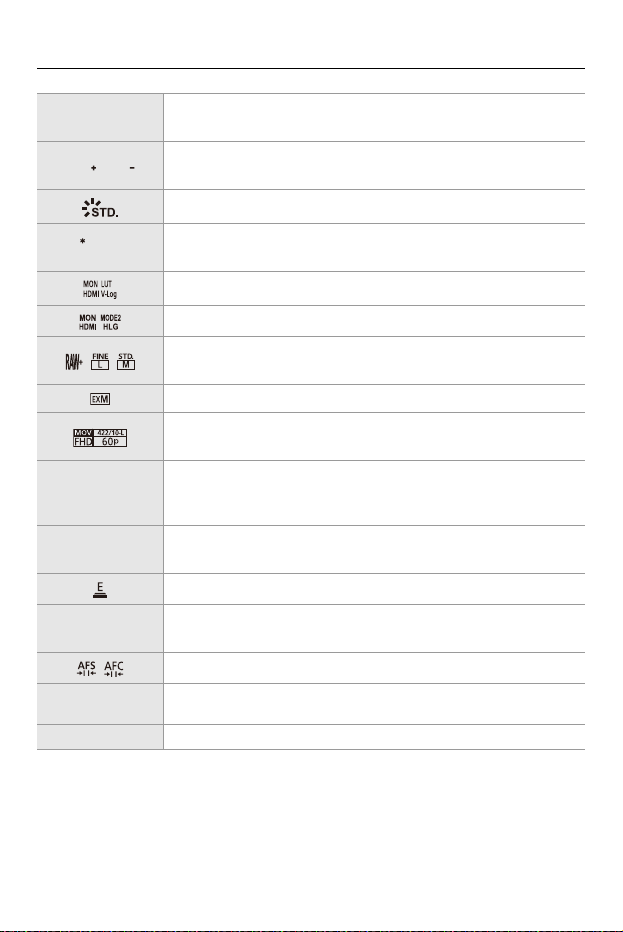
Materials – Monitor/Viewfinder Displays
708
White Balance Bracket, White Balance Bracket (Color
Temperature) (Î[More Settings] (White Balance Bracket): 249)
Adjusting the white balance (ÎAdjusting the White Balance:
305)
Photo Style (Î[Photo Style]: 307)
Filter setting (Î[Filter Settings]: 317)/
Filter effect adjustment (ÎAdjusting the Filter Effect: 319)
LUT View Assist (Î[V-Log View Assist]: 433)
HLG View Assist (Î[HLG View Assist]: 438)
Picture quality (Î[Picture Quality]: 123), Picture size (Î[Picture
Size]: 121)
Extended Tele Conversion (ÎExtended Tele Conversion: 206)
Recording file format (Î[Rec. File Format]: 134)/
Recording quality (Î[Rec Quality]: 136)
Recording file format (Î[Rec. File Format]: 134)/
Recording quality (Î[Rec Quality]: 136)
59.94p
60/59.94p
Recording frame rate (Î[Rec Quality]: 136)/
Variable frame rate (ÎVariable Frame Rate: 415)
Electronic shutter (Î[Shutter Type]: 252)
Focus mode (ÎSelecting the Focus Mode: 153, Record Using
MF: 195)
Focus Limiter (Î[Focus Limiter]: 163)
Focus Bracket (Î[More Settings] (Focus Bracket): 248)
AFL AF Lock (ÎLocking Focus and Exposure (AF/AE Lock): 292)
BKT
AWB
AWB
AWB
EXPS
MOV
FHD
422/10-L
AFS
AFC MF
AFS
BKT
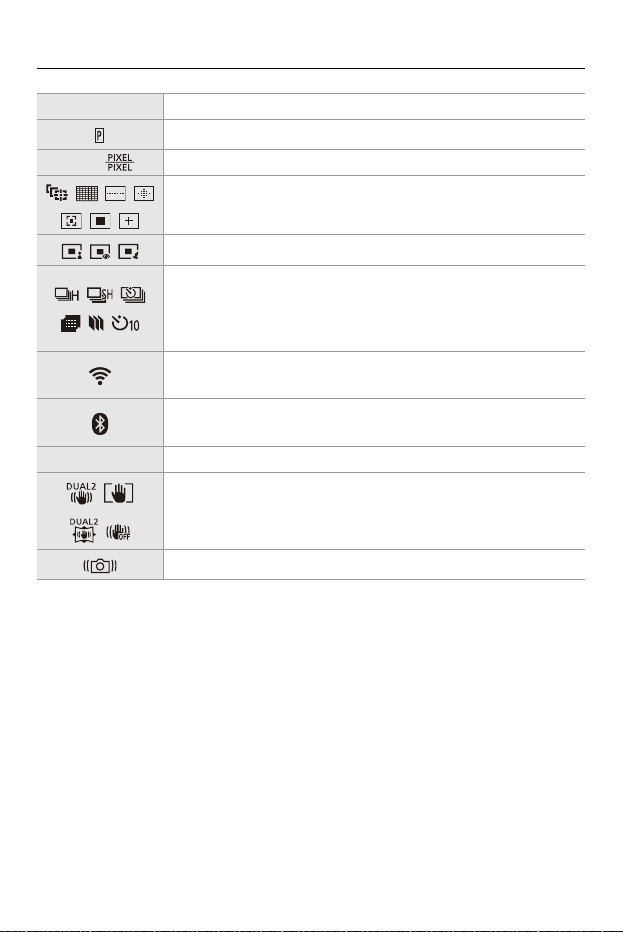
Materials – Monitor/Viewfinder Displays
709
MFL Focus ring lock (Î[Focus Ring Lock]: 554)
Focus Peaking (Î[Focus Peaking]: 202)
FULL Image area of video (Î[Image Area of Video]: 150)
AF mode (ÎSelecting the AF Mode: 167)
AF detection setting (ÎAutomatic Detection: 170)
Drive mode (ÎSelecting the Drive Mode: 210)
Connected to Wi-Fi (ÎChecking operation of the Wi-Fi and
Bluetooth functions: 624)
Connected to Bluetooth (ÎConnecting to a Smartphone
(Bluetooth Connection): 628)
GPS Location logging (Î[Location Logging]: 653)
Image stabilizer (ÎImage Stabilizer: 259)
Camera shake alert (ÎUsing the Image Stabilizer: 261)
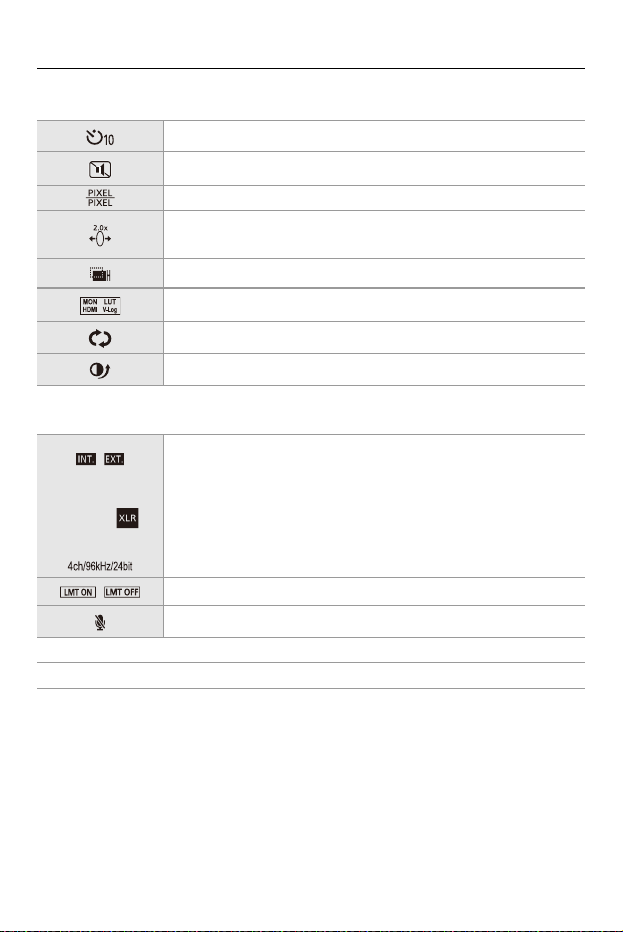
Materials – Monitor/Viewfinder Displays
710
(2)
(3)
Self-timer (ÎRecording Using the Self-timer: 238)
Silent mode (Î[Silent Mode]: 250)
Image area of video (Î[Image Area of Video]: 150)
Anamorphic Desqueeze Display (Î[Anamorphic Desqueeze
Display]: 441)
Overlay indication (Î[Sheer Overlay]: 572)
LUT View Assist (Î[V-Log View Assist]: 433)
Loop recording (Î[Loop Recording (video)]: 445)
Dynamic Range Boost (Î[Dynamic Range Boost]: 363)
Built-in microphone, External microphone (Î[Sound Rec Level
Disp.]: 365, External Microphones (Optional): 374)
Sound recording quality/XLR microphone adaptor setting
(Î[Sound Rec Quality]: 369, XLR Microphone Adaptor
(Optional): 379)
4ch microphone input (Î[4ch Mic Input]: 381)
Sound recording level limiter (Î[Sound Rec Level Limiter]: 370)
Mute (Î[Mute Sound Input]: 366)
Sound recording level (Î[Sound Rec Level Disp.]: 365)
Exposure meter (Î[Expo.Meter]: 571)
96kHz/24bit
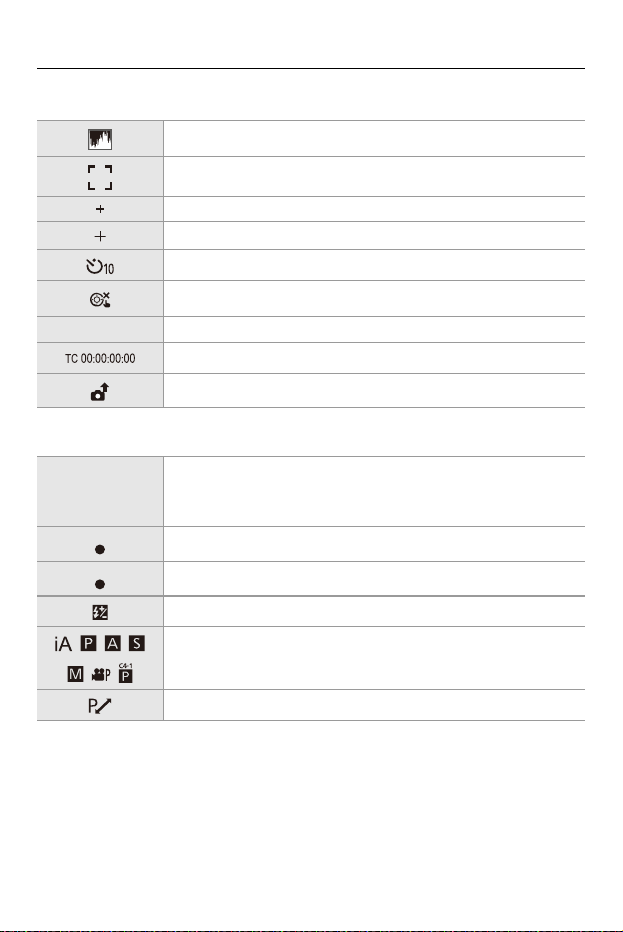
Materials – Monitor/Viewfinder Displays
711
(4)
(5)
Histogram (Î[Histogram]: 566)
AF area (ÎAF Area Movement Operation: 187)
Spot metering target (Î[Metering Mode]: 268)
Center marker (Î[Center Marker]: 576)
Self-timer (ÎRecording Using the Self-timer: 238)
Lock lever (ÎOperation Lock Lever: 86)
24m59s Elapsed recording time (ÎBasic Video Operations: 126)
Time code (ÎTime Code: 386)
Image being sent (Î[Auto Transfer]: 651)
¥
Focus (turns green) (ÎBasic Picture Operations: 118)/
Recording state (turns red) (ÎHigh Resolution mode: 220,
Basic Video Operations: 126)
Focus (in low light AF situations) (ÎLow illumination AF: 157)
Focus (Starlight AF) (ÎStarlight AF: 157)
Flash adjustment (Î[Flash Adjust.]: 334)
Recording mode (ÎSelecting the Recording Mode: 79)
Program Shift (ÎProgram Shift: 272)
LOW
STAR
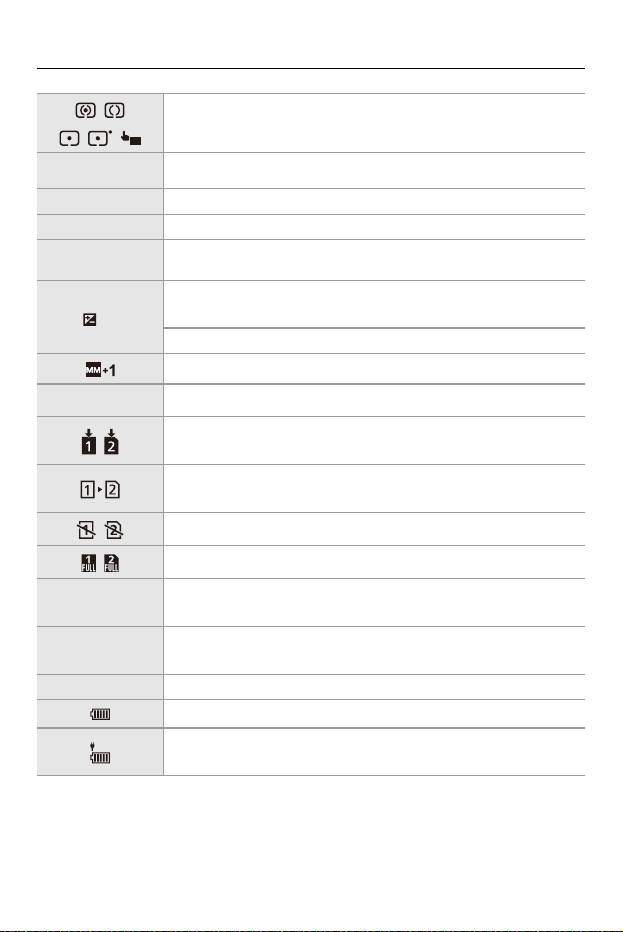
Materials – Monitor/Viewfinder Displays
712
Metering mode (Î[Metering Mode]: 268)
AE Lock (ÎLocking Focus and Exposure (AF/AE Lock): 292)
60 Shutter speed (ÎBasic Picture Operations: 118)
F2.8 Aperture value (ÎBasic Picture Operations: 118)
Aperture Bracket (Î[More Settings] (Aperture Bracket): 247)
Exposure compensation value (ÎExposure Compensation:
287)
Exposure Bracket (Î[More Settings] (Exposure Bracket): 246)
Manual Exposure Assist (ÎManual Exposure Assist: 282)
ISO sensitivity (ÎISO Sensitivity: 294)
Card access indication (turns red) (ÎBasic Video Operations:
126)
Card slot (ÎInserting Cards (Optional): 60)/
Double card slot function (Î[Double Card Slot Function]: 587)
No card
Card full
999
Number of pictures that can be taken (ÎNumber of Pictures
That Can Be Taken and Video Recording Time with Cards: 770)
r20
Number of pictures that can be taken continuously (ÎNumber of
Pictures That Can Be Taken Continuously: 216)
24m59s Video recording time (ÎVideo Recording Time: 771)
Battery indication (ÎPower Indications: 55)
Power supply (ÎUsing the Camera While Supplying It with
Power (Supplying Power/Charging): 53)
AE
A
E
L
F2.8
BKT
BKT
+
1
/
3
ISO
100
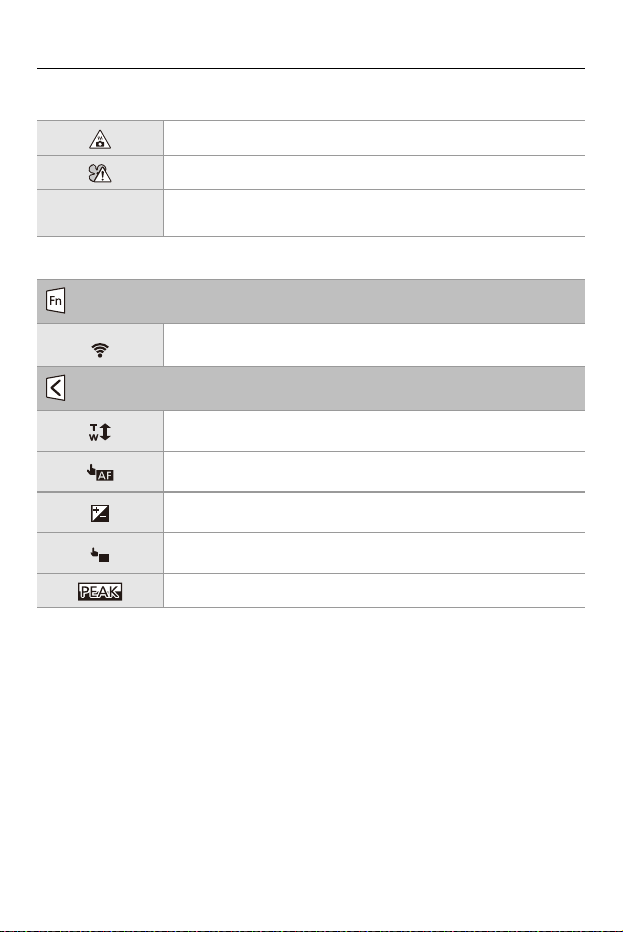
Materials – Monitor/Viewfinder Displays
713
(6)
Touch Tab (Î[Touch Settings]: 558)
Temperature rise warning icon (ÎRecording: 733)
Fan error warning icon (ÎOthers: 746)
A001C001
Video file name (when [CINE Style] is set) (Î[Video File Name]:
588)
Fn button (ÎUse [Fn4] to [Fn8] (Touch Icons): 531)
Touch Zoom (ÎOperations During Video Recording: 349)
Touch AF, Touch Shutter (ÎTouch AF/Touch Shutter: 112)
Exposure compensation (ÎExposure Compensation: 287)
Touch AE (ÎTouch AE: 115)
Focus Peaking (Î[Focus Peaking]: 202)
Fn4
AE
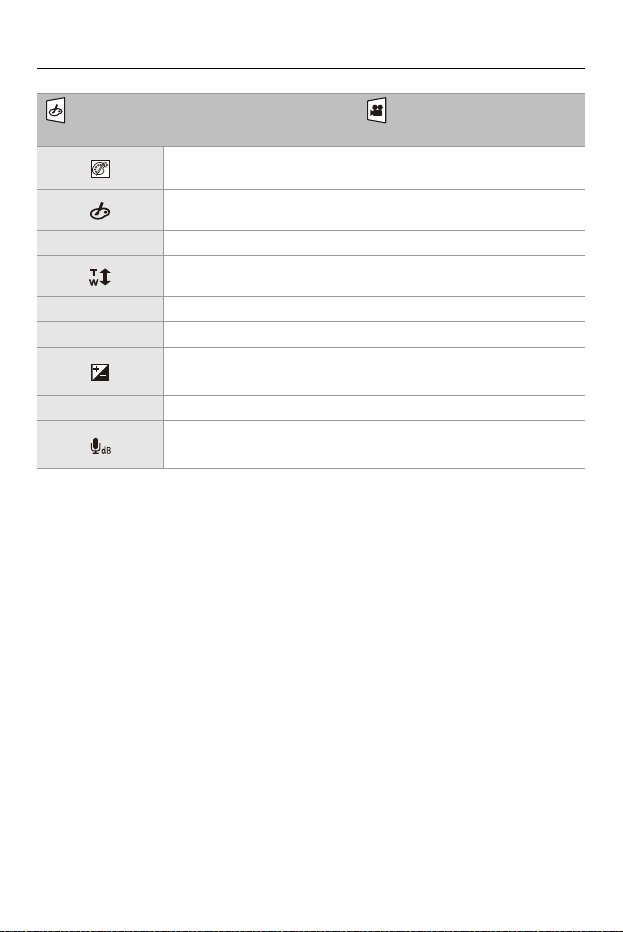
Materials – Monitor/Viewfinder Displays
714
(ÎSetting a Filter with Touch Operation: 320)/ (ÎOperations During Video
Recording: 349)
Filter effect adjustment (ÎAdjusting the Filter Effect: 319)
Filter on/off (ÎSetting a Filter with Touch Operation: 320)
EXPS Filter setting (Î[Filter Settings]: 317)
Zoom (ÎOperations During Video Recording: 349)
F Aperture value (ÎOperations During Video Recording: 349)
SS Shutter speed (ÎOperations During Video Recording: 349)
Exposure compensation (ÎOperations During Video Recording:
349)
ISO ISO sensitivity (ÎOperations During Video Recording: 349)
Sound recording level adjustment (ÎOperations During Video
Recording: 349)
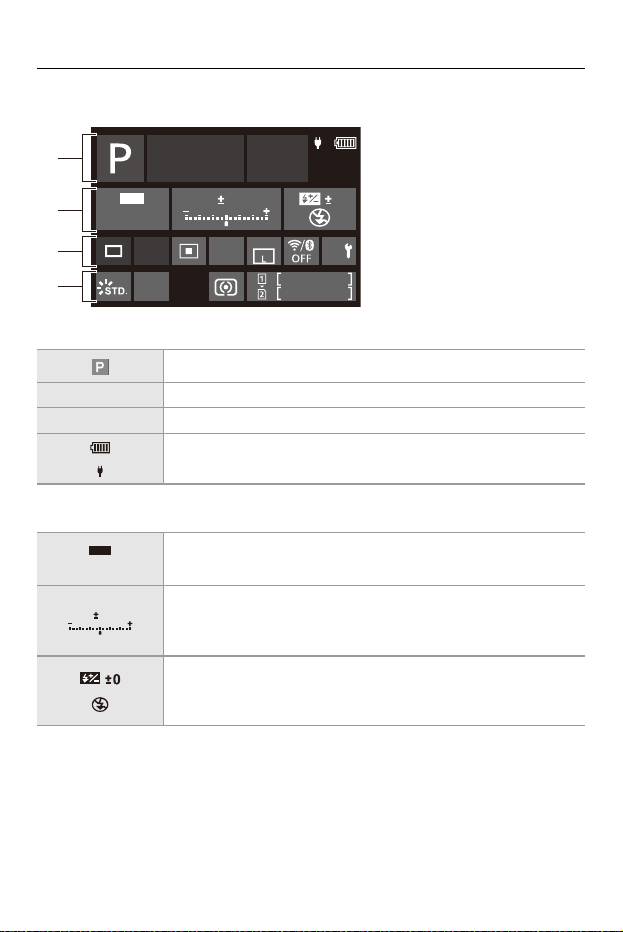
Materials – Monitor/Viewfinder Displays
715
Control Panel
(1)
(2)
Recording mode (ÎSelecting the Recording Mode: 79)
1/60 Shutter speed (ÎBasic Picture Operations: 118)
F2.8 Aperture value (ÎBasic Picture Operations: 118)
Battery indication (ÎPower Indications: 55)/
Power supply (ÎPower Supply: 52)
ISO sensitivity (ÎISO Sensitivity: 294)
Exposure compensation value (ÎExposure Compensation:
287)/
Manual Exposure Assist (ÎManual Exposure Assist: 282)
Flash setting (Î[Flash Adjust.]: 334, [Flash Synchro]: 335,
Recording Using a Wireless Flash: 337)/
Flash mode (Î[Flash Mode]: 329)
F2.8
1/60
999
999
AWB
Fn
0 0
0
ISO
100
AFS
FINE
4:3
(1)
(2)
(3)
(4)
ISO
100
0
0
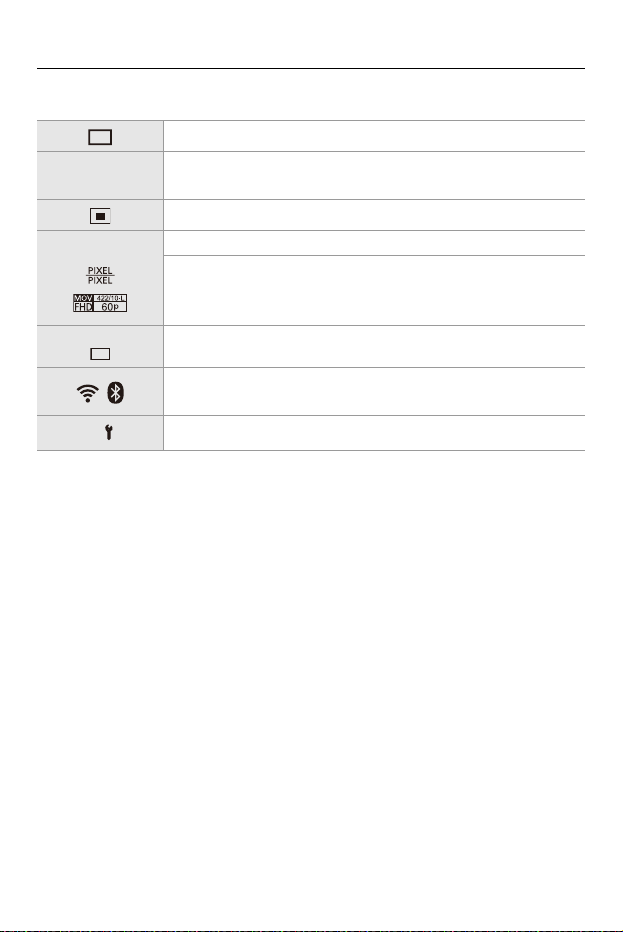
Materials – Monitor/Viewfinder Displays
716
(3)
Drive mode (ÎSelecting the Drive Mode: 210)
Focus mode (ÎSelecting the Focus Mode: 153, Record Using
MF: 195)
AF mode (ÎSelecting the AF Mode: 167)
FINE Picture quality (Î[Picture Quality]: 123)
Image area of video (Î[Image Area of Video]: 150)/
Recording file format (Î[Rec. File Format]: 134)/
Recording quality (Î[Rec Quality]: 136)
Picture size/Aspect ratio (Î[Picture Size]: 121)
Wi-Fi/Bluetooth connection state (ÎChecking operation of the
Wi-Fi and Bluetooth functions: 624)
Fn button settings (ÎFn Buttons: 517)
AFS
L
4:3
Fn
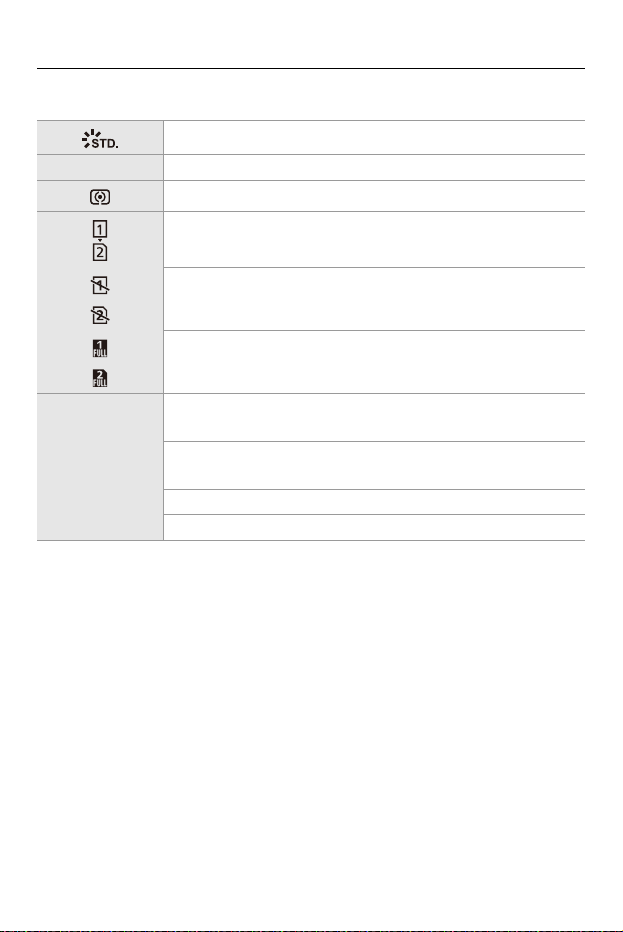
Materials – Monitor/Viewfinder Displays
717
(4)
Photo Style (Î[Photo Style]: 307)
AWB White balance (ÎWhite Balance (WB): 300)
Metering mode (Î[Metering Mode]: 268)
Card slot (ÎInserting Cards (Optional): 60)/
Double card slot function (Î[Double Card Slot Function]: 587)
No card
Card full
999
Number of pictures that can be taken (ÎNumber of Pictures
That Can Be Taken and Video Recording Time with Cards: 770)
r20
Number of pictures that can be taken continuously (ÎNumber of
Pictures That Can Be Taken Continuously: 216)
R24m59s Video recording time (ÎVideo Recording Time: 771)
---- No card
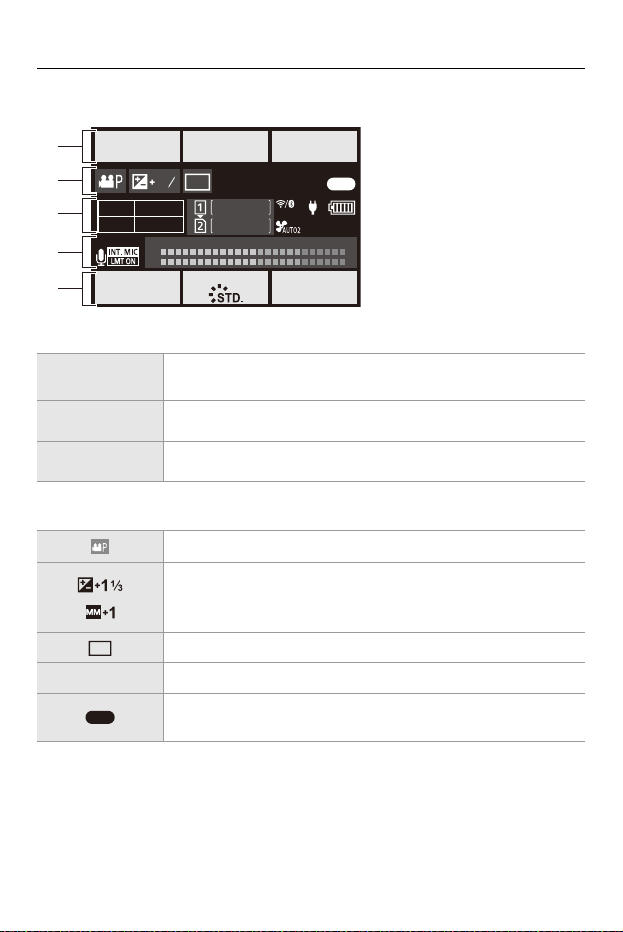
Materials – Monitor/Viewfinder Displays
718
Control Panel (Creative Video Mode)
(1)
(2)
Frame rate (Î[Rec Quality]: 136)/
Variable frame rate (ÎVariable Frame Rate: 415)
Shutter speed (ÎShutter-Priority AE Mode: 277)
Aperture value (ÎAperture-Priority AE Mode: 274)
Exposure mode (ÎRecording with Creative Video: 347)
Exposure compensation value (ÎExposure Compensation:
287)/
Manual Exposure Assist (ÎManual Exposure Assist: 282)
Image area of video (Î[Image Area of Video]: 150)
Time code (ÎTime Code: 386)
Recording state (ÎScreen Displays While Video Recording:
127)
FULL
FPS
60
F2.8
1/60
100
AWB
IRISSHUTTER
ISO WBPHOTO STYLE
TC
DF
00:00:00:00
REC
1
1
3
FHD 59.94
p
422/10-L
MOV
24m59s
24m59s
AUTO
CH1
-2
-36 -12 -6-24 0
CH2
-6
(1)
(2)
(4)
(3)
(5)
OFF
48kHz/24bit
FPS
60
SHUTTER
1/60
IRIS
F2.8
FULL
00:00:00:00
TC
DF
REC
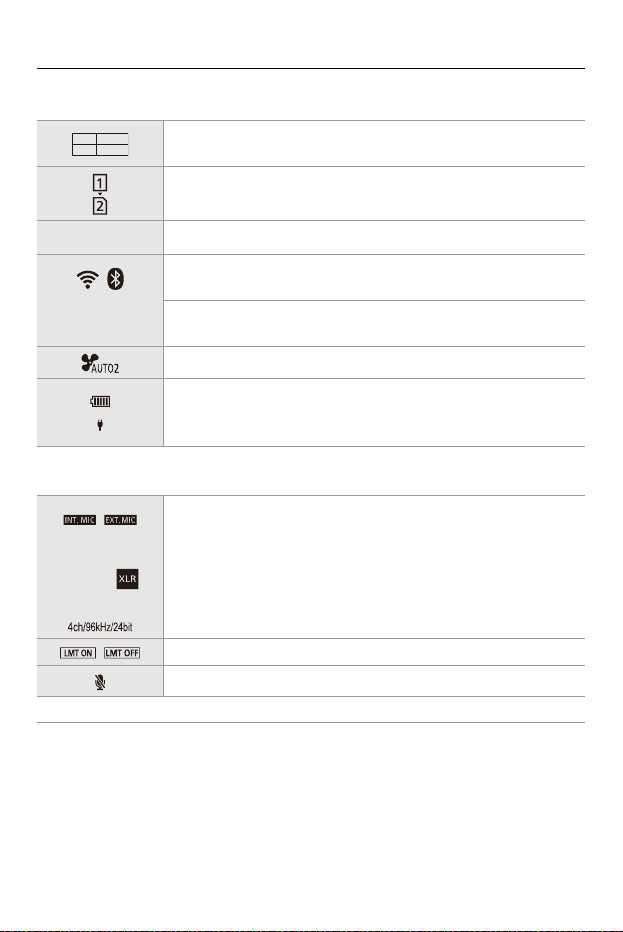
Materials – Monitor/Viewfinder Displays
719
(3)
(4)
Recording file format (Î[Rec. File Format]: 134)/
Recording quality (Î[Rec Quality]: 136)
Card slot (ÎInserting Cards (Optional): 60)/
Double card slot function (Î[Double Card Slot Function]: 587)
Video recording time (ÎVideo Recording Time: 771)
Wi-Fi/Bluetooth connection state (ÎChecking operation of the
Wi-Fi and Bluetooth functions: 624)
Video file name (when [CINE Style] is set) (Î[Video File Name]:
588)
Fan operating mode (Î[Fan Mode]: 580)
Battery indication (ÎPower Indications: 55)/
Power supply (ÎUsing the Camera While Supplying It with
Power (Supplying Power/Charging): 53)
Built-in microphone, External microphone (Î[Sound Rec Level
Disp.]: 365, External Microphones (Optional): 374)
Sound recording quality/XLR microphone adaptor setting
(Î[Sound Rec Quality]: 369, XLR Microphone Adaptor
(Optional): 379)
4ch microphone input (Î[4ch Mic Input]: 381)
Sound recording level limiter (Î[Sound Rec Level Limiter]: 370)
Mute (Î[Mute Sound Input]: 366)
Sound recording level (Î[Sound Rec Level Disp.]: 365)
FHD 59.94
p
422/10-L
MOV
24
m
59
s
A001
C001
96kHz/24bit

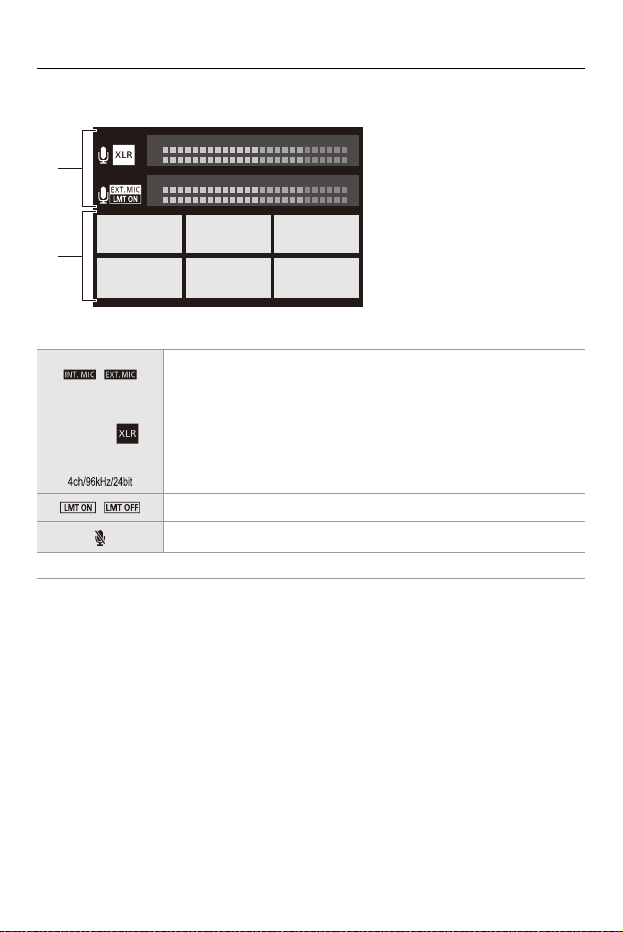
Materials – Monitor/Viewfinder Displays
721
Audio Information Display
(1)
Built-in microphone, External microphone (Î[Sound Rec Level
Disp.]: 365, External Microphones (Optional): 374)
Sound recording quality/XLR microphone adaptor setting
(Î[Sound Rec Quality]: 369, XLR Microphone Adaptor
(Optional): 379)
4ch microphone input (Î[4ch Mic Input]: 381)
Sound recording level limiter (Î[Sound Rec Level Limiter]: 370)
Mute (Î[Mute Sound Input]: 366)
Sound recording level (Î[Sound Rec Level Disp.]: 365)
EXT. GAIN
96kHz/24bit
OFF
CH1/CH2
Audio QualityMute
4ch MIC Input Monitor CHMonitor
CH1
-2
-36 -12 -6-24 0
CH2
-6
CH3
-2
-36 -12 -6-24 0
CH4
-6
ON
4ch/96kHz/24bit
STD.
REALTIME
(1)
(2)
96kHz/24bit

Materials – Monitor/Viewfinder Displays
722
(2)
Sound recording gain switch (Î[Sound Rec Gain Level]: 367)
Sound input mute (Î[Mute Sound Input]: 366)
Sound recording quality (Î[Sound Rec Quality]: 369)
4ch microphone input (Î[4ch Mic Input]: 381)
Sound monitoring (ÎHeadphones: 382)
Sound monitoring channel (Î[Sound Monitoring Channel]: 384)
EXT.GAIN
STD.
Mute
OFF
Audio Quality
96kHz/24bit
4ch MIC Input
ON
Monitor
REALTIME
Monitor CH
CH1/CH2
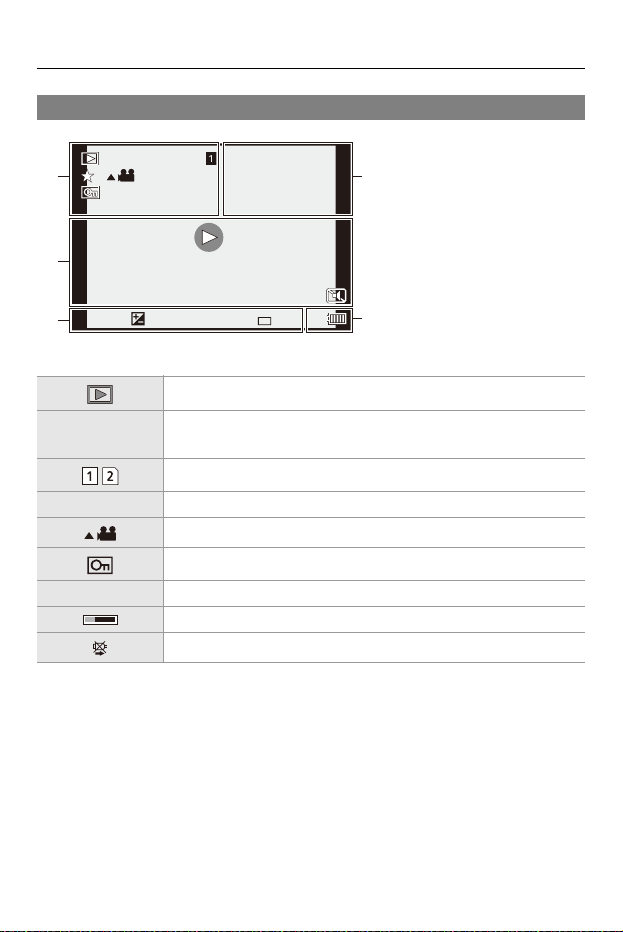
Materials – Monitor/Viewfinder Displays
723
Playback Screen
(1)
Playback mode (Î[Playback Mode]: 506)
Recording date and time (ÎSetting the Clock (When Turning On
for the First Time): 72)
Card slot (ÎSwitching the Card to Display: 476)
¿3 Rating (Î[Rating]: 510)
Video playback (ÎPlaying Back Videos: 477)
Protected picture (Î[Protect]: 510)
GPS Location logging (Î[Location Logging]: 653)
Obtaining information
Cable disconnect prohibit icon (ÎPrinting: 696)
2022.12.1 10:00 100-0001 1/9991/999
8m30s8m30s
ISO
100
F
2.86060
±
0
33
GPS
L
FINE
GPSGPS
(4)
(1)
(5)
(2)
(3)
2022.12. 1 10:00
Materials – Monitor/Viewfinder Displays
724
(2)
100-0001
A001C001
Folder/file number (Î[Folder / File Settings]: 591)/
Video file name (when [CINE Style] is set) (Î[Video File Name]:
588)
1/999 Image number/Total number of images
Number of group images/
Number of files
8m30s Video recording time (ÎPlaying Back Videos: 477)
Variable frame rate (ÎVariable Frame Rate: 415)
Loop recording (Î[Loop Recording (video)]: 445)
HLG View Assist (Î[HLG View Assist]: 438)
LUT View Assist (Î[V-Log View Assist]: 433)
SLF
ILOHV
XX
s
XX
m
XX
s
XX
m
XX
s
MON
MODE2
MONITOR LUT
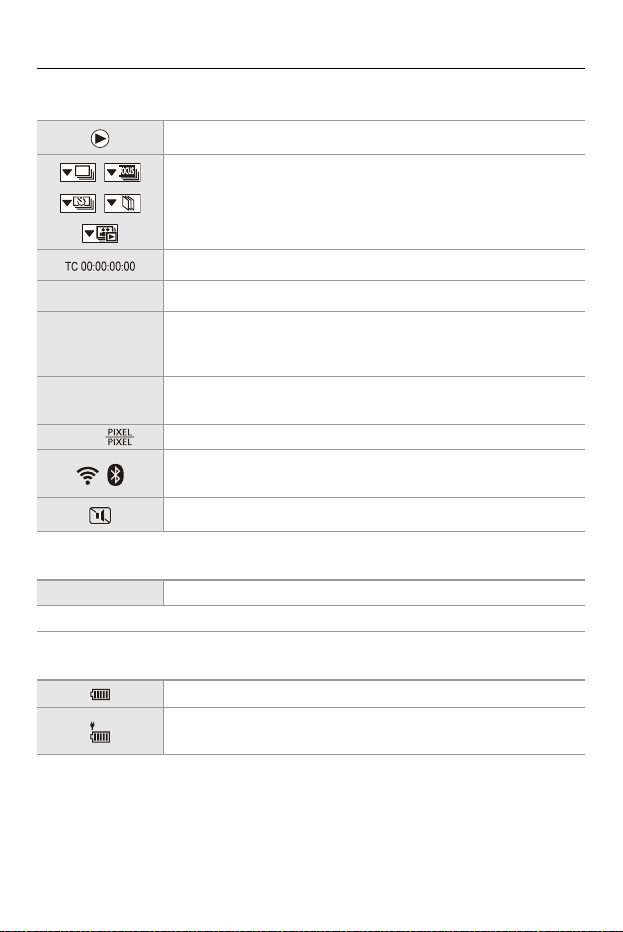
Materials – Monitor/Viewfinder Displays
725
(3)
(4)
(5)
Playback (video) (ÎPlaying Back Videos: 477)
Group images (ÎGroup Images: 492)
Time code (ÎTime Code: 386)
Sound recording quality (Î[Sound Rec Quality]: 369)
Recording file format (Î[Rec. File Format]: 134)/
Recording quality (Î[Rec Quality]: 136)
59.94p
60/59.94p
Frame rate (Î[Rec Quality]: 136)/
Variable frame rate (ÎVariable Frame Rate: 415)
FULL Image area of video (Î[Image Area of Video]: 150)
Wi-Fi/Bluetooth connection state (ÎChecking operation of the
Wi-Fi and Bluetooth functions: 624)
Silent mode (Î[Silent Mode]: 250)
8m30s Elapsed playback time (ÎPlaying Back Videos: 477)
Recording information
Battery indication (ÎPower Indications: 55)
Power supply (ÎUsing the Camera While Supplying It with
Power (Supplying Power/Charging): 53)
96kHz/24bit
MOV
FHD
422/10-L
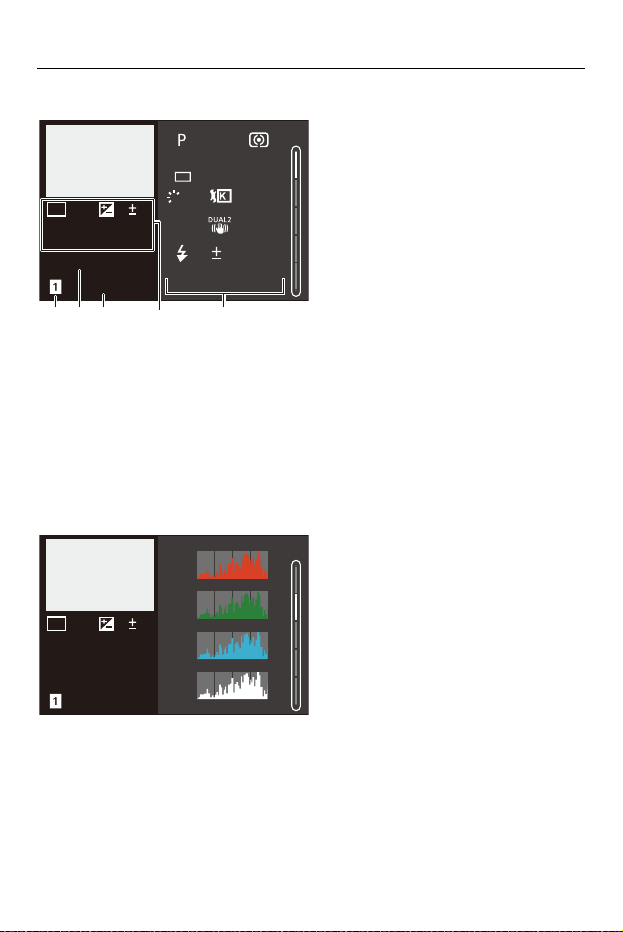
Materials – Monitor/Viewfinder Displays
726
Detailed information display
(1) Card slot (ÎInserting Cards (Optional): 60)
(2) Recording date and time (ÎSetting the Clock (When Turning On for the First
Time): 72)
(3) Folder/file number (Î[Folder / File Settings]: 591)/Video file name (when [CINE
Style] is set) (Î[Video File Name]: 588)
(4) Recording information (basic)
(5) Recording information (advanced)
Histogram display
100
100-0001
ISOISO
0
F2.8
60
2022.12. 1 10:00
s
RGB
1/5
FINE
AFS
5500
0
STD.
L
4:3
1
(1) (5)(4)(3)(2)
2/5
R
Y
B
G
100
100-0001
ISOISO
0
F2.8
60
2022.12. 1 10:00
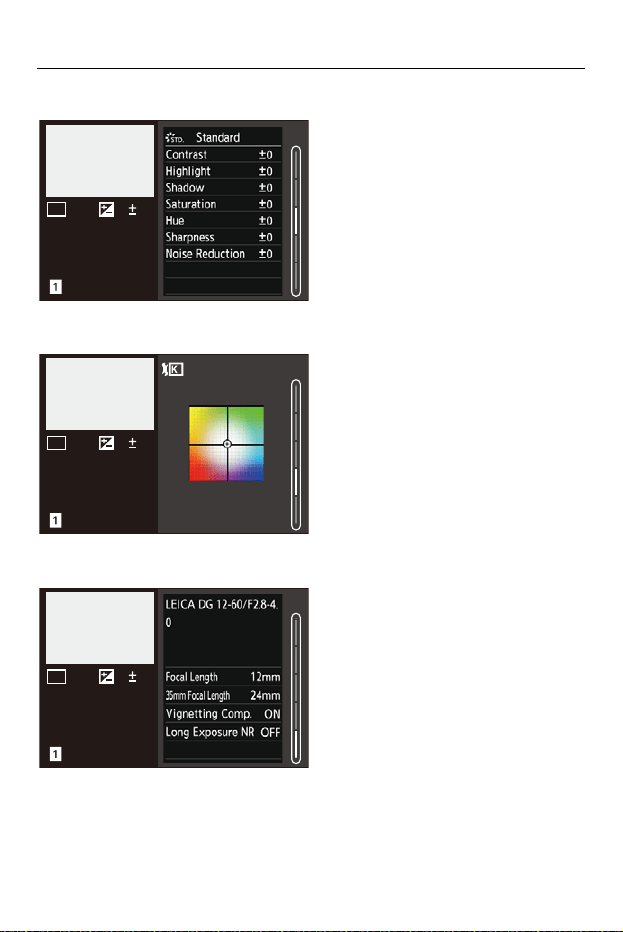
Materials – Monitor/Viewfinder Displays
727
Photo Style display
White balance display
Lens information display
3/5
100
100-0001
ISOISO
0
F2.8
60
2022.12. 1 10:00
100
100-0001
ISOISO
0
F2.8
60
2022.12. 1 10:00
4/5
5500K
1
G
M
AB
5/5
100
100-0001
ISOISO
0
F2.8
60
2022.12. 1 10:00

Materials – Message Displays
728
Message Displays
Meanings of main messages displayed on the camera screen, and
response methods.
Card
[Memory Card Error]/[Format this card?]
•
It is a format that cannot be used with the camera.
Either insert another card, or back up any necessary data before formatting.
(Î[Card Format]: 586)
[Memory Card Error]/[This memory card cannot be used]
•
Use a card compatible with the camera. (ÎMemory Cards That Can Be Used: 24)
[Insert memory card again.]/[Try another card]
•
Unable to access the card. Reinsert the card.
• Insert a different card.
[Read Error]/[Write Error]/[Please check the card]
•
Failure to read or write data.
Turn off the camera, reinsert the card, and then turn it on again.
• The card may be broken.
• Insert a different card.

Materials – Message Displays
729
[Recording was cancelled due to the limitation of the writing
speed of the card]
•
The card does not meet the writing speed requirements for recording.
Cards that can be used depend on the video image quality. Check whether the card
you are using meets the conditions required for recording. (ÎSD Cards That Can Be
Used with This Camera: 25)
* Check with the card manufacturers for the specifications of their cards.
• If recording stops even if you are using a card that meets the conditions required for
recording, it is possible that the speed of writing on the card has dropped.
Take a backup of the data, and either format the card (SD cards) or low level format
the card (CFexpress cards). (Î[Card Format]: 586)
• When using CFexpress cards, the writing speed can drop if the temperature of the
card rises. Wait until the card cools down.
[Now writing]
•
The card door is opened while writing to a card. Wait until writing is finished, then
turn the camera off and remove.

Materials – Message Displays
730
Lens
[The lens is not attached properly. Do not push lens release button
while lens is attached.]
•
Remove the lens once, and then attach it again without pressing the lens release
button. (ÎAttaching a Lens: 64)
Turn on the camera again, and if it is still displaying, contact the dealer.
[Lens attachment failed. Please make sure the lens is attached
correctly.]
•
Remove the lens from the camera body and gently wipe the contacts on the lens and
the camera body using a dry cotton swab.
Attach the lens, turn on the camera again, and if it is still displaying, contact the
dealer.
Battery
[This battery cannot be used]
•
Use a genuine Panasonic battery.
If this message is displayed even when a genuine Panasonic battery is used, contact
the dealer.
• If the terminal of the battery is dirty, remove the dirt and dust from the terminal.
[The life span of this battery is starting to decline and should be
considered for replacement. To maintain reliability refrain from
using this battery.]
•
The battery has deteriorated. Try not to use that battery.

Materials – Message Displays
731
Others
[Some pictures cannot be deleted]/[This picture cannot be
deleted]
•
Images that do not comply with the DCF standard cannot be deleted.
Back up any necessary data before formatting the card. (Î[Card Format]: 586)
[A folder cannot be created]
•
The maximum number of folder numbers has been reached, so new folders cannot
be created.
When [Video File Name] is set to [Same As Photo(DCF Standard)]:
After formatting the card, execute [File Number Reset] in the [Setup] ([Card/File])
menu. (Î[File Number Reset]: 593)
When [Video File Name] is set to [CINE Style]:
Format the card. (Î[Card Format]: 586)
[Please turn camera off and then on again]/[System Error]
•
Turn off and on the camera.
If the message is displayed even when doing this several times, contact the dealer.
[The fan is not functioning correctly.]
•
The fan has stopped. Turn off and on the camera. If the fan does not work after
turning the camera off and then on again, consult the dealer.
• The temperature of the camera will rise if you continue to use the camera with the
fan stopped. Do not use over long periods of time.

Materials – Troubleshooting
732
Troubleshooting
≥Power, Battery: 732
≥Recording: 733
≥Video: 738
≥Playback: 739
≥Monitor/Viewfinder: 740
≥Flash: 741
≥Wi-Fi Function: 742
≥TV, PC, Printer: 745
≥Others: 746
First, try out the following procedures.
If the problem is not resolved, it may be improved by selecting
[Reset] (Î[Reset]: 104) on the [Setup] ([Setting]) menu.
Power, Battery
The camera turns off automatically.
•
[Power Save Mode] is enabled. (Î[Power Save Mode]: 57)
The battery becomes flat too quickly.
•
When connected to Wi-Fi, the battery drains quickly.
Turn the camera off frequently such as by using [Power Save Mode] (Î[Power Save
Mode]: 57).

Materials – Troubleshooting
733
Recording
Recording stops before finishing. Cannot record. Cannot use
some functions.
•
The temperature of the camera or card rises more readily in the following
circumstances: when the ambient temperature is high; and during continuous use
such as when recording high-definition video, taking burst pictures at high speed, or
outputting via HDMI.
When the temperature of the camera or card rises, [ ] appears blinking on the
screen. If you continue to use the camera, a message indicating that the camera or
card cannot be used is displayed on the screen and recording and HDMI output will
be stopped. Wait for the camera or card to cool down and for the message indicating
that they can be used again. When the message indicating that they can be used
again is displayed, turn the camera off then on again.
* When recording with the camera mounted on a tripod, etc., you can set the
temperature at which recording is stopped to a higher temperature. (Î[Thermal
Management]: 595)
Cannot record images. The shutter will not operate immediately
when the shutter button is pressed.
•
If [Focus/Shutter Priority] is set to [FOCUS], then recording will not take place until
focus is achieved. (Î[Focus/Shutter Priority]: 552)
The recorded image is whitish.
•
Images may look whitish when the lens or image sensor gets dirty with fingerprints or
similar.
If the lens is dirty, turn the camera off, then wipe the lens surface with a soft, dry
cloth.
For information about how to clean the image sensor (ÎDirt on the Image Sensor:
751)

Materials – Troubleshooting
734
The recorded image is too bright or dark.
•
Ensure AE Lock is not set where it is not appropriate. (ÎLocking Focus and
Exposure (AF/AE Lock): 292)
Multiple images are recorded at once.
•
When drive mode is set to [ ] (Burst Shot 1) or [ ] (Burst Shot 2), pressing
and holding the shutter button will take burst pictures. (ÎSelecting the Drive Mode:
210)
• When [Bracketing] is set, then pressing the shutter button records multiple images
while automatically changing the settings. (ÎBracket Recording: 242)
The subject is not focused properly.
•
Confirm the following details:
– Is the subject outside of the focus range?
– Is [Shutter AF] set to [OFF]? (Î[Shutter AF]: 555)
– Is [Focus/Shutter Priority] set to [RELEASE]? (Î[Focus/Shutter Priority]: 552)
– Is AF Lock (ÎLocking Focus and Exposure (AF/AE Lock): 292) set where it is not
appropriate?
– Is [Focus Limiter] set to [ON]? (Î[Focus Limiter]: 163)
Cannot focus or zoom with the lens.
•
Confirm the following details:
– Is “Lens” in [Lock Lever Setting] set to [ ]? (Î[Lock Lever Setting]: 559)
– Is [Focus Ring Lock] set to [ON]? (Î[Focus Ring Lock]: 554)

Materials – Troubleshooting
735
The recorded image is blurred. The image stabilizer is not
effective.
•
The shutter speed will become slower and the image stabilizer function may not
work properly when recording in dark places.
In these cases, use a tripod and the self-timer when recording.
The recorded image looks rough. Noise appears on the picture.
•
Try the following:
– Reduce the ISO sensitivity. (ÎISO Sensitivity: 294)
– Increase [Noise Reduction] of [Photo Style] to the positive direction, or adjust each
item other than [Noise Reduction] to the negative direction. (ÎAdjusting Image
Quality: 311)
– Set [Long Exposure NR] to [ON]. (Î[Long Exposure NR]: 256)
• When the camera is used continuously, the temperature inside the camera may rise
and this may cause lower image quality. We recommend turning off the camera
whenever you are not actually recording.
The subject appears distorted on the image.
•
When a moving subject is recorded while using the following functions, the subject
may appear distorted in the picture:
– [ELEC.]
– Video recording
This is a characteristic of the MOS sensor that is the image sensor of the camera,
and is not a malfunction.

Materials – Troubleshooting
736
Striping or flicker may appear under lighting such as fluorescent
or LED lighting.
•
This is characteristic of MOS sensors which serve as the camera’s pickup sensors.
This is not a malfunction.
• When using the electronic shutter (Î[Shutter Type]: 252), lowering the shutter
speed may reduce the effect of the horizontal stripes.
• If flicker or horizontal stripes are noticeable when recording video, this can be
mitigated by fixing the shutter speed.
Either set [Flicker Decrease (Video)] (Î[Flicker Decrease (Video)]: 399), or fix the
shutter speed with the [ ] mode (ÎCreative Video Mode: 345).
Stripes appear in high ISO sensitivity.
•
Stripes may appear in high ISO sensitivity or depending on the lens you use.
Decrease the ISO sensitivity. (ÎISO Sensitivity: 294)

Materials – Troubleshooting
737
The brightness or coloring of the recorded image is different from
the actual scene.
•
When recording under lighting such as fluorescent or LED lighting, increasing the
shutter speed may introduce slight changes to brightness or coloring.
These are a result of the characteristics of the light source and do not indicate a
malfunction.
• When recording subjects in extremely bright locations or recording under lighting
such as fluorescent, LED, mercury, or sodium lighting, the coloring or screen
brightness may change or horizontal striping may appear on the screen.
Bright spot not in subject is recorded.
•
Pixels may be missing from the image sensor.
Perform [Pixel Refresh]. (Î[Pixel Refresh]: 607)

Materials – Troubleshooting
738
Video
Cannot record videos.
•
Try again after either returning the [System Frequency] to the original setting or
inserting another card.
• When using a large capacity card, you may not be able to record for a while after
turning on the camera.
• There are [Rec. File Format] and [Rec Quality] that cannot be recorded to SD cards.
Use CFexpress cards. (ÎMemory Cards That Can Be Used: 24)
In videos, abnormal clicking and buzzing sounds are recorded.
The recorded audio is very quiet.
•
Depending on the recording conditions or the lens used, the sound of aperture and
focus actions may be recorded in videos.
You can set the focus operation during video recording to [OFF] in [Continuous AF]
(Î[Continuous AF]: 353).
• Do not block the microphone hole during video recording.
An operation sound is recorded in a video.
•
We recommend setting the [ ] mode and recording with touch operation if you
are bothered about the operation sounds during recording. (ÎOperations During
Video Recording: 349)

Materials – Troubleshooting
739
Playback
Cannot play back. There are no recorded pictures.
•
Folders and images processed on a PC cannot be played on the camera.
• Some images are not displayed when the [Playback Mode] is set. Set to [Normal
Play]. (Î[Playback Mode]: 506)
• Videos recorded with a different [System Frequency] setting cannot be played back.
Return the [System Frequency] setting to the one you used during the recording.
(Î[System Frequency]: 132)

Materials – Troubleshooting
740
Monitor/Viewfinder
The monitor/viewfinder turns off when the camera is turned on.
•
If no operations are performed during the set time period, [Auto LVF/Monitor Off]
(Î[Auto LVF/Monitor Off]: 58) is activated, and the monitor/viewfinder turns off.
• When an object or your hand is positioned near the eye sensor, the monitor display
may switch to the viewfinder display.
It may flicker for an instant or the brightness of the screen may
change significantly for an instant.
•
This occurs when the shutter button is pressed halfway, or when the subject
brightness changes, making the lens aperture change.
This is not a malfunction.
Unevenly bright parts or irregular colors appear on the viewfinder.
•
The viewfinder of the camera is built with OLED components. Screen burn-in may
occur on the screen/viewfinder when a same image is displayed for a long period of
time, but it does not affect the recorded images.

Materials – Troubleshooting
741
Updating of the information display on the screen is sometimes
slow.
•
When using functions that put a burden on processing in the camera, updating of the
information display on the screen may get slower, but this is not a malfunction. There
will be no change to the images recorded.
Functions that put a burden on processing in the camera:
– [Rec Quality] with a high frame rate video exceeding a recording frame rate of
60.00p
– HDMI output
– Wi-Fi connection with a smartphone
– Tethered recording
Information displays that may get updated slower:
– [Time Code Display]
– [Sound Rec Level Disp.]
– AF area (while a subject is locked, while tracking a subject)
– Level gauge
– [Luminance Spot Meter], etc.
Flash
The flash does not fire.
•
The flash does not fire when using the following functions:
– Video recording
– [ELEC.]/[Silent Mode]
– High Resolution mode
– [Filter Settings]

Materials – Troubleshooting
742
Wi-Fi Function
A Wi-Fi connection cannot be established. Radio waves get
disconnected. Wireless access point is not displayed.
General tips for using a Wi-Fi connection
• Use within the communication range of the device to be connected.
• Usage near devices that utilize the 2.4 GHz frequency such as microwave ovens
and cordless telephones may result in the radio wave being lost.
Use the camera at a sufficient distance from these devices.
• When the remaining battery level is low, it may not be possible to connect to or
maintain communication with other devices.
(A message such as [Communication error] is displayed.)
• If you place the camera on a metal table or shelf, the radio waves may be adversely
affected. In such cases, you may not be able to establish a connection.
Move the camera away from the metal surface.
Wireless access point
• Confirm that the connected wireless access point can be used.
• Confirm the radio wave conditions of the wireless access point.
– Move the camera closer to the wireless access point.
– Change the location and angle of the wireless access point.
• Depending on the wireless access point, the radio wave may not be displayed even
though it is present.
– Turn off and then on the wireless access point.
– If the wireless channel of the wireless access point cannot be set automatically,
manually set the channel supported by the camera.
– If the wireless access point SSID is set not to broadcast, it may not be detected.
Enter the SSID, and then connect. (ÎConnecting by Manual Input: 670)
• Depending on the wireless access point, connection may be automatically
disconnected after specific time has passed.
Reconnect the connection again.

Materials – Troubleshooting
743
Cannot connect with a wireless access point.
•
The wireless access point information set on the camera is wrong.
Check the authentication type and encryption key. (ÎConnecting by Manual Input:
670)
• Radio waves from other devices may block the connection to a wireless access
point.
Check the status of other devices that are connected to the wireless access point as
well as the status of other wireless devices.
Wi-Fi connection on an iOS device fails.
•
Follow the message displayed to allow connection to the camera.
If you still cannot connect, select the SSID of the camera on the Wi-Fi setup screen
of the smartphone to connect.
If the SSID is not displayed, turn off and on the camera, then perform the Bluetooth
connection settings again.
Wi-Fi connection with a smartphone is not possible.
•
Change the access point to connect to in the smartphone Wi-Fi settings to the
camera.
When trying to connect to a PC by Wi-Fi, this does not recognize
the user name and password, and connection is not possible.
•
Depending on the version of the OS, there are two types of user account (local
account/Microsoft account).
Ensure you use the local account user name and password.

Materials – Troubleshooting
744
The PC is not recognized when I use a Wi-Fi connection. The
camera cannot be connected to the PC using the Wi-Fi function.
•
At the time of purchase, this camera is set to use a workgroup name of
“WORKGROUP”.
If you have changed the workgroup name of the PC, this will not be recognized.
In the [Wi-Fi Setup] menu, [PC Connection], change the workgroup name of the PC
to which to connect. (Î[PC Connection]: 677)
• Check that the login name and password are correctly typed.
• When the clock settings of the PC connected to the camera differs considerably from
those of the camera, the camera cannot be connected to the PC depending on the
OS.
Transmission of the image fails midway. Some images cannot be
transmitted.
•
Is the size of the image too large?
– Reduce the image size at [Size] (Î[Size]: 675), and then send.
– Transmit after dividing the video with [Video Divide] (Î[Video Divide]: 484).
• File format of the video that can be sent differs depending on the destination.
(ÎImages That Can be Sent: 660)
I have forgotten the password for the Wi-Fi.
•
In the [Setup] ([Setting]) menu, [Reset], reset network settings. (Î[Reset]: 104)
However, all information set in [Wi-Fi Setup] and [Bluetooth] will also be reset.

Materials – Troubleshooting
745
TV, PC, Printer
The TV images are displayed with gray bands.
•
Depending on the [Aspect Ratio], gray bands may be displayed on the top and
bottom or the left and right of the images. You can change the band color in
[Background Color(Playback)] in [HDMI Connection] of the [Setup] ([IN/OUT]) menu.
(Î[Background Color(Playback)]: 603)
Images cannot be imported even when connected to a PC.
•
Set the [USB Mode] of the camera to [PC(Storage)]. (Î[USB Mode]: 601)
• Turn the camera off and on.
Cannot print when the camera is connected to a printer.
•
Pictures cannot be printed using a printer that does not support PictBridge.
• Set the camera’s [USB Mode] to [PictBridge(PTP)]. (Î[USB Mode]: 601)
Materials – Troubleshooting
746
Others
[ ] is displayed on the screen.
•
The fan has stopped. Turn off and on the camera. If the fan does not work after
turning the camera off and then on again, consult the dealer.
• The temperature of the camera will rise if you continue to use the camera with the
fan stopped. Do not use over long periods of time.
An alarm sounds when the card door is opened.
•
An alarm may sound when a door is opened while writing to a card. Wait until writing
finishes, then turn the camera off and remove the card.
When the camera is shaken, a rattling sound is heard from the
camera.
•
The sound is caused by the in-body stabilizer. This is not a malfunction.
There is rattling noise from the lens when the camera is turned on
or off, or when the camera is swung. There is a sound from the
lens when recording.
•
This is the sound of the internal lenses moving or the aperture operating. It is not a
malfunction.
An unreadable language was selected by mistake.
•
Reselect the language from the menu using the following procedure:
¨ [ ] ¨ [ ] ¨ [ ] ¨ Select desired language (Î[Language]: 607)
The camera becomes warm.
•
The camera surface and back of the monitor may become warm during use, but this
does not indicate a problem with performance or quality.

Materials – Cautions for Use
747
Cautions for Use
The Camera
Keep this unit as far away as possible from electromagnetic
equipment (such as microwave ovens, TVs, video games etc.).
•
If you use this unit on top of or near a TV, the pictures and/or sound on this unit may
be disrupted by electromagnetic wave radiation.
• Do not use this unit near cell phones because doing so may result in noise adversely
affecting the pictures and/or sound.
• Recorded data may be damaged, or pictures may be distorted, by strong magnetic
fields created by speakers or large motors.
• Electromagnetic wave radiation may adversely affect this unit, disturbing the pictures
and/or sound.
• If this unit is adversely affected by electromagnetic equipment and stops functioning
properly, turn this unit off and remove the battery or disconnect AC adaptor. Then
reinsert the battery or reconnect AC adaptor and turn this unit on.
Do not use this unit near radio transmitters or high-voltage lines.
•
If you record near radio transmitters or high-voltage lines, the recorded pictures and/
or sound may be adversely affected.
Always use the supplied cords and cables.
If you use optional accessories, use the cords and the cables
supplied with them.
Do not extend the cords or the cables.
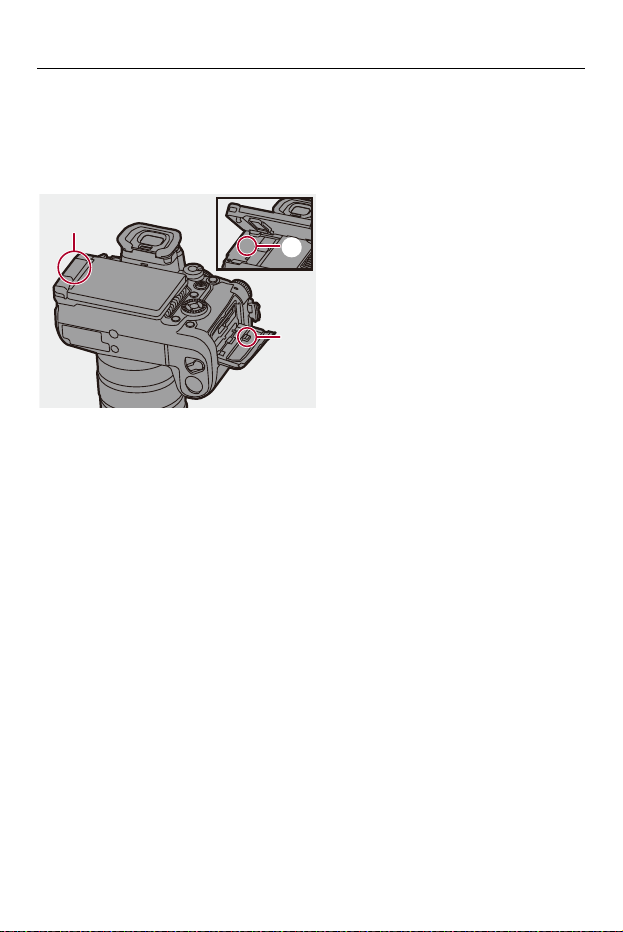
Materials – Cautions for Use
748
Keep items away from the magnetic parts (A)/(B)/(C) that are easily
influenced by magnetism.
The effects of the magnets may cause items like bank cards,
commuter cards, and clocks to cease functioning correctly.
Do not spray the camera with insecticides or volatile chemicals.
•
If the camera is sprayed with such chemicals, the body of the camera may be
damaged and the surface finish may peel off.
Do not keep products made of rubber, PVC or similar materials in
contact with the camera for a long period of time.
(A)
(C)
(B)

Materials – Cautions for Use
749
When Using in Cold Places or at Low Temperatures
• Skin burns may result if you leave the metal parts of the camera in direct
contact with the skin for long periods of time at cold places (environments
with temperatures at or below 0 oC (32 oF), such as ski resorts or places at high
altitude).
Use gloves or similar when using it for long periods.
• The performance of the battery (Number of pictures that can be taken/available
recording time) may decrease temporarily at temperatures between −10 °C and 0 °C
(14 oF and 32 oF).
Keep the battery warm as you are using by keeping it inside your cold weather gear
or clothes. Battery performance will recover when the internal temperature rises
again.
• The battery cannot be charged at temperatures below 0 °C (32 oF).
An error message is shown on the charger or on the camera body when charging is
not possible.
– When charging with the charger: The 50 % charged light blinks rapidly.
– When charging in the camera body: The charging light blinks red.
• If using in cold locations, do not allow water droplets and snow to remain on the
camera.
If these are left on the camera, water may freeze in gaps in the camera on/off switch,
speaker, and microphone, making these parts difficult to move, and/or leading to
reduced volume. This is not a malfunction.

Materials – Cautions for Use
750
Cleaning
Before cleaning the camera, remove the battery or the DC Coupler,
and disconnect the power plug from the electrical outlet. Then wipe
the camera with a dry, soft cloth.
•
When the camera is soiled badly, it can be cleaned by wiping the dirt off with a wrung
wet cloth, and then with a dry cloth.
• Do not use solvents such as benzine, thinner, alcohol, kitchen detergents, etc., to
clean the camera, since it may deteriorate the external case or the coating may peel
off.
• When using a chemical cloth, be sure to follow the accompanying instructions.

Materials – Cautions for Use
751
Dirt on the Image Sensor
If dirt gets inside the mount when changing lenses, depending on the
recording conditions, it may adhere to the image sensor and appear on the
recorded picture.
To prevent debris or dust adhering to internal parts of the body, avoid
changing the lens in a dusty environment and always fit the body cap or a
lens when storing the camera.
Remove any dirt on the body cap before attaching it.
Dust reduction function
The camera has a dust reduction function that will blow off the dirt and dust
that have affixed to the front of the image sensor.
If the dirt is particularly noticeable, from the [Setup] ([Others]) menu,
perform [Sensor Cleaning]. (Î[Sensor Cleaning]: 607)
Removing dirt on the image sensor
The image sensor is very precise and delicate, so be sure to observe the
following when you do have to clean it yourself.
•
Blow dust off the surface of the image sensor using a commercially available blower.
Do not blow the dust off with excessive power.
• Do not put the blower further inside than the lens mount.
The blower can scratch the image sensor if it touches.
• Do not use any objects except a blower brush to clean the image sensor.
• If you cannot remove the dirt or dust with the blower, consult the dealer or
Panasonic.
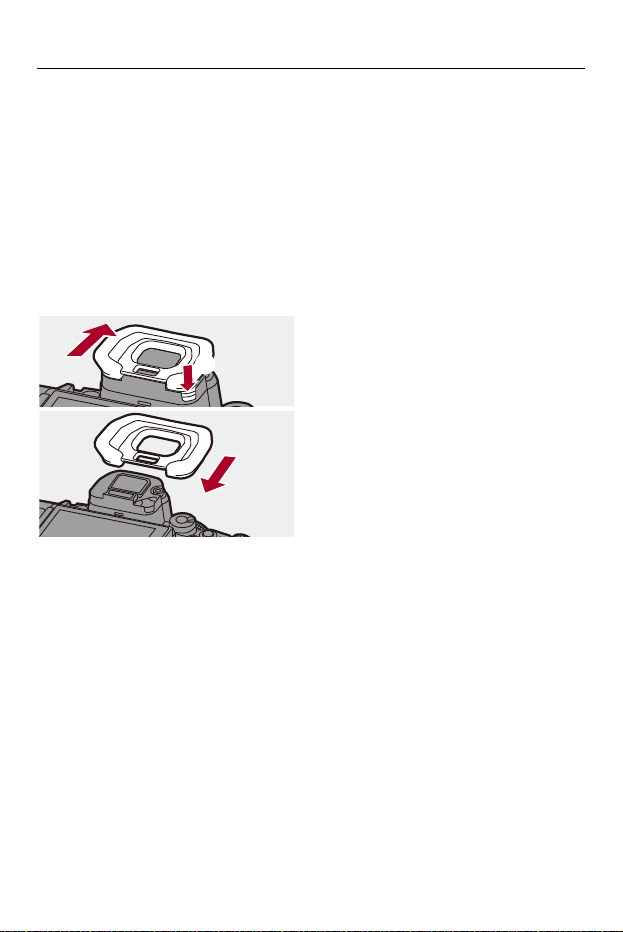
Materials – Cautions for Use
752
Cleaning the Viewfinder
If the viewfinder is dirty, then remove the eye cup and clean.
While pushing the eye cup lock lever (D), push the eye cup up in the
direction of the arrow and remove (E).
Blow dirt off the surface of the viewfinder using a commercially available
blower, then lightly wipe with a soft, dry cloth.
•
After cleaning, fit by pushing the eye cup in the direction of the arrow until a click is
heard (F).
• Be careful not to lose the eye cup.
(D)
(F)
(E)

Materials – Cautions for Use
753
Monitor/Viewfinder
• Do not push hard on the monitor.
This may cause irregular coloration or malfunction.
• Extremely high precision technology is employed to produce the monitor/viewfinder
screen. However there may be some dark or bright spots, or spots that light
constantly (red, blue, or green) on the screen.
This is not a malfunction.
Though the monitor/viewfinder screen parts are produced with highly controlled
precision technology, some pixels may be inactive or always lit.
The spots will not be recorded on images on a card.
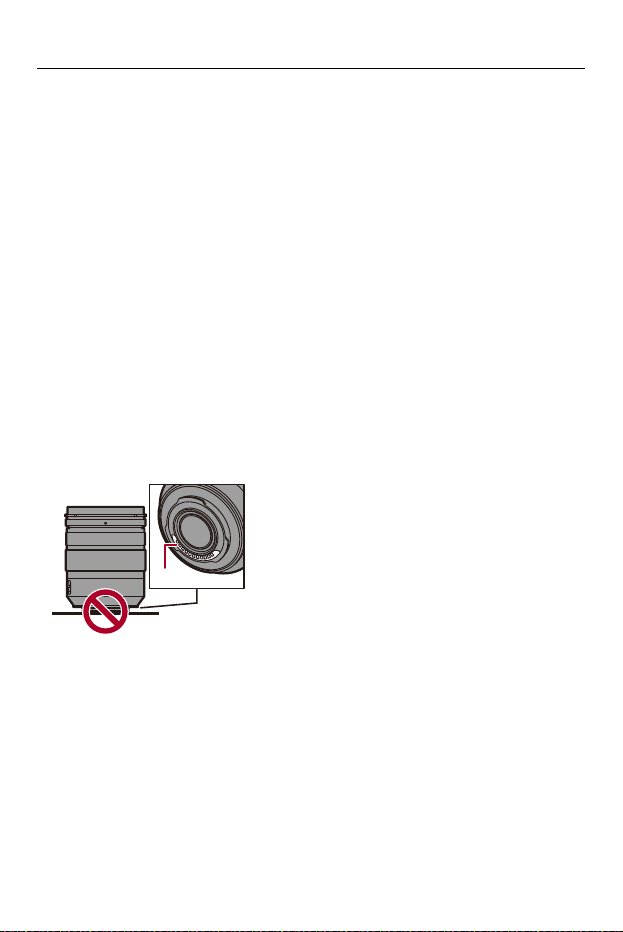
Materials – Cautions for Use
754
Lens
• When using this lens, take care not to drop, bump, or apply undue force to it.
Doing so may cause malfunction or damage to this lens and the digital
camera.
• Do not aim the lens at the sun or strong light sources.
The concentrated light may cause fire or damage.
• Images may be affected by dust, dirt, and soiling (water, oil, fingerprints, etc.) on the
lens surface.
Before and after recording, use a blower to blow off dust and dirt from the surface of
the lens, then lightly wipe with a soft dry cloth to remove soiling.
• When the camera is not being used, attach the lens cap and lens rear cap to prevent
dust and dirt from adhering to or entering the camera.
• To protect the lens contact points (G), do not do the following.
These may cause a malfunction.
– Touch the lens contact points.
– Soil the lens contact points.
– Place the lens with its mount surface facing down.
• To improve the dust and splash resistant performance of the interchangeable lens
(H-ES12060/H-FS12060), a lens mount rubber is used in the mount.
– The lens mount rubber will leave scuff marks on the digital camera mount, but this
does not impact performance.
– To replace the lens mount rubber, contact Panasonic.
(G)

Materials – Cautions for Use
755
Battery
The battery is a rechargeable lithium ion battery.
It is highly sensitive to temperature and humidity, and the effect on
performance increases as the temperature rises or drops.
Always remove the battery after use.
• Place the removed battery in a plastic bag, etc., and keep away from metallic objects
(clips, etc.) for storage or transport.
If you drop the battery accidentally, check to see if the body of the
battery and the contacts are deformed.
•
Damage to the camera will result if a battery with deformed contacts is inserted into
the camera.
Dispose of unusable battery.
•
The battery has a limited life.
• Do not throw the battery into fire because it may cause an explosion.
Do not allow battery terminals to come into contact with metal objects
(such as necklaces, hairpins, etc.).
•
This can cause short-circuiting or heat generation and you may be badly burned if
you touch a battery.
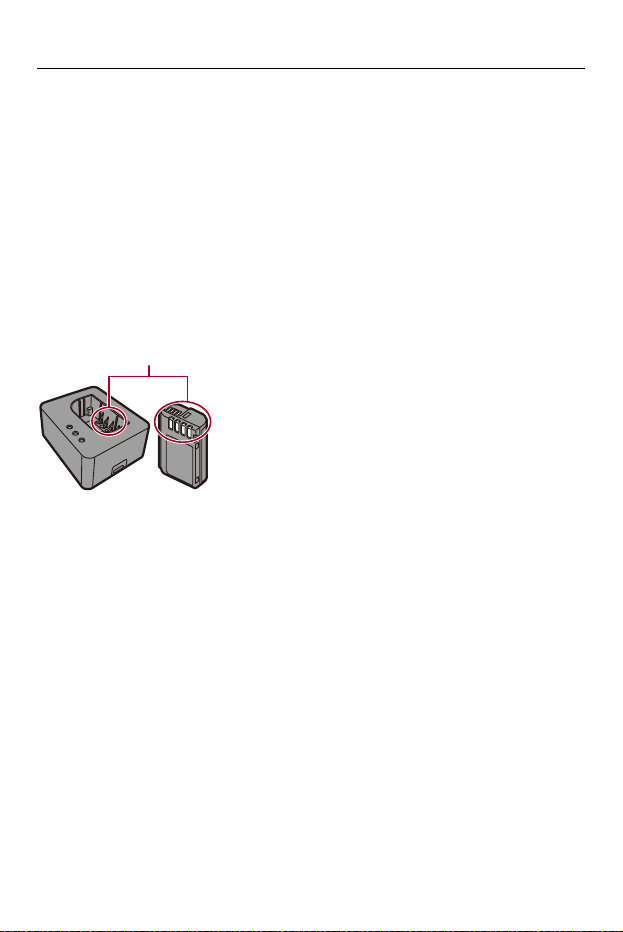
Materials – Cautions for Use
756
Charger, AC Adaptor
• The charging lights may blink under the influence of static electricity or
electromagnetic wave, depending on the charging environment. This phenomenon
has no effects on charging.
• If you use the battery charger near a radio, the radio reception may be disturbed.
Keep the charger 1 m (3.3 feet) or more away from radio.
• During usage, the AC adaptor may emit an electrical hum; this is not a malfunction.
• After use, be sure to disconnect the power plug from the electrical outlet.
(A very small amount of current is consumed if it is left connected.)
• Keep the contacts (H) of the charger and battery clean.
Wipe them with a dry cloth if they get dirty.
Card
Do not leave the card in areas with high temperatures, direct sunlight,
or areas prone to electromagnetic waves and static.
Do not bend or drop the card.
Do not subject the card to strong vibration.
•
Otherwise, the card and recorded data may be damaged.
• Put the card in the card case or the storage bag after use and when storing or
carrying the card.
• Do not allow dirt, water or other foreign objects to get into the contacts on the card.
Additionally, do not touch the contacts with your hands.
(H)

Materials – Cautions for Use
757
Personal Information
Personal information is stored within the camera and in recorded images.
We recommend that you enhance security by setting a Wi-Fi password and
Wi-Fi function lock to protect personal information. (Î[Wi-Fi Setup] Menu:
677)
•
Images may contain information that can be used to identify the user, such as
recording dates and times, and location information.
Disclaimer
•
Information including personal information may be altered or vanish due to
erroneous operation, effect of static electricity, accident, malfunction, repair, or other
handlings.
Please note in advance that Panasonic is not liable in any way for any direct or
indirect damage from the alteration or vanishing of information or personal
information.
When requesting a repair or transferring/disposing of the camera
•
After making a copy of personal information, be sure to delete information, including
personal information, such as wireless LAN connection settings that you have
registered or saved within the camera with [Reset] (Î[Reset]: 104).
• Reset the settings to protect the personal information. (Î[Reset]: 104)
• Remove the card from the camera.
• Settings may return to factory default when camera is repaired.
• Please contact the dealer where you purchased the camera or Panasonic if above
operations are not possible due to malfunction.

Materials – Cautions for Use
758
Points to remember when disposing of/transferring the memory card
Format or delete using the camera or a PC will only modify the file management
information, so it will not delete the data in the card completely.
We recommend physically destroying the card or using commercially available PC
data deletion software to delete the card data completely when disposing of/
transferring the card.
You are responsible for handling of data on cards.
When Not Using the Camera for a Long Period of Time
• Ensure you remove the battery and card from the camera.
If the battery is left in the camera, it may over-discharge, and be rendered unusable
even after charging.
• Store the battery in a cool and dry place with a relatively stable temperature.
(Recommended temperature: 15 oC to 25 oC (59 oF to 77 oF); recommended
humidity: 40 %RH to 60 %RH)
• If storing for a long period of time, it is recommended that the battery be charged
once per year, fully drained in the camera, then removed from the camera and then
stored again.
• We recommend storing the camera with a desiccant (silica gel) when you keep it in a
closet or a cabinet.
• Check all the parts before recording when you have not used the camera for a long
period of time.
Image Data
• Recorded data may be damaged or lost if the camera breaks down due to
inappropriate handling.
Panasonic will not be liable for any damage caused due to loss of recorded data.

Materials – Cautions for Use
759
Tripod
• Make sure the tripod is stable when the camera is attached to it.
• When using a tripod, removal of the battery may not be possible.
• Care is required because tightening the screw excessively may damage the camera,
or cause the rating label to come off.
• Depending on the type of tripod you are using, the lens may interfere with the tripod
head if the lens you are using has a large diameter.
Attempting to tighten the tripod screws in this case may cause damage to the
camera or the lens.
We recommend using the Tripod Adaptor (DMW-TA1: optional).
• Please also refer to the operating instructions for the tripod.
Shoulder Strap
• If you attach a heavy interchangeable lens to the camera body, do not carry the
camera by the shoulder strap.
Hold the camera and the lens when carrying them.

Materials – Cautions for Use
760
Wi-Fi Function
Use the camera as a wireless LAN device.
When using devices or computer systems that require more reliable security than
wireless LAN devices, ensure that the appropriate measures are taken for safety
designs and defects for the systems used.
Panasonic will not take any responsibility for any damage that arises when using the
camera for any purpose other than as a wireless LAN device.
Use of the Wi-Fi function of the camera is presumed to be in
countries where it is sold.
There is the risk that the camera violates the radio wave regulations if used in
countries other than those where it is sold, and Panasonic takes no responsibility for
any violations.
There is the risk that data sent and received via radio waves may be
intercepted.
Please note that there is the risk that data sent and received via radio waves may be
intercepted by a third party.
Do not use the camera in areas with magnetic fields, static electricity
or interference.
•
Do not use the camera in areas with magnetic fields, static electricity or interference,
such as near microwave ovens.
These may cause the interruption of the radio waves.
• Using the camera near devices such as microwave ovens or cordless telephones
that use the 2.4 GHz radio wave band may cause a decrease in performance in both
devices.
Do not connect to the wireless network you are not authorized to use.
When using Wi-Fi, wireless networks (SSID) that you are not allowed to use may be
displayed, but you should not connect to these as it may be viewed as unauthorized
access.

Materials – Number of Pictures That Can Be Taken and Available Recording Time with the Battery
761
Number of Pictures That Can Be Taken and
Available Recording Time with the Battery
Listed below are the numbers of pictures that can be taken and the time
lengths available for recording when the supplied battery is being used.
•
The number of pictures that can be taken is according to the CIPA (Camera &
Imaging Products Association) standards.
• Using a Lexar CFexpress Type B card.
• Using a Panasonic SDXC memory card.
• The values listed are approximate.
Recording Pictures (When Using the Monitor)
When the interchangeable lens (H-ES12060) is used
When the interchangeable lens (H-FS12060) is used
Card used Number of pictures that can be taken
CFexpress card 330
SDXC memory card 360
Card used Number of pictures that can be taken
CFexpress card 350
SDXC memory card 380

Materials – Number of Pictures That Can Be Taken and Available Recording Time with the Battery
762
Recording Pictures (When Using the Viewfinder)
When the interchangeable lens (H-ES12060) is used
When the interchangeable lens (H-FS12060) is used
•
The numbers in parentheses indicate the values that result when [Time to Sleep] in
[Power Save LVF Shooting] is set to [1SEC] and the [Power Save LVF Shooting]
function works as intended.
(Based on the test conditions derived from the CIPA standard and specified by
Panasonic)
Card used Number of pictures that can be taken
CFexpress card 330 (750)
SDXC memory card 360 (850)
Card used Number of pictures that can be taken
CFexpress card 350 (800)
SDXC memory card 380 (900)

Materials – Number of Pictures That Can Be Taken and Available Recording Time with the Battery
763
Recording Videos (When Using the Monitor)
When the interchangeable lens (H-ES12060) is used
(A) Using a CFexpress card
(B) Using an SDXC memory card
[Rec. File
Format]
[Rec Quality] Card used
Continuous
available
recording time
(minutes)
Actual
available
recording time
(minutes)
[Image Area of
Video]
[Image Area of
Video]
[FULL] [FULL]
[MP4]
[4K/10bit/100M/60p]
[4K/10bit/100M/50p]
(A) 80 40
(B) 90 45
[4K/8bit/100M/30p]
[4K/8bit/100M/25p]
(A) 80 40
(B) 100 50
[FHD/8bit/28M/60p]
[FHD/8bit/28M/50p]
(A) 90 45
(B) 100 50
Materials – Number of Pictures That Can Be Taken and Available Recording Time with the Battery
764
[MOV]
[5.7K/60p/420/10-L]
[5.7K/50p/420/10-L]
(A) 60 30
(B) 60 30
[C4K/120p/420/10-L]
[C4K/100p/420/10-L]
(A) 50 25
(B) 50 25
[C4K/60p/422/10-I(H)]
[C4K/50p/422/10-I(H)]
(A) 80 40
(B)
[C4K/60p/422/10-I(L)]
[C4K/50p/422/10-I(L)]
(A) 80 40
(B) 90 45
[C4K/60p/420/10-L]
[C4K/50p/420/10-L]
(A) 80 40
(B) 90 45
[C4K/30p/420/10-L]
[C4K/25p/420/10-L]
(A) 80 40
(B) 90 45
[C4K/24p/420/10-L]
(A) 90 45
(B) 100 50
[FHD/240p/422/10-I]
[FHD/200p/422/10-I]
(A) 80 40
(B)
[FHD/240p/420/10-L]
[FHD/200p/420/10-L]
(A) 80 40
(B) 90 45
[FHD/60p/422/10-I]
[FHD/50p/422/10-I]
(A) 80 40
(B) 100 50
[FHD/60p/420/10-L]
[FHD/50p/420/10-L]
(A) 80 40
(B) 100 50
[FHD/24p/420/10-L]
(A) 90 45
(B) 110 55
Materials – Number of Pictures That Can Be Taken and Available Recording Time with the Battery
765
• Actual available recording time is the time available for recording when repeating
actions such as turning the camera on and off, starting/stopping recording, etc.
[Apple
ProRes]
[5.7K/30p/422 HQ]
(A) 60 30
(B)
[5.7K/30p/422]
(A) 60 30
(B)
[5.7K/25p/422 HQ]
(A) 70 35
(B)
[5.7K/25p/422]
(A) 70 35
(B)
[5.7K/24p/422 HQ]
(A) 70 35
(B)
[5.7K/24p/422]
(A) 70 35
(B)
Materials – Number of Pictures That Can Be Taken and Available Recording Time with the Battery
766
When the interchangeable lens (H-FS12060) is used
(A) Using a CFexpress card
(B) Using an SDXC memory card
[Rec. File
Format]
[Rec Quality] Card used
Continuous
available
recording time
(minutes)
Actual
available
recording time
(minutes)
[Image Area of
Video]
[Image Area of
Video]
[FULL] [FULL]
[MP4]
[4K/10bit/100M/60p]
[4K/10bit/100M/50p]
(A) 80 40
(B) 90 45
[4K/8bit/100M/30p]
[4K/8bit/100M/25p]
(A) 90 45
(B) 100 50
[FHD/8bit/28M/60p]
[FHD/8bit/28M/50p]
(A) 90 45
(B) 100 50
Materials – Number of Pictures That Can Be Taken and Available Recording Time with the Battery
767
[MOV]
[5.7K/60p/420/10-L]
[5.7K/50p/420/10-L]
(A) 60 30
(B) 70 35
[C4K/120p/420/10-L]
[C4K/100p/420/10-L]
(A) 50 25
(B) 50 25
[C4K/60p/422/10-I(H)]
[C4K/50p/422/10-I(H)]
(A) 80 40
(B)
[C4K/60p/422/10-I(L)]
[C4K/50p/422/10-I(L)]
(A) 80 40
(B) 90 45
[C4K/60p/420/10-L]
[C4K/50p/420/10-L]
(A) 80 40
(B) 90 45
[C4K/30p/420/10-L]
[C4K/25p/420/10-L]
(A) 90 45
(B) 100 50
[C4K/24p/420/10-L]
(A) 100 50
(B) 110 55
[FHD/240p/422/10-I]
[FHD/200p/422/10-I]
(A) 80 40
(B)
[FHD/240p/420/10-L]
[FHD/200p/420/10-L]
(A) 80 40
(B) 90 45
[FHD/60p/422/10-I]
[FHD/50p/422/10-I]
(A) 90 45
(B) 100 50
[FHD/60p/420/10-L]
[FHD/50p/420/10-L]
(A) 90 45
(B) 100 50
[FHD/24p/420/10-L]
(A) 100 50
(B) 120 60
Materials – Number of Pictures That Can Be Taken and Available Recording Time with the Battery
768
• Actual available recording time is the time available for recording when repeating
actions such as turning the camera on and off, starting/stopping recording, etc.
[Apple
ProRes]
[5.7K/30p/422 HQ]
(A) 70 35
(B)
[5.7K/30p/422]
(A) 70 35
(B)
[5.7K/25p/422 HQ]
(A) 70 35
(B)
[5.7K/25p/422]
(A) 70 35
(B)
[5.7K/24p/422 HQ]
(A) 70 35
(B)
[5.7K/24p/422]
(A) 70 35
(B)
Materials – Number of Pictures That Can Be Taken and Available Recording Time with the Battery
769
Playback (When Using the Monitor)
When the interchangeable lens (H-ES12060) is used
When the interchangeable lens (H-FS12060) is used
Card used Playback time
CFexpress card 240 minutes
SDXC memory card 240 minutes
Card used Playback time
CFexpress card 250 minutes
SDXC memory card 260 minutes
• The number of pictures that can be taken and the available recording time vary
depending on the surrounding environment and the usage conditions.
For example, these will reduce in the following case:
– In low-temperature environments, such as on ski slopes.
• If the usage duration drops significantly even when the battery is fully charged,
then the battery is at the end of its service life.
Replace with a new battery.
Materials – Number of Pictures That Can Be Taken and Video Recording Time with Cards
770
Number of Pictures That Can Be Taken and
Video Recording Time with Cards
Listed below are the numbers of pictures and the time lengths of videos
that can be recorded on a card.
•
The values listed are approximate.
Number of Pictures That Can Be Taken
• [Aspect Ratio]: [4:3]; [Picture Quality]: [FINE]
• [Aspect Ratio]: [4:3]; [Picture Quality]: [RAW+FINE]
[Picture
Size]
CFexpress card capacity SD card capacity
128 GB 256 GB 512 GB 64 GB 128 GB 256 GB
[L] (25M) 9470 18770 37550 4790 9490 18180
[M] (12.5M) 17430 33660 67340 8820 17470 32590
[S] (6.5M) 29580 57430 114870 14970 29640 55600
[Picture
Size]
CFexpress card capacity SD card capacity
128 GB 256 GB 512 GB 64 GB 128 GB 256 GB
[L] (25M) 1960 3900 7810 990 1960 3780
[M] (12.5M) 2160 4300 8600 1090 2170 4160
[S] (6.5M) 2280 4540 9080 1150 2290 4390
Materials – Number of Pictures That Can Be Taken and Video Recording Time with Cards
771
Video Recording Time
• “h” is an abbreviation for hour, “m” for minute and “s” for second.
• Video recording time is the total time of all the videos which have been recorded.
• [Rec. File Format]: [MP4]
[System Frequency]: [59.94Hz (NTSC)]
[Rec Quality]
CFexpress card capacity SD card capacity
128 GB 256 GB 512 GB 64 GB 128 GB 256 GB
[4K/10bit/100M/60p]/
[4K/8bit/100M/30p]/
[4K/8bit/100M/24p]
2h45m 5h40m 11h20m 1h25m 2h45m 5h25m
[4K/10bit/72M/30p]/
[4K/10bit/72M/24p]
3h55m 7h50m 15h45m 1h55m 3h55m 7h35m
[FHD/8bit/28M/60p] 9h55m 19h55m 39h55m 4h55m 9h45m 19h30m
[FHD/8bit/24M/24p] 11h35m 23h15m 46h35m 5h40m 11h25m 22h45m
[FHD/8bit/20M/30p] 13h15m 26h35m 53h15m 6h30m 13h00m 26h00m
[System Frequency]: [50.00Hz (PAL)]
[Rec Quality]
CFexpress card capacity SD card capacity
128 GB 256 GB 512 GB 64 GB 128 GB 256 GB
[4K/10bit/100M/50p]/
[4K/8bit/100M/25p]
2h45m 5h40m 11h20m 1h25m 2h45m 5h25m
[4K/10bit/72M/25p] 3h55m 7h50m 15h45m 1h55m 3h55m 7h35m
[FHD/8bit/28M/50p] 9h55m 19h55m 39h55m 4h55m 9h45m 19h30m
[FHD/8bit/20M/25p] 13h15m 26h35m 53h15m 6h30m 13h00m 26h00m

Materials – Number of Pictures That Can Be Taken and Video Recording Time with Cards
772
• [Rec. File Format]: [MOV]
[System Frequency]: [59.94Hz (NTSC)]
[Rec Quality]
CFexpress card capacity SD card capacity
128 GB 256 GB 512 GB 64 GB 128 GB 256 GB
[C4K/60p/422/10-I(H)]/
[C4K/48p/422/10-I(H)]/
[4K/60p/422/10-I(H)]/
[4K/48p/422/10-I(H)]/
[FHD/240p/422/10-I]
21m00s 42m00s 1h25m
[C4K/60p/422/10-I(L)]/
[C4K/48p/422/10-I(L)]/
[4K/60p/422/10-I(L)]/
[4K/48p/422/10-I(L)]
28m00s 56m00s 1h50m 14m00s 28m00s 54m00s
[C4K/30p/422/10-I]/
[C4K/24p/422/10-I]/
[4K/30p/422/10-I]/
[4K/24p/422/10-I]/
[FHD/120p/422/10-I]
42m00s 1h20m 2h50m 21m00s 42m00s 1h20m
[5.7K/60p/420/10-L]/
[5.7K/48p/420/10-L]/
[4.4K/60p/420/10-L]/
[4.4K/48p/420/10-L]/
[C4K/120p/420/10-L]/
[4K/120p/420/10-L]
56m00s 1h50m 3h45m 28m00s 56m00s 1h45m

Materials – Number of Pictures That Can Be Taken and Video Recording Time with Cards
773
[5.8K/30p/420/10-L]/
[5.8K/24p/420/10-L]/
[5.7K/30p/420/10-L]/
[5.7K/24p/420/10-L]/
[C4K/60p/422/10-L]/
[C4K/60p/420/10-L]/
[C4K/48p/422/10-L]/
[C4K/48p/420/10-L]/
[4K/60p/422/10-L]/
[4K/60p/420/10-L]/
[4K/48p/422/10-L]/
[4K/48p/420/10-L]/
[FHD/240p/422/10-L]/
[FHD/240p/420/10-L]/
[FHD/60p/422/10-I]/
[FHD/48p/422/10-I]/
[FHD/30p/422/10-I]/
[FHD/24p/422/10-I]
1h20m 2h50m 5h40m 42m00s 1h20m 2h40m
[C4K/30p/422/10-L]/
[C4K/30p/420/10-L]/
[C4K/24p/422/10-L]/
[C4K/24p/420/10-L]/
[4K/30p/422/10-L]/
[4K/30p/420/10-L]/
[4K/24p/422/10-L]/
[4K/24p/420/10-L]/
[FHD/120p/422/10-L]/
[FHD/120p/420/10-L]
1h50m 3h45m 7h30m 56m00s 1h50m 3h35m
[FHD/60p/422/10-L]/
[FHD/60p/420/10-L]/
[FHD/60i/422/10-I]/
[FHD/48p/422/10-L]/
[FHD/48p/420/10-L]/
[FHD/30p/422/10-L]/
[FHD/30p/420/10-L]/
[FHD/24p/422/10-L]/
[FHD/24p/420/10-L]
2h45m 5h40m 11h20m 1h25m 2h45m 5h25m
[FHD/60i/422/10-L] 5h35m 11h15m 22h40m 2h50m 5h35m 10h55m

Materials – Number of Pictures That Can Be Taken and Video Recording Time with Cards
774
[System Frequency]: [50.00Hz (PAL)]
[Rec Quality]
CFexpress card capacity SD card capacity
128 GB 256 GB 512 GB 64 GB 128 GB 256 GB
[C4K/50p/422/10-I(H)]/
[4K/50p/422/10-I(H)]/
[FHD/200p/422/10-I]
21m00s 42m00s 1h25m
[C4K/50p/422/10-I(L)]/
[4K/50p/422/10-I(L)]
28m00s 56m00s 1h50m 14m00s 28m00s 54m00s
[C4K/25p/422/10-I]/
[4K/25p/422/10-I]/
[FHD/100p/422/10-I]
42m00s 1h20m 2h50m 21m00s 42m00s 1h20m
[5.7K/50p/420/10-L]/
[4.4K/50p/420/10-L]/
[C4K/100p/420/10-L]/
[4K/100p/420/10-L]
56m00s 1h50m 3h45m 28m00s 56m00s 1h45m
[5.8K/25p/420/10-L]/
[5.7K/25p/420/10-L]/
[C4K/50p/422/10-L]/
[C4K/50p/420/10-L]/
[4K/50p/422/10-L]/
[4K/50p/420/10-L]/
[FHD/200p/422/10-L]/
[FHD/200p/420/10-L]/
[FHD/50p/422/10-I]/
[FHD/25p/422/10-I]
1h20m 2h50m 5h40m 42m00s 1h20m 2h40m
[C4K/25p/422/10-L]/
[C4K/25p/420/10-L]/
[4K/25p/422/10-L]/
[4K/25p/420/10-L]/
[FHD/100p/422/10-L]/
[FHD/100p/420/10-L]
1h50m 3h45m 7h30m 56m00s 1h50m 3h35m

Materials – Number of Pictures That Can Be Taken and Video Recording Time with Cards
775
[FHD/50p/422/10-L]/
[FHD/50p/420/10-L]/
[FHD/50i/422/10-I]/
[FHD/25p/422/10-L]/
[FHD/25p/420/10-L]
2h45m 5h40m 11h20m 1h25m 2h45m 5h25m
[FHD/50i/422/10-L] 5h35m 11h15m 22h40m 2h50m 5h35m 10h55m

Materials – Number of Pictures That Can Be Taken and Video Recording Time with Cards
776
[System Frequency]: [24.00Hz (CINEMA)]
[Rec Quality]
CFexpress card capacity SD card capacity
128 GB 256 GB 512 GB 64 GB 128 GB 256 GB
[C4K/24p/422/10-I]/
[4K/24p/422/10-I]/
[FHD/120p/422/10-I]
42m00s 1h20m 2h50m 21m00s 42m00s 1h20m
[5.7K/48p/420/10-L]/
[4.4K/48p/420/10-L]/
[C4K/120p/420/10-L]/
[4K/120p/420/10-L]
56m00s 1h50m 3h45m 28m00s 56m00s 1h45m
[5.8K/24p/420/10-L]/
[5.7K/24p/420/10-L]/
[FHD/24p/422/10-I]
1h20m 2h50m 5h40m 42m00s 1h20m 2h40m
[C4K/24p/422/10-L]/
[C4K/24p/420/10-L]/
[4K/24p/422/10-L]/
[4K/24p/420/10-L]/
[FHD/120p/422/10-L]/
[FHD/120p/420/10-L]
1h50m 3h45m 7h30m 56m00s 1h50m 3h35m
[FHD/24p/422/10-L]/
[FHD/24p/420/10-L]
2h45m 5h40m 11h20m 1h25m 2h45m 5h25m
Materials – Number of Pictures That Can Be Taken and Video Recording Time with Cards
777
• [Rec. File Format]: [Apple ProRes]
[System Frequency]: [59.94Hz (NTSC)]
[Rec Quality]
CFexpress card capacity
128 GB 256 GB 512 GB
[5.7K/30p/422 HQ] 8m00s 17m00s 35m00s
[5.7K/30p/422] 13m00s 26m00s 53m00s
[5.7K/24p/422 HQ] 11m00s 22m00s 44m00s
[5.7K/24p/422] 16m00s 33m00s 1h05m
[System Frequency]: [50.00Hz (PAL)]
[Rec Quality]
CFexpress card capacity
128 GB 256 GB 512 GB
[5.7K/25p/422 HQ] 10m00s 21m00s 42m00s
[5.7K/25p/422] 15m00s 32m00s 1h00m
[System Frequency]: [24.00Hz (CINEMA)]
[Rec Quality]
CFexpress card capacity
128 GB 256 GB 512 GB
[5.7K/24p/422 HQ] 11m00s 22m00s 44m00s
[5.7K/24p/422] 16m00s 33m00s 1h05m

Materials – Number of Pictures That Can Be Taken and Video Recording Time with Cards
778
• The number of pictures that can be taken and the available recording time will be
shorter depending on the SD card used when recording with [Segmented File
Recording] or [Loop Recording (video)].
• Depending on the recording conditions and the type of card, number of pictures
that can be taken, video recording time vary.
• [9999+] is displayed on the recording screen if the remaining number of pictures
that can be taken is 10000 or more.
• The continuous recordable time for videos is displayed on the screen.
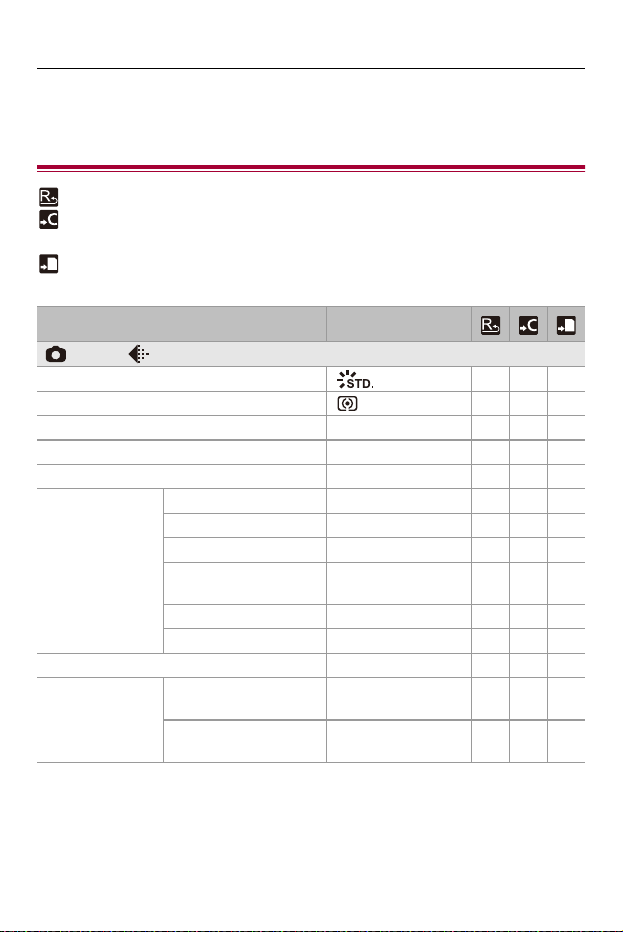
Materials – List of Default Settings/Custom Saving/Settings Available for Copying
779
List of Default Settings/Custom Saving/
Settings Available for Copying
: Using [Reset], the function to return to default settings
: Using [Save to Custom Mode], the function to save settings details in the Custom
mode
: Using [Save/Restore Camera Setting], the function to copy settings details
Menu Default setting
[Photo]: [Image Quality]
[Photo Style] [ ] 333
[Metering Mode] [ ] 333
[Aspect Ratio] [4:3] 333
[Picture Quality] [FINE] 333
[Picture Size] [L] (25M) 333
[High Resolution
Mode Setting]
[Handheld High-Res] [OFF] 333
[Picture Quality] [COMBINED] 333
[Picture Size] [XL] 333
[Simul Record Normal
Shot]
[ON] 333
[Shutter Delay] [2 SEC] 333
[Motion Blur Processing] [MODE1] 333
[Long Exposure NR] [ON] 333
[ISO Sensitivity
(photo)]
[ISO Auto Lower Limit
Setting]
[100] 333
[ISO Auto Upper Limit
Setting]
[AUTO] 333
Materials – List of Default Settings/Custom Saving/Settings Available for Copying
780
[Min. Shutter Speed] [AUTO] 333
[Vignetting Comp.] [OFF] 333
[Diffraction Compensation] [OFF] 333
[Filter Settings]
[Filter Effect] [OFF] 333
[Simultaneous Record w/o
Filter]
[OFF] 333
Menu Default setting
[Photo]: [Focus]
[AF Detection Setting] [OFF] 333
[Detecting Subject] [HUMAN] 333
[AF Custom Setting(Photo)] [Set 1] 333
[Focus Limiter]
[ON] / [OFF] [OFF] 333
[SET] — 333
[AF Assist Light] [ON] 333
[Focus Peaking]
[ON] / [OFF] [ON] 333
[SET] — 333
[1-Area AF Moving Speed] [FAST] 333
Materials – List of Default Settings/Custom Saving/Settings Available for Copying
781
Menu Default setting
[Photo]: [Flash]
[Flash Mode] [ ] 333
[Firing Mode] [TTL] 333
[Flash Adjust.] [±0 EV] 333
[Flash Synchro] [1ST] 333
[Manual Flash Adjust.] [1/1] 333
[Auto Exposure Comp.] [OFF] 333
[Wireless] [OFF] 333
[Wireless Channel] [1CH] 333
[Wireless FP] [OFF] 333
[Communication Light] [HIGH] 333
[Wireless Setup] — 333
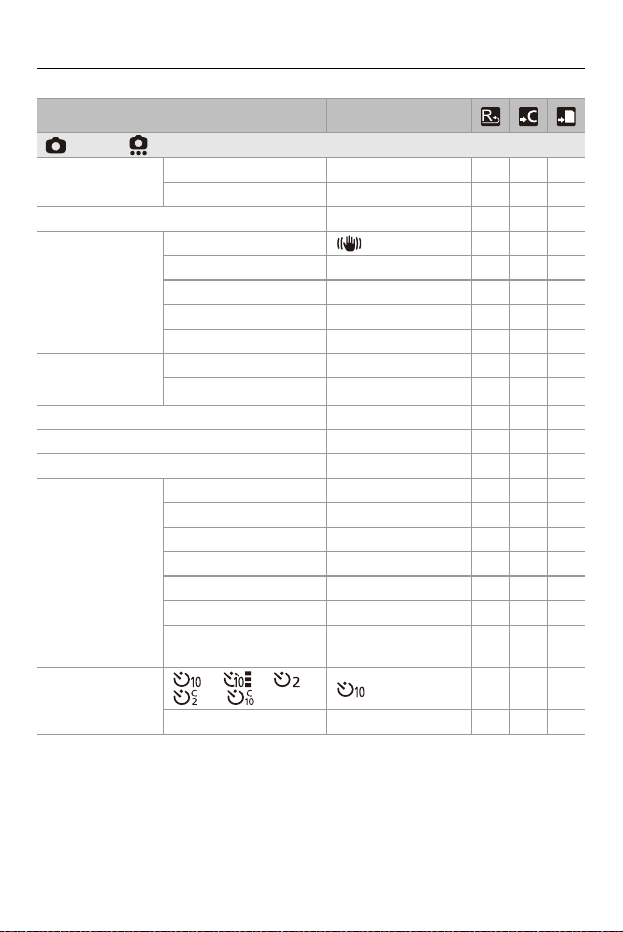
Materials – List of Default Settings/Custom Saving/Settings Available for Copying
782
Menu Default setting
[Photo]: [Others (Photo)]
[Bracketing]
[Bracketing Type] [OFF] 333
[More Settings] — 333
[Silent Mode] [OFF] 333
[Image Stabilizer]
[Operation Mode] [ ] 333
[E-Stabilization (Video)] [OFF] 333
[Boost I.S. (Video)] [OFF] 333
[Anamorphic (Video)] [OFF] 333
[Lens Information] [Lens1] 33
[Burst Shot Setting]
[Burst Shot 1 Setting] [H] 333
[Burst Shot 2 Setting] [SH75] 333
[Shutter Type] [MECH.] 333
[Shutter Delay] [OFF] 333
[Ex. Tele Conv.] [OFF] 333
[Time Lapse/
Animation]
[Mode] [Time Lapse Shot] 333
[Shooting Interval Setting] [ON] 333
[Start Time] [Now] 333
[Image Count] [1] 333
[Shooting Interval] [1m00s] 333
[Exposure Leveling] [OFF] 333
[Create New Folder At
Rec]
— 333
[Self Timer]
[ ] / [ ] / [ ] /
[ ] to [ ]
[] 333
[SET] — 333
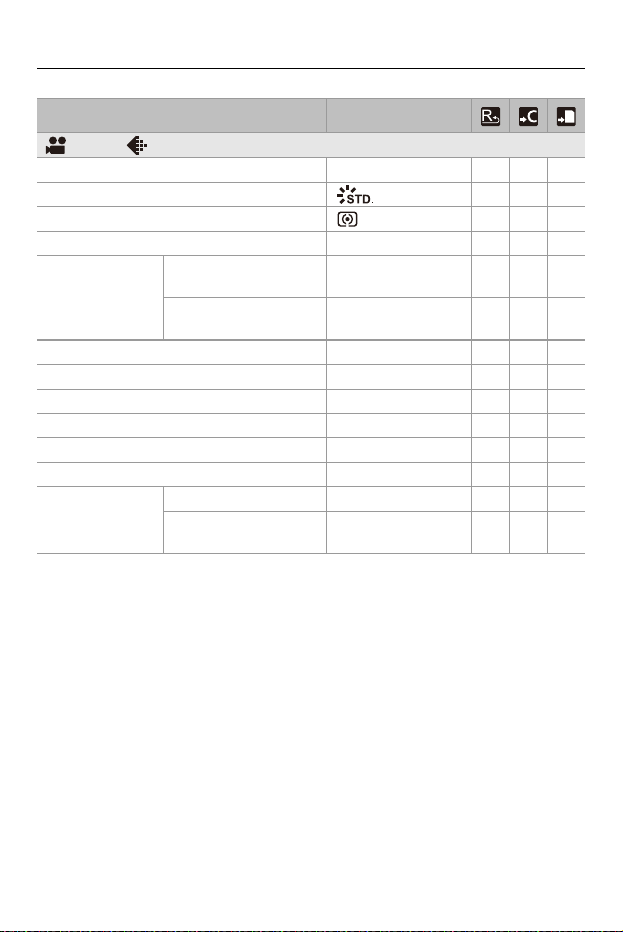
Materials – List of Default Settings/Custom Saving/Settings Available for Copying
783
Menu Default setting
[Video]: [Image Quality]
[Exposure Mode] [P] 333
[Photo Style] [ ] 333
[Metering Mode] [ ] 333
[Dynamic Range Boost] [OFF] 333
[ISO Sensitivity
(video)]
[ISO Auto Lower Limit
Setting]
[100] 333
[ISO Auto Upper Limit
Setting]
[AUTO] 333
[Synchro Scan] [OFF] 333
[Flicker Decrease (Video)] [OFF] 333
[Master Pedestal Level] [0] 333
[SS/Gain Operation] [SEC/ISO] 333
[Vignetting Comp.] [OFF] 333
[Diffraction Compensation] [OFF] 333
[Filter Settings]
[Filter Effect] [OFF] 333
[Simultaneous Record w/o
Filter]
[OFF] 333
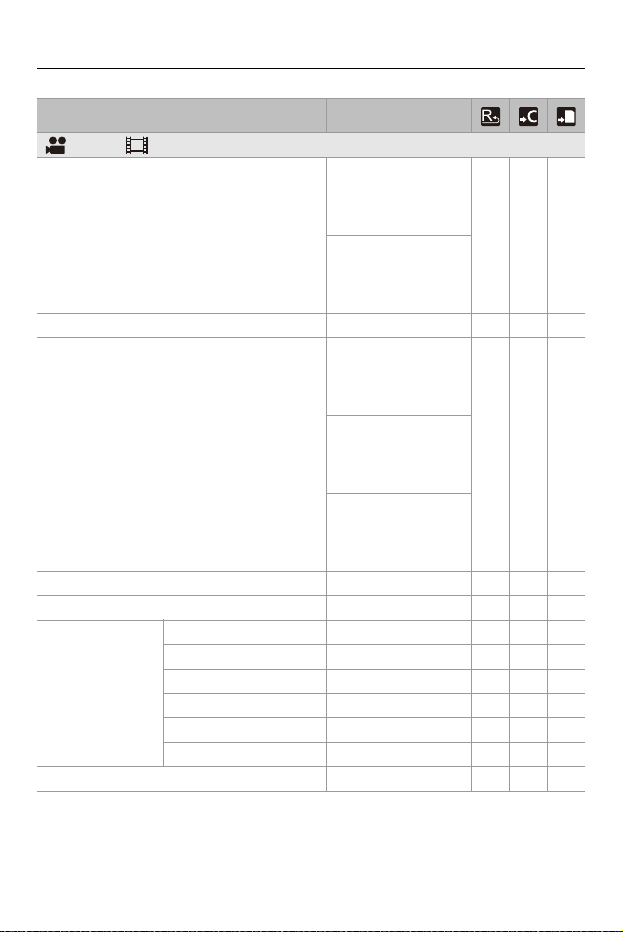
Materials – List of Default Settings/Custom Saving/Settings Available for Copying
784
Menu Default setting
[Video]: [Image Format]
[Rec. File Format]
When [System
Frequency] is set to
[59.94Hz (NTSC)] or
[50.00Hz (PAL)]: [MP4]
333
When [System
Frequency] is set to
[24.00Hz (CINEMA)]:
[MOV]
[Image Area of Video] [FULL] 333
[Rec Quality]
When [System
Frequency] is set to
[59.94Hz (NTSC)]:
[FHD/8bit/28M/60p]
333
When [System
Frequency] is set to
[50.00Hz (PAL)]: [FHD/
8bit/28M/50p]
When [System
Frequency] is set to
[24.00Hz (CINEMA)]:
[FHD/24p/422/10-L]
[Rec Quality (My List)] — 333
[Variable Frame Rate] [OFF] 333
[Time Code]
[Time Code Display] [OFF] 333
[Count Up] [REC RUN] 333
[Time Code Value] —
[Time Code Mode] [DF] 333
[HDMI Time Code Output] [OFF] 333
[External TC Setting] — 333
[Luminance Level] [16-255] 333
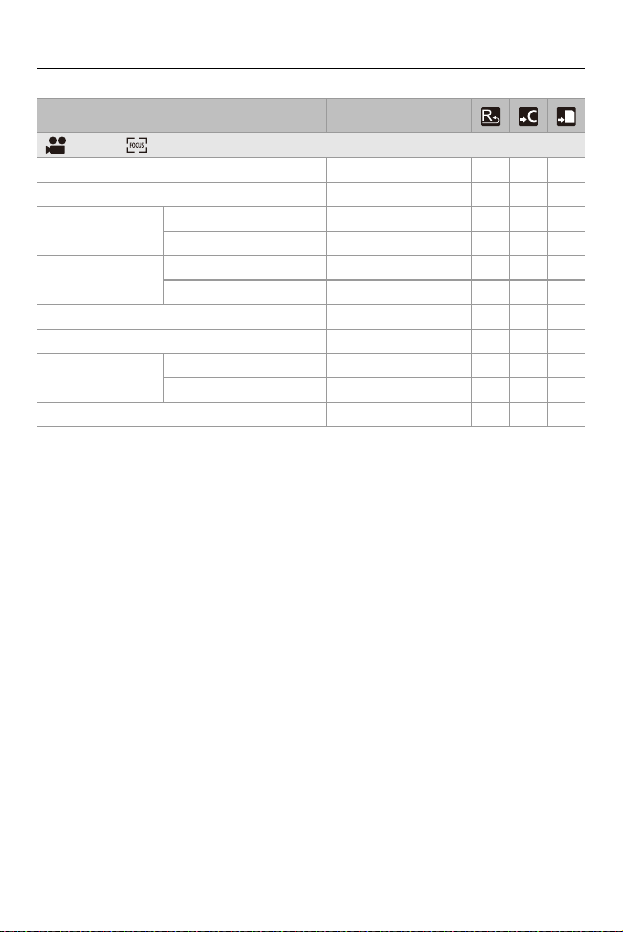
Materials – List of Default Settings/Custom Saving/Settings Available for Copying
785
Menu Default setting
[Video]: [Focus]
[AF Detection Setting] [OFF] 333
[Detecting Subject] [HUMAN] 333
[AF Custom
Setting(Video)]
[ON] / [OFF] [OFF] 333
[SET] — 333
[Focus Limiter]
[ON] / [OFF] [OFF] 333
[SET] — 333
[Continuous AF] [MODE1] 333
[AF Assist Light] [ON] 333
[Focus Peaking]
[ON] / [OFF] [ON] 333
[SET] — 333
[1-Area AF Moving Speed] [FAST] 333
Materials – List of Default Settings/Custom Saving/Settings Available for Copying
786
Menu Default setting
[Video]: [Audio]
[Sound Rec Level
Disp.]
[ON] / [OFF] [OFF] 333
[SET] — 333
[Mute Sound Input] [OFF] 333
[Sound Rec Gain Level] [STANDARD] 333
[Sound Rec Level Adj.] [0dB] 333
[Sound Rec Quality] [48kHz/24bit] 333
[Sound Rec Level Limiter] [ON] 333
[Wind Noise Canceller] [STANDARD] 333
[Wind Cut] [OFF] 333
[Lens Noise Cut] [ON] 333
[Mic Socket] [ ] 333
[Special Mic.] [STEREO] 333
[4ch Mic Input] [OFF] 333
[XLR Mic Adaptor Setting] [ON] 333
[Sound Output] [REALTIME] 333
[Headphone Volume] [LEVEL3] 33
[Sound Monitoring Channel] [CH1/CH2] 333
Materials – List of Default Settings/Custom Saving/Settings Available for Copying
787
Menu Default setting
[Video]: [Others (Video)]
[Silent Mode] [OFF] 333
[Image Stabilizer]
[Operation Mode] [ ] 333
[E-Stabilization (Video)] [OFF] 333
[Boost I.S. (Video)] [OFF] 333
[Anamorphic (Video)] [OFF] 333
[Lens Information] [Lens1] 33
[Self Timer Setting]
[Self Timer] [ ] 333
[Self Timer For Video] [OFF] 333
[Focus Transition]
[Focus Position Setting] —
[Focus Transition Speed] [M] 333
[Focus Transition Rec] [OFF] 333
[Focus Transition Wait] [OFF] 333
[Loop Recording (video)] [OFF] 333
[Segmented File Recording] [OFF] 333
Materials – List of Default Settings/Custom Saving/Settings Available for Copying
788
Menu Default setting
[Custom]: [Image Quality]
[Photo Style
Settings]
[Show/Hide Photo Style] — 333
[My Photo Style Settings] — 333
[Reset Photo Style] —
[ISO Increments] [1/3 EV] 333
[Extended ISO] [OFF] 333
[Exposure Offset
Adjust.]
[Multi Metering] [±0EV] 333
[Center Weighted] [±0EV] 333
[Spot] [±0EV] 333
[Highlight Weighted] [±0EV] 333
[Face Priority In Multi Metering] [ON] 333
[Color Space] [sRGB] 333
[Exposure Comp. Reset] [OFF] 33
[Auto Exposure in P/A/S/M] [ON] 333
[CreativeVideo
Combined Set.]
[F/SS/ISO/Exposure
Comp.]
[] 333
[White Balance] [ ] 333
[Photo Style] [ ] 333
[Metering Mode] [ ] 333
[AF Mode] [ ] 333
Materials – List of Default Settings/Custom Saving/Settings Available for Copying
789
Menu Default setting
[Custom]: [Focus/Shutter]
[Focus/Shutter
Priority]
[AFS] [FOCUS] 333
[AFC] [BALANCE] 333
[Focus Switching for Vert / Hor] [OFF] 333
[AF/AE Lock Hold] [OFF] 333
[AF+MF] [OFF] 333
[MF Assist]
[Focus Ring] [ON] 333
[AF Mode] [ON] 333
[Press Joystick] [OFF] 333
[MF Assist Display] [PIP] 333
[MF Guide] [ ] / [ ]
*1
333
[Focus Ring Lock] [OFF] 333
[Show/Hide AF
Mode]
[Tracking] [ON] 333
[Full Area AF] [ON] 333
[Zone(Horizontal/Vertical)] [ON] 333
[Zone] [ON] 333
[1-Area+] [ON] 333
[Pinpoint] [ON] 333
[Pinpoint AF
Setting]
[Pinpoint AF Time] [MID] 333
[Pinpoint AF Display] [PIP] 333

Materials – List of Default Settings/Custom Saving/Settings Available for Copying
790
*1 Default setting specifications vary depending on the country or area where the
camera was purchased.
[Shutter AF] [ON] 333
[Eye Detection Display] [ON] 333
[Half-Press Shutter] [OFF] 333
[Assign REC to Shutter Button] [ON] 333
[Quick AF] [OFF] 333
[Eye Sensor AF] [OFF] 333
[Looped Focus Frame] [OFF] 333
[Enlarged Live
Display(Video)]
[Keep Enlarged Display] [ON] 333
[PIP Display] [PIP] 333
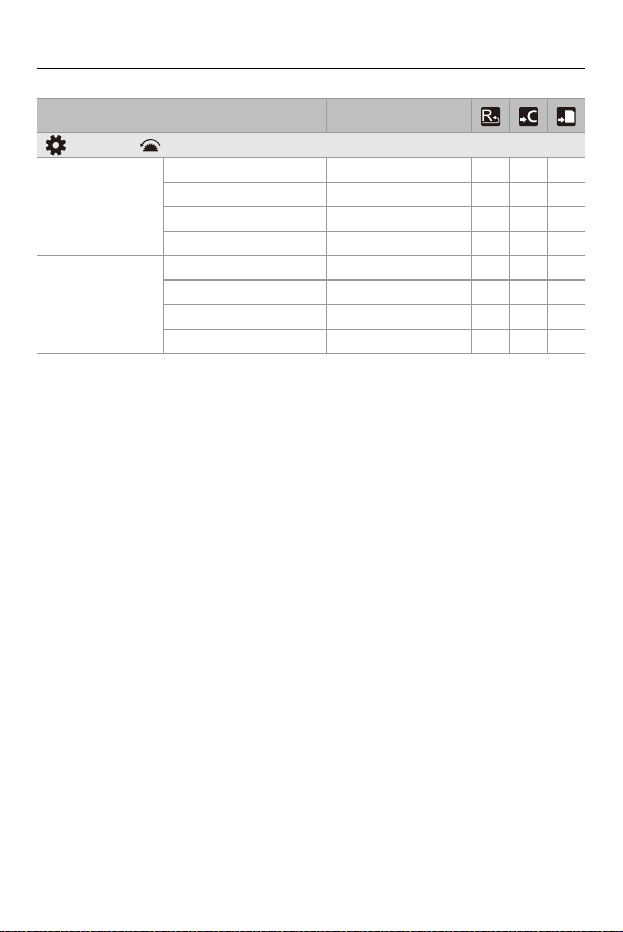
Materials – List of Default Settings/Custom Saving/Settings Available for Copying
791
Menu Default setting
[Custom]: [Operation]
[Q.MENU Settings]
[Layout Style] [MODE1] 333
[Front Dial Assignment] [Value] 333
[Item Customize (Photo)] — 333
[Item Customize (Video)] — 333
[Touch Settings]
[Touch Screen] [ON] 333
[Touch Tab] [OFF] 333
[Touch AF] [AF] 333
[Touch Pad AF] [OFF] 333
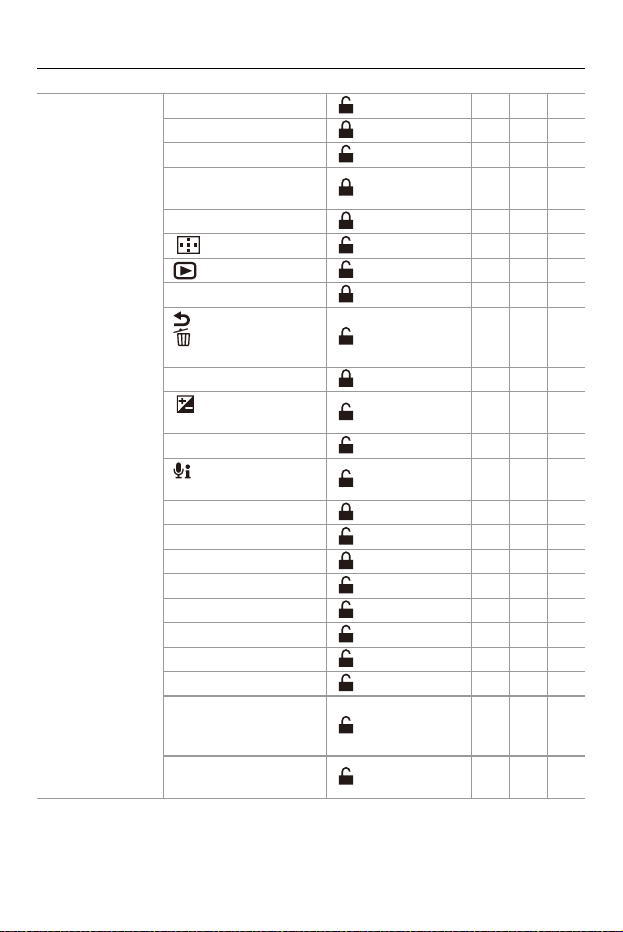
Materials – List of Default Settings/Custom Saving/Settings Available for Copying
792
[Lock Lever Setting]
[AF ON] button [ ] 333
Joystick [ ] 333
[Q] button [ ] 333
Cursor buttons / [MENU/
SET] button
[] 333
Control dial [ ] 333
[ ] (AF mode) button [ ] 333
[ ] (Playback) button [ ] 333
Touch screen [ ] 333
[ ] (Cancel) button /
[ ] (Delete) button / Fn
button (Fn1)
[] 333
[DISP.] button [ ] 333
[ ] (Exposure
compensation) button
[] 333
[ISO] button [ ] 333
[ ] (Audio information)
button
[] 333
Rear dial [ ] 333
Video rec. button [ ] 333
Front dial [ ] 333
[WB] button [ ] 333
[LVF] button [ ] 333
Shutter button [ ] 333
Sub video rec. button [ ] 333
Lens [ ] 333
Enlarged live display
(video) button / Fn button
(Fn2)
[] 333
Preview button / Fn button
(Fn3)
[] 333
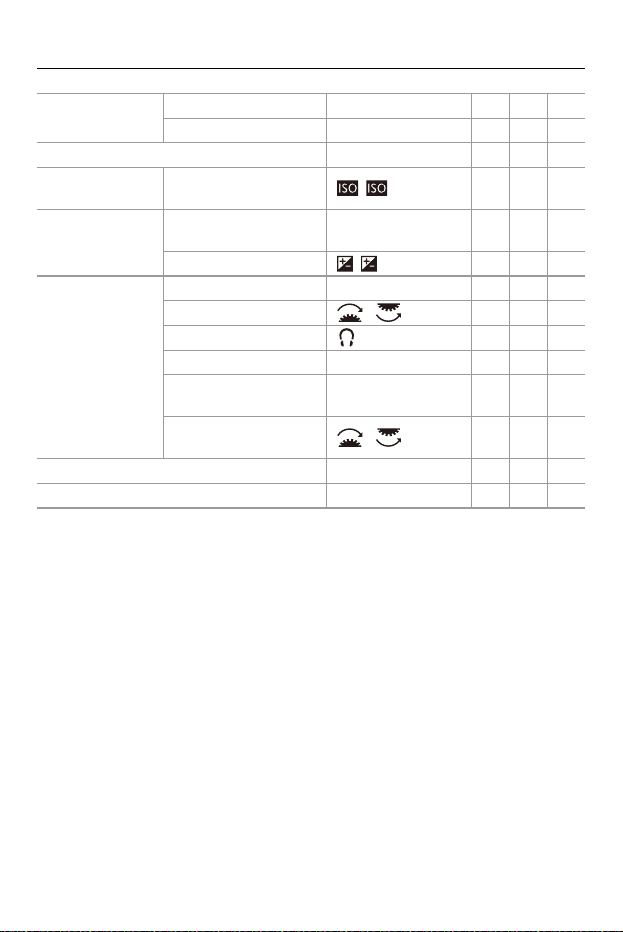
Materials – List of Default Settings/Custom Saving/Settings Available for Copying
793
[Fn Button Set]
[Setting in REC mode] — 333
[Setting in PLAY mode] — 333
[WB/ISO/Expo. Button] [AFTER PRESSING2] 333
[ISO Displayed
Setting]
[Front/Rear Dials] [ / ] 333
[Exposure Comp.
Disp. Setting]
[Cursor Buttons (Up/
Down)]
[OFF] 333
[Front/Rear Dials] [ / ] 333
[Dial Set.]
[Assign Dial (F/SS)] [SET1] 333
[Rotation (F/SS)] [ ] 333
[Control Dial Assignment] [ ] 333
[Exposure Comp.] [OFF] 333
[Dial Operation Switch
Setup]
— 333
[Rotation (Menu
Operation)]
[] 333
[Joystick Setting] [D.FOCUS Movement] 333
[Video Rec. Button (Remote)] [Video Record] 333
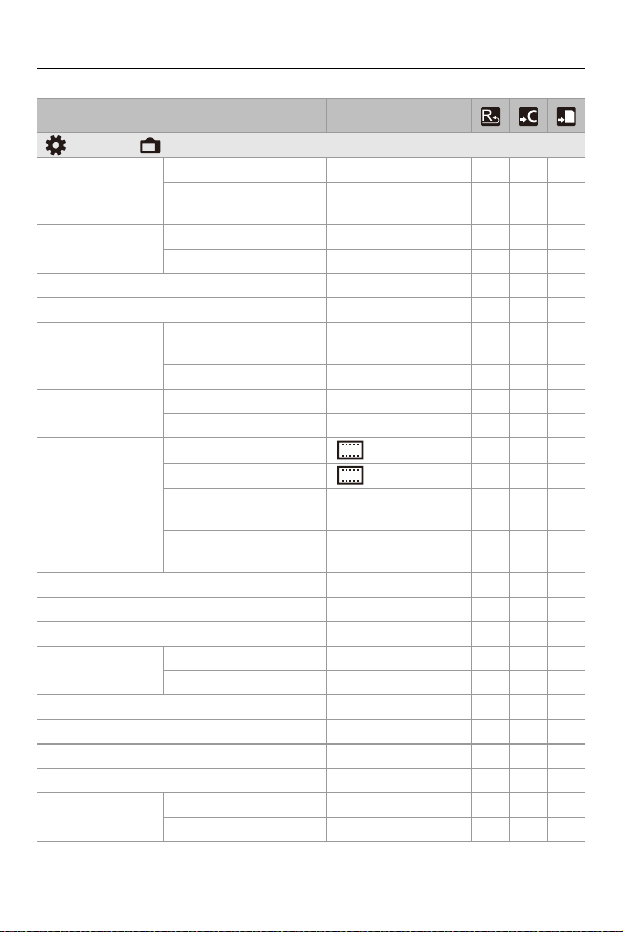
Materials – List of Default Settings/Custom Saving/Settings Available for Copying
794
Menu Default setting
[Custom]: [Monitor / Display (Photo)]
[Auto Review]
[Duration Time (photo)] [OFF] 333
[Playback Operation
Priority]
[OFF] 333
[Constant Preview]
[ON] / [OFF] [OFF] 333
[SET] — 333
[Histogram] [OFF] 333
[Photo Grid Line] [OFF] 333
[Live View Boost]
[MODE1] / [MODE2] /
[OFF]
[OFF] 333
[SET] [M] 333
[Night Mode]
[Monitor] [OFF] 333
[LVF] [OFF] 333
[LVF/Monitor Disp.
Set]
[LVF Disp. Set] [ ] 333
[Monitor Disp. Set] [ ] 333
[Horizontal Image
Flip(Monitor)]
[AUTO] 333
[Vertical Image
Flip(Monitor)]
[AUTO] 333
[Expo.Meter] [OFF] 333
[Focal Length] [ON] 333
[Blinking Highlights] [OFF] 333
[Sheer Overlay]
[ON] / [OFF] [OFF] 3
[SET] — 3
[I.S. Status Scope] [OFF] 333
[Level Gauge] [ON] 333
[Luminance Spot Meter] [OFF] 333
[Framing Outline] [OFF] 333
[Show/Hide Monitor
Layout]
[Control Panel] [ON] 333
[Black Screen] [ON] 333
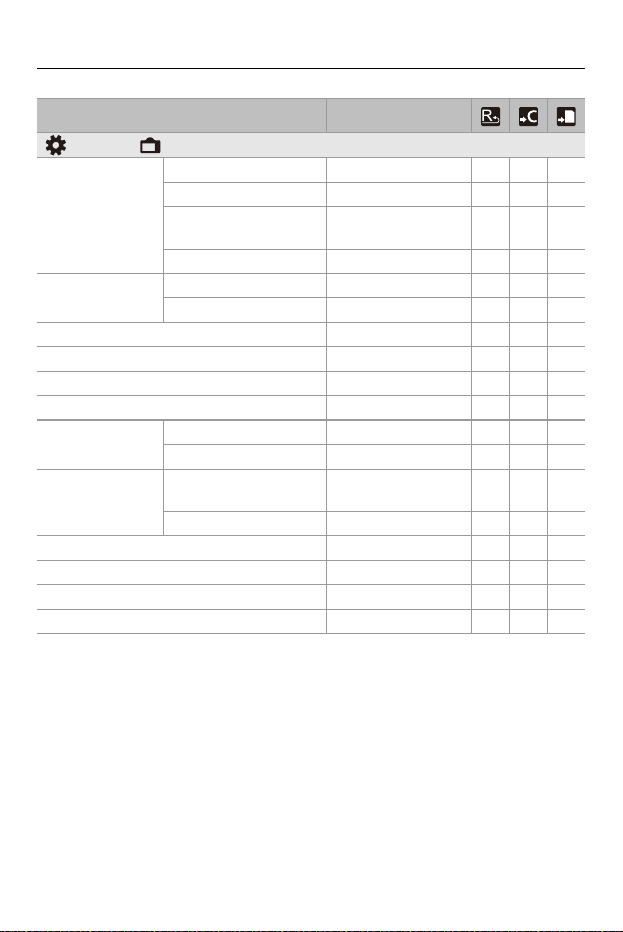
Materials – List of Default Settings/Custom Saving/Settings Available for Copying
795
Menu Default setting
[Custom]: [Monitor / Display (Video)]
[V-Log View Assist]
[Read LUT File] —
[LUT Select] [Vlog_709] 333
[LUT View Assist
(Monitor)]
[OFF] 333
[LUT View Assist (HDMI)] [OFF] 333
[HLG View Assist]
[Monitor] [MODE2] 333
[HDMI] [AUTO] 333
[Anamorphic Desqueeze Display] [OFF] 333
[Monochrome Live View] [OFF] 333
[Center Marker] [OFF] 333
[Safety Zone Marker] [OFF] 333
[Frame Marker]
[ON] / [OFF] [OFF] 333
[SET] — 333
[Zebra Pattern]
[ZEBRA1] / [ZEBRA2] /
[ZEBRA1+2] / [OFF]
[OFF] 333
[SET] — 333
[WFM/Vector Scope] [OFF] 333
[Color Bars] [SMPTE] 333
[Video-Priority Display] [OFF] 333
[Red REC Frame Indicator] [OFF] 333
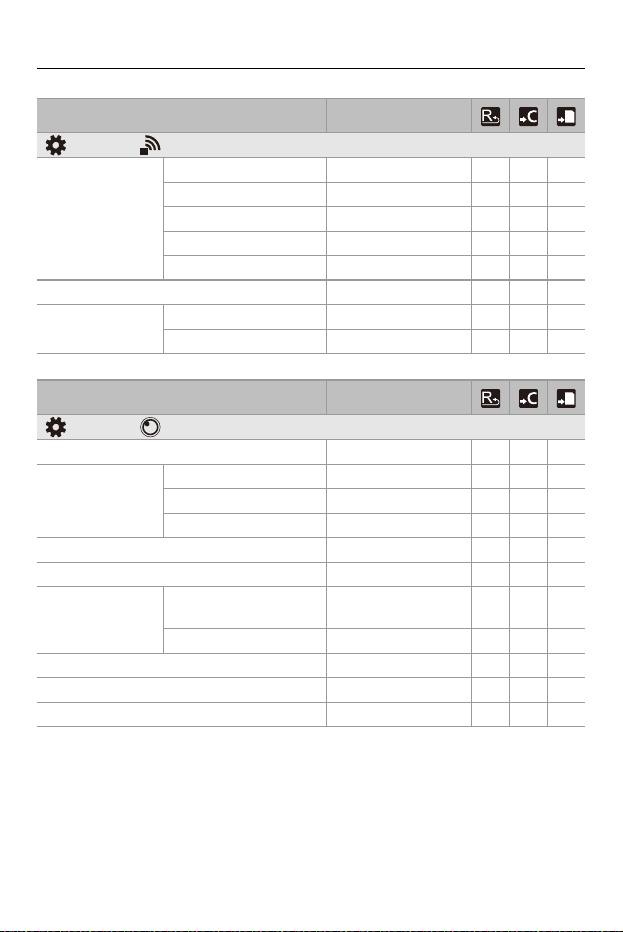
Materials – List of Default Settings/Custom Saving/Settings Available for Copying
796
Menu Default setting
[Custom]: [IN/OUT]
[HDMI Rec Output]
[Info Display] [OFF] 333
[Down Convert] [AUTO] 333
[HDMI Recording Control] [OFF] 333
[Sound Output (HDMI)] [ON] 333
[Enlarged Live Display] [OFF] 333
[Fan Mode] [AUTO2] 333
[Tally Lamp]
[Front Tally Lamp] [H] 333
[Rear Tally Lamp] [L] 333
Menu Default setting
[Custom]: [Lens / Others]
[Lens Focus Resume] [OFF] 333
[Power Zoom Lens]
[Step Zoom] [OFF] 333
[Zoom Speed] — 333
[Zoom Ring] [ON] 333
[Lens Fn Button Setting] [Focus Stop] 333
[Aperture Ring Increment] [1/3EV] 333
[Focus Ring
Control]
[NON-LINEAR] /
[LINEAR]
[NON-LINEAR] 333
[SET] [300°] 333
[Lens Information] [Lens1] 33
[Lens Info. Confirmation] [ON] 333
[Vertical Position Info (Video)] [ON] 333
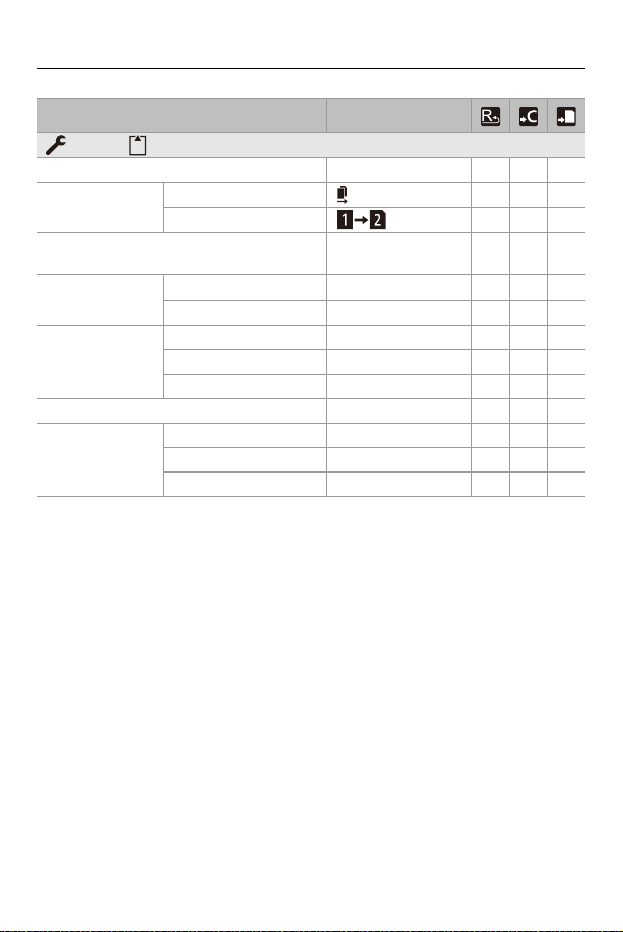
Materials – List of Default Settings/Custom Saving/Settings Available for Copying
797
Menu Default setting
[Setup]: [Card/File]
[Card Format] —
[Double Card Slot
Function]
[Recording Method] [ ] 33
[Destination Card Slot] [ ] 33
[Video File Name]
[Same As Photo(DCF
Standard)]
33
[CINE Style File
Setting]
[Camera Index] [A] 33
[Next Card Number] [001] 33
[Folder / File
Settings]
[Select Folder] —
[Create a New Folder] —
[File Name Setting] [Folder Number Link] 33
[File Number Reset] —
[Copyright
Information]
[Artist] [OFF] 33
[Copyright Holder] [OFF] 33
[Display Copyright Info.] —
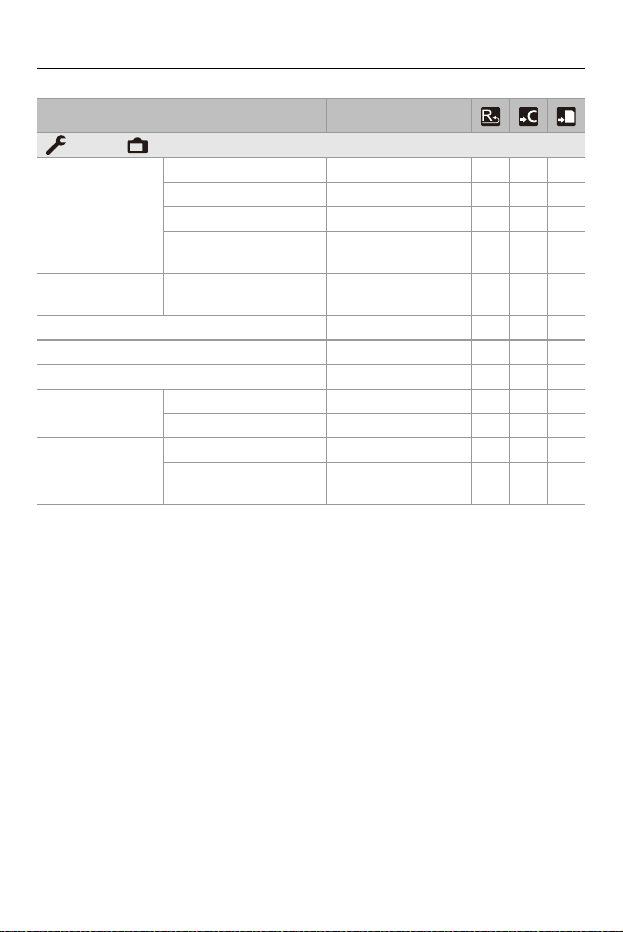
Materials – List of Default Settings/Custom Saving/Settings Available for Copying
798
Menu Default setting
[Setup]: [Monitor / Display]
[Power Save Mode]
[Sleep Mode] [5MIN.] 33
[Sleep Mode(Wi-Fi)] [ON] 33
[Auto LVF/Monitor Off] [5MIN.] 33
[Power Save LVF
Shooting]
— 33
[Thermal
Management]
[Recording Max
Temperature]
[STANDARD] 33
[Monitor Frame Rate] [60fps] 33
[Monitor Settings] / [Viewfinder] — 33
[Monitor Backlight] / [LVF Luminance] [AUTO] 33
[Eye Sensor]
[Sensitivity] [HIGH] 33
[LVF/Monitor Switch] [LVF/MON AUTO] 33
[Level Gauge
Adjust.]
[Adjust.] — 3
[Level Gauge Value
Reset]
—
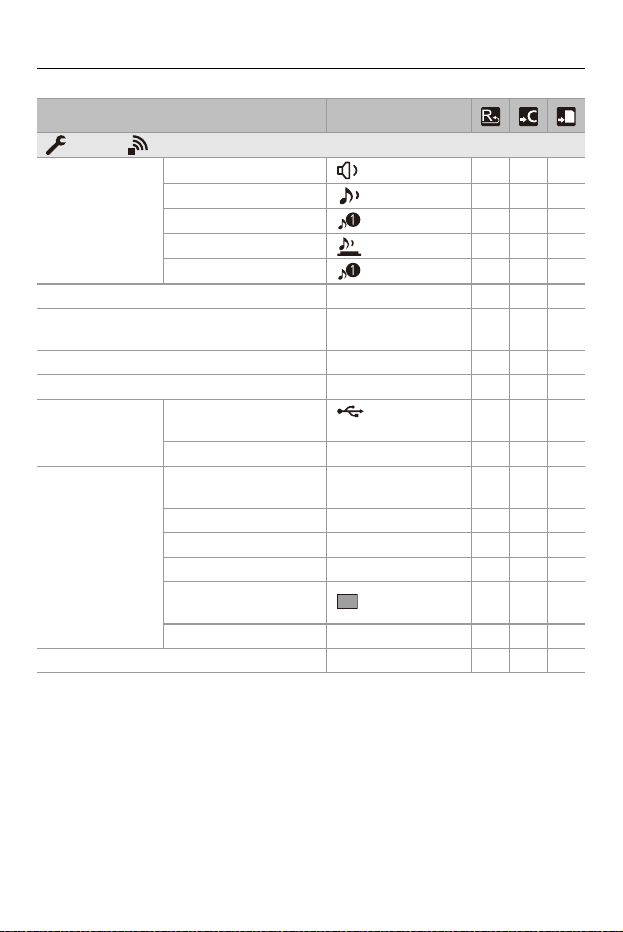
Materials – List of Default Settings/Custom Saving/Settings Available for Copying
799
Menu Default setting
[Setup]: [IN/OUT]
[Beep]
[Beep Volume] [ ] 33
[AF Beep Volume] [ ] 33
[AF Beep Tone] [ ] 33
[E-Shutter Vol] [ ] 33
[E-Shutter Tone] [ ] 33
[Headphone Volume] [LEVEL3] 33
[Sound Monitoring Channel(Play)]
[COMBINED WITH
REC]
333
[Wi-Fi] — 3
[Bluetooth] — 3
[USB]
[USB Mode]
[ ] [Select on
connection]
33
[USB Power Supply] [ON] 33
[HDMI Connection]
[Output
Resolution(Playback)]
[AUTO] 33
[LUT View Assist (HDMI)] [OFF] 333
[HLG View Assist (HDMI)] [AUTO] 333
[VIERA Link (CEC)] [OFF] 33
[Background
Color(Playback)]
[] 33
[Photo Luminance Level] [16-255] 33
[Power/Network Indicator] [ON] 33
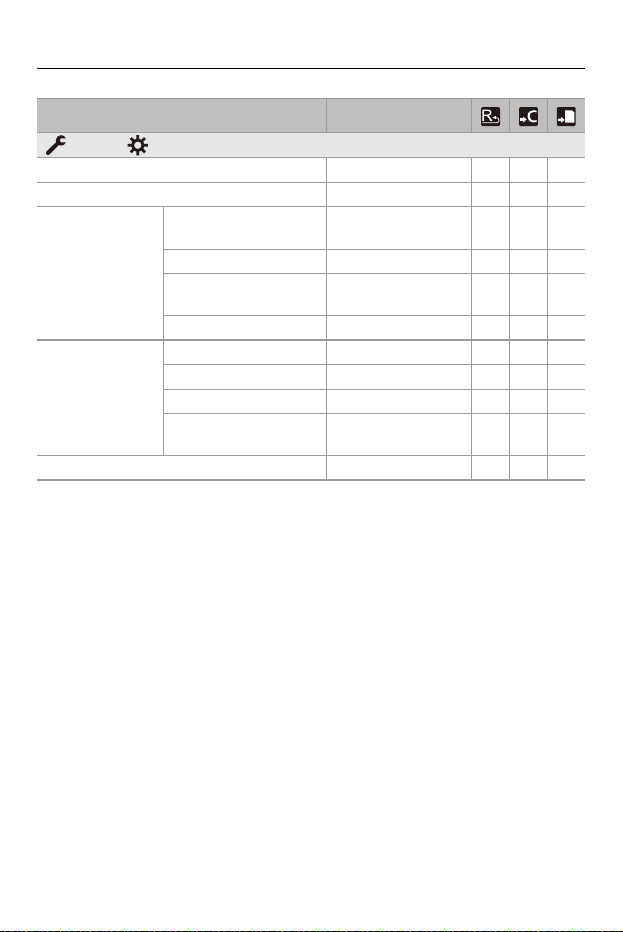
Materials – List of Default Settings/Custom Saving/Settings Available for Copying
800
Menu Default setting
[Setup]: [Setting]
[Save to Custom Mode] — 33
[Load Custom Mode] — 33
[Custom Mode
Settings]
[Limit No. of Custom
Mode]
[3] 33
[Edit Title] — 33
[How to Reload Custom
Mode]
— 33
[Select Loading Details] — 33
[Save/Restore
Camera Setting]
[Save] —
[Load] —
[Delete] —
[Keep Settings While
Format]
[OFF] 33
[Reset] —
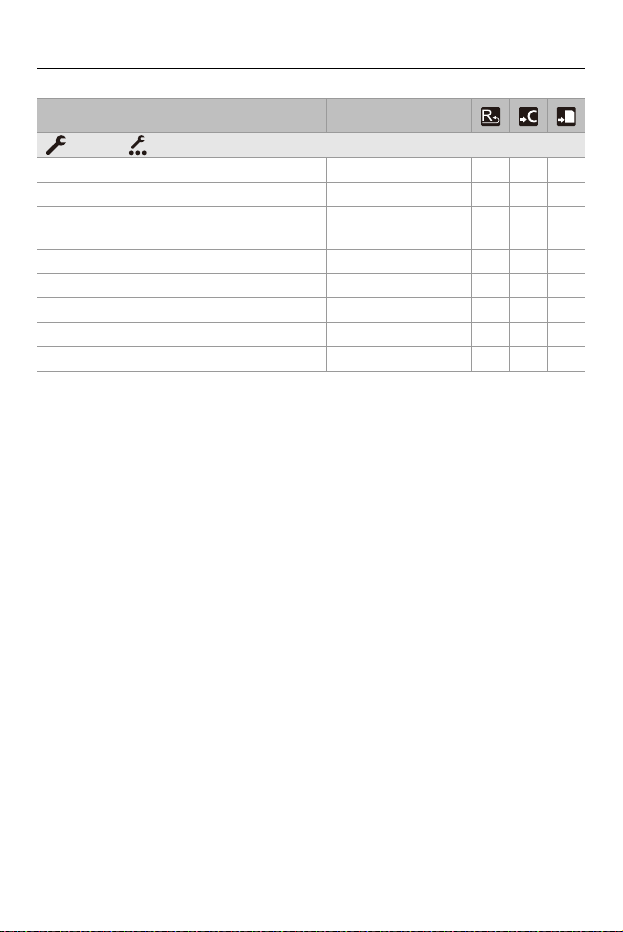
Materials – List of Default Settings/Custom Saving/Settings Available for Copying
801
*1 Default setting specifications vary depending on the country or area where the
camera was purchased.
*2 Depending on the country or area where the camera was purchased, this is not
displayed due to differences in specifications.
Menu Default setting
[Setup]: [Others]
[Clock Set] 0:00:00 1/1/2022
[Time Zone] *1 3
[System Frequency]
[59.94Hz (NTSC)] /
[50.00Hz (PAL)]
*1
33
[Pixel Refresh] —
[Sensor Cleaning] —
[Language] *1 33
[Firmware Version] —
[Approved Regulations]
*2
—
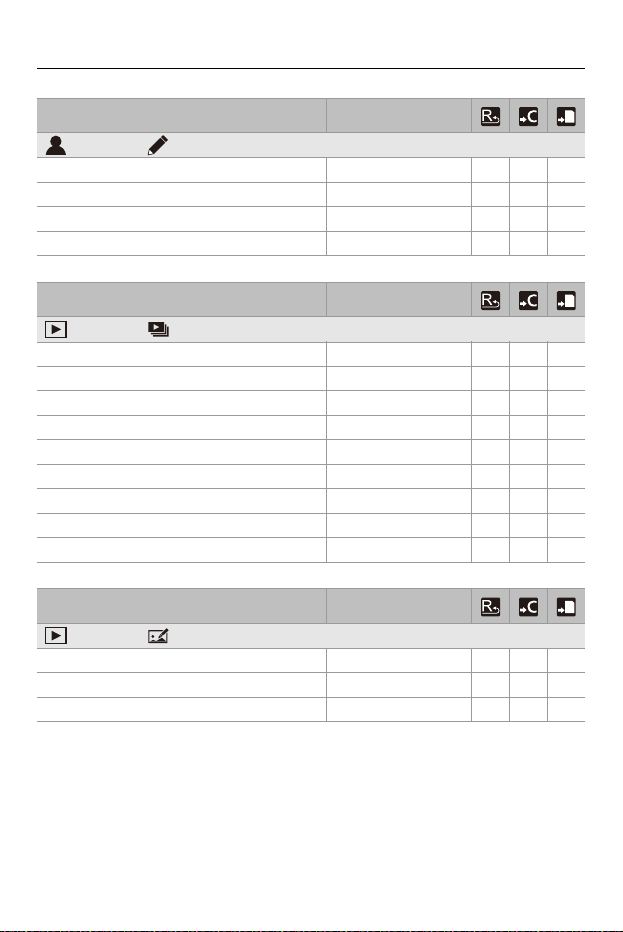
Materials – List of Default Settings/Custom Saving/Settings Available for Copying
802
Menu Default setting
[My Menu]: [Edit My Menu]
[Add] — 33
[Sorting] —
[Delete] —
[Display from My Menu] [OFF] 33
Menu Default setting
[Playback]: [Playback Mode]
[Playback Mode] [Normal Play] 33
[Slide Show] — 33
[Rotate Disp.] [ON] 33
[Picture Sort] [DATE/TIME] 33
[Magnify from AF Point] [OFF] 33
[LUT View Assist (Monitor)] [OFF] 333
[HLG View Assist (Monitor)] [MODE2] 333
[Anamorphic Desqueeze Display] [OFF] 333
[Behavior After Video Playback] [End Playback] 33
Menu Default setting
[Playback]: [Process Image]
[RAW Processing] —
[Time Lapse Video] —
[Stop Motion Video] —
Materials – List of Default Settings/Custom Saving/Settings Available for Copying
803
Menu Default setting
[Playback]: [Add/Delete Info.]
[Protect] —
[Rating] —
Menu Default setting
[Playback]: [Edit Image]
[Resize] —
[Rotate] —
[Video Divide] —
[Copy] —
Menu Default setting
[Playback]: [Others]
[Delete Confirmation] ["No" first] 33
[Delete All Images] —
Materials – List of Functions That Can Be Set in Each Recording Mode
804
List of Functions That Can Be Set in Each
Recording Mode
Menu iA P A S M
[Photo]: [Image Quality]
[Photo Style] 33333
[Metering Mode] 3333
[Aspect Ratio] 33333
[Picture Quality] 33333
[Picture Size] 33333
[High Resolution Mode
Setting]
[Handheld High-Res] 3333
[Picture Quality] 3333
[Picture Size] 3333
[Simul Record Normal
Shot]
3333
[Shutter Delay] 3333
[Motion Blur Processing] 3333
[Long Exposure NR] 3333
[ISO Sensitivity (photo)]
[ISO Auto Lower Limit
Setting]
3333
[ISO Auto Upper Limit
Setting]
3333
[Min. Shutter Speed] 33
[Vignetting Comp.] 3333
[Diffraction Compensation] 3333
[Filter Settings]
[Filter Effect] 3333
[Simultaneous Record w/
o Filter]
3333
Materials – List of Functions That Can Be Set in Each Recording Mode
805
Menu iA P A S M
[Photo]: [Focus]
[AF Detection Setting] 3333
[Detecting Subject] 3333
[AF Custom Setting(Photo)] 3333
[Focus Limiter] 33333
[AF Assist Light] 3333
[Focus Peaking]
[ON] / [OFF] 33333
[SET] 33333
[1-Area AF Moving Speed] 33333
Menu iA P A S M
[Photo]: [Flash]
[Flash Mode] 33333
[Firing Mode] 3333
[Flash Adjust.] 3333
[Flash Synchro] 3333
[Manual Flash Adjust.] 3333
[Auto Exposure Comp.] 3333
[Wireless] 3333
[Wireless Channel] 3333
[Wireless FP] 3333
[Communication Light] 3333
[Wireless Setup] 3333
Materials – List of Functions That Can Be Set in Each Recording Mode
806
Menu iA P A S M
[Photo]: [Others (Photo)]
[Bracketing]
[Bracketing Type] 33333
[More Settings] 33333
[Silent Mode] 33333
[Image Stabilizer]
[Operation Mode] 33333
[E-Stabilization (Video)] 33333
[Boost I.S. (Video)] 33333
[Anamorphic (Video)] 33333
[Lens Information] 33333
[Burst Shot Setting]
[Burst Shot 1 Setting] 33333
[Burst Shot 2 Setting] 33333
[Shutter Type] 33333
[Shutter Delay] 33333
[Ex. Tele Conv.] 33333
[Time Lapse/Animation] 33333
[Self Timer] 33333
Materials – List of Functions That Can Be Set in Each Recording Mode
807
Menu iA P A S M
[Video]: [Image Quality]
[Exposure Mode] 3
[Photo Style] 333333
[Metering Mode] 33333
[Dynamic Range Boost] 3
[ISO Sensitivity (video)]
[ISO Auto Lower Limit
Setting]
3
[ISO Auto Upper Limit
Setting]
3
[Synchro Scan] 3
[Flicker Decrease (Video)] 3333
[Master Pedestal Level] 3
[SS/Gain Operation] 3
[Vignetting Comp.] 33333
[Diffraction Compensation] 33333
[Filter Settings]
[Filter Effect] 33333
[Simultaneous Record w/
o Filter]
3333
Materials – List of Functions That Can Be Set in Each Recording Mode
808
Menu iA P A S M
[Video]: [Image Format]
[Rec. File Format] 333333
[Image Area of Video] 333333
[Rec Quality] 333333
[Rec Quality (My List)] 333333
[Variable Frame Rate] 3
[Time Code]
[Time Code Display] 333333
[Count Up] 333333
[Time Code Value] 333333
[Time Code Mode] 333333
[HDMI Time Code
Output]
3
[External TC Setting] 3
[Luminance Level] 333333
Menu iA P A S M
[Video]: [Focus]
[AF Detection Setting] 33333
[Detecting Subject] 33333
[AF Custom
Setting(Video)]
[ON] / [OFF] 333333
[SET] 333333
[Focus Limiter] [OFF] 333333
[Continuous AF] 333333
[AF Assist Light] 33333
[Focus Peaking]
[ON] / [OFF] 333333
[SET] 333333
[1-Area AF Moving Speed] 333333
Materials – List of Functions That Can Be Set in Each Recording Mode
809
Menu iA P A S M
[Video]: [Audio]
[Sound Rec Level Disp.] 333333
[Mute Sound Input] 333333
[Sound Rec Gain Level] 333333
[Sound Rec Level Adj.] 333333
[Sound Rec Quality] 333333
[Sound Rec Level Limiter] 333333
[Wind Noise Canceller] 333333
[Wind Cut] 333333
[Lens Noise Cut] 333333
[Mic Socket] 333333
[Special Mic.] 333333
[4ch Mic Input] 333333
[XLR Mic Adaptor Setting] 333333
[Sound Output] 333333
[Headphone Volume] 333333
[Sound Monitoring Channel] 333333
Materials – List of Functions That Can Be Set in Each Recording Mode
810
Menu iA P A S M
[Video]: [Others (Video)]
[Silent Mode] 333333
[Image Stabilizer]
[Operation Mode] 333333
[E-Stabilization (Video)] 333333
[Boost I.S. (Video)] 333333
[Anamorphic (Video)] 333333
[Lens Information] 333333
[Self Timer Setting]
[Self Timer] 333333
[Self Timer For Video] 333333
[Focus Transition] 3
[Loop Recording (video)] 3
[Segmented File Recording] 333333

Materials – Specifications
811
Specifications
The specifications are subject to change for performance enhancement.
Digital camera body (DC-GH6):
Information for your safety
Type
≥ Type
Digital Single Lens Mirrorless camera
≥ Recording media
Card slot 1: CFexpress Type B card
Card slot 2: SD memory card / SDHC memory card
*1
/ SDXC memory card
*1
*1 Compliant with UHS-I/UHS-II UHS Speed Class 3, UHS-II Video Speed Class 90
Double slot recording function is available.
≥ Lens mount
Micro Four Thirds Mount
Power source:
9.0 V
Power consumption:
4.8 W (when recording with the monitor), 3.8 W (when playing back with the
monitor)
[When using the interchangeable lens (H-ES12060)]
4.6 W (when recording with the monitor), 3.6 W (when playing back with the
monitor)
[When using the interchangeable lens (H-FS12060)]

Materials – Specifications
812
Image sensor
≥ Image sensor
4/3″ Live MOS sensor, a total of 26,520,000 pixels, primary color filter
≥ Effective number of pixels of the camera
25,210,000 pixels
Latitude
13+ stops (when [Dynamic Range Boost] is set to [ON]),
12+ stops (when [Dynamic Range Boost] is set to [OFF]) ([V-Log])
Recording format for still images
≥ File format for still images
JPEG (DCF compliant, Exif 2.31 compliant) / RAW
≥ Picture size (pixels)
When the aspect ratio setting is [4:3]
[L]: 5776×4336
[M]: 4096×3072
[S]: 2944×2208
High Resolution mode ([XL]): 11552×8672
High Resolution mode ([LL]): 8192×6144
When the aspect ratio setting is [3:2]
[L]: 5776×3848
[M]: 4096×2728
[S]: 2944×1960
High Resolution mode ([XL]): 11552×7696
High Resolution mode ([LL]): 8192×5464

Materials – Specifications
813
When the aspect ratio setting is [16:9]
[L]: 5776×3248
[M]: 4096×2304
[S]: 2944×1656
High Resolution mode ([XL]): 11552×6496
High Resolution mode ([LL]): 8192×4608
When the aspect ratio setting is [1:1]
[L]: 4336×4336
[M]: 3072×3072
[S]: 2208×2208
High Resolution mode ([XL]): 8672×8672
High Resolution mode ([LL]): 6144×6144
≥ Image quality for pictures
Fine / Standard / RAW+Fine / RAW+Standard / RAW
Recording format for video
≥ Video format
MP4 (H.264/MPEG-4 AVC, H.265/HEVC) / MOV (H.264/MPEG-4 AVC, H.265/
HEVC, Apple ProRes)
≥ Audio compression format
MP4: AAC (2ch, 48 kHz/16 bit)
MOV: LPCM (2ch, 48 kHz/24 bit, 96 kHz/24 bit)
*2
*2 LPCM (2ch, 48 kHz/24 bit, 96 kHz/24 bit and 4ch, 48 kHz/24 bit, 96 kHz/24 bit)
is available for selection when an XLR Microphone Adaptor (DMW-XLR1:
optional) is attached
≥ System frequency
59.94 Hz / 50.00 Hz / 24.00 Hz
≥ Image quality for video
Refer to the “[Rec Quality]” pages for information about resolution, recording frame
rate, and other elements of recording quality. (Î[Rec Quality]: 136)

Materials – Specifications
814
Viewfinder
≥ Type
Aspect ratio 4:3, 0.5 inches, approx. 3,680,000 dots, organic EL (OLED) live view
viewfinder
≥ Field of view ratio
Approx. 100 %
≥ Magnification
Approx. 1.52×, Approx. 0.76× (35 mm film camera equivalent), −1.0m
−1
50 mm at
infinity, with aspect ratio set to [4:3]
≥ Eye point
Approx. 21 mm (at −1.0 m
−1
)
≥ Diopter adjustment range
−4.0 to +3.0 diopter
≥ Eye sensor
Yes
Monitor
≥ Type
Aspect ratio 3:2, 3.0 inches, approx. 1,840,000 dots monitor, capacitive touch screen
≥ Field of view ratio
Approx. 100 %

Materials – Specifications
815
Focus
≥ AF type
TTL type based on image detection (Contrast AF)
≥ Focus mode
AFS / AFC / MF
≥ AF mode
Tracking / Full Area AF / Zone (Horizontal/Vertical) / Zone / 1-Area+Supplementary /
1-Area / Pinpoint
Focus area selection is possible by touching or with the joystick
Exposure control
≥ Light metering system, Light metering mode
1728-zone metering, multi-metering / center-weighted metering / spot metering /
highlight-weighted metering
≥ Metering range
EV 0 to EV 18 (F2.0 lens, ISO100 conversion)
≥ Exposure
Program AE (P) / Aperture-Priority AE (A) / Shutter-Priority AE (S) / Manual
Exposure (M)
≥ Exposure compensation
1/3 EV steps, ±5 EV
≥ ISO sensitivity for still images (standard output sensitivity)
Normal: AUTO / 50
*3
/ 100 to 25600
[V-Log]: AUTO / 125
*3
/ 250 to 12800
*3 When [Extended ISO] is set
• Switchable between 1/3 EV and 1 EV steps

Materials – Specifications
816
≥ ISO sensitivity for video (standard output sensitivity)
Normal:
[Dynamic Range Boost]
[OFF]: AUTO / 50
*4
/ 100 to 12800 (base sensitivity ISO100)
[ON]
*5
: AUTO / 800 to 12800 (base sensitivity ISO800)
[V-Log]:
[Dynamic Range Boost]
[OFF]: AUTO / 125
*4
/ 250 to 12800 (base sensitivity ISO250)
[ON]
*5
: AUTO / 2000 to 12800 (base sensitivity ISO2000)
[Hybrid Log Gamma]:
[Dynamic Range Boost]
[OFF]: AUTO / 250 to 12800 (base sensitivity ISO250)
[ON]
*5
: AUTO / 2000 to 12800 (base sensitivity ISO2000)
*4 When [Extended ISO] is set
*5 Available for selection in the Creative Video mode
• Switchable between 1/3 EV and 1 EV steps
Image stabilizer
≥ Image stabilizer type
Compliant with Image sensor shift type, 5-axis stabilizer, Dual I.S.2
≥ Image stabilizer effect
In-body image stabilizer: 7.5 stops
[Focal length f=60 mm (35 mm film camera equivalent f=120 mm), using an
interchangeable lens (H-ES12060)]
Dual I.S.2: 7.5 stops
[Focal length f=140 mm (35 mm film camera equivalent f=280 mm), using an
interchangeable lens (H-FS14140)]
(Based on the CIPA standard, Yaw/Pitch direction)

Materials – Specifications
817
White balance
≥ White balance mode
AWB / AWBc / AWBw / Daylight / Cloudy / Shade / Incandescent lights / Flash / Set
mode 1, 2, 3, 4 / Color temperature 1, 2, 3, 4
Shutter
≥ Type
Focal-plane shutter
≥ Shutter speed
Pictures:
Mechanical shutter: Bulb (max. approx. 30 minutes), 60 seconds to 1/8000 of a
second
Electronic front curtain: Bulb (max. approx. 30 minutes), 60 seconds to 1/2000 of a
second
Electronic shutter: Bulb (max. approx. 60 seconds), 60 seconds to 1/32000 of a
second
Videos:
1/25
*6
of a second to 1/25000 of a second
*6 When [Exposure Mode] is set to [M] in Creative Video mode and focus mode is
set to [MF], this can be set up to 1/8 of a second
≥ Flash synchronization speed
Equal to or smaller than 1/250 of a second

Materials – Specifications
818
Burst recording
≥ Mechanical shutter/Electronic front curtain
High speed: 14 frames/second ([AFS], [MF]) / 8 frames/second ([AFC])
Medium speed: 6 frames/second ([AFS], [MF]) / 5 frames/second ([AFC])
Low speed: 2 frames/second
≥ Electronic shutter
[SH75]: 75 frames/second ([AFS], [MF])
[SH60]: 60 frames/second ([AFS], [MF])
[SH20]: 20 frames/second ([AFS], [MF])
High speed: 14 frames/second ([AFS], [MF]) / 7 frames/second ([AFC])
Medium speed: 6 frames/second ([AFS], [MF]) / 5 frames/second ([AFC])
Low speed: 2 frames/second
≥ Maximum number of frames recordable (SH burst recording)
[FINE] / [STD.] / [RAW+FINE] / [RAW+STD.] / [RAW]: 200 frames
≥ Maximum number of frames recordable (High speed, medium speed, low
speed)
[FINE] / [STD.]: 95 frames or more
*7
/ 90 frames or more
*8
[RAW+FINE] / [RAW+STD.]: 40 frames or more
[RAW]: 65 frames or more
*7
/ 50 frames or more
*8
*7 Using a CFexpress Type B card
*8 Using an SDXC memory card compliant with UHS-II UHS Speed Class 3
(When recording is performed under the test conditions specified by Panasonic)
Zoom
≥ Extended Tele Conversion (Picture)
Max. 2× (when a picture size of [S] is selected.)
Microphone / Speaker
≥ Microphone
Stereo
≥ Speaker
Monaural

Materials – Specifications
819
Interface
≥ USB
USB Type-C
®
, SuperSpeed USB 10Gbps (USB 3.2 Gen 2)
Supports USB Power Delivery (9.0 V/3.0 A)
≥ HDMI
HDMI Type A
≥ [REMOTE]
‰2.5 mm jack
≥ [MIC]
‰3.5 mm stereo mini jack
Mic Input (Plug-in Power) / Mic Input / Line Input (Operate the menu to switch
between these inputs)
Standard input level: −55 dBV (Mic Input) / −10 dBV (Line Input)
≥ Headphones
‰3.5 mm stereo mini jack
≥ Flash Synchro
Yes
≥ TC IN/OUT
Yes (connect the BNC conversion cable (supplied) to the flash synchro socket)
Input: 1.0 V to 4.0 V [p-p], 10 kΩ
Output: 2.0 V ±0.5 V [p-p], low impedance
Splash Resistant
Yes

Materials – Specifications
820
External dimensions / Mass (Weight)
≥ External dimensions
Approx. 138.4 mm (W)×100.3 mm (H)×99.6 mm (D)
(5.45″ (W)×3.95″ (H)×3.92″ (D))
(excluding the projecting parts)
≥ Mass (Weight)
Approx. 823
g/1.81 lb (camera body, with battery and one SD memory card)
Approx. 739
g/1.63 lb (only camera body)
Operating environment
≥ Recommended operating temperature
−10 oC to 40 oC (14 oF to 104 oF)
• Battery performance temporarily worsens at low temperatures (−10 oC to 0 oC
(14 oF to 32 oF)), reducing the number of pictures that can be taken and the
available recording time.
≥ Permissible relative humidity
10 %RH to 80 %RH
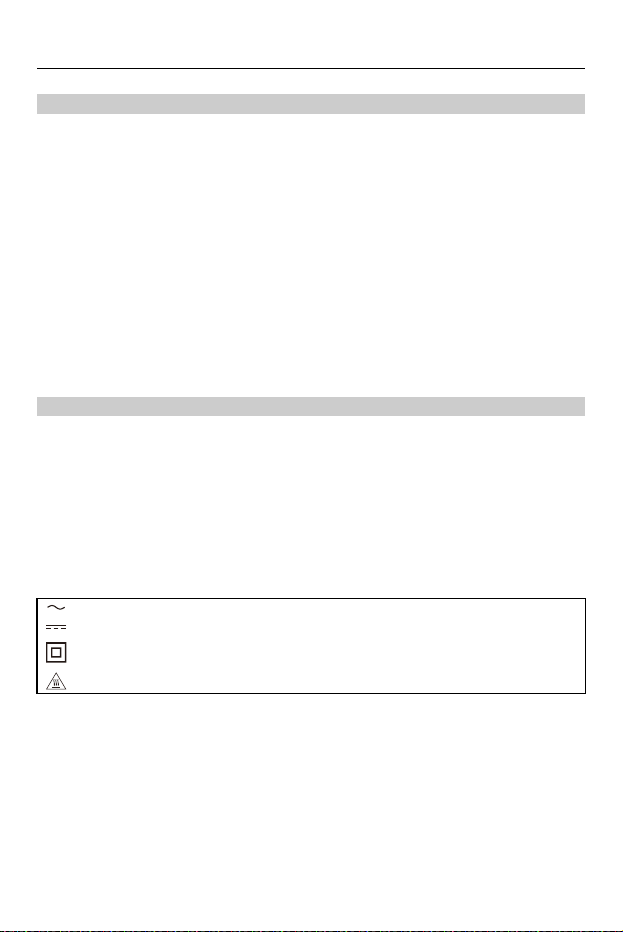
Materials – Specifications
821
Wi-Fi
≥ Compliance standard
IEEE 802.11a/b/g/n/ac (standard wireless LAN protocol)
≥ Frequency range used (central frequency)
Specifications vary depending on the country or area where the camera was
purchased.
Refer to the “Operating Instructions / Owner’s Manual <Quick Start Guide>”
(supplied) for details.
≥ Encryption method
Wi-Fi compliant WPA™ / WPA2™ / WPA3™
≥ Access method
Infrastructure mode
Bluetooth
≥ Compliance standard
Bluetooth v5.0, Bluetooth Low Energy (BLE)
≥ Frequency range used (central frequency)
2402 MHz to 2480 MHz
The symbols on this product (including the accessories) represent the
following:
AC
DC
Class II equipment (The construction of the product is double-insulated.)
Hot surfaces

Materials – Specifications
822
Interchangeable Lens:
H-ES12060 “LEICA DG VARIO-ELMARIT 12-60mm/F2.8-4.0 ASPH./
POWER O.I.S.”
≥ Mount
Micro Four Thirds Mount
≥ Focal length
f=12 mm to 60 mm
(35 mm film camera equivalent: 24 mm to 120 mm)
≥ Lens construction
14 elements in 12 groups (4 aspherical lenses, 2 ED lenses)
≥ Aperture type
9 diaphragm blades/circular aperture diaphragm
≥ Maximum aperture
F2.8 (Wide) to F4.0 (Tele)
≥ Minimum aperture value
F22
≥ Angle of view
84o (Wide) to 20o (Tele)
≥ In focus distance
0.20 m (0.66 feet) to ¶ (Wide)/0.24 m (0.79 feet) to ¶ (Tele) (from the focus distance
reference line)
≥ Maximum image magnification
0.3× (35 mm film camera equivalent: 0.6×)
≥ Optical Image Stabilizer
Yes

Materials – Specifications
823
≥ Filter diameter
62 mm
≥ Maximum diameter
‰68.4 mm (2.7″)
≥ Overall length
Approx. 86 mm (3.4″) (from the tip of the lens to the base side of the lens mount)
≥ Mass (Weight)
Approx. 320
g (0.70 lb)
≥ Dust and splash resistant
Yes
≥ Recommended operating temperature
−10 oC to 40 oC (14 oF to 104 oF)
≥ Permissible relative humidity
10 %RH to 80 %RH

Materials – Specifications
824
Interchangeable Lens:
H-FS12060 “LUMIX G VARIO 12-60mm/F3.5-5.6 ASPH./POWER O.I.S.”
≥ Mount
Micro Four Thirds Mount
≥ Focal length
f=12 mm to 60 mm
(35 mm film camera equivalent: 24 mm to 120 mm)
≥ Lens construction
11 elements in 9 groups (3 aspherical lenses, 1 ED lens)
≥ Aperture type
7 diaphragm blades/circular aperture diaphragm
≥ Maximum aperture
F3.5 (Wide) to F5.6 (Tele)
≥ Minimum aperture value
F22
≥ Angle of view
84o (Wide) to 20o (Tele)
≥ In focus distance
0.20 m (0.66 feet) to ¶ (Wide)/0.25 m (0.82 feet) to ¶ (Tele) (from the focus distance
reference line)
≥ Maximum image magnification
0.27× (35 mm film camera equivalent: 0.54×)
≥ Optical Image Stabilizer
Yes

Materials – Specifications
825
≥ Filter diameter
58 mm
≥ Maximum diameter
‰66.0 mm (2.6″)
≥ Overall length
Approx. 71 mm (2.8″) (from the tip of the lens to the base side of the lens mount)
≥ Dust and splash resistant
Yes
≥ Recommended operating temperature
0 oC to 40 oC (32 oF to 104 oF)
≥ Permissible relative humidity
10 %RH to 80 %RH
≥ Mass (Weight)
Approx. 210
g (0.46 lb)
Materials – Trademarks and Licenses
826
Trademarks and Licenses
• Micro Four Thirds™ and Micro Four Thirds Logo marks are trademarks or registered
trademarks of OM Digital Solutions Corporation, in Japan, the United States, the
European Union and other countries.
• Lexar, the Lexar logo, and all other Lexar trademarks are the property of Longsys
Electronics (HK) Co., Ltd.
• SDXC Logo is a trademark of SD-3C, LLC.
• The terms HDMI and HDMI High-Definition Multimedia Interface, and the HDMI Logo
are trademarks or registered trademarks of HDMI Licensing Administrator, Inc. in the
United States and other countries.
Materials – Trademarks and Licenses
827
• USB Type-C
®
and USB-C
®
are registered trademarks of USB Implementers Forum.
• The USB Type-C
®
Charging Trident Logos are trademarks of USB Implementers
Forum, Inc.
• The SuperSpeed USB 10Gbps Trident Logo is a registered trademark of USB
Implementers Forum, Inc.
• QuickTime and the QuickTime logo are trademarks or registered trademarks of
Apple Inc., used under license therefrom.
• HDAVI Control™ is a trademark of Panasonic Corporation.
• Adobe is a trademark or registered trademark of Adobe Systems Incorporated in the
United States and/or other countries.
• Pentium is a trademark of Intel Corporation in the U.S. and/or other countries.
• Windows is a registered trademark or trademark of Microsoft Corporation in the
United States and/or other countries.
• Apple, Final Cut Pro, Mac, OS X, macOS, and ProRes are trademarks or registered
trademarks of Apple Inc. in the United States and/or other countries.
• App Store is a service mark of Apple Inc.
• Google, Android and Google Play are trademarks of Google LLC.
Materials – Trademarks and Licenses
828
• The Bluetooth
®
word mark and logos are registered trademarks owned by Bluetooth
SIG, Inc. and any use of such marks by Panasonic Corporation is under license.
Other trademarks and trade names are those of their respective owners.
• The Wi-Fi CERTIFIED™ Logo is a registered trademark of Wi-Fi Alliance
®
.
• The Wi-Fi Protected Setup™ Logo is a trademark of Wi-Fi Alliance
®
.
• “Wi-Fi
®
” is a registered trademark of Wi-Fi Alliance
®
.
• “Wi-Fi Protected Setup™”, “WPA™”, “WPA2™”, and “WPA3™” are trademarks of
Wi-Fi Alliance
®
.

Materials – Trademarks and Licenses
829
• This product uses “DynaFont” from DynaComware Corporation. DynaFont is a
registered trademark of DynaComware Taiwan Inc.
• QR Code is a registered trademark of DENSO WAVE INCORPORATED.
• LEICA is a registered trademark of Leica Microsystems IR GmbH. ELMARIT is a
registered trademark of Leica Camera AG. The LEICA DG lenses are manufactured
using measurement instruments and quality assurance systems that have been
certified by Leica Camera AG based on the company’s quality standards.
• Other names, company names, product names mentioned in this document are
trademarks or registered trademarks of the companies concerned.

Materials – Trademarks and Licenses
830
This product incorporates the following software:
(1) the software developed independently by or for Panasonic Corporation,
(2) the software owned by third party and licensed to Panasonic Corporation,
(3) the software licensed under the GNU General Public License, Version 2.0 (GPL
V2.0),
(4) the software licensed under the GNU LESSER General Public License, Version
2.1 (LGPL V2.1), and/or
(5) open source software other than the software licensed under the GPL V2.0 and/
or LGPL V2.1.
The software categorized as (3) - (5) are distributed in the hope that it will be useful,
but WITHOUT ANY WARRANTY, without even the implied warranty of
MERCHANTABILITY or FITNESS FOR A PARTICULAR PURPOSE. Please refer to
the detailed terms and conditions thereof displayed by selecting [MENU/SET] ¨
[Setup] ¨ [Others] ¨ [Firmware Version] ¨ [Software info].
At least three (3) years from delivery of this product, Panasonic will give to any third
party who contacts us at the contact information provided below, for a charge no more
than our cost of physically performing source code distribution, a complete
machine-readable copy of the corresponding source code covered under GPL V2.0 or
LGPL V2.1, as well as the respective copyright notice thereof.
Contact Information: [email protected]
The source code and the copyright notice are also available for free in our website
below.
https://panasonic.net/cns/oss/index.html
This product is licensed under the AVC Patent Portfolio License for the personal use of
a consumer or other uses in which it does not receive remuneration to (i) encode video
in compliance with the AVC Standard (“AVC Video”) and/or (ii) decode AVC Video that
was encoded by a consumer engaged in a personal activity and/or was obtained from
a video provider licensed to provide AVC Video. No license is granted or shall be
implied for any other use. Additional information may be obtained from MPEG LA,
L.L.C.
See http://www.mpegla.com
Materials – Trademarks and Licenses
831
Disposal of Old Equipment and Batteries
Only for European Union and countries with recycling systems
These symbols on the products, packaging, and/or accompanying
documents mean that used electrical and electronic products and
batteries must not be mixed with general household waste.
For proper treatment, recovery and recycling of old products and used
batteries, please take them to applicable collection points in
accordance with your national legislation.
By disposing of them correctly, you will help to save valuable
resources and prevent any potential negative effects on human health
and the environment.
For more information about collection and recycling, please contact
your local authority.
Penalties may be applicable for incorrect disposal of this waste, in
accordance with national legislation.
Note for the battery symbol (bottom symbol):
This symbol might be used in combination with a chemical symbol. In
this case it complies with the requirement set by the Directive for the
chemical involved.

F-1
Firmware Update
≥ Firmware Ver. 2.0: F-3
≥ Firmware Ver. 2.2: F-23
≥ Firmware Ver. 2.3: F-50
≥ Firmware Ver. 3.0: F-67
A firmware update has been made available to improve camera
capabilities and to add functionality.
The subsequent sections describe functions that have been added or
modified.
•
To check the firmware version of the camera, select [Firmware Version] in the
[Setup] ([Others]) menu.
•
For the latest information on the firmware or to download/update the firmware,
visit the following support site:
https://panasonic.jp/support/global/cs/dsc/download/index.html
(English only)

Firmware Update
F-2
About Applications/Software
When you have updated the firmware for the camera, use the latest
version of the application for your smartphone or the software for your PC.
“LUMIX Sync”
•
Install or update the application on your smartphone.
“LUMIX Tether”
•
Check the following site and then download and install the software:
https://panasonic.jp/support/global/cs/soft/download/d_lumixtether.html
(English only)

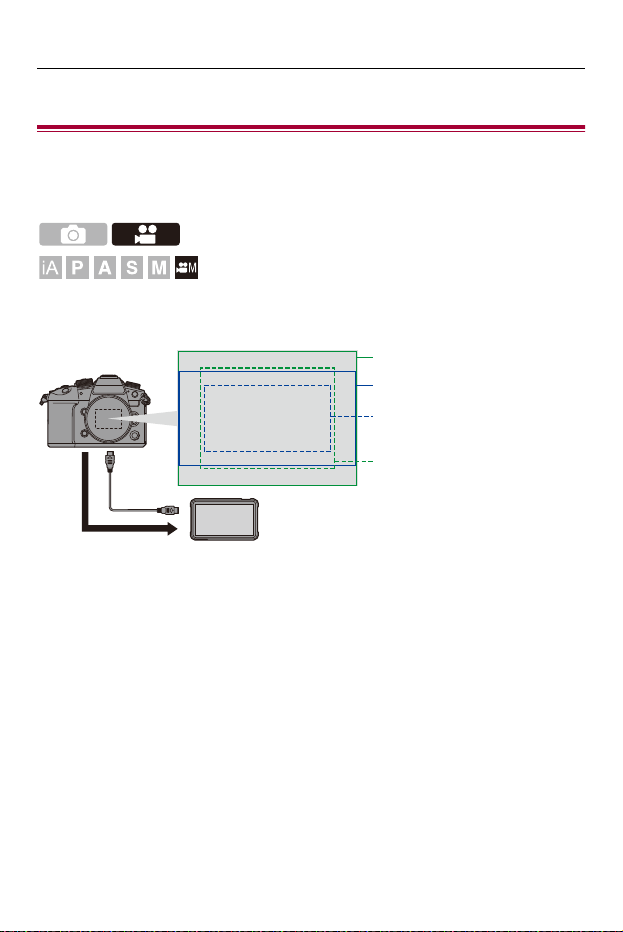
Firmware Ver. 2.0 – Support for Output of RAW Video Data
F-4
Support for Output of RAW Video Data
≥Outputting RAW Video Data via HDMI: F-6
≥Notes When Outputting RAW Video Data: F-11
12-bit RAW Video Data with a maximum resolution of 5.8K can now be
output via HDMI to a compatible external recorder.
(A) RAW Video
(B) External recorder
• Recording of the RAW Video Data of this camera has been confirmed on the
following external recorder. (As of June 2022)
– ATOMOS HDMI field monitor/recorder "Ninja V+" (AtomOS 10.77 or better)/"Ninja
V" (AtomOS 10.77 or better)
For details, please contact ATOMOS.
– Recording of some recording qualities is not available with the "Ninja V". (Î[Rec
Quality] (When [HDMI RAW Data Output] is selected): F-8)
• This does not guarantee all of the capabilities that the compatible external recorder
may have.
HDMI
4.4K(4:3) / FULL
59.94p/50.00p
5.8K(4:3) / FULL
29.97p/25.00p/23.98p
5.7K(17:9) / FULL
59.94p/50.00p/29.97p/25.00p/23.98p
C4K(17:9) / PIXEL/PIXEL
119.88p/100.00p/59.94p/50.00p/
29.97p/25.00p/23.98p
(A)
(B)

Firmware Ver. 2.0 – Support for Output of RAW Video Data
F-5
• You will need compatible software to edit the RAW Video Data recorded with the
external recorder. To change the coloring according to V-Log/V-Gamut when editing,
download a LUT (Look-Up Table) from the support site below and load it into the
software.
• Visit the following site to download LUT data or view the latest support information:
https://panasonic.jp/support/global/cs/dsc/
(English only)
• Video cannot be recorded to cards while RAW Video Data is being output via
HDMI.
• When [System Frequency] is set to [24.00Hz (CINEMA)], RAW Video Data
cannot be output via HDMI.
• RAW Video Data output via HDMI is not available when the optional
DMW-BLF19 battery is being used.
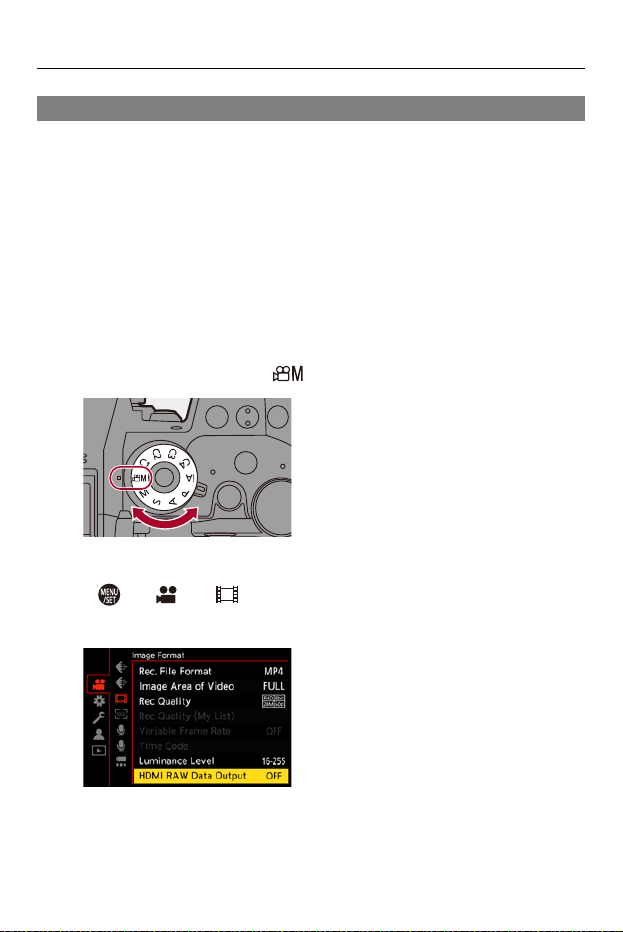
Firmware Ver. 2.0 – Support for Output of RAW Video Data
F-6
Outputting RAW Video Data via HDMI
[HDMI RAW Data Output] has been added to the [Video] menu. The image
quality for the output images is set in [Rec Quality].
Getting started:
1 Turn off the camera and the external recorder.
2 Connect the camera and the external recorder with a commercially available
HDMI cable.
• Use an Ultra High Speed HDMI cable (Type A–Type A plug, up to 1.5 m
(4.9 feet) long).
3 Turn on the camera and the external recorder.
1
Set the mode dial to [ ].
2
Set [HDMI RAW Data Output].
≥ ¨ [] ¨ [] ¨ [HDMI RAW Data Output] ¨ [ON]
•
[HDMI RAW] is displayed on the recording screen.
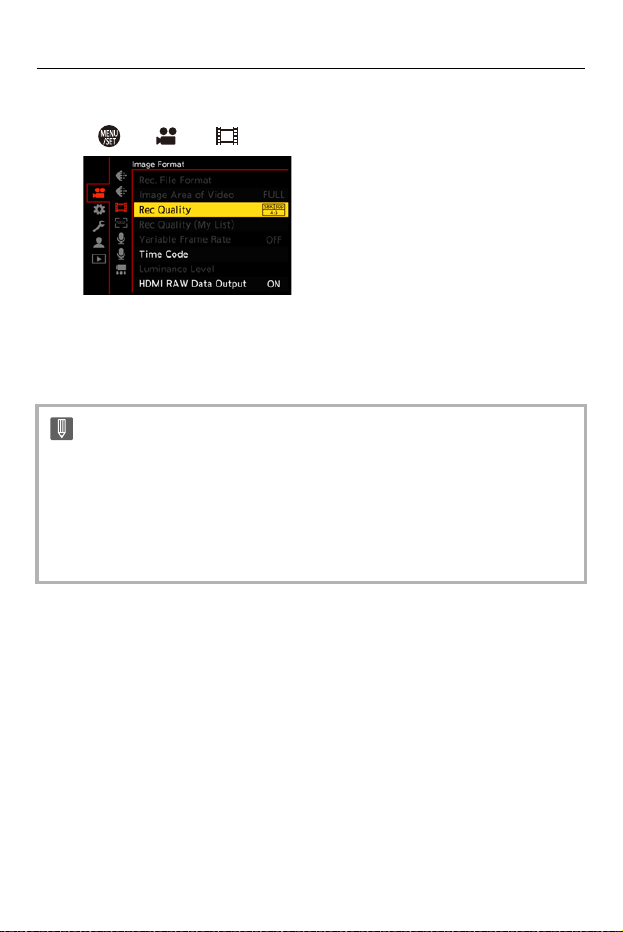
Firmware Ver. 2.0 – Support for Output of RAW Video Data
F-7
3
Select a recording quality.
≥ ¨ [] ¨ [] ¨ [Rec Quality]
4
Set the HDMI input on the external recorder.
• When the connection is complete, images will be displayed on the screen of
the external recorder.
There are differences from normal HDMI output operation.
• [HDMI Rec Output] in the [Custom] ([IN/OUT]) menu.
– [Info Display] is not available. You cannot output the camera information
display to an external recorder connected by HDMI.
– [Down Convert] is not available. Outputs at the resolution and recording frame
rate of the [Rec Quality].

Firmware Ver. 2.0 – Support for Output of RAW Video Data
F-8
[Rec Quality] (When [HDMI RAW Data Output] is selected)
*1 Recording on the "Ninja V" is not available.
*2 Anamorphic (4:3) video
[Rec Quality]
[System
Frequency]
[Image Area
of Video]
Resolution Frame rate
[5.8K/30p/4:3]
*1, 2
59.94Hz(NTSC)
[FULL] 5760×4320 29.97p
[5.8K/24p/4:3]
*2
[FULL] 5760×4320 23.98p
[5.7K/60p/17:9]
*1
[FULL] 5728×3024 59.94p
[5.7K/30p/17:9] [FULL] 5728×3024 29.97p
[5.7K/24p/17:9] [FULL] 5728×3024 23.98p
[4.4K/60p/4:3]
*1, 2
[FULL] 4352×3264 59.94p
[C4K/120p/17:9]
*1
[PIXEL/PIXEL] 4096×2160 119.88p
[C4K/60p/17:9] [PIXEL/PIXEL] 4096×2160 59.94p
[C4K/30p/17:9] [PIXEL/PIXEL] 4096×2160 29.97p
[C4K/24p/17:9] [PIXEL/PIXEL] 4096×2160 23.98p
[5.8K/25p/4:3]
*2
50.00Hz(PAL)
[FULL] 5760×4320 25.00p
[5.7K/50p/17:9]
*1
[FULL] 5728×3024 50.00p
[5.7K/25p/17:9] [FULL] 5728×3024 25.00p
[4.4K/50p/4:3]
*1, 2
[FULL] 4352×3264 50.00p
[C4K/100p/17:9]
*1
[PIXEL/PIXEL] 4096×2160 100.00p
[C4K/50p/17:9] [PIXEL/PIXEL] 4096×2160 50.00p
[C4K/25p/17:9] [PIXEL/PIXEL] 4096×2160 25.00p

Firmware Ver. 2.0 – Support for Output of RAW Video Data
F-9
• Bit value: 12-bit
• Audio format: LPCM (4ch)
– When the XLR Microphone Adaptor (DMW-XLR1: optional) is connected, if [4ch
Mic Input] is set to [ON], 4-channel audio can be recorded.
– Even if [4ch Mic Input] is set to [OFF], 4 channels are recorded to the audio tracks
of the video.
• [Image Area of Video] is fixed to the image area according to the [Rec Quality]
setting.
• [Sound Rec Quality] can be set to [96kHz/24bit] when you have connected an XLR
Microphone Adaptor (DMW-XLR1: optional), Stereo Shotgun Microphone
(DMW-MS2: optional), or Stereo Microphone (VW-VMS10: optional).
Monitor/Viewfinder Display When Outputting RAW Video
Data
Images equivalent to those recorded when recording with V-Log are
displayed on the monitor/viewfinder of the camera for monitoring purposes.
[LUT View Assist (Monitor)] with the [Vlog_709] preset applied can be used
for the [V-Log View Assist].
•
The LUT for the monitor display cannot be changed.
• When you use [LUT View Assist (Monitor)], [709] is displayed on the screen and
[RAW] is displayed on the screen as a [LUT View Assist (HDMI)] item.
• [Luminance Spot Meter], and [BASE/RANGE] of [Zebra Pattern] are set at “Stop”
units.
(Calculated as “0 Stop”=42 % (IRE))
Firmware Ver. 2.0 – Support for Output of RAW Video Data
F-10
Notes on displayed images
•
The images displayed on the camera do not affect the RAW Video Data that is
output.
• The images displayed on the external recorder are images that suit the external
recorder specifications. This means that there may be differences between the
images displayed on the camera and the images displayed on the external recorder.
• The monitor/viewfinder of the camera shows images with the angle of view of the
RAW Video Data. There may be some difference with the angle of view of the data
recorded on the external recorder.
[HDMI Time Code Output]/[HDMI Recording Control]
The time code of the camera can be added and output via HDMI to the
external recorder.
In addition, recording can be started and stopped on the external recorder
by using the video rec. button and shutter button of the camera.
1 Set [HDMI Time Code Output] to [ON].
• ¨ [ ] ¨ [ ] ¨ [Time Code] ¨ [HDMI Time Code Output] ¨ [ON]
2 Set [HDMI Recording Control] to [ON].
• ¨ [ ] ¨ [ ] ¨ [HDMI Rec Output] ¨ [HDMI Recording Control]
¨ [ON]
• [HDMI Recording Control] can be set when [HDMI Time Code Output] is set to
[ON] in [ ] mode.

Firmware Ver. 2.0 – Support for Output of RAW Video Data
F-11
Notes When Outputting RAW Video Data
Operation is as follows when outputting RAW Video Data:
•
The lower limit of available ISO sensitivity is [250] (when [Extended ISO] is set: [125]).
• When the following function is being used, the ISO sensitivity that can be set is
restricted.
– [Dynamic Range Boost]: Down to a lower limit of [2000], up to an upper limit of [6400]
• The minimum shutter speed changes as follows when recording with MF and
[Exposure Mode] is set to [M].
– When [Rec Quality] is set to [C4K/120p/17:9]: can be set down to 1/125 of a
second
– When [Rec Quality] is set to [C4K/100p/17:9]: can be set down to 1/100 of a
second
• [AWB], [AWBc], [AWBw] and [ ] cannot be used for white balance.
• [Photo Style] is fixed to [V-Log], and Image quality cannot be adjusted.
• [ ] of the AF mode is not available.
• Enlarging the display with [MF Assist] and [Enlarged Live Display(Video)] is not
possible.
• The following functions are not available:
– [Master Pedestal Level]
– [Vignetting Comp.]
– [Diffraction Compensation]
– [Filter Settings]
– [Rec. File Format]
– [Filtering] and [add to list] in [Rec Quality]
– [Rec Quality (My List)]
– [Variable Frame Rate]
– [Luminance Level]
– [E-Stabilization (Video)] ([Image Stabilizer])
– [Loop Recording (video)]
– [Segmented File Recording]
– [Color Bars]
Firmware Ver. 2.0 – [Apple ProRes] Recording Qualities Have Been Added
F-12
[Apple ProRes] Recording Qualities Have
Been Added
[Apple ProRes] recording qualities have been added. Accordingly, the
default settings for [Apple ProRes] recording qualities have been changed.
Additional recording qualities can also be used in the [iA]/[P]/[A]/[S]/[M]
modes.
• [Apple ProRes] video with a resolution of 4K or more cannot be recorded
to an SD card. Use a CFexpress card.
¨ [ ] ¨ [ ] ¨ Select [Rec Quality]
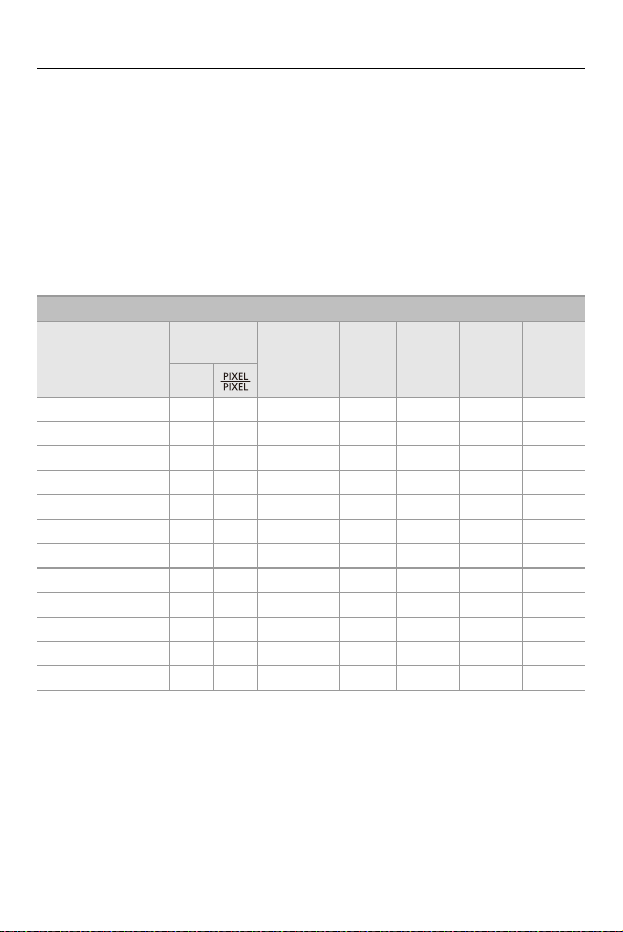
Firmware Ver. 2.0 – [Apple ProRes] Recording Qualities Have Been Added
F-13
[Rec. File Format]: [Apple ProRes]
• Audio format: LPCM (4ch)
– Even if [4ch Mic Input] is set to [OFF], 4 channels are recorded to the audio tracks
of the video.
(A) Recording frame rate
(B) Bit rate
(C) Video compression format (422 HQ: Apple ProRes 422 HQ, 422: Apple ProRes
422)
[System Frequency]: [59.94Hz (NTSC)]
[Rec Quality]
[Image Area
of Video]
Resolution
Aspect
ratio
(A) (B) (C)
FULL
[C4K/60p/422 HQ] 334096×2160 17:9 59.94p 1.9 Gbps 422 HQ
[C4K/60p/422] 334096×2160 17:9 59.94p 1.3 Gbps 422
[C4K/30p/422 HQ] 334096×2160 17:9 29.97p 972 Mbps 422 HQ
[C4K/30p/422] 334096×2160 17:9 29.97p 648 Mbps 422
[C4K/24p/422 HQ] 334096×2160 17:9 23.98p 778 Mbps 422 HQ
[C4K/24p/422] 334096×2160 17:9 23.98p 519 Mbps 422
[FHD/60p/422 HQ] 331920×1080 16:9 59.94p 454 Mbps 422 HQ
[FHD/60p/422]
*
331920×1080 16:9 59.94p 302 Mbps 422
[FHD/30p/422 HQ] 331920×1080 16:9 29.97p 227 Mbps 422 HQ
[FHD/30p/422] 331920×1080 16:9 29.97p 151 Mbps 422
[FHD/24p/422 HQ] 331920×1080 16:9 23.98p 181 Mbps 422 HQ
[FHD/24p/422] 331920×1080 16:9 23.98p 121 Mbps 422
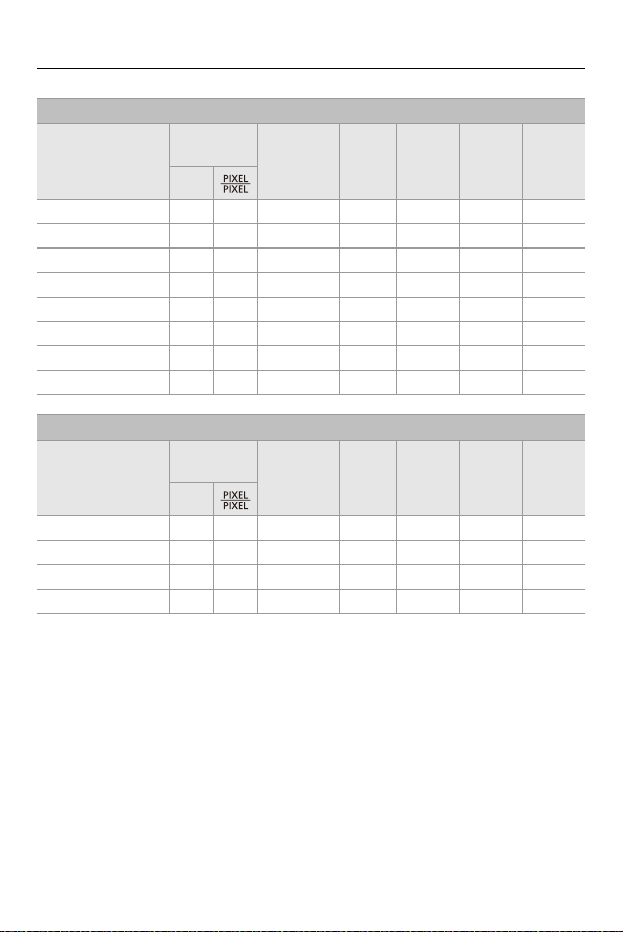
Firmware Ver. 2.0 – [Apple ProRes] Recording Qualities Have Been Added
F-14
* Default setting
[System Frequency]: [50.00Hz (PAL)]
[Rec Quality]
[Image Area
of Video]
Resolution
Aspect
ratio
(A) (B) (C)
FULL
[C4K/50p/422 HQ] 334096×2160 17:9 50.00p 1.6 Gbps 422 HQ
[C4K/50p/422] 334096×2160 17:9 50.00p 1.1 Gbps 422
[C4K/25p/422 HQ] 334096×2160 17:9 25.00p 811 Mbps 422 HQ
[C4K/25p/422] 334096×2160 17:9 25.00p 541 Mbps 422
[FHD/50p/422 HQ] 331920×1080 16:9 50.00p 378 Mbps 422 HQ
[FHD/50p/422]
*
331920×1080 16:9 50.00p 252 Mbps 422
[FHD/25p/422 HQ] 331920×1080 16:9 25.00p 189 Mbps 422 HQ
[FHD/25p/422] 331920×1080 16:9 25.00p 126 Mbps 422
[System Frequency]: [24.00Hz (CINEMA)]
[Rec Quality]
[Image Area
of Video]
Resolution
Aspect
ratio
(A) (B) (C)
FULL
[C4K/24p/422 HQ] 334096×2160 17:9 24.00p 779 Mbps 422 HQ
[C4K/24p/422] 334096×2160 17:9 24.00p 519 Mbps 422
[FHD/24p/422 HQ] 331920×1080 16:9 24.00p 182 Mbps 422 HQ
[FHD/24p/422]
*
331920×1080 16:9 24.00p 121 Mbps 422
Firmware Ver. 2.0 – [Apple ProRes] Recording Qualities Have Been Added
F-15
File Division
A new file will be created to continue recording if the continuous recording
time or the file size exceeds the following conditions.
(A) Using a CFexpress card
(B) Using an SDXC memory card
(C) Using an SDHC memory card
[Rec. File
Format]
[Rec
Quality]
Bit rate Card used
File division
Continuous
recording time
File size
[Apple
ProRes]
[FHD]
All
(A)
3 hours
4 minutes
192 GB
(B)
(C) 30 minutes 4 GB
[4K] or
better
(A)
3 hours
4 minutes
640 GB
(B)
(C)

Firmware Ver. 2.0 – [Apple ProRes] Recording Qualities Have Been Added
F-16
Available Recording Time for the Battery (When Using the
Monitor)
Listed below are the time lengths available for recording that can be taken
when the supplied battery is being used.
•
Using a Lexar CFexpress Type B card.
• Using a Panasonic SDXC memory card.
• The values listed are approximate.
• Actual available recording time is the time available for recording when repeating
actions such as turning the camera on and off, starting/stopping recording, etc.
Firmware Ver. 2.0 – [Apple ProRes] Recording Qualities Have Been Added
F-17
When the interchangeable lens (H-ES12060) is used
(A) Using a CFexpress card
(B) Using an SDXC memory card
[Rec. File
Format]
[Rec Quality] Card used
Continuous
available
recording time
(minutes)
Actual
available
recording time
(minutes)
[Image Area of
Video]
[Image Area of
Video]
[FULL] [FULL]
[Apple
ProRes]
[C4K/60p/422 HQ]
(A) 60 30
(B)
[C4K/60p/422]
(A) 60 30
(B)
[C4K/50p/422 HQ]
(A) 60 30
(B)
[C4K/50p/422]
(A) 60 30
(B)
[C4K/24p/422 HQ]
(A) 80 40
(B)
[C4K/24p/422]
(A) 80 40
(B)
[FHD/60p/422 HQ]
(A) 80 40
(B) 90 45
[FHD/60p/422]
(A) 80 40
(B) 90 45
[FHD/50p/422 HQ]
(A) 80 40
(B) 90 45
[FHD/50p/422]
(A) 80 40
(B) 90 45
[FHD/24p/422 HQ]
(A) 100 50
(B) 110 55
[FHD/24p/422]
(A) 100 50
(B) 110 55
Firmware Ver. 2.0 – [Apple ProRes] Recording Qualities Have Been Added
F-18
When the interchangeable lens (H-FS12060) is used
(A) Using a CFexpress card
(B) Using an SDXC memory card
[Rec. File
Format]
[Rec Quality] Card used
Continuous
available
recording time
(minutes)
Actual
available
recording time
(minutes)
[Image Area of
Video]
[Image Area of
Video]
[FULL] [FULL]
[Apple
ProRes]
[C4K/60p/422 HQ]
(A) 60 30
(B)
[C4K/60p/422]
(A) 60 30
(B)
[C4K/50p/422 HQ]
(A) 60 30
(B)
[C4K/50p/422]
(A) 60 30
(B)
[C4K/24p/422 HQ]
(A) 80 40
(B)
[C4K/24p/422]
(A) 80 40
(B)
[FHD/60p/422 HQ]
(A) 80 40
(B) 90 45
[FHD/60p/422]
(A) 80 40
(B) 90 45
[FHD/50p/422 HQ]
(A) 80 40
(B) 90 45
[FHD/50p/422]
(A) 80 40
(B) 90 45
[FHD/24p/422 HQ]
(A) 100 50
(B) 110 55
[FHD/24p/422]
(A) 100 50
(B) 110 55
Firmware Ver. 2.0 – [Apple ProRes] Recording Qualities Have Been Added
F-19
Video Recording Time for Cards
Listed below are the time lengths of videos that can be recorded on a card.
•
Video recording time is the total time of all the videos which have been recorded.
• The values listed are approximate.
• [Rec. File Format]: [Apple ProRes]
• “h” is an abbreviation for hour, “m” for minute and “s” for second.
[System Frequency]: [59.94Hz (NTSC)]
[Rec Quality]
CFexpress card capacity SD card capacity
128 GB 256 GB 512 GB 64 GB 128 GB 256 GB
[C4K/60p/422 HQ] 8m00s 17m00s 34m00s
[C4K/60p/422] 12m00s 26m00s 52m00s
[C4K/30p/422 HQ] 17m00s 34m00s 1h10m
[C4K/30p/422] 26m00s 52m00s 1h45m
[C4K/24p/422 HQ] 21m00s 43m00s 1h25m
[C4K/24p/422] 32m00s 1h05m 2h10m
[FHD/60p/422 HQ] 37m00s 1h10m 2h30m 18m00s 37m00s 1h10m
[FHD/60p/422] 56m00s 1h50m 3h45m 28m00s 56m00s 1h45m
[FHD/30p/422 HQ] 1h10m 2h25m 5h00m 37m00s 1h10m 2h25m
[FHD/30p/422] 1h50m 3h45m 7h30m 56m00s 1h50m 3h35m
[FHD/24p/422 HQ] 1h30m 3h05m 6h15m 47m00s 1h30m 3h00m
[FHD/24p/422] 2h20m 4h40m 9h20m 1h10m 2h20m 4h30m
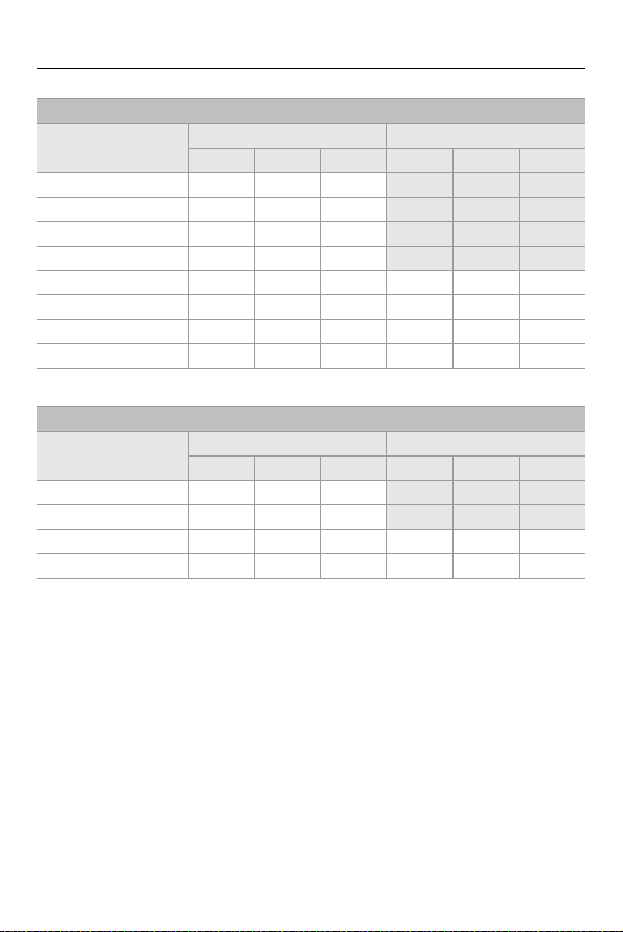
Firmware Ver. 2.0 – [Apple ProRes] Recording Qualities Have Been Added
F-20
[System Frequency]: [50.00Hz (PAL)]
[Rec Quality]
CFexpress card capacity SD card capacity
128 GB 256 GB 512 GB 64 GB 128 GB 256 GB
[C4K/50p/422 HQ] 10m00s 20m00s 41m00s
[C4K/50p/422] 15m00s 31m00s 1h00m
[C4K/25p/422 HQ] 20m00s 41m00s 1h20m
[C4K/25p/422] 31m00s 1h00m 2h05m
[FHD/50p/422 HQ] 44m00s 1h25m 3h00m 22m00s 44m00s 1h25m
[FHD/50p/422] 1h05m 2h10m 4h30m 33m00s 1h05m 2h10m
[FHD/25p/422 HQ] 1h25m 2h55m 6h00m 45m00s 1h25m 2h50m
[FHD/25p/422] 2h10m 4h30m 9h00m 1h05m 2h10m 4h20m
[System Frequency]: [24.00Hz (CINEMA)]
[Rec Quality]
CFexpress card capacity SD card capacity
128 GB 256 GB 512 GB 64 GB 128 GB 256 GB
[C4K/24p/422 HQ] 21m00s 43m00s 1h25m
[C4K/24p/422] 32m00s 1h05m 2h10m
[FHD/24p/422 HQ] 1h30m 3h05m 6h10m 46m00s 1h30m 3h00m
[FHD/24p/422] 2h20m 4h40m 9h20m 1h10m 2h20m 4h30m
Firmware Ver. 2.0 – Button Operations Have Been Added for AF Area Setting
F-21
Button Operations Have Been Added for
AF Area Setting
When [AF Detection Setting] is set to [OFF] in the [ ] AF mode, it is now
possible to set the [ ] AF area to any position with button operations.
≥Button operations
1 Press [ ] to display the AF mode selection screen.
2 Select [ ] and then press 4.
3 Press 3421 to move the AF area, and then press to confirm.
• Press again to return to [ ].
Firmware Ver. 2.0 – Added Menus
F-22
Added Menus
Specifications information for the menus added by the firmware update.
List of Default Settings/Custom Saving/Settings Available
for Copying
: Using [Reset], the function to return to default settings
: Using [Save to Custom Mode], the function to save settings details in the Custom
mode
: Using [Save/Restore Camera Setting], the function to copy settings details
List of Functions That Can Be Set in Each Recording
Mode
• Ninja V+ / Ninja V / ATOMOS are registered trademarks of ATOMOS Pty Ltd.
Menu Default setting
[Video]: [Image Format]
[HDMI RAW Data Output] [OFF] 333
Menu iA P A S M
[Video]: [Image Format]
[HDMI RAW Data Output] 3

Firmware Ver. 2.2 – Support for External USB Drive (SSD)
F-24
Support for External USB Drive (SSD)
≥Connecting the External SSD: F-25
≥Formatting the External SSD: F-27
≥Notes About External SSDs: F-28
≥Number of Pictures That Can Be Taken and Available Recording Time
with the Battery: F-30
≥Number of Pictures That Can Be Taken and Video Recording Time When
Using an External SSD: F-38
≥USB Port Specifications (Output): F-47
≥Precautions When Inserting a Battery into the Camera for Charging: F-47
Pictures and videos can now be recorded and played back with a
commercially available external SSD connected to the USB port.
•
This camera is compatible with SuperSpeed USB 10Gbps (USB 3.2 Gen 2).
• Use an external SSD no more than 2 TB in size that is compatible with USB Type-C.
We recommend using an external SSD whose operation has been confirmed by
Panasonic.
Note beforehand that this is not a guarantee of operation on all devices.
• For the latest information about external SSDs, check the following support site:
https://panasonic.jp/support/global/cs/dsc/connect/index.html
(English only)
• This does not guarantee all of the capabilities that the external SSD whose operation
has been verified may have.
• Perform trial recording in advance to check that operation is correct.
• Please also refer to the operating instructions for the external SSD.
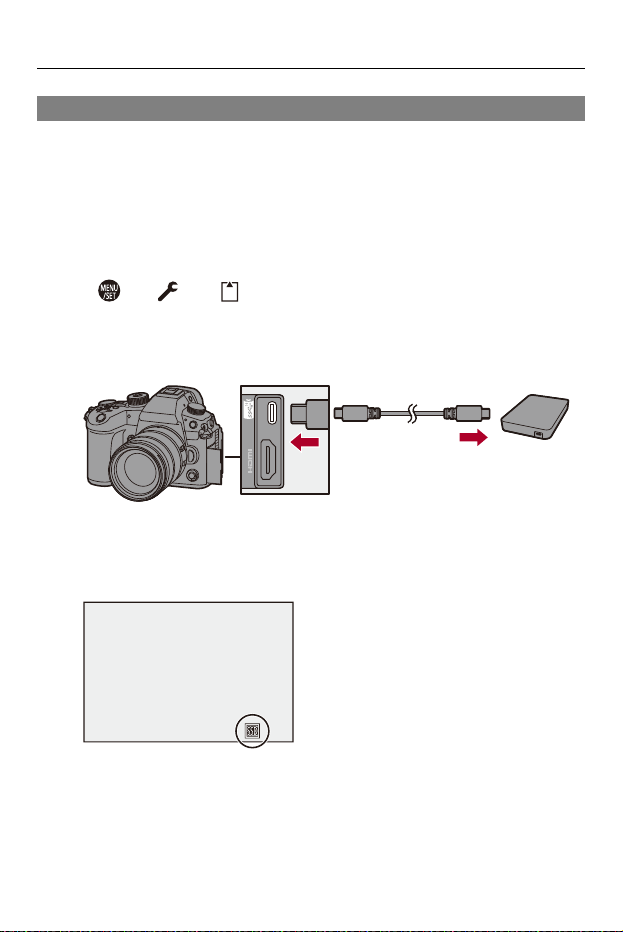
Firmware Ver. 2.2 – Support for External USB Drive (SSD)
F-25
Connecting the External SSD
Be sure to follow the below steps when connecting and removing the
external SSD.
If you do not perform the steps as shown, the external SSD may not be
recognized or the external SSD or recording data may be corrupted.
1
Set [USB-SSD] to [ON].
≥ ¨ [ ] ¨ [ ] ¨ [USB-SSD] ¨ [ON]
2
Connect the camera and external SSD with the USB
connection cable.
• Use the USB connection cable supplied with the external SSD.
≥The USB-SSD icon is displayed on the screen when the camera
recognizes the external SSD.
Firmware Ver. 2.2 – Support for External USB Drive (SSD)
F-26
Removing the External SSD
1 Set [USB-SSD] to [OFF].
• ¨ [ ] ¨ [ ] ¨ [USB-SSD] ¨ [OFF]
2 Confirm that the USB-SSD icon on the screen changes to the card icon, then
unplug the USB connection cable from the camera.
• It may take a while for the external SSD to be recognized.
• When [USB-SSD] is set to [ON], you cannot use a card even if a card has been
inserted. To use a card, set [USB-SSD] to [OFF].
• [ ] is displayed on the screen while writing to the external SSD.
• While the USB-SSD icon is being displayed on the screen, do not perform any of
the following operations.
The camera may operate incorrectly or the external SSD and recorded images
may be damaged.
– Disconnect the USB connection cable.
– Remove the battery or disconnect the power plug.
– Subject the camera or external SSD to vibration, impacts, or static electricity.
Firmware Ver. 2.2 – Support for External USB Drive (SSD)
F-27
Formatting the External SSD
Format the external SSD with this camera before use.
¨ [ ] ¨ [ ] ¨ [USB-SSD Format]
• When an external SSD is formatted, all of the data stored in the external
SSD is erased and cannot be restored.
Save a backup of necessary data before formatting the external SSD.
• Do not turn off the camera or perform another operation during formatting.
• Take care not to turn off the camera while formatting is in progress.
• If the external SSD has been formatted with a PC or other device, format it again
with the camera.

Firmware Ver. 2.2 – Support for External USB Drive (SSD)
F-28
Notes About External SSDs
• An external SSD cannot be used when the optional DMW-BLF19 battery is being
used.
• When [USB-SSD] is set to [ON], the following functions are not available:
– Recording to cards, playing back pictures/videos recorded to cards
– [Rec Quality] with a high frame rate video exceeding a recording frame rate of
60.00p
– [Variable Frame Rate] exceeding a frame rate of 60 fps
– [Copy]
– [Double Card Slot Function]
– [USB]
– [Firmware Update] ([Firmware Version])
• If you want to automatically transfer pictures to a smartphone as they are taken while
using an external SSD, set [USB-SSD] to [ON], then set [Auto Transfer] in
[Bluetooth] to [ON]. ([Auto Transfer]: 651)
• When an external SSD is connected, power is supplied from the camera, so the
battery will be consumed faster. It is recommended to either have a backup battery
ready, or to use the Panasonic AC Adaptor (DMW-AC10: optional) and DC Coupler
(DMW-DCC17: optional).
• When not using the external SSD, turn [USB-SSD] [OFF].
When set to [ON], power is supplied from the battery of this camera to the connected
device, so the battery will be consumed faster.
• Depending on the external SSD connected, a message indicating that it cannot be
used may be displayed on the screen due to insufficient power and it may not
operate.
– We recommend using an external SSD whose operation has been confirmed by
Panasonic.
– Perform trial recording in advance to check that operation is correct.

Firmware Ver. 2.2 – Support for External USB Drive (SSD)
F-29
• When the temperature of the camera rises when recording over long periods to an
external SSD, for example, [ ] appears blinking on the screen. If you continue to
use the camera, a message indicating that the camera cannot be used is displayed
on the screen and recording and HDMI output will be stopped. Wait for the camera to
cool down and for the message indicating that the camera can be used again. When
the message indicating that it can be used again is displayed, turn the camera off
then on again.
• The camera cannot access the external SSD if the external SSD is protected by a
password, etc. Check the settings of the external SSD before use.
• Do not use USB extension cables, USB conversion adaptors, or USB hubs.
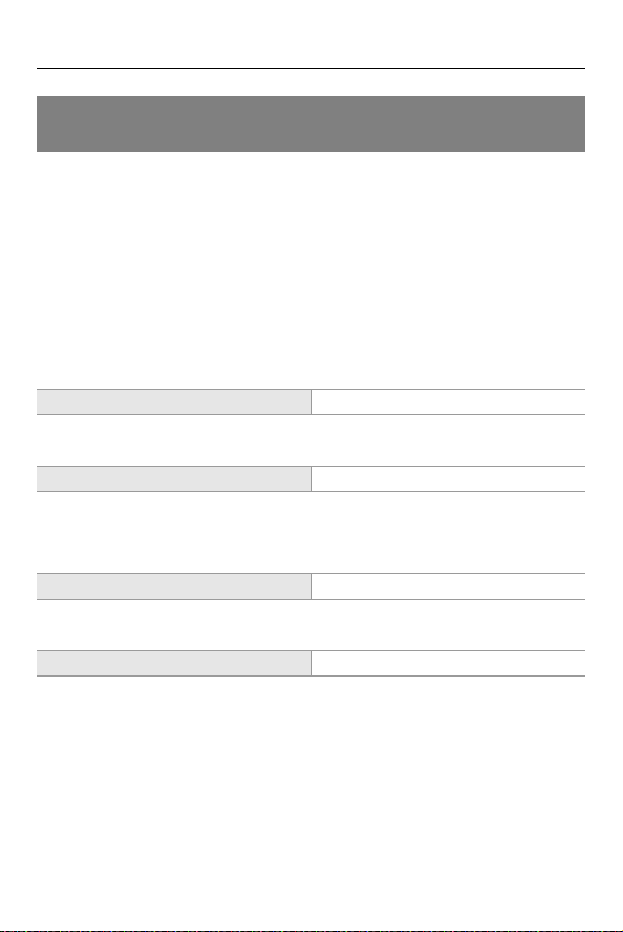
Firmware Ver. 2.2 – Support for External USB Drive (SSD)
F-30
Number of Pictures That Can Be Taken and
Available Recording Time with the Battery
Listed below are the numbers of pictures that can be taken and the time
lengths available for recording when the supplied battery is being used.
•
The number of pictures that can be taken is according to the CIPA (Camera &
Imaging Products Association) standards.
• Using a Samsung external SSD.
• The values listed are approximate.
Recording Pictures (When Using the Monitor)
When the interchangeable lens (H-ES12060) is used
When the interchangeable lens (H-FS12060) is used
Recording Pictures (When Using the Viewfinder)
When the interchangeable lens (H-ES12060) is used
When the interchangeable lens (H-FS12060) is used
Number of pictures that can be taken 320
Number of pictures that can be taken 330
Number of pictures that can be taken 320
Number of pictures that can be taken 330

Firmware Ver. 2.2 – Support for External USB Drive (SSD)
F-31
Recording Videos (When Using the Monitor)
When the interchangeable lens (H-ES12060) is used
[Rec. File
Format]
[Rec Quality]
Continuous available
recording time
(minutes)
Actual available
recording time
(minutes)
[Image Area of Video] [Image Area of Video]
[FULL] [FULL]
[MP4]
[4K/10bit/100M/60p]
[4K/10bit/100M/50p]
70 35
[4K/8bit/100M/30p]
[4K/8bit/100M/25p]
70 35
[FHD/8bit/28M/60p]
[FHD/8bit/28M/50p]
80 40

Firmware Ver. 2.2 – Support for External USB Drive (SSD)
F-32
[MOV]
[5.7K/60p/420/10-L]
[5.7K/50p/420/10-L]
50 25
[C4K/60p/422/10-I(H)]
[C4K/50p/422/10-I(H)]
70 35
[C4K/60p/422/10-I(L)]
[C4K/50p/422/10-I(L)]
70 35
[C4K/60p/420/10-L]
[C4K/50p/420/10-L]
70 35
[C4K/30p/420/10-L]
[C4K/25p/420/10-L]
70 35
[C4K/24p/420/10-L] 80 40
[FHD/60p/422/10-I]
[FHD/50p/422/10-I]
70 35
[FHD/60p/420/10-L]
[FHD/50p/420/10-L]
70 35
[FHD/24p/420/10-L] 80 40

Firmware Ver. 2.2 – Support for External USB Drive (SSD)
F-33
• Actual available recording time is the time available for recording when repeating
actions such as turning the camera on and off, starting/stopping recording, etc.
[Apple
ProRes]
[5.7K/30p/422 HQ] 50 25
[5.7K/30p/422] 50 25
[5.7K/25p/422 HQ] 60 30
[5.7K/25p/422] 60 30
[5.7K/24p/422 HQ] 60 30
[5.7K/24p/422] 60 30
[C4K/60p/422 HQ] 50 25
[C4K/60p/422] 50 25
[C4K/50p/422 HQ] 50 25
[C4K/50p/422] 50 25
[C4K/24p/422 HQ] 70 35
[C4K/24p/422] 70 35
[FHD/60p/422 HQ] 70 35
[FHD/60p/422] 70 35
[FHD/50p/422 HQ] 70 35
[FHD/50p/422] 70 35
[FHD/24p/422 HQ] 90 45
[FHD/24p/422] 90 45

Firmware Ver. 2.2 – Support for External USB Drive (SSD)
F-34
When the interchangeable lens (H-FS12060) is used
[Rec. File
Format]
[Rec Quality]
Continuous available
recording time
(minutes)
Actual available
recording time
(minutes)
[Image Area of Video] [Image Area of Video]
[FULL] [FULL]
[MP4]
[4K/10bit/100M/60p]
[4K/10bit/100M/50p]
70 35
[4K/8bit/100M/30p]
[4K/8bit/100M/25p]
80 40
[FHD/8bit/28M/60p]
[FHD/8bit/28M/50p]
80 40

Firmware Ver. 2.2 – Support for External USB Drive (SSD)
F-35
[MOV]
[5.7K/60p/420/10-L]
[5.7K/50p/420/10-L]
50 25
[C4K/60p/422/10-I(H)]
[C4K/50p/422/10-I(H)]
70 35
[C4K/60p/422/10-I(L)]
[C4K/50p/422/10-I(L)]
70 35
[C4K/60p/420/10-L]
[C4K/50p/420/10-L]
70 35
[C4K/30p/420/10-L]
[C4K/25p/420/10-L]
80 40
[C4K/24p/420/10-L] 90 45
[FHD/60p/422/10-I]
[FHD/50p/422/10-I]
80 40
[FHD/60p/420/10-L]
[FHD/50p/420/10-L]
80 40
[FHD/24p/420/10-L] 90 45

Firmware Ver. 2.2 – Support for External USB Drive (SSD)
F-36
• Actual available recording time is the time available for recording when repeating
actions such as turning the camera on and off, starting/stopping recording, etc.
[Apple
ProRes]
[5.7K/30p/422 HQ] 60 30
[5.7K/30p/422] 60 30
[5.7K/25p/422 HQ] 60 30
[5.7K/25p/422] 60 30
[5.7K/24p/422 HQ] 60 30
[5.7K/24p/422] 60 30
[C4K/60p/422 HQ] 50 25
[C4K/60p/422] 50 25
[C4K/50p/422 HQ] 50 25
[C4K/50p/422] 50 25
[C4K/24p/422 HQ] 70 35
[C4K/24p/422] 70 35
[FHD/60p/422 HQ] 70 35
[FHD/60p/422] 70 35
[FHD/50p/422 HQ] 70 35
[FHD/50p/422] 70 35
[FHD/24p/422 HQ] 90 45
[FHD/24p/422] 90 45
Firmware Ver. 2.2 – Support for External USB Drive (SSD)
F-37
Playback (When Using the Monitor)
When the interchangeable lens (H-ES12060) is used
When the interchangeable lens (H-FS12060) is used
Playback time 180 minutes
Playback time 180 minutes
• The number of pictures that can be taken and the available recording time vary
depending on the surrounding environment and the usage conditions.
For example, these will reduce in the following case:
– In low-temperature environments, such as on ski slopes.
• If the usage duration drops significantly even when the battery is fully charged,
then the battery is at the end of its service life.
Replace with a new battery.
Firmware Ver. 2.2 – Support for External USB Drive (SSD)
F-38
Number of Pictures That Can Be Taken and Video
Recording Time When Using an External SSD
Listed below are the numbers of pictures and the time lengths of videos
that can be recorded on an external SSD.
•
The values listed are approximate.
Number of Pictures That Can Be Taken
• [Aspect Ratio]: [4:3]; [Picture Quality]: [FINE]
• [Aspect Ratio]: [4:3]; [Picture Quality]: [RAW+FINE]
[Picture Size]
External SSD capacity
1TB 2TB
[L] (25M) 70630 141290
[M] (12.5M) 119200 238420
[S] (6.5M) 190710 381460
[Picture Size]
External SSD capacity
1TB 2TB
[L] (25M) 15010 30030
[M] (12.5M) 16430 32880
[S] (6.5M) 17330 34670
Firmware Ver. 2.2 – Support for External USB Drive (SSD)
F-39
Video Recording Time
• “h” is an abbreviation for hour, “m” for minute and “s” for second.
• Video recording time is the total time of all the videos which have been recorded.
• [Rec. File Format]: [MP4]
[System Frequency]: [59.94Hz (NTSC)]
[Rec Quality]
External SSD capacity
1TB 2TB
[4K/10bit/100M/60p]/
[4K/8bit/100M/30p]/
[4K/8bit/100M/24p]
22h10m 44h20m
[4K/10bit/72M/30p]/
[4K/10bit/72M/24p]
30h45m 61h35m
[FHD/8bit/28M/60p] 78h00m 156h00m
[FHD/8bit/24M/24p] 91h00m 182h00m
[FHD/8bit/20M/30p] 104h00m 208h00m
[System Frequency]: [50.00Hz (PAL)]
[Rec Quality]
External SSD capacity
1TB 2TB
[4K/10bit/100M/50p]/
[4K/8bit/100M/25p]
22h10m 44h20m
[4K/10bit/72M/25p] 30h45m 61h35m
[FHD/8bit/28M/50p] 78h00m 156h00m
[FHD/8bit/20M/25p] 104h00m 208h00m

Firmware Ver. 2.2 – Support for External USB Drive (SSD)
F-40
• [Rec. File Format]: [MOV]
[System Frequency]: [59.94Hz (NTSC)]
[Rec Quality]
External SSD capacity
1TB 2TB
[C4K/60p/422/10-I(H)]/
[C4K/48p/422/10-I(H)]/
[4K/60p/422/10-I(H)]/
[4K/48p/422/10-I(H)]
2h45m 5h30m
[C4K/60p/422/10-I(L)]/
[C4K/48p/422/10-I(L)]/
[4K/60p/422/10-I(L)]/
[4K/48p/422/10-I(L)]
3h40m 7h20m
[C4K/30p/422/10-I]/
[C4K/24p/422/10-I]/
[4K/30p/422/10-I]/
[4K/24p/422/10-I]
5h30m 11h05m
[5.7K/60p/420/10-L]/
[5.7K/48p/420/10-L]/
[4.4K/60p/420/10-L]/
[4.4K/48p/420/10-L]
7h20m 14h45m
[5.8K/30p/420/10-L]/
[5.8K/24p/420/10-L]/
[5.7K/30p/420/10-L]/
[5.7K/24p/420/10-L]/
[C4K/60p/422/10-L]/
[C4K/60p/420/10-L]/
[C4K/48p/422/10-L]/
[C4K/48p/420/10-L]/
[4K/60p/422/10-L]/
[4K/60p/420/10-L]/
[4K/48p/422/10-L]/
[4K/48p/420/10-L]/
[FHD/60p/422/10-I]/
[FHD/48p/422/10-I]/
[FHD/30p/422/10-I]/
[FHD/24p/422/10-I]
11h05m 22h10m

Firmware Ver. 2.2 – Support for External USB Drive (SSD)
F-41
[C4K/30p/422/10-L]/
[C4K/30p/420/10-L]/
[C4K/24p/422/10-L]/
[C4K/24p/420/10-L]/
[4K/30p/422/10-L]/
[4K/30p/420/10-L]/
[4K/24p/422/10-L]/
[4K/24p/420/10-L]
14h45m 29h35m
[FHD/60p/422/10-L]/
[FHD/60p/420/10-L]/
[FHD/60i/422/10-I]/
[FHD/48p/422/10-L]/
[FHD/48p/420/10-L]/
[FHD/30p/422/10-L]/
[FHD/30p/420/10-L]/
[FHD/24p/422/10-L]/
[FHD/24p/420/10-L]
22h10m 44h20m
[FHD/60i/422/10-L] 44h20m 88h45m

Firmware Ver. 2.2 – Support for External USB Drive (SSD)
F-42
[System Frequency]: [50.00Hz (PAL)]
[Rec Quality]
External SSD capacity
1TB 2TB
[C4K/50p/422/10-I(H)]/
[4K/50p/422/10-I(H)]
2h45m 5h30m
[C4K/50p/422/10-I(L)]/
[4K/50p/422/10-I(L)]
3h40m 7h20m
[C4K/25p/422/10-I]/
[4K/25p/422/10-I]
5h30m 11h05m
[5.7K/50p/420/10-L]/
[4.4K/50p/420/10-L]
7h20m 14h45m
[5.8K/25p/420/10-L]/
[5.7K/25p/420/10-L]/
[C4K/50p/422/10-L]/
[C4K/50p/420/10-L]/
[4K/50p/422/10-L]/
[4K/50p/420/10-L]/
[FHD/50p/422/10-I]/
[FHD/25p/422/10-I]
11h05m 22h10m
[C4K/25p/422/10-L]/
[C4K/25p/420/10-L]/
[4K/25p/422/10-L]/
[4K/25p/420/10-L]
14h45m 29h35m
[FHD/50p/422/10-L]/
[FHD/50p/420/10-L]/
[FHD/50i/422/10-I]/
[FHD/25p/422/10-L]/
[FHD/25p/420/10-L]
22h10m 44h20m
[FHD/50i/422/10-L] 44h20m 88h45m

Firmware Ver. 2.2 – Support for External USB Drive (SSD)
F-43
[System Frequency]: [24.00Hz (CINEMA)]
[Rec Quality]
External SSD capacity
1TB 2TB
[C4K/24p/422/10-I]/
[4K/24p/422/10-I]
5h30m 11h05m
[5.7K/48p/420/10-L]/
[4.4K/48p/420/10-L]
7h20m 14h45m
[5.8K/24p/420/10-L]/
[5.7K/24p/420/10-L]/
[FHD/24p/422/10-I]
11h05m 22h10m
[C4K/24p/422/10-L]/
[C4K/24p/420/10-L]/
[4K/24p/422/10-L]/
[4K/24p/420/10-L]
14h45m 29h35m
[FHD/24p/422/10-L]/
[FHD/24p/420/10-L]
22h10m 44h20m

Firmware Ver. 2.2 – Support for External USB Drive (SSD)
F-44
• [Rec. File Format]: [Apple ProRes]
[System Frequency]: [59.94Hz (NTSC)]
[Rec Quality]
External SSD capacity
1TB 2TB
[5.7K/30p/422 HQ] 1h05m 2h15m
[5.7K/30p/422] 1h40m 3h30m
[5.7K/24p/422 HQ] 1h25m 2h55m
[5.7K/24p/422] 2h10m 4h20m
[C4K/60p/422 HQ] 1h05m 2h15m
[C4K/60p/422] 1h40m 3h25m
[C4K/30p/422 HQ] 2h15m 4h30m
[C4K/30p/422] 3h25m 6h50m
[C4K/24p/422 HQ] 2h50m 5h40m
[C4K/24p/422] 4h15m 8h30m
[FHD/60p/422 HQ] 4h50m 9h45m
[FHD/60p/422] 7h20m 14h40m
[FHD/30p/422 HQ] 9h45m 19h30m
[FHD/30p/422] 14h40m 29h20m
[FHD/24p/422 HQ] 12h15m 24h30m
[FHD/24p/422] 18h20m 36h40m
Firmware Ver. 2.2 – Support for External USB Drive (SSD)
F-45
[System Frequency]: [50.00Hz (PAL)]
[Rec Quality]
External SSD capacity
1TB 2TB
[5.7K/25p/422 HQ] 1h20m 2h45m
[5.7K/25p/422] 2h05m 4h10m
[C4K/50p/422 HQ] 1h20m 2h40m
[C4K/50p/422] 2h00m 4h05m
[C4K/25p/422 HQ] 2h40m 5h25m
[C4K/25p/422] 4h05m 8h10m
[FHD/50p/422 HQ] 5h50m 11h40m
[FHD/50p/422] 8h45m 17h35m
[FHD/25p/422 HQ] 11h40m 23h30m
[FHD/25p/422] 17h35m 35h15m
[System Frequency]: [24.00Hz (CINEMA)]
[Rec Quality]
External SSD capacity
1TB 2TB
[5.7K/24p/422 HQ] 1h25m 2h50m
[5.7K/24p/422] 2h10m 4h20m
[C4K/24p/422 HQ] 2h50m 5h40m
[C4K/24p/422] 4h15m 8h30m
[FHD/24p/422 HQ] 12h10m 24h20m
[FHD/24p/422] 18h20m 36h40m

Firmware Ver. 2.2 – Support for External USB Drive (SSD)
F-46
• Depending on the recording conditions and the type of external SSD, the number
of pictures that can be taken and video recording time vary.
• [9999+] is displayed on the recording screen if the remaining number of pictures
that can be taken is 10000 or more.
• [99h59m] is displayed on the recording screen if the remaining video recording
time is 100 hours or more.
• The continuous recordable time for videos is displayed on the screen.

Firmware Ver. 2.2 – Support for External USB Drive (SSD)
F-47
USB Port Specifications (Output)
≥ USB
USB Type-C
®
, SuperSpeed USB 10Gbps (USB 3.2 Gen 2)
Output: DC 5 V, 900 mA
Precautions When Inserting a Battery into the
Camera for Charging
After removing an external SSD, when charging the battery in the camera,
make sure that the charging light of the camera lights red.
If the charging light does not light, reconnect the USB connection cable
while the camera is turned off.

Firmware Ver. 2.2 – Improvements to Limitations on RAW Video Data Output
F-48
Improvements to Limitations on RAW
Video Data Output
It is now possible to use ISO sensitivities between [2000] and [12800]
when [Dynamic Range Boost] is set to [ON].
Firmware Ver. 2.2 – Added Menus
F-49
Added Menus
Specifications information for the menus added by the firmware update.
List of Default Settings/Custom Saving/Settings Available
for Copying
: Using [Reset], the function to return to default settings
: Using [Save to Custom Mode], the function to save settings details in the Custom
mode
: Using [Save/Restore Camera Setting], the function to copy settings details
• Samsung is the registered trademark of Samsung Electronics Co., Ltd.
Menu Default setting
[Setup]: [Card/File]
[USB-SSD] [OFF] 33


Firmware Ver. 2.3 – Models Supporting Output of RAW Video Data Have Been Added
F-51
Models Supporting Output of RAW Video
Data Have Been Added
RAW Video Data of this camera can now be recorded to a Blackmagic
Design external recorder.
•
Recording of the RAW Video Data of this camera has been confirmed on the
following external recorder. (As of July 2023)
– Blackmagic Design “Blackmagic Video Assist 5q 12G HDR” and “Blackmagic
Video Assist 7q 12G HDR” (Ver. 3.12 or higher)
For details, please contact Blackmagic Design.
• This does not guarantee all of the capabilities that the compatible external recorder
may have.
• You will need compatible software to edit the RAW Video Data recorded with the
external recorder.
• Visit the following site to download LUT data or view the latest support information:
https://panasonic.jp/support/global/cs/dsc/
(English only)
Firmware Ver. 2.3 – Models Supporting Output of RAW Video Data Have Been Added
F-52
• Video cannot be recorded to cards while RAW Video Data is being output via
HDMI.
• When [System Frequency] is set to [24.00Hz (CINEMA)], RAW Video Data
cannot be output via HDMI.
• RAW Video Data output via HDMI is not available when the optional
DMW-BLF19 battery is being used.
• When the [Rec Quality] is set to 5.7K/60p (50p) or C4K/120p (100p) and
recording to a Blackmagic Design recorder, it is recommended to set the codec
quality on the recorder to the following:
– When recording to an SSD: constant bitrate 5:1 or less
– When recording to an SD card: constant bitrate 8:1 or less
• Refer to “Outputting RAW Video Data via HDMI” in “Firmware Ver. 2.0” for
operations and limitations for RAW Video Data output.
Firmware Ver. 2.3 – Support for 4K/120p (4K/100p) HDMI Output
F-53
Support for 4K/120p (4K/100p) HDMI
Output
≥[4K/120p Output] ([4K/100p Output]) Menu Has Been Added: F-53
≥Power Save Live View Setting Has Been Added: F-55
≥Changing Image Quality During HDMI Output: F-56
≥[Enlarged Live Display] Menu Changes: F-57
[4K/120p Output] ([4K/100p Output]) Menu Has Been
Added
When set to a recording quality of C4K/120p (100p) or 4K/120p (100p),
video is output to an external device connected via HDMI as C4K/120p
(100p) or 4K/120p (100p).
[] [] [HDMI Rec Output] Select [4K/120p
Output] ([4K/100p Output])
Firmware Ver. 2.3 – Support for 4K/120p (4K/100p) HDMI Output
F-54
[ON]
Output as C4K/120p (100p) or 4K/120p (100p) via HDMI.
If the external device is not compatible, output is FHD/60p or less.
• While outputting as C4K/120p (100p) or 4K/120p (100p) via HDMI, video cannot be
recorded to cards.
• The YUV and bit value are output at 4:2:2 10-bit.
If the external device is not compatible, the output is at 4:2:0 10-bit.
[OFF]
Output as FHD/60p or less via HDMI.
• When the following function is being used, [4K/120p Output] ([4K/100p Output])
is not available:
– [HDMI RAW Data Output]
Firmware Ver. 2.3 – Support for 4K/120p (4K/100p) HDMI Output
F-55
Power Save Live View Setting Has Been Added
When outputting C4K/120p (100p) or 4K/120p (100p) via HDMI, activation
of the image sensor is limited during recording standby to reduce power
consumption and keep the temperature from rising.
•
This can be set when [HDMI Recording Control] and [4K/120p Output] ([4K/100p
Output]) are [ON].
[] [] [HDMI Rec Output] Select [4K/120p Power
Save Live View] ([4K/100p Power Save Live View])
[ON]
Activation of the camera’s image sensor is limited to C4K/60p (50p) or 4K/60p (50p)
during recording standby.
The limitation is canceled when recording is started by pressing either the video rec.
button or shutter button on the camera.
• The output destination device recognizes as C4K/120p (100p) or 4K/120p (100p),
but if the recording is started on the external recorder during recording standby,
recording is made with a limited image quality, so use the camera to perform the
operations for starting and stopping video recording on the external recorder.
(Outputting Control Information to an External Recorder: 472)
[OFF]
Output stays C4K/120p (100p) or 4K/120p (100p) via HDMI even during recording
standby.
• The camera is released from the time code slave state when you use the [4K/
120p Power Save Live View] ([4K/100p Power Save Live View]) function.
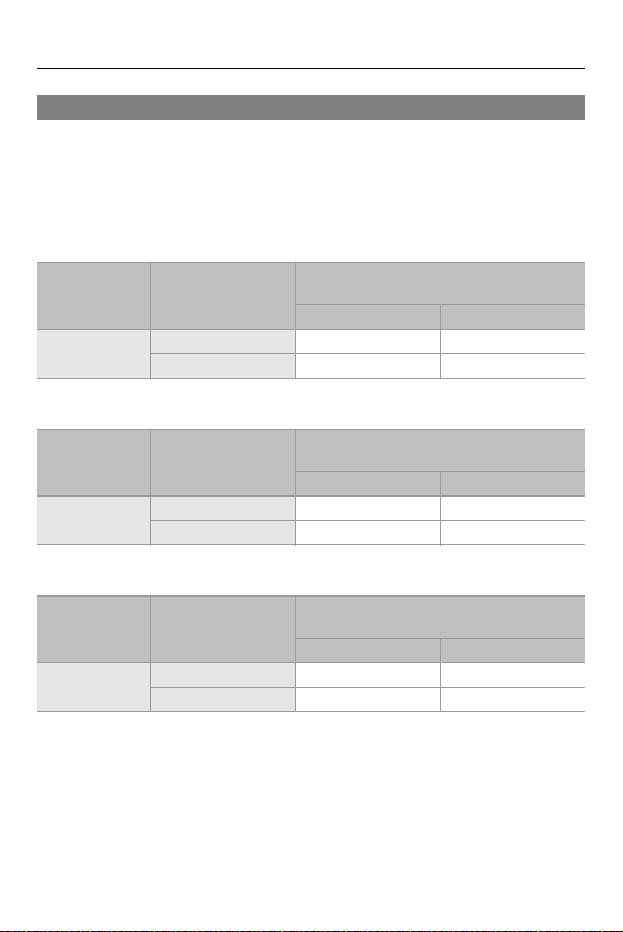
Firmware Ver. 2.3 – Support for 4K/120p (4K/100p) HDMI Output
F-56
Changing Image Quality During HDMI Output
Due to the support for 4K/120p (4K/100p) HDMI output, the image quality
when outputting via HDMI with the [Rec Quality] and [Down Convert]
setting combinations will be as follows.
[System Frequency]: [59.94Hz (NTSC)]
[System Frequency]: [50.00Hz (PAL)]
[System Frequency]: [24.00Hz (CINEMA)]
[Down Convert] [4K/120p Output]
Resolution and recording frame rate of the
[Rec Quality]
C4K/119.88p 4K/119.88p
[OFF]
[ON] C4K/119.88p 4K/119.88p
[OFF] 1080/59.94p 1080/59.94p
[Down Convert] [4K/100p Output]
Resolution and recording frame rate of the
[Rec Quality]
C4K/100.00p 4K/100.00p
[OFF]
[ON] C4K/100.00p 4K/100.00p
[OFF] 1080/50.00p 1080/50.00p
[Down Convert] [4K/120p Output]
Resolution and recording frame rate of the
[Rec Quality]
C4K/120.00p 4K/120.00p
[OFF]
[ON] C4K/120.00p 4K/120.00p
[OFF] 1080/24.00p 1080/24.00p

Firmware Ver. 2.3 – Support for 4K/120p (4K/100p) HDMI Output
F-57
[Enlarged Live Display] Menu Changes
When [4K/120p Output] ([4K/100p Output]) is set to [ON] during HDMI
output with C4K/120p (100p) or 4K/120p (100p), the [Enlarged Live
Display] menu behaves as follows.
[] [] [HDMI Rec Output] Select [Enlarged
Live Display]
[MODE1]
• When the enlarged display of live view is used, the resolution and frame rate of the
video is output via HDMI with C4K/120p (100p) or 4K/120p (100p), but the image
refresh rate will be 30 fps or lower.
[MODE2]
• [MODE2] is not available.
[OFF]
• When the enlarged display of live view is used, the image refresh rate on the camera
will be 30 fps or lower.

Firmware Ver. 2.3 – Additions/Changes to Video Functions
F-58
Additions/Changes to Video Functions
≥Improvements to the Recording Function for External SSD: F-58
≥Changes to Image Area of Video for 4.4K Recording Qualities: F-61
Improvements to the Recording Function for
External SSD
By using a Panasonic AC Adaptor (DMW-AC10: optional) and DC Coupler
(DMW-DCC17: optional), the following videos can now be recorded to an
external SSD.
•
[Rec Quality] with a high frame rate video exceeding a recording frame rate of
60.00p
• [Variable Frame Rate] exceeding a frame rate of 60 fps
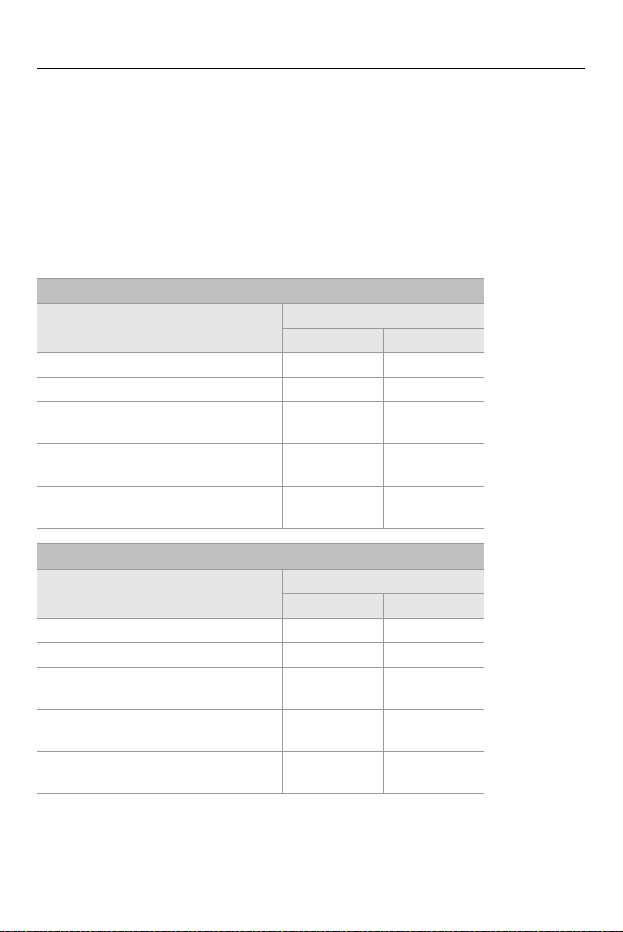
Firmware Ver. 2.3 – Additions/Changes to Video Functions
F-59
Video Recording Time for External SSD
Listed below are the time lengths of videos that can be recorded on an
external SSD.
•
Video recording time is the total time of all the videos which have been recorded.
• The values listed are approximate.
• [Rec. File Format]: [MOV]
• “h” is an abbreviation for hour, “m” for minute and “s” for second.
[System Frequency]: [59.94Hz (NTSC)]
[Rec Quality]
External SSD capacity
1TB 2TB
[FHD/240p/422/10-I] 2h45m 5h30m
[FHD/120p/422/10-I] 5h30m 11h05m
[C4K/120p/420/10-L]/
[4K/120p/420/10-L]
7h20m 14h45m
[FHD/240p/422/10-L]/
[FHD/240p/420/10-L]
11h05m 22h10m
[FHD/120p/422/10-L]/
[FHD/120p/420/10-L]
14h45m 29h35m
[System Frequency]: [50.00Hz (PAL)]
[Rec Quality]
External SSD capacity
1TB 2TB
[FHD/200p/422/10-I] 2h45m 5h30m
[FHD/100p/422/10-I] 5h30m 11h05m
[C4K/100p/420/10-L]/
[4K/100p/420/10-L]
7h20m 14h45m
[FHD/200p/422/10-L]/
[FHD/200p/420/10-L]
11h05m 22h10m
[FHD/100p/422/10-L]/
[FHD/100p/420/10-L]
14h45m 29h35m

Firmware Ver. 2.3 – Additions/Changes to Video Functions
F-60
[System Frequency]: [24.00Hz (CINEMA)]
[Rec Quality]
External SSD capacity
1TB 2TB
[FHD/120p/422/10-I] 5h30m 11h05m
[C4K/120p/420/10-L]/
[4K/120p/420/10-L]
7h20m 14h45m
[FHD/120p/422/10-L]/
[FHD/120p/420/10-L]
14h45m 29h35m
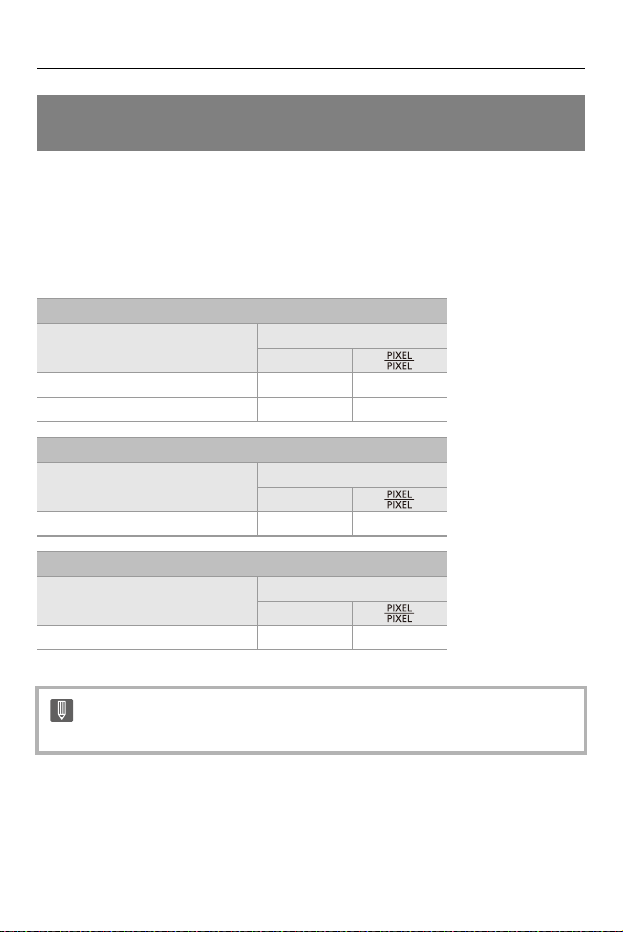
Firmware Ver. 2.3 – Additions/Changes to Video Functions
F-61
Changes to Image Area of Video for 4.4K Recording
Qualities
The image area of video for the following recording qualities has changed
from [FULL] to [PIXEL/PIXEL].
•
There is no change to the angle of view for the recorded videos.
[Rec. File Format]: [MOV]
[System Frequency]: [59.94Hz (NTSC)]
[Rec Quality]
[Image Area of Video]
[FULL]
[4.4K/60p/420/10-L]
[4.4K/48p/420/10-L]
[System Frequency]: [50.00Hz (PAL)]
[Rec Quality]
[Image Area of Video]
[FULL]
[4.4K/50p/420/10-L]
[System Frequency]: [24.00Hz (CINEMA)]
[Rec Quality]
[Image Area of Video]
[FULL]
[4.4K/48p/420/10-L]
• When set to a 4.4K [Rec Quality], [Vignetting Comp.] is available for use.

Firmware Ver. 2.3 – Additions/Changes to Video Functions
F-62
[Rec Quality] (When [HDMI RAW Data Output] is selected)
[Rec Quality] [System Frequency] [Image Area of Video]
[4.4K/60p/4:3] [59.94Hz (NTSC)] [PIXEL/PIXEL]
[4.4K/50p/4:3] [50.00Hz (PAL)] [PIXEL/PIXEL]
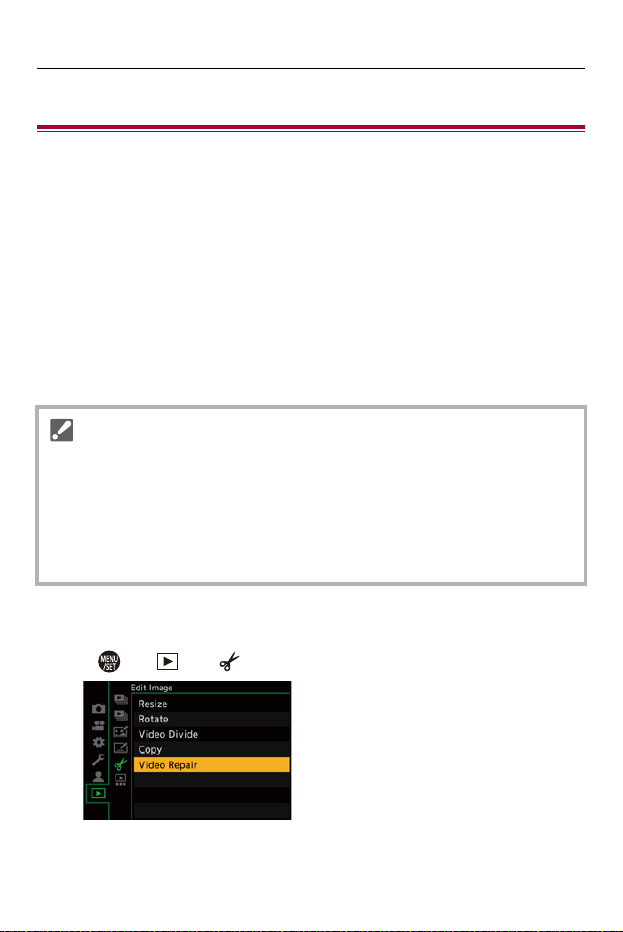
Firmware Ver. 2.3 – [Video Repair] Has Been Added
F-63
[Video Repair] Has Been Added
When the recording of a video could not be completed normally, a video file
that cannot be played back may be generated (extension “.mdt”).
You can repair the “.mdt” file with this function to make it playable.
•
Possible causes for the generation of “.mdt” files are:
– Power turns off during video recording (battery is removed, AC cable is unplugged,
power outage while using the AC adaptor, etc.)
– Card removed during video recording
– Card removed while writing to card after video recording
– When an unexpected freeze occurs during video recording/while writing to the
card
1
Select [Video Repair].
≥ [] [] [Video Repair]
•
Videos that can be repaired are those videos recorded with the [Rec. File
Format] being either [MOV] or [Apple ProRes].
Video recorded in [MP4] cannot be repaired.
• As repairs can take some time, use the Panasonic AC Adaptor (DMW-AC10:
optional) and DC Coupler (DMW-DCC17: optional) or supply with power during
the operation.
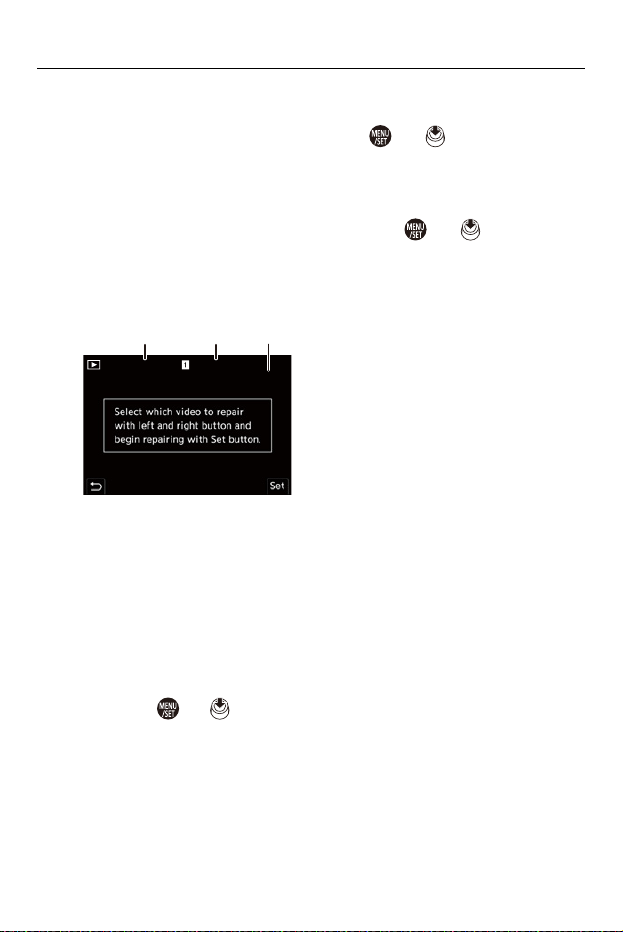
Firmware Ver. 2.3 – [Video Repair] Has Been Added
F-64
2
Select [Card Slot 1(CFexpress)] or [Card Slot 2(SD)].
≥Press 34 to select, and then press or .
•
Video files that can be repaired are filtered.
3
Select the video file to repair.
≥Press 21 to select a file and then press or .
•
Refer to the recording date and time (A), folder number (volume label)/file
(clip) number (B), and video recording time (C) to help with selecting the
video file.
4
Select [Yes] on the confirmation screen.
• Video repair starts. Repair takes some time.
• The video file after repair is saved in the same folder as the file before repair.
Canceling Video Repair
Even if you cancel video repair, the file is not deleted, so the procedure can
be done over again later if required.
1 Press either or in the video repair progress screen.
2 Select [Yes] on the confirmation screen.
(B)(A) (C)
2023.12.1 10:00 100-0001 1/2
8m30s

Firmware Ver. 2.3 – [Video Repair] Has Been Added
F-65
• It may not be possible to repair videos with a short recording time.
• It may not be possible to repair videos in some cases due to the state of the data.
• Video repair cannot be started if there is very limited free space on the card.
• Do not turn off the power or remove the card during repair.
Otherwise, the card and recorded data may be damaged.
• Do not perform other operations during the repair.
• You cannot repair videos recorded with devices other than this camera.
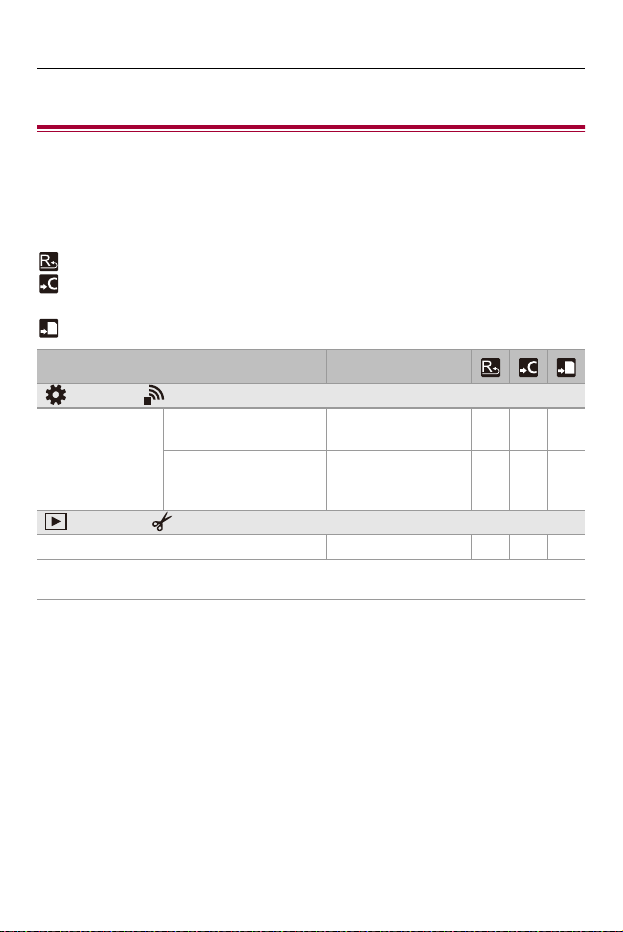
Firmware Ver. 2.3 – Added Menus
F-66
Added Menus
Specifications information for the menus added by the firmware update.
List of Default Settings/Custom Saving/Settings Available
for Copying
: Using [Reset], the function to return to default settings
: Using [Save to Custom Mode], the function to save settings details in the Custom
mode
: Using [Save/Restore Camera Setting], the function to copy settings details
• ‘Blackmagic Design’ is a registered trademark of Blackmagic Design Pty. Ltd.
Menu Default setting
[Custom]: [IN/OUT]
[HDMI Rec Output]
[4K/120p Output]/[4K/
100p Output]
[OFF]
[4K/120p Power Save
Live View]/[4K/100p
Power Save Live View]
[OFF]
[Playback]: [Edit Image]
[Video Repair] —

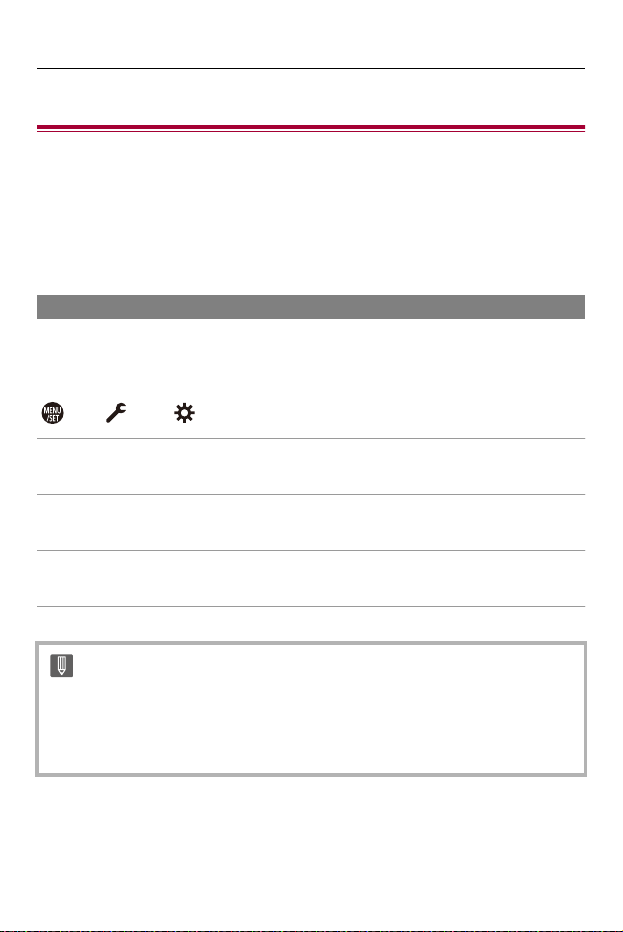
Firmware Ver. 3.0 – Support for Upgrade Software Key
F-68
Support for Upgrade Software Key
≥ [Activate] Has Been Added: F-68
Upgrade Software Key (DMW-SFU3A: optional) is now supported.
Using an Upgrade Software Key to activate the camera enables usage of
extended functions.
[Activate] Has Been Added
Using an Upgrade Software Key (DMW-SFU3A: optional) enables usage
of extended functions for the camera.
[] [] Select [Activate]
[Export Serial Code]
Exports the device information of the camera to the card.
[Import Activation Code]
Imports the activation code into the camera to enable extended functions.
[Activation List]
Displays extended functions which have been enabled for usage on the camera.
•
After activation, even if [Reset] is selected in the [Setup] ([Setting]) menu,
re-activation is not required.
•
Refer to the Installation guide supplied with the Upgrade Software Key
(DMW-SFU3A: optional) for details about activation methods.
Firmware Ver. 3.0 – Extended Functions
F-69
Extended Functions
≥ [ARRI LogC3] Has Been Added as a Photo Style: F-69
≥ Log Recording: F-71
This section explains the extended functions that become available by
using an Upgrade Software Key (DMW-SFU3A: optional).
[ARRI LogC3] Has Been Added as a Photo Style
It is now possible to select [ARRI LogC3] from [Photo Style].
This can only be selected in [ ] mode with [Rec. File Format] set to
[MOV] or [Apple ProRes].
[] [] Select [Photo Style]
[ARRI LogC3]
A setting for log video that conforms to the EI800 gamma curve from the LogC3
specification offered by ARRI (Log Recording: F-71)
•
It allows the production of images rich in gradation through post-production
techniques.

Firmware Ver. 3.0 – Extended Functions
F-70
•
It is possible to set [ARRI LogC3] in the Photo Style display restrictions in the
Photo Style setting of the [Custom] ([Image Quality]) menu.
•
In [LUT Select(ARRI LogC3)] in [Log View Assist] in the [Custom] ([Monitor /
Display (Video)]) menu, select the LUT data to apply from either [ARRI 709] or
registered LUT data. Also, in [LUT View Assist (Monitor)] and [LUT View Assist
(HDMI)], it is possible to output images with the LUT data set in [LUT
Select(ARRI LogC3)] applied.
•
Functions are restricted as follows when [ARRI LogC3] is set:
– Cannot record with the [MP4] recording quality.
– ISO sensitivity is restricted to a lower limit of 160 (lower limit of 1250 when
[Dynamic Range Boost] is set).
– The luminance level setting is fixed to [64-940].
– [Master Pedestal Level] is not available.
– The only image quality adjustments available are [Sharpness] and [Noise
Reduction].
– The 0 dB in the seconds/dB in [SS/Gain Operation] is equivalent to ISO1250
(when [Dynamic Range Boost] is set to [ON])/ISO160 (when [Dynamic Range
Boost] is set to [OFF]).
Firmware Ver. 3.0 – Extended Functions
F-71
Log Recording
Log recording is possible when [Photo Style] is set to [ARRI LogC3]. It
allows the production of images rich in gradation through post-production
techniques.
•
Set [Rec. File Format] to [MOV] or [Apple ProRes].
[] [] [Photo Style] Select [ARRI LogC3]

Firmware Ver. 3.0 – Extended Functions
F-72
•
Post-production processing is enabled by utilizing LUT (Look-Up Table).
Download the LUT data for [ARRI LogC3] from the following:
(1) ARRI Look Library (LogC3-to-Rec709)
A LUT data with the ARRI Look File applied for the Rec.709 color space.
There are 87 types of Look Files, providing you with a great variety.
https://www.arri.com/resource/blob/365070/
de67ce8908d30b22d83526dc4c1c8732/
arri-look-library-logc3-to-rec709-3d-luts-data.zip
(2) ARRI Look Library (log-to-log)
A LUT data for applying Looks with the Log space as is with its rich color
information.
Similarly to (1), there are 87 types of Look Files, providing you with a great
variety.
https://www.arri.com/resource/blob/283984/
763aadc4a2be5c301529704b1357513c/
arri-look-library-logc3-log-to-log-3d-luts-data.zip
(3) ARRI LogC3 LUT Package
A LUT data for converting from ARRI LogC3 to the color spaces of a variety of
display devices.
By going through (2) ARRI Look Library (log-to-log), it is possible to produce
the Look according to the color space you are aiming for.
https://www.arri.com/resource/blob/294620/
f4290b963ff83a4dde4fff795645bc26/
2022-09-arri-logc3-v1-2-lut-package-data.zip
Refer to the following site for information regarding ARRI Look Files:
https://www.arri.com/en/learn-help/learn-help-camera-system/
image-science/look-files

Firmware Ver. 3.0 – Extended Functions
F-73
ISO Sensitivity When [ARRI LogC3] Is Set
ISO sensitivity can be set in the range between 1250 and 12800 (When
[Dynamic Range Boost] is set to [ON]) or between 160 and 12800 (When
[Dynamic Range Boost] is set to [OFF]).
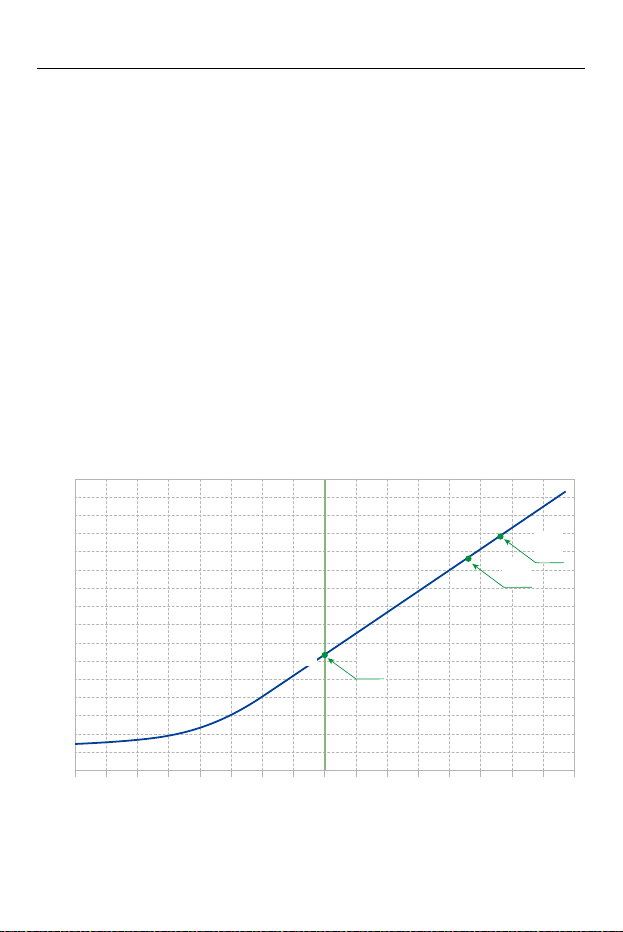
Firmware Ver. 3.0 – Extended Functions
F-74
Exposure When [ARRI LogC3] Is Set
The log characteristics of [ARRI LogC3] comply with 800 ASA (EI 800),
described in “ARRI_ALEXA_LogC_Curve_in_VFX.pdf” released by ARRI.
The log characteristics of [ARRI LogC3] on this camera do not depend on
the ISO sensitivity settings. However, there will be clipping worth the
equivalent of 2 stops when [Dynamic Range Boost] is set to [ON] or the
equivalent of 3 stops when [Dynamic Range Boost] is set to [OFF],
according to the Exposure Stops values defined in 800 ASA (EI 800).
Refer to the following for “ARRI_ALEXA_LogC_Curve_in_VFX.pdf”:
https://www.arri.com/resource/blob/31918/
66f56e6abb6e5b6553929edf9aa7483e/
2017-03-alexa-logc-curve-in-vfx-data.pdf
Diagram of the log characteristics of [ARRI LogC3] on this camera
-
8
-
8
-
7
-
7
-
6
-
6
-
5
-
5
-
4
-
4
-
3
-
3
-
2
-
2
-
1
-
1001122334455667788
(Stop)(Stop)
(10bitcodevalue)(10bitcodevalue)
ExposureStopsExposureStops
00
6464
128128
192192
256256
320320
384384
448448
512512
576576
640640
704704
768768
832832
896896
960960
10241024
(1)
(2)
(3)
LogSignalLogSignal
00
0.20.2
0.60.6
0.80.8
11
0.40.4

Firmware Ver. 3.0 – Extended Functions
F-75
(1) 18 % gray
(2) Clipping level (When [Dynamic Range Boost] is set to [OFF])
(3) Clipping level (When [Dynamic Range Boost] is set to [ON])
•
When the [Photo Style] is set to [ARRI LogC3], the [Luminance Level] is fixed to
[64-940] (video range).
•
The recorded data is recorded as video range.
•
HDMI output is output as video range.
•
The waveform and vector scope are both displayed as video range.
•
The luminance spot meter displays the 18 % gray output level as 0 Stop.
When [Photo Style] is set to [ARRI LogC3]
Exposure Stops
(18 % gray
standard)
Full range Video range
IRE (%)
Code Value
IRE
(%)
Code Value
10 bit 12 bit 10 bit 12 bit
Black
level
— 3.5 95 380 9.2 145 580
(1) 0.0 38 400 1600 39 407 1628
(2) 4.6 78 748 2992 73 705 2820
(3) 5.6 87 824 3296 81 770 3080
Firmware Ver. 3.0 – Changing from [V-Log View Assist] to [Log View Assist]
F-76
Changing from [V-Log View Assist] to [Log
View Assist]
When [Photo Style] is set to [V-Log]/[ARRI LogC3], the recording screen
and images output via HDMI will darken. Using [Log View Assist] means
you can show images with LUT data applied on the monitor/viewfinder and
output them via HDMI.
[] [] Select [Log View Assist]
[LUT Select(V-Log)]
Selects the LUT data to apply from a preset (
[Vlog_709]) or registered LUT data.
[LUT Select(ARRI LogC3)]
Selects the LUT data to apply from a preset ([ARRI 709]) or registered LUT data.
•
The function can be used only when you have used the Upgrade Software Key
(DMW-SFU3A: optional) and enabled the function with [Activate]. (Support
for Upgrade Software Key: F-68)
Firmware Ver. 3.0 – Changing the Luminance Level Settings
F-77
Changing the Luminance Level Settings
There are some changes to the luminance level setting values.
•
When [Rec. File Format] is set to [Apple ProRes], this is fixed to [64-940].
•
When [Rec. File Format] is set to [MP4] or [MOV] and [Photo Style] is set to
[V-Log], this is fixed to [0-255] ([0-1023]).
•
When the [Photo Style] is set to [ARRI LogC3] or [Hybrid Log Gamma], this is
fixed to [64-940].
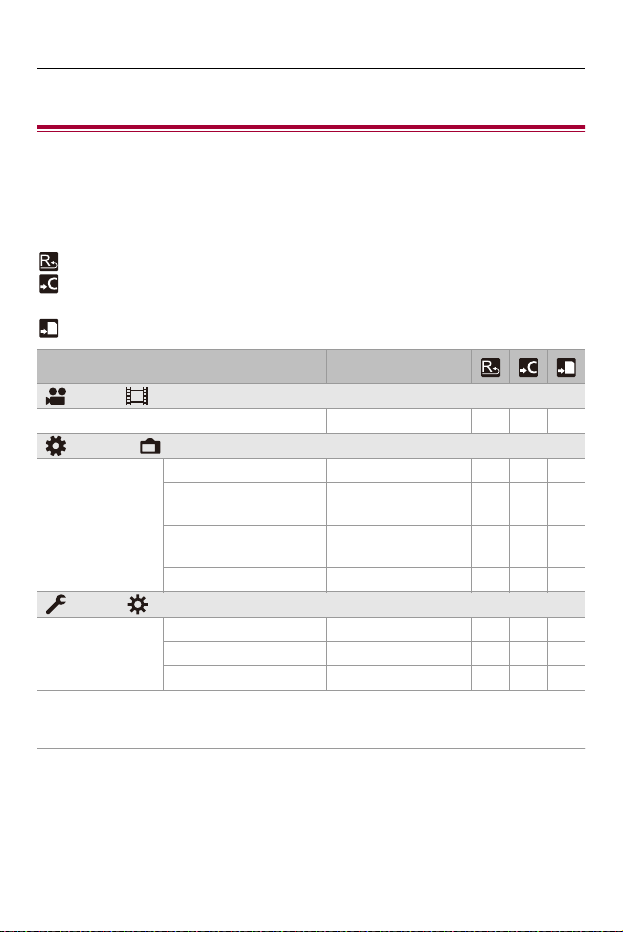
Firmware Ver. 3.0 – Added Menus
F-78
Added Menus
Specifications information for the menus added by the firmware update.
List of Default Settings/Custom Saving/Settings Available
for Copying
: Using [Reset], the function to return to default settings
: Using [Save to Custom Mode], the function to save settings details in the Custom
mode
: Using [Save/Restore Camera Setting], the function to copy settings details
* Available when activated with the Upgrade Software Key (DMW-SFU3A: optional).
•
ARRI is a registered trademark of Arnold & Richter Cine Technik GmbH & Co.
Betriebs KG.
Menu Default setting
[Video]: [Image Format]
[Luminance Level] [16-235]
[Custom]: [Monitor / Display (Video)]
[Log View Assist]
[LUT Select(V-Log)] [Vlog_709]
[LUT Select(ARRI
LogC3)]
*
[ARRI 709]
[LUT View Assist
(Monitor)]
[OFF]
[LUT View Assist (HDMI)] [OFF]
[Setup]: [Setting]
[Activate]
[Export Serial Code] —
[Import Activation Code] —
[Activation List] —