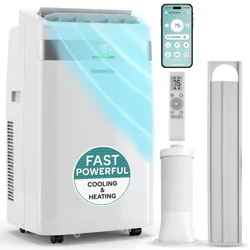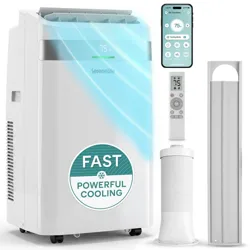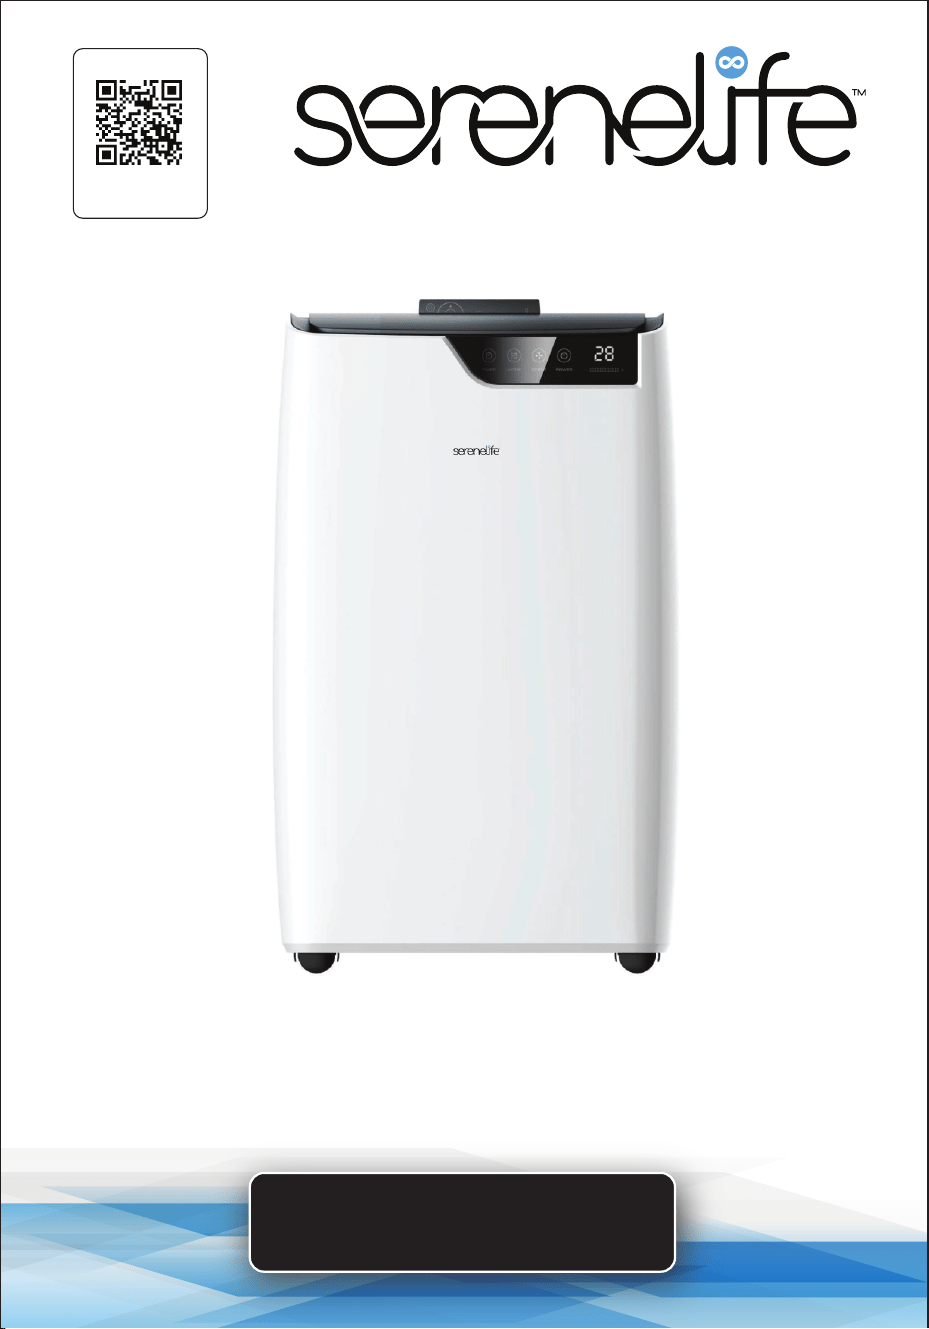
Single Duct Portable Air Conditioner and Heater
Visit Our Website
SCAN ME
serenelifehome.com
USER GUIDE
SLACHT12W
www.SereneLifeHome.com
2
About SereneLife
SereneLife products are designed to create a more comfortable living space,
indoors and out. Our team presents innovative lifestyle solutions throughout
the year that promote simplicity and serenity.
We’re committed to delivering the most dependable products so you can live a
better, more serene life.
www.SereneLifeHome.com
3
California Prop 65 Warning
WARNING:
This product can expose you to chemicals, which is known to
the state of California to cause cancer birth defects and other
reproductive harm. Do not ingest.
For more info go to: www.P65warnings.ca.gov
CONTENTS
INTRODUCTION
FEATURES AND TECHNICAL SPECS
FCC STATEMENT
ELECTRICAL SPECIFICATIONS
IMPORTANT SAFETY INSTRUCTIONS
SAFETY INSTRUCTIONS DURING SERVICING
IDENTIFICATION OF PARTS
REMOTE CONTROLLER
PROTECTION
INSTALLATION
CONNECTING YOUR AIR CONDITIONING UNIT TO THE SMART LIFE APP
LINK TO AMAZON "ALEXA"
MAINTENANCE
TROUBLESHOOTING
USING INFORMATION
REGISTER PRODUCT
IMPORTANT:
READ ALL INSTRUCTIONS CAREFULLY BEFORE USING THIS PRODUCT.
RETAIN THIS OWNER’S MANUAL FOR FUTURE REFERENCE.
4
5
6
6
7
8
9
12
14
15
19
23
25
26
28
29

www.SereneLifeHome.com
4
INTRODUCTION
Thank you for choosing this mobile air conditioner to provide you and your
family with all of the "Home Comfort" requirements for your home, cottage,
or oce. The appliance can be moved from room to room within your home
and set up in just minutes.
It is a multi-functional room air exchanging and air-processing appliance, designed
to oer you the functions of cooling, dehumidifying, and independent fan.
The external static pressure at which the appliance was tested is 0 MPa.
This manual will provide you with valuable information necessary for the proper
care and maintenance of your new appliance. Please take a few moments to read
the instructions thoroughly. If properly maintained, your appliance will give you
many years of trouble-free operation.

www.SereneLifeHome.com
5
Features:
•
Metal Control Box to Prevent Fire and Exploding
• Rotary Compressor
• Ecient & Powerful Cooling
• Universal Castors for Moving Freely
• Lightweight & Portable A/C Unit
• Compact Freestanding Room Air Conditioner & Heater
• (4) Operation Modes: Auto AC Cooling / Heat / Dehumidier / Fan
• Smart Wi Control
• Hassle-Free, Quick Setup Cooling and Heating
• Simple Electric Plug-in Operation
• Built-in Sensitive Touch Control Panel
• Automatic Upward Swing Delivers Cool Air Widely
• Convenient Wide-Area Climate Control Room AC Coverage
• Time, Temperature & Fan Speed Adjustment Settings
• Includes Universal Window Mount AC Exhaust Kit
• Removable & Washable Air Filter Screen
• Modern Style, Matt Body Housing
• Energy Ecient: Low Power Consumption
• Low Noise Level Motor
• Rolling Wheels for Easy Portability
• Ideal for Home, Oce, School & Business Rooms
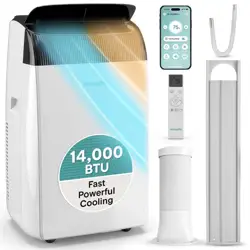
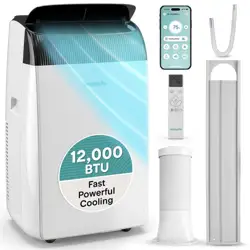
What's in the Box:
•
AC Unit
• Exhaust Hose
• Window Installation Plate
• Remote Control
• Hose Connector
• Drain Pipe
Technical Specs:
•
Construction Material: High-Quality ABS
• Power Supply: 115V/60Hz
• Power Output: 1260W
• Refrigerant Type: R32
• Cooling capacity (ASHRAE): 12000 Btu/h
• Cooling capacity (DOE): 8000 Btu/h
• Coverage Area: Cools Rooms up to 380 Square Feet
• Air Flow: 400 Cubic Meters / Hour
• Operating Modes: Auto / Cool / Fan / Dry (Dehumidier)
• Moisture Removal / Dehumidier: 1.2 Liters / Hour
• Operating Noise Level: 54 dBA
• Fan Speed Settings: Two Level, Low/High
• Temperature Range: °C / °F (Celsius / Fahrenheit
• Adjustable Timer Settings: Up to 24 Hours
• Item Weight: 67.2 lbs.
• Battery Operated Remote Control, Requires (2) x ‘AAA’ Batteries, (Included)
• Battery Construction Material: Zinc-Manganese
• Battery Weight: 13g
• Milliamp Hours (mAh): 500mAh
• Power Cable Length: 5.9 ft.
• Product Dimension (L x W x H): 17.3” x 13.2” x 28” -inches

www.SereneLifeHome.com
6
FCC Statement
This device cornplies with part 15 of the FCC Rules. Operation is subject to
following two conditions: (1) This device may not cause harmful
interference, and (2) this device must accept interterence received, including
intenerence that may cause operation.
NOTE:
This equipment has been tested and found to comply with the limits for a Class
B digital device, pursuant to Part 15 of the FCC Rules. These limits are designed
to provide reasonable protection against harmful interference in a residential
installation. This equipment generates, uses, and can radiate radio frequency
energy and, if not installed and used in accordance with the instructions, may
cause harmful interference to radio communications. However, there is no
guarantee that interference will not occur in a particular installation. If this
equipment causes harmful interference to radio or television reception, which
can be determined by turning the equipment o and on, the user is advised to
try to correct the interference by one or more of the following measures:
• Reorient or relocate the receiving antenna.
• Increase the separation between the equipment and the receiver.
• Connect the equipment to an outlet on a circuit dierent from that to which
the receiver is connected.
• Consult the dealer or an experienced technician for help.
Caution: Any changes or modications expressly approved by the party for
compliance could void the user's authority to operate the equipment.
FCC RF Radiation Exposure Statement Caution:
To maintain compliance with the FCC's RF exposure guidelines, place the product
at least 20cm away from nearby persons.
ELECTRICAL SPECIFICATIONS
1. All wiring must comply with local and national electrical codes and be installed
by a qualied electrician. If you have any questions regarding the following
instructions, contact a qualied electrician.
2. Check available power supply and resolve any wiring problems before
installation and operation of this unit.
3. For your safety and protection, this unit is grounded through the power cord
plug when plugged into a matching wall outlet. If you are not sure whether
the wall outlets in your home are properly grounded, please consult an electrician.
If the supply cord is damaged, it must be replaced by the manufacturer, its
service agent, or similarly qualied persons to avoid a hazard.
www.SereneLifeHome.com
7
IMPORTANT SAFETY INSTRUCTIONS
WARNING
To reduce the risk of re, electrical shock, or injury when
using your air conditioner, follow these basic precautions:
1. Plug into a grounded 3-prong outlet.
2. Do not remove the ground prong.
3. Do not use an adapter.
4. Do not use an extension cord.
5. Unplug the air conditioner before servicing.
6. Use two or more people to move and install the air conditioner.
7. This appliance can be used by children aged 8 years and above and persons
with reduced physical, sensory, or mental capabilities or lack of experience
and knowledge if they have been given supervision or instruction concerning
the use of the appliance in a safe way and understand the hazards involved.
8. Children shall not play with the appliance. Cleaning and user maintenance
shall not be made by children without supervision.
9. If the supply cord is damaged, it must be replaced by the manufacturer, its
service agent, or similarly qualied persons to avoid a hazard.
10. The appliance shall be installed in accordance with national wiring regulations.
11. This appliance is not intended for use by persons (including children) with `
reduced physical, sensory, or mental capabilities or lack of experience and
knowledge unless they have been given supervision or instruction concerning
the use of the appliance by a person responsible for their safety.
Young children should be supervised to ensure that they do not play with
the appliance.
12. Do not use means to accelerate the defrosting process or to clean, other
than those means recommended by the manufacturer. The appliance shall
be stored in a room without continuously operating ignition sources, for
example, open ames, an operating gas appliance, or an operating electric
heater. Be aware that refrigerants may not contain an odor.
Do not pierce or burn.
13. When the machine malfunctions, do not repair it yourself. Please contact a
professional organization or a professionally trained maintenance personnel
or a service organization recommended by the supplier for repair!
(The maximum refrigerant charge amount: R32/290g (10.23oz)
14. Do not use means to accelerate the defrosting process or to clean, other
than those recommended by the manufacturer.
15. The appliance shall be stored in a room without continuously operating
ignition sources (for example: open ames, an operating gas appliance, or
an operating electric heater).
16. Do not pierce or burn.
17. Be aware that refrigerants may not contain an odor.
CAUTION
RISK OF FIRE
A2L

www.SereneLifeHome.com
8
SAFETY INSTRUCTIONS DURING SERVICING
1. Ensure that only qualied personnel handle maintenance and repair tasks
aecting safety.
2. Conduct safety checks before servicing systems containing ammable
refrigerants to minimize ignition risks.
3. Perform work under controlled procedures to minimize ammable gas or
vapor presence.
4. Instruct maintenance sta on the nature of work, avoiding work in conned
spaces.
5. Use appropriate refrigerant detectors to check for toxic or ammable
atmospheres before and during work.
6. Have re extinguishing equipment available for hot work on refrigerating
equipment.
7. Avoid sources of ignition during work on refrigerating systems and display
"No Smoking" signs.
8. Work in well-ventilated areas and continue ventilation during servicing to
disperse released refrigerants.
9. Conduct initial safety checks on electrical components and report faults to
the equipment owner.
10. Disconnect electrical supplies before working on sealed components and
use leak detection if power supply is necessary.
11. Ensure electrical components are not altered during repair and use
replacement parts according to manufacturer specications.
12. Avoid applying permanent loads to circuits exceeding equipment
specications.
13. Only work on intrinsically safe components in ammable atmospheres and
use test apparatus with correct ratings.
14. Replace components only with manufacturer-specied parts to prevent
ignition risks.
15. Check cabling for wear, corrosion, and other environmental eects.
16. Never use potential ignition sources to detect refrigerant leaks.
www.SereneLifeHome.com
9
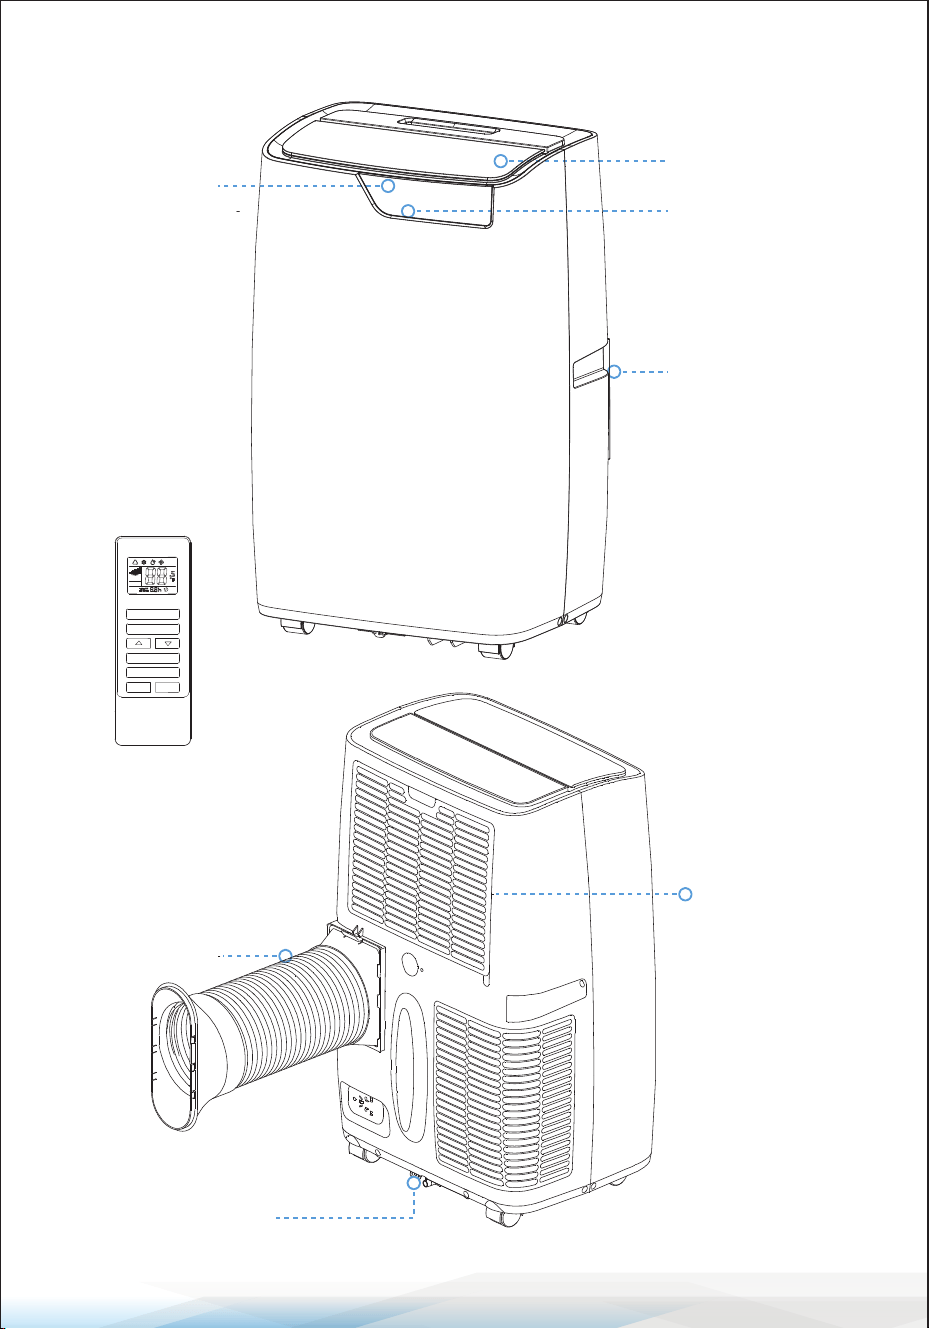
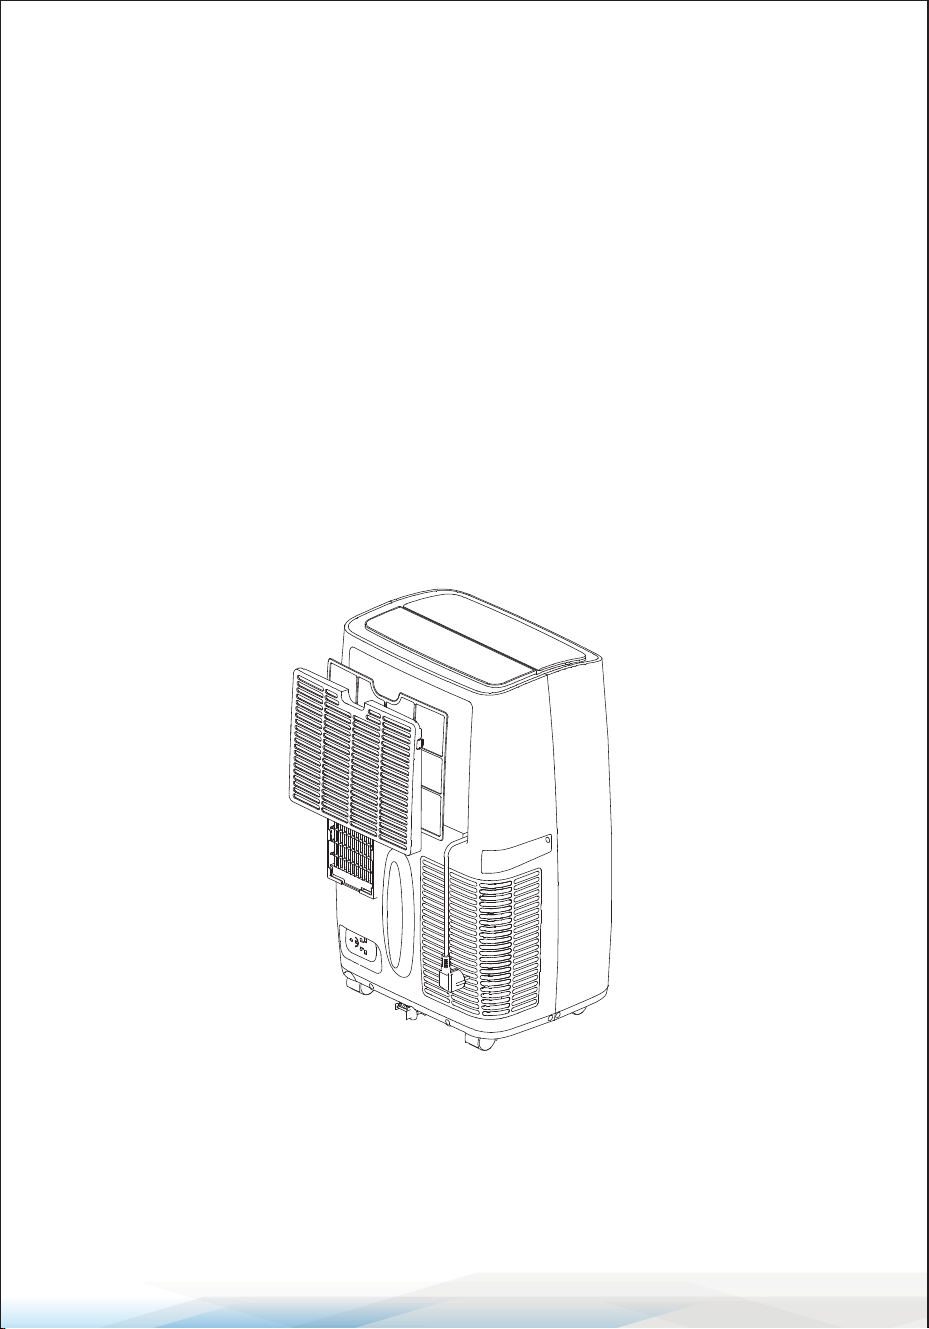
Remote Controller
Evaporator Air
Intake
Air Outlet Hose
Primary Drain Port
Control Panel
Signal Receptor
Cold Air Outlet
Transport Handle
SLEEP
ON/OFF
MODE
SPEED
SWING
TIMER
IDENTIFICATION OF PARTS
www.SereneLifeHome.com
10
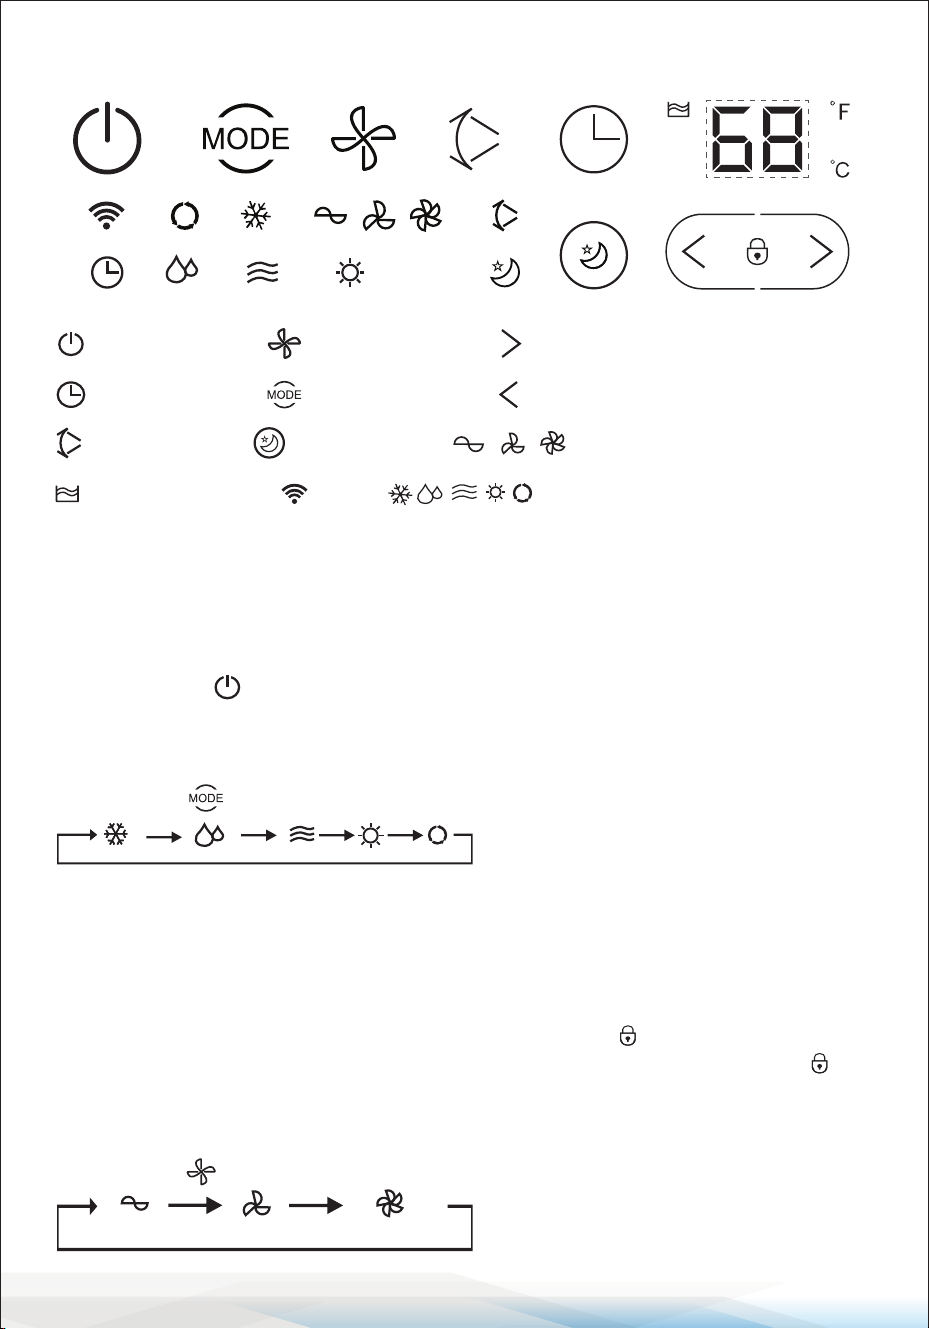
CONTROL PANEL
Control Panel Operation
Auto, Cool, Dehumidify, Fan, Mode Operation.
1. Turn on the unit:
a. Plug in the unit; it beeps once.
b. Press the " " button; the unit is turned on.
The LED displays the room temperature and operate in Automatic mode.
2. Select Operating Mode:
Press the " " button to select the desired mode.
3. Adjust Temperature:
The temperature can be set within a range of 59-88°F.
Press the “>” and “<” button to increase or decrease the temperature.
The unit LED shows the target temperature for 5 seconds and then displays
the room temperature.
Press “>” and “<” button at the same time to turn on “ ” mode.
Press and hold “>” and “<” button after three seconds and then turn o “ ”
mode.
4. Adjust Fan Speed:
Press the " " button to select your desired fan speed as indicated below:
Power Button
Timer Button
Sleep Button
Speed Button
Mode Button
Low/Middle/High Fan Speed
Timer/Temperature up Button
Timer/Temperature down Button
Cool/Dehmidify/Fan/Heat/Auto
Swing Button
Full Water Alarm
Wi
www.SereneLifeHome.com
11
5. Power:
Press the " " button again, and the unit will emit a "beep," indicating that it
has stopped working.
6. Swing: Press this “ ” to set swing mode.
7. TIMER BUTTON: Used to set a delay start or shut down time.
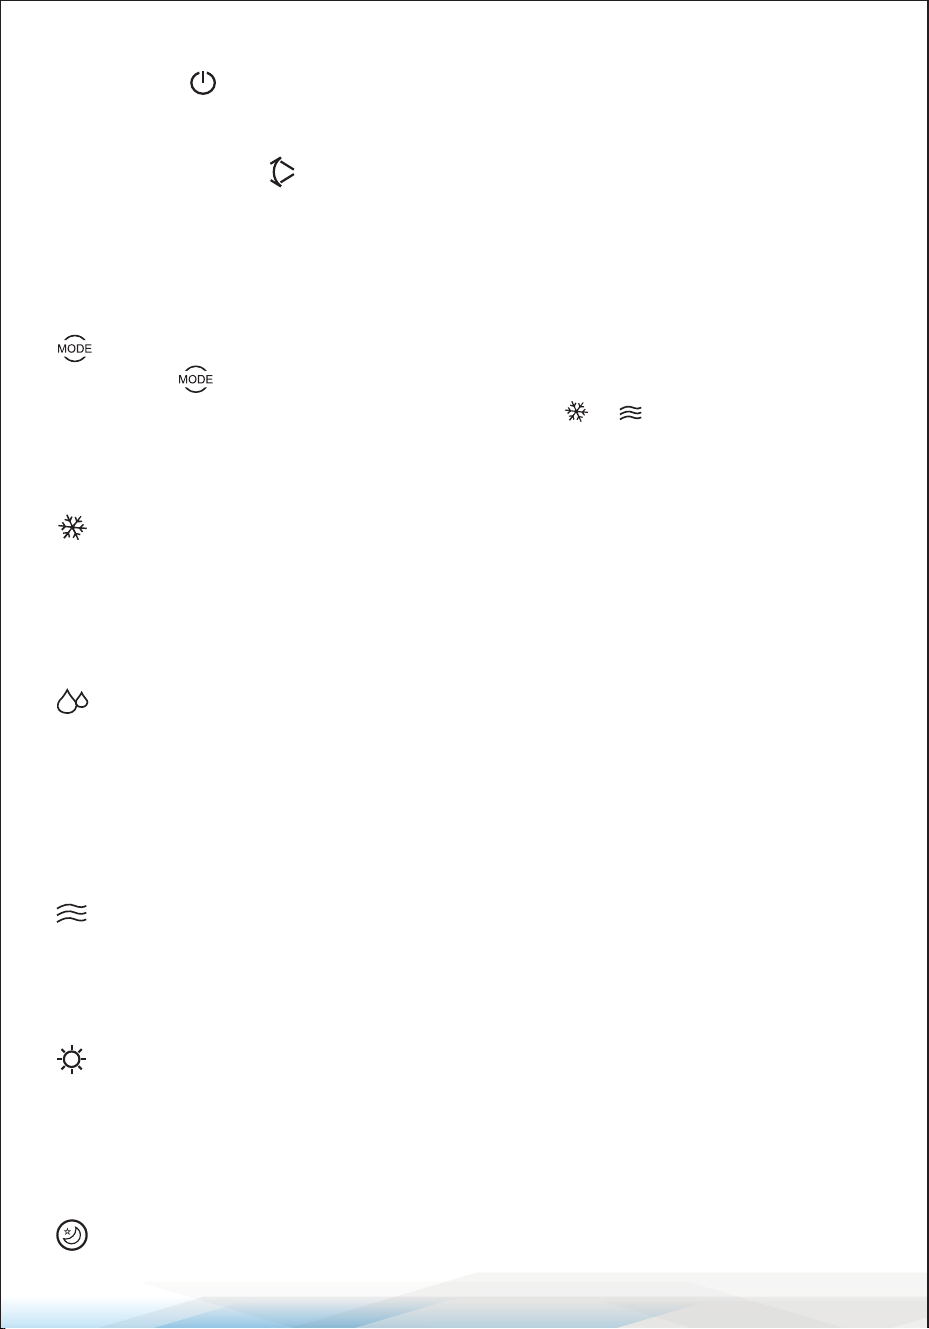
NOTICE: Understanding Each Operation Mode
Mode
1. Once the operation is selected, the indoor temperature sensor operates
automatically to choose the desired mode with or .
2. If the room temperature is ≥ 75°F, the unit will automatically select mode.
3. If the room temperature is ≤ 75°F, the unit will automatically select mode.
Mode
1. When the room temperature is higher than the set temperature,
the compressor starts.
2. When the room temperature is lower than the set temperature, the compressor
stops and operates at the original set speed.
Mode
1. The up centrifugal fan runs at a low speed, and the speed cannot be adjusted.
2. The compressor and the down centrifugal fan stop after running for 8 minutes,
then restart after 6 minutes.
3. The unit operates in constant temperature dehumidifying mode, and the
temperature adjustment is not eective.
Mode
1. The up centrifugal fan runs at the set speed, and the compressor does not
operate.
2. Temperature adjustment is not eective.
Mode
1. When the room temperature is higher than the set temperature, the unit will
stop the heating function.
2. When the room temperature is lower than the set temperature, the unit will
start the heating function.
Sleep Mode: Press the sleep button to activate sleep mode.
www.SereneLifeHome.com
12
Operation
1. Press the "Timer" button to set the Automatic O time while the unit is running.
2. Press the "Timer" button to set the Automatic On time while the unit is ready.
3. The time can be adjusted within a range of 1 hour to 24 hours.
Press the temperature up (+) or temperature down (-) button to increase or
decrease the time by one hour with each press.
Operation
1. The operation is eective when the unit is in mode.
2. Press the button in mode, then the unit will operate under sleep mode,
and the up centrifugal fan will automatically switch to low speed.
The set temperature will increase by 2°F (1°C) after one hour and by 4°F (2°C)
after two hours. After six hours, the unit will stop running.
Operation
When the swing button is activated, the swing blade will automatically move
up and down. If you want to stop, press the button again.
Notice:
The main control board has a memory function. When the unit is ready to run
but in stop status, the main control board can memorize the initialization of the
working mode. When you turn on the unit, it will work with the same settings as
the last time, with no need to reset the working mode again. (This condition is
not available when the unit is under " " mode).
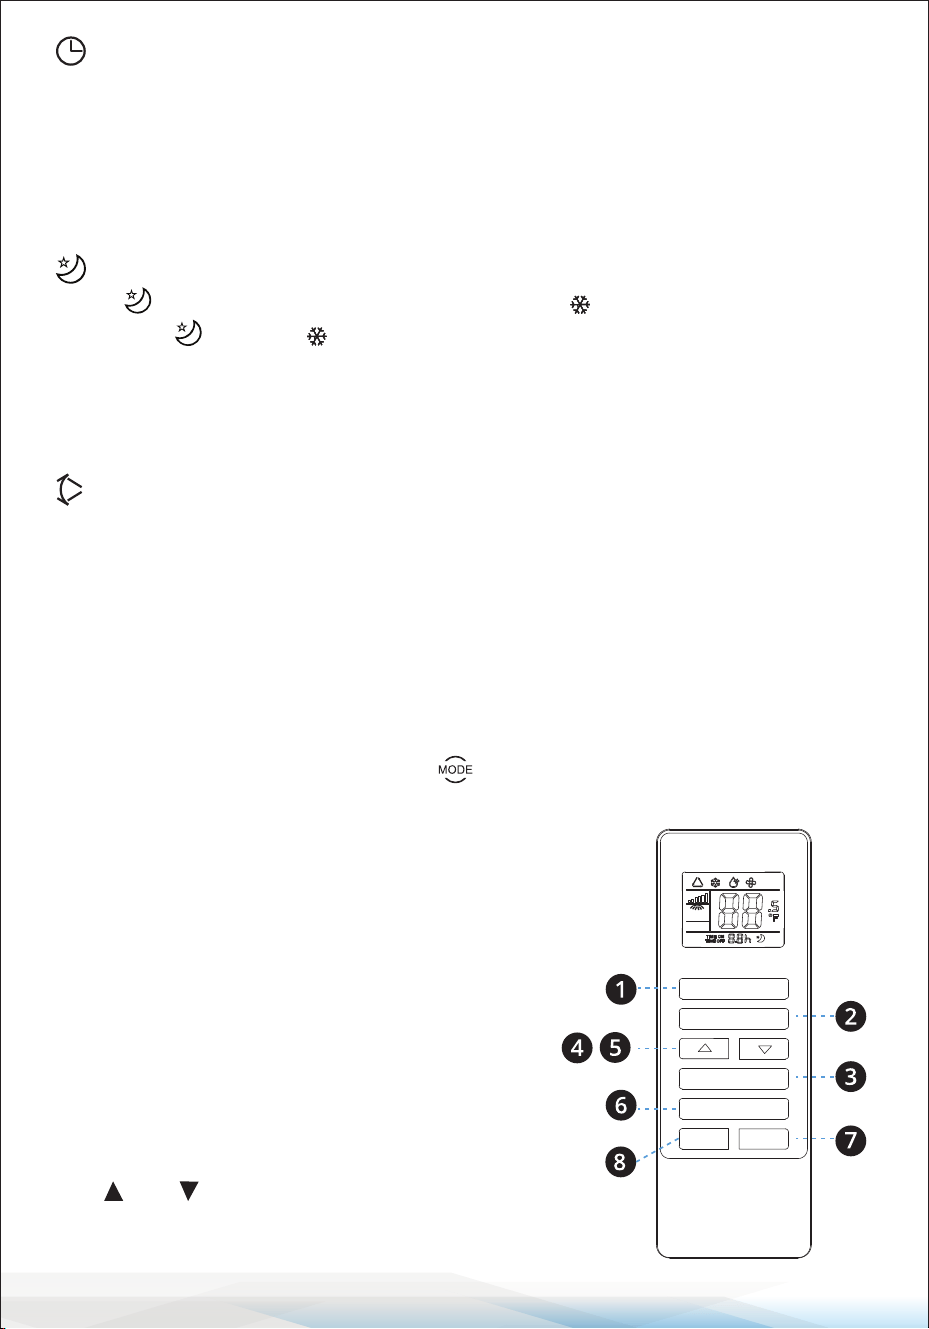
REMOTE CONTROLLER
The Remote Controller transmits signals to the system.
1. ON/OFF Button: The appliance will start
when energized or stop when in operation by
pressing this button.
2. MODE Button: Press this button to select the
operation mode.
3. Speed Button: Used to select fan speed in
sequence mode.
4,5. and Setting Buttons: Used to adjust
the room temperature and set the timer.
SLEEP
ON/OFF
MODE
SPEED
SWING
TIMER

www.SereneLifeHome.com
13
6. Sleep Button: Used to set or cancel Sleep mode operation.
7. Timer Button: Used to set or cancel OFF and automatic ON time.
8. Swing Button: Used to activate or deactivate automatic Swing mode.
How to Install Batteries
1. Open the back cover and remove the isolating lm from the batteries.
2. Insert the batteries into the slot, ensuring the anode and cathode are in the
correct directions.
3. Replace the back cover and slide to close, ensuring the direction is correct.
Notice
1. The anode and cathode of the batteries must correspond to the signs of
"+" and "-" on the remote control.
2. Avoid using new batteries with run-down cells.
3. If not in use for an extended period, remove the batteries.
4. Dispose of used batteries safely to prevent environmental pollution.
How to Use
To operate the air conditioner,
aim the remote controller at the
signal receptor.
The remote controller can operate
the air conditioner from a distance
of up to 5m (16.4 feet) when pointing
it at the signal receptor of the air
conditioner.
Slide the cover to open, ensuring
the direction is correct.
ON/
OFFMO
DE
SPEED
SLEEP
SWING
TIMER

www.SereneLifeHome.com
14
PROTECTION
Operating Conditions:
The protective device may trip and stop the appliance in the following cases:
Cooling:
• Indoor air temperature is over 109°F.
• Room temperature is below 59°F.
Dehumidifying:
• Room temperature is below 59°F.
If the air conditioner runs in COOLING or DRY mode with a door or window
opened for a long time when the relative humidity is above 80%, dew may drip
down from the outlet.
Features of the Protector
1. The protective device will work in the following cases.
Restarting the unit immediately after operation stops or changing mode
during operation, you need to wait for 3 minutes.
2. If the plug is taken out, when you restart the appliance, it will return to the
original mode. TIMER ON and TIMER OFF must be set again.
Drain Water
Special reminder: There is condensing water recycling hidden within this unit.
The condensing water is partly kept recycling between the condenser and the
water plate. When the water level rises to the upper level, the oat switch and
water full indicator (E4) light on to remind draining water. Please cut o the
power supply, move the appliance to a suitable place, remove the drain plug,
drain water completely. After the drain, reinstall the plug, or the appliance may
leak and make your room wet.
If the appliance is placed in a position admitting drain water, you can also
connect the drain hose to the drain port for water drainage.
www.SereneLifeHome.com
15
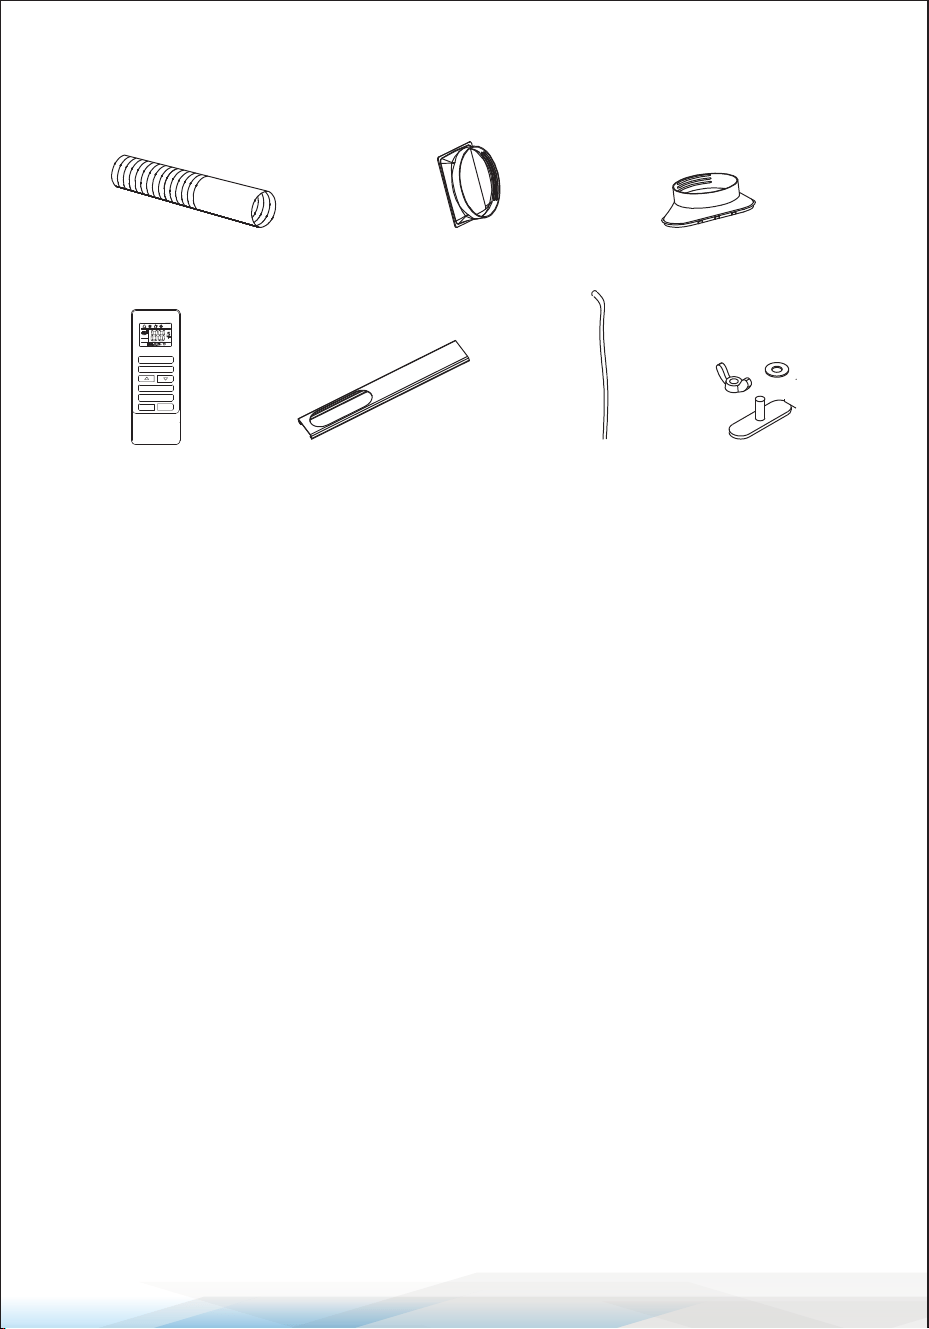
INSTALLATION
Installation Accessories:
A. Air Exhaust Duct
B. Connector of Air Exhaust Duct
C. Window Exhaust
D. Remote Controller
E. Bae Plate
F. Drain Hose
G. Wing Nut Set
Select the Best Location
• Beside a window, a door, or a French window.
• Keep a required distance from the return air outlet to the wall or other
obstacles, at least 60 cm (23.6"). Fix one end of the air hose (A) on the air outlet
underside the appliance.
• Extend the air hose to ensure that the other end of the air hose has clearance
between the window, door, or French window, or wall hole.
• Ensure the air outlet or intake is not blocked by a protective grid or any obstacle.
A CB
D FE G
ON/
OFFMO
DE
SPEED
SLEEP
SWING
TIMER

www.SereneLifeHome.com
16
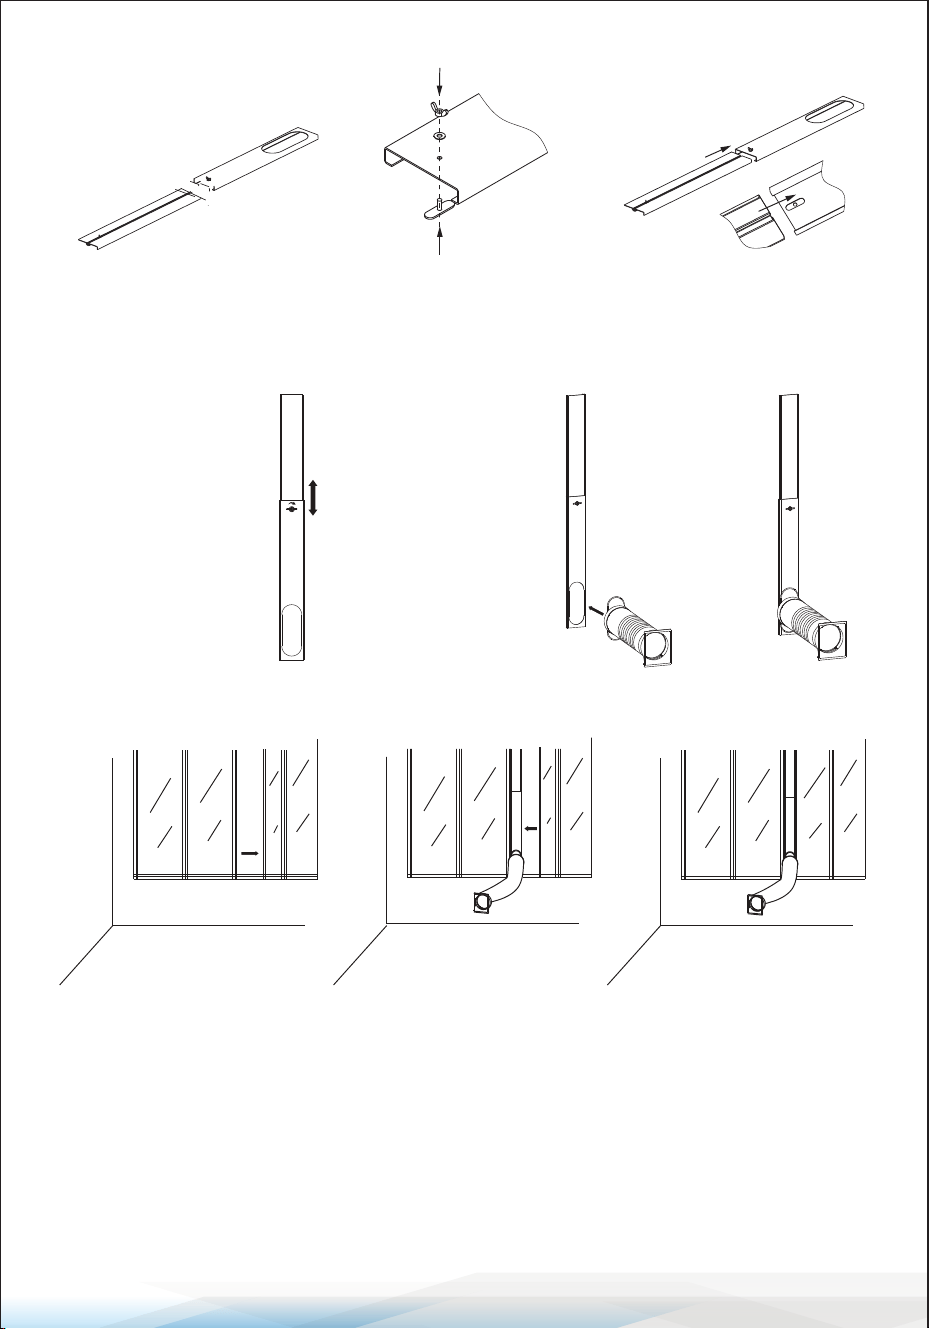
Install Exhaust Hose and Adapter
How to connect the connectors to the Air exhaust duct.
1. Extend the air exhaust duct (A) by drawing out
the two ends of the duct.
2. Screw the air exhaust duct (A) into the connector
of air exhaust duct (B) anticlockwise.
3. Screw the connector of the window (C) into the air exhaust duct (A) anticlockwise.
4. Connect the connector of the air exhaust duct (B) to the unit from top to
bottom until it clicks into position. If you need to remove the hose, please
press the locking system and slide the connector from bottom to up.
Air outlet
Air intake
Air intake
Locking
system
www.SereneLifeHome.com
17
Install Window Kit
B
A
B
B
A
A
B
g.1
1. Separate both boards
A board, and B board
2. Screw the wing nut
through the B board.
Leave 2/3 of free space.
3. Insert A board into
B board according to
arrowhead direction.
A
B
4. Once assembled,
adjust A board
up or down
according to the
height of the
window. Screw it
until it is tight.
5. Install the exhaust
air duct and its
accessories into
the window kit
following the
arrowhead
direction.
6. Assembly
nished.
Fig. 3 Fig. 4 Fig. 5
Fig. 6 Fig. 7 Fig. 8
7. Open the window where
you need to install the
exhaust air duct, window
kit, and their accessories.
8. Install the exhaust air
duct, window kit, and
their accessories onto
the window. Close the
window according to
the arrowhead direction
in Fig7, pressing the
window kit tightly.
9. Install the exhaust air
duct, window kit, and
their accessories onto
the window following
the illustration in Fig8.
www.SereneLifeHome.com
18
Fig. 9 Fig. 10
Fig. 11
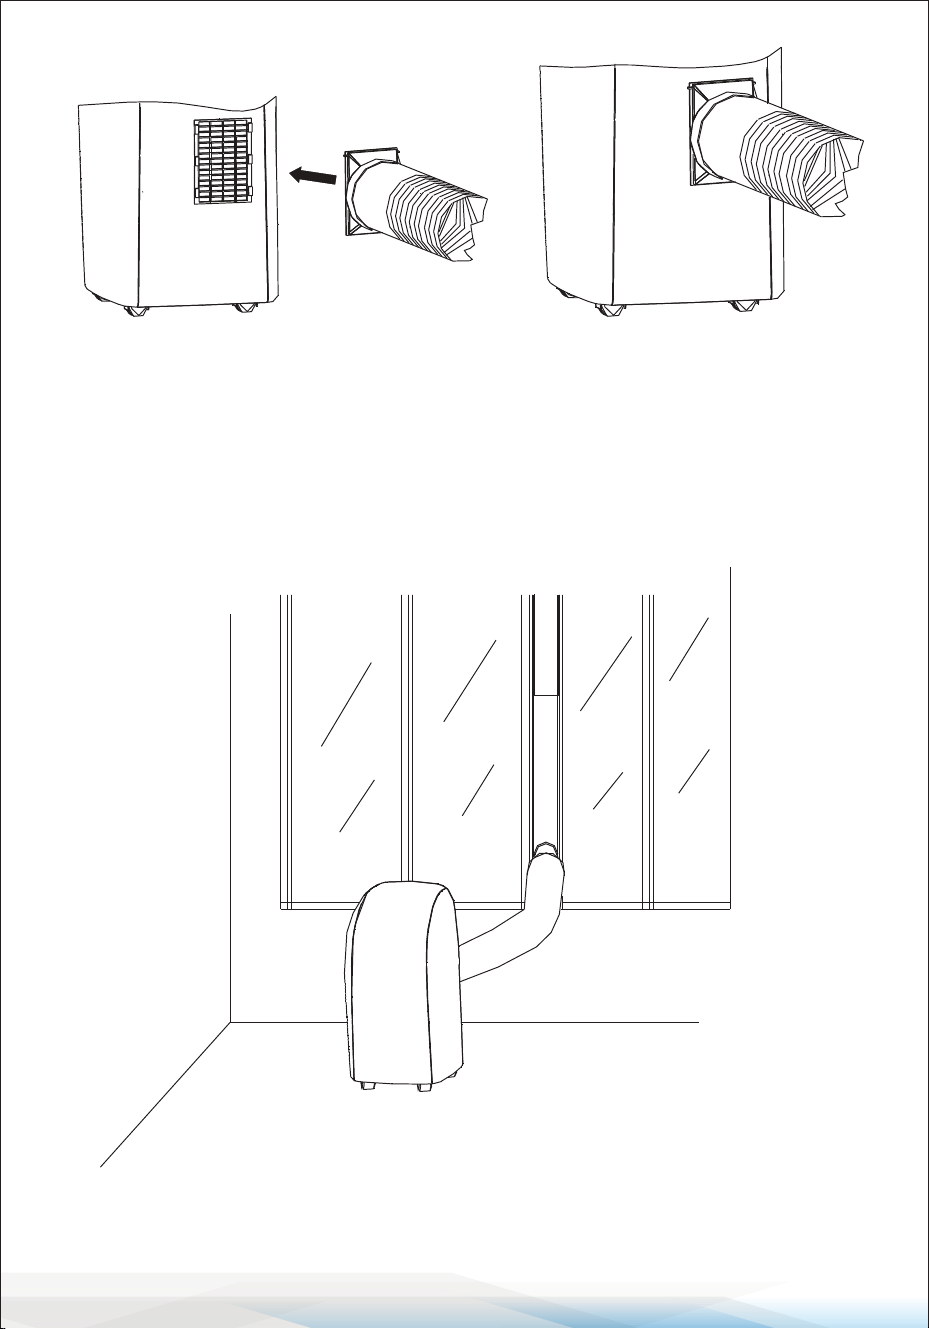
10. Connect the other end of the exhaust
air duct and its accessories to the
portable air conditioner.
11. The assembly of the exhaust
air duct and its accessories
is complete, as illustrated
in Fig10.
12. The entire unit is now well-assembled, as shown in Fig11.
www.SereneLifeHome.com
19
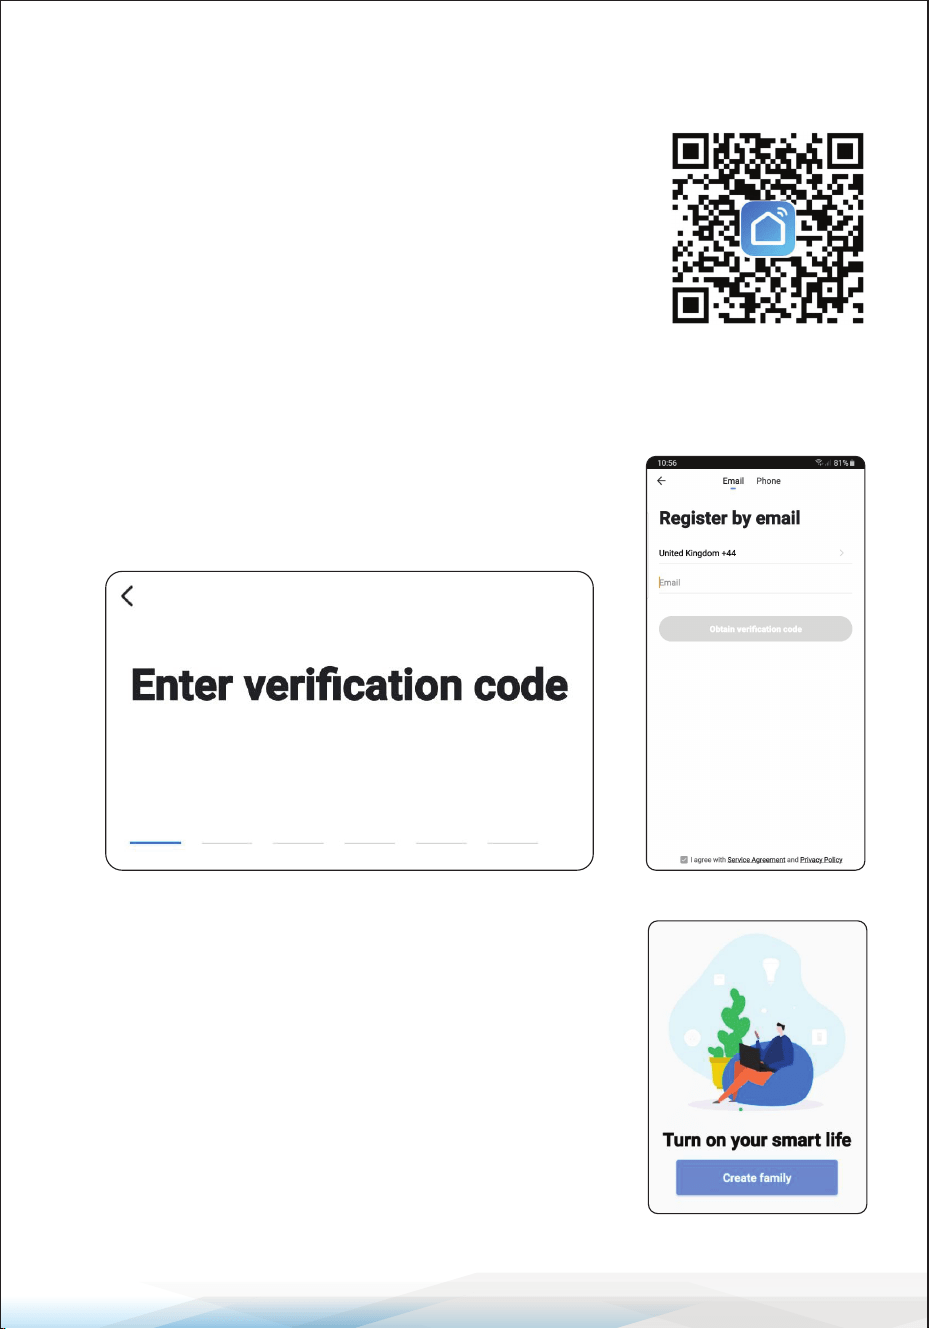
Connecting Your Air Conditioning Unit to The Smart Life App
Step 1: Download the Smart Life App
Scan the QR code (on the right) or search for "Smart Life"
on the App Store/Play Store.
Step 2: Registering an Account
Once the app has downloaded, open it and click login.
If you do not already have an account, click register.
You will be met with the page shown on the left.
You can also register using your phone number.
When you have registered, you will receive a verication
code either through email or text, depending on how
you registered (see below).
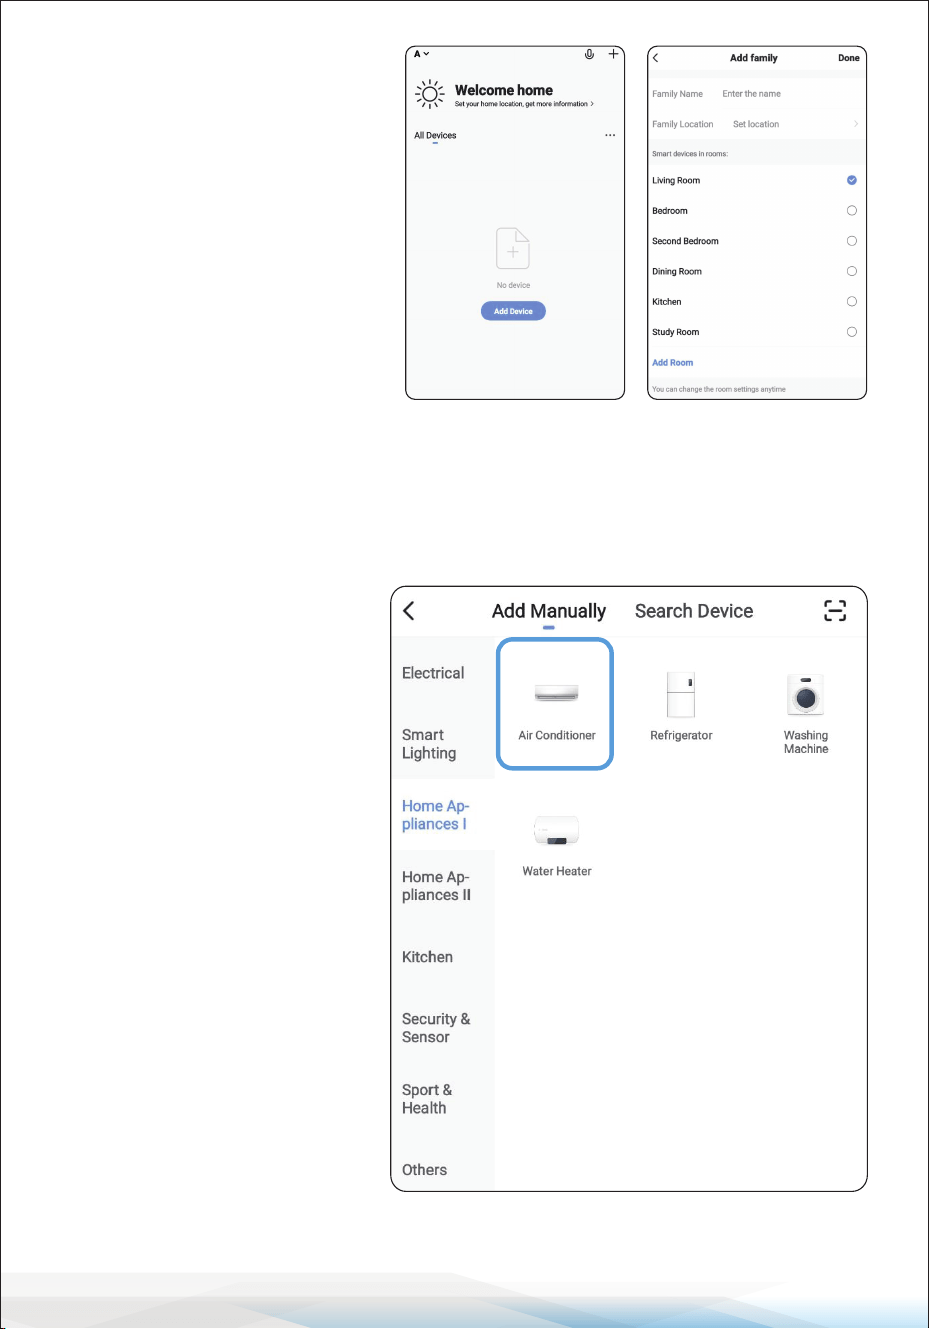
Step 3: Creating Your “Smart Family”
After registering and verifying using the code, you will
be ready to set up your new smart device.
Simply click “Create Family” (shown on the right).
You will be taken to the page shown on the right.
This is where you can set up which room the air
conditioning unit is in.
www.SereneLifeHome.com
20
Once all this information is entered, click “Done” in the top right, and you will be
taken to the main Home Page. From here, you can control all of your smart devices.
The family name is a group
name under which all your
smart devices will be grouped;
this does not have to be correct;
it is simply a group under which
all your smart devices will be
located.
The location is NOT mandatory;
if you do not wish to enter this
information, you do not have to.
Step 4: Binding the unit to
the App
From the home page, click
“Add Device,” and you will be
taken to this page on the left.
Select “Home Appliances 1”
from the list and then select
“Air Conditioner” (Blue box
around the correct item).
www.SereneLifeHome.com
21
To put the unit into Wi-Fi mode, plug the unit into the
wall, but do not push the power button.
Simply press and hold the “FAN” button until the unit
beeps, and the Wi-Fi LED ashes. This will usually take
between 5-10 seconds.
Below is the control panel of the SLACHT12W and SLACHT14W models with
the "FAN" button highlighted.
Once the LED is ashing rapidly, proceed to click
“Conrm indicator rapidly blink” on your screen.
You will then be brought to this page (on the right),
where it should automatically input your Wi-Fi network
name connected to your phone. Enter the password,
then click “Conrm.” Please note the unit will be
searching for the App to connect to; input these details
as soon as possible after conrming the LED ashing.
www.SereneLifeHome.com
22
Step 5: Setting Up New Device on the App
Once the unit has connected, you will be given the option to change the name
of the air conditioner. The name you enter will be what you refer to it as using
Alexa or Google (the name can be changed at any time).
Please note if you have more than 1 air conditioning unit, you will need to name
them dierently, so you can control each unit separately using Alexa or Google.
Now that you have successfully bound the system to the WiFi App, you can test
this out by turning the unit on and setting the temperature.
Once this is working, you can now bind the Smart Life app to Alexa or Google.
Once entered and pressed “Conrm,” the App will be
trying to connect to the unit.
Wait while the unit connects (shown on the right).
If the unit fails to connect, please retry from Step 4
before contacting us about a problem.

www.SereneLifeHome.com
23
LINK TO AMAZON "ALEXA"
Preparation before use:
1. Ensure a stable Wi-Fi network that can access the Amazon server.
(For mainland China users)
2. An Echo device, including Echo, Echo Tap, or Echo Dot.
3. An Amazon account. (If you don't have one, sign up rst).
4. Make sure there's at least one device under your "Smartlife" account, and the
device's name can be easily recognized by Echo.
Connection method 1:
1. Open "Alexa" and search for the "Smartlife" application. Click "ENABLE TO USE".
2. Click "Agree and link".
3. Click "CLOSE" to complete the skill binding.
Connection method 2:
You can connect your mobile air conditioner to Amazon Alexa using the
"Smartlife" app:
1. In the "Me" section in the lower right corner of "Smartlife", select "More Services"
and then "Alexa".
2. Sign in with Amazon.
3. Conrm the link to complete the skill binding.
4. Click “Back”.
www.SereneLifeHome.com
24
Control devices by voice commands:
Now you can control your smart devices through Alexa.
You can use the following commands to control your devices:
• Querying the ambient temperature: "Alexa, what is the temperature of
<device name>?"
• Power switch: "Alexa, turn on <device name>" / "Alexa, turn o <device
name>"
• Adjust the temperature: "Alexa, set <device name> to N"
NOTE: Every time you change the device's name on the "Smartlife" app, Alexa
must rediscover it before it can be controlled.
www.SereneLifeHome.com
25
Maintenance
Appliance Maintenance
1. Cut o the power supply: Turn o the appliance before disconnecting it
from the power supply.
2. Wipe with a soft, dry cloth: Use lukewarm water (below 104°F/40°C) to
clean if the appliance is very dirty.
3. Never use volatile substances such as gasoline or polishing powder to clean
the appliance.
4. Never sprinkle water onto the main unit.
Air Filter Maintenance
It is necessary to clean the air lter after using it for about 100 hours.
Clean it as follows:
1. Stop the appliance and remove the air lter.
2. Clean and reinstall the air lter. If the dirt is conspicuous, wash it with a
solution of detergent in lukewarm water. After cleaning, dry it in a shaded
and cool place, then reinstall it.
3. Clean the air lter every two weeks if the air conditioner operates in an
extremely dusty environment.

www.SereneLifeHome.com
26
Maintenance After Using
1. If the appliance will not be used for a long time, be sure to pull out the
primary and the secondary rubber plug of the drain port to drain the water.
2. Keep the appliance running with the fan only for a half day during a sunny
day to dry the appliance inside and prevent it from going moldy.
3. Stop the appliance and pull out the power supply plug, then take out the
batteries of the remote controller and store the appliance properly.
4. Clean the air lter and reinstall it.
5. Remove the air hoses and store them properly, covering the hole tightly.
Troubleshooting
Does not run:
• If the protector trip or fuse is blown.
• Wait for 3 minutes and start again; the protector device may be preventing the
unit from working.
• Check if batteries in the remote controller are exhausted.
• Ensure the plug is properly plugged in.
Runs for a short while only:
• Adjust the set temperature if it is close to room temperature.
• Remove any obstacles blocking the air outlet.
Runs but not cooling:
• Check if the door or window is open.
• Ensure there are no other heat-producing appliances in operation.
• Clean the air lter.
• Ensure the air outlet or intake is not blocked.
• Adjust the set temperature if it is too high.
Water leak during moving:
• Drain the condensate before moving.
• Place the unit on at ground to avoid water leakage.
• Does not run and water full indicator:
Does not run and water full indicator "E4":
• Pull out the rubber plug to drain water.
• If the issue persists, contact a qualied service technician.
www.SereneLifeHome.com
27
Machine Failures, Causes, and Solutions:
Failures Causes
Solutions
Machine fails
to start up.
Power supply failure:
1. Not plugged;
2. Plug or socket
damaged;
3. Fuse broken.
1. Plug in;
2. Replace the power cord or
socket;
3. Replace the fuse by a service
provider
(Specication: 6.3A/250VAC).
Machine
automatically
stops.
TIMER shut down or set
temperature reached.
Restart or wait for auto-switch.
No cold air
under
COOLING
mode.
1. Room temperature
lower than set
temperature;
2. Machine enters into
anti-frost protection.
1. Normal phenomenon; the
machine will auto-switch while
the room temperature is higher
than the set temperature;
2. The machine will auto-switch
after anti-frost protection is over.
LED displays
failure code
“E2”
Room temperature
sensor fails or damaged.
Replace the room temperature
sensor.
LED displays
failure code
“E3”
The evaporator coil pipe
sensor fails or damaged.
Replace the evaporator coil pipe
sensor.
LED displays
failure code
“E4”
Drain out the water.Water-full warning.

www.SereneLifeHome.com
28
Using Information
Cautions:
• Keep the unit at least 3.3 feet away from TVs or radios to avoid electromagnetic
interference.
• Avoid exposing the unit to direct sunlight to prevent surface color fading.
• Do not tilt the unit for more than 35° or upside-down during transportation.
• Place the unit on a at surface with less than a 5° inclination.
• The unit operates more eciently in certain room locations
(see Technical Specications).
• Empty the condensed drainage pan before storing the unit at the end of the
season.
• Do not use chemical solvents to clean the unit surface to avoid scratching or
damaging the surface.
• Cut o the power before disassembling or installing the air-inlet fence.
• Empty the water from the water tank before moving the machine.
• Remove the battery before scrapping and dispose of it safely.
www.SereneLifeHome.com
29
Register Product
Thank you for choosing SereneLife. By registering your
product, you ensure that you receive the full benets of our
exclusive warranty and personalized customer support.
Complete the form to access expert support and to keep
your SereneLife purchase in perfect condition.
Serenelifehome.com/
register

Questions or Comments?
We are here to help!
Phone: 1.718.535.1800
Serenelifehome.com/ContactUs