portable air
conditioner
user manual
SL12PACWFWH - SL12PACHWFWH
SL14PACWFWH - SL14PACHWFWH
visit our website
SCAN ME
serenelifehome.com
PLEASE KEEP THIS MANUAL CAREFULLY FOR FUTURE
REFERENCE. FOR HOUSEHOLD USE ONLY.
Table of Contents
FEATURES AND TECHNICAL SPECS
BEFORE YOU BEGIN
PRODUCT OVERVIEW
INSTALLATION
OPERATION
WI-FI SETUP GUIDE
CLEANING AND CARE
TROUBLESHOOTING
DECOMMISSIONING
REGISTER PRODUCT
WARNING
Read and understand this entire owner's manual, including all safety information,
before plugging in or using this product. Failure to do so could result in re,
electric shock, or serious personal injury.
02 serenelifehome.com
03
05
09
10
14
17
21
23
25
25
CALIFORNIA PROP 65 WARNING
WARNING:
This product may expose you to chemicals, which is known to
the state of California to cause cancer, bih defects and other
reproductive harm. Do not ingest.
For more info go to: www.P65warnings.ca.gov

03serenelifehome.com
Unique Elements:
• Automatic Swing Air Vents for Improved Circulation
• Poable and Quick Installation
• Digital Feather-Touch Control Panel
• Sleep Mode with Low Noise Operation
• Rolling Wheels for Easy Poability
Features:
• Sma Wi-Fi Control via SereneLife App
• Lightweight & Poable A/C Unit
• Compact, Freestanding Room Air Conditioner
• Heating Capability (SL12PACHWFWH, SL14PACHWFWH)
• Operation Modes:
• 3) Modes: AC Cooling / Dehumidier / Fan (SL12PACWFWH, SL14PACWFWH)
• (4) Modes: AC Cool / Heat / Dehumidier / Fan
(SL12PACHWFWH, SL14PACHWFWH)
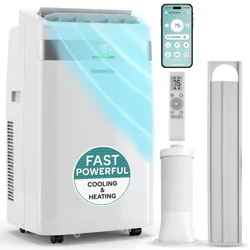
• Hassle-Free, Quick Setup Cooling and Heating (Select Models)
• Simple Plug-and-Play / Electric Plug-In Operation
• Adjustable Temperature Control with Air Circulation Function
• Automatic Swing Mode with Adjustable Air Vents for Improved Ailow
• Digital Touch Buon Panel with LED Display
• Time, Temperature & Fan Speed Adjustment Seings
• Includes Universal Window Exhaust Kit for Easy Installation
• Removable & Washable Air Filter Screen
• Modern Style with Sleek Body Housing
• Energy-Ecient Design with Low Power Consumption
• Quiet Operation with Low Noise Level Compressor and Motor
• Rolling Wheels for Easy Poability
• Ideal for Use in Home, Oce, School & Business Rooms
What’s in the Box:
• Poable AC Unit
• Exhaust Hose
• Window Installation Plate
• Remote Control or Digital Remote Control
• Drain Pipe
• Exhaust Hose Connector

Technical Specs:
• Cooling Power (ASHRAE):
• SL12PACWFWH / SL12PACHWFWH: 12,000 Btu/h
• SL14PACWFWH / SL14PACHWFWH: 14,000 Btu/h
• Cooling Power (DOE):
• SL12PACWFWH / SL12PACHWFWH: 8,000 Btu/h
• SL14PACWFWH / SL14PACHWFWH: 10,000 Btu/h
• Heating Power (ASHRAE):
• SL12PACHWFWH: 10,000 Btu/h
• SL14PACHWFWH: 11,000 Btu/h
• Rated Power:
• SL12PACWFWH / SL12PACHWFWH: 1,081 W
• SL14PACWFWH / SL14PACHWFWH: 1,260 W
• Air Flow:
• SL12PACWFWH / SL12PACHWFWH: 410 m³/hour
• SL14PACWFWH / SL14PACHWFWH: 470 m³/hour
• Operating Modes: Cool / Heat (Select Models) / Fan / Dry (Dehumidier)
• Moisture Removal (Dehumidier):
• SL12PACWFWH / SL12PACHWFWH: 1.8 L/hour
• SL14PACWFWH / SL14PACHWFWH: 2.0 L/hour
• Operating Noise Level:
• SL12PACWFWH / SL12PACHWFWH: 45–53 dBA
• SL14PACWFWH / SL14PACHWFWH: 46–54 dBA
• Fan Speed Seings: Low / Medium / High
• Temperature Unit Selectable: °F / °C (Fahrenheit / Celsius)
• Adjustable Timer Seings: Up to 24 Hours
• Refrigerant Type: R32
• Construction Material: ABS Housing
• Remote Control: Baery-operated, requires (2) × AAA baeries (not included)
• Power Supply: AC 115 V / 60 Hz
• Power Cable Length: 5.5 ft.
• Drain Pipe Length: 2.1 ft.
• Exhaust Hose Length: 4.9 ft.
• Product Dimensions (L × W × H): 16.7 × 13.7 × 28.4 in.
• Item Weight:
• SL12PACWFWH / SL12PACHWFWH: 61.7 lbs.
• SL14PACWFWH: 64 lbs.
• SL14PACHWFWH: 65 lbs.
04 serenelifehome.com
05serenelifehome.com
BEFORE YOU BEGIN
PRODUCT OVERVIEW
Our poweul poable air conditioners are ideal cooling solutions for single rooms,
creating a comfoable atmosphere in your space. The unit also features ventilation
and dehumidifying functions to circulate air and remove moisture. These are self-
contained systems that do not require permanent installation, allowing you to move
the unit to the area where it is most needed.
Poable air conditioners are commonly used in kitchens, temporary residences,
computer rooms, garages, and other locations where installation of an outdoor air
conditioner unit is limited.
The environmentally friendly refrigerant R32 is used in this unit. R32 has no
damaging eect on the ozone layer (ODP). Due to its high energy eciency, R32 is
well suited for this application. However, special precautions must be observed
because of the refrigerant’s ammability.
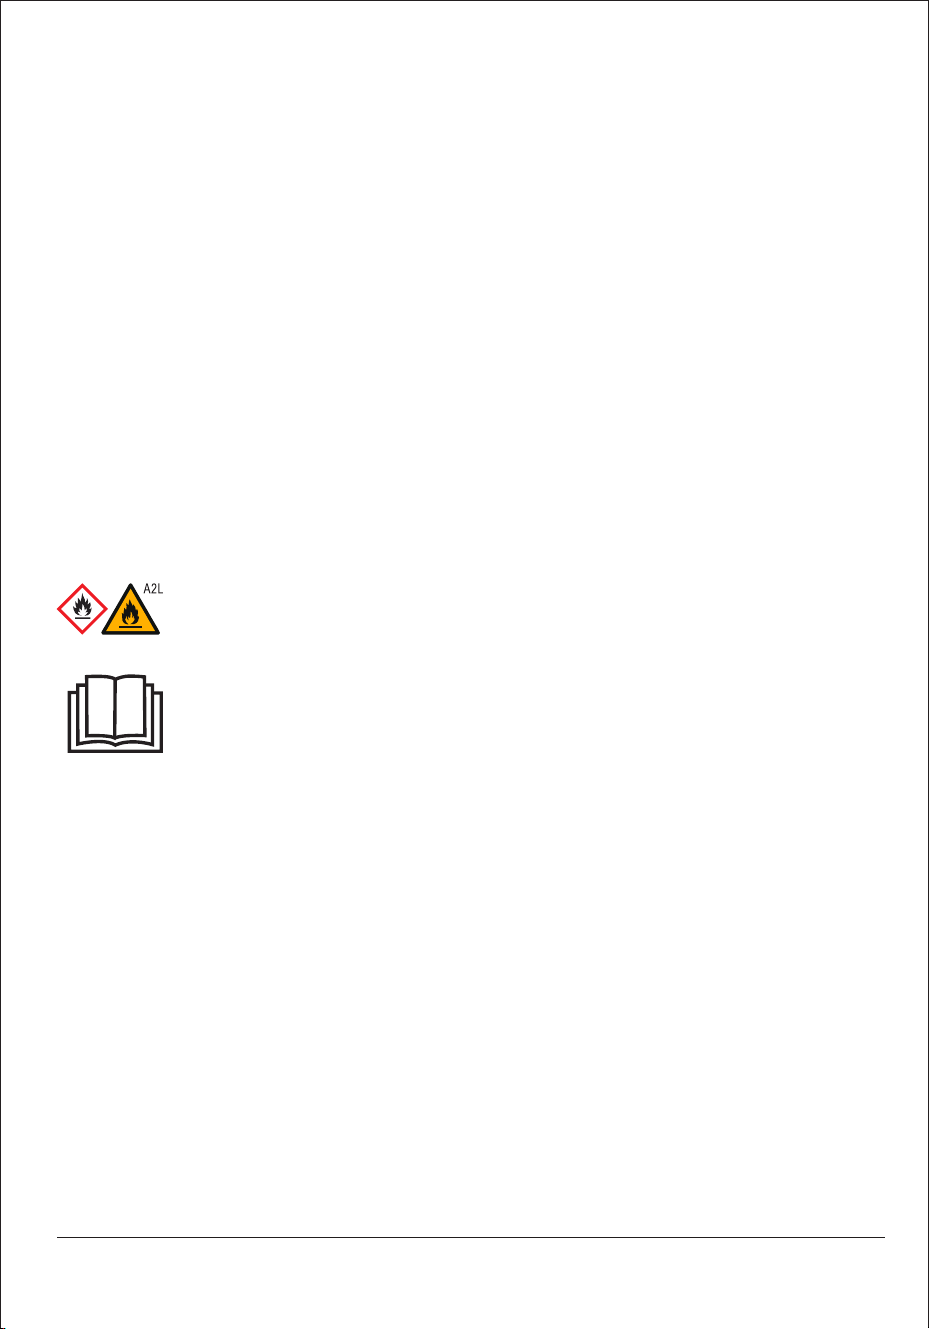
SYMBOLS FROM THE UNIT AND USER MANUAL
This unit contains a ammable refrigerant. If the refrigerant leaks and
comes into contact with an open ame or hot suace, it may produce
harmful gas and pose a re hazard.
Read the USER MANUAL carefully before operation.
Additional information is available in the USER MANUAL and SERVICE
MANUAL.
Service personnel must carefully read the USER MANUAL and SERVICE
MANUAL before servicing or operating the unit.
FOR YOUR SAFETY
ALWAYS OBSERVE THE FOLLOWING SAFETY INSTRUCTIONS
• This appliance is not intended for use by persons (including children) with reduced
physical, sensory, or mental capabilities, or lack of experience and knowledge,
unless supervised or instructed by a person responsible for their safety.
Children must be supervised to ensure they do not play with the appliance.
• The appliance must be installed in accordance with national wiring regulations.
• Installation of the appliance and refrigerant system must only be peormed by
the manufacturer’s service personnel or a suitably qualied person.
• The unit must be installed by qualied personnel ceied to handle R32
refrigerant. Refer to applicable local regulations and laws.

06 serenelifehome.com
• Cleaning and user maintenance must not be peormed by children.
• The unit is designed to operate exclusively with R32 refrigerant.
• The refrigerant circuit is sealed. Servicing must be peormed by a qualied
technician.
• Do not discharge refrigerant into the atmosphere.
• R32 is mildly ammable and must be kept away from open ames or ignition
sources.
• If R32 refrigerant leaks, do not allow untrained personnel to aempt to locate
the leak.
• R32 may have a slight odor; however, leaks may still go undetected.
Do not rely on smell to detect refrigerant leakage.
• If a leak is detected, immediately evacuate all persons from the area, ventilate the
room, and contact the local re depament to repo an R32 refrigerant leak.
• Do not allow anyone to re-enter the area until a qualied service technician
conrms it is safe.
• Do not use open ames, cigarees, or other ignition sources in or near the unit.
• Components are designed for R32 refrigerant and are non-sparking. Replace
components only with identical pas approved by the manufacturer.
FAILURE TO FOLLOW THESE WARNINGS MAY RESULT IN EXPLOSION, SERIOUS
INJURY, DEATH, OR PROPERTY DAMAGE.
OPERATIONAL PRECAUTIONS
WARNING: To reduce the risk of re, electric shock, personal injury, or propey
damage:
• If the power cord is damaged, stop using the unit immediately. The cord must
be replaced by the manufacturer, service agent, or a qualied technician.
• Disconnect the appliance from the power supply during servicing.
• Operate the unit only with the voltage, frequency, and rating specied on the
product identication plate.
• Always use a properly grounded power outlet.
• Do not use extension cords or adapter plugs, as this may cause overheating
or re.
• Unplug the unit when cleaning or when not in use. Do not unplug by pulling on
the power cord.
• Do not operate the unit with wet hands or allow water to spill onto the unit.
• Do not immerse or expose the unit to rain, moisture, or liquids.

07serenelifehome.com
• Do not leave the unit operating unaended. Do not tilt or oveurn the unit.
• Do not operate the unit if it has been dropped, damaged, or is malfunctioning.
• Do not climb on or sit on the unit.
• Do not inse ngers or objects into the air outlet.
• Do not touch the air inlet or aluminum ns.
• Do not clean the unit with chemicals.
• Do not use methods to accelerate defrosting or cleaning other than those
recommended by the manufacturer.
• Keep the unit away from re, ammable, or explosive materials.
• Store the unit in a location free from continuous heat sources or open ames.
• Store the unit in a manner that prevents mechanical damage.
• Do not pierce or burn the unit, even after disposal.
• Store the unit in a well-ventilated area meeting the minimum room size
requirements.
• Protect all pipework from physical damage and do not install in unventilated
spaces smaller than 4 m².
• Keep ventilation openings unobstructed.
• Be aware that refrigerants may be odorless.
WARNING:
Any person servicing a refrigerant circuit must hold a valid ceicate from an
industry-accredited authority authorizing safe handling of refrigerants.
Servicing must be peormed only as recommended by the manufacturer.
Repairs requiring assistance from other skilled personnel must be supervised by a
qualied refrigerant technician.
If you have questions regarding operation or safety, contact after-sales service for
assistance.
SAFETY PRECAUTIONS FOR SERVICING
Please observe the following warnings when servicing appliances using R32
refrigerant.
Qualication of Workers
All safety-related work must be peormed by competent personnel. This includes:
• Opening the refrigerant circuit
• Opening sealed components
• Opening ventilated enclosures

08 serenelifehome.com
Checks to the Area: Before beginning work, peorm safety checks to minimize
ignition risks in areas containing ammable refrigerants.
Work Procedure: All work must be peormed under controlled procedures to
reduce the risk of ammable gas or vapor presence.
General Work Area: Maintenance personnel must be informed of the nature of
the work. Avoid working in conned spaces whenever possible.
Refrigerant Detection: Use appropriate, non-sparking refrigerant detectors
before and during work. Ensure detection equipment is suitable for ammable
refrigerants and properly calibrated.
Fire Extinguishers: Keep appropriate re extinguishing equipment nearby, such as
dry powder or CO2 extinguishers.
Ignition Sources: No ignition sources are permied near exposed refrigerant
systems. Post “No Smoking” signs and eliminate re hazards before work begins.
Ventilation: Ensure adequate ventilation before and during servicing to safely
disperse refrigerant.
Refrigeration Equipment Checks: Ensure components meet specications,
markings are legible, ventilation is unobstructed, and refrigerant piping is protected
from corrosion.
Electrical Safety: Peorm safety checks, discharge capacitors safely, and ensure
proper grounding before servicing electrical components.
Repairs, Cabling & Leak Detection:
Replace sealed and intrinsically safe components as required. Do not use open
ames for leak detection. Approved electronic detectors or leak detection uids
may be used.
Removal and Evacuation: Recover refrigerant according to regulations. Use
oxygen-free nitrogen where required and ensure proper ventilation.
09serenelifehome.com
Charging Procedures: Prevent refrigerant contamination, ground the system,
avoid oveilling, and peorm leak testing before commissioning.
Decommissioning: Safely recover refrigerant, isolate electrical power, and follow
proper handling and storage procedures.
Labeling: Clearly label decommissioned equipment and indicate the presence of
ammable refrigerant.
Recovery: Use approved recovery cylinders, calibrated equipment, and follow
local regulations for refrigerant disposal.
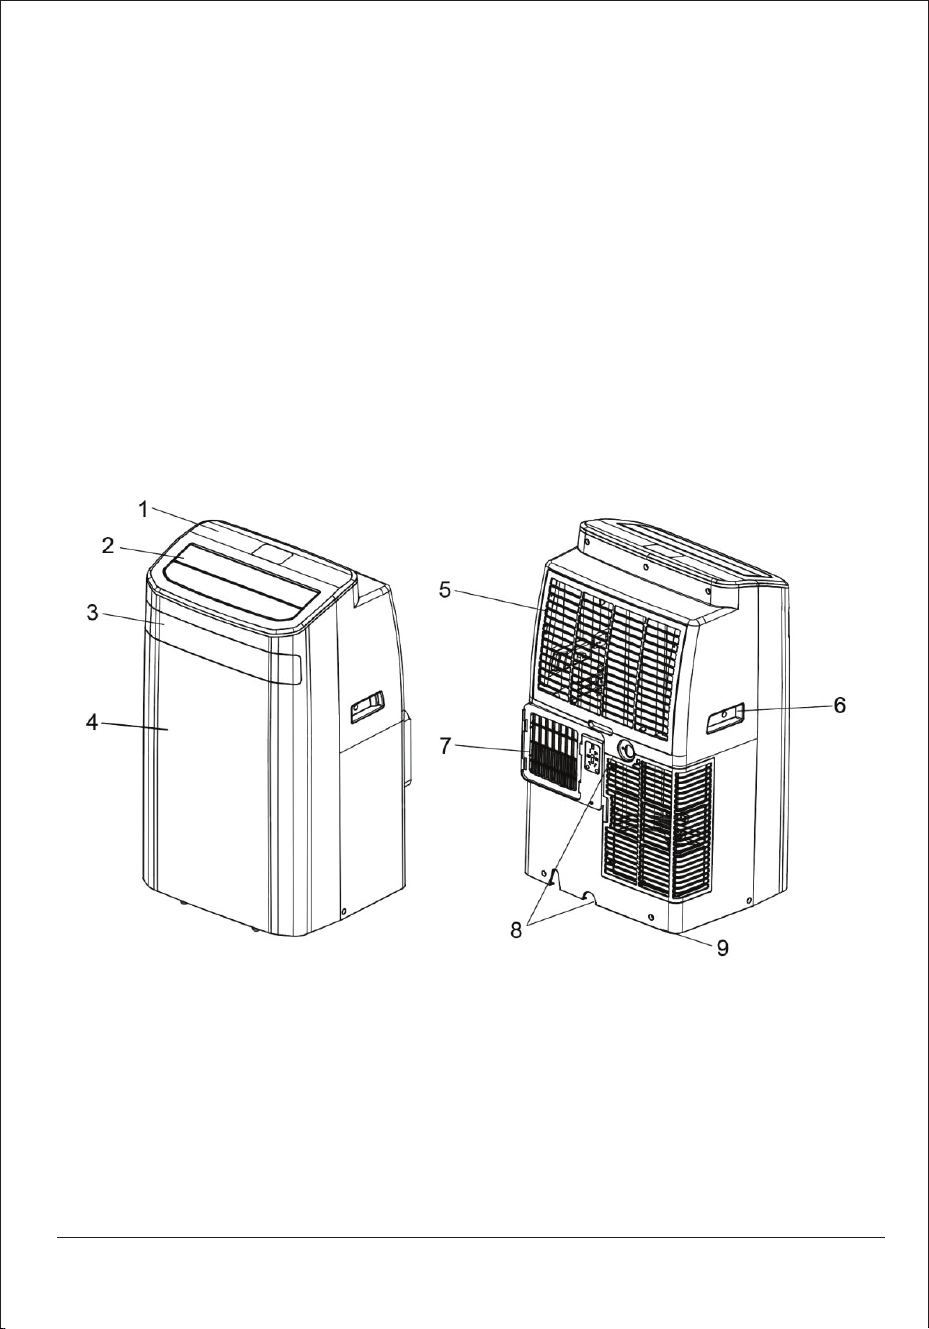
PRODUCT OVERVIEW
PRODUCT DIAGRAM
1. Control Panel
2. Air Outlet
3. Front Temperature Display
4. Front Panel
5. Air Inlet with Air Filter
Note: The appearance is for reference only. Please refer to the actual product for
detailed information.
6. Recessed Handle
7. Air Exhaust
8. Drain Hole with Sealing Plug
9. Caster
10 serenelifehome.com
INSTALLATION
UNPACKING
• Unpack the caon and remove the appliance and accessories.
• Check the unit after unpacking for any damage or scratches.
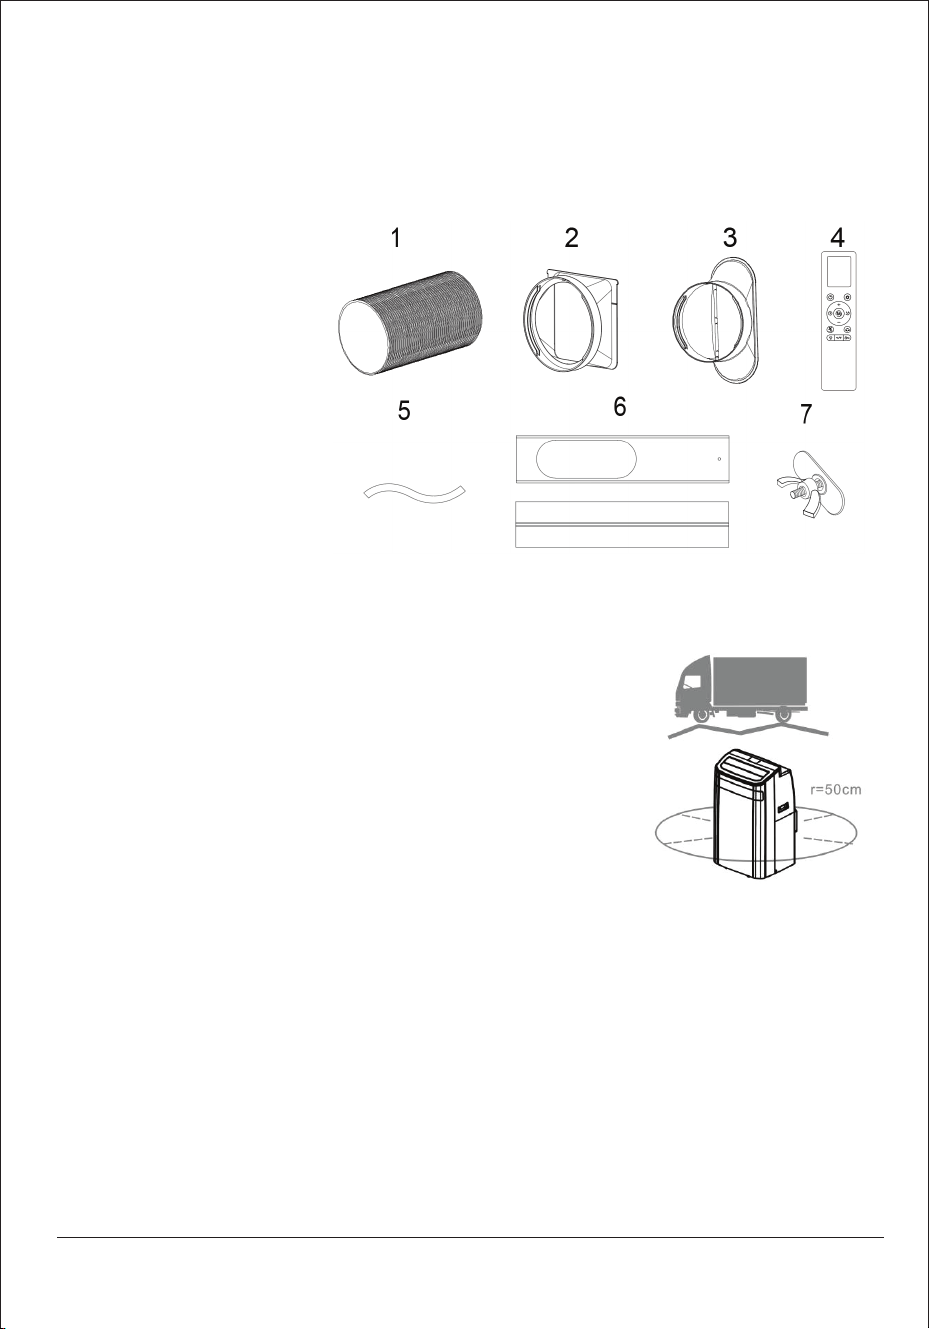
Accessories Included:
1. Exhaust hose
2. Hose connector
3. Window kit adapter
4. Remote control
5. Drain pipe
6. Window kit
7. Buely bolt (for securing the window kit)
CHOOSE YOUR LOCATION
• If tipped more than 45°, allow the unit to stand
upright for at least 24 hours before operation.
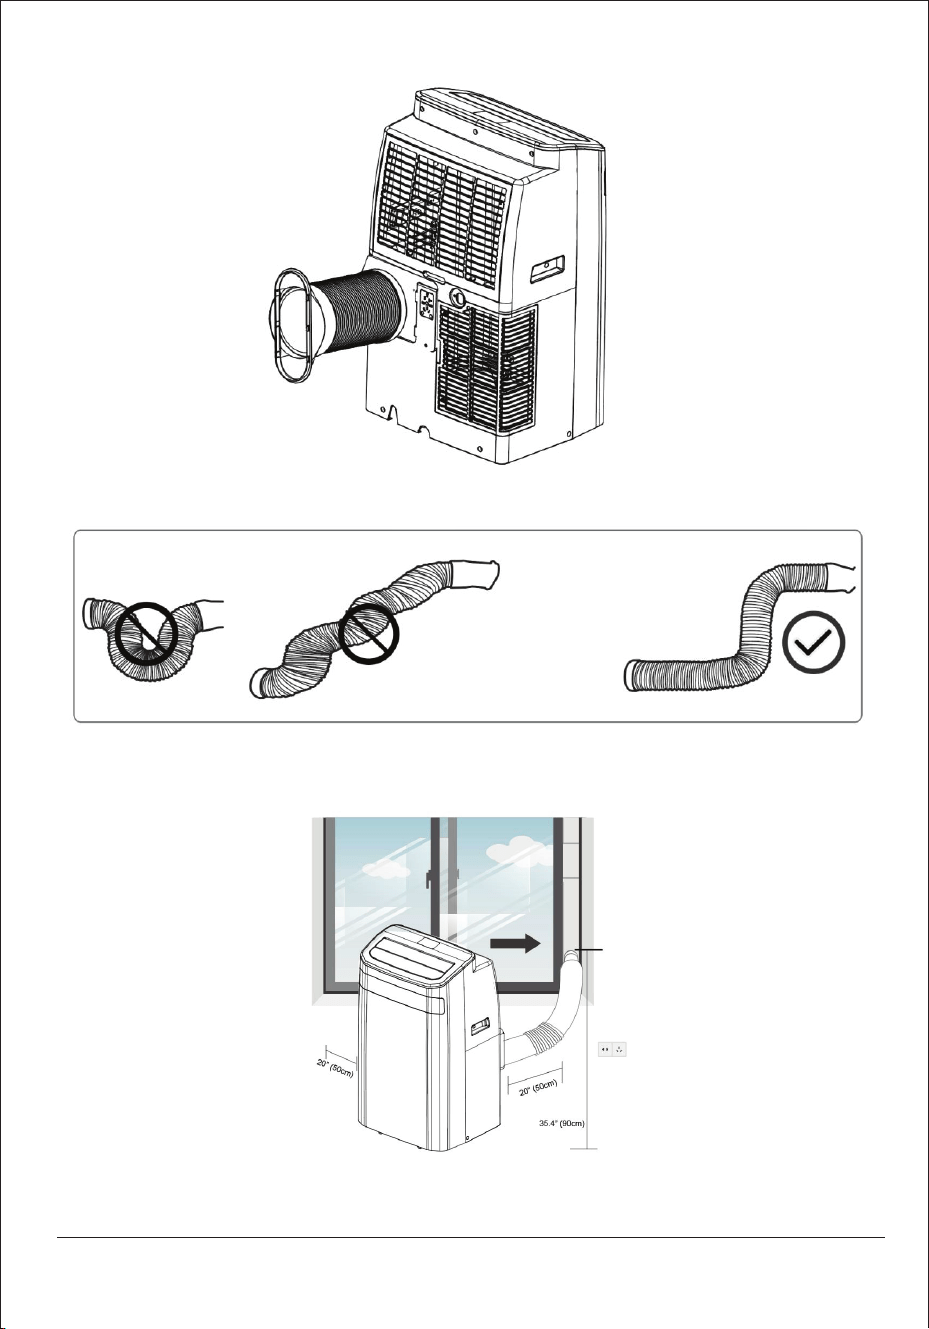
• Place the unit on a rm, level suace with at least 20 in.
(50 cm) of clearance around it for proper air circulation.
• Do not operate near walls, cuains, or objects that may
block the air inlet or outlet.
Do not install the unit in locations exposed to:
• Heat sources such as radiators, stoves, or other heat-producing appliances
• Direct sunlight
• Mechanical vibration or shock
• Excessive dust
• Poor ventilation (e.g., cabinets or bookcases)
• Uneven suaces
11serenelifehome.com
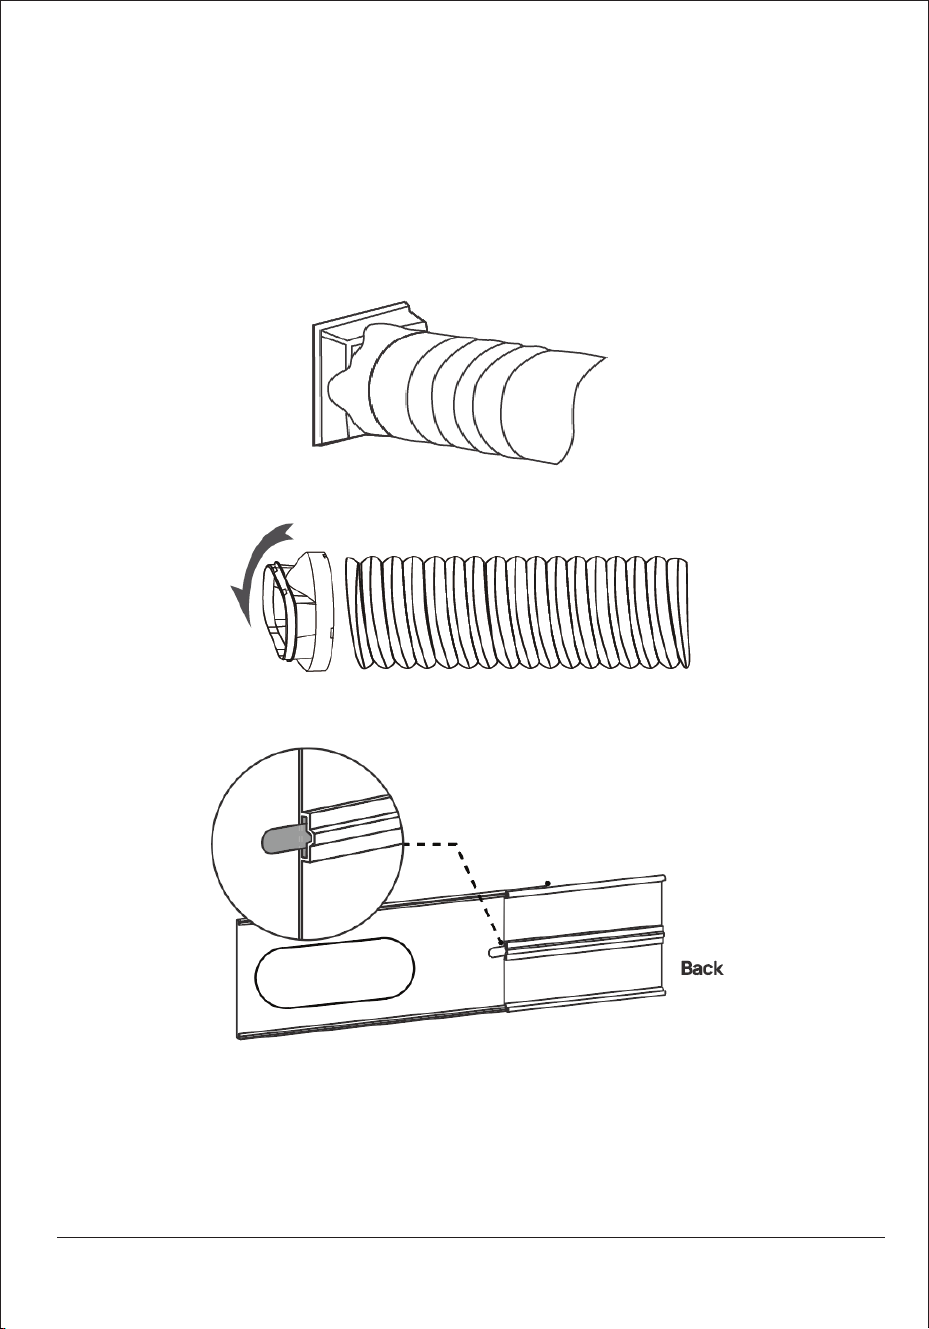
ATTACH THE EXHAUST HOSE
The air conditioner must be vented outdoors to allow hot air and moisture to escape.
Impoant: Do not replace or extend the exhaust hose, as this will reduce
eciency and may cause the unit to shut down due to low back pressure.
Installation Steps:
Step 1: Connect the hose connector to one end of the exhaust hose.
Step 2: Connect the window kit adapter to the other end of the exhaust hose.
Step 3: Adjust the window kit to t your window and connect the exhaust hose.
Align the back side slot with the panel’s buely bolt.
Note: The buely bolt must be inseed in the back side slot before installing the
panel on the window.

12 serenelifehome.com
Step 4: Close the window to secure the kit in place. Use duct tape if necessary.
Seal gaps around the adapter for maximum eciency.
13serenelifehome.com
Step 5: Aach the hose connector to the exhaust air outlet on the unit.
Note: Do not overextend or bend the hose.
Step 6: Adjust the hose length, avoid sharp bends, and place the unit near a
power outlet.
Step 7: Switch on the unit.
14 serenelifehome.com
OPERATION
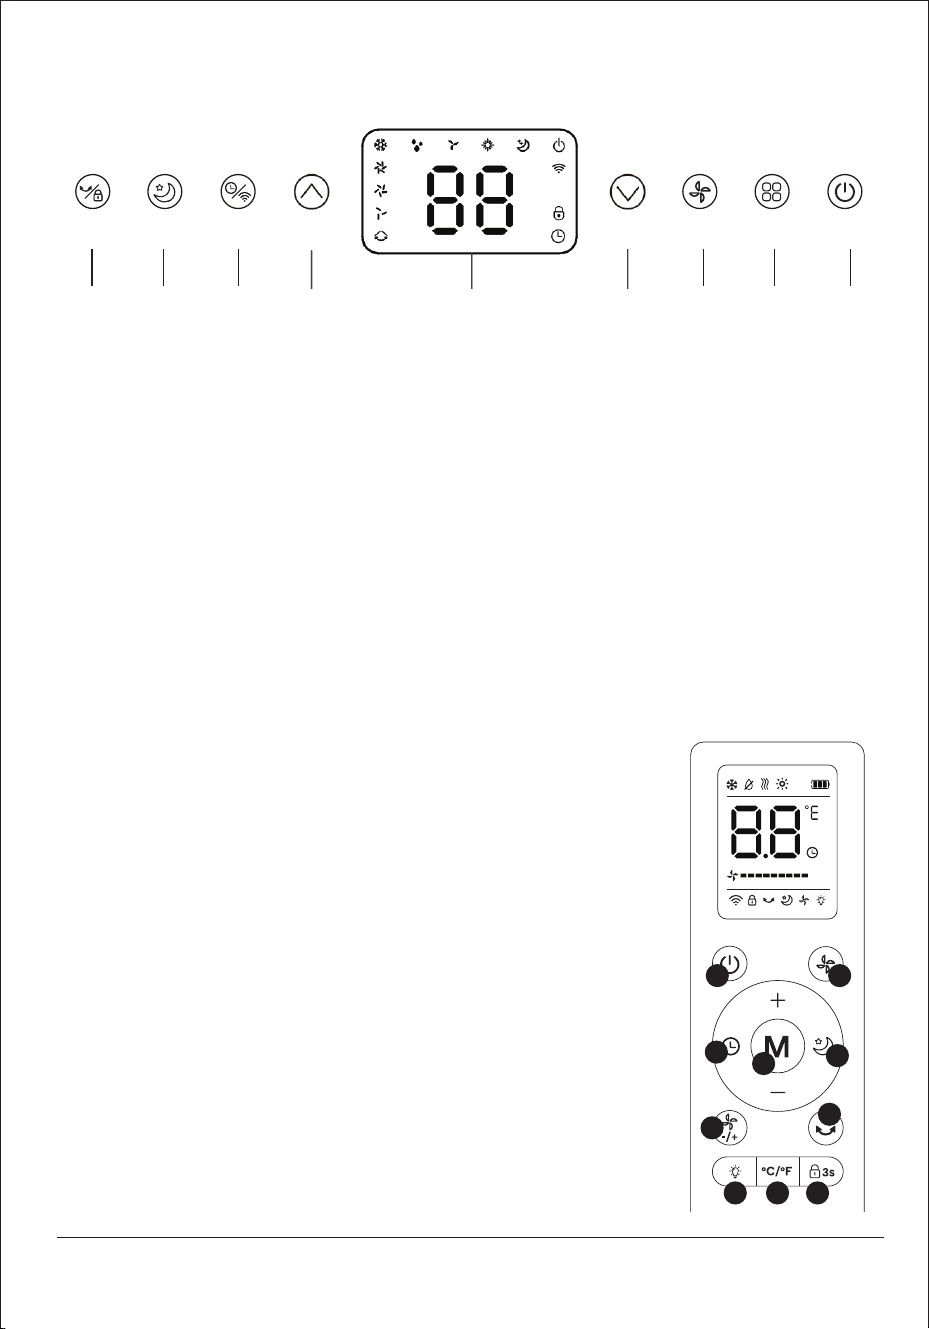
CONTROL PANEL AND DISPLAY
FUNCTION KEYS AND INDICATORS
1. POWER: Press to turn the unit on or o.
2. MODE: Press to switch between Cool, Heat (optional), Dry, and Fan modes.
3. SPEED: Press to select High, Medium, or Low fan speed.
4. DOWN: Decreases the set temperature (61°F–90°F) or timer seing.
5. Digital Display: Displays temperature and function seings.
6. UP: Increases the set temperature (61°F–90°F) or timer seing.
7. TIMER / Wi-Fi: Press to set the timer (1–24 hours) or turn it on/o.
• Press and hold for 5 seconds to activate or deactivate Wi-Fi.
8. SLEEP: Press to activate or deactivate sleep mode.
9. SWING / LOCK: Adjusts veical ailow direction.
• Press and hold for 5 seconds to activate or deactivate the child lock.
REMOTE CONTROL
Notes:
• Use the remote control within 16 ft. (5 m) of the unit, ideally
within a 45° angle.
• Baery type: (2) AAA baeries (not included).
1. Power: Turns the unit on or o.
2. Timer: Sets a timer to automatically turn the unit on or o.
3. Swing Louver: Sets the air discharge louvers to oscillate
up and down.
4. Child-Lock Function: Press and hold for 3 seconds to
turn the Child-Lock function on or o.
5. Fan Speed: Adjusts the fan speed between Low, Medium,
and High.
Speed
PowerMode
Timer/Wi-Fi
SleepSwing/Lock
789 123456
1 8
2
7
9
5
3
6 10 4

15serenelifehome.com
6. LED Light: Turns the control panel LED lights on or o.
7. Mode: Switches between Cool, Heat (optional), Dry (dehumidify), and Fan Only
modes.
8. Turbo: In Cooling mode, switches operation to 16 °C (61 °F) with High fan speed.
9. Sleep Function: (Available only in Cooling and Heating modes) Turns Sleep
Mode on or o.
10. Celsius/Fahrenheit: Switches the temperature display between Celsius (°C)
and Fahrenheit (°F).
SETTINGS
START-UP AND SHUTDOWN
• Press POWER to turn on the unit.
• Press MODE to select the desired operation mode.
• Press POWER again to turn o the unit.
OPERATION MODES
The unit oers four modes: Cool, Heat (optional), Dry, and Fan.
• Cooling operating temperature range: 61°F–95°F (compressor operating range).
A. Cooling Mode
• Select COOL mode.
• Set temperature between 61°F–90°F using UP/DOWN buons.
• Select fan speed as desired.
• Press SWING to adjust ailow direction.
Note: Cooling stops when the room temperature is lower than the set temperature.
B. Fan Mode
• Select FAN mode.
• Air circulates without cooling.
• Fan speed is adjustable.
C. Heating Mode (Optional Models Only)
• Select HEAT mode.
• Set temperature above room temperature.
• Fan speed is adjustable.
Note: The drainage hose must be connected for continuous operation.

16 serenelifehome.com
D. Dry Mode
• Select DRY mode.
• Fan speed is xed at low and cannot be adjusted.
• Connect the drain hose to the boom drain outlet.
E. Sleep Mode
• Available in Cool and Heat modes.
Cool Mode:
• After 1 hour: temperature increases by 2°F
• After 2 hours: temperature increases by another 2°F
Heat Mode:
• After 1 hour: temperature decreases by 2°F
• After 2 hours: temperature decreases by another 2°F
The unit automatically turns o after 12 hours in Sleep mode.
TIMER SETTING (1–24 Hours)
The timer has two operating modes:
To Turn OFF Automatically (Unit Powered ON)
1. Press the TIMER buon to activate the timer function.
2. Press the UP / DOWN buons repeatedly to set the delayed OFF time.
To Turn ON Automatically (Unit Powered OFF)
1. Press the TIMER buon to activate the timer function.
2. Press the UP / DOWN buons repeatedly to set the delayed ON time.
Canceling the Timer
• Press the UP / DOWN buons repeatedly until the LED display shows “00”.
• Note: Pressing the POWER buon will also exit the timer seing mode.
Wi-Fi Activation
• Press and hold the TIMER buon for 5 seconds to activate the Wi-Fi function.
• Refer to the Wi-Fi Setup Guide.
17serenelifehome.com
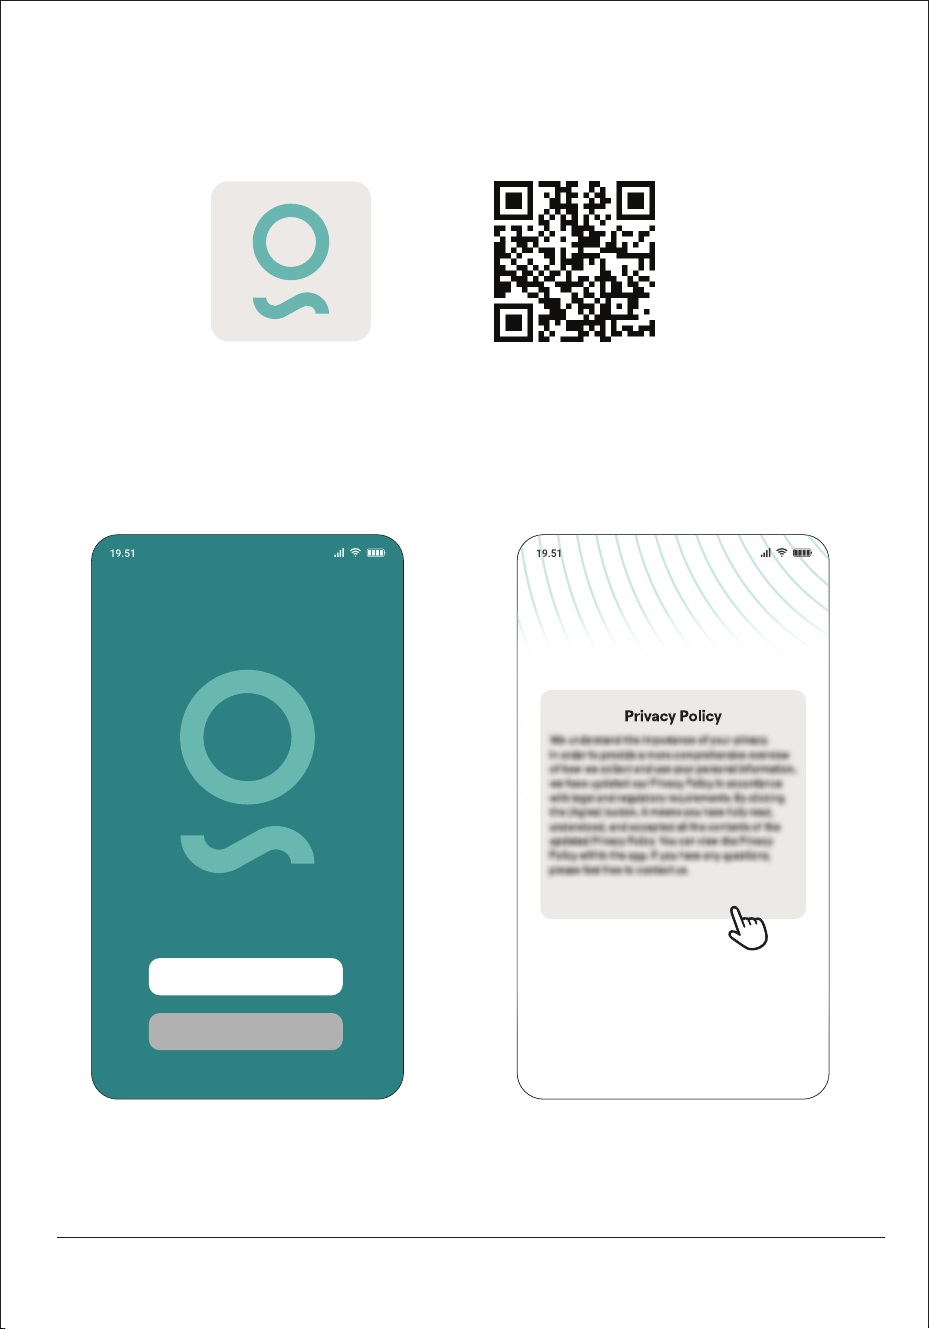
Wi-Fi Setup Guide
Installing the SereneLife: Sma Home App
1. Go to Google Play Store or Apple App Store and search for "Sma Home".
2. Open the app and register an account or log in.
• New users: Tap "Sign Up".
• Existing users: Log in with your Sma Home account credentials.
Tap on "Agree" to go to the
registration page.
Log In
Sign Up
Disagree Agree
hps://links.serenelifehome.com/serenelife-app
18 serenelifehome.com
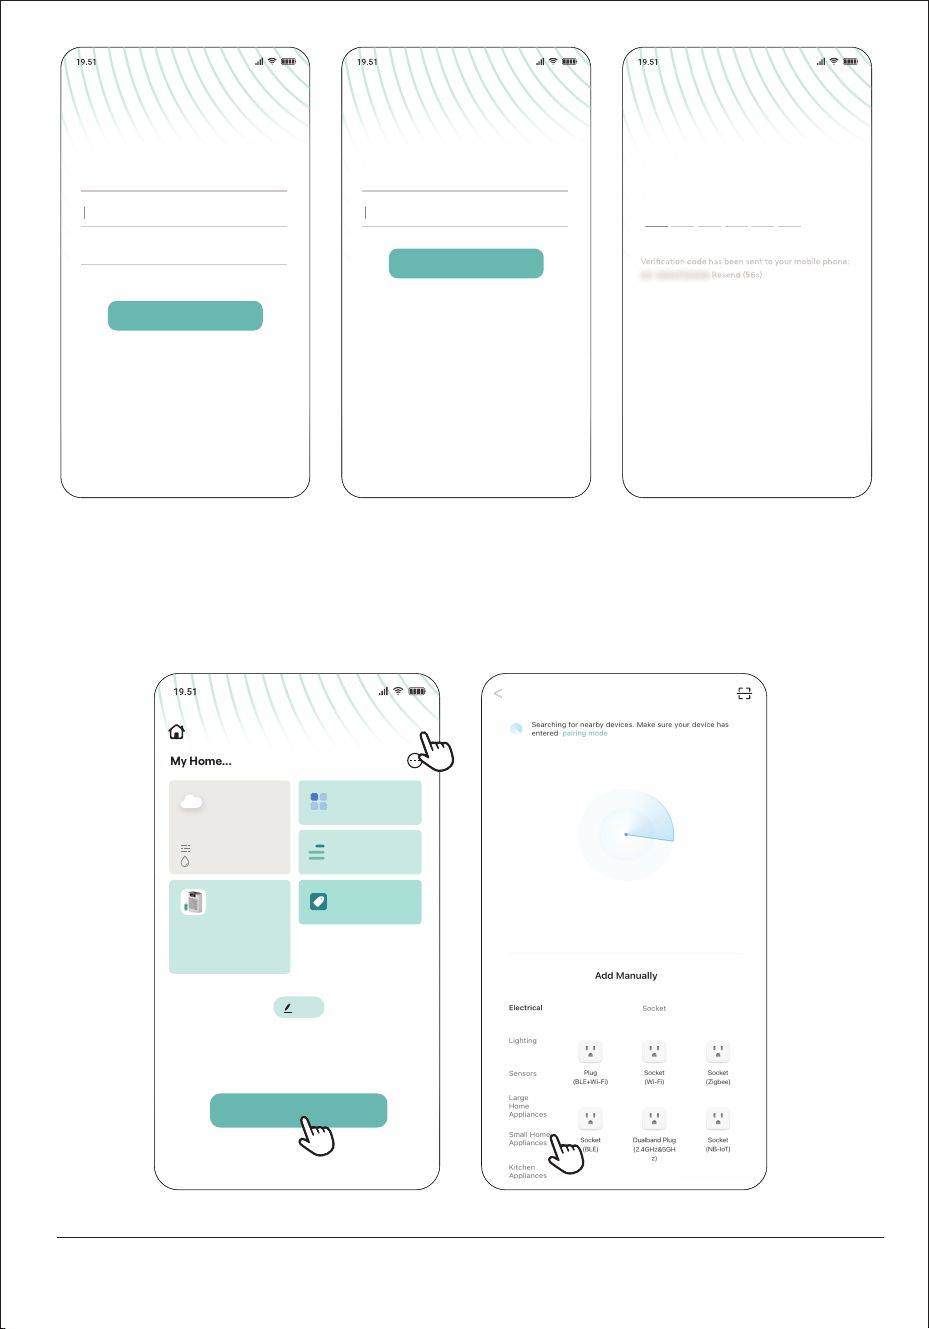
• Open the Sma Home app and tap "Add Device" or the "+" symbol.
• Select your device and enter the WiFi password of the network your
smaphone is connected to.
Log In
>
United States
Please enter your account
Password
Log In
Forgot Password
Register
>
United States
Mobile Number/Email
Get Verication Code
Enter
Verication Code
Didn’t get a code?
My Home...
Add Device
+
Edit
69°F
Excellent
81.0%
All Devices
Room List
Turn on
purier
SLARP1076
oce | Oine
Add Device
>
19serenelifehome.com
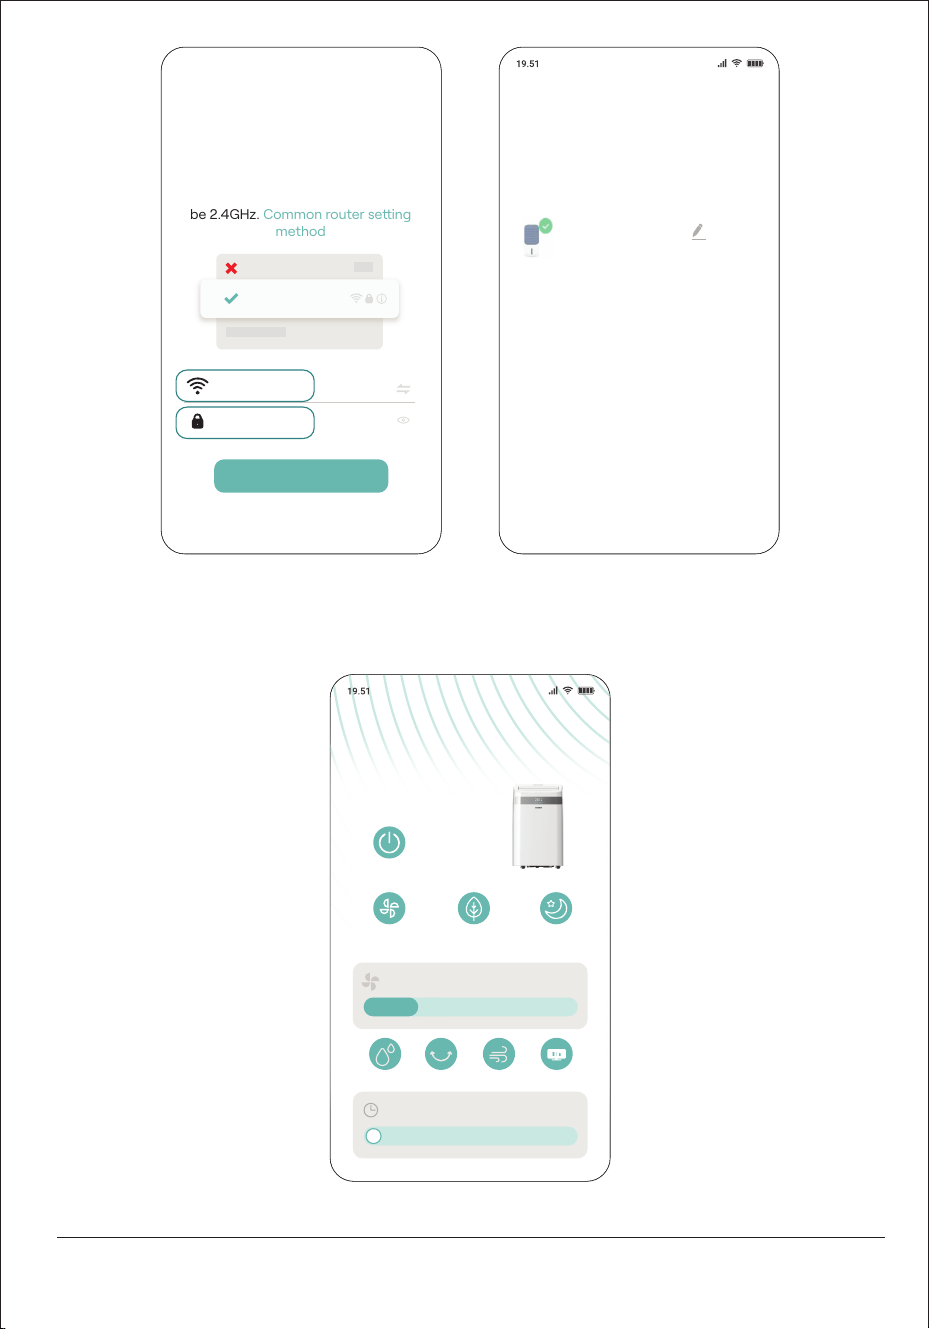
• Once pairing is complete, the device will appear in the app, and you can
control it remotely.
Select 2.4 GHz WiFi
Network and enter
password.
If your WiFi is 5GHz, please set it to
be 2.4GHz. Common router seing
method
Next
WiFi - 5GHz
WiFi - 5GHz
SereneLife
John123456
Added successfully
Device added successfully
SL12PACWFWH
Done
Power
Ordinary Natural Sleep
Speed - Low
Speed
•
•
Shutdown Time - 0h
Humidier Swing Drying Display
20 serenelifehome.com
AUTOMATIC DEFROST
At low room temperatures, frost may form on the evaporator.
The unit will automatically enter defrost mode, and the POWER LED will blink.
A. Cooling/Dry Mode: Compressor stops for 10 minutes when coil temperature
falls below 30°F, or until it rises to 44°F, then resumes operation.
B. Dry Mode: After 20 minutes of compressor operation, if the evaporator
temperature is below 104°F and the temperature dierence is below 66°F,
defrost activates for 5 minutes.
OVERLOAD PROTECTION
After a power interruption, the compressor restas after a 3-minute delay for
protection.
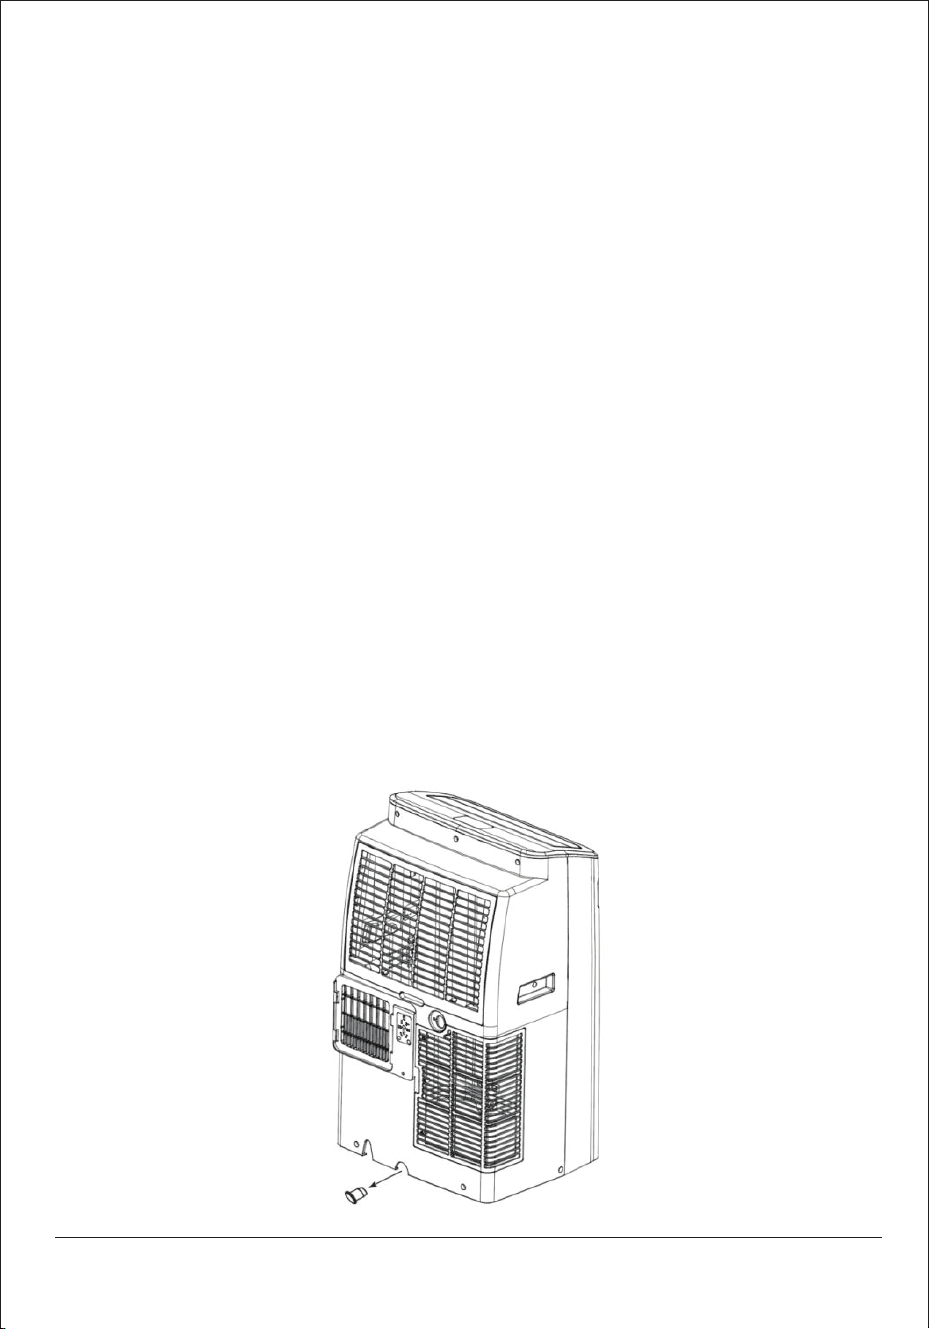
DRAINAGE
Manual Drainage
1. When the water tank is full and the unit stops, unplug the power cord.
2. Place a container beneath the rear drain outlet.
3. Remove the drain plug and allow water to ow out.
4. Reinstall the drain plug after drainage.
Notes:
• Tilt the unit slightly backward during drainage if necessary.
• Resta only after the drain plug and cover are properly installed.
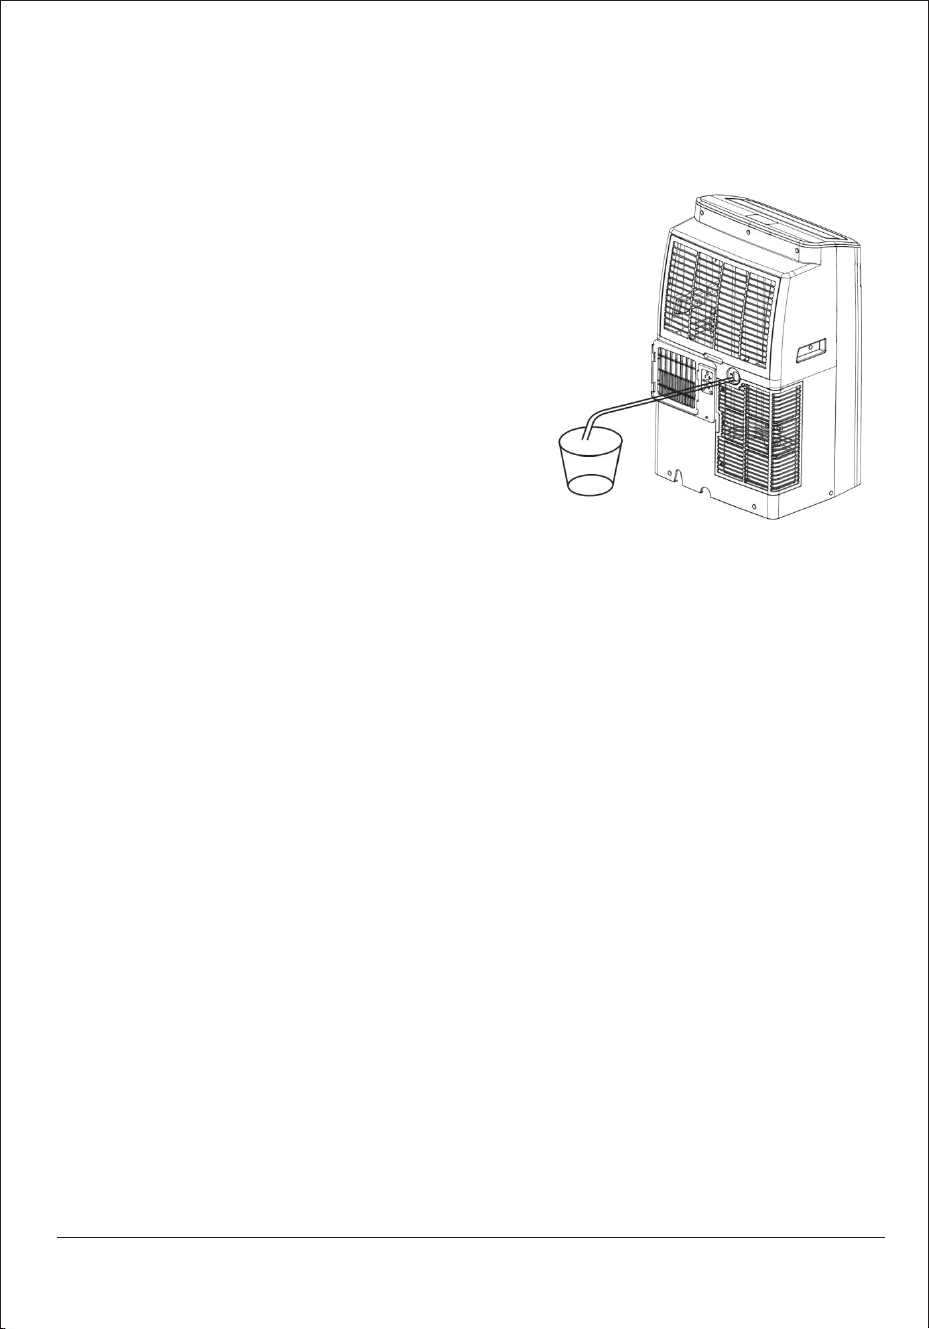
Continuous Drainage
The self-evaporating system reuses collected water for improved cooling eciency.
Manual drainage is usually unnecessary in cooling mode except under high humidity
conditions.
For continuous or unaended operation in Dry mode:
• Turn o the unit before connecting the drain hose.
• Remove the drain plug and store it safely.
• Secure the drain hose and ensure it is not kinked.
• Position the hose over a drain or container.
• Do not submerge the hose end in water.
To prevent water spillage:
• Tilt the drain hose downward at an angle greater than 20°.
• Keep the hose straight to avoid air traps.
CLEANING AND CARE
CLEANING THE AIR FILTER (Every Month)
Dust accumulation on the air lter restricts ailow, reduces system eciency, and
may cause damage if the lter becomes blocked. Regular cleaning is required.
The air lter is removable for easy maintenance.
Impoant: Do not operate the unit without the air lter installed, as this may
contaminate the evaporator.
Cleaning Steps:
1. Press the POWER buon to switch o the unit and unplug the power cord.
2. Remove the air lter mesh from the unit.
3. Use a vacuum cleaner to remove dust from the lter.
4. Turn the lter over and rinse it under running water. Allow water to ow through
the lter in the opposite direction of ailow.
5. Set the lter aside and allow it to air-dry completely before reinstalling.
21serenelifehome.com

22 serenelifehome.com
Switch o the unit and remove the upper and lower air lters.
Rinse the air lter under running water.
Warning:
Do not touch the evaporator suace with bare hands, as this may cause nger
injury.

23serenelifehome.com
CLEANING UP OF REFRIGERANT
General Measures:
1. Gas/vapor is heavier than air and may accumulate in conned spaces, especially
at or below ground level.
2. Eliminate all possible ignition sources.
3. Use appropriate personal protective equipment (PPE).
4. Evacuate unnecessary personnel, isolate the area, and provide ventilation.
5. Avoid contact with eyes, skin, and clothing. Do not inhale vapors or gas.
6. Prevent entry into sewers and public waterways.
7. Stop the source of the release if it is safe to do so. Water spray may be used to
disperse vapors.
8. Isolate the area until gas has dispersed. Ventilate and test the area before
re-entry. Contact appropriate authorities after a spill.
TROUBLESHOOTING
General Staup Issues
• Power Connection: Ensure the air conditioner plug is pushed completely into
the wall outlet.
• Circuit Breaker: Check the house fuse or circuit breaker box and replace the
fuse or reset the breaker if it has tripped.
• Power Failure: The unit will automatically resta when power returns, though
there is a protective time delay of approximately 3 minutes to prevent damage.
• Current Interrupter: Press the RESET buon on the power cord plug; if it will not
stay engaged, discontinue use and contact a technician.
• Operating Range: Verify that the room temperature is between 41°F and 95°F.
Reduced Capacity and Cooling
• Ailow Obstructions: Ensure there are no cuains, blinds, or furniture blocking
the air intakes.
• Thermostat Seings: Lower the set thermostat temperature or ensure the
desired operating mode is properly selected.

24 serenelifehome.com
• Filter Maintenance: Clean the air lter as necessary if it has become diy.
• Environmental Seals: Keep doors and windows closed to prevent cold air from
escaping.
• Exhaust Hose: Make sure the air exhaust hose is securely aached to the back
of the appliance.
• Frozen Coils: If ice blocks the ailow, set the mode to HIGH FAN or HIGH COOL
and set the thermostat to a higher temperature.
Operational Warnings and Maintenance
• Water Leakage: To prevent ovelow, empty the water tank before transpoing
the unit and ensure the drain hose is straightened to avoid kinks.
• Drain Pan: If the water level indicator lights up or the "Ft" error appears, empty
the drain pan by removing the rubber plug.
• Noise: Place the unit on horizontal, rm ground and tighten any loose or
vibrating pas; owing refrigerant sounds are normal.
• Heating Mode: For beer eect, use heating mode in a range of 55°F–70°F; the
unit may momentarily interrupt operation to defrost automatically in very cold
rooms.
• Safety Warning: Never cover or block air vents, as they are required for sucient
ailow and proper blower cooling.
System Error Codes
• E0: Communication fault between the main and display PCB; check the wire
harness for damage.
• E1: Ambient temperature sensor failure; check the connection or replace the
sensor.
• E2: Coil temperature sensor failure; check the connection or replace the sensor.
• Ft: Condensate water high-level alarm; empty the drain pan by removing the
rubber plug.
25serenelifehome.com
DECOMMISSIONING
STORAGE
Long-Term Storage (More Than a Few Weeks):
1. Unplug the unit and remove the exhaust hose and window kit.
2. Drain all remaining water from the unit.
3. Clean the air lter and allow it to dry completely in a shaded area.
4. Reinstall the air lter.
5. Store the unit in an upright position only.
6. Store indoors in a dry, well-ventilated area free from corrosive gases.
Aention: The evaporator must be fully dried before storage to prevent mold or
component damage.
Drying Methods:
• Leave the unplugged unit in a dry, open area for several days, or
• Operate the unit in low fan mode until the drainage pipe is dry.
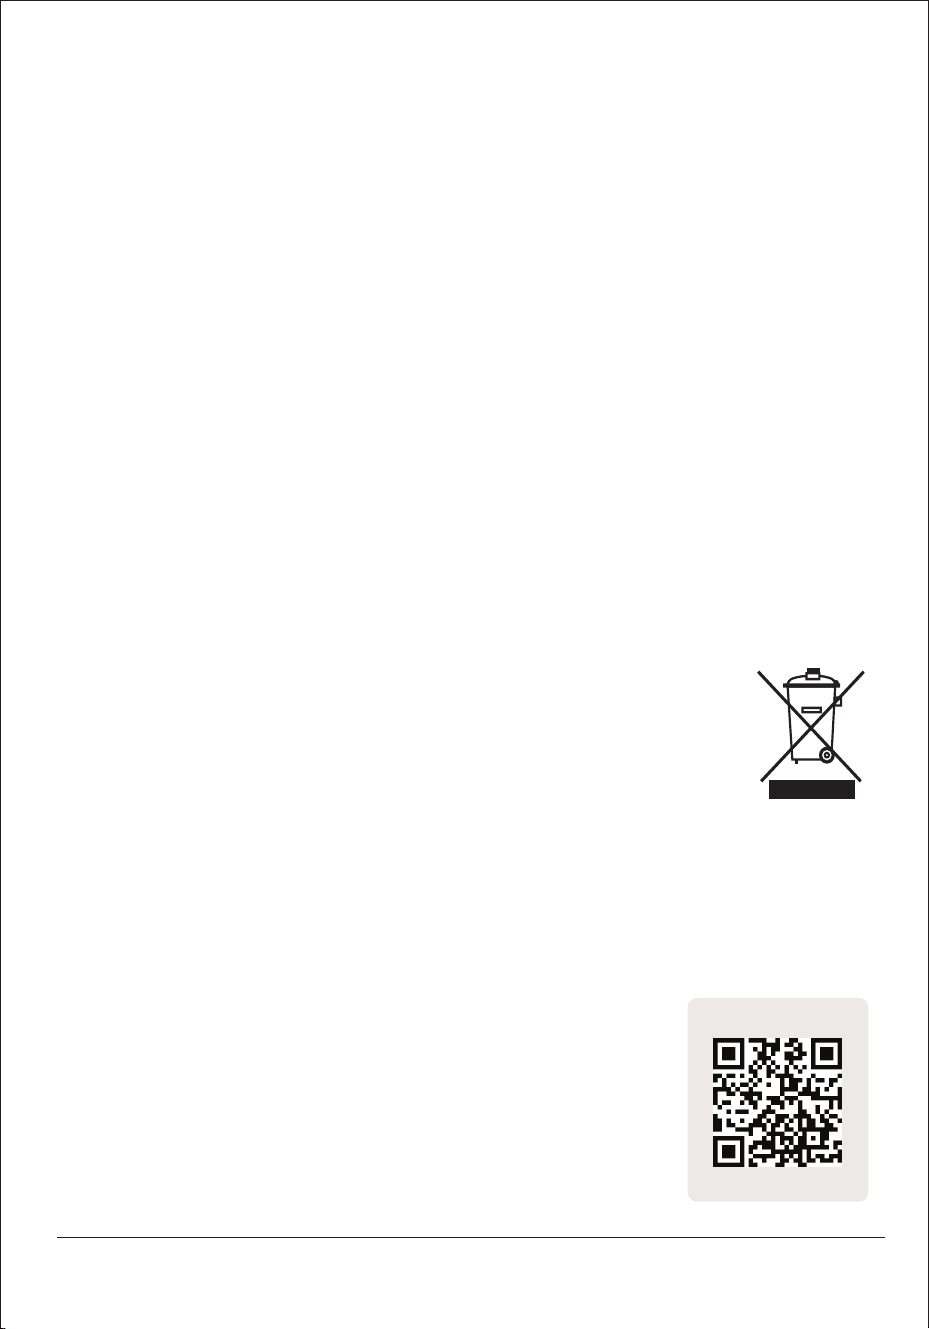
DISPOSAL
WARNING: Releasing refrigerant into the atmosphere is strictly prohibited.
Do not dispose of electrical appliances with household waste.
Use designated collection facilities.
Contact your local authorities for proper disposal information.
Improper disposal may result in hazardous substances contaminating
groundwater and harming health and the environment.
Register Product
Thank you for choosing SereneLife. By registering your product,
you ensure that you receive the full benets of our exclusive
warranty and personalized customer suppo. Complete the form
to access expe suppo and to keep your SereneLife purchase in
peect condition.
Sta Here
Serenelifehome.com/pages/register
questions? comments?
We are here to help!
Phone: 1.718.535.1800
serenelifehome.com/contact us