Cleaning and Sterilizing
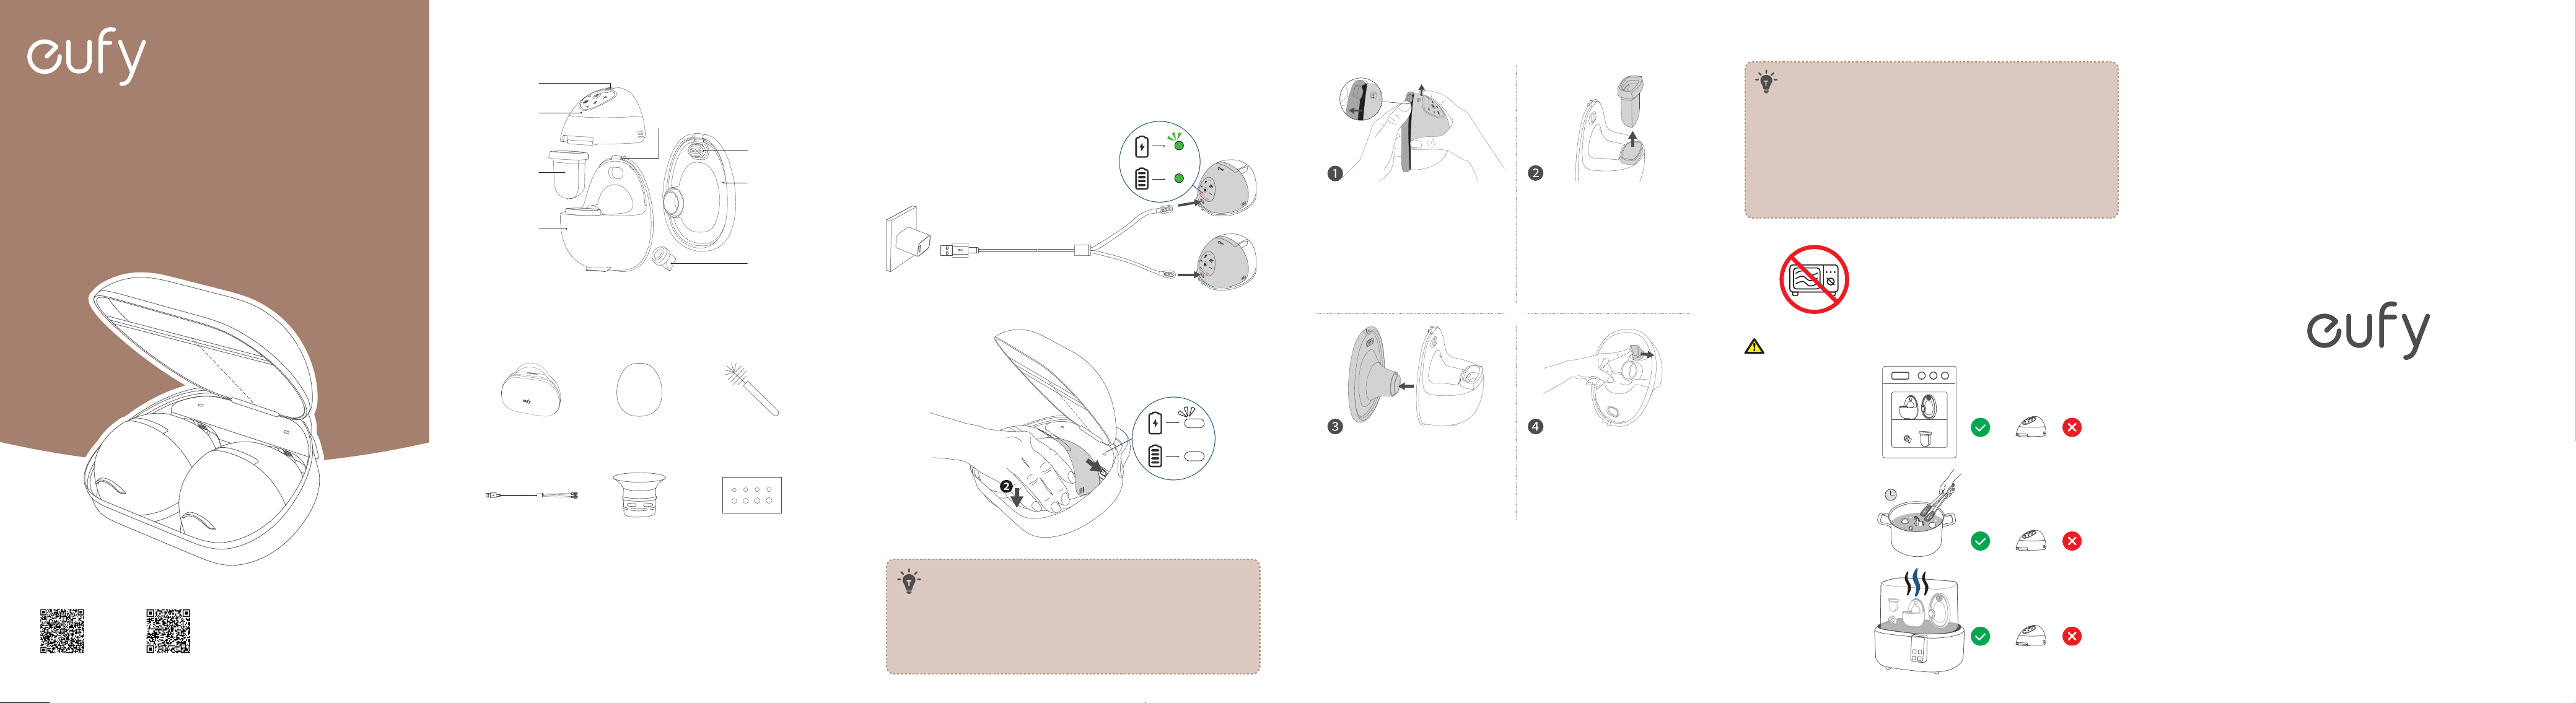
• Before Initial Use: Sterilize all washable parts by boiling for up to 5
minutes, stirring constantly to prevent the parts from sticking to the
container and melting. Alternatively, steam-sterilize for a maximum of 5
minutes.
• Daily Cleaning: Rinse all washable parts with warm, soapy water,
then air dry. Sterilize if needed, using the same methods as the initial
cleaning.
• Lifespan of washable parts: The estimated life of the washable parts is
1-3 months, and actual life will vary with use and sterilization frequency.
Replace them if you notice a decrease in suction and performance
(particularly the duckbill valve), or if you have stored them too long
when planning to pump for your next child.
• Do not use a microwave to sterilize.
• All washable parts (except pump hub) can be sterilized as follows.
Always keep the pump hub dry and clean after each pumping session. If milk is spilled on the
pump hub, wipe it clean with a dry cloth to ensure proper charging.
5 min
Disassembling
Step 2
Step 1
Step 1: Hold the pump hub with
one hand and use the thumb of the
other hand to pull the container
edge near the spout outward to
release the pump hub from the
spout. (Avoid pulling the flange.)
Step 2: Lift the hub.
Remove the diaphragm from
the groove.
Unwrap the outer ring of the
flange, pull the heating pins out of
the oval notch, and then pull the
entire flange out.
Flick the duckbill valve with
your finger to remove it.
Charging
Fully charge the pump hub before initial use; it won’t operate while
charging.
• Option 1: 2-in-1 Magnetic Charging Cable
5V/2A
• Option 2: Charging Case
❶
Why will my charging case or pump hub not boot up?
If you encounter a pump hub or charging case that does not work, try the
following steps:
1. Press and hold the power button on the pump hub for 12 seconds to
reset and see if it turns on.
2. Be sure to use a 5V/2A or higher current rating adapter.
3. Adjust or swap the position of the breast pumps to ensure proper
contact.
4. Use the included magnetic charging cable for direct charging.
Breast Pump Overview
Flange
(24 mm)
Pump Hub
Duckbill Valve
Diaphragm
Milk Container
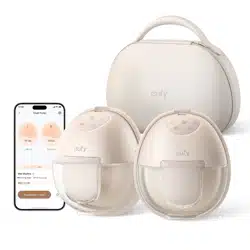
Accessories also include:
Charging Case Dust Covers Cleaning Brush
Charging Cables Sizing Inserts
(17/19/21 mm)
Nipple
Measurement Card
Quick Start Guide
eufy Wearable Breast Pump S1 Pro
Heating Pins
Pouring Spout
Charging Pins
Scan to read the
detailed User Guide.
Scan to watch the
tutorial video.
Dishwasher
Cooking Pot
Baby Bottle Sterilizer
Model: T8D02, T87C1
51005004617_V3
Anker Innovations Limited. All rights reserved, registered
in the United States and other countries.
Anker Innovations Limited
Unit 56, 8th Floor, Tower 2, Admiralty Centre, 18 Harcourt
Road, Hong Kong
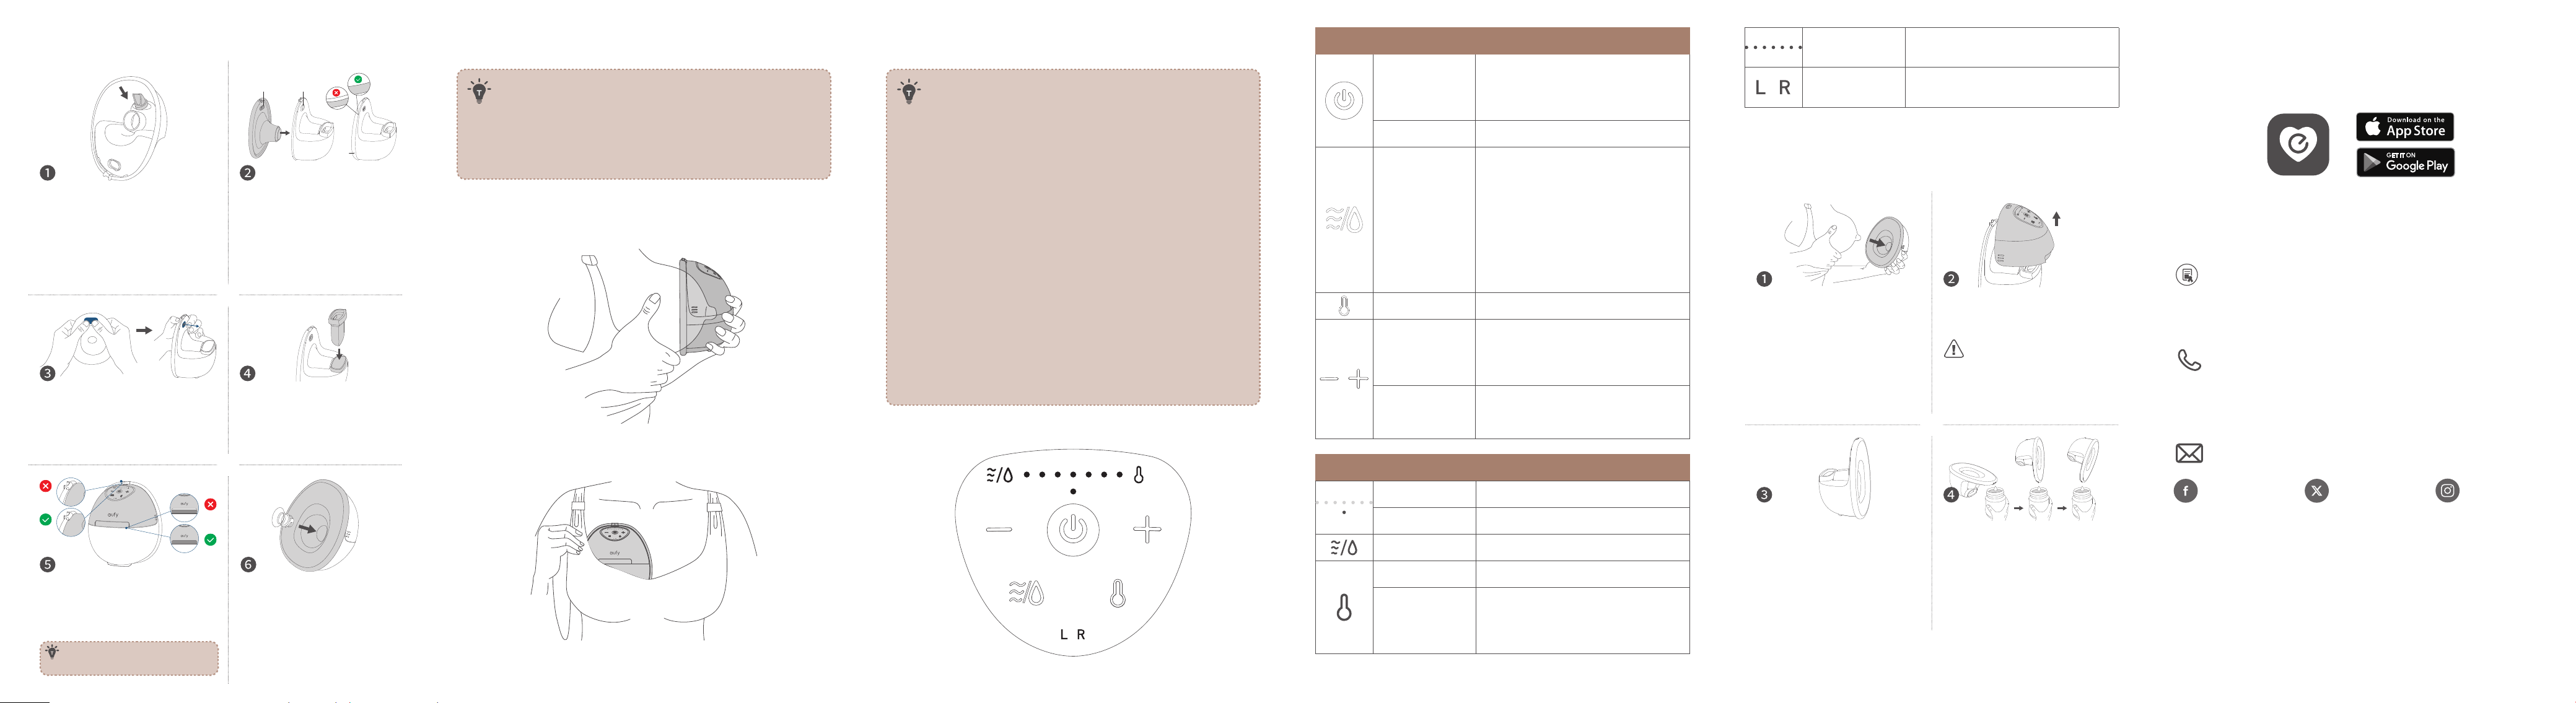
1 to 7 Indicators
White / Orange
Suction / Heat Level: 1 to 7
L / R Indicator
White
Left / Right Side Paired in the App
Transferring Milk
Pause or turn o the breast
pump. Lean forward when
taking out the pump to prevent
leakage.
Remove the pump hub
from the container. Refer to
“Disassembling" step 1.
Avoid disassembling any
parts (including the diaphragm)
other than the pump hub before
transferring milk to prevent
leakage.
Leave the container on the
table ready for transfer.
Tilt the container with the
flange up to pour milk. When
the pouring spout faces down,
tilt further to empty completely.
Lastly, remove the diaphragm if
needed to collect any trapped
milk under it.
Using
To prevent leakage:
• When you complete assembling, check again that the outer ring of the
flange is perfectly sealed.
• Make sure your nipple is at the center of the flange tunnel, and use a
full-coverage nursing bra to create a tight seal between your breasts
and the flange.
• Do not lean back while pumping. At the end of a session, lean forward to
remove the pump.
Can't feel suction or have zero or very little output?
• Inspect the duckbill valve and diaphragm for damage, including
cracks, chips, holes, or tears. If a part is damaged, discontinue use and
purchase a replacement.
• Check that the assembly is correct and that the four pieces (duckbill
valve, flange tunnel, diaphragm, and pump hub) are perfectly sealed.
• Adjust the wearing position, make sure the nipple is at the center of
the flange tunnel, the pump is sealed to your breast, and you can feel
noticeable suction.
• Experiment with dierent flange or insert sizes.
• Try dierent suctions and rhythms.
To ensure proper heating:
• Press the heating pins firmly into the container oval notch.
• Seal the gap between the pump hub and the diaphragm.
• Identify the heat settings and duration that suit you best without
irritating your skin.
Button Controls
Press and Hold
for 2 Seconds
Turn Breast Pump On / O
(The breast pump will turn o
automatically after pumping for 30
minutes or pausing for 10 mintues.)
Press Pause / Continue
Press Switch between Stimulation Mode and
Expression Mode
• Stimulation Mode: In this mode, the
breast pump begins with a quick and
short sucking pattern to get your milk
to start flowing.
• Expression Mode: In this mode, the
breast pump begins with a slow
sucking pattern for milk expression,
sucking more deeply and more slowly.
Press Turn Heating On / O
Press Increase / Decrease the Suction / Heat
Level
(To adjust the heat level, press the
heating button first.)
Press and Hold
Simultaneously
for 2 Seconds
L/R Pairing in the App
Light Guide
Steady Red Battery Level <20%
Flashing Red Battery Level <10%
White In Stimulation / Expression Mode
Steady Orange In Heating Mode
Flashing Orange Heating Exception
(Reassemble the flange and pump hub
to ensure the heating pins are properly
seated.)
Wearing
Two criteria will help you determine if the breast pump is positioned
correctly:
• Whether you feel a noticeable suction that can pull out milk;
• Whether it is comfortable to wear.
If the wearing position doesn't meet either of these criteria, you need to
adjust the position of the pump.
It takes a bit of time for your body to adapt to a new pump, so don't be
discouraged if the results aren't good at the very beginning.
Option 1: Slightly lean forward to make sure your nipple is centered in the
flange tunnel. The breast pump should be firmly against your breast.
Option 2: Use a full-coverage nursing bra with a flap to create a tight seal
between your breasts and the flange.
Downloading the App (Optional)
Download and install the eufy Baby app, then sign in or create an
account. Follow the in-app instructions to add this device and complete
the setup.
Customer Service
12-month limited warranty on pump hub
3-month limited warranty on washable parts
(US/CA) +1 (800) 988 7973
(UK) +44 (0) 1604 936200
(DE) +49 (0) 69 9579 7960
(
中国
) +86 400 0550 036
(
日本
) 03 4455 7823
(AU) +61 3 8331 4800
(Egypt) +20 8000000826
(UAE) +971 8000320817
(Kuwait) +965 22069086
(KSA) +966 8008500030
support@eufy.com
@EufyOfficial@EufyOfficial @EufyOfficial
Assembling
Heating pins Oval notch
Outer
ring
Hold the bottom of the container
up, insert the duckbill valve into the
small hole inside the container with
your thumb and index finger and
flick it to ensure it does not fall out.
Push the flange onto the
container, making sure the
heating pins are firmly pushed
into the oval notch. Wrap
the outer ring to ensure it is
properly sealed to prevent
milk leakage.
Press firmly behind the heating pins
for full extension. Heating may fail
if not fully extended.
Insert the diaphragm into
the groove of the container,
with the concave side of the
diaphragm facing the flange
side.
Install the pump hub on the top
of the container, pressing firmly to
seal the gap between the pump
hub and the diaphragm.
The locking mechanism between the
pump hub and the pouring spout
ensures reliable suction and heating.
To ensure a proper fit, use the
Nipple Measurement Card to
select an appropriate sizing
insert and place the sizing
insert in the flange tunnel.