⑩
⑨
1
Installation Guide
Installation Guide
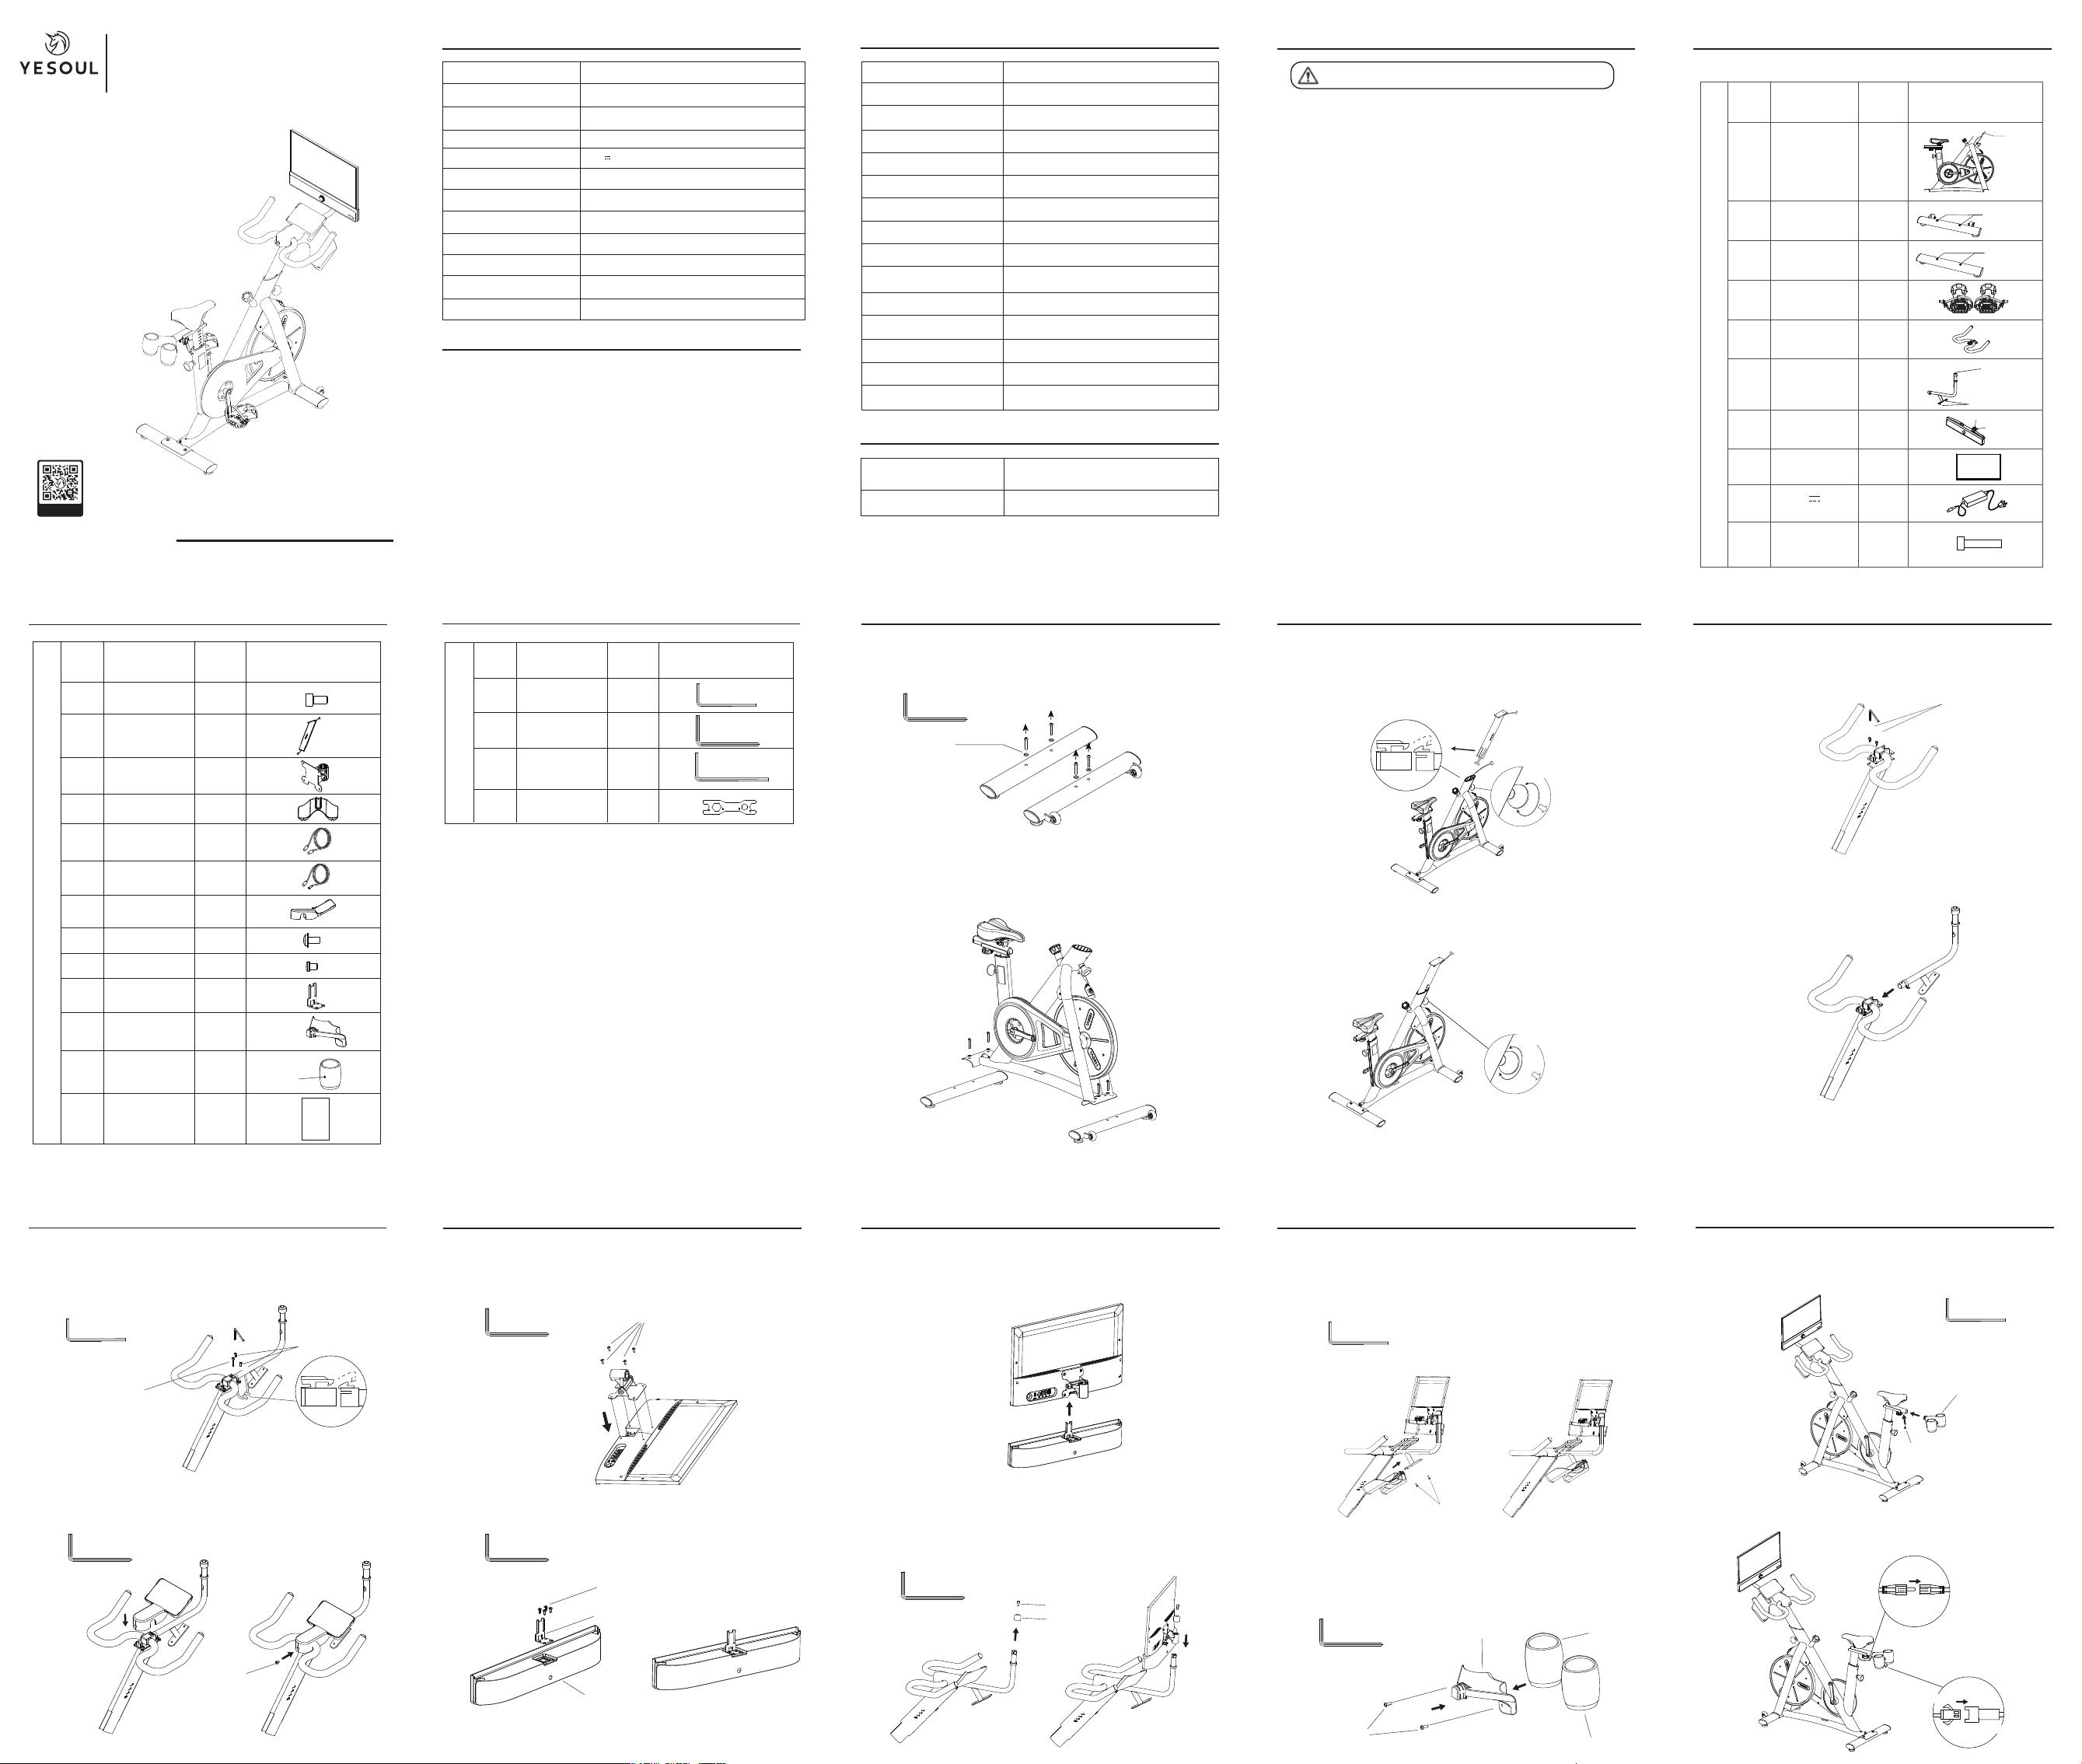
STEP 2: Installation of bottom tube
1. Take L-type cross head hex wrench 6# (B) out of the ziplock bag;
2. Remove 4 hexagon socket button head screws (M8×45) and washers of the
front tube ② and rear tube ③ via the L-type cross head hex wrench 6# (B);
3. Align the holes of the front tube ② and rear tube ③ with the holes at the bottom
of the frame ①. Hand-thread the washers and hexagon socket pan head screws (M8×45)
in sequence. Then, use the L-type cross head hex wrench 6# (B) to fully tighten them.
Installation Guide
Installation Guide Installation Guide
Installation Guide
STEP 6: Installation of screen and speaker
STEP 5: Installation of one piece hood
Important Safety Instructions
G1M MAX
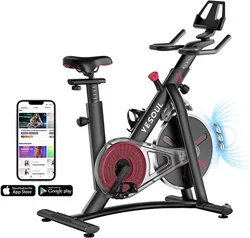
YESOUL Bike
Monitor Stand
Front speaker
⑦
1
2×hexagon socket
button head screw
M8×45/washer
2×hexagon socket
button head screw
M8×45/washer
Installation Guide - List of Parts
Parts List (Components List)
NO. Name
Handlebar assembly
Pedal set left/right
Front tube
Rear tube
Quantity Picture
②
③
④
1
1
1
①
1
(left)
(right)
⑤
⑥
1
1
Display screen
⑧
1
1
Routine Maintenance
Product Parameters
Screen connecting cable
STEP 3: Installation of head tube
Before installing the
head tube, please screw
out the adjustment
knob as indicated by
the arrow.
Align the port to
connect to the screen
connection cable
* Please make sure
that the connection
direction is correct.
Please do not connect
it with violence.
Align the port to
connect to the screen
connection cable
* Please make sure
that the connection
direction is correct.
Please do not connect
it with violence.
1. Screw out the adjustment knob as indicated by the arrow, and connect the
screen connection cable in the head tube⑫ to the cable in the bike ① (as shown
in the figure). After the screen connection cable is connected, align the head tube
⑫to the mounting hole of the frame ① (Note: Place the surface with a hole in the
head tube⑫ outwards. Do not press the cable);
2. Insert the head tube⑫ into the frame①, and keep the scale p arallel to the top
surface of the tube. Align the hole on the head tube⑫ with the hole on the frame①.
Then, tighten the adjustment knob as indicated by the arrow.
After installation,
tighten the head tube as
indicated by the arrow.
Loose
(Left)
Installation Guide
2. Insert the display bracket ⑥ into the handlebar following the direction of the arrow.
Before using this product,
carefully read and properly
keep this manual.
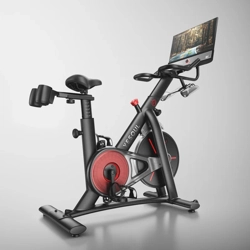
YESOUL Smart Cycling Bike
G1M MAX Product Manual
Screen size
Resistance system
Drive mode
Power supply input
Bluetooth
Height limit
Rated maximum load
Net weight
Gross weight
Overall dimensions
21.5 inch (1920*1080 pixels)
Magnetron resistance system
Supporting software version
iOS 12.0 or higher, Android 5.1 or higher (inclusive)
Belt drive
24V 3A
Wireless connection method
WiFi2.4Ghz/BT/BLE
Bike: V4.2, Speaker: V5.3
140 ~ 195cm
120kg
35kg
40.5kg
(Length) 1374mm × (Width) 528mm × (Height) 1429mm
Please read them carefully. Improper use may result in personal
injury or death!
.
STEP1: Check of parts
Frame
Installation Guide - List of Parts
Installation Guide - List of Parts
Align the port to connect to the
screen connection cable,
and retract the excess wire
into the tube.
* Please make sure that the
connection direction is correct.
Please do not connect it with
violence!
power adapter
1. Keep the cycling bike on a dry, ventilated and flat floor. If not used in a long time, the bike should
be covered to keep its body clean and tidy.
2. Wipe off sweat on the frame with cloth after exercise. Do not wipe the bike with wet cloth, in order
to avoid rusting.
3.Adjust or replace the belt timely if the belt pulley is cracked and deviated.Regularly clean the belt
groove to prevent the belt from jumping out of t
he groove.
4. Regularly check the screws of all body parts for loosening or falling, and tighten or replace them in
time.
5. Regularly Check the resistance knob for looseness or dislodgement and reasonable resistance
values so that the resistance value can be calibrated in time.
6. Regularly check if the screws between the pedals and the crank are loose. Tighten them promptly
if necessary.
7. Regularly check if the saddle is loose. Tighten it promptly if necessary. Use a cotton cloth to wipe
the saddle and keep it dry.
8. Regularly inspect the power cord for any cracks or damage, and replace it promptly if needed.
*In order to facilitate assembly, some accessories have been installed on
the body before delivery.
Accessories List (Tools List)
L-shaped head six
corner wrench 5#
L-type cross head
hex wrench 6#
L-shaped head six
Multi-function wrench
corner wrench 8#
Name Quantity Picture
NO.
A
B
C
D
1
1
1
1
Prelocked hexagon
socket head screw M6
Prelocked hexagon
socket head screw M8×16
power port
Signal port
Parts List (Components List)
Name Quantity Picture
NO.
⑪
⑫
⑬
⑭
⑮
⑯
⑰
⑱
Head tube
Screen fixing part
Bottle holder
C to C data cable
C to Lightning
data cable
1
1
1
1
1
4
Installation Guide
Hexagon socket
haed screw M6×35
Hexagon socket
haed screw M6×12
Hexagon socket
haed screw M8×16
Panel type
Curvature
Proportion
Size
Backlight type
Display size (H*V)
Resolution
Refresh rate
Interface version
Indicator mode (power on, standby)
Storage temperature
Operating temperature
Operating humidity
Storage humidity
Control method
Product Size
Product weight
Monitor Parameters
Front/Rear Speaker Parameters
Note: After the speaker is installed and turned on for the
first time, you need to double-click the button to pair.
VA
Flat screen
16:9
21.5 inches
LED
476mm*268mm
1920*1080
Max:60HZ
1*USB+Type-c+TTL+Audio out+DC-IN
Blue light indicates power on, light turns off when power
is off, and blinks every 0.5 seconds in standby mode.
-20ºC~60ºC
0ºC~40ºC
10~90%RH
10~90%RH
Five-way joystick buttons
24V 3A
⑲
Cross pan head screw
with washer M4 × 10
1
8
Cross recessed pan
head screw M5×6
Cross recessed pan
head screw M5×6
1
One-piece hood
Washer
STEP 4: Installation of handlebar assembly
1. Align the holes on the handlebar assembly ⑤ with the holes on the front tube ⑫.
Take out the hexagon socket head cap screws (M6×12) ⑪1-2. As shown in the figure,
hand-tighten the screws 1-2 clockwise (do not fully tighten them yet) to temporarily
hold them in place;
Hexagon socket
haed screw M6×12
1
2
4.Finally,insert the monitor bracket ⑥ into the handle in the direction of the arrow
(as shown in the picture).
L-shaped head six corner wrench 5#(A)
1. Gently snap the one piece hood⑰onto the handlebar assembly⑤;
2. Use L-type cross head hex wrench 6# (B) to screw the cross recessed
pan head screw (M5×6) ⑲ into the cross recess.
Cross pan head screw with washer M4×10
Cross pan head screw with washer M4×10
Speaker holder
Front speaker
2. Align the speaker holder ⑳ with the slot of the front speaker ⑦, and use the
L-type cross head hex wrench 6# (B) to tighten the remaining 4 cross pan head
screw with washer(M4×10) ⑱ until they are tight ;
L-type cross head hex wrench 6#(B)
L-type cross head hex wrench 6#(B)
L-type cross head hex wrench 6#(B)
L-type cross head hex wrench 6#(B)
L-type cross head hex wrench 6#(B)
L-type cross head hex wrench 6#(B)
4. Loosen the hexagonal socket head screw(M8×16) pre-installed on the monitor
bracket ⑥ with an
L-type cross head hex wrench 6#(B)
, and then remove the upper
connecting seat;
5. Insert the screen and speaker components assembled in the previous step into the
monitor bracket ⑥, then put in the upper connecting seat and hexagonal socket head
screw(M8×16) in sequence, and use an
L-type cross head hex wrench 6#(B)
lock until secure.
3. Align the speaker assembly with the slot of the screen assembly and insert the
buckle connection;
STEP 7: Installation of bottle holder
STEP 8: Installation rear speaker
As shown in the figure, remove the 2 hexagon socket head screw M6
pre-installed in the monitor stand ⑥,and align the bottle holder ⑭ with the
slot in the monitor stand⑥,and push it in along the direction shown in the figure.
Then, use the L-shaped head six corner wrench 5# (A) to align 2 hexagon socket
head screws M6 with the holes, and lock the bottle holder.
1. Loosen the cross slot screws pre-installed on the rear speaker㉒with an
L-type cross
head hex wrench 6#(B)
;
2. Then dock the rear speaker ㉒ and the rear speaker connection seat ㉑,(The ones
with buttons are left rear speakers, those without buttons are right rear speakers)
and finally align the cross slot screws with the holes in the rear speaker connection seat ㉑,
and lock them until they are tightened with
L-type cross head hex wrench 6#(B)
;
Hexagon socket
head screw M6
Rear speaker assembly
Hexagonal socket screw M6
L-shaped head six corner wrench 5#(A)
L-shaped head six corner wrench 5#(A)
Please scan the QR code to watch
the installationguide video
Product model:YS-001
Item NO.:G1MMAX
Scan for Installation Guide
Tight
(Right)
Loose
(Left)
Tight
(Right)
1. This product is for household use (Class H) and not medical fitness equipment.
2. This product must not be used for medical rehabilitation.
3. Keep children and pets away from this product. This product is for those over 16 years old only.
4. Do not place the equipment in damp or wet environments.
5. Never use this product with inappropriate shoes or barefoot.
6. Use this product on a flat and clean ground.
7.Lift the rear tube and the roller on the front tube can move the product freely or be placed in a
suitable position.
8. If the product fails, immediately stop using it.
9. Check whether the bike for loosening or damage before each use.
10. Never stretch any object or body part into the openings of the bike.
11. When using the screen holder, ensure the device is centered to prevent it from falling off.
12. Never refit this bike or use non-original accessories without permission. The casing must be
opened by professionals, in order to avoid damage.
13. Ensure all screws and bolts are securely tightened before use.
14. When not in use,turn the knob to the right end to lock the corresponding component.
15.Instructions for using the emergency brake: When you want to stop movement, press down on
the emergency brake until it stops.
16. Never turn pedals by hand,or touch any rotating mechanical part,otherwise personal injury
may be caused.
17. Get off the bike until flywheel/inertial wheel and pedals stop rotating. Otherwise, severe
injuries may be caused due to control failure.
18. Wear professional cycling clothes or tight-fitting sportswear and sports shoes, and tighten foot
straps to avoid injury caused by pulling or entanglement by this product.
19.The product should have at least 0.6 meters of free space all around it.
20. Incorrect or excessive training may cause injury.
21. Use this product according to the instructions in this manual. Warm up fully before exercise.
22. Keep the body hydrated as needed during riding.
23. Without the preliminary determination of baseline fitness level and medical certificate signed
by a doctor, never be engaged in high-speed or high-intensity sports. Before attempting any
high-intensity short sprints, pay attention to the body state and posture, and apply a controllable
speed.
24. If you experience any discomfort while using the equipment, stop immediately and consult a
doctor.
25. Those pregnant or with high blood pressure, heart disease, lumbar spondylosis or reduced
mobility must not use this product without the permission of doctors.
26. The weight of the user must not exceed the maximum load.
27. Carry out preventive maintenance regularly.
28. Please use the standard power adapter. Replacement of the power adapter without
authorization may cause serious consequences.
1
1
2
⑳
㉑
㉒
㉓
Hexagon socket
head screw M6×12
Hexagon socket
head screw M6×35
Speaker holder
Rear speaker connector
Rear speaker
3
4
3. After correctly aligning the hole position, use L-shaped hex
wrench 5# (A) to
screw the hexagonal socket cap screw M6×12⑪3-4 and the h
exagonal
socket cap screw M6X35 ⑩ into the holes and lock them.Next, tighten the
hexagonal socket cap screw M6×12M6×12⑪1-2;
1.Take out the screen fixing piece ⑬, and use the L-type cross head hex
wrench 6# (B) to lock the 4 cross pan head screw with washer(M4×10) ⑱
until they are tight (* Please put the screen on the desk flatly. Do not collide
with the screen withhard objects to avoid screen damage!);
Upper connection seat
3. Insert the rear speaker assembly into the sliding tube of the body seat cushion,
align the hexagonal socket screw M6 with the holes, and tighten with an L-shaped
head six corner wrench 5# (A) in the direction of the arrow;
4. Connect the left rear speaker wire A to the right rear speaker wire, and the bike
power wire to the left rear speaker wire B.
Cross recessed screw
Rear speaker
Left rear speaker
Right rear speaker
Left rear speaker wire B
Bike power wire
Left rear speaker wire A
Right rear speaker wire
Front speaker:498*72*82mm
Rear speaker:98*83.3*82.3mm
1080g
Prelocked cross
recessed screw
Instructions
Instructions
1
Installation Guide
/
/
Shutdown tone
(Power off)
Disconnect tone
(Disconnected)
Disconnect tone
(Disconnected)
Red LED
flash quickly
Red LED
flash quickly
Red LED
flash quickly
Red LED
flash quickly
The tone of
successful
connection
(Connected)
The tone of
successful
connection
(Connected)
The tone of
successful
connection
(Connected)
Red LED
always on
Red LED
always on
Red LED
always on
Red LED
always on
Red LED
always on
Red LED
always on
Red LED
goes out
Red LED
goes out
Volume up to
maximum with
a tone (Tone)
/
/
/
/
Switch to Bluetooth
mode with beep
(Bluetooth pairing on)
Beeps when pairing
(TWS pairing)
Beeps when pairing is
successful (sound
effects)
1. Rear pairing:
red light flashes quickly
2. Rear pairing
successful: red light
always on
1.AUX mode: red light
always on
2. Bluetooth mode:
red light flashes quickly
Power-on beep
(sound effect)
Shutdown tone
(Power off)
How to adjust the speakers
Audio function operation
Knob keys
AUX audio input cable
Note: When your phone is connected to the speaker via Bluetooth and connected to wired screen projection,
please switch the speaker to AUX mode.
USB 5V power cable
Front speaker
/
/
/
/
/
Short press the
Rotary switch
Power On
Sleep
state
On/Off
Sleep state Sleep state
Wake
function
Volume up
Turn the switch Clockwise
The volume increases
gradually as your rotation
Volume down
Turn the switch anticlockwise
The volume decreases
gradually as your rotation
Mode Switch
Power on
Front and rear
speakers powered
on
Double-click the knob
button of one of the front
and rear speakers to pair
Front and rear speakers combined
to play music simultaneously
Short press the Rotary switch
Switch AUX mode and Bluetooth mode
Power on
Click the knob button to
switch the mode to
Bluetooth mode
1. Pairing search status, red light flashes quickly
2. If pairing times out in 10mins, it will enter
sleep state
S
witch to Pairing mode
(
the bluetooth can be
f
ound by other devise)
Power on
Open the bluetooth and
Search on the devise
Bluetooth device searches for "Wireless
Speaker" and connects, successful pairing
announces a tone(Connected)
Close your devise
bluetooth function
Cancel the pairing
by the devise
Disconnect the bluetooth
connection by Devise
1. After over-distance disconnection,
the speaker enters the pairing state and
the red light flashe quickly
2. After 10 mis, no device is connected and
the speaker enters sleep state
Reconnected successful with devise
Reconnected
Bluetooth mode
(paired with
devise before)
Switch to bluetooth mode,
spkeaker try to reconnect
with the last devise
If unable to reconnect within 10mins,
enter sleep state
F
(In AUX mode
and Bluetooth
mode)
actory Reset
Power On
In AUX mode or Bluetooth mode,
triple-click the button on
one of the front and rear
speakers
1. Restore to the default boot state
(enter AUX mode)
2. Clear Bluetooth connection records and
clear front and rear speakers
Pairing record, volume restored to default
volume (maximum volume 50%)
3. Enter AUX state
4. The rear camera enters the pairing state
Power On
Power On
Tone
LED
Pre-Condition
Effect
Control
Fuction
Pairing
function
Disconnected
Reconnected-
back to BT range
Connected
Disconnected
1. Connected with devise,
the bluetooth disconnected
after move the devise out
of the BT range
2. It reconnected successful if
back in BT range within 10mins
1. Announcement tone (Disconnected)
2. Speaker enter the pairing mode
Power ffO
Press and hold the
knob button for 3 seconds
The speaker has no AUX
signal or Bluetooth signal
input for more than
10 mis
When clicking the knob
button (clicking does not
switch modes), inputting
audio signals、adjusting
the volume and connecting
Bluetooth can wake up
Power off
The speaker goes to sleep
Enter pre-wake state
Recovery
success tone
(Audio mode)
STEP 10: Installation of connection cable
Safety tips:
Please adjust the back accordingto your physical condition before use;
and tighten the body fastening knob.
Statement:
This manual contains the functional introduction and operating instructions as
much as possible when printed. With the continuous improvement of hardware
and software and optimization of design, this manual may be inconsistent with
the purchased product.
In case of any discrepancy in appearance, interface and color, the actual
product shall prevail.
Installation Guide
(for reference only, subject to the actual product)
Note: Do not plug or unplug the monitor's
interface without cutting off the power supply.
Please unplug the power when not in use.
Precautions
How to adjust the screen
Before the first use, please turn the
resistance adjustment knob
counterclockwise to loosen it;
otherwise, you cannot ride the bike!
1.Insert the monitor's power port (a)、signal port (b)、audio's signal port (c) and
power port (d) into the jacks at the bottom of the back of the monitor. Be sure to
plug them in tightly (Pay attention to the colors and specifications of the sockets.
Match the same color plugs to the same color sockets,the power cord port must
be tightened, and ensure it is securely inserted);
2. Select the appropriate full-featured C to C data cable (which supports DisplayPort
(DP) signal output)and insert it intothe Type C jack under the monitor(Secure the
excess wire with Velcro);
3.Connect the power adapter ⑨ to the power jack at the rear under the frame ①.
the indicator light is always on (Please use the standard power adapter,
unauthorized replacement of the power adapter may cause serious
consequences).
After the installation is complete, please check whether the sc
reen will fall
down when flipped up and down. If this happens, use an L-shaped head six
corner wrench 8#(C) and an multi-function wrench (D) to tighten them as
shown in the picture.(If there is any looseness during use or adjustments
needed for the joints,you can adjust them according to this operation)
Screen Adjustment:
Check screen
Front tightening knob
Resistance knob
(Please adjust the resistance appropriately
according to your exercising needs.
Press the knob to brake in an emergency.)
360 degrees of rotation angles
of the screen,rotate 180 degrees
clockwise/counterclockwise
(Here,the L-type cross head hex
wrench 6# (B) can be used to tighten
/loose).
+
-
180 degrees clockwise
Installation Guide
1. Press and hold the "OK key" button for 6 seconds to power off the phone,
and for 1-2 seconds to power it on.
2. The monitor is turned on, and when there is a screen projection signal,
press the "OK key" button to activate the main menu within 1 second.
3. Use the Arrow key to navigate the main menu and select the desired item
for adjustment. After selecting the item, press the "OK key" to adjust it. Press the
"OK key" again to save changes and return to the upper-level menu.
4.Press and hold the left shortcut key for 10 seconds to display the version number.
5. After confirming the adjustment, move the joystick to the left to exit the
current option.
Operations to close the data window during screen projection:
1. Connect the screen projector and start projecting.
2. Press the "OK key" button to enter the main menu.
3. Scroll down using the remote to select "Settings," and then scroll right to enter
the setting options.
4 Scroll down using the remote to select "BikeOsd," and then scroll right to enter
the "BikeOsd" setting interface.
5. Select "OFF," and press the "OK key" button to confirm the option.
6. Continuously scroll left three times using the remote to exit the main menu.
(Five-way joystick buttons)
(OK key)
②
①
(Arrow key)
Monitor's power port
(a)
Audio's signal port(c)
Signal port(b) Power port (d)
Multi-function wrench(D)
Movable pulley
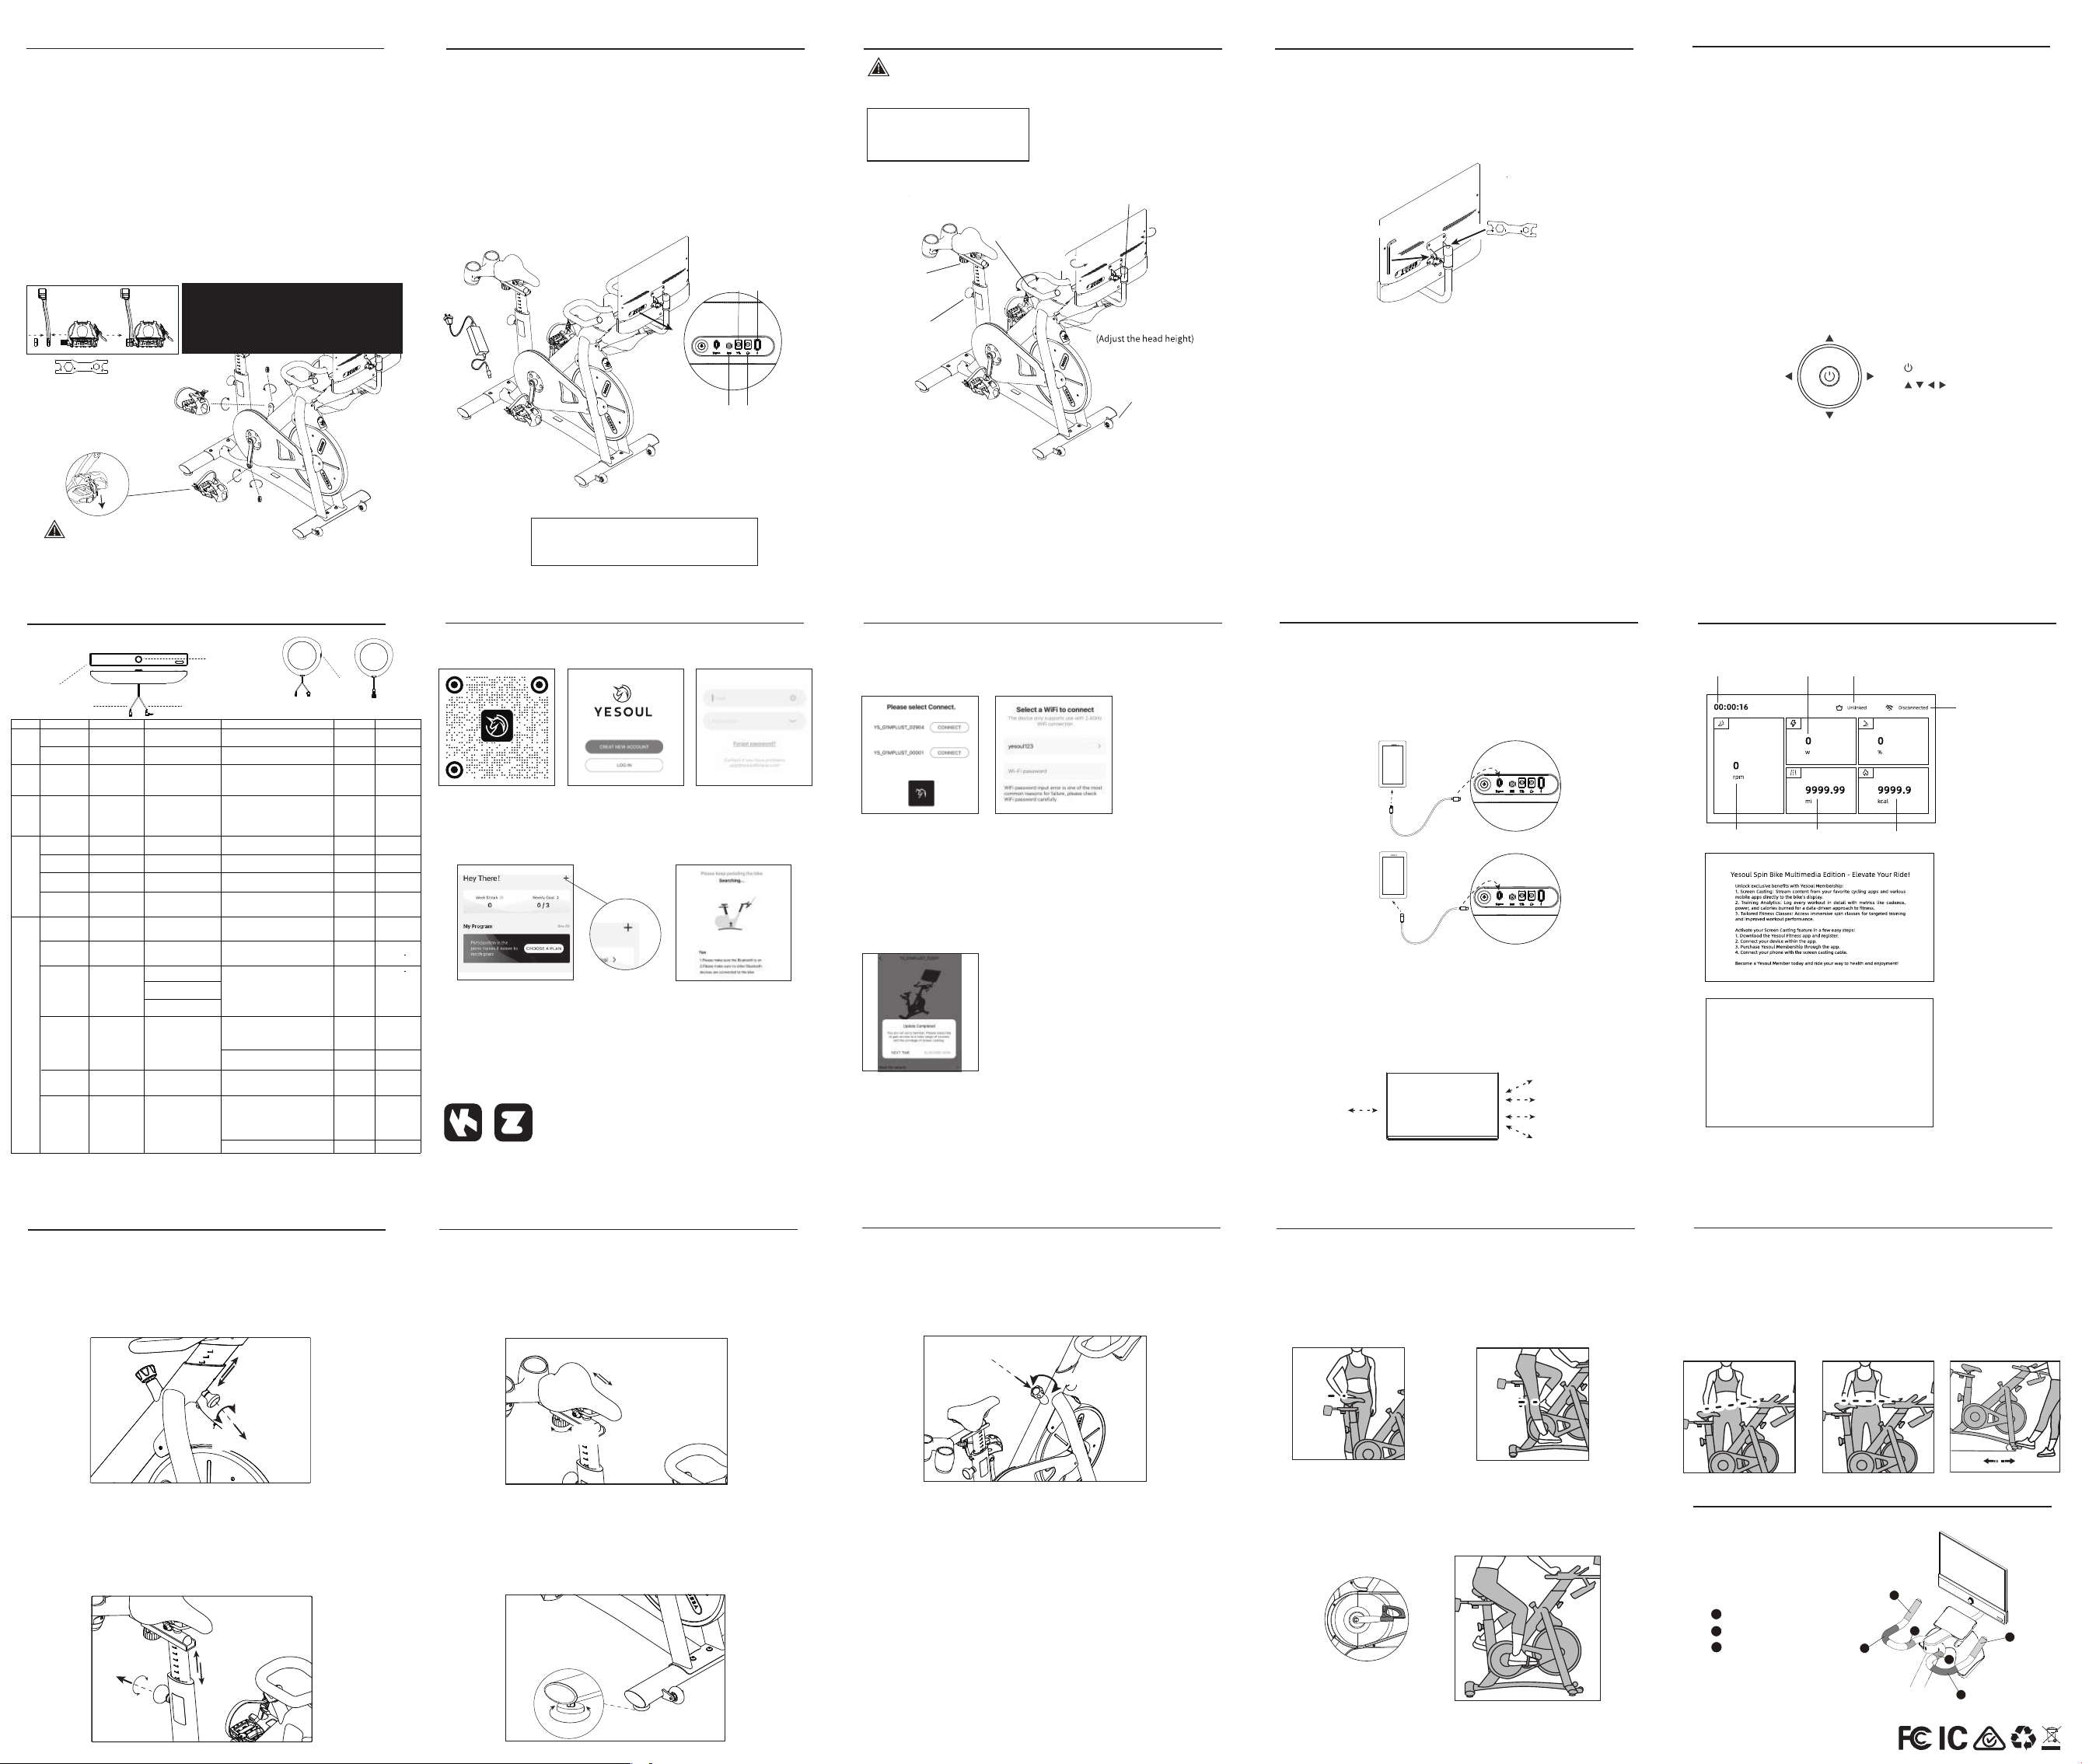
STEP 9: Installation of pedal
Safety tips:
Reverse riding is not recommended, as it is likely to loosen pedals. After reverse
riding, check whether the pedals are locked, in order to avoid safety issues arising
from loose pedals.
1.Take the pedals out of the package;
2.Distinguish between the left and right pedals. The right pedal is marked with a blue
"R" and the left pedal is marked with a red "L". (Pay attention to distinguishing the left
and right pedals. If they are installed incorrectly, the crank threads will be damaged!);
3.Stand behind the seat and face the handlebar.Remove the nut pre-installed on
the right pedal and install the right pedal to the right hand side on the crank,
the foot pedal should be perpendicular to the crank installation opening.
Use a multi-function wrench (D) to lock it by turning it towards the front of the bike.
Then align the removed nut with the thread and use a multi-function wrench (D)
to lock it towards the tail direction;
4.Remove the nut pre-installed on the left pedal and install the left pedal to the left
hand side on the crank,the foot pedal should be perpendicular to the crank
installation opening. Use a multi-function wrench (D) to lock it by turning it towards the
front of the bike. Then align the removed nut with the thread and use a multi-function
wrench (D) to lock it towards the tail direction.
Note: During installation, correspond the red mark on the crank to the red mark
on the pedal,and the blue mark on the crank to the blue mark on the pedal.
Multi-function wrench (D)
(in the ziplock bag)
Left pedal
assembly④
Right pedal
assembly④
Note: Check whether the
pedal straps are tightened
before riding. Tighten them
by pulling them down.
Please first hand-thread the pedal into the crank,
then use the multi-function wrench (D) to tighten the
pedal assemblies L/R ④. (Note: The tightening directions
for both the left and right pedals are towards the front of
the bike, while the tightening directions for the nuts are
towards the rear of the bike.)
Nut
Nut
Loosen the handle under the saddle, slide the saddle back and forth to the
desired position, and tighten the knob as much as possible.
There are four adjustment pads at the bottom of the front and rear pedal tubes.
Screw these pads until they are tightly secured on the floor and the body does
not shake.
How to Adjust Bike
1 .Handlebar height adjustment:
2. Saddle height adjustment:
How to Adjust Bike
3.Horizontal adjustment of saddle:
4.Body level adjustment:
The head tube must not exceed
the MAX mark during handlebar
adjustment.
Low
High
Horizontal adjustment of saddle
Pull
The saddle must
not exceed the MAX
mark during saddle
adjustment.
About wired projection screen
Installation instructions for wired screen projection:
1. Take out the data cable,
Note: There are two data cables for Android and iOS included in the package.
Please use the appropriate one according to your phone model;
2. Connect the Type-C interface of the data cable to the screen;
3. Connect the Type-C or Lightning interface of the data cable to the phone.
Note: Android phones need to support DisplayPort (DP) signal output in order
to use the wired screen projection function normally.
APP usage instructions APP usage instructions
*The above illustrations are for reference only. Since the software is
constantly updated and iterated, please refer to actual use.
Rotate the front column knob in the left direction for 4-5 turns using one hand,
pull it out and hold it, hold and lift up (or press down) the handlebar using
another hand to the desired position, then release the knob, gently pull the
column up and down, so that the spring can automatically reset (the “click”
sound indicates that the knob has slipped into the column slot hole), and then
turn the knob to the right direction to the tightest position.
Rotate the front column knob in the left direction for 4-5 turns using one hand,
pull it out and hold it, hold and lift up (or press down) the seat using another
hand to the desired position, then release the knob, gently pull the column up
and down, so that the spring can automatically reset (the “click” sound
indicates that the knob has slipped into the column slot hole), and then turn
the knob to the right direction to the tightest position.
Tight
(Right)
Loose
(Left)
Tight
(Right)
Loose
(Left)
Pull
3 o’clock: the right crank
is parallel to floor
in the right direction
(Fig. 1) (Fig. 2)
(Fig. 3)
How to Determine Correct Riding Posture
1. Setup of correct saddle position
Hip
joint
Leg
straight
3
How to Determine Correct Riding Posture
2. Setup of appropriate handlebar height
Hand position 1
1
Hand position 2
2
3. Handle position layout of bike
Hand position 3
(Fig. 1) (Fig. 2)
How to Adjust Bike
5.Emergency brake adjustment:
Each user can set up the appropriate handlebar height based on his or her body height and riding
experience.
We recommend: For new users (Fig. 1), the handlebar height should be slightly higher than the saddle,
for experienced users (Fig. 2), the handlebar height should be level with or slightly lower than the saddle.
For users with lumbar muscle strain or lumbar spondylosis, it is recommended to ride with a doctor's
consent and to adjust the handlebar to a higher position.
Press down the armrest to raise the foot tube by more than 25 °, and use the moving pulley to drag the
dynamic bicycle(Fig. 3).
During riding, coaches will show the corresponding
hand positions, i.e. the corresponding parts of the
handlebar, as shown below.
Saddle height
Put the feet together, stand on one side of the saddle and adjust the saddle to the
hip height(Fig. 1), then sit on the saddle, step on the pedals forcibly until they are
stopped at 6 o’clock and the leg can be fully stretched (Fig. 2).
Horizontal position of saddle
Put the right foot into the clamp, and step on the pedals, until the right pedal is
at 3 o’clock and the front side of the knee joint is on the same vertical line as
the pedal, that is, the saddle is in the correct position (Fig. 3).
About display interface
Display interface description:
Excercise time
Number of remaining days
of membership
WI-FI signal
Instantaneous power
Waiting for loading!
Connect Dp-enabled phone to start mirroring.
Unplug after 10 mins to sleep.
DP : DisplayPort
Cadence
The screencasting device
has been connected.
No membership
purchased.
This interface will appear under
the following circumstances:
1. Waiting for screen casting.
2. The access device does not
support screencasting.
3.ipad or iPhone first time
access untrusted devices.
Single exercise mileage Calories per exercise
Screen casting permissions (Membership):
1. After registering on the app and becoming a member, connecting the bike will
activate screen casting permissions, allowing you to use the screen casting function.
2. Once the bike has activated screen casting function permissions, it can share the
function with up to 4 other non-member accounts (a total of 5 shared accounts).
Note: (1) Among the 5 most recently paired accounts with the bike, at least 1 must
be a member; otherwise, the screen casting function will be disabled.
(2) Member accounts can only activate the bike they are initially paired with.
For any changes, please contact customer service.
Android:
IOS:
Non-member 1
Member
Non-member 2
Non-member 3
Non-member 4
When not in use, turn the knob to the right to the bottom to lock it. When riding,
turn the knob to the left to the top to unlock the knob (you can turn the knob left
and right to adjust the resistance according to your riding needs).In case of emergency
braking or stopping movement, press the knob all the way down until it stops.
Press down
Left (Small)
Right (Big)
180 degrees
counterclockwise
L-shaped head six corner wrench 8#(C)
Connect devices
·When using for the first time, click the 「+」 in the upper right corner of the「Home」
or enter the course and connect the device according to the interface prompts.
Device connected to Wi-Fi
·After connecting the device, follow the page prompts and select the corresponding
Wi-Fi to complete the network connection to the device.
·The device only supports connecting to 2.4G networks.
Purchase APP membership
·For first time use, after completing the network configuration, the page will
automatically jump to the membership purchase page, and follow the page
prompts to complete the membership purchase.
·If you need to purchase a membership again in the future, please open the APP
and find 「Homepage」 - 「Settings」 - 「Member Rights」, and follow the interface
prompts to complete the membership purchase.
APP installation registration
·You can scan the QR code below to download the APP and register an APP account.
·For subsequent use, just step on the device and open the sports mode or course of
the APP to automatically connect.
·The device does not support simultaneous connection of multiple mobile phones.
Please confirm that no other users are connected to the device at this time before use.
·After shutting down, Bluetooth will be automatically disconnected.
·In addition to connecting with YESOUL FITNESS APP, Bluetooth can also be connected
with Kinomap and Zwift software.
Zwift
Kinomap
2. Enter the APP login page
1.Scan the QR code and
download the APP
4. Enter the APP homepage
6. Select the device to connect 7. Select the corresponding
Wi-Fi connection device
8. Follow the interface prompts to complete the membership purchase.
3. Register an APP account
5.Search for devices
Button
Left rear speaker
Right rear speaker
Tight
(Right)
Loose
(Left)
3
2
2
1
1
3
(Fig. 3)
25°
*Note: Before locking,
please make sure to
align the holes and do
not exceed the MAX line.
*Note: Before locking,
please make sure to
align the holes and do
not exceed the MAX line.
Saddle tightening knob
(Adjust the saddle
position front to back)
Rear column
tightening knob
(Adjust the saddle
height)
TWS pairing
Bluetooth
pairing
Operation steps
Project