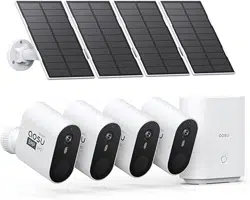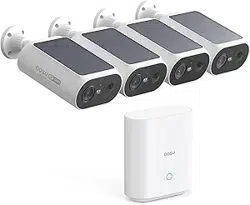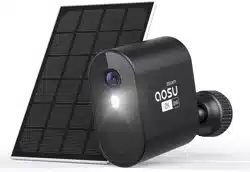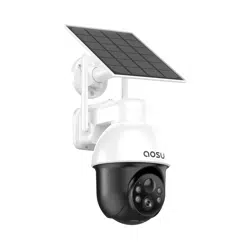
封面
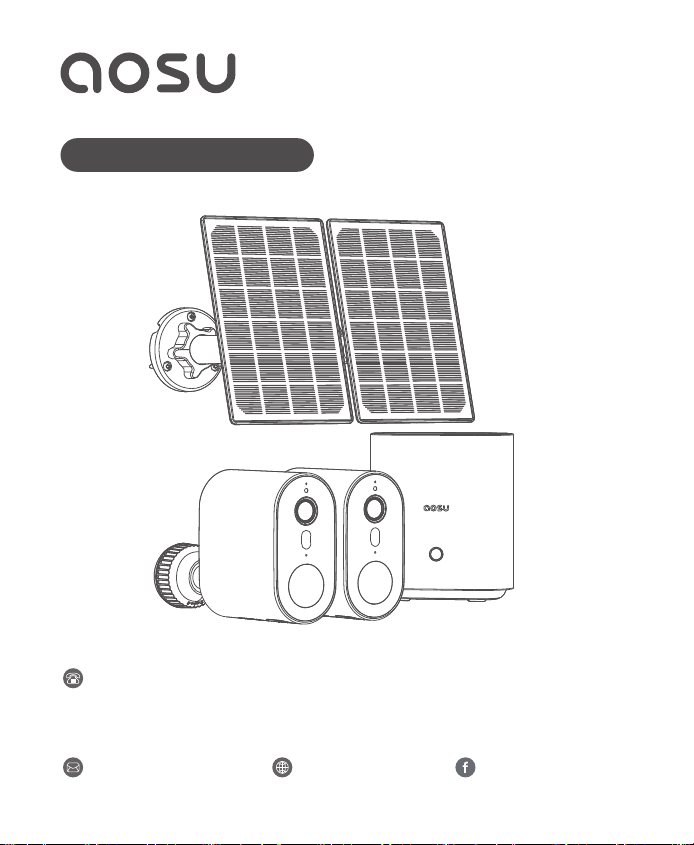
Quick Start Guide
Solar-Powered Security Camera System
SolarCam Max/Pro System
www.aosulife.com[email protected] @aosulife
United States: +1-866-905-9950 Mon-Fri 9AM-5PM(PST)
United Kingdom: +44-20-3885-0830 Mon-Fri 9AM-5PM(GMT)
Germany: +49-32-221094692 Mon-Fri 9AM-5PM(CET)
Japan: +81-50-5840-2601 Mon-Fri 9AM-5PM ( JST )
TABLE OF CONTENTS
01
P02Getting Started
01
P03Product Overview
02
P04Connecting the Homebase
03
P06-P13Mounting the Camera
05
P14Charging the Camera
06
P15-17Safety Statement
07
P05Setting Up the System
04
P18Customer Service
08
EN
Getting Started
02
EN
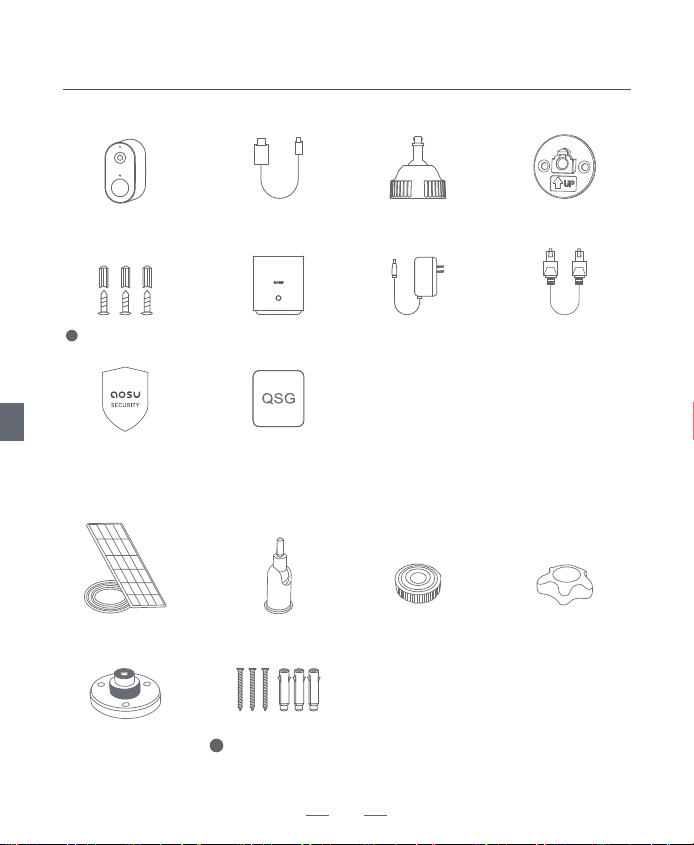
SolarCam Max/Pro
Solar Panel
USB-C Charging
Cable
Mounting Bracket
SolarCam Max/Pro
Quick Start Guide
Mounting Base
Mounting Screws
and Anchors
1
EthernetCable
Power Adapter
for HomeBase
HomeBase
Security Sticker
Solar Panel
Universal Joint
Socket nut
Locking Screw Cap
Mounting base
Mounting Screws
and Anchors
2
Product Overview
03
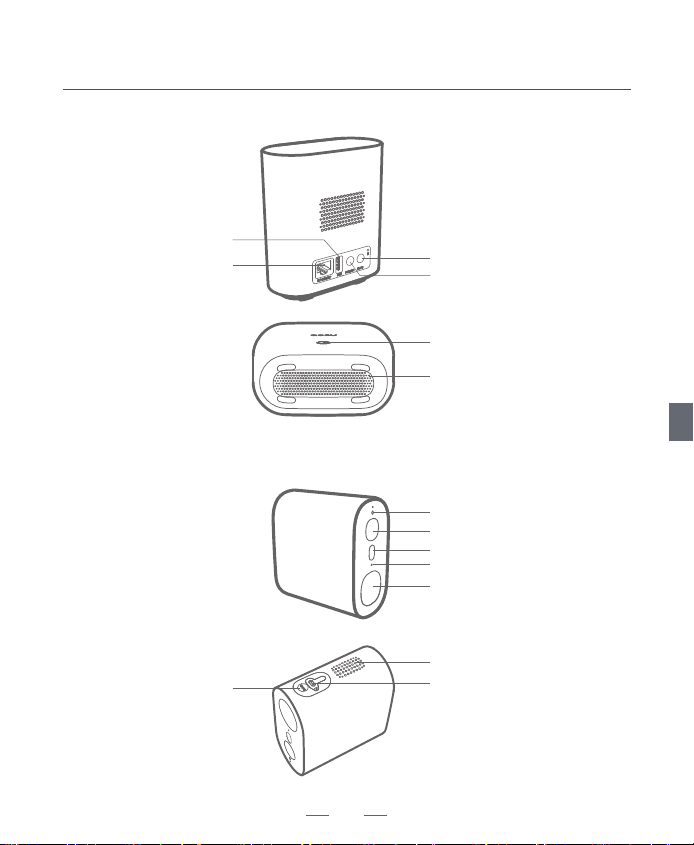
HomeBase
Wire-Free Security Camera
Power port
Lens
Spotlight
Microphone
Motion sensor
Status LED
SYNC button
Status LED
Speaker
USB port
Ethernet port
SYNC button
USB-C port
Speaker
EN
04
CONNECTING THE HOMEBASE
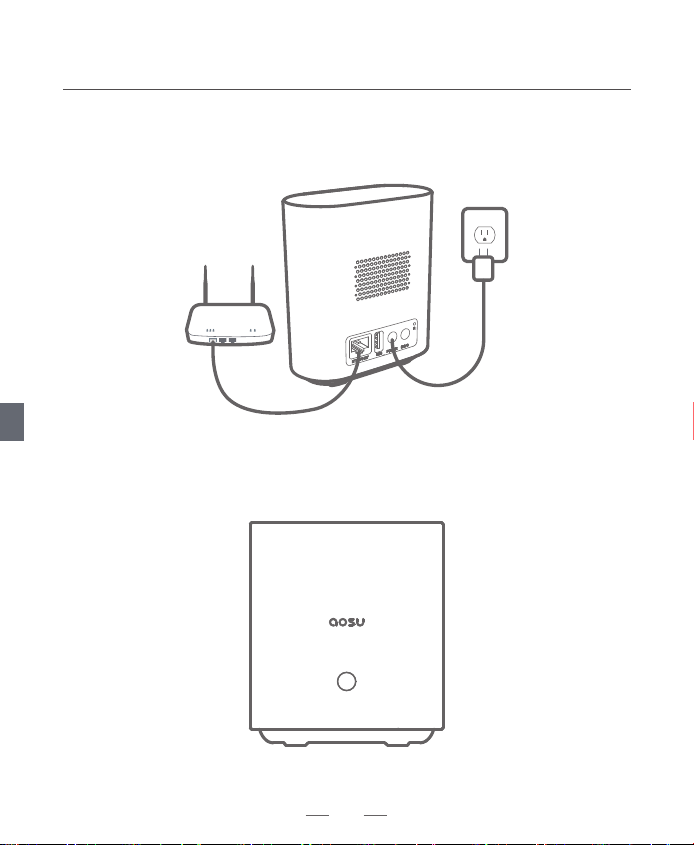
1. Power on the HomeBase, then use the ethernet cable provided to
connect the HomeBase to your home router.
Connect the HomeBase to the Internet
EN
2. The LED indicator turns blue (this may take up to 1min) when
HomeBase is ready for setup.
SETTING UP THE SYSTEM
05
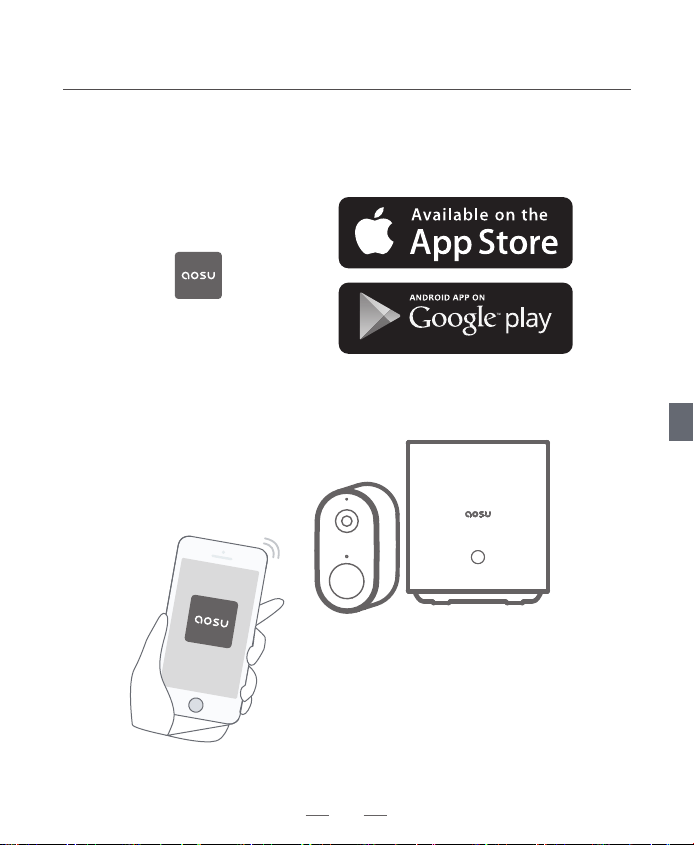
Download the App and Set up the Systems ready for setup.
Download the 'aosu' app from the App Store (iOS devices) or Google Play
(Android devices).
Sign up for a 'aosu' app account, then follow the onscreen instructions to
complete the setup.
EN
MOUNTING THE CAMERA
06
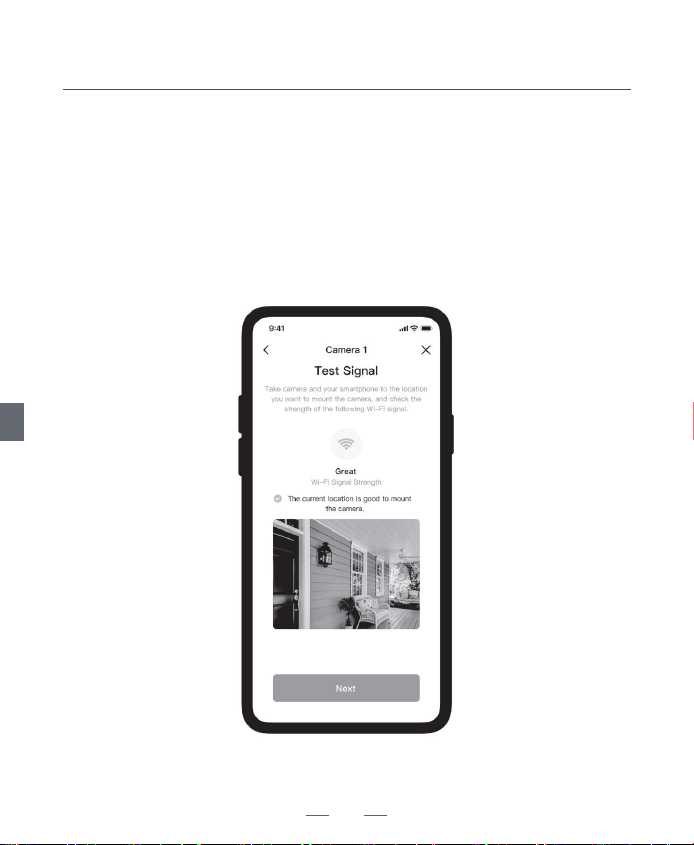
To find a spot to mount Wire-Free Security Camera, you need to test
wireless signal strength.
① Open the 'aosu' app, go to Camera Settings > Mounting Guide.
② To test the wireless signal strength, take your camera and phone to
the location where you want to mount the camera.
③ Move the camera as close to the HomeBase as possible if the wireless.
Find a Good Mounting Spot
EN
07
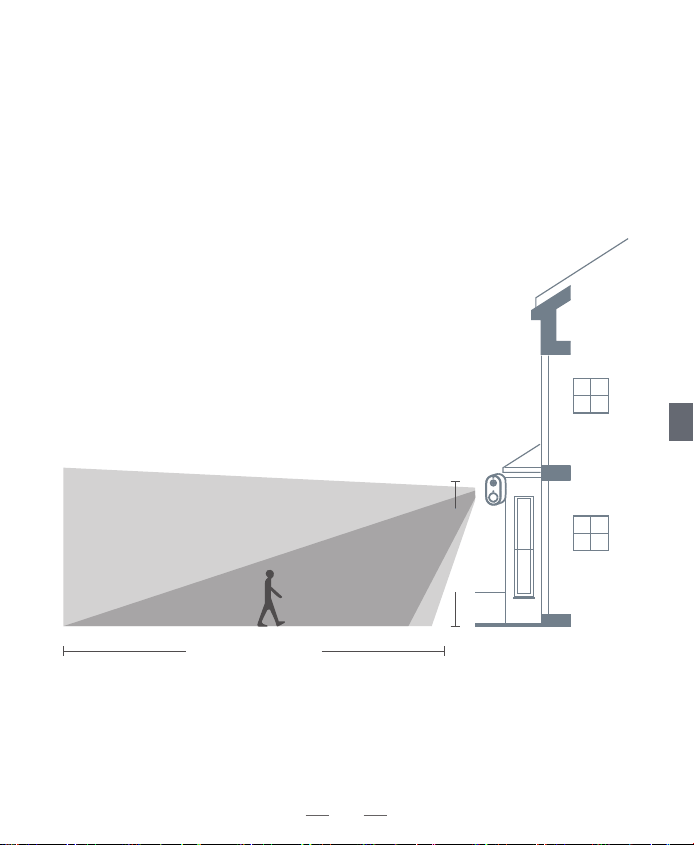
Select Height and Location
Hang Wire-Free Security Camera 7-10 ft (2-3 m) above the ground. This
height maximizes the detection range of the motion sensor of Wire-Free
Security Camera.
Avoid placing Wire-Free Security Camera under direct sunlight.
Motion
Detection
Zone
Camera field
of view
Up to 30 ft (10 m)
7-10 ft
(2 - 3 m)
Camera field
of view
Motion
Detection
Zone
EN
08
Mount the camera
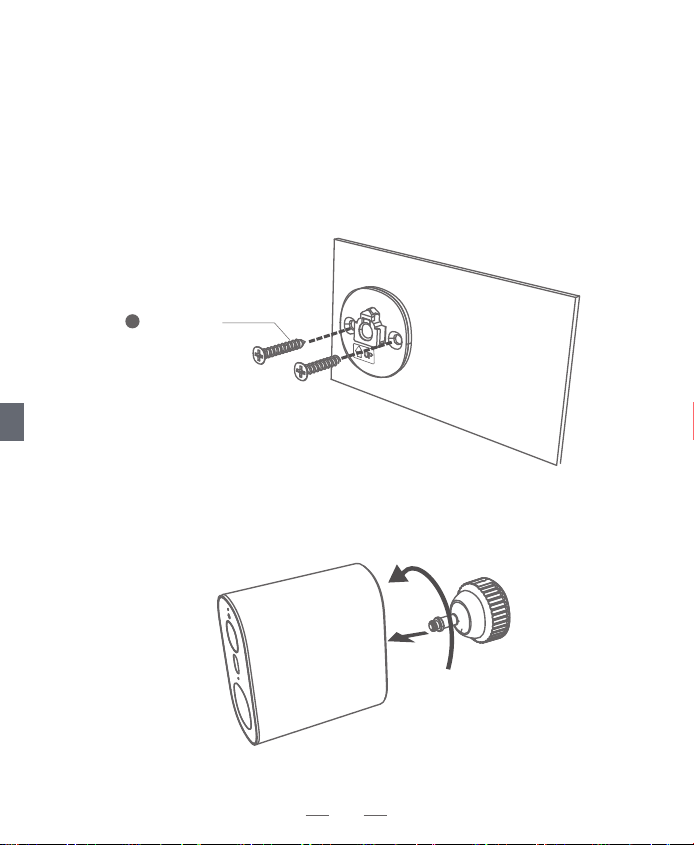
The camera can be mounted both indoors and outdoors.
1. Drill holes with a 15/64 inch (5.95mm) drill bit, then insert the anchors
into the holes; anchors are necessary for walls that are made out of
hard materials such as concrete, brick, or stucco. Firmly nailed the
mounting base onto the wall.
2. Tighten the camera to the mounting bracket.
EN
Mounting
Screws
1
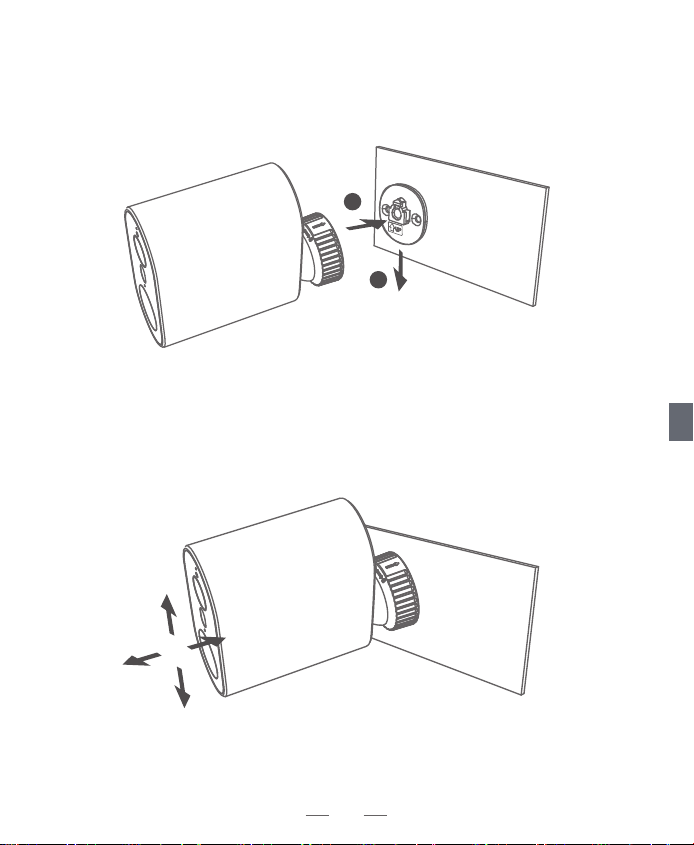
4. Adjust the viewing angle by checking the live stream feed in the
'aosu'app.
3. Accurately snap the camera to the mounting base.
09
EN
1
2
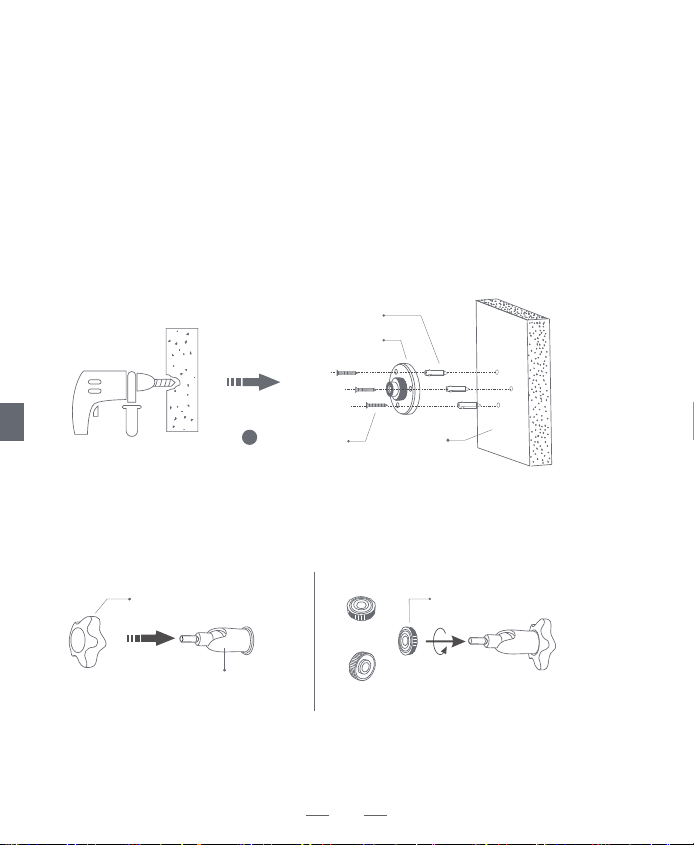
Wall Anchors
Wall
Base
Mounting
Screws
Locking Screw Cap
Universal Joint
Back
Front
Socket nut
Place Solar Panel in an area with consistent sunlight throughout the
year.It only needs a few hours of direct sunlight each day to keep your
camera powered.
The amuont of energy that the solar panel produces is affected by
weather conditions,seasonal changes, geographic loction,etc.
1. Fix the base to your mounting location using the included screws.If the
installation surface is soft or unstable,first use a φ6.0 drill bit to drill a
hole in the wall,then insert the anchor nail into the hole,and fix
thebase with screws.
2. First,install the locking screw cap into the universal joint and then
screw the circular socket nut into the universal joint.
2
10
EN
Installation instruction of Solar Panel
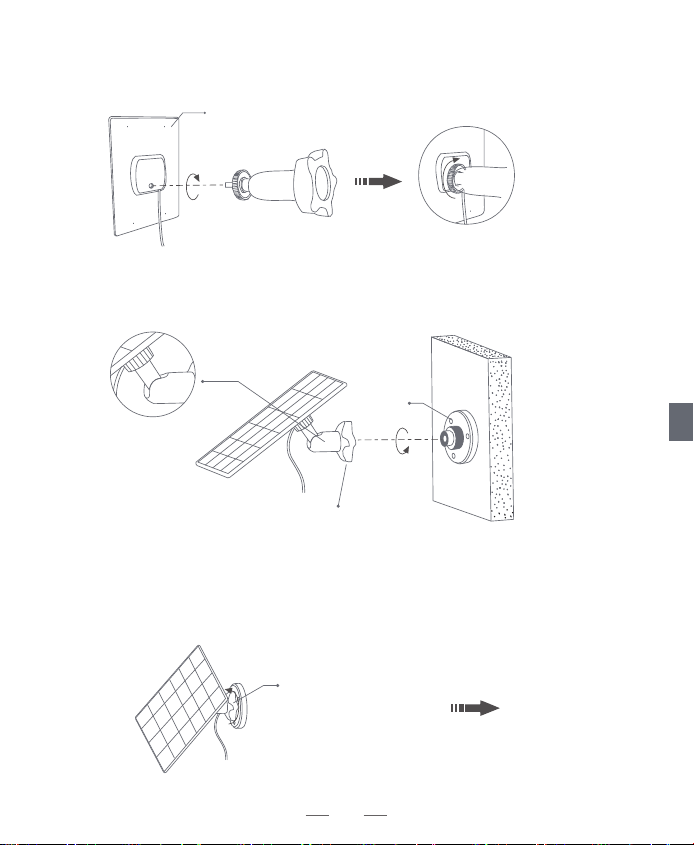
Solar Panel
Locking Screw Cap
①
Base
Locking Screw Cap
3. Screw the universal joint into the back of the solar panel.Tight-
en it firmly with the attached nut.
4. Screw the locking screw cap into the base.Make sure that the
universal joint is angled upward.
5. When adjusting the solar panel left or right,loosen thelocking
screw cap,turn the sleeve rod,and tighten thelocking screw
cap when the panel is in position.
11
EN
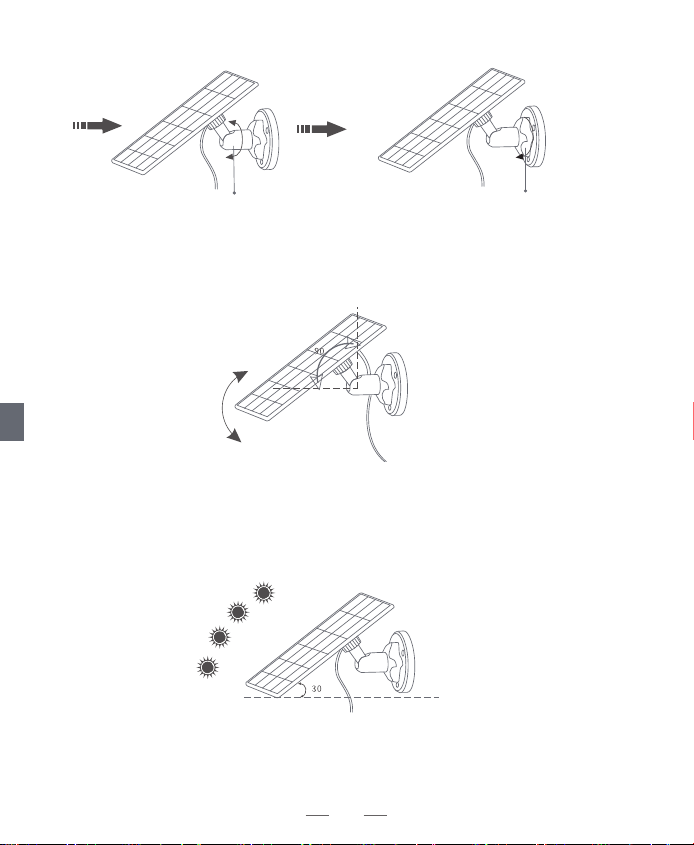
Locking Screw Cap Sleeve Rod
°
② ③
°
6. Solar panel’s angle can be adjusted up and down up to
90°.
Tip: After the installation is complete,please check that all
locking mechanisms are tightly secured.
12
EN
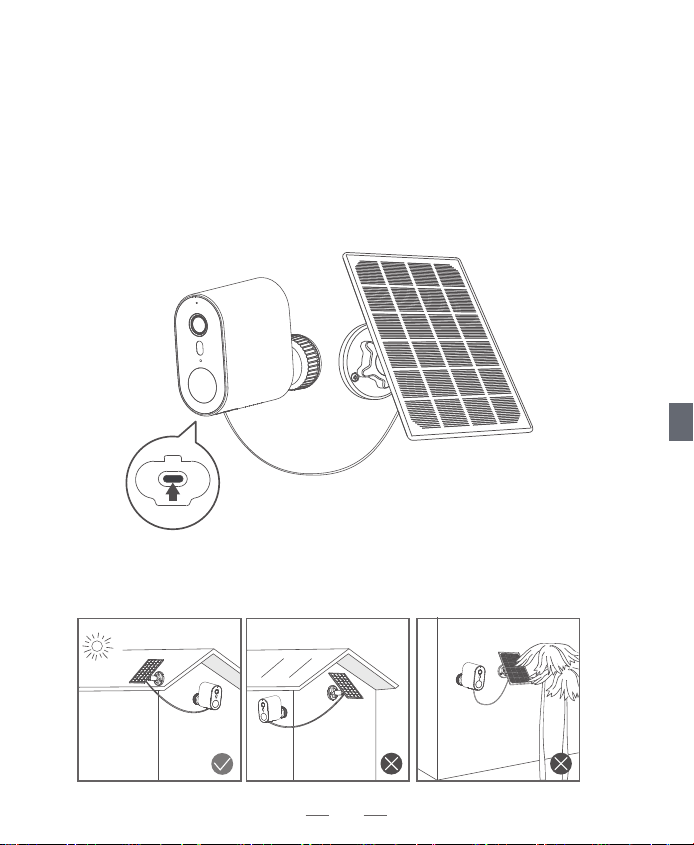
Installation instruction of solar panel
1. keep the installation angle of solar panels about 30-45° with the
horizontal plane, as shown in the picture below.
2. The installation between the solar panel and the camera is shown in
the following figure (open up the silicone cover at the bottom of the
camera, remove the small center part of the cover, insert the power
cord through the opening and plug it into the USB-C Port and then
close the cover taking up any slack in the power cord from the solar
panel) .
3. Take care to install the solar panel so that the sun is not
blocked by any items such as eaves, trees branches, etc.
4. Tighten the camera to the mounting bracket.
13
EN
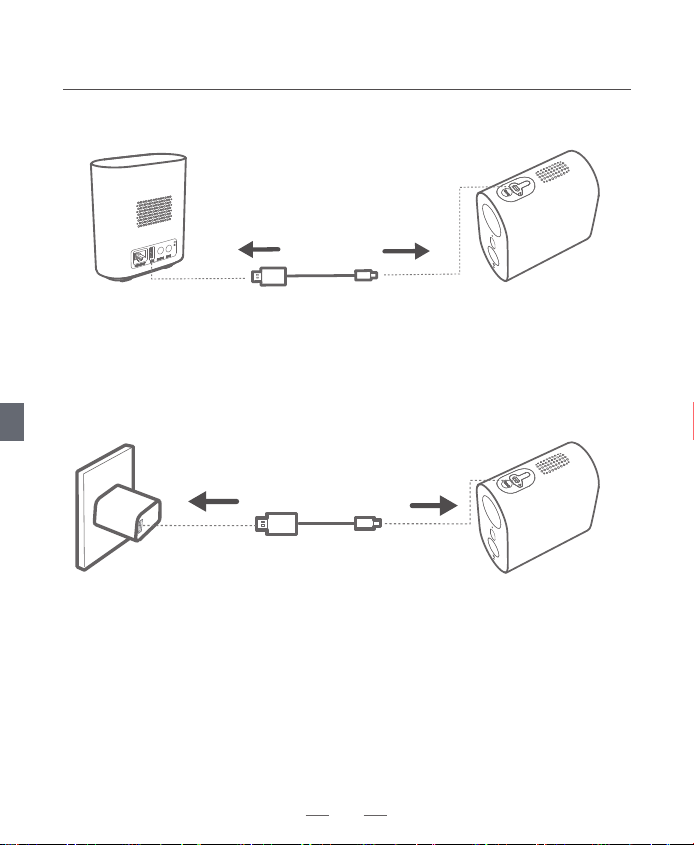
CHARGING THE CAMERA
Method 1
Method 2
5V/2A
14
EN
Satety Statement
FCC Statement
This device complies with Part 15 of the FCC Rules. Operation is subject
to the following two conditions: (1) this device may not cause harmful
interference, and (2) this device must accept any interference received,
including interference that may cause undesired operation.
Warning: Changes or modifications not expressly approved by the party
responsible for compliance could void the user's authority to operate the
equipment. Note: This equipment has been tested and found to comply
with the limits for a Class B digital device, pursuant to Part 15 of the FCC
Rules. These limits are designed to provide reasonable protection
against harmful interference in a residential installation.
This equipment generates uses and can radiate radio frequency energy
and, if not installed and used in accordance with the instructions, may
cause harmful interference to radio communications. However, there is
no guarantee that interference will not occur in a particular installation. If
this equipment does cause harmful interference to radio or television
reception, which can be determined by turning the equipment off and
on, the user is encouraged to try to correct the interference by one or
more of the following measures: (1) Reorient or relocate the receiving
antenna. (2) Increase the separation between the equipment and
receiver. (3) Connect the equipment into an outlet on a circuit different
from that to which the receiver is connected. (4) Consult the dealer or an
experienced radio/ TV technician for help.
FCC Radio Frequency Exposure Statement
The device has been evaluated to meet general RF exposure requirements.
The device can be used in fixed/mobile exposure condition. The min
separation distance is 20cm.
15
EN
Declaration of Conformity
Hereby, Glazero Limited declares that this device is in compliance with the
essential requirements and other relevant provisions of Directive 2014/53/EU.
For the declaration of conformity, visit the Web site:https://www.aosulife.com/.
This product can be used across EU member states.
Do not use the Device in the environment at too high or too low temperature,
never expose the Device under strong sunshine or too wet environment.
The suitable temperature for HomeBase and accessories is -10°C-45°C.
The suitable temperature for Video Doorbell and accessories is -20°C - 40°C .
When charging, please place the device in an environment that has a normal
room temperature and good ventilation.
It is recommended to charge the device in an environment with a temperature
that ranges from 5°C ~ 25°C.
RF exposure information: The Maximum Permissible Exposure (MPE) level has
been calculated based on a distance of d=20 cm between the device and the
human body. To maintain compliance with RF exposure requirement, use
product that maintain a 20cm distance between the device and human body.
For HomeBase: Wi-Fi Operating Frequency Range:2412~2472MHz ; Wifi Max
Output Power: 17.13dBm(EIRP)
Wi-Fi Operating Frequency Range: 5150MHz ~ 5850MHz, Wifi Max Output
Power: 13.7dBm(EIRP)
For Video Doorbell :
Wi-Fi Operating Frequency Range: 2412~2472MHz ; Wi-Fi Max Output Power:
18.30 dBm
This product is designed and manufactured with high quality materials
and components, which can be recycled and reused.
This symbol means the product must not be discarded as household
waste, and should be delivered to an appropriate collection facility for
recycling. Proper disposal and recycling helps protect natural
resources, human health and the environment. For more information
on disposal and recycling of this product, contact your local municipality,
disposal service, or the shop where you bought this product.
16
EN
This product complies with the radio interference requirements of
the European Community.
• Replacement of a battery with an incorrect type that can defeat a safeguard
(for example,in the case of some lithium battery types).
• Disposal of a battery into fire or a hot oven, or mechanically crushing or
cutting of a battery, that can result in an explosion.
• Leaving a battery in an extremely high temperature surrounding environ-
ment that can result in an explosion or the leakage of flammable liquid or gas.
• A battery subjected to extremely low air pressure that may result in an
explosion or the leakage of flammable liquid or gas.
IC Caution:
User manuals for licence-exempt radio apparatus shall contain the following
or equivalent notice in a conspicuous location in the user manual or
alternatively on the device or both.
This device complies with Industry Canada licence-exempt RSS standard(s).
Operation is subject to the following two conditions:
(1) this device may not cause interference, and
(2) this device must accept any interference, including interference that may
cause undesired operation of the device.
Le présent appareil est conforme aux CNR d'Industrie Canada applicables aux
appareils radio exempts de licence. L'exploitation est autorisée aux deux
conditions suivantes :
(1) l'appareil nedoit pas produire de brouillage, et
(2) l'utilisateur de l'appareil doit accepter tout brouillage radioélectrique subi,
même si le brouillage est susceptible d'en compromettre le fonctionnement.
IC SAR Warning:
This equipment should be installed and operated with minimum distance 20
cm between the radiator and your body.
Lors de l’ installation et de l’ exploitation de ce dispositif, la distance entre le
radiateur et le corps est d ’au moins 20 cm.
Battery warning
17
ENEN
Customer Service
Warranty
12-month limited warranty(The actual warranty period shall be implemented
according to the requirements of local laws and regulations)
Email Us
Customer Support: support@aosulife.com
Facebook:@aosulife
Twitter:@aosulife
YouTube:@aosulife
18
Call Us
United States: +1-866-905-9950 Mon-Fri 9AM-5PM(PST)
United Kingdom: +44-20-3885-0830 Mon-Fri 9AM-5PM(GMT)
Germany: +49-32-221094692 Mon-Fri 9AM-5PM(CET)
Japan: +81-50-5840-2601 Mon-Fri 9AM-5PM ( JST )
EN