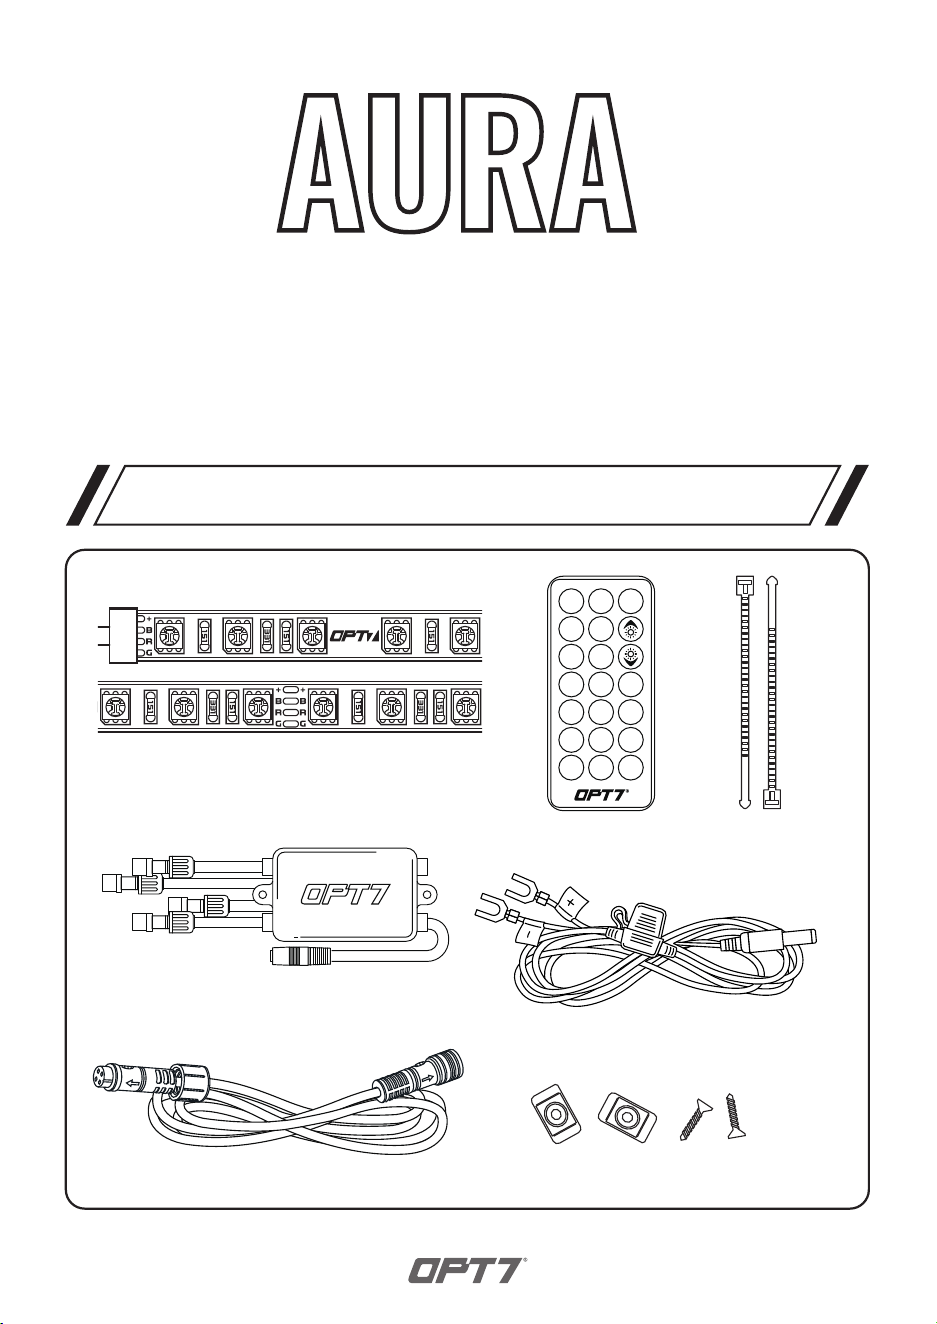
AURA CONTROL BOX
REMOTE
LIGHT STRIPS
EXTENSION WIRES
MOUNTING KIT
ZIPTIES
HARDWIRE POWER HARNESS
COMPONENTS
TM
ENGINE BAY
INSTALLATION GUIDE
ON
S+ M+
OFF
AUTO
S- M-
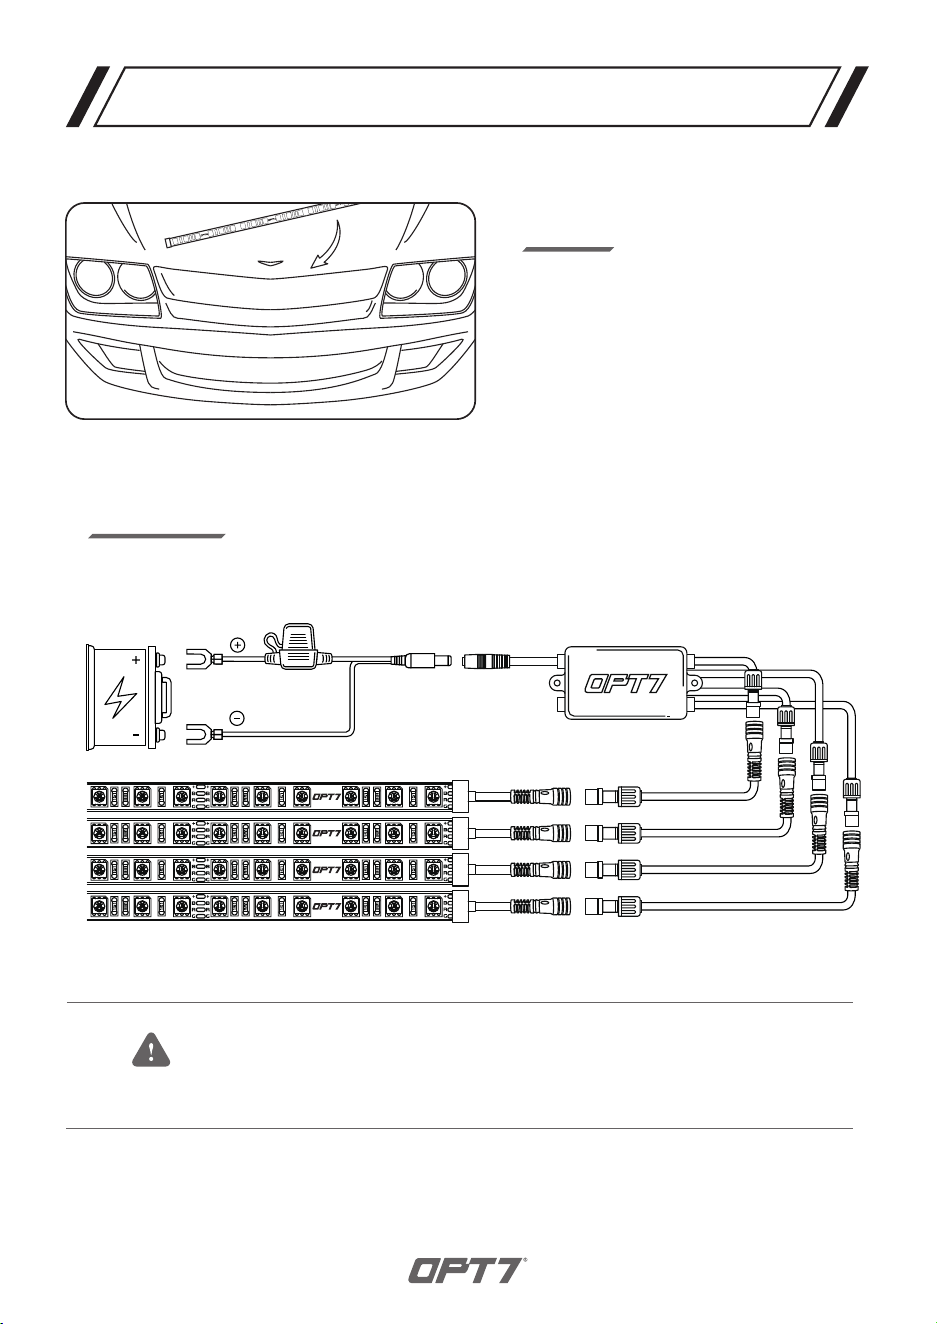
Decide where to locate the control
box and light strips.
Ensure wiring has enough length for
light strips to be installed in desired
location.
STEP 1
INSTALLATION
1.
2.
Connecting to more than 10 AMP will override the kit and cause early failure,
ensure it is 10AMPs or less!!
Please ensure that the LED bars or strips/control box/wiring all are mounted
in areas where will not exceed 85℃ or 185℉.
WARNING
EXAMPLES
EXTENSION WIRE
FUSE
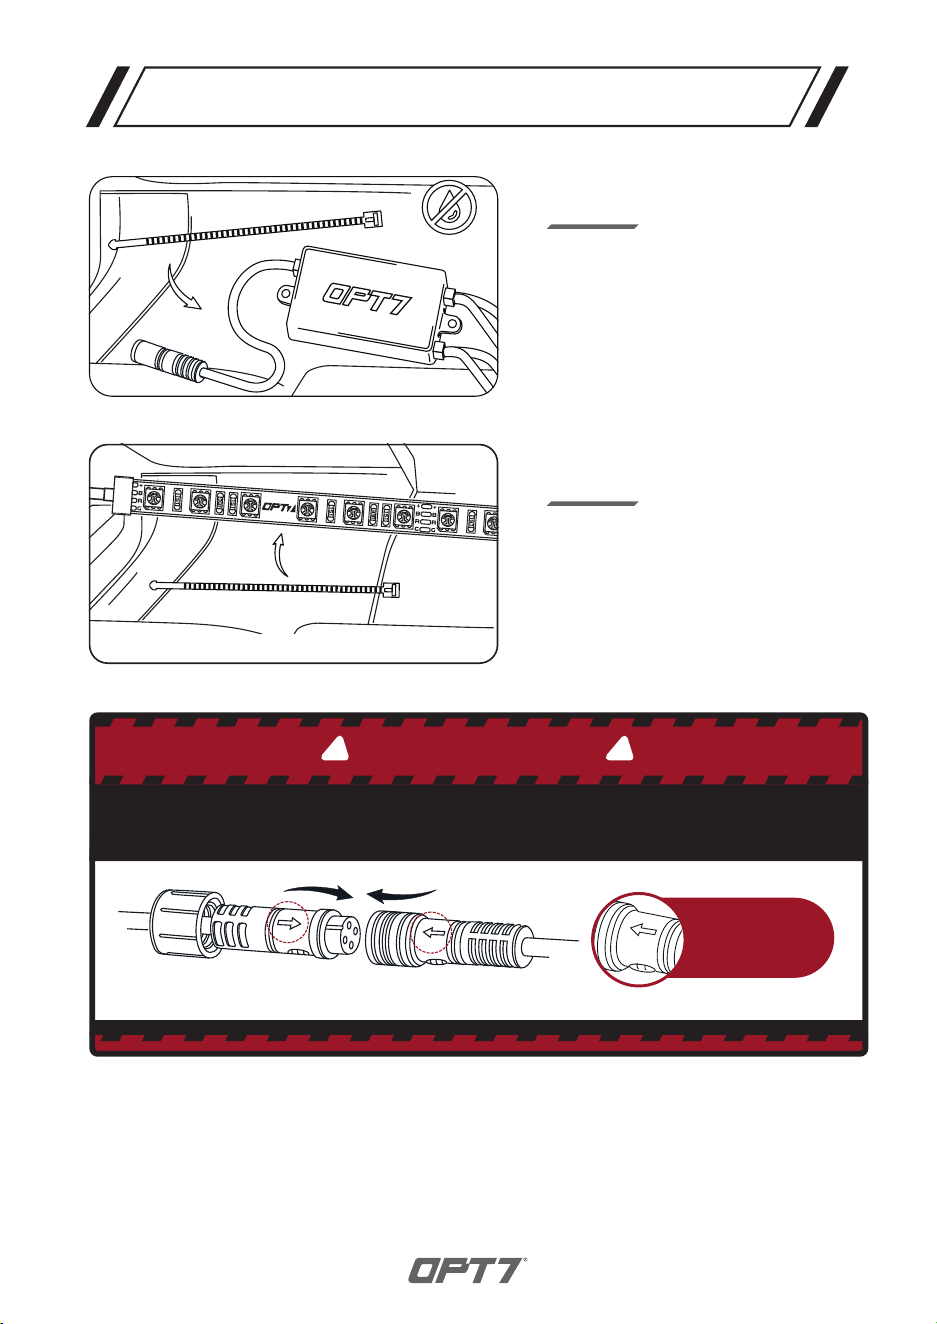
As shown below, connect all light strips to the control box with the included
extension cables.
STEP 2
Secure the light strips using the
zip ties to tie all the wiring away
from the moving components.
Secure Control box in desired
location with Velcro or zipties.
* CONTROL BOX NOT WATERPROOF
Ensure the control box is safely and
securely hidden from exposing
elements of moisture.
STEP 3
INSTALLATION
Note the
direction of
the arrows
BE SURE TO CONFIRM THE CORRECT DIRECTION OF THE ARROW!!
TO AVOID PRODUCT DAMAGE DUE TO INCORRECT INSTALLATION.
CORRECT INSTALLATION
IMPORTANT
! !
Flow direction
DISCLAIMER
OPT7 Lighting is not liable for damages or personal injuries while installing
this product. The Installation Guide is intended as assistance to reduce setup
time. OPT7 Lighting assumes no responsibility for improper installation.
If you are unfamiliar with your vehicle or inexperienced with aftermarket
upgrades, please seek professional assistance.
OPT7 recommends installation for safety and guidance.
Modified installations or installation recommendations not specified by
OPT7 Lighting will void product warranty.
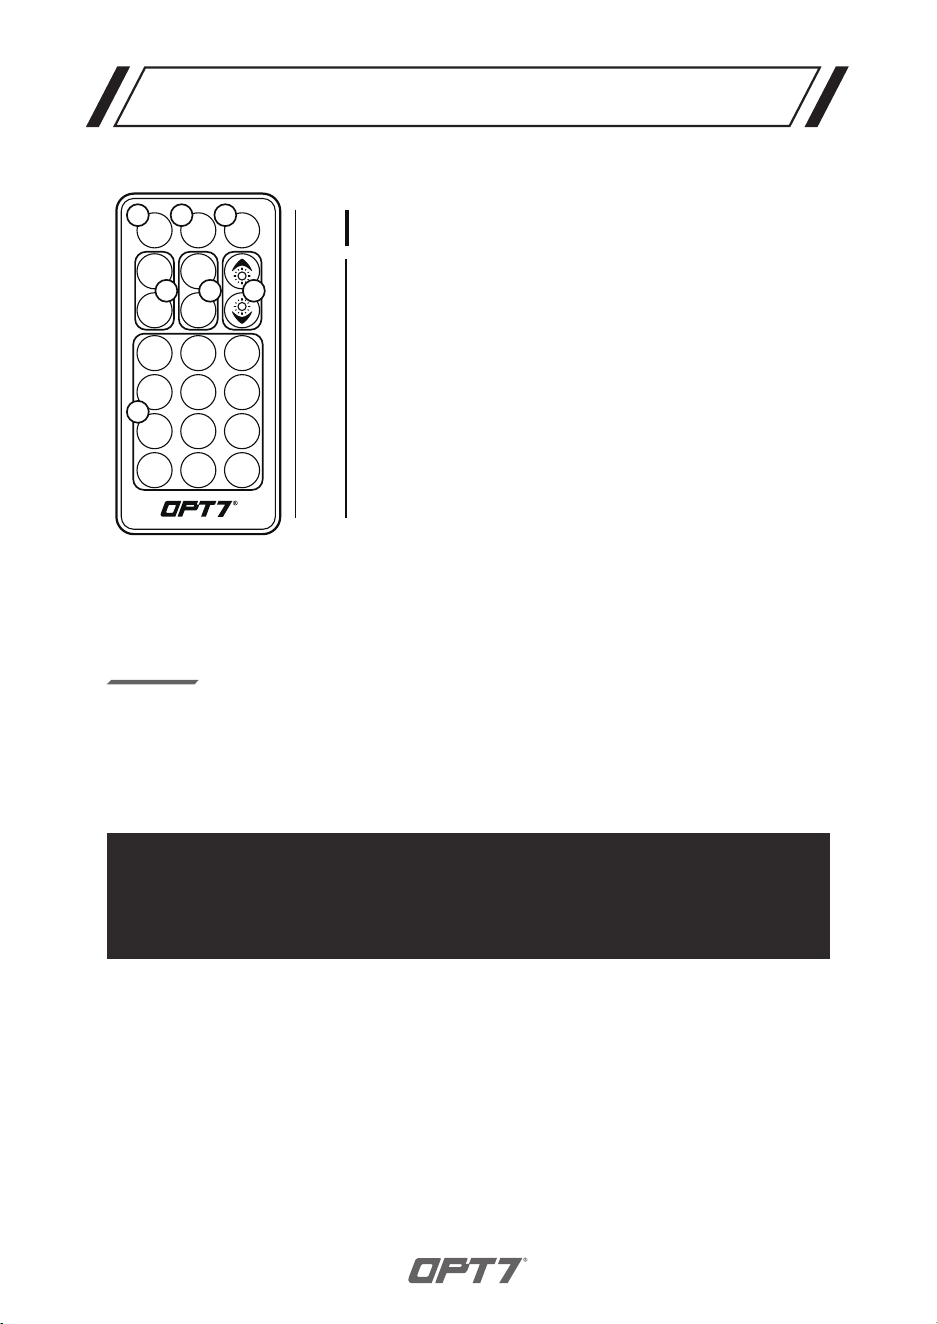
Using the included E-Z Remote,
select your desired color or pattern.
STEP 4
Power-ON
Automatic Color Change
Power-OFF
Speed +/- 8 Levels
Mode +/- 19 Mode
Dimmer 8 Levels
Color Selection 12 Colors
1
2
3
4
5
6
7
ON
S+ M+
OFF
AUTO
S- M-
BUTTON LAYOUT
INSTALLATION