THANK YOU
for purchasing the Euhomy ice maker
RECORD THIS INFORMATION
CUSTOMER SERVICE
JOIN US
ACTIVATE YOUR WARRANTY
Scan the QR code using
a mobile device
Model Number _________________
Serial Number __________________
Date of Purchase ________________
Store of Purchase ________________
(Keep receipt)
1-833-362-2655(US)
euhomyofficial
Euhomy_global
euhomy
EuhomyOfficial
https://euhomy.com
Check the back or side of the
machine for the serial number
on the nameplate.
IM048-N
TIP
https://euhomy.com/pages/activate-warranty
SCAN HERE to share tips, get
support,and connect with fellow
enthusiasts!

Important Safety Instructions
Key Components and Structure
Getting to Know Your Ice Maker
Installation Guide
Cleaning Your Ice Maker Before
Using for the First Time
How to Operate the Ice Maker
Troubleshooting
Preparing Your Ice Maker for
Long-term Storage or Relocation
Clean the Ice Maker
Warranty Policy
01
04
05
06
08
09
14
11
12
15
IMPORTANT SAFETY INSTRUCTIONS
Electrical Safety
WARNINGS
Make sure the voltage from the wall outlet matches the specifications listed on the appli-
ance nameplate.
This appliance must be properly grounded.
DO NOT use an extension cord unless absolutely necessary. Using one may cause overheat-
ing or fire.
If an extension cord is required: Only use a cord with a grounding plug; The cord’s rated
power must be equal to or higher than that of the appliance.
DO NOT operate the appliance if any part, including the power cord or plug, is damaged.
Always unplug the unit before cleaning.
Only responsible and capable adults should operate this appliance.
When positioning the appliance, make sure the power cord is not trapped or damaged.
DO NOT install multiple portable socket outlets or power strips behind the appliance.
1.
2.
3.
4.
5.
6.
7.
8.
9.
Placement and Operation
This appliance may be used by children aged 8 years and older and by persons with reduced
physical, sensory, or mental capabilities, or lack of experience and knowledge, if supervised
or properly instructed in safe use and understanding of hazards.
Place the unit on a stable, level surface according to the installation instructions before use.
DO NOT place or use the appliance outdoors, or expose it to direct sunlight, rain, or high
humidity.
10.
11.
12.
Failure to follow these instructions could result in electric shock, fire or burn hazard, which could
cause property damage, personal injury, or death. When using electrical appliances, basic safety
precautions should always be followed, including the following:
Read and review instructions to understand the operation and use of the product.
Indicates the presence of a hazard that can cause personal injury, death, or substantial
property damage if the warning included with this symbol is ignored.
01

Food Safety and Hygiene
DO NOT leave the door open for extended periods, as this will raise internal temperatures.
Regularly clean all surfaces that come into contact with food and the drainage system.
Clean water tanks if not used for more than 48 hours; flush the water system if unused for
more than 5 days.
If the appliance will not be used for an extended time, switch it off, defrost, clean, dry, and
leave the door open to prevent mold growth.
25.
26.
27.
28.
Keep the power cord away from children and areas where it may be pulled or create a
tripping hazard.
DO NOT allow children to operate or play near the appliance during use.
DO NOT use water that is microbiologically unsafe or of unknown quality.
DO NOT remove any safety, warning, or product labels from the unit.
DO NOT touch the evaporator while the appliance is operating.
DO NOT plug in or unplug the unit with wet hands.
DO NOT store or use flammable vapors or liquids near the unit.
Never immerse any part of the appliance in water.
DO NOT attempt to disassemble, repair, or modify the appliance unless instructed by the
manufacturer.
Children should not play with the appliance.
Cleaning and user maintenance must not be performed by children without supervision.
Children aged 3 to 8 years may load or unload the appliance under supervision.
13.
14.
15.
16.
17.
18.
19.
20.
21.
22.
23.
24.
02
Risk of Fire or Explosion-Flammable Refrigerant Used
Dispose of the appliance following federal or local regulations. Follow all handling instruc-
tions to ensure safe disposal.
DO NOT use mechanical devices to defrost the ice maker.
DO NOT puncture refrigerant tubing.
Servicing must be performed by trained personnel only.
The ice maker should comply with the safety standards for refrigeration systems (ASHRAE15)
and should not be installed in corridors or hallways of public buildings.
Clean and maintain the appliance regularly according to the Cleaning & Maintenance
section of this manual.
03
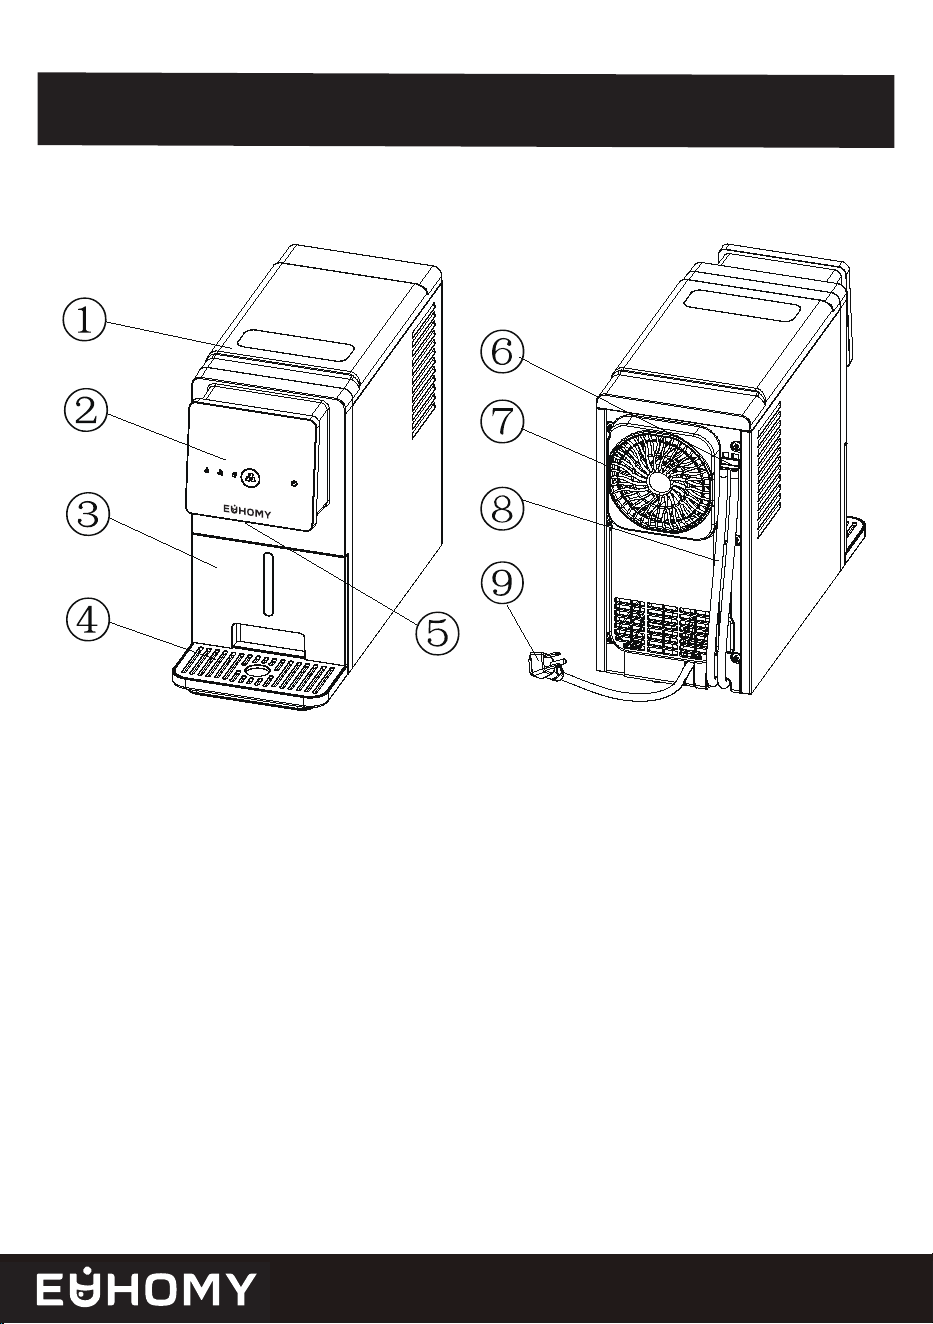
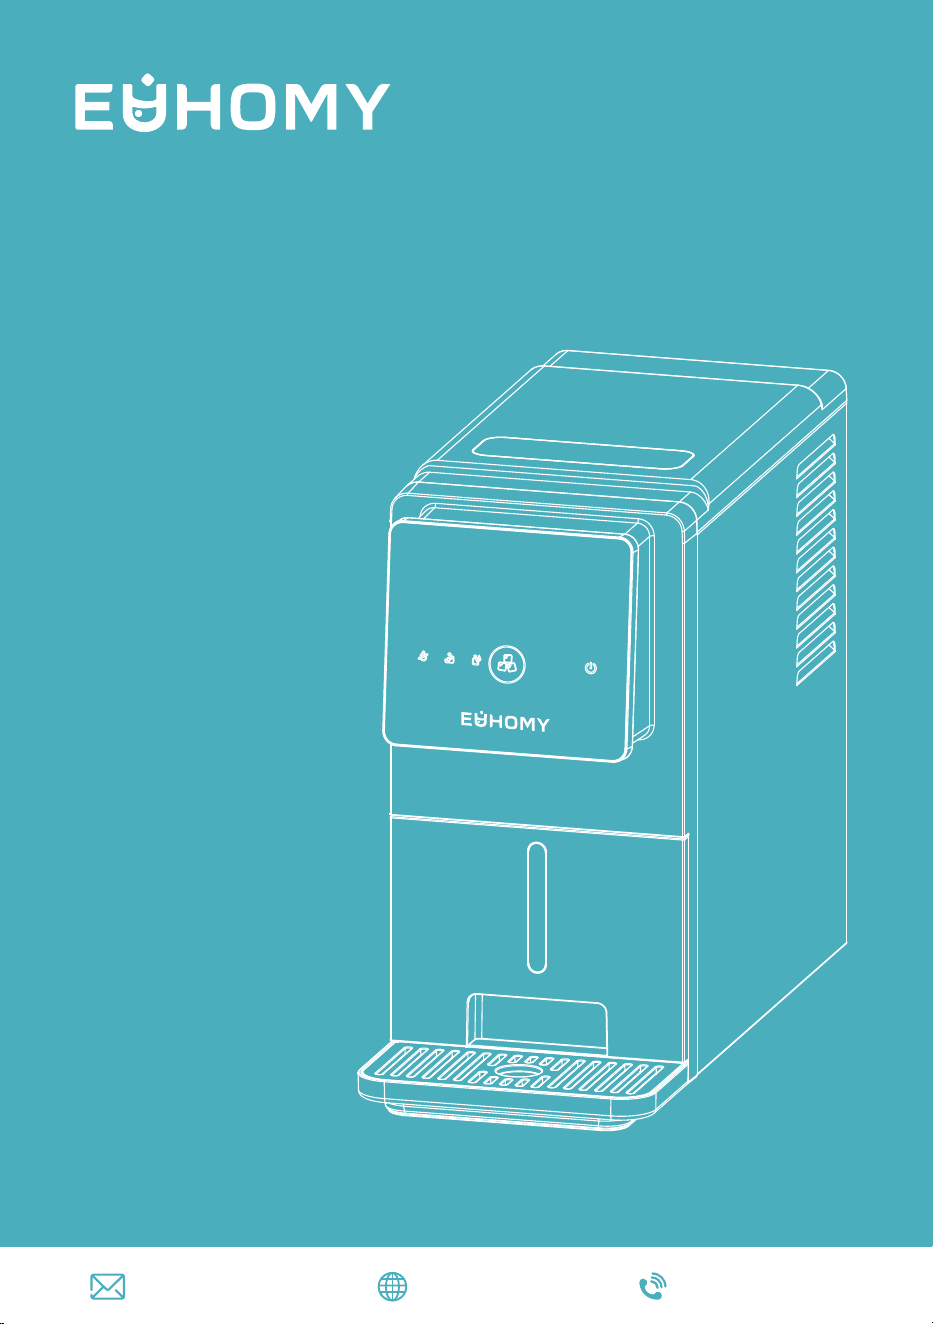
KEY COMPONENTS AND STRUCTURE
1.Top Cover
2.Control Panel
3.Water Tank
4.Drip Tray
5.Ice Outlet
6.Drain Plug
7.Air Outlet
8.Drain Hose
9.Power Cord
04
GETTING TO KNOW YOUR ICE MAKER
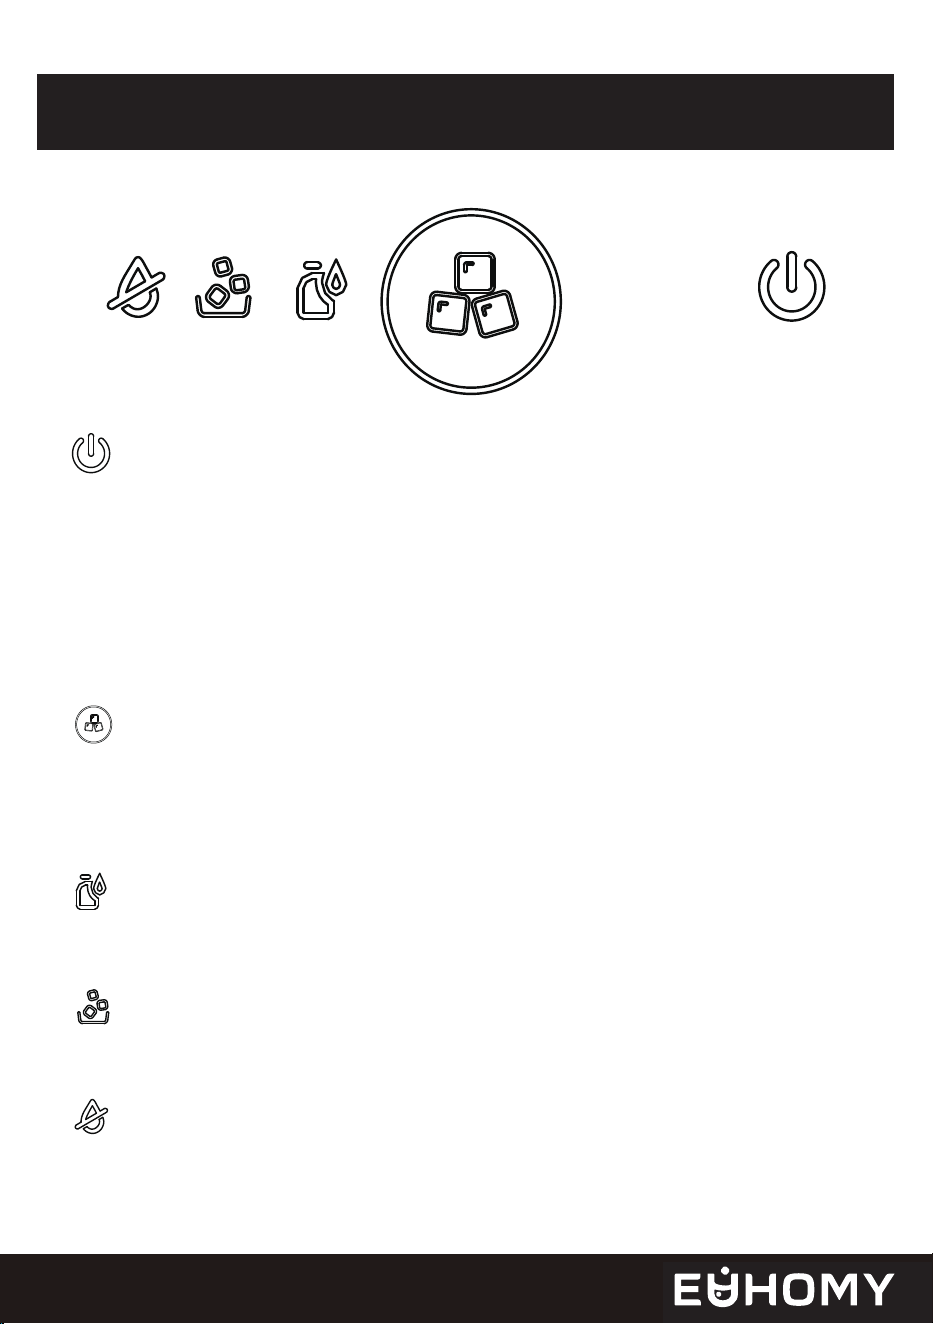
Ice/Clean Button
Ice Dispense Button & Indicator
When plugged in, the icon lights red.
Ice-Making Function
While in standby mode, press the button once to start ice making; the icon turns white.
Cleaning Function
While in standby mode, press and hold the button for more than 5 seconds to start the
self-cleaning mode. The icon stays white and the Cleaning indicator lights up.
The entire icon lights up after being plugged in.
Press once, and the ice cube will fall out automatically, accompanied by a rotating light
along the outer ring. Press the button again to stop the ice fall.
Cleaning Indicator
The indicator lights up when the automatic cleaning function is activated.
Ice Full Indicator
The indicator lights up when the ice basket is full.
ADD WATER Indicator
The ADD WATER indicator lights up when the water reservoir is low.
05
INSTALLATION GUIDE
A. Unpack
Remove all exterior and interior packaging. Confirm all accessories are included: instruction
manual. If anything is missing, contact our customer service team.
B. Prepare the Ice Maker
The ice bin and ice scoop should be cleaned with a damp cloth before first use.
C. Position the Ice Maker
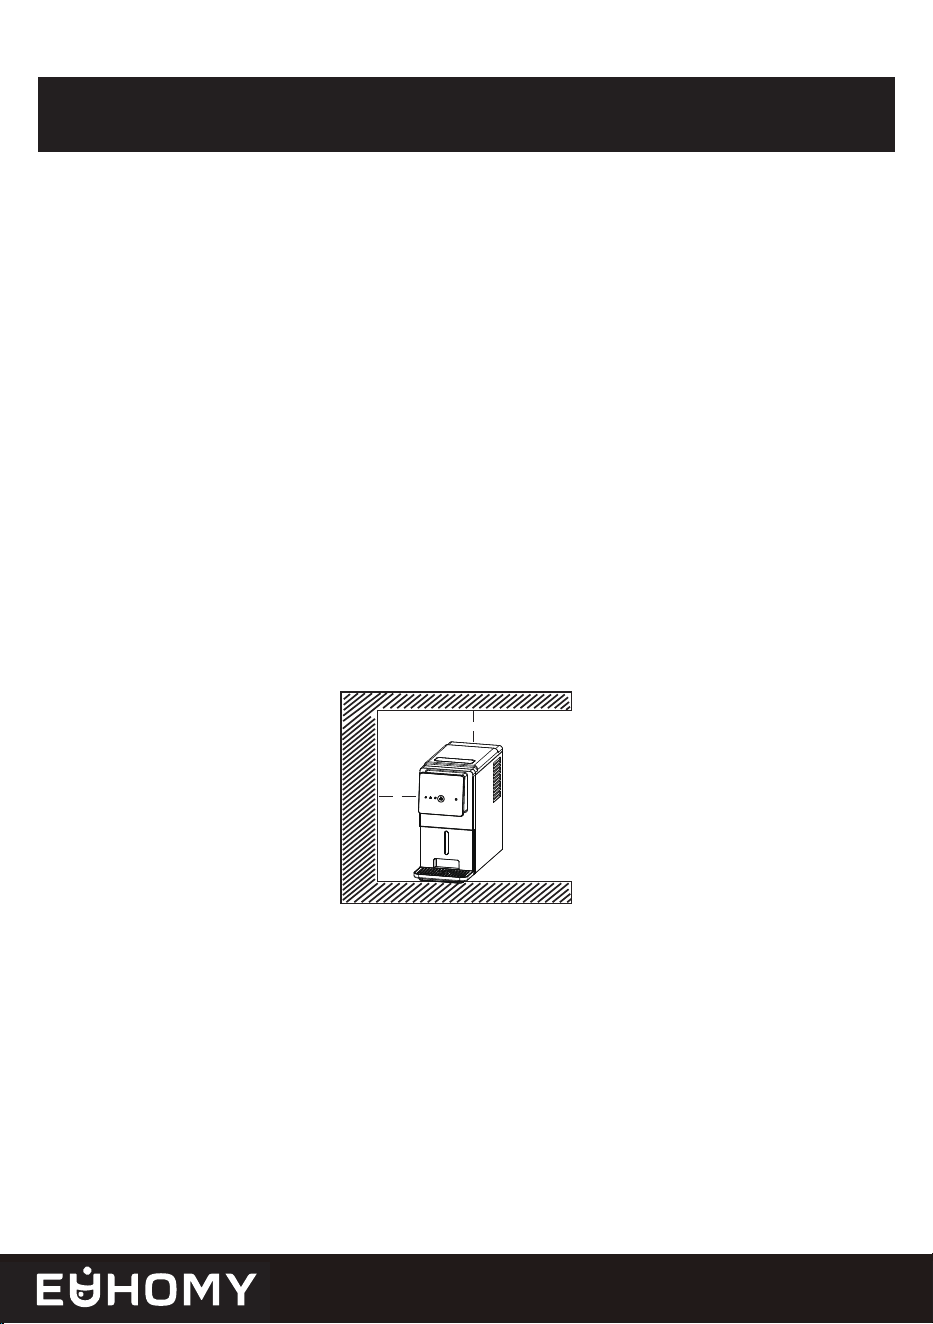
Place the unit on a level, flat surface away from direct sunlight and heat sources (e.g., stove,
furnace, radiator). Ensure that there is at least 6inch(15cm) between the back and sides
of the ice maker and the wall.
D. Allow Refrigerant to Settle
Wait 24 hours for refrigerant liquid to settle before plugging ice maker into power.
E. Plug Accessibility
Position the appliance so that the plug is easily accessible.
1.Set Up the Ice Maker
6 inches
6 inches
06

• Plug into a grounded outlet.
• DO NOT use an extension cord. Failure to follow these instructions may cause fire, shock,
or death.
Electrical Connection
• Ensure a dedicated circuit for the ice maker.
• Never under any circumstances damage the grounding feature of the plug.
• For replacement of power cord or plug, contact a qualified technician.
• Requires a 110-120V, 60Hz grounded outlet.
2.Important Safety Warnings
Note: This unit must be grounded
For safety, the appliance must be grounded. Use the supplied grounding plug and plug into
a compatible grounded outlet. If one is unavailable, contact a qualified electrician to install
it.
Note: Grounding Method
07
CLEANING YOUR ICE MAKER BEFORE
USING FOR THE FIRST TIME
* We highly recommend using our cleaning solution for product maintenance. Always
unplug the power cord before cleaning or performing any maintenance.
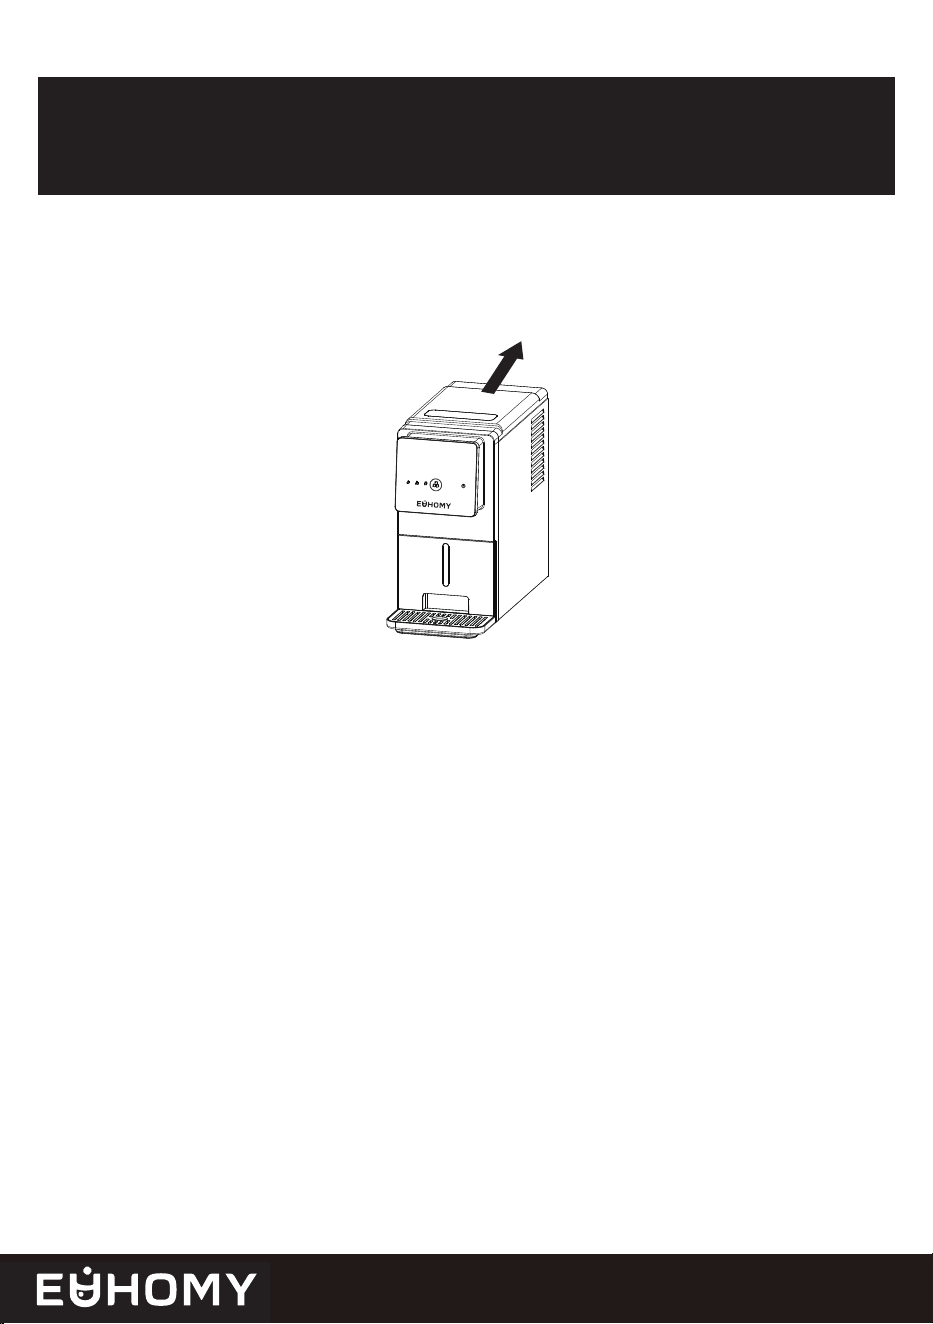
1.Remove the top cover. (To open the top cover, press and hold the top of the lid and push
it backward.)
2.Use a diluted detergent, warm water, and a soft cloth to clean the ice maker.
3.Thoroughly clean all inner parts that come into contact with water.
4.Rinse the internal components with water, then drain the water through drain hose.
5.Regularly clean the exterior of the ice maker using a mild cleaning solution and warm
water.
6.Dry the ice maker's interior and exterior with a clean, soft cloth.
Attention: If the machine will not be used for an extended period, please drain all the water
and wipe the interior dry.
08
HOW TO OPERATE THE ICE MAKER
1.Ensure that the drain hose is sealed with the drain plug and secured at the back of the
unit.
2.Let the ice maker rest for 30 minutes before plugging it in if it has been moved.
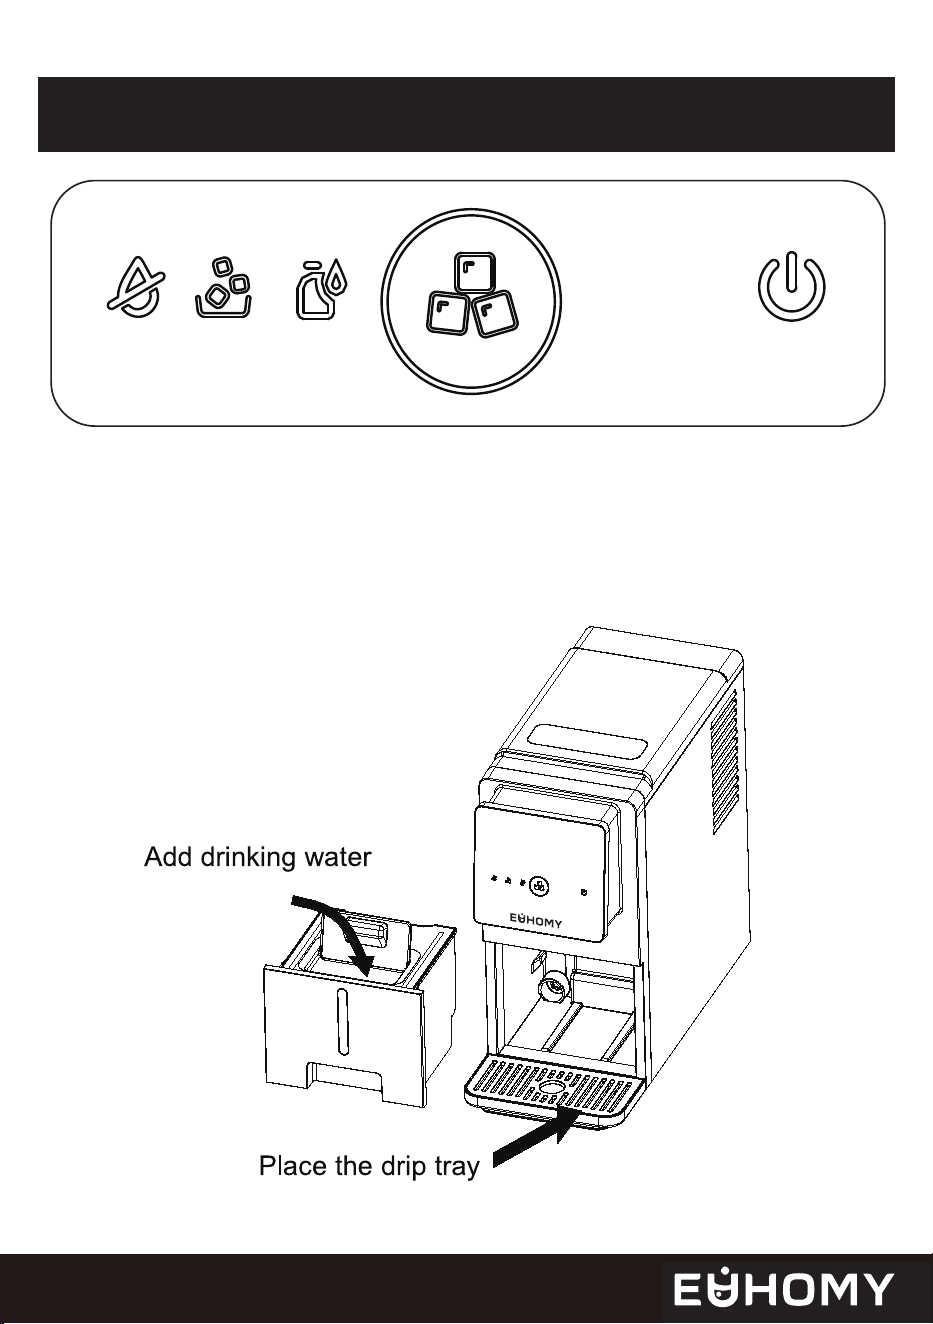
3.Fill the reservoir with potable water. DO NOT fill the water above the MAX level line.
4.Put the reservoir back in place, and then place the drip tray in the correct post.
Before Powering On
09

Plugging in the power cord, the Ice/Clean indicator lights will illuminate red. At this point,
the unit is in standby mode.
Power On the Machine
While in standby mode, press the Ice/Clean button briefly to start ice-making; and the icon
turns white.
Note: For first-time use or after long-term storage, run a cleaning cycle before ice-making.
Discard ice produced during the first hour, and use only ice made after that.
Starting Ice Making
While in standby mode, press and hold the Ice/Clean button for more than 5 seconds to
start the self-cleaning mode.
The self-cleaning cycle lasts for about 20 minutes, after which the unit automatically returns
to standby mode.
Automatic Self-Cleaning Program
When the ice bin is full, the ICE FULL indicator light illuminates. Take out the ice, and the
unit will automatically enter ice-making mode.
ICE FULL Indicator Light
When the water reservoir is low, the ADD WATER indicator light illuminates. After adding
water, press the Ice/Clean button again to start ice-making. (If not press Ice/Clean, the
water pumping operation will begin after 20 minutes.)
ADD WATER Indicator Light
10

PREPARING YOUR ICE MAKER FOR
LONG-TERM STORAGE OR RELOCATION
If the ice maker is not to be used for an extended period or needs to be moved to a
different location, it’s essential to prepare it correctly. Follow these steps:
Remove All Ice: Empty the ice bin.
Power Off: Unplug the ice maker from the power source.
Drain Reservoir: Locate the reservoir drain and empty it completely.
Step 1: Drain All Water
Unplug Before Cleaning: Always unplug the ice maker before cleaning.
Avoid Harsh Chemicals: DO NOT use alcohol or harsh cleaning agents, as they can
damage the ice maker.
Deep Clean Before Storage: If the ice maker has been sitting idle for a long time,
thoroughly clean it before using it again. Replace the water every 24 hours and drain the
reservoir every 3 days.
Step 2: Clean and Maintain
Dry Completely: Ensure the ice maker is completely dry before storing.
Cover: Use a plastic bag to cover the ice maker, protecting it from dust.
Daily Use Tips
Ice Only: Use the ice bin exclusively for ice. Avoid storing other items like bottles or cans,
and DO NOT place the unit it in the dishwasher for cleaning.
Mild Detergent: When cleaning the exterior, use a mild detergent and warm water. Avoid
abrasive cleaners.
Step 3: Store Properly
11
CLEAN THE ICE MAKER
Deep Cleaning
Follow the automatic self-cleaning program mentioned above for daily cleaning.
You can also use a mild detergent, warm water, and a soft cloth.
We strongly recommend using our ice machine-specific cleaner to ensure optimal perfor-
mance.
Clean every component that comes into contact with water, especially the second water
reservoir.
Below are the detailed steps for cleaning:
1.Unplug the ice maker from the power outlet.
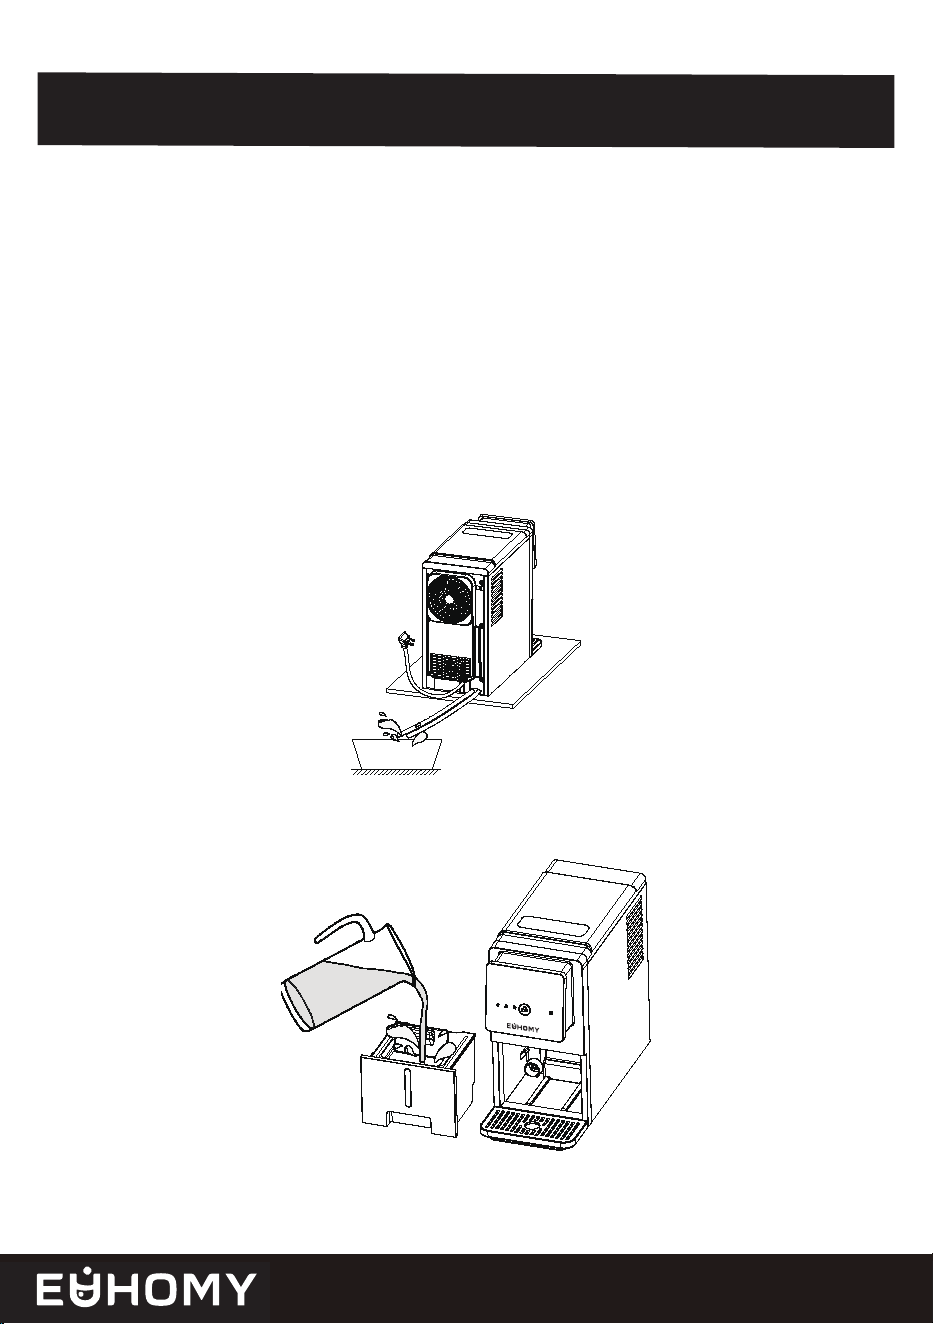
2.Remove the back drain pipe and drain the water into the sink.
3.Drain the water into a sink through the drain hose. Then, reinstall the drain hose.
4.Prepare the cleaning solution by mixing or diluting the cleaner according to the
instructions to remove mineral deposits.
12
5.Pour the cleaning solution into the water reservoir.
6.Plug the ice maker back into the power outlet. Press the “Ice/Clean” button for 5
seconds to start the cleaning cycle, which lasts about 20 minutes. Afterward, unplug
the machine and let the cleaning solution sit inside for at least 12 hours.
7.Drain the water into the sink through the drain hose.
8.Add fresh drinking water, plug in the power, and run the cleaning cycle again. Drain
the water afterward. Repeat this rinsing step 2 - 3 times.
9.Reset the drain pipe after drainage.
10.After cleaning is complete, fill the machine with fresh drinking water. You can then
press the “Ice/Clean” button to start making clean ice cubes.
Regular cleaning programs can ensure smooth water flow, keep the ice machine clean,
prevent clogging, and extend the machine’s service life.
We recommend performing the self-cleaning function every day. In addition, all parts that
come into contact with water, including the reservoir, ice bin, evaporator, etc., should be
thoroughly cleaned every month.
1. Avoid harsh chemicals: DO NOT use harsh chemicals or abrasive cleaners on any part
of the ice maker. These can damage the surface and affect the taste of the ice.
2. Regular cleaning: For optimal performance, clean your ice maker regularly.
By following these simple steps, you can keep your ice maker clean and hygienic, ensuring
that you have a steady supply of fresh, clean ice.
Note:
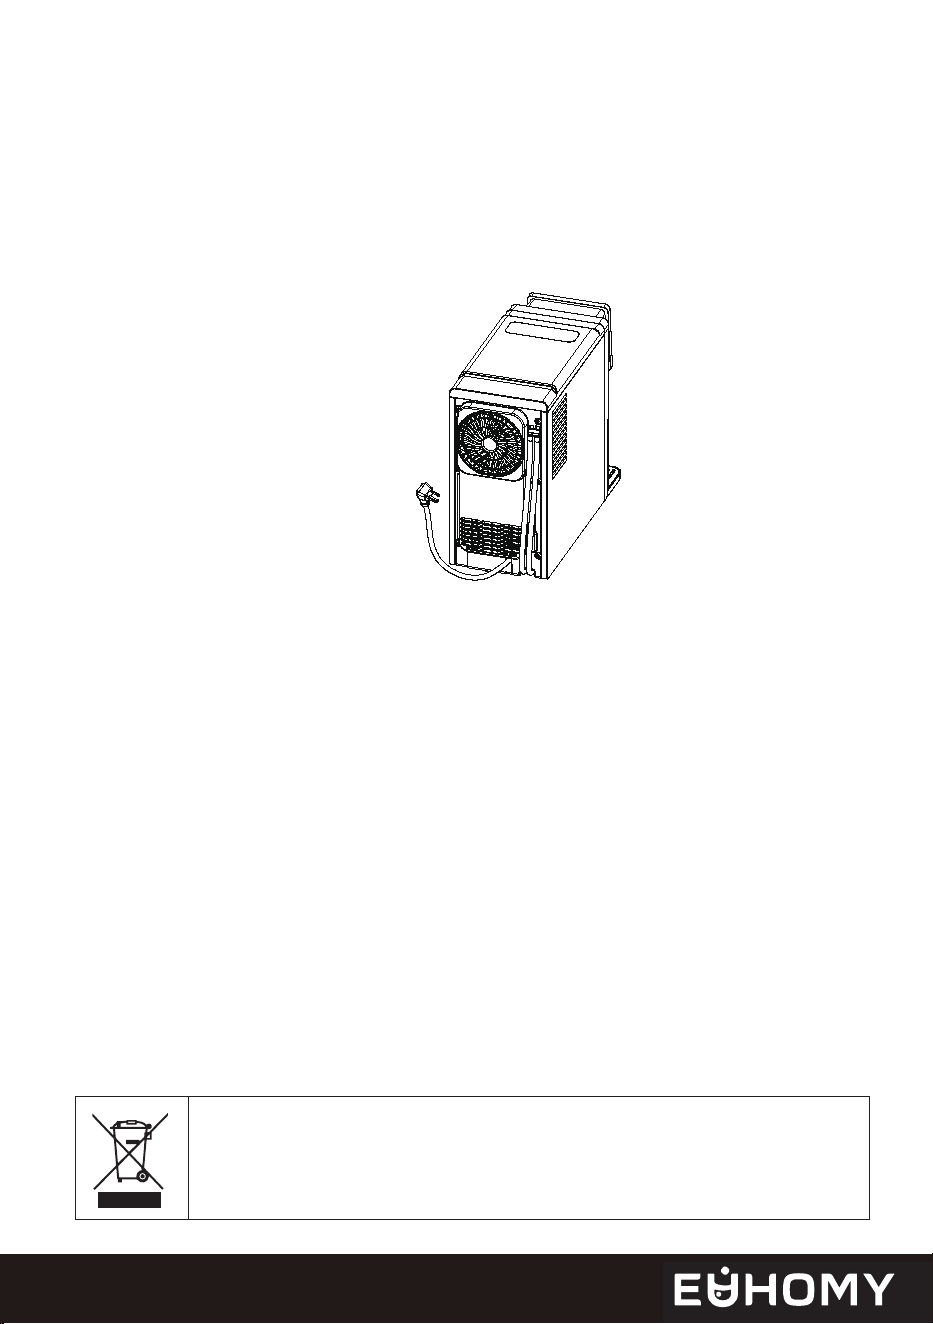
CORRECT DISPOSAL OF THIS PRODUCT
When the unit is taken out of service, its disposal and the handling
of its materials must comply with national regulations.
13
TROUBLESHOOTING
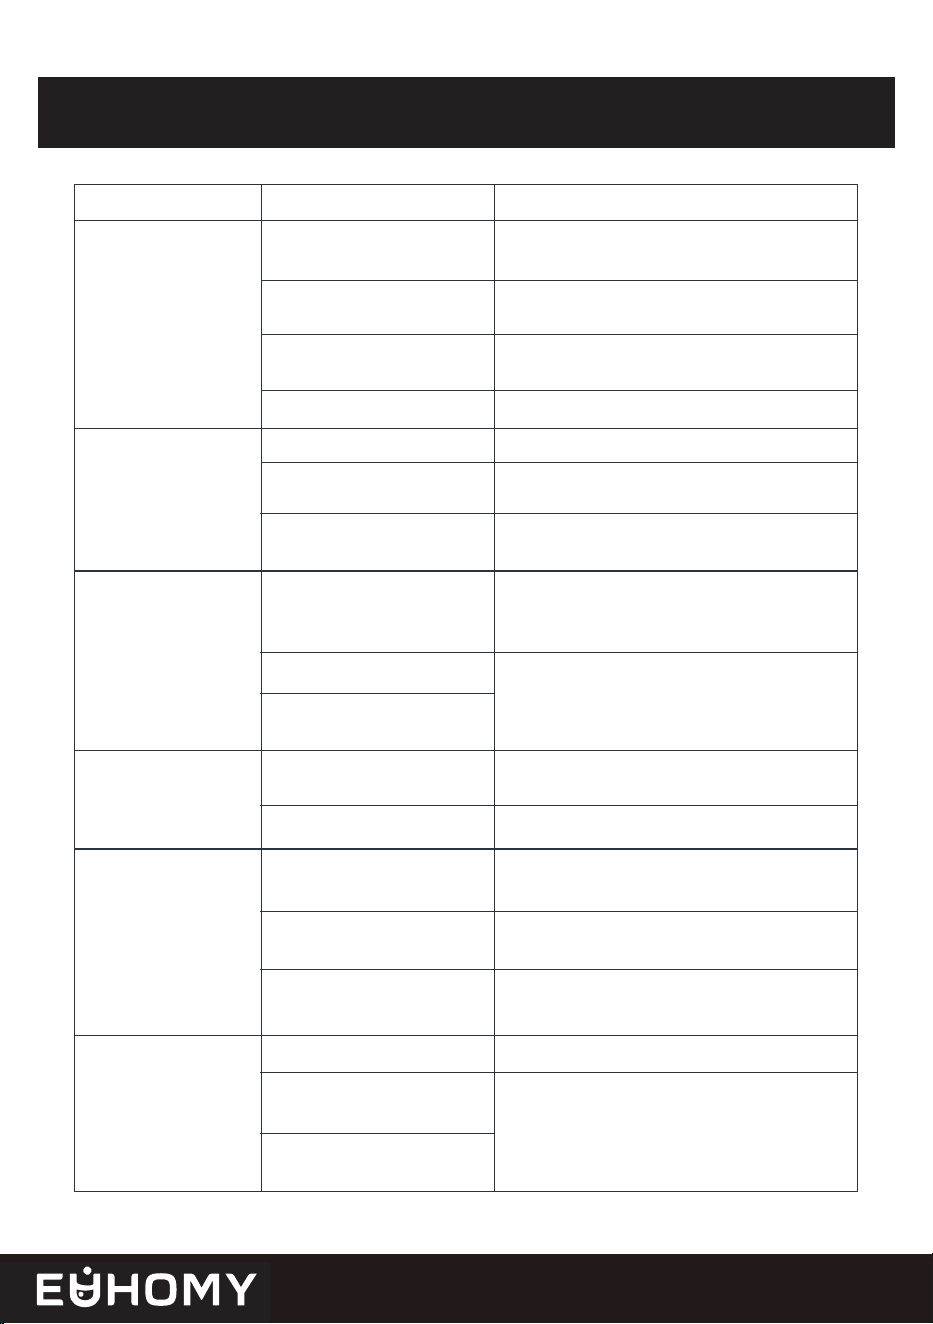
Lack of water.
ADD WATER
indicator light
turns on
ICE FULL indicator
light turns on
Making ice
too slowly
Ice/Clean indicator
flashing red
Ice/Clean indicator
flashing fast,
then slow
Water leakage
Problem
Possible cause(s)
Solution
Stop the ice maker, fill water, and press
ICE/CLEAN button again to restart the unit
Float not rising in the
ice-making compartment
Open top cover and clean the ice-making
compartment
Water reservoir not fully
inserted
Reinsert properly until secure
Water pump failure
There is too much ice
Verify by a qualified technician
Remove ice from ice basket
No ice cube inside Remove probable obstacle inside or clean
the inside wall of ice storage
Ice full sensor is broken:
the ice full light is not on.
Contact our after-sales customer service at
Ambient temperature or
water temperature in inner
tank is too high
Run ice maker below 90°Fahrenheit., and
pour colder water into tank
Ice jam Evaporator is frozen; power off for 2 hours,
then clean the unit.
Ice pusher fault Verify by a qualified technician
Water temperature in inner
tank is too high
Water temperature requirement between
45°F – 91°F
Refrigeration system
malfunctions
Verify via a qualified technician
Hot air outlet has been
blocked by something
Hot air outlet must be guaranteed to have
more than 6inch(15cm) of ventilation distance.
Verify via a qualified technician
Drain plug not in place
Pipe joint in the appliance
may be loose
Seal has reached service
life
Put drain plug in place
Refrigerant liquid leakage
Pipe in the cooling system
is blocked
Press the Ice/Clean button twice and restart
ice-making program. If this problem shows
up again, verify via a qualified technician
1414
WARRANTY POLICY
Euhomy 1-Year Limited Warranty
What is covered?
Euhomy is dedicated to delivering top-notch products and outstanding customer service.
We back our products 100% and are here to support you every step of the way.
To activate your warranty, please visit https://euhomy.com
To request customer service, feel free to contact us anytime!
The One-Year (1) Limited Warranty is valid for purchases from this website or official
Euhomy purchase channels such as Amazon, TikTok, and Walmart. It covers the original
owner and product only, and it isn’t transferable. For purchases made through unauthorized
resellers, we recommend you contact them directly. Euhomy guarantees the unit is free of
material and workmanship defects for one year from the purchase
date, as long as it's used under normal household conditions and maintained per the User
Manual. This is subject to certain conditions and exclusions as follows:
If the original unit or non-wearable parts are found defective, as determined by Euhomy,
we will arrange repair or replace it within one year from the purchase date. If you receive a
replacement unit, the warranty lasts for the remainder of the original warranty.
For further support, feel free to reach out to the Euhomy support team!
1-833-362-2655(US) [email protected]
Business Time: Mon to Fri, 9 AM- 6 PM (ET)
https://euhomy.com
16
15

What is not covered?
Feel free to contact us anytime with any issues.
How to get service?
(a) Normal wear and tear on the unit or parts, as well as any parts lost or damaged due to
human factors after delivery; replacement parts are available for purchase. Feel free to
contact us using the methods provided below.
(b) Damage from misuse, mishandling, accidents, or not following the operating instruc-
tions.
(c) Damage caused by exposure to liquids other than water or foreign substances.
(d) Repairs or modifications not performed by Euhomy.
(e) Use in commercial settings or non-household environments (except for commercial
models).
If your appliance isn't working properly or if you need any assistance, we offer several
ways for you to get in touch with us.
You can reach us by calling 1-833-362-2655 or emailing [email protected] directly.
For specific product categories, we also offer potential upgrades to enhance your warranty
to our VIP service.Our phone lines are open
Mon to Fri, 9 AM - 6 PM (ET), and we
normally respond to emails and forms within 24 business hours. To help us assist you
better, we recommend that you register your product online at 1-833-362-2655 and have
the appliance with you when you call us. If you reach out via email, sometimes our emails
might end up in your spam folder, so please check there to make sure you don’t miss our
response. The proof of purchase will be needed when you request a warranty service.
In addition to our one-year warranty, we offer lifetime technical support. After the
warranty expires, you can arrange for service at an additional cost.
17
16

@euhomyoicial
SCAN HERE to share tips,
get support, and connect
with fellow enthusiasts!