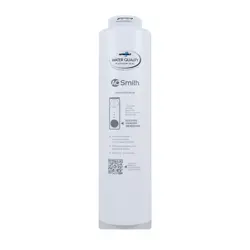
AOS-HERO-S1S3
DIRECT FLOW
REVERSE OSMOSIS
FILTER REPLACEMENTS
REPUESTOS DE FILTRO DE OSMOSIS
INVERSA DE FLUJO DIRECTO
Replacement Manual | Manual de reemplazo
IF YOU NEED HELP OR HAVE A QUESTION, WE’VE GOT YOU COVERED.
GIVE US A CALL AT 877.333.7108.
SI NECESITA AYUDA O TIENE ALGUNA CONSULTA, NOSOTROS NOS
ENCARGAMOS. LLÁMENOS AL 877.333.7108.
Sign and Lock Aligned
1. Turn off COLD water valve. Release pressure from system
by turning on dedicated faucet until water stops owing.
Once water stops owing from the dedicated faucet, turn
the faucet off.
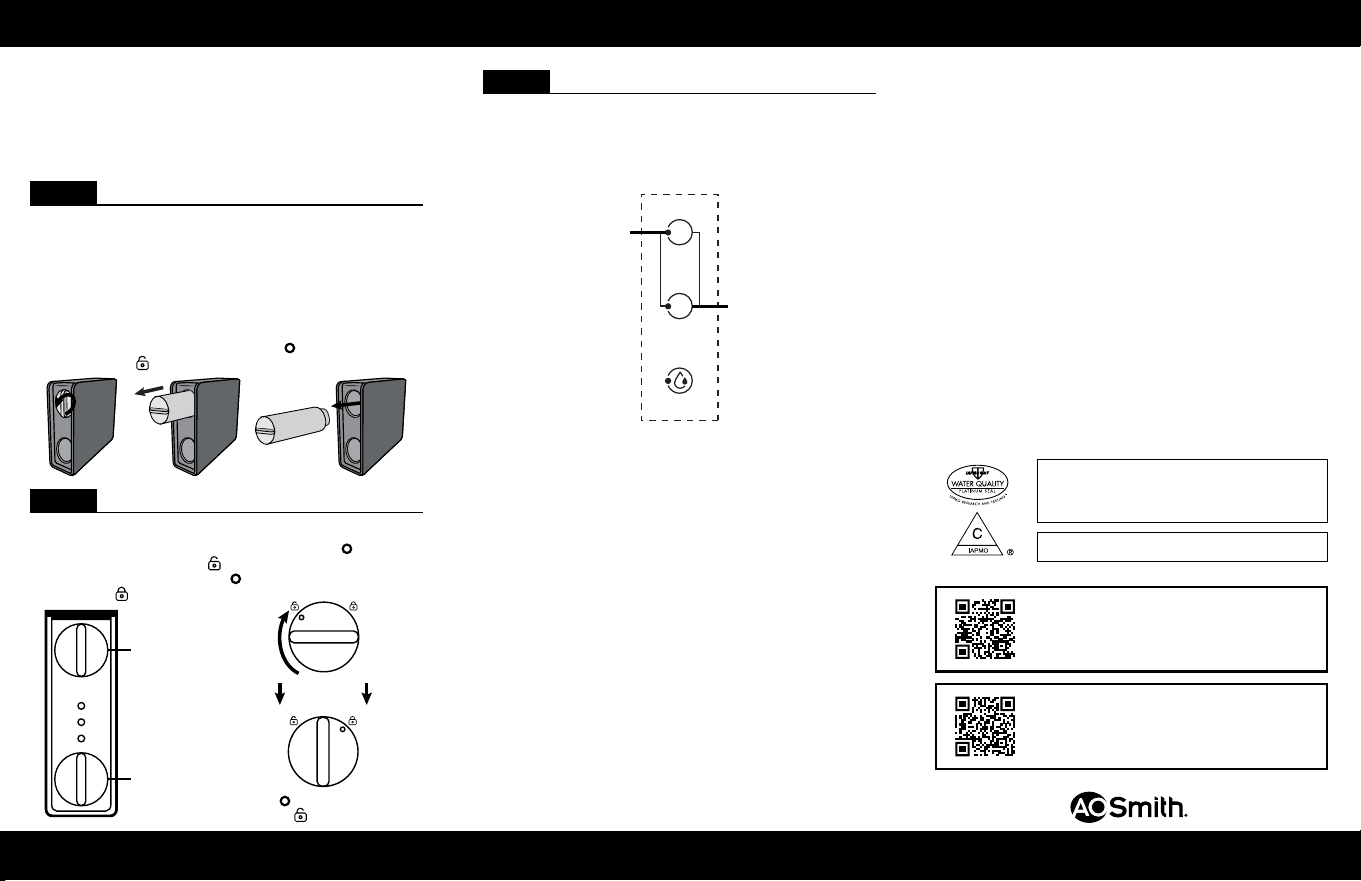
2. Unbox lter cartridge replacements and remove plastic.
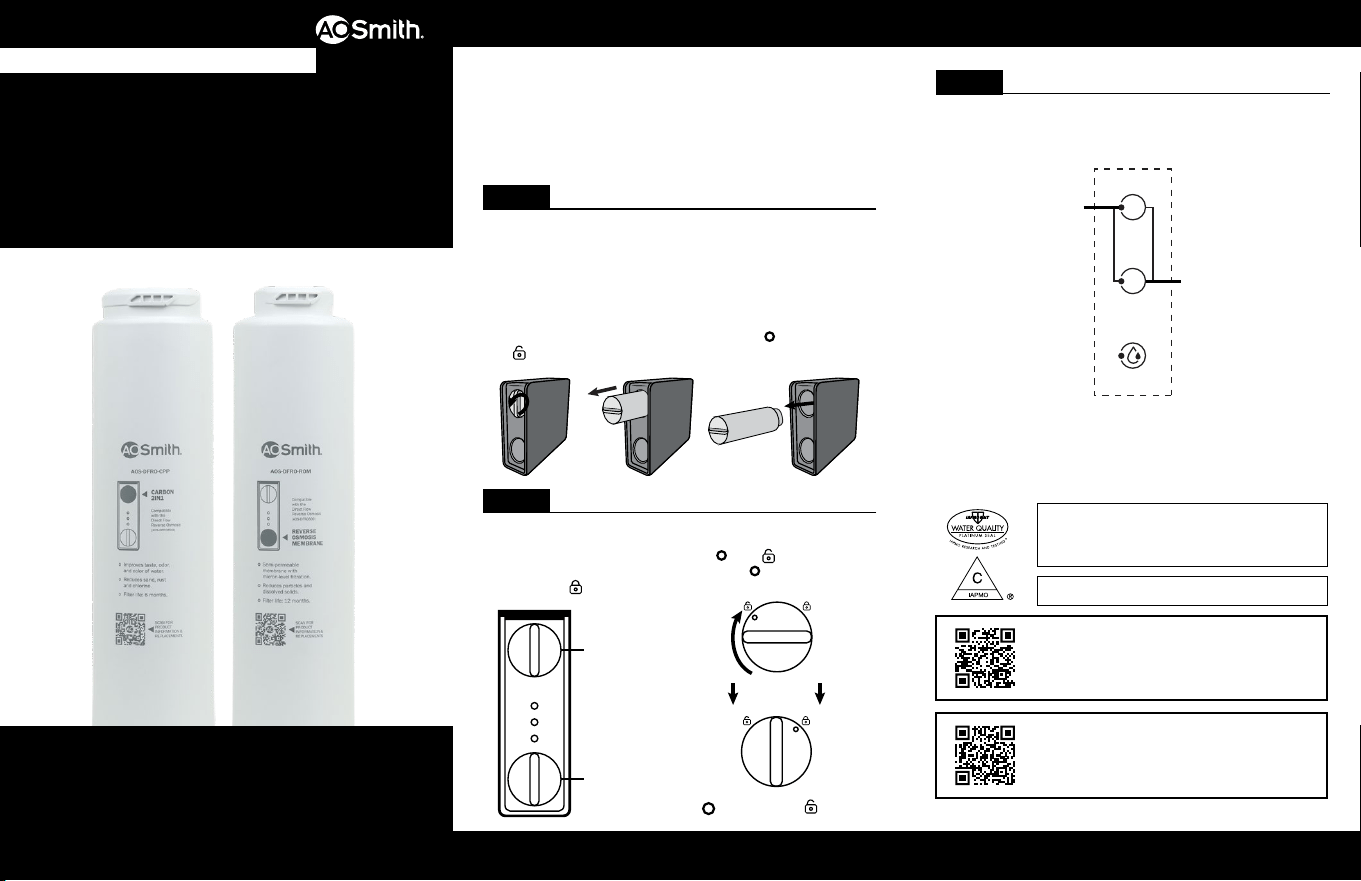
3. Remove the lter cartridge by turning the handle
counterclockwise and pulling out. Align
icon with
unlock icon. Discard entire lter cartridge.
The required replacement frequency for the AOS-DFRO800
is every 6 months for the Carbon 2in1 (Stage 1) and every
12 months for the RO Membrane (Stage 2).
Use only certied, genuine A. O. Smith replacement lters
for continued contaminant removal and system performance.
STEP 1 Remove Filter Cartridge
1. Insert each lter cartridge into its designated location in
the system manifold by aligning
with unlock icon,
then turning lter clockwise until the
icon is aligned
with the
lock icon.
STEP 2 Insert Filter Cartridges
STEP 3 Reset and Flush System
1. Reset lter indicator by pressing and holding relevant
lter indicator for 3 seconds until you hear a beep and
the light turns on.
2. Open the dedicated faucet to ush. Flush for 30 minutes.
Note: Do not drink ushed water. When initially ushing
the water after starting the system, ne carbon powder or
bubbles may appear which is normal. It may take 30 seconds
or more until water runs clear.
1
CPP
1
CPP
1
CPP
1
CPP
1
CPP
1
CPP
1
CPP
1
CPP
Clockwise
1
CPP
1
CPP
System certied by IAPMO R&T to NSF/ANSI Standard
58 for the reduction of the claims specied on the
Performance Data Sheet and at www.IAPMO.org.
System internally tested to NSF/ANSI Standard 42.
Carbon 2in1
RO Membrane
1
2
Filter 2
Touch Key
Filter 1
Touch Key
Scan to view the AOS-DFRO800 replacement video.
For the full list of contaminants ltered, scan to
view the AOS-DFRO800 Performance Data Sheet.
NEED HELP? GIVE US A CALL 877.333.7108
REPLACEMENT GUIDE
GUÍA DE REEMPLAZO
¿NECESITAS AYUDA? LLÁMANOS AL 877.333.7108
Cuidado
Para limpiar el colector del sistema y el tanque, limpie el exterior con
un paño húmedo. No use agentes de limpieza abrasivos o fuertes ni
limpiadores con solventes.
AVISO
Resguardos
• Cumple con la norma NSF/ANSI 58 para la reducción de TDS.
Consulte la hoja de datos de rendimiento para ver los contaminantes
individuales y el desempeño de reducción.
• La frecuencia de reemplazo recomendada para el AOS-DFRO-CPP es
cada 6 meses.
• La frecuencia de reemplazo recomendada para el AOS-DFRO-ROM
es cada 12 meses.
Signo y bloqueo
alineados
1. Cierre la válvula de agua FRÍA. Para liberar la presión del
sistema, gire la llave dedicada hasta que se detenga el
ujo de agua. Una vez que el agua deje de uir desde la
llave dedicada, cierre la llave.
2. Desempaque los repuestos del cartucho de ltro y retire
el plástico.
3. Para retirar el cartucho de ltro, gire la manilla hacia la
izquierda y sáquelo. Alinee el ícono
con el ícono de
desbloqueo
. Deseche todo el cartucho de ltro.
La frecuencia de reemplazo necesaria para AOS-DFRO800 es
cada 6 meses para Carbón 2 en 1 (Etapa 1) y cada 12meses
para la membrana de osmosis inversa (OI) (Etapa 2).
Solo use filtros de repuesto originales A.O.Smith
y certificados para eliminación de contaminantes y
rendimiento del sistema constantes.
PASO 1 Retire el cartucho de ltro
1. Inserte cada cartucho de ltro en su ubicación designada
en el colector del sistema; para esto alinee la
con
el ícono de desbloqueo
, luego gire el ltro hacia la
derecha hasta que el ícono
se alinee con el ícono de
bloqueo
.
PASO 2 Inserte los cartuchos de ltro
1
CPP
1
CPP
1
CPP
1
CPP
1
CPP
1
CPP
1
CPP
1
CPP
Hacia la
derecha
1
CPP
1
CPP
Carbón 2 en 1
Membrana de
osmosis inversa
PASO 3 Restablezca y purgue el sistema
1. Para restablecer el indicador del ltro, mantenga
presionado el indicador de ltro pertinente durante
3 segundos hasta que escuche un pitido y se encienda
la luz.
2. Abra la llave dedicada para purgar. Purgue por
30 minutos.
Nota: No beba el agua purgada. Cuando purgue inicialmente
el agua después de iniciar el sistema, puede aparecer polvo
de carbón o burbujas, lo que es normal. Puede tardar
30 segundos o más hasta que el agua salga limpia.
1
2
Tecla táctil
del ltro 2
Tecla táctil
del ltro 1
Sistema probado y certicado por IAPMO R&T según la norma
NSF/ANSI 58 para la reducción de las declaraciones especicadas
en la hoja de datos de rendimiento y en www.IAPMO.org.
Sistema probado internamente según la norma42 de NSF/ANSI.
Escanee para ver el video de reemplazo de
AOS-DFRO800.
Para obtener la lista completa de los
contaminantes ltrados, escanee para ver la hoja
de datos de rendimiento de AOS-DFRO800.
GUÍA DE REEMPLAZO
¿NECESITAS AYUDA? LLÁMANOS AL 877.333.7108
CARE & SAFEGUARDS | CUIDADO Y RESGUARDOS
Care
To clean the system manifold and tank, wipe exterior with a damp cloth.
Do not use any strong or abrasive cleaning agent or solvent cleaner.
NOTICE
Safeguards
• Conforms to NSF/ANSI 58 for TDS reduction. See performance data
sheet for individual contaminants and reduction performance.
• The recommended replacement frequency for the AOS-DFRO-CPP is
every 6 months.
• The recommended replacement frequency for the AOS-DFRO-ROM is
every 12 months.
A. O. Smith Corporation
11270 W Park Pl #170, Milwaukee, WI 53224
877.333.7108
100362810_June2026