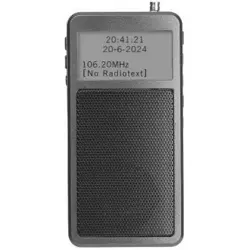
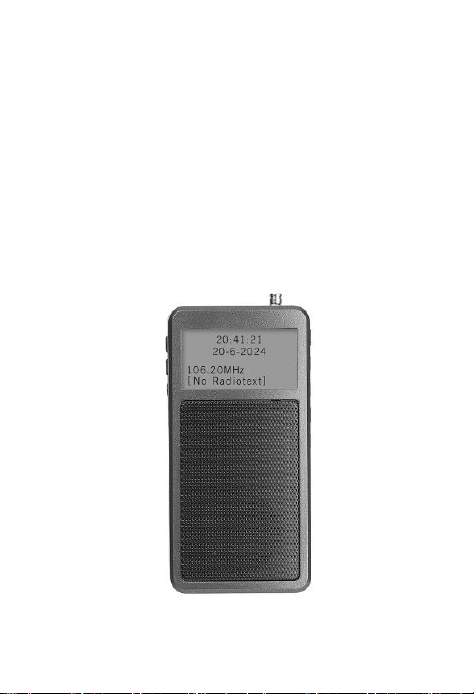
Mini FM Radio.BT Player
Operational
Thank you for your purchase, please read the
operation instructions before use, and please
keep it safe for future reference.

1:Product overview
☞This product is a radio programmed by DSP
software, with high sensitivity and stable signal.
☞The Bluetooth connection of version 5.0 can
be used for short-distance music transmission
(receiving distance ≦10 meters) to achieve wireless
music transmission。
☞This product supports the conversion of FM
signals into Bluetooth signals to be transmitted to
Bluetooth earphones for listening. Create more
convenience for users.
☞Use high-quality speakers, sound
comfortable. You can plug in Earphones to listen.
☞COG module Display,The display content is
abundant: FM frequency point, working mode,
storage station, take station indication, volume
level, time, date and other related content, to give
the user a clear operation instruction.
☞Radio search station mode: automatic search
station, automatic search station, manual search
station.
☞ Radio storage mode: manual storage,
automatic scanning storage radio.
☞ Radio chip capacity is larget, storage
stations can be stored 30, and has the shutdown
memory function.
☞Support for lock,Adjustable alarm clock,
Backlight,The product function is very humanized.
☞The use of steel tie rod antenna is not easy to
bend and break, and the received signal is more
stable.
☞Charge using the Type-C charging jack.
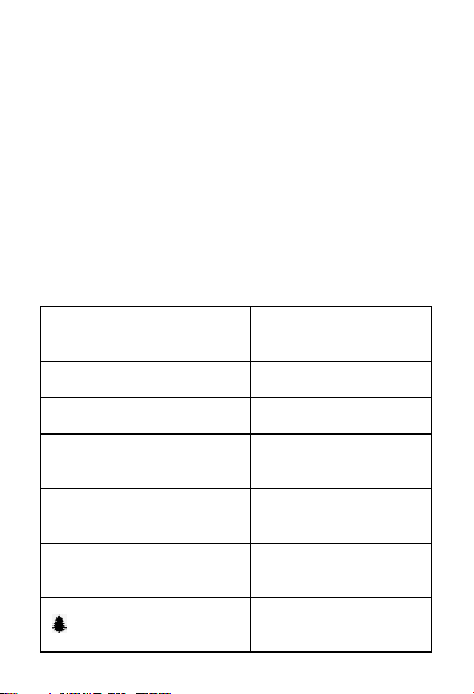
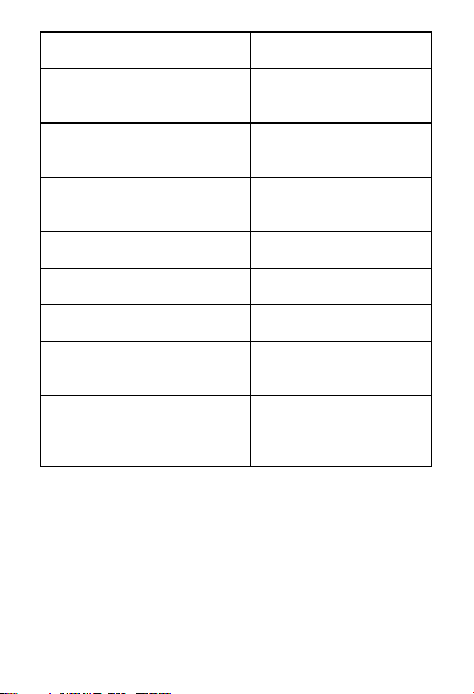
2:introduction to COG module Display
Welcome to Digital Radio
Displays content when
powered on
Standby
Enter standby mode
Set time
Set time
Set 12/24 hour 24h
Set the 12 hour /24
hour format
Time Saved
update adjust time
successful
Time Not Saved
update adjust time not
successful
Enable alarm symbol
indicator
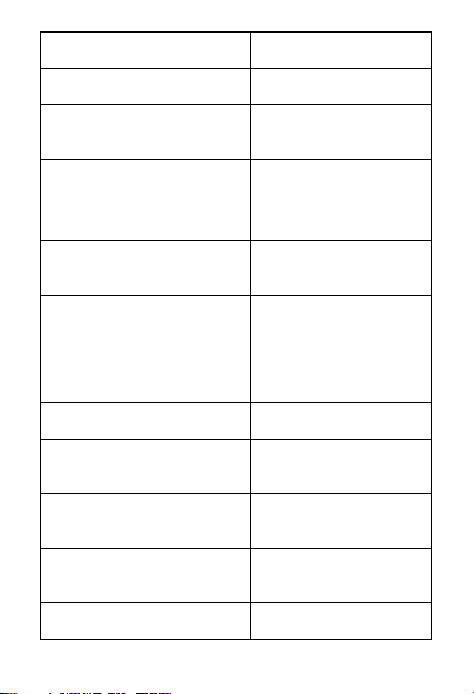
Alarm off
Stop the alarm
Alarm Setup
Enter alarm Settings
Alarm Wizard On time
xx:xx
Alarm time setting
Alarm Wizard Duration
90-60-45-30-15
The alarm lasts
90-60-45-30-15
minutes
Alarm Wizard Source FM
The alarm tone is a
radio broadcast
Alarm Wizard Last
listened
The alarm clock is the
last radio broadcast to
be heard before
switching off
Once
Ring the alarm once
Daily
Ring the alarm every
day
Week days
An alarm goes off
during the workday
Week ends
Ring the alarm
weekends
Alarm Not Saved
Alarm clock not saved
Preset Store
Preset storage
Preset **Stored
The storage station is
saved successfully
Preset Store <x(Empty) >
The store address
number is empty
P**
Storage/recall address
number
NO Radio text
No radio information
Preset Recall
Recall station
Bluetooth Connected
Bluetooth connected
Bluetooth Not Connected
Bluetooth not
connected
Auto Scanning
Fully automatic search
and storage stations
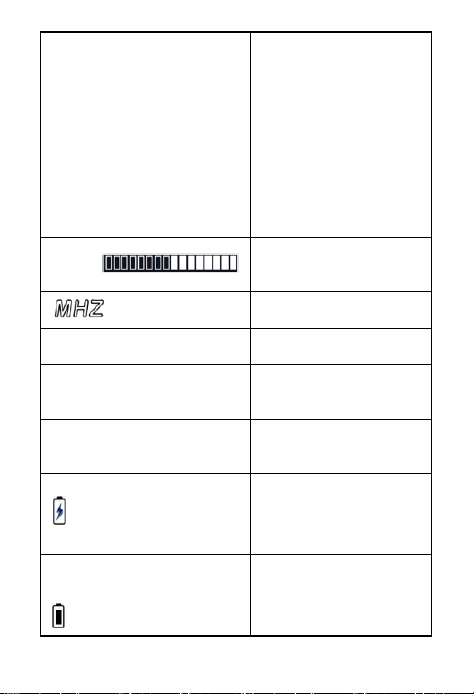
TX+
TX Blinking indicates
searching for
Bluetooth devices;
TX The constant state
indicates that the
connected device is
connected。
Volume
Volume level indicator
symbol
FM unit
FM
FM receiver mode
AM
12 hour format in the
morning symbol
PM
12 hour format in the
afternoon symbol
Charge indication
symbol
Battery capacity
symbol
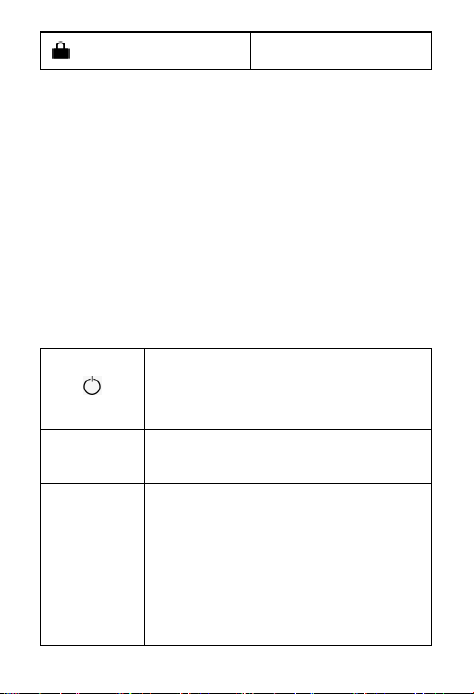
Lock symbol
3:Description of each key function:
【 】
Power on/off button [see
Operation Description 5.1 for
details]
【+.-】
Adjust the volume [See
Operation 5.2 for details]
【BAND】
1: Set alarm function [see
operation introduction point 9
for details]
2:Working mode. Tap to switch
Bluetooth/Radio working mode
3:Working mode, enter to the
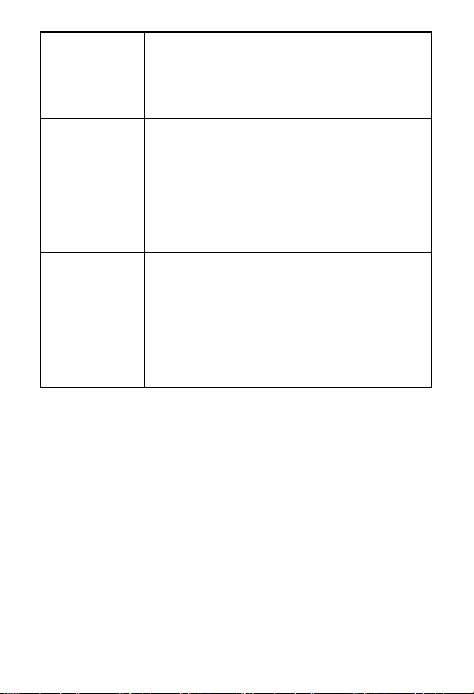
full automatic scan and storage
station [details see operation
description 5.3.1]
【∧】
1:Select station/music
song/adjust time/adjust alarm
clock to increase
2:FM mode,long press to
automatically search for stations
【∨】
1:Select station/Select music
song/Adjust time/Adjust alarm
clock decrease
2:FM mode,long press to
automatically search for stations
MEM
1:Enter the time setting [see
operation introduction point 8
for details].
2:Radio working mode: long
press start manual storage
mode; Tap to enter recall station
mode.
3:Confirm button when you
finish Manually store the station,
Recall the station.
4: Bluetooth playback mode:
Pause/switch between playback;
Hold down to disconnect the
Bluetooth connection.
1:Long press enter“ ”Lock
state;long press again cancel the
Lock state.
[see operation introduction
point 11 for details].
2:Radio working mode: Tap to
turn on/off the radio signal into
Bluetooth signal transmission
mode.
DC 5V
Charge status display“ ”symbol
Full charge status display“ ”
symbol
earphone 3.5mm earphone jack
4: Radio charging introduction
When using the Radio for the first time, it is
recommended to charging before using it.
The recommended charging adapter
parameters are:DC5V/1A-3 A。
5:Function Introduction:
5.1.Power ON/OFF:
Turn on the radio:long press the【 】button 2
second,LCD display the time state
Tap again【 】button,Turn on the radio。
Turn off the radio:Tap the 【 】button to turn
off the radio.
Tip:
After turn off the radio,Time is displayed, and
long press [ ] key again for 2 seconds to
close the time display, enter the power saving
mode.
In the time display state, stop any operation,
10 seconds later, the backlight will
automatically turn off and display the clock,
and 10 minutes later, the clock will
automatically turn off and enter the power
saving mode.
5.2:Value Adjustment:
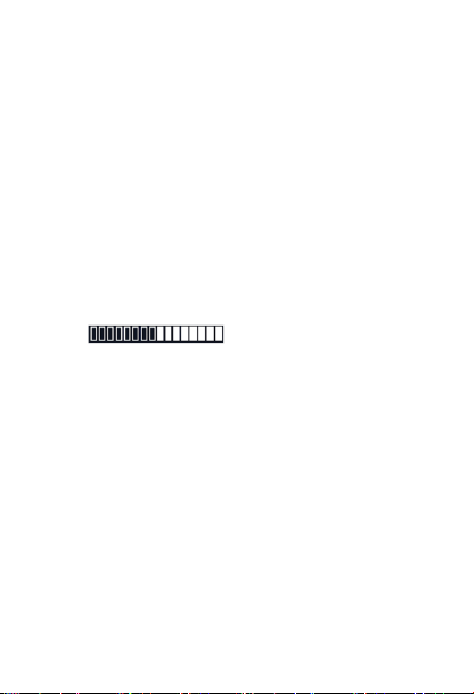
Volume can be adjusted within
" " 16 levels
Powder-on state, tap any key to turn on the
backlight, tap the volume [+.-] key to
increase or decrease the volume, and long
press the volume [+.-] button to adjust the
volume rapidly.
5.3:There are three ways to search for radio
stations:
-Full automatic scan and storage station
-Automatic search for radio stations
-Manual search for radio stations

FM frequency receiving
range :87.5-108.0MHZ, tuning step value:
0.05MHZ,
5.3.1:Full automatic scan and storage station:
On the Radio working mode, tap any key to
turn on the backlight, and long press [BAND]
key for 2 seconds to enter “Full automatic
scan and storage station”function, the
frequency is from the lowest end to the
highest end, automatic scan and search
radio stations, and automatically store radio
stations with signals.
5.3.2:Automatic search for radio stations:
On the Radio working mode, press any key
to turn on the backlight, and long press [∧]
key or [∨] key for 2 seconds to start
forward or backward automatic search for
radio station, and receive radio station to
stop search and play the received radio
program at this time.
5.3.3.Manual search for radio stations:

On the Radio working mode, press any key
to turn on the backlight, and press [∧] key
[∨] key frequency to increase and decrease
by the lowest step value: 0.05MHZ.
5.4:Manual storage station operation:
5.4.1: Press the above operation in 5.3.2/5.3.3,
adjust to the target frequency point, and
long press [MEM] key for 2 seconds. The
LCD screen displays "Preset Store
<*(Empty) >", (* indicates the address
number of storage station), press [∧] key
or [∨] key to select the storage address
number, and press [MEM] key to confirm
the storage station. LCD screen displays
“Preset * Stored”, 2 seconds later the
LCD screen displays the currently stored
radio station.
5.4.2:If you do not press the [MEM] key to
confirm the station within 30 seconds
after the station address number is
displayed, the station will not be stored.

Tip1:If you do not press the [MEM] key to
confirm the station within 30 seconds
after the station address number is
displayed, the station will not be stored.
Tip2:Long press or light press [∧] key or [∨]
key to search the station, the LCD
screen will automatically display "P**" station
number when the station is received, indicating
that the station has been stored in memory and
it is unnecessary to store it in other station
number repeatedly.
5.5:Recall station introduction:
Press the above 5.4/5.3.1 operation
introduction. After the signal station stored in
the radio, press [MEM] key. The LCD screen
displays the “Preset Recall” character, as
follows: "Preset Recall <1: 105.7MHz >, press [∧]
key or [∨] key to select the storage address
number., and press [MEM] key to confirm.
If the backlight is off, press any key to turn on
the backlight before taking off the console.

6:Bluetooth Mode Introduction:
Bluetooth name of this product: "HRD-205"
Connect Bluetooth operation:
Power-on state, tap [BAND] button to switch to
Bluetooth mode
LCD display“Bluetooth Not connected”,“Not
connected ” flashing , Indicates waiting
Bluetooth connection。
After connecting to the mobile phone or
computer, the LCD screen displays Bluetooth
connected, indicating that the device is
connected.
Once connected, turn on your phone/computer
music player and click "▶" to play your music.
Press [∧] key to enter the next song, press [∨]
key to return to the previous song.
Tap [MEM] to switch between pause and play.
Long press the [MEM] to disconnect the
Bluetooth connection.
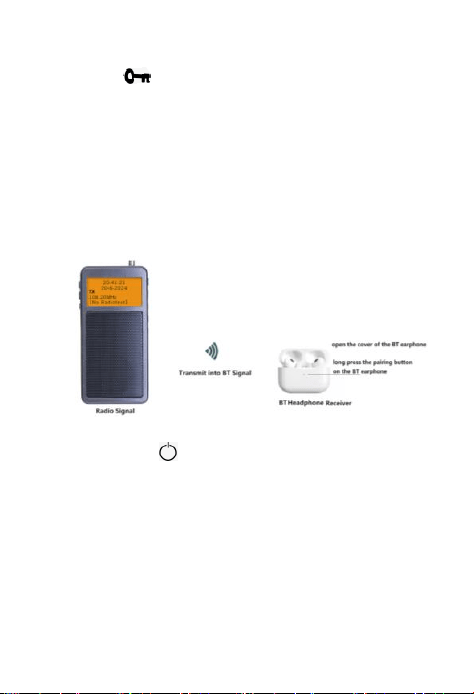
7:The radio signal is converted into a Bluetooth
transmission operation:

This function can use a Bluetooth earphone to
listen to the FM signal of the radio, its
operation is as follows:
Select the program station of the radio, tap
the 【 】 key, the LCD screen displays "TX"
flashing prompt, at this time, turn on the
Bluetooth earphone, the radio searches for
the nearest Bluetooth device, when the
Bluetooth device is found, the automatic
connection
After the connection is successful, the radio
LCD screen displays the Bluetooth model, and
"TX" is often displayed. At this time, the
Bluetooth earphone can listen to the radio
program.
After listening to the Bluetooth earphone, the
user can also adjust the radio station and take
out the favorite radio program.
Use a Bluetooth earphone for uninterrupted
listening.
Disconnect the Bluetooth earphone:
Tap any key to start the backlight screen, tap
the 【 】 key, the LCD screen "TX" character
disappears, return to the radio normal
playback.
[Tip: In the process of connection, you need to
turn on the backlight display before you can
operate]
8:Run time/date setting operation:
-long press【 】button,On time display state,
Tap any key to turn on the backlight screen
-long press【MEM】button 2 second,LCD display
“Set 12/24 hour 24h”,
-tap【∧】or【∨】button to select the 24H or 12H
time format
-Tap [MEM] again. "Set time xx:xx " is displayed.

A blinking prompt is displayed for xx hours
-Press [∧] key or [∨] key to adjust the hour time;
-Press [MEM] key "xx" to indicate minute flashing,
press [∧] key or [∨] key to adjust the minute
time;
-Press [MEM] key to display date xx on the LCD
screen. Press [∧] key or [∨] key to adjust the
date;
-Press [MEM] key "xx" blinks. Press [∧] key or [∨]
key to adjust the month;
-Press [MEM] key Year xx xx blinks. Press [∧] key
or [∨] key to adjust the year
-After Time Saved is displayed on the LCD screen,
the adjusted time and date are displayed.
Tip:If you do not press [MEM] to confirm the last
adjusted Time after setting the time, it is not
saved, and the LCD displays "Time not
saved"
9:Alarm setting operation:
On the Time display state. Adjust the current
time according to the operation instructions in

point 8.
-Tap【BAND】button enable alarm function,LCD
display“ ”symbol;
-Long press 【 BAND 】 button 2 second,LCD
display ”Alarm Setup”
-Tap【BAND】button , LCD display”On time xx:xx
“ xx“hour is flashing,Press [∧] or [∨] button
to adjust the hour of the alarm hour;
-Tap【BAND】button”xx“minute is flashing,
Press [∧] or [∨] button to adjust the hour of
the alarm minute;
-Tap【BAND】button,LCD display”Duration ,
press【∧】or【∨】button,
It can be seen that the numbers 15, 30, 45,60,
and 90 are changing in turn. In this case, the
alarm duration is selected
-Tap the [BAND] button to display "Source FM"
on the LCD screen.
-Press [BAND] key to display "Last listened" on
the LCD screen. You can also press [∧] or [∨]
button to select the saved radio frequency as
the frequency for the alarm to be played on.
-Tap [BAND] button, The LCD screen displays the
alarm date "Daily” or “Once” or “Week
days” or “Weekends” In this case, tap [∧] or
[∨] key to select the alarm date.
-Press [BAND] button to display volume level on
the LCD screen. Press [∧] or [∨] key to adjust
the volume level of the alarm clock
-Tap the [BAND] button to confirm. The " "
character on the LCD screen stops blinking。
10:Cancel The Alarm Function:
When the time is displayed, tap [BAND] again
to turn off the alarm. The " " character on the
LCD screen disappears.
11:Lock/Unlock function operations:
11.1: LOCK: Tap any key to start the backlight
screen, long press [ ] key for 2
seconds,LCD screen display "LOCK" prompt,
and then display " " symbol , at this time, all
key functions have been locked.
11.2:Unlock:Tap [ ] key start the backlight

screen,long press[ ] key for 2 seconds ,LCD
screen display
“Unlock”prompt,and the " " symbol
disappearing, at this moment, all key functions
have been unlocked and resume normal work."
Tip: Lock in the time display state, stop the
operation for 10 minutes, the time display
automatically extinguished, enter the standby
state, automatically release the lock key
function, " " symbol disappears with.
12:Use Antenna
Listen to FM radio: The machine adopts a
telescopic pull rod antenna to receive FM
radio,
* Tip: If the received signal is not clear, or
strong radio interference, resulting in a string
station, you can change the length of the rod
antenna appropriate adjustment.

13:Matters Needing Attention:
Before using this machine, you should ensure
that you follow the following basic safety tips
to ensure the safe and reliable use of the
product
♦ Read and understand all safety guidelines
and usage information.
♦ In the use of the machine electricity ""
symbol shows the space, please charge in
time, so as not to affect the normal use.
♦ It is recommended to use a charging
device with an output voltage of DC5V/1A-3A
to charge, so as not to cause damage to
lithium batteries or equipment.
♦ If the machine is not used for a long time,
please ensure that the radio is charged once a
month.
♦ Do not expose this product to rain,
moisture, dripping or splashing of any liquid.
♦ Do not let this product near high
temperature heat source, do not barbecue or
blow bake at high temperature.
♦ Do not place in direct sunlight for a long
time.
♦ Do not let the product fall or be hit and
put heavy pressure on it.
14:Parameter Specification:
FM frequency range
FM:87.5-108.0MHz
SNR
40dB
BT version
V5.0
Receiver distance of
FM radio signal to
Bluetooth signal
≦20 Meters
BT receiving distance
≦20 Meters
Storage stations
30pcs
earphone output
3.5mm ,earphone JACK
Loudspeaker
Ф40mm/4Ω/3W
External power
source
DC5V
Minimal working
voltage
3.4V
Maximum power
output
280mW
Lithium battery
3.7V 500mAh
Quiescent current
48uA
Maximum current
130mA
Stereo separation
26dB
Product size
93x44.7x22.6MMmm
Net weight
75g

FCC Warnning:
This equipment has been tested and found to comply with the limits for a Class B digital device,
pursuant to part 15 of the FCC Rules. These limits are designed to provide
reasonable
protection againstharmful interference in a residential installation. This equipment generates,
uses and can radiateradio
frequency
energy
and,
if
not
installed
and
used
in
accordance
with
the
instructions,
maycause
harmful
interference
to
radio
communications.
However,
there
is
no
guarantee
thatinterference
will
not
occur
in
a
particular
installation.
If
this
equipment
does
cause
harmfulinterference to radio or television reception, which can be
determined by turning the equipmentoff
and
on,
the
user
is
encouraged
to
try
to
correct
the
interference
by
one
or
more
of
thefollowing measures:
•
Reorient or relocate the receiving antenna.
•
Increase the separation between the equipment and receiver.
•
Connect the equipment into an outlet on a circuit different from that to which the receiver is
connected.
• Consult the dealer or an experienced radio/TV technician for help.
Caution:
Any
changes
or
modifications
to
this
device
not
explicitly
approved
by
manufacturer
could void your authority to operate this equipment.
This
device
complies
with
part
15
of
the
FCC
Rules.
Operation
is
subject
to
the
following
two
conditions:
(1)This
device
may
not
cause
harmful
interference,
and
(2)
this
device
must
accept
any
interference received, including interference that may cause undesired operation.
This
equipment
complies
with
FCC
radiation
exposure
limits
set
forth
for
an
uncontrolled
environment.
This
equipment
should
be
installed
and
operated
with
minimum
distance
0cm
between the radiator and your body.

