Questions or Concerns?
Please contact us Mon–Fri, 9:00 am–5:00 pm PST/PDT
at support.levoit.com or at 1-888-726-8520
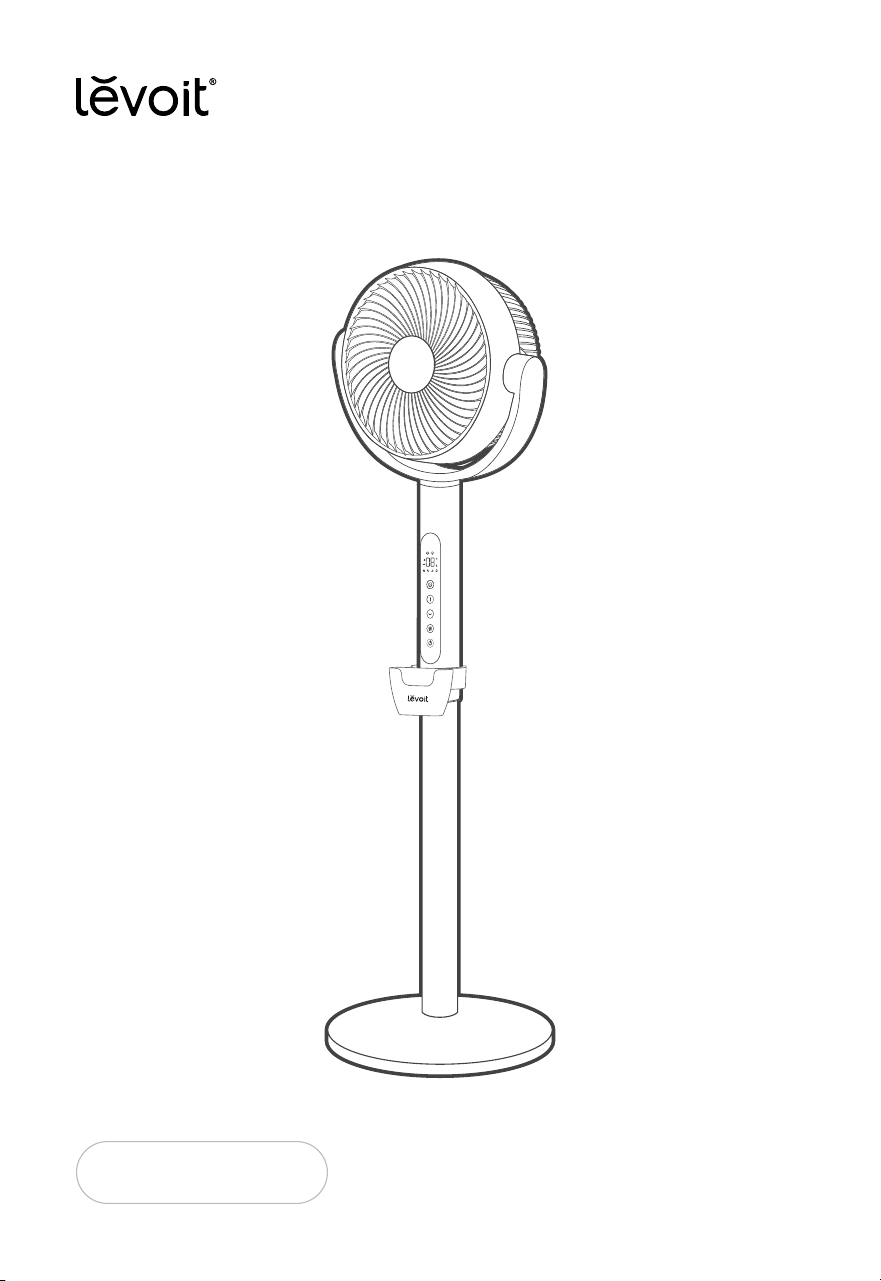
Smart Pedestal Air Circulator Fan
User Manual
2
Table of Contents
Package Contents
Specifications
Safety Information
Getting to Know Your
Smart Pedestal Fan
Controls & Display
Remote Control
Getting Started
Using Your Fan
Care & Maintenance
Troubleshooting
Warranty Information
Customer Support
2
2
3
7
8
8
9
12
14
15
18
19
Package Contents
1 x Fan Head
1 x Base
1 x Pole
1 x Remote Control
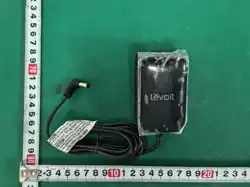
1 x Power Adapter
1 x Quick Start Guide
1 x User Manual
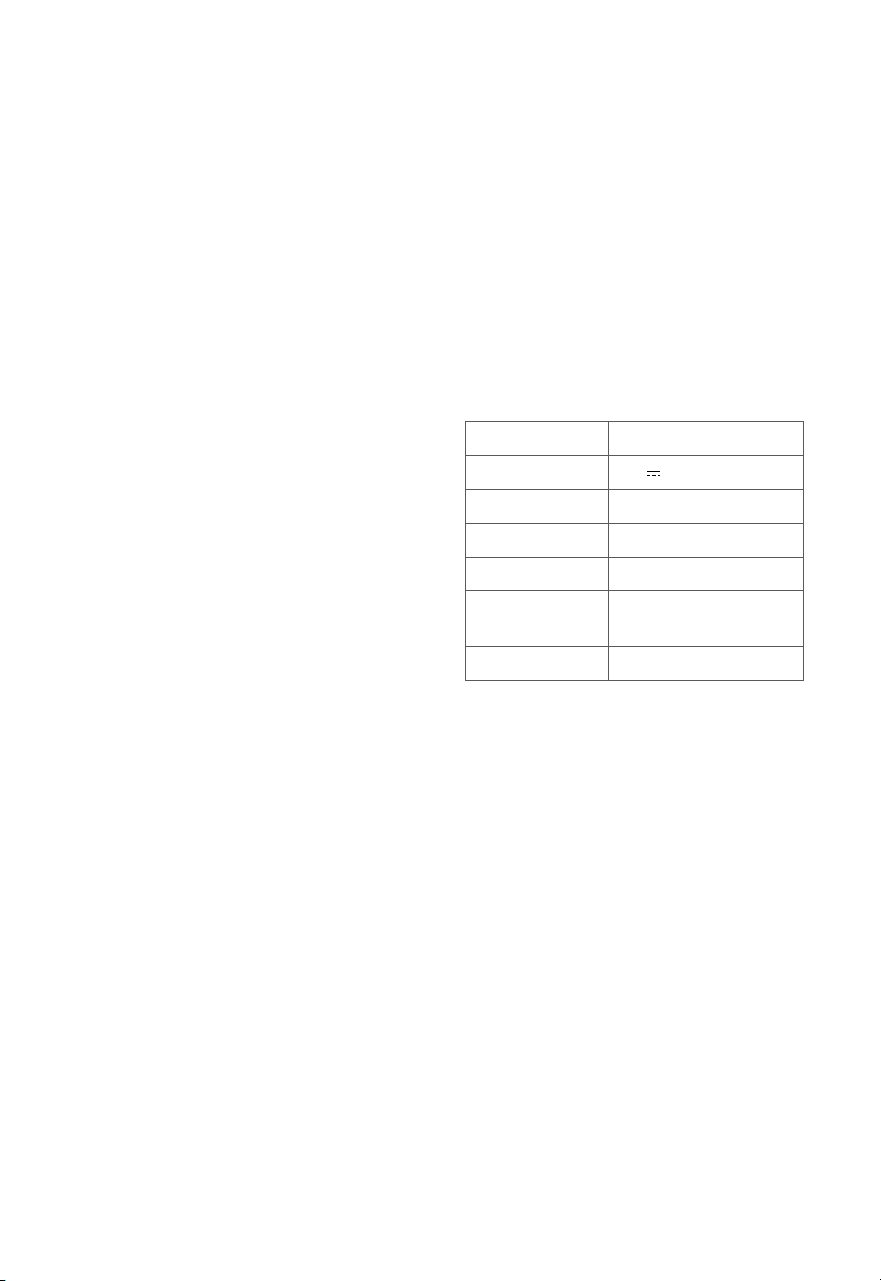
Specications
Model LPF-R432S-AUS
Power Supply 24V 30W
Timer 1–12 hr
Max Speed 24.6 ft/s
Noise Level 20–52dB
Dimensions 14.3 x 12.5 x 43.6 in /
36.5 x 32.0 x 110.8 cm
Weight 12.7 lb / 5.8 kg

3
SAFETY INFORMATION
READ AND SAVE THESE
INSTRUCTIONS
To reduce the risk of re, electric shock, or other injury, follow all instructions and
safety guidelines.
GENERAL SAFETY
• Only use your pedestal fan as
described in this manual. Any other
use may cause a fire, electric shock,
or personal injury.
• Do not use your pedestal fan
outdoors.
• To protect against electric shock, do
not immerse the pedestal fan cord,
plug / adapter,or housing in water or
spray with liquids.
• Do not place the pedestal fan in a
window.
• Keep your pedestal fan away from
water, and wet or damp areas.
• Keep your pedestal fan away from
open flames, heat sources, or other
heating and cooking appliances.
• Do not use where combustible
gases, vapours, metallic dust,
aerosol (spray) products, or fumes
from industrial oil are present.
• Do not place anything into any
opening on the pedestal fan.
• Do not use with any openings
blocked; keep free of dust, lint,
hair, and anything that may reduce
airflow.
• Avoid contact with moving fan parts.
• Do not hang or mount the pedestal
fan on a wall or ceiling.
• Only use the pedestal fan on a dry
and level surface.
• Close supervision is necessary
when the pedestal fan is used by or
near children.
• Children should be supervised
to ensure that they do not play
with the appliance.
• Children should be supervised
to ensure they do not insert
fingers or objects into the vent
openings.
• Cleaning and user maintenance
shall not be made by children
without supervision.
• Keep the inside of the pedestal
fan dry. To prevent moisture
buildup, avoid placing in rooms
with major temperature changes.
• Unplug the pedestal fan when
not in use for an extended
period of time.
• Do not use other items or third
party parts as replacement parts
for this pedestal fan.
• Do not use your pedestal fan
if it is damaged or not working
correctly, or if the cord or plug
is damaged. Do not try to repair
it yourself. Contact Customer
Support (see page <?>).
• WARNING: To reduce the risk of
fire or electric shock, do not use
this pedestal fan with any solid-
state speed controls (such as a
dimmer switch).
• WARNING: To Reduce The
Risk Of Fire, Electric Shock, Or
Injury To Persons, Do Not Use
Replacement Parts That Have
4
Safety Information (cont.)
POWER ADAPTER
• This device is only to be used with
the power supply unit provided with
the device.
• Turn o the pedestal fan before
removing the adapter from the
outlet. To unplug, grab the adapter
and pull from the outlet. Never pull
from the power cord.
• Keep the pedestal fan near the outlet
it is plugged into. The use of an
extension cord is not recommended.
• Always turn the pedestal fan o and
unplug it when not in use and before
moving, cleaning, or servicing the
fan.
Warning: Do not force-
fully move or adjust
the fan head while the
fan is oscillating.
• Not Been Recommended By The
Manufacturer (e.g., Parts Made At
Home Using A 3D Printer).
• The fan shall not be modified
by users, such as by adding
supplemental filters to fans not
intended to be used for air cleaning
purposes.
• This appliance is not intended for
use by persons (including children)
with reduced physical, sensory
or mental capabilities, or lack of
experience and knowledge, unless
they have been given supervision
or instruction concerning use of the
appliance by a person responsible
for their safety.
• Not for commercial or industrial use.
Household use only.
• Ensure that the fan is switched
o from the supply mains before
removing the guard.
• Turn o and unplug the adapter
when not in use for extended
periods of time.
• Never place the cord near any heat
source.
• Do not cover the cord with a rug,
carpet, or other covering. Do not
place the cord under furniture or
appliances.
• To avoid a tripping hazard, keep the
cord out of areas where people walk
often. Place the cord where it will not
be tripped over and safely coil the
cord.
• A loose fit between the outlet and
plug may cause overheating and
a distortion of the adapter. Contact
a qualified electrician to replace a
loose or worn outlet.
• Do not run cord under carpeting.
Do not cover cord with throw rugs,
runners, or similar coverings. Do
not route cord under furniture or
appliances. Arrange cord away from
trac area and where it will not be
tripped over.
• If the power adapter is damaged,
it must be replaced by Vesync (US)
Corporation or similarly qualified
persons in order to avoid an electric
or fire hazard. Please contact
Customer Support (see page <?>).
• This device is only to be used with
the power supply unit provided with
the device.
• Your fan should only be used with
North American 120V, 60Hz outlets
electrical systems. Do not plug into
another type of outlet.
5
• Only use with a 3V CR2025
battery;
• The method of replacing batteries
including maintaining correct
polarity. Ensure the batteries are
installed correctly according to
polarity (+ and -);
• This appliance contains non-
rechargeable batteries,these
batteries are not to be recharged;
• Do not force discharge, recharge,
disassemble, heat above 60°C
(140°F) or incinerate. Doing so
may result in injury due to venting,
leakage or explosion resulting in
chemical burns;
• Do not mix old and new batteries,
dierent brands or types of
batteries, such as alkaline,
carbon-zinc, or rechargeable
batteries;
• WARNING: CHEMICAL BURN
HAZARD.
• WARNING: Keep out of reach of
children. Swallowing can lead
to chemical burns, perforation
of soft tissue, and death. Severe
burns can occur within 2 h of
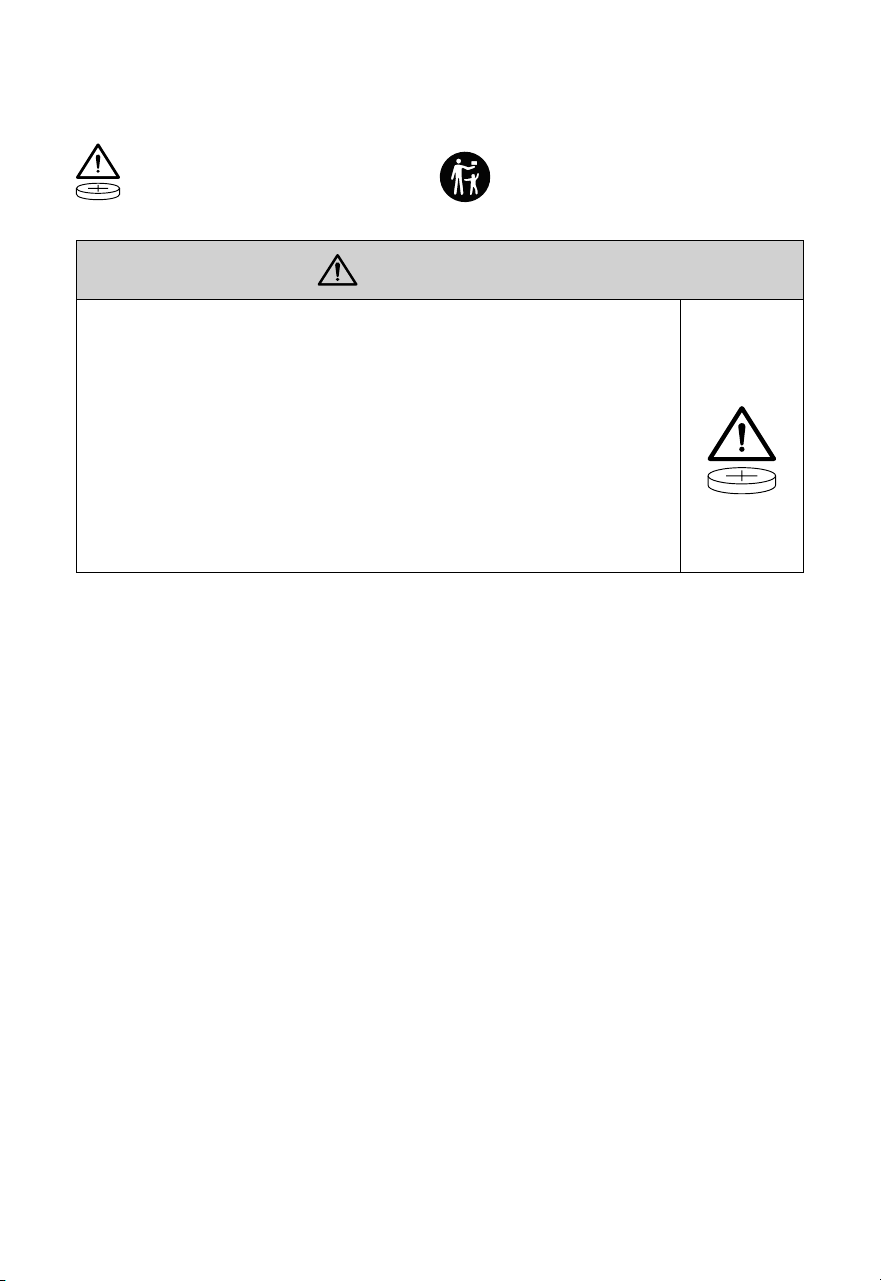
WARNINGS FOR USING THE REMOTE CONTROLLER
Warning:
Contains coin battery
KEEP OUT OF REACH
OF CHILDREN
WARNING
• INGESTION HAZARD: This product contains a button
cell or coin battery.
• DEATH or serious injury can occur if ingested.
• A swallowed button cell or coin battery can cause
Internal Chemical Burns in as little as 2 hours.
• KEEP new and used batteries OUT OF REACH of CHILDREN.
• Seek immediate medical attention if a battery is
suspected to be swallowed or inserted inside any part
of the body.
ingestion. Seek medical attention
immediately.
• Be aware of the risk of terminals of
the battery-operated appliance
or battery being short-circuited
by metal objects.
• If the appliance is to be stored
unused for a long period, the
batteries should be removed.
• Do not use modified or damaged
batteries.
• The coin battery is hazardous and
is to be kept away from children
(whether the battery is new or
used). Always completely secure
the battery compartment. If the
battery compartment does not
close securely, stop using the
product, remove the batteries,
and keep them away from
children.
Unfortunately, it is not obvious when
a button or coin battery is stuck in
a child’s esophagus (food pipe). The
child might:

6
• Cough, gag or drool a lot;
• Appear to have a stomach upset
or a virus;
• Be sick;
• Point to their throat or stomach;
• Have pain in their abdomen,
chest, or throat;
• Be tired or lethargic;
• Be quieter or more clingy
than usual or otherwise “not
themselves”;
• Lose their appetite or have a
reduced appetite;
• Not want to eat solid food / be
unable to eat solid food.
These sorts of symptoms vary or
fluctuate, with the pain increasing
and then subsiding.
A specific symptom to button and
coin battery ingestion is vomiting
fresh (bright red) blood. If a child
does this, seek immediate medical
help. Call a local poison control
center for treatment information;
The lack of clear symptoms is
why it is important to be cautious
with “flat” or spare button or coin
batteries in the home and the
products that contain them. Be
aware that even used button or coin
batteries may cause injury.
• Even used batteries may cause
severe injury or death;
• Place sticky tape around both
sides of the battery and dispose
of it immediately in an outdoor
trashcan or recycle safely;
• Store spare batteries securely;
• Empty recycling units on a regular
basis;
• Use non-transparent containers
to keep the batteries out of view.
• Remove and immediately recycle
or dispose of used batteries
according to local regulations
and keep away from children.
Do NOT dispose of batteries in
household trash or incinerate;
• Remove and immediately
recycle or dispose of batteries
from equipment not used for
an extended period of time
according to local regulations.
Instructions for Users on Removal,
Recycling and Disposal of Used
Batteries
To remove the batteries from your
equipment or remote control,
reverse the procedure described
in the owner’s manual for inserting
batteries. For products with a built-
in battery that lasts for the lifetime
of the product, removal may not be
possible for the user. In this case,
recycling or recovery centers handle
the dismantling of the product and
the removal of the battery. If, for
any reason, it becomes necessary
to replace such a battery, this
procedure must be performed
by authorized service centers. In
the European Union and other
locations, it is illegal to dispose of
any battery with household trash.
All batteries must be disposed
of in an environmentally sound
manner. Contact your local waste-
management ocials for information
regarding the environmentally sound
collection, recycling and disposal of
used batteries. WARNING: Danger
of explosion if battery is incorrectly
replaced. To reduce risk of fire,
explosion or leakage of flammable
liquid/gas, don’t disassemble, crush,
puncture, short external contacts,
expose to temperature above 60°C
(140°F), sunshine or like, expose to
extremely low air pressure or dispose
of in fire or water. Replace only with
specified batteries.
Call the National Battery Ingestion
Hotline at 1-800-498-8666
for treatment information.
SAVE THESE
INSTRUCTIONS
7
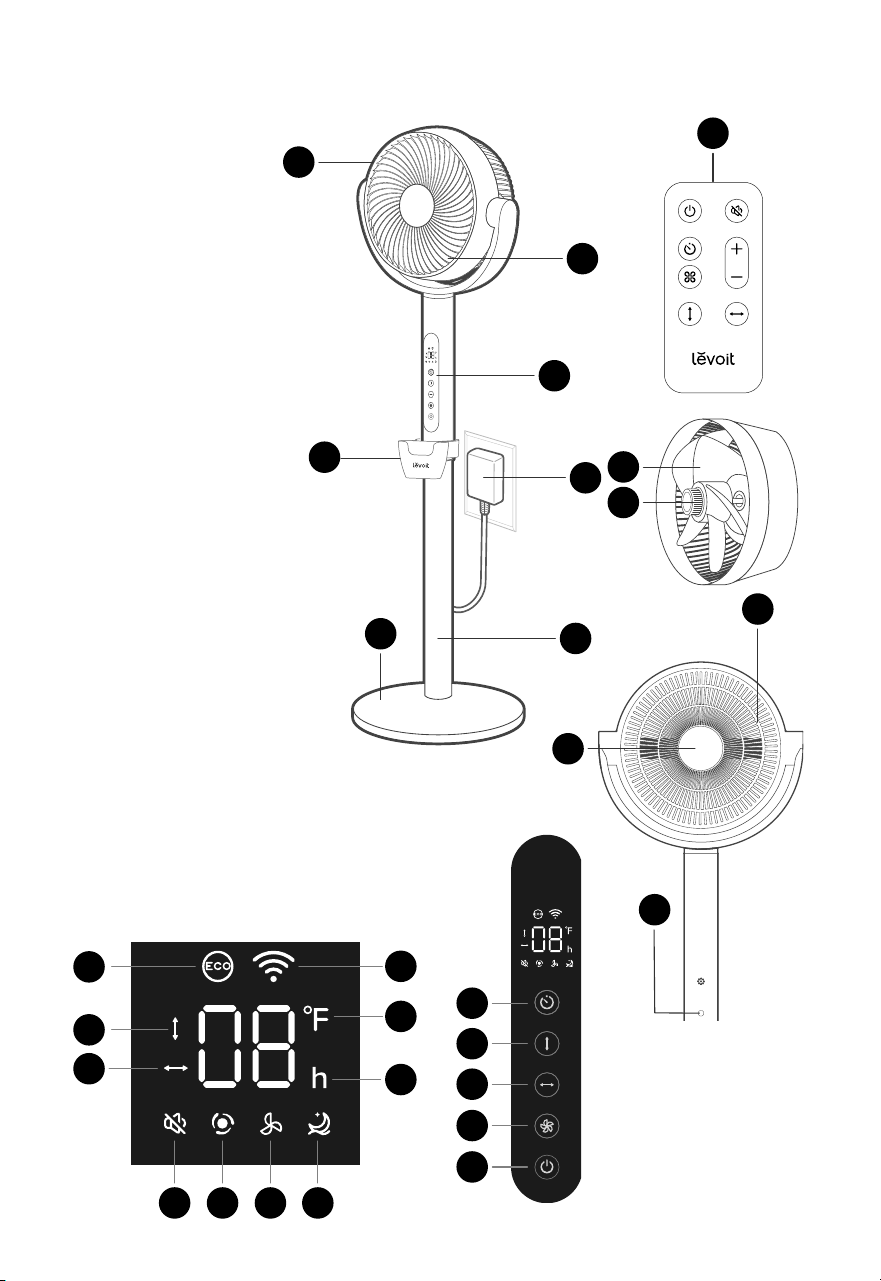
Getting to Know Your Smart Pedestal Fan
A. Fan Head
B. Front Grille
C. Control Panel
D. Pole
E. Base
F. Air Inlet
G. Remote Control
H. Magnetic Dock
I. Fan Blades
J. Knob
K. Power Adapter
L. Adapter Port
M. Remote control holder
LED Display
Control Panel
N. ECO Mode Indicator
O. Up/Down Oscillate Indicator
P. Left/Right Oscillate Indicator
Q. Wi-Fi
®
Indicator
R. Fahrenheit Indicator
S. Hour Indicator
T. Sleep Mode Indicator
U. Normal Mode Indicator
V. Turbo Mode Indicator
W. Sound/Display O Indicator
X. Timer Button
Y. Up/Down Oscillate Button
Z. Left/Right Oscillate Button
AA. Fan Speed Button
AB. Power Button
Z
O
AA
E
G
P
AB
R
Q
N
S
K
L
I
Y
X
W
V
U T
A
H
C
D
F
J
B
M
8
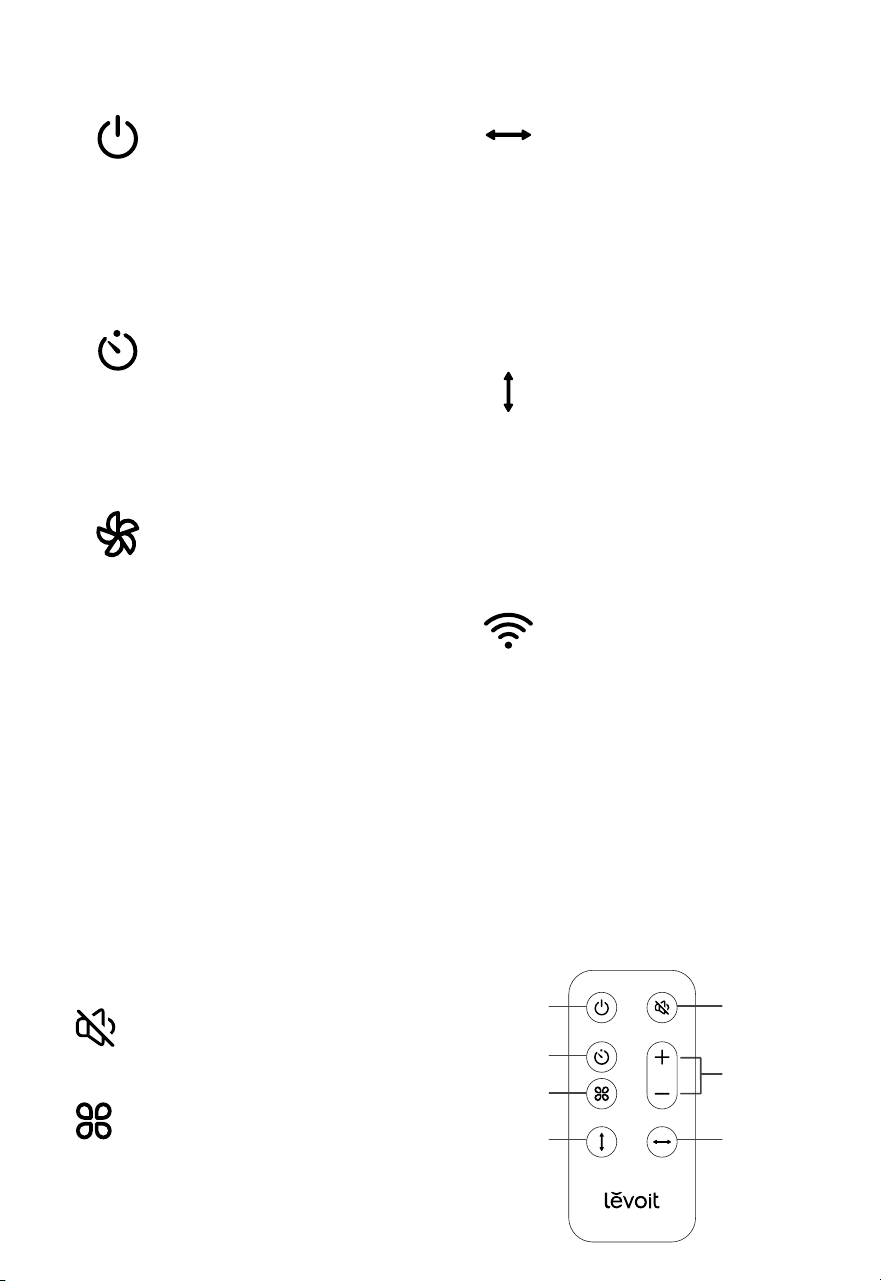
Controls & Display
Fan Speed Button
• Tap to cycle through fan
speeds from 1 (low) to
12 (high).
• Press and hold for 3
seconds to turn selection
sounds and the display
on/o (see Sound/
Display O, page 13).
Power Button
• Tap to turn the fan on/o.
The default fan speed is
1 (low).
• Press and hold for 15
seconds to reset the fan
to default settings.
Timer Button
• Tap to cycle through timer
options from 1–12 hours.
• Press and hold to quickly
cycle through options in
increments of 1 hour.
Left/Right Oscillate Button
• Tap to turn left/right
oscillation on/o. The
default oscillation angle
is 90°.
• Press and hold to adjust
the angle of left/right
oscillation (see Adjusting
Oscillation Angle, page 13).
Up/Down Oscillate Button
• Tap to turn up/down
oscillation on/o. The
default oscillation angle
is 120°.
• Press and hold to adjust
the angle of up/down
oscillation (see Adjusting
Oscillation Angle, page 13).
Remote Control
Fan Mode Button
• Press to cycle through fan
modes: Normal, Turbo, ECO and
Sleep (see Fan Modes, page 12).
Sound/Display O Button
• Press to turn selection
sounds and display on/o.
Note:
• Remove the plastic tab from the remote control’s battery compartment before using.
• To replace the battery, see page 15.
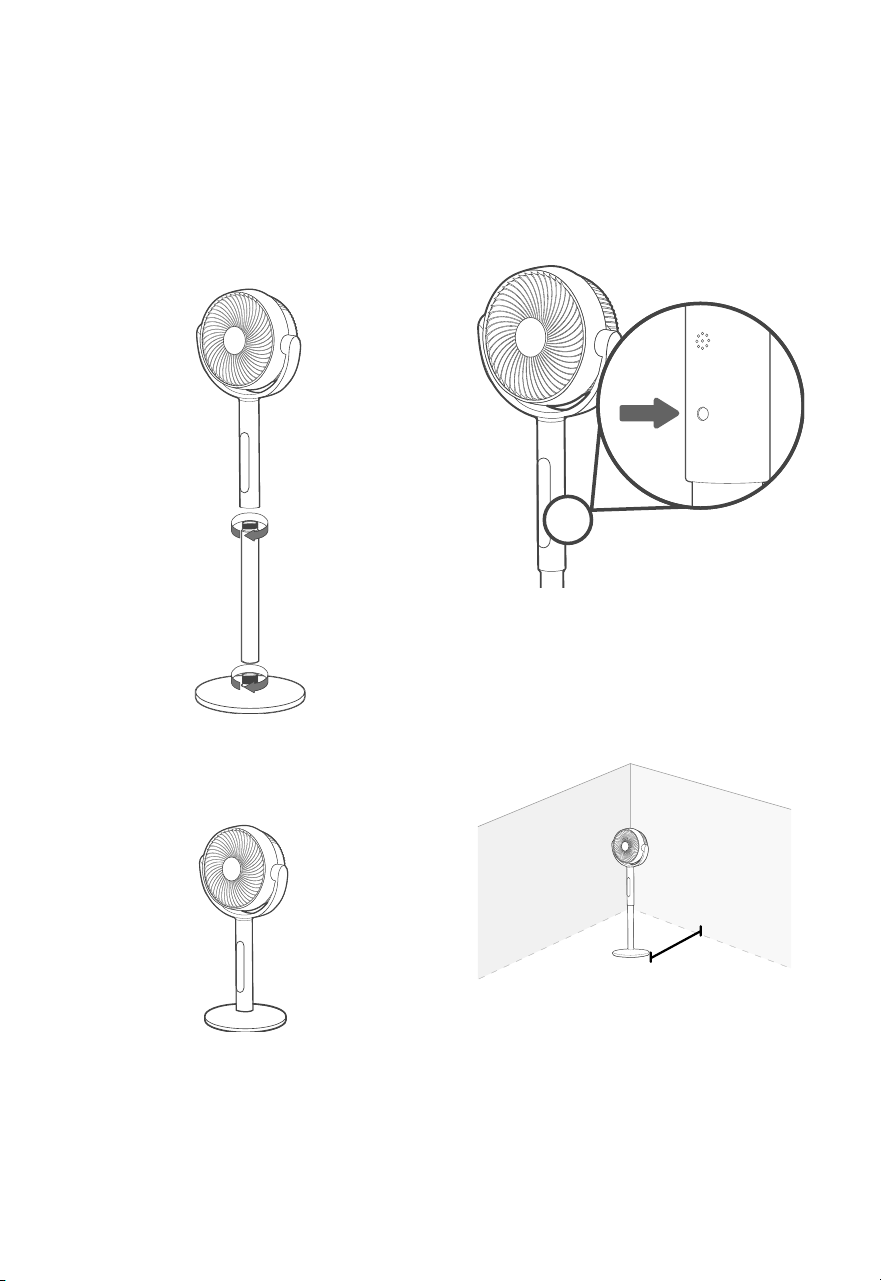
The remote control can be used to control any of the fan’s functions from a distance.
The remote must be within 16 ft / 5 m of the fan to work.
Wi-Fi
®
Indicator
• Blinks when connecting
to the VeSync app, lights
up when connected to
VeSync, and is o when
disconnected from VeSync.
See the VeSync in-app
instructions for more
information (see page 11).
Power
Button
Left / Right
Oscillate
Button
Increase /
Decrease Fan
Speed Buttons
Sound /
Display O
Button
Timer
Button
Fan Mode
Button
Up / Down
Oscillate
Button
9
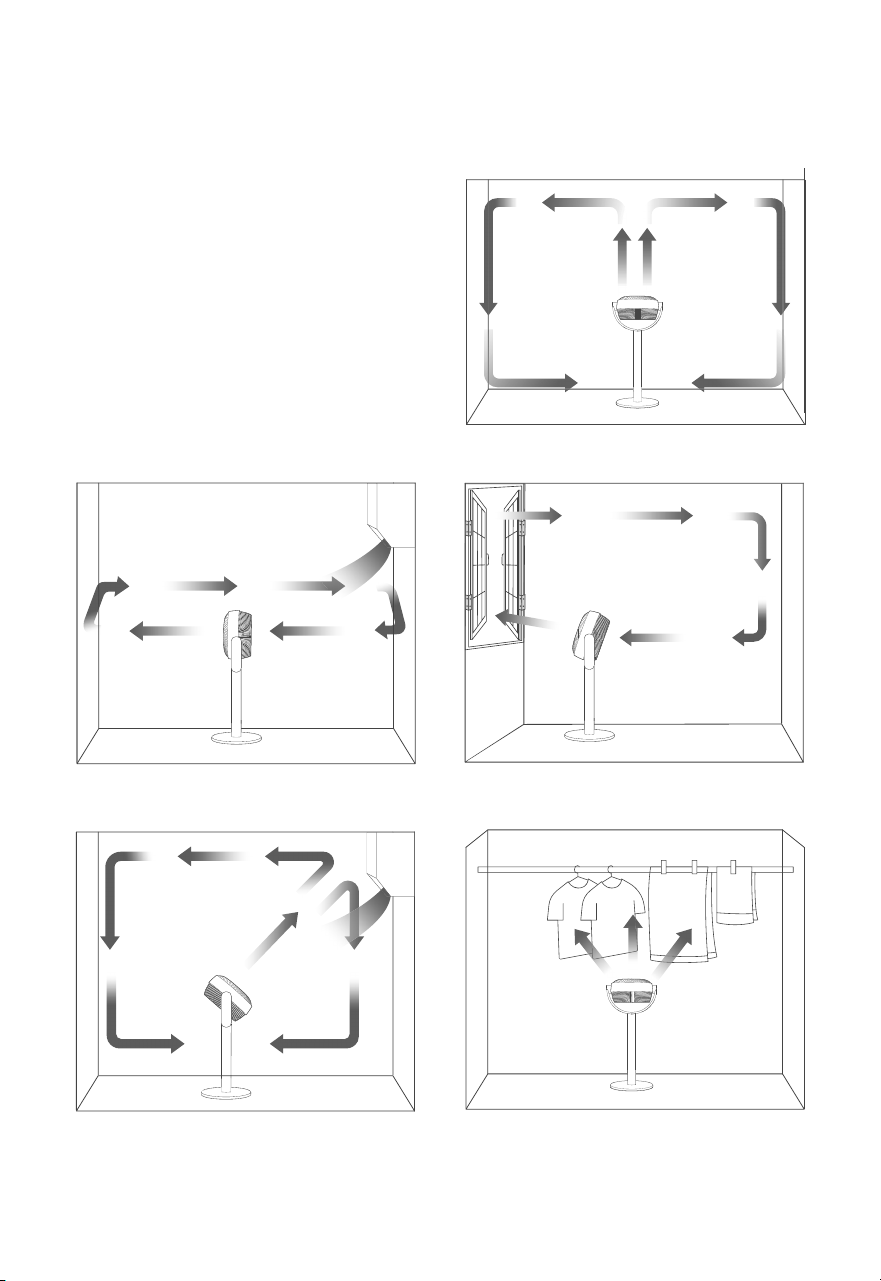
WARNING: Do not use the fan before finishing assembly.
Getting Started
1. Remove all packaging.
2. Rotate the pole clockwise to attach
it to the base. Rotate the fan head
clockwise onto the pole.
3. Optionally, you can attach the fan head
directly to the base for a shorter fan.
4. Place the fan on a flat, stable surface
such as the floor.
5. Insert the power adapter into the port,
located at the bottom of the fan. Plug
in and turn on.
6. When using the fan, allow at least
15 inches / 38 cm of clearance from
the front of the fan. Keep away from
anything that would block air flow,
such as curtains.
15 in /
38 cm
10
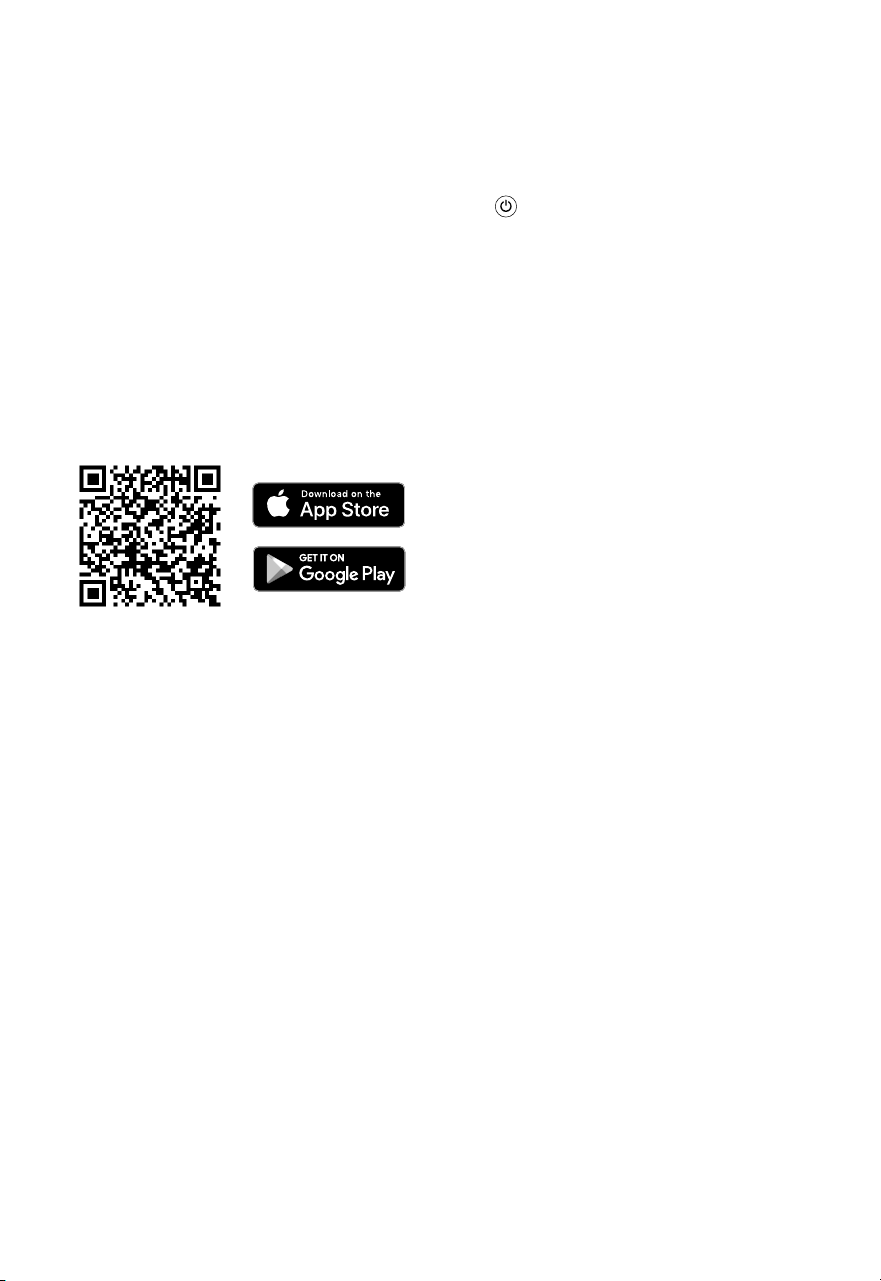
Pedestal Fan Placement
• Point the fan towards the ceiling to
circulate the air in the room. [Figure 2.1]
• Point the fan forward to circulate cool
air when the air conditioner is on.
[Figure 2.2]
• Point the fan out a door or window
to circulate fresh air from outside.
[Figure 2.3]
• Point the fan upwards to circulate
warm air when the heater is on. [Figure
2.4]
• Point the fan towards wet laundry to
expedite drying. [Figure 2.5]
Figure 2.2
Figure 2.3
Figure 2.4
Figure 2.5
Figure 2.1
11
Note:
• You must create your own VeSync account to
access voice assistants.
• A list of voice commands is available under
settings in the VeSync app.
• To disconnect Wi-Fi, press and hold
for 15 seconds until the Wi-Fi
indicator turns o. This will restore the
smart pedestal fan’s default settings
and disconnect it from the VeSync app.
• To reconnect, please follow the
instructions in the VeSync app for
adding a device.
You can use the VeSync app to connect
your smart pedestal fan to Amazon Alexa or
Google Assistant™. Please follow the in-app
instructions to set up your voice assistant.
Wi-Fi® Connection
Connect with Amazon Alexa
or Google Assistant™
Note: For Android™ users, choose “Allow” to
use VeSync.
Note: You must create your own VeSync
account to use third-party services and
products. These will not work with a guest
account. With a VeSync account, you can
also allow your family and friends to control
your smart pedestal fan.
Note: Your phone must have Location
turned on while your phone is connect-
ing to your smart pedestal fan. This is
required to establish the Bluetooth
®
con-
nection. You can turn Location o after your
smart pedestal fan is finished connecting
to the VeSync app.
1. To download the VeSync app, scan
the QR code or search “VeSync” in the
Apple App Store
®
or Google Play Store.
VeSync App Setup
2. Open the VeSync app. Log In or
Sign Up.
3. Follow the in-app instructions to set up
your smart pedestal fan.
Getting Started (cont.)
Note:
• The VeSync app is continually being improved
and may change over time. If there are any
dierences, follow the in-app instructions.
• Requires device to run app, Wi-Fi or mobile
data, and iOS version 12 or Android version
6 (or above). Standard data and messaging
rates may apply. Registration is required.
12
Using Your Pedestal Fan
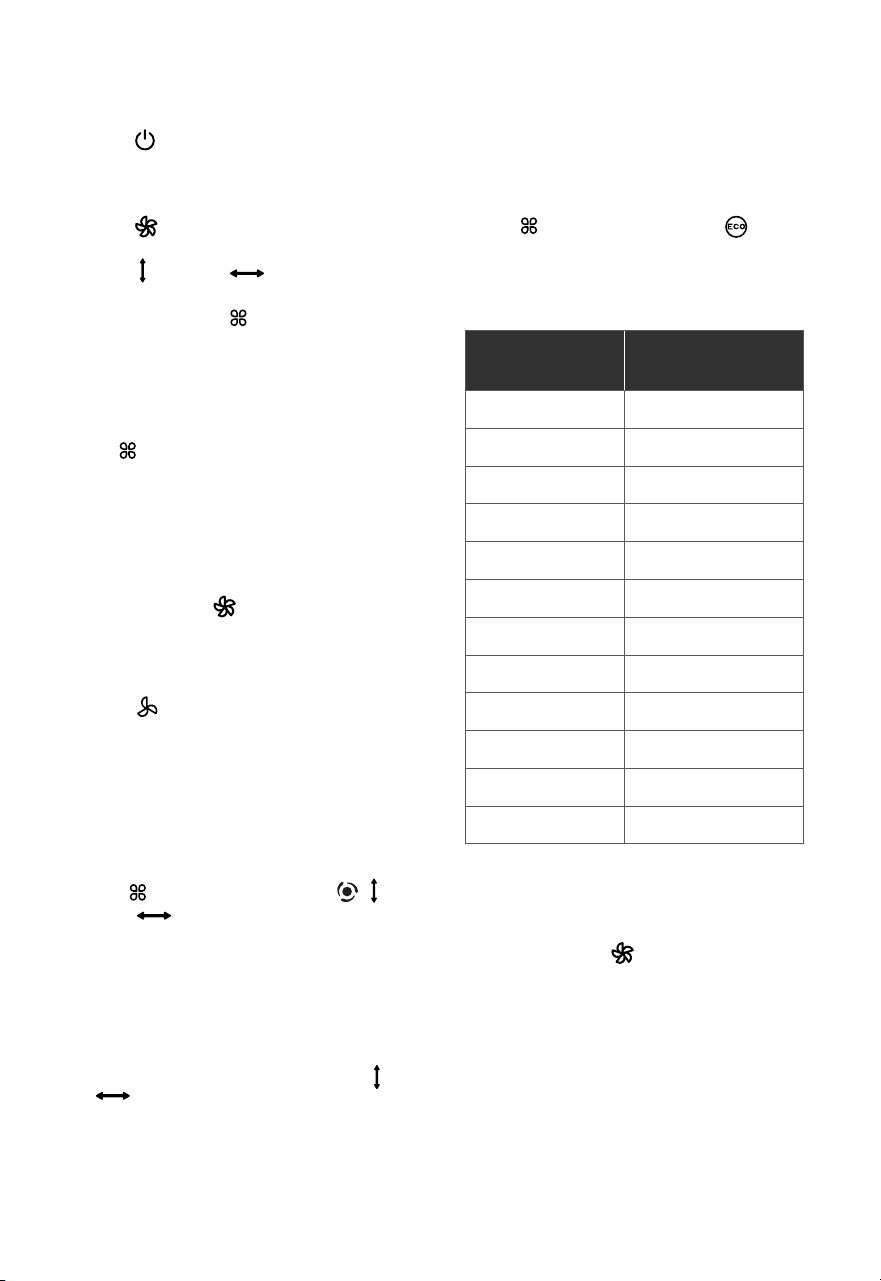
1. Tap to turn on the fan. The display
will show the selected fan speed for
5 seconds, then show the current room
temperature for 5 seconds.
2. Tap to change fan speed from 1
(low) to 12 (high).
3. Tap and/or to turn on
oscillation.
4. Optionally, press on the remote to
select a dierent fan mode.
Press on the remote to cycle through fan
modes: Normal, Turbo, ECO, and Sleep.
• This is the fan’s default mode.
• will show on the display.
Fan Modes
Normal Mode
Use Normal Mode to manually control the
fan’s speed. Tap to change fan speed
from 1 (low) to 12 (high).
Use ECO Mode for automatic fan
speed adjustments according to the
room temperature.
ECO Mode
1. Tap and select ECO Mode. will
show on the display.
2. The starting fan speed is determined by
the current room temperature.
Note: The max ambient working tempera-
ture is 104°F.
Room
Temperature
Fan Speed
≤ 70°F 1
72°F 2
74°F 3
76°F 4
78°F 5
80°F 6
82°F 7
84°F 8
86°F 9
88°F 10
90°F 11
≥ 90°F 12
Use Turbo Mode with air conditioning to
quickly circulate air in your home.
Turbo Mode
1. Tap and select Turbo Mode , ,
and will show on the display.
2. The fan automatically starts oscillating
and operates at fan speed 12.
Note:
• If you manually adjust fan speed, the fan will
automatically switch to Normal Mode.
• You can turn o oscillation by tapping or
.
3. Optionally, tap to manually adjust
the fan speed while in ECO Mode. The
fan will then operate according to the
following logic:
a. If the temperature increases
2°F, the fan speed will increase
one level.
b. If the temperature decreases
2°F, the fan speed will decrease
one level.
13
Sleep Mode is optimized to take into
account the stages before you sleep,
during sleep, and as you wake up.
Sleep Mode
Using Your Pedestal Fan (cont.)
Adjusting Oscillation Angle
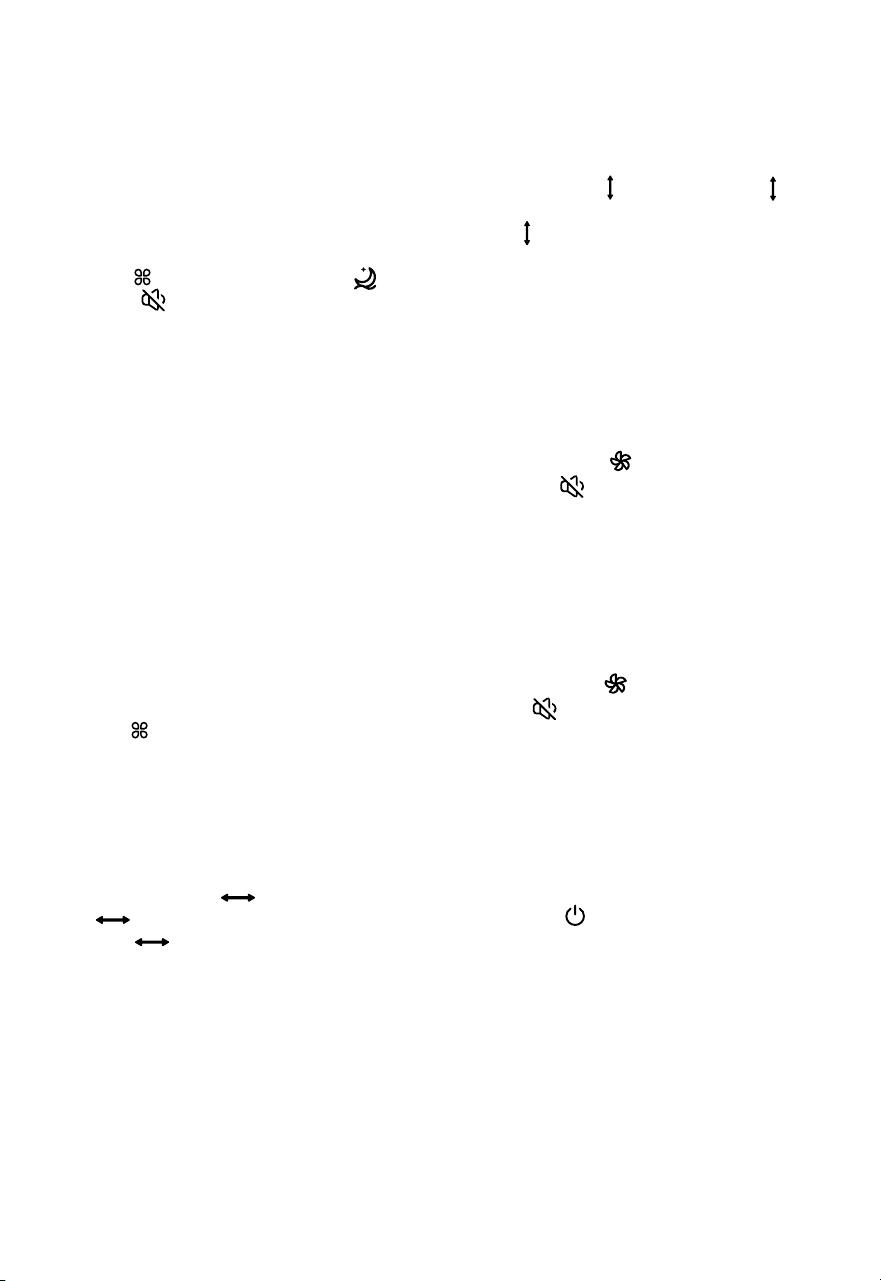
1. Press and hold for 3 seconds and
will flash.
2. Tap to cycle between 90°, 60°,
and 30° oscillation angles.
3. After 5 seconds of no operation, the new
oscilation angle is automatically set.
Left/Right Oscillation
1. Press and hold for 3 seconds
(or press on the remote) to turn
selection sounds and the display o.
2. After 5 seconds of no operation, the
display will automatically turn o and
selection sounds will be disabled.
3. Tap any button to temporarily turn
the display back on. If you don’t tap
another button, the display will turn
back o after 5 seconds.
4. Press and hold for 3 seconds (or
press on the remote) to turn selection
sounds and the display back on.
1. Press and hold for 3 seconds and
will flash.
2. Tap to cycle between 120°
(displayed as 99°), 90°, 60°, and
30° oscillation angles.
3. After 5 seconds of of no operation,
the new oscilation angle is
automatically set.
Sound & Display O
Up/Down Oscillation
• When the fan is in standby, it will
remember all its previous settings,
except timer.
• When the fan is turned o and
unplugged, it will remember all its
previous settings, except for timer
and oscillation.
Memory Function
• The fan is in Standby Mode when it
is turned o, but plugged in.
• Tap to turn the fan on.
Standby Mode
1. Tap and select Sleep Mode.
and will show on the display.
a. After 5 seconds, the display will
turn o and selection sounds will
be disabled.
b. When you select Sleep Mode,
the starting fan speed is based
o your current fan speed.
2. After 1 hour, the fan speed will decrease
as the room temperature stabilizes.
a. If the temperature increases
2°F, the fan speed will increase
one level.
b. If the temperature decreases
2°F, the fan speed will decrease
one level.
3. Tap to turn Sleep Mode o.
14
Care & Maintenance
Cleaning the Fan
1. Unplug before cleaning.
2. Wipe the outside of the fan with a
soft, dry cloth. If necessary, wipe with a
damp cloth, then immediately dry.
3. Use a vacuum, duster, or compressed
air to remove dust.
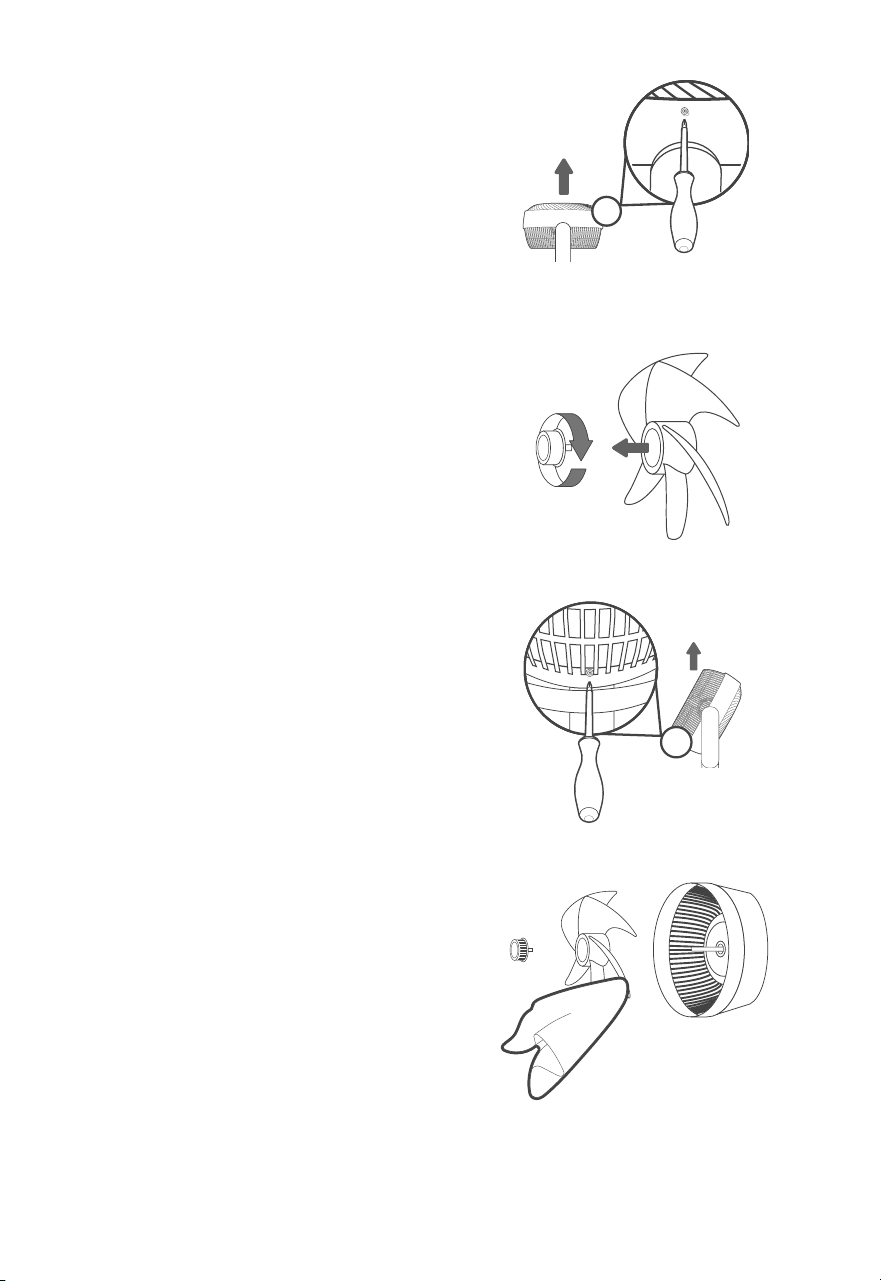
4. For deeper cleaning, use a screwdriver
to remove the screw from under the
front grille. Rotate the front grille
counterclockwise and remove it.
[Figure 3.1]
5. Rotate the knob clockwise to remove it.
Pull the fan blades out. [Figure 3.2]
6. Remove the screw at the bottom of the
air inlet. Rotate the air inlet clockwise to
remove it. [Figure 3.3]
7. Wipe the parts down with a damp
cloth, then immediately dry. If necessary,
use mild detergent to remove dirt.
[Figure 3.4]
We recommend regularly cleaning the fan
because excessive dust will accumulate on
the front grille, air inlet, and fan blades. This
may cause the fan performance to decrease,
as well as increase noise and vibration.
Figure 3.1
Figure 3.2
Figure 3.3
Figure 3.4
Notes:
• A screwdriver is required. Do not use an
electric drill.
• Make sure the fan is turned o before
removing parts.
• Do not clean with abrasive chemicals or
flammable cleaning agents.
• Do not immerse the fan in water or allow
water to drip into the motor housing.
15
Replacing the Remote
Control Battery
If not using the fan for an extended period
of time, cover the fan and store in a cool,
dry place to avoid moisture damage.
Storage
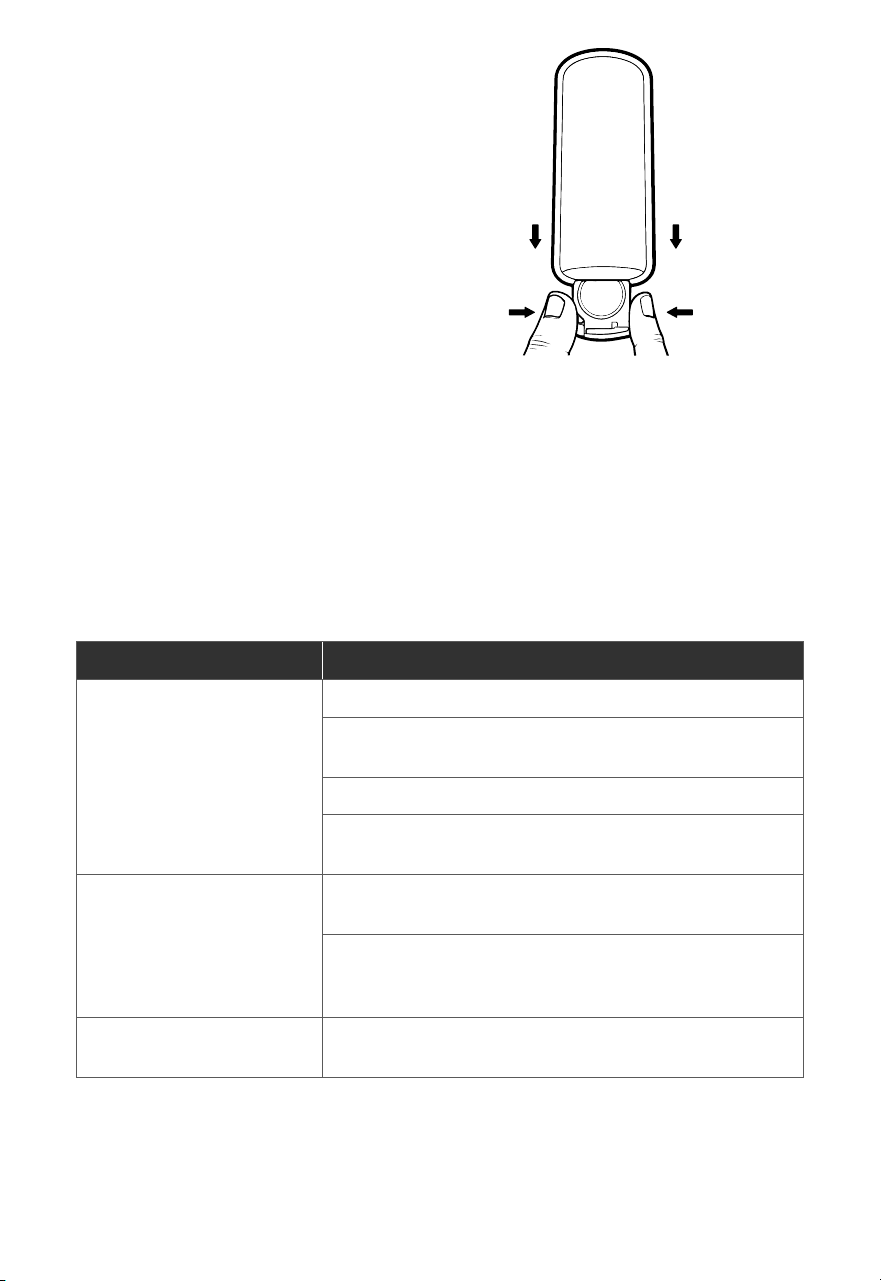
1. Remove the battery compartment
by pinching the tab and pulling the
compartment out. [Figure 3.5]
2. Remove the old battery.
3. Replace with a new 3V CR2025 battery.
Make sure the polarities match.
4. Replace the battery compartment.
Problem Possible Solution
Fan will not turn on or
respond to button controls.
Plug in the fan.
Check to see if the power cord is damaged. If so, stop using
the fan and contact Customer Support (see page 19).
Plug the fan into a dierent outlet.
Fan may be malfunctioning. Contact Customer Support
(see page 19).
Fan makes an unusual noise
while the fan is on.
Make sure the fan is operating on a hard, flat, level
surface.
Fan may be damaged, or a foreign object may be inside.
Stop using the fan and contact Customer Support (see
page 19). Do not try to repair the fan.
Fan randomly turns o. Fan is malfunctioning. Stop using the fan and contact
Customer Support (see page 19).
Troubleshooting
If your problem is not listed, please contact Customer Support (see page 19).
Figure 3.5

16
VeSync App Troubleshooting
My smart pedestal fan isn’t connecting to the VeSync app.
• Make sure your phone has Bluetooth® turned on and is not currently connected to
another Bluetooth device.
• During the setup process, you must be on a secure 2.4GHz Wi-Fi® network. Confirm
that the network is working correctly.
• Make sure the Wi-Fi password you entered is correct.
• There should be no spaces at the beginning or end of the password.
• Test the password by connecting a dierent electronic device to the router.
• If you’re manually typing in the SSID and password, double check that both
are entered correctly.
• Try moving your pedestal fan closer to the router. Your phone should be as close as
possible to your pedestal fan.
• Your router may need to be at a higher location, away from obstructions.
• Make sure your pedestal fan and router are away from appliances (such as
microwave ovens, refrigerators, electronic devices, etc.) to avoid signal interference.
• If you’re using a VPN, make sure it’s turned o while setting up your pedestal fan.
• Disable portal authentication for your Wi-Fi network. If portal authentication is
enabled, the pedestal fan will not be able to access your Wi-Fi network, and setup
will fail.
My smart pedestal fan is oine.
• Make sure the pedestal fan is plugged in and has power, then refresh the VeSync
menu by swiping down on the screen.
• Make sure your router is connected to the internet and your phone’s network
connection is working.
• Delete the oine pedestal fan from the VeSync app. Swipe left (iOS®) or press
and hold (Android™), then tap Delete. Reconfigure the pedestal fan with the
VeSync app.
Note: Portal authentication means that you need to sign in to your Wi-Fi network through a web
page before you can use the Internet.
Note: Power outages, internet outages, or changing Wi-Fi routers may cause the pedestal fan to
go oine.
If your problem is not listed, please contact Customer Support (see page 19).

17
Federal Communication Commission Interference
Statement – Part 15
FCC SDOC Supplier’s Declaration Of Conformity
FCC Radiation Exposure Statement
This device complies with Part 15 of the FCC Rules. Operation is subject to the following two
conditions:
1. This device may not cause harmful interference, and
2. This device must accept any interference received, including interference that may
cause undesired operation.
NOTE: This equipment has been tested and found to comply with the limits for a Class
B digital device, pursuant to Part 15 of the FCC Rules. These limits are designed to
provide reasonable protection against harmful interference in a residential installation.
This equipment generates, uses and can radiate radio frequency energy and, if not
installed and used in accordance with the instructions, may cause harmful interference
to radio communications. However, there is no guarantee that interference will not occur
in a particular installation. If this equipment does cause harmful interference to radio
or television reception, which can be determined by turning the equipment o and on,
the user is encouraged to try to correct the interference by one or more of the following
measures:
• Reorient or relocate the receiving antenna.
• Increase the separation between the equipment and receiver.
• Connect the equipment into an outlet on a circuit dierent from that to which the
receiver is connected.
• Consult the dealer or an experienced radio/TV technician for help.
FCC Caution: Any changes or modifications not expressly approved by the party
responsible for compliance could void the user’s authority to operate this equipment.
Vesync (US) Corporation hereby declares that this equipment is in compliance with the FCC
requirements. The declaration of conformity may be consulted in the support section of our
website, accessible from www.levoit.com/usa/compliance
This equipment complies with FCC radiation exposure limits set forth for an uncontrolled
environment. End users must follow the specific operating instructions for satisfying
RF exposure compliance. To maintain compliance with FCC RF exposure compliance
requirements, please follow operation instructions as documented in this manual. This
transmitter must not be co-located or operating in conjunction with any other antenna or
transmitter. This equipment should be installed and operated with a minimum distance of
20 cm between the radiator and your body. The availability of some specific channels and/
or operational frequency bands are country dependent and are firmware programmed at
the factory to match the intended destination. The firmware setting is not accessible by the
end user.

18
Product Name
Smart Pedestal
Air Circulator Fan
Model
LPF-R432S-AUS
Order ID
Date of Purchase
WARRANTY INFORMATION
Levoit Limited Product Warranty
Register your products at https://warranty.levoit.
com/warranty to stay up to date with important
product information such as product updates, limited
warranties, usage and maintenance recommendations,
and notifications concerning safety warnings or
product recalls. Registration is not required to claim
your limited warranty.
Two (2) Year* Limited Consumer Product Warranty
Vesync (US) Corporation (“Vesync”) warrants that the
product shall be free from defects in material and
workmanship for a period of 2 years from the date of
original purchase (“Limited Warranty Period”), provided
the product was used in accordance with its use and
care instructions (e.g., in the intended environment and
under normal circumstances).
Your Limited Warranty Benefits
During the Limited Warranty Period and subject to
this limited Warranty Policy, Vesync will, in its sole and
exclusive discretion, either (i) refund the purchase price
if the purchase was made directly from the online Levoit
store, (ii) repair any defects in material or workmanship,
(iii) replace the product with another product of equal
or greater value, or (iv) provide store credit in the
amount of the purchase price.
Who Is Covered?
This limited warranty extends only to the original
consumer purchaser of the product and is not
transferable to any subsequent owner of the product,
regardless of whether the product transferred
ownership during the specified term of the limited
warranty. The original consumer purchaser must provide
verification of the defect or malfunction and proof of
the date of purchase to claim the Limited Warranty
Benefits.
Be Aware of Unauthorized Dealers or Sellers
This limited warranty does not extend to products
purchased from unauthorized dealers or sellers. Vesync’s
limited warranty only extends to products purchased
from authorized dealers or sellers that are subject to
Vesync’s quality controls and have agreed to follow its
quality controls. Please be aware, products purchased
from an unauthorized website or dealer may be
counterfeit, used, defective, or may not be designed for
use in your country. You can protect yourself and your
products by making sure you only purchase from Vesync
or its authorized dealers.
If you have any questions about a specific seller, or if
you think you may have purchased your product from
an unauthorized seller, please contact our Customer
Support Team via support.levoit.com
What’s Not Covered?
• Normal wear and tear, including parts that might
wear out over time (e.g., batteries, filters, cleaning
brush, essential oil pads, etc.).
• If the proof-of-purchase has been altered in any
way or is made illegible.
• If the model number, serial number or production
date code on the product has been altered,
removed or made illegible.
• If the product has been modified from its original
condition.
• If the product has not been used in accordance
with directions and instructions in the user
manual.
• Damages caused by connecting peripherals,
additional equipment or accessories other than
those recommended in the user manual.
• Damages or defects caused by accident, abuse,
misuse, or improper or inadequate maintenance.
• Damages or defects caused by service or repair
of the product performed by an unauthorized
service provider or by anyone other than Vesync.
• Damages or defects occurring during commercial
use, rental use, or any use for which the product
is not intended.
• If the unit has been damaged, including but not
limited to damage by animals, lightning,
abnormal voltage, fire, natural disaster,
transportation, dishwasher, or water (unless the
user manual expressly states that the product is
dishwasher-safe).
• Incidental and consequential damages.
• Damages or defects exceeding the cost of
the product.
Claiming Your Limited Warranty Service in
5 Simple Steps:
1. Make sure your product is within the specified
limited warranty period.
2. Make sure you have a copy of the invoice and
order ID or proof-of-purchase.
3. Make sure you have your product. DO NOT
dispose of your product before contacting us.
4. Contact our Customer Support Team via
support.levoit.com
5. Once our Customer Support Team has approved
your request, please return the product with a
copy of the invoice and order ID.
Sole and Exclusive Remedy
THE FOREGOING LIMITED WARRANTY CONSTITUTES
VESYNC (US) CORPORATION’S EXCLUSIVE LIABILITY,
AND YOUR SOLE AND EXCLUSIVE REMEDY, FOR
ANY BREACH OF ANY WARRANTY OR OTHER
NONCONFORMITY OF THE PRODUCT COVERED BY
THIS LIMITED PRODUCT WARRANTY STATEMENT. THIS
LIMITED WARRANTY IS EXCLUSIVE, AND IN LIEU OF ALL
OTHER WARRANTIES. NO EMPLOYEE OF VESYNC (US)

19
Customer Support
If you have any questions or concerns
about your new product, please contact
our helpful Customer Support Team.
Corporation OR ANY OTHER PARTY IS AUTHORIZED TO
MAKE ANY WARRANTY IN ADDITION TO THE LIMITED
WARRANTY IN THIS LIMITED PRODUCT WARRANTY
STATEMENT.
Disclaimer of Limited Warranties
TO THE FULLEST EXTENT PROVIDED BY APPLICABLE
LAW, EXCEPT AS WARRANTED IN THIS LIMITED
PRODUCT WARRANTY POLICY, VESYNC (US)
Corporation PROVIDES THE PRODUCTS YOU PURCHASE
FROM VESYNC (US) Corporation “AS IS” AND VESYNC
(US) Corporation HEREBY DISCLAIMS ALL WARRANTIES
OF ANY KIND, WHETHER EXPRESS OR IMPLIED,
STATUTORY, OR OTHERWISE, INCLUDING BUT NOT
LIMITED TO ANY WARRANTIES OF MERCHANTABILITY,
NON-INFRINGEMENT, AND FITNESS FOR PARTICULAR
PURPOSE.
Limitations of Liability
TO THE FULLEST EXTENT PROVIDED BY APPLICABLE
LAW, IN NO EVENT WILL VESYNC (US) Corporation, ITS
AFFILIATES, OR THEIR LICENSORS, SERVICE PROVIDERS,
EMPLOYEES, AGENTS, OFFICERS, OR DIRECTORS BE
LIABLE FOR:
(a) DAMAGES OF ANY KIND ARISING OUT OF OR IN
CONNECTION WITH PRODUCTS PURCHASED FROM
VESYNC (US) Corporation IN EXCESS OF THE PURCHASE
PRICE PAID BY THE PURCHASER FOR SUCH PRODUCTS,
OR
(b) INDIRECT, SPECIAL, INCIDENTAL, CONSEQUENTIAL,
OR PUNITIVE DAMAGES EVEN IF VESYNC (US)
Corporation OR ONE OF ITS SUPPLIERS HAS BEEN
ADVISED OF THE POSSIBILITY OR LIKELIHOOD OF SUCH
DAMAGES.
AND REGARDLESS OF WHETHER CAUSED BY TORT
(INCLUDING NEGLIGENCE), BREACH OF CONTRACT,
OR OTHERWISE. OUR LIABILITY SHALL UNDER NO
CIRCUMSTANCES EXCEED THE ACTUAL AMOUNT PAID
BY YOU FOR THE DEFECTIVE PRODUCT, NOR SHALL
WE UNDER ANY CIRCUMSTANCES BE LIABLE FOR ANY
CONSEQUENTIAL, INCIDENTAL, SPECIAL OR PUNITIVE
DAMAGES OR LOSSES, WHETHER DIRECT OR INDIRECT.
EXCEPT AS COVERED BY THIS LIMITED PRODUCT
WARRANTY STATEMENT, VESYNC (US) Corporation
SHALL NOT BE LIABLE FOR COSTS ASSOCIATED
WITH THE REPLACEMENT OR REPAIR OF PRODUCTS
PURCHASED FROM IT, INCLUDING, BUT NOT LIMITED TO,
LABOR, INSTALLATION, OR OTHER COSTS INCURRED BY
THE USER AND, IN PARTICULAR, ANY COSTS RELATING
TO THE REMOVAL OR REPLACEMENT OF ANY PRODUCT.
Other Rights You May Have
SOME JURISDICTIONS DO NOT ALLOW FOR: (1)
EXCLUSION OF IMPLIED WARRANTIES; (2) LIMITATION
ON THE DURATION OF IMPLIED WARRANTIES; AND/
OR (3) EXCLUSION OR LIMITATION OF INCIDENTAL OR
CONSEQUENTIAL DAMAGES; SO THE DISCLAIMERS
IN THIS POLICY MAY NOT APPLY TO YOU. IN THESE
JURISDICTIONS YOU HAVE ONLY THE IMPLIED
WARRANTIES THAT ARE EXPRESSLY REQUIRED TO BE
PROVIDED IN ACCORDANCE WITH APPLICABLE LAW.
THE LIMITATIONS OF WARRANTIES, LIABILITY, AND
REMEDIES APPLY TO THE MAXIMUM EXTENT PERMITTED
BY LAW.
ALTHOUGH THIS LIMITED WARRANTY GIVES YOU
SPECIFIC LEGAL RIGHTS, YOU MAY HAVE OTHER RIGHTS
IN YOUR JURISDICTION. THIS STATEMENT OF LIMITED
WARRANTY IS SUBJECT TO APPLICABLE LAWS THAT
APPLY TO YOU AND THE PRODUCT. PLEASE REVIEW THE
LAWS IN YOUR JURISDICTION TO UNDERSTAND YOUR
RIGHTS FULLY.
Changes to This Policy
We may change the terms and availability of this
limited warranty at our discretion, but any changes will
not be retroactive.
This warranty is made by:
Vesync (US) Corporation
1775 Flight Way, Suite 150
Tustin, CA 92782
USA
Vesync (US) Corporation
1775 Flight Way, Suite 150
Tustin, CA 92782
USA
URL: support.levoit.com
Toll-Free: 1-888-726-8520
Mon–Fri, 9:00 am–5:00 pm PST/PDT
Support Hours
*Please have your order invoice PDF or
screenshot(s) ready before contacting
Customer Support.
Attributions
The Bluetooth
®
word mark and logos are reg
istered trademarks owned by Bluetooth SIG,
Inc. and any use of such marks by VESYNC
(SINGAPORE) PTE. LTD. is under licence. Other
trademarks and trade names are those of
their respective owners.

A2_26H28_us