BPO830V1
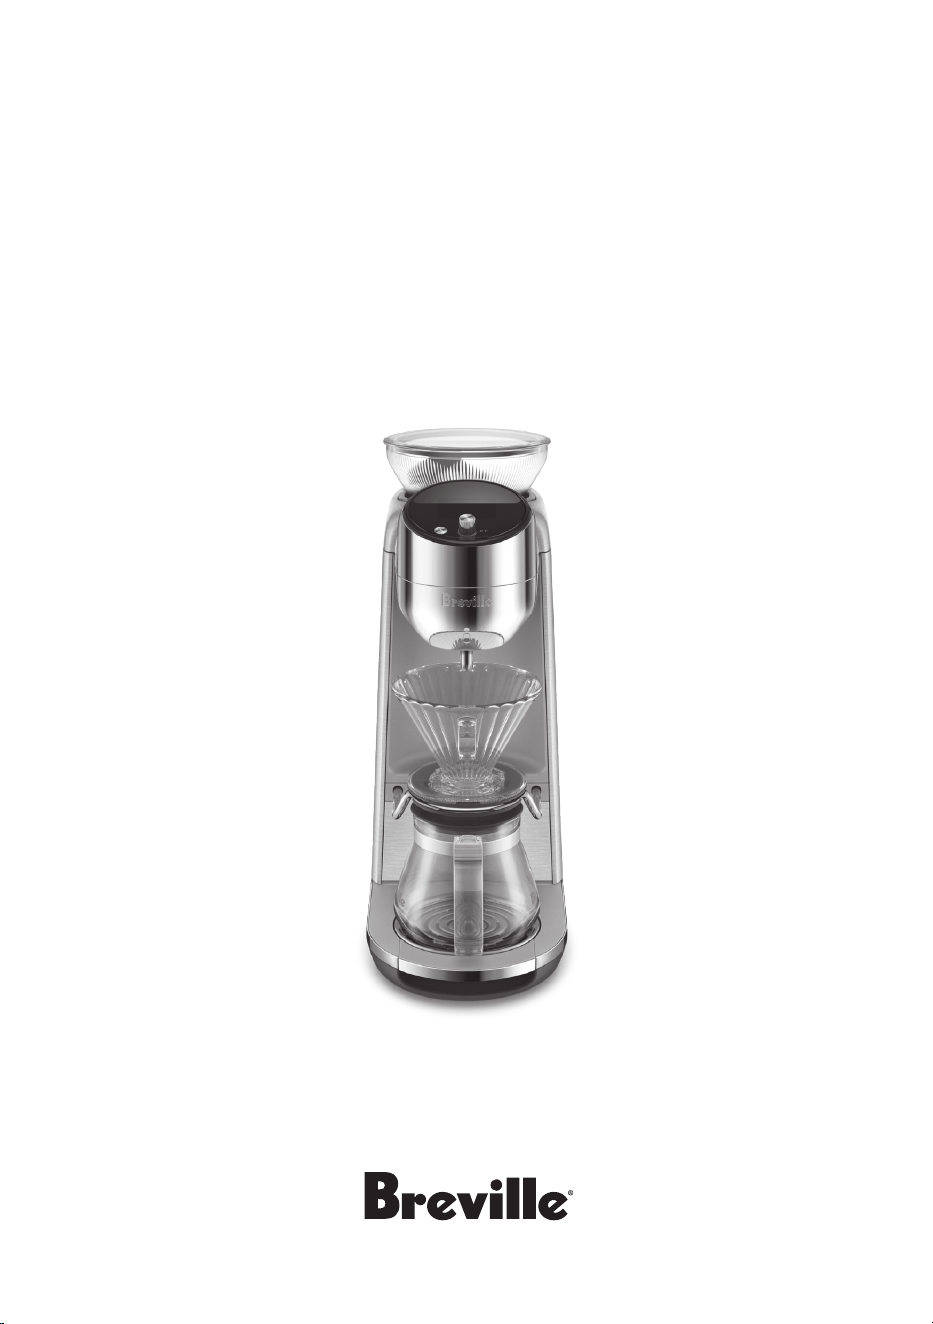
the Spiral Luxe
™
Auto Pour Over
i
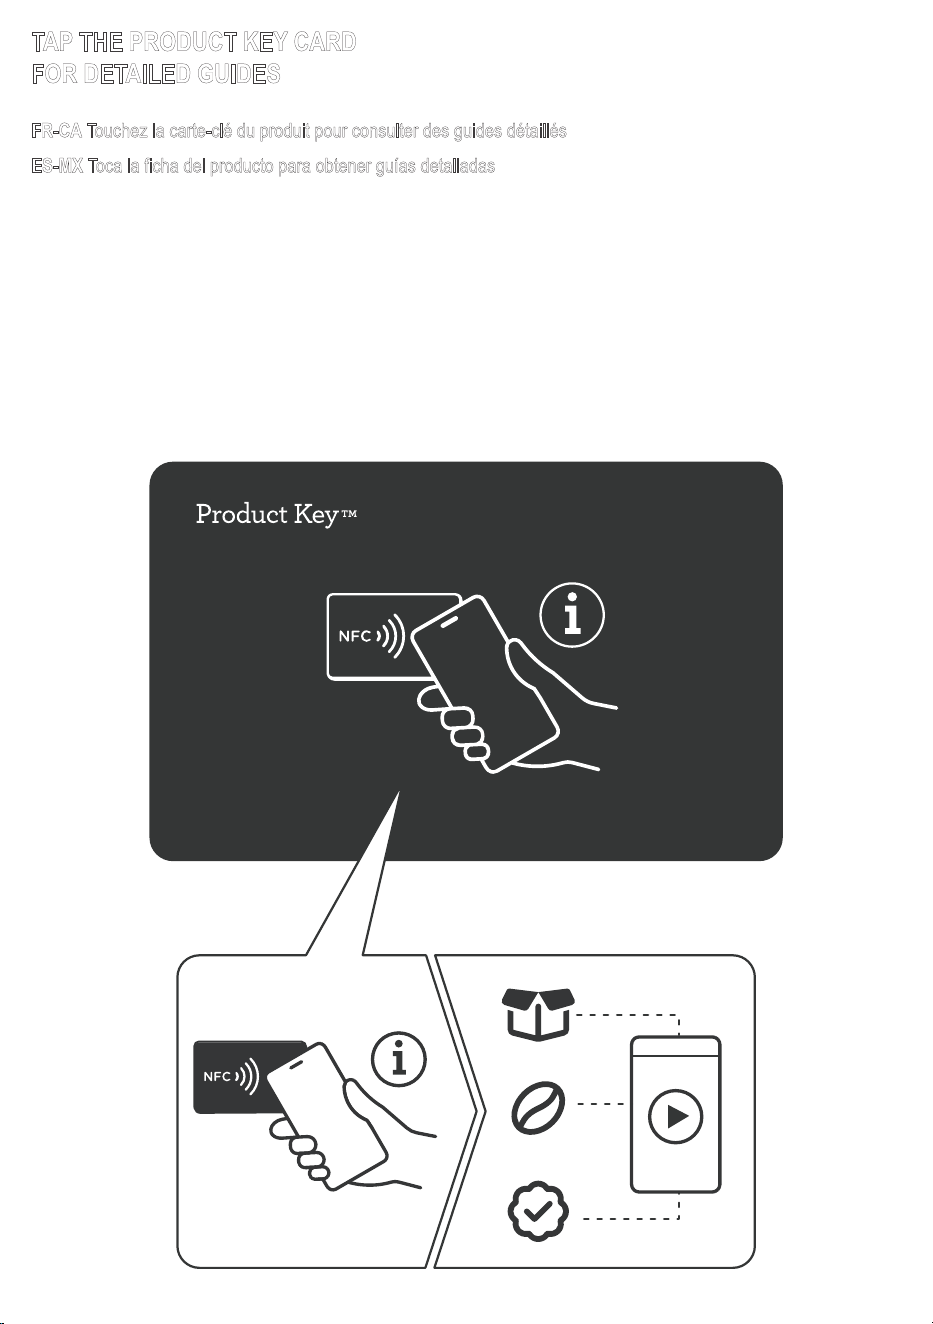
TAP THE PRODUCT KEY CARD
FOR DETAILED GUIDES
FR-CA Touchez la carte-clé du produit pour consulter des guides détaillés
ES-MX Toca la ficha del producto para obtener guías detalladas
i
TAP THE PRODUCT KEY CARD
FOR DETAILED GUIDES
FR-CA Touchez la carte-clé du produit pour consulter des guides détaillés
ES-MX Toca la ficha del producto para obtener guías detalladas
i
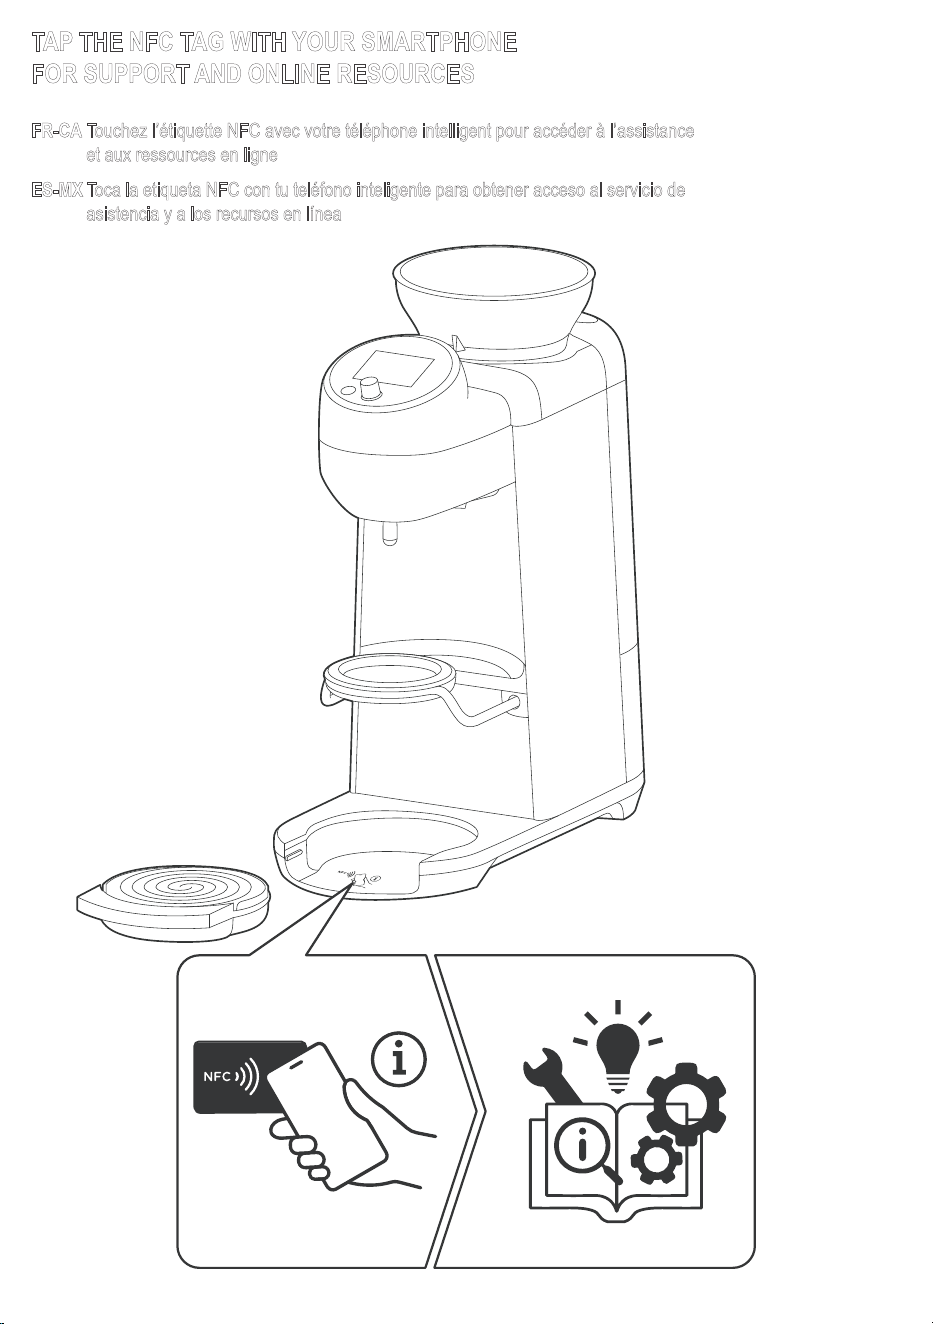
TAP THE NFC TAG WITH YOUR SMARTPHONE
FOR SUPPORT AND ONLINE RESOURCES
Touchez l’étiquette NFC avec votre téléphone intelligent pour accéder à l’assistance
et aux ressources en ligne
Toca la etiqueta NFC con tu teléfono inteligente para obtener acceso al servicio de
asistencia y a los recursos en línea
FR-CA
ES-MX
EN
BREVILLE
®
RECOMMENDS SAFETY FIRST
AT BREVILLE
®
WE ARE VERY SAFETY CONSCIOUS. WE DESIGN AND MANUFACTURE CONSUMER
PRODUCTS WITH THE SAFETY OF YOU, OUR VALUED CUSTOMER, FOREMOST IN MIND. IN ADDITION, WE
ASK THAT YOU EXERCISE A DEGREE OF CARE WHEN USING ANY ELECTRICAL APPLIANCE AND ADHERE
TO THE FOLLOWING PRECAUTIONS.
IMPORTANT SAFEGUARDS
READ ALL INSTRUCTIONS BEFORE USE AND SAVE FOR FUTURE REFERENCE.
1. Remove and safely discard any packaging material, plastic power plug cover, and any removable labels before
using appliance
2. Ensure the product is properly assembled before use and fully unwind the power cord before operating.
3. If the appliance is to be left unattended, cleaned, moved, assembled or stored, unplug the unit from the power
outlet.
4. Always operate the appliance on a stable and heat-resistant surface.
5. Do not place the appliance on or near a hot gas burner, electric element or where it could touch a heated oven.
6. Ensure the unit has at least 10 cm (4 inches) of clearance from all side panels.
7. Do not operate the appliance without water in the water tank. Use only cold, preferably filtered water. Do not fill the
appliance with any other liquids for brewing operations
8. We recommend using cold, filtered water. We do not recommend the use of de-mineralized or distilled or RO
(Reverse Osmosis) water as this may affect the taste of brewed coffee.
9. Ensure a filter paper is properly installed in the coffee machine prior to each use.
10. The container (glass carafe) is designed for use with this appliance. It must never be used on a range top.
11. Before starting a brew cycle:
• Check the drip stop moves up and down freely.
• Ensure the dripper is empty, then place it on the carriage in the BREW position.
• Insert and seat the mug or carafe under the dripper.
12. During a brew cycle:
• Do not remove the mug or carafe or remove the dripper while the unit is in brewing.
• Failure to follow the above may lead to scalding or serious injury.
13. Some surfaces may be hot, use caution when touching or lifting the unit or accessories.
14. Scalding may occur if the carafe lid or dripper is removed during the brewing cycle.
15. Do not set a hot container on a wet or cold surface.
16. Do not use a cracked container or a container having a loose or weakened handle.
17. Do not clean container with cleansers, steel wool pads, or other abrasive material.
18. Do not use harsh or abrasive materials when cleaning any part of this appliance such as steel wool or scoring pads.
19. Wait for the machine to cool completely before removing the dripper. Make sure the brewing cycle is finished, and
all liquid has fully drained.
20. Do not touch hot surfaces. Use the handle for lifting and carrying the carafe.
21. To disconnect, turn the machine to the off position, then remove plug from wall outlet.
22. Unplug the appliance from the power outlet before cleaning and storing. Allow to cool before putting on or taking off
parts.
23. Using accessories not sold or recommended by Breville may result in fire, electric shock, or injury.
24. The appliance shall not be placed in a cabinet when in use
25. Improper use of the appliance, incorrectly operated, or unprofessionally repaired will void any warranty.
26. Servicing other than cleaning should be performed by an authorised service representative or at an authorised
Breville Service Center.
CAUTION
• To prevent damage to the appliance, do not use alkaline cleaning agents. Use a soft cloth and a mild detergent.
• Risk of injury. Proper installation of the dripper is required to reduce the risk of splashing of hot water.
NOTES
• Ensure the dripper is seated on the carriage in the BREW position — the ring handle must face forward. If the
handle is turned right, it indicates the STOP (non-drip) position.
• The user may brew directly into a mug; however, ensure the mug has enough capacity for a single brew.
• This appliance has a three-wire grounded plug. To reduce the risk of electric shock, this plug will fit in a polarized
outlet only one way. If the plug does not fit properly into the outlet, contact a qualified electrician. Do not use an
adaptor or modify the plug in any way. Do not connect the appliance to an external switch or device (such as a
timer, monitor or remote circuit) that can be switched on and off.
• The appliance is not intended to be operated by means of an external timer or separate remote-control system.
IMPORTANT SAFEGUARDS FOR ALL ELECTRICAL APPLIANCES
27. Do not let the power cord hang over the edge of a counter or table. Do not let the power cord touch hot surfaces or
become knotted.
28. Do not leave the appliance unattended when in use.
29. Children should be supervised to ensure they do not play with the appliance.
30. Close supervision is necessary when the appliance is used by or near children.
31. This appliance can be used by persons with reduced physical, sensory or mental capabilities or lack of experience
and knowledge if they have been given supervision or instruction concerning use of the appliance in a safe way and
understand the hazards involved.
32. This appliance can be used by children aged from 8 years and above if they have been given supervision or
instruction concerning use of the appliance in a safe way and if they understand the hazards involved. Cleaning and
user maintenance shall not be made by children unless they are supervised. Keep the appliance and its cord out of
reach of children.
33. This appliance is recommended for household use only. Do not use this appliance for anything other than its
intended use. Do not use in moving vehicles or boats. Do not use outdoors. Misuse may cause injury.
34. Do not use the appliance if the power supply cord, power plug, or appliance becomes damaged in anyway.
Immediately stop using the unit and return the entire appliance to the nearest authorized Breville Service Center for
examination, replacement, or repair.
To protect against, fire, electric shock; do not immerse the power cord, power plug or appliance in water or any
other liquid.
SHORT CORD INSTRUCTIONS
Your Breville appliance is fitted with a short power cord to reduce the risk of personal injury or property damage
resulting from pulling, tripping or becoming entangled with a longer cord. Longer detachable power cords or extension
cords are available and may be used if care is exercised. If an extension cord is used, (1) the marked electrical rating of
the cord set or extension cord should be at least as great as the electrical rating of the appliance, (2) the cord should be
arranged so that it will not drape over the countertop or table where it can be pulled on by children or tripped over
unintentionally and (3) the extension cord must include a 3-prong grounding plug. It is recommended to regularly
inspect the appliance.
2-YEAR LIMITED WARRANTY
Breville’s warranty for this product covers the repair or replacement if it’s found to be defective due
to faulty materials, workmanship, or function within the warranty period. All legal warranty rights under applicable
national legislation will be respected and will not be impaired by our warranty. For details on length of warranty, to
obtain a printed copy or to read full terms and conditions please visit www.breville.com. Alternatively, call the Breville
Service Center (see back cover for contact details).
SAVE THESE INSTRUCTIONS
FOR HOUSEHOLD USE ONLY

FR-CA
BREVILLE
®
RECOMMANDE LA SÉCURITÉ AVANT
TOUT
CHEZ BREVILLE
®
, LA SÉCURITÉ EST NOTRE PRIORITÉ. NOUS CONCEVONS ET FABRIQUONS DES
PRODUITS DE CONSOMMATION EN PLAÇANT VOTRE SÉCURITÉ, EN TANT QUE CLIENT ESTIMÉ, AU CŒUR
DE NOS PRIORITÉS. DE PLUS, NOUS VOUS INVITONS À FAIRE PREUVE DE PRUDENCE LORS DE
L’UTILISATION DE TOUT APPAREIL ÉLECTRIQUE ET À RESPECTER LES PRÉCAUTIONS SUIVANTES.
MESURES DE SÉCURITÉ IMPORTANTES
LISEZ TOUTES LES INSTRUCTIONS AVANT UTILISATION ET CONSERVEZ-LES POUR CONSULTATION
ULTÉRIEURE.
1. Retirez et jetez en toute sécurité tout matériau d’emballage, le capuchon de la fiche d’alimentation en plastique
ainsi que toute étiquette amovible avant d’utiliser l’appareil.
2. Assurez-vous que le produit est correctement assemblé avant utilisation et déroulez complètement le cordon
d’alimentation avant de l’utiliser
3. Si l’appareil doit être laissé sans surveillance, nettoyé, déplacé, assemblé ou rangé, débranchez-le de la prise de
courant.
4. Faites toujours fonctionner l’appareil sur une surface stable et résistante à la chaleur.
5. Ne placez pas l’appareil sur ou à proximité d’un brûleur à gaz chaud, d’un élément électrique ou à un endroit où il
pourrait entrer en contact avec un four chaud.
6. Assurez-vous que l’appareil dispose d’un dégagement d’au moins 10 cm (4 po) sur tous les côtés.
7. Ne faites pas fonctionner l’appareil sans eau dans le réservoir. Utilisez uniquement de l’eau froide, de préférence
filtrée. Ne remplissez pas l’appareil avec d’autres liquides pour les préparations d’infusion.
8. Nous vous recommandons d’utiliser de l’eau froide et filtrée. Nous ne recommandons pas l’utilisation d’eau
déminéralisée, distillée ou d’osmose inverse (OI), car cela peut affecter le goût du café pré-paré.
9. Assurez-vous qu’un filtre en papier est correctement installé dans la machine à café avant chaque utilisation.
10. Le contenant (verseuse en verre) est conçu pour être utilisé avec cet appareil. Il ne doit jamais être utilisé sur une
cuisinière.
11. Avant de démarrer un cycle d’infusion :
• Vérifiez que le dispositif anti-goutte se déplace librement vers le haut et vers le bas.
• Assurez-vous que le support de filtre est vide et correctement installé.
• Placez correctement la tasse ou la carafe sous le support de filtre
12. Pendant un cycle d’infusion :
• Ne retirez pas la tasse, la carafe ou le support de filtre pendant que l’appareil est en cours d’infusion.
• Le non-respect des consignes ci-dessus peut entraîner des brûlures ou des blessures graves.
13. Certaines surfaces peuvent être chaudes; faites preuve de prudence lorsque vous touchez ou soulevez l’appareil
ou ses accessoires.
14. Des brûlures peuvent survenir si le couvercle de la carafe ou le support de filtre est retiré pendant le cycle
d’infusion.
15. Ne pas déposer un contenant chaud sur une surface mouillée ou froide.
16. Ne pas utiliser un contenant fissuré ou dont la poignée est desserrée ou affaiblie.
17. Ne pas nettoyer le contenant avec des produits nettoyants, des tampons en laine d'acier ou tout autre matériau
abrasif.
18. N’utilisez pas de matériaux agressifs ou abrasifs pour nettoyer toute partie de cet appareil, comme de la laine
d’acier ou des tampons à récurer.
19. Attendez que la machine refroidisse complètement avant de retirer le support de filtre. Assurez-vous que le cycle
d’infusion est terminé et que tout le liquide s’est complètement écoulé.
20. Ne touchez pas les surfaces chaudes. Utilisez la poignée pour soulever et transporter la carafe.
21. Pour débrancher l'appareil, tourner toute commande à la position d'arrêt (off), puis retirer la fiche de la prise murale.
22. Débranchez l’appareil de la prise de courant avant de le nettoyer et de le ranger. Laissez refroidir avant de mettre
ou de retirer des pièces.
23. L’utilisation d’accessoires qui ne sont pas vendus ou recommandés par Breville peut entraîner un incendie, une
décharge électrique ou des blessures.
24. L’appareil ne doit pas être placé dans une armoire lorsqu’il est en cours d’utilisation.
25. Une utilisation inappropriée de l’appareil, une utilisation incorrecte ou une réparation non professionnelle annulera
toute garantie.
26. Toute intervention autre que le nettoyage doit être effectuée par un représentant de service autorisé ou dans un
centre de service Breville autorisé.
ATTENTION
• Risque de blessure. Une installation correcte du support de filtre est nécessaire pour réduire le risque
d’éclaboussures d’eau chaude.
• Pour éviter d’endommager l’appareil, n’utilisez pas de produits de nettoyage alcalins. Utilisez un chiffon doux et
un détergent doux.
REMARQUES
• Assurez-vous que le support de filtre est installé sur le support en position ouverte — la poignée circulaire doit
être orientée vers l’avant. Si la poignée est tournée vers la droite, cela indique la position fermée (anti-goutte).
• L’utilisateur peut préparer le café directement dans une tasse; toutefois, assurez-vous que la tasse a une capacité
suffisante pour une préparation simple.
• Avant l’infusion, assurez-vous que le support de filtre est complètement en place et correctement positionné pour
activer l’arrêt anti-goutte
• Cet appareil est équipé d’une fiche à trois fils avec mise à la terre. Pour réduire le risque de choc électrique cette
fiche ne peut être insérée dans une prise polarisée que d’une seule façon. Si la fiche ne s’insère pas
correctement dans la prise, communiquez avec un électricien qualifié. N’utilisez pas d’adaptateur et ne modifiez
pas la fiche de quelque façon que ce soit. Ne branchez pas l’appareil à un interrupteur ou dispositif externe
(comme une minuterie, un moniteur ou un circuit à commande à distance) pouvant être activé ou désactivé.
• Cet appareil n’est pas conçu pour être utilisé au moyen d’une minuterie externe ou d’un système de commande à
distance séparé.
PRÉCAUTIONS IMPORTANTES POUR TOUS LES APPAREILS ÉLECTRIQUES
27. Ne laissez pas le cordon d’alimentation pendre du bord d’un comptoir ou d’une table. Ne laissez pas le cordon
d’alimentation toucher des surfaces chaudes ni s’emmêler.
28. Ne laissez pas l’appareil sans surveillance lorsqu’il est en cours d’utilisation.
29. Les enfants doivent être surveillés afin de s’assurer qu’ils ne jouent pas avec l’appareil.
30. Une surveillance étroite est nécessaire lorsque l’appareil est utilisé par des enfants ou à proximité d’enfants.
31. Cet appareil peut être utilisé par des personnes ayant des capacités physiques, sensorielles ou mentales réduites,
ou un manque d’expérience et de connaissances, à condition qu’elles soient supervisées ou qu’elles aient reçu des
instructions concernant une utilisation sécuritaire de l’appareil et qu’elles comprennent les risques associés.
32. Cet appareil peut être utilisé par des enfants âgés de 8 ans et plus s’ils sont supervisés ou s’ils ont reçu des
instructions concernant une utilisation sécuritaire de l’appareil et s’ils comprennent les risques associés. Le
nettoyage et l’entretien par l’utilisateur ne doivent pas être effectués par des enfants, sauf s’ils sont âgés de plus de
huit ans et supervisés. Gardez l’appareil et son cordon hors de portée des enfants de moins de huit ans.
33. Cet appareil est recommandé pour un usage domestique uniquement. N’utilisez pas cet appareil à des fins autres
que celles prévues. N’utilisez pas cet appareil dans des véhicules en mouvement ou sur des bateaux. N’utilisez pas
cet appareil à l’extérieur. Une mauvaise utilisation peut entraîner des blessures.
34. N’utilisez pas l’appareil si le cordon d’alimentation, la fiche ou l’appareil est endommagé de quelque manière que ce
soit. Cessez immédiatement d’utiliser l’appareil et retournez-le au centre de service Breville autorisé le plus proche
pour inspection, remplacement ou réparation.
Pour éviter tout risque d’incendie ou de choc électrique, n’immergez pas le cordon d’alimentation, la fiche ou
l’appareil dans l’eau ou tout autre liquide.
INSTRUCTIONS RELATIVES AU CORDON COURT

Votre appareil Breville est muni d’un cordon d’alimentation court afin de réduire les risques de blessures ou de
dommages matériels résultant d’un tirage, d’un trébuchement ou d’un enchevêtrement avec un cordon plus long. Des
cordons d’alimentation plus longs et amovibles ou des rallonges sont disponibles et peuvent être utilisés avec
précaution. Si une rallonge est utilisée, (1) la puissance électrique indiquée du cordon ou de la rallonge doit être au
moins égale à celle de l’appareil, (2) le cordon doit être disposé de manière à ne pas pendre du comptoir ou de la table
où il pourrait être tiré par des enfants ou provoquer un trébuchement involontaire, et (3) la rallonge doit être munie
d’une fiche de mise à la terre à trois broches. Il est recommandé d’inspecter régulièrement l’appareil.
GARANTIE LIMITÉE DE 2 ANS
La garantie de Breville pour ce produit couvre la réparation ou le remplacement s’il s’avère défectueux en raison de
matériaux défectueux, de fabrication ou de fonctionnement défectueux pendant la période de garantie. Tous les droits
de garantie légaux en vertu de la législation nationale applicable seront respectés et ne seront pas compromis par notre
garantie. Pour plus de détails sur la durée de la garantie, pour obtenir une copie imprimée ou pour lire les conditions
générales complètes, visiter www.brev
ille.com. Vous pouvez également appeler le centre de service Breville (voir la
quatrième de couverture pour les coordonnées).
CONSERVER CES INSTRUCTIONS
POUR USAGE DOMESTIQUE EXCLUSIVEMENT
ES-MX
BREVILLE
®
RECOMIENDA PRIORIZAR LA
SEGURIDAD
EN BREVILLE
®
SOMOS MUY CONSCIENTES DE LA SEGURIDAD. DISEÑAMOS Y FABRICAMOS PRODUCTOS
DE CONSUMO CON TU SEGURIDAD, NUESTRO VALIOSO CLIENTE, COMO PRIORIDAD. ADEMÁS, TE
PEDIMOS QUE EJERZAS UN GRADO DE CUIDADO AL USAR CUALQUIER APARATO ELÉCTRICO Y QUE
ADOPTES LAS SIGUIENTES PRECAUCIONES.
CONSIDERACIONES DE SEGURIDAD
IMPORTANTES
LEE TODAS LAS INSTRUCCIONES ANTES DEL USO Y GUÁRDALAS PARA CONSULTAR EN EL FUTURO.
1. Retira y desecha de manera segura cualquier material de embalaje, cubierta de enchufe de plástico y cualquier
etiqueta removible antes de usar el aparato.
2. Antes del uso, desenrolla el cable de alimentación por completo y asegúrate de que el producto esté correctamente
ensamblado.
3. Si el aparato va a quedar sin vigilancia, se va a limpiar, mover, ensamblar o almacenar, desenchufa la unidad de la
toma de corriente.
4. Siempre opera el aparato sobre una superficie estable y resistente al calor.
5. No deje el equipo cerca o encima de un quemador de gas caliente, una placa eléctrica ni donde pueda tocar un
horno caliente.
6. Asegúrate de que la unidad tenga al menos 10 cm (4 pulgadas) de espacio libre de todos los paneles laterales.
7. No operes el equipo si el depósito de agua está vacío. Usa solo agua fría, preferiblemente filtrada. No llenes el
aparato con otros líquidos en operaciones de preparación.
8. Recomendamos utilizar agua fría y filtrada. No recomendamos el uso de agua desmineralizada o destilada o de OI
(ósmosis inversa), ya que esto podría afectar el sabor del café preparado.
9. Asegúrate de que esté correctamente instalado un filtro de papel en la cafetera antes de cada uso.
10. El recipiente (jarra de vidrio) está diseñado para usarse con este aparato. Nunca debe utilizarse sobre una estufa o
parrilla.
11. Antes de comenzar un ciclo de preparación:
• Verifica que el sistema antigoteo se mueva arriba y abajo libremente.
• Asegúrate de que el portafiltro esté vacío y correctamente colocado en su lugar.
• Inserta y coloca la taza o la jarra debajo del portafiltro.
12. Durante un ciclo de preparación:
• No retires la taza o la jarra ni el portafiltro cuando la unidad esté en preparación.
• No seguir lo anterior podría provocar quemaduras o lesiones graves.
13. Algunas superficies podrían estar calientes, ten precaución al tocar o levantar la unidad o los accesorios.
14. Podrían ocurrir quemaduras si se retira la tapa de la jarra o el portafiltro durante el ciclo de preparación.
15. No coloque un recipiente caliente sobre una superficie húmeda o fría.
16. No utilice un recipiente agrietado o con el asa floja o debilitada.
17. No limpie el recipiente con limpiadores, fibras de acero (esponjas de lana de acero) u otros materiales abrasivos.
18. No uses materiales duros o abrasivos al limpiar cualquier parte de este aparato, como esponjas abrasivas o de
acero.
19. Espera a que la máquina se enfríe completamente antes de retirar el portafiltro. Asegúrate de que el ciclo de
preparación haya terminado y de que todo el líquido se haya drenado completamente.
20. No toque las superficies calientes. Usa el asa para levantar y transportar la jarra.
21. Para desconectar el aparato, coloque todos los controles en la posición de apagado (off) y luego retire la clavija del
contacto de pared.
22. Siempre desconecta el equipo de la toma de corriente antes de limpiarlo o guardarlo. Deja que se enfríe antes de
poner o quitar partes.
23. El uso de accesorios no comercializados o recomendados por Breville podría provocar incendios, descargas
eléctricas o lesiones.
24. El aparato no debe colocarse en un gabinete cuando esté en uso.
25. El uso incorrecto del equipo o las reparaciones no profesionales anularán cualquier reclamación de garantía.
26. Cualquier mantenimiento que no sea la limpieza debe llevarse a cabo por un representante autorizado en un
Centro de servicios de Breville autorizado.
PRECAUCIÓN
• Riesgo de lesión. Se requiere la instalación adecuada del portafiltro para reducir el riesgo de salpicadura de agua
caliente.
• Para evitar daños al equipo, no uses productos de limpieza alcalinos. Usa un paño y un detergente suaves.
NOTAS
• Asegúrate de que el portafiltro esté colocado en el soporte en la posición abierta; el asa del anillo debe estar
orientado hacia adelante. Si la manija se gira a la derecha, indica la posición cerrada (sin goteo).
• El usuario puede preparar directamente en una taza; sin embargo, asegúrate de que la taza tenga suficiente
capacidad para una sola preparación.
• Antes de preparar, asegúrate de que el portafiltro esté completamente asentado y en la posición correcta para
activar el sistema antigoteo.
• Este aparato tiene clavija de tres polos con conexión a tierra. Para reducir el riesgo de descarga eléctrica, esta
clavija embona en una toma polarizada de una sola manera. Si la clavija no embona correctamente en la toma,
comunícate con un electricista calificado. No uses un adaptador ni modifiques la clavija de ninguna manera. No
conectes el aparato a un interruptor o dispositivo externo (como un temporizador, monitor o circuito remoto) que
pueda encenderse y apagarse.
• El aparato no está diseñado para funcionar mediante un temporizador externo o un sistema de control remoto
independiente.
CONSIDERACIONES IMPORTANTES PARA TODOS LOS APARATOS ELÉCTRICOS
27. No permitas que el cable de alimentación cuelgue del borde de una mesa o mostrador. No permitas que el cable de
alimentación toque superficies calientes o se enrede.
28. No deje el aparato sin supervisión mientras esté en uso.
29. Se debe supervisar a los niños para asegurarse de que no jueguen con el equipo.
30. Supervisa atentamente el uso del aparato por niños o en su presencia.

31. Este aparato lo pueden utilizar personas con capacidades físicas, sensoriales o mentales reducidas, o personas
con falta de experiencia y conocimiento, si se les supervisa o se les proporcionan instrucciones sobre cómo usar el
equipo de manera segura, y si comprenden los riesgos involucrados.
32. Este aparato lo pueden utilizar niños de ocho años en adelante bajo supervisión o si se les ha dado instrucciones
sobre el uso seguro del aparato y comprenden los riesgos involucrados. Los niños no deben realizar la limpieza y
mantenimiento del equipo a menos que sean mayores de ocho años y cuenten con supervisión. Mantén el aparato
y su cable fuera del alcance de niños menores de ocho años.
33. Se recomienda que el equipo se utilice solamente en el hogar. No use este equipo para otro fin distinto al previsto.
No use el equipo en vehículos o embarcaciones en movimiento. No use el equipo al aire libre. El uso incorrecto
puede causar lesiones.
34. No uses el aparato si el cable de alimentación, el enchufe o el aparato se dañaron de alguna manera. Deja de usar
la unidad de inmediato y devuelve el aparato completo al Centro de Servicios Breville
®
autorizado más cercano
para examinarlo, reemplazarlo, o repararlo.
Como protección contra incendios y descargas eléctricas, no sumerjas el cable de alimentación, la clavija o el
aparato en agua u otros líqui-dos.
INSTRUCCIONES DEL CABLE DE ALIMENTACIÓN CORTO
Tu aparato Breville está equipado con un cable de alimentación corto para disminuir el riesgo de lesiones personales o
daños a la propiedad que pudieran suceder si alguien lo jala o se tropieza con él o si se enreda con otro cable más
largo. Hay cables de alimentación y de extensión desmontables más largos disponibles que se pueden usar con la
debida precaución. Si se usa un cable de extensión, 1) la clasificación eléctrica del cable de alimentación o de la
extensión debe al menos igualar la clasificación eléctrica del equipo. 2) El cable debe disponerse de tal forma que no
cuelgue sobre una barra o mesa donde un niño pueda jalarlo o alguien pueda tropezar accidentalmente con él. 3) El
cable de extensión debe incluir una clavija de tres polos con conexión a tierra. Se recomienda inspeccionar el equipo
regularmente.
DATOS TÉCNICOS
120 V ~ 60 HZ 1 600 W
GARANTÍA LIMITADA DE 2 AÑOS
La garantía de Breville para este producto cubre la reparación o el reemplazo si se encuentra defectuoso debido a
materiales, mano de obra o función defectuosos dentro del período de garantía.Todos los derechos de garantía legal
en virtud de la legislación
nacional aplicable serán respetados y no se verán perjudicados por nuestra garantía. Para
obtener más información sobre la duración de la garantía, para obtener una copia impresa o para leer los términos y
condiciones completos, visite www.breville.com. A
lternativamente, llame al Centro de Servicio de Breville (consulte
la contraportada para obtener los detalles de contacto).
GUARDE ESTAS INSTRUCCIONES
PARA USO EXCLUSIVO EN EL HOGAR

COMPONENTS
See Fig. A
A. Hopper Lid
B. 7 oz (200 g) bean hopper
C. 40 mm flat burr grinder
D. Display screen
E. Back button
F. Play / pause / off button dial
G. Waterspout
H. Auto carriage
I. Drip tray grill
J. Drip tray
K. Water tank lid
L. 40 oz (1.2 L) water tank
M. Grinder chute flap
COMPOSANTS
Voir la fig. A
A. Couvercle de la tremie
B. Trémie à grains de 200 g (7 oz)
C. Moulin à meules plates de 40 mm
D. Écran d'affichage
E. Bouton de retour
F. Molette lecture / pause / arrêt
G. Bec verseur
H. Chariot automatique
I. Grille du plateau d'égouttement
J. Plateau d'égouttement
K. Couvercle du réservoir d'eau
L. Réservoir d'eau de 1,2 L (40 oz)
M. Volet de la goulotte du moulin
COMPONENTES
Consulte la fig. A
A. Tapa de la tolva
B. Depósito de café de 200 g (7 oz)
C. Molino de muelas planas de 40 mm
D. Pantalla de visualización
E. Botón de retroceso
F. Perilla de reproducir / pausar /
apagar
G. Vertedor de agua
H. Carro automático
I. Rejilla para la bandeja de goteo
J. Bandeja de goteo
K. Tapa del depósito de agua
L. Tanque de agua de 1.2 L (40 oz)
M. Compuerta del conducto del molino
ACCESSORIES
See Fig. B
1. Filter papers
2. Dripper
3. Carafe lid
4. Glass carafe
5. Water filter
6. Water filter holder
7. Water hardness strip
8. Descale powder
ACCESSOIRES
Voir la fig. B
1. Filtres en papier
2. Porte-filtre (dripper)
3. Couvercle de la carafe
4. Carafe en verre
5. Filtre à eau
6. Support du filtre à eau
7. Bandelette d'analyse de la dureté
de l'eau
8. Poudre de détartrage
ACCESORIOS
Consulte la fig. B
1. Filtros de papel
2. Gotero (dripper)
3. Tapa de la jarra
4. Jarra de vidrio
5. Filtro de agua
6. Soporte del filtro de agua
7. Tira reactiva de dureza del agua
8. Polvo desincrustante
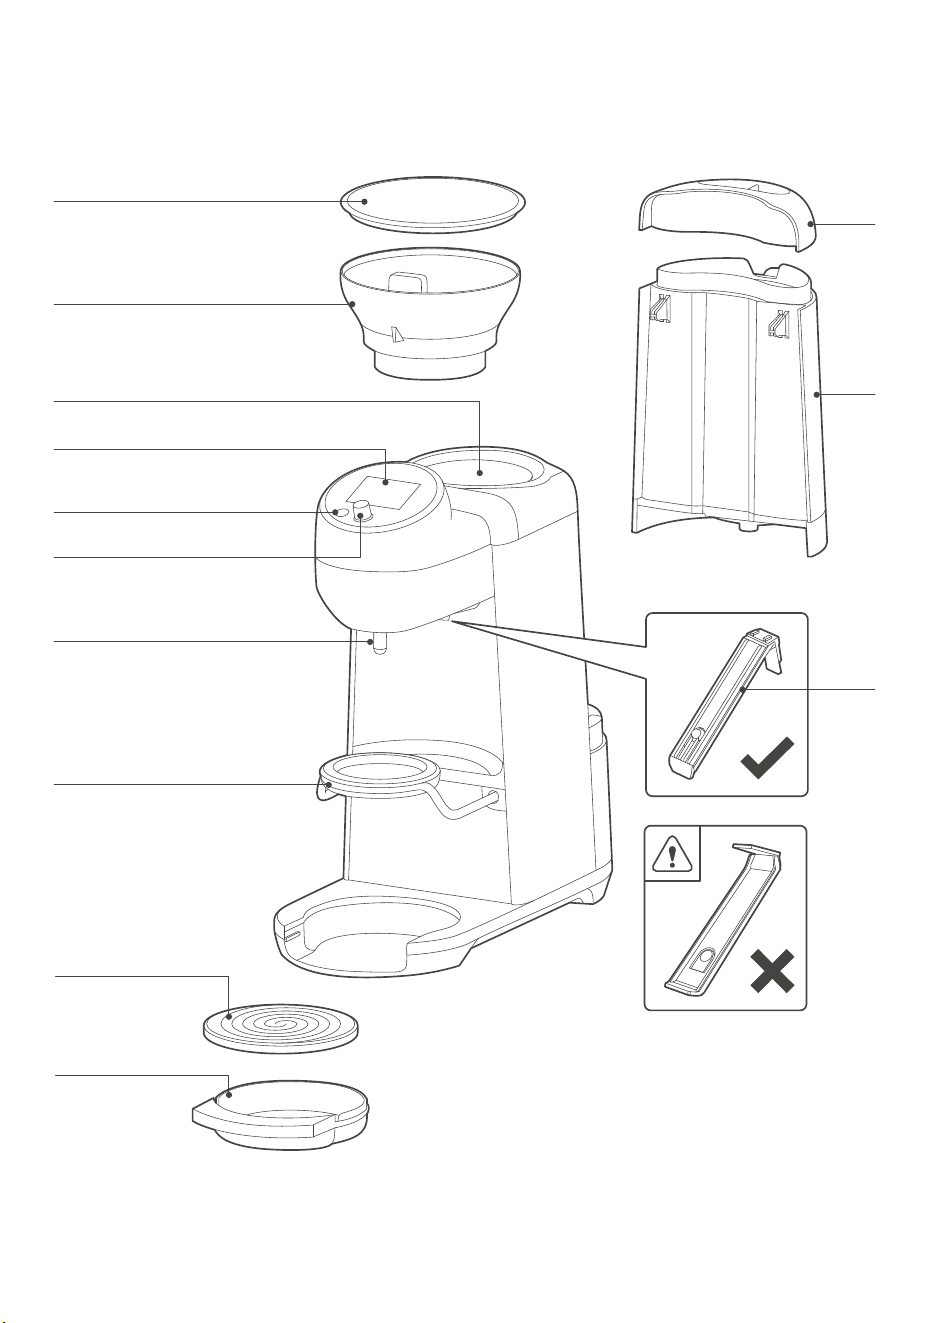
A
B
C
D
E
F
G
H
I
J
L
M
K
Fig. A
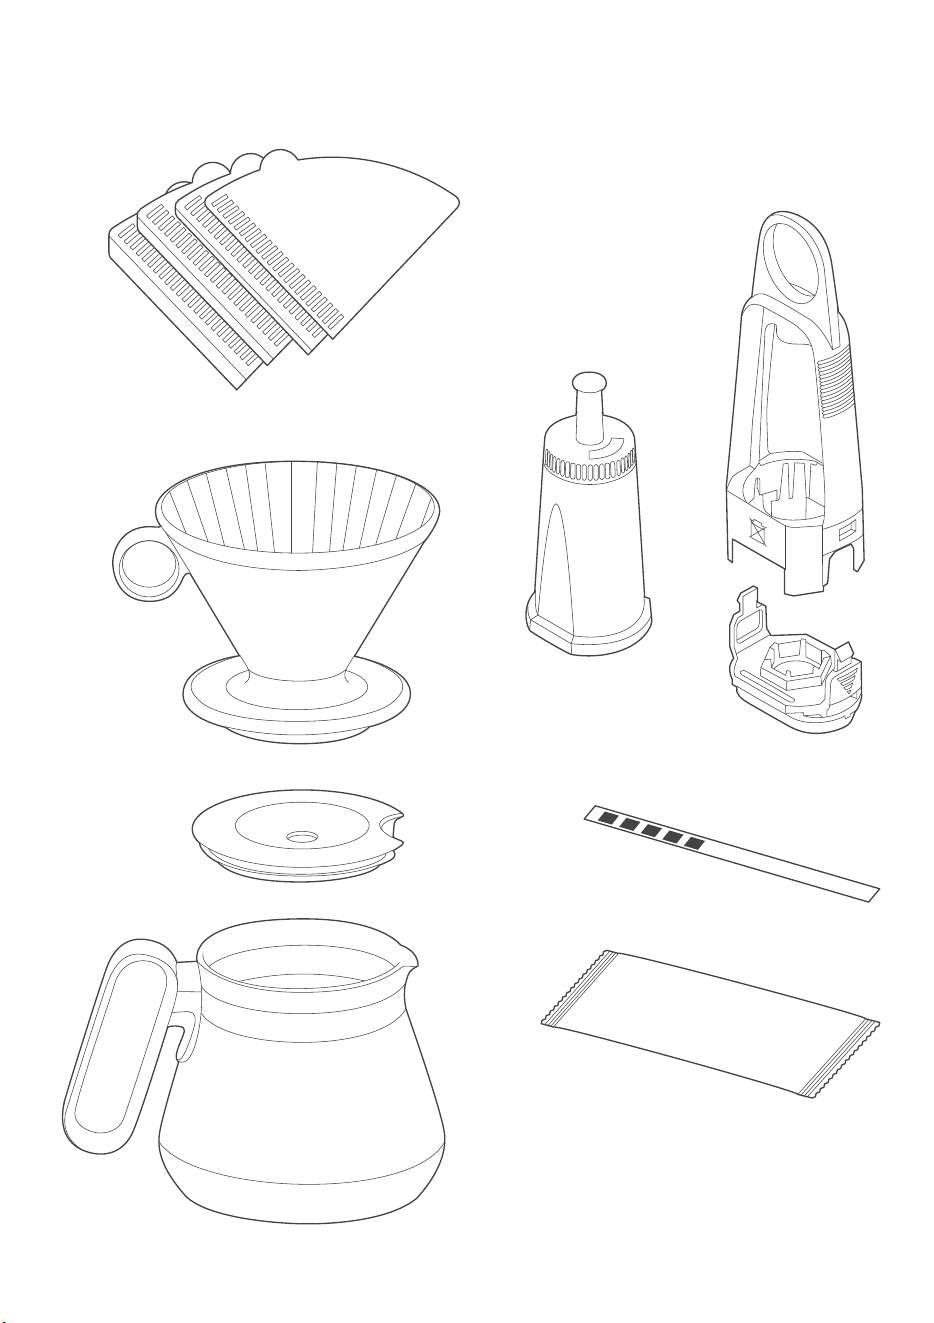
5
6
7
8
3
4
1
2
Fig. B

FEATURES
The Spiral Luxe™ Auto Pour Over delivers a premium, automated pour-over experience designed to enjoy the ritual and
flavor of authentic pour over coffee without the guesswork and with minimal user effort.
SIMPLE ONE TOUCH BREWING
Simply choose your strength and size. The Brew System dials in everything else, ensuring each cup reaches café-quality,
the way you like it. And all it takes is one touch.
FULLY AUTOMATED GRIND TO BREW
To begin, the pour over dripper automatically retracts to be positioned beneath the built-in coffee grinder. Whole beans
are ground fresh and dosed precisely for a consistent cup, before the dripper glides to the spout, ready to brew.
AUTHENTIC BARISTA SPIRAL POUR
The articulating spout replicates a barista’s pouring technique with a gooseneck kettle. It delivers smooth, controlled
laminar water flow that evenly saturates the grounds, drawing out the coffee’s flavor notes for a clean, balanced cup.
BREW BRIGHTER FLAVORS. STRONG, MEDIUM OR MILD
Pour over is known for producing a cleaner, brighter, more balanced cup than other methods. Choose Strong, Medium,
or Mild to match your preferred intensity, all with the clean, filtered character that pour over is known for.
CUSTOMIZE LIKE A PRO
For those who want more control, Advanced Mode lets you fine tune brew ratio, temperature, pours, and pauses. Grinder
options allow for Auto, Single Dose, or bypass for pre-ground coffee.
THERMOJET
®
HEATING SYSTEM
Ready to brew in seconds with ThermoJet
®
heating system. Fast heat-up and precise PID temperature control quickly
reaches and maintains the optimum brewing temperature for delightfully consistent results, cup after cup.
CONICAL SHAPE. AUTHENTIC SHAPE
The BPA-free* Tritan Dripper helps maintain a consistent brewing temperature while vertical ridges support consistent
water flow for balanced extraction. An integrated drip stop keeps surfaces clean between brews. Includes Breville filter
papers, with replacement papers available separately. Also compatible with standard conical filter papers.
SINGLE SERVE OR BREW FOR MORE
Enjoy the flexibility to brew directly into taller mugs by removing the drip tray or brew for more with the included 20oz
glass carafe.
DELAYED AUTO START
Set the machine to automatically start brewing at a preset time.
ASSEMBLY
BEFORE FIRST USE
Remove and discard all labels and packaging materials attached to the machine. Make sure to remove all parts and
accessories from the box before discarding the packaging. Take a soft cloth and firmly wipe the exterior stainless-steel
housing. Wash the dripper, carafe lid and glass carafe in warm, soapy water. Avoid using abrasive cleansers, pads, or
cloths that can scratch the surface. Rinse and dry everything thoroughly.
Follow the on-screen setup instructions to prepare the machine for first use.
The guided processes include:
→ Setting up the machine
→ Cleaning the machine and accessories
→ Installing the drip tray
→ Installing and locking the bean hopper
→ Setting the water hardness
→ Installing the water filter
→ First Rinse Cycle
→ Filling the bean hopper
→ Placing filter paper in the dripper
IMPORTANT NOTE ON WATER HARDNESS
Water quality varies in each household. It is important to check the water hardness level in your home before using your
machine for the first time. If the water that you use for brewing coffee is hard, the machine requires descaling on a more
regular basis. You can test the water hardness using the test strip provided (included in the package) and select the right
hardness level of water as shown in your water test strip result. Setting the water hardness level in your machine can
prevent scale build-up. Scale build-up can affect the brewing flow of the machine, the brewing temperature and the taste
of the coffee. Again, to ensure good coffee results, it is important to select the right water hardness level before brewing
coffee for the first time.
Follow the steps on screen.
INSTALLING THE WATER FILTER
This product is designed to be used with a water filter installed in the water tank. Not doing so will affect the internal
components and performance of the appliance. The filter cartridges should be replaced regularly.
NOTE
All water tank levels will be incorrect if the machine is used without the water filter being properly installed.
→ Remove the water filter and water filter adapter from the packaging.
→ Soak the filter in cold water for 5 minutes.
→ Attach water filter to adapter.
→ Insert the assembled water filter and adapter into the water tank.
IMPORTANT NOTE ON COFFEE BEANS
This machine is designed for grinding whole roasted coffee beans. Avoid grinding unroasted (green) beans or very hard,
dense roasted beans (for example, cinnamon roast and some other very light roasts). These beans may not grind correctly
in a burr grinder and can cause damage to the grinding mechanism. Damage caused by grinding unsuitable beans is
considered misuse and is not covered by the product warranty.

OPERATION
SETTING UP THE MACHINE
Initial Machine Setup
Complete the following steps when powering on the machine for the first time. Turn the dial to navigate each menu; press
the dial to confirm a selection.
1. Language — Turn the dial to highlight the desired language, then press the dial to select.
2. Region — Turn the dial to highlight your region (e.g. Americas), then press the dial to select.
3. Units — Turn the dial to highlight the desired unit system (Imperial or Metric), then press the dial to select.
4. Clock format — Turn the dial to highlight the desired clock format (12-hour or 24-hour), then press the dial to
select.
5. Time — Turn the dial to adjust the hour, then press the dial to confirm. Repeat to set the minutes.
About the Machine
The machine displays an overview of its parts and accessories on first use. Turn the dial to navigate through each screen;
press the dial to advance to the next screen. Review each of the following parts and confirm they are included with your
machine:
1. Dripper
2. Filter paper
3. Hopper
4. Grind adjustment
5. Water filter
6. Water filter holder
7. Water tank
First Use Rinse Cycle
Complete the following steps before brewing for the first time. Turn the dial to navigate; press the dial to confirm a
selection.
1. Soak the water filter in water for 5 minutes.
2. Wash and dry all removable accessories: filter holder, drip tray, drip tray grill, glass carafe, carafe lid, and dripper.
3. Install the drip tray and drip tray grill on the machine.
4. Install the bean hopper on the machine and lock it in place.
5. Test the water hardness: dip the test strip in your brewing water for 1 second, then set it aside.
6. Assemble the water filter and water filter holder as shown on the screen.
7. Install the assembled water filter in the water tank. Ensure it locks securely in place.
8. Fill the water tank to the MAX line.
9. Install the water tank on the machine. Ensure it sits flat and fully seated.
10. Read the test strip result. Turn the dial to highlight the corresponding water hardness level, then press the dial to
confirm.
11. Position the dripper on the machine as shown on the screen.
12. Position the carafe beneath the dripper as shown on the screen.
13. Press dial to start rinse cycle. The cycle runs for approximately 1 minute.
14. When finished, the screen displays Rinse Cycle Complete.
Guided Brew
This section provides step-by-step instructions for completing your first pour over brew. Press the dial to start and follow
the on-screen instructions. To skip, turn the dial to highlight Skip, then press the dial to confirm. Press the back arrow
button at any time to return to the previous step or cancel.
1. Set the grind level to 4. If not already at the default, rotate the hopper until the level is reached, then press the
dial to confirm.
2. Remove the hopper lid and fill the hopper with coffee beans. Replace the lid, then press the dial to confirm.
3. Fold one filter paper as shown on the screen, then press the dial to confirm.
4. Place the folded filter paper in the dripper, then press the dial to confirm.
5. Position the dripper on the machine carriage. Ensure the dripper handle is in the BREW position as shown on the
screen.
6. Position the glass carafe or a mug* beneath the dripper as shown on the screen.
7. Turn the dial and select play to continue and begin the brew with the current settings, or customise the brew in
the next step.
The screen displays three options. Turn the dial to highlight an option, then press the dial to confirm:
→ Auto Start — Schedules the brew to begin at a set time.
→ Play — Begins the brew with the current settings.
→ Edit — Adjusts brew strength, size, and pre-heat.
Edit Brew Settings
1. Turn the dial to highlight the brew strength (Mild, Medium, or Strong), then press the dial to confirm.
2. Turn the dial to highlight the brew size (8, 10, 12, 16, 18 or 20 oz), then press the dial to confirm.
3. Turn the dial to select Pre-Heat On or Off, then press the dial to confirm. Pre-heating dispenses hot water to
warm the dripper and carafe or mug* before brewing.
4. Press the dial to save the settings.
5. Press the dial again to continue.
6. Press the dial to start the brew.
* Ensure your mug can hold the selected brew size.
Auto Start Function
1. Set the auto start time: turn the dial to select the hour, then press the dial to confirm. Repeat to set the minutes.
2. Press the dial to continue.
3. Place a folded filter paper in the dripper and position the dripper on the machine carriage.
4. Ensure the bean hopper contains sufficient beans.
5. Fill the water tank to the MAX line.
6. Press the dial to confirm the delayed auto start setting.
NOTES
• Using Auto Start disables the pre-heat function.
• The brew begins automatically at the scheduled time.
TIPS
WHOLE BEANS
FRESH IS BEST! Freshly roasted, quality coffee is key to making great tasting coffee. Peak flavor potential is 5-20 days
after roast. Always look for a “Roasted On” date on the bag. Avoid coffee with a “Best Before” or “Use By” date as you
never know when it was roasted.
Coffee flavor and strength are a personal preference. Vary the type of coffee beans and the amount of ground coffee to
achieve your preferred taste.
Freshly ground beans are the key to making coffee with more flavor and body. Pre-ground coffee will have lost most of
its flavor and aromatics, so always grind right before you brew for superior taste.
Store coffee beans in a dark, cool and dry place. Vacuum seal if possible.
Buy coffee beans in small batches to reduce the storage time and store no more than one week’s supply at any time.
OTHER FUNCTIONS IN SETTINGS
Bean purge
Use this function when changing coffee beans or to set a certain grind style use this function. Follow the steps on screen
by pressing the dial to confirm selection. Use the back arrow button on the machine to go back or cancel.
→ Go to settings
→ Highlight and press the dial to select Bean Purge from the menu.
→ Unlock the hopper and empty the beans as shown on screen, press the dial to confirm.
→ Remove filter paper from the dripper, press the dial to confirm.
→ Remove and reinsert the chute flap (as shown on screen), then press the dial to confirm.
→ Position the dripper on the carriage.
→ Press the dial to start the bean purge.
Grinder Calibration
Calibrate the grinder when changing coffee beans or when brew results are inconsistent.
You will need: A coffee scale that measures 0.1 grams (Breville Precision Duo Coffee Scale recommended) and your
chosen beans.
→ Fill the hopper with beans.
→ From the Settings menu, rotate the dial to highlight Grinder Calibration, then press the dial to select.
→ Rotate the bean hopper to set the grind size.
→ Place the dripper with filter paper on the scale and press Tare.
→ Transfer the dripper to the machine carriage and press the dial to begin grinding.
→ When grinding is complete, return the dripper to the scale and note the weight.
→ On the machine, rotate the dial to enter the measured weight, then press the dial to save.
→ Calibration is now complete.
NOTE
The ground coffee can be used for your next brew.
Pre-heat function
The pre-heat function dispenses a set amount of hot water through the dripper into the carafe or mug, warming both
before brewing. Pre-heating minimizes heat loss during extraction and helps maintain optimal brew temperature.
NOTE
Always position a dripper and a carafe or mug before activating the pre-heat function. To increase warming, the pre-
heat cycle can be repeated by double-tapping the dial once the cycle has finished. Discard the pre-heat water before
brewing.
Activate pre-heat using either method:
→ Quick access — Double-tap the dial to integrate into your coffee recipe.
→ Menu access — Go to Edit Brew Settings, turn the dial to highlight Pre-heat, select On, then press the dial to
confirm.
Change the icon
→ In the Edit menu, turn the dial to highlight Icon, then press the dial to confirm.
→ Turn the dial to select the desired cup icon, then press the dial to confirm.
→ Turn the dial to select the icon colour, then press the dial to confirm
Name your drink
→ In the Edit menu, turn the dial to highlight Name Your Drink, then press the dial to confirm.
→ Turn the dial to select each letter, pressing the dial to confirm each one. The first letter is automatically
capitalised; subsequent letters are lowercase.
→ When finished, press and hold the dial to save the name.
RETRACT THE CARRIAGE
Use this function before transporting or repacking the machine.
→ From Settings, scroll and select Retract the carriage, then press the dial to confirm. The carriage returns to
its original position.
TURNING OFF THE MACHINE
Press and hold the Back arrow button for 2 seconds. The machine powers down.
TURNING THE MACHINE ON
Press any button or turn the dial to power on the machine.
CARE & CLEANING
Always turn the coffee machine off and remove the plug from the power outlet before cleaning.
CLEANING THE OUTER HOUSING
The outer housing and screen can be cleaned with soft, damp cloth. Apply cleaner to the cloth and not the screen surface.
Polish with a soft, dry cloth. Cleaning and drying with dry paper towels or abrasive cloths and cleaners may scratch the
surface.
CLEANING THE DRIPPER
NOTE
All water tank levels will be incorrect if the machine is used without the water filter being properly installed.
CAUTION
The dripper and grinds may still be very hot after brewing. Use caution and allow it to cool before removing.
Discard the ground coffee and filter paper. Rinse the dripper under running water, or for a deeper clean, wash in warm,
soapy water with a soft sponge or brush. The dripper is dishwasher safe (top rack only).
Disassembling for a thorough clean
1. Pinch the sides of the drip stop valve on the underside of the dripper and pull it straight down to remove.
2. Lift out the spring and set it aside.
3. Wash all parts in warm, soapy water and dry thoroughly. Hand wash the spring and drip stop valve only.
4. Reassemble in reverse order: seat the spring inside the dripper, then press the drip stop valve onto the
underside until it clicks into place.
NOTE
The spring must be correctly seated before fitting the drip stop valve. If the spring is missing or incorrectly seated,
the drip stop will not seal, and coffee may leak during brewing
CLEANING THE CARAFE
After each use, empty the carafe. Do not let brewed coffee stand overnight as this can cause the carafe to stain. Rinse
the carafe and carafe lid under warm running water. For a deeper clean, we recommend regularly washing the carafe in
warm, soapy water using a soft bristled brush. Do not use abrasive cleansers, pads or cloths which can scratch the
surface. Rinse and dry thoroughly. The glass carafe is dishwasher safe (top rack only).
DESCALING
Regular use with hard water can cause mineral build-up inside the machine. This may reduce brewing flow, affect
temperature performance, and impact coffee taste. Descale the machine regularly to maintain optimal performance.
NOTE
Ensure that the water filter is removed from the water tank before adding the descaling powder when descaling the
machine. The descaling cycle takes approximately 15 minutes.
→ Allow the appliance to cool completely.
→ Empty the water tank.
→ Fully dissolve one sachet of Breville descaling powder in one litre of cold tap water.
→ Pour the descaling solution into the water tank, then top up with water to the MAX line..
→ Install the dripper and place the carafe on the base.
→ Ensure the carafe is empty
→ Turn the dial to Settings.
→ Select Descale from the menu.
→ Press the dial to begin the descaling cycle.
→ The machine dispenses descaling solution until the carafe is full, then prompts you to empty the carafe.
→ Return the empty carafe to the machine.

→ The machine dispenses the remaining descaling solution into the carafe. Empty the carafe again.
→ When prompted, rinse water tank, carafe and dripper, then fill the tank with fresh water. The water filter can be
reinstalled at this point.
→ When the cycle is complete, the display will return to the main menu.
→ The machine will run a rinse cycle, dispensing one full carafe of water. Empty the carafe.
MACHINE FACTORY RESET
1. Turn the dial to highlight Settings in the menu, then press the dial to select.
2. Turn the dial to scroll to the bottom of the Settings menu.
3. Press the dial to select Factory Reset.
4. Turn the dial to highlight Reset, then press the dial to confirm.
5. The machine sounds an audible tone and restores all settings to factory defaults.
TROUBLESHOOTING
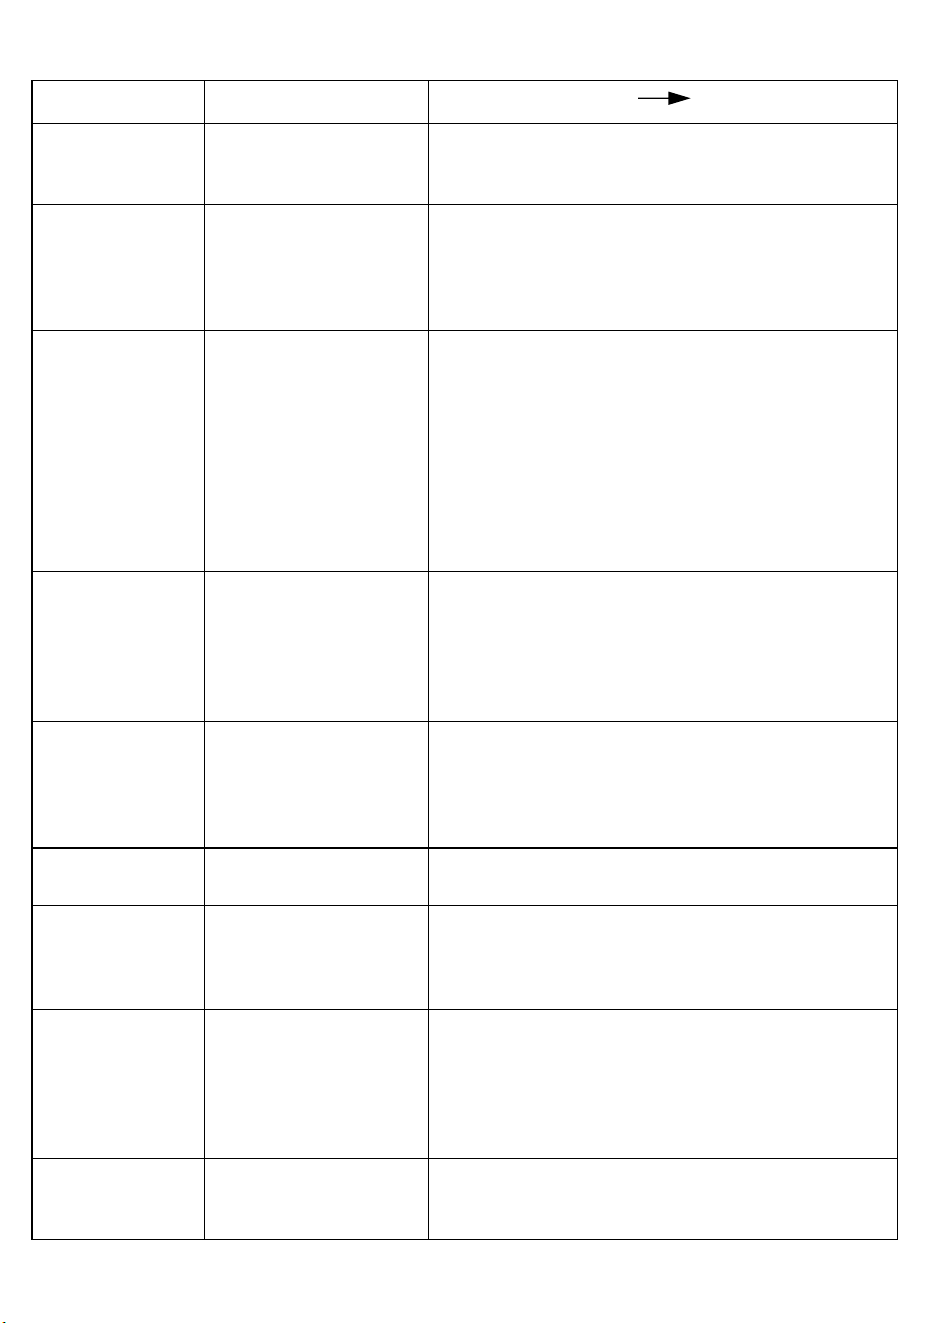
PROBLEM
ON SCREEN MESSAGE
POSSIBLE CAUSES SOLUTIONS
Water tank empty
Fill water tank
Tank empty.
→ Ensure water tank is filled
→ Ensure water tank is installed correctly.
Over temperature
Machine overheating
Pump runs dry or running dry too many times.
Running too many consecutive brews.
Surge in power mains.
→ Allow the machine to cool for 10 minutes
→ Fill the water tank and lock it firmly onto the machine.
Flow meter error
Water Flow Blocked
Pump is running but flow below 20ml / min for 3 seconds.
Clogged filter.
Scale build-up inside the heater path.
→ Check the water filter and tank.
→ Ensure water tank is pressed locked to the machine.
→ Check for any blockages in the water tank inlet.
→ Ensure the water filter has been soaked and installed
properly.
→ Remove the water filter and filter holder, then brew a
cycle to see if it improves.
Hopper not installed
Install Hopper
Hopper is not installed properly.
Loose beans stuck in the channel and causing the hopper to
not align properly on the machine.
→ Unlock and remove the hopper and ensure no loose
beans around the grind chamber.
→ Re-lock the hopper in place.
Grinder clogged
Grinder Blocked
Foreign object in the burrs.
→ Unlock and remove the hopper and check if anything is
stuck on the burrs.
→ Clean the grinder (run grinder purge and remove chute
flap).
NTC outlet fault
Temperature Sensor Issue
NTC thermistor disconnected or damaged.
→ Service required, contact Breville Customer Support.
Carriage Jam
Dripper Platform Error
Carriage stuck; obstruction in the travel path.
→ Check for obstruction.
→ Clean the carriage rails.
→ If error persists, contact Breville Customer Support.
Spout home timeout
Waterspout Sensor Issue
Spout fails to reach home position.
Broken home position sensor.
Stepper motor blocked.
→ Turn off the machine and power on and see if the spout
moves back to position.
→ If error persists, contact Breville Customer Support.
Grinds spray
unevenly from the
grinder
n/a
Chute flap is missing or incorrectly inserted
→ Insert the chute flap with the tongue facing upward (see
Fig. A)

NOTES
QR CODES
WARRANTY QR CODE
PRODUCT QR CODE

AUSTRALIAN CUSTOMERS
Phone: 1300 139 798
Web: www.breville.com
NEW ZEALAND CUSTOMERS
Phone: 0800 273 845
Web: www.breville.com
BREVILLE USA
19400 S. Western Ave, Torrance CA
90501
-1119
1
-866-273-8455 / 1-866-BREVILLE
breville.com/us/support
BREVILLE CANADA
300 Town Centre Blvd,
Suite 201, Markham,
Ontario, L3R 5Z6, Canada
1
-855-683-3535
breville.ca/support
BREVILLE MÉXICO, S.A. DE C.V.
Montes Urales 360 Piso 2
Col. Lomas de Chapultepec III Sección
Miguel Hidalgo
Ciudad de México C.P. 11000
México
800
-649-0543
breville.mx/support
EN Due to continued product improvement, the products
illustrated/photographed in this brochure may vary slightly
from the actual product.
FR-CA En raison de son amélioration continue, le produit
représenté sur cet emballage peut différer légèrement
du produit réel.
ES-MX Perfeccionamos nuestros productos
continuamente, por lo que el artículo podría diferir
ligeramente de la ilustración o imagen en este documento.
Breville is a registered trademark of Breville Pty. Ltd. A.B.N. 98 000 092 928.
Copyright Breville Pty. Ltd. 2026.
BPO830 USCM
IB A26