Contents
Important Safeguards
Safety Precautions
Parts and Accessories
Control Panel
Before First Use
Instructions for Use
Cleaning and Maintenance
Troubleshooting
Replacement Parts
Warranty
1
5
11
16
19
20
27
29
31
32
IMPORTANT
SAVE THESE
INSTRUCTIONS
Please read and keep these instructions
handy. These instructions will help you
learn to use your Dream Cooker properly
and thoroughly so that you can achieve
consistent, professional results.
FOR HOUSEHOLD USE ONLY. NOT
INTENDED FOR COMMERCIAL USE.
DREAMS NEVER TASTED SO GOOD
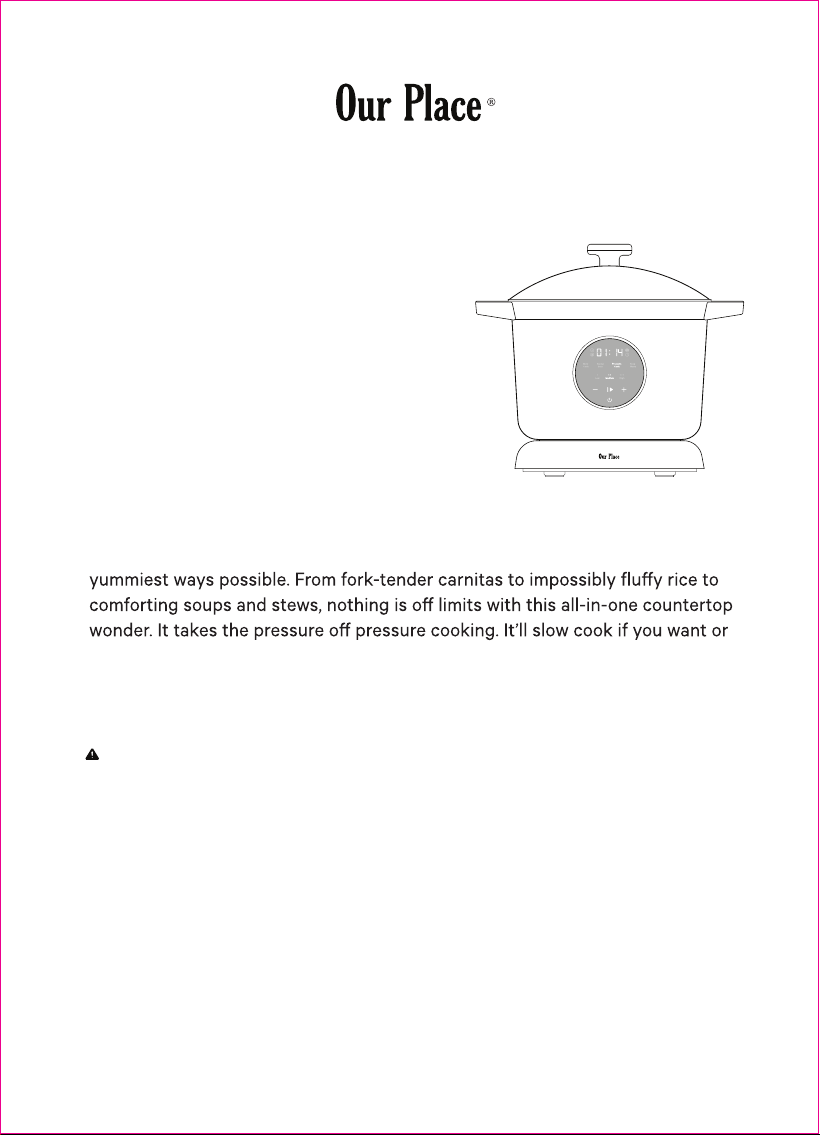
Your new Dream Cooker is here to unlock your kitchen imagination in the
deliver equally delicious results in record time — all while keeping it warm until
you’re ready. So kick back and start dreaming big about what’s going to be on
your table next.
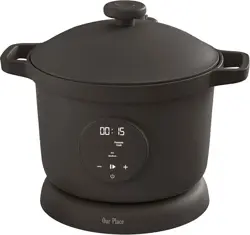
Dream Cooker
User Manual
TM
APL.MCK.ESN
120V 60Hz 1200W
6QT / 6L
15.16 x 12.44 x 13.15 in / 38.5 x 31.6 x 33.4 cm
12.87lbs / 5.84kg
1
1. Do not touch hot surfaces. Use handles. Never move the appliance while it’s
in use.
2. Use on a flat, stable, heat-resistant surface away from heat sources or
liquids.
3. Close supervision is necessary when any appliance is used by or near
children.
4. This appliance cooks under pressure. Improper use may result in burn
injuries. Make sure to always properly lock and seal the lid before pressure
cooking. See INSTRUCTIONS FOR USE.
5. To protect against electric shock, do not immerse the cooker base, cord, or
plug in water or liquid.
6. Do not let the cord hang over the edge of a table or counter, or touch hot
surfaces.
7. Do not operate the appliance with a damaged cord and/or plug, after the
appliance malfunctions or after it has been damaged in any manner. If the
appliance malfunctions or has been damaged in any way, email
8. The use of accessory attachments not recommended by the appliance
manufacturer may cause hazard or injury.
9. Unplug the appliance from the outlet when not in use, or before cleaning.
10.
parts and before cleaning.
11. To disconnect, press the START/STOP button to return to Standby mode,
and then unplug the plug. When unplugging the appliance, always hold the
plug to remove it from the outlet. Do not pull the cord. Always attach the
plug to the appliance first, then plug the cord into the wall outlet.
12. Do not use this appliance for pressure frying with oil.
13. Do not lean over or place your hands or face over the appliance while it is in
operation. Do not touch the lid cover when the appliance is in operation.
IMPORTANT SAFEGUARDS
Read all instructions carefully and thoroughly before first use. When using
electrical appliances, basic safety precautions should always be followed
including the following:
SAVE THESE INSTRUCTIONS.
FOR HOUSEHOLD USE ONLY. NOT INTENDED FOR COMMERCIAL USE.

2
This could result in injury.
14. WARNING: Spilled food can cause serious burns. Keep appliance and cord
away from children. Never drape the cord over the edge of courter, never
use outlet below counter and never use with an extension cord.
15. Do not exceed the maximum fill line.
16. Do not place any of the following materials in the pot: cardboard, plastic,
paper, or anything similar which may catch fire or melt.
17. Do not store any materials, other than manufacturer’s recommended
accessories and the inner cooking pot, in this appliance when not in use.
18. Never use your appliance without adding liquid, as this will seriously
damage the appliance.
19. Be aware that certain foods, such as applesauce, cranberries, pearl barley,
oatmeal or other cereals, split peas, noodles, macaroni, rhubarb, or spaghetti
can foam, froth, and sputter, and clog the pressure release device (steam
vent). These foods should not be cooked in a pressure cooker.
20. Be careful not to be scalded by the hot steam when opening the lid or when
placing the food inside the inner cooking pot.
21. Do not block any ventilation openings. Hot steam is released through
openings.
22. Do not touch the steam release valve or the area near the valve while
cooking. Do not cover the area with a cloth.
23. Do not use outdoors. Do not use the appliance for anything other than
intended use.
24. This appliance is for HOUSEHOLD USE ONLY.
25. The
temperature of the lid cover and the outer surface may be higher when
the appliance is working.
26. Temperature of accessible surfaces may be high when the appliance is
operating.
27. This appliance is not intended for use by persons (including children) with
reduced physical, sensory or mental capabilities or lack of experience and
knowledge, unless they have been given supervision or instruction
concerning use of the appliance by a person responsible for their safety.
28. Children should be supervised to ensure that they do not play with the
appliance.
SAVE THESE INSTRUCTIONS.
FOR HOUSEHOLD USE ONLY. NOT INTENDED FOR COMMERCIAL USE.
3
29. WARNING: This appliance includes a heating function. Surfaces, other than
the functional surfaces, may develop high temperatures.
30. Always use heat-resistant gloves, pads, or oven mitts when handling hot
materials.
31. Allow the appliance to cool completely before touching. Do not place the
appliance on or near a hot gas or electric burner or in a heated oven.
32. To reduce the risk of electrical shock, never use the appliance without the
inner cooking pot in place.
33. Ensure the heating plate is clean and the underside of the inner cooking
pot is dry before inserting it.
34. Do not touch the heating element after cooking, as it will be hot and may
cause burns.
35. Do not open the appliance until the unit has cooled and all internal pressure
that the appliance is still pressurized – do not force it open. Any pressure in
the appliance can be hazardous. See INSTRUCTIONS FOR USE.
36. Extreme caution must be used when moving an appliance containing hot
liquids.
37. Always place the inner cooking pot on a heat-resistant surface after
removing it from the cooker base.
38. Cleaning and maintenance shall not be done by children without
supervision.
39. If there is a foreign object between the inner cooking pot and heating plate,
remove it before use. Keep the heating plate dry and clean.
40. Cooking meat with skin may swell under pressure. Do not prick the meat
while the skin is swollen, as you may be burned.
41. To prevent deformation of the inner cooking pot, do not hit it or drop it on
the ground. Only the manufacturer-provided inner cooking pot should be
used with the appliance. Do not use the inner cooking pot with any other
appliances or to heat on the stove or grill, or in an oven or microwave.
42. The inner cooking pot has a non-stick coating. Do not use sharp or metal
utensils to remove food from the appliance. Please use silicone, plastic or
wooden tools.
43. INTENDED FOR COUNTERTOP USE ONLY.
SAVE THESE INSTRUCTIONS.
FOR HOUSEHOLD USE ONLY. NOT INTENDED FOR COMMERCIAL USE.

4
CAUTION
44. A SHORT POWER-SUPPLY CORD IS USED TO REDUCE THE RISK OF IT
BEING GRABBED, ENTANGLED IN OR TRIPPED OVER.
45. DO NOT USE A POWER ADAPTER.
46. Your cooker has a 3-prong grounding plug, and should only be used with
120V, 60Hz electrical systems in North America. Always plug in to a
grounded electrical outlet. Do not modify the plug in any way.
47. Do not fill the appliance over 2/3 full. When cooking foods that expand
during cooking such as rice or dried vegetables, do not fill the unit over 1/2
full. Over-filling may cause a risk of clogging the vent pipe and developing
excess pressure. See "Overfill During Pressure Cooking"
48. Always check the pressure release devices for clogging before use.
49. When the normal operating pressure is reached, turn the heat down so all
the liquid, which creates the steam, does not evaporate.
50. A short power-supply cord is used to reduce the risk resulting from it being
grabbed by children, becoming entangled in, or tripping over a longer cord.
51. SAVE THESE INSTRUCTIONS
1. RISK OF ELECTRIC SHOCK. ONLY COOK IN THE REMOVABLE INNER
COOKING POT.
2. APPLIANCE SURFACES ARE HOT DURING AND AFTER COOKING.
3. NOT FOR COMMERCIAL USE. FOR HOUSEHOLD USE ONLY.
SAVE THESE INSTRUCTIONS.
FOR HOUSEHOLD USE ONLY. NOT INTENDED FOR COMMERCIAL USE.
SAVE THESE INSTRUCTIONS.
FOR HOUSEHOLD USE ONLY. NOT INTENDED FOR COMMERCIAL USE.
5
• Read all instructions carefully and thoroughly.
• To eliminate choking hazards for young children, remove and safely discard
any packing materials before using the appliance for the first time.
• Take inventory of all contents to ensure you have all parts needed to
properly and safely operate your appliance.
• Unplug appliance from outlet when not in use and before cleaning. Allow
• INTENDED FOR COUNTERTOP USE ONLY. Ensure the surface is stable,
non-combustible, level, clean, and dry. DO NOT place the appliance near the
edge of a countertop during operation.
• DO NOT place the appliance on or near hot surfaces, on or near a gas or
electric burner, or in a heated oven.
• DO NOT use near water or flames.
• DO NOT use outdoors. Keep out of direct sunlight. DO NOT use in moving
vehicles or boats.
• When using this appliance, provide adequate space (at least 5 inches above
and at least 3 inches on all sides) for air circulation.
• To avoid possible steam damage, place the appliance away from walls and
cabinets during use. DO NOT use under cabinets or in an enclosed space.
• When the appliance is in operation, hot steam is released through the steam
release vent cover. Place the appliance so the steam release vent cover is
not directed toward the power cord, electrical outlets, cabinets or other
appliances.
• DO NOT block the steam release vent cover. Keep your hands and face a
safe distance from the vent.
• Keep the appliance and its cord out of reach of children. DO NOT allow the
appliance to be used by children or persons with reduced physical, sensory,
or mental capabilities. Close supervision is necessary when the appliance is
used by or near children and persons with reduced physical, sensory, or
mental capabilities.
General Instructions
Placement
SAFETY PRECAUTIONS

6
• ALWAYS ensure the appliance is properly assembled before use.
• Before placing the inner cooking pot in the cooker base, ensure all parts are
clean and dry by wiping with a soft cloth. If there is a foreign object
between the inner cooking pot and cooker base, remove it before use.
• DO NOT use a damaged inner cooking pot, silicone sealing ring, or lid.
Replace before using.
• DO NOT use the appliance without the inner cooking pot installed. Doing so
could result in electric shock or other injury.
• DO NOT move the appliance when in use.
• Only use the side handles to carry or move the appliance. DO NOT use the
lid knob to carry the appliance.
• DO NOT touch hot surfaces. Appliance surfaces are hot during and after
operation. To prevent burns or personal injury, ALWAYS use heat-resistant
gloves, pads, or oven mitts, and use available handles.
• Extreme caution must be used when moving an appliance containing hot oil
or other hot liquids. Improper use, including moving the appliance, may
result in personal injury such as serious burns.
• The removable inner cooking pot can be extremely heavy when full of
ingredients. Care should be taken when lifting the inner cooking pot from
the cooker base.
• Use caution when removing the inner cooking pot and lid from the
appliance. ALWAYS place it on a heat-resistant surface after removing.
DO
NOT
touch the appliance and its parts during or immediately after cooking
to avoid burn injury. ALWAYS use heat-resistant gloves, pads, or oven mitts
when handling the appliance, inner cooking pot, or other hot materials.
• DO NOT use this appliance for deep-frying. Use only as intended. When
sautéing, ALWAYS use high smoke point oils and avoid aerosol spray oil.
• DO NOT use this appliance to cook instant rice.
• When the removable inner cooking pot is empty,
DO NOT heat for more
than 10 minutes. Doing so may damage the cooking surface.
• NEVER use your appliance without adding liquid for Pressure Cook and
Slow Cook modes, as this will seriously damage the appliance.
• Should the unit emit smoke, unplug immediately and wait for smoking to
stop before removing the inner pot.
• To prevent fire, DO NOT cook food directly on the heating element without
the inner cooking pot in place.
General Use
7
• Caution should be used when searing and sauteing. Keep hands and face
away from the inner cooking pot, especially when adding new ingredients,
as hot oil may splatter. This could result in burns or personal injury.
• DO NOT lean over or place your hands or face over the appliance while it is
in operation. This could result in burns or personal injury.
• The inner cooking pot has a ceramic nonstick coating. DO NOT use sharp or
metal utensils to remove food from the inner cooking pot. Please use
silicone or wooden tools to prevent damage to the nonstick coating.
• This appliance is for household use only. DO NOT use this appliance for
anything other than its intended use. Misuse may cause injury.
• This appliance cooks under pressure. Improper use may result in scalding
injury, personal injury, and/or property damage.
• When using the Slow Cook and Pressure Cook modes,
ALWAYS keep the lid
closed. Ensure the silicone sealing ring is installed properly and the lid is
properly assembled and closed before operating. See page 14 for further
instructions.
• Before use,
ALWAYS check the steam release valve and float valve pin for
clogging, and clean if necessary. The float valve pin should move freely up
and down when the lid is in proper working order and not in the locked
position.
• ONLY lift the lid from the knob on the top of the appliance.
• If steam escapes from the steam
release valve in a steady stream for over 3
installed once the appliance has cooled. See the Parts and Accessories
section on page 9 for more information on installing the silicone sealing
ring.
• Extreme caution must be used when the appliance contains hot food and
liquids and/or is under pressure. Failure to follow all instructions regarding
proper use of the appliance may result in unintended contact with hot
foods or liquids that have been pressurized, resulting in serious burns.
• DO NOT attempt to open the lid during or after pressure cooking until all
internal pressure has been released through the steam release valve and
the appliance has cooled slightly. The pressure release indicator on the
has been released. Open lid promptly to avoid re-pressurization of the inner
Pressure Cooking and Slow Cooking
8
cooking pot.
• If the lid will not unlock to open, this indicates the appliance is still under
pressure —
DO NOT force the lid open. Any pressure remaining can be
hazardous. Let the appliance naturally release pressure or press the manual
steam release button. Take care to avoid contact with the releasing steam to
avoid burns, personal injury, and/or property damage.
• Meat with skin may swell when cooked under pressure. DO NOT prick the
meat while the skin is swollen, as you may be burned.
• DO NOT tamper with, disassemble, or remove the steam release valve.
• Use extreme caution when removing the lid after cooking. Serious burns can
result from the steam inside.
ALWAYS lift and tilt the lid away from you
when removing.
• ALWAYS keep hands, face, and other body parts away from the steam
release valve prior to or during pressure cooking, and when opening the lid
after cooking. Do not touch the steam release valve or the area near the
valve while pressure cooking. Serious burns can result from the steam and
hot foods inside the inner cooking pot.
• DO NOT cover or obstruct the steam release valve. DO NOT cover the area
with a cloth.
Overfill During Pressure Cooking
• Overfilling may cause a risk of clogging the steam release valve and
developing excess pressure.
• DO NOT overfill or exceed the maximum fill line. Overfilling may cause
Foods such as apple sauce, cranberries, pearl barley, oatmeal and other
cereals, split peas, noodles and pasta can foam, froth, and splatter when
pressure cooked.
DO NOT fill the inner cooking pot past the maximum fill
line (designated as “PC MAX”) when cooking these foods.
• When pressure cooking foods that expand (such as dried vegetables,
beans, grains, rice, etc.),
DO NOT fill the pot more than halfway (designated
as the “1/2” line on the inner cooking pot), or as otherwise instructed in a
recipe.
• DO NOT place oversized foods that exceed the maximum fill line (PC MAX)
into the inner cooking pot as they may cause risk of fire, personal injury,
and/or property damage.

9
• A short power-supply cord is provided to reduce the risks of children
grabbing the cord or becoming entangled in or tripping over a longer cord.
DO NOT use an extension cord.
• To connect, ALWAYS attach the power cord to the appliance first, then plug
the power cord into the wall outlet.
• Regularly inspect the appliance and power cord.
DO NOT use the appliance
if there is damage to the power cord or plug. If the appliance malfunctions
or has been damaged in any way, email [email protected].
•
output of your product. To prevent possible illness, use a thermometer to
check that your food is cooked to the recommended temperatures.
• DO NOT use with power converters or adapters, timer switches, or separate
Parts and Accessories
• DO NOT use any lid, inner cooking pot, or accessories that are not provided
with the appliance or recommended by Our Place. Doing so may cause fire,
electric shock, personal injury, and/or property damage.
• DO NOT use the inner cooking pot or any other accessories in a microwave,
toaster oven, convection oven, or on a ceramic cooktop, electric coil, gas
burner range, or outdoor grill.
• To prevent risk or injury, only use silicone sealing rings provided by
Our Place as replacement parts.
DO NOT use if the silicone sealing ring is
torn or damaged.
• Let the appliance cool before handling, cleaning, or storing.
• DO NOT place anything — other than the lid — on top of the appliance.
When assembled, when in use, and when stored.
DO NOT store any
materials other than the inner cooking pot in this appliance when not in use.
• DO NOT place any of the following materials in the appliance: cardboard,
plastic, paper, wood, or anything similar which may catch fire or melt.
• Cleaning and user maintenance should not be done by children.
• DO NOT use harsh abrasives, caustic cleaners, or oven cleaners when
cleaning this appliance. Refer to the Cleaning and Maintenance section on
page 27.
Care and Storage
Power Cord and Plug
10
The cooker base contains electrical components that are an electrical shock
hazard. Failure to follow these instructions may result in electric shock.
To protect against electric shock:
•
power source. Always unplug when not in use, as well as before adding or
removing parts and before cleaning. To unplug, grasp the plug and pull
from the outlet.
NEVER pull from the power cord.
• DO NOT attempt to repair, replace, or modify components of the appliance,
unless expressly noted as replaceable throughout this user manual, as this
may cause electric shock, fire, personal injury, and/or property damage and
will void the limited U.S. warranty.
• DO NOT tamper with any of the safety mechanisms, as this may result in
personal injury or property damage.
• To protect against fire, electric shock, or injury,
DO NOT immerse the cord,
plug or appliance in water or other liquids.
DO NOT splash water on the
appliance.
• DO NOT place food or liquid directly into the cooker base. Only the inner
cooking pot is designed to contain food or liquid.
• DO NOT use appliance in electrical systems other than 120V~/60Hz for
North America.
• DO NOT clean the appliance by rinsing it under a faucet.
Electrical Warning
remote-control systems.
•
appliance, always hold the plug to remove it from the outlet; do not pull the
cord.
• WARNING: Spilled food can cause serious burns. Keep the appliance and
cord away from children.
NEVER drape the cord over the edge of the
counter.
NEVER use an outlet below the counter, and NEVER use with an
extension cord.
• This appliance has a 3-prong grounding plug and should only be used with
120V, 60Hz electrical systems in North America. To reduce the risk of
electric shock:
ONLY plug the power cord into a grounded electrical outlet;
DO NOT remove ground; DO NOT modify the plug in any way.
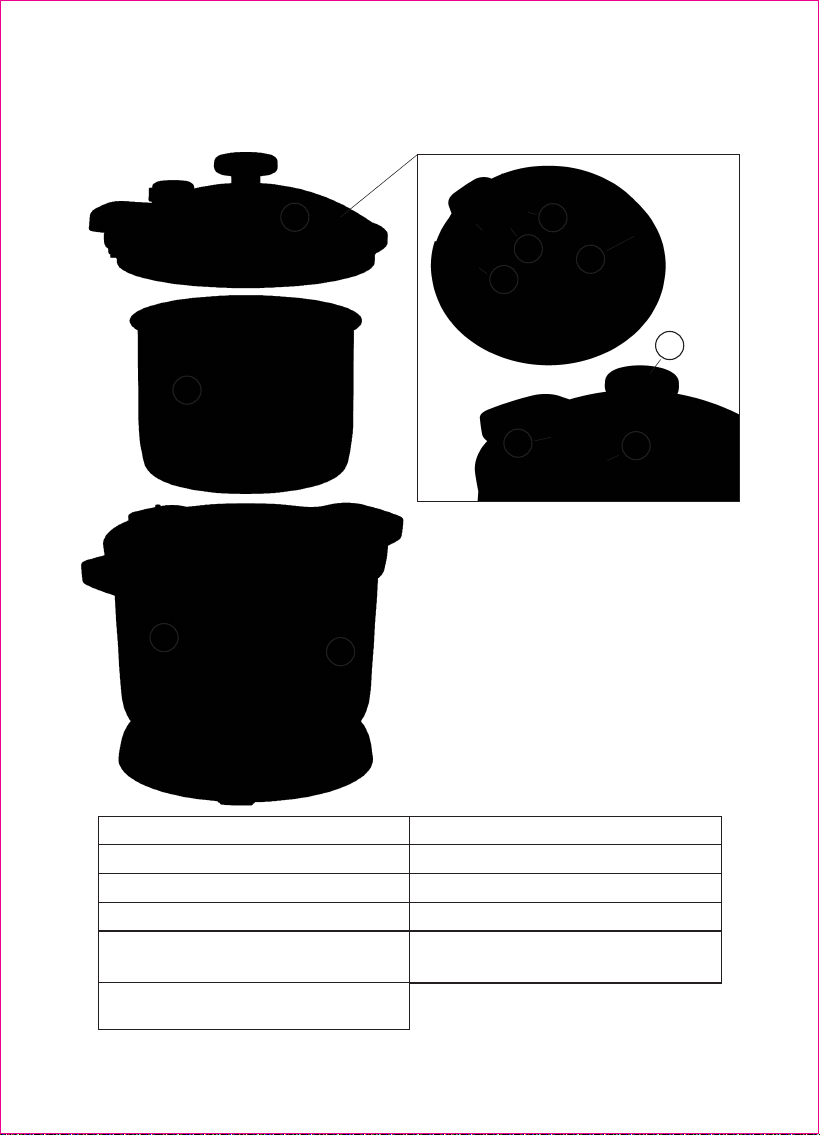
1. Cooker Base
2. Control Panel
3. Lid
4. Inner Cooking Pot
5. Manual Steam Release Button
(Top of Lid)
6. Steam Release Vent Cover (Top of
Lid)*
*These parts come pre-installed with the appliance.
7. Float Valve Pin (Top of Lid)*
8. Anti-Clog Cap (Underside of Lid)*
9. Float Valve Pin (Underside of Lid)*
10. Sealing Ring Holder
11. Silicone Sealing Ring (Underside of
Lid)*
11
PARTS AND ACCESSORIES
1
2
3
4
5
6
7
8
9
11
10
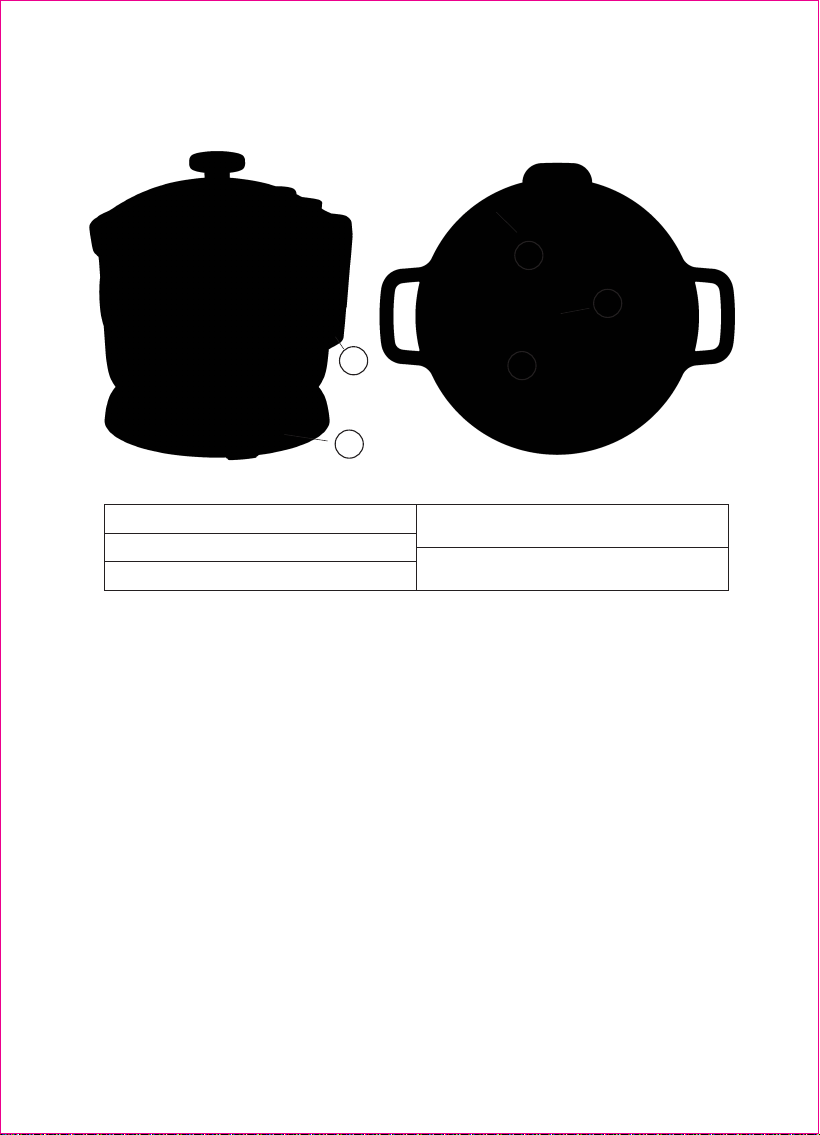
*These parts come pre-installed with the appliance.
**Detachable power cord not shown.
12. Condensation Collector*
13. Power Cord Connection**
14. Heating Plate (Inside Cooker Base)
15. Heating Plate Sensor (Inside Cooker
Base)
16. Condensation Rim (Inside Cooker
Base)
12
The anti-clog cap prevents food and debris from entering the steam release pipe.
This is a crucial component of the appliance's safety mechanism and it's
imperative for regulating pressure while cooking. The anti-clog cap comes
pre-installed with the appliance.
Check the anti-clog cap regularly to make sure nothing is blocking it. Proper
cleaning of the underside of the lid will help mitigate blockage. If you need to
remove the anti-clog cap to clean it, you MUST install it again before using the
appliance. To install the anti-clog cap, put it on top of the prongs and press down
until it snaps into place.
To Install: Position the anti-clog cap in place and push down.
Anti-Clog Cap
PARTS AND ACCESSORIES CONTINUED
12
13
14
15
16
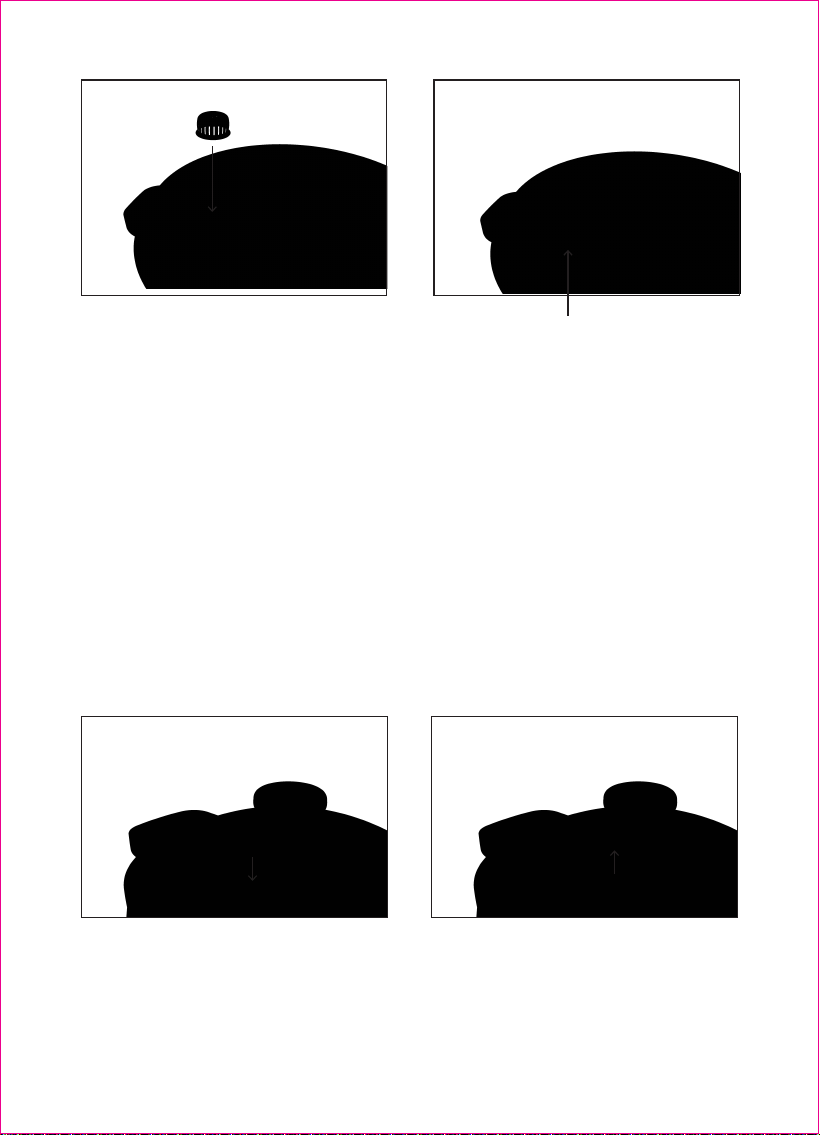
Properly Installed
Depressurized: Float Valve Pin will be
down
Pressurized: Float Valve Pin will be up
and slightly flush with the lid
13
The float valve pin indicates whether the appliance is pressurized or not. The
float valve pin comes pre-installed with the appliance.
When it
IS pressurized, the valve pin will be visibly sticking out above the lid.
When it is
NOT pressurized, the valve will be flush to the lid or slightly lower.
The float valve pin and anti-clog cap work together to make sure pressure and
steam are sealed inside the appliance. Both parts
MUST be installed before use.
Never operate the appliance without the float valve pin and anti-clog cap
installed and never touch the float valve pin when the appliance is in use.
Float Valve Pin
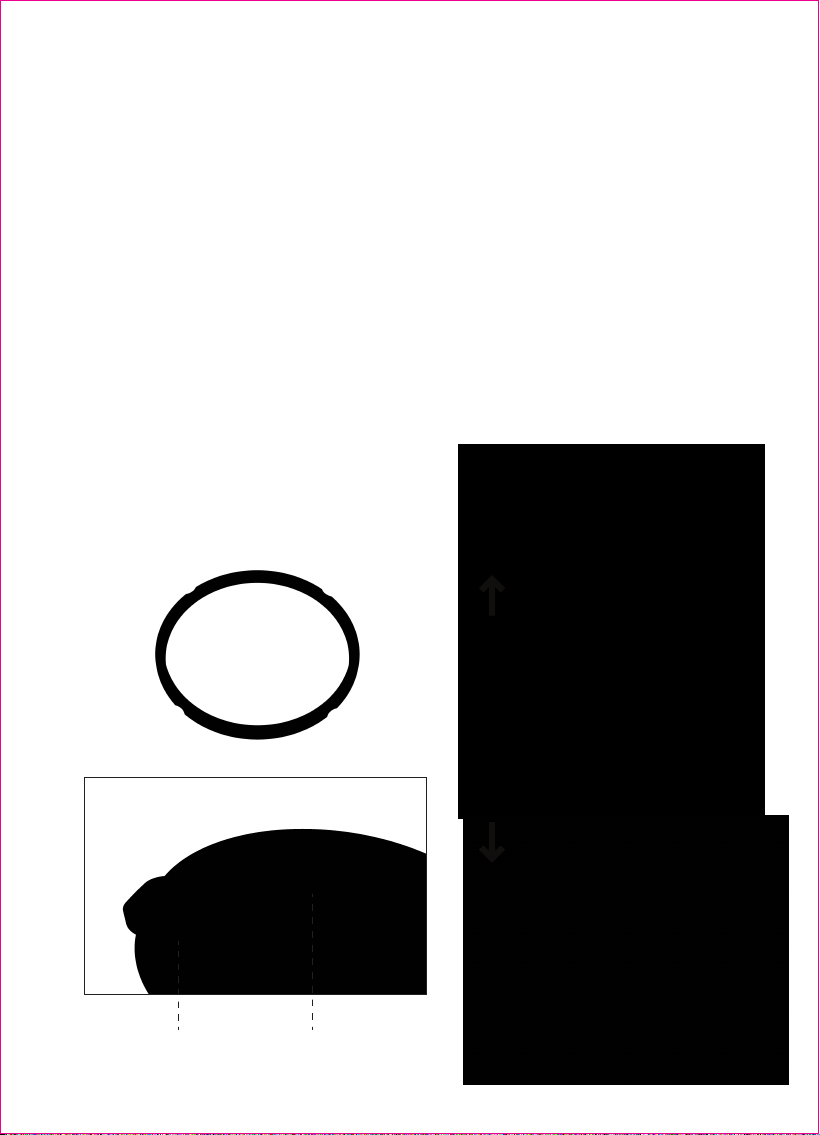
Silicone Sealing Ring
Silicone Sealing Ring
Sealing Ring Holder
14
When the lid is closed, the silicone sealing ring (on the underside of the lid)
creates an air-tight seal between the lid and the cooker base. The silicone
sealing ring comes pre-installed with the appliance.
The silicone sealing ring must be installed before using the appliance and should
be cleaned after each use. NEVER install more than one silicone sealing ring at a
time.
The silicone sealing ring is reversible and can be inserted in either direction.
Insert around the outer edge of the sealing ring holder on the underside of the
lid. Ensure it is fully inserted and lies flat under the sealing ring holder.
It's normal for silicone sealing rings to stretch over time with use. To keep your
appliance safe, replace the silicone sealing ring every 12 to 18 months. Replace
sooner if you notice stretching, deformation, or damage. See page 31 for more
information on replacement parts.
Silicone Sealing Ring
InstalledNot Installed
15
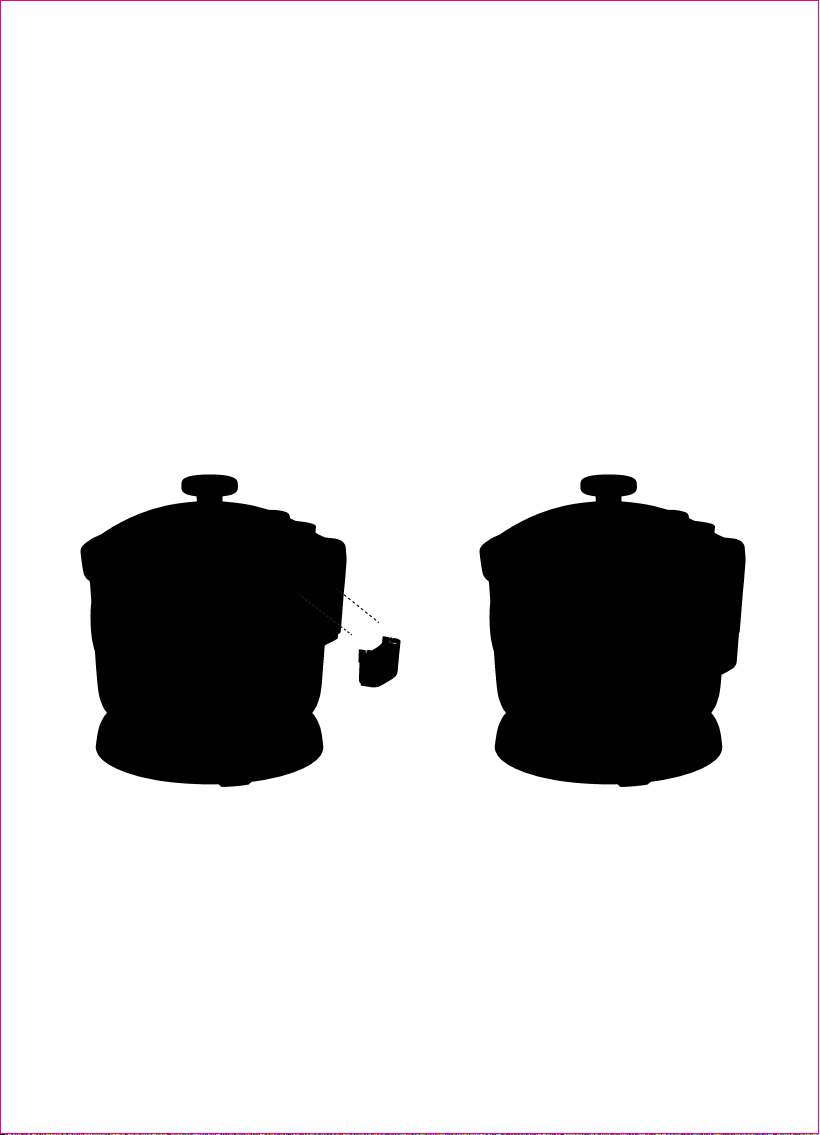
The condensation collector sits on the back of the appliance and collects any
overflow of moisture. The condensation collector comes pre-installed with the
appliance.
The condensation collector should be installed before cooking, then emptied and
rinsed out after each use of the appliance. Be sure to empty it when full.
To remove, simply pull the condensation collector away (not down!) from the
base of the appliance.
To install, line up the grooves on the condensation collector with the tabs on the
base of the appliance, then slide into place like a drawer.
Condensation Collector
A, B & C
16
CONTROL PANEL
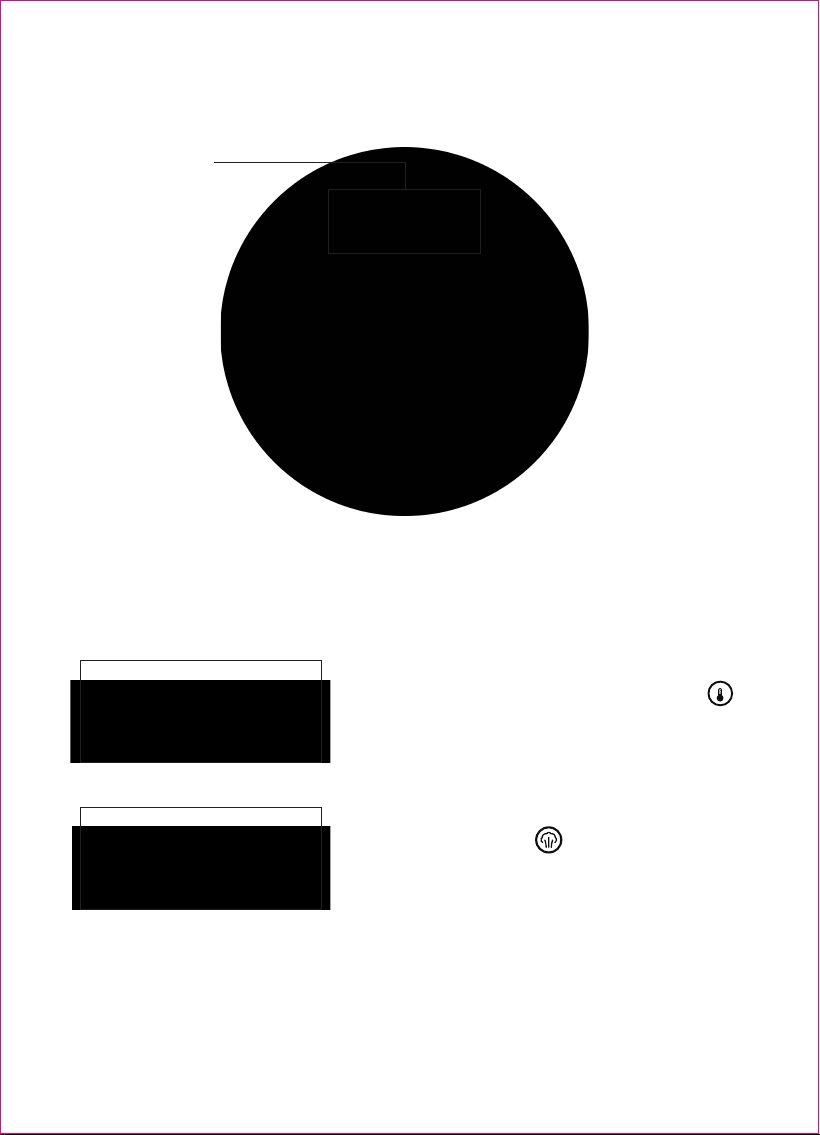
A. Timer: The timer will count down from the set cook time. Once cooking is
complete, it will switch to Keep Warm, depending on your chosen cooking mode,
and will begin counting up to a maximum of 8 hours.
B. Preheat: Preheat: “PrE” will appear on the
control panel, and the Preheat Indicator icon
will be on, indicating the appliance is preheating.
C. Hold: During pressure release, “HOLD” and
the Steam Release icon will appear on the
control panel. Wait until they have disappeared
from the control panel and the float valve pin has
dropped before removing the lid, indicating
pressure has been released.

D
E
F
G
17
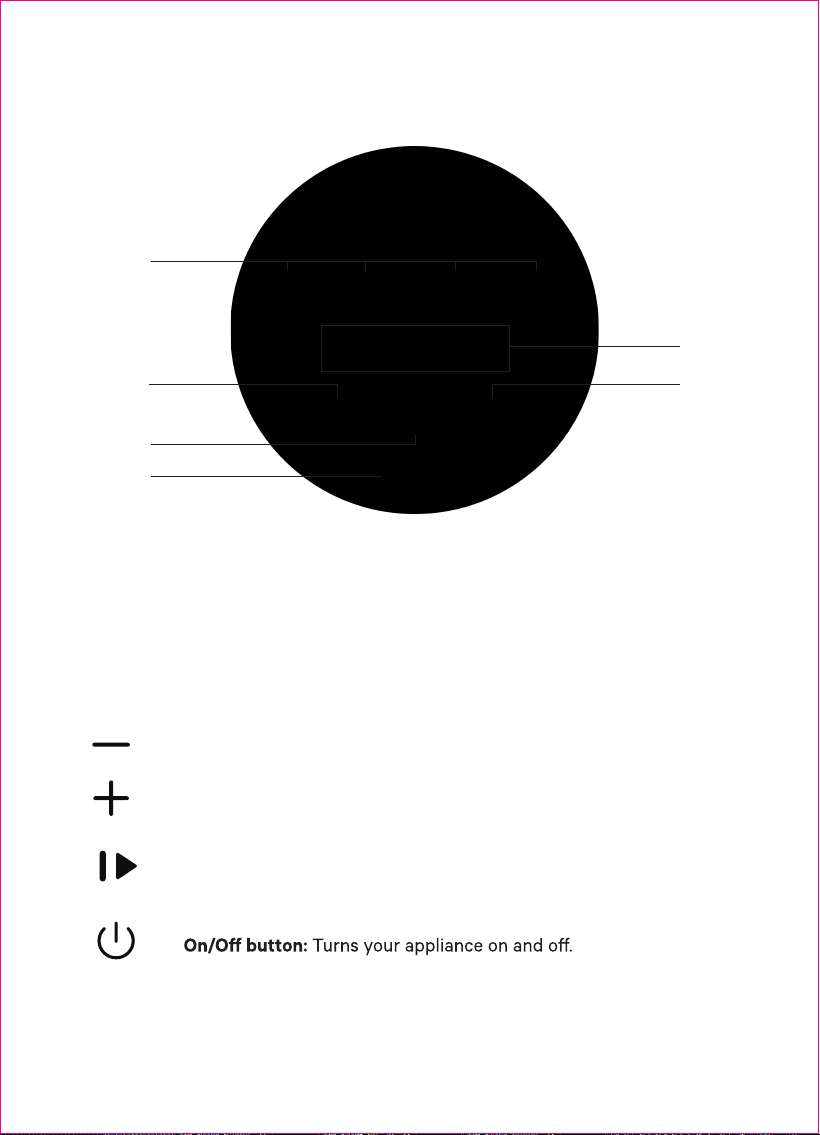
D. The Preheat Indicator will be on during preheating when the
Saute/Sear mode is selected, and during pressurizing when the
Pressure Cook mode is selected.
E. The Steam Release Indicator will be on during steam-releasing
when the Pressure Cook mode is being used.
F. The Lid Warning Indicator will be on if the lid is not closed properly
or installed. Cooking will not begin until the lid is adjusted or installed
correctly if using the Slow Cook or Pressure Cook modes. This icon
will also appear if attempting to lock the lid while using the
Saute/Sear cooking mode.
G. The Inner Cooking Pot Warning Indicator will turn on if no inner
cooking pot has been inserted. Cooking will not begin until the inner
cooking pot is inserted. “POT” will also appear on the Timer until the
inner cooking pot has been inserted. This icon will also be on if the lid
is not installed correctly.
Icons:
CONTROL PANEL
H
I
K
L
M
J
18
Controls:
CONTROL PANEL
H. Cooking Mode: Select from Slow Cook, Saute/Sear, Pressure Cook, or Keep
Warm.
I. Temperature / Pressure: Select from Low, Medium or High temperature and
pressure.
L. Start/Stop button: After selecting your cooking mode, temperature,
and time, press to start cooking. Press again to stop cooking or before
changing your settings.
M.
J. Decreases the time setting.
K. Increases the time setting.

19
BEFORE FIRST USE
1. Remove and discard any packaging material from the appliance.
2. Remove all components from the package and read this manual carefully.
Please pay particular attention to operational instructions, warnings, and
important safeguards to avoid any injury or property damage.
3. Wash the inner cooking pot, lid cover, and silicone sealing ring in hot, soapy
water, then rinse and dry thoroughly. NEVER put the inner cooking pot,
cooker base, or lid cover in the dishwasher.
4. Inspect the lid to ensure there is no debris blocking the steam release vent
cover.
5. The silicone sealing ring is reversible and can be inserted in either
direction. Insert the silicone sealing ring around the outer edge of the
sealing ring holder on the underside of the lid. Ensure it is fully inserted and
lies flat under the sealing ring holder, as shown on page 8.
6. Ensure the steam release anti-clog cap is installed. Place it over the prongs
under the underside of the lid and press down until it snaps into position.
7. Ensure the vent cover is not clogged and is securely installed on the lid.
8. Ensure the float valve pin is installed properly, not clogged and is in proper
working order.
9. Ensure the condensation collector is installed securely over the tabs on the
back of the appliance base.
10. Place the appliance on a stable, level, heat-resistant surface. Keep away
from areas that can be damaged by steam (such as walls or cupboards).
11. When using this appliance, provide adequate space (at least 5 inches a
bove
and at least 3 inches on all sides) for air circulation.
12. Ensure the inner cooking pot is in position and the lid is secured properly.
13. Plug the appliance into a kitchen outlet.
Note: The appliance may have a plastic smell during the first use. This is normal.
If the plastic smell does not decrease after the first use, please contact
Customer Support at [email protected].
20
INSTRUCTIONS FOR USE
NOTE: Prior to each use, make sure the silicone sealing ring is well-positioned in
the sealing ring holder and the anti-clog cap is mounted properly on the steam
release valve shield. Make sure the condensation collector and steam release
vent cover are properly installed.
1.
2.
mode.
3. Select your desired cooking mode by pressing the Slow Cook, Saute/Sear,
or Pressure Cook buttons, and then select Low, Medium, or High to choose
your heat setting. You can also select Keep Warm – no temperature input is
required.
4. Press the “-” (minus) and “+” (plus) buttons to adjust the cooking time
lower and higher.
5. Press the Start/Stop button to begin cooking. A beep will sound signaling
the unit is preheating.
6. During the cooking process, press the Start/Stop button to fully stop the
cooking process, to pause the cooking process to adjust the temperature or
time, or to change to another cooking mode.
7. Once the set cook time has been reached, the appliance will beep three
times, signaling cooking has completed. It will then automatically switch to
Keep Warm mode and the timer will begin counting up to 8 hours. You can
stop this at any time by pressing the Start/Stop button.
8. You can also press the Keep Warm button immediately after turning on the
appliance to keep food & liquids warm.
9.
21
Pressure cooking is the process of cooking food under pressurized steam and
liquid in a sealed vessel. High pressure helps to limit boiling and create high
temperatures, which cook foods faster than other cooking methods. This
cooking mode is the recommended method for foods that are unlikely to
overcook, such as soups and stews, or for foods you wish to cook quickly.
Pressure cooking requires the use of liquid to create the steam needed. We
recommend 1.5 cups (12 oz. or 375mL) as the minimum. The liquids used for
pressure cooking should be water-based (such as broth, stock, or soup) and not
oil-based. If your recipe calls for dairy, we recommend adding that at the end of
the cooking process since dairy can curdle under pressure.
Most foods cook under high pressure, which helps to break them down and cook
faster. Foods that are sensitive to overcooking (like rice, pasta, and eggs) cook
better with low pressure.
1. Add food and required liquid to the inner cooking pot and place in the
cooker base.
2. Place the lid on the appliance and twist to lock.
3.
Standby mode. Select Pressure Cook as your desired cooking mode.
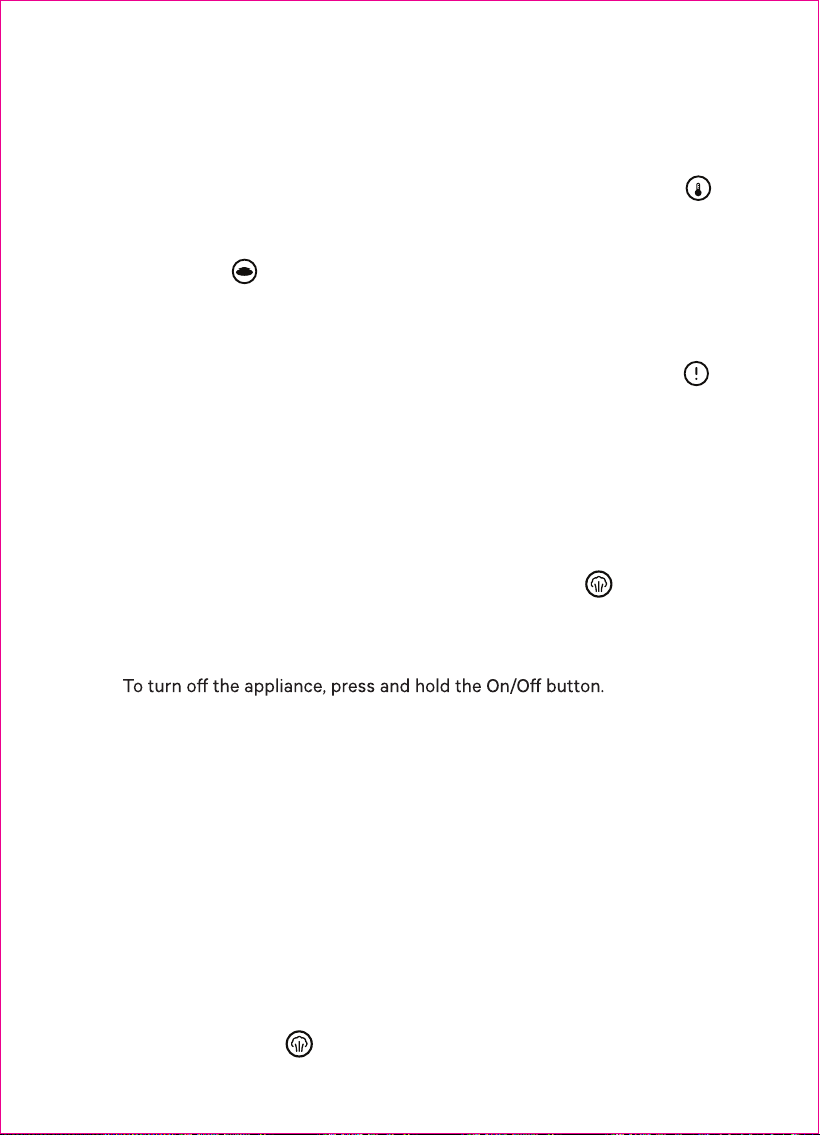
Cook Time and Temperature Chart
Function
Temp Range
Time Range
Lid Status
Remark
Slow Cook
Pressure Cook
Saute/Sear
Keep Warm
Low, Medium, High
Low, Medium, High
Low, Medium, High
N/A
00:30 – 12:00
00:01 – 02:00
00:01 – 01:00
00:30 – 12:00
Closed
Closed
Open
Open or
Closed
Will turn to Keep Warm
mode automatically once
cooking is complete for
up to 8 hours.
Maximum time is 8 hours.
Appliance will then auto
Pressure Cook
How to pressure cook
22
a. If the lid is not properly secured, the word ‘Lid’ and the Lid Warning
icon will appear on the control panel and the appliance will
beep. Adjust the lid and once locked, the beeping will stop and
cooking will begin.
b. If the inner cooking pot has not been properly placed in the cooker
base, the word 'Pot' and the Inner Cooking Pot Warning icon
will appear on the control panel and the appliance will beep. Once
the inner cooking pot is properly installed, the beeping will stop.
Pressure Release Options:
Natural Steam Release
This appliance is designed to release steam automatically during the cook cycle.
• Steam will periodically be released automatically during cooking to maintain
ideal pressure.
• At the end of the cooking cycle, steam will be released periodically for
several minutes (15 minutes up to 1 hour).
• Once cooking is complete, “HOLD” will appear on the control panel, and the
Steam Release icon will be on. You will hear two beeps before each
How to Release Steam
4. Set the desired pressure.
5. Set the desired time.
6. Press the Start button.
7. A beep will sound signaling the appliance is preheating and pressurizing.
“PrE” will appear on the control panel, and the Preheat Indicator icon
will be on.
8. Once the appliance has reached the set pressure and temperature, you will
hear a beep, the “PrE” and the Preheat Indicator will disappear f
rom the
control panel, and the timer will begin counting down from the set time.
9. When the timer reaches 00:00, this indicates cooking has stopped.
You will hear three beeps, indicating cooking is complete. “HOLD" will
appear on the control panel, and the Steam Release icon will be on. The
appliance will then automatically switch to Keep Warm mode and pressure
will begin to release naturally. The timer will begin counting up, indicating
how long it has been in Keep Warm mode.
10.
Tip: Choose the steam release method that works for your recipe. See Pressure
Release Options below.
23
Manual Steam Release
This appliance includes a manual steam release button on the lid.
• The manual steam release button can be pressed at the end of the
cooking cycle to rapidly release steam.
• The manual steam release button can be used in addition to automatic
steam release.
• When cooking foods like rice or pasta, it is recommended to use the
manual steam release to rapidly release the pressure at the end of the
cooking cycle to avoid overcooking food.
NOTE: Do not use the manual steam release button right away after cooking is
complete. Food can come out of the steam release vent and clog the valve.
Pressure Cooking Caution
This appliance uses pressure to cook. Allow the appliance to release all
excesspressure and steam through the steam release vent cover before opening
float valve pin will drop when all pressure has been released. Opening the lid
before pressure is released may result in burns, personal injury, and/or property
damage. You
MUST USE the inner cooking pot when cooking. DO NOT overfill
the inner cooking pot. You
MUST USE liquid when using the Pressure Cook
mode.
ALWAYS keep hands and face clear of the steam release valve when pressure
cooking as hot steam and water may be emitted during operation which can
result in scalding.
NEVER place your face or hands over the appliance when
removing the lid.
NOTE: If the lid will not unlock, this indicates the appliance is still under
steam release.
• Wait until “HOLD” and the Steam Release icon have disappeared from
the control panel and the float valve pin has dropped before removing the
lid. The lid will unlock easily. DO NOT force open. Release steam manually if
needed or allow additional time for steam to naturally release.
• The Keep Warm icon will not illuminate on the control panel until steam is
fully released.
NOTE: Dense foods such as oatmeal and chili should utilize the natural steam
release option.
24
• Overfilling may cause a risk of clogging the steam release valve and
developing excess pressure.
• DO NOT overfill or exceed the maximum fill line. Overfilling may cause
Foods such as apple sauce, cranberries, pearl barley, oatmeal and other
cereals, split peas, noodles and pasta can foam, froth, and splatter when
pressure cooked. DO NOT fill the inner cooking pot past the maximum fill
line (designated as “PC MAX”) when cooking these foods.
• When pressure cooking foods that expand (such as dried vegetables,
beans, grains, rice, etc.), DO NOT fill the pot more than halfway
(designated as the “1/2” line on the inner cooking pot), or as otherwise
instructed in a recipe.
• DO NOT place oversized foods that exceed the maximum fill line (PC
MAX) into the inner cooking pot as they may cause risk of fire, personal
injury, and/or property damage.
pressure.
DO NOT force the lid open as any remaining pressure can be
hazardous. Let the appliance naturally release pressure OR press the manual
steam release button. Take care to avoid contact with the steam to avoid burns,
personal injury, and/or property damage
NOTE: Even if “HOLD” has disappeared from the control panel indicating the lid
can be removed, ALWAYS push the manual steam release button before opening
the lid to make sure all pressure has been released.
Use the Saute/Sear mode like
you would use a skillet or saute pan on the stove.
(Except you won’t have another pot or pan to clean!). Searing (or browning meat)
prior to slow cooking or pressure cooking helps develop and enhance flavors. We
recommend setting the temperature to High while searing.
Sauteing veggies or infusing herbs and aromatics into broths before cooking is
another great way to boost your recipes. We recommend setting the temperature
to either Low or Medium while sauteing.
Saute/Sear
Overfill During Pressure Cooking
25
Slow Cook
Saute/Sear Cooking Caution
ALWAYS use silicone or wooden utensils in the inner cooking pot. DO NOT use
metal utensils, as they will scratch the nonstick coating on the inner cooking pot.
DO NOT twist to lock the lid on the appliance when using Saute/Sear mode.
Doing so will cause the lid icon to activate, and the appliance will beep and not
cook. Always use high smoke point oils and avoid aerosol spray oils when using
Saute/Sear mode.
Slow cooking is a method used to cook foods slowly over a long period of time
using low, steady and moist heat. With slow cooking, recipes that call for High
temperature usually cook in 4 – 6 hours, while recipes that call for Low
temperature usually cook in 8 – 10 hours.
How to Saute/Sear:
1. Add food to the inner cooking pot and place in the cooker base.
2. Select the Saute/Sear mode.
3. Set the desired temperature.
4. Set the desired time.
5. Press the Start button.
a. If the inner cooking pot has not been properly placed in the cooker
base, the word 'Pot' and the Inner Cooking Pot Warning icon will
appear on the control panel and the appliance will beep. Once the
inner cooking pot is properly inserted, the beeping will stop.
6. A beep will sound signaling the appliance is preheating.“PrE” will appear on
the control panel, and the Preheat Indicator icon will be on.
7. Once the appliance has reached the set tem
perature, you will hear a beep,
the “PrE” and the Preheat Indicator will disappear from the control panel,
and the timer will begin counting down from the set time.
8. Once the timer has reached 00:00, this indicates the cooking has stopped.
You will hear three beeps, indicating cooking is complete.
9. Remove food or select another cooking mode (if pressure cooking or slow
cooking).
10.
NOTE: The appliance does not auto switch to Keep Warm on Saute/Sear mode.
26
Keep Warm can be used as its own mode to keep foods warm or to reheat
foods like soups, stew and warm beverages. When Keep Warm is used at the
end of the cooking process, the timer will count up to a maximum of 8 hours.
Keep Warm
How to Keep Warm (used as its own mode):
1. Add food to the inner cooking pot and place in the cooker base.
2. If desired, place the lid on the appliance and twist to lock. The lid is not
required to use the Keep Warm mode.
How to slow cook:
1. Add food and required liquid to the inner cooking pot and place in the
cooker base. Do not exceed the PC MAX fill line on the inner cooking pot.
2. Place the lid on the appliance and twist to lock.
3.
mode. Select the Slow Cook mode as your desired cooking mode.
4. Set the desired temperature.
5. Set the desired time.
6. Press the Start button.
7. A beep will sound signaling the appliance is ready to operate.
8. The timer will begin counting down from the set time.
9. Once the timer reaches 00:00, you will hear three beeps, indicating cooking
is complete.
10. The appliance will then automatically switch to Keep Warm mode, and the
timer will begin counting up to a maximum of 8 hours.
11.
NOTE: If the lid is hard to remove, push the manual steam release button a few
times until pressure releases.
a. If the lid is not properly secured, the Lid Warning icon will appear
on the control panel and the appliance will beep. Adjust the lid and
once locked, the beeping will stop and cooking will begin.
b. If the inner cooking pot has not been properly placed in the cooker
base, the word 'Pot' and the Inner Cooking Pot Warning icon will
appear on the control panel and the appliance will beep. Once the
inner cooking pot is properly inserted, the beeping will stop.
27
CLEANING AND MAINTENANCE
1. Unplug the appliance from the wall outlet before cleaning and make sure it
has cooled to room temperature.
2. NEVER put the cooker base in the dishwasher or immerse it in water or any
other liquid. To clean the cooker base and control panel, wipe clean with a
damp cloth.
3. The lid can be washed with water and dish soap.
DO NOT wash the lid or
any of its components in the dishwasher, and
DO NOT take apart the steam
release valve.
4. Wash the inner cooking pot in hot, soapy water, then rinse and dry
thoroughly.
NEVER put the inner cooking pot in the dishwasher.
5. Wash the silicone sealing ring in hot, soapy water, then rinse and dry
thoroughly.
NEVER put the sealing ring in the dishwasher.
6. If food residue is stuck on the inner cooking pot, fill the pot with water and
a. Remove the sealing ring by pulling the edge of the silicone out of the
sealing ring holder on the underside of the lid.
b. Replace the sealing ring by pressing it firmly into the sealing ring
holder to prevent warping. The sealing ring should fit snugly inside the
sealing ring holder and should not fall out when lifting the lid.
c. Make sure the sealing ring does not have any warping or tears. If the
sealing ring is damaged, contact Customer Support at
3.
Standby mode. Select the Keep Warm mode as your desired cooking mode.
4. Set the desired time.
5. Press the Start button
6. A beep will sound signaling the appliance is ready to operate.
a. If the inner cooking pot has not been properly placed in the cooker
base, the word 'Pot' and the Inner Cooking Pot Warning icon will
appear on the control panel and the appliance will beep. Once the inner
cooking pot is properly inserted, the beeping will stop.
7. The timer will begin counting down from the set time.
8. Once the timer has reached 00:00, you will hear three beeps indicating the
9.

28
a. To remove the condensation collector, pull the condensation collector
away (not down!) from the base of the appliance.
b. Keep level to avoid spilling any collected liquid.
WARNING
DO NOT immerse the cooker base, power cord, or power plug in water or any other
liquid as this may cause electrocution.
allow to soak before cleaning. DO NOT use scouring pads. If scrubbing is
necessary, use a non-abrasive cleaner or liquid dish soap with a nylon pad
or brush.
7. Remove the condensation collector and hand wash with soap and water or
place in the top rack of a dishwasher.
8. Air dry all parts after each use and make sure they are dried thoroughly
before storing.
NOTE: Ensure all the parts are in place before next use.
29
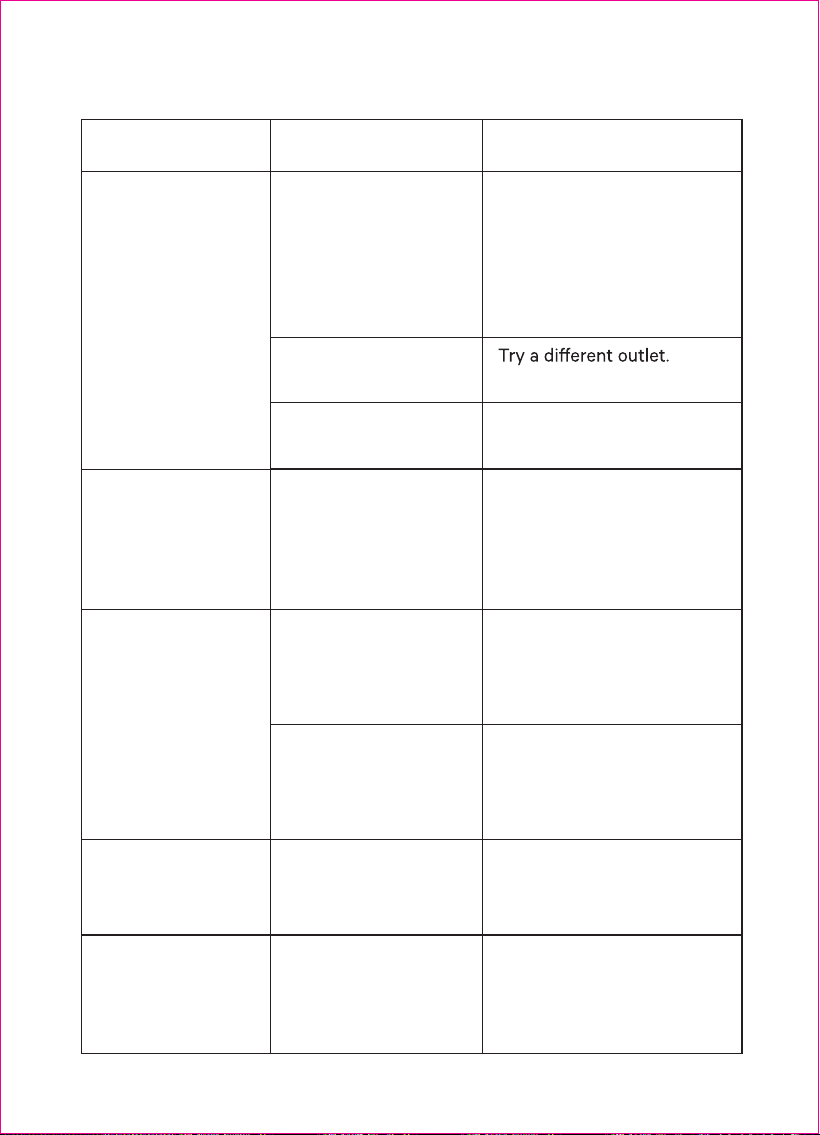
Troubleshooting
PROBLEM POSSIBLE REASON POSSIBLE SOLUTION
Smell and minimal
smoke on initial use.
Packing material still
present in cooker
base.
Ensure all packing material
has been removed in and
around the appliance and
wash parts thoroughly.
closing the lid.
Sealing ring not
installed properly.
Position the sealing ring well,
ensuring it is snug behind
the sealing ring holder.
opening the lid.
Pressure exists inside
the appliance.
Contents in the inner
cooking pot are still
hot.
Press the steam release
button to reduce internal
pressure. Wait for the float
valve pin to drop down,
indicating pressure is
completely released. The
Pressure Cook icon will turn
pressure is released,
indicating the lid is safe to
open.
Steam leaks from
the side of the lid.
Sealing ring damaged. Replace the sealing ring.
Food debris attached
to the sealing ring.
Clean the sealing ring.
There is an
occasional
clicking sound.
The bottom outside of
the inner cooking pot
may be wet.
Dry the exterior of the
inner pot.
The pressure board
may be switching
when temperature is
increasing inside the
appliance.
This is normal. The clicking
indicates the appliance’s
heating elements are
naturally cycling.
Ensure heating element is
dry before inserting inner
cooking pot into cooker base.
30
PROBLEM POSSIBLE REASON POSSIBLE SOLUTION
The control panel
does not illuminate
after connecting the
appliance to a power
outlet.
The plug may not be
fully connected to the
appliance, or to the
power outlet.
Make sure the plug is
securely connected to the
outlet. If the plug is
damaged, contact
Customer Support at
The outlet may not
have power.
Error code
“Pot” shows on
the display.
Inner cooking pot is
not inside the cooker
base. Inner cooking
pot is required for all
functions.
Ensure the inner cooking
pot is properly installed in
the cooker base.
The appliance fuse
may have blown.
Contact Customer Support
Error code “Lid”
shows on the
display.
The lid may not be
completely sealed or
is not installed on the
appliance.
Remove the lid and replace
the lid, and make sure it is
securely installed on the
cooker base.
If Saute/Sear cooking
function is selected,
the lid should not be
used.
Remove the lid with the
“Saute/Sear” cooking
function.
Error code
“Er01” shows on
the display.
Faulty temperature
sensor.
Contact Customer Support
Error code
“Er02” shows
on the display.
Faulty pressure
sensor.
Contact Customer Support
Troubleshooting

31
Scan this QR code for replacement parts. You can also find recipes, FAQs and
more there, too.
Replacement Parts

32
We stand by our products. We want you to have the best experience with your
Dream Cooker, so our team is here to help. Please contact us at hello@fromour-
place.com if you have any questions regarding our warranty program or need
advice on using your product. Lagom Kitchen Company, d/b/a “Our Place” (“Our
purchased and used in the United States. This Limited Warranty is made solely
conditions set forth in this Limited Warranty, also available on www.fromour-
place.com/warranty.
What does this warranty cover?
This warranty covers defects in materials and workmanship for the Dream
Cooker when used normally in accordance with Our Place’s user manual.
What does this warranty not cover?
This warranty does not cover any damages due to:
• Use of the product not for regular household purposes;
• Misuse, abuse, or negligent handling;
• Failure to follow the user manual (e.g. use, warning, maintenance, and care
instruction);
• Normal wear and tear;
• Modifications to the product or use with products or parts not approved by
Our Place;
• Cosmetic changes, including stains and discolorations;
• Installation with an incorrect electric current, voltage, circuit breaker rating,
extension cord, or power supply;
• Damages or defects caused by service or repair of the product performed
by an unauthorized service provider;
• Loss or damage in transit after initial delivery; and
• Accidents or other actions beyond our reasonable control.
Who is covered by this warranty?
This limited warranty covers the original retail consumer purchaser of a covered
product or a consumer that receives the product new and unused as a gift from
the original re
tail purchaser. Coverage terminates if a covered consumer sells or
otherwise transfers the product. This limited warranty applies only to products
purchased directly from Our Place or an Our Place authorized retailer.
This limited warranty is not transferable.
Warranty

33
How long does this warranty last?
The warranty period for the Dream Cooker is limited to one (1) year from the
date of delivery to the purchaser.
How do you exercise your rights under the Limited Warranty program?
Please complete our Warranty Claim form available at fromourplace.com/pag-
es/warranty to submit a claim for evaluation. Proof of purchase is required for all
claims, including gifted products. As part of the investigation into the claim, we
may require you to submit photos, answer questions about the product and your
use of the product, and/or try recommended techniques to rectify the issue first.
If your claim is approved, Our Place will either repair, replace or refund the
purchase price of the product, as determined by Our Place in its sole discretion.
If your claim is approved, Our Place will either repair, replace or refund the
purchase price of the product, as determined by Our Place in its sole discretion.
If we require the defective item to be returned to us, we will pay for return
shipping if the item is returned within the country of purchase for our non-appli-
ance products. For appliances, you will be responsible for the costs incurred to
mail the returned produ
ct to us, including any applicable accessories.
While we will strive to exchange your product for the same make, color and
model as your original purchase, we cannot make any guarantees. If an Our
Place product, component or product color has been discontinued at the time of
repair or replacement or if Our Place determines, in its sole discretion, that such
repair or replacement is not commercially practicable or cannot be timely made,
Our Place reserves the right to repair or replace such product or product
component with a product model or color that is similar but not exactly the same
as the product or component model originally purchased. Replacement with the
same color cannot be guaranteed. At its sole discretion, Our Place is entitled to
replace each defective component individually, as opposed to the entire product,
and some assembly may be required by you. For example, if you purchase the
Dream Cooker and only one component is found defective, Our Place may, at its
discretion, opt to replace either the defective component or the entire Dream
Cooker. Our Place reserves the right to utilize comparable reconditioned,
refurbished, repaired, or re-manufactured products or parts in the warranty
repair or replacement process. Such products and parts will be comparable in
fun
ction and performance to an original product or part. The original warranty
period will remain and will not restart with this replacement item, regardless of
the time remaining under the original warranty period.

34
Disclaimer of Implied Warranties
EXCEPT AS EXPRESSLY PROVIDED HEREIN AND TO THE EXTENT PERMIT-
TED BY LAW, THIS WARRANTY AND THE REMEDIES SET FORTH ARE
EXCLUSIVE AND IN LIEU OF ALL OTHER WARRANTIES, REMEDIES AND
CONDITIONS, WHETHER ORAL, WRITTEN, STATUTORY, EXPRESS OR IMPLIED.
OUR PLACE DISCLAIMS ALL STATUTORY AND IMPLIED WARRANTIES
INCLUDING, WITHOUT LIMITATION, WARRANTIES OF MERCHANTABILITY
AND FITNESS FOR A PARTICULAR PURPOSE, WORKMANSHIP, MERCHANT-
ABILITY, MERCHANTABLE QUALITY, DURABILITY AND WARRANTIES
AGAINST HIDDEN OR LATENT DEFECTS, TO THE MAXIMUM EXTENT
PERMITTED BY LAW. IN SO FAR AS SUCH WARRANTIES CANNOT BE
DISCLAIMED, OUR PLACE LIMITS THE DURATION AND REMEDIES OF SUCH
WARRANTIES TO THE DURATION OF THIS EXPRESS WARRANTY AND, AT
OUR PLACE'S OPTION, THE REPAIR OR REPLACEMENT SERVICES DESCRIBED
HEREIN. SOME STATES DO NOT ALLOW LIMITATIONS ON HOW LONG AN
IMPLIED WARRANTY (OR CONDITION) MAY LAST, SO THE LIMITATION
DESCRIBED ABOVE MAY NOT APPLY TO YOU.
Limitation of Liability
THE REMEDIES DESCRIBED ABOVE ARE YOUR SOLE AND EXCLUSIVE
REMEDIES AND OUR PLACE’S ENTIRE LIABILITY FOR ANY BREACH OF THIS
WARRANTY. This warranty gives you specific legal rights, and you may also have
other rights which vary from state to state, or country to country.
OUR PLACE’S LIABILITY WILL UNDER NO CIRCUMSTANCES EXCEED THE
ACTUAL AMOUNT PAID BY YOU FOR THE DEFECTIVE PRODUCT. OUR PLACE
WILL NOT UNDER ANY CIRCUMSTANCES BE LIABLE FOR ANY CONSEQUEN-
TIAL, INCIDENTAL, SPECIAL OR PUNITIVE DAMAGES OR LOSSES ARISING
OUT OF OR IN CONNECTION WITH THE USE OR PERFORMANCE OF THE
PRODUCTS OR DAMAGES WITH RESPECT TO ANY ECONOMIC LOSS,
PERSONAL INJURY, LOSS OF PROPE
RTY, LOSS OF REVENUES OR PROFITS,
LOSS OF ENJOYMENT OR USE, COSTS OF REMOVAL, INSTALLATION OR
OTHER INDIRECT, INCIDENTAL OR CONSEQUENTIAL DAMAGES OF ANY
NATURE OR KIND. Some states do not allow the exclusion or limitation of
incidental or consequential damages, so the preceding limitation or exclusion
may not apply to you.

Need help? We’re always here at
hello@fromourplace.com
Scan this QR code for replacement parts.
You can also find recipes, FAQs and more there, too.