Wireless Weather Station with Barometer
Model 1733
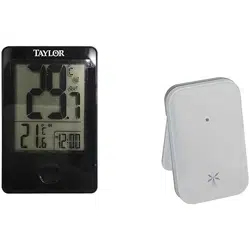
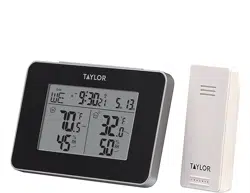
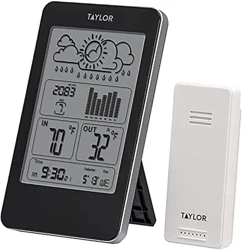
Simple, reliable, accurate…the weather station allows you to monitor indoor or outdoor locations from one room. The
base unit reads indoor conditions, while the remote sensor wirelessly reports outdoor weather conditions back to the
base unit for an all-in-one weather display.
NOTE: Some units have a static cling label over the digital display. Please remove before use.
BATTERY INSTALLATION
The base unit operates on 2 AAA batteries and the remote sensor operates on 2 AAA batteries (batteries not included).
Do not mix old and new batteries. Do not mix alkaline, standard (carbon-zinc) or rechargeable
(ni-cad, ni-mh, etc.) batteries.
IMPORTANT: Install batteries in the base unit first, then the remote sensor, otherwise the units’ transmissions may not
properly connect. Place the base unit as close as possible to the remote sensor when installing batteries.
TIP: When the temperature falls below freezing point, alkaline batteries used in outdoor units may freeze, lowering their
voltage supply and effective range. Use of Lithium batteries is recommended in extremely cold or hot locations.
Base Unit
The battery compartment is located on the back of the unit. Remove the battery compartment door. Install (2) AAA size
batteries into the battery compartment according to the polarity markings. Replace the battery compartment door.
Remote Sensor
The battery compartment is located on the back of the unit. Slide off the battery compartment cover. Install (2) AAA size
batteries into the battery compartment according to the polarity markings. Replace the battery compartment door.
After Powering Up the Units:
When the base unit is powered up, it will beep and the LCD screen will light up.
The base unit will begin to display indoor temperature. The outdoor temperature display will flash dashes “(--)”.
Allow at least 3 minutes for the base unit to connect with the remote sensor and analyze current outdoor temperature
conditions. A radio antenna icon (“ ”) moves next to the “OUT” icon in the outdoor temperature screen during this
time.
Temperature digits replace the flashing dashes “(--)” when analysis is complete.
If after 3 minutes the icon stops moving and dashes remain, press and hold the “DOWN” button on the back of the base
unit for 3 seconds to send another signal. The outdoor temperature will switch to flashing dashes “--” and the radio
antenna icon (“ ”) will flash as the base unit searches for the remote sensor’s signal. For best setup connection, keep
the base unit and remote close to each other while trying to connect. Keep away from other electronic equipment that
may interfere with the connections, such as mobile phones, appliances, computers, refrigerators, TVs, etc.
Indoor temperature readings update on the base unit approximately every 60 seconds. The remote transmits
temperature readings to the base unit approximately every 57 seconds. A red light flashes on the sensor when it sends a
transmission signal and the radio antenna icon (“ ”) will flash on the base unit when the signal is received.
Note: While the base unit is in “analyzing” mode, some functions may not be operational, or using the functions will
interrupt the transmission reception. Once the “analyzing” mode is complete, the other functions will become
operational.
DISPLAYING YOUR WEATHER STATION
Base Unit
Place the base unit indoors in a well-ventilated location away from direct sunlight.
Table top - pull the bottom of the Table Stand located on the back of the base unit to set it on a flat surface.
Wall – use the keyhole on the back of the base unit to hang on a wall using a screw or nail (not included).

Remote Sensor
Table top – place the sensor on a flat surface.
Wall – use the keyhole on the back of the remote to hang on a wall using a nail or screw (not included).
The transmission range of the remote sensor is 200 feet (60 meters). The effective transmission range is vastly affected by
obstacles such as walls, sheds, trees, etc. Try various set ups for the best results. Shorten the distance between the base
and remote units when necessary.
To get the most accurate readings and to prolong the life of your sensor, we recommend that you mount it out of direct
sunlight and rain. Direct sunlight will heat the casing and inflate temperatures readings. Place the sensor in a dry, shaded
area. Fog and mist will not affect the sensor, but large volumes of soaking rain may. To guard against this, we recommend
that you mount it under the eve of your house, your garage or any other suitable place that will keep it out of direct sun
and rain.
Important: Though the remote unit is weather resistant, it should be placed away from direct sunlight, rain, snow and
should never be submerged in water.
TEMPERATURE READINGS
The base unit displays indoor temperature readings on the left side of the screen (“IN”) from its location.
The remote sensor transmits outdoor temperature readings (“OUT”) from its location back to the base unit.
Press the “DOWN” button on the back of the base unit to switch between Fahrenheit and Celsius temperature displays.
Note: If the current temperature is higher than the range of the unit, the display will show “HH”. If the current
temperature is lower, the display will show “LL”.
CLOCK FEATURE
The Clock display is located at the bottom of the base unit’s LCD screen. The clock has alarm and snooze functions.
A) Clock Setting
1. Press and hold the “MODE” button on the back of the base unit for 2 seconds to enter Clock Setting Mode. The year
digits flash in place of the clock digits.
2. Press the “UP” or “DOWN” button to change the year. Press “MODE” to confirm. The month digits blink.
3. Press the “UP” or “DOWN” button to change the month. Press “MODE” to confirm. The date digits blink.
4. Press the “UP” or “DOWN” button to change the date. Press “MODE” to confirm. The Month/Day (“M D”) or
Day/Month “M D”) selection blinks.
5. Press the “UP” or “DOWN” button to toggle between Month/Day and Day/Month format. Press “MODE” to confirm.
“12 Hr” or “24 Hr” blinks.
6. Press the “UP” or “DOWN” button to toggle between 12 and 24 hour clock mode. Press “MODE” to confirm. The hour
and minute digits reappear. The hour digits blink.
7. Press the “UP” or “DOWN” button to change the hours. Press “MODE” to confirm. The minute digits blink.
8. Press the “UP” or “DOWN” button to change the minutes. Press “MODE” to confirm. The hour and minute digits stop
flashing. The clock is set.
Notes: If no buttons are pressed within 30 seconds, the unit will automatically exit Clock Setting mode.
Until a time has been set, the clock will count up the time since battery installation.
B) Alarm Setting
1. Press the “UP” button on the back of the base unit. An “ ” icon appears between the hour and minute digits (above
the colon “:”), indicating the alarm function is active.
2. Press the “MODE” button to enter Alarm Setting mode. The alarm digits appear in place of the clock, indicated by the
“AL” icon which appears next to the alarm digits.
3. Press and hold the “MODE” button for 2 seconds. The alarm hour digits blink.
4. Press the “UP” or “DOWN” button on the back of the unit to change the hours. Press “MODE” to confirm. The minute
digits blink.
5. Press the “UP” or “DOWN” button to change the minutes. Press “MODE” to confirm. The alarm is set. The clock
display returns.
6. The alarm will sound for 1 minute at a rising volume unless silenced.
• To silence the alarm for 5 minutes, press the “SNOOZE” button on the back of the base unit.
The Snooze icon (“Zz”) between the hour and minute digits (under the colon “:”) blinks. The “Zz” icon will
continue to blink as long as the Snooze is active.
• To stop the alarm for the day and deactivate the Snooze, press any button on the base unit except SNOOZE. The
alarm will sound again the next day at the set time.
• To deactivate the alarm completely, press the “UP” button until the alarm bell icon (“ ”) disappears. The alarm
is deactivated and will not ring the next day.
Note: If no buttons are pressed within 30 seconds, the unit will automatically exit Alarm Setting mode and return to Clock
mode. If the snooze button is not pressed, the alarm will silence after one minute. The alarm will not ring again until the
next day if the alarm is still active.
WEATHER FORECAST ICONS
The weather station will estimate weather conditions over the next 6-12 hours. These estimates are based on changes in
barometric pressure.
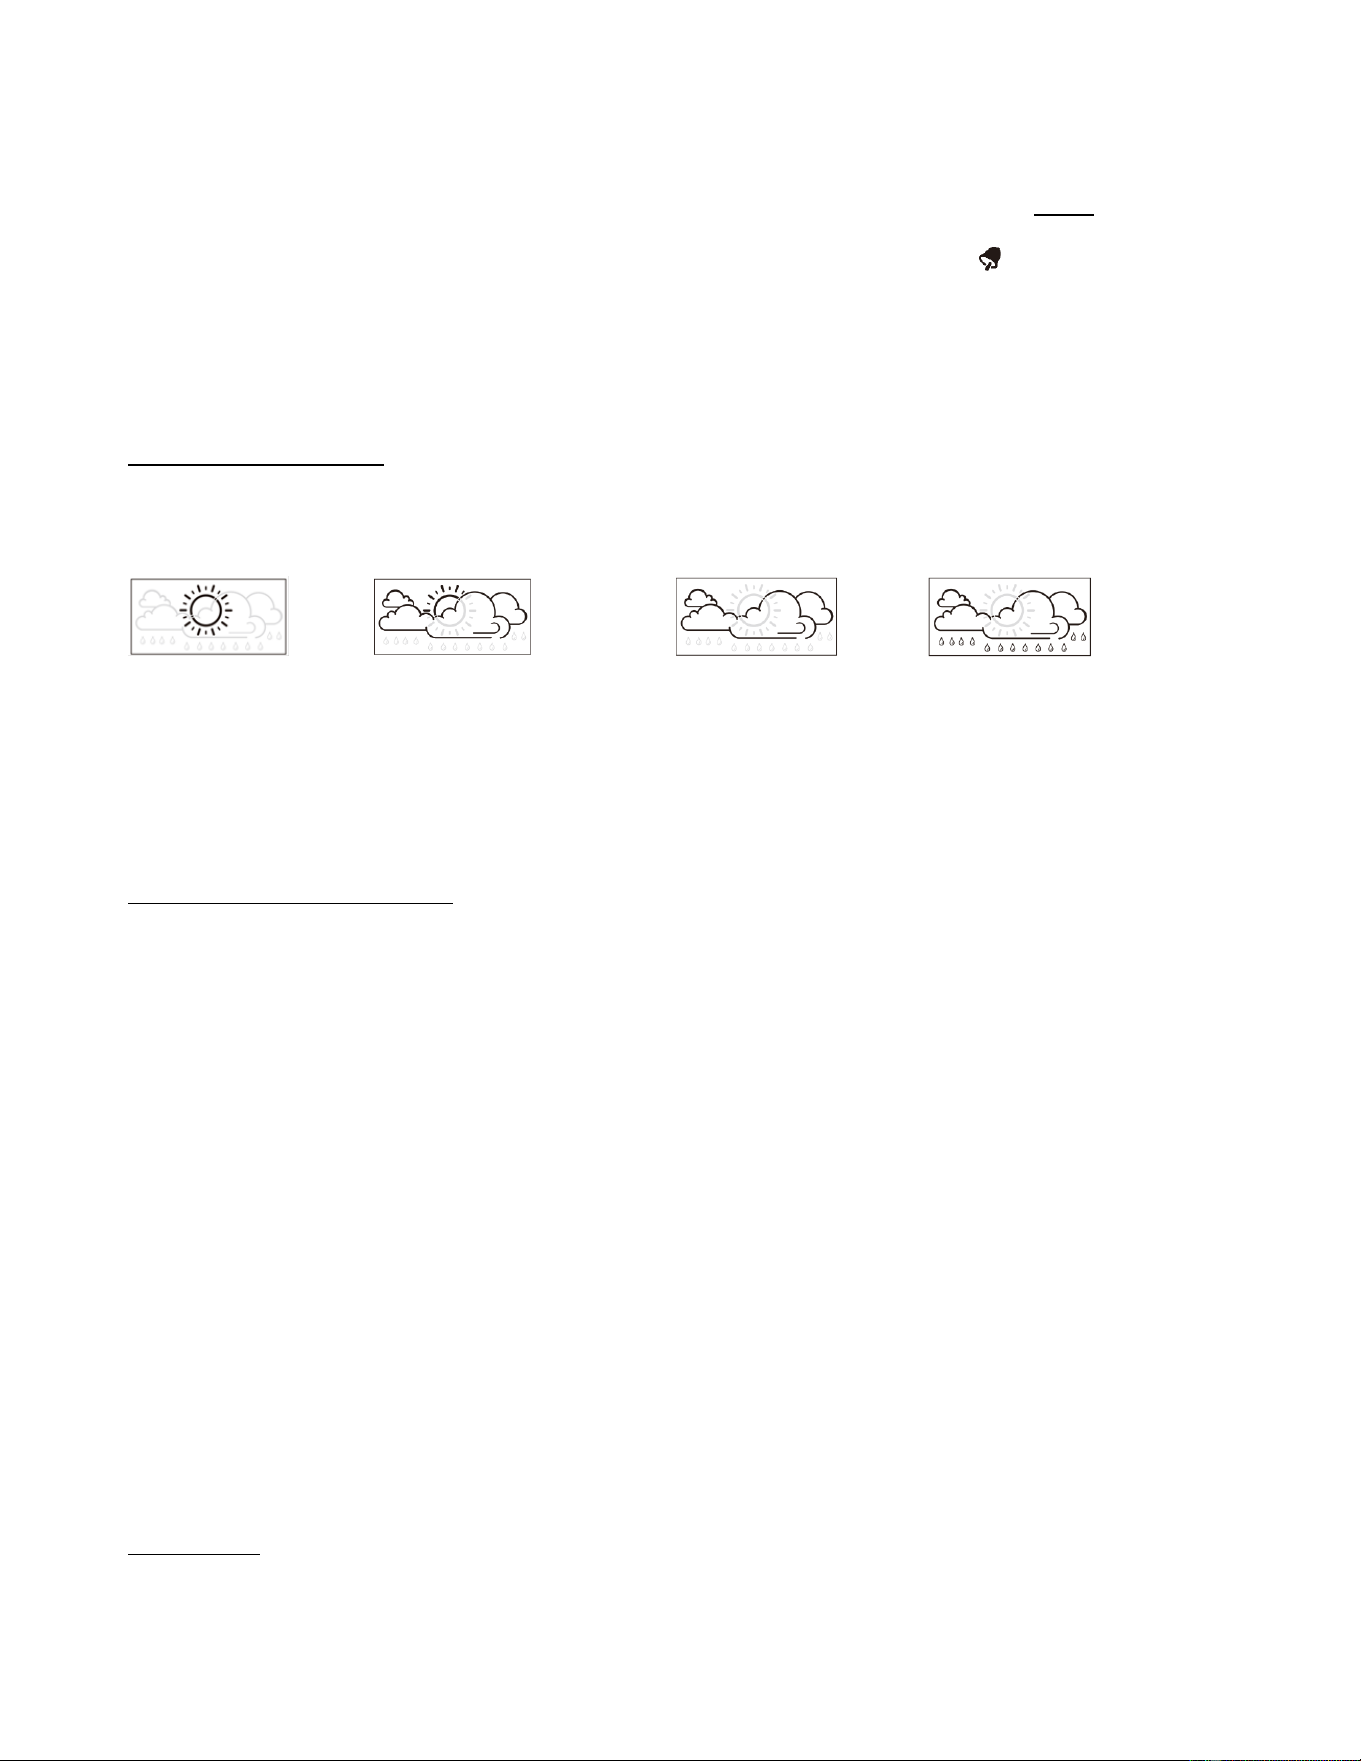
One of these weather icons will be display at the top of the LCD screen:
= Sunny = Partly Cloudy = Cloudy = Rainy
Notes: The weather icons indicate estimated weather fluctuations over the next 6-12 hours, not the current weather
conditions. Once the weather station is powered, the first 12 hours of data will be incorrect, as the units are still analyzing
the current weather conditions.
Please take the weather forecast from your local weather forecasting service into account as well as the forecast from
your weather station. If there are discrepancies between the information from your weather station and local weather
forecasting service, please take the advice of the forecasting service over the weather station.
BAROMETRIC PRESSURE READINGS
Absolute barometric pressure refers to the true measured air pressure at the current time and location of the weather
station. It may be expressed in either millibars (mb)/hectopascals (hPa) or inches of mercury (inHg). A rising or falling
barometric pressure reading indicates the likelihood of fair or poor weather conditions. The barometric pressure display is
located in the center of the LCD screen.
-A high or rising barometric pressure indicates fair weather conditions.
-A low or falling barometric pressure indicates poor weather conditions.
To select a Barometric Pressure Display:
1. Press and hold the “HISTORY” button on the back of the base unit for 2 seconds. An “mb/hPa” or “inHg” icon blinks
in the Barometric Pressure Display window.
2. Press the “UP” or “DOWN” button to toggle between “mb/hPa” and “inHg”.
3. Press “HISTORY” to confirm. The barometric pressure display format is set.
Note: “mb/hPa” altitudes will be expressed in meters, while “inHg” is expressed in feet. If no buttons are pressed within
30 seconds, the unit will automatically return to Normal mode.
Barometric Pressure History
Press the “HISTORY” button on the back of the unit to see the barometric pressure readings for the past 12 hours. The
“HIST” (history) box icon indicates which hour history is displayed (1 hour ago, 2 hours ago, etc.).To return to the current
barometric pressure readings, press “HISTORY” until the hour icon is “0”.
Note: until there are 12 hours of history readings, some history hours will show dashes.
LOW BATTERY
Base unit: replace the batteries if readings grow dim or irregular.
Remote sensor: replace the batteries if the red light on the sensor stops flashing approximately every 57 seconds, or if
transmission signals seem weak or irregular.

Always replace all batteries in each unit at the same time; do not mix old and new batteries. Do not mix alkaline,
standard (carbon-zinc) or rechargeable (ni-cad, ni-mh, etc.) batteries.
NOTE: Please recycle or dispose of batteries per local regulations.
WARNING: Batteries may pose a choking hazard. As with all small items, do not let children handle batteries. If swallowed,
seek medical attention immediately.
PRECAUTION: Do not dispose of batteries in fire. Batteries may explode or leak. Remove the batteries if the units will not
be used for a long period of time.
PROBLEM SOLVING
1. If the base unit does not receive a transmission from the remote sensor for one hour, the outdoor temperature
display will show dashes (“- -”). Press and hold the “DOWN” button on the back of the base unit for 3 seconds to
force a transmission signal. If the connection still fails:
a) Check that the remote is properly positioned, within the appropriate transmission range (200 feet/60 meters).
Transmissions are vastly affected by building materials and where the receiver and remote units are positioned.
Try various set ups for the best results. Shorten the distance between receiver and remote units when necessary.
b) Check to make sure the transmission path is clear of obstacles and interference.
c) Place the remote sensor closer to the base unit.
d) Remove and reinstall all batteries. Try fresh batteries.
2. If the current temperature is higher than the range of the unit, the display will show “HH”. If the current temperature
is lower, the display will show “LL”.
• Indoor temperature range is 32°F to 122°F (0°C to 50°C).
• Outdoor temperature range transmitted by remote sensor is -4°F to 140°F (-20°C to 60°C) using alkaline
batteries. (Use of Lithium batteries can extend the range to -40°F to 140°F / -40°C to 60°C.)
3. The temperature sensors are manufactured to the accurate within plus or minus 2°F (1°C) within a temperature range
from 32 to 104°F (0 to 40°C) and plus or minus 4°F (2°C) outside that range. Therefore, 2 units placed next to each
other may report different readings. This is a normal occurrence with digital sensors and should not be considered a
defect.
4. For maximum performance in normal conditions, good quality alkaline batteries are recommended. When
temperatures are below 0°F, alkaline batteries can lose power resulting in a loss of remote transmission. If you reside
in an area that experiences frequent temperatures near or below 0°F, lithium batteries are recommended to
minimize the loss of transmission.
TRANSMISSION COLLISION
Signals from other household devices, such as doorbells, home security systems and entry controls, may interfere. This is
normal and does not affect the general performance of this product. The transmission will resume once the interference
recedes.
Important: Though the remote sensor is weather resistant, it should be placed away from direct sunlight, rain, snow and
should never be submerged in water.
PRECAUTIONS
1. The base unit is intended for indoor use only. It is not sealed against moisture and could be damaged if used
outdoors. The remote sensor is weather-resistant but not weather-proof or waterproof. Do not immerse it in water
or allow snow to accumulate on it. Do not leave it outdoors in extreme weather conditions. If these conditions
become likely to occur, temporarily move the sensor to an indoor area. Otherwise, permanent damage to the
sensor's internal circuits may occur.
2. Do not immerse the units in water. If you spill liquid on one, dry immediately with a soft, lint-free cloth.
3. Do not clean the units with abrasive or corrosive materials. This may scratch plastic parts and corrode electronic
circuits.
4. Do not subject units to excessive force, shock, dust, temperature or humidity. This may result in malfunction, shorter
electronic life span, damaged batteries or distorted parts.
5. Do not tamper with the unit's internal components. Doing so will invalidate the warranty on this product and may
cause damage. Other than replacing the batteries, the units contain no user-serviceable parts.
6. Do not mix old and new batteries. Do not mix alkaline, standard (carbon-zinc) or rechargeable (ni-cad, ni-mh, etc.)
batteries. Do not dispose of batteries in fire. Batteries may explode or leak. Remove the batteries if the units will not
be used for a long period of time.

7. This product is for measuring weather temperatures only. DO NOT PLACE UNITS INTO OVENS, GRILLS, FREEZERS or
MICROWAVE OVENS.
8. Always read the instruction manual before operating this product.
SPECIFICATIONS
Indoor temperature range: 32°F to 122°F (0°C to 50°C)
Outdoor temperature range transmitted by remote sensor:
Alkaline batteries: -4°F to 140°F (-20°C to 60°C)
Lithium batteries: -40°F to 140°F (-40°C to 60°C)
Over/Under temperature range messages: “HH” for over, “LL” for under
Resolution: 1 degree for temperature
Indoor temperature readings update approximately every 60 seconds
Remote sensor transmits temperature readings approximately every 57 seconds
Weather Forecast – 6 to 12 hour forecast icons
Barometer with 12 hour history
Clock with alarm and snooze
Transmission: Maximum 200 feet (60 meters) in open area
Power: 2 AAA batteries for base unit (not included) and 2 AAA batteries for remote sensor (not included).
IC Caution:
This device complies with Industry Canada license-exempt RSS standard(s). Operation is subject to the following two
conditions:
(1) This device may not cause interference, and
(2) This device must accept any interference, including interference that may cause undesired operation of the device.
RF exposure warning
This equipment complies with IC radiation exposure limits set forth for an uncontrolled environment. This equipment
should be installed and operated with minimum distance 20cm between the radiator & your body.
One Year Limited Warranty
This product is warranted against defects in materials or workmanship (excluding batteries and adapters) for one (1) year
from date of original purchase for the original purchaser. It does not cover damages or wear resulting from accident,
misuse, abuse, commercial use, or unauthorized adjustment and/or repair. Should this product require service (or
replacement at our option) while under warranty, do not return to retailer. Please return the item to:
Lifetime Brands Canada
5151 Thimens Boul.,
Montreal, Quebec,
H4R 2C8
Questions about your weather station?
1-800-661-6721
Service@accenthome.com
Manufactured For :
LIFETIME BRANDS CANADA
5151 Thimens Boul., Montreal, Quebec H4R 2C8
The trademarks ®/™ and logos appearing herein are the property of Lifetime Brands, Inc., and/or their respective owners.
© 2019 Taylor, a Division of Lifetime Brands Inc. All rights reserved.
Due to continuous product improvements, the picture on the carton may differ slightly from the actual product.
Made to our exact specifications in China. Not legal for trade.
MADE IN CHINA