
COMMODORE 64 ULTIMATE
USER’S GUIDE
Published by
Commodore® International Corporation

1st Edition, October 2025
Copyright © 2025 Commodore International Corporation and © MOS
Technology, Inc. All rights reserved. No part of this manual may be re-
produced, stored in a retrieval system, or transmitted in any form or by any
means without prior written permission of Commodore, except as expressly
permitted under applicable copyright law.
This device, manual, and associated documentation incorporate material
subject to copyrights by various owners. Used with permission.
Commodore® and the Commodore logo are registered trademarks
of Commodore Corporation BV or its affiliates in certain countries.
Commodore 64 Ultimate ™, Commobot™, and C6T4™ are trademarks of
Commodore Corporation BV or its affiliates.
HDMI, the HDMI logo, and High-Definition Multimedia Interface are trade-
marks or registered trademarks of HDMI Licensing Administrator, Inc.
Other names are trademarks of their respective owners. All rights reserved.
ii

TABLE OF CONTENTS
Quick Start . . . . . . . . . . . . . . . . . . . . . . . . . . . . . vii
Fun Things to Try! . . . . . . . . . . . . . . . . . . . . . . . . . . x
Introduction . . . . . . . . . . . . . . . . . . . . . . . . . . . . . xi
1 SETTING UP 1
Unpacking and Connecting the Commodore 64 Ultimate . . . . 3
Installing and Switching On the C64U . . . . . . . . . . . . . . 5
The Multi Function Switch . . . . . . . . . . . . . . . . . . . . . 6
Configuring the C64U . . . . . . . . . . . . . . . . . . . . . . . 6
Typing Commands . . . . . . . . . . . . . . . . . . . . . . . . . 12
2 THE C64U FILE BROWSER 15
The Disk File Browser . . . . . . . . . . . . . . . . . . . . . . . . 17
Updating the C64U Firmware . . . . . . . . . . . . . . . . . . . 19
Using Disk Images . . . . . . . . . . . . . . . . . . . . . . . . . . 20
Using Cartridge ROM Files . . . . . . . . . . . . . . . . . . . . . 24
Using Tape Images . . . . . . . . . . . . . . . . . . . . . . . . . 26
Using PRG and T64 Files . . . . . . . . . . . . . . . . . . . . . . 27
Playing SID Music Files . . . . . . . . . . . . . . . . . . . . . . . 27
File Operations . . . . . . . . . . . . . . . . . . . . . . . . . . . 28
3 GETTING STARTED 31
The Keyboard . . . . . . . . . . . . . . . . . . . . . . . . . . . . 33
Back to Normal . . . . . . . . . . . . . . . . . . . . . . . . . . . 36
Loading and Saving Programs . . . . . . . . . . . . . . . . . . . 37
PRINT and Calculations . . . . . . . . . . . . . . . . . . . . . . . 40
Precedence . . . . . . . . . . . . . . . . . . . . . . . . . . . . . 44
Combining Things . . . . . . . . . . . . . . . . . . . . . . . . . . 46
4 BEGINNING BASIC PROGRAMMING 49
The Next Step . . . . . . . . . . . . . . . . . . . . . . . . . . . . 51
Quote Mode . . . . . . . . . . . . . . . . . . . . . . . . . . . . 53
iii

Editing Tips . . . . . . . . . . . . . . . . . . . . . . . . . . . . . 54
Variables . . . . . . . . . . . . . . . . . . . . . . . . . . . . . . 55
IF…THEN . . . . . . . . . . . . . . . . . . . . . . . . . . . . . . . 58
FOR…NEXT Loops . . . . . . . . . . . . . . . . . . . . . . . . . . 59
5 ADVANCED BASIC 63
Introduction . . . . . . . . . . . . . . . . . . . . . . . . . . . . . 65
Simple Animation . . . . . . . . . . . . . . . . . . . . . . . . . . 66
INPUT . . . . . . . . . . . . . . . . . . . . . . . . . . . . . . . . 69
GET . . . . . . . . . . . . . . . . . . . . . . . . . . . . . . . . . 71
Random Numbers and Other Functions . . . . . . . . . . . . . . 72
Guessing Game . . . . . . . . . . . . . . . . . . . . . . . . . . . 75
Your Roll . . . . . . . . . . . . . . . . . . . . . . . . . . . . . . . 77
Random Graphics . . . . . . . . . . . . . . . . . . . . . . . . . . 77
6 ADVANCED COLOR AND GRAPHIC COMMANDS 79
Color and Graphics . . . . . . . . . . . . . . . . . . . . . . . . . 81
PRINTing Colors . . . . . . . . . . . . . . . . . . . . . . . . . . . 81
Color CHR$ Codes . . . . . . . . . . . . . . . . . . . . . . . . . 83
PEEKs and POKEs . . . . . . . . . . . . . . . . . . . . . . . . . . 85
Screen Graphics . . . . . . . . . . . . . . . . . . . . . . . . . . 87
Screen Memory Map . . . . . . . . . . . . . . . . . . . . . . . . 87
Color Memory Map . . . . . . . . . . . . . . . . . . . . . . . . . 89
More Bouncing Balls . . . . . . . . . . . . . . . . . . . . . . . . 90
7 SPRITE GRAPHICS 93
Introduction to Sprites . . . . . . . . . . . . . . . . . . . . . . . 95
Sprite Creation . . . . . . . . . . . . . . . . . . . . . . . . . . . 96
Additional Notes on Sprites . . . . . . . . . . . . . . . . . . . . 104
Binary Arithmetic . . . . . . . . . . . . . . . . . . . . . . . . . . 105
8 CREATING SOUND 109
Using Sound If You’re Not a Computer Programmer . . . . . . . 111
Structure of a Sound Program . . . . . . . . . . . . . . . . . . . 111
Sample Sound Program . . . . . . . . . . . . . . . . . . . . . . 111
Making Music on Your Commodore 64 . . . . . . . . . . . . . . 113
Important Sound Settings . . . . . . . . . . . . . . . . . . . . . 115
Playing a Song on the Commodore 64 . . . . . . . . . . . . . . 121
Creating Sound Effects . . . . . . . . . . . . . . . . . . . . . . 122
Sample Sound Effects to Try . . . . . . . . . . . . . . . . . . . . 123
9 ADVANCED DATA HANDLING 125
iv

READ and DATA . . . . . . . . . . . . . . . . . . . . . . . . . . . 127
Averages . . . . . . . . . . . . . . . . . . . . . . . . . . . . . . 129
Subscripted Variables . . . . . . . . . . . . . . . . . . . . . . . 130
Dimension . . . . . . . . . . . . . . . . . . . . . . . . . . . . . . 133
Simulated Dice Roll with Arrays . . . . . . . . . . . . . . . . . . 134
Two-Dimensional Arrays . . . . . . . . . . . . . . . . . . . . . . 135
10 USING COMMODORE 64 PERIPHERALS 139
Using Commodore 64 Peripherals . . . . . . . . . . . . . . . . . 141
Joysticks, gamepads, and mice . . . . . . . . . . . . . . . . . . 141
Cartridges . . . . . . . . . . . . . . . . . . . . . . . . . . . . . . 142
Disk drives . . . . . . . . . . . . . . . . . . . . . . . . . . . . . . 142
Printers . . . . . . . . . . . . . . . . . . . . . . . . . . . . . . . 143
Datassette . . . . . . . . . . . . . . . . . . . . . . . . . . . . . 143
User port devices . . . . . . . . . . . . . . . . . . . . . . . . . . 143
11 C64U NETWORKING AND WI-FI 145
Getting Online . . . . . . . . . . . . . . . . . . . . . . . . . . . 147
Searching the CommoServe File Index . . . . . . . . . . . . . . 149
FTP File Service . . . . . . . . . . . . . . . . . . . . . . . . . . . 151
Telnet Remote Menu . . . . . . . . . . . . . . . . . . . . . . . . 151
Other Network Features . . . . . . . . . . . . . . . . . . . . . . 153
12 C64U MODEM EMULATION 155
C64U Modem Emulation . . . . . . . . . . . . . . . . . . . . . . 157
Configuring Modem Emulation . . . . . . . . . . . . . . . . . . . 157
Modem Commands . . . . . . . . . . . . . . . . . . . . . . . . . 158
Incoming Connections . . . . . . . . . . . . . . . . . . . . . . . 159
13 C64U PRINTER EMULATION 161
C64U Printer Emulation . . . . . . . . . . . . . . . . . . . . . . 163
Enabling the Virtual Printer . . . . . . . . . . . . . . . . . . . . . 163
Testing the Printer . . . . . . . . . . . . . . . . . . . . . . . . . . 164
Configuring the Printer . . . . . . . . . . . . . . . . . . . . . . . 165
Printer Capabilities . . . . . . . . . . . . . . . . . . . . . . . . . 167
APPENDICES 169
A Commodore 64 BASIC 171
Variables . . . . . . . . . . . . . . . . . . . . . . . . . . . . . . 171
Operators . . . . . . . . . . . . . . . . . . . . . . . . . . . . . . 172
Commands . . . . . . . . . . . . . . . . . . . . . . . . . . . . . 173
v

Statements . . . . . . . . . . . . . . . . . . . . . . . . . . . . . 176
Numeric Functions . . . . . . . . . . . . . . . . . . . . . . . . . 183
String Functions . . . . . . . . . . . . . . . . . . . . . . . . . . . 185
Other Functions . . . . . . . . . . . . . . . . . . . . . . . . . . . 186
B Abbreviations for BASIC Keywords 189
C Screen Display Codes 191
D ASCII and CHR$ Codes 195
E Screen and Color Memory Maps 199
F Deriving Mathematical Functions 201
G Connections and Pinouts 203
H Programs to Try 211
I Error Messages 217
J Music Note Values 221
K Sprite Register Map 225
L Commodore 64 Sound Control Settings 229
M Acknowledgements 233
INDEX 239
vi
QUICK START
Let’s get up and running with your Commodore 64 Ultimate!
Make sure you have:
• Commodore 64 Ultimate computer
• Power supply
• An HDMI® digital display, and
HDMI cable (included)
or
• A composite or S-Video analog display,
and 8-pin Commodore A/V cable (avail-
able at our website)
To set up the computer:
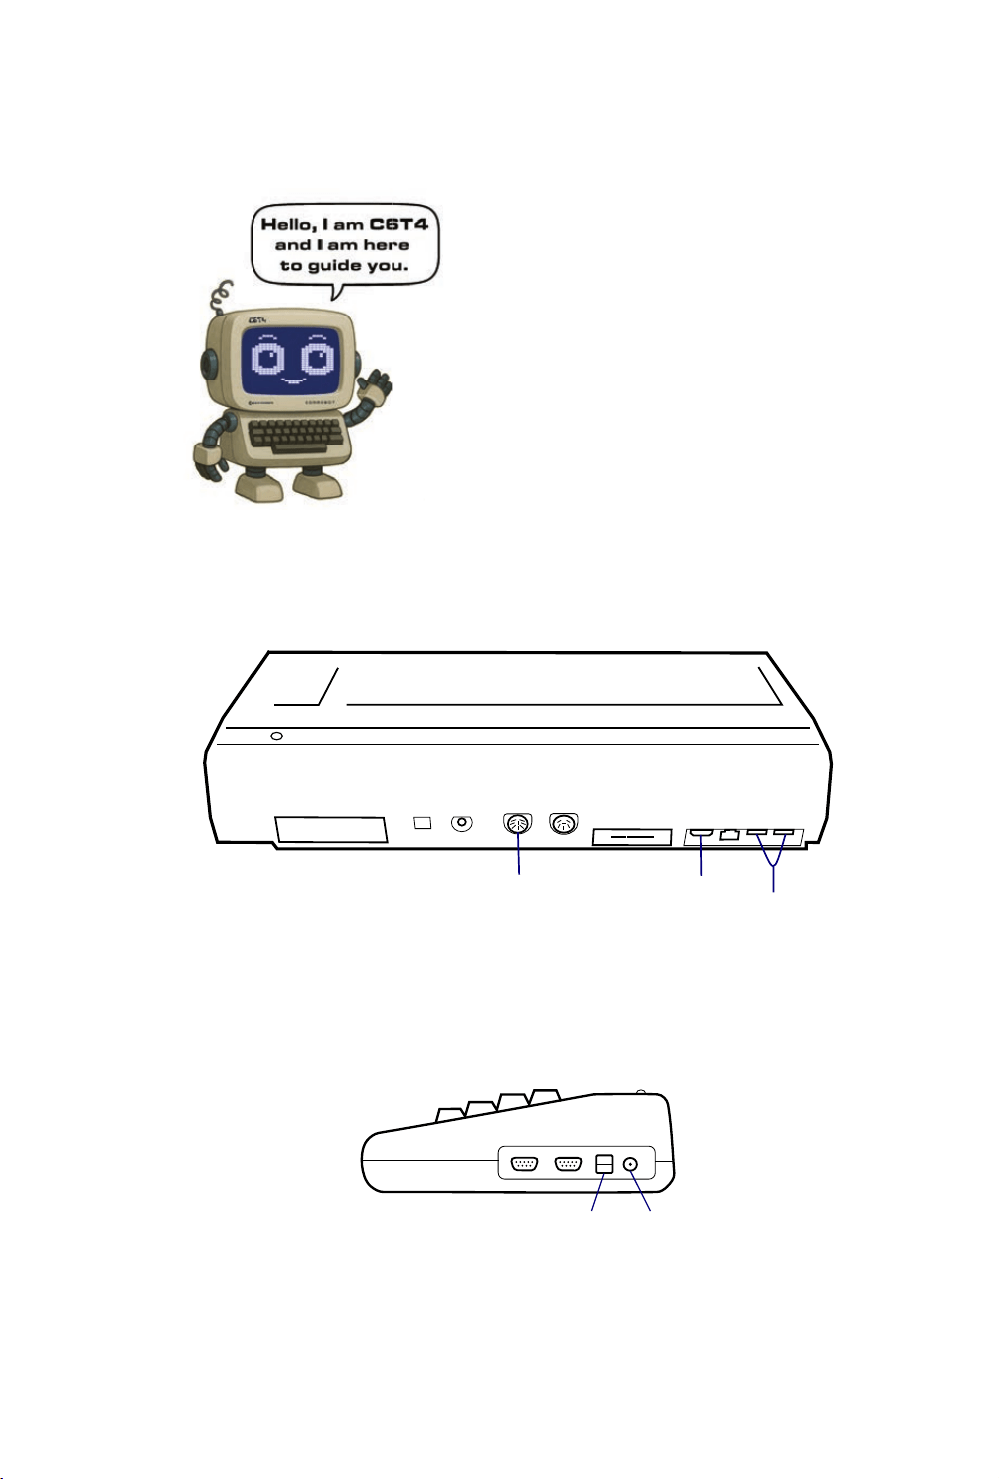
Step 1: Use the appropriate video cable to connect the computer to your
display.
ANALOG
AUDIO/
VIDEO
HDMI
AUDIO/
VIDEO
USB
STORAGE
Step 2: Attach the power connector appropriate for your locale to the
power adapter, then connect the adapter to your household power outlet.
Step 3: Connect the power supply to the barrel jack on the right-hand
side of the computer.
MULTI
FUNCTION
SWITCH
POWER
SOCKET
Step 4: If you have a USB storage device, connect it to either USB storage
port.
vii
Step 5: Locate the Multi Function Switch on the right-hand side of the
computer. Push it upward to switch on the computer.
NOTE: If you are not seeing an image on your display, switch off the
computer by holding the Multi Function Switch downward for four
seconds. Hold the Commodore key ǣ and
N
while switching the
computer on again. This temporarily sets the C64U in NTSC video
mode, which is required for some displays. See the chapter “Setting
Up” for information on how to save this setting.
To switch off the C64U, hold the Multi Function Switch downward for four
seconds. To reset the C64U without switching it off, hold the Multi Func-
tion Switch upward for one second.
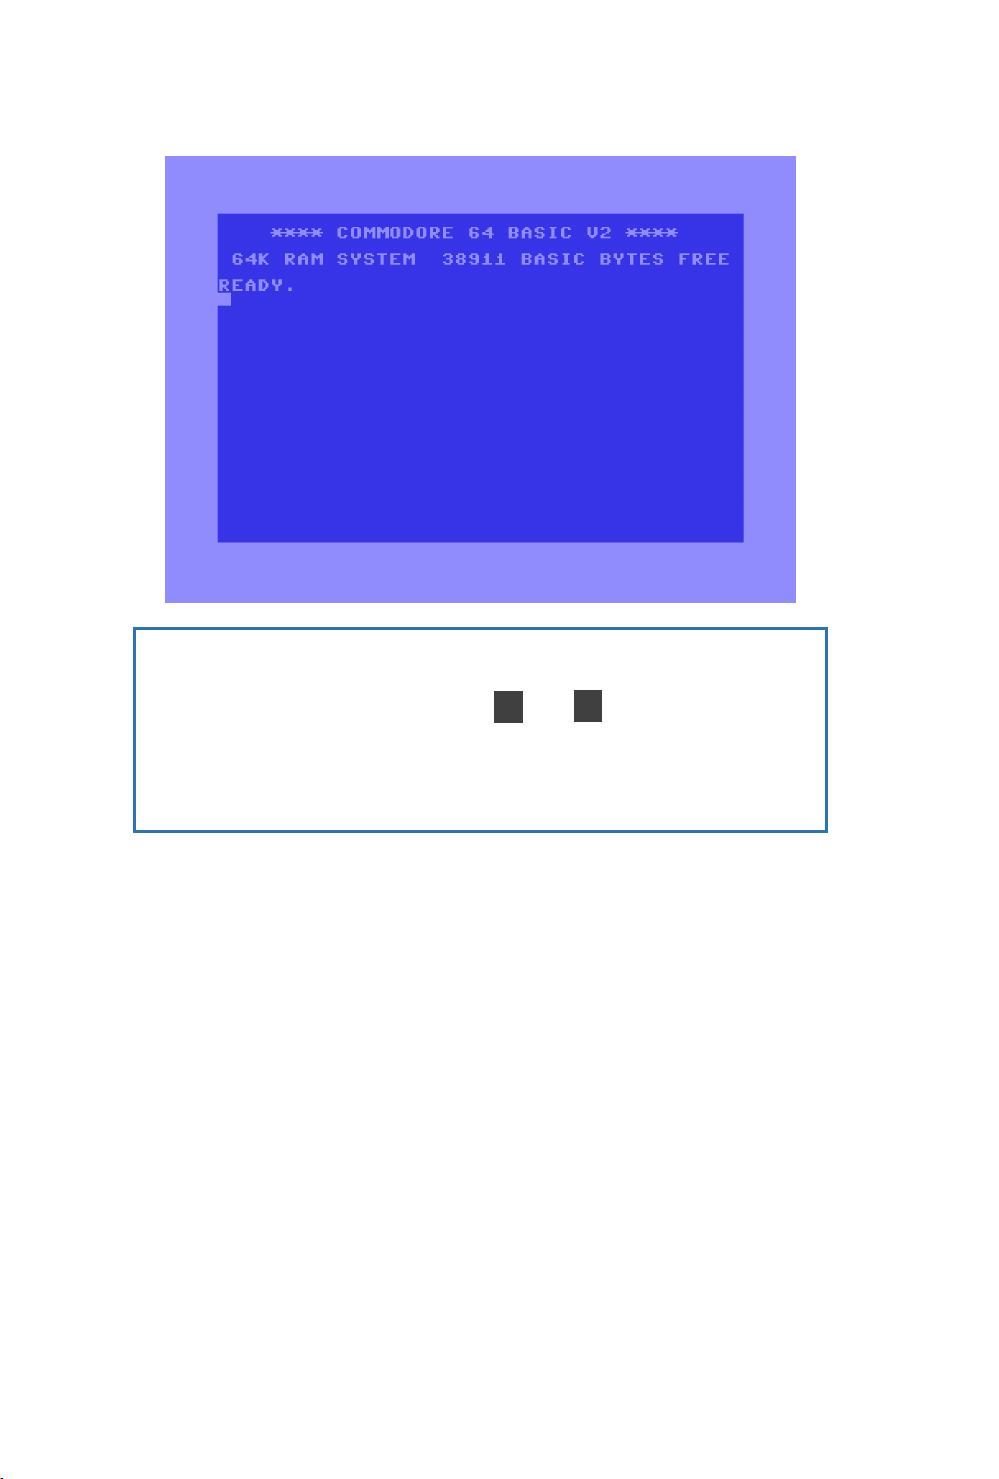
The Commodore 64 Ultimate works like the original Commodore 64, with
modern conveniences. Ultimate features and settings can be accessed
from the C64U Menu. To open the C64U Menu, press the Multi Function
Switch upward momentarily.
viii
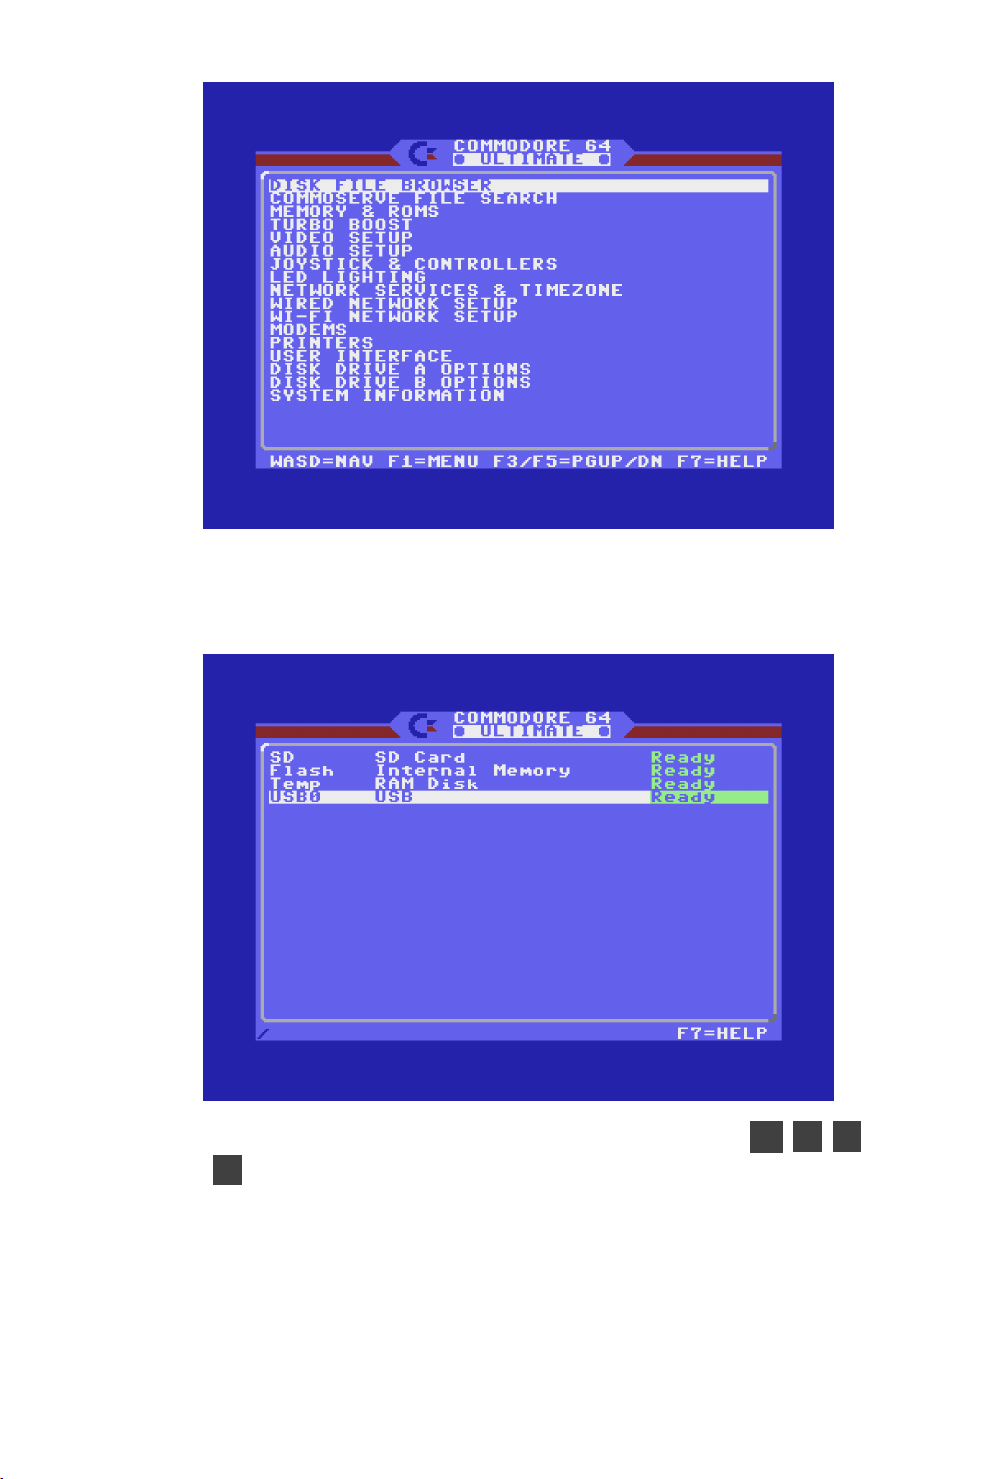
The most useful item in the main menu is the Disk File Browser. You can
use this to browse files on modern storage devices, such as a USB storage
device connected to the back-left of the computer.
You can navigate the menu system and file browser using the W , A , S ,
and D keys, or the Commodore cursor keys.
Press the Multi Function Switch upward to close the menu and return to the
READY prompt. You can access the C64U Menu at any time, even while a
program is running.
ix

FUN THINGS TO TRY!
The best way to learn is to try things. Here are just a few suggestions:
• Play a game. Connect your included USB cassette to a
USB port, then use the Disk File Browser to find GAMES/NTSC &
PAL/Bomberland. Run the .d64 disk image to start the game.
• Connect to Wi-Fi. Select “Wi-Fi Network Setup,” then “Select AP
from list” to connect to your wireless access point. See chapter 11.
• Search for a new game. Select “CommoServe File Search,” then
enter Tenebra 2 in the “Name” field. Submit the form, then select
Tenebra 2 (Haplo, 2022) from the results. Run the .d64 disk im-
age. See chapter 11. Tip: Don’t have a joystick? Turn on keyboard
joystick emulation from the C64U Menu.
• Run a demo. Try DEMOS/Next Level. Start with disk “s1.”
• Play some music. MUSIC/MultiSID/The Tuneful Eight really
shines, using all eight of the C64U’s UltiSIDs.
• Connect to a BBS. Find BBS/UltimateTerm on the included USB
drive, then run UltimateTerm.d64. Load the BBS client (option 1),
then select a BBS from the list. See chapter 12.
And you’re off! Once you’ve had a look around, return to this Guide for a
complete introduction to your new computer.
x

INTRODUCTION
Congratulations on your purchase of the ultimate version of one of the
most beloved computers in the world. You are now the proud owner of
a COMMODORE 64 ULTIMATE. Commodore is known as The Friendly
Computer company, and part of being friendly is giving you easy to
read, easy to use and easy to understand instruction manuals. The
COMMODORE 64 ULTIMATE USER’S GUIDE is designed to give you all
the information you need to properly set up your equipment, get ac-
quainted with operating the COMMODORE 64 ULTIMATE, outline its ad-
vanced features in comparison to the original Commodore 64, and give
you a simple, fun start at learning to make your own programs.
For those of you who don’t want to learn how to program, or who are only
interested in the advanced features of the COMMODORE 64 ULTIMATE,
we’ve put all the information you need to use Commodore programs from
USB storage devices right up front. Later chapters introduce topics such
as BASIC programming and more advanced features of the Ultimate.
Let’s look at some of the exciting features that are just waiting for you
when using a C64U. When it comes to graphics, you’ve got what was once
the most advanced picture maker in the microcomputer industry. SPRITE
GRAPHICS allow you to design your own pixel based pictures in 4 differ-
ent colors, just like the ones you see in arcade video games. Using simple
programming techniques, you can animate as many as 8 different sprites
at one time. You can move your pixel creations anywhere on the screen,
even pass one image in front of or behind another. The C64U provides au-
tomatic collision detection which instructs the computer to take the action
you want when the sprites hit each other.
The Commodore 64 was famous for its built-in music and sound effects
that rivaled many well-known music synthesizers of the early 80s. Whilst
the original Commodore 64 gave you 3 independent voices, each with
a full 9 octave “piano-type” range, the COMMODORE 64 ULTIMATE
provides as many as 8 emulated SID chips that can operate simultane-
ously, with 24 independent voices, including the possibility of populating
two additional original SID chips on the motherboard. As in the origi-
nal Commodore 64, you get 4 different waveforms (sawtooth, triangle,
variable pulse, and noise), a programmable ADSR (attack, decay, sustain,
release) envelope generator, programmable high, low, and bandpass fil-
ters for the voices, and variable resonance and volume controls. If you
want your music to play back with professional sound reproduction, the
xi

COMMODORE 64 ULTIMATE allows you to connect your audio output to
almost any high-quality amplification system.
While we’re on the subject of connecting the COMMODORE 64 ULTIMATE
to other pieces of equipment: your system can be expanded by adding
many of the same accessories as the original Commodore 64, known as
peripherals. Some of your peripheral options include Commodore disk
drive storage units such as the VIC 1541, or even the original DATASSETTE
recorder, for the programs you make and/or play. You can add a dot ma-
trix printer to give you printed copies of your programs, letters, invoices,
etc.
You will find the modern features of the COMMODORE 64 ULTIMATE
negate the need for most of these peripherals as disk, tape, and cartridge
images, sometimes referred to as ROM files, can be utilized instead, ac-
cessed via a USB storage device, or via the SD card reader mounted on the
Ultimate’s motherboard. Printing from various Commodore 64 programs,
such as GEOS, can generate output to modern PNG graphics files, which
can be transferred to another device for printing on modern printers.
Just as important as all the available hardware is the fact that this USER’S
GUIDE will help you develop your understanding of computers at a more
basic level. Commodore wants you to really enjoy your new COMMODORE
64 ULTIMATE. And to have fun, remember: programming is not the kind of
thing you can learn in a day. Be patient with yourself as you go through
the USER’S GUIDE.
The Commodore 64 Ultimate (the “C64U”) is a modern interpretation
of the best-selling single model of personal computer of all time, the
Commodore 64. The C64U adds modern conveniences and connectiv-
ity to your Commodore 64 experience, while recreating everything that
was great about the original.
We strongly encourage you to seek out the many books, magazine articles,
and online resources that have been written about the Commodore 64
over the decades to enhance your Ultimate experience.
Be sure to visit the website of Commodore International for firmware up-
dates, documentation, and more resources for getting the most out of your
Commodore 64 Ultimate:
commodore.net
xii

Safety and Health
• Use only approved power supply.
• Keep away from water and excessive heat.
• Provide proper ventilation.
• No user-serviceable parts inside. Contact Commodore for service.
• Some people may experience epileptic seizures when exposed to ashing lights or
visual patterns --- even if they have never had one before. If you or any member
of your family has a history of epilepsy, consult a doctor before using this product.
Stop use immediately and seek medical advice if you experience dizziness, blurred
vision, involuntary movements, loss of awareness, or other symptoms.
• Parents: monitor children's use. Take regular breaks (10 -- 15 minutes per hour)
and adjust brightness as needed.
• Take regular breaks during use. Use in a well-lit room at a safe viewing distance.
• California Prop 65: This product may expose you to chemicals including
lead and phthalates, known to cause cancer or reproductive harm. See:
www.P65Warnings.ca.gov
Warranty. Commodore warrants this product against defects in materials and work-
manship for one (1) year from the date of original retail purchase. Repair, re-
placement, or refund at Commodore's option. Warranty excludes normal wear,
misuse, accidents, unauthorized modications. Rights under consumer law are
not aected. Made in China. For warranty service, contact Commodore Support:
commodore.net/contact-us Or write to: Commodore International Corporation, 8 The
Green, Ste A, Dover, Kent, DE 19901, USA
Software License. Commodore software, rmware, and ROMs are licensed, not sold.
You may use the software only with your Commodore hardware. Reverse engineer-
ing, modication, or redistribution is prohibited except as permitted by law. Some
software includes licensed or open-source components. For more information, visit:
commodore.net/licenses
Regulatory Compliance. This device complies with Part 15 of the FCC Rules. Opera-
tion is subject to the following two conditions: (1) this device may not cause harmful
interference, and (2) this device must accept any interference received, including in-
terference that may cause undesired operation. This device complies with ICES-003,
CE, UKCA, RCM, RoHS, and REACH. Unauthorized modications may void regulatory
approval and your authority to operate the product.
Support & Recycling. Do not dispose of with household waste. For recycling infor-
mation, see the symbol on the product or packaging.
For full warranty terms, service instructions, and EU/UK Declarations of Conformity,
visit: commodore.net/compliance
xiii

FCC Warning: This device complies with Part 15 of the FCC Rules. Operation is subject
to the following two conditions: (1) This device may not cause harmful interference,
and (2) This device must accept any interference received, including interference that
may cause undesired operation.
Any Changes or modications not expressly approved by the party responsible for
compliance could void the user's authority to operate the equipment.
These limits are designed to provide reasonable protection against harmful inter-
ference in a residential installation. This equipment generates uses and can radiate
radio frequency energy and, if not installed and used in accordance with the instruc-
tions, may cause harmful interference to radio communications. However, there is
no guarantee that interference will not occur in a particular installation. If this equip-
ment does cause harmful interference to radio or television reception, which can be
determined by turning the equipment o and on, the user is encouraged to try to
correct the interference by one or more of the following measures: Reorient or re-
locate the receiving antenna. Increase the separation between the equipment and
receiver. Connect the equipment into an outlet on a circuit dierent from that to
which the receiver is connected. Consult the dealer or an experienced radio/TV tech-
nician for help.
This equipment complies with FCC radiation exposure limits set forth for an uncon-
trolled environment. This equipment should be installed and operated with a mini-
mum distance of 20cm between the radiator and your body.
IC WARNING: This device complies with Innovation, Science and Economic Develop-
ment Canada licence-exempt RSS standard(s). Operation is subject to the following
two conditions: (1) This device may not cause interference, and (2) This device must
accept any interference, including interference that may cause undesired operation
of the device.
The device has been evaluated to meet general RF exposure requirement.
The device can be used in portable exposure condition without restriction.
HVIN: C64U
PMN: C64U
IC: 34683-C64U
xiv

Sicherheit und Gesundheit
• Verwenden Sie nur zugelassene Netzteile.
• Von Wasser und übermäßiger Hitze fernhalten.
• Für ausreichende Belüftung sorgen.
• Enthält keine vom Benutzer zu wartenden Teile. Wenden Sie sich für Service an
Commodore.
• Manche Menschen können epileptische Anfälle erleiden, wenn sie blinkenden
Lichtern oder visuellen Mustern ausgesetzt sind –auch wenn sie noch nie zuvor
einen Anfall hatten. Wenn Sie oder ein Familienmitglied an Epilepsie leiden, kon-
sultieren Sie vor der Verwendung dieses Produkts einen Arzt. Beenden Sie die Ver-
wendung sofort und suchen Sie einen Arzt auf, wenn Schwindel, verschwommenes
Sehen, unwillkürliche Bewegungen, Bewusstseinsverlust oder andere Symptome
auftreten.
• Eltern: Beaufsichtigen Sie die Verwendung Ihres Kindes. Machen Sie regelmäßig
Pausen (10–15 Minuten pro Stunde) und passen Sie die Helligkeit nach Bedarf an.
• Machen Sie während der Verwendung regelmäßig Pausen. Verwenden Sie das Pro-
dukt in einem gut beleuchteten Raum und aus sicherer Entfernung.
• California Prop 65: Dieses Produkt kann Sie Chemikalien wie Blei und Phtha-
laten aussetzen, die bekanntermaßen Krebs verursachen oder die Fortpanzungs-
fähigkeit schädigen. Siehe: www.P65Warnings.ca.gov
Garantie. Commodore gewährt für dieses Produkt eine Garantie von einem
(1) Jahr ab Kaufdatum auf Material- und Verarbeitungsfehler. Reparatur, Er-
satz oder Rückerstattung erfolgen nach Ermessen von Commodore. Von der
Garantie ausgeschlossen sind normale Abnutzung, Missbrauch, Unfälle und nicht au-
torisierte Modikationen. Verbraucherschutzrechte bleiben unberührt. Hergestellt
in China. Für Garantieleistungen wenden Sie sich bitte an den Commodore-Support:
commodore.net/contact-us Oder schreiben Sie an: Commodore International Corpo-
ration, 8 The Green, Ste A, Dover, Kent, DE 19901, USA
Softwarelizenz. Commodore-Software, -Firmware und -ROMs werden lizenziert,
nicht verkauft. Sie dürfen die Software nur mit Ihrer Commodore-Hardware
verwenden. Reverse Engineering, Modikation oder Weiterverbreitung sind,
sofern gesetzlich nicht gestattet, untersagt. Manche Software enthält lizen-
zierte oder Open-Source-Komponenten. Weitere Informationen nden Sie unter:
commodore.net/licenses
Einhaltung gesetzlicher Vorschriften. Dieses Gerät entspricht Teil 15 der FCC-
Bestimmungen. Der Betrieb unterliegt den folgenden zwei Bedingungen: (1)
Das Gerät darf keine schädlichen Störungen verursachen und (2) das Gerät muss
alle empfangenen Störungen tolerieren, einschließlich Störungen, die zu uner-
wünschtem Betrieb führen können. Dieses Gerät entspricht ICES-003, CE, UKCA,
RCM, RoHS und REACH. Unbefugte Modikationen können zum Erlöschen der be-
hördlichen Zulassung und Ihrer Betriebserlaubnis führen.
Support & Recycling. Nicht im Hausmüll entsorgen. Recyclinginformationen nden
Sie auf dem Symbol auf dem Produkt oder der Verpackung.
Vollständige Garantiebedingungen, Serviceanleitungen und EU/UK-
Konformitätserklärungen nden Sie unter: commodore.net/compliance
xv

Veiligheid en gezondheid
• Gebruik alleen een goedgekeurde voeding.
• Verwijderd houden van water en extreme hitte.
• Zorg voor voldoende ventilatie.
• Geen door de gebruiker te onderhouden onderdelen. Neem contact op met
Commodore voor onderhoud.
• Sommige mensen kunnen epileptische aanvallen krijgen bij blootstelling aan it-
sende lichten of visuele patronen, zelfs als ze er nog nooit eerder een hebben
gehad. Als u of een familielid epilepsie heeft, raadpleeg dan een arts voordat u
dit product gebruikt. Stop het gebruik onmiddellijk en raadpleeg een arts als u last
krijgt van duizeligheid, wazig zien, onwillekeurige bewegingen, bewustzijnsverlies
of andere symptomen.
• Ouders: houd toezicht op het gebruik van kinderen. Neem regelmatig pauzes (10-
15 minuten per uur) en pas de helderheid indien nodig aan.
• Neem regelmatig pauzes tijdens gebruik. Gebruik het product in een goed ver-
lichte ruimte op een veilige kijkafstand.
• California Prop 65: Dit product kan u blootstellen aan chemicaliën, waaronder lood
en ftalaten, waarvan bekend is dat ze kanker of reproductieve schade veroorzaken.
Zie: www.P65Warnings.ca.gov
Garantie. Commodore garandeert dit product tegen materiaal- en fabricagefouten
gedurende één (1) jaar vanaf de datum van oorspronkelijke aankoop. Reparatie,
vervanging of restitutie naar keuze van Commodore. Garantie is exclusief nor-
male slijtage, verkeerd gebruik, ongevallen en ongeoorloofde wijzigingen. Rechten
onder consumentenrecht worden niet aangetast. Gemaakt in China. Neem voor
garantieservice contact op met Commodore Support: commodore.net/contact-us Of
schrijf naar: Commodore International Corporation, 8 The Green, Ste A, Dover, Kent,
DE 19901, VS
Softwarelicentie
. Commodore-software, -rmware en -ROM's worden in licen-
tie gegeven, niet verkocht. U mag de software uitsluitend gebruiken met
uw Commodore-hardware. Reverse engineering, modicatie of herdistributie
is verboden, behalve voor zover wettelijk toegestaan. Sommige software be-
vat gelicentieerde of open-sourcecomponenten. Ga voor meer informatie naar:
commodore.net/licenses
Naleving van regelgeving. Dit apparaat voldoet aan Deel 15 van de FCC-regels. Ge-
bruik is onderworpen aan de volgende twee voorwaarden: (1) dit apparaat mag geen
schadelijke interferentie veroorzaken, en (2) dit apparaat moet alle ontvangen in-
terferentie accepteren, inclusief interferentie die ongewenste werking kan veroorza-
ken. Dit apparaat voldoet aan ICES-003, CE, UKCA, RCM, RoHS en REACH. Ongeau-
toriseerde wijzigingen kunnen de wettelijke goedkeuring en uw bevoegdheid om het
product te gebruiken ongeldig maken.
Ondersteuning & Recycling. Niet weggooien bij het huisvuil. Raadpleeg het sym-
bool op het product of de verpakking voor informatie over recycling.
Ga voor de volledige garantievoorwaarden, service-instructies en EU/VK-
conformiteitsverklaringen naar: commodore.net/compliance
xvi

Sécurité et santé
• Utiliser uniquement une alimentation électrique homologuée.
• Tenir à l'écart de l'eau et de la chaleur excessive.
• Assurer une ventilation adéquate.
• Aucune pièce interne réparable par l'utilisateur. Contacter Commodore pour une
intervention.
• Faire des pauses régulières pendant l'utilisation. Utiliser dans une pièce bien
éclairée et à une distance de sécurité.
• California Proposition 65: Ce produit peut vous exposer à des produits chimiques,
notamment le plomb et les phtalates, connus pour être cancérigènes ou nocifs
pour la reproduction. Voir: www.P65Warnings.ca.gov
Garantie. Commodore garantit ce produit contre tout défaut de matériaux et de
fabrication pendant un (1) an à compter de la date d'achat initiale. Réparation, rem-
placement ou remboursement au choix de Commodore. La garantie exclut l'usure
normale, une mauvaise utilisation, les accidents et les modications non autorisées.
Les droits garantis par le droit de la consommation ne sont pas aectés. Fabriqué en
Chine. Pour toute intervention sous garantie, contactez l'assistance Commodore:
commodore.net/contact-us ou écrivez à: Commodore International Corporation, 8
The Green, Ste A, Dover, Kent, DE 19901, États-Unis.
Licence du logiciel. Les logiciels, micrologiciels et ROM Commodore sont con-
cédés sous licence et non vendus. Vous ne pouvez utiliser le logiciel qu'avec votre
matériel Commodore. La rétro-ingénierie, la modication ou la redistribution sont
interdites, sauf dans les cas autorisés par la loi. Certains logiciels incluent des
composants sous licence ou open source. Pour plus d'informations, consultez:
commodore.net/licenses
Conformité réglementaire. Cet appareil est conforme à la partie 15 de la régle-
mentation FCC. Son utilisation est soumise aux deux conditions suivantes: (1) cet
appareil ne doit pas provoquer d’interférences nuisibles; (2) il doit accepter toute
interférence reçue, y compris celles pouvant entraîner un dysfonctionnement. Cet
appareil est conforme aux normes ICES-003, CE, UKCA, RCM, RoHS et REACH. Toute
modication non autorisée peut annuler l’approbation réglementaire et votre droit
d’utiliser le produit.
Support & Recyclage. Ne pas jeter avec les ordures ménagères. Pour plus d’infor-
mations sur le recyclage, consultez le symbole sur le produit ou son emballage.
Pour consulter l’intégralité des conditions de garantie, les instructions d’en-
tretien et les déclarations de conformité UE/Royaume-Uni, rendez-vous sur:
commodore.net/compliance
xvii

Avertissement —Épilepsie photosensible: Certaines personnes sont susceptibles
de faire des crises d’épilepsie comportant, le cas échéant, des pertes de conscience
à la vue, notamment, de certains types de stimulations lumineuses fortes : succes-
sion rapide d’images ou répétition de gures géométriques simples, d’éclairs ou d’
explosions.
Ces personnes s
’
exposent à des crises lorsqu
’
elles jouent à certains jeux vidéo com-
portant de telles stimulations, alors même qu’elles n’ont pas d’antécédent médical
ou n’ont jamais été sujettes elles-mêmes à des crises d’épilepsie.
Si vous-même ou un membre de votre famille avez déjà présenté des symptômes liés
à l’épilepsie (crise ou perte de conscience) en présence de stimulations lumineuses,
consultez votre médecin avant toute utilisation.
Les parents se doivent également d’être particulièrement attentifs à leurs enfants
lorsqu’ils jouent avec des jeux vidéo.
Si vous-même ou votre enfant présentez un des symptômes suivants : vertige, trou-
ble de la vision, contraction des yeux ou des muscles, trouble de l’orientation, mou-
vement involontaire ou convulsion, perte momentanée de conscience, il faut cesser
immédiatement de jouer et consulter un médecin.
ADVERTENCIA IC: Le présentappareilestconforme aux CNR d'Avis sur l'innovation,la
science etle développement économique applicables aux appareils radio ex-
empts de licence. L'exploitationestautorisée aux deux conditions suivantes: (1)
l'appareil ne doit pas produire de brouillage, et (2) l'utilisateur de l'appareildoit
accepter tout brouillageradioélectriquesubi, mêmesi le brouillageest susceptible
d'encompromettre le fonctionnement.
Le dispositif a été évalué à satisfaire l'exigence générale de l'exposition aux rf.
L'appareil peut être utilisé dans des conditions d'exposition portatif sans restriction.
HVIN: C64U
PMN: C64U
IC: 34683-C64U
xviii

Sicurezza e salute
• Utilizzare solo alimentatori approvati.
• Tenere lontano dall'acqua e da fonti di calore eccessive.
• Garantire un'adeguata ventilazione.
• Non ci sono parti riparabili dall'utente all'interno. Contattare Commodore per
l'assistenza.
• Alcune persone possono manifestare crisi epilettiche se esposte a luci lampeggianti
o schemi visivi, anche se non ne hanno mai avute prima. Se tu o un membro della
tua famiglia avete una storia di epilessia, consultate un medico prima di utilizzare
questo prodotto. Interrompete immediatamente l'uso e consultate un medico in
caso di vertigini, visione ouscata, movimenti involontari, perdita di coscienza o
altri sintomi.
• Genitori: monitorare l'uso dei bambini. Fare pause regolari (10-15 minuti ogni ora)
e regolare la luminosità secondo necessità.
• Fare pause regolari durante l'uso. Utilizzare in una stanza ben illuminata a una
distanza di sicurezza.
• California Proposition 65: Questo prodotto può esporvi a sostanze chimiche, tra cui
piombo e ftalati, notoriamente cancerogeni o dannosi per l'apparato riproduttivo.
Vedere: www.P65Warnings.ca.gov
Garanzia. Commodore garantisce questo prodotto contro difetti di materiali e fab-
bricazione per un (1) anno dalla data di acquisto originale. Riparazione, sostituzione
o rimborso a discrezione di Commodore. La garanzia esclude la normale usura, l'uso
improprio, gli incidenti e le modiche non autorizzate. I diritti previsti dalla legge
a tutela dei consumatori non sono interessati. Prodotto in Cina. Per l'assistenza
in garanzia, contattare l'assistenza Commodore: commodore.net/contact-us Oppure
scrivere a: Commodore International Corporation, 8 The Green, Ste A, Dover, Kent,
DE 19901, USA
Licenza software
. Il software, il rmware e le ROM Commodore sono concessi in li-
cenza, non venduti. È possibile utilizzare il software solo con l'hardware Commodore.
Il reverse engineering, la modica o la ridistribuzione sono vietati, salvo quanto con-
sentito dalla legge. Alcuni software includono componenti concessi in licenza o open
source. Per ulteriori informazioni, visitare: commodore.net/licenses
Conformità alle normative. Questo dispositivo è conforme alla Parte 15 delle
Norme FCC. Il funzionamento è soggetto alle seguenti due condizioni: (1) questo
dispositivo non deve causare interferenze dannose e (2) questo dispositivo deve ac-
cettare qualsiasi interferenza ricevuta, incluse interferenze che potrebbero causare
un funzionamento indesiderato. Questo dispositivo è conforme a ICES-003,
CE, UKCA, RCM, RoHS e REACH. Modiche non autorizzate possono invalidare
l'approvazione normativa e l'autorizzazione all'utilizzo del prodotto.
Supporto & Riciclo. Non smaltire con i riuti domestici. Per informazioni sul riciclag-
gio, consultare il simbolo sul prodotto o sulla confezione.
Per i termini di garanzia completi, le istruzioni di assistenza e le dichiarazioni di con-
formità UE/Regno Unito, visitare: commodore.net/compliance
xix

Turvallisuus ja terveys
• Käytä vain hyväksyttyä virtalähdettä.
• Pidä poissa vedestä ja liiallisesta kuumuudesta.
• Varmista asianmukainen ilmanvaihto.
• Sisällä ei ole käyttäjän huollettavia osia. Ota yhteyttä Commodoreen huoltoa
varten.
• Jotkut ihmiset saattavat saada epileptisiä kohtauksia altistuessaan välkkyville val-
oille tai visuaalisille kuvioille --- vaikka heillä ei olisi koskaan aiemmin ollut sellaista.
Jos sinulla tai jollain perheenjäsenelläsi on epilepsia, ota yhteys lääkäriin ennen
tämän tuotteen käyttöä. Lopeta käyttö välittömästi ja hakeudu lääkärin hoitoon,
jos sinulla ilmenee huimausta, näön hämärtymistä, tahattomia liikkeitä, tajunnan
menetystä tai muita oireita.
• Vanhemmat: valvokaa lasten käyttöä. Pidä säännöllisiä taukoja (10-15 minuuttia
tunnissa) ja säädä kirkkautta tarpeen mukaan.
• Pidä säännöllisiä taukoja käytön aikana. Käytä hyvin valaistussa huoneessa turval-
lisella katseluetäisyydellä.
• Kalifornian lakiehdotus 65: Tämä tuote voi altistaa sinut kemikaaleille, mukaan
lukien lyijy ja ftalaatit, joiden tiedetään aiheuttavan syöpää tai lisääntymistervey-
delle haitallisia vaikutuksia. Katso: www.P65Warnings.ca.gov
Takuu. Commodore myöntää tälle tuotteelle yhden (1) vuoden takuun materiaali-
ja valmistusvirheiden varalta alkuperäisestä ostopäivästä. Korjaus, vaihto tai hyvitys
Commodoren valinnan mukaan. Takuu ei kata normaalia kulumista, väärinkäyttöä,
onnettomuuksia tai luvattomia muutoksia. Kuluttajansuojalain mukaiset oikeudet
eivät muutu. Valmistettu Kiinassa. Takuupalvelua varten ota yhteyttä Commodoren
tukeen: commodore.net/contact-us Tai kirjoita osoitteeseen: Commodore Interna-
tional Corporation, 8 The Green, Ste A, Dover, Kent, DE 19901, USA
Ohjelmistolisenssi. Commodoren ohjelmisto, laiteohjelmisto ja ROM-levyt lisen-
soidaan, niitä ei myydä. Voit käyttää ohjelmistoa vain Commodore-laitteistosi kanssa.
Käänteinen suunnittelu, muokkaaminen tai jakelu on kielletty, ellei laki sitä salli.
Jotkin ohjelmistot sisältävät lisensoituja tai avoimen lähdekoodin komponentteja.
Lisätietoja on osoitteessa: commodore.net/licenses
Sääntelyvaatimustenmukaisuus. Tämä laite on FCC-sääntöjen osan 15 mukainen.
Käyttöön sovelletaan seuraavia kahta ehtoa: (1) tämä laite ei saa aiheuttaa haitallisia
häiriöitä ja (2) tämän laitteen on siedettävä kaikki vastaanotetut häiriöt, mukaan
lukien häiriöt, jotka voivat aiheuttaa ei-toivottua toimintaa. Tämä laite on ICES-003-
, CE-, UKCA-, RCM-, RoHS- ja REACH-standardien mukainen. Luvattomat muutokset
voivat mitätöidä viranomaisten hyväksynnän ja oikeutesi käyttää tuotetta.
Tuki & Kierrätys. Älä hävitä kotitalousjätteen mukana. Kierrätystiedot löytyvät tuot-
teen tai pakkauksen symbolista.
Täydelliset takuuehdot, huolto-ohjeet ja EU:n/UK:n vaatimustenmukaisuusvakuutuk-
set löytyvät osoitteesta: commodore.net/compliance
xx

Säkerhet och hälsa
• Använd endast godkänd strömförsörjning.
• Förvaras åtskilt från vatten och stark värme.
• Sörj för god ventilation.
• Inga delar inuti som kan repareras av användaren. Kontakta Commodore för ser-
vice.
• Vissa personer kan uppleva epileptiska anfall när de utsätts för blinkande ljus eller
visuella mönster --- även om de aldrig har haft det förut. Om du eller någon i din
familj har epilepsi tidigare, rådfråga en läkare innan du använder denna produkt.
Sluta använda produkten omedelbart och sök läkarvård om du upplever yrsel, dim-
syn, ofrivilliga rörelser, medvetslöshet eller andra symtom.
• Föräldrar: övervaka barns användning. Ta regelbundna pauser (10-15 minuter per
timme) och justera ljusstyrkan efter behov.
• Ta regelbundna pauser under användning. Använd i ett väl upplyst rum på säkert
avstånd.
• California Prop 65: Denna produkt kan utsätta dig för kemikalier inklusive bly
och ftalater, som är kända för att orsaka cancer eller reproduktionsskador. Se:
www.P65Warnings.ca.gov
Garanti. Commodore garanterar att denna produkt är fri från defekter i material
och utförande i ett (1) år från det ursprungliga inköpsdatumet. Reparation, utbyte
eller återbetalning sker efter Commodores gottnnande. Garantin gäller inte nor-
malt slitage, felaktig användning, olyckor eller obehöriga modieringar. Rättigheter
enligt konsumentlagstiftningen påverkas inte. Tillverkad i Kina. För garantiservice,
kontakta Commodore Support: commodore.net/contact-us Eller skriv till: Commodore
International Corporation, 8 The Green, Ste A, Dover, Kent, DE 19901, USA
Programvarulicens
. Commodore-programvara, rmware och ROM-skivor är licen-
sierade, säljs inte. Du får endast använda programvaran med din Commodore-
hårdvara. Reverse engineering, modiering eller omdistribution är förbjuden föru-
tom vad som är tillåtet enligt lag. Viss programvara innehåller licensierade kom-
ponenter eller komponenter med öppen källkod. För mer information, besök:
commodore.net/licenses
Efterlevnad av regelverk. Denna enhet uppfyller del 15 av FCC-reglerna. Använd-
ning är föremål för följande två villkor: (1) denna enhet får inte orsaka skadliga
störningar, och (2) denna enhet måste acceptera alla mottagna störningar, inklusive
störningar som kan orsaka oönskad drift. Denna enhet uppfyller ICES-003, CE, UKCA,
RCM, RoHS och REACH. Obehöriga modieringar kan ogiltigförklara myndighetsgod-
kännande och din behörighet att använda produkten.
Stöd & Återvinning. Kassera inte med hushållsavfallet. För information om återvin-
ning, se symbolen på produkten eller förpackningen.
För fullständiga garantivillkor, serviceinstruktioner och EU/UK-försäkran om öv-
erensstämmelse, besök: commodore.net/compliance
xxi

Sikkerhet og helse
• Bruk kun godkjent strømforsyning.
• Holdes unna vann og sterk varme.
• Sørg for tilstrekkelig ventilasjon.
• Ingen deler inni som kan repareres av brukeren. Kontakt Commodore for service.
• Noen kan oppleve epileptiske anfall når de utsettes for blinkende lys eller visuelle
mønstre --- selv om de aldri har hatt det før. Hvis du eller noen i familien din har en
historie med epilepsi, bør du kontakte lege før du bruker dette produktet. Stopp
bruken umiddelbart og kontakt lege hvis du opplever svimmelhet, tåkesyn, ufrivil-
lige bevegelser, bevissthetstap eller andre symptomer.
• Foreldre: Overvåk barns bruk. Ta regelmessige pauser (10–15 minutter per time)
og juster lysstyrken etter behov.
• Ta regelmessige pauser under bruk. Bruk i et godt opplyst rom med trygg synsav-
stand.
• California Prop 65: Dette produktet kan utsette deg for kjemikalier, inkludert
bly og ftalater, som er kjent for å forårsake kreft eller reproduksjonsskader. Se:
www.P65Warnings.ca.gov
Garanti. Commodore garanterer at dette produktet er fri for defekter i materialer
og utførelse i ett (1) år fra datoen for det opprinnelige kjøpsresultatet. Reparasjon,
erstatning eller refusjon er etter Commodores valg. Garantien ekskluderer normal
slitasje, misbruk, ulykker og uautoriserte modikasjoner. Rettigheter under forbruk-
erloven påvirkes ikke. Laget i Kina. For garantiservice, kontakt Commodore Support:
commodore.net/contact-us Eller skriv til: Commodore International Corporation, 8 The
Green, Ste A, Dover, Kent, DE 19901, USA
Programvarelisens. Commodore-programvare, fastvare og ROM-er er lisensiert,
ikke solgt. Du kan kun bruke programvaren med Commodore-maskinvaren din.
Omvendt utvikling, modisering eller videredistribusjon er forbudt, med mindre det
er tillatt ved lov. Noe programvare inneholder lisensierte komponenter eller kompo-
nenter med åpen kildekode. For mer informasjon, besøk: commodore.net/licenses
Samsvar med forskrifter. Denne enheten er i samsvar med del 15 av FCC-reglene.
Bruk er underlagt følgende to betingelser: (1) denne enheten må ikke forårsake
skadelig interferens, og (2) denne enheten må godta all mottatt interferens, inkludert
interferens som kan forårsake uønsket drift. Denne enheten er i samsvar med ICES-
003, CE, UKCA, RCM, RoHS og REACH. Uautoriserte modikasjoner kan ugyldiggjøre
myndighetsgodkjenning og din rett til å bruke produktet.
Støtte & Resirkulering. Ikke kast i husholdningsavfallet. For informasjon om re-
sirkulering, se symbolet på produktet eller emballasjen.
For fullstendige garantivilkår, serviceinstruksjoner og samsvarserklæringer for EU-
/UK, besøk: commodore.net/compliance
xxii

Bezpieczeństwo i higiena pracy
• Używaj wyłącznie zatwierdzonego zasilacza.
• Trzymaj z dala od wody i nadmiernego ciepła.
• Zapewnij odpowiednią wentylację.
• Wewnątrz nie ma części, które mogą być naprawiane przez użytkownika. Skontak-
tuj się z Commodore w celu naprawy.
• U niektórych osób mogą wystąpić napady padaczkowe po narażeniu na migające
światło lub wzorce wizualne --- nawet jeśli nigdy wcześniej ich nie miały. Jeśli Ty lub
ktokolwiek z Twojej rodziny choruje na padaczkę, skonsultuj się z lekarzem przed
użyciem tego produktu. Natychmiast przerwij używanie i zasięgnij porady lekarza,
jeśli wystąpią zawroty głowy, niewyraźne widzenie, mimowolne ruchy, utrata przy-
tomności lub inne objawy.
• Rodzice: kontroluj użytkowanie urządzenia przez dzieci. Rób regularne przerwy
(10-15 minut na godzinę) i dostosowuj jasność w razie potrzeby.
• Rób regularne przerwy podczas użytkowania. Używać w dobrze oświetlonym
pomieszczeniu, w bezpiecznej odległości.
• California Prop 65: Ten produkt może narazić Cię na działanie substancji
chemicznych, w tym ołowiu i ftalanów, o których wiadomo, że powodują raka lub
uszkodzenia układu rozrodczego. Patrz: www.P65Warnings.ca.gov
Gwarancja. Commodore udziela gwarancji na ten produkt na wady materiałowe i
wykonawcze przez jeden (1) rok od daty pierwotnego zakupu detalicznego. Naprawa,
wymiana lub zwrot pieniędzy według uznania Commodore. Gwarancja nie obejmuje
normalnego zużycia, niewłaściwego użytkowania, wypadków ani nieautoryzowanych
modykacji. Prawa wynikające z przepisów prawa konsumenckiego pozostają nien-
aruszone. Wyprodukowano w Chinach. W celu uzyskania serwisu gwarancyjnego
skontaktuj się z pomocą techniczną Commodore: commodore.net/contact-us lub
napisz na adres: Commodore International Corporation, 8 The Green, Ste A, Dover,
Kent, DE 19901, USA
Licencja oprogramowania. Oprogramowanie, oprogramowanie sprzętowe i
pamięci ROM rmy Commodore są licencjonowane, a nie sprzedawane. Opro-
gramowanie można używać wyłącznie ze sprzętem Commodore. Inżynieria
wsteczna, modykacja lub redystrybucja są zabronione, chyba że zezwala na to
prawo. Niektóre oprogramowanie zawiera komponenty licencjonowane lub open
source. Aby uzyskać więcej informacji, odwiedź stronę: commodore.net/licenses
Zgodność z przepisami. To urządzenie jest zgodne z częścią 15 przepisów FCC.
Jego użytkowanie podlega dwóm następującym warunkom: (1) urządzenie nie może
powodować szkodliwych zakłóceń oraz (2) urządzenie musi akceptować wszelkie od-
bierane zakłócenia, w tym zakłócenia, które mogą powodować niepożądane dzi-
ałanie. To urządzenie jest zgodne z ICES-003, CE, UKCA, RCM, RoHS i REACH. Nieau-
toryzowane modykacje mogą unieważnić zatwierdzenie regulacyjne i prawo do ko-
rzystania z produktu.
Wsparcie & Recykling. Nie wyrzucać razem z odpadami domowymi. Informacje na
temat recyklingu znajdują się na symbolu umieszczonym na produkcie lub opakowa-
niu.
Pełne warunki gwarancji, instrukcje serwisowe oraz deklaracje zgodności UE/Wielkiej
Brytanii można znaleźć na stronie: commodore.net/compliance
xxiii

Seguridad y Salud
• Utilice únicamente una fuente de alimentación aprobada.
• Mantener alejado del agua y del calor excesivo.
• Proporcione una ventilación adecuada.
• No contiene piezas que el usuario pueda reparar. Contacte con Commodore para
obtener servicio técnico.
• Algunas personas pueden experimentar ataques epilépticos al exponerse a luces
intermitentes o patrones visuales, incluso si nunca los han sufrido. Si usted o algún
miembro de su familia tiene antecedentes de epilepsia, consulte a un médico antes
de usar este producto. Deje de usarlo inmediatamente y busque atención médica
si experimenta mareos, visión borrosa, movimientos involuntarios, pérdida de con-
sciencia u otros síntomas.
• Padres: supervisen el uso de los niños. Tomen descansos regulares (de 10 a 15
minutos por hora) y ajusten el brillo según sea necesario.
• Tomen descansos regulares durante el uso. Úselo en una habitación bien ilumi-
nada y a una distancia de visión segura.
• California Prop 65: Este producto puede exponerlo a sustancias químicas, como
plomo y ftalatos, que se sabe que causan cáncer o daños reproductivos. Consulte:
www.P65Warnings.ca.gov
Garantía. Commodore garantiza este producto contra defectos de materiales y
mano de obra durante un (1) año a partir de la fecha de compra original. La
reparación, el reemplazo o el reembolso son a discreción de Commodore. La garan-
tía excluye el desgaste normal, el mal uso, los accidentes y las modicaciones no
autorizadas. Los derechos bajo la ley del consumidor no se ven afectados. Fabricado
en China. Para obtener servicio de garantía, comuníquese con el soporte técnico de
Commodore: commodore.net/contact-us o escriba a: Commodore International Cor-
poration, 8 The Green, Ste A, Dover, Kent, DE 19901, EE. UU.
Licencia del software. El software, el rmware y las ROM de Commodore se otor-
gan bajo licencia, no se venden. Puede usar el software únicamente con su hard-
ware Commodore. La ingeniería inversa, la modicación y la redistribución están
prohibidas, salvo en los casos permitidos por la ley. Algunos programas incluyen
componentes con licencia o de código abierto. Para obtener más información, visite:
commodore.net/licenses
Cumplimiento normativo. Este dispositivo cumple con la Parte 15 de las Normas
de la FCC. Su funcionamiento está sujeto a las dos condiciones siguientes: (1) este
dispositivo no puede causar interferencias perjudiciales y (2) este dispositivo debe
aceptar cualquier interferencia recibida, incluidas las que puedan causar un fun-
cionamiento no deseado. Este dispositivo cumple con las normas ICES-003, CE, UKCA,
RCM, RoHS y REACH. Las modicaciones no autorizadas pueden anular la aprobación
regulatoria y su autorización para operar el producto.
Apoyo & Reciclaje
. No lo deseche con la basura doméstica. Para obtener informa-
ción sobre el reciclaje, consulte el símbolo en el producto o el embalaje.
Para consultar los términos completos de la garantía, las instrucciones de servicio y
las Declaraciones de Conformidad UE/RU, visite: commodore.net/compliance
xxiv

Biztonság és egészség
• Csak jóváhagyott tápegységet használjon.
• Tartsa távol víztől és túlzott hőhatástól.
• Biztosítson megfelelő szellőzést.
• A készülék nem tartalmaz felhasználó által szervizelhető alkatrészeket. Sz-
ervizelésért forduljon a Commodore-hoz.
• Egyes emberek epilepsziás rohamokat tapasztalhatnak villogó fények vagy vizuális
minták hatására --- még akkor is, ha korábban soha nem volt ilyenjük. Ha Önnek
vagy családtagjának epilepsziája van, a termék használata előtt konzultáljon orvos-
sal. Azonnal hagyja abba a használatát, és forduljon orvoshoz, ha szédülést, homá-
lyos látást, akaratlan mozgásokat, eszméletvesztést vagy egyéb tüneteket tapasz-
tal.
• Szülők: felügyeljék a gyermekek használatát. Rendszeresen tartson szüneteket
(óránként 10-15 perc), és szükség szerint állítsa be a fényerőt.
• Használat közben rendszeresen tartson szüneteket. Használja jól megvilágított
helyiségben, biztonságos látótávolságban.
• California Prop 65: Ez a termék olyan vegyi anyagoknak teheti ki Önt, beleértve az
ólmot és a ftalátokat, amelyekről ismert, hogy rákot vagy reproduktív károsodást
okoznak. Lásd: www.P65Warnings.ca.gov
Garancia. A Commodore az eredeti kiskereskedelmi vásárlás dátumától számított
egy (1) évig szavatolja, hogy nem felel meg az anyag- és gyártási hibáknak. A javítás,
csere vagy visszatérítés a Commodore belátása szerint történik. A garancia nem
vonatkozik a normál kopásra, a nem rendeltetésszerű használatra, a balesetekre
és a jogosulatlan módosításokra. A fogyasztóvédelmi törvények szerinti jogokat ez
nem érinti. Kínában készült. Garanciális szervizért forduljon a Commodore támo-
gatásához: commodore.net/contact-us Vagy írjon a következő címre: Commodore In-
ternational Corporation, 8 The Green, Ste A, Dover, Kent, DE 19901, USA
Szoftverlicenc. A Commodore szoftver, rmware és ROM-ok licencbe kerülnek, nem
kerülnek értékesítésre. A szoftvert csak a Commodore hardverével használhatja.
A visszafejtés, módosítás vagy terjesztés tilos, kivéve, ha azt törvény engedélyezi.
Egyes szoftverek licencelt vagy nyílt forráskódú összetevőket tartalmaznak. További
információkért látogasson el ide: commodore.net/licenses
Szabályozási megfelelőség. Ez az eszköz megfelel az FCC szabályok 15. részének. A
működés a következő két feltételhez kötött: (1) ez az eszköz nem okozhat káros inter-
ferenciát, és (2) az eszköznek el kell fogadnia minden interferenciát, beleértve a nem
kívánt működést okozó interferenciát is. Ez az eszköz megfelel az ICES-003, CE, UKCA,
RCM, RoHS és REACH előírásoknak. A jogosulatlan módosítások érvényteleníthetik a
hatósági jóváhagyást és a termék üzemeltetésére vonatkozó jogosultságot.
Támogatás & Újrahasznosítás. Ne dobja a háztartási hulladékkal együtt. Az újra-
hasznosítási információkért lásd a terméken vagy a csomagoláson található szim-
bólumot.
A teljes jótállási feltételekért, a szervizelési utasításokért és az EU/UK megfelelőségi
nyilatkozatokért látogasson el ide: commodore.net/compliance
xxv

Sikkerhed og sundhed
• Brug kun godkendt strømforsyning.
• Holdes væk fra vand og overdreven varme.
• Sørg for tilstrækkelig ventilation.
• Ingen dele indeni, som brugeren kan servicere. Kontakt Commodore for service.
• Nogle mennesker kan opleve epileptiske anfald, når de udsættes for blinkende lys
eller visuelle mønstre --- selvom de aldrig har haft det før. Hvis du eller et medlem
af din familie har en historie med epilepsi, skal du kontakte en læge, før du bruger
dette produkt. Stop brugen med det samme og søg lægehjælp, hvis du oplever
svimmelhed, sløret syn, ufrivillige bevægelser, bevidsthedstab eller andre symp-
tomer.
• Forældre: Overvåg børns brug. Tag regelmæssige pauser (10-15 minutter i timen)
og juster lysstyrken efter behov.
• Tag regelmæssige pauser under brug. Brug i et godt oplyst rum i sikker synsafs-
tand.
• California Prop 65: Dette produkt kan udsætte dig for kemikalier, herunder
bly og ftalater, der vides at forårsage kræft eller reproduktionsskader. Se:
www.P65Warnings.ca.gov
Garanti. Commodore garanterer dette produkt mod defekter i materialer og ud-
førelse i et (1) år fra datoen for det oprindelige køb. Reparation, udskiftning eller
refusion efter Commodores valg. Garantien udelukker normal slitage, misbrug,
ulykker og uautoriserede ændringer. Rettigheder i henhold til forbrugerlovgivnin-
gen påvirkes ikke. Fremstillet i Kina. For garantiservice, kontakt Commodore Sup-
port: commodore.net/contact-us Eller skriv til: Commodore International Corporation,
8 The Green, Ste A, Dover, Kent, DE 19901, USA
Softwarelicens
. Commodore-software, rmware og ROM'er er licenseret, ikke solgt.
Du må kun bruge softwaren med din Commodore-hardware. Reverse engineering,
ændring eller videredistribution er forbudt, medmindre det er tilladt ved lov. Noget
software indeholder licenserede eller open source-komponenter. For mere informa-
tion, besøg: commodore.net/licenses
Overholdelse af regler. Denne enhed overholder del 15 af FCC-reglerne. Brug er
underlagt følgende to betingelser: (1) denne enhed må ikke forårsage skadelig in-
terferens, og (2) denne enhed skal acceptere enhver modtaget interferens, herunder
interferens, der kan forårsage uønsket drift. Denne enhed overholder ICES-003, CE,
UKCA, RCM, RoHS og REACH. Uautoriserede ændringer kan ugyldiggøre den lovgivn-
ingsmæssige godkendelse og din tilladelse til at betjene produktet.
Support & Genbrug. Bortskaf ikke med husholdningsaald. For information om
genbrug, se symbolet på produktet eller emballagen.
For fulde garantivilkår, serviceinstruktioner og EU/UK-
overensstemmelseserklæringer, besøg: commodore.net/compliance
xxvi

安全と健康
• 承認された電源のみを使用してください。
• 水や高温に近づけないでください。
• 適切な換気を行ってください。
• 内部にはユーザーが修理できる部品はありません。修理については、Commodore に
お問い合わせください。
• 点滅する光や視覚パターンにさらされると、てんかん発作を起こす場合があります。
たとえ過去に発作を経験したことがない方でもです。ご自身またはご家族にてんかん
の既往歴がある場合は、本製品を使用する前に医師にご相談ください。めまい、かす
み目、不随意運動、意識喪失、その他の症状が現れた場合は、直ちに使用を中止し、医
師の診察を受けてください。
• 保護者の皆様:お子様の使用状況に十分注意してください。定期的に休憩(1 時間に
10~15 分)を取り、必要に応じて明るさを調整してください。
• 使用中は定期的に休憩してください。明るい部屋で、安全な視聴距離からご使用くだ
さい。
• カリフォルニア州プロポジション 65:本製品は、鉛やフタル酸エステルなど、がんや
生殖への悪影響を引き起こすことが知られている化学物質にさらされる可能性があり
ます。詳細は、www.P65Warnings.ca.gov をご覧ください。
保証。コモドールは、本製品について、ご購入日から 1 年間、材質および製造上の欠陥
に対する保証をいたします。コモドールの判断により、修理、交換、または返金いたし
ます。通常の摩耗、誤用、事故、不正な改造は保証の対象外です。消費者法に基づく権
利は影響を受けません。中国製。保証サービスについては、Commodore サポートまで
お問い合わせください:commodore.net/contact-us または、Commodore International
Corporation, 8 The Green, Ste A, Dover, Kent, DE 19901, USA まで書面でお問い合わせ
ください。
ソフトウェアライセンス。Commodore のソフトウェア、ファームウェア、および ROM
は、販売されるものではなく、ライセンス供与されるものです。お客様は、Commodore
ハードウェアでのみソフトウェアを使用できます。法律で許可されている場合を除き、
リバースエンジニアリング、改変、または再配布は禁止されています。一部のソフトウ
ェアには、ライセンス供与されたコンポーネントまたはオープンソースコンポーネント
が含まれています。詳細については、commodore.net/licenses をご覧ください。
規制遵守。本製品は、FCC 規則の Part 15 に準拠しています。本製品の動作には、以下の
2 つの条件が適用されます。(1) 本製品は有害な干渉を引き起こしてはなりません。(2)
本製品は、望ましくない動作を引き起こす可能性のある干渉を含め、受信したあらゆる
干渉を受け入れなければなりません。本製品は、ICES-003、CE、UKCA、RCM、RoHS、
および REACH に準拠しています。許可なく改造すると、規制当局の承認および製品の
操作権限が無効になる場合があります。
& リサイクルをサポート。家庭ごみと一緒に廃棄しないでください。リサイクルに関す
る情報は、製品またはパッケージに記載されているシンボルをご覧ください。
保 証 条 件、 サ ー ビ ス 手 順、 お よ び EU/UK 適 合 宣 言 の 全 文 に つ い て は、
commodore.net/compliance をご覧ください。
xxvii

xxviii


2
UNPACKING AND CONNECTING THE
COMMODORE 64 ULTIMATE
The following step-by-step instructions show you how to connect the
Commodore 64 Ultimate to your HDMI display and make sure everything
is working properly.
Your box contains the following:
• Commodore 64 Ultimate
• Power supply, with power connectors for each locale
• HDMI cable
• USB storage device
If any items are missing, visit the Commodore International website to con-
tact customer support: commodore.net
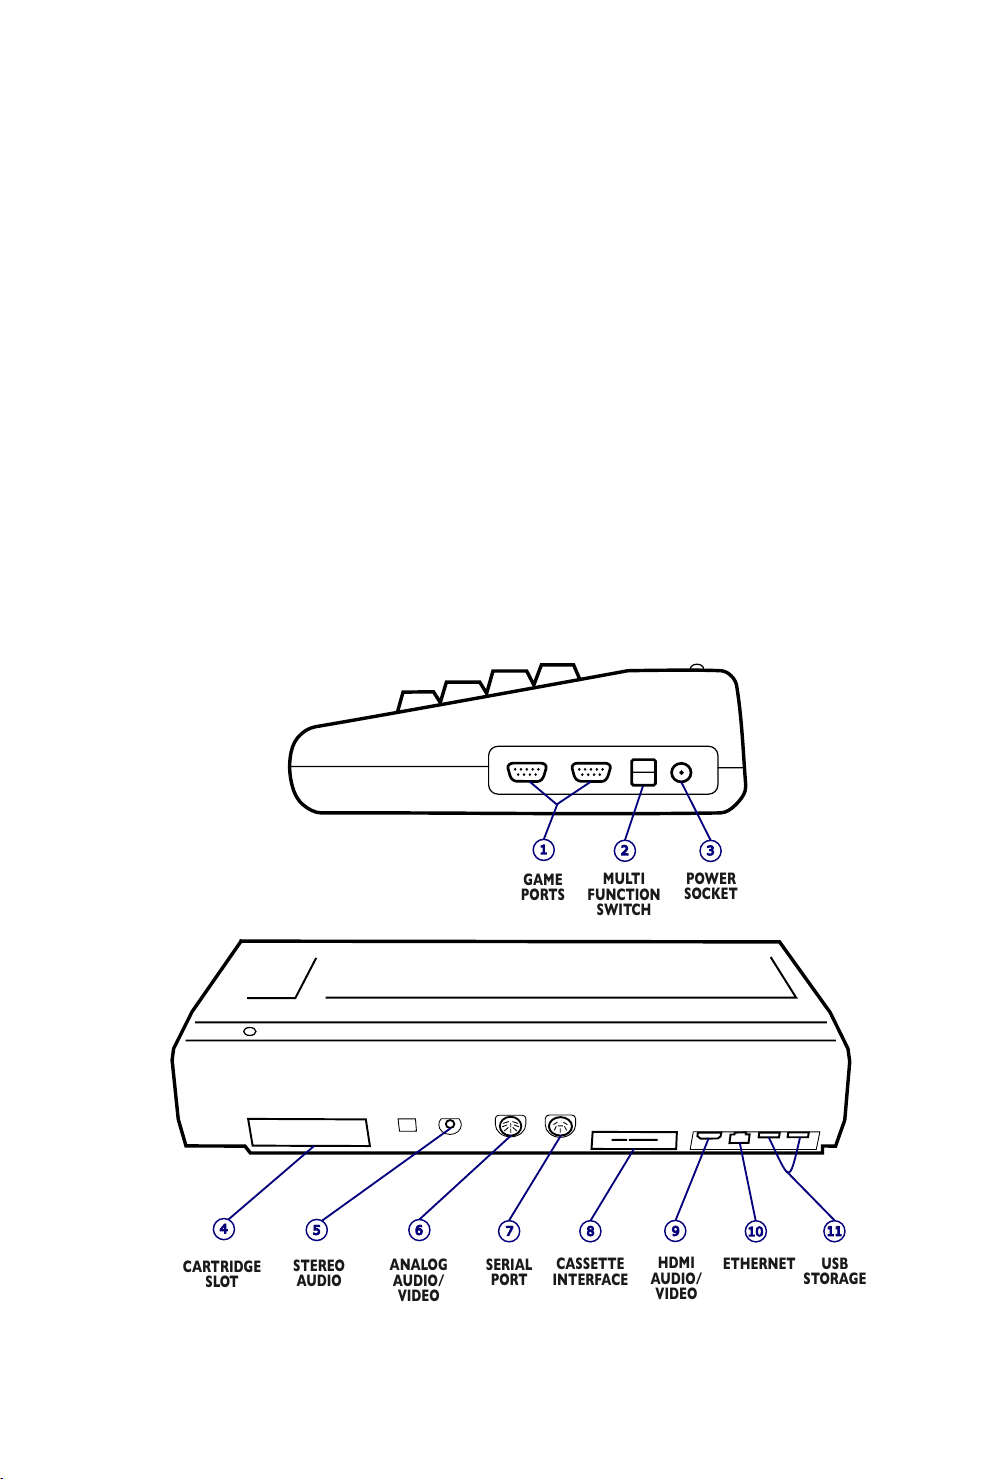
First, let’s take a look at the arrangement of the various connections on the
computer and how each functions.
4
5
6
7
8
9
10
11
CARTRIDGE
SLOT
STEREO
AUDIO
ANALOG
AUDIO/
VIDEO
SERIAL
PORT
CASSETTE
INTERFACE
HDMI
AUDIO/
VIDEO
ETHERNET
USB
STORAGE
1
2
3
GAME
PORTS
MULTI
FUNCTION
SWITCH
POWER
SOCKET
3

Side Panel Connections
1. Control (Game) ports. Each game port can accept a joystick or
game controller paddle set, or a Commodore 64-compatible mouse
or mouse adapter.
2. Multi Function Switch. This switches the C64U on or off, and pro-
vides access to the C64U Menu and other functions.
3. Power socket. The free end of the cable from the power supply is
attached here to supply power to the Commodore 64 Ultimate.
Rear Connections
4. Cartridge slot. The rectangular slot to the left (when viewed from
the back) accepts Commodore 64 or C64U program or game car-
tridges.
5. Audio output. You can connect optional speakers to this standard
3.5mm stereo audio jack. The C64U also supports optical S/PDIF
audio output through the same port. This is a line-level output and
cannot be used with headphones.
6. Commodore 64 video output. Use an 8-pin Commodore video ca-
ble (available from our website) to connect the C64U to composite
or S-Video displays, such as vintage CRT monitors or 4:3 flat panel
displays. This is not needed when using an HDMI display.
7. IEC serial port. Connect IEC serial devices such as original
Commodore disk drives, modern drive emulator devices, or printer
interfaces. (See chapter 10.)
8. Cassette interface. An original Commodore Datassette recorder
or compatible device can be attached for loading and saving pro-
grams on cassette tape.
9. HDMI® video output. Connect an HDMI digital video display, with
built-in audio. HDMI video output uses a 16:9 aspect ratio, 1080p
HD.
10. Ethernet. The C64U can connect to your local network via Ethernet
cable, or via Wi-Fi.
11. USB storage (2x). Use these USB-A ports to connect USB storage
devices containing disk images, tape images, cartridge files, system
ROMs, and firmware updates.
4

The C64U does not have a Commodore 64-style user port (IEEE-488 in-
terface) on the back side. Instead, an optional user port adapter (sold
separately) can be connected to the mainboard. See chapter 10.
NOTE: The C64U’s case is designed to resemble the Commodore 64, in-
cluding some unusual port labels pressed into the plastic along the back.
“MEMORY EXPANSION” is another name for the cartridge slot, because
cartridges contain memory chips that connect to the Commodore 64
memory system. “H-L” and “RF” refer to ways the Commodore 64 con-
nects to vintage television sets; the C64U does not provide these ports,
and instead provides a stereo audio output jack. The label “USER PORT”
appears above the HDMI port, Ethernet port, and USB ports, because this
is the location of the user port on the Commodore 64. We just couldn’t
resist keeping the original labels.
INSTALLING AND SWITCHING ON THE C64U
To set up the computer with an HDMI display:
1. Connect the computer to the display with the HDMI cable to the
HDMI port on the back-left of the computer.
2. Connect the power supply to the barrel jack on the right-hand side
of the computer.
3. Attach the power connector appropriate for your locale to the power
adapter, then connect it to your main power.
The HDMI connection provides a 1080p HD digital signal, with a 16:9 as-
pect ratio. To change the size of the image as it appears on your HDMI
display, use your display’s built-in options. Usually these are found in the
display’s on-screen settings menu, and are often called “Aspect Ratio” or
similar.
Alternatively, you can use an 8-pin Commodore A/V cable to connect the
C64U to an analog display that supports a composite or S-Video connec-
tion. This connection provides an analog video signal, with a 4:3 aspect
ratio. The analog A/V port is on the back of the computer. Take care to
identify the A/V port and the serial IEC port: they have similar shapes but
different pins.
Locate the Multi Function switch on the right-hand side of the computer.
Push it in either direction to switch on the computer. The C64U’s power
light illuminates, and an image appears on the display.
5
THE MULTI FUNCTION SWITCH
The Multi Function Switch is a rocker switch that can be pressed or held
either upward or downward. It has the following features:
To do this… Multi Function Switch operation
Switch on (when off) Press either upward or downward
Switch off (when on) Hold downward for 4 seconds
Reset (when not in menu) Hold upward for 1 second, then release
Toggle C64U Menu Press upward
CONFIGURING THE C64U
The Commodore 64 Ultimate is extremely configurable, for the ultimate
experience. The following are just a few options you might consider ad-
justing for now. Additional options will be described later in this Guide.
You can browse and modify all configuration options in the C64U Menu.
To access the menu, press upward on the Multi Function Switch.
6
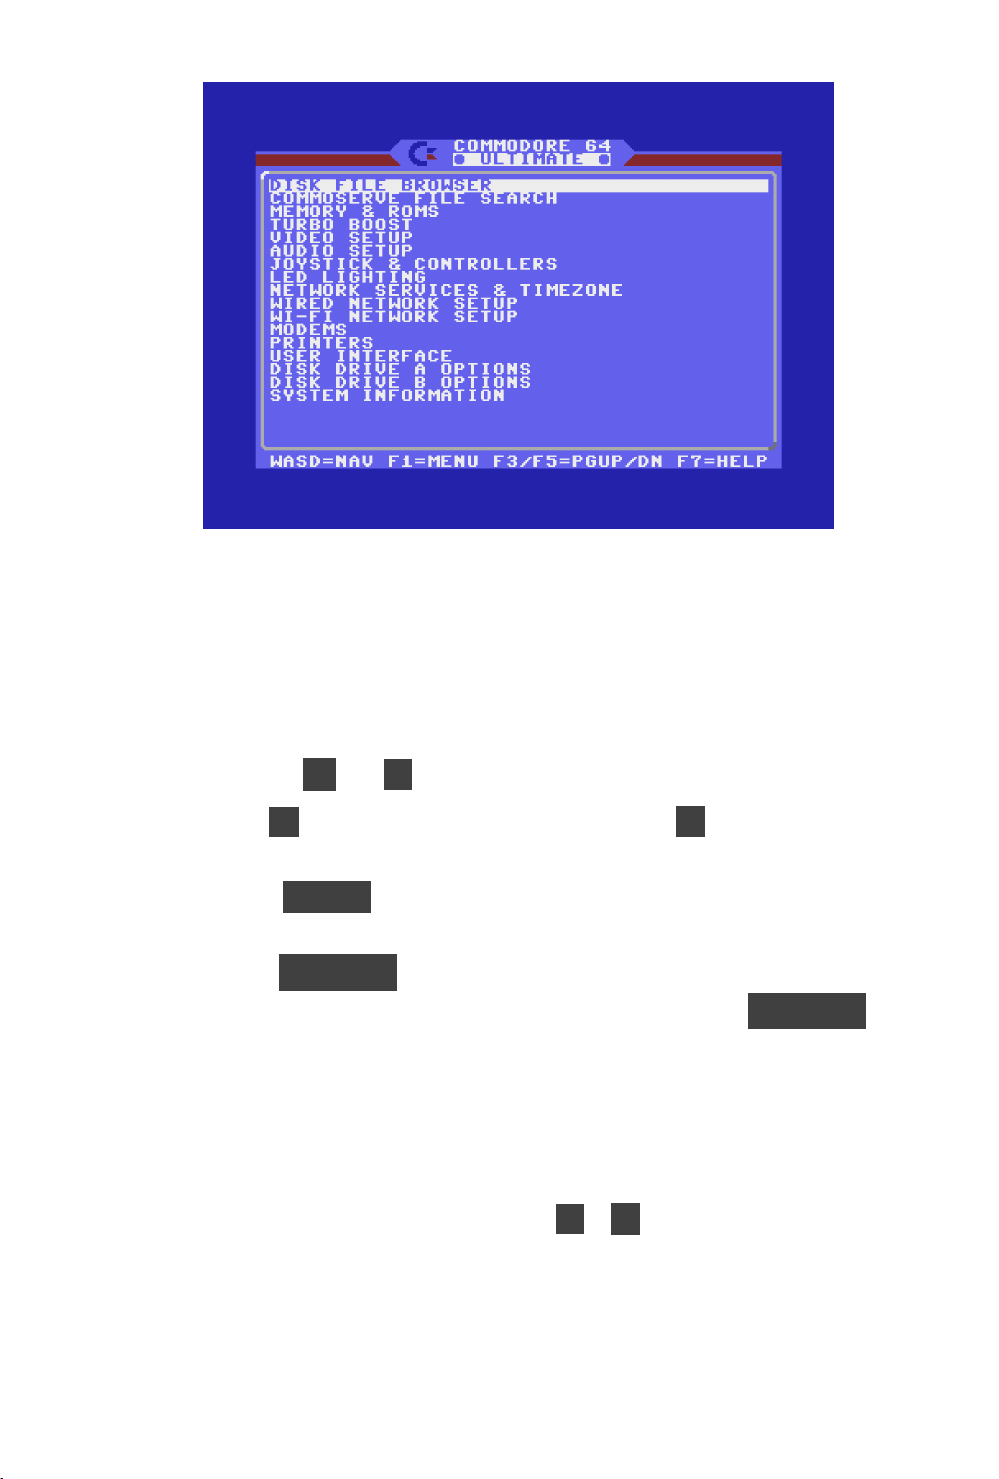
The C64U Menu is accessible at all times while using your C64U, even
when a Commodore 64 program is running. Pressing upward on the Multi
Function Switch pauses the program that is running, then displays the
menu. When you exit the menu, the program will resume. (You can use
this to pause any game if you need a break.)
You can navigate the menu with the keyboard, as follows:
• Use the W and
S
keys to move the selection up and down.
• Use D to open the selected sub-menu, and A to return to the
parent menu.
• Press RETURN to select an option or action. In some cases, this
opens a pop-up menu to change a setting or offer additional actions.
• Press RUN/STOP to exit a pop-up menu, return to a parent menu, or
exit the C64U main menu. (To make a hasty exit, press RUN/STOP
repeatedly.)
If you’re already familiar with the Commodore 64 cursor keys, these can
also be used to navigate menus. If you’re not already familiar, you will be
introduced to them in chapter 3.
If you change an option, the C64U Menu prompts you to save your changes
when you attempt to exit the menu. Press Y or N to confirm or skip saving
the settings. Some options do not take effect until you exit the menu.
7

Safe Mode
If you accidentally change a setting that is incompatible with your display
or otherwise prevents your ability to access the menu, you can restart the
computer in safe mode. This mode temporarily resets all settings to their
defaults.
To enter safe mode:
1. Hold the Multi Function Switch downward for 4 seconds to switch
off the computer.
2. Press and hold the RESTORE key.
3. Switch on the computer: press the Multi Function Switch upward.
To save the restored settings to flash memory, make any change, exit the
menu, then save the settings when prompted. Safe mode will only change
the saved settings when asked to do so.
The Tool Menu
The Tool menu provides several useful actions, available anywhere within
the C64U Menu. To open the Tool menu, press F1 . To exit the Tool menu
without selecting an option, press RUN/STOP .
PAL vs. NTSC
When the original Commodore 64 was released, different countries used
competing technical standards for analog video signals displayed on tele-
visions and computer monitors. Commodore made versions of its comput-
ers for two different standards, and sold them in the countries where those
standards were used: NTSC in North America and Japan, and PAL in Eu-
rope, the United Kingdom, Australia, and New Zealand.
Most modern digital displays support both NTSC and PAL image sizes and
refresh rates. If you have an older digital display, or if you are using an
analog display with a Commodore 64 video cable, you may need to switch
the video mode to one that is compatible with your display.
There’s another reason to switch video modes: Some Commodore 64 soft-
ware only runs correctly in one mode or the other. Some games will run
in either mode, but the game or music will play at the wrong speed, due
to how the program uses the computer’s refresh rate to synchronize timed
events. A few games will crash or not run at all if the computer is in a mode
it doesn’t expect.
8

You can choose the video mode temporarily while switching on the com-
puter:
To start in this mode... Hold these keys...
NTSC ǣ N
PAL ǣ P
To switch the C64U video mode setting and save it for future sessions:
1. Open the C64U Menu.
2. Select “Video Setup.”
3. Select the “System Mode” option (press RETURN ).
4. In the pop-up menu, select “PAL” or “NTSC.” (Other options support
unusual combinations of video encoding and refresh rate.)
5. Press RUN/STOP to switch video modes. If the display is no longer
working, switch off the computer, then switch it on again to return
to the previously selected video mode.
6. Press Y to save the setting.
Most software runs correctly in PAL mode, while some titles require NTSC.
If your display supports PAL mode, it is useful to make this your default
setting. You can always change it later.
HDMI Scan Lines
Cathode ray tube (CRT) displays use a raster beam to draw the image onto
a phosphor coating many times per second, moving the beam horizontally
in tiny rows. This method of producing an image causes tiny gaps to appear
between the rows, known as scan lines. Modern LCD flat panel displays do
not show gaps between the rows, and anyone used to seeing Commodore
64 images on a CRT may notice the difference. The Commodore 64 Ulti-
mate can simulate the scan lines on an HDMI display.
To enable or disable HDMI scan lines:
1. Open the C64U Nenu.
2. Select “Video Setup.”
3. Select the “HDMI Scan lines” option (move the selection down, then
press RETURN ).
4. Select “Disabled” or “Enabled,” as you prefer.
5. Exit the menu to apply the setting, then press Y to save it.
9

Built-in Speaker
The Commodore 64 Ultimate has a built-in speaker inside the computer.
This speaker has two functions: it plays sound effects and music generated
by a program, and it simulates the sounds of using a vintage disk drive
when working with digital disk images. (It is common to rely on disk drive
noises to confirm that the computer is busy loading or saving data, when
the computer otherwise doesn’t look like it’s doing anything.)
You can disable the built-in speaker for quieter operation.
1. Open the C64U Menu.
2. Select “Audio Setup.”
3. Select “Speaker Mixer.”
4. Select the “Speaker Enable” option (press
RETURN
).
5. Select “Disabled” or “Enabled,” as you prefer.
6. Exit the menu to apply the setting, then press Y to save it.
Sound generated by programs will continue to play through HDMI displays
or the audio jack. Simulated drive noises only play through the built-in
speaker, and only when it is enabled.
RAM Expansion Unit
The original Commodore 64 provided up to 64 kilobytes of memory for
program use. This memory could be expanded using a RAM Expansion Unit
(REU), a separate device connected to the Commodore 64’s expansion
port. Some programs use the REU for faster operation or large temporary
storage.
The C64U provides an emulation of an REU to support running such pro-
grams. It is disabled by default to avoid confusing programs that are not
expecting an REU to be connected. To enable the REU:
1. Open the C64U Menu.
2. Select “Memory & ROMs.”
3. Select “RAM Expansion Unit.”
4. Select “Disabled” or “Enabled,” as you prefer.
5. Exit the menu to apply the setting, then press
Y
to save it.
10

Joystick Swap
Many Commodore 64 games require that a joystick be connected to the
second game port (port 2). Others only work with the joystick connected to
port 1. Commodore gamers are familiar with needing to move the joystick
between the ports when switching games.
To make this easier, the Commodore 64 Ultimate can swap the identities
of the two game ports, so you can continue playing without hassling with
the cable connections.
To swap the joystick port assignments in the configuration:
1. Open the C64U Menu.
2. Select “Joystick & Controllers.”
3. Select “Joystick Input.”
4. Select “Normal” or “Swapped,” as you prefer.
5. Exit the menu to apply the setting, then press Y to save it.
Troubleshooting Software
The Commodore 64 Ultimate can behave like a Commodore 64 with
common peripherals attached. Some of these features, such as the PAL
or NTSC video mode or the RAM Expansion Unit (REU), can cause some
Commodore 64 programs to behave incorrectly, because those programs
were not written to be compatible with the equivalent hardware.
If a Commodore 64 program does not appear to be behaving correctly,
try changing C64U settings, such as the following:
• Change the video mode from PAL to NTSC, or from NTSC to PAL.
• Disable the RAM Expansion Unit.
• If you have installed JiffyDOS ROM files, switch back to the stock
Commodore 64 ROMs.
• Disconnect unused IEC peripherals, such as external disk drives.
• Disable virtual disk drive B: from the C64U Menu, select “Disk Drive
B Options,” then ensure “Drive” is “Disabled.”
• Disable the Software IEC feature: from the C64U Menu, open the
Tool menu (press
F1
). Select “Software IEC.” If the action “Turn Off”
is available, select it.
11

• Disable the printer emulation feature: from the C64U Menu, open
the Tool menu (press F1 ). Select “Printer.” If the action “Turn Off”
is available, select it.
TYPING COMMANDS
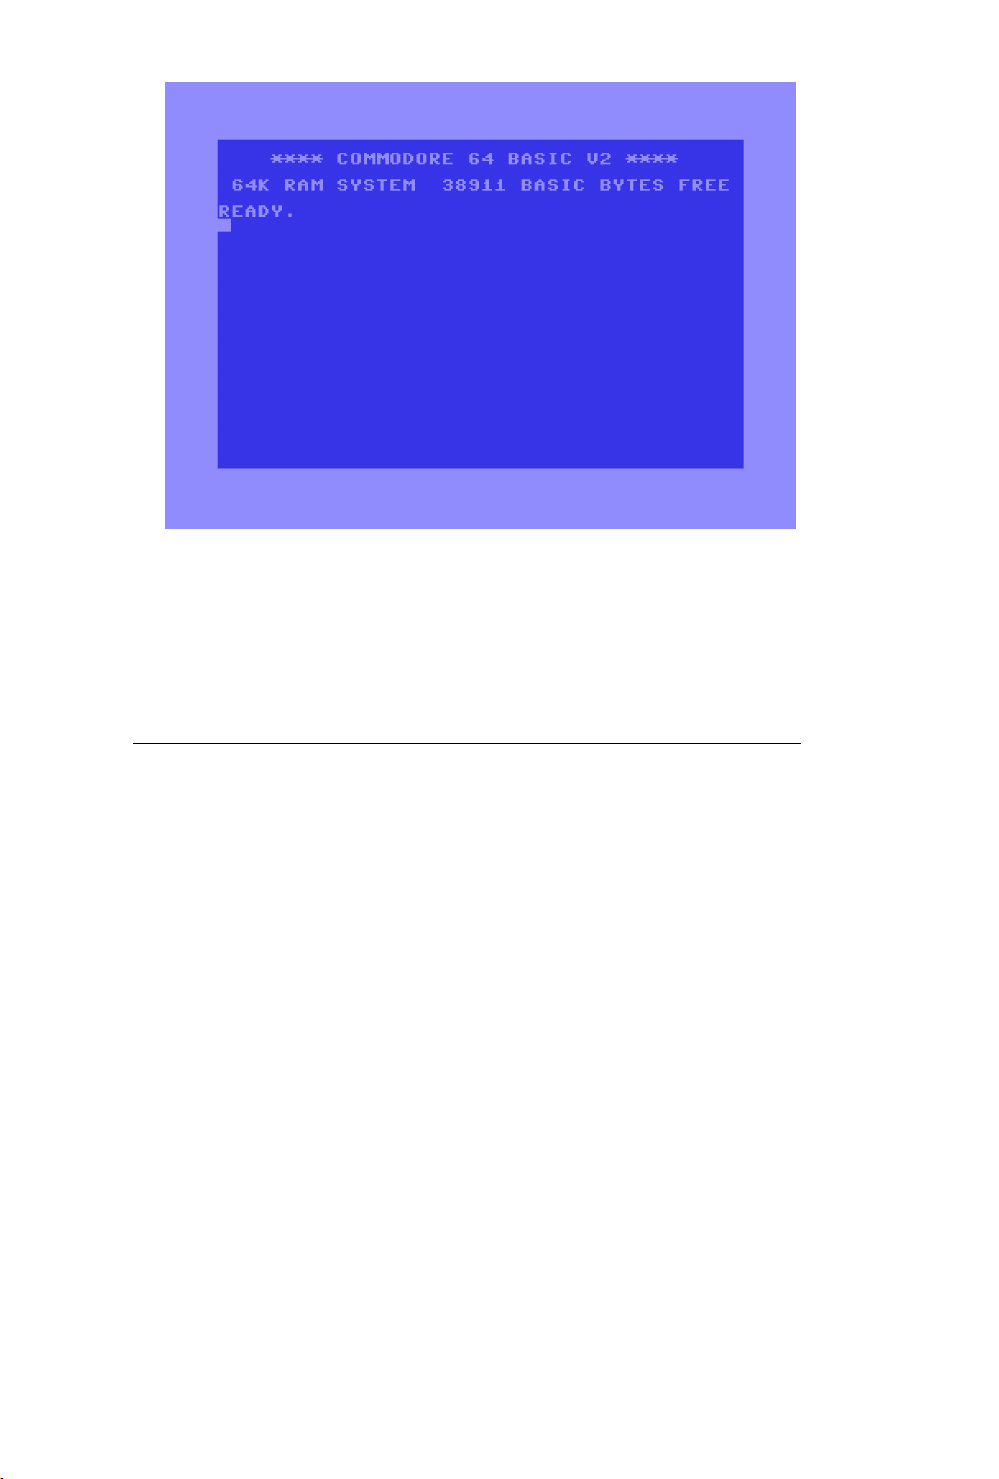
When you switch on the Commodore 64 Ultimate (without a cartridge at-
tached), it starts the Commodore 64 command prompt: a blinking cursor
at a READY prompt. This prompt is your Commodore saying it is ready to
receive your commands.
READY.
ǀ
Let’s try giving it a command. Type the following text, then press the
RETURN key:
PRINT "HELLO COMMODORE 64 ULTIMATE!"
You’ll get a complete introduction to the Commodore 64 keyboard in
chapter 3. For now, notice a few things:
• When you type a letter, it appears in uppercase, as shown here. In
the default uppercase letter mode, you do not need to hold SHIFT
to type an uppercase letter. (There is also a lowercase letter mode,
which we will discuss later.)
• To type the double-quote mark, hold
SHIFT
and press 2 . The
Commodore 64 keyboard has minor differences from a modern PC
keyboard.
• If you type an incorrect character, press INST DEL to delete it.
When you press RETURN with the cursor anywhere on the line with your
command, the C64U performs your command. In this case, it performs
a command to PRINT a phrase onto the screen. The phrase appears just
below the command, followed by a fresh READY prompt.
PRINT "HELLO COMMODORE 64 ULTIMATE!"
HELLO COMMODORE 64 ULTIMATE!
READY.
ǀ
12


14


16

THE DISK FILE BROWSER
The original Commodore 64 connected to other devices for loading and
storing (saving) programs and data, such as floppy disk drives and the
Commodore Datassette drive. You can connect your Commodore 64 Ulti-
mate to such devices for the same purpose, if you have them. (See chapter
10.)
The Commodore 64 Ultimate also offers modern data storage options, in-
cluding USB storage devices or an SD card formatted for a modern com-
puter with the FAT-32 or exFAT filesystem.
1
Here are just some of the things
you can do with files on USB storage or an SD card:
• Store disk or tape image files that replicate the experience of using
floppy disks or cassettes.
• Store cartridge ROM files that replicate the experience of attaching
cartridge modules.
• Update the C64U firmware.
• Play Commodore 64 SID music files using the built-in SID player.
You use the C64U Disk File Browser to access files on modern storage
devices.
To start the Disk File Browser:
1. Open the C64U Menu: press the Multi Function Switch upward. The
menu appears.
2. The first entry, “Disk File Browser,” is selected. Press
RETURN
. The
Disk File Browser starts.
1
You can install an SD memory card by opening the case and locating the SD card holder
on the mainboard. You can connect a USB storage device to one of the external USB ports
on the back, or to an internal USB port on the mainboard.
17
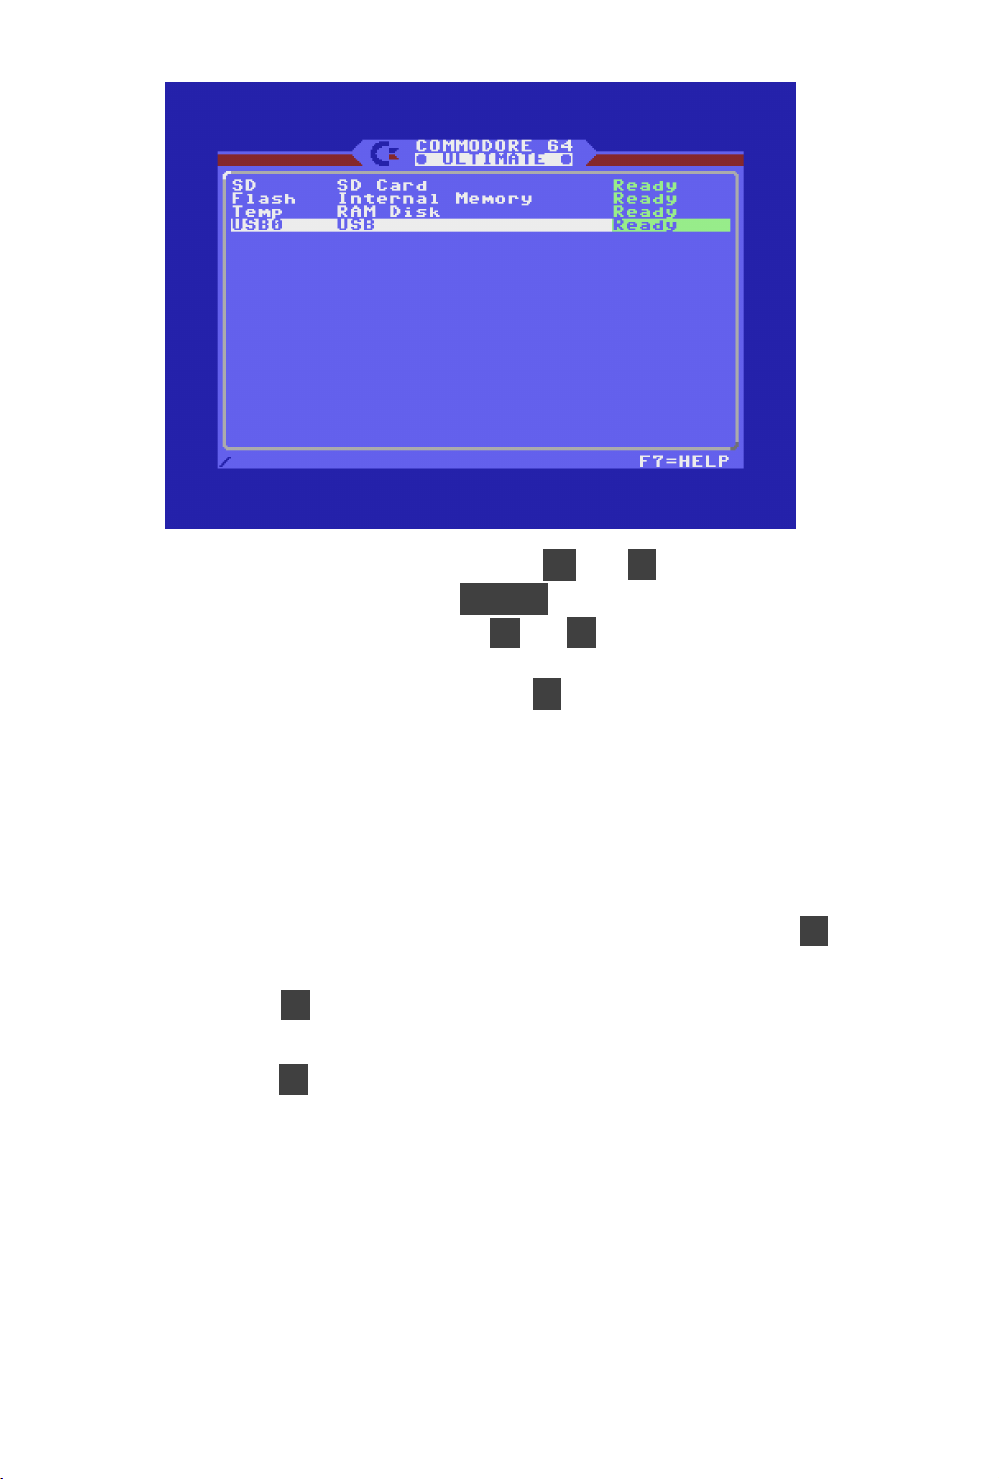
As with the C64U Menu, you can use the W and S keys to move the
selection up and down, and press
RETURN
to open a pop-up menu with
actions for the item. You can also use D and A to navigate into and out
of each storage container, such as a storage device, folder, or disk image.
You can return to the C64U Menu with the A key from the top level of the
Disk File Browser.
Try this:
1. Connect a USB storage device to a USB port on the back of the
computer.
2. Start the Disk File Browser.
3. Locate the USB storage device in the list (such as Usb1). Use the S
key to select it.
4. Press the
D
key to open the USB storage device. A list of files on
the device is shown.
5. Press the A key to return to the device list.
18
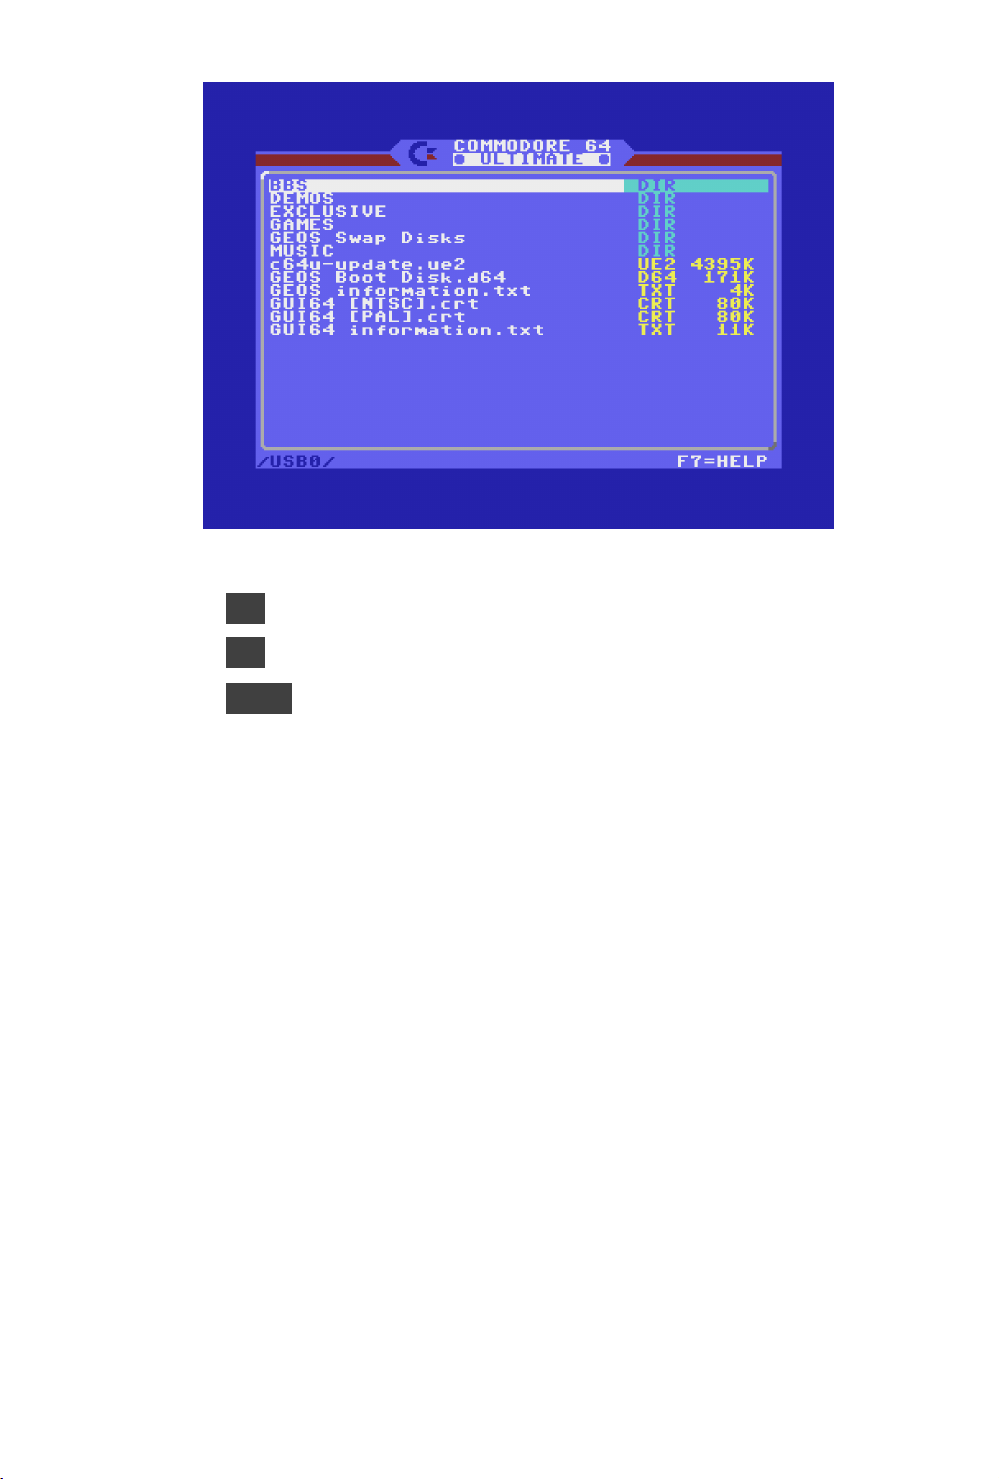
You can navigate a long list of files with these handy shortcuts:
• F3 : Go up one page.
• F5 : Go down one page.
• SHIFT + a letter : Jump to the next entry starting with the given
letter.
UPDATING THE C64U FIRMWARE
Your Commodore 64 Ultimate uses firmware to power the menus and op-
erating system. Keeping this firmware up to date ensures that you have
the latest features and fixes. You can download firmware updates from
the Commodore website, and install it using the Disk File Browser.
1. On your PC, visit the Commodore International website:
commodore.net/downloads
2. Download the Commodore 64 Ultimate firmware. The file is a .zip
archive. Expand the archive to access the firmware update files.
3. Connect a USB storage device to your PC. Copy the firmware update
file to the storage device. Eject the device from your PC.
4. Connect the USB storage device to the C64U.
5. Start the Disk File Browser, then navigate to the USB storage device.
19
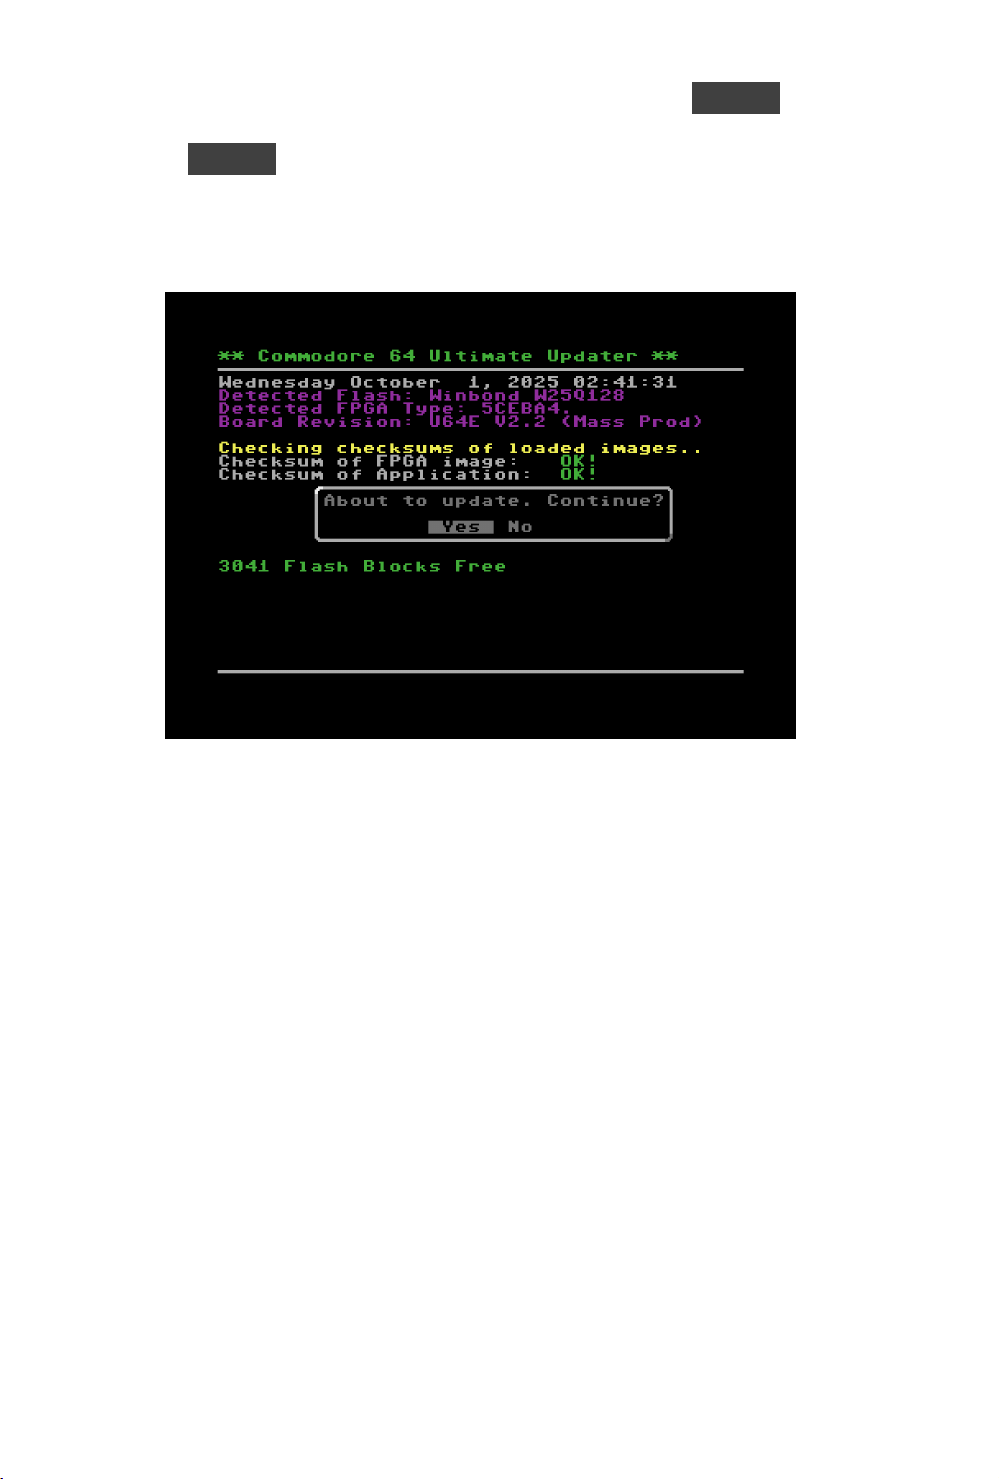
6. Locate the firmware update file, select it, then press RETURN . The
pop-up menu opens with the “Run Update” action selected. Press
RETURN
to start the update, and follow the prompts.
Do not switch off or disconnect power from your C64U while the update
is in progress. The C64U will switch off automatically at the end of the
update. Switch it back on again to continue using your computer.
USING DISK IMAGES
Back in the day, the most common way to store Commodore 64 programs
and data was on 5-1/4” magnetic floppy disks, using a floppy disk drive
such as the Commodore 1541 or 1571, or on 3-1/2” disks using the
Commodore 1581. There are no manufacturers of floppy disk drives or
media still active today.
Today, it is more convenient to use disk images, files that contain the
same data as a floppy disk, with a modern storage device that repli-
cates the experience of a floppy disk drive. Commodore enthusiasts have
archived thousands of original Commodore 64 programs as disk images
that you can download from the Internet. When you buy a newly published
Commodore 64 game, it often comes in the form of a disk image file (or
cartridge ROM file, discussed later in this chapter). You can also create
empty disk image files to store your own programs and data.
The Commodore 64 Ultimate can use disk images stored on a USB storage
device or SD card. The Ultimate provides two virtual disk drives, labelled
20

drive A and drive B. You use the Disk File Browser to locate a disk im-
age file, and mount the file to a virtual drive to make it accessible to the
Commodore 64 Ultimate. You can then use the disk image like you would
a floppy disk, with Commodore 64 disk commands and programs.
The C64U supports the following disk image types:
File type Equivalent media
.d64 1541 5-1/4” floppy disk, 170 KB
.d71 1571 5-1/4” floppy disk, 340 KB
.d81 1581 3-1/2” floppy disk, 800 KB
.g64 1541 5-1/4” floppy disk, raw GCR-encoded
.g71 1571 5-1/4” floppy disk, raw GCR-encoded
.dnp CMD hard drive (various sizes)
Mount a Disk Image
To mount a disk image:
1. Start the Disk File Browser.
2. Locate the disk image file on the connected USB storage device or
SD card.
3. With the disk image selected, press RETURN to open the pop-up
action menu.
4. Select “Mount Disk,” then press
RETURN
. The Disk File Browser
mounts the disk in virtual drive A.
5. Exit the menu: press the Multi Function Switch upward, or press
RUN/STOP repeatedly.
21
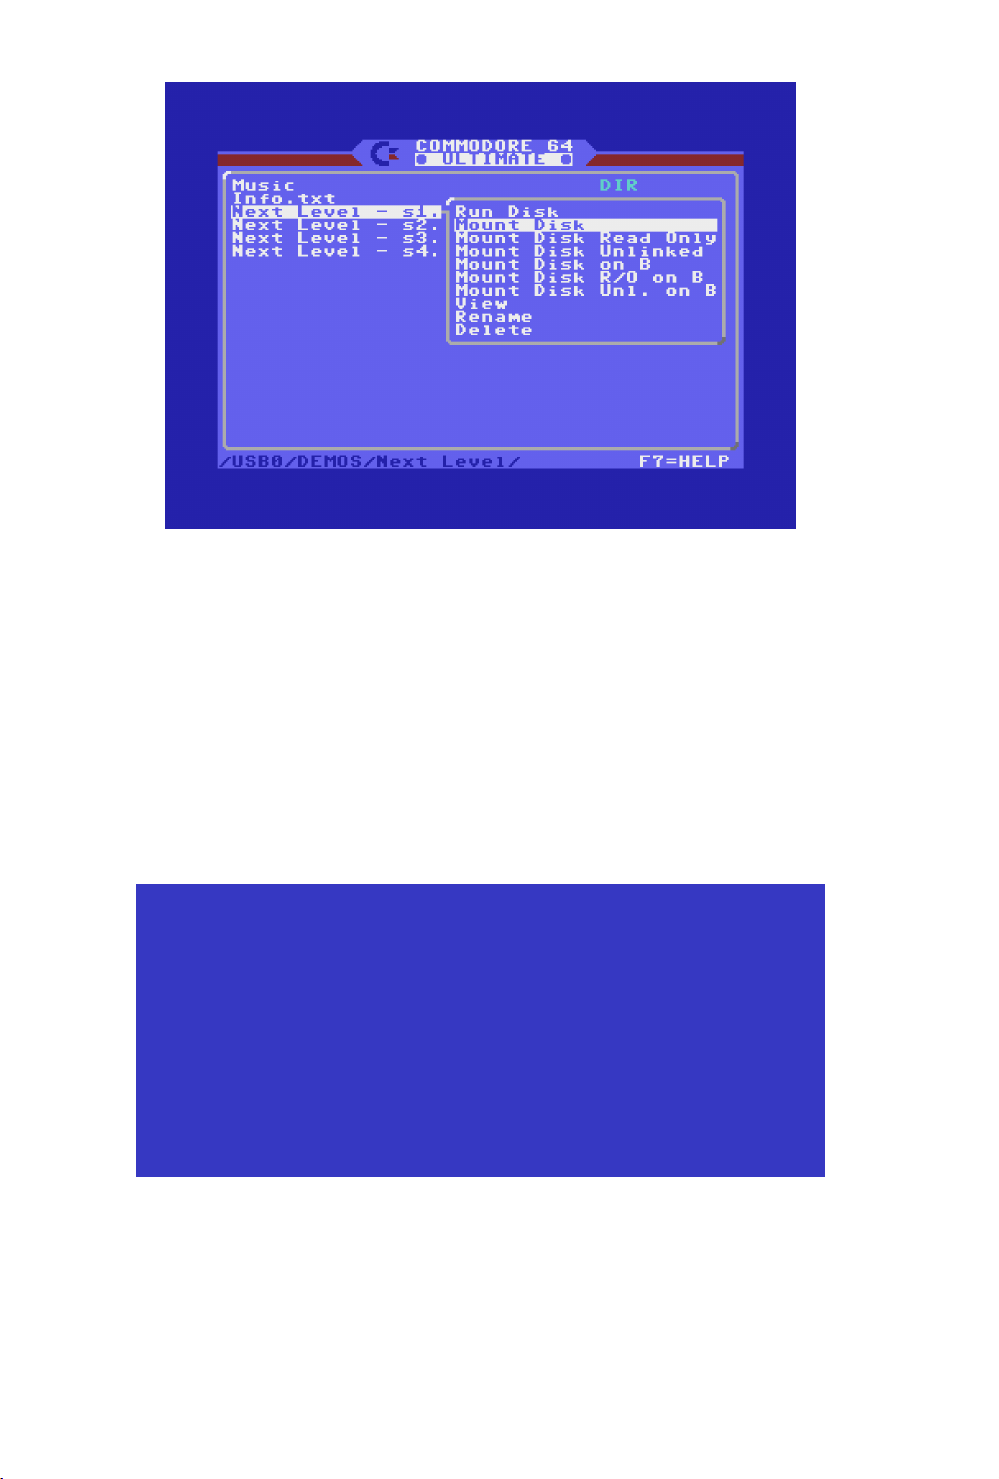
By default, virtual drive A is configured as unit number 8, the unit number
for the primary Commodore 64 disk drive. You can use the Commodore
64 LOAD command to load programs, or get a listing of the file directory.
For example, to list the files on the mounted disk, enter these commands:
LOAD "$",8
LIST
The display would look something like this, depending on the contents of
the disk image:
LOAD "$",8
SEARCHING FOR $
LOADING
READY.
LIST
0 "DISK NAME " 00 ID
99 "PROGRAM FILE " PRG
5 "DATA FILE " SEQ
320 BLOCKS FREE.
READY.
(Don’t worry if you’re not familiar with Commodore disk commands yet. This
will be discussed in later chapters.)
The loading process will appear to pause at the word LOADING. If you have
the C64U’s internal speaker enabled, it will make sounds similar to the
22

noise of a whirring disk drive while data is being loaded into memory. The
C64U power light will also change color during this process.
Run a Disk Image
The Disk File Browser offers another action that is convenient for running
most programs from disk, such as a game distributed as a disk image. With
a disk image of a professional program disk, instead of “Mount Disk,” select
“Run Disk.” This action mounts the disk, switches to Commodore 64 mode,
then automatically runs the following commands:
LOAD "*",8,1
RUN
These commands are frequently used to launch published software titles
such as games or productivity software. The command LOAD "*",8,1
loads the first program on the disk in the drive connected as unit 8, in
this case the disk image in virtual drive A. (The ,1 tells LOAD to read part of
the file to determine how to store the program in memory.) The command
RUN starts the program.
Not all program disks will work with “Run Disk,” but most will.
Running Multi-Disk Programs
Some programs are distributed on multiple disk images, similar to how they
were originally distributed on multiple floppy disks. At some point in the
process of using the program, the program will prompt to insert one of the
other floppy disks. You can use the Disk File Browser to swap disk images
while the program is running.
When the program prompts for a new disk, press upward on the Multi Func-
tion Switch. This pauses the program. Start the Disk File Browser, navigate
to the disk image for the disk that the program is requesting, then select
“Mount Disk.” The C64U mounts the new disk image in the virtual drive,
then resumes execution of the Commodore 64 program. Continue to use
the program with the new disk.
Create an Empty Disk Image
Disk images are an excellent way to store your own Commodore 64 pro-
grams and data. You can use the Disk File Browser to create new disk
images for your own use.
23

To create a disk image:
1. Start the Disk File Browser.
2. Navigate to the location on the storage device where you wish to
create the disk image.
3. Open the Tool menu: press F1 .
4. Select “Create,” then press RETURN . The pop-up action menu
opens with a list. Select an image type, such as “D81 Image.”
5. When prompted, enter a name for the disk image. The C64U cre-
ates the disk image, and after a moment, it appears in the Disk File
Browser.
You can now mount your disk image to start using it.
NOTE: If the “Create” action does not open a pop-up menu, make sure
you have navigated the Disk File Browser to a location on a storage device
where a file can be created.
You can also use the “Create” action to create directories (folders) on the
storage device. Use this to organize your disk images.
USING CARTRIDGE ROM FILES
Many Commodore 64 games and programs are distributed as cartridges,
small boxes of electronics that connect to the expansion port in the back-
right of the computer. In most cases, the cartridge is program data on a
ROM chip. Commodore enthusiasts have archived these programs as car-
tridge ROM files (.crt), and some new titles are distributed as cartridges
ROM files as well. The Commodore 64 Ultimate can load and run cartridge
image files.
To run a cartridge ROM file:
1. Open the C64U Menu, then start the Disk File Browser.
2. Locate the cartridge ROM file, then press
RETURN
to open the pop-
up action menu.
3. Select “Run Cart.”
The C64U resets, then starts the program as if the cartridge is inserted in
the expansion port.
24

The C64U will behave as if the cartridge is connected, even after per-
forming a reset with the Multi Function Switch. To disconnect the cartridge
ROM:
1. Open the C64U Menu.
2. Open the Tool menu: press F1 .
3. Select “C64 Machine.”
4. Select “Reboot C64.” This is similar to switching the C64U off then
on again.
Most cartridge ROM files are in the common 8 KB, 16 KB, or UltiMax for-
mats. In addition to these, the C64U supports cartridge ROM files in the
following formats:
Action Replay Westermann EasyFlash
KCS Power Cartridge Final Cartridge I Retro Replay
Final Cartridge III Magic Formel EXOS
Simons Basic C64 Game System Pagefox
Ocean type 1 Zaxxon Kingsoft Business Basic
Super Games Magic Desk, Domark, HES GMod2
Atomic Power Super Snapshot 5 Blackbox V8, V3, V4
Epyx Fastload COMAL 80
Installing a Cartridge ROM in Flash Memory
In some cases, it is useful to configure the Commodore 64 Ultimate to
behave as if a cartridge ROM is attached, such that the ROM is active
after resetting the computer. This is especially useful for utility cartridges
that augment the behavior of the computer, such as BASIC extensions. You
can install a cartridge ROM in flash memory to enable this effect.
To install a cartridge ROM in flash memory:
1. Navigate to the CRT file.
2. Press RETURN to open the pop-up action menu.
3. Select “Copy to Flash.”
Switch off the computer, then switch it back on again. The program of the
cartridge ROM takes effect.
To remove the cartridge ROM from flash memory:
1. Open the C64U Menu. Select “Memory & ROMs.”
2. Select “Cartridge.”
25

3. Select “None.”
4. Exit the menu, then save settings to flash memory when prompted.
USING TAPE IMAGES
Older Commodore 64 software was originally distributed on cassette
tape, for use with the Commodore Datassette drive. Commodore enthu-
siasts have archived these cassette tapes as tape image files (.tap). The
Commodore 64 Ultimate provides a virtual Datassette for use with tape
image files.
To load and run the first program on a tape image:
1. Open the C64U Menu, then start the Disk File Browser.
2. Locate the tape image file, then press RETURN to open the pop-up
action menu.
3. Select “Run Tape.”
Similar to “Run Disk,” this returns to Commodore 64 mode, then performs
the commands to load a program from tape, and simulates the tape play-
back. This is sufficient for most programs distributed as tape image files.
If you’d like to fully recreate the experience of using a Datasette, you can
use the other pop-up actions to simulate starting tape playback at the
appropriate time. The sequence is as follows:
1. At the READY prompt, enter this command (without anything after it):
LOAD
2. The Commodore 64 replies with: PRESS PLAY ON TAPE
3. Open the C64U Menu, then start the Disk File Browser. Locate the
tape image file, then press RETURN to open the pop-up action
menu.
4. Select “Start Tape.” The C64U returns to Commodore 64 mode, and
the screen goes blank for a moment while it reads the tape.
5. The computer will say FOUND (PROGRAM NAME) on the screen. Press
the
ǣ
key to load this program. (Some programs will run automat-
ically without this step.)
The Disk File Browser does not have a way to create tape image files. We
recommend using disk images instead.
26
USING PRG AND T64 FILES
With respect to Commodore software, a file with a .prg extension rep-
resents a single Commodore program file. As long as the program does
not need to be run from a floppy disk (or disk image), you can run such a
program stored directly on the USB storage device or SD card, from the
Disk File Browser.
You may also find a file format with the .t64 extension. A T64 file contains
one or more programs that can also be run from the Disk File Browser.
Neither of these file types behave as a floppy disk or a cassette tape, and
they cannot be written to. When you select a PRG program or a program
from a T64 file, the C64U simply resets the computer, copies the program
into memory, and runs it. These file types take up less space than disk
images, because they do not need to make room for empty space as on a
disk.
PLAYING SID MUSIC FILES
The Commodore 64 has a long heritage of
music composed for its SID sound synthe-
sizer chip, published as title and background
music for games, or to accompany demos
and animations. To preserve this heritage,
Commodore enthusiasts developed SID files,
a file format that captures the part of the
program that plays this music, so that it can
be played in a jukebox-style music player ap-
plication.
The Commodore 64 Ultimate includes a built-in music player capable of
playing SID files (.sid).
To play a SID music file from storage:
1. Open the C64U Menu, then start the Disk File Browser.
2. Locate the SID music file, then press
RETURN
to open the pop-up
action menu.
3. Select “Play Main Tune,” or select a song from the list if the SID file
contains multiple songs.
27
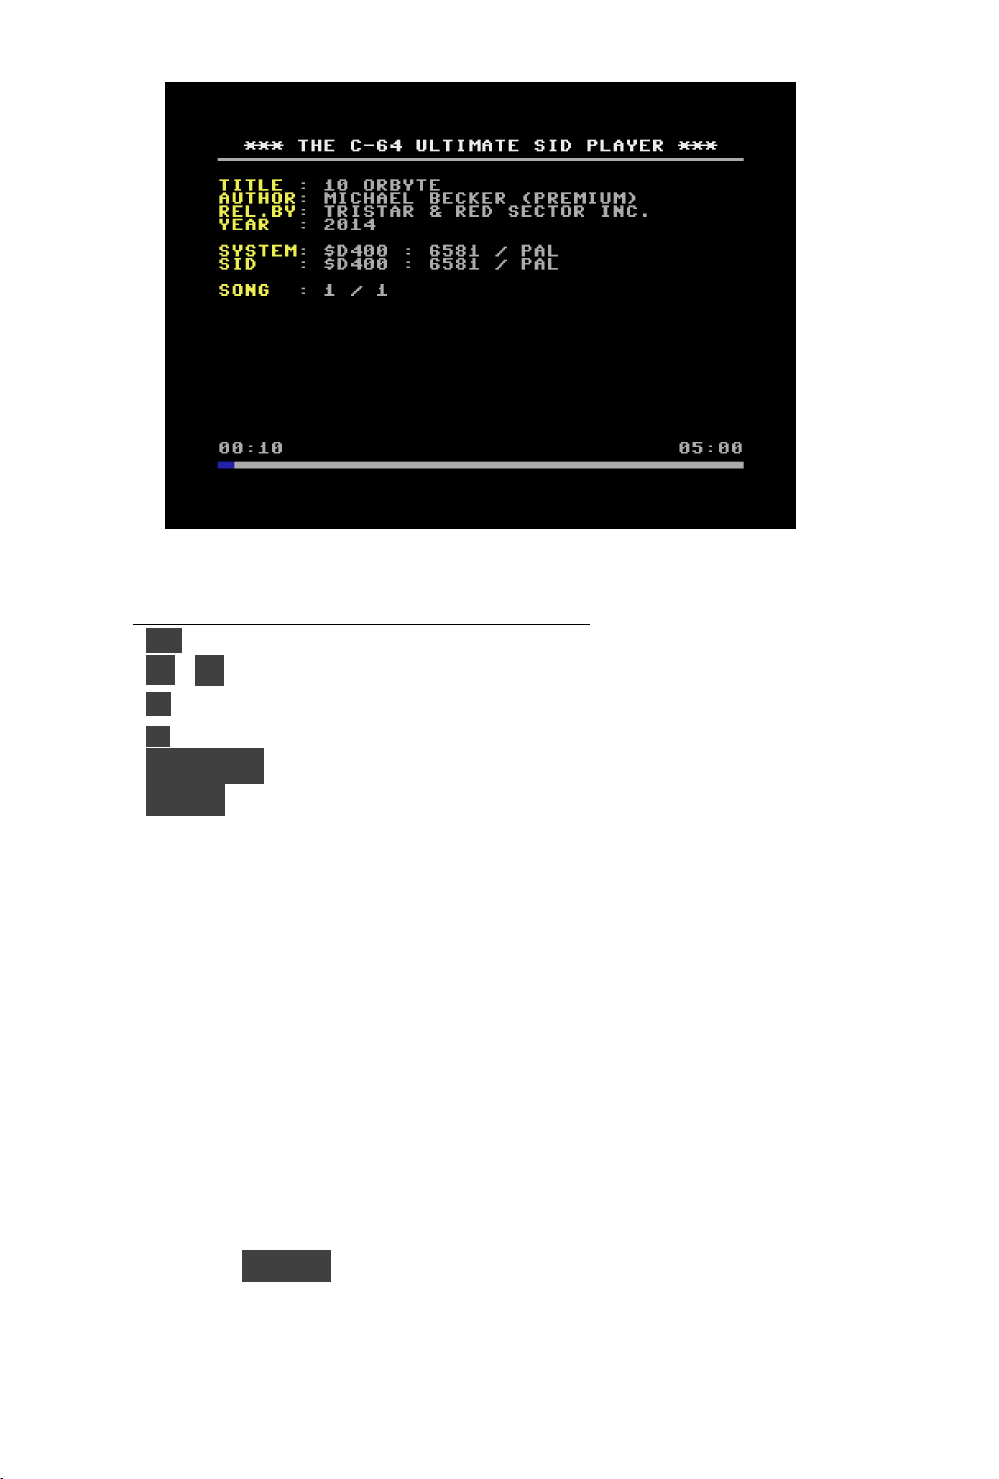
You can control the C-64 Ultimate SID Player with the following keys:
Key Function
←
Fast forward
1
– 0 Select a tune 1 – 10
+ Play next tune
- Play previous tune
RUN/STOP Return to the Disk File Browser
SPACE Pause or resume
The High Voltage SID Collection (HVSC) is a large collection of SID mu-
sic files from throughout Commodore 64 history. Visit their website:
www.hvsc.c64.org
FILE OPERATIONS
You can perform common operations on files stored on any storage device
accessible from the Disk File Browser.
Rename and Delete
To rename a file or directory:
1. Navigate to the file or directory to rename.
2. Press
RETURN
. The pop-up action menu opens.
3. Select “Rename.” When prompted, enter the new name.
28
To delete a file or directory:
1. Navigate to the file or directory to rename.
2. Press RETURN . The pop-up action menu opens.
3. Select “Delete.” When prompted, confirm the operation ( RETURN
or Y ).
Copy
To copy a file or directory:
1. Navigate to the file or directory to copy.
2. Hold ǣ then press C (for “Copy”). Acknowledge the dialog (press
RETURN ).
3. Navigate to the location where you want the copy to reside.
4. Hold ǣ then press V . A new file or directory is created with the
same contents.
You can copy a file or directory between directories, or between different
storage devices. Copying a directory copies all files and subdirectories in
the directory.
29

To copy multiple files or directories in a single operation:
1. Navigate to the location where items to copy reside.
2. Move the selection to a file or directory to copy. Press SPACE . A
diamond appears next to the filename to indicate it is selected for
copying.
3. Repeat for every file or directory to select.
4. Hold ǣ then press C (for “Copy”). Acknowledge the dialog (press
RETURN ).
5. Navigate to the location where you want the copy to reside.
6. Hold ǣ then press V . All selected items are copied.
Create a Directory
You can create an empty directory (folder) on any storage device.
To create a directory:
1. Navigate to the location where the new directory will reside.
2. Open the Tool menu: press F1 .
3. Select “Create.”
4. Select “Directory.”
5. When prompted, enter the name of the directory to create.
30


32
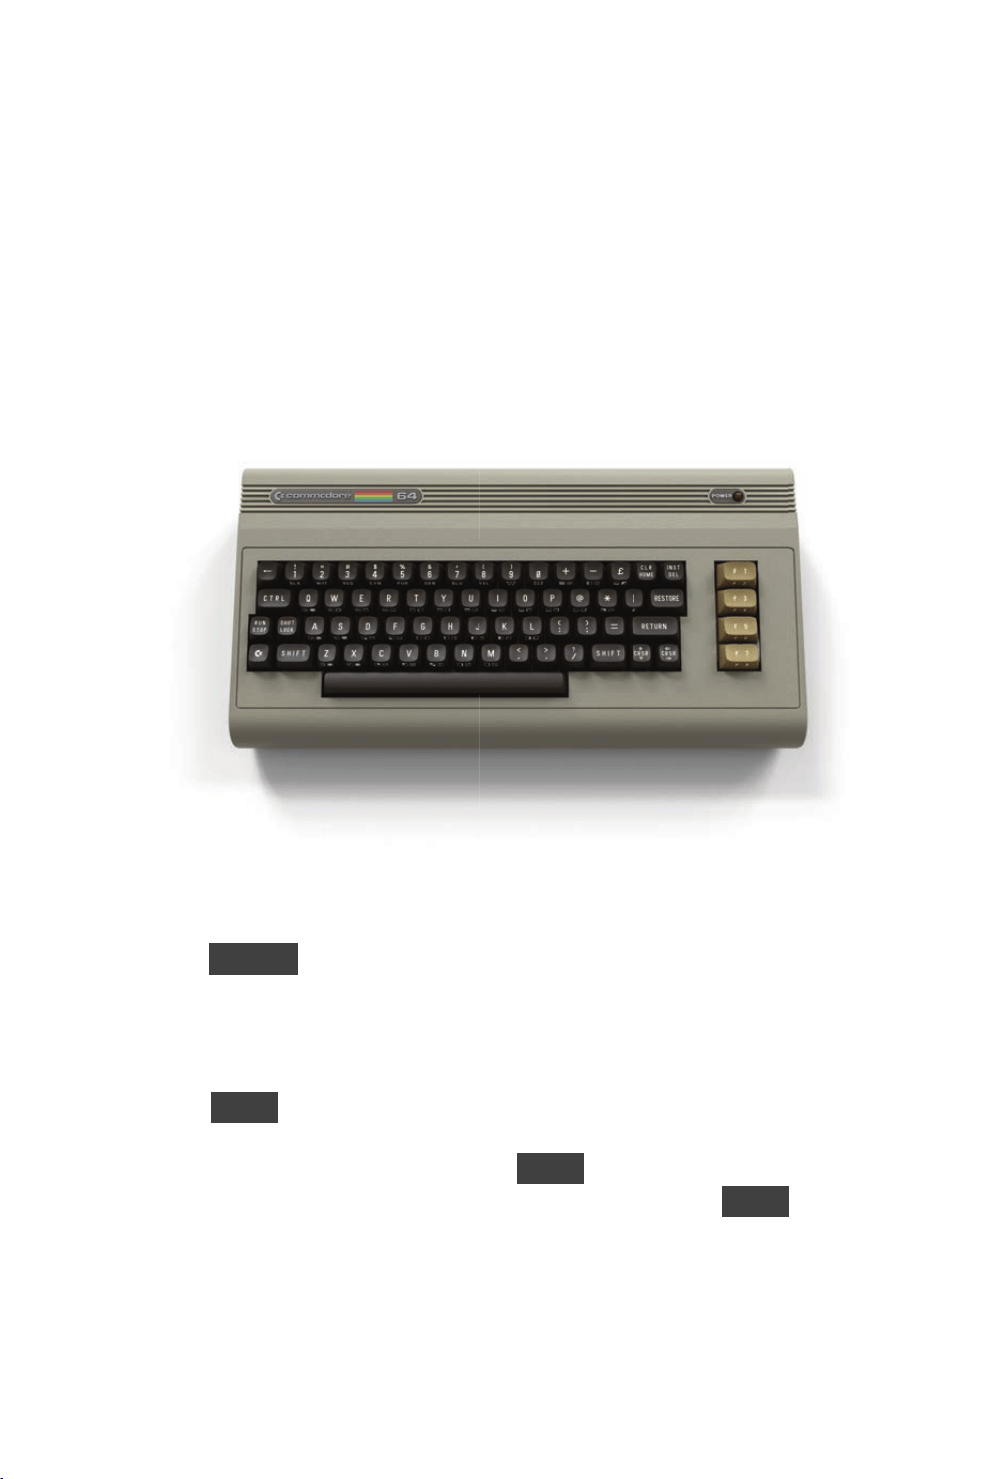
THE KEYBOARD
Now that you’ve got everything set up and adjusted, please take a few
moments to familiarize yourself with the keyboard which is your most im-
portant means of communication with the Commodore 64 Ultimate.
You will find the keyboard similar to a standard typewriter keyboard. There
are, however, a number of new keys which control specialized functions.
What follows is a brief description of the various keys and how they func-
tion. The detailed operation of each key will be covered in later sections.
RETURN
The
RETURN key signals the computer to look at the information that you
typed and enters that information into memory.
SHIFT
The SHIFT key works like that on a standard typewriter. Many keys are
capable of displaying two letters or symbols and two graphic characters.
In the “upper/lower case” mode the
SHIFT key gives you standard upper
case characters. In the “upper case/graphic” mode the
SHIFT key will
display the graphic character on the right hand side of the front part of
the key.
33

In the case of special function keys, the SHIFT key will give you the func-
tion marked on the front of the key.
Editing
No one is perfect, and the Commodore 64 takes that into account. A num-
ber of editing keys let you correct typing mistakes and move information
around on the screen.
CRSR
There are two keys marked
CRSR
(CuRSoR), one with up and down ar-
rows ⇑CRSR⇓ the other with left and right arrows
⇐CRSR⇒
. You can
use these keys to move the cursor up and down or left and right. In the
unshifted mode, the CRSR keys will let you move the cursor down and
to the right. Using the SHIFT key and CRSR keys allows the cursor to
be moved either up or to the left. The cursor keys have a special repeat
feature that keeps the cursor moving until you release the key.
INST/DEL
If you hit the INST/DEL key, the cursor will move back a space, erasing
(DELeting) the previous character you typed. If you’re in the middle of a
line, the character to the left is deleted and the characters to the right
automatically move together to close up the space.
A SHIFT ed INST/DEL allows you to INSerT information on a line. For ex-
ample, if you noticed a typing mistake in the beginning of a line — perhaps
you left out part of a name — you could use the
⇐CRSR⇒
key to move
back to the error and then hit SHIFT INST/DEL to insert a space. Then
just type in the missing letter.
CLR/HOME
CLR/HOME positions the cursor at the “HOME” position of the screen,
which is the upper left-hand corner. A SHIFT ed CLR/HOME will clear
the screen and place the cursor in the home position.
RESTORE
RESTORE
has different functions depending on the program that is run-
ning. In many cases, you can use it to interrupt a running program, clear
34
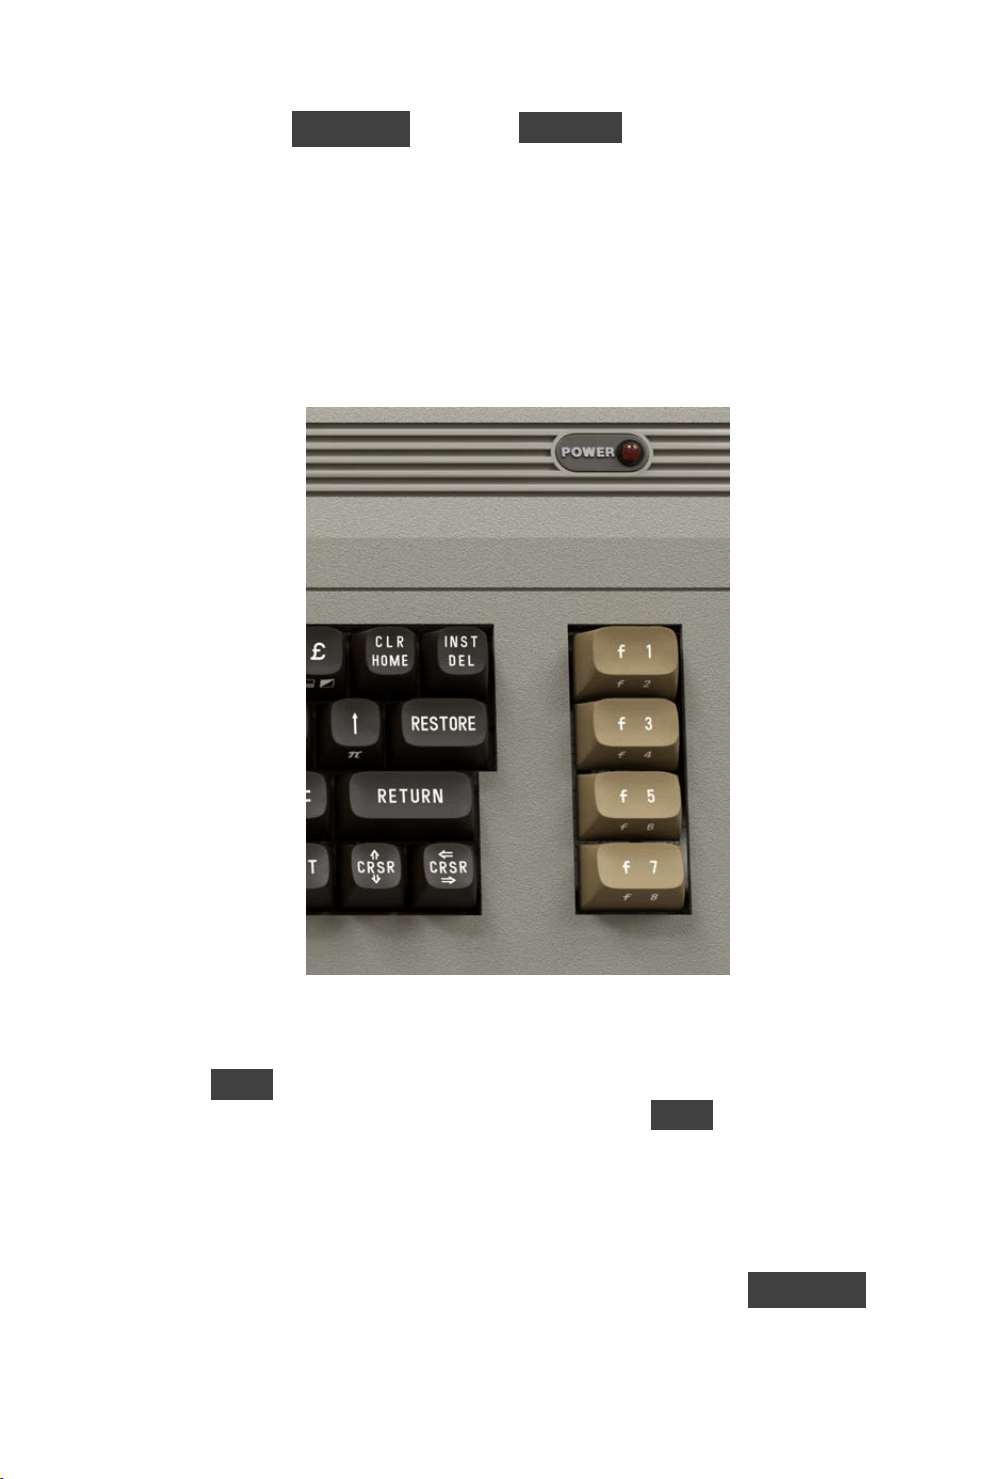
the screen, and restore the state of operation to a command prompt. To
do this, hold
RUN/STOP
then press
RESTORE
.
Function Keys
The four function keys on the right side of the keyboard are used by pro-
grams for various purposes. Their behavior depends on the program. You
can write your own programs that can be controlled by the user pressing
these keys.
You can use the function keys to perform actions in the C64U Menu.
CTRL
The CTRL key, which stands for ConTRoL, allows you to set colors, and
perform other specialized functions. You hold the CTRL key down while
depressing another designated key to get a control function.
RUN/STOP
Normally, depressing the key will stop the execution of a BASIC program.
It signals the computer to STOP doing something. Using the RUN/STOP
35

key in the shifted mode automatically loads a program from tape, which
was the style at the time.
ǣ Commodore Key
The Commodore key ǣ performs a number of functions. First, it allows
you to move between the text and graphic display modes.
When the computer is first turned on, it is in the Upper Case/Graphic mode,
that is, everything you type is in upper case letters. As was mentioned,
using the SHIFT key in this mode will display the graphic on the right side
of the keys.
If you hold down the ǣ key and press the SHIFT key, the display will
change to upper and lower case. Now, if you hold down the ǣ key and
any other key with a graphic symbol, the graphic shown on the left side of
the key will be displayed.
To get back into the upper case/graphic mode hold down the ǣ key and
press the SHIFT key again.
The second function of the ǣ key is to allow you access to a second set
of eight text colors. By holding down the ǣ key and any of the number
keys, any text now typed will be in the alternate color available from the
key you depressed. Chapter 6 lists the text colors available from each key.
BACK TO NORMAL
Now that you’ve had a chance to look over the keyboard, let’s explore some
of the Commodore 64’s many capabilities.
Hold SHIFT and press CLR/HOME . The screen should clear and the
cursor will be positioned in the “home” spot (upper left-hand corner of the
screen).
Now, simultaneously hold ǣ and the 7 key. This sets the text color back
to light blue. There is one more step needed to get everything back to
normal. Hold CTRL and 0 (Zero not Oh!). If the cursor was in “reversed”
mode, this sets the mode back to normal.
36

TIP:
Now that you’ve done things the hard way, there is a simple way to
reset the machine to the normal display. First press the RUN/STOP
key and then press the RESTORE key. RUN/STOP must always be
held down in order to use the RESTORE key function.
This will clear the screen and return everything to normal. If there is
a program in the computer, it will be left untouched. This is a good
sequence to remember, especially if you do a lot of programming.
LOADING AND SAVING PROGRAMS
One of the most important features of the Commodore 64 is the ability to
save and load programs to and from a floppy disk. This capability allows
you to save the programs you write for use at a later time, or purchase
prewritten programs to use with the Commodore 64.
We discussed how to mount, run, and create disk images in chapter 2.
When a disk image is connected to a Commodore 64 Ultimate virtual drive,
that disk image behaves like a floppy disk in a physical disk drive.
If you have a vintage 5-1/4” floppy disk drive such as the VIC 1541, you
can use it with the Commodore 64 Ultimate, connected to the IEC serial
port. Carefully insert the pre-programmed disk so that the label on the
disk is facing up and is closest to you. Look for a little notch on the disk
(it might be covered with a little piece of tape). If you’re inserting the disk
properly the notch will be on the left side. Once the disk is inside close the
protective gate by pushing down on the lever.
The computer refers to the disk drive (virtual or otherwise) using a unit
number. The most common unit number for a single disk drive is 8. You
will use this unit number with commands that perform disk operations. It
is possible to connect multiple disk drives simultaneously, including up to
two C64U virtual drives. Additional drives use unit numbers 9 and above.
Unit numbers must be configured with the drive itself. For information on
configuring a physical disk drive with the C64U, see chapter 10.
37

Loading Programs from Disk
A floppy disk contains a set of files, each with a name. A file can be a
program file or a data file. To load and run a program, type:
LOAD "PROGRAM NAME",8
and hit the RETURN key. The disk will make noise and your screen will say:
SEARCHING FOR PROGRAM NAME
LOADING
READY.
ǀ
When READY appears and the cursor is blinking, just type RUN. The program
starts.
Some program disks expect you to use a program name of *, the asterisk
character. This tells the disk drive to load the first file on the disk, which
professionally produced program disks have set up to be the program you
should run. It is also common to follow the LOAD command with ,8,1, to
give the program full control over how it is loaded into memory.
LOAD "*",8,1
SEARCHING FOR *
LOADING
READY.
RUN
NOTE: When you load a new program into the computer’s memory, any
instructions that were in the computer previously will be erased. Make sure
you save a program you’re working on before loading a new one. Once a
program has been loaded, you can RUN it, LIST it, or make changes and
re-save the new version.
Saving Programs to Disk
Soon, you will be writing your own programs in BASIC. When you do, you
can (and should!) save them to disk for later retrieval. You will find it is a
good practice to save your program frequently as you work, so when the
computer needs to be reset, you can pick up where you left off.
To save a BASIC program to disk, type:
38

SAVE "PROGRAM NAME",8
After you press RETURN the disk will start to turn and the computer will
respond with:
SAVING PROGRAM NAME
READY.
ǀ
When saving a program in this way, the disk drive will report an error if
you are using the name of a program that already exists on the disk. This
prevents accidental data loss. If you are sure you want to replace the file,
type @: inside the quote marks, just before the filename:
SAVE "@:PROGRAM NAME",8
Another good practice is to keep old versions of your program on the disk
while you are working, using different filenames. Only replace the file if
you are sure you don’t need the previous version.
NOTE: Older physical floppy disk drives had flaws with the save-with-
replace mechanism that can lead to data loss. This is not an issue when
using disk images.
Listing the Files on a Disk
A disk stores a list of its files in a directory. You can view the directory listing
by LOADing a special file named "$", then issuing the LIST command:
LOAD "$",8
SEARCHING FOR $
LOADING
READY.
LIST
If the list of files is long, you can slow down the listing by holding down the
CTRL key, or you can interrupt it by pressing RUN/STOP .
NOTE: LOADing the directory listing overwrites the program in memory, if
any. Be sure to save any work in progress before loading the directory
listing. Also, be sure to enter the NEW command to clear program memory
before starting a new program.
39

PRINT AND CALCULATIONS
Now that you’ve gotten through a couple of the more difficult operations
you need in order to keep the programs you like, let’s start making some
programs for you to save.
Try typing the following exactly as shown:
PRINT "COMMODORE 64"
COMMODORE 64
TYPE THIS LINE AND
HIT RETURN
COMPUTER TYPED
If you make a typing mistake, use the INST/DEL key to erase the character
immediately to the left of the cursor. You can delete as many characters
as necessary.
Let’s see what went on in the example above. First, you instructed (com-
manded) the computer to PRINT whatever was inside the quote marks.
By hitting RETURN you told the computer to do what you instructed and
COMMODORE 64 was printed on the screen.
When you use the PRINT statement in this form, whatever is enclosed in
quotes is printed exactly as you typed it.
If the computer responded with:
?SYNTAX ERROR
ask yourself if you made a mistake in typing, or forgot the quote marks.
The computer is precise and expects instructions to be given in a specific
form.
But don’t get worried; just remember to enter things as we present them
in the examples and you’ll get along great with the Commodore 64.
Remember, you can’t hurt the computer by typing on it, and the best way
to learn BASIC is to try different things and see what happens.
PRINT is one of the most useful and powerful commands in the BASIC lan-
guage. With it, you can display just about anything you wish, including
graphics and results of computations.
For example, try the following. Clear the screen by holding down the
SHIFT key and CLR/HOME key and type (be sure to use the 1 key for
one, not a letter I):
40

PRINT 12+12
24
READY.
ǀ
TYPE THIS LINE AND
HIT RETURN
COMPUTER PRINTED THE ANSWER
What you’ve discovered is that the Commodore 64 is a calculator in its
basic form. The result of “24” was calculated and printed automatically. In
fact, you can also perform subtraction, multiplication, division, exponenti-
ation, and advanced math functions such as calculating square roots, etc.
And you’re not limited to a single calculation on a line, but more on that
later.
Note that in the above form, PRINT behaved differently from the first ex-
ample. In this case, a value or result of a calculation is printed, rather than
the exact message you entered because the quote marks were omitted.
Addition
The plus sign (+) signals addition: we instructed the computer to print the
result of 12 added to 12. Other arithmetic operations take a similar form
to addition. Remember to always hit RETURN after typing PRINT and the
calculation.
Subtraction
To subtract, use the conventional minus (-) sign. Type:
PRINT 12-9
3
HIT RETURN
Multiplication
If you wanted to multiply 12 times 12, use the asterisk (*) to represent
multiplication. You would type:
41

PRINT 12*12
144
HIT RETURN
Division
Division uses the familiar / symbol. For example, to divide 144 by 12, type:
PRINT 144/12
12
HIT
RETURN
Exponentation
In a like fashion, you can easily raise a number to a power (this is the same
as multiplying a number by itself a specified number of times). The ↑ (Up
arrow) signifies exponentiation.
PRINT 12^5
248832
This is the same as typing:
PRINT 12*12*12*12*12
248832
42

TIP:
BASIC has a number of shortcut ways of doing things. One such way
is abbreviating BASIC commands (or keywords). A ? can be used in
place of PRINT, for example. As we go on you’ll be presented with
many commands; Appendix B shows the abbreviations for each and
what will be displayed on the screen when you type the abbreviated
form.
The last example brings up another important point: many calculations
may be performed on the same line, and they can be of mixed types.
You could calculate this problem (? replaces the word PRINT):
? 3 + 5 - 7 + 2
3
THIS ?
REPLACES THE
WORD PRINT
Up to this point we’ve just used small numbers and simple examples. How-
ever, the Commodore 64 is capable of more complex calculations. You
could, for example, add a number of large figures together. Try this, but
don’t use any commas, or you’ll get an error:
? 123.45 + 345.78 + 7895.687
8364.917
That looks fine, but now try this:
? 12123123.45 + 345.78 + 7895.687
12131364.9
If you took the time to add this up by hand, you would get a different result.
What’s going on here? Even though the computer has a lot of power,
there’s a limit to the numbers it can handle. The Commodore 64 can work
43

with numbers containing 10 digits. However when a number is printed,
only nine digits are displayed.
So in our example, the result was “rounded” to fit in the proper range. The
Commodore 64 rounds up when the next digit is five or more; it rounds
down when the next digit is four or less.
Numbers between 0.01 and 999,999,999 are printed using standard no-
tation. Numbers outside this range are printed using scientific notation.
Scientific notation is just a process of expressing a very large or small num-
ber as a power of 10.
If you type:
? 123000000000000000
1.23E+17
This is the same as 1.23 * 10↑17 and is used just to keep things tidy.
There is a limit to the numbers the computer can handle, even in scientific
notation. These limits are:
Largest: ± 1.70141183E+38
Smallest (different from zero): ± 2.93873588-39
PRECEDENCE
If you tried to perform some mixed calculations different from the exam-
ples we showed earlier, you might not have gotten the results that you
expected. The reason is that the computer performs calculations in a cer-
tain order.
44

In this calculation:
20 + 8/2
you can’t tell whether the answer
should be 24 or 14 until you know in
which order to perform the calcula-
tions. If you add 20 to 8 divided by
2 (or 4), then the result is 24. But, if
you add 20 plus 8 and then divide by
2 the answer is 14. Try the example
and see what result you get.
The reason you got 24 is because the Commodore 64 performs calcula-
tions left to right according to the following:
First: - minus sign indicating negative numbers
Second: ↑ exponentiation, left to right
Third: */ multiplication and division, left to right
Fourth: +- addition and subtraction, left to right
Follow along according to the order of precedence, and you will see that in
the above example the division was performed first and then the addition
to get a result of 24.
Make up some problems of your own and see if you can follow along and
predict the results according to the rules set down above.
There’s also an easy way to alter the precedence process by using paren-
theses to set off which operations you want performed first.
For example, if you want to divide 35 by 5 plus 2 you type:
?35/5+2
9
you will get 35 divided by 5 with 2 added to the answer, which is not what
you intended at all. To get what you really wanted, try this:
? 35 / (5 + 2)
5
What happens now is that the computer evaluates what is contained in the
parentheses first. If there are parentheses within parentheses, the inner-
most parentheses are evaluated first.
45

Where there are a number of parentheses on a line, such as:
? (12 + 9) * (6 + 1)
147
the computer evaluates them left to right. Here 21 would be multiplied by
7 for the result of 147.
COMBINING THINGS
Even though we’ve spent a lot of time in areas that might not seem very
important, the details presented here will make more sense once you start
to program, and will prove invaluable.
To give you an idea how things fit in place, consider the following: how
could you combine the two types of print statements we’ve examined so
far to print something more meaningful on the screen?
We know that by enclosing something within quote marks prints that infor-
mation on the screen exactly as it was entered, and by using math oper-
ators, calculations can be performed. So why not combine the two types
of PRINT statements like this:
? "5 * 9=";5 * 9
5 * 9 = 45
SEMICOLON MEANS NO SPACE
Even though this might seem a bit redundant, what we’ve done is simply
use both types of print statements together. The first part prints “5 * 9
=” exactly as it was typed. The second part does the actual work and
prints the result, with the semicolon separating the message part of the
statement from the actual calculation.
You can separate the parts of a mixed print statement with punctuation
for various formats. Try a comma in place of the semicolon and see what
happens.
For the curious, the semicolon causes the next part of the statement to
be printed immediately after the previous part, without any spaces. The
comma does something different. Even though it is an acceptable sepa-
rator, it spaces things out more. If you type:
46

? 2,3,4,5,6
2 3 4 5
6
HIT RETURN
the numbers will be printed across the screen and down on to the next line.
The Commodore 64’s display is organized into 4 areas of 10 columns each.
The comma tabs each result into the next available area. Since we asked
for more information to be printed than would fit on one line, (we tried to
fit five 10-column areas on one line) the last item was moved down to the
next line.
The basic difference between the comma and semicolon in formatting
PRINT statements can be used to our advantage when creating more com-
plex displays: it will allow us to create some sophisticated results very eas-
ily.
47

48


50

THE NEXT STEP
Up to now we’ve performed some simple operations by entering a single
line of instructions into the computer. Once RETURN was depressed, the
operation that we specified was performed immediately. This is called the
IMMEDIATE or CALCULATOR mode.
But to accomplish anything significant, we must be able to have the com-
puter operate with more than a single line statement. A number of state-
ments combined together is called a PROGRAM and allows you to use the
full power of the Commodore 64.
To see how easy it is to write your first Commodore 64 program, try this:
Clear the screen by holding the SHIFT key, and then depressing the
CLR/HOME key.
Type NEW and press RETURN . (This just clears out any numbers that might
have been left in the computer from your experimenting.)
Now type the following exactly as shown (remember to hit
RETURN
each
line):
10 ?"COMMODORE 64"
20 GOTO 10
Now, type RUN and hit RETURN — watch what happens. Your screen will
come alive with COMMODORE 64. After you’ve finished watching the
display, hit
RUN/STOP
to stop the program.
A number of important concepts were introduced in this short program that
are the basis for all programming.
Notice that here we preceded each statement with a number. This LINE
number tells the computer in what order to work with each statement.
These numbers are also a reference point, in case the program needs to
get back to a particular line. Line numbers can be any whole number (in-
teger) value between 0 – 63,999.
10 PRINT "COMMODORE 64"
STATEMENT
LINE NUMBER
51

COMMODORE 64
COMMODORE 64
COMMODORE 64
COMMODORE 64
COMMODORE 64
COMMODORE 64
COMMODORE 64
COMMODORE 64
COMMODORE 64
COMMODORE 64
COMMODORE 64
COMMODORE 64
BREAK IN 10
READY.
ǀ
It is good programming practice to number lines in increments of 10, in
case you need to insert some statements later on.
Besides PRINT, our program also used another BASIC command, GOTO.
This instructs the computer to go directly to a particular line and perform
it, then continue from that point.
10 PRINT "COMMODORE 64"
20 GOTO 10
In our example, the program prints the message in line 10, goes to the next
line (20), which instructs it to go back to line 10 and print the message over
again. Then the cycle repeats. Since we didn’t give the computer a way
out of this loop, the program will cycle endlessly, until we physically stop it
with the RUN/STOP key.
Once you’ve stopped the program, type: LIST. Your program will be dis-
played, intact, because it’s still in the computer’s memory. Notice, too,
that the computer converted the ? into PRINT for you. The program can
now be changed, saved, or run again.
Another important difference between typing something in the immedi-
ate mode and writing a program is that once you execute and clear the
screen of an immediate statement, it’s lost. However, you can always get
a program back by just typing LIST.
By the way, when it comes to abbreviations, remember that the computer
may run out of space on a line if you use too many. A line of a BASIC
program can have up to 79 characters, and abbreviations get expanded
to their full length after you enter the line.
52

QUOTE MODE
Consider the command in the first line of the program:
PRINT "COMMODORE 64"
This instructs the Commodore 64 to print the message inside the double-
quote marks ("..."). This phrase surrounded by quotes is known as a string.
Specifically, the PRINT command prints the string as if you typed those
characters at the location of the cursor.
Many of the key combinations described in the previous chapter manip-
ulate the cursor or the screen in various ways. When you use a cursor
key, it moves the cursor. When you select a color, it changes the color
of the cursor and the text that it types. When you hold SHIFT and press
CLR/HOME , it clears the screen and moves the cursor to the top left
corner.
The Commodore 64 lets you “print” these effects as well, just as if you
typed them. To do this, the screen editor notices when you start a quoted
phrase by typing a double-quote mark, then switches to a special entry
mode called quote mode. In this mode, when you type a key combination
that normally manipulates the cursor or the string, the cursor actually types
a special symbol that represents that key combination. When you type the
closing double-quote mark, the screen editor returns to its normal typing
mode.
Try this: hold SHIFT and press CLR/HOME . The screen clears immedi-
ately. Don’t worry: if you entered the short program above, it is still in
memory. (Type LIST and press RETURN to see it.)
Now try this: type the following, but do not press
RETURN
:
PRINT "
Because you typed a double-quote, the editor is now in quote mode.
Next, hold
SHIFT
and press
CLR/HOME
. Instead of clearing the screen,
the editor prints a heart symbol in a box.
Finally, type the rest of this phrase, but do no press RETURN :
COMMODORE 64"
53

Because you typed another quote mark, the editor is no longer in quote
mode. The command appears like this on the screen:
PRINT "ƳCOMMODORE 64"
Finally, press RETURN to execute the command. The Commodore 64
prints the message as you typed it: it clears the screen and moves the
cursor to the top-left corner as if typing SHIFT + CLR/HOME , then prints
the message.
Quote mode lets you include cursor manipulation commands in your pro-
grams, entered just as if you typed them directly to the screen. We’ll use
quote mode for programs later in this Guide. It’s worth noticing it now,
because it is easy to accidentally type a cursor control key while in quote
mode, causing symbols to appear. If you type a cursor command you did
not intend while in quote mode, use INST/DEL to delete it. ( INST/DEL is
one of several keys that do not emit commands in quote mode. RETURN
is another one.)
EDITING TIPS
If you make a mistake on a line, you have a number of editing options:
1. You can retype a line anytime, and the computer will automatically
substitute the new line for the old one.
2. An unwanted line can be erased by simply typing the line number
and RETURN .
3. You can also easily edit an existing line, using the cursor keys and
editing keys.
Suppose you made a typing mistake in a line of the example. To correct it
without retyping the entire line, try this:
Type LIST, then using the
SHIFT
and ⇑CRSR⇓ keys together move the
cursor up until it is positioned on the line that needs to be changed.
Now, use the cursor-right key to move the cursor to the character you want
to change, typing the change over the old character. Now hit RETURN
and the corrected line will replace the old one.
If you need more space on the line, position the cursor where the space
is needed and hit SHIFT and INST/DEL at the same time and a space
54

will open up. Now just type in the additional information and hit RETURN .
Likewise, you can delete unwanted characters by placing the cursor to the
right of the unwanted character and hitting the
INST/DEL
key.
To verify that changes were entered, type LIST again, and the corrected
program will be displayed! And lines don’t have to be entered in numerical
order. The computer will automatically place them in the proper sequence.
Try editing our sample program on page 52 by changing line 10 and
adding a comma to the end of the line. Then RUN the program again.
1
10 PRINT "COMMODORE",
VARIABLES
Variables are some of the most used features of any programming lan-
guage, because variables can represent much more information in the
computer. Understanding how variables operate will make computing
easier and allow us to accomplish feats that would not be possible other-
wise.
COMMODORE COMMODORE COMMODORE COMMODORE
COMMODORE COMMODORE COMMODORE COMMODORE
COMMODORE COMMODORE COMMODORE COMMODORE
COMMODORE COMMODORE COMMODORE COMMODORE
COMMODORE COMMODORE COMMODORE COMMODORE
COMMODORE COMMODORE COMMODORE COMMODORE
COMMODORE COMMODORE COMMODORE COMMODORE
COMMODORE COMMODORE COMMODORE COMMODORE
COMMODORE COMMODORE COMMODORE COMMODORE
COMMODORE COMMODORE COMMODORE COMMODORE
COMMODORE COMMODORE COMMODORE COMMODORE
COMMODORE COMMODORE COMMODORE COMMODORE
BREAK IN 10
READY.
ǀ
Imagine a number of boxes within the computer that can each hold a num-
ber or a string of text characters. Each of these boxes is to be labeled with
a name that we choose. That name is called a variable and represents the
information in the respective box.
For example, if we say:
1
Don’t forget to move the cursor past line 20 before you run the program.
55

10 X% = 15
20 X = 23.5
30 X$ = "THE SUM OF X%+X = "
The computer might represent the variables like this:
X% 15
X 23.5
X$ THE SUM OF X%+X =
A variable name represents the box, or memory location, where the current
value of the variable is stored. As you can see, we can assign either an
integer number, floating point number, or a text string to a variable.
The % symbol following a variable name indicates the variable will repre-
sent an integer number. The following are valid integer variable names:
A%
X%
A1%
NM%
The ’$’ following the variable name indicates the variable will represent a
text string. The following are examples of string variables:
A$
X$
M1$
Floating point variables follow the same format, with the type indicator:
A1
X
Y
MI
In assigning a name to a variable there are a few things to keep in mind.
First, a variable name can have one or two characters. The first character
56

must be an alphabetic character from A to Z; the second character can
be either alphabetic or numeric (in the range 0 to 9). A third character
can be included to indicate the type of variable (integer or text string), %
or $.
You can use variable names having more than two alphabetic char-
acters, but only the first two are recognized by the computer. So PA
and PARTNO are the same and would refer to the same variable box.
The last rule for variable names is simple: they can’t contain any BASIC key-
words (reserved words) such as GOTO, RUN, etc. Refer back to Appendix
B for a complete list of BASIC reserved words.
To see how variables can be put to work, type in the complete program
that we introduced earlier and RUN it. Remember to hit RETURN after
each line in the program.
NEW
10 X% = 15
20 X = 23.5
30 X$ = "THE SUM OF X% + X ="
40 PRINT "X% ="; X%, "X ="; X
50 PRINT X$; X% + X
If you did everything as shown, you should get the following result printed
on the screen:
RUN
X% = 15 X = 23.5
THE SUM OF X% + X = 38.5
READY.
We’ve put together all the tricks learned so far to format the display as you
see it and print the sum of the two variables.
In lines 10 and 20 we assigned an integer value to X% and assigned a
floating point value to X. This puts the number associated with the variable
in its box. In line 30, we assigned a text string to X$. Line 40 combines
the two types of PRINT statements to print a message and the actual value
of X% and X. Line 50 prints the text string assigned to X$ and the sum of
X% and X.
57

Note that even though X is used as part of each variable name, the identi-
fiers % and $ make X%, X, and X$ unique, thus representing three distinct
variables.
But variables are much more powerful. If you change their value, the new
value replaces the original value in the same box. This allows you to write
a statement like:
X = X + 1
This would never be accepted in normal algebra, but is one of the most
used concepts in programming. It means: take the current value of X, add
one to it and place the new sum into the box representing X.
IF…THEN
Armed with the ability to easily update the value of variables, we can now
try a program such as:
NEW
10 CT = 0
20 ?"COMMODORE 64"
30 CT = CT + 1
40 IF CT < 5 THEN 20
50 END
RUN
COMMODORE 64
COMMODORE 64
COMMODORE 64
COMMODORE 64
COMMODORE 64
What we’ve done is introduce two new BASIC commands, and provided
some control over our runaway little print program introduced at the start
of this chapter.
IF…THEN adds some logic to the program. It says IF a condition holds true
THEN do something. IF the condition no longer holds true, THEN do the next
line in the program.
A number of conditions can be set up in using an IF…THEN statement:
58

SYMBOL MEANING
< Less Than
> Greater Than
= Equal To
<> Not Equal To
>= Greater Than or Equal To
<= Less Than or Equal To
The use of any one of these conditions is simple, yet surprisingly powerful.
10 CT = 0
20 ?"COMMODORE 64"
30 CT = CT + 1
40 IF CT < 5 THEN 20
↓
50 END
In the sample program, we’ve set up a “loop” that has some constraints
placed on it by saying: IF a value is less than some number THEN do some-
thing.
Line 10 sets CT (CounT) equal to 0. Line 20 prints our message. Line 30
adds one to the variable CT. This line counts how many times we do the
loop. Each time the loop is executed, CT goes up by one.
Line 40 is our control line. If CT is less than 5, meaning we’ve executed the
loop less than 5 times, the program goes back to line 20 and prints again.
When CT becomes equal to 5 — indicating five COMMODORE 64’s were
printed — the program goes to line 50, which signals to END the program.
Try the program and see what we mean. By changing the CT limit in line
40 you can have any number of lines printed.
IF…THEN has a multitude of other uses, which we’ll see in future examples.
FOR…NEXT LOOPS
There is a simpler, and preferred way to accomplish what we did in the
previous example by using a FOR…NEXT loop. Consider the following:
59

NEW
10 FOR CT = 1 TO 5
20 PRINT "COMMODORE 64"
30 NEXT CT
RUN
COMMODORE 64
COMMODORE 64
COMMODORE 64
COMMODORE 64
COMMODORE 64
As you can see, the program has become much smaller and more direct.
CT starts at 1 in line 10. Then, line 20 does some printing. In Line 30 CT is
incremented by 1. The NEXT statement in line 30 automatically sends the
program back to line 10 where the FOR part of the FOR…NEXT statement
is located. This process will continue until CT reaches the limit you entered.
The variable used in a FOR…NEXT loop can be incremented by smaller
amounts than 1, if needed.
Try this:
NEW
10 FOR NB = 1 TO 10 STEP .5
20 PRINT NB,
30 NEXT NB
RUN
1 1.5 2 2.5
3 3.5 4 4.5
5 5.5 6 6.5
7 7.5 8 8.5
9 9.5 10
If you enter and run this program, you’ll see the numbers from 1 to 10,
incremented by .5, printed across the display.
All we’re doing here is printing the values that NB assumes as it goes
through the loop.
You can even specify whether the variable is increasing or decreasing.
Substitute the following for line 10:
10 FOR NB = 10 to 1 STEP -.5
60

and watch the opposite occur, as NB goes from 10 to 1 in descending
order.
61

62


64

INTRODUCTION
The next few chapters have been written for people who have become
relatively familiar with the BASIC programming language and the concepts
necessary to write more advanced programs.
For those of you who are just starting to learn how to program, you may
find some of the information a bit too technical to understand completely.
But take heart…because for these two fun chapters, SPRITE GRAPHICS and
CREATING SOUND, we’ve set up some simple examples that are written for
the new user. The examples will give you a good idea of how to use the so-
phisticated sound and graphics capabilities available on your Commodore
64.
If you are already familiar with BASIC programming, these chapters will
help you get started with advanced BASIC programming techniques. More
detailed information can be found in the COMMODORE 64 PROGRAM-
MER’S REFERENCE GUIDE (1982).
65
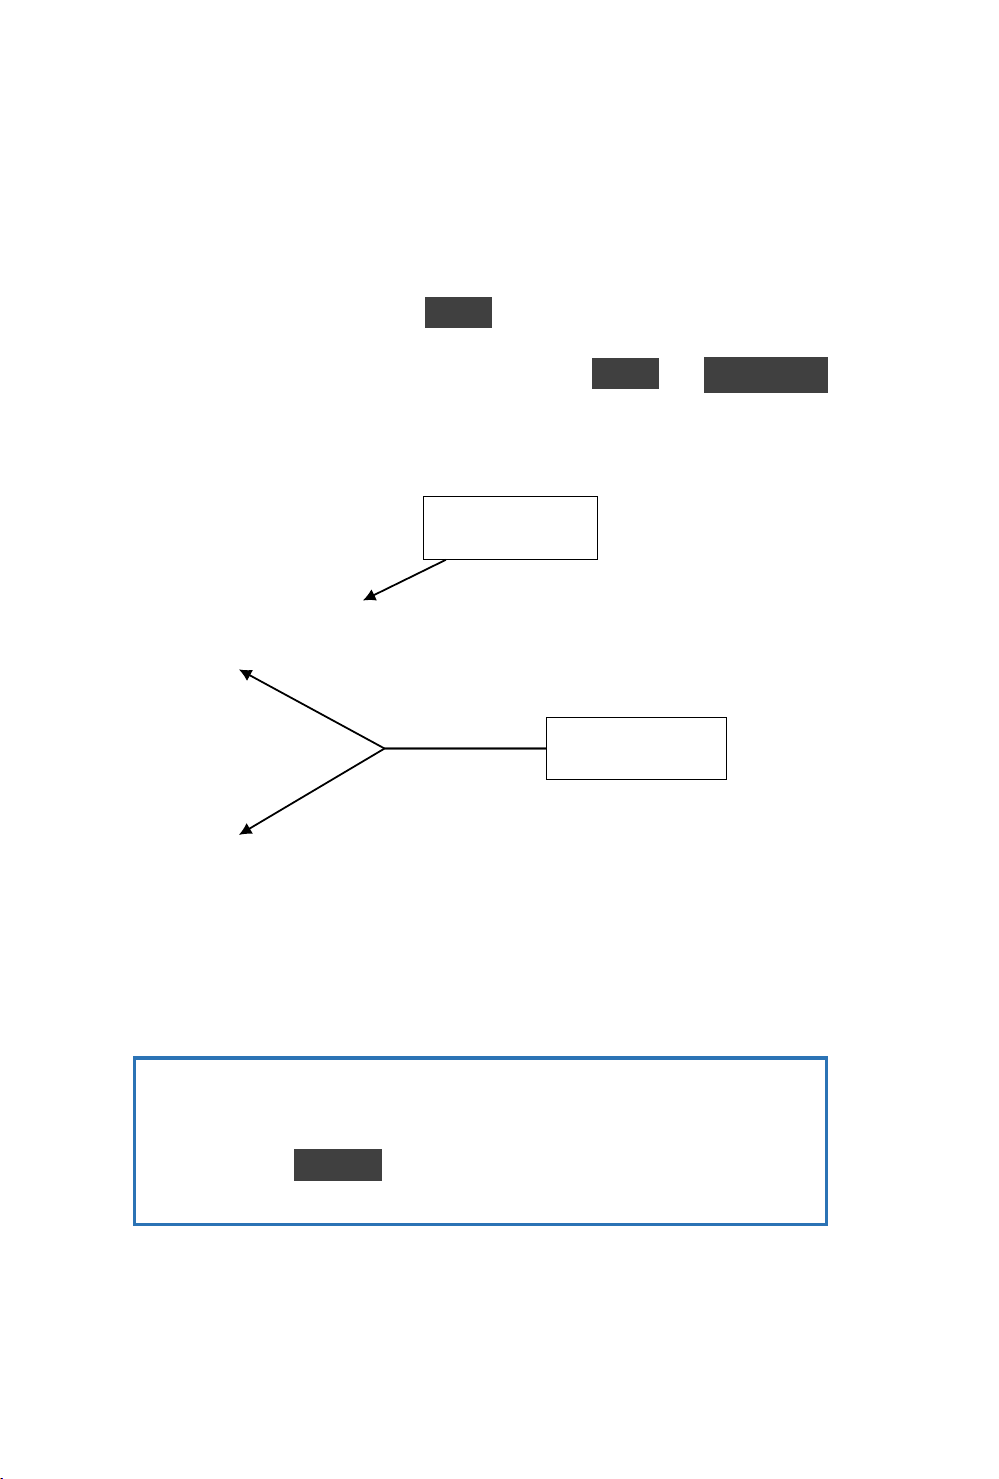
SIMPLE ANIMATION
Let’s exercise some of the Commodore 64’s graphic capabilities by putting
together what we’ve seen so far, together with a few new concepts. If
you’re ambitious, type in the following program and see what happens.
You will notice that within the print statements we can also include cursor
controls and screen commands. When you see something like {CRSR LEFT}
in a program listing, hold the SHIFT key and hit the CRSR LEFT/RIGHT
key. The screen will show the graphic representation of a cursor left (two
vertical reversed bars). In the same way, pressing
SHIFT
and
CLR/HOME
shows as a reversed heart.
NEW
10 REM BOUNCING BALL
20 PRINT "{CLR/HOME}"
25 FOR X = 1 TO 10 : PRINT "{CRSR DOWN}": NEXT
30 FOR BL = 1 TO 40
40 PRINT" đ{CRSR LEFT}";: REM (đ is a SHIFT-Q)
50 FOR TM = 1 TO 5
60 NEXT TM
70 NEXT BL
75 REM MOVE BALL RIGHT TO LEFT
80 FOR BL = 40 TO 1 STEP -1
90 PRINT" {CRSR LEFT}{CRSR LEFT}đ{CRSR LEFT}";
100 FOR TM = 1 TO 5
110 NEXT TM
120 NEXT BL
130 GOTO 20
: INDICATES
NEW COMMAND
THESE SPACES
ARE INTENTIONAL
TIP:
All words in this text will be completed on one line. However, as long
as you don’t hit RETURN your 64 will automatically move to the next
line even in the middle of a word.
The program will display a bouncing ball moving from left to right, and
back again, across the screen.
66

If we look at the program closely, you can see how this feat was accom-
plished.
10 REM BOUNCING BALL
20 PRINT "{CLR/HOME}"
25 FOR X = 1 TO 10 : PRINT "{CRSR DOWN}": NEXT
30 FOR BL = 1 TO 40
40 PRINT" đ{CRSR LEFT}";:REM (đ is a SHIFT-Q)
50 FOR TM = 1 TO 5
60 NEXT TM
70 NEXT BL
75 REM MOVE BALL RIGHT TO LEFT
80 FOR BL = 40 TO 1 STEP -1
90 PRINT" {CRSR LEFT}{CRSR LEFT}đ{CRSR LEFT}";
100 FOR TM = 1 TO 5
110 NEXT TM
120 NEXT BL
130 GOTO 20
Line 10 is a REMark that just tells what the program does; it has no effect
on the program itself. Line 20 clears the screen of any information.
Line 25 PRINTs 10 cursor-down commands. This just positions the ball in
the middle of the screen. If line 25 was eliminated the ball would move
across the top line of the screen.
Line 30 sets up a loop for moving the ball the 40 columns from the left to
right.
Line 40 does a lot of work. It first prints a space to erase the previous ball
positions, then it prints the ball, and finally it performs a cursor-left to get
everything ready to erase the current ball position again.
The loop set up in lines 50 and 60 slows the ball down a bit by delaying
the program. Without it, the ball would move too fast to see.
Line 70 completes the loop that prints balls on the screen, set up in line
30. Each time the loop is executed, the ball moves another space to the
right. As you notice from the illustration, we have set up a loop within a
loop.
67

This is perfectly acceptable. The only time you get in trouble is when the
loops cross over each other. It’s helpful in writing programs to check your-
self as illustrated here to make sure the logic of a loop is correct.
To see what would happen if you cross a loop, reverse the statements in
lines 60 and 70. You will get an error because the computer gets confused
and cannot figure out what’s going on.
Lines 80 through 120 just reverse the steps in the first part of the program,
and move the ball from right to left. Line 90 is slightly different from line
40 because the ball is moving in the opposite direction (we have to erase
the ball to the right and move to the left).
And when that’s all done the program goes back to line 20 to start the
whole process over again. Pretty neat! To stop the program hold down
RUN/STOP and hit RESTORE .
For a variation on the program, edit line 40 to read:
40 PRINT "đ";
TO MAKE THE đ HOLD THE SHIFT KEY
DOWN AND HIT THE LETTER ”Q.”
Run the program and see what happens now. Because we left out the
cursor control, each ball remains on the screen until erased by the ball
moving right to left in the second part of the program.
68
INPUT
Up to now, everything within a program has been set before it is run. Once
the program was started, nothing could be changed. INPUT allows us to
pass new information to a program as it is running and have that new
information acted upon.
To get an idea of how INPUT works, type NEW RETURN and enter this short
program:
10 INPUT A$
20 PRINT "YOU TYPED: ";A$
30 PRINT
40 GOTO 10
RUN
? COMMODORE 64
YOU TYPED: COMMODORE 64
YOU TYPED
COMPUTER
RESPONDED
What happens when you run this program is simple. A question mark will
appear, indicating that the computer is waiting for you to type something.
Enter any character, or group of characters, from the keyboard and hit
RETURN . The computer will then respond with “YOU TYPED: ” followed by
the information you entered.
This may seem very elementary, but imagine what you can have the com-
puter do with any information you enter.
You can INPUT either numeric or string variables, and even have the INPUT
statement prompt the user with a message. The format of INPUT is:
INPUT "PROMPT MESSAGE";VARIABLE
PROMPT MESSAGE MUST BE 38 CHARACTERS OR LESS.
Or, just:
INPUT VARIABLE
NOTE: To get out of this program hold down the RUN/STOP and
RESTORE keys.
The following program is not only useful, but demonstrates a lot of what
has been presented so far, including the new input statement.
69
NEW
1 REM TEMPERATURE CONVERSION PROGRAM
5 PRINT "{CLR/HOME}"
10 PRINT "CONVERT FROM FAHRENHEIT OR CELSIUS
(F/C)": INPUT A$
20 IF A$ = "" THEN 10
30 IF A$ = "F" THEN 100
40 IF A$ <> "C" THEN 10
50 INPUT "ENTER DEGREES CELSIUS: ";C
60 F = (C*9)/5+32
70 PRINT C; " DEG. CELSIUS = "; F; " DEG.
FAHRENHEIT"
80 PRINT
90 GOTO 10
100 INPUT "ENTER DEGREES FAHRENHEIT: ";F
110 C = (F-32)*5/9
120 PRINT F; " DEG. FAHRENHEIT = "; C;
" DEG. CELSIUS"
130 PRINT
140 GOTO 10
NO SPACE
HERE
DON’T
FORGET
TO
HIT RETURN
If you enter and run this program, you’ll see INPUT in action.
Line 10 uses the input statement to not only gather information, but also
print our prompt. Also notice that we can ask for either a number or a
string (by using a numeric or string variable).
Lines 20, 30 and 40 do some checks on what is typed in. In line 20, if
nothing is entered (just
RETURN
is hit), then the program goes back to
line 10 and requests the input again. In line 30, if F is typed, you know the
user wants to convert a temperature in degrees Fahrenheit to Celsius, so
the program branches to the part that does that conversion.
Line 40 does one more check. We know there are only two valid choices the
user can enter. To get to line 40, the user must have typed some character
other than F. Now, a check is made to see if that character is a C; if not,
the program requests input again.
70

This may seem like a lot of detail, but it is good programming practice. A
user not familiar with the program can become very frustrated if it does
something strange because a mistake was made entering information.
Once we determine what type of conversion to perform, the program does
the calculation and prints out the temperature entered and the converted
temperature.
The calculation is just straight math, using the established formula for tem-
perature conversion. After the calculation is finished and answer printed,
the program loops back and starts over.
After running, the screen might look like this:
CONVERT FROM FAHRENHEIT OR CELSIUS (F/C)
? F
ENTER DEGREES FAHRENHEIT: ? 32
32 DEG. FAHRENHEIT = 0 DEG. CELSIUS
CONVERT FROM FAHRENHEIT OR CELSIUS (F/C)
?
After running the program, make sure to save it on disk or tape. This pro-
gram, as well as others presented throughout this Guide, can form the
base of your program library.
GET
GET allows you to input one character at a time from the keyboard without
hitting RETURN . This really speeds entering data in many applications.
Whatever key is hit is assigned to the variable you specify with GET.
The following routine illustrates how GET works:
NEW
1 PRINT "{CLR/HOME}"
10 GET A$: IF A$ = "" THEN 10
20 PRINT A$;
30 GOTO 10
NO SPACE
HERE
If you RUN the program, the screen will clear and each time you hit a key,
line 20 will print it on the display, and then GET another character. It is
71
important to note that the character entered will not be displayed unless
you specifically PRINT it to the screen, as we’ve done here.
The second statement on line 10 is also important. GET continually works,
even if no key is pressed (unlike INPUT that waits for a response), so the
second part of this line continually checks the keyboard until a key is hit.
See what happens if the second part of line 10 is eliminated.
To stop this program you can hit the RUN/STOP and RESTORE keys.
The first part of the temperature conversion program could easily be rewrit-
ten to use GET. LOAD the temperature conversion program, and modify
lines 10, 20 and 40 as shown:
10 PRINT "CONVERT FROM FAHRENHEIT OR CELSIUS (F/C)"
20 GET A$: IF A$ = "" THEN 10
40 IF A$ <> "C" THEN 20
NO SPACE
HERE
This modification will make the program operate smoother, as nothing will
happen unless the user types in one of the desired responses to select the
type of conversion.
Once this change is made, make sure you save the new version of the
program.
RANDOM NUMBERS AND OTHER FUNCTIONS
The Commodore 64 contains a number of functions that are used to per-
form special operations. Functions could be thought of as built-in pro-
grams included in BASIC. But rather than typing in a number of statements
each time you need to perform a specialized calculation, you just type the
command for the desired function and the computer does the rest.
Many times when designing a game or educational program, you need to
generate a random number, to simulate the throw of dice, for example.
You could certainly write a program that would generate these numbers,
but an easier way is to call upon the RaNDom number function.
To see what RND actually does, try this short program:
72
NEW
10 FOR X = 1 TO 10
20 PRINT RND(1),
30 NEXT
IF YOU LEAVE OUT THE COMMA YOUR LIST OF
NUMBERS WILL APPEAR AS 1 COLUMN
After running the program, you will see a display like this:
.789280697 .664673958
.256373663 .0123442287
.682952381 .9058727922
.402343724 .87930926
.158209063 .245596701
Your numbers don’t match? Well, if they did we would all be in trouble, as
they should be completely random!
Try running the program a few more times
to verify that the results are always dif-
ferent. Even if the numbers don’t follow
any pattern, you should start to notice that
some things remain the same every time
the program is run.
First, the results are always between 0 and
1, but never equal to 0 or 1. This will cer-
tainly never do if we want to simulate the
random toss of dice, since we’re looking
for numbers between 1 and 6.
The other important feature to look for
is that we are dealing with real numbers
(with decimal places). This could also be a problem since whole (integer)
numbers are often needed.
There are a number of simple ways to produce numbers from the RND func-
tion in the range desired.
Replace line 20 with the following and run the program again:
73

20 PRINT 6*RND(1),
RUN
3.60563664 4.53660853
5.47238963 2.40850227
3.19265054 4.39547668
3.16331095 5.50620749
1.32527884 4.17090293
That cured the problem of not having results larger than 1, but we still have
the decimal part of the result to deal with. Now, another function can be
called upon.
The INTeger function converts real numbers into integer values.
Once more, replace line 20 with the following and run the program to see
the effect of the change:
20 PRINT INT(6*RND(1)),
RUN
2 3 1 0
2 4 5 5
0 1
That took care of a lot, getting us closer to our original goal of generat-
ing random numbers between 1 and 6. If you examine closely what we
generated this last time, you’ll find that the results range from 0 to 5, only.
As a last step, add a one to the statement, as follows:
20 PRINT INT(6*RND(1))+1,
Now, we have achieved the desired results.
In general, you can place a number, variable, or any BASIC expression
within the parentheses of the INT function. Depending on the range de-
sired, you just multiply the upper limit by the RND function. For example,
to generate random numbers between 1 and 25, you could type:
20 PRINT INT(25*RND(1))+1
The general formula for generating a set of random numbers in a certain
range is:
74

NUMBER=INT(LOWER LIMIT+(UPPER - LOWER+1)*RND(1))
GUESSING GAME
Since we’ve gone to some lengths to understand random numbers, why not
put this information to use? The following game not only illustrates a good
use of random numbers, but also introduces some additional programming
theory.
In running this program, a random number, NM, will be generated.
NEW
1 REM NUMBER GUESSING GAME
2 PRINT "{CLR/HOME}"
5 INPUT "ENTER UPPER LIMIT FOR GUESS ";LI
10 NM = INT(LI*RND(1))+1
15 CN = 0
20 PRINT "I'VE GOT THE NUMBER.":PRINT
30 INPUT "WHAT'S YOUR GUESS"; GU
35 CN = CN + 1
40 IF GU > NM THEN PRINT "MY NUMBER IS LOWER"
: PRINT : GOTO 30
50 IF GU < NM THEN PRINT "MY NUMBER IS HIGHER"
: PRINT : GOTO 30
60 PRINT "GREAT! YOU GOT MY NUMBER"
65 PRINT "IN ONLY "; CN ;"GUESSES.":PRINT
70 PRINT "DO YOU WANT TO TRY ANOTHER (Y/N)?";
80 GET AN$ : IF AN$="" THEN 80
90 IF RN$ = "Y" THEN 2
100 IF AN$ <> "N" THEN 70
110 END
; INDICATES NO SPACE
AFTER QUOTATION MARK
You can specify how large the number will be at the start of the program.
Then, it’s up to you to guess what the number is.
A sample run follows along with an explanation:
75

ENTER UPPER LIMIT FOR GUESS? 25
I'VE GOT THE NUMBER.
WHAT'S YOUR GUESS? 15
MY NUMBER IS HIGHER
WHAT'S YOUR GUESS? 20
MY NUMBER IS HIGHER
WHAT'S YOUR GUESS? 23
GREAT! YOU GOT MY NUMBER
IN ONLY 3 GUESSES
DO YOU WANT ANOTHER TRY (Y/N)
IF/THEN statements compare your guess to the number generated. De-
pending on your guess, the program tells you whether your guess was
higher or lower than the random number generated.
From the formula given for determining random number range, see if you
can add a few lines to the program that allow the user to also specify the
lower range of numbers generated.
Each time you make a guess, CN is incremented by 1 to keep track of
the number of guesses. In using the program, see if you can use good
reasoning to guess a number in the least number of tries.
When you get the right answer, the program prints out the “GREAT! YOU
GOT MY NUMBER” message, along with the number of tries it took.
You can then start the process over again. Remember, the program gen-
erates a new random number each time.
76

PROGRAMMING TIPS:
In lines 40 and 50, a colon is used to separate multiple statements
on a single line. This not only saves typing, but in long programs will
conserve memory space.
Also notice in the IF/THEN statements on the same two lines, we in-
structed the computer to PRINT something, rather than immediately
branching to some other point in the program.
The last point illustrates the reason behind using line numbers in incre-
ments of 10: we originally wrote Guessing Game without the feature
that counts your guesses. We were able to add that feature by en-
tering the lines numbered 15, 35, and 65, after all of the other lines
had been entered. BASIC inserted the lines into the program in line
number order. This made it easy to change the program without re-
entering any of the other lines.
YOUR ROLL
The following program simulates the throw of two dice. You can enjoy it
as it stands, or use it as part of a larger game.
5 PRINT "CARE TO TRY YOUR LUCK?"
10 PRINT "RED DICE = " ;INT(6*RND(1))+1
20 PRINT "WHITE DICE = " ;INT(6*RND(1))+1
30 PRINT "HIT SPACE BAR FOR ANOTHER ROLL ":PRINT
40 GET A$: IF A$ = "" THEN 40
50 IF A$ = CHR$(32) THEN 10
Care to try your luck?
From what you’ve learned about random numbers and BASIC, see if you
can follow what is going on.
RANDOM GRAPHICS
As a final note on random numbers, and as an introduction to designing
graphics, take a moment to enter and run this neat little program:
77

10 PRINT "{CLR/HOME}"
20 PRINT CHR$(205.5 + RND(1));
40 GOTO 20
As you may have expected, line 20 is the key here. Another function, CHR$
(Character String), gives you a character, based on a standard code num-
ber from 0 to 255. Every character the Commodore 64 can print is en-
coded this way (see Appendix D).
To quickly find out the code for any character, just type:
PRINT ASC("X")
where X is the character you’re checking (this can be any printable char-
acter, including graphics). The response is the code for the character you
typed. As you probably figured out, “ASC” is another function, which re-
turns the standard “ASCII” code for the character you typed.
You can now print that character by typing:
PRINT CHR$(X)
If you try typing:
PRINT CHR$ (205); CHR$(206)
you will see the two right side graphic characters on the M and N keys.
These are the two characters that the program is using for the maze.
By using the formula 205.5 + RND (1) the computer will pick a random
number between 205.5 and 206.5. There is a fifty-fifty chance of the
number being above or below 206. CHR$ ignores any fractional values,
so half the time the character with code 205 is printed and the remaining
time code 206 is displayed.
If you’d like to experiment with this program, try changing 205.5 by adding
or subtracting a couple tenths from it. This will give either character a
greater chance of being selected.
78


80

COLOR AND GRAPHICS
Up to now we’ve explored some of the sophisticated computing capabili-
ties of the Commodore 64. But one of its most fascinating features is an
outstanding ability to produce color and graphics.
You’ve seen a quick example of graphics in the “bouncing ball” and “maze”
programs. But these only touched on the power you command. A number
of new concepts will be introduced in this section to explain graphic and
color programming and show how you can create your own games and
advanced animation.
Because we’ve concentrated on the computing capabilities of the ma-
chine, all the displays we’ve generated so far were a single color (light
blue text on a dark blue background, with a light blue border).
In this chapter we’ll see how to add color to programs and control all those
strange graphic symbols on the keyboard.
PRINTING COLORS
As you type, the cursor prints characters to the display in one of the avail-
able colors. You can change cursor text color by holding the CTRL key
and one of the color keys. This works fine in the immediate mode, but what
happens if you want to incorporate color changes in your programs?
When we showed the “bouncing ball” program, you saw how keyboard
commands, like cursor movement, could be incorporated within PRINT
statements. In a like way, you can also add text color changes to your
programs.
You have a full range of 16 text colors to work with. Using the CTRL key
and a number key, the following colors are available:
1 2 3 4 5 6 7 8
Black White Red Cyan Purple Green Blue Yellow
If you hold down the ǣ key along with the appropriate number key, these
additional eight colors can be used:
1 2 3 4 5 6 7 8
Orange Brown
Light
Red
Gray 1 Gray 2
Light
Green
Light
Blue
Gray 3
81
Type NEW, and experiment with the following. Hold down the CTRL key
and at the same time hit the 1 key. Next, hit the R key without holding
down the CTRL key. Now, while again depressing the CTRL key at the
same time hit the
2
key. Release the CTRL key and hit the
A
key. Move
through the numbers, alternating with the letters, and type out the word
RAINBOW as follows:
10 PRINT" R A I N B O W"
↑ ↑ ↑ ↑ ↑ ↑ ↑
CTRL 1 2 3 4 5 6 7
RUN
RAINBOW
Just as cursor controls show as graphic characters within the quote marks
of print statements, color controls are also represented as graphic char-
acters.
In the previous example, when you held down CTRL and typed 3 a “£”
was displayed. CTRL 7 displayed a “←”. Each color control will display
its unique graphic code when used in this way. The table shows the graphic
representations of each printable color control.
KEYBOARD COLOR DISPLAY KEYBOARD COLOR DISPLAY
CTRL 1 BLACK
ư
ǣ 1 ORANGE
ơ
CTRL 2 WHITE
ť
ǣ 2 BROWN
Ƶ
CTRL 3 RED
ż
ǣ 3 LT. RED
ƶ
CTRL
4
CYAN
ƿ
ǣ
4
GRAY 1
Ʒ
CTRL 5 PURPLE
Ƽ
ǣ 5 GRAY 2
Ƹ
CTRL 6 GREEN
ž
ǣ 6 LT. GREEN
ƹ
CTRL
7 BLUE
ſ
ǣ 7 LT. BLUE
ƺ
CTRL 8 YELLOW
ƞ
ǣ 8 GRAY 3
ƻ
Even though the PRINT statement may look a bit strange on the screen,
when you RUN the program, only the text will be displayed. And it will
automatically change colors according to the color controls you placed in
the print statement.
Try a few examples of your own, mixing any number of colors within a single
PRINT statement. Remember, too, you can use the second set of text colors
by using the Commodore key and the number keys.
82

TIP:
You will notice after running a program with color or mode (reverse)
changes, that the “READY” prompt and any additional text you type is
the same as the last color or mode change. To get back to the normal
display, remember to depress: RUN/STOP and RESTORE .
COLOR CHR$ CODES
Take a brief look at Appendix D, then turn back to this section.
You may have noticed in looking over the list of CHR$ codes in Appendix
D that each color (as well as most other keyboard controls, such as cursor
movement) has a unique code. These codes can be printed directly to
obtain the same results as typing
CTRL
and the appropriate key within
the PRINT statement. For example, try this:
NEW
10 PRINT CHR$(147) : REM CLR/HOME
20 PRINT CHR$(30);"CHR$(30) CHANGES ME TO?"
RUN
CHR$(30) CHANGES ME TO?
The text should now be green. In many cases, using the CHR$ function will
be much easier, especially if you want to experiment with changing colors.
The following program is a different way to get a rainbow of colors. Since
there are a number of lines that are similar (40 – 110) use the editing
keys to save a lot of typing. See the notes after the listing to refresh your
memory on the editing procedures.
NEW
1 REM AUTOMATIC COLOR BARS
5 PRINT CHR$(147) : REM CHR$(147)=CLR/HOME
10 PRINT CHR$(18); " " ;:REM REVERSE BAR
20 CL = INT(8*RND(1))+1
30 ON CL GOTO 40,50,60,70,80,90,100,110
40 PRINT CHR$(5);: GOTO 10
50 PRINT CHR$(28);: GOTO 10
60 PRINT CHR$(30);: GOTO 10
70 PRINT CHR$(31);: GOTO 10
83

80 PRINT CHR$(144);: GOTO 10
90 PRINT CHR$(156);: GOTO 10
100 PRINT CHR$(158);: GOTO 10
110 PRINT CHR$(159);: GOTO 10
Type lines 5 through 40 normally. Your display should look like this:
1 REM AUTOMATIC COLOR BARS
5 PRINT CHR$(147) : REM CHR$(147)=CLR/HOME
10 PRINT CHR$(18); " ";:REM REVERSE BAR
20 CL = INT(8*RND(1))+1
30 ON CL GOTO 40,50,60,70,80,90,100,110
40 PRINT CHR$(5);: GOTO 10
Editing Notes
Use the CRSR-UP key to position the cursor on line 40. Then type 5 over
the 4 of 40. Next, use the CRSR-RIGHT key to move over to the 5 in the
CHR$ parentheses. Hit SHIFT INST/DEL to open up a space and type
’28’. Now just hit
RETURN
with the cursor anywhere on the line.
The display should now look like this:
1 REM AUTOMATIC COLOR BARS
5 PRINT CHR$(147) : REM CHR$(147)=CLR/HOME
10 PRINT CHR$(18); " ";:REM REVERSE BAR
20 CL = INT(8*RND(1))+1
30 ON CL GOTO 40,50,60,70,80,90,100,110
50 PRINT CHR$(28);: GOTO 10
Don’t worry. Line 40 is still there. LIST the program and see. Using the
same procedure, continue to modify the last line with a new line number
and CHR$ code until all the remaining lines have been entered. See, we
told you the editing keys would come in handy. As a final check, list the
entire program to make sure all the lines were entered properly before you
RUN it.
Here is a short explanation of what’s going on.
You’ve probably figured out most of the color bar program by now except
for some strange new statement in line 30. But let’s quickly see what the
whole program actually does. Line 5 prints the CHR$ code for CLR/HOME.
84
Line 10 turns reverse type on and prints 5 spaces, which turn out to be a
bar, since they’re reversed. The first time through the program the bar will
be light blue, the normal text color.
Line 20 uses our workhorse, the random function to select a random color
between 1 and 8.
Line 30 contains a variation of the IF…THEN statement which is called
ON…GOTO. ON…GOTO allows the program to choose from a list of line
numbers to go to. If the variable (in this case CL) has a value of 1, the
first line number is the one chosen (here 40). If the value is 2, the second
number in the list is used, etc.
Lines 40–110 just convert our random key colors to the appropriate CHR$
code for that color and return the program to line 10 to PRINT a section of
the bar in that color. Then the whole process starts over again.
See if you can figure out how to produce 16 random numbers, expand
ON…GOTO to handle them, and add the remaining CHR$ codes to display
the remaining 8 colors.
PEEKS AND POKES
No, we’re not talking about jabbing the computer, but we will be able to
“look around” inside the machine and “stick” things in there.
Just as variables could be thought of as a representation of “boxes” within
the machine where you placed your information, you can also think of
some specially defined “boxes” within the computer that represent spe-
cific memory locations.
The Commodore 64 looks at these memory locations to see what the
screen’s background and border color should be, what characters are to
be displayed on the screen — and where — and a host of other tasks.
85

By placing, “POKEing,” a different value into the proper memory location,
we can change colors, define and move objects, and even create music.
These memory locations could be represented like this:
53280 53281 53282 53283
X Y
BORDER BACKGROUND
COLOR COLOR
These are just four memory locations, two of which control the screen and
background colors. Try typing this:
POKE 53281,7 RETURN
The background color of the screen will change to yellow because we
placed the value ’7’ — for yellow — in the location that controls the back-
ground color of the screen.
Try POKEing different values into the background color location, and see
what results you get. You can POKE any value between 0 and 255, but
only 0 through 15 will work.
The actual values to POKE for each color are:
0 BLACK 8 ORANGE
1 WHITE 9 BROWN
2 RED 10 Light RED
3 CYAN 11 GRAY 1
4 PURPLE 12 GRAY 2
5 GREEN 13 Light GREEN
6 BLUE 14 Light BLUE
7 YELLOW 15 GRAY 3
Can you think of a way to display the various background and border com-
binations? The following may be of some help:
NEW
10 FOR BA = 0 TO 15
20 FOR BO = 0 TO 15
30 POKE 53280, BA
40 POKE 53281, BO
50 FOR X = 1 TO 2000 : NEXT X
60 NEXT BO: NEXT BA
RUN
86

Two simple loops were set up to POKE various values to change the back-
ground and border colors. The delay loop in line 50 just slows things down
a bit.
For the curious, try:
? PEEK (53280) AND 15
You should get a value of 15. This is the last value BO was given and
makes sense because both the background and border colors are GRAY
(value 15) after the program is run.
By entering AND 15 you eliminate all other values except 0 – 15, because
of the way the color codes are stored in the computer. Normally you would
expect to find the same value that was last POKEd in the location. In
general, PEEK lets us examine a specific location and see what value is
present there. Can you think of a one line addition to the program that
will display the value of BA and BO as the program runs? How about this?
25 PRINT CHR$(147); "BORDER = ";PEEK (53280) AND 15,
"BACKGROUND = "; PEEK (53281) AND 15
SCREEN GRAPHICS
In all the printing of information that you’ve done so far, the computer nor-
mally handled information in a sequential fashion: one character is printed
after the next, starting from the current cursor position (except where you
asked for a new line, or used the ’, ’ in PRINT formatting).
To PRINT data in a particular spot you can start from a known place on
the screen and PRINT the proper number of cursor controls to format the
display. But just as there are certain spots in the Commodore 64’s memory
to control color, there are also locations that you can use to directly control
each location on the screen.
SCREEN MEMORY MAP
Since the computer’s screen is capable of holding 1000 characters (40
columns by 25 lines) there are 1000 memory locations set aside to handle
what is placed on screen. The layout of the screen could be thought of as
a grid, with each square representing a memory location.
87

And since each location in memory can contain a number from 0 to 255,
there are 256 possible values for each memory location. These values rep-
resent the different characters the Commodore 64 can display (see Ap-
pendix C). By POKEing the value for a character in the appropriate screen
memory location, that character will be displayed in the proper position.
1024 →
1984 →
0
10
20
24
0 10 20
30 39
↓
1063
↑
2023
Screen memory in the Commodore 64 normally begins at memory location
1024, and ends at location 2023. Location 1024 is the upper left corner
of the screen. Location 1025 is the position of the next character to the
right of that, and so on across the row. Location 1063 is the right-most
position of the first row. The next location following the last character on
a row is the first character on the next row down.
Now, let’s say that you’re controlling a ball bouncing on the screen. The
ball is in the middle of the screen, column 20, row 12. The formula for
calculation of the memory on the screen is:
POINT = 1024 + X + 40*Y
COLUMN
ROW
where X is the column and Y is the row.
88

Therefore, the memory location of the ball is
1024 + 20 + (480) = 1524
COLUMN
ROW (40*12)
Clear the screen with SHIFT and CLR/HOME and type:
POKE 1524,81
POKE 55796,1
LOCATION
COLOR
COLOR MEMORY MAP
A ball appears in the middle of the screen! You have placed a character
directly into screen memory without using the PRINT statement. The ball
that appeared was white. However there is a way to change the color of
an object on the screen by altering another range of memory. Type:
POKE 55796,2
LOCATION
COLOR
The ball’s color changes to red. For every spot on the Commodore 64’s
screen there are two memory locations, one for the character code, and
the other for the color code. The color memory map begins at location
55296 (top left-hand corner), and continues on for 1000 locations. The
same color codes, from 0 to 15, that we used to change border and back-
ground colors can be used here to directly change character colors.
The formula we used for calculating screen memory locations can be mod-
ified to give the locations to POKE color codes. The new formula is:
COLOR PRINT = 55296 + X + 40*Y
89
55296→
56256→
0
10
20
24
0 10 20
30 39
↓
55335
↑
56295
MORE BOUNCING BALLS
Here’s a revised bouncing ball program that prints directly on the screen
with POKEs, rather than using cursor controls within PRINT statements. As
you will see after running the program, it is much more flexible than the
earlier program, and will lead up to programming much more sophisticated
animation.
90

NEW
10 PRINT "{CLR/HOME}"
20 POKE 53280,7 : POKE 53281,13
30 X = 1 : Y = 1
40 DX = 1 : DY = 1
50 POKE 1024 + X + (40*Y),81
60 FOR T = 1 TO 10 : NEXT
70 POKE 1024 + X + (40*Y),32
80 X = X + DX
90 IF X <= 0 OR X >= 39 THEN DX = -DX
100 Y = Y + DY
110 IF Y <= 0 OR Y >= 24 THEN DY = -DY
120 GOTO 50
Line 10 clears the screen, and line 20 sets the background to light green
with a yellow border.
The X and Y variables in line 30 keep track of the current row and column
position of the ball. The DX and DY variables in line 40 are the horizontal
and vertical direction of the ball’s movement. When a +1 is added to the
X value, the ball is moved to the right; when -1 is added, the ball moves
to the left. A +1 added to Y moves the ball down a row; a -1 added to Y
moves the ball up a row.
Line 50 puts the ball on the screen at the current cursor position. Line 60
is the familiar delay loop, leaving the ball on the screen just long enough
to see it.
Line 70 erases the ball by putting a space (code 32) where the ball was
on the screen.
Line 80 adds the direction factor to X. Line 90 tests to see if the ball has
reached one of the side walls, reversing the direction if there’s a bounce.
Lines 100 and 110 do the same thing for the top and bottom walls.
Line 120 sends the program back to display and moves the ball again.
By changing the code in line 50 from 81 to another character code, you
can change the ball to any other character. If you change DX or DY to 0
the ball will bounce straight instead of diagonally.
91

We can also add a little more intelligence. So far the only thing you
checked for is the X and Y values getting out-of-bounds for the screen.
Add the following lines to the program:
21 FOR L = 1 TO 10
25 POKE 1024 + INT(RND(1)*1000), 166
27 NEXT L
85 IF PEEK(1024 + X + (40*Y)) = 166 THEN DX = -DX : GOTO 80
105 IF PEEK(1024 + X + (40*Y)) = 166 THEN DY = -DY : GOTO 100
SCREEN CODE
Lines 21 to 27 put 10 blocks on the screen in random positions. Lines 85
and 105 check (PEEK) to see if the ball is about to bounce into a block,
and change the ball’s direction if so.
92


94

INTRODUCTION TO SPRITES
In previous chapters dealing with graphics we saw that graphic symbols
could be used in PRINT statements to create animations and add chartlike
appearances to our displays.
A way was also shown to POKE character codes in specific screen memory
locations. This would then place the appropriate characters directly on the
screen in the right spot.
Creating animation in both these cases requires a lot of work because
objects must be created from existing graphic symbols. Moving the object
requires a number of program statements to keep track of the object and
move it to a new spot. And, because of the limitation of using graphic
symbols, the shape and resolution of the object might not be as good as
required.
Using sprites in animated sequences eliminates a lot of these problems. A
sprite is a high-resolution programmable object that can be made into just
about any shape — through BASIC commands. The object can be easily
moved around the screen by simply telling the computer the position the
sprite should be moved to. The computer takes care of the rest.
And sprites have much more power than just that. Their color can be
changed; you can tell if one object collides with another; they can be
made to go in front and behind another; and they can be easily expanded
in size, just for starters.
The penalty for all this is minimal. However, using sprites requires know-
ing some more details about how the Commodore 64 operates and how
numbers are handled within the computer. It’s not as difficult as it sounds
though. Just follow the examples and you’ll be making your own sprites do
amazing things in no time.
95

SPRITE CREATION
Sprites are controlled by a separate picture-maker in the Commodore 64.
This picture-maker handles the video display. It does all the hard work of
creating and keeping track of characters and graphics, creating colors,
and moving around.
This display circuit has 46 different “ON/OFF” locations which act like in-
ternal memory locations. Each of these locations breaks down into a series
of 8 blocks. And each block can either be “on” or “off”. We’ll get into more
detail about this later. By POKEing the appropriate decimal value in the
proper memory location you can control the formation and movement of
your sprite creations.
In addition to accessing many of the picture-making locations we will also
be using some of the Commodore 64’s main memory to store information
(data) that defines the sprites. Finally, 8 memory locations directly after
the screen memory will be used to tell the computer exactly which memory
area each sprite will get its data from.
As we go through some examples, the process will be very straightforward,
and you’ll get the hang of it.
So let’s get on with creating some sprite graphics. A sprite object is 24
dots wide by 21 dots long. Up to 8 sprites can be controlled at a time.
Sprites are displayed in a special independent 320 dot wide by 200 dot
high area. However, you can use your sprite with any mode, high- resolu-
tion, low-resolution, text etc.
96

Say you want to create a balloon and have it float around the sky. The
balloon could be designed as in the 24 by 21 grid below.
The next step is to convert the graphic design into data the computer can
use. Get a piece of data or graph paper and set up a sample grid that is
21 spaces down and 24 spaces across. Across the top write 128, 64, 32,
16, 8, 4, 2, 1, three times (as shown) for each of the 24 squares. Number
down the left side of the grid 1 – 21 for each row. Write the word DATA at
the end of each row. Now fill the grid with any design or use the balloon
that we have. It’s easiest to outline the shape first and then go back and
fill in the grid.
Now if you think of all the squares you filled as “on” then substitute a 1 for
each filled square. For the squares that aren’t filled in, they’re “off” so put
a zero.
Starting on the first row, you need to convert the dots into 3 separate
pieces of data the computer can read. Each set of 8 squares is equal to
one piece of data called a byte in our balloon. Working from the left, the
first 8 squares are blank, or 0, so the value for that series of numbers is 0.
The middle series looks like this (again a 1 indicates a dot, 0 is a space):
128 64 32 16 8 4 2 1
0 1 1 1 1 1 1 1
↑ ↑ ↑ ↑ ↑ ↑ ↑ ↑
0 + 64 + 32 + 16 + 8 + 4 + 2 + 1 = 127
The third series on the first row also contains blanks, so it too equals zero.
Thus the data for the first line is:
DATA 0, 127, 0
97
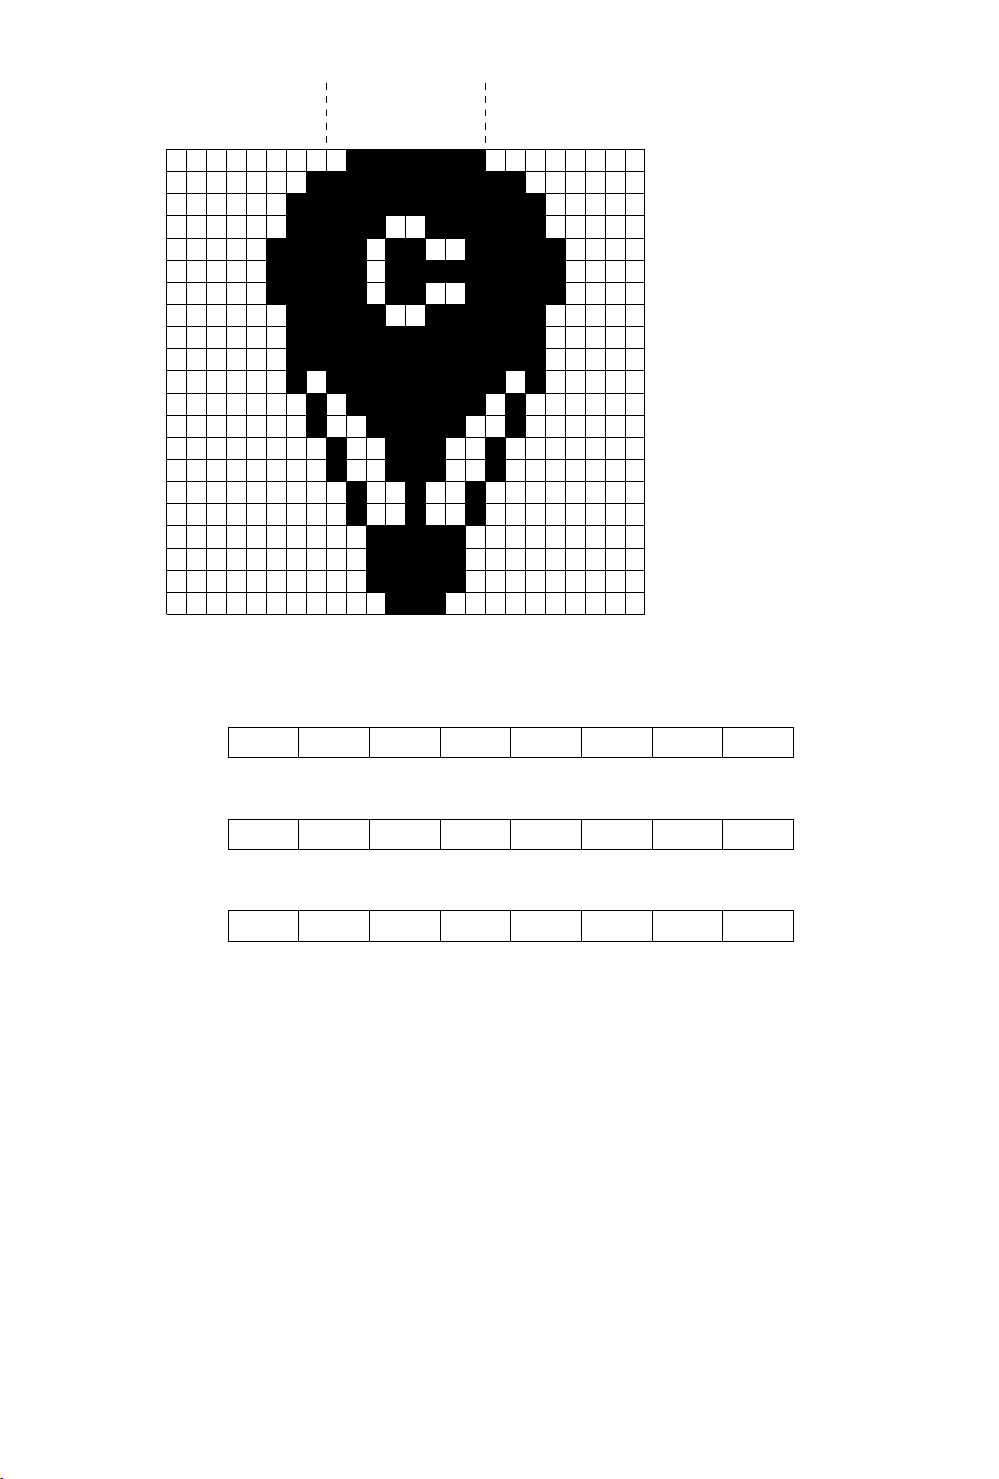
128
64
32
16
8
4
2
1
128
64
32
16
8
4
2
1
128
64
32
16
8
4
2
1
1
5
10
15
20
21
1
5
10
15
20
24
SERIES 1 SERIES 2 SERIES 3
The series that make up row two are calculated like this:
Series 1: 0 0 0 0 0 0 0 1
↑ ↑ ↑ ↑ ↑ ↑ ↑ ↑
0 + 0 + 0 + 0 + 0 + 0 + 0 + 1 = 1
Series 2: 1 1 1 1 1 1 1 1
↑ ↑ ↑ ↑ ↑ ↑ ↑ ↑
128 + 64 + 32 + 16 + 8 + 4 + 2 + 1 = 255
Series 3: 1 1 0 0 0 0 0 0
↑ ↑ ↑ ↑ ↑ ↑ ↑ ↑
128 + 64 + 0 + 0 + 0 + 0 + 0 + 0 = 192
For row 2, the data would be:
DATA 1, 255, 192
In the same way, the 3 series that make up each remaining row would be
converted into their decimal value. Take the time to do the remainder of
the conversion in this example.
Now that you have the data for the object, how can it be put to use? Type
in the following program and see what happens.
1 REM UP, UP, AND AWAY!
98

5 PRINT CHR$(147)
10 V = 53248 : REM START OF DISPLAY CHIP
11 POKE V+21,4 : REM ENABLE SPRITE 2
12 POKE 2042,13 : REM SPRITE 2 DATA FROM 13TH BLK
20 FOR N = 0 TO 62 : READ Q : POKE 832+N,Q : NEXT
30 FOR X = 0 TO 200
40 POKE V+4,X : REM UPDATE X COORDINATES
50 POKE V+5,X : REM UPDATE Y COORDINATES
60 NEXT X
70 GOTO 30
200 DATA 0,127,0,1,255,192,3,255,224,3,231,224
210 DATA 7,217,240,7,223,240,7,217,240,3,231,224
220 DATA 3,255,224,3,255,224,2,255,160,1,127,64
230 DATA 1,62,64,0,156,128,0,156,128,0,73,0,0,73,0
240 DATA 0,62,0,0,62,0,0,62,0,0,28,0
If you typed everything correctly, your balloon is smoothly flying across the
sky.
In order to understand what happened, first you need to know what
picture-making locations control the functions you need. These locations,
called “registers”, could be illustrated in this manner:
Registers Description
0 X coordinate of sprite 0
1 Y coordinate of sprite 0
2 – 15 Paired like 0 and 1 for sprites 1 – 7
16 Most significant bit – X coordinate
21 Sprite appear: 1=appear 0=disappear
29 Expand sprite in “X” direction
23 Expand sprite in “Y” direction
39 – 46 Sprite 0 – 7 color
In addition to this information you need to know from which 64 bytes sec-
tion sprites will get their data (1 byte is not used).
The data is handled by 8 locations directly after screen memory:
2040 2041 2042 2043 2044 2045 2046 2047
↑ ↑ ↑ ↑ ↑ ↑ ↑ ↑
SPRITE 0 1 2 3 4 5 6 7
Now let’s outline the exact procedure to get things moving and finally write
a program.
99

There are only a few things necessary to actually create and move an ob-
ject.
1. Make the proper sprite(s) appear on the screen by POKEing into lo-
cation 21 a 1 for the bit which turns on the sprite.
2. Set sprite pointer (locations 2040 – 2047) to where sprite data
should be read from.
3. POKE actual data into memory.
4. Through a loop, update X and Y coordinates to move sprite around.
5. You can, optionally, expand the object, change colors, or perform a
variety of special functions. Using location 29 to expand your sprite
in the “X” direction and location 23 in the “Y” direction.
There are only a few items in the program that might not be familiar from
the discussion so far.
In line 10:
V=53248
sets V to the starting memory location of the video chip. In this way, we
just increase V by the memory number to get the actual memory location.
The register numbers are the ones given on the sprite register map.
100
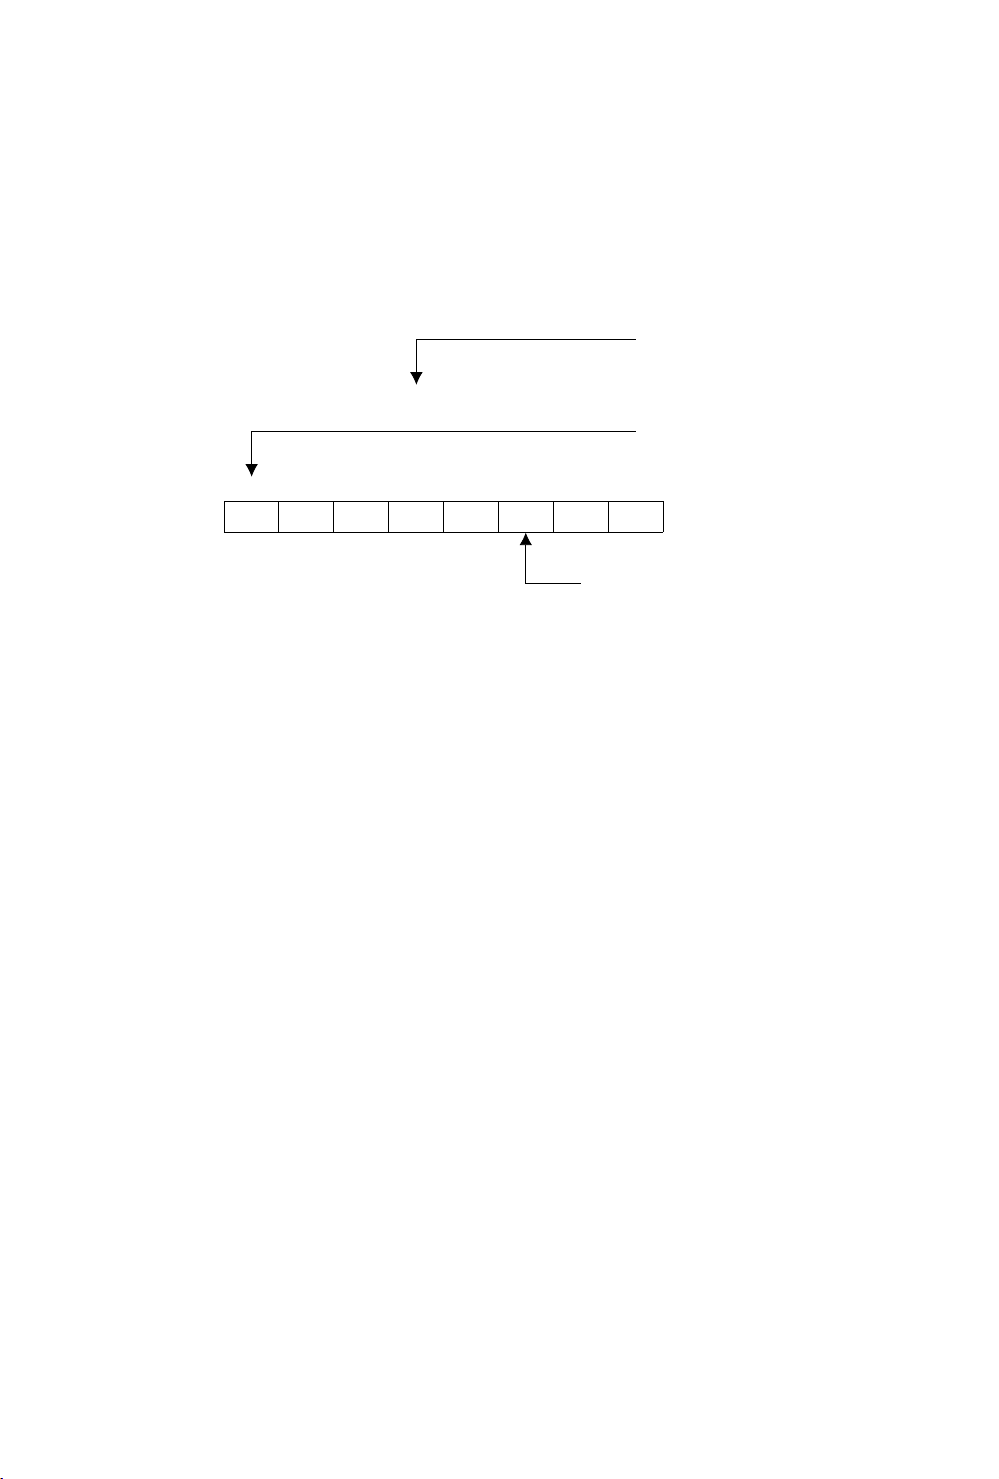
In line 11:
POKE V+21,4
makes sprite 2 appear by placing a 4 in what is called the “sprite enable
register” (21) to turn on sprite 2. Think of it like this:
SPRITES
128 64 32 16 8 4 2 1
7 6 5 4 3 2 1 0
21 0 0 0 0 0 1 0 0 = 4
Decimal values of each
sprite number
Sprite Level Number
Put a 1 for the SPRITE you want
Each sprite level is represented in section 21 of the sprite memory and 4
happens to be sprite level 2. If you were using level 3 you would put a 1 in
sprite 3 which has a value of 8. In fact if you used both sprites 2 and 3 you
would put a 1 in both 4 and 8. You would then add the numbers together
just like you did with the DATA on your graph paper. So, turning on sprites
2 and 3 would be represented as V+21,12.
In line 12:
POKE 2042,13
instructs the computer to get the data for sprite 2 (location 2042) from
the 13th area of memory. You know from making your sprite that it takes
up 63 sections of memory. You may not have realised it, but those numbers
you put across the top of your grid equal what is known as 3 bytes of the
computer. In other words, each collection of the following numbers: 128,
64, 32, 16, 8, 4, 2, 1 equals 1 byte of computer memory. Therefore with
the 21 rows of your grid times the 3 bytes of each row, each sprite takes
up 63 bytes of memory.
101

20 FOR N = 0 TO 62 : READ Q : POKE 832+N,Q:NEXT
1 WHOLE SPRITE
This line handles the actual sprite creation. The 63 bytes of data that
represent the sprite you created are READ in through the loop and POKEd
into the 13th block of memory. This starts at location 832.
30 FOR X = 0 TO 200
40 POKE V+4, X
50 POKE V+5, X
SPRITE 2’S X COORDINATE
SPRITE 2’S Y COORDINATE
If you remember from school the X coordinate represents an object’s hor-
izontal movement across the screen and the Y coordinate represents the
sprite’s vertical movement across the screen. Therefore as the values of X
change in line 30 from 0 to 200 (one number at a time) the sprite moves
across the screen DOWN and TO THE RIGHT one space for each number.
The numbers are READ by the computer fast enough to make the move-
ment appear to be continuous, instead of 1 step at a time. If you need
more details take a look at the register map in Appendix K.
When you get into moving multiple objects, it would be impossible for one
memory section to update the locations of all 8 objects. Therefore each
sprite has its own set of 2 memory locations to make it move on the screen.
Line 70 starts the cycle over again, after one pass on the screen. The
remainder of the program is the data for the balloon. Sure looks different
on the screen, doesn’t it?
Now try adding the following line:
25 POKE V+23,4:POKE V+29,4:REM EXPAND
and RUN the program again. The balloon has expanded to twice the orig-
inal size! What we did was simple. By POKEing 4 (again to indicate sprite
2) into memory sections 23 and 29, sprite 2 was expanded in the X and Y
direction.
It’s important to note that the sprite will appear in the upper left-hand
corner of the object. When expanding an object in either direction, the
starting point remains the same.
102

For some added excitement, make the following changes:
11 POKE V+21,12
12 POKE 2042,13:POKE 2043,13
30 FOR X = 1 TO 190
45 POKE V+6,X
55 POKE V+7,190-X
A second sprite (number 3) has been turned on by POKEing 12 into the
memory location that makes the sprite appear (V+21). The 12 turns sprites
3 and 2 on (00001100 = 12).
The added lines 45 and 55 move sprite 3 around by POKEing values into
sprite 3’s X and Y coordinate locations (V+6 and V+7).
Want to fill the sky with even more action? Try making these additions:
11 POKE V+21,28
12 POKE 2042,13:POKE 2043,13:POKE 2044,13
25 POKE V+23,12:POKE V+29,12
48 POKE V+8,X
58 POKE V+9,100
28 IS REALLY 4 (SPRITE 2) + 8
(SPRITE 3) + 16 (SPRITE 4)
In line 11 this time, another sprite (4) was made to appear by POKEing
28 into the appropriate “on” location of the sprite memory section. Now
sprites 2 – 4 are on (00011100 = 28).
Line 12 indicates that sprite 4 will get its data from the same memory area
(13th 63 section area) as the other sprites by POKEing 2044,13.
In line 25, sprites 2 and 3 are expanded by POKEing 12 (sprites 2 and
3 on) into the X and Y direction expanded memory locations (V+23 and
V+29).
Line 48 moves sprite 3 along the X axis. Line 58 positions sprite 3 halfway
down the screen, at location 100. Because this value does not change,
like it did before with X=0 to 200, sprite 3 just moves horizontally.
103

ADDITIONAL NOTES ON SPRITES
Now that you’ve experimented with sprites, a few more words are in order.
First, you can change a sprite’s color to any of the standard 16 color codes
(0 – 15) that were used to change character color. These can be found in
chapter 6 or in Appendix E.
For example, to change sprite 1 to light green, type: POKE V+40,13 (be
sure to set V = 53248).
You may have noticed in using the example sprite programs that the object
never moved to the right-hand edge of the screen. This was because the
screen is 320 dots wide and the X direction register can only hold a value
up to 255. How then can you get an object to move across the entire
screen?
There is a location on the memory map that has not been mentioned yet.
Location 16 (of the map) controls something called the “Most Significant
Bit” (MSB) of the sprite’s X direction location. In effect, this allows you to
move the sprite to a horizontal spot between 256 and 320.
The MSB of X register works like this: after the sprite has been moved
to X location 255, place a value into memory location 16 representing
the sprite you want to move. For example, to get sprite 2 to move into
horizontal locations 256 – 320, POKE the value for sprite 2 (which is 4)
into memory location 16:
POKE V+16,4
Now start from 0 again in the usual X direction register for sprite 2 (which
is in location 4 of the map). Since you are only moving another 64 spaces,
X locations would only range between 0 and 63 this time.
This whole concept is best illustrated with a version of the original sprite 1
program:
5 PRINT CHR$(147)
10 V = 53248:POKE V+21,4:POKE 2042,13
20 FOR N = 0 TO 62:READ Q:POKE 832+N,Q:NEXT
25 POKE V+5,100
30 FOR X = 0 TO 255
40 POKE V+4,X
50 NEXT
104

60 POKE V+16,4
70 FOR X = 0 TO 63
80 POKE V+4,X
90 NEXT
100 POKE V+16,0
110 GOTO 30
200 DATA 0,127,0,1,255,192,3,255,224,3,231,224
210 DATA 7,217,240,7,223,240,7,217,240,3,231,224
220 DATA 3,255,224,3,255,224,2,255,160,1,127,64
230 DATA 1,62,64,0,156,128,0,156,128,0,73,0,0,73,0
240 DATA 0,62,0,0,62,0,0,62,0,0,28,0
Line 60 sets the most significant bit for sprite 2. Line 70 starts moving the
standard X direction location, moving sprite 2 the rest of the way across
the screen.
Line 100 is important because it “turns off” the MSB so that the sprite can
start moving from the left edge of the screen again.
To define multiple sprites, you may need additional blocks for the sprite
data. You can use some of BASIC’s RAM by moving BASIC. Before typing
or loading your program type:
POKE44,16:POKE16*256,0:NEW
Now you can use blocks 32 to 41 (locations 2048 through 4095) to store
sprite data.
BINARY ARITHMETIC
It is beyond the scope of this introductory Guide to go into details of how
the computer handles numbers. We will, however, provide you with a good
base for understanding the process and get you started on sophisticated
animation.
But, before you get too involved we have to define a few terms:
BIT — This is the smallest amount of information a computer can store.
Think of a BIT as a switch that is either “on” or “off”. When a BIT is “on” it
has a value of 1; when a BIT is “off” it has a value of 0.
After BIT, the next level is BYTE.
105
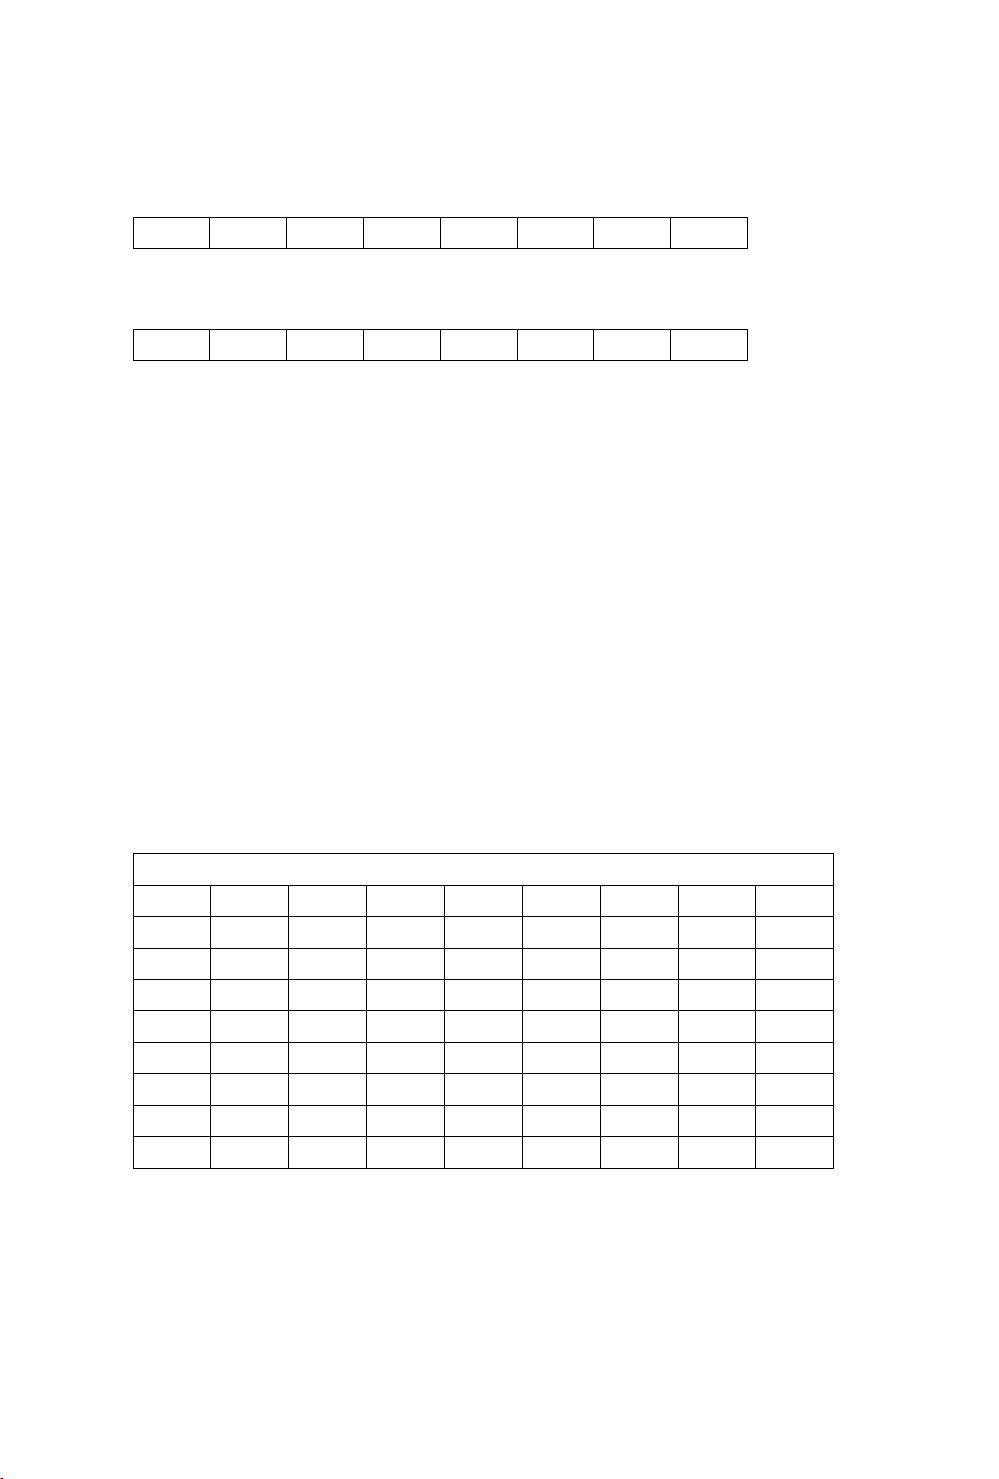
BYTE — This is defined as a series of BITS. Since a BYTE is made up of 8
BITS, you can actually have a total of 256 different combinations of BITS.
In other words, you can have all 8 bits “off” so your BYTE will look like this:
128 64 32 16 8 4 2 1
0 0 0 0 0 0 0 0
and its value will be 0. All BITS “on” is:
128 64 32 16 8 4 2 1
1 1 1 1 1 1 1 1
which is 128+64+32+16+8+4+2+1 = 255.
The next step up is called a REGISTER.
REGISTER — Defined as a block of BYTES strung together. But in this case
each REGISTER is really only 1 BYTE long. A series of REGISTERS makes up
a REGISTER MAP. REGISTER MAPS are charts like the one you looked at
to make your balloon sprite. Each REGISTER controls a different function,
like turning on the sprite is really called the ENABLE REGISTER. Making the
sprite longer is the EXPAND X REGISTER, while making the sprite wider is
the EXPAND Y REGISTER. Keep in mind that a REGISTER is a BYTE that
performs a specific task.
Now let’s move on to the rest of BINARY ARITHMETIC.
Binary to Decimal Conversion
Decimal Value
128 64 32 16 8 4 2 1
0 0 0 0 0 0 0 1 2 ↑ 0
0 0 0 0 0 0 1 0 2 ↑ 1
0 0 0 0 0 1 0 0 2 ↑ 2
0 0 0 0 1 0 0 0 2 ↑ 3
0 0 0 1 0 0 0 0 2 ↑ 4
0 0 1 0 0 0 0 0 2 ↑ 5
0 1 0 0 0 0 0 0 2 ↑ 6
1 0 0 0 0 0 0 0 2 ↑ 7
Using combinations of all 8 BITS, you can obtain any decimal value from 0
to 255. Do you start to see why when we POKEd character or color values
into memory locations the values had to be in the 0 – 255 range? Each
memory location can hold a BYTE of information.
106

Any possible combination of 8 0’s and 1’s will convert to a unique deci-
mal value between 0 – 255. If all places contain a 1 then the value of
the BYTE equals 255. All zeros equal a byte value of zero; “00000011”
equals 3, and so on. This will be the basis for creating data that represents
sprites and manipulating them. As just one example, if this BYTE grouping
represented part of a sprite (0 is a space, 1 is a colored area):
2
7
2
6
2
5
2
4
2
3
2
2
2
1
2
0
1 1 1 1 1 1 1 1
128 + 64 + 32 + 16 + 8 + 4 + 2 + 1 = 255
Then we would POKE 255 into the appropriate memory location to repre-
sent that part of the object.
107

TIP:
To save you the trouble of converting binary numbers into decimal
values — we’ll need to do that a lot — the following program will do
the work for you. It’s a good idea to enter and save the program for
future use.
5 REM BINARY TO DECIMAL CONVERTER
10 INPUT "ENTER 8-BIT BINARY NUMBER: ";A$
12 IF LEN(A$) <> 8 THEN PRINT "8 BITS PLEASE..." : GOTO 10
15 TL = 0 : C = 0
20 FOR X = 8 TO 1 STEP-1 : C = C+1
30 TL = TL + VAL(MID$(A$,C,1))*2↑(X-1)
40 NEXT X
50 PRINT A$;"BINARY ";" = ";TL; " DECIMAL"
60 GOTO 10
This program takes your binary number, which was entered as a string,
and looks at each character in the string, from left to right (the MID$
function). The variable C indicates what character to work on as the
program goes through the loop.
The VAL function, in line 30, returns the actual value of the character.
Since we are dealing with numeric characters, the value is the same
as the character. For example, if the first part of A$ is 1 then the
value would also be 1.
The final part of line 30 multiplies the value of the current character
by the proper power of 2. Since the first value is in the 27 place, in
the example, TL would first equal 1 times 128 or 128. If the BIT is
zero then the value for that place would also be zero.
This process is repeated for all 8 characters as TL keeps track of the
running total decimal value of the binary number.
108


110

USING SOUND IF YOU’RE NOT A COMPUTER
PROGRAMMER
Most programmers use computer sound for two purposes: making music
and generating sound effects. Before getting into the intricacies of pro-
gramming sound, let’s take a quick look at how a typical sound program is
structured…and give you a short sound program you can experiment with.
STRUCTURE OF A SOUND PROGRAM
To begin with there are 5 settings which you should know in order to
generate sound on your Commodore 64: VOLUME, ATTACK/DECAY,
SUSTAIN/RELEASE (ADSR), WAVEFORM CONTROL and HIGH FREQUEN-
CY/LOW FREQUENCY. The first 3 settings are usually set ONCE at the
beginning of your program. The high and low frequency settings must be
set for EACH NOTE you play. The waveform control starts and stops each
note.
SAMPLE SOUND PROGRAM
Before you start you have to choose a VOICE. There are 3 voices. Each
voice requires different sound setting numbers for Waveform, etc. You can
play 1, 2, or 3 voices together but our sample uses only VOICE NUMBER
1. Type in this program line by line…be sure to hit the RETURN key after
each line:
5 FOR L = 54272 TO 54296
: POKE L,0 : NEXT
10 POKE 54296,15
20 POKE 54277,190
First clear sound chip.
Set VOLUME at highest set-
ting. Set ATTACK/DECAY rates
to define how fast a note rises
to and falls from its peak volume
level (0 to 255).
30 POKE 54278,248 Set SUSTAIN/RELEASE to define
level to prolong note and rate to
release it.
111
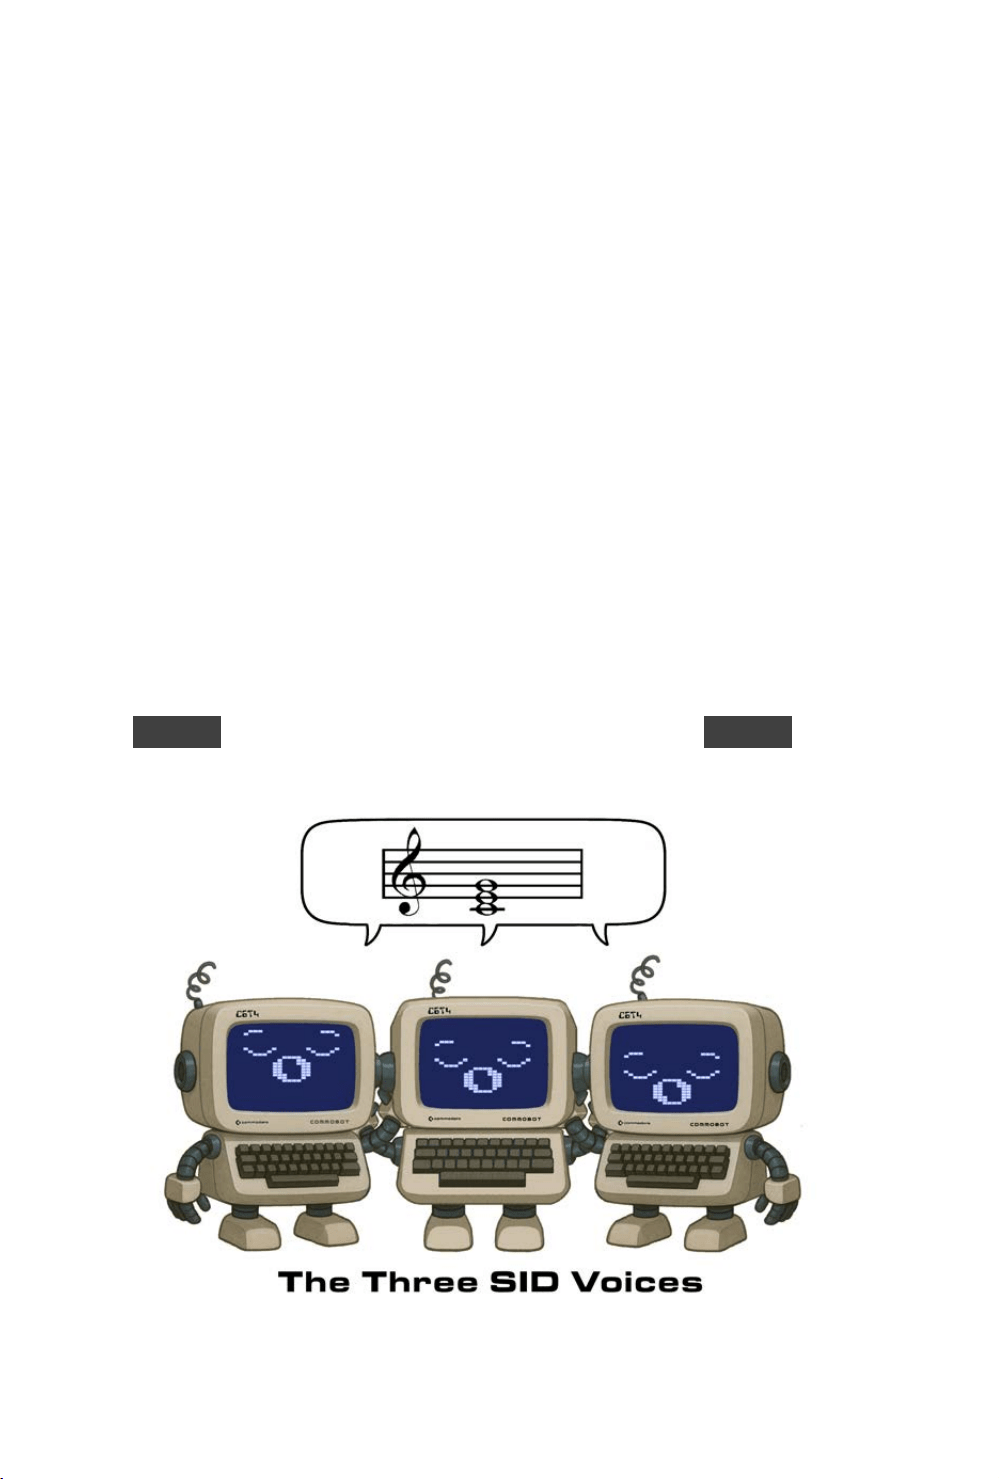
40 POKE 54273,17 : POKE
54272,37
Find the note/tone you want to
play in the TABLE OF MUSICAL
NOTES in Appendix J and enter
the HIGH FREQUENCY and LOW
FREQUENCY values for than note
(each note requires 2 POKEs).
50 POKE 54276,17 Start WAVEFORM with one of the
4 standard settings (17, 33, 65 or
129).
60 FOR T = 1 TO 250 :
NEXT
Enter a time loop to set the DU-
RATION of the note to be played
(a quarter note is approx. “250”
but may vary since a longer pro-
gram can affect the timing).
70 POKE 54276,16 Turn off note.
To hear the note you just created, type the word RUN and then hit the hit
RETURN key. To view the program type the word LIST and RETURN . To
change it, retype the lines you want to alter.
112

MAKING MUSIC ON YOUR COMMODORE 64
You don’t have to be a musician to make music on your Commodore 64!
All you need to know are a few simple numbers which tell your computer
how loud to set the volume, which notes to play, how long to play them,
etc. But first…here’s a program which gives you a quick demonstration of
the Commodore 64’s incredible music capabilities, using only ONE of your
computer’s 3 separate voices.
Type the word NEW and hit
RETURN
to erase your previous program, then
enter this program, type the word RUN and hit the RETURN key.
5 REM MUSICAL SCALE Title of program.
7 FOR L = 54272 TO 54296 : POKE L,0 : NEXT
10 POKE 54296,15 Sets volume at highest setting
(15).
20 POKE 54277,9 Sets Attack/Decay Sustain/Re-
lease level (each note).
30 POKE 54276,17 Determines waveform (type of
sound).
40 FOR T = 1 TO 300 : NEXT Duration (how long) each note
plays.
50 READ A Reads first number in line 110
DATA.
60 READ B Reads second number in line 110
DATA.
70 IF B = -1 THEN END Ends when it READs -1 in line
900.
113

80 POKE 54273,A : POKE
54272,B
POKEs the first number from DATA
in line 110 (A = 17) as HIGH
FREQUENCY and second number
(B = 37) as LOW FREQUENCY.
Next time program loops around
it READs A as 19 and B as 63,
and so on, and POKEs these num-
bers into the HIGH and LOW FRE-
QUENCY locations. The number
54273 = HIGH FREQUENCY for
VOICE1 and 54272 = LOW FRE-
QUENCY for VOICE1.
85 POKE 54276,17 Start note.
90 FOR T = 1 TO 250 : NEXT
: POKE 54276,16
Let it play then stop note.
95 FOR T = 1 TO 50 : NEXT Time for release.
100 GOTO 20 Loops back to reset CONTROL
and play new note.
110 DATA 17, 37, 19, 63, 21,
154, 22, 227
120 DATA 25, 177, 28, 214,
32, 94, 34, 175
Musical note values from note
value chart in Appendix J. Each
pair of numbers represents one
note. For example, 17 and 37
represent “C” of the 4th octave,
19 and 63 represent “D” and so
on.
900 DATA -1, -1 When program reaches -1 it turns
off HIGH/LOW FREQUENCY set-
tings and ENDs as instructed in
line 70.
To change the sound to a “harpsichord,” change line 85 to read
POKE 54276,33 and line 90 to read FOR T = 1 TO 250 : NEXT : POKE
54276,32 and RUN the program again. (To change the line hit the
RUN/STOP key to stop the program, type the word LIST and hit RETURN ,
then retype the program line you want to change; the new line will auto-
114

matically replace the old one). What we did here is change the “waveform”
from a “triangular” shaped sound wave to a “sawtooth” wave. Chang-
ing the WAVEFORM can drastically change the sound produced by the
Commodore 64…but…waveform is only one of several settings you can
change to make different musical tones and sound effects! You can also
change the ATTACK/DECAY rate of each note…for example, to change
from a “harpsichord” sound to a more “banjo” sound try changing lines 20
and 30 to read:
20 POKE 54277,3
30 POKE 54278,0
Sets no sustain for banjo effect
As you’ve just seen, you can make your Commodore 64 sound like different
musical instruments. Let’s take a closer look at how each sound setting
works.
IMPORTANT SOUND SETTINGS
1. VOLUME — To turn on the volume and set it to the highest level, type:
POKE 54296,15. The volume setting ranges from 0 to 15 but you’ll use 15
most of the time. To turn “off” the volume, type:
POKE 54296,0
You only have to set the volume ONCE at the beginning of your program,
since the same setting activates all 3 of the Commodore 64’s voices.
(Changing the volume during a musical note or sound effect can produce
interesting results but is beyond the scope of this introduction.)
2. ADSR and WAVEFORM CONTROL SETTING — You’ve already seen how
changing the waveform can change the sound effect from “xylophone” to
“harpsichord.” Each VOICE has its own WAVEFORM CONTROL SETTING
which lets you define 4 different types of waveforms: Triangle, Sawtooth,
Pulse (Square) and Noise. The CONTROL also activates the Commodore
115

64’s ADSR feature, but we’ll come back to this in a moment. A sample
waveform start setting looks like this:
POKE 54276,17
where the first number (54276) represents the control setting for VOICE1
and the second number (17) represents the start for a triangular waveform.
The settings for each VOICE and WAVEFORM combination are shown in the
table below:
ADSR AND WAVEFORM CONTROL SETTINGS
CONTROL Note Start/Stop Numbers
REGISTER TRIANGLE SAWTOOTH PULSE NOISE
VOICE 1 54276 17/16 33/32 65/44 129/128
VOICE 2 54283 17/16 33/32 65/44 129/128
VOICE 3 54290 17/16 33/32 65/44 129/128
Although the control registers are different for each voice the waveform
settings are the same for each type of waveform. To see how this works,
look at lines 85 and 90 in the musical scale program. In this program,
immediately after setting the frequency in line 80, we set the CONTROL
SETTING for VOICE 1 in line 85 by POKEing 54276,17. This turned on the
CONTROL for VOICE 1 and set it to a TRIANGLE WAVEFORM (17). In line 90
we POKE 54276,16, stopping the note. Later, we changed the waveform
start setting from 17 to 33 to create a SAWTOOTH WAVEFORM and this
gave the scale a “harpsichord” effect. See how the CONTROL SETTING
and WAVEFORM interact? Setting the waveform is similar to setting the
volume, except each voice has its own setting and instead of POKEing
volume levels we’re defining waveforms. Next, we’ll look at another aspect
of sound…the ADSR feature.
3. ATTACK/DECAY SETTING — As we mentioned before, the ADSR
CONTROL SETTING not only defines the waveform but it also acti-
vates the ADSR, or ATTACK/DECAY/SUSTAIN/RELEASE feature of the
Commodore 64. We’ll begin by looking at the ATTACK/DECAY setting.
The following chart shows the various ATTACK and DECAY levels for each
voice. If you’re not familiar with the concepts of sound attack and de-
cay, you might think of “attack” as the rate at which a note/sound arises
to its maximum volume. The DECAY is the rate at which the note/sound
falls from its highest volume level back to the SUSTAIN level. The following
chart shows the ATTACK/DECAY setting for each voice, and the numbers
for each attack and decay setting.
116

Note that YOU MUST COMBINE ATTACK AND DECAY SETTINGS BY ADDING
THEM UP AND ENTERING THE TOTAL. For example, you can set a HIGH
ATTACK rate and a low DECAY rate by adding the high attack number (64)
to the low decay number (1). The total (65) will tell the computer to set
the high attack rate and low decay rate. You can also increase the attack
rates by adding them together (128 + 64 + 32 + 16 = MAX. ATTACK RATE
of 240.)
ATTACK/DECAY RATE SETTINGS
ATTACK/DECAY HIGH MED LOW LOWEST HIGH MED LOW LOWEST
SETTINGATTACK ATTACK ATTACK ATTACK DECAY DECAY DECAY DECAY
VOICE 1 54277 128 64 32 16 8 4 2 1
VOICE 2 54284 128 64 32 16 8 4 2 1
VOICE 3 54291 128 64 32 16 8 4 2 1
If you set an attack rate with no decay, the decay is automatically zero,
and vice-versa. For example if you POKE 54277,64 you set a medium
attack rate with zero decay for VOICE 1. If you POKE 54277,66 you set
a medium attack rate and a low decay rate (because 66 = 64 + 2 and
sets BOTH settings). You can also add up several attack values, or several
decay values. For example, you can add a low attack (32) and a medium
attack (64) for combined attack rate of 96, then add a medium decay of
4 and…presto…POKE 54277,100.
At this point a sample program will better illustrate the effect. Type the
word NEW, hit RETURN
and type this program in and RUN it:
5 FORL=54272TO54296:POKEL,0:NEXT Duration the note plays
10 PRINT"HIT ANY KEY" Screen message
20 POKE54296,15 Set volume at highest level
30 POKE54277,64 Set Attack/Decay
40 POKE54273,17:POKE54272,37 POKE one note into VOICE
1
50 GETK$:IFK$=""THEN50 Check the keyboard.
60 POKE54276,17:FORT=1TO200:NEXT Set Waveform control (tri-
angle).
117

70 POKE54276,16:FORT=1TO50:NEXT Turn off settings.
80 GOTO 20 Loop back and do it again.
Here, we’re using VOICE 1 to create one note at a time…with a MEDIUM
ATTACK RATE and ZERO DECAY. The Key like is line 40. POKEing the AT-
TACK/DECAY setting with the number 64 activates a MEDIUM attack rate.
The result sounds like someone bouncing a ball in an oil drum. Now for the
fun part. Hit the RUN/STOP key to stop the program, then type the word
LIST and hit RETURN . Now type this line and hit RETURN (the new line
30 automatically replaces the old line 30):
30 POKE 54277,190
Type the word RUN and hit
RETURN
to see how it sounds. What we’ve
done here is combine several attack and decay settings. The settings are:
HIGH ATTACK (128) + LOW ATTACK (32) + LOWEST ATTACK (16) + HIGH
DECAY (8) + MEDIUM DECAY (4) + LOW DECAY (2) = 190.
This effect sounds like the noise an “Oboe” or other “reed” instrument might
make. If you’d like to experiment, try changing the waveform and at-
tack/decay numbers in the musical scale example to see how an “oboe”
sounds. Thus…you can see that changing the attack/decay rates can be
used to create different types of sound effects.
4. SUSTAIN RELEASE SETTING — Like Attack/Decay, the SUSTAIN/RE-
LEASE setting is activated by the ADSR/WAVEFORM Control. SUSTAIN/RE-
LEASE lets you “extend” (SUSTAIN) a portion of a particular sound, like the
“sustain pedal” on a piano or organ which lets you prolong a note. Any note
or sound can be sustained at any one of 16 levels. The SUSTAIN/RELEASE
setting may be used with a FOR…NEXT loop to determine how long the note
will be held at SUSTAIN volume before being released. The following chart
shows the numbers you have to POKE to reach different SUSTAIN/RELEASE
rates:
SUSTAIN/RELEASE RATE SETTINGS
SUSTAIN/RELEASE HIGH MED LOW LOWEST HIGH MED LOW LOWEST
CONTROL SETTING SUS SUS SUS SUS REL REL REL REL
VOICE 1 54278 128 64 32 16 8 4 2 1
VOICE 2 54285 128 64 32 16 8 4 2 1
VOICE 3 54292 128 64 32 16 8 4 2 1
118

As an example, if you’re using VOICE 1, you can set a HIGH SUSTAIN LEVEL
by typing: POKE 54278,128 or you could combine a HIGH SUSTAIN LEVEL
with a LOW RELEASE RATE by adding 128 + 2 and then POKE 54278,130.
Here’s the same sample program we used in the ATTACK/DECAY section
above…with a SUSTAIN/RELEASE feature added. Notice the difference in
sounds:
5 FORL=54272TO54296:POKEL,0:NEXT Duration the note plays.
10 POKE54296,15 Set volume at highest
level.
20 POKE54277,64 Set Attack/Decay.
30 POKE54278,128 Set SUSTAIN/RELEASE.
40 POKE54273,17:POKE 54272,37 POKE one note into
VOICE 1
50 PRINT"HIT ANY KEY" Screen message.
60 GETK$:IFK$=""THEN60 Check the keyboard.
70 POKE54276,17:FORT=1TO200:NEXT Set Waveform control (tri-
angle).
80 POKE54276,16:FORT=1TO50:NEXT Turn off settings.
90 GOTO60 Loop back and do it again.
In line 30, we tell the computer to SUSTAIN the note at a HIGH SUSTAIN
LEVEL (128 from the chart above)…after which the tone is released in line
80. You can vary the duration of a note by changing the “count” in line
70. To see the effect of using the release function try changing line 30 to
POKE 54278,89 (SUSTAIN = 80, RELEASE = 9).
5. CHOOSING VOICES AND SETTING HIGH/LOW FREQUENCY SOUND
VALUES — Each individual note on the Commodore 64 requires TWO SEP-
ARATE POKE COMMANDS…one for HIGH FREQUENCY and one for LOW
FREQUENCY. The MUSICAL NOTE VALUE table in Appendix J shows the
corresponding POKEs you need to play any note in the Commodore 64’s
119

8 octave range. The HIGH and LOW FREQUENCY POKE commands are
different for each voice you use — this allows you to program all 3 voices
independently to create 3-voice music or exotic sound effects.
The HIGH and LOW FREQUENCY POKE commands for each voice are shown
in the chart below, which also contains the NOTE VALUES for the middle
(fifth) octave.
VOICE NUMBER POKE SAMPLE MUSICAL NOTES — FIFTH OCTAVE
& FREQUENCY NUMBER C C# D D# E F F# G G# A A# B C C#
VOICE 1 HIGH 55273 34 36 38 40 43 45 48 51 54 57 61 64 68 72
VOICE 1 LOW 55273 75 85 126 200 52 198 127 97 111 172 126 188 149 169
VOICE 2 HIGH 54280 34 36 38 40 43 45 48 51 54 57 61 64 68 72
VOICE 2 LOW 54279 75 85 126 200 52 198 127 97 111 172 126 188 149 169
VOICE 3 HIGH 54287 34 36 38 40 43 45 48 51 54 57 61 64 68 72
VOICE 3 LOW 54286 75 85 126 200 52 198 127 97 111 172 126 188 149 169
As you can see, there are 2 settings for each voice, a HIGH FREQUENCY
setting and a LOW FREQUENCY setting. To play a musical note, you must
POKE a value into the HIGH FREQUENCY location and POKE another value
into the LOW FREQUENCY location. Using the settings in our VOICE/FRE-
QUENCY/NOTE VALUE table, here’s the setting that plays a C note from
the fifth octave (VOICE 1):
POKE54273,34:POKE54272,75
The same note on VOICE 2 would be:
POKE54280,34:POKE54279,75
Used in a program, it looks like this:
5 FORL=54272TO54296:POKEL,0:NEXT Duration the note plays.
10 V=54296:W=54276:A=54277:
S=54278:H=54273:L=54272
Set numbers equal to let-
ters.
20 POKEV,15:POKEA,190:POKES,8 Poke volume, waveform,
attack/decay.
30 POKEH,34:POKEL,7 POKE hi/lo freq. notes
40 POKEW,33:FORT=1TO200:NEXT Start note, let it play.
50 POKEW,32 Stop note.
120

PLAYING A SONG ON THE COMMODORE 64
The following program can be used to compose or play a song (using
VOICE 1). There are two important lessons in this program: first, note
how we abbreviate all the long control numbers in the first line of the pro-
gram…after that, we can use the letter W for “Waveform” instead of the
number 54276.
The second lesson concerns the way we use the DATA. This program is set
up to let you enter 3 numbers for each note: the HIGH FREQUENCY NOTE
VALUE, the LOW FREQUENCY NOTE VALUE, and the DURATION THE NOTE
WILL BE PLAYED.
For this song, we used a duration “count” of 125 for an eighth note, 250
for a quarter note, 375 for a dotted quarter note, 500 for a half note
and 1000 for a whole note. These number values can be increased or
decreased to match a particular tempo, or your own musical taste.
To see how a song gets entered, look at line 110. We entered 34 and 75
as our HIGH and LOW FREQUENCY settings to play a “C” note (from the
sample scale shown previously) and then the number 250 for a quarter
note. So the first note in our song is a quarter note C. The second note is
also a quarter note, this time the note is “E”…and so on to the end of our
tune. You can enter almost any song this way, adding as many DATA state-
ment lines as you need. You can continue the note and duration numbers
from one line to the next but each line must begin with the word DATA.
DATA -1,-1,-1 should be the last line in your program. This line “ends” the
song.
Type the word NEW to erase your previous program and type in the follow-
ing program, then type RUN to hear the song.
Michael Row the Boat Ashore — 1 Measure
10 FORL=54272TO54296:POKEL,0:NEXT
20 V=54296:W=54276:A=54277:HF=54273:LF=54272:S= 54278:
PH=54275:PL=54274
30 POKEV,15:POKEA,88:POKEPH,15:POKEPL,15:POKES,89
40 READH:IFH=-1THENEND
50 READL
60 READD
70 POKEHF,H:POKELF,L:POKEW,65
121

80 FORT=1TOD:NEXT:POKEW,64
85 FORT=1TO50:NEXT
90 GOTO10
100 DATA34,75,250,43,52,250,51,97,275,43,52,125,51,97
105 DATA250,57,172,250
110 DATA51,97,500,0,0,125,43,52,250,51,97,250,57,172
115 DATA1000,51,97,500
120 DATA-1,-1,-1
CREATING SOUND EFFECTS
Unlike music, sound effects are more often tied to a specific program-
ming “action” such as the explosion made by an astro-fighter as it crashes
through a barrier in a space game…or the warning buzzer in a business
program that tells the user he’s about to erase his disk by mistake.
You have a wide range of options available if you want to create different
sound effects. Here are 11 programming ideas which might help you get
started experimenting with sound effects.
1. Change the volume while a note is playing, for example to create an
“echo” effect.
2. Vary between two notes rapidly to create a sound “tremor”.
3. Waveform…try different settings for each voice.
4. ATTACK/DECAY…alter the rate a sound rises towards its “peak” vol-
ume and the rate it diminishes from that peak.
5. SUSTAIN/RELEASE…change sustain to volume of a sound effect, and
the rate it diminishes from that volume.
122

6. Multivoice effects…playing more than one voice at the same time,
each voice independently controlled, or one voice playing longer or
shorter than the another, or serving as an “echo” or response to a
first note.
7. Changing notes on the scale, or changing octaves, using the values
in the MUSICAL NOTES VALUE table.
8. Use the Square Waveform and different Pulse settings to create dif-
ferent effects.
9. Use the Noise Waveform to generate “white noise” for accenting
tonal sound effects or creating explosions, gunshots or footsteps.
The same musical notes that create music can also be used with the
Noise Waveform to create different types of white noise.
10. Combine several HIGH/LOW-FREQUENCIES in rapid succession
across different octaves.
11. Filter…try the extra POKE settings in Appendix J.
SAMPLE SOUND EFFECTS TO TRY
The following programs may be added to almost any BASIC program. They
are included to give you some programming ideas and demonstrate the
Commodore 64’s sound effect range.
Notice the programming shortcut we’re using in line 10. We can abbre-
viate those long, cumbersome sound setting numbers by defining them as
easy-to-use letters (numeric variables). Line 10 simply means that these
easy-to-remember LETTERS can be used instead of those long numbers.
Here, V = Volume, W = Waveform, A = Attack/Decay, H = High Frequency
(VOICE 1), L = Low Frequency (VOICE 1), HP = High- Pulse (VOICE 1), LP
= Low-Pulse (VOICE 1). We then use these letters instead of numbers in
our program…making our program shorter, typing faster, and the sound
settings easier to remember and spot.
123

Doll Crying
10 V=54296:W=54276:A=54277:H=54273:L=54272:
HP=54275:LP=54274
20 FORI=54272TO54296:POKEI,0:NEXT
30 POKEHP,15:POKELP,40
40 POKEV,15:POKEW,65:POKEA,15
50 FORX=200TO5STEP-2:POKEH,40:POKEL,X:NEXT
60 FORX=150TO5STEP-2:POKEH,40:POKEL,X:NEXT
70 POKEW,0
Shooting Sound
10 V=54296:W=54276:A=54277:H=54273:L=54272
20 FORI=54272TO54296:POKEI,0:NEXT
30 FORX=15TO0STEP-1:POKEV,X:POKEW,129:POKEA,15
40 POKEH,40:POKEL,200:NEXT
50 POKEW,128:POKEA,0
124


126

READ AND DATA
You’ve seen how to assign values to variables directly within the program
(A = 2), and how to assign different values while the program is running —
through the INPUT statement.
There are many times, though, when neither one of these ways will quite
fit the job you’re trying to do, especially if it involves a lot of information.
Try this short program:
10 READ X
20 PRINT "X IS NOW:";X
30 GOTO 10
40 DATA 1, 34, 10.5, 16, 234.56
RUN
X IS NOW: 1
X IS NOW: 34
X IS NOW: 10.5
X IS NOW: 16
X IS NOW: 234.56
?OUT OF DATA ERROR IN 10
READY.
ǀ
In line 10, the computer READs one value from the DATA statement and as-
signs that value to X. Each time through the loop the next value in the DATA
statement is read and that value assigned to X, and PRINTed. A pointer in
the computer itself keeps track of which value is to be used next:
40 DATA 1, 34, 10.5, 16, 234.56
Pointer
↓
When all the values have been used, and the computer executed the loop
again, looking for another value, the OUT OF DATA error was displayed
because there were no more values to READ.
It is important to follow the format of the DATA statement precisely:
40 DATA 1, 34, 10.5, 16, 234.56
↑
Comma separates each item
↑
No comma
127

Data statements can contain integer numbers, real numbers (234.65) or
numbers expressed in scientific notation. But you can’t READ other vari-
ables, or have arithmetic operations in DATA lines. This would be incorrect:
40 DATA A, 23/56, 2*5
You can, however, use a string variable in a READ statement and then place
string information in the DATA line. The following is acceptable:
NEW
10 FOR X = 1 TO 3
15 READ A$
20 PRINT "A$ IS NOW:";A$ 30 NEXT
40 DATA THIS, IS, FUN
RUN
A$ IS NOW: THIS
A$ IS NOW: IS
A$ IS NOW: FUN
READY.
ǀ
Notice that this time, the READ statement was placed inside a FOR…NEXT
loop. This loop was then executed to match the number of values in the
data statement.
In many cases you will change the number of values in the DATA statement
each time the program is run. A way to avoid counting the number of
values and still avoid an OUT OF DATA ERROR is to place a “FLAG” as the
last value in the DATA line. This would be a value that your data would
never equal, such as a negative number or a very large or small number.
When that value is READ the program will branch to the next part.
There is a way to reuse the same DATA later in the program by RESTOREing
the data pointer to the beginning of the data list. Add line 50 to the
previous program:
50 GOTO 10
You will still get the OUT OF DATA error because as the program branches
back to line 10 to reread the data, the data pointer indicates all the data
has been used. Now, add:
128

45 RESTORE
and RUN the program again. The data pointer has been RESTOREd and
the data can be READ continuously.
AVERAGES
The following program illustrates a practical use of READ and DATA, by
reading in a set of numbers and calculating their average.
NEW
5 T = 0 : CT = 0
10 READ X
20 IF X = -1 THEN 50 : REM CHECK FOR FLAG
25 CT = CT + 1
30 T = T + X : REM UPDATE TOTAL
40 GOTO 10
50 PRINT "THERE WERE"; CT;"VALUES READ"
60 PRINT "TOTAL =";T
70 PRINT "AVERAGE =";T/CT
80 DATA 75, 80, 62, 91, 87, 93, 78, -1
RUN
THERE WERE 7 VALUES READ
TOTAL = 566
AVERAGE = 80.8571429
READY.
ǀ
Line 5 sets CT, the CounTer, and T, Total, equal to zero. Line 10 READs
a value and assigns the value to X. Line 20 checks to see if the value is
our flag (here a -1). If the value READ is part of the valid DATA, CT is
incremented by 1 and X is added to the total.
When the flag is READ, the program branches to line 50 which PRINTs the
number of values read. Line 60 PRINTs the total, and line 70 divides the
total by the number of values to get the average.
By using a flag at the end of the DATA, you can place any number of val-
ues in DATA statements — which may stretch over several lines — without
worrying about counting the number of values entered.
Another variation of the READ statement involves assigning information
from the some DATA line to different variables. This information can even
be a mixture of string data and numeric values. You can do all this in the
129

following program that will READ a name, some scores — say bowling —
and print the name, scores, and the average score:
NEW
10 READ N$,A,B,C
20 PRINT N$;"'S SCORES WERE:";A;B;C
30 PRINT "AND THE AVERAGE IS:";(A+B+C)/3
40 PRINT:GOTO 10
50 DATA MIKE,190,185,165,DICK,225,245,190
60 DATA JOHN,155,185,205,LUKE,160,179,187
RUN
MIKE'S SCORES WERE: 190 185 165
AND THE AVERAGE IS: 180
DICK'S SCORES WERE: 225 245 190
AND THE AVERAGE IS: 220
JOHN'S SCORES WERE: 155 185 205
AND THE AVERAGE IS: 181.666667
LUKE'S SCORES WERE: 160 179 187
AND THE AVERAGE IS: 175.333333
In running the program, the DATA statements were set up in the some order
that the READ statement expected the information: a name (a string), then
three values. In other words N$ the first time through gets the DATA ”MIKE”,
A in the READ corresponds to 190 in the data statement, “B” to 185 and
“C” to 165. The process is then repeated in that order for the remainder
of the information. (Dick and his scores, John and his scores, and Luke and
his scores.)
SUBSCRIPTED VARIABLES
In the past we’ve used only simple BASIC variables, such as A, A$, and
NU to represent values. These were a single letter followed by a letter or
single digit. In any of the programs that you would write, it is doubtful that
we would have a need for more variable names than possible with all the
combinations of letters or numbers available. But you are limited in the
way variables are used with programs.
Now let’s introduce the concept of subscripted variables.
A(1)
Subscript
Variable
130

This would be said: A sub 1. A subscripted variable consists of a letter
followed by a subscript enclosed within parentheses. Please note the dif-
ference between A, Al, and A(1). Each is unique. Only A(1) is a subscripted
variable.
Subscripted variables, like simple variables, name a memory location within
the computer. Think of subscripted variables as boxes to store information,
just like simple variables:
A(0)
A(1)
A(2)
A(3)
A(4)
If you wrote:
10 A(0) = 25: A(3) = 55 : A(4) = -45.3
Then memory would look like this:
A(0) 25
A(1)
A(2)
A(3) 55
A(4) -45.3
This group of subscripted variables is also called an array. In this case, a
one-dimensional array. Later on, we’ll introduce multidimensional arrays.
Subscripts can also be more complex to include other variables, or com-
putations. The following are valid subscripted variables:
A(X) A(X+ 1) A(2+1) A(1 * 3)
The expressions within the parentheses are evaluated according to the
same rules for arithmetic operations outlined in chapter 3.
Now that the ground rules are in place, how can subscripted variables be
put to use? One way is to store a list of numbers entered with INPUT or
READ statements.
Let’s use subscripted variables to do the averages a different way.
131

5 PRINT CHR$(147)
10 INPUT "HOW MANY NUMBERS:";X
20 FOR A = 1 TO X
30 PRINT "ENTER VALUE #";A;:INPUT B(A)
40 NEXT
50 SU = 0
60 FOR A = 1 TO X
70 SU = SU + B(A)
80 NEXT
90 PRINT:PRINT "AVERAGE =";SU/X
RUN
HOW MANY NUMBERS:? 5
ENTER VALUE # 1 ? 125
ENTER VALUE # 2 ? 167
ENTER VALUE # 3 ? 189
ENTER VALUE # 4 ? 167
ENTER VALUE # 5 ? 158
AVERAGE = 161.2
There might have been an easier way to accomplish what we did in this
program, but it illustrates how subscripted variables work. Line 10 asks for
how many numbers will be entered. This variable, X, acts as the counter for
the loop within which values are entered and assigned to the subscripted
variable, B.
Each time through the INPUT loop, A is increased by 1 and so the next value
entered is assigned to the next element in the array A. For example, the
first time through the loop A = 1, so the first value entered is assigned to
B(1). The next time through, A = 2; the next value is assigned to B(2), and
so on until all the values have been entered.
But now a big difference comes into play. Once all the values have been
entered, they are stored in the array, ready to be put to work in a variety
of ways. Before, you kept a running total each time through the INPUT or
READ loop, but never could get back the individual pieces of data without
re-reading the information.
In lines 50 through 80, another loop has been designed to add up the
various elements of the array and then display the average. This separate
part of the program shows that all of the values are stored and can be
accessed as needed.
To prove that all of the individual values are actually stored separately in an
array, type the following immediately after running the previous program:
132

FOR A = 1 TO 5 : ?B(A),:NEXT
125 167 189 167
158
and hit RETURN . The display will show your actual values as the contents
of the array are PRINTed.
DIMENSION
If you tried to enter more than 10 numbers in the previous example, you
got a DIMENSION ERROR. Arrays of up to eleven elements (subscripts 0
to 10 for a one-dimensional array) may be used where needed, just as
simple variables can be used anywhere within a program. Arrays of more
than eleven elements need to be “declared” in a dimension statement.
Add this line to the program:
5 DIM B(100)
This lets the computer know that you will have a maximum of 100 elements
in the array.
This dimension statement may also be used with a variable, so the following
line could replace line 5 (don’t forget to eliminate line 5):
15 DIM B(X)
This would dimension the array with the exact number of values that will
be entered.
Be careful, though. Once dimensioned, an array cannot be re-
dimensioned in another part of the program. You can, however, have mul-
tiple arrays within the program and dimension them all on the same line,
like this:
10 DIM C(20), D(50), E(40)
133

SIMULATED DICE ROLL WITH ARRAYS
As programs become more complex, using subscripted variables will cut
down on the number of statements needed, and make the program simpler
to write.
A single subscripted variable can be used, for example, to keep track of
the number of times a particular face turns up:
1 REM DICE SIMULATION : PRINT CHR$(147)
10 INPUT "HOW MANY ROLLS:";X
20 FOR L = 1 TO X
30 R = INT(6*RND(1))+1
40 F(R) = F(R) + 1
50 NEXT L
60 PRINT "FACE", "NUMBER OF TIMES"
70 FOR C = 1 TO 6 : PRINT C, F(C) : NEXT
The array F, for FACE, will be used to keep track of how many times a
particular face turns up. For example, every time a 2 is thrown, F(2) is
increased by 1. By using the same element of the array to hold the actual
number on the face that is thrown, we’ve eliminated the need for 5 other
variables (one for each face) and numerous statements to check and see
what number is thrown.
Line 10 asks for how many rolls you want to simulate.
Line 20 establishes the loop to perform the random roll and increment the
proper element of the array by 1 each, for each toss.
After all of the required tosses are complete, line 60 PRINTs the heading
and line 70 PRINTs the number of times each face shows up.
A sample run might look like this:
HOW MANY ROLLS:? 1000
FACE NUMBER OF TIMES
1 148
2 176
3 178
4 166
5 163
6 169
Well, at least it wasn’t loaded!
134

Just as a comparison, the following is one way of re-writing the same pro-
gram, but without using subscripted variables. Don’t bother to type it in,
but do notice the additional statements necessary.
10 INPUT "HOW MANY ROLLS:";X
20 FOR L = 1 TO X
30 R = INT(6*RND(1))+1
40 IF R = 1 THEN F1 = F1 + 1 : NEXT
41 IF R = 2 THEN F2 = F2 + 1 : NEXT
42 IF R = 3 THEN F3 = F3 + 1 : NEXT
43 IF R = 4 THEN F4 = F4 + 1 : NEXT
44 IF R = 5 THEN F5 = F5 + 1 : NEXT
45 IF R = 6 THEN F6 = F6 + 1 : NEXT
60 PRINT "FACE", "NUMBER OF TIMES"
70 PRINT 1, F1
71 PRINT 2, F2
72 PRINT 3, F3
73 PRINT 4, F4
74 PRINT 5, F5
75 PRINT 6, F6
The program has doubled in size from 8 to 16 lines. In larger programs the
space savings from using subscripted variables will be even more dramatic.
TWO-DIMENSIONAL ARRAYS
Earlier in this chapter you experimented with one-dimensional arrays. This
type of array was visualized as a group of consecutive boxes within memory
each holding an element of the array. What would you expect a two-
dimensional array to look like?
First, a two-dimensional array would be written like this:
A(4,6)
Subscripts
Array Name
and could be represented as a two-dimensional grid within memory:
135
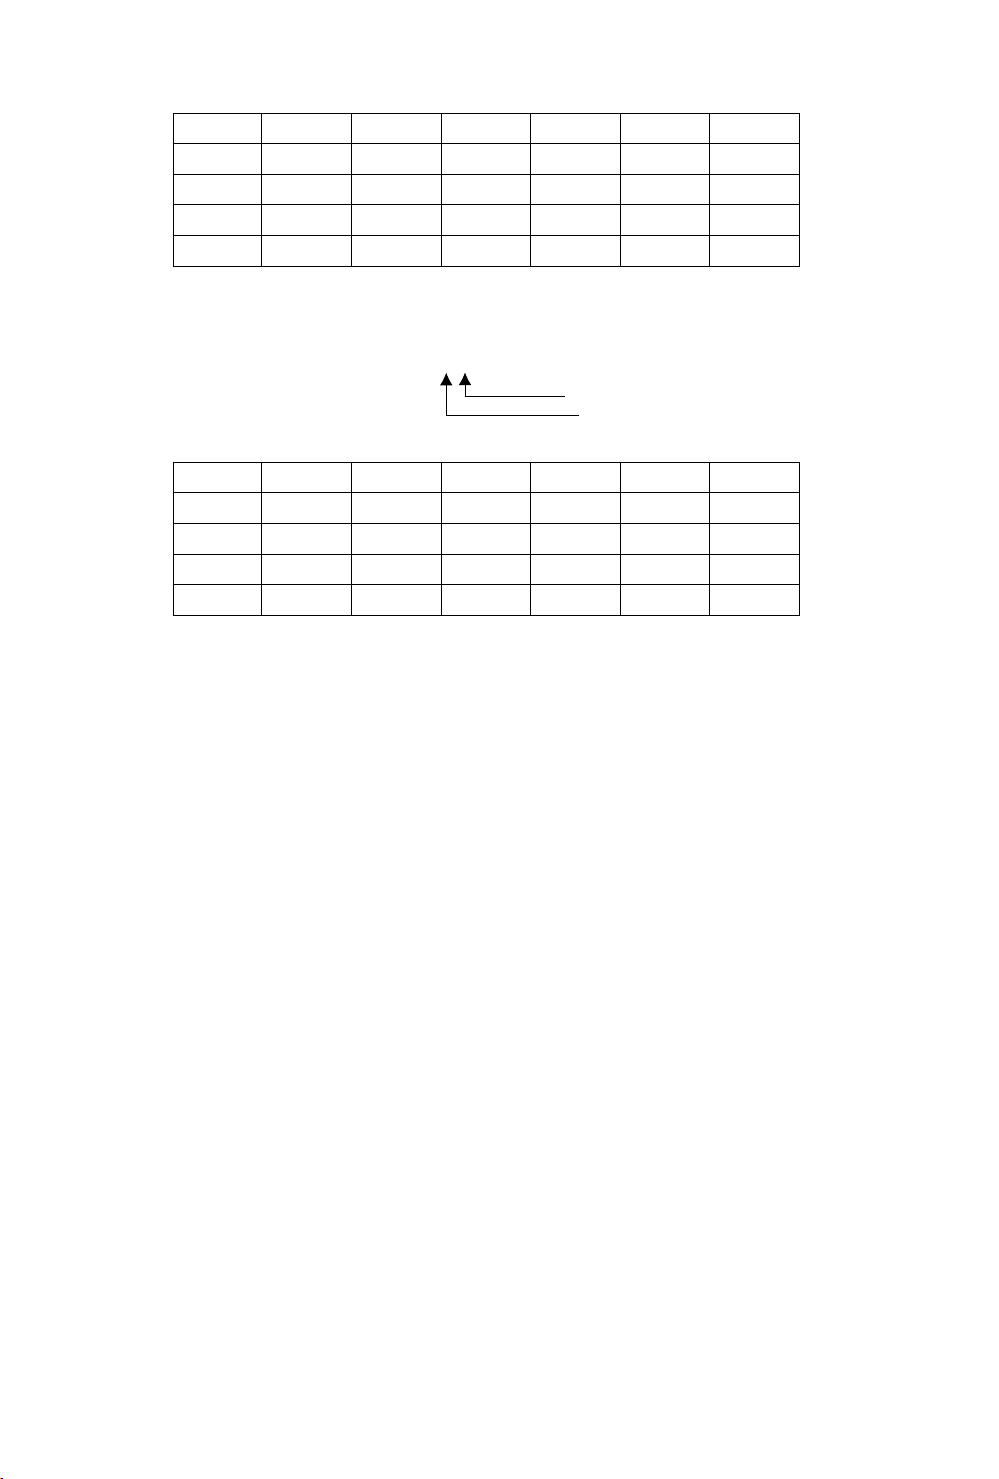
0 1 2 3 4 5 6
0
1
2
3
4
The subscripts could be thought of as representing the row and column
within the table where the particular element of the array is stored.
A(3,4) = 255
Column
Row
0 1 2 3 4 5 6
0
1
2
3 255
4
If we assigned the value 255 to A(3,4), then 255 could be thought of as
being placed in the 4th column of the 3rd row within the table.
Two-dimensional arrays behave according to the same rules that were es-
tablished for one-dimensional arrays:
They must be dimensioned: DIM A(20,20)
Assignment of data: A(1,1) = 255
Assign values to other variables: AB = A(1,1)
PRINT values: PRINT A(1,1)
If two-dimensional arrays work like their smaller counterparts, what addi-
tional capabilities will the expanded arrays handle?
Try this: can you think of a way, using a two-dimensional array, to tabulate
the results of a questionnaire for your cub that involves 4 questions and had
up to 3 responses for each question? The problem could be represented
like this:
CLUB QUESTIONNAIRE
Q1: ARE YOU IN FAVOUR OF RESOLUTION #1?
□ 1 — YES □ 2 — NO □ 3 — UNDECIDED
…and so on.
The array table for this problem could be represented like this:
136

RESPONSES
YES NO UNDECIDED
QUESTION 1
QUESTION 2
QUESTION 3
QUESTION 4
The program to do the actual tabulation for the questionnaire might look
like that shown on page 138.
This program makes use of many of the programming techniques that have
been presented so far. Even if you don’t have any need for the actual
program right now, see if you can follow how the program works.
The heart of this program is a 4 by 3 two-dimensional array, A(4,3). The
total responses for each possible answer to each question are held in the
appropriate element of the array. For the sake of simplicity, we don’t use
the first rows and columns (A(0,0) to A(0,4)). Remember, though, that
those elements are always present in any array you design.
In practice, if question 1 is answered YES, then A(1,1) is incremented by
one: Row1 for question 1 and Column1 for a YES response. The rest of
the questions and answers follow the same pattern. A NO response for
question 3 would add one to element A(3,2), and so on.
137

20 PRINT CHR$(147)
30 FOR R = 1 TO 4
40 PRINT "QUESTION # :";R
50 PRINT " 1-YES 2-NO 3-UNDECIDED"
60 PRINT "WHAT WAS THE RESPONSE :";
61 GET C : IF C <1 OR C>3 THEN 61
65 PRINT C : PRINT
70 A(R,C) = A(R,C) + 1 : REM UPDATE ELEMENT
80 NEXT R
85 PRINT
90 PRINT "DO YOU WANT TO ENTER ANOTHER" :
PRINT "RESPONSE (Y/N)";
100 GET A$ : IF A$ = "" THEN 100
110 IF A$ = "Y" THEN 20
120 IF A$ <> "N" THEN 100
130 PRINT CHR$(147)";"THE TOTAL RESPONSES
WERE:":PRINT
140 PRINT SPC(18);"RESPONSE":PRINT
141 PRINT "QUESTION","YES","NO","UNDECIDED"
142 PRINT "--------","---","--","---------"
150 FOR R = 1 TO 4
160 PRINT R, A(R,1), A(R,2), A(R,3)
170 NEXT R
RUN
QUESTION # : 1
1-YES 2-NO 3-UNDECIDED
WHAT WAS THE RESPONSE : 1
QUESTION # : 2
1-YES 2-NO 3-UNDECIDED
WHAT WAS THE RESPONSE : 1
QUESTION # : 3
1-YES 2-NO 3-UNDECIDED
WHAT WAS THE RESPONSE : 1
QUESTION # : 4
1-YES 2-NO 3-UNDECIDED
WHAT WAS THE RESPONSE : 3
DO YOU WANT TO ENTER ANOTHER
RESPONSE (Y/N)
THE TOTAL RESPONSES WERE:
RESPONSE
QUESTION YES NO UNDECIDED
-------- --- -- ---------
1 1 0 0
2 1 0 0
3 1 0 0
4 0 0 1
138


140

USING COMMODORE 64 PERIPHERALS
The original Commodore 64 is a powerful all-in-one computer all on its
own, but it really becomes a part of your life when you connect additional
devices to it. Known generally as peripherals, these devices include joy-
sticks, gamepads, mice, floppy disk drives, hard drives, Datassette drives,
printers, and modems. Less common Commodore 64 peripherals even sup-
port home automation, science lab experiments, and control of robotics.
Most of the peripherals from back in the day are no longer manufac-
tured, but can still be acquired on the secondary market. Some types of
Commodore 64 peripherals, especially game controllers and data storage
devices, are still being made today.
The Commodore 64 Ultimate supports many of the same peripherals as
the original Commodore 64. It includes many of the same connection
ports: two 9-pin game ports, an IEC serial port for storage and printer
interfaces, an expansion port for cartridges, and a Datassette port. With
an adapter cable available at commodore.net, you can even add a user
port for modems, additional printer options, and an RS-232 adapter.
The C64U comes pre-configured to emulate common peripherals (disk
drives, printers, and modems) with internal logic, so you do not need to own
such peripherals to enjoy your computer to its fullest. Some Commodore
64 peripherals require a change in the C64U configuration to disable the
emulation in favor of an external device connected to a port.
JOYSTICKS, GAMEPADS, AND MICE
The C64U has two 9-pin game ports located on the right-hand side of
the computer. The front-most port is “port 1,” and the rear-most port is
“port 2.” Most Commodore 64 games expect a Commodore-style joystick
or gamepad connected to one of these ports. The Commodore 1351
mouse, and compatible alternatives, also connect to the game port.
For various reasons technical and cultural, different games may prefer a
joystick in one port or the other. To spare you from having to disconnect
and reconnect your joystick to switch ports, the C64U can swap the joystick
port assignments in a configuration menu. Pause the game by pressing
upward on the Multi Function Switch, then navigate to “Joystick & Con-
trollers,” then “Joystick Input,” then select “Swapped.”
141

Several modern manufacturers make new joysticks, gamepads, mice, and
mouse adapters that work with the C64U. Visit the Commodore website
for information on how to purchase: commodore.net
CARTRIDGES
Cartridges are devices that connect to the expansion port in the back-right
of the computer. Most cartridges contain program data, such as a game
program, that runs the program when the computer is switched on with the
cartridge connected. Some cartridges contain sophisticated electronics
that add features to the computer.
NOTE: Always switch the C64U completely off before connecting or dis-
connecting a cartridge. This ensures that both the computer and the
cartridge receive electrical power and signal only when the cartridge is
seated properly, and that the computer executes the cartridge’s program
code in the way that the program expects.
The C64U will use a physical cartridge if one is connected. If no physical
cartridge is present, it will use the cartridge ROM file if one is connected
to the virtual cartridge port, or no cartridge otherwise.
DISK DRIVES
The IEC serial port on the back of the computer accommodates devices
such as floppy disk drives and printer interfaces. Some IEC devices offer
a passthru IEC port of their own, so you can connect multiple devices in a
chain. Up to five IEC devices can be connected at a time to the C64U.
The computer refers to each device using a unit number known to the de-
vice. Each device must be configured to know its unit number, so it re-
sponds correctly when called by the computer. For example, with disk
drives connected set to units 8, 9, and 10, the computer contacts drive
unit 8 by announcing to all devices that it wishes to talk to unit 8, and
only the drive set to unit 8 is expected to respond. If more than one con-
nected device is configured to use the same unit number, the devices get
confused and will not communicate properly.
The C64U provides two virtual drives, known as drive A and drive B. These
drives behave as if connected to the IEC port with other drives, and sim-
ulate disk access for disk images. By default, drive A assumes it is unit 8,
and drive B assumes it is unit 9.
142

If you wish an external drive to use unit numbers 8 or 9, you can change
the unit number assigned to the virtual drives: from the C64U Menu, select
“Disk Drive A Options” or “Disk Drive B Options,” then adjust “Drive Bus ID.”
You can also disable and enable each virtual drive from this menu.
For more on using the C64U virtual drives with disk images, refer to chapter
2.
Commodore 64 disk drives are expected to use unit numbers in the range
8 – 31. Lower unit numbers are reserved for other purposes.
PRINTERS
Similar to disk drives, some printer interfaces connect to the Commodore
64 using the IEC port, and respond to messages addressed to a unit num-
ber. A Commodore 64 printer typically uses unit number 4 or 5.
The C64U provides a virtual printer that waits for a program to print a
document, then saves the printed document in a modern file format in the
filesystem. If an external IEC printer is connected, the document may be
printed by both devices. You can disable the virtual printer in configuration:
from the C64U Menu, select “Printers,” then set “IEC printer” to “Disabled.”
This will cause printing to only engage the external IEC printer.
For more on using the C64U virtual printer, refer to chapter 13.
DATASSETTE
The C64U provides a Datassette port for connecting an original
Commodore Datassette storage device. To use a Datassette, simply con-
nect it to the C64U’s Datassette port.
The C64U also emulates a Datassette drive when using tape images. This
does not conflict with the use of an external Datassette drive: simply use
the drive as normal. For more on using tape images, refer to chapter 2.
USER PORT DEVICES
The original Commodore 64 has another port for connecting devices,
known as the user port. This port is often used with telecommunication
devices such as modems, or for connecting to other computers or devices.
The C64U locates its USB, Ethernet, and HDMI connectors where the user
port would be on an original Commodore 64.
143

The C64U does have a way to connect to user port devices using an
adapter, sold separately. The adapter connects to the mainboard inside
the C64U case, and has a ribbon cable that extends to the outside of the
case for use with devices. For information on how to obtain this adapter,
see the Commodore website: commodore.net
The C64U provides built-in emulation of a modem device for the purposes
of connecting to other computers over the Internet, where both computers
are pretending to be connected using modems over a telephone line. For
more information on the C64U’s virtual modem, refer to chapter 12.
144


146

GETTING ONLINE
The Commodore 64 Ultimate can connect to your local network via an
Ethernet cable or a Wi-Fi connection. This enables powerful features, in-
cluding the ability to download and run Commodore 64 software from the
Internet.
Ethernet
You can connect the C64U to your local network router with an Ethernet
cable.
Most local network routers support the DHCP standard for assigning IP ad-
dresses to connected devices. To connect the C64U to your local network
with DHCP, simply connect an Ethernet cable from the port on the back-
left of the computer to your router.
To confirm that this worked:
1. Open the C64U Menu: press the Multi Function Switch upward. The
menu appears.
2. Use the W and S keys to move the selection to “Wired Network
Setup.” Press the RETURN key.
3. Confirm that “Use DHCP” is “Enabled.”
4. Confirm that “Active IP address” is a DHCP-assigned IP address (and
not 0.0.0.0). If you connected an ethernet cable or enabled DHCP
with this menu displayed, exit and re-enter the menu to check for an
updated IP address.
147
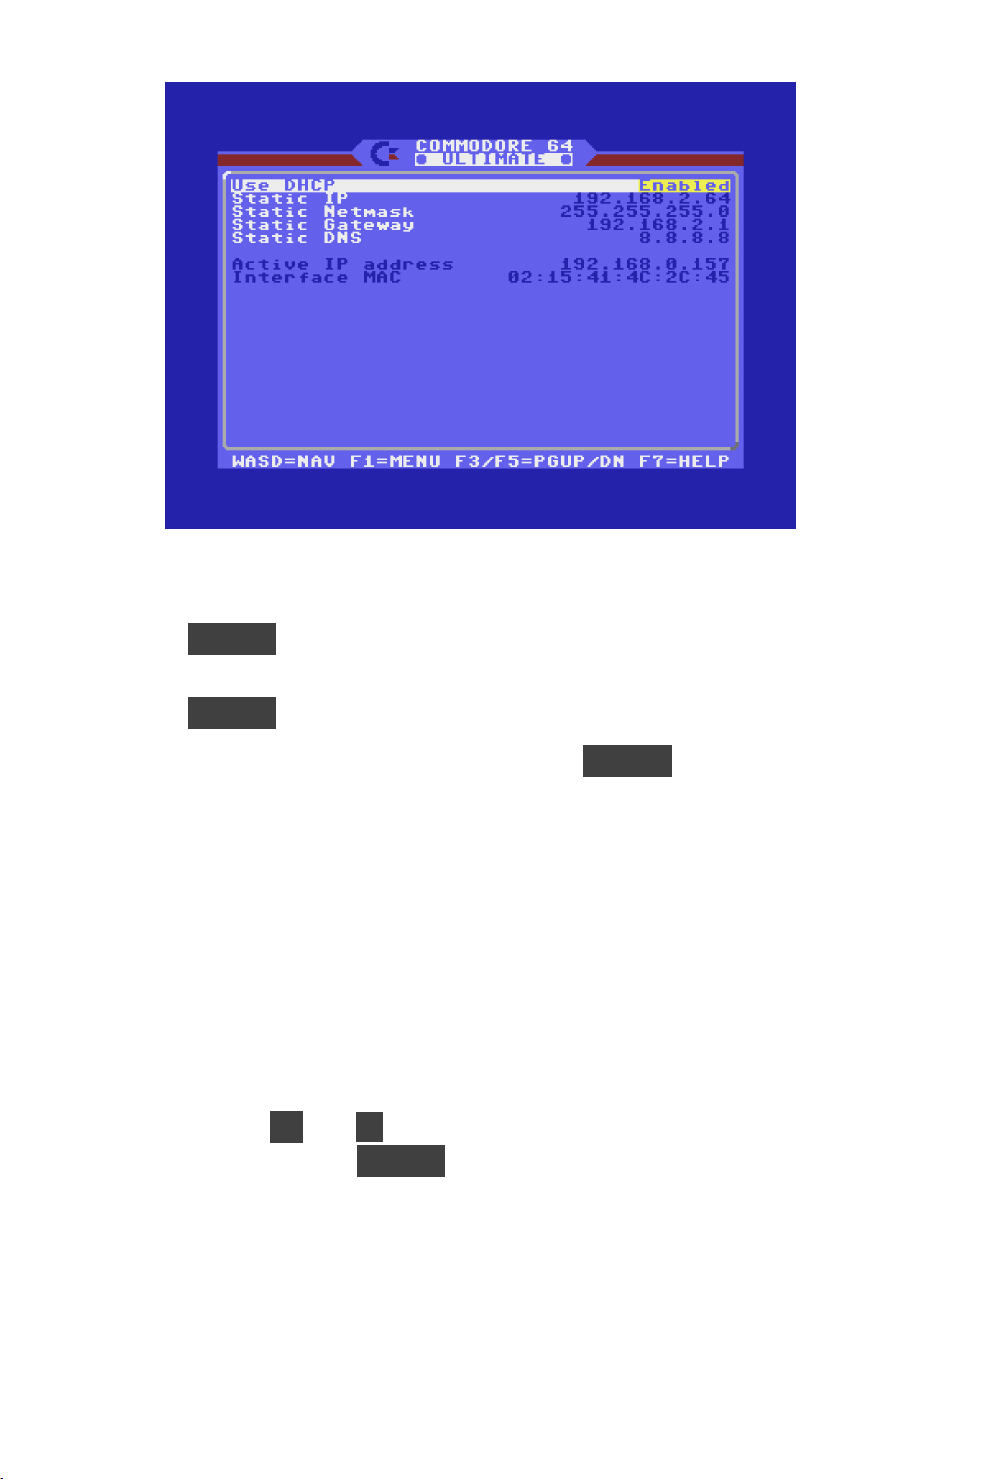
If your local network requires that you assign a static IP address:
1. In the “Wired Network Setup” screen, select “Use DHCP” then press
RETURN
.
2. Move the selection in the pop-up menu to “Disabled,” then press
RETURN .
3. Move the selection to “Static IP,” press
RETURN
, then enter the
static IP address. Repeat this for the netmask, gateway, and DNS
address for your local network.
4. Exit the menu, and confirm saving the settings when prompted.
Wi-Fi
The C64U supports connecting to Wi-Fi networks. To connect to your wire-
less access point:
1. Open the C64U Menu: press the Multi Function Switch upward. The
menu appears.
2. Use the W and S keys to move the selection to “Wi-Fi Network
Setup.” Press the RETURN key.
3. Select “Select AP from list.” The C64U scans for local wireless ac-
cess points, then displays a list.
148
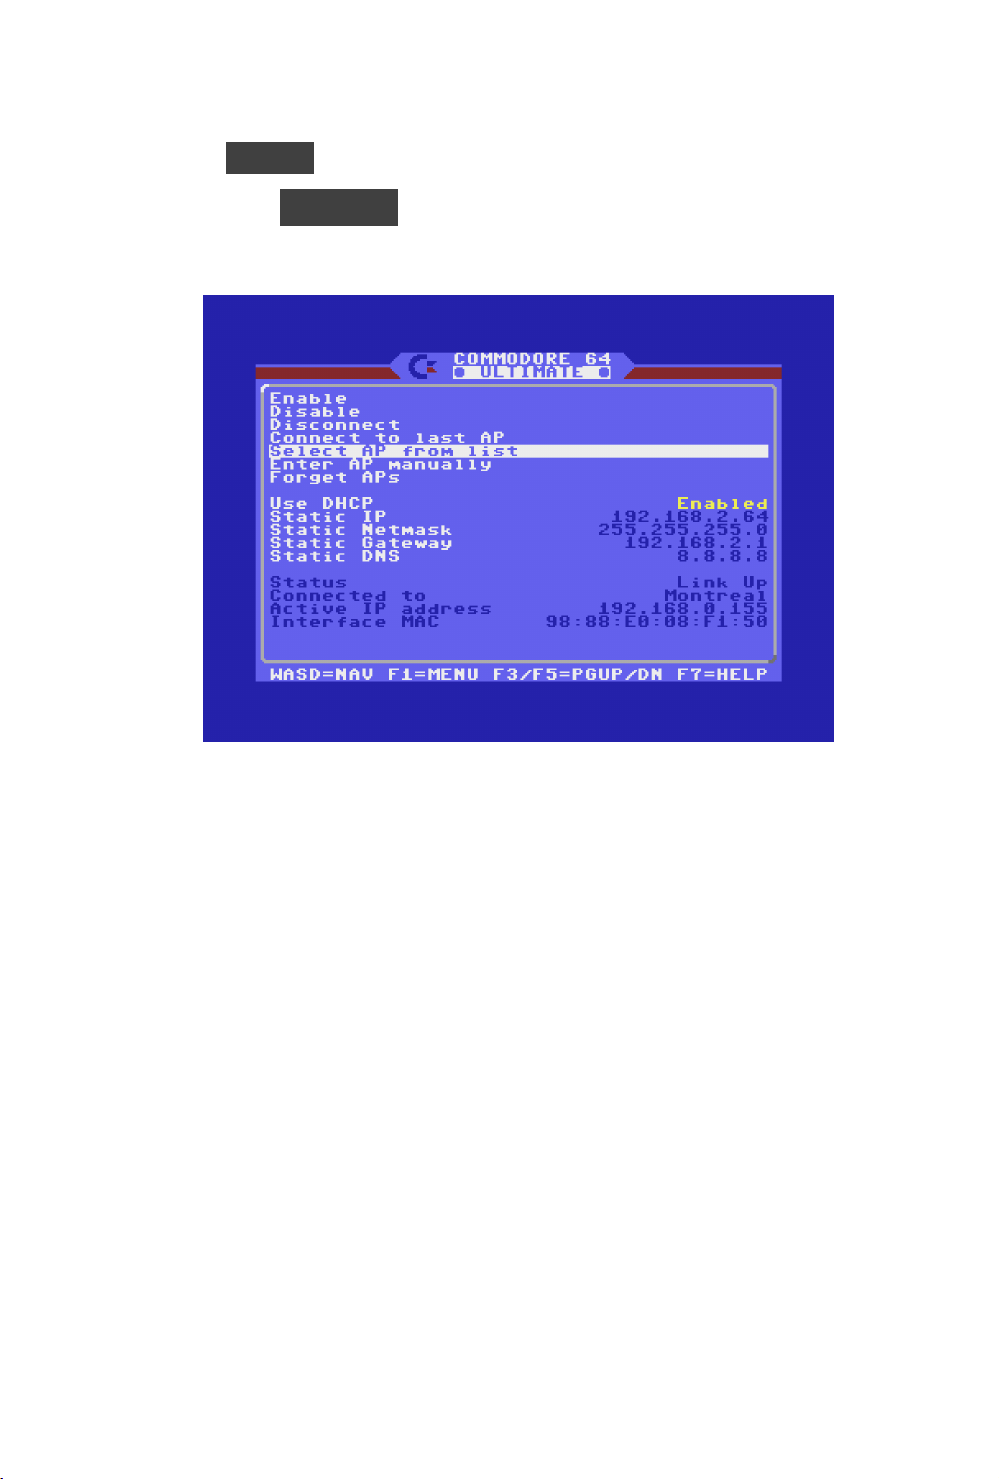
4. Select your wireless access point, then select “Connect.” When
prompted, enter your wireless access point password, then press
RETURN .
5. Press RUN/STOP to return to the Wi-Fi Network Setup menu. Con-
firm the connection status at the bottom of the screen: “Status” says
“Link Up,” and “Connected to” indicates your access point.
If your wireless access point is a private network, it will not appear in the
list. Instead, select “Enter AP manually,” then enter the name (SSID) of
your wireless access point, followed by the password. You will also need
to select the Authentication method. Most modern wireless access points
support “WPA2 PSK.”
SEARCHING THE COMMOSERVE FILE INDEX
Commodore enthusiasts have been archiving and preserving the long his-
tory of Commodore 64 software, transferring data off of aging magnetic
media, and making the software available for download from the Internet
in the form of disk images, tape images, and cartridge ROMs. As discussed
in chapter 2, you can download such software to your PC, then transfer it
to a USB storage device for use with your Commodore 64 Ultimate.
CommoServe is an Internet service that provides a continuously updated
index of archived Commodore 64 software. You can use your Commodore
64 Ultimate to search this database, and download and run games, de-
149
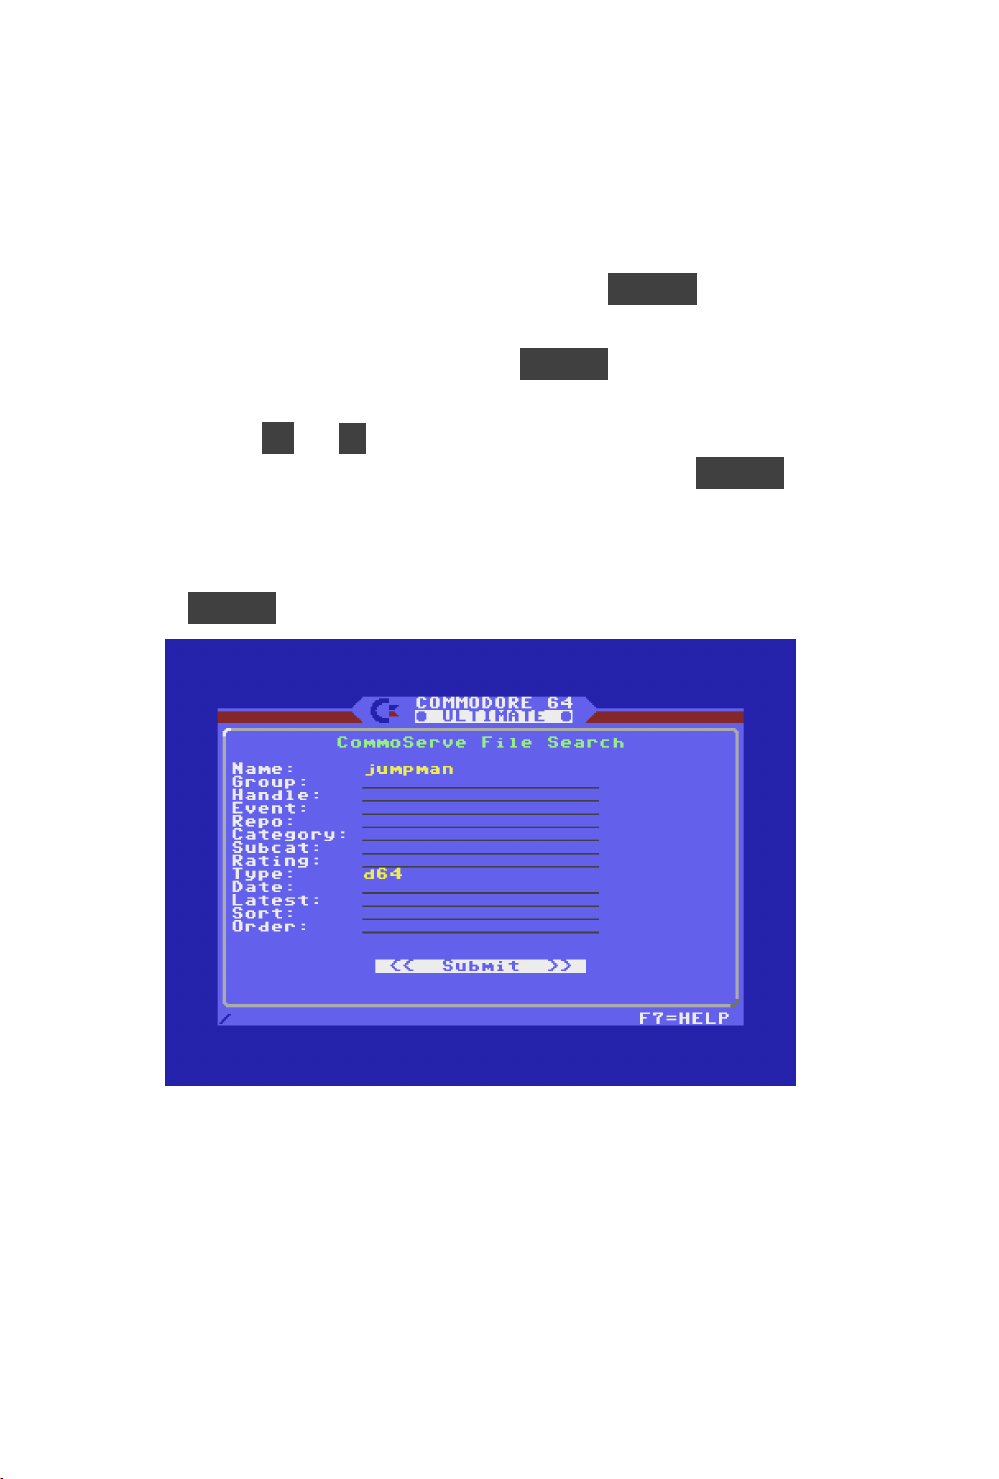
mos, and other programs directly to the C64U, all without the need of a
PC.
To perform a search of the CommoServe index:
1. Open the C64U Menu: press the Multi Function Switch upward. The
menu appears.
2. Select “CommoServe File Search”, press RETURN . The Com-
moServe File Search form displays.
3. The “Name” field is selected. Press RETURN , then type the name of
a program to find. For example: jumpman
4. Use the W and
S
keys to move the field selection below the bottom
of the form to select the “Submit” button. Press the RETURN key.
The C64U connects to CommoServe over the Internet to perform the
search, and the results are displayed in a list.
5. Select a matching title (for example, “Jumpman”), then press
RETURN . Select an image file to download and run it.
You can optionally select other fields to narrow the search. For example,
you can use the “Type” field to see only results in the form of D64 disk
images.
There is not a way to browse the index’s contents in a single list, but you
can perform a search by category and rating to find highly rated games
and demos. Look for websites that list popular Commodore 64 games for
examples of things to try.
150

The index is large, and contains multiple copies of some titles. It sometimes
takes some trial and error to find the right version of a given game or demo.
FTP FILE SERVICE
You can use the network connection to transfer files between your PC and
your Commodore 64 Ultimate. This works with an Ethernet connection or
a Wi-Fi connection. Your PC must be on the same local network as the
C64U.
This requires a file transfer program for your PC that supports the File Trans-
fer Protocol (FTP). This feature does not support encrypted connections
(such as SFTP).
FTP file transfer is disabled by default. To enable it:
1. Open the C64U Menu.
2. Select “Network Services & Timezone.”
3. Select “FTP File Service,” then select “Enable.”
4. Exit the menu, and confirm saving the settings when prompted.
To connect an FTP client program to the C64U:
1. On the C64U, open the “Wired Network Setup” or “Wi-Fi Network
Setup,” depending on how the computer is connected.
2. Note the IP address of the active network connection, such as:
“192.168.0.64”
3. On your PC, use the FTP file transfer program to open a connection
to this IP address.
The file transfer client can access every storage device connected to the
C64U.
TELNET REMOTE MENU
You can access the C64U Menu remotely from your PC over your local
network. As with file transfers, this works with an Ethernet connection or a
Wi-Fi connection, and your PC must be on the same local network as the
C64U.
NOTE: Using this feature requires familiarity with a command line terminal
and a Telnet client. Most modern operating systems require that a Telnet
151

client be installed separately. This feature does not support encrypted
connections (such as SSH).
Telnet Remote Menu is disabled by default. To enable it:
1. Open the C64U Menu.
2. Select “Network Services & Timezone.”
3. Select “Telnet Remote Menu Service,” then select “Enable.”
4. Exit the menu, and confirm saving the settings when prompted.
To connect to the Telnet Remote Menu from your PC:
1. On the C64U, open the “Wired Network Setup” or “Wi-Fi Network
Setup,” depending on how the computer is connected.
2. Note the IP address of the active network connection, such as:
“192.168.0.64”
3. On your PC, use your Telnet client to open a connection to this IP
address. If you are using a command line telnet client in a terminal
program, enter the command with the IP address as an argument:
telnet 192.168.0.64
The Telnet client connects to the C64U, and displays a version of the Disk
File Browser menu. You can use this to access any feature available in the
Disk File Browser, including mounting disks and playing SID music files. Use
your PC’s cursor keys and function keys to navigate. (Some PC keyboards
require holding a fn key to press F1 through F8.)
152
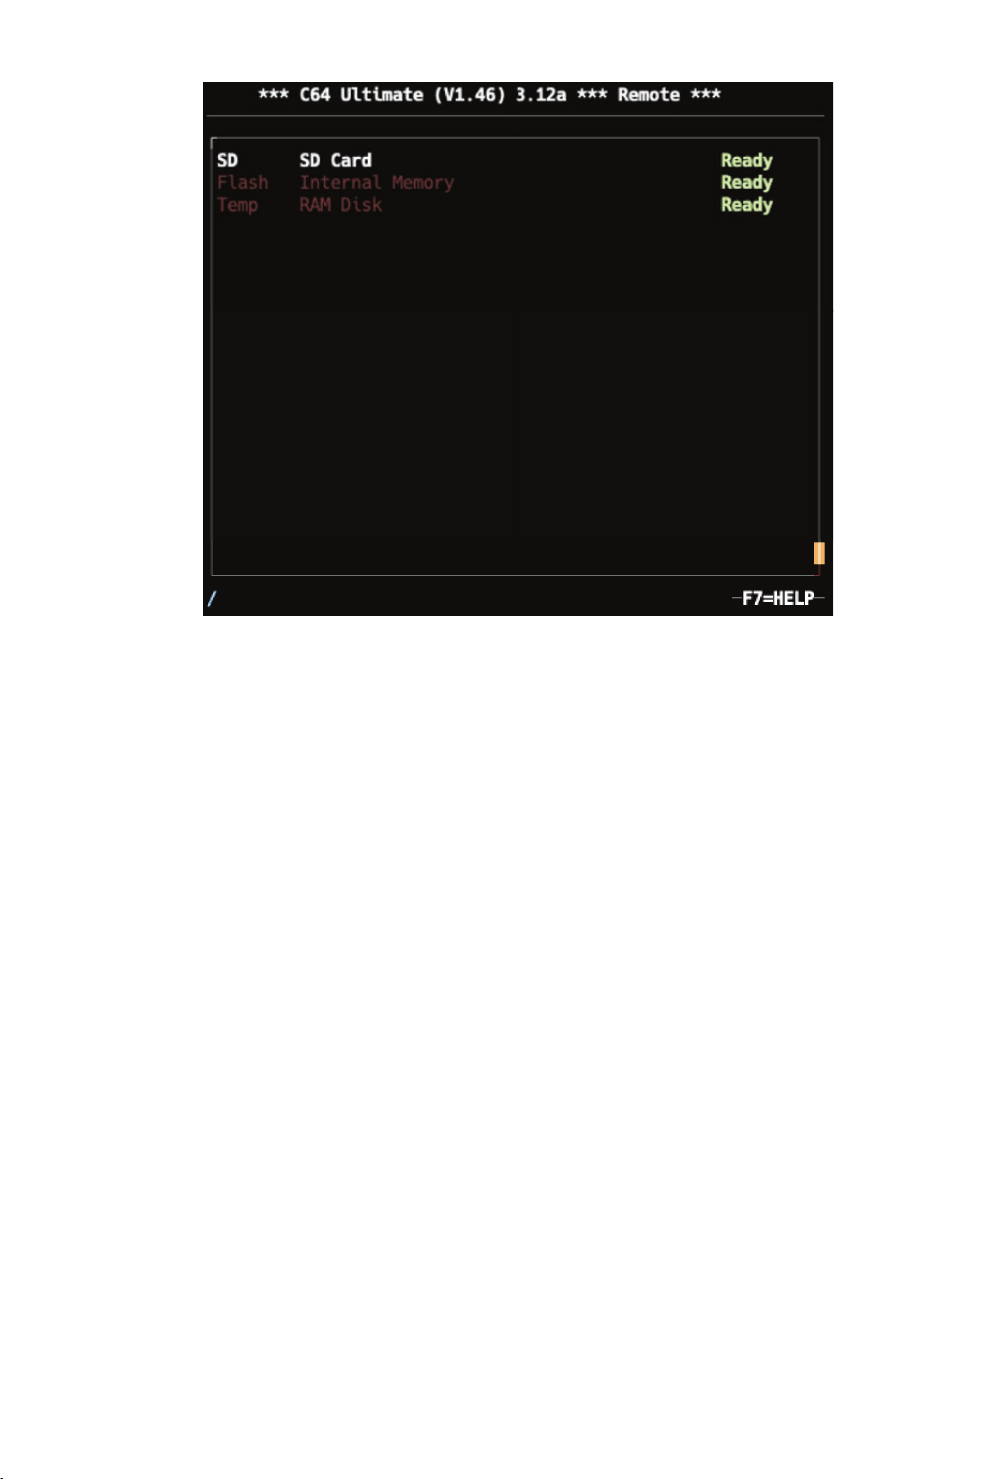
Unlike the menu system on the C64U, the Telnet Remote Menu will not exit.
The “Return to Main Menu” action does nothing: the C64U Menu is not
accessible. You can access advanced settings by pressing F2.
You can reset the C64U remotely using the C64 Machine menu from the
Tool menu: press F1, select “C64 Machine,” then select one of the reset
options. Note that “Power OFF” and “Power Cycle” will terminate the Telnet
connection.
OTHER NETWORK FEATURES
Your Commodore 64 Ultimate can connect to computer bulletin board sys-
tems (BBSes) using the Telnet protocol over the Internet. This replicates
the experience of connecting to BBSes over telephone lines with a mo-
dem, and works with most Commodore 64 BBS client software. With ap-
propriate network configuration, the C64U modem emulation can accept
incoming connections as well, for hosting a Telnet-based BBS. See chapter
12 for a complete introduction to modem emulation and BBSes.
You can use software on your PC to control your Commodore 64 Ultimate
remotely over the network. The Web Remote Control service, available in
the “Network Services & Timezone” menu, features an HTTP-based API for
launching programs, playing music files, manipulating disk images, updat-
153

ing configuration, and more. The C64U is also capable of sending data
streams of video, audio, and CPU traces to a local broadcast address. You
can activate these streams from the Tool menu (press F1 from the C64U
Menu). Reference information for these features is out of scope for this
Guide. See the website for information on writing PC software that can
access these features.
154


156

C64U MODEM EMULATION
The original Commodore 64 connected to other computers over telephone
lines using a device called a modem, typically connected to the User Port.
Commodore 64 enthusiasts would use modems to connect to hobbyist-
run bulletin board systems (BBSes) running on their own Commodore 64s
set up with modems, or to use commercial networking services or dial into
corporate systems. If you have the C64U User Port adapter, you could
connect such a device to your computer today, though there are few BBSes
and services available via telephone line today. (There are a few!)
Today, it is more common for hobbyists to set up Commodore BBSes con-
nected to the Internet, available via a networking protocol known as Telnet.
The Commodore 64 Ultimate has built-in support for emulating a modem
that can connect to BBSes and similar services over the Internet via Tel-
net. This works over Ethernet or Wi-Fi connections. See chapter 11 for
information on setting up your Internet connection.
With the C64U modem emulation, you can use any Commodore 64 BBS
client program, such as UltimateTerm, or Commodore Color Graphics Ma-
nipulation System (CCGMS). The C64U emulates the MOS 6551 ACIA
chip, originally found in the SwiftLink cartridge and other RS-232 car-
tridges.
NOTE: The Telnet protocol does not encrypt data, as many modern Internet
protocols do. Anyone connected to your local network and any interme-
diate network may be able to see your communication with Telnet BBSes,
including your username and password. Always use a unique password
when creating an account at a Telnet BBS, and never send sensitive infor-
mation.
CONFIGURING MODEM EMULATION
The modem emulation is disabled by default. To enable it, you tell the
C64U to connect the ACIA emulation to a memory address and interrupt
interface. To set this up for use with CCGMS emulating a SwiftLink modem:
1. Open the C64U Menu. Select “Modems.”
2. Select “ACIA (6551) Mapping,” then set it to “DE00/NMI.”
3. Ensure “Hardware Mode” is set to “SwiftLink.”
4. Exit the menu, the save settings to flash memory when prompted.
157

NOTE: The address DE00 is a memory address where the ACIA will con-
nect. It is possible to configure other C64U features that may conflict with
this setting, such as setting up SID sound chips, or utility cartridges such as
Retro Replay.
You can now run a program such as CCGMS. Using CCGMS is beyond the
scope of this Guide. The following are example CCGMS settings:
• Baud Rate: 19200
• Duplex: Full
• Modem Type: Swift / Turbo DE
• Protocol: Punter
MODEM COMMANDS
Many vintage modems supported being controlled by commands, known
as the Hayes AT command set. The operator would initiate a phone call by
typing ATDT followed by the phone number, then RETURN .
The modem emulation supports a subset of the Hayes commands, with
small differences for connecting to locations on the Internet instead of
telephone numbers. To connect to a Telnet BBS, type ATDT followed by the
domain name, a colon (:), and a port number.
ATDTAFTERLIFE.DYNU.COM:6400
The complete set of supported commands are as follows.
Command Description
ATI Identify. This command prints the modem identification text
message.
ATZ Reset. This command resets the modem. Any existing con-
nection will be dropped.
ATH Hangup. This command terminates the current connection.
ATD Dial. With this command an outgoing connection is initiated.
The D should be followed by another character, usually T or
P for tone and pulse dialing. However, the Commodore 64
Ultimate ignores this character. The domain name follows.
The port number can be specified after a colon. This is op-
tional; when the port number is not given, the Commodore
64 Ultimate will attempt to connect to port 80. An example
of such command is: ATDTAFTERLIFE.DYNU.COM:6400
158

Command Description
ATA Answer. This command picks up the incoming call. This is a
required command when the option “Do RING sequence” is
set to “Enabled.” If this command is not given in time, the
incoming call times out after a number of rings.
ATO Online. Use this command to go back to an active connec-
tion, if it was interrupted by the +++ sequence.
ATV Verbose mode. Recognized but ignored. Usually, such a
command appears in the initialization string of a terminal
program, such as StrikeTerm. It is followed by a digit.
ATS Register Select. With this command the so-called S-registers
can be read and set. Not all registers are supported, but
some useful registers are S0 (auto answer), S1 (ring counter),
S2 (escape char) and S12 (escape time). See Hayes modem
specification for more details.
+++ Escape sequence. The actual character can be set with reg-
ister S2, with defaults to +. When three of these characters
are sent to the modem, and at least S12 jiffies expire (by
default 50, thus one second), the modem switches to com-
mand mode, but the existing connection remains active. A
command such as ATH can then be given.
INCOMING CONNECTIONS
The C64U modem emulation supports accepting incoming connections
over the Internet. It listens on a numbered TCP port (such as 3000), which
you can set in the modem configuration. This enables you to run a simple
server on your C64U, or a BBS of your own!
Your Internet connection has an IP address accessible to your local net-
work. You can see this address in the Disk File Browser, where you enabled
the connection. You can use a computer on your local network (such as
your PC, or another C64U) to connect to this IP address at the configured
port.
Most local network routers are set up with firewall rules to disallow incom-
ing connections from the wider Internet. (This is a good thing.) To allow
connections to the C64U from the Internet, you will need to configure your
router to assign the C64U a static IP address, and enable external connec-
tions to that IP address and the configured port. Setting this up is outside
the scope of this Guide.
159

When an external node on the network attempts to connect to the C64U,
this is recognized as an incoming connection. Depending on the current
state of the modem, the following will happen:
State Behavior
Offline When DTR=0, it is assumed that the modem software is not
running. This happens when the ACIA is not configured and
thus not enabled. In this case, the connecting party will re-
ceive a message, which is defined by the file specified in
the configuration (default: /Usb0/offline.txt). If this file
does not exist, the C64U replies with the default message,
“Modem Software is currently not running…”
Busy When the modem is currently already in a call, thus the mo-
dem has an active connection, the connecting party will re-
ceive a message, which is defined by the file specified in
the configuration (default: /Usb0/busy.txt). If this file does
not exist, the C64U replies with the default message, “The
modem you are connecting to is currently busy.”
Ready The modem is configured and the software is ready to ac-
cept a call. In this case, the connecting party will receive a
message, which is defined by the file specified in the con-
figuration (default: /Usb0/connect.txt). If this file does not
exist, the C64U replies with the default message “Welcome
to the Modem Emulation Layer of the Commodore 64 Ulti-
mate!” Following this message the RING sequence will begin
(if enabled in the configuration). This means that the termi-
nal program will receive RING messages, which it needs to
answer with ATA to answer.
160


162

C64U PRINTER EMULATION
The original Commodore 64 connected to printers using the IEC serial port
or user port, sometimes via printer interface devices. You can connect such
printers to your Commodore 64 Ultimate in the same way. If you do not
have a compatible printer, the C64U can emulate a vintage Commodore
MPS-1230 printer.
With the virtual printer, the prints that you make using Commodore 64
printing software or BASIC commands appear as PNG image files in the
filesystem, such as on a USB storage device.
You can also configure it to bypass the printer emulation and simply send
the raw data to a file in the filesystem. This is useful for redirecting the
screen terminal output with the CMD command, to save the terminal output
to a text file.
Similar to disk drives, printers that connect to the IEC serial port use unit
numbers. A printer can be assigned unit number 4 or 5.
The MPS-1230 printer is a mid-range black ink ribbon 9 needle matrix
printer, manufactured in the late 1980’s. It is compatible with nearly all
the usual programs that allow editing for the Commodore 64 and 128. It
can interpret four printer instruction sets:
• Commodore MPS-801
• Epson FX-80
• IBM Graphics Printer
• IBM Proprinter
ENABLING THE VIRTUAL PRINTER
The virtual printer is disabled by default. To enable it:
1. Open the C64U Menu. Select “Printers.”
2. Select “IEC printer,” then set it to “Enabled.”
3. Select “Output file,” then set it to a file path that exists on your sys-
tem. The default value /Usb0/printer only works if you have a USB
storage device connected to the innermost USB port. If you’re using
the outermost USB port, change this setting to /Usb1/printer (or a
filename of your choice).
163
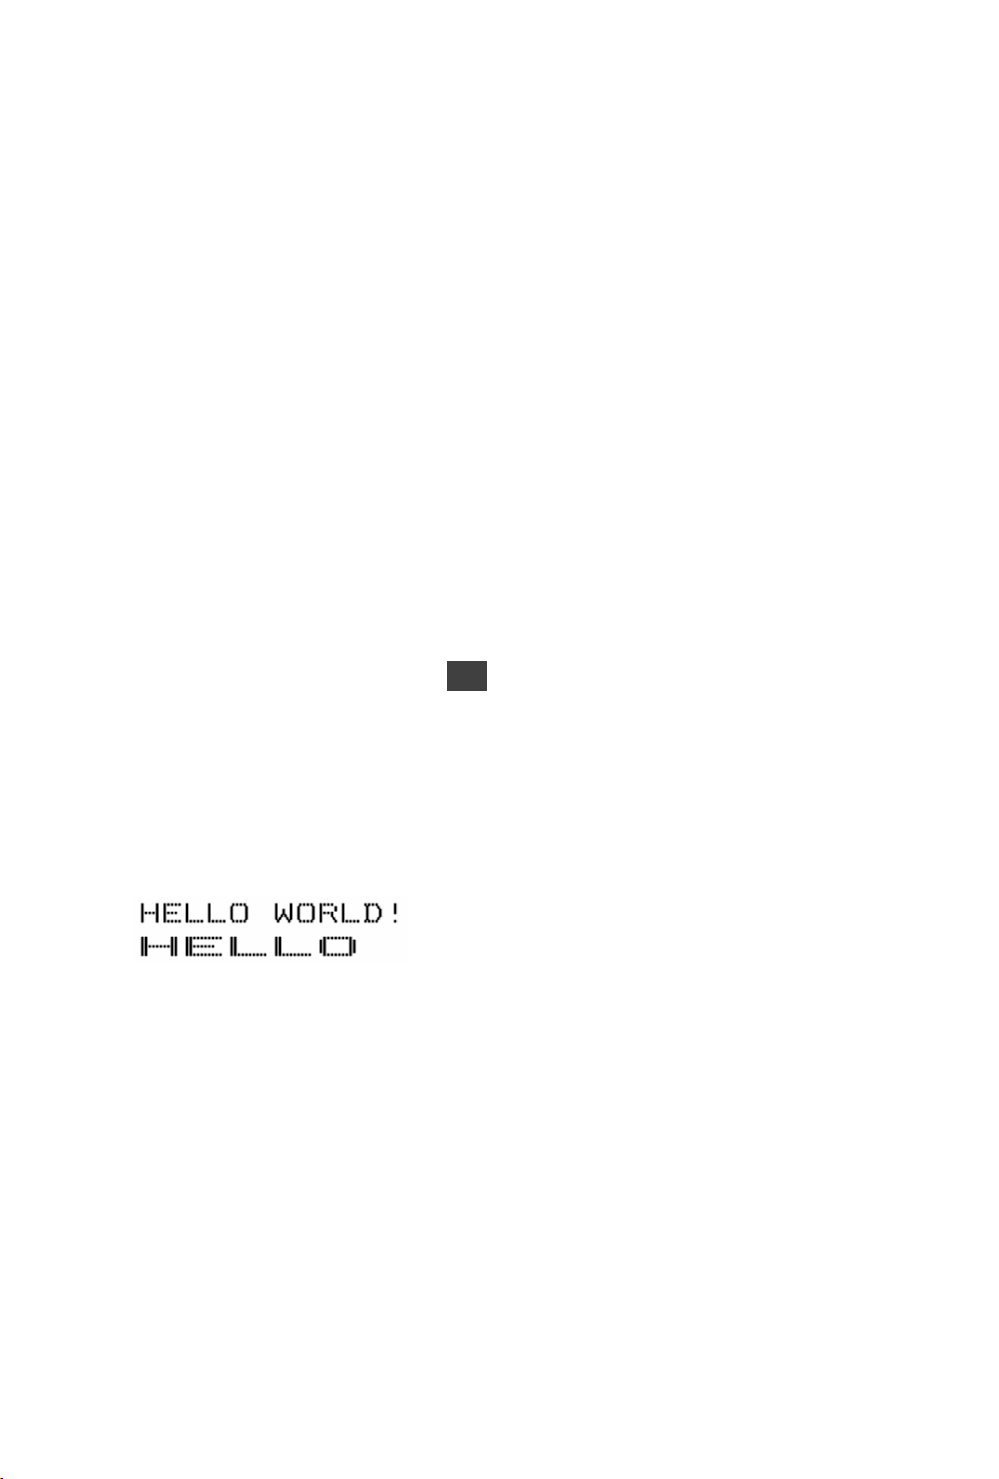
4. Exit the menu, the save settings to flash memory when prompted.
TESTING THE PRINTER
You can test the virtual printer by entering and running the following pro-
gram:
10 OPEN1,4
20 PRINT#1,"HELLO WORLD!"
30 PRINT#1,CHR$(14)"HELLO"
40 CLOSE1
When you RUN the program, it immediately returns to the READY prompt.
Important: At this point, the image file has not yet been saved to storage,
because the printer hasn’t finished printing a page. Flush the page to save
the image:
1. Open the C64U Menu.
2. Open the Tool menu: press F1 .
3. Select “Printer.”
4. Select “Flush/Eject.”
You can now use the Disk File Browser to locate the image file (such as
printer-001.png). You cannot view this file directly on the C64U. To view
it, transfer your USB storage device to your PC.
You can copy, rename, and delete the image file just like any other filesys-
tem file. (See chapter 2.)
Here’s another test you can perform. With the BASIC program still in mem-
ory, enter these commands at the READY prompt:
OPEN 1,4
CMD 1
LIST
PRINT#1
CLOSE 1
164

Flush the page to create the image file, as before. The printed file is the
program listing output by the LIST command.
CONFIGURING THE PRINTER
The following configuration options are available in the “Printers” menu.
Bus ID: 4 or 5 (default is 4)
This will assign device ID 4 or 5 to the printer.
Output file:
(default is /Usb0/printer)
You can select file base name that the virtual printer will use to create
the PNG files. If you choose to generate PNG files they will be named
printer-001.png, printer-002.png, and so on. If you chose the bypass
the emulation and write RAW binary data to disk the file will be named
printer with no extension. When using ASCII filter output, extension .txt
will be appended to file name.
Output type: RAW, ASCII, PNG B&W, PNG COLOR (default is PNG B&W)
PNG files are images created by the printer emulator each time a page
is ejected from the printer. A number and filename extension is added to
the filename to ensure that it doesn’t overwrite previous files when printing
multiple pages. RAW is the data directly sent by the Commodore 64/128
to the IEC port and recorded as binary to a file. ASCII will keep and con-
vert printable characters to ISO8859-1 standard. This output only makes
sense if you are printing text as you will only get garbage with bitmap. In
both RAW and ASCII output mode, if the file already exists, the new data
will be appended to it.
Ink density: Low, Medium, or High (default is Medium)
The density (image contrast) of the print. For PNG images, this is imple-
mented as spacing between printed dots. See table below for examples.
Page top margin: (default is 5)
The number of text lines to use for a top margin of the page.
Page height: (default is 60)
The number of text lines to use for the height of the page.
Emulation: Commodore MPS, Epson FX-80, IBM Graphics Printer, IBM
Proprinter (default is Commodore MPS)
You can select which instruction set the emulator will recognize. Chang-
ing from one emulation to another will reset the printer attributes but the
printer head stays at the same place and the page is not ejected.
165
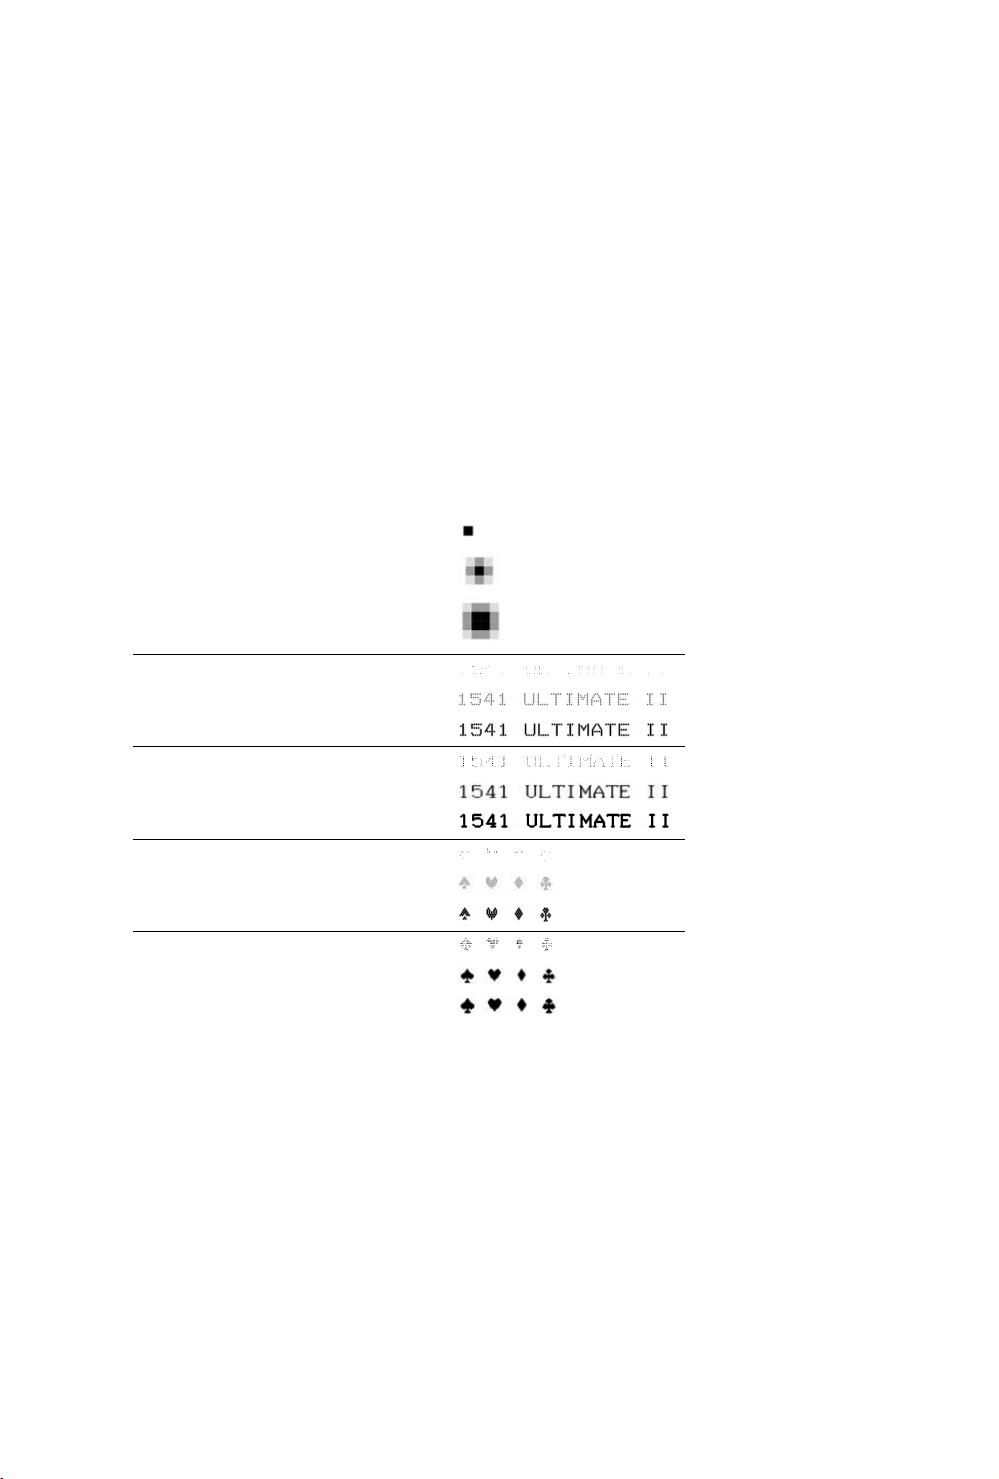
Commodore charset: USA/UK, Denmark, France/Italy, Germany, Spain,
Sweden, Switzerland (default is USA/UK)
Select which charset to use when using Commodore MPS emulation. US-
A/UK has the expected PETSCII graphics characters.
Epson charset: Basic, USA, France, Germany, England, Denmark I, Swe-
den, Italy, Spain, Japan, Norway, Denmark II (default is Basic)
Select which charset to use when using Epson FX-80 emulation.
Printer IBM table 2: International 1, International 2, Israel, Greece, Por-
tugal, Spain (default is International 1)
Select which charset to use for Table2 when using IBM Graphics Printer
or IBM Proprinter emulation. IBM printers can use 2 charsets: Table 1 and
Table2. Table 1 cannot be modified and is the default charset. Table 2 is
the one you chose with this parameter.
Elementary Dot Low
Medium
High
Draft text Low
Medium
High
NLQ text Low
Medium
High
Draft graphic chars Low
Medium
High
NLQ graphic chars Low
Medium
High
166

PRINTER CAPABILITIES
The table below summarizes the printer capabilities depending on which
printer emulation is active:
MPS Epson FX-80 IBM Graphics IBM Proprinter
Draft • • • •
Double strike • • • •
Bold • • • •
Italic (draft only) • • •
NLQ • • • •
Underline • • • •
Double width • • • •
Superscript • • • •
Subscript • • • •
Reverse •
Overline •
Backspace • • •
Reverse page feed •
CR=CR+LF • optional
LF=CR+LF • •
7 dot BIM •
8 dot BIM • • •
9 dot BIM •
HT Program • • •
VT Program • •
60 dpi BIM • (dbl width) • • •
75 dpi BIM •
80 dpi BIM •
90 dpi BIM •
120 dpi BIM • • •
240 dpi BIM • • •
Pica (10cpi) • • • •
Elite (12cpi) • • • •
Micro (15cpi) •
Condensed (17.1cpi) • • • •
Pica Comp (20cpi) •
Elite Comp (24 cpi) •
Micro Comp (30 cpi) •
167

168

APPENDICES

170

APPENDIX A
COMMODORE 64 BASIC
This Guide has given you an introduction to the BASIC language — enough
for you to get a feel for computer programming and some of the vocab-
ulary involved. This appendix gives a complete list of the rules (SYNTAX)
of Commodore 64 BASIC, along with concise descriptions. Please ex-
periment with these commands. Remember, you can’t do any permanent
damage to the computer by just typing in programs, and the best way to
learn computing is by doing.
This appendix is divided into sections according to the different types of
operations in BASIC. These include:
1. Variables and Operators: describes the different type of variables,
legal variable names, and arithmetic and logical operators.
2. Commands: describes the commands used to work with programs,
edit, store, and erase them.
3. Statements: describes the BASIC program statements used in num-
bered lines of programs.
4. Functions: describes the string, numeric, and print functions.
VARIABLES
The Commodore 64 uses three types of variables in BASIC. These are real
numeric, integer numeric, and string (alphanumeric) variables.
Variable names may consist of a single letter, a letter followed by a num-
ber, or two letters.
171

An integer variable is specified by using the percent (%) sign after the
variable name. String variables have the dollar sign ($) after their name.
EXAMPLES
Real Variable Names: A, A5, BZ
Integer Variable Names: A%, A5%, BZ%
String Variable Names: A$, A5$, BZ$
Arrays are lists of variables with the same name, using extra numbers to
specify the element of the array. Arrays are defined using the DIM state-
ment, and may contain floating point, integer, or string variables. The array
variable name is followed by a set of parentheses ( ) enclosing the num-
ber of variables in the list.
A(7), BZ%(11), A$(50), PT(20,20)
NOTE: there are three variable names which are reserved for use by the
Commodore 64, and may not be defined by you. These variables are: ST,
TI, and TI$. ST is a status variable which relates to input/output operations.
The value of ST will change if there is a problem loading a program from
disk or tape.
TI and TI$ are variables which relate to the real-time clock built into the
Commodore 64. The variable TI is updated every 1/60th of a second. It
starts at 0 when the computer is turned on, and is reset only by changing
the value of TI$.
TI$ is a string which is constantly updated by the system. The first two
characters contain the number of hours, the 3rd and 4th characters the
number of minutes, and the 5th and 6th characters are the number of
seconds. This variable can be given any numeric value, and will be updated
from that point.
TI$ = "101530" sets the clock to 10:15 and 30 seconds AM.
This clock is erased when the computer is turned off, and starts at zero
when the system is turned back on.
OPERATORS
The arithmetic operators include the following signs:
172

+ Addition
- Subtraction
* Multiplication
/ Division
↑ Raising to a power (exponentiation)
On a line containing more than one operator, there is a set order in which
operations always occur. If several operations are used together on the
same line, the computer assigns priorities as follows: first, exponentiation;
next, multiplication and division, and last, addition and subtraction.
You can change the order of operations by enclosing within parentheses
the calculation to be performed first. Operations enclosed in parentheses
will take place before other operations.
There are also operations for equalities and inequalities:
= Equal To
< Less Than
> Greater Than
<= Less Than or Equal To
>= Greater Than or Equal To
<> Not Equal To
Finally, there are three logical operators:
AND
OR
NOT
These are used most often to join multiple formulas in IF…THEN statements.
For example:
IF A = B AND C = D THEN 100 (Requires both parts to be true)
IF A = B OR C = D THEN 100 (Allows either part to be true)
COMMANDS
CONT (Continue)
This command is used to restart the execution of a program which has
been stopped by either using the STOP key, a STOP statement, or an END
statement within the program. The program will restart at the exact place
from where it left off.
173

CONT will not work if you have changed or added lines to the program (or
even just moved the cursor), or if the program halted due to an error, or if
you caused an error before trying to restart the program. In these cases
you will get a CAN’T CONTINUE ERROR.
LIST
The LIST command allows you to look at lines of a BASIC program in mem-
ory. You can ask for the entire program to be displayed, or only certain line
numbers.
LIST Shows entire program
LIST 10- Shows only from line 10 until end
LIST 10 Shows only line 10
LIST -10 Shows lines from beginning until 10
LIST 10-20 Shows line from 10 to 20, inclusive
LOAD
This command is used to transfer a program from tape or disk into memory
so the program can be used. If you just type LOAD and hit RETURN, the
first program found on the cassette unit will be placed in memory. The
command may be followed by a program name enclosed within quotes.
The name may then be followed by a comma and a number or numeric
variable, which acts as a device number to indicate where the program is
coming from.
If no device number is given, the Commodore 64 assumes device #1, which
is the cassette unit. The other device commonly used with the LOAD com-
mand is the disk drive, which is device #8.
LOAD Reads in the next program on tape
LOAD "HELLO" Searches tape for program called HELLO, and loads
program, if found
LOAD A$ Looks for program whose name is in the variable A$
LOAD "HELLO",8 Looks for program called HELLO on the disk drive
LOAD "*",8 Looks for first program on disk
LOAD "$",8 Loads the disk directory. Display with LIST.
NEW
This command erases the entire program in memory, and also clears out
any variables that may have been used. Unless the program was SAVEd,
it is lost. BE CAREFUL WHEN YOU USE THIS COMMAND.
174

The NEW command can also be used as a BASIC program statement. When
the program reaches this line, the program is erased. This is useful if you
want to leave everything neat when the program is done.
RUN
This command causes execution of a program, once the program is loaded
into memory. If there is no line number following RUN, the computer will
start with the lowest line number. If a line number is designated, the pro-
gram will start executing from the specified line.
RUN Starts program at lowest line number.
RUN 100 Starts execution at line 100.
RUN X UNDEFINED STATEMENT ERROR. You must always
specify an actual line number, not a variable repre-
sentation.
SAVE
This command will store the program currently in memory on cassette or
disk. If you just type SAVE and RETURN, the program will be SAVEd on cas-
sette. The computer has no way of knowing if there is a program already
on that tape, so be careful with your tapes or you may erase a valuable
program.
If you type SAVE followed by a name in quotes or a string variable, the
computer will give the program that name, so it can be more easily located
and retrieved in the future. The name may also be followed by a device
number.
After the device number, there can be a comma and a second number,
either 0 or 1. If the second number is 1, the Commodore 64 will put an
END-OF-TAPE marker after your program. This signals the computer not
to look any further on the tape if you were to give an additional LOAD
command. If you try to LOAD a program and the computer finds one of
these markers, you will get a FILE NOT FOUND ERROR.
SAVE Stores program to tape without name
SAVE "HELLO" Stores on tape with name HELLO
SAVE A$ Stores on tape with name in A$
SAVE "HELLO",8 Stores on disk with name HELLO
SAVE "HELLO",I,1 Stores on tape with name HELLO and follows program
with END-OF-TAPE marker
VERIFY
175

This command causes the computer to check the program on disk or tape
against the one in memory. This is proof that the program is actually SAVEd,
in case the tape or disk is bad, or something went wrong during the SAVE.
VERIFY without anything after the command causes the Commodore 64 to
check the next program on tape, regardless of name, against the program
in memory.
VERIFY followed by a program name, or a string variable, will search for
that program and then check. Device numbers can also be included with
the VERIFY command.
VERIFY Checks the next program on tape.
VERIFY "HELLO" Searches for HELLO, checks against memory.
VERIFY "HELLO",8 Searches for HELLO on disk, then checks.
STATEMENTS
CLOSE
This command completes and closes any files used by OPEN statements.
The number following CLOSE is the file number to be closed.
CLOSE 2 Only file #2 is closed
CLR
This command will erase any variables in memory, but leaves the program
itself intact. This command is automatically executed when a RUN com-
mand is given.
CMD
CMD sends the output which normally would go to the screen (i.e. PRINT
statements, LISTs, but not POKEs onto the screen) to another device in-
stead. This could be a printer, or a data file on tape or disk. This device
or file must be OPENed first. The CMD command must be followed by a
number or numeric variable referring to the file.
OPEN 1,4 OPENS device #4, which is the printer.
CMD 1 All normal output now goes to printer.
LIST The program listing now goes to the printer, not the
screen.
To send output back to the screen, CLOSE the file with CLOSE 1.
DATA
176

This statement is followed by a list of items to be used by READ statements.
Items may be numeric values or text strings, and items are separated by
commas. String items need not be inside quote marks unless they contain
space, colon, or comma. If two commas have nothing between them, the
value will be READ as a zero for a number, or an empty string.
DATA 12, 14.5, "HELLO, MOM", 3.14, PART1
DEF FN
This command allows you to define a complex calculation as a function
with a short name. In the case of a long formula that is used many times
within the program, this can save time and space.
The function name will be FN and any legal variable name (1 or 2 char-
acters long). First you must define the function using the statement DEF
followed by the function name. Following the name is a set of parenthe-
ses enclosing a numeric variable. Then follows the actual formula that you
want to define, with the variable in the proper spot. You can then “call”
the formula, substituting any number for the variable.
10 DEF FNA (X) = 12*(34.75 - X/.3)
20 PRINT FNA(7) T
7 is inserted where
X is in the formula
For this example, the result would be 137.
DIM
When you use more than 11 elements of an array, you must execute a
DIM statement for the array. Keep in mind that the whole array takes up
room in memory, so don’t create an array much larger than you’ll need. To
figure the number of variables created with DIM, multiply the total number
of elements in each dimension of the array.
10 DIM A$(40), B7(15), CC%(4,4,4)
↑
41 ELEMENTS
↑
16 ELEMENTS
↑
125 ELEMENTS
You can dimension more than one array in a DIM statement. However, be
careful not to dimension an array more than once.
177

END
When a program encounters an END statement, the program halts, as if it
ran out of lines. You may use CONT to restart the program.
FOR…TO…STEP
This statement works with the NEXT statement to repeat a section of the
program a set number of times. The format is:
FOR <var name>=<start of count> TO <end of count> STEP <count by>
The loop variable will be added to or subtracted from during the program.
Without any STEP specified, STEP is assumed to be 1. The start count and
end count are the limits to the value of the loop variable.
10 FOR L = 1 TO 10 STEP .1
20 PRINT L
30 NEXT L
The end of the loop value may be followed by the word STEP and another
number or variable. In this case, the value following STEP is added each
time instead of 1. This allows you to count backwards, or by fractions.
GET
The GET statement allows you to get data from the keyboard, one charac-
ter at a time. When GET is executed, the character that is typed is assigned
to the variable. If no character is typed, then a null (empty) character is
assigned.
GET is followed by a variable name, usually a string variable. If a numeric
variable was used and a nonnumeric key depressed, the program would
halt with an error message. The GET statement may be placed into a loop,
checking for any empty result. This loop will continue until a key is hit.
10 GET A$ : IF A$ ="" THEN 10
GET#
The GET# statement is used with a previously OPENed device or file, to
input one character at a time from that device or file.
GET #1,A$
178

This would input one character from a data file.
GOSUB
This statement is similar to GOTO, except the computer remembers which
program line it lost executed before the GOSUB. When a line with a RE-
TURN statement is encountered, the program jumps back to the statement
immediately following the GOSUB. This is useful if there is a routine in your
program that occurs in several parts of the program. Instead of typing the
routine over and over, execute GOSUBs each time the routine is needed.
20 GOSUB 800
GOTO OR GO TO
When a statement with the GOTO command is reached, the next line to be
executed will be the one with the line number following the word GOTO.
IF…THEN
IF…THEN lets the computer analyze a situation and take two possible
courses of action, depending on the outcome. If the expression is true,
the statement following THEN is executed. This may be any BASIC state-
ment.
If the expression is false, the program goes directly to the next line. The
expression being evaluated may be a variable or formula, in which case it
is considered true if nonzero, and false if zero. In most cases, there is an
expression involving relational operators (=, <, >, <=, >=, <>, AND, OR, NOT).
10 IF X > 10 THEN END
INPUT
The INPUT statement allows the program to get data from the user, assign-
ing that data to a variable. The program will stop, print a question mark (?)
on the screen, and wait for the user to type in the answer and hit RETURN.
INPUT is followed by a variable name, or a list of variable names, separated
by commas. A message may be placed within quote marks, before the list
of variable names to be INPUT. If more than one variable is to be INPUT,
they must be separated by commas when typed.
10 INPUT "PLEASE ENTER YOUR FIRST NAME ";A$
20 PRINT "ENTER YOUR CODE NUMBER"; : INPUT B
179

INPUT#
INPUT# is similar to INPUT, but takes data from a previously OPENed file or
device.
10 INPUT#1, A
LET
LET is hardly ever used in programs, since it is optional, but the statement is
the heart of all BASIC programs. The variable name which is to be assigned
the result of a calculation is on the left side of the equal sign, and the
formula on the right.
10 LET A = 5
20 LET D$ = "HELLO"
NEXT
NEXT is always used in conjunction with the FOR statement. When the
program reaches a NEXT statement, it checks the FOR statement to see if
the limit of the loop has been reached. If the loop is not finished, the loop
variable is increased by the specified STEP value. If the loop is finished,
execution proceeds with the statement following NEXT.
NEXT may be followed by a variable name, or list of variable names, sepa-
rated by commas. If there are no names listed, the last loop started is the
one being completed. If variables are given, they are completed in order
from left to right.
10 FOR X = 1 TO 100: NEXT
ON
This command turns the GOTO and GOSUB commands into special ver-
sions of the IF statement. ON is followed by a formula, which is evaluated.
If the result of the calculation is one, the first line on the list is executed;
if the result is 2, the second line is executed, and so on. If the result is 0,
negative, or larger than the list of numbers, the next line executed will be
the statement following the ON statement.
10 INPUT X
20 ON X GOTO 10,20,30,40,50
180

OPEN
The OPEN statement allows the Commodore 64 to access devices such
as the cassette recorder and disk for data, a printer, or even the screen.
OPEN is followed by a number (0-255), to which all following statements
will refer. There is usually a second number after the first, which is the
device number.
The device numbers are:
0 Screen
1 Cassette
4 Printer
8 Disk
Following the device number may be a third number, separated again by
a comma, which is the secondary address. In the case of the cassette, this
is 0 for read, 1 for write, and 2 for write with end-of-tape marker.
In the case of the disk, the number refers to the buffer, or channel, num-
ber. In the printer, the secondary address controls features like expanded
printing. See the Commodore 64 Programmer’s Reference Guide for more
details.
10 OPEN 1,0 OPENs the SCREEN as a device.
20 OPEN 2,1,0,"D" OPENs the cassette for reading, file to be searched
for is D.
30 OPEN 3,4 OPENs the printer.
40 OPEN 4,8,15 OPENs the data channel on the disk.
Also see: CLOSE, CMD, GET#, INPUT#, and PRINT#, system variable ST, and
Appendix ??.
POKE
POKE is always followed by two numbers, or formulas. The first location
is a memory location; the second number is a decimal value from 0 to
255, which will be placed in the memory location, replacing any previously
stored value.
10 POKE 53281,0
20 S=4096 * 13
30 POKE S + 29,8
PRINT
181

The PRINT statement is the first one most people learn to use, but there are
a number of variations to be aware of. PRINT can be followed by:
Text String with quotes
Variable names
Functions
Punctuation marks
Punctuation marks are used to help format the data on the screen. The
comma divides the screen into four columns, while the semicolon sup-
presses all spacing. Either mark can be the last symbol on a line. This
results in the next thing PRINTed acting as if it were a continuation of the
some PRINT statement.
10 PRINT "HELLO"
20 PRINT "HELLO",A$
30 PRINT A+B
40 PRINT J;
60 PRINT A,B,C,D
Also see: POS, SPC and TAB functions.
PRINT#
There are a few differences between this statement and PRINT. PRINT# is
followed by a number, which refers to the device or data file previously
OPENed. This number is followed by a comma and a list to be printed. The
comma and semicolon have the same effect as they do in PRINT. Please
note that some devices may not work with TAB and SPC.
100 PRINT#1,"DATA VALUES"; A%, B1, C$
READ
READ is used to assign information from DATA statements to variables, so
the information may be put to use. Care must be taken to avoid READing
strings where READ is expecting a number, which will give a TYPE MIS-
MATCH ERROR.
REM (Remark)
REMark is a note to whomever is reading a LIST of the program. It may ex-
plain a section of the program, or give additional instructions. REM state-
ments in no way affect the operation of the program, except to add to its
length. REM may be followed by any text.
182

RESTORE
When executed in a program, the pointer to which an item in a DATA state-
ment will be READ next is reset to the first item in the list. This gives you
the ability to re-READ the information. RESTORE stands by itself on a line.
RETURN
This statement is always used in conjunction with GOSUB. When the pro-
gram encounters a RETURN, it will go to the statement immediately follow-
ing the GOSUB command. If no GOSUB was previously issued, a RETURN
WITHOUT GOSUB ERROR will occur.
STOP
This statement will halt program execution. The message, BREAK IN xxx will
be displayed, where xxx is the line number containing STOP. The program
may be restarted by using the CONT command. STOP is normally used in
debugging a program.
SYS
SYS is followed by a decimal number or numeric value in the range 0-
65535. The program will then begin executing the machine language
program starting at that memory location. This is similar to the USR func-
tion, but does not allow parameter passing.
WAIT
WAIT is used to halt the program until the contents of a memory location
changes in a specific way. WAIT is followed by a memory location (X) and
up to two variables. The format is:
WAIT X,Y,Z
The contents of the memory location are first exclusive-ORed with the third
number, if present, and then logically ANDed with the second number. If
the result is zero, the program goes back to that memory location and
checks again. When the result is nonzero, the program continues with the
next statement.
NUMERIC FUNCTIONS
ABS(X) (absolute value)
183

ABS returns the absolute value of the number, without its sign (+ or -). The
answer is always positive.
ATN(X) (arctangent)
Returns the angle, measured in radians, whose tangent is X.
COS(X) (cosine)
Returns the value of the cosine of X, where X is an angle measured in
radians.
EXP(X)
Returns the value of the mathematical constant e (2.71828183) raised to
the power of X.
FNxx(X)
Returns the value of the user-defined function xx created in a DEF FNxx(X)
statement.
INT(X)
Returns the truncated value of X, that is, with all the decimal places to the
right of the decimal point removed. The result will always be less than, or
equal to, X. Thus, any negative numbers with decimal places will become
the integer less than their current value.
LOG(X) (logarithm)
Will return the natural log of X. The natural log to the base e (see EXP(X)).
To convert to log base 10, simply divide by LOG(10).
PEEK(X)
Used to find out contents of memory location X, in the range 0-65535,
giving a result from 0-255. PEEK is often used in conjunction with the
POKE statement.
RND(X) (random number)
RND(X) returns a random number in the range 0-1. The first random num-
ber should be generated by the formula RND(-TI) to start things off differ-
ently every time. After this, X should be a 1 or any positive number. If X is
zero, the result will be the same random number as the last one.
A negative value for X will reseed the generator. The use of the same neg-
ative number for X will result in the same sequence of “random” numbers.
The formula for generating a number between X and Y is:
184

N = RND(1)*(Y-X)+X
where:
Y is the upper limit
X is the lower range of numbers desired.
SGN(X) (sign)
This function returns the sign (positive, negative, or zero) of X. The result
will be + 1 if positive, 0 if zero, and -I if negative.
SIN(X) (sine)
SIN(X) is the trigonometric sine function. The result will be the sine of X,
where X is an angle in radians.
SQR(X) (square root)
This function will return the square root of X, where X is a positive number
or 0. If X is negative, an ILLEGAL QUANTITY ERROR results.
TAN(X) (tangent)
The result will be the tangent of X, where X is an angle in radians.
USR(X)
When this function is used, the program jumps to a machine language pro-
gram whose starting point is contained in memory locations. The parame-
ter X is passed to the machine language program, which will return another
value back to the BASIC program. Refer to the Commodore 64 Program-
mer’s Reference Guide for more details on this function and machine lan-
guage programming.
STRING FUNCTIONS
ASC(X$)
This function will return the ASCII code of the first character of X$.
CHR$(X)
This is the opposite of ASC, and returns a string character whose ASCII
code is X.
LEFT$(X$,X)
Returns a string containing the leftmost X characters of $X.
185

LEN(X$)
Returned will be the number of characters (including spaces and other
symbols) in the string X$.
MID$(X$,S,X)
This will return a string containing X characters starting from the Sth char-
acter in X$.
RIGHT$(X$,X)
Returns the rightmost X characters in X$.
STR$(X)
This will return a string which is identical to the PRINTed version of X.
VAL(X$)
This function converts X$ into a number, and is essentially the inverse op-
eration from STR$. The string is examined from the leftmost character to
the right, for as many characters as are in recognizable number format.
10 X = VAL("123.456") X = 123.456
10 X = VAL("12A13B") X = 12
10 X = VAL("RIU017") X = 0
10 X = VAL("-1.23.45.67") X = -1.23
OTHER FUNCTIONS
FRE(X)
This function returns the number of unused bytes available in memory, re-
gardless of the value of X. Note that FRE(X) will read out in negative num-
bers if the number of unused bytes is over 32K.
POS(X)
This function returns the number of the column (0-39) at which the next
PRINT statement will begin on the screen. X may have any value and is not
used.
SPC(X)
This is used in a PRINT statement to skip X spaces forward.
TAB(X)
186

TAB is also used in a PRINT statement; the next item to be PRINTed will be
in column X.
187

188
APPENDIX B
ABBREVIATIONS FOR BASIC
KEYWORDS
As a time-saver when typing in programs and commands, Commodore 64
BASIC allows the user to abbreviate most keywords. The abbreviation for
PRINT is a question mark. The abbreviations for other words are made by
typing the first one or two letters of the word, followed by the SHIFTed
next letter of the word. If the abbreviations are used in a program line, the
keyword will LIST in the full form.
Command Abbreviation
Looks like
this
on screen
Command Abbreviation
Looks like
this
on screen
ABS A SHIFT B A
Ă
GOTO G SHIFT O G
ď
AND A SHIFT N A
Ď
IF NONE IF
ASC A SHIFT S A
ē
INPUT NONE INPUT
ATN A SHIFT T A
Ĕ
INPUT# I SHIFT N G
Ď
CHR$ C SHIFT H A
Ĉ
INT NONE INT
CLOSE CL SHIFT O CL
ď
LEFT$ LE SHIFT F LE
Ć
CLR C SHIFT L C
Č
LEN NONE LEN
CMD C SHIFT M C
č
LET L SHIFT E L
ą
CONT C SHIFT O C
ď
LIST L SHIFT I L
ĉ
COS NONE COS LOAD L SHIFT O L
ď
DATA D SHIFT A D
ā
LOG NONE LOG
DEF D SHIFT E D
ą
MID$ M SHIFT I M
ĉ
189
Command Abbreviation
Looks like
this
on screen
Command Abbreviation
Looks like
this
on screen
DIM D
SHIFT
I D
ĉ
NEW NONE NEW
END E
SHIFT
N E
Ď
NEXT N
SHIFT
E N
ą
EXP E
SHIFT
X E
Ę
NOT N
SHIFT
O N
ď
FN NONE FN ON NONE ON
FOR F
SHIFT
O F
ď
OPEN O
SHIFT
P O
Đ
FRE
F SHIFT
R
F
Ē
OR
NONE
OR
GET G SHIFT E G
ą
PEEK P SHIFT E P
ą
GET# NONE GET# POKE P SHIFT O P
ď
GOSUB GO SHIFT S GO
ē
POS NONE POS
PRINT ? ? STATUS ST ST
PRINT# P SHIFT R P
Ē
STEP ST SHIFT E ST
ą
READ R SHIFT E R
ą
STOP S SHIFT T S
Ĕ
REM NONE REM STR$ ST SHIFT R ST
Ē
RESTORE RE SHIFT S RE
ē
SYS S SHIFT Y S
ę
RETURN RE SHIFT T RE
Ĕ
TAB T SHIFT A T
ā
RIGHT$ R SHIFT I R
Ē
TAN NONE TAN
RND R SHIFT N R
Ď
THEN T SHIFT H T
Ĉ
RUN R SHIFT U A
ĕ
TIME TI TI
SAVE S SHIFT A S
ā
TIME$ TI$ TI$
SGN S SHIFT G S
ć
USR U SHIFT S U
ē
SIN S SHIFT I S
ĉ
VAL V SHIFT A V
ā
SPC S SHIFT P S
Đ
VERIFY V SHIFT E V
ą
SQR S SHIFT Q S
đ
WAIT W SHIFT A W
ā
190

APPENDIX C
SCREEN DISPLAY CODES
The following chart lists all of the characters built into the Commodore
64 character sets. It shows which numbers should be POKEd into screen
memory (locations 1024 – 2023) to get a desired character. Also shown
is which character corresponds to a number PEEKed from the screen.
Two character sets are available, but only one set at a time. This means
that you cannot have characters from one set on the screen at the same
time you have characters from the other set displayed. The sets are
switched by holding down the
SHIFT
and ǣ keys simultaneously.
From BASIC, POKE 53272,21 will switch to upper case mode and POKE
53272,23 switches to lower case.
Any number on the chart may also be displayed in REVERSE. The reverse
character code may be obtained by adding 128 to the values shown.
If you want to display a solid circle at location 1504, POKE the code for
the circle (81) into location 1504: POKE 1504,81.
There is a corresponding memory location to control the color of each
character displayed on the screen (locations 55296-56295). To change
the color of the circle to yellow (color code 7) you would POKE the cor-
responding memory location (55776) with the character color: POKE
55776,7.
Refer to Appendix E for the complete screen and color memory maps,
along with color codes.
191
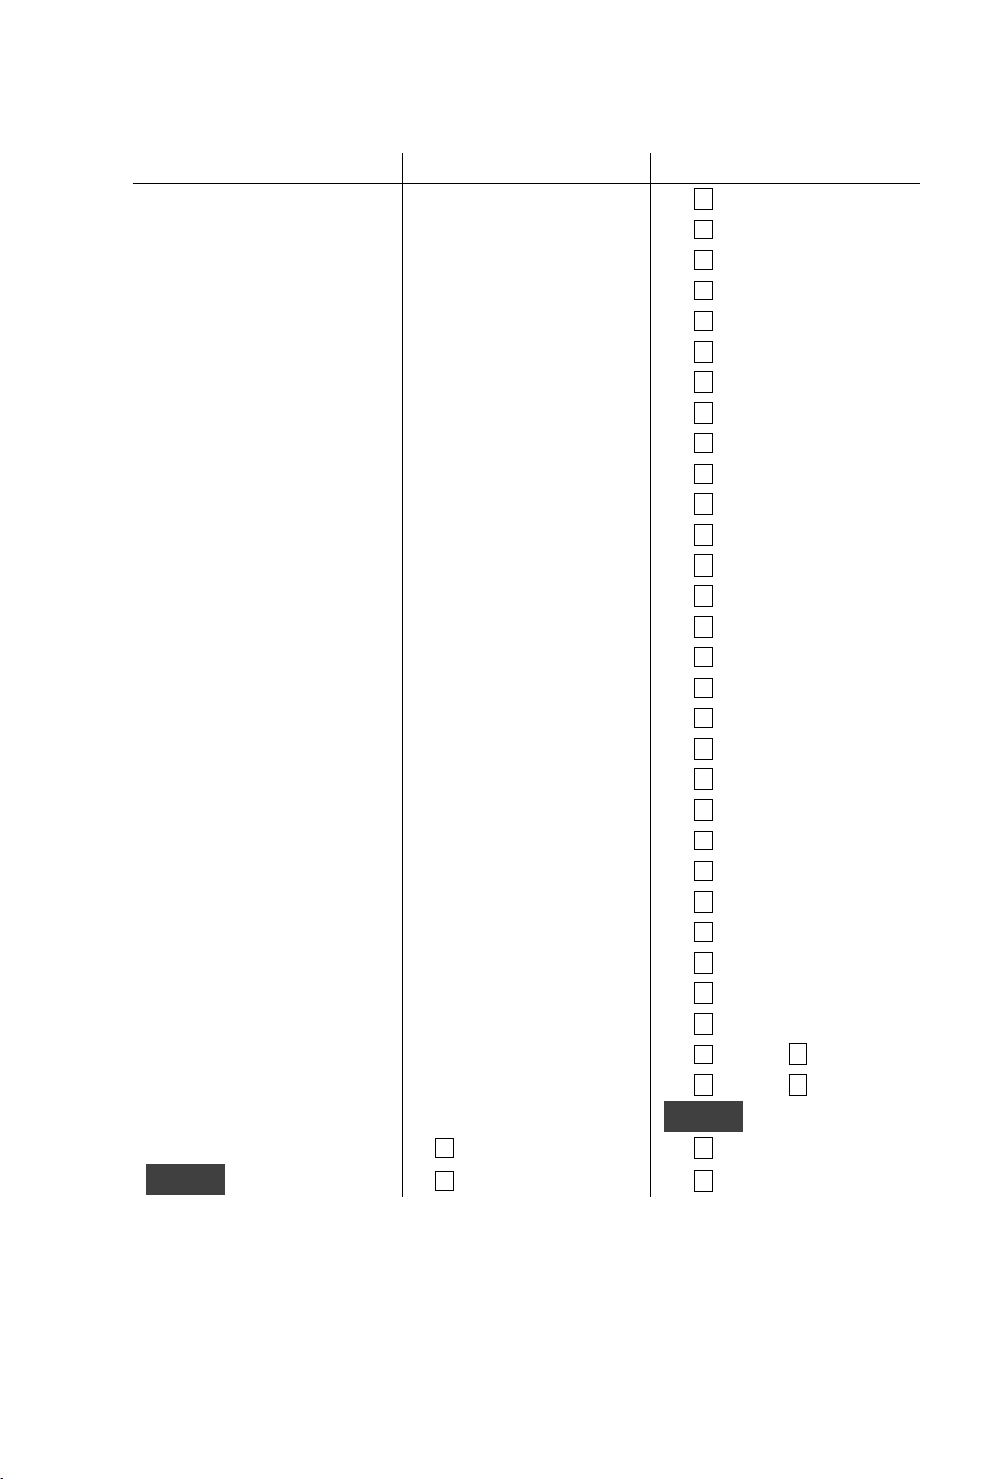
SCREEN CODES
SET 1 SET 2 POKE SET 1 SET 2 POKE SET 1 SET 2 POKE
@ 0 ! 33
Ă
B 66
A a 1 ” 34
ă
C 67
B b 2 # 35
Ą
D 68
C c 3 $ 36
ą
E 69
D d 4 % 37
Ć
F 70
E e 5 & 38
ć
G 71
F f 6 ’ 39
Ĉ
H 72
G g 7 ( 40
ĉ
I 73
H h 8 ) 41
Ċ
J 74
I i 9 *
42
ċ
K 75
J j 10 + 43
Č
L 76
K k 11 , 44
č
M 77
L l 12 - 45
Ď
N 78
M m 13 . 46
ď
O 79
N n 14 / 47
Đ
P 80
O o 15 0 48
đ
Q 81
P p 16 1 49
Ē
R 82
Q q 17 2 50
ē
S 83
R r 18 3 51
Ĕ
T 84
S s 19 4 52
ĕ
U 85
T t 20 5 53
Ė
V 86
U u 21 6 54
ė
W 87
V v 22 7 55
Ę
X 88
W w 23 8 56
ę
Y 89
X x 24 9 57
Ě
Z 90
Y y 25 : 58
ě
91
Z z 26 ; 59
Ĝ
92
[ 27 < 60
ĝ
93
£ 28 = 61
Ğ
dž
94
] 29 > 62
ğ
Ǡ
95
↑ 30 ? 63 SPACE 96
← 31
Ā
64
ġ
97
SPACE 32
ā
A 65
Ģ
98
192

SET 1 SET 2 POKE SET 1 SET 2 POKE SET 1 SET 2 POKE
ģ
99
ĭ
109
ķ
119
Ĥ
100
Į
110
ĸ
120
ĥ
101
į
111
Ĺ
121
Ħ
102
İ
112
ĺ
Ǣ
122
ħ
103
ı
113
Ļ
123
Ĩ
104
IJ
114
ļ
124
ĩ
ǡ
105
ij
115
Ľ
125
Ī
106
Ĵ
116
ľ
126
ī
107
ĵ
117
Ŀ
127
Ĭ
108
Ķ
118
Codes from 128 – 255 are reversed images of codes 0 – 127.
193

194

APPENDIX D
ASCII AND CHR$ CODES
This appendix shows you what characters will appear if you PRINT CHR$(X),
for all possible values of X. It will also show the values obtained by typing
PRINT ASC(”x”), where x is any character you can type. This is useful in eval-
uating the character received in a GET statement, converting upper/lower
case, and printing character based commands (like switch to upper/lower
case) that could not be enclosed in quotes.
195
PRINT CHR$ PRINT CHR$ PRINT CHR$ PRINT CHR$
0 22 , 44 B 66
1 23 - 45 C 67
2 24 . 46 D 68
3 25 / 47 E 69
4 26 0 48 F 70
WHT 5 27 1 49 G 71
6 RED 28 2 50 h 72
7 CRSR→ 29 3 51 I 73
DISABLES SHIFT ǣ 8 GRN 30 4 52 J 74
ENABLES SHIFT ǣ 9
BLU
31 5 53 K 75
10 SPACE 32 6 54 L 76
11 ! 33 7 55 M 77
12 ” 34 8 56 N 78
RETURN 13 # 35 9 57 O 79
SWITCH TO LOWER CASE 14 $ 36 : 58 P 80
15 % 37 ; 59 Q 81
16 & 38 < 60 R 82
CRSR↓ 17 ’ 39 = 61 S 83
RVS ON 18 ( 40 > 62 T 84
CLR HOME 19 ) 41 ? 63 U 85
INST DEL
20 * 42 @ 64 V 86
21 + 43 A 65 W 87
196
PRINT CHR$ PRINT CHR$ PRINT CHR$ PRINT CHR$
X 88
Ē
114 f8 140
Ħ
166
Y 89
ē
115 SHIFT RETURN 141
ħ
167
Z 90
Ĕ
116 SWITCH TO UPPER CASE 142
Ĩ
168
[ 91
ĕ
117 143
ĩ
169
£ 92
Ė
118
BLK
144
Ī
170
] 93
ė
119 CRSR↑ 145
ī
171
↑ 94
Ę
120 RVS OFF 146
Ĭ
172
← 95
ę
121 CLR HOME 147
ĭ
173
Ā
96
Ě
122 INST DEL 148
Į
174
ā
97
ě
123 Brown 149
į
175
Ă
98
Ĝ
124 Lt Red 150
İ
176
ă
99
ĝ
125 Gray 1 151
ı
177
Ą
100
Ğ
126 Gray 2 152
IJ
178
ą
101
ğ
127 Lt Green 153
ij
179
Ć
102 128 Lt Blue 154
Ĵ
180
ć
103 Orange 129 Gray 3 155
ĵ
181
Ĉ
104 130 PUR 156
Ķ
182
ĉ
105 131
←CRSR
157
ķ
183
Ċ
106 132 YEL 158
ĸ
184
ċ
107 f1 133
CYN
159
Ĺ
185
Č
108 f3 134 SPACE 160
ĺ
186
č
109 f5 135
ġ
161
Ļ
187
Ď
110 f7 136
Ģ
162
ļ
188
ď
111 f2 137
ģ
163
Ľ
189
Đ
112 f4 138
Ĥ
164
ľ
190
đ
113 f6 139
ĥ
165
Ŀ
191
CODES 192 – 223 SAME AS 96 – 127
CODES 224 – 254 SAME AS 160 – 190
CODE 255 SAME AS 126
197

198

APPENDIX E
SCREEN AND COLOR MEMORY
MAPS
The following charts list which memory locations control placing charac-
ters on the screen, and the locations used to change individual character
colors, as well as showing character color codes.
SCREEN MEMORY MAP
1024 →
1984 →
0
10
20
24
0 10 20
30 39
↓
1063
↑
2023
199

The actual values to POKE into a color memory location to change a char-
acter’s color are:
0 BLACK 8 ORANGE
1 WHITE 9 BROWN
2 RED 10 Light RED
3 CYAN 11 GRAY 1
4 PURPLE 12 GRAY 2
5 GREEN 13 Light GREEN
6 BLUE 14 Light BLUE
7 YELLOW 15 GRAY 3
For example, to change the color of a character located at the upper
left-hand corner of the screen to red, type: POKE 55296,2.
COLOR MEMORY MAP
55296→
56256→
0
10
20
24
0 10 20
30 39
↓
55335
↑
56295
200

APPENDIX F
DERIVING MATHEMATICAL
FUNCTIONS
Functions that are not intrinsic to Commodore 64 BASIC may be calculated
as follows:
FUNCTION BASIC EQUIVALENT
Secant SEC(X)=1/COS(X)
Cosecant CSC(X)=1/SIN(X)
Cotangent COT(X)=1/TAN(X)
Inverse Sine ASIN(X)=ATN(X/SQR(-X*X+1))
Inverse Cosine ACOS(X)=-ATN(X/SQR(-X*X+1))+π/2
Inverse Secant ASEC(X)=ATN(SQR(X*X-1))+(SGN(X)-1)*π/2
Inverse Cosecant ASEC(X)=ATN(1/SQR(X*X-1))+(SGN(X)-1)*
π
/2
Inverse Cotangent AOT(X)=ATN(-X)+π/2
Hyperbolic Sine SINH(X)=(EXP(X)-EXP(-X))/2
Hyperbolic Cosine COSH(X)=(EXP(X)+EXP(-X))/2
Hyperbolic Tangent TANH(X)=(EXP(X)-EXP(-X))/(EXP(X)+EXP(-X))
Hyperbolic Secant SECH(X)=2/(EXP(X)+EXP(-X))
Hyperbolic Cosecant CSCH(X)=2/(EXP(X)-EXP(-X))
Hyperbolic Cotangent COTH(X)=EXP(-X)/(EXP(X)-EXP(-X))*2+1
Inverse Hyperbolic Sine ASINH(X)=LOG(X+SQR(X*X+1))
Inverse Hyperbolic Cosine ACOSH(X)=LOG(X+SQR(X*X-1))
Inverse Hyperbolic Tanget ATANH(X)=LOG((1+X)/(1-X))/2
Inverse Hyperbolic Secant ASECH(X)=LOG((1+SQR(1-X*X))/X)
Inverse Hyperbolic Cosecnat ACSCH(X)=LOG((SGN(X)+SQR(X*X+1))/X)
Inverse Hyperbolic Cotangent ACOTH(X)=LOG((SQR(X*X-1))/(X-1))
201

202
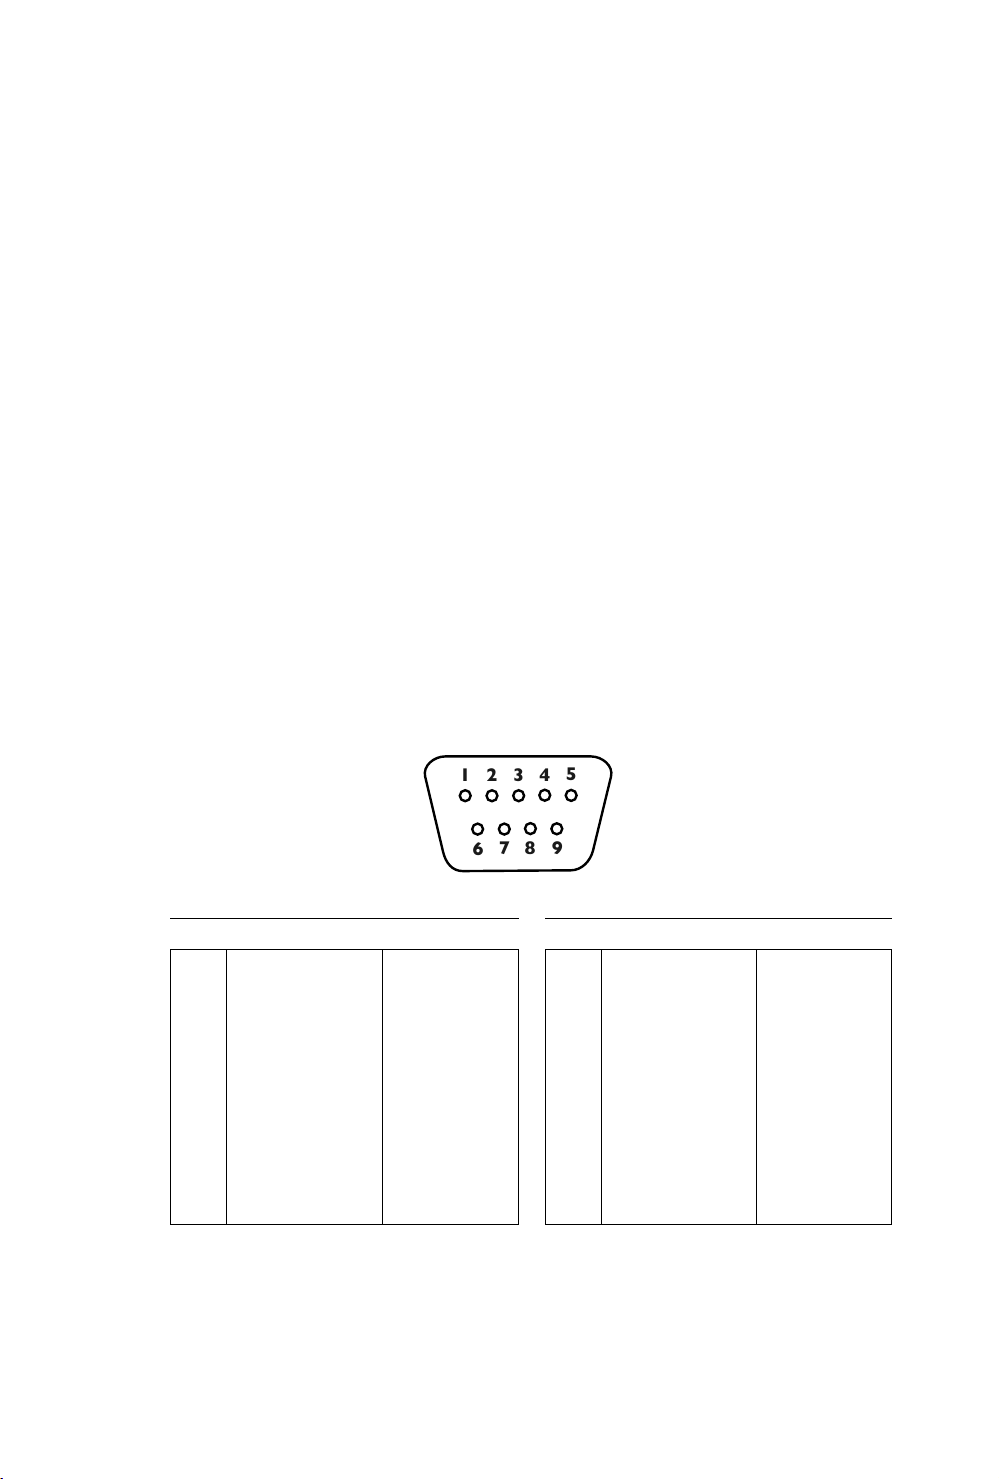
APPENDIX G
CONNECTIONS AND PINOUTS
This appendix is designed to show you what connections may be made to
the original Commodore 64 ports, as well as notable items on the main-
board.
Pin numbering for ports is pictured from the point of view of looking at the
port from the outside of the computer.
Game I/O
1
2
3 4
5
6
7
8
9
Control Port 1 Control Port 2
Pin Type Note Pin Type Note
1 JOYA0 1 JOYB0
2 JOYA1 2 JOYB1
3 JOYA2 3 JOYB2
4 JOYA3 4 JOYB3
5 POT AY 5 POT BY
6 BUTTON A/LP 6 BUTTON B/LP
7 +5V MAX 50mA 7 +5V MAX 50mA
8 GND 8 GND
9 POT AX 9 POT BX
203
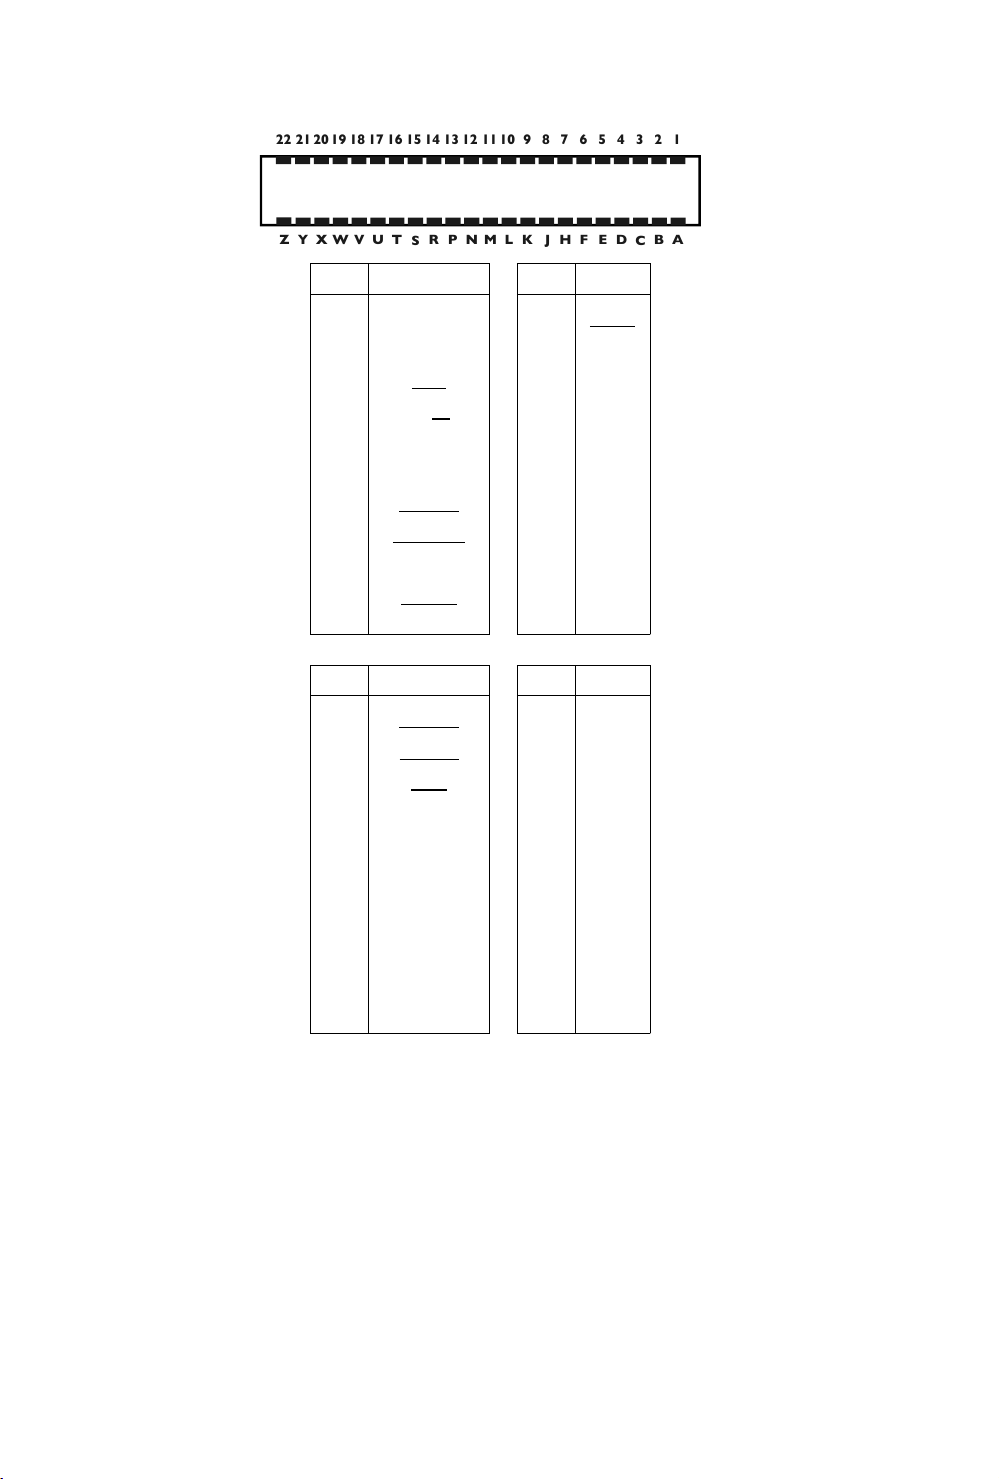
Cartridge Slot
22 21 20 19 18
17
16
15 14
13 12
11
10 9 8
7
6
5 4
3 2
1
Z Y X W V U T
S
R P N M L K J H F E D
C
B A
Pin Type Pin Type
1 GND 12 BA
2 +5V 13 DMA
3 +5V 14 D7
4 IRQ 15 D6
5 R/W 16 D5
6 Dot Clock 17 D4
7 I/O 1 18 D3
8 GAME 19 D2
9 EXROM 20 D1
10 I/O 2 21 D0
11 ROML 22 GND
Pin Type Pin Type
A GND N A9
B ROMH P A8
C RESET R A7
D NMI S A6
E S 02 T A5
F A15 U A4
H A14 V A3
J A13 W A2
K A12 X A1
L A11 Y A0
M A10 Z GND
204
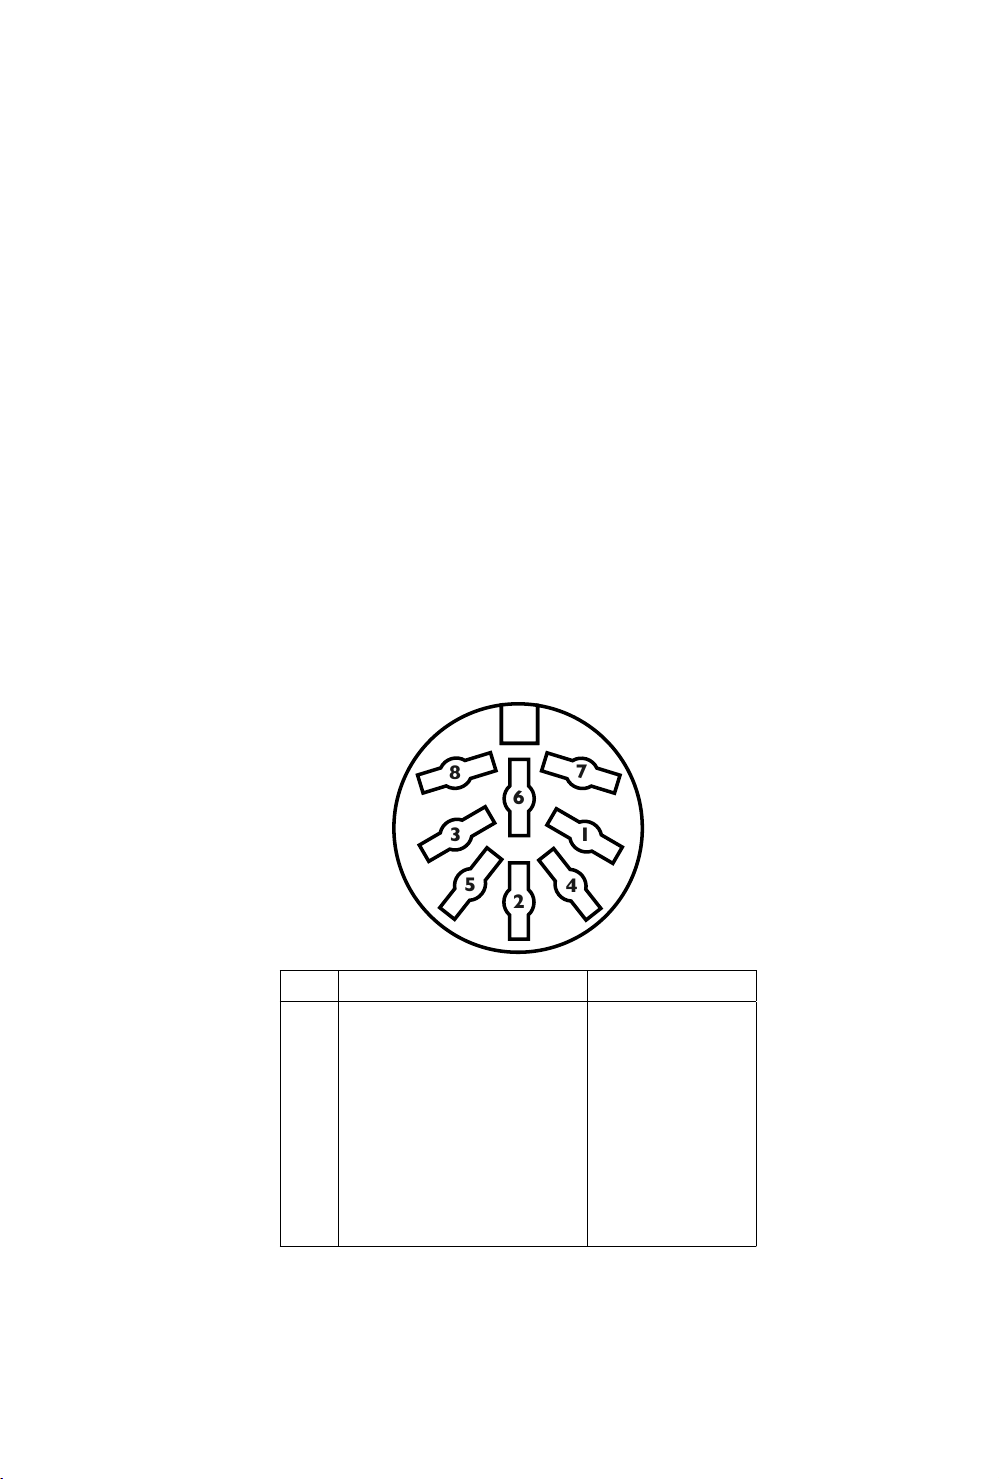
Commodore Audio/Video
This describes the 8-pin Commodore Audio/Video connector, used by
most Commodore 64s, all Commodore 128s, and the C64U. (The VIC-
20 and early Commodore 64s use a 5-pin Audio/Video connector.)
The connector is a full-size 8-pin 262
◦
DIN. Note that this is different from
the 270
◦
DIN connector found on MIDI cables. Be sure to use an A/V cable
designed for use with Commodore computers.
The Commodore 64 Ultimate treats pins 3 and 5 as stereo audio output,
left and right channels respectively. The original Commodore 64 offered
only monaural audio output on pin 3 and nominally described pin 5 as an
audio input. The C64U does not support audio input over this port. Audio
output uses “line out” levels.
The Commodore 64 Ultimate supports an alternate mode for this port,
known as “RGB” mode. You can select this mode in Advanced Settings,
U64 Specific Settings, Analog Video Mode. RGB mode supports analog
video adapters that need separate red, green, and blue signals, such as a
SCART adapter. Be sure to use “CVBS + S-Video” mode (the default) when
using a composite or S-Video cable.
1
4
7
2
5
3
8
6
Pin CVBS + S-Video mode RGB mode
1 Luminance (Y) Green
2 Ground Ground
3 Audio out left Audio out left
4 Composite video (Y+C) Red
5 Audio out right Audio out right
6 Chrominance (C) Blue
7 Not connected Csync
8 Not connected Fast switching
205
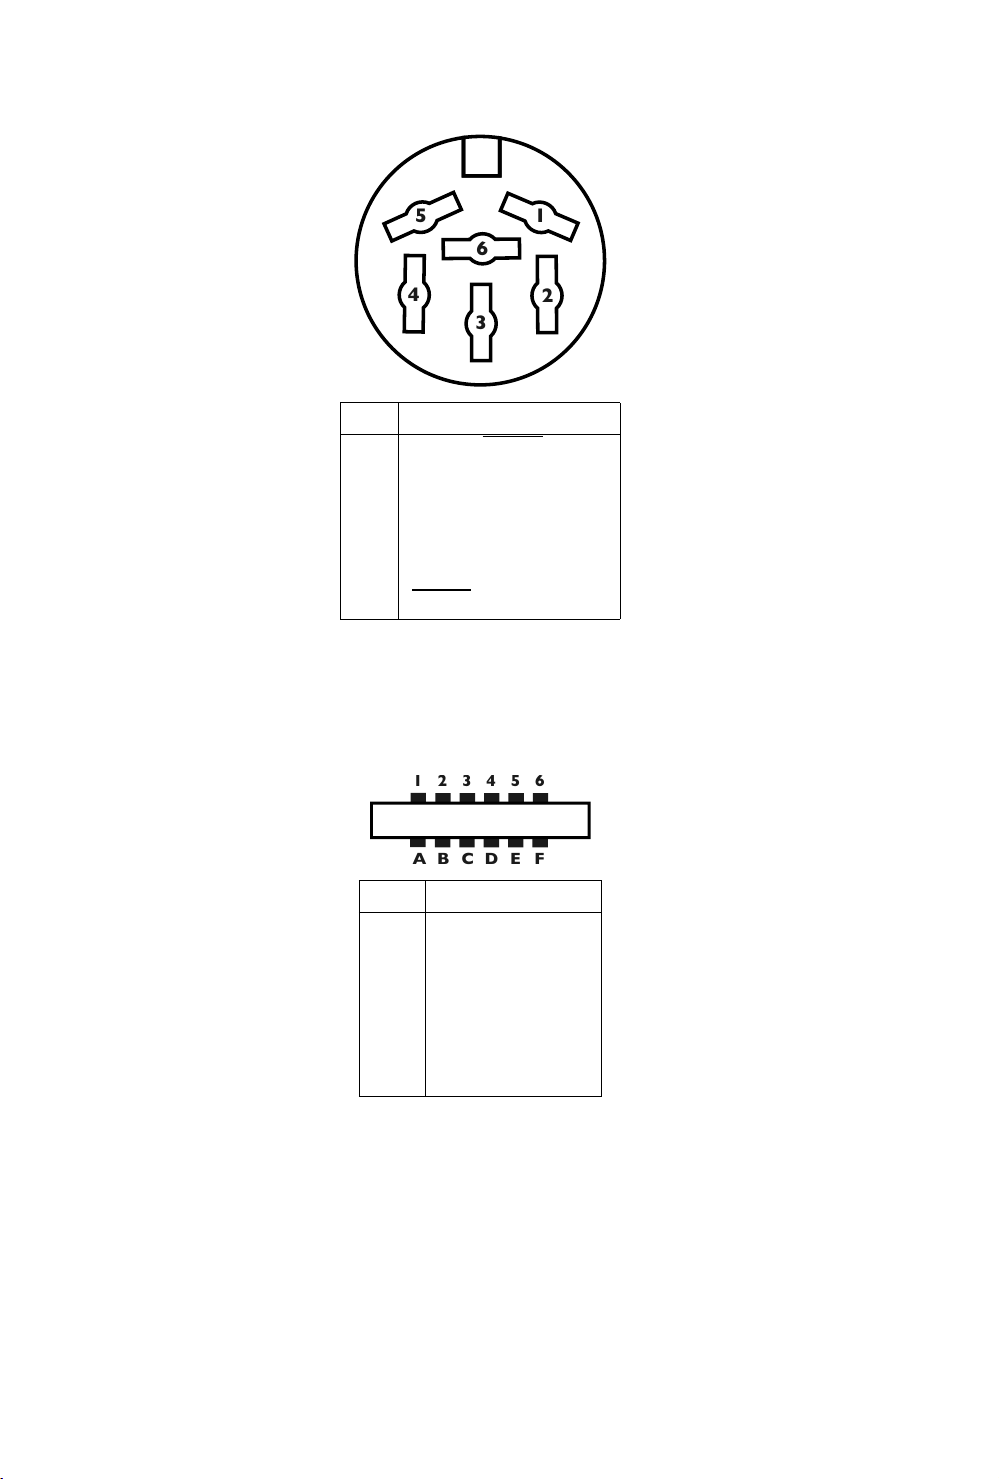
IEC Serial Port
2
1
3
4
5
6
Pin Type
1 SERIAL SRQIN
2 GND
3 SERIAL ATN IN/OUT
4 SERIAL CLK IN/OUT
5 SERIAL DATA IN/OUT
6 RESET
Cassette
The Datassette connector has a key notch between pins B-2 and C-3, to
orient the Datassette plug.
1
2 3
4 5
6
A B
C
D E F
Pin Type
A-1 GND
B-2 +5V
C-3 Cassette Motor
D-4 Cassette Read
E-5 Cassette Write
F-6 Cassette Sense
206
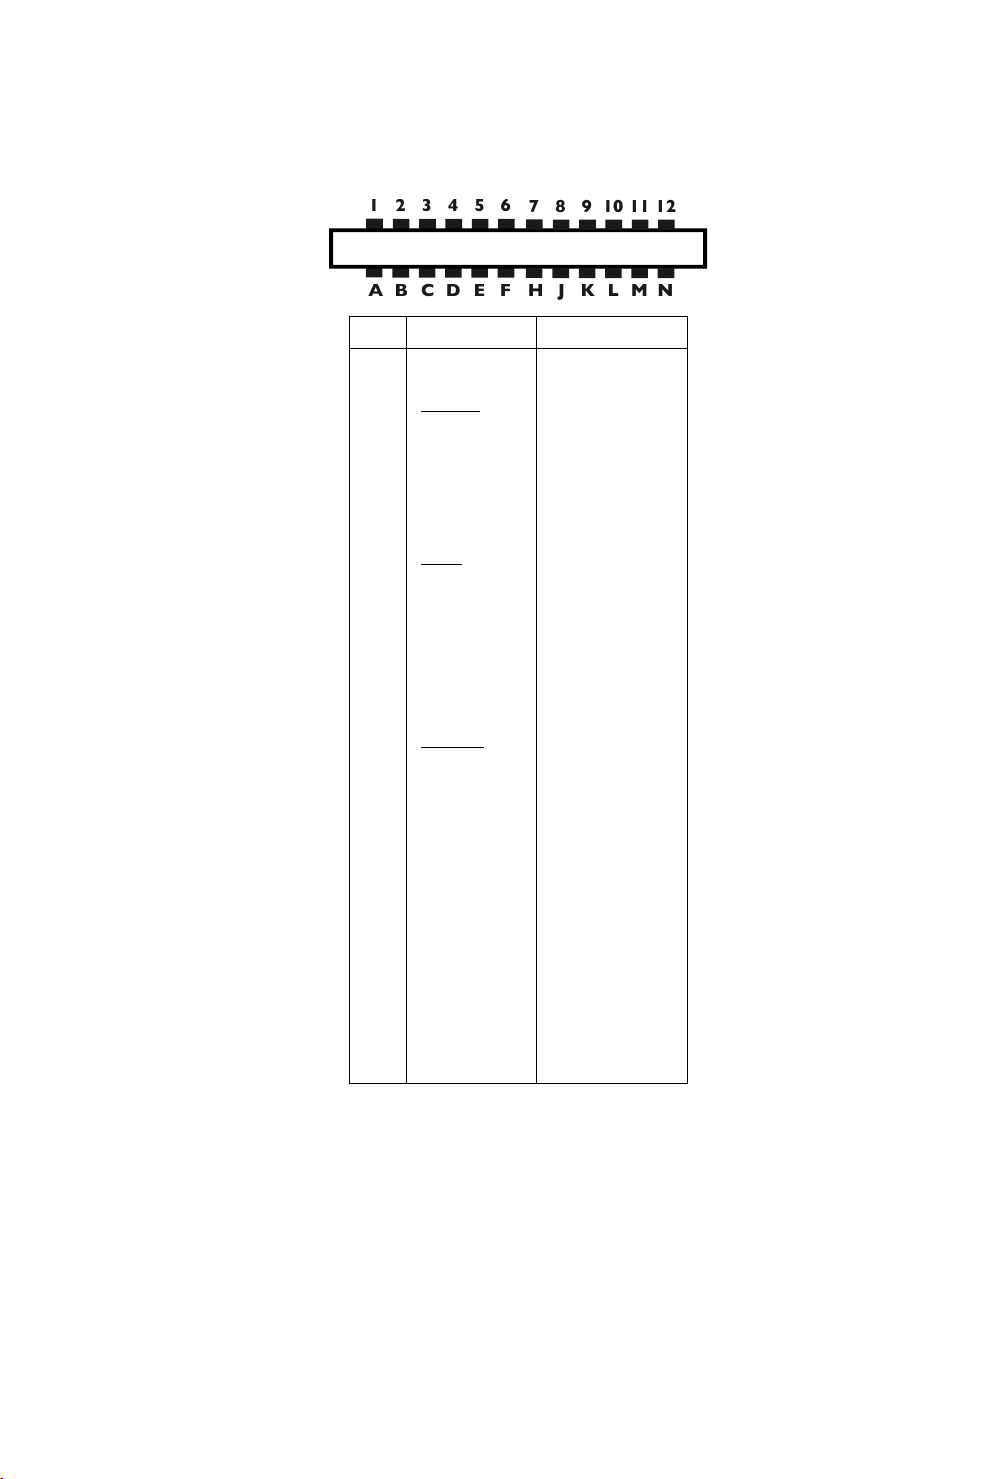
User Port
This port is provided by the C64U User Port adapter, available from the
Commodore International website: commodore.net
1
2 3
4 5
6
A B
C
D E F
7
8 9
10 11
12
H J
K
L M N
Pin Type Note
1 GND
2 +5V MAX 100mA
3 RESET
4 CNTI
5 SP1
6 CNT2
7 SP2
8 PC2
9 SER ATN IN
10 9V AC MAX 100mA
11 9V AC MAC 100mA
12 GND
A GND
B FLAG2
C PB0
D PB1
E PB2
F PB3
H PB4
J PB5
K PB6
L PB7
M PA2
N GND
207
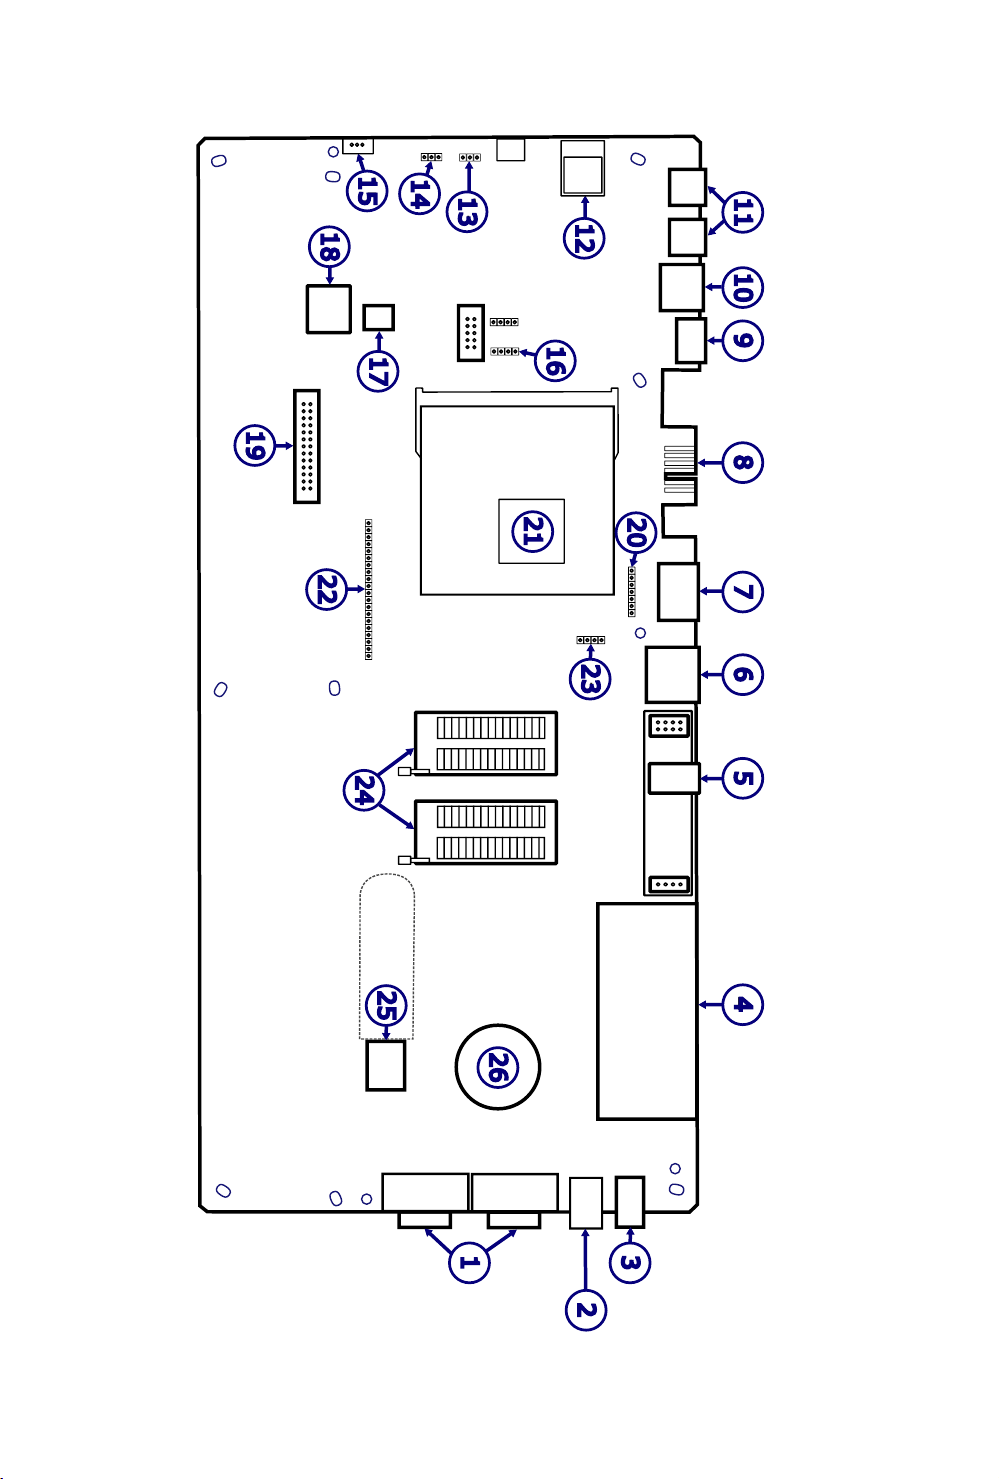
The C64U Mainboard
1
2
3
4567891011
13
12
14
16
17
19
18
22
20
23
24
25
26
21
15
208

Mainboard connections and components:
1. Control (Game) ports
2. Multi Function Switch
3. Power socket
4. Cartridge slot
5. 3.5mm audio line output / opti-
cal S/PDIF
6. Commodore 64 video output
7. IEC serial port
8. Cassette interface
9. HDMI® video output
10. Ethernet
11. USB storage
12. Wi-Fi module
13. Keyboard lighting output
(equipped models only)
14. Case lighting output (equipped
models only)
15. Case lighting strip (equipped
models only)
16. Utility buttons
17. C64U keyboard connector
18. SD card slot
19. User port connector
20. IEC header
21. FPGA unit
22. Commodore 64 keyboard con-
nector
23. Multi-color power LED
24. SID chip sockets
25. USB storage (USB-A)
26. Internal speaker
Connection notes:
• 3: Power socket. The power connection expects a 12 volt DC sup-
ply capable of 2.5 amps (30 watts) for models with LED case light-
ing, or 1.25 amps (15 watts) for models without LED case lighting.
The supply must be center-positive.
• 16: Utility buttons. Connections for dedicated “reset,” “menu,” and
“freeze” buttons.
• 17: C64U keyboard connector. Only connect the C64U keyboard
to this connector. Though this uses a USB type C connector, it is not
a general purpose USB port.
• 18: SD card slot. Insert a microSD card to serve as internal storage
accessible from the Disk File Browser, similar to USB storage.
• 19: User port connector. See the website for information on how
to purchase an adapter that provides a Commodore 64-style user
port. The adapter connects here.
• 22: Commodore 64 keyboard connector. Orient the black wire
to the leftmost pin, as seen from the front of the computer.
209

• 23: Multi-color power LED. The four pins support a two-pin power
LED (power only), a three-pin two-color LED (power and disk activity),
or a four-pin RGB LED. Connections always use the rearmost pins, as
indicated.
• 24: SID chip sockets. You can install vintage SID chips or mod-
ern equivalents to supplement the FPGA UltiSIDs. Lift the ZIF socket
lock, then insert the SID chip with the notch toward the back of the
computer. Secure the chip by setting the socket lock in the down
position, parallel to the mainboard.
• 25: USB storage. Connect a USB storage device to the upper USB-
A port to serve as additional internal storage accessible from the
Disk File Browser, similar to the external USB storage ports. Only the
upper port is active.
Ports not labeled above are for factory use only. Connecting anything to
the unlabeled ports may damage the computer.
210

APPENDIX H
PROGRAMS TO TRY
We’ve included a number of useful programs for you to try with your
Commodore 64. These programs will prove both entertaining and useful.
JOTTO
100 PRINTCHR$(17):PRINT"JOTTO JIM BUTTERFIELD"
120 PRINTCHR$(17):INPUT"WANT INSTRUCTIONS";Z$:IFASC(Z$)=78 GOTO250
130 PRINTCHR$(17):PRINT"TRY TO GUESS THE MYSTERY 5-LETTER WORD"
140 PRINTCHR$(17):PRINT"YOU MUST GUESS ONLY LEGAL 5-LETTER"
150 PRINT"WORDS, TOO..."
160 PRINT"YOU WILL BE TOLD THE NUMBER OF MATCHES"
170 PRINT"(OR 'JOTS') OF YOUR GUESS."
180 PRINTCHR$(17):PRINT"HINT: THE TRICK IS TO VARY SLIGHTLY"
190 PRINT" FROM ONE GUESS TO THE NEXT; SO THAT"
200 PRINT" IF YOU GUESS 'BATCH' AND GET 2 JOTS"
210 PRINT" YOU MIGHT TRY 'BOTCH' OR 'CHART'"
220 PRINT" FOR THE NEXT GUESS..."
250 DATA BXBSF,IPCCZ,DBDIF,ESFBE,PGGBM
260 DATA HPSHF,IBUDI,DJWJM,KPMMZ,LBZBL
270 DATA SBKBI,MFWFM,NJNJD,BOOFY,GJGFS
280 DATA RVFTU,SJWFS,GSFTT,PUUFS,FWFOU
290 DATA XFBWF,FYUPM,NVTIZ,AFCSB,GJAAZ
300 DATA UIJDL,ESVOL,GMPPE,UJHFS,GBLFS
310 DATA CPPUI,MZJOH,TRVBU,HBVAF,PXJOH
320 DATA UISFF,TJHIU,BYMFT,HSVNQ,BSFOB
330 DATA RVBSU,DSFFQ,CFMDI,GSFTT,TGBSL
211

340 DATA SBEBS,SVSBM,TNFMM,GSPXO,ESJGU
400 N=50
410 DIMN$(N),Z(5),Y(5)
420 FORJ=1TON:READN$(J):NEXTJ
430 T=TI
440 T=T/1000:IFT>=1THENGOTO440
450 Z=RND(-T)
500 G=0:N$=N$(RND(1)*N+1)
510 PRINTCHR$(17):PRINT"I HAVE A FIVE LETTER WORD:":IFR>0GOTO 560
520 PRINT"GUESS (WITH LEGAL WORDS)"
530 PRINT"AND I'LL TELL YOU HOW MANY"
540 PRINT"'JOTS', OR MATCHING LETTERS,"
550 PRINT"YOU HAVE..."
560 G=G+1:INPUT"YOUR WORD";Z$
570 IFLEN(Z$)<>5THENPRINT"YOU MUST GUESS A 5-LETTER WORD!":GOTO 560
580 V=0:H=0:M=0
590 FORJ=1TO5
600 Z=ASC(MID$(Z$,J,1)):Y=ASC(MID$(N$,J,1))-1:IFY=64THENY=90
610 IFZ<65ORZ>90THENPRINT"THAT'S NOT A WORD!":GOTO560
620 IFZ=65ORZ=69ORZ=73ORZ=79ORZ=85ORZ=89THENV=V+1
630 IFZ=YTHENM=M+1
640 Z(J)=Z:Y(J)=Y:NEXTJ
650 IFM=5GOTO800
660 IFV=0ORV=5THENPRINT"COME ON-WHAT KIND OF A WORD IS THAT?":
GOTO560
670 FORJ=1TO5:Y=Y(J)
680 FORK=1TO5:IFY=Z(K)THENH=H+1:Z(K)=0:GOTO700
690 NEXTK
700 NEXTJ
710 PRINTCHR$(145):PRINT">>>";H;"JOTS"
720 IFG<30GOTO560
730 PRINT"I'D BETTER TELL YOU. WORD WAS'"
740 FORJ=1TO5:PRINTCHR$(Y(J));:NEXTJ
750 PRINT"'":GOTO810
800 PRINT"YOU GOT IT IN ONLY";G;"GUESSES."
810 PRINTCHR$(17):INPUT"ANOTHER WORD";Z$
820 R=1:IFASC(Z$)<>78GOTO500
212

SEQUENCE
1 REM *** SEQUENCE
2 REM
3 REM *** FROM PET USER GROUP
4 REM *** SOFTWARE EXCHANGE
5 REM *** PO BOX 371
6 REM *** MONTGOMERYVILLE, PA 18936
7 REM ***
50 DIMA$(26)
100 Z$="ABCDEFGHIJKLMNOPQRSTUVWXYZ"
110 Z1$="12345678901234567890123456"
200 PRINT"ƳűűENTER LENGTH OF STRING TO BE SEQUENCEDű"
220 INPUT"MAXIMUM LENGTH IS 26 ";S%
230 IF S%<1 OR S%>26 THEN 200
240 S=S%
300 FOR I=1 TO S
310 A$(I)=MID$(Z$,I,1)
320 NEXT I
400 REM RANDOMIZE STRING
420 FOR I=1 TO S
430 K=INT(RND(1)*S+1)
440 T$=A$(I)
450 A$(I)=A$(K)
460 A$(K)=T$
470 NEXT I
480 GOSUB 950
595 T=0
600 REM RVERSE SUBSTRING
605 T=T+1
610 INPUT "HOW MANY TO REVERSE ";R%
620 IF R%=0 GOTO 900
630 IF R%>0 AND R%<=S GOTO 650
640 PRINT "MUST BE BETWEEN 1 AND ";S: GOTO 610
650 R=INT(R%/2)
660 FOR I=1 TO R
670 T$=A$(I)
680 A$(I)=A$(R%-I+1)
690 A$(R%-I+1)=T$
700 NEXT I
213

750 GOSUB 950
800 C=1: FOR I=2 TO S
810 IF A$(I)>A$(I+1) GOTO 830
820 C=0
830 NEXT I
840 IF C=0 GOTO 600
850 PRINT "űYOU DID IT IN ";T;" TRIES"
900 REM CHECK FOR ANOTHER GAME
910 INPUT "űWANT TO PLAY AGAIN ";Y$
920 IF LEFT$(Y$,1)="Y" OR Y$="OK" OR Y$="1" GOTO 200
930 END
950 PRINT
960 PRINT LEFT$(Z1$,S)
970 FOR I=1 TO S: PRINT A$(I);: NEXT I
980 PRINT "ű"
990 RETURN
This program courtesy of Gene Deals
PIANO KEYBOARD
5 REM PIANO KEYBOARD
10 POKE 53281,0:POKE 53280,0
100 PRINT"Ƴ Ų Ž Ž ć Ž Ž Ž ć Ž Ž ć Ž Ž ć "
110 PRINT" Ų Ž Ž ć Ž Ž Ž ć Ž Ž ć Ž Ž ć "
120 PRINT" Ų Ž Ž ć Ž Ž Ž ć Ž Ž ć Ž Ž ć "
130 PRINT" Ų ć ć ć ć ć ć ć ć ć ć ć ć "
140 PRINT" ŲQćWćEćRćTćYćUćIćOćPć@ć*ć↑"
150 PRINT"ű'SPACE' FOR SOLO OR POLYPHONIC"
160 PRINT"ű'F1,F3,F5,F7' OCTAVE SELECTION"
170 PRINT"ű'F2,F4,F6,F8' WAVEFORM"
175 PRINT"ű PRESS X TO PLAY A TUNEű"
180 PRINT"HANG ON, SETTING UP FREQUENCY TABLE..."
190 S=13*4096+1024:DIMF(26):DIMK(255)
200 FORI=0TO28:POKES+I,0:NEXT
210 FI=7040:FORI=1TO26:F(27-I)=FI*5.8+30:FI=FI/2^(1/12):NEXT
220 K$="Q2W3ER5T6Y7UI9O0P@-*£^"
230 FORI=1TOLEN(K$)
235 K(ASC(MID$(K$,I)))=I:NEXT
240 PRINT"Ʊ "
214

250 AT=0:DE=0:SU=15:RE=10:SR=SU*16+RE:AD=AT*16+DE:
WV=16:W=0:M=1:OC=4:HB=256:Z=0
260 FORI=0TO2:T=I*7:POKES+5+T,AD:POKES+6+T,SR
270 POKES+2+T,15:POKES+3+T,15:NEXT
280 POKES+24,15
300 GETA$:IFA$=""THEN300
310 FR=K(ASC(A$)):IFFR=ZTHEN500
315 FR=F(FR)/M:T=V*7:CR=S+T+4
320 POKES+5+T,Z:POKES+6+T,Z
330 POKECR,8:POKECR,Z
340 POKES+T,FR-HB*INT(FR/HB)
350 POKES+1+T,FR/HB
360 POKES+5+T,AD:POKES+6+T,SR
370 POKECR,WV+1:FORI=1TO50*AT:NEXT
375 POKECR,WV
380 IFP=1THENV=V+1:IFV=3THENV=0
400 GOTO300
500 IFA$="ƥ"THENM=1:OC=4:GOTO300
510 IFA$="Ʀ"THENM=2:OC=3:GOTO300
520 IFA$="Ƨ"THENM=4:OC=2:GOTO300
530 IFA$="ƨ"THENM=8:OC=1:GOTO300
540 IFA$="Ʃ"THENW=0:WV=16:GOTO300
550 IFA$="ƪ"THENW=1:WV=32:GOTO300
560 IFA$="ƫ"THENW=2:WV=64:GOTO300
570 IFA$="Ƭ"THENW=3:WV=128:GOTO300
580 IFA$=" "THENP=1-P:GOTO300
585 IFA$="X"THEN10000
590 IFA$="Ƴ"THEN200
600 GOTO 300
800 PRINT"HIT A KEY"
810 GETA$:IFA$=""THEN810:WAIT FOR A KEY
820 PRINTA$:RETURN
9000 DATA 40,17,15,17,13,17,12,17,10,
17,8,17,6,17,15,13,15,15,13,15,12
9005 DATA 15,10,15,8,15,6,15,5,15,13,
12,13,13,12,13,10,13,8,13,6,13,5,13,4,13
9006 DATA 12,10,12,12
9010 DATA 10,12,9,12,7,12,5,12,3,12,1,12
9020 DATA 10,8,10,0
9600 DATA 40,12,8,10,12,15,13,13,17,15,15,20
9610 DATA 19,20,15,12,8,10,12,13,15,17,15,13,12,10,12,8,7,8,10,3
215

9620 DATA 7,10,13,12,10
9630 DATA 12,8,10,12,15,13,13,17,15,15,20
9640 DATA 19,20,15,12,8,10,12
9650 DATA 5,15,13,12,10,8,3,8,7,8,12,15,20,15,12,8
9660 DATA 12,15,18,15,12,8,12,15,17,13,10
9670 DATA 7,10,13,15,12,8,5,8,12,13,10,7,3,7,10,13,12,10
9680 DATA 8,12,15,20,0
9999 DATA -1,-1
10000 READTE
10005 READA:IFA=ZTHEN300
10015 FR=F(A)/M:T=V*7:CR=S+T+4
10020 POKES+5+T,Z:POKES+6+T,Z
10030 POKECR,8:POKECR,Z
10040 POKES+T,FR-HB*INT(FR/HB)
10050 POKES+1+T,FR/HB
10060 POKES+5+T,AD:POKES+6+T,SR
10070 POKECR,WV+1:FORI=1TO50*AT:NEXT
10075 POKECR,WV
10080 IFP=1THENV=V+1:IFV=3THENV=0
10090 FORI=1TOTE:NEXT
10100 GOTO10005
NOTES:
Line 100 uses (SHIFT CLR/HOME) Line 530 uses (f7)
(CTRL 9, CTRL ]), (SHIFT B) LIne 540 uses (f2)
Line 150 uses (CRSR DOWN) Line 550 uses (f4)
Line 240 uses (CRSR UP) Line 560 uses (f6)
Line 500 uses (f1) Line 570 uses (f8)
Line 510 uses (f3) Line 590 uses (SHIFT CLR/HOME)
Line 520 uses (f5)
216

APPENDIX I
ERROR MESSAGES
This appendix contains a complete list of the error messages generated
by the Commodore 64, with a description of causes.
BAD DATA String data was received from an open file, but the
program was expecting numeric data.
BAD SUBSCRIPT The program was trying to reference an element of an
array whose number is outside of the range specified
in the DIM statement.
BREAK Program execution was stopped because you hit the
RUN/STOP key.
CAN’T CONTINUE The CONT command will not work, either because the
program was never RUN, there has been an error, or a
line has been edited.
DEVICE NOT
PRESENT
The required I/O device was not available for an
OPEN, CLOSE, CMD, PRINT#, INPUT#, or GET#.
DIVISION BY ZERO Division by zero is a mathematical oddity and not al-
lowed.
EXTRA IGNORED Too many items of data were typed in response to an
INPUT statement. Only the first few items were ac-
cepted.
FILE NOT FOUND If you were looking for a file on tape, and END-OF-
TAPE marker was found. If you were looking on disk,
no file with that name exists.
FILE NOT OPEN The file specified in a CLOSE, CMD, PRINT#, INPUT#,
or GET#, must first be OPENed.
FILE OPEN An attempt was made to open a file using the number
of an already open file.
217

FORMULA TOO
COMPLEX
The string expression being evaluated should be split
into at least two parts for the system to work with, or
a formula has too many parentheses.
ILLEGAL DIRECT The INPUT statement can only be used within a pro-
gram, and not in direct mode.
ILLEGAL QUAN-
TITY
A number used as the argument of a function or state-
ment is out of the allowable range.
LOAD There is a problem with the program on tape.
NEXT WITHOUT
FOR
This is caused by either incorrectly nesting loops or
having a variable name in a NEXT statement that
doesn’t correspond with one in a FOR statement.
NOT INPUT FILE An attempt was made to INPUT or GET data from a
file which was specified to be for output only.
NOT OUTPUT FILE An attempt was made to PRINT data to a file which
was specified as input only.
OUT OF DATA A READ statement was executed but there is no data
left unREAD in a DATA statement.
OUT OF MEMORY There is no more RAM available for program or vari-
ables. This may also occur when too many FOR loops
have been nested, or when there are too many GO-
SUBs in effect.
OVERFLOW The result of a computation is larger than the largest
number allowed, which is 1.70141884E+38.
REDIM’D ARRAY An array may only be DIMensioned once. If an array
variable is used before that array is DIM’d, an auto-
matic DIM operation is performed on that array setting
the number of elements to ten, and any subsequent
DIMs will cause this error.
REDO FROM START Character data was typed in during an INPUT state-
ment when numeric data was expected. Just re-type
the entry so that it is correct, and the program will
continue by itself.
RETURN WITHOUT
GOSUB
A RETURN statement was encountered, and no GO-
SUB command has been issued.
STRING TOO LONG A string can contain up to 255 characters.
SYNTAX ERROR A statement is unrecognizable by the Commodore 64.
A missing or extra parenthesis, misspelled keywords,
etc.
TYPE MISMATCH This error occurs when a number is used in place of a
string, or vice-versa.
218

UNDEF’D FUNC-
TION
A user defined function was referenced, but it has
never been defined using the DEF FN statement.
UNDEF’D STATE-
MENT
An attempt was made to GOTO or GOSUB or RUN a
line number that doesn’t exist.
VERIFY The program on tape or disk does not match the pro-
gram currently in memory.
219

220

APPENDIX J
MUSIC NOTE VALUES
This appendix contains a complete list of Note#, actual note, and the val-
ues to be POKED into the HI FREQ and LOW FREQ registers of the sound
chip to produce the indicated note. The table shows values based on both
a system clock of 1.02 MHz (shown as NTSC) and 0.985 MHz (shown as
PAL).
MUSICAL NOTE OSCILLATOR FREQ (NTSC) OSCILLATOR FREQ (PAL)
NOTE OCTAVE DECIMAL HI LOW DECIMAL HI LOW
0 C-0 268 1 12 278 1 22
1 C#-0 284 1 28 294 1 38
2 D-0 301 1 45 312 1 56
3 D#-0 318 1 62 331 1 75
4 E-0 337 1 81 350 1 94
5 F-0 358 1 102 371 1 115
6 F#-0 379 1 123 393 1 137
7 G-0 401 1 145 417 1 161
8 G#-0 425 1 169 441 1 185
9 A-0 451 1 195 468 1 212
10 A#-0 477 1 221 496 1 240
11 B-0 506 1 250 525 2 13
16 C-1 536 2 24 556 2 44
17 C#-1 568 2 56 589 2 77
18 D-1 602 2 90 625 2 113
19 D#-1 637 2 125 662 2 150
20 E-1 675 2 163 701 2 189
21 F-1 716 2 204 743 2 231
22 F#-1 758 2 246 787 3 19
221

MUSICAL NOTE OSCILLATOR FREQ (NTSC) OSCILLATOR FREQ (PAL)
NOTE OCTAVE DECIMAL HI LOW DECIMAL HI LOW
23 G-1 803 3 35 834 3 66
24 G#-1 851 3 83 883 3 115
25 A-1 902 3 134 936 3 168
26 A#-1 955 3 187 992 3 224
27 B-1 1012 3 244 1051 4 27
32 C-2 1072 4 48 1113 4 89
33 C#-2 1136 4 112 1179 4 155
34 D-2 1204 4 180 1250 4 226
35 D#-2 1275 4 251 1324 5 44
36 E-2 1351 5 71 1403 5 123
37 F-2 1432 5 152 1486 5 206
38 F#-2 1517 5 237 1575 6 39
39 G-2 1607 6 71 1668 6 132
40 G#-2 1703 6 167 1767 6 231
41 A-2 1804 7 12 1873 7 81
42 A#-2 1911 7 119 1984 7 192
43 B-2 2025 7 233 2102 8 54
48 C-3 2145 8 97 2227 8 179
49 C#-3 2273 8 225 2359 9 55
50 D-3 2408 9 104 2500 9 196
51 D#-3 2551 9 247 2649 10 89
52 E-3 2703 10 143 2806 10 246
53 F-3 2864 11 48 2973 11 157
54 F#-3 3034 11 218 3150 12 78
55 G-3 3215 12 143 3337 13 9
56 G#-3 3406 13 78 3535 13 207
57 A-3 3608 14 24 3746 14 162
58 A#-3 3823 14 239 3969 15 129
59 B-3 4050 15 210 4205 16 109
64 C-4 4291 16 195 4455 17 103
65 C#-4 4547 17 195 4719 18 111
66 D-4 4817 18 209 5000 19 136
67 D#-4 5103 19 239 5298 20 178
68 E-4 5407 21 31 5613 21 237
69 F-4 5728 22 96 5946 23 58
70 F#-4 6069 23 181 6300 24 156
71 G-4 6430 25 30 6675 26 19
72 G#-4 6812 26 156 7071 27 159
73 A-4 7217 28 49 7492 29 68
222

MUSICAL NOTE OSCILLATOR FREQ (NTSC) OSCILLATOR FREQ (PAL)
NOTE OCTAVE DECIMAL HI LOW DECIMAL HI LOW
74 A#-4 7647 29 223 7938 31 2
75 B-4 8101 31 165 8410 32 218
80 C-5 8583 33 135 8910 34 206
81 C#-5 9094 35 134 9439 36 223
82 D-5 9634 37 162 10001 39 17
83 D#-5 10207 39 223 10596 41 100
84 E-5 10814 42 62 11226 43 218
85 F-5 11457 44 193 11893 46 117
86 F#-5 12139 47 107 12600 49 56
87 G-5 12860 50 60 13350 52 38
88 G#-5 13625 53 57 14143 55 63
89 A-5 14435 56 99 14985 58 137
90 A#-5 15294 59 190 15876 62 4
91 B-5 16203 63 75 16820 65 180
96 C-6 17167 67 15 17820 69 156
97 C#-6 18188 71 12 18879 73 191
98 D-6 19269 75 69 20002 78 34
99 D#-6 20415 79 191 21192 82 200
100 E-6 21629 84 125 22452 87 180
101 F-6 22915 89 131 23787 92 235
102 F#-6 24278 94 214 25201 98 113
103 G-6 25721 100 121 26700 104 76
104 G#-6 27251 106 115 28287 110 127
105 A-6 28871 112 199 29970 117 18
106 A#-6 30588 119 124 31752 124 8
107 B-6 32407 126 151 33640 131 104
112 C-7 34334 134 30 35640 139 56
113 C#-7 36376 142 24 37759 147 127
114 D-7 38539 150 139 40005 156 69
115 D#-7 40830 159 126 42384 165 144
116 E-7 43258 168 250 44904 175 104
117 F-7 45830 179 6 47574 185 214
118 F#-7 48556 189 172 50403 196 227
119 G-7 51443 200 243 53400 208 152
120 G#-7 54502 212 230 56575 220 255
121 A-7 57743 225 143 59940 234 36
122 A#-7 61176 238 248 63504 248 16
123 B-7 64814 253 46 - - -
223

FILTER SETTINGS
Location Contents
54293 Low cutoff frequency (0 – 7)
54294 High cutoff frequency (0 – 255)
54295 Resonance (bits 4 – 7)
Filter Voice 3 (bit 2)
Filter Voice 2 (bit 1)
Filter Voice 1 (bit 0)
54296 High Pass (bit 6)
Bandpass (bit 5)
Low pass (bit 4)
Volume (bits 0 – 3)
224

APPENDIX K
SPRITE REGISTER MAP
Register #
Dec Hex DB7 DB6 DB5 DB4 DB3 DB2 DB1 DB0
0 0 S0X7 S0X0 SPRITE 0 X
Component
1 1 S0Y7 S0Y0 SPRITE 0 Y
Component
2 2 S1X7 S1X0 SPRITE 1 X
3 3 S1Y7 S1Y0 SPRITE 1 Y
4 4 S2X7 S2X0 SPRITE 2 X
5 5 S2Y7 S2Y0 SPRITE 2 Y
6 6 S3X7 S3X0 SPRITE 3 X
7 7 S3Y7 S3Y0 SPRITE 3 Y
8 8 S4X7 S4X0 SPRITE 4 X
9 9 S4Y7 S4Y0 SPRITE 4 Y
10 A S5X7 S5X0 SPRITE 5 X
11 B S5Y7 S5Y0 SPRITE 5 Y
12 C S6X7 S6X0 SPRITE 6 X
13 D S6Y7 S6Y0 SPRITE 6 Y
14 E S7X7 S7X0 SPRITE 7 X
Component
15 F S7Y7 S7Y0 SPRITE 7 Y
Component
16 10 S7X8 S6X8 S5X8 S4X8 S3X8 S2X8 S1X8 S0X8 MSB of X
COORD.
17 11 RC8 ECM BMM BLNK RSEL YSCL2 YSCL1 YSCL0 Y SCROLL
MODE
18 12 RC7 RC6 RC5 RC4 RC3 RC2 RC1 RC0 RASTER
19 13 LPX7 LPX0 LIGHT PEN
X
20 14 LPY7 LPY0 LIGHT PEN
Y
21 15 SE7 SE0 SPRITE
ENABLE
ON/OFF
22 16 N.C. N.C. RST MCM CSEL XSCL2 XSCL1 XSCL0 X SCROLL
MODE
225
Register #
Dec Hex DB7 DB6 DB5 DB4 DB3 DB2 DB1 DB0
23 17 SEXY7 SEXY0 SPRITE
EXPAND Y
24 18 VS13 VS12 VS11 VS10 CB13 CB12 CB11 N.C. SCREEN
Character
Memory
25 19 IRQ N.C. N.C. N.C. LPIRQ ISSC ISBC RIRQ Interrupt
Requests
26 1A N.C. N.C. N.C. N.C. MLPI MISSC MISBC MRIRQ Interrupt
Requests
MASKS
27 1B BSP7 BSP0 Background
Sprite
Priority
28 1C SCM7 SCM0 Multicolor
Sprite
Select
29 1D SEXX7 SEXX0 SPRITE
EXPAND X
30 1E SSC7 SSC0 Sprite-
Sprite
Collision
31 1F SBC7 SBC0 Sprite-
Background
COLLISION
COLOR REGISTERS
32 20 Border
33 21 Background 0
34 22 Background 1
35 23 Background 2
36 24 Background 3
37 25 Sprite Multicolor 0
38 26 Sprite Multicolor 1
39 27 Sprite 0 color
40 28 1
41 29 2
42 2A 3
43 2B 4
44 2C 5
45 2D 6
46 2E 7
226

Only colors 0-7 may be used in multicolor character mode.
COLOR CODES
0 0 BLACK 8 8 ORANGE
1 1 WHITE 9 9 BROWN
2 2 RED 10 A LT RED
3 3 CYAN 11 B GRAY 1
4 4 PURPLE 12 C GRAY 2
5 5 GREEN 13 D LT GREEN
6 6 BLUE 14 E LT BLUE
7 7 YELLOW 15 F GRAY 3
227

228

APPENDIX L
COMMODORE 64 SOUND
CONTROL SETTINGS
This handy table gives you the key numbers you need to use in your sound
programs, according to which of the Commodore 64’s 3 voices you want
to use. To set or adjust a sound control in your BASIC program, just POKE
the number from the second column, followed by a comma (,) and a num-
ber from the chart…like this: POKE 54276,17 (Selects a Triangle Waveform
for VOICE 1).
Remember that you must set the VOLUME before you can generate sound.
POKE 54296 followed by a number from 0 to 15 sets the volume for all 3
voices.
It takes 2 separate POKEs to generate each musical note…for example
POKE 54273,34 : POKE 54272,75 designates low C in the sample scale
below.
Also…you aren’t limited to the numbers shown in the tables. If 34 doesn’t
sound “right” for a low C, try 35. To provide a higher SUSTAIN or ATTACK
rate than those shown, add two or more SUSTAIN numbers together. (Ex-
amples: POKE 54277,96 combines two attack rates (32 and 64) for a
combined higher attack rate…but…POKE 54277,20 provides a low attack
rate (16) and a medium decay rate (4).
229
SETTING VOLUME — SAME FOR ALL 3 VOICES
VOLUME
CONTROL
POKE
54296
Settings range from 0 (off) to 15 (loudest)
VOICE NUMBER 1
TO CONTROL POKE THIS FOLLOWED BY ONE OF THESE NUMBERS
THIS SETTING NUMBER (0 to 15…or 0 to 255 depending on range)
TO PLAY A NOTE C C# D D# E F F# G G# A A# B C C#
HIGH FREQUENCY 54273 34 36 38 40 43 45 48 51 54 57 61 64 68 72
LOW FREQUENCY 54272 75 85 12620052 19812797 111172126188149169
WAVEFORM POKE TRIANGLE SAWTOOTH PULSE NOISE
54276 17 33 65 129
PULSE RATE (PULSE WAVEFORM)
HI PULSE 54275 A value of 0 to 15 (for Pulse waveform only)
LO PULSE 54274 A value of 0 to 255 (for Pulse waveform only)
ATTACK/DECAY POKE ATK4 ATK3 ATK2 ATK1 DEC4 DEC3 DEC2 DEC1
54277 128 64 32 16 8 4 2 1
SUSTAIN/RELEASE POKE SUS4 SUS3 SUS2 SUS1 REL4 REL3 REL2 REL1
54278 128 64 32 16 8 4 2 1
VOICE NUMBER 2
TO PLAY A NOTE C C# D D# E F F# G G# A A# B C C#
HIGH FREQUENCY 54280 34 36 38 40 43 45 48 51 54 57 61 64 68 72
LOW FREQUENCY 54279 75 85 12620052 19812797 111172126188149169
WAVEFORM POKE TRIANGLE SAWTOOTH PULSE NOISE
54283 17 33 65 129
PULSE RATE (PULSE WAVEFORM)
HI PULSE 54282 A value of 0 to 15 (for Pulse waveform only)
LO PULSE 54281 A value of 0 to 255 (for Pulse waveform only)
ATTACK/DECAY POKE ATK4 ATK3 ATK2 ATK1 DEC4 DEC3 DEC2 DEC1
54284 128 64 32 16 8 4 2 1
SUSTAIN/RELEASE POKE SUS4 SUS3 SUS2 SUS1 REL4 REL3 REL2 REL1
54285 128 64 32 16 8 4 2 1
VOICE NUMBER 3
TO PLAY A NOTE C C# D D# E F F# G G# A A# B C C#
HIGH FREQUENCY 54287 34 36 38 40 43 45 48 51 54 57 61 64 68 72
LOW FREQUENCY 54286 75 85 12620052 19812797 111172126188149169
WAVEFORM POKE TRIANGLE SAWTOOTH PULSE NOISE
54290 17 33 65 129
PULSE RATE (PULSE WAVEFORM)
HI PULSE 54289 A value of 0 to 15 (for Pulse waveform only)
LO PULSE 54288 A value of 0 to 255 (for Pulse waveform only)
ATTACK/DECAY POKE ATK4 ATK3 ATK2 ATK1 DEC4 DEC3 DEC2 DEC1
54291 128 64 32 16 8 4 2 1
230

SUSTAIN/RELEASE POKE SUS4 SUS3 SUS2 SUS1 REL4 REL3 REL2 REL1
54292 128 64 32 16 8 4 2 1
TRY THESE SETTINGS TO SIMULATE DIFFERENT INSTRUMENTS
Instrument Waveform Attack/Decay Sustain/Release Pulse Rate
Piano Pulse 9 0 Hi-Lo, Lo-255
Flute Triangle 96 0 Not applicable
Harpsichord Sawtooth 9 0 Not applicable
Xylophone Triangle 9 0 Not applicable
Organ Triangle 0 240 Not applicable
Calliope Triangle 0 240 Not applicable
Accordion Triangle 102 0 Not applicable
Trumpet Sawtooth 96 0 Not applicable
MEANINGS OF SOUND TERMS
ADSR — Attack/Decay/Sustain/Release
Attack — rate sound rises to peak volume
Decay — rate sound falls from peak volume to Sustain level
Sustain — prolong note at certain volume
Release — rate at which volume falls from Sustain level
Waveform — “shape” of sound wave
Pulse — tone quality of Pulse Waveform
NOTE: Attack/Decay and Sustain/Release settings should always be POKEd in your
program BEFORE the Waveform is POKEd.
231

232

APPENDIX M
ACKNOWLEDGEMENTS
We are ever grateful to the following people who helped make the
Commodore 64 Ultimate possible. Thank you!
Adam ’Wacek’ Wacławski
http://piernik.arise64.pl/
Adrian Gartland
Albert & Jodie Bodenhamer
Aleski Eeben
https://aleksi-eeben.itch.io
Alessandro Molina
Alex Tuna
Alfie Simpson Canavan
Alwyz
Andre Dziekonski
Andreas ’Icon’ Lindkvist
Andreas Hecka
Andrew Vaisey
https://andyvaisey.itch.io
Andy Finkel
Ash Jones
Baby Fractic
Bart van Leeuwen
Bernard Couture
Bernd ’Panther’ Buchegger
https://www.cosmos-c64.com
Bernd Heymanns
Beth Greenall
Bil Herd
Bjørn Røstøen
Boesiger Rolf
Brandon Staggs
Brett Olsen
Brian Nagel
Bryan ’Pete’ Peterson
Bryan Peterson
Cem Tezcan
Chris Abbott
https://c64audio.com
Chris Smith
Clare Simpson
Colin Proudfoot
Conrad Vogel
233

Cris Blyth
Dan Sanderson
https://dansanderson.com/
Dan Tootill
Daniel ’DeeKay’ Kottmair
Daniel Krenn
Daniel Zandelin
Darren Melbourne
Dave Haynie
DaViD
David ’Jazzcat’ Simmons
https://vandalism.news
David Morton
David Pleasance
David Rostcheck
David Simmons
Dom Simpson Vanner
drmortalwombat
https://drmortalwombat.itch.io
Eelko de Vos
Even ’Cycleburner’ Scharning
Ewan Wilcocks
https://mini-itx.com
Faith Simpson
fieserWolF
https://englishclass.de/ wolf/ac
Francesco Sblendorio
https://github.com/sblendorio
Fredrik Åberg
Fulco ’Magic’ Koop
Gary Arnold
Gavin Horricks
Gideon Zweijtzer
Glenn Rune Gallefoss
Graham Axten
https://axtevision.itch.io
Hannes Sommer
https://www.cosmos-c64.com
Hein Holt
Hendrik Richter
Hugues ’Ax!s’ Poisseroux
Jake Young
Jakob Voos
Protovision
https://www.protovision.games
James Grafton
James Harrison
James Margetson
Jan de Ruiter
Jan Klose
https://artexsoft.com
Jani Parviainen
https://vector5games.itch.io
Janne ’Mummypowder’ Lehtinen
Jarno ’McGurk’ Lehtinen
Jarrod Coombs
Jason ’Kenz’ Mackenzie
Psytronik Software
https://www.psytronik.net
Jason LaFosse
Jason Waves
Jason Winters
Jeremy Fitzpatrick
Jeremy Hoel
Jeri Ellsworth
Jeroen Wunnink
Jesper ’Trap’ Larsen
Jim Williams
https://deviouscodeworks.co.uk
234

Joachim ’The Sarge’ Ljunggren
John Errico
Jon Burton
Jon Wells
Jose Pereira
Jose San Pedro Wandelmer
Jozsef Keller
Juan J. Martínez
https://www.usebox.net/jjm/
Kelsyn Rooks
Ken Silbert
Knifegrinder
https://knifegrinder.itch.io
Knut M. Clausen
Kodie Grantham
Kosmas Einbrodt
Krill
http://plush.de
Krzysztof ’Brush’ Dabrowski
https://elysium64.itch.io
Krzysztof ’Zephyr’ Augustyn
Kyle J Cardoza
Kürşad ’Hydrogen’ Karamahmuto�lu
Lady Fractic
Lars ’Mirage’ Verhoeff
Lars Vonhof-Hunold
Lasse Öörni
https://cadaver.github.io
Laura Gottlieb
https://stirringdragon.games
Laurence Gonsalves
Lee Cullip
Leo Nigro
Leonard Tramiel
Levi C. Maaia
Liam Murray
Linus ’Lft’ Åkesson
https://linusakesson.net
Luca Facione
Lucas Liaskos
https://lucasliaskos.com/
Mads ’Slammer’ Nielsen
Marc Bilodeau
Marcel Franquinet
Marco Anastasi
Marco Panzanella
Mark Boulding
Mark Hindsbo
https://rgcddev.itch.io/aviator-arcade-ii
Mark Janzen
Marko Lehtimäki
Martijn Bosschaart
https://www.retro8bitshop.com/
Martin Weiss
Marvin ’Joshua5’ Droogsma
https://www.marvindroogsma.com
Mathew Howard
Matt Money
Matthias ’Lazycow’ Bock
https://lazycow.itch.io
Matthias ’Quiss’ Kramm
https://www.quiss.org
Matthias Brukner
Michael Paull
Michael Schneider
Mikael Dunker
Mike Battilana
Mike Hellyer
Naveed ’Algorithm’ Khugiani
235

Neil Harris
Nick Kreifels
Oliver ’Veto’ Lindau
Owen ’Conrad’ Crowley
https://rgcddev.itch.io/bomberland
Patrick Bass
Paul Andrews
Paul Koller
https://paulko64.itch.io
Petros Grivas
Pex ’Mahoney’ Tufvesson
https://livet.se/mahoney
Pickled Light (aka Iain B)
Pietro Zuco
https://zuco.dev
Plaion
Pontus Axelsson
Puppy Fractic
René Bonvanie
René Garcia
Retro Games Ltd.
Richard Keimel
Rik Bruins
Robert ’Bob’ Gyorvari
https://censordesign.com
Robert ’Raistlin’ Troughton
Robin Raymond
Roman Werner
https://romwer.itch.io
Sam Tramiel
Sami Häyrynen
Sasha Simpson Vanner
Sauli ’Apatia’ Laitinen
Scott Adams
Scott Hanselman
Scott Williams
Sean Corbett
Sebastian Straub
Stefan Schleicher
Stellan ’Dane’ Andersson
Steve Cottam
Steve Morris
Steve Taylor
Steve West
Steven S
Stuart Chiplin
Style
https://style64.org/
Tallosy ’Oswald’ Zoltan
Tatu ’Mr. Sex’ Blomberg
https://byterapers.scene.org
Tero ’Apollyon’ Rönnqvist
Tero ’Dr. TerrorZ’ Heikkinen
https://drterrorz.itch.io
Thomas Egeskov ’Laxity’ Petersen
Thomas Middleditch
Thomas P. Wilson
Thomas Tahsin-Bey
Tim Bulshaka
Tim Morgan
Timothy Earl Morgan
Tobias ’Bitbreaker’ Bindhammer
Todd Gill
Tomek ’Carrion’ Mielnik
https://carrion64.itch.io
Torsten Kohlhoff
236

Tyson Lutz
Vanja ’Mermaid’ Utne
https://cheesepirate.com
Vidar ’DMX’ Bang
https://rebelandroid.com
WebFritzi (AKA Friedrich ”Fritz” Philipp)
https://github.com/WebFritzi
Wilfred Bos
Willi ’Duke’ Bäcker
Zbigniew ’Zbych’ Ross
https://rgcddev.itch.io/yoomp-64
Zoran Zambo
237

238

INDEX
A
Abbreviations, BASIC com-
mands, 189
ABSolute value function, 183
Addition (+), 41, 45, 173
AND operator, 173
Animation, 66–68, 90, 95–96,
100–105
Arithmetic, Formulas, 41, 46,
172–173, 177, 201
Arithmetic, Operators, 41–46,
172–173
Arrays, 130–133
ASC function, 185, 195
ASCII character codes, 195
ATN (arctangent) function, 184
Audio port, 3.5mm, 4
B
BASIC
abbreviations, 189
commands, 173–176
numeric functions, 183–185
operators, 172–173
other functions, 186–187
statements, 176–183
string functions, 185–186
variables, 171–172
Binary arithmetic, 105–108
Bit, 105
Byte, 106
C
C64U Menu, 4, 6, 18
Calculations, 40–46
Cartridge ROM files, 24
Cartridges, 4, 24, 142
CHR$ function, 77–78, 83–85,
185
Clock, 172
CLOSE statement, 176
CLR statement, 176
CLR/HOME key, 34
CMD statement, 176
Color
CHR$ codes, 83
keys, 81–83
memory map, 89, 199
PEEKs and POKEs, 89–92
screen and border, 85–87
Commands, BASIC, 173–176
Commodore 64 video output, 4
Commodore key, see graphic
keys
CommoServe File Index, 149
Connections, 3–5
CONT command, 173
ConTRoL key, 35
239

Correcting errors, 54
COSine function, 184
CRT files, see Cartridge ROM
files
CuRSoR keys, 34
D
D64 files, see Disk images
D71 files, see Disk images
D81 files, see Disk images
DATA statement, 176
Datassette, 4, 26, 143
DEFine statement, 177
DEFinte statement, 184
Delay loop, 87, 91
DELete key, 34
DIMension statement, 177
Disk drives, 4, 20, 142
Disk File Browser, 17
Disk image, creating, 23
Disk images, 20
Division (/), 42, 45, 173
DNP files, 21
E
Editing programs, 34
END statement, 178
Equal (=), not-equal-to (<>),
signs, 173
Error messages, 40, 217–219
Ethernet port, 4, 147
Expansion port, 204
EXPonent function, 184
Exponentation (↑), 42, 45, 173
F
Files (disk), 37
listing a directory, 39
Files (USB/SD)
copying, 29
creating a directory, 30
deleting, 29
renaming, 28
Firmware, updating, 19
FOR statement, 178
FRE function, 186
FTP File Service, 151
Function keys, 35
Functions, 183–187
G
G64 files, see Disk images
G71 files, see Disk images
Game controls and ports, 4, 11,
203
GET statement, 178
GET# statement, 178
Getting started, 33–47
GOSUB statement, 179
GOTO (GO TO) statement, 179
Graphic keys, 36, 81, 191–193
Graphic symbols, see graphic
keys
Greater than (<), 173
H
HDMI video, 4
Hyperbolic functions, 201
I
I/O ports, 4, 203
IEEE-488 interface, 5, 207
IF…THEN statement, 58–59, 179
INPUT statement, 179
INPUT# statement, 180
INSerT key, 34
INT function, 184
Integer variable, 172
J
Joysticks, 4, 11, 203
K
Keyboard, 33–36
240

L
LEFT$ function, 185
LEN function, 186
Less than (<), 173
LET statement, 180
LIST command, 174
LOAD command, 22, 23, 38,
174
LOGarithm function, 184
Loops, 59–61, 66–68
Lower case characters, 33, 36
M
Mathematics
formulas, 40–46
function table, 201
symbols, 40–46, 172
Memory expansion, 204
Memory maps, 87–90
MID$ function, 186
Modem emulation, 157
Multi Function Switch, 4, 6
Multiplication (*), 41, 45, 173
Music, 111–124
N
Names
variable, 55–58
Negation (-), 45
Networking
Ethernet, 147
Wi-Fi, 148
NEW command, 174
NEXT statement, 180
NOT operator, 173
NTSC video mode, 8
Numeric variables, 55–58
O
ON statement, 180
OPEN statement, 181
Operators
arithmetic, 172
logical, 173
relational, 173
OR operator, 173
P
PAL video mode, 8
Parenthesis, 45
PEEK function, 184
Peripherals, 3
POKE statement, 181
Ports, I/O, 3, 203
POS function, 186
PRG files, 27
PRINT statement, 181
PRINT# statement, 182
Printer emulation, 163
Printers, 143, 163
Programs
editing, 34, 54
line numbering, 51–52
loading/saving (disk), 37
Prompt, 69
Q
Quotation marks, 40
R
RAM Expansion Unit (REU), 10
RaNDom function, 184
READ statement, 182
REMark statement, 182
Reserved words, see commands,
statements
Restore key, 34
RESTORE statement, 183
Return key, 33
RETURN statement, 183
REU, see RAM Expansion Unit
RIGHT$ function, 186
RUN command, 23, 38, 175
RUN/STOP key, 35
241

S
SAVE command, 38, 175
Saving programs (disk), 37
Screen memory maps, 87, 199
SGN function, 185
Shift key, 33
SID music files, 27
SINe function, 185
Sound effects, 122–124
SPC function, 186
Sprite graphics, 95–108
SQuaRe function, 185
STOP statement, 183
STR$ function, 186
String variables, 55–58, 172
Subscripted variables, 130–133,
172
Subtraction (-), 41, 45, 173
SYS statement, 183
T
T64 files, 27
TAB function, 186
TAN function, 185
TAP files, see Tape image files
Tape image files, 26
Telnet Remote Menu, 151
TI variable, 172
TI$ variable, 172
Time clock, 172
U
Upper/Lower case mode, 36
USB storage, 4
User defined function, see DE-
Fine statement
User port, 143
USR function, 185
V
VAL function, 186
Variables
array, 130–133, 172
dimensions, 133, 172
floating point, 127–138, 171
integer, 127–138, 172
numeric, 127–138, 171
string, 127–138, 172
VERIFY command, 175
Video mode, 8
Video output
Commodore 64 8-pin, 4
HDMI, 4
Voice, 111–124, 229–231
W
WAIT statement, 183
Wi-Fi networking, 148
242

Commodore International Corporation
8 The Green, Ste A, Dover, Kent, DE 19901, USA
www.commodore.net
MANUFACTURER / FABRICANTE
MOS Technology, Inc.
8 The Green, Ste A, Dover, Kent, DE 19901, USA
EU AUTHORIZED REPRESENTATIVE / REPRÉSENTANT AUTORISÉ DE L’UE
Commodore Business Machines BV
Hullenbergweg 278 308, Zuidoost, 1101 BV Amsterdam, Netherlands
UK RESPONSIBLE PERSON / PERSONNE RESPONSABLE AU ROYAUME-UNI
Commodore Electronics Ltd.
Lytchett House, 13 Freeland Park, Wareham Road, Poole, BH16 6FA, UK
RESPONSIBLE SUPPLIER (AU/NZ) / FOURNISSEUR RESPONSABLE (AU/NZ)
Commodore Business Machines Pty. Ltd.
11 Bayer Road, Elizabeth South, S.A 5112 Australia
CANADIAN DISTRIBUTOR / DISTRIBUTEUR CANADIEN
Commodore Portable Typewriter Company Ltd.
622 - 602 West Hastings Street, Vancouver, BC V6B 1P2 Canada