-ダブルキック
アダプターの音量+ボタンと音量-ボタンを同時に2秒間押し続けて、デュアル
バスドラムモードに切り替えます。
-音響/イヤホンによる発声
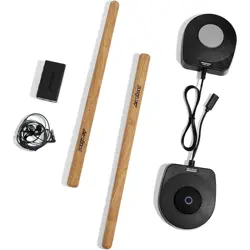
ドラムスティック+ペダル+アダプター+ヘッドフォン/スピーカー
ケーブルのイヤホンやオーディオを3.5 mmの音声入力接続アダプタ3.5mm
オーディオ負け輸出が、実現イヤホン/オーディオ再生音。
-音の切り替え
アダプタ8種の音色を支持し、音色を切り替えキーを通じた换。
-背景音楽にミックス
方法その1: 携帯電話機のbluetoothリストで「PocketDrum Audio」を検索
すると,音楽プレーヤから音楽を再生できる。注:アダプターは、ステレオまた
はイヤホンに接続して音を出す必要があります。
方法その2: アクティブなマイク/携帯電話をLINE INポートに接続して、アダ
プターを介して音楽や音声を再生します。 注:音を出すには、アダプターを
スピーカーまたはヘッドフォンに接続する必要があります。
ドラムマップを掲示
します。
注意:ドラムマップの掲示手順に
従ってください。
ドラム表面を見つけま
す。
4 6
よくある質問
1. どのように、私は望ましいドラム面を打ちますか?
ポケットドラムはドラムヘッドに正確に当たることができません。
ドラムを再校正してください。 注:位置を移動したり、長時間再生したり
するには、再調整が必要です。
ドラムは位置ではなく角度で識別されることに注意してください。
2.ドラムスティックを叩いた後、ドラム表面がずれている。
ドラムスティックを再キャリブレーションしてください。注意: ドラムスティッ
クは電子機器であり、物理的な物体で叩くことはできません。
でインジケ
ーターライ
ト状態
-Bluetooth接続インジケーター
白色のライ
トが点滅
白色のライ
トが消灯
白色が点滅
から常時点
灯へト状態
説明する
接続可能
接続
動かない
QRコードをスキャンして
授業動画を見てください
ドラムスティック充電時間:1-2h
ドラムスティック勤務時間は:16−18 h
ドラムスティック電池容量は:480 mAh
アダプタ充電時間:1-2h
アダプタ動作時間:3-5h
アダプタバッテリ容量:600mAh
ペダル充電時間:1-2h
ペダル勤務時間:16-18h
ペダル電池時間:360mAh
より多くのサポートが必要な場合は、Aerobandの公式
カスタマーサービスチームにお問い合わせください。
公式ウェブサイト: www.aeroband.net
カスタマーサービス: [email protected]
ビジネス協力 : [email protected]
产品介绍
A. 鼓棒
① Type-C充电口 ② 指示灯
③ 电源键
短按电源键校准/开机;长按3s,关机
C. 适配器
① 电量指示灯 ② 音量+ ③ 音量-
④ 音色切换键
短按切换8种音色,长按关闭鼓槌的
鼓位提示灯
长按适配器的音色切换键,即可开/关鼓位提示灯
アダプターの音色切替ボタンを長押しして、ドラム位置のライトインジケーター
をオン/オフにします。
⑤ 便捷式背夹
⑥ 充电及MIDI接口
专用Type-C数据线输出MIDI到USB
⑦ 电源键
⑧ 蓝牙连接指示灯
⑨ 3.5mm音频输出口
输入有源话筒或者背景音乐实现混音,例如装有电池的麦克风和手机
⑩3.5mm音频输入口
接入3.5mm有线耳机,或者通过3.5mm 音频线接入带有LINE IN /
AUX IN音频输入口的音响等数字音频设备
B. 脚踏(左和右)
① Type-C充电口
② 电源键
短按开机,开机后自动连接蓝牙,
长按3s后关机
未连接状态下,5分钟后自动关机
③指示灯
仅右脚踏有指示灯,用于提示开关机和蓝牙状态
功能介绍
-鼓棒指示灯
白灯由闪
烁到常亮
白灯熄灭
已连接
所有设备
未开机
指示灯状态
含义
白灯闪烁
可连接
-适配器蓝牙连接指示灯
鼓棒
脚踏(左) 脚踏(右)
使用方法
-校准定位
-脚踏指示灯
指示灯
状态
由闪烁
到常亮
闪烁后熄灭
含义 可连接
已连接设备
提示充电
正在充电
充电完成
闪烁(快)
呼吸(慢)
绿色常亮
-开启鼓位指示灯后,鼓棒指向每个鼓面会呈现不同颜色的灯光
鼓面
颜色
吊镲
黄色
高音
通鼓
粉色
中音
通鼓
青色
叮叮镲
紫色
踩镲
橙色
军鼓
蓝色
地通鼓
绿色
指示灯
状态
含义
闪烁(快)
可连接
由闪烁
到常亮
已连接
设备
闪烁后
熄灭
提示充电
呼吸(慢)
正在充电
绿色常亮
充电完成
彩灯
变换
指示
鼓面位置
将鼓棒开机,当指示灯由闪烁变成常亮时,表示连接成功,手持鼓棒如上
图所示,双手短按电源键,即完成校准。校准时注意鼓棒间夹角呈45度,
并保持水平。
注:当军鼓的位置改变或者打不到鼓面时,需要重新定位。
-MIDI功能
方法1:鼓棒 + 脚踏 + 适配器 + 移动端App
蓝牙MIDI:以“库乐队”为例,手机打开蓝牙和定位功能,在库乐队中依次点击
“设置”图标-“高级”-“蓝牙MIDI设备”,点击设备名“PocketDrum Midi
(该设备为适配器)”。
方法2:鼓棒 + 脚踏 + 适配器 + PC端DAW
USB MIDI:通过专用Type-C数据线连接适配器和电脑USB,即可使用电脑端
数字音频工作站,例如库乐队、cubase、logic pro。
-双底鼓
同时按下适配器的音量键+ 和音量键-,2s后切换成双底鼓模式。
注意:電源ランプがドラム表面の色
と一致し、ドラム表面を見つけるの
に役立ちます。
ドラムスティックを
キャリブレーション
します。
5
注意:ドラムスティックの先端を
ドラムマップのスネアドラムに合
わせ、2本のドラムスティックが
45度の角度になるようにします。
その間に、電源ボタンを短く押し
てキャリブレーションを完了し、
スネアドラムの位置を見つけます。
基本パラメータ
製品紹介
A.ドラムスティック
① Type-C充電口 ② でインジケーターライト
③ 電源ボタン
電源キーを押して机械を開きます/較正しま
す;3sを長押しして、机械を止めます
C. アダプタ
① でインジケーターライト ② ボリュームプラス ③ ボリューム-
短く押して8つの音色を切り替え、長押ししてドラムライトインジケータ
ーをオフにします。
⑤ 便利なバックホルダー
⑥ 充電とMIDIポート
専用のType-Cデータケーブル
でMIDIをUSBに出力する
⑦ 電源ボタン
⑧ Bluetooth接続インジケーター
⑨ 3.5 mmオーディオ出力口
バックグラウンドまたはマイクを3.5mmケーブルで入力して、アクティブマイ
クや携帯電話などのミキシングを実現します
⑩3.5mmオーディオ入力口
3.5mm有線のイヤホン、または3.5mmオーディオケーブルを介してLINE IN /
AUX INのオーディオ入力口付きオーディオなどのデジタルオーディオ機器
にアクセスする
-ドラムスティックきでインジケーターライト
-足でインジケーターライトを踏む
接続され
たデバイ
ス
でインジケ
ーターラ
イト状態
説明する
フラッシュ
接続可能
点滅から
常時点灯
へ
点滅して
消灯する
充電を促
す
呼吸
充電中
緑色のライ
トが点灯
充電完了
カラフル
ライト切
り替え
ドラム面
の位置
でインジケ
ーターラ
イト状態
点滅から
常時点灯へ
点滅して
消灯する
説明する
接続可能
接続された
デバイス
充電を促す 充電中
充電完了
フラッシュ
呼吸
緑色のライ
トが点灯
ドラムスティック
フットペダル(左)
B. ペダル(左と右)
① Type-C充電口
② 電源ボタン
ペダルを短く押してオンにし、長押し
(3秒)してオフにします。ペダルがオ
ンになっている場合、Bluetoothが自動的に接続されます。
ただし、5分間Bluetoothが接続されない場合、ペダルはオフになります。
③でインジケーターライト
右側のペダルにのみ、オン/オフと
Bluetoothステータスを促すインジケーターライトがあります
①
②
③
①
③
②
④
⑤
⑥
⑦
⑧
⑨ ⑩
①
③
②
④
⑤
⑥
⑦
⑧
⑨ ⑩
鼓组位置
-5鼓3镲摆放位置
吊镲
开镲:左脚尖抬起
闭镲:左脚平放
高音通鼓
叮叮镲
地通鼓
踩镲脚踏
底鼓脚踏
中音通鼓
军鼓
鼓棒 + 脚踏 + 适配器
适配器接入耳机或者
音响
注:适配器开机,鼓棒和脚踏
自动连接。如需要播放背景音
乐,手机搜索蓝牙“Pocket-
Drum Audio”。
鼓棒开机
注:短按鼓棒电源键按钮即可
开机。如需关机,长按电
源键3s即可。
1 3
短按电源键
短按脚踏电源键开机
注:开机后自动连接适配器蓝
牙。未连接蓝牙时,5分钟
后将自动关机。
注:鼓位图上有张贴步骤,请
按提示张贴好鼓位图。
2
张贴鼓位图
4
注:鼓棒头部对准鼓位图军鼓
位置,两鼓棒呈45度夹角,
同时短按电源键完成校准,
找到军鼓位置。
鼓棒校准
5
注:鼓棒指向哪个鼓面,电源灯
会变成这个鼓的颜色,帮你
定位鼓面位置。
找到鼓面
6
ドラムスティック + ペダル +アダプタ
ドラムスティックの
電源を入れます。
注意:ドラムスティックの電源ボ
タンを短く押してオンにし、長押
し(3秒)してオフにします。
3
使い方
電源
ボタンを短く押す
ペダルの電源ボタン
を短く押して電源を
入れます。
2
注意:電源を入れた後、Bluetooth
が自動的に接続されます。ただし、
5分以内にBluetoothが接続されな
い場合、ペダルは自動的に電源が切
れます。
イヤホンやオーディ
オに接続するアダプタ
注:アダプターがオンになると、ドラ
ムスティックとペダルは自動的に接
続されます。bgmを再生する場合は
bluetooth「PocketDrum Audio」
を携帯で検索。
1
ドラムセット位置
-5鼓3金がないから位置を置く
クローズドハイハット:
左足を平らにする
オープンハイハット:
左足を持ち上げる
クラッシュシンバル
ハイタム
ミッドタム
フロアタム
ライドシンバル
バスドラム
スネアドラム
フットペダル(右)
ハイハット
アダプタ
機能紹介
-キャリブレーション
ドラムスティックの電源をオンにし,インジケーターランプが点滅から点灯
に変われば、接続に成功したことを意味します。ドラムスティックを手に持
って上の図のように、両手で電源ボタンを短く押すとキャリブレーションが
完了します。キャリブレーションの際、ドラムスティック間の角度が45度で
あることに注意し、水平を保つ。
注: スネアやタムの位置が変わったときや、ドラムヘッドを叩かないときは、
再キャリブレーション が必要です。
−MIDI機能
方法1:ドラムスティック + ペダル + アダプター + モバイルアプリ
Bluetooth MIDI接続方法:「GarageBand」アプリを例に説明します。まず、ス
マートフォンのBluetoothと位置情報機能をオンにします。次に、「設定」 > 「
詳細設定」 > 「Bluetooth MIDIデバイス」をクリックし、「PocketDrum Midi」
というアダプター名を選択します。
方法2:ドラムスティック + ペダル + アダプター + PC DAW
USB MIDI接続: Type-Cケーブルを使用して、アダプターとコンピュータをUSBポ
ートで接続します。その後、GarageBand、Cubase、Logic Proなどのデジタルオ
ーディオワークステーション(DAW)をコンピュータで使用できます。
敲打踩镲、军鼓、地通鼓时,敲击落点
尽量与地面保持水平。
地面
敲打吊镲、高音通鼓、中音通鼓时,
敲击落点尽量与地面保持45度角。
- 打鼓姿势
①
② ③
①
② ③
More Manuals Subscribe Here
Show More Gain More!
Subscribe And Join Our Affiliate Plan
To Get More Commission
-音响/耳机发声
鼓棒 + 脚踏 + 适配器 + 耳机/音箱
使用有线耳机或者音响的3.5mm音频输入接入适配器的3.5mm音频输出
口,即可实现耳机/音响发声。
-音色切换
适配器支持8种音色,通过音色切换键进行切换。
常见问题
-背景音乐混音
方法1: 在手机蓝牙列表中搜索“PocketDrum Audio”,即可通过适配器
播放音乐播放器中的音乐。注:适配器要连接音响或者耳机发出声音。
方法2: 将装有电池的麦克风/手机等设备接入LINE IN,即可通过适配器播
放音乐或人声。注:适配器要连接音响或者耳机发出声音。
1. 空气鼓棒无法精准击中鼓面。
请对鼓棒重新校准,注意:移动位置或者长时间打击,都需要重新校准。
请注意鼓棒通过角度识别,而不是位置。
2.鼓槌发生撞击之后,导致鼓面发生错位。
请对鼓棒重新校准,注意:鼓棒为电子物品,不能敲击实物。
鼓棒充电时间:1-2h
鼓棒工作时间:16-18h
鼓棒电池容量:480mAh
适配器充电时间:1-2h
适配器工作时间:3-5h
适配器电池容量:600mAh
-联系我们
更多售后支持,请联系您的专属微信客服,
搜索品牌Aeroband
官方网站 :www.aeroband.cn
售后邮箱 :support@aeroband.net
商务合作 :business@aeroband.net
脚踏充电时间:1-2h
脚踏工作时间:16-18h
脚踏电池容量:360mAh
基本参数
扫码查看教学视频
PD2 MAX DRUM MAP
短按电源键
PD2 MAX DRUM MAP
PD2 MAX DRUM MAP
PD2 MAX DRUM MAP
注意: 每次开始使用,或者过程中敲击不准确时,请用鼓棒头部对准军鼓,呈45度
夹角校准。
注意:使用開始時(または不正確に叩いた場合)は、ドラムスティックの先端をス
ネアドラムに45度の角度で合わせてキャリブレーションを行います。
①
②
③
地面
45°
- ドラミング姿勢
ハイハット、スネアドラム、フロアタム
を叩く際には、叩くポイントが地面に対
して水平である必要があります。
地面
クラッシュシンバル、高トム、ミッド
トムを叩く際には、叩くポイントが
地面に対して45°の角度である必要が
あります。
地面
45°
電源
ボタンを短く押す
-ドラムインジケーターをオンにすると、ドラムスティックが各ドラムヘッドを指
しているときに、それぞれ異なる色の光が表示されます。
ドラム
表面
色
クラッシ
ュシンバ
ル
黄色
ハイ
タム
ピンク
ミッド
タム
シアン
ライドシ
ンバル
オレ
ンジ
ハイハ
ット
紫
スネアド
ラム
青
フロア
タム
緑
④ トーンコントロールキー
Product Introduction
Schlagzeugstöcke
① Ladeanschluss ② Leuchtanzeige
③ Starten Sie die Taste
Kurz Drücken Sie die Einschalttaste, um zu
kalibrieren oder einschalten. und Lange Drücken
Sie für 3s, um es auszuschalten.
Gemeinsame Probleme
1. Wie kann ich die gewünschte Trommel treffen.
Die Taschentrommel kann das Trommelfell nicht genau treffen.
Bitte kalibrieren Sie die Trommel neu. Hinweis: EineNeukalibrierung ist
erforderlich, wenn Sie die Position verschiebenoder ängere Zeit spielen.
Bitte beachten Sie, dass die Trommel anhand des Winkelsund nicht der
Position identifiziert wird.
2. Die Schlagfläche ist nach dem Schlagen der Drumsticks nicht richtig
ausgerichtet.
Bitte kalibrieren Sie die Drumsticks neu. Hinweis: Drumsticks sind
elektronische Gegenstände und dürfen nicht von physischen Objekten
getroffen werden.
C. Adapter
① Lichtindikator ② Volumen + ③ Volumen -
④ Ton-Steuer-Button
Kurz drücken, um zwischen 8 Tönen zu
wechseln, und lange drücken, um die
Schlagzeuglichtanzeige auszuschalten.
⑤ bequeme Rückklammer
⑥ Midi-Eingang & Ladeport
Es muss an das dedizierte Type-C
ausgang MIDI auf USB-anschluss.
⑦ Starten Sie die Taste
⑧
Bluetooth-Verbindungsanzeige
⑩ 3,5-mm-Audioeingang
Geben Sie Hintergrund oder Mikrofon über ein 3,5-mm-Kabel ein, um das
Mischen zu realisieren, z. B. aktives Mikrofon und Mobiltelefone
⑨3.5-mm-Audio-Output-Port
Es muss an einen 3.5-mm-kabelgebundenen Kopfhörer angeschlossen
werden, oder es kann über 3.5-mm-Audiokabel auf digitale Audiogeräte
wie Lautsprecher mit Line.
Ladezeit des Schlagzeugstöcke: 1-2 stunden
Arbeitszeit des Schlagzeugstöcke: 16-18 stunden
Batteriekapazität des Schlagzeugstöcke: 480mAh
Die Fussmaschine Ladezeit ist: 1-2 stunden
Arbeitszeit des Fussmaschine: 16-18 stunden
Batteriekapazität von Fussmaschine: 360mAh
Ladezeit des bluetooth-Adapters: 1-2 stunden
Arbeitszeit des bluetooth-Adapters: 3-5 stunden
Batteriekapazität des Bluetooth-Adapters: 600mAh
Grundlegende Merkmale
Für weitere Unterstützung wenden Sie sich bitte
an das offizielle Kundenserviceteam von
Aeroband.
Offizielle Website: www.aeroband.net
Kundenservice: [email protected]
Geschäftskooperation: [email protected]
Bitte scannen Sie den
QR-Code, um das
Lehrvideo anzuzeigen
Indikator für den schlagzeugstöcke
Anzeigestatus
blinkend
Vom Blinken
zum
Dauerlicht
Nach dem
Flashen
ausschalten
durchatmen
Grünes
Licht
konstant
Farbwechse-
lndes Licht
Schlagfläch-
enposition
Bedeutung
Anschließbar
Verbundenes
Gerät
Aufforderung
zum
Aufladen
Aufladenfertig
geladen
Indikator für den Fussmaschine
Anzeigestatus
blinkend
Vom Blinken
zum
Dauerlicht
Nach dem
Flashen
ausschalten
durchatmen
Grünes
Licht
konstant
Bedeutung
Anschließbar
Verbundenes
Gerät
Aufforderung
zum
Aufladen
Aufladenfertig
geladen
Bluetooth-Verbindungsanzeige
Anzeigestatus
Weißes Licht
blinkend
Weißes
Licht wechselt
von Blinken
zu Dauerlicht
Weißes Licht
aus
Bedeutung
Anschlie ßbar
Konstante
Nicht
eingeschaltet
Beim Schlagen der Hi-Hat, Snaredrum und
Floor Tom muss der Schlagpunkt horizontal
zum Boden ausgerichtet sein.
-Schlagzeughaltung
Beim Schlagen der Crash-Becken, High Tom
und Mid Tom muss der Schlagpunkt in
einem 45°-Winkel zum Boden ausgerichtet
sein.
Schlagzeugstöcke
Hi-Hat Fussmaschine
Bass Fussmaschine
Adapter
Product Introduction
A. Drumsticks
① Type-C charging port
② Light indicator
③ Power button
Short press the power button to
calibrate/turn on, and long press for
3s to turn it off
The light indicator of drumsticks
Drums Positions
B. Pedals (Left & Right )
① Micro Charging port
② Power button
Short press to turn on the pedal and
long press for 3s to turn it off. If the
pedal is turned on, the Bluetooth will
be automatically connected.
However, if the Bluetooth is not
connected for 5 minutes, the pedal will
be turned off.
-5 drums( 1 snare & 3 Toms & Bass) and 3 cymbals(1 Hi-Hat & 1 Crash &
1 Ride)position
FAQ
1. The pocketdrum cannot hit the drum head accurately.
Please recalibrate the drum. Note: recalibration is requiredfor moving
the position or playing for a long time.
Please note that the drum is identified by angle, not position.
2. The drum surface is misaligned after drumsticks are stricken.
Please recalibrate the drumsticks. Note: drumsticks are electronic items and
cannot be stricken by any physical object.
Method 2: Drumsticks + Pedal + Adapter + PC DAW
USB MIDI: Use Type-C cable to connect the adapter and computer
via USB Port. Then you can use Digital Audio Workstation (DAW) ,
such as GarageBand, Cubase, or Logic Pro in computer.
-Double Kick
Press and hold the volume+ and volume- buttons on the adapter
simultaneously for 2s to switch to dual bass drum mode.
o
Drumsticks
Bass drum Pedal
Closed Hi-Hat :
put the left foot flat
Opened Hi-Hat:
slighly lift up the toes
part up
Crash
High-Tom
Mid-Tom
Floor-Tom
Ride
Hi-Hat pedal
Bass drum pedal
Snare
Hi-Hat Pedal
- Speaker / Speaker Sound
Drumsticks + Pedal + Adapter + Headphone/Speaker
Use the 3.5mm audio input of the wired headset or speaker to access
the 3.5mm audio output of the adapter to make the sound to go
inside the headset or speaker.
- Tone Switching
The adapter supports 8 kinds of tones that are controlled by tone
control button.
- Background Music Mix
Method 1: Search for "PocketDrum Audio" in your phone's Bluetooth
list to play music from your music player via the adapter. Note: The
adapter should be connected to the headset or speaker to make
sound.
Method 2: Plug in the active microphone / mobile phone on LINE IN
port to play music or voice through the adapter. Note: the adapter
should be connected to an speaker or headphone to make sound.
4 6
Short press on
the power button
Note: Please follow the
posting steps on the drum
map
Note: The power light will
match the drum surface
color, which helps you
locate the drum surface.
Note: When starting to use (or if striking inaccurately), align the drumstick
tip with the snare drum at a 45° angle for calibration.
Post the drum map
Find the drum
surface
Green
light
Steady
Changes
from flashing
to off
Unsteady
ed
Charging
Charging
completed
Status
Meaning
Flashing
Bluetooth
connectable
Changes
from flashing
to steady
Low
battery
Bluetooth
connect
Colored light
switching
Drum surface
position
Drumstick charging time: 1-2h
Drumstick working time: 16-18h
Drumstick battery capacity: 480mAh
Pedal charging time: 1-2h
Pedal working time: 16-18h
Pedal battery capacity: 360mAh
Adapter charging time: 1-2h
Adapter working time: 3-5h
Adapter battery capacity: 600mAh
Basic Paraments
For more support, please contact the Aeroband
official customer service team.
Official website: www.aeroband.net
Customer Services: [email protected]
Business Cooperation: [email protected]
Please scan the QR code
to watch the tutorial video
B. Fussmaschine (linke & rechte)
① Type-C-Ladeanschluss
② Starten Sie die Taste
Kurz drücken, um das Pedal einzuschalten,
und lange drücken (3 Sekunden), um es au-
szuschalten. Wenn das Pedal eingeschaltet
ist, wird die Bluetooth-Verbindung
automatisch hergestellt.
Wenn die Bluetooth-Verbindung
jedoch innerhalb von 5 Minuten nicht
hergestellt wird, wird das Pedal ausgeschaltet.
③ Leuchtanzeige
Nur das rechte Pedal hat eine Kontrollleuchte,
um den Ein-/Aus-und Bluetooth-Status abzufragen
5
Note: The drumstick tip is
aligned with the snare drum
on the drum map, with the
two drumsticks forming a
45-degree angle. Meanwhile,
short press the power button
to complete the calibration
and find the snare drum
position.
Calibrate the
drumsticks
Schlagzeugstöcke + Fussmaschine + ein Adapter
Schalten Sie die
Drumsticks ein.
3
Finden Sie die
Schlagfläche.
6
Methoden der Verwendung
Hinweis: Das Stromlicht wird mit der
Farbe der Schlagfläche
übereinstimmen, was Ihnen hilft, die
Schlagfläche zu finden.
Hinweis: Beim Starten der Benutzung (oder wenn die Schläge ungenau sind)
richten Sie die Spitze der Drumsticks im 45-Grad-Winkel auf die Snaredrum
aus, um die Kalibrierung durchzuführen.
Drücken Sie kurz den
Ein-/Ausschalter, um
das Pedal einzuschalten.
2
Hinweis: Nach dem Einschalten wird die
Bluetooth-Verbindung automatisch
hergestellt. Wenn die Bluetooth-
Verbindung jedoch innerhalb von 5
Minuten nicht hergestellt wird, wird das
Pedal ausgeschaltet.
Kr zpresse auf
dem Netzschalter
Hinweis: Drücken Sie die Stromtaste des
Drumsticks kurz, um ihn einzuschalten,
und halten Sie sie 3 Sekunden lang
gedrückt, um ihn auszuschalten.
Kalibrieren Sie die
Drumsticks.
5
Hinweis: Richten Sie die Spitze der
Drumsticks auf die Snaredrum auf der
Drum-Karte aus, wobei die beiden
Drumsticks einen Winkel von 45 Grad
bilden. Drücken Sie dann kurz den Ein-/
Ausschalter, um die Kalibrierung
abzuschließen und die Position der
Snaredrum zu finden.
Positionen der trommeln
- 5 Trommeln( 1 Snare, High-Tom, Mid-Tom,Floor-Tom, Bass-drum )
und (Hi-Hat und 1 Crash becken und 1 Ride becken) stellung
-Hintergrund-Musikmischung
Methode 1: Suhe nach " PocketDrum" lhren telefon-Bluetooth Liste,
um Musik vom Musik-Player über den Adapter wiedergeben zu
können. Hinweis: der Adapter sollte an ein Stereo-oder Kopfhörer
angeschlossen sein, um Ton zu erzeugen.
Methode 2: Schließen Sie das aktive Mikrofon / Mobiltelefon an den
LINE IN-Anschluss an, um Musik oder Sprache über den Adapter
abzuspielen. Hinweis: Der Adapter sollte an einen Lautsprecher oder
Kopfhörer angeschlossen werden, um Ton zu erzeugen.
-Audio- / Kopfhörerton
Drumsticks + Pedal + Adapter + Kopfhörer/Lautsprecher
Verbinden Sie die 3.5mm Audio-Eingangsanschlussleitung LINE IN
/AUX IN im verdrahteten kopfhoren oder sprechern mit dem 3.5mm
Audio-Ausgang-Port des Adapters, um die kopfhoren-sprechern-
Erzeugung zu realisieren.
-zwischen den Musiktönen navigieren.
Die Adapter unterstützt 8 Modus, die über die Ton-Steuer-Button
angesteuert werden.
①
③
②
④
⑤
⑥
⑦
⑧
⑨ ⑩
Bass drum Fussmaschine
Geschlossen Hi-Hat :
Setzen sie den linken Fub flach
Angebrochen Hi-Hat :
Heben sie den linken Fub auf
Crash Becken
High-Tom Mid-Tom
Floor-Tom
Ride beken
Snare
Hi-Hat Fussmaschine
- Die Kalibration
Strom auf die Schlagzeugstöcke. Wenn sich die Kontrollleuchte vom
Blinken auf hell schaltet, bedeutet dies, dass die Verbindung
erfolgreich ist. Halten Sie die Schlagzeugstöcke wie oben gezeigt, und
drücken Sie die Tasten mit beiden Händen, um die Kalibration
abzuschließen.
Hinweis: wenn sich die Position der Snare und der Toms geändert hat
oder der Trommel treffen nicht getroffen wird, müssen Sie die
Schlagzeugstöcke neu kalibrieren.
-Midi-Funktionen
Methode 1: Drumsticks + Pedal + Adapter + Mobile App
Bluetooth-MIDI: Verwenden Sie die "GarageBand"-App als Beispiel:
Schalten Sie die Bluetooth- und Standortfunktion Ihres Telefons ein,
klicken Sie auf "Einstellungen" > "Erweitert" > "Bluetooth-MIDI-Gerät"
und wählen Sie dann "PocketDrum Midi", den Namen des Adapters, aus.
Methode 2: Drumsticks + Pedal + Adapter + PC-DAW
USB-MIDI: Verwenden Sie ein Type-C-Kabel, um den Adapter über den
USB-Anschluss mit dem Computer zu verbinden. Danach können Sie eine
Digital Audio Workstation (DAW) wie GarageBand, Cubase oder Logic Pro
auf dem Computer verwenden.
-Double Kick
Drücken und halten Sie die Lautstärke+ und Lautstärke- Tasten am Adapter
gleichzeitig für 2 Sekunden, um in den Dual-Bassdrum-Modus zu wechseln.
Einführung in die Funktionen
- Calibration
When striking the hi-hat, snare
drum and floor tom, the striking
point needs to be horizontal to
the ground.
When striking the crash cymbal,
high tom and mid tom, the striking
point needs to be at a 45° angle to
the ground.
-Drumming posture
Functions Introduction
- Calibration
Power on the drumsticks. When the indicator light turns from flashing
to steady, it means the connection is successful. Hold the drumsticks
as shown above, and press on the power buttons with both hands to
finish the calibration. When calibrating, note that the angle between
the drumsticks is 45 degrees and kept level.
Note: When the position of the Snare and Toms have changed or the
desired drum is not hit, it needs to be recalibrate.
- MIDI functionalities
Method 1: Drumsticks + Pedal + Adapter + Mobile App
Bluetooth MIDI: Take "GarageBand" App as an example: turn on the
phone's Bluetooth and Location function, click "Settings" > "Advanced" >
"Bluetooth MIDI Device" and then select "PocketDrum Midi", which is
the name of the adapter.
Posten Sie die Drum-Karte.
Hinweis: Bitte folgen Sie den Schritten
auf der Drum-Karte zum Aufstellen.
4
Verbinden Sie den Adapter mit
Kopfhörern oder Lautsprechern
Hinweis: nach dem Booten des Adapters
werden die Schlagzeugstöcke und die
Fussmaschine automatisch angeschlossen.
Wenn Sie Hintergrundmusik benötigen,
suchen Sie bitte "PocketDrum Audio" auf
Bluetooth-Liste Ihres Telefons.
1
Kr zpresse auf
dem Netzschalter
The light indicator of pedals
Drumsticks + Pedals + Adapter
Methods of Use
C. Adapter
① Light indicator
② Volume + ③ Volume -
Short press to switch between 8 tones,
long press to turn off the drum light
indicator
⑤ Convenient back clip
⑥ MIDI ouput & charging port
It must be connected to the dedicated
Type-C data cable output MIDI to USB.
⑦ Power button
⑧ Bluetooth connection indicator
⑩ 3.5mm audio input
Input background or mic through 3.5mmcable to realize mixing, such as
Activemicrophone and mobile phones
Connect to 3.5mm wired headphones or digital audio devices such as
speakers with LINE IN / AUX IN audio input ports using a 3.5mm audio cable.
⑨ 3.5mm audio output port
③ Light indicator
Only the right pedal has an indicator light to prompt the
on / off and Bluetooth status
-Bluetooth connection indicator
Status
White
light
flashing
White light
changes from
flashing to
steady
White
light
extinguished
Meaning
Bluetooth
connectable
Bluetooth
connected
all of devices
Not
powered on
Adapter
3
Short press on
the power button
Note: Short press the
drumstick power button
to turn it on and long
press for 3s to turn it off.
2
Note: After turning it on, the
Bluetooth will be auto-
matically connected.
However, if the Bluetooth is
not connected for 5 minutes,
the pedal will be turned off.
Short press the
power button to
turn on the pedal
Turn on the
drumsticks
Status
Flashing Unsteady
Meaning
Bluetooth
connectable
Bluetooth
connected
Low
battery
Charging
Charging
completed
Green
light
Steady
Changes
from flashing
to steady
Changes
from flashing
to off
①
③
②
④
⑤
⑥
⑦
⑧
⑨ ⑩
1
Note: After the adapter
is boots, the drumsticks and
pedals get automatically
connected.
If you need background
music, please search
"PocketDrum Audio"
on Bluetooth list of
your phone.
Link the adapter to
headphones or
speakers
①
② ③
①
② ③
①
②
③
①
②
③
-After turning on the drum indicator, each drum head will show different
colors of light when the drum stick is pointing at it.
Drum
Surface
Color
Crash
Cymbal
Yellow
High
Tom
Pink
Mid
Tom
Cyan
Ride
Cymbal
Orange
Hi-Hat
Purple
Snare
Drum
Blue
Floor
Tom
Green
-Nachdem Sie den Schlagflächen-Indikator eingeschaltet haben, wird
jede Schlagfläche unterschiedliche Lichtfarben anzeigen, wenn der
Drumstick auf sie zeigt.
Schlag-
fläche
Farbe
Crash-
Becken
Gelb
High
Tom
Pink
Mid
Tom
Cyan
Ride-
Becken
Orange
Hi-Hat
Lila
Snare
Drum
Blau
Floor
Tom
Grün
ground
PD2 MAX DRUM MAP
PD2 MAX DRUM MAP
PD2 MAX DRUM MAP
PD2 MAX DRUM MAP
ground
45°
Boden
Boden
45°
④ Tone control button
Long press the tone switch button on the adapter to turn on/off the light
indicator of the drum position.
Drücken Sie die Tonumschalt-Taste am Adapter lange, um die Lichtanzeige
für die Schlagzeugposition ein- oder auszuschalten.
changes or modifications not expressly approved by the party responsible for compliance could void
the user’s authority to operate the equipment.
This device complies with Part 15 of the FCC Rules. Operation is subject to the following two
conditions:
(1) this device may not cause harmful interference, and
(2) this device must accept any interference received, including interference that may cause undesired
operation.
Note: This equipment has been tested and found to comply with the limits for a Class B digital device,
pursuant to Part 15 of the FCC Rules. These limits are designed to provide reasonable protection
against harmful interference in a residential installation. This equipment generates, uses, and can
radiate radio frequency energy, and if not installed and used in accordance with the instructions, may
cause harmful interference to radio communications. However, there is no guarantee that interference
will not occur in a particular installation. If this equipment does cause harmful interference to radio or
television reception, which can be determined by turning the equipment off and on, the user is
encouraged to try to correct the interference by one or more of the following measures:
– Reorient or relocate the receiving antenna.
– Increase the separation between the equipment and receiver.
– Connect the equipment into an outlet on a circuit different from that to which the receiver is
connected.
– Consult the dealer or an experienced radio/TV technician for help.
This equipment complies with FCC radiation exposure limits set forth for an uncontrolled
environment. This equipment should be installed and operated with a minimum distance of 20cm
between the radiator & your body. This transmitter must not be co-located or operating in
conjunction with any other antenna or transmitter.