2 . According to the measurement requirement, long press ABS / mm / in button to select the
measurement unit.
3 . When the measuring range is 0-25 mm and below, turn the ratchet barrel to close the two
measuring surfaces of the micrometer, observe the displayed value and check whether the 0
position is correct.If the product exceeds the range of 25 mm, select the measuring calibration
bar or block corresponding to the corresponding range, make the measuring surface and the
measured surface fit closely, and select the measuring unit.If the product exceeds 2.5 mm range,
select the measurin
g calibration bar or block corresponding to the corresponding range, make
the measuring surface and the measured surface close together, observe the displayed value
and check whether the 0 position is correct. When the 0 position of the product is not correct,
press the ZERO key to reset the 0 position of the micrometer.
1 . Press the ON / OFF (On/Off) key to illuminate the display. If the display shows "SET", use the
appropriate calibration post or block.Make a tight fit between the measuring surface and the
surface to be measured, then twist the ratchet barrel so that it clicks three times. Final
ly press
and hold ON / OFF and it will be set to the corresponding preset 0 position.
4 . Rotate the ratchet barrel or micrometer barrel so that the measuring surface and the surface
being measured fit closely together, then twist the ratchet barrel so that the ratchet barrel rattles
three times. Then observe the display and read the value.
1 . Without any operation for more than 25 minutes, the screen is automatically off, rotating the
sleeve can be turned on; without any operation for more than 72 H, then the systemPower off, you
need to press ON / OFF power on, the screen appears "SET" characters, at this tim
e, long press
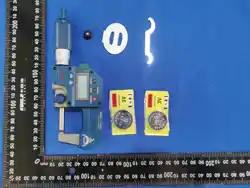
"ON / OFF" to reset the 0 position.2 . The product uses CR2450 batteries.3 . Using the supplied
'S' wrench, rotate the battery cover in a counterclockwise direction and remove. Then install the
battery with the positive terminal facing up.
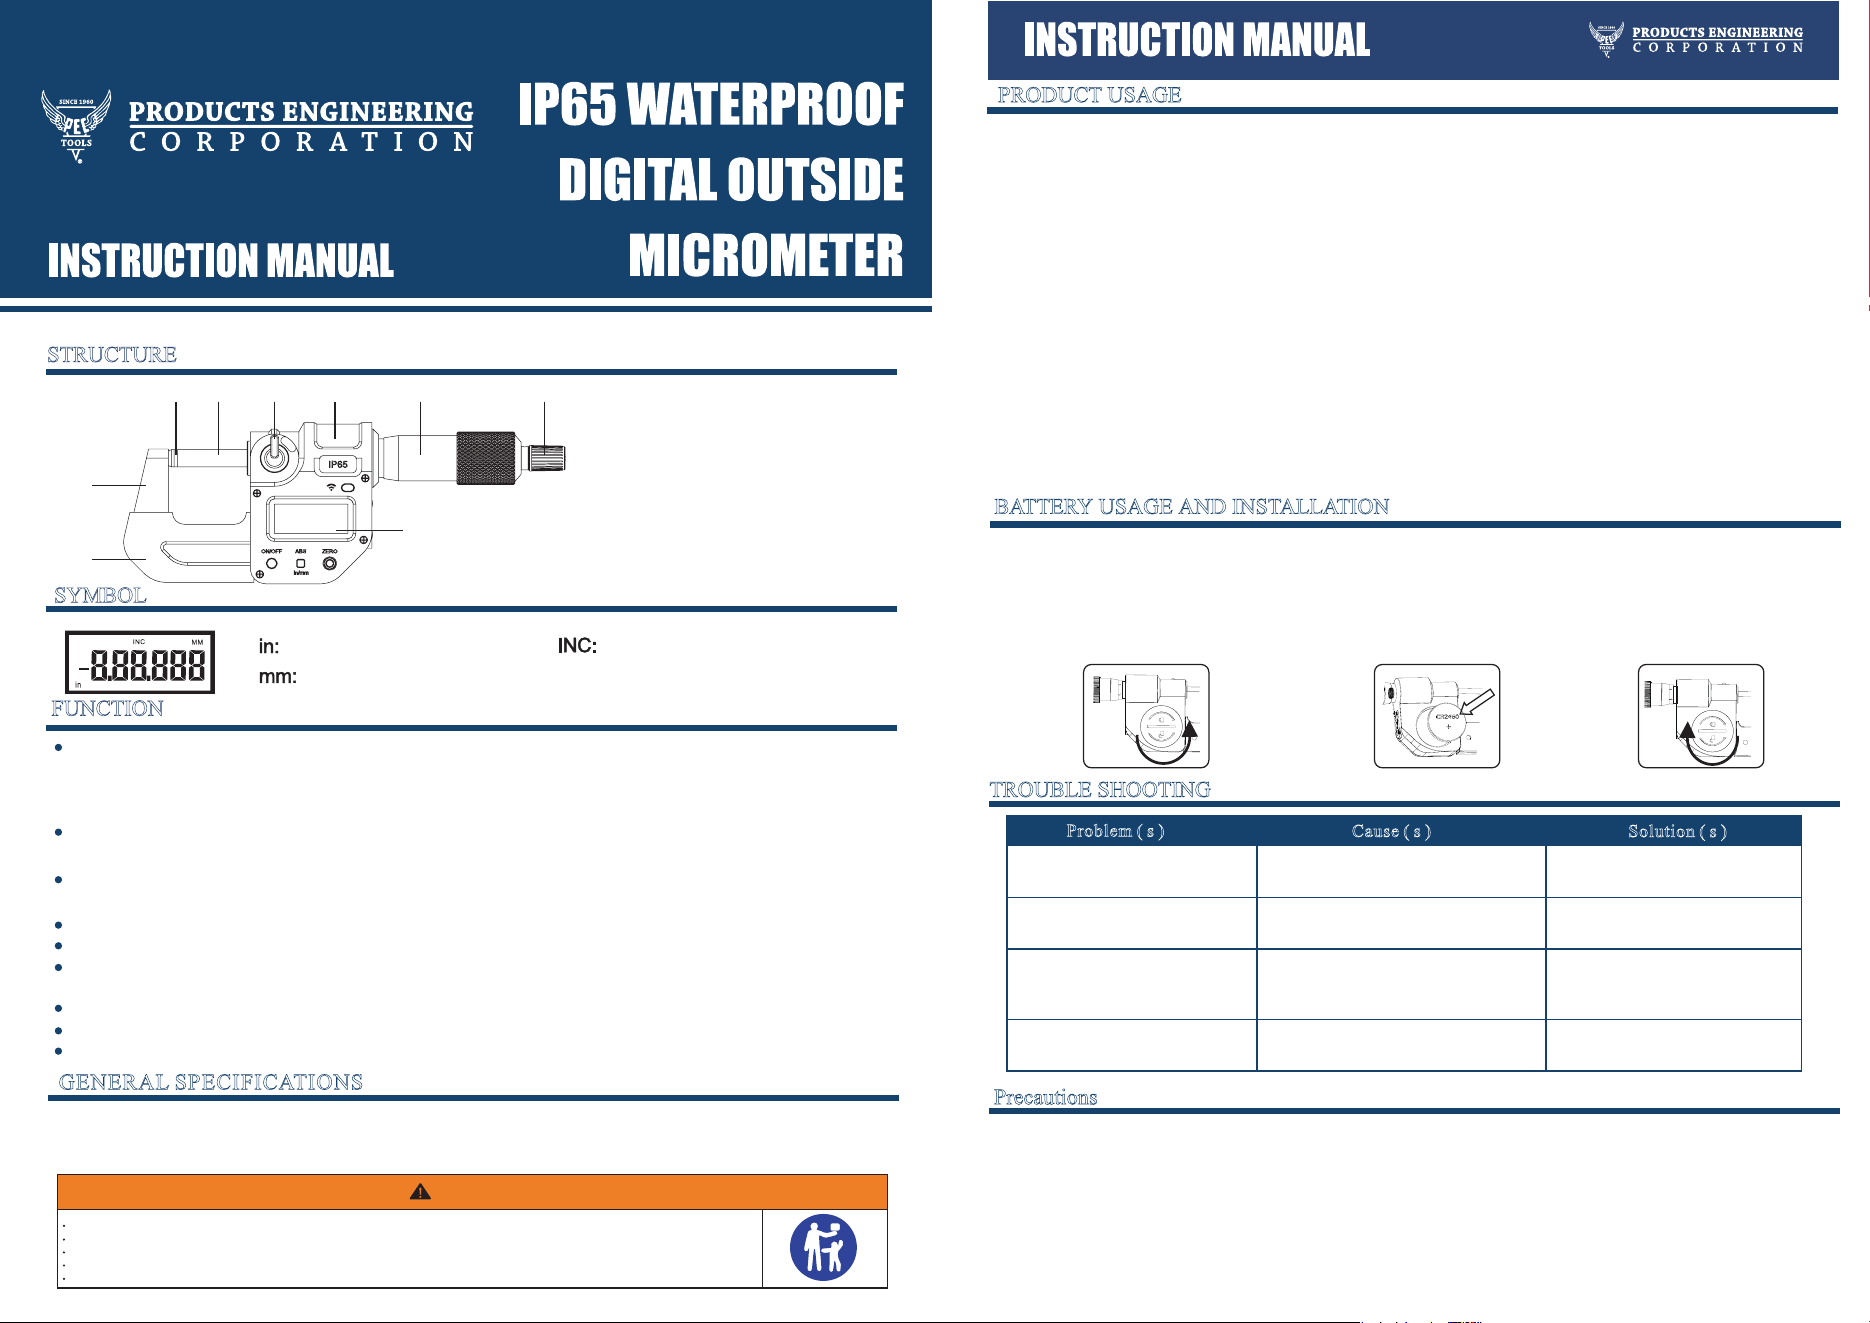
1.Anvil
7.
LCD screen6.
3.Locking screw
Frame
5.Ratchet barrel
2.Spindle
4.Thimble
8
9.Bluetooth
.
Frame shield
For your safety, please ready this manual book before using. Thanks for choosing PEC TOOLS !
Buttons are pressed two ways to execute functions :
2 . Press and hold for at least two seconds
1 . Press and immediately release
2 .Zero
Button
Press and release : Zero set for absolute measuring
Press and release : Absolute and INC measuring mode conversion
Press and hold : Inch / Metric conversion ( " in " will appear for inch readings , "mm " will appear for m
etric
3 .
4 . Bluetooth
ABS / - Unit
Button
readings
Press and release : Power on / off
1 .ON / OFF Button
Operating temperature : 0-40℃
Storage temperature : -20-60℃
Measuring force : 5-10N
GENERAL SPECIFICATIONS
Use a soft cloth to clean the instrument . Never use organic solvents such as acetone or benzene to clean
Do not drop it or apply excessive force
Avoid exposing the instrument away from strong magnetic fields and high voltage .
Do not disassemble the instrument
Do not use or store the instrument under direct sunlight
If the instrument is to be stored or left unused for extended periods , remove the battery
Do not subject the instrument to blows or shock .
Measuring data incorrect
2 . Zero is incorrect
1 . Dirty measuring faces
1 . Clean measuring faces
2 . Inspect and reset zero
No display on LCD
1 . Bat
tery position is incorrect
2 . Battery is dead
1 . Reset battery
2 . Replace with new battery
1 . Flickering display
3 . Display remains dead
2 . Display is sporadic
2 . Replace battery
1 . Replace battery
3 . Reset battery
Replace with new battery
3 . Battery position is incorrect
2 . Weak battery
1 . Weak battery
Weak battery
2 . Output data is incorrect
1 . Display is blurry
S
olution ( s )
Cause ( s )
Problem ( s )
1
2
3 9 4 5
8
7
6
FUNCTION
SYMBOL
S
TRUCTURE
BATTERY USAGE AND INSTALLATION
PRODUCT USAGE
Precautions
INCH measurement
Metric measurement
Increasing measurement
TROUBLE SHOOTING
INGESTION HAZARD: This product contains a button cell or coin battery.
DEATH or serious injury can occur if ingested.
A swallowed button cell or coin battery can cause Internal Chemical Burns in as little as 2 hours.
KEEP new and used batteries OUT OF REACH Of CHILDREN
Seek immediate medical attention if a battery is suspected to be swallowed or inserted inside any part of the body.
WARNING
Enable device Bluetooth,Press & hold DATA button 3+ sec until LED blinks fast (1/sec).
On device, select "Bluetooth Keyboard" and tap "Pair".
When connected, LED blinks slowly.
This device complies with part 15 of the FCC Rules. Operation is subject to the following two conditions:
(1) This device may not cause harmful interference, and (2) this device must accept any interference received,
including interference that may cause undesired operation.
Any Changes or modifications not expressly approved by the party responsible for compliance could void the
user's authority to operate the equipment.
Note: This equipment has been tested and found to comply with the limits for a Class B digital device, pursuant
to part 15 of the FCC Rules. These limits are designed to provide reasonable protection against harmful
interference in a residential installation. This equipment generates uses and can radiate radio frequency
energy and, if not installed and used in accordance with the instructions, may cause harmful interference
to radio communications. However, there is no guarantee that interference will not occur in a particular
installation. If this equipment does cause harmful interference to radio or television reception, which can
be determined by turning the equipment off and on, the user is encouraged to try to correct the interference
by one or more of the following measures:
-Reorient or relocate the receiving antenna.
-Increase the separation between the equipment and receiver.
-Connect the equipment into an outlet on a circuit different from that to which the receiver is connected.
-Consult the dealer or an experienced radio/TV technician for help.
Micrometer Caliper
Resolution 0-25mm/0-1"*0.001mm/0.00005
Accuracy ±0.02mm/0.001"
Battery: 3V CR2450 2PC
FCC ID: 2BT4E-4410-1105