Product Instructions
Product No. 2000353 / 2000354 / 2000355
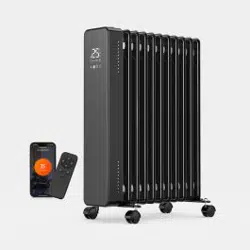
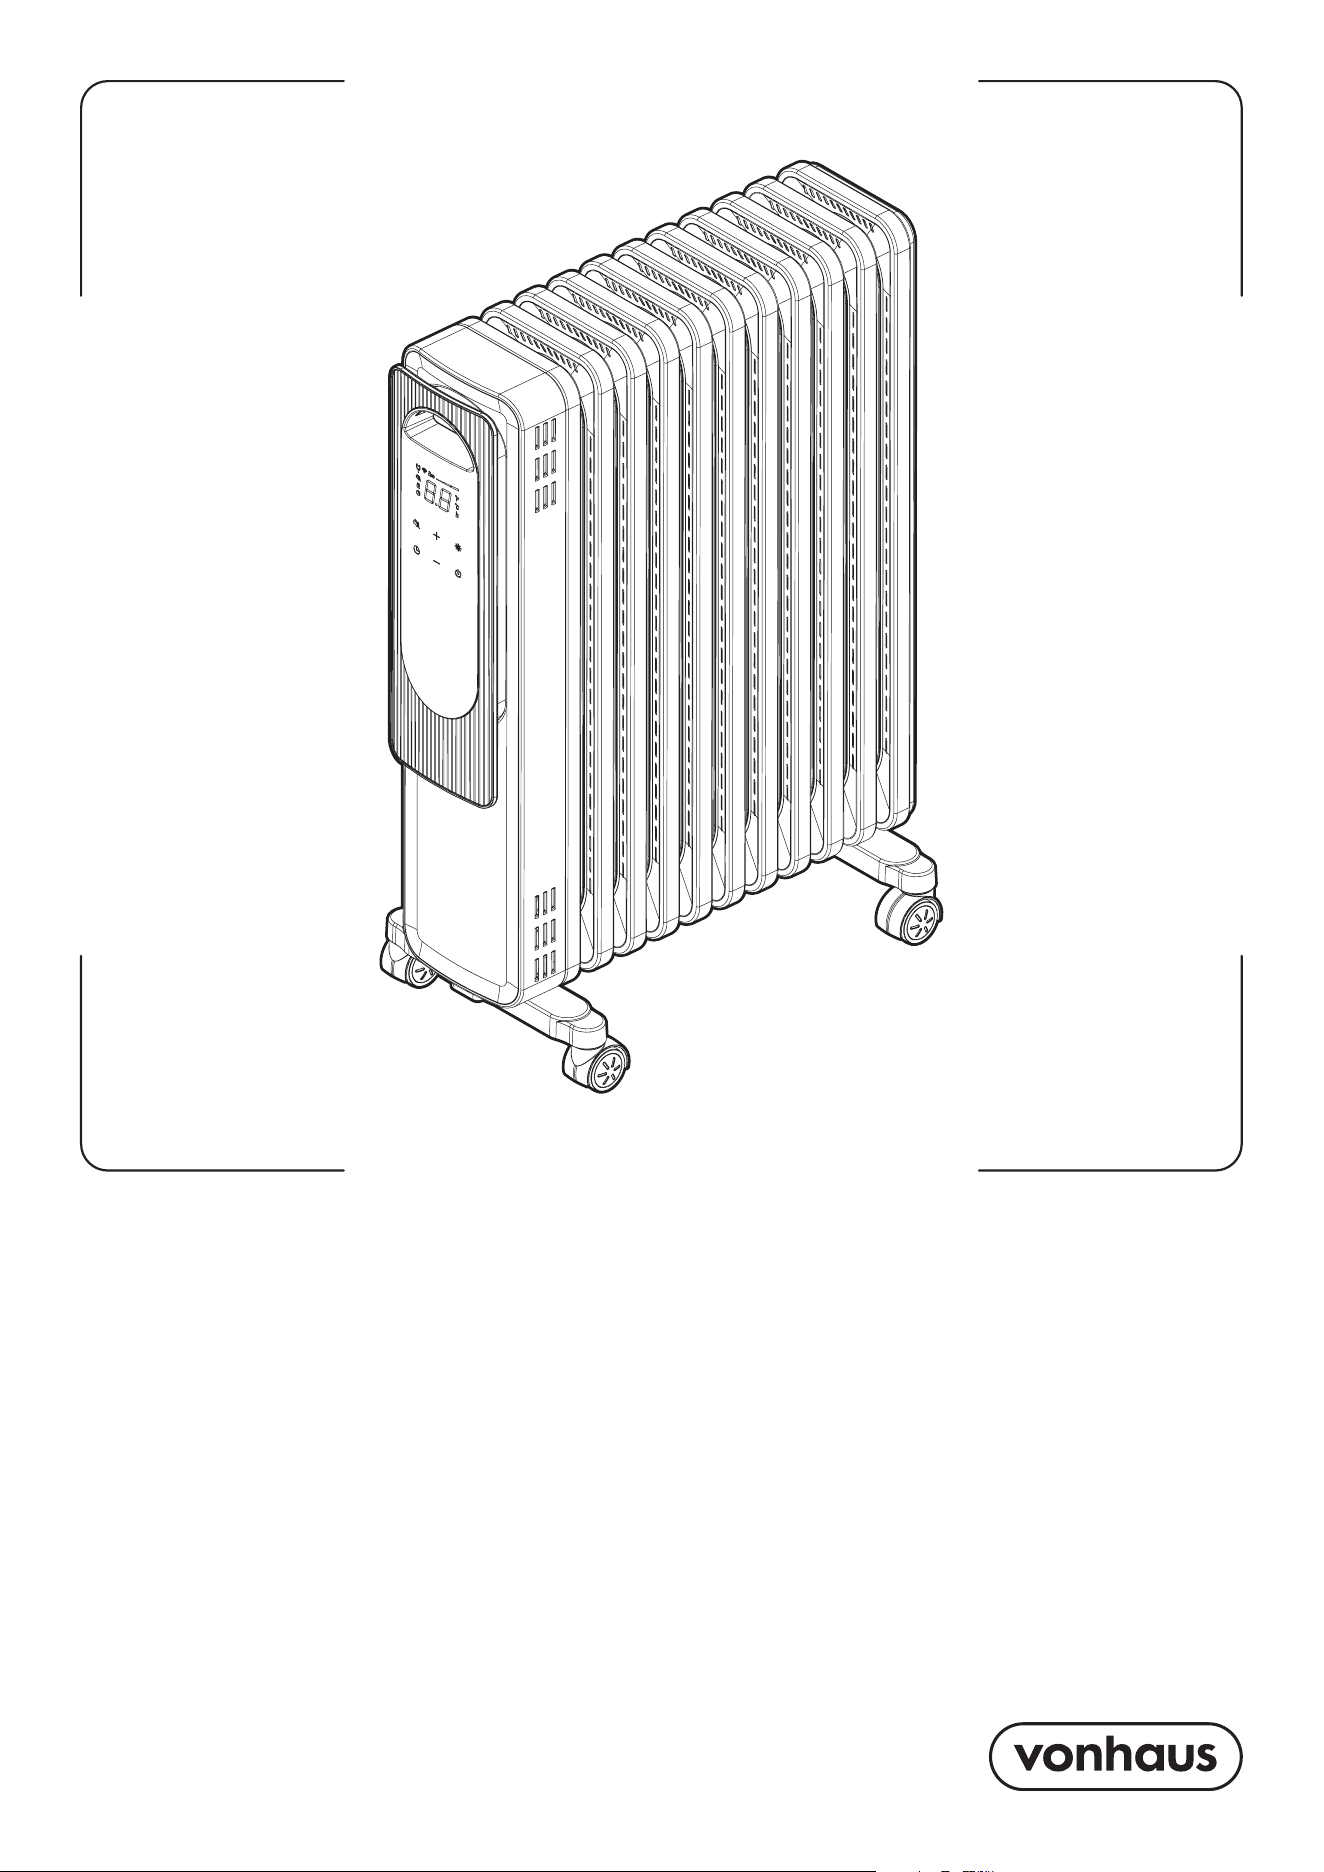
11 FIN OIL FILLED
RADIATOR WITH
WIFI
2 3
Need further help?
suppor[email protected]
See our full range at
www.vonhaus.com
Let’s get started!
Visit our product hub for
useful tips and tricks on
getting the most out of
your new product.
SCAN ME
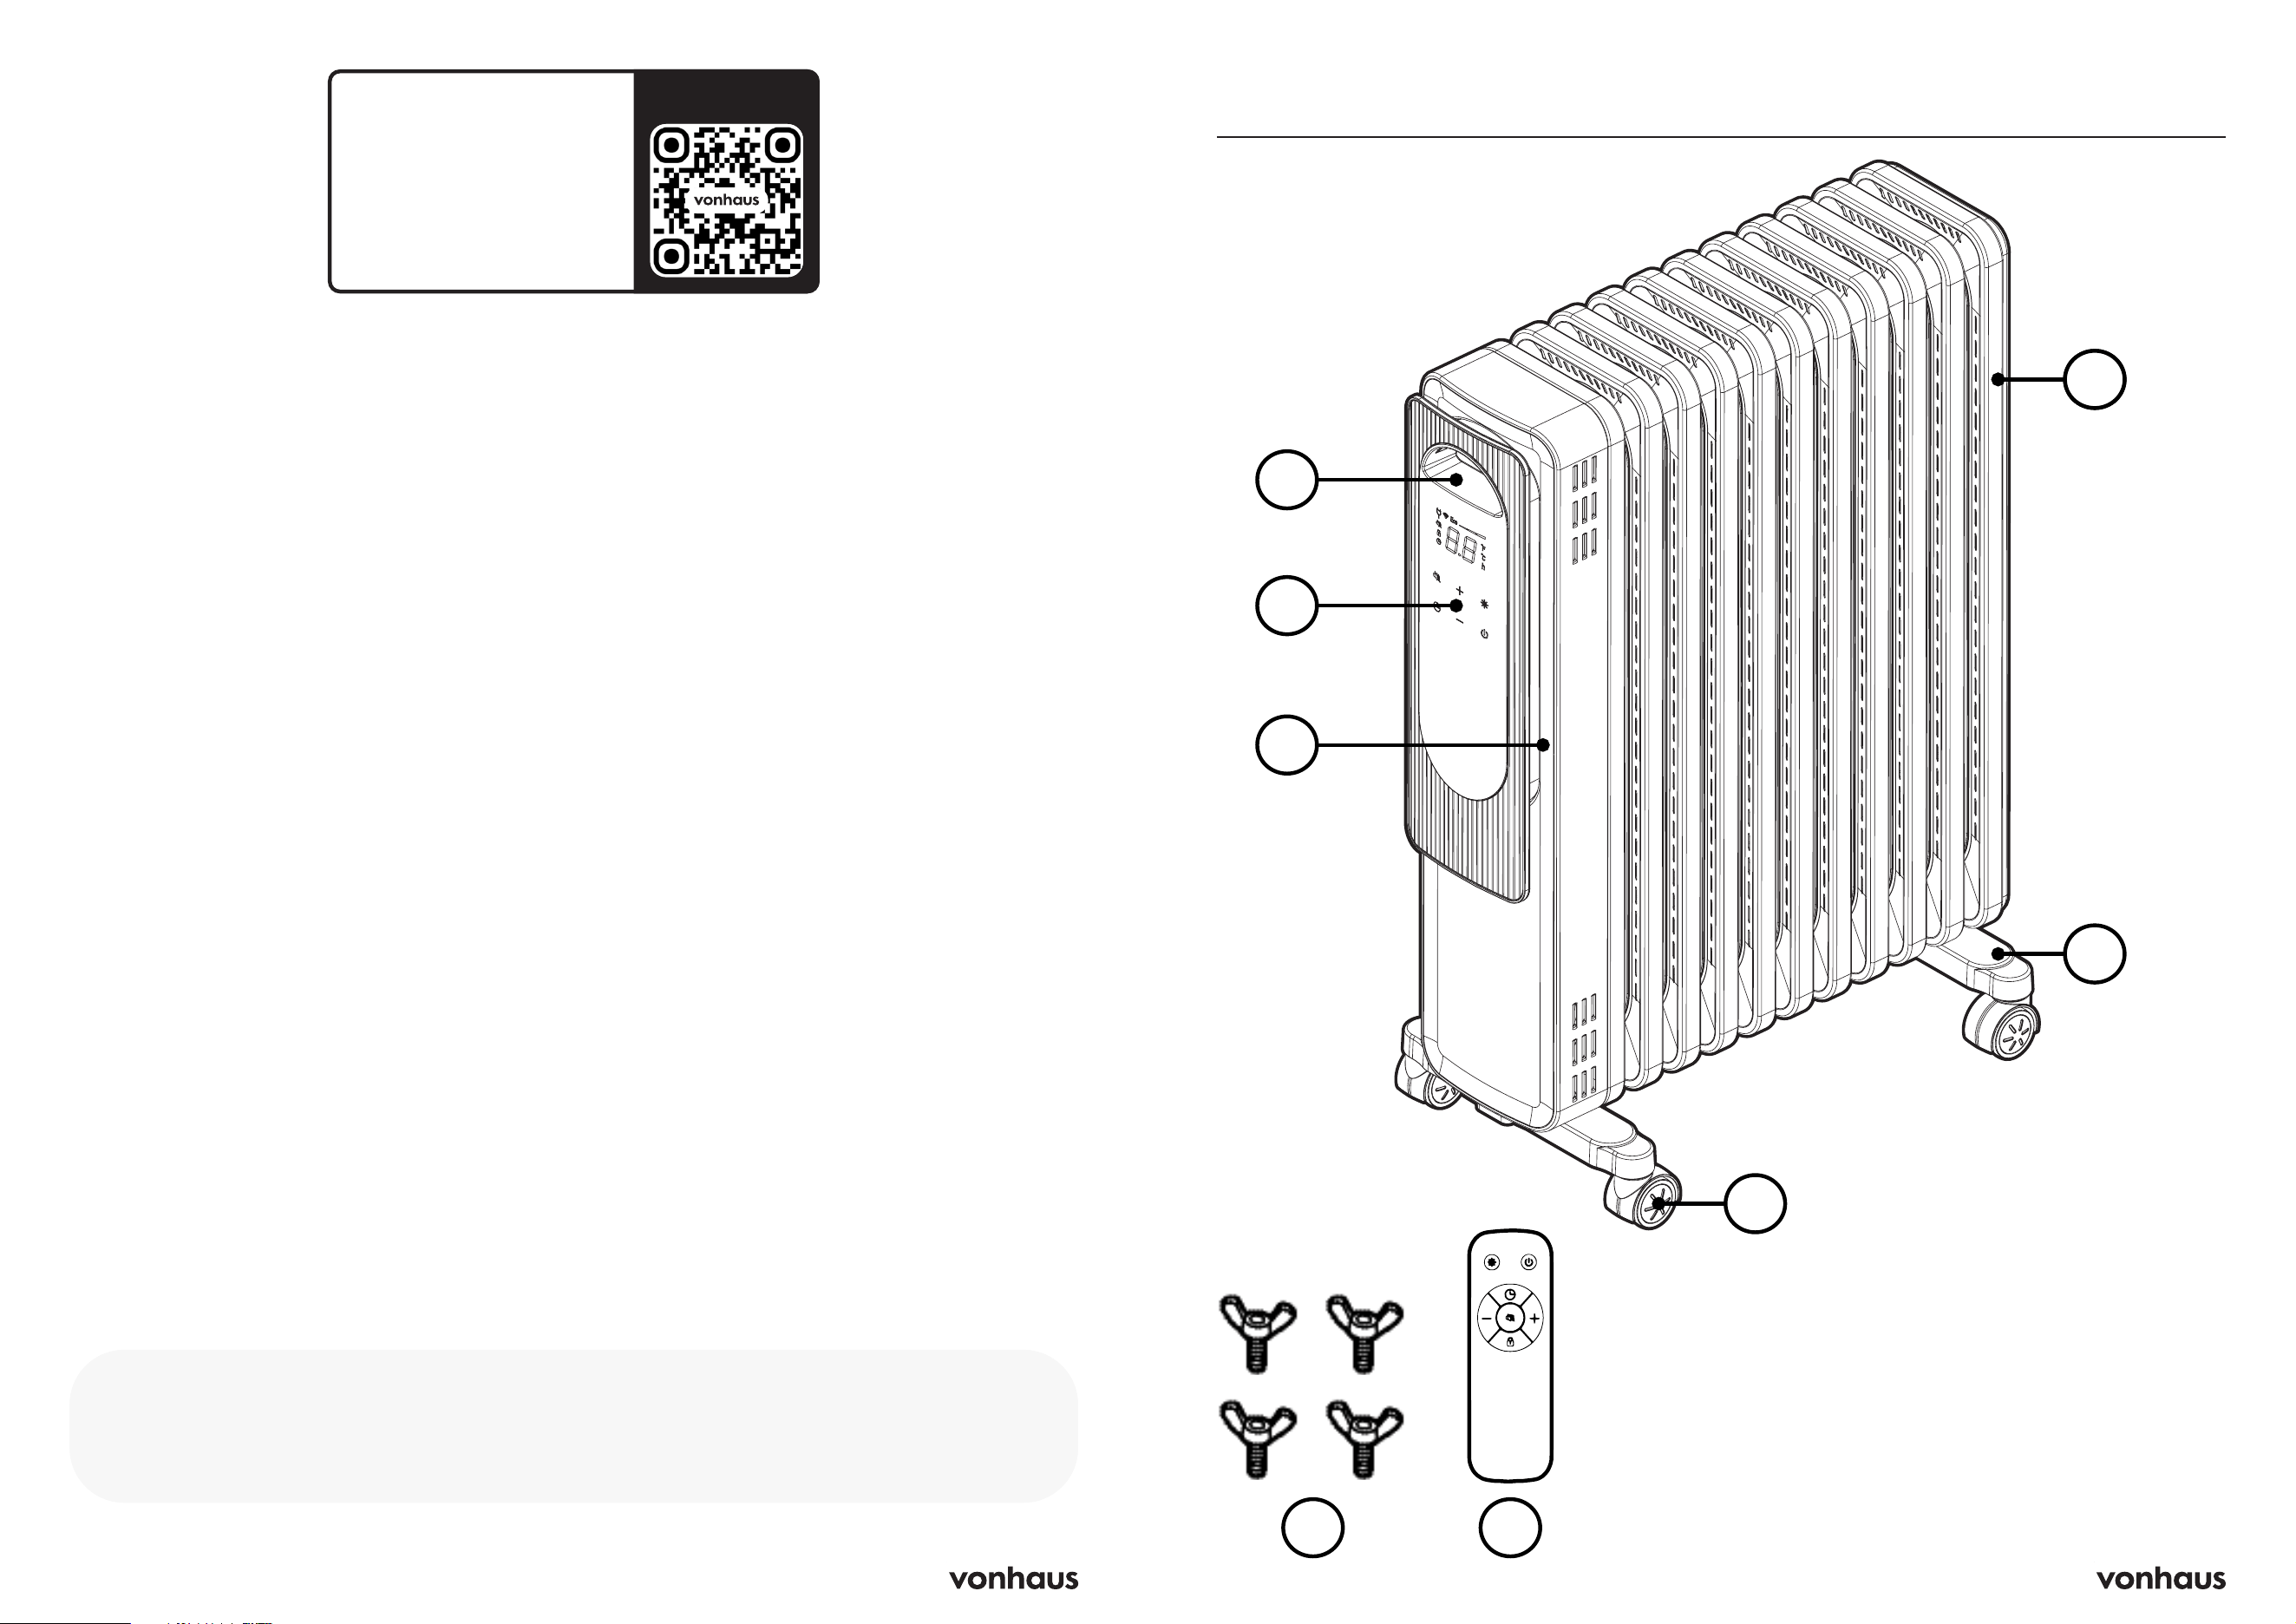
Components
A. Heater body
B. Handle
C. Control panel
D. Cable storage
E. Wheel bases
F. Wheels
G. Wing screws x4
H. Remote Control
(x2 AAA battery required)
A
B
C
A
D
E
F
G H
4 5
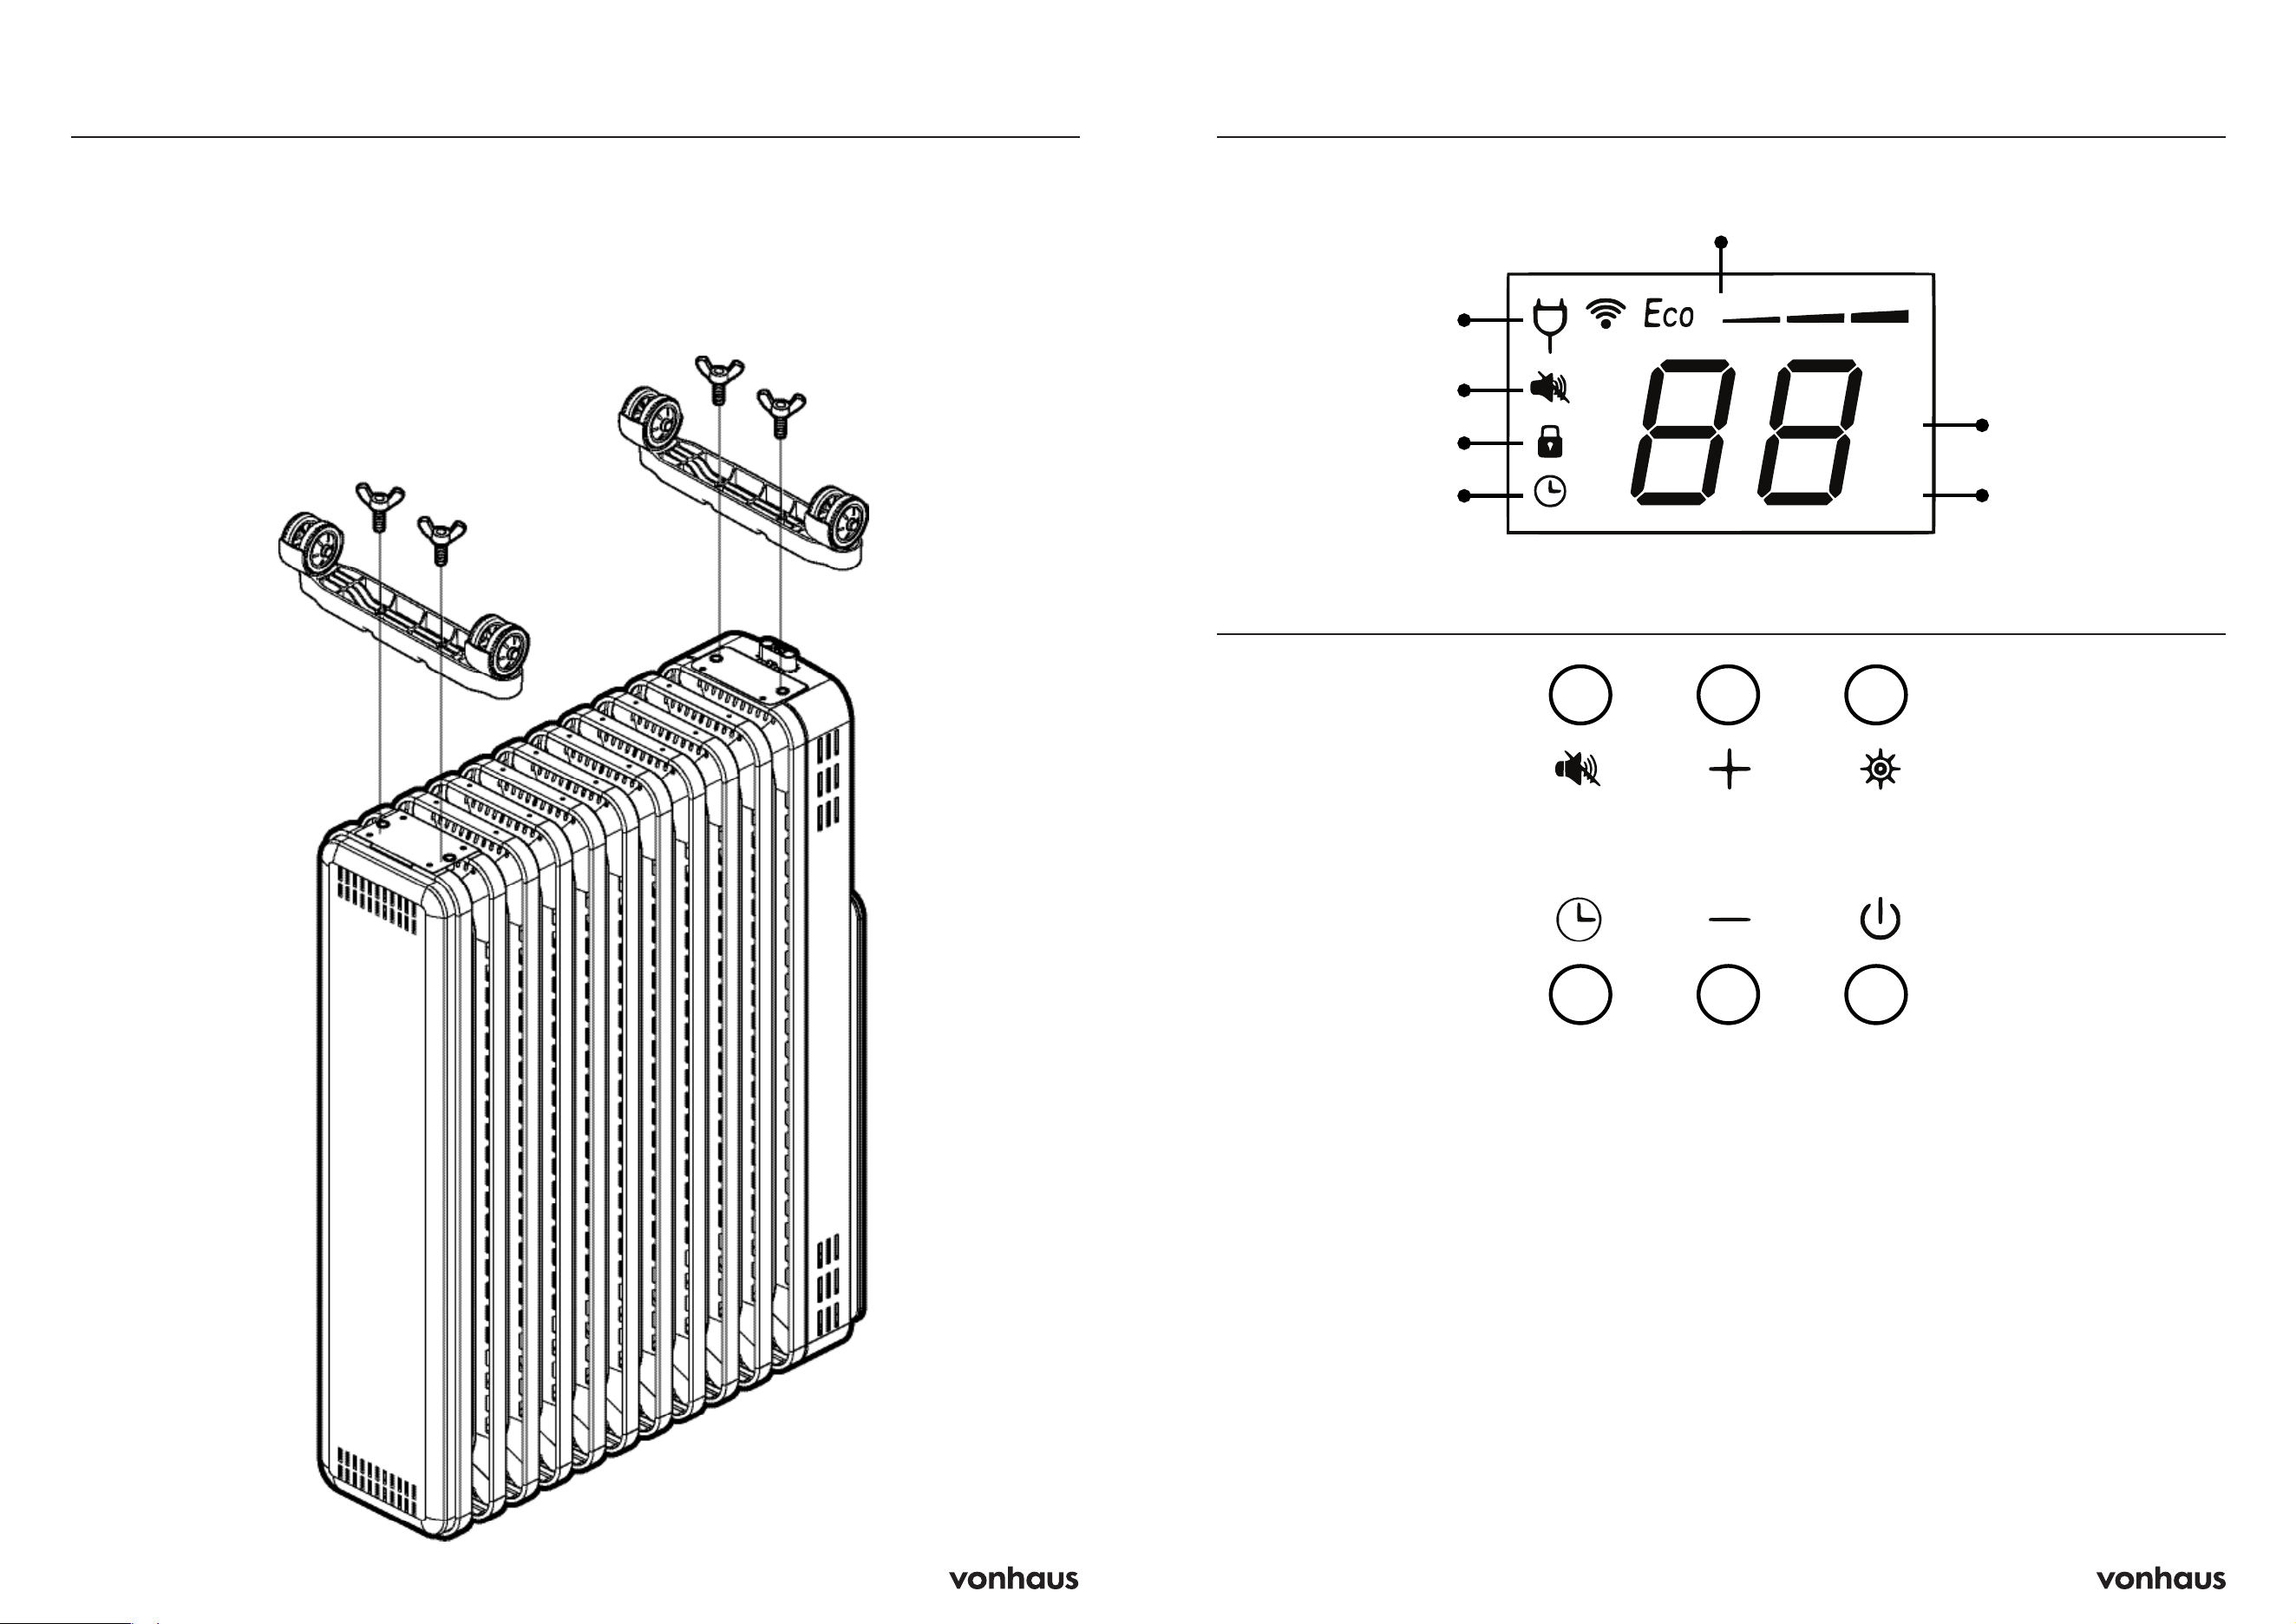
Assembly
Before first use, you need to attach the wheel
base:
• Turn the radiator upside down on a scratch-
free surface
• Fit the two wheel assemblies into the holes
on each side
• Secure with the 4 wing screws provided
The unit must only be operated upright with
wheels at the bottom and the control panel at
the top. Any other position is a safety hazard.
Display Screen Icons
°C
h
°C
h
Control Panel
1
1.
Mute Button
A beep sound is emitted every time a button is
pressed. Press this button once to turn the sound
off, and press again to turn it back on.
2. Increase
When in Eco Mode, press to increase the
temperature between 5°C and 35°C.
3. Power/Mode Button
Press the Power/Mode button to choose
between.
4. Timer
Use the timer if you’d like the heater to switch on
or off automatically after a set period (up to 24
hours).
5.
Temperature/Hours Decrease Button
Press the + or − buttons to adjust the temperature.
The display will flash w hile t he t emperature i s
being set.
6. Standby Button
Press to wake the heater from standby mode, or
to return it to standby when not in use.
Note: These controls are also operable
via remote control, which requires 2x AAA
batteries). The remote must be pointed at the
sensor on the control panel.
2 3
Eco Mode & Heat Settings
Temperature
Time Remaining
Child Lock
Timer
Stand-by
Mute
4 5 6
6 7
Assembly
Timer — Auto Power Off
Use this to shut the heater off after a set period:
• Press Timer while the heater is running
• Use +/− to set between 0–24 hours
• The display alternates between the
countdown and the current mode
• Heater shuts off automatically when time
expires
Child Lock
Hold the Standby and Power/Mode buttons
simultaneously for 3 seconds. A lock symbol
appears and all panel buttons are disabled.
Repeat to unlock.
Switching Off
Press standby until the screen goes off (sleep
mode). To fully disconnect, remove the plug
from the socket.
Built-in Safety Features
Tip-over protection: If the heater falls or tilts
excessively, it switches off automatically. When
stood back upright, it resumes operation.
Overheat protection: If the internal
temperature gets dangerously high, the unit
cuts out. If this happens:
1. Unplug the heater
2. Wait approximately 30 minutes for it to
cool
3. Remove any obstruction or covering
4. Check the cord and plug for damage
5. Plug back in and restart
If it still won’t turn on after this, contact Customer
Service.
Wi-Fi / Smart Control
• Download the Tuya Smart app (App Store
search or QR code scan)
• Create or log into a Tuya Smart / Smart
Life account
• Plug in the heater and switch it on (it enters
standby)
• Hold the Timer button for 3 seconds —
the Wi-Fi symbol flashes rapidly, indicating
pairing mode
Note: After each power down, you need to
press and hold the timer button to activate the
Wi-Fi function.
• Complete the connection via the app
• Important: The heater only supports
2.4GHz Wi-Fi — it will not connect to
5GHz networks
• To disable Wi-Fi: hold Timer for 3 seconds
until a beep sounds and the Wi-Fi icon
turns off
Cleaning & Maintenance
• Always unplug and allow to cool fully
before cleaning
• Wipe exterior and control panel with a
damp, lint-free soft cloth
• Clear dust from vents using a vacuum
cleaner or blower
• Never use harsh detergents, chemical
cleaners, or solvents — these can damage
the unit
Storage
• Keep the original packaging for safe
storage and transport
• Store in a dry, clean location
• Keep out of reach of children
Modes
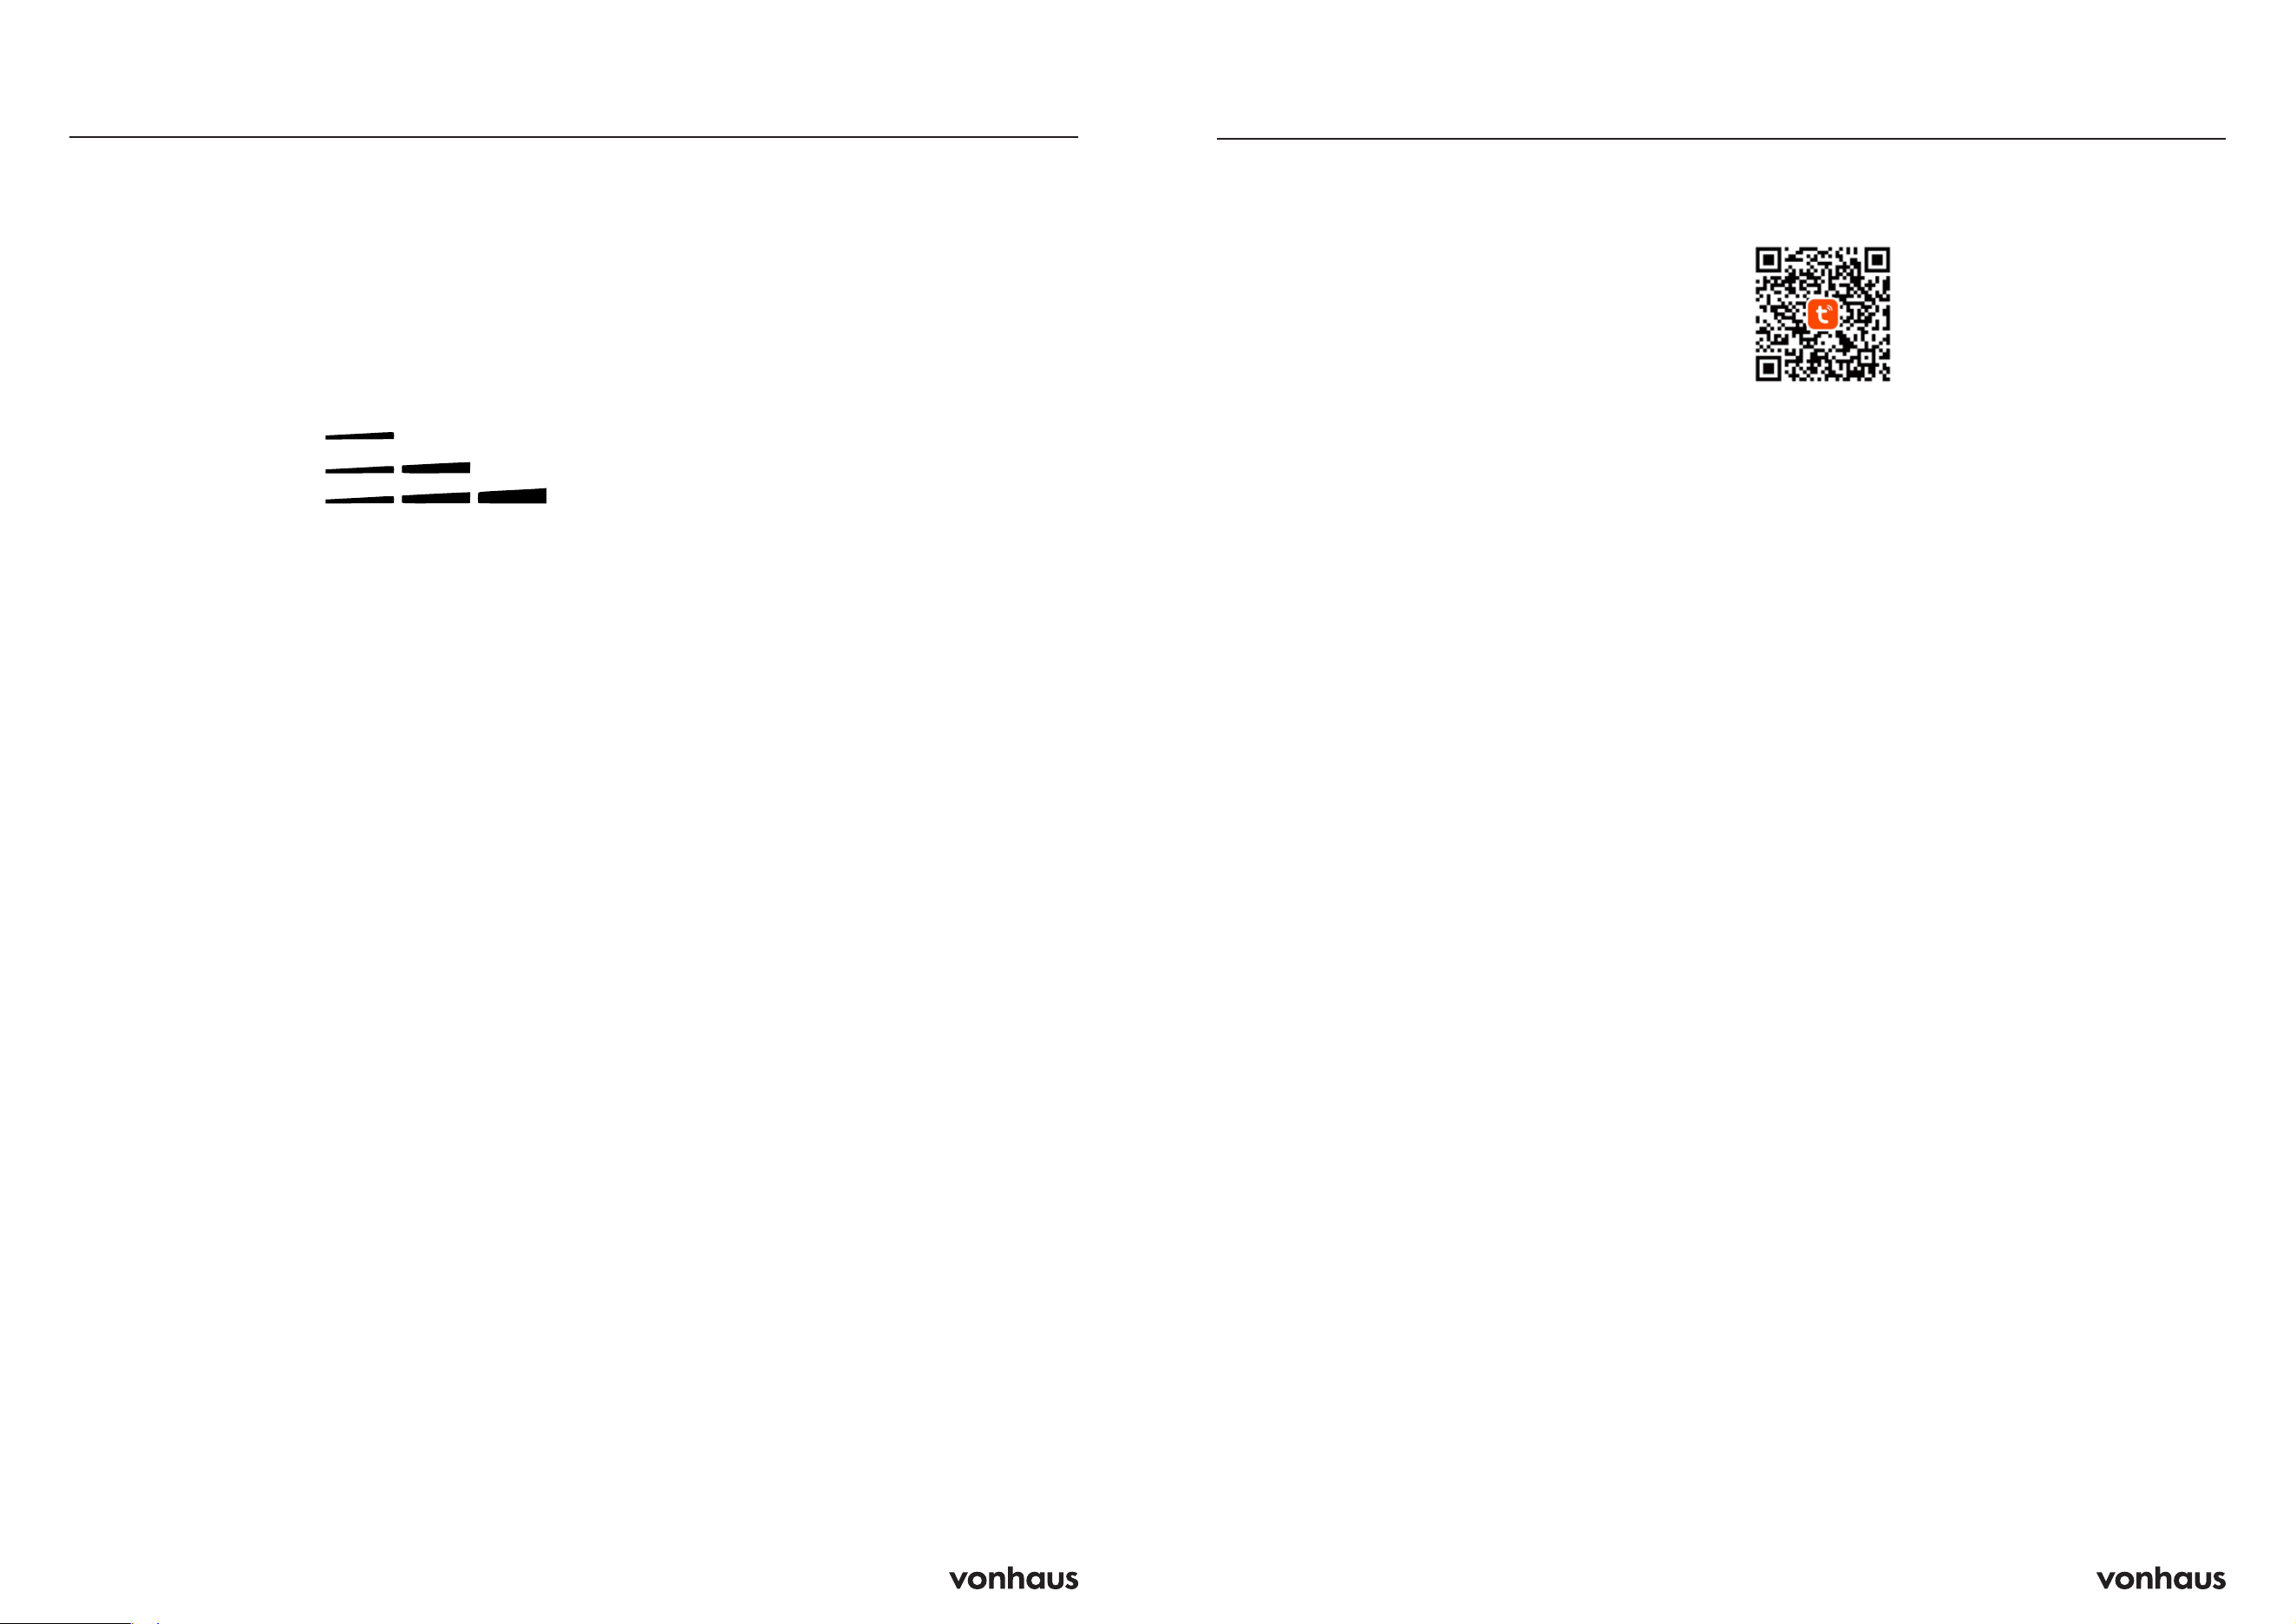
Heating Modes
Press the Power/Mode button to cycle through
Eco and Power Heat modes.
In power heat modes, press “+” or “–” to set
the heat mode to H1, H2 or H3.
• H1 — Low heat
• H2 — Medium heat
• H3 — High heat
• Eco mode — automatic power adjustment
In H1/H2/H3, the heater runs continuously at
the set level — no thermostat control. Higher
settings heat the room faster but use more
electricity. Lower settings are recommended
for extended use.
In Eco mode, the heater monitors room
temperature and adjusts output automatically
as it approaches your target. This is the most
energy-efficient setting for long sessions.
Thermostat (Eco mode only)
• Temperature range: 5°C to 35°C
• Press Power/Mode to enter Eco, then use
+/− to set your desired temperature (the
digit will blink while setting)
• Once confirmed, the heater cycles on
and off automatically to maintain that
temperature
Timer — Auto Power On
Use this to have the heater switch itself on after
a set delay (e.g. warm a room before you get
home):
• Must be set while in standby mode
• Press Timer — the hour digit blinks
• Use +/− to set between 0–24 hours
• The countdown appears on screen; the
heater turns on automatically when time is
up
• Note: the heater may activate while
unattended — always follow safety
instructions

8 9
Important Safety Notice
This product is not suitable for use by children
or by individuals with physical, sensory, or
mental impairments that may limit their ability
to operate the equipment safely, unless they
have been given supervision or instruction
concerning the safe use of the product by a
person responsible for their safety.
Failure to follow all instructions and safety
warnings may result in electric shock, fire, or
serious injury.
General Safety
Do not allow this appliance to be used as a
toy. Children should be supervised at all times
to ensure they do not play with it.
If the appliance is not functioning properly,
has been dropped, damaged, left outdoors
or immersed in liquid, do not use it. Contact
contact our customer services department at
suppor[email protected]
Do not use the appliance if any parts appear
to be faulty, missing or damaged.
Ensure all parts are securely attached as
instructed in this manual before use.
This appliance is intended for indoor domestic
use only.
Do not use in bathrooms, shower rooms, or
areas with high humidity.
Cables and Plugs
Check that your electricity supply matches the
voltage shown on the rating plate. This product
should only be used as rated. Where possible,
the socket outlet should be protected by a
Residual Current Device (RCD).
Do not use with a damaged cable or plug. If the
supply cable is damaged, it must be replaced
by a qualified engineer or authorised service
agent to avoid a hazard. Do not use this
appliance with extension leads, multi-socket
adapters, or external switching devices such
as timers or smart plugs.
• Do not handle the plug or appliance with
wet hands
• Keep the cable away from heated surfaces
• Do not allow the cable to hang over the
edge of a worktop or table where it could
be pulled by children or pets
• Do not pull the cable around sharp edges
or corners
• Do not leave the appliance unattended
when plugged in — unplug when not in use
• Turn off all controls before unplugging
• Always unplug by grasping the plug, not
the cable
• Always unplug before performing
maintenance, connecting or disconnecting
attachments, or changing accessories
• Ensure the cable is stored safely when not
in use
Risk of Personal Injury
Always place the appliance on a firm, flat,
heat-resistant surface, away from the edge
of the worktop, with sufficient space around
all sides. Do not insert any objects into the
openings or cover the appliance.
Keep away from curtains, furniture, and
flammable materials
Do not place or dry clothing, towels, or any
materials on or near the appliance. Do not use
near combustible surfaces, outdoors, or near
other heat sources.
Do not use the heater to dry laundry. Ensure
all air vents are kept clear and unobstructed.
Never operate inside cupboards or enclosed
spaces.
Information
Take care not to touch surfaces that may
become hot during use or remain hot for a
period after use. Never operate the appliance
when empty and do not overload or overfill it.
When using the appliance for the first time, it
may produce a ‘new’ smell or slight vapour
— this is normal and will dissipate after a few
uses. Do not lift or move the appliance whilst in
use. Do not operate continuously for extended
periods without supervision. Always switch
off and unplug before cleaning or changing
accessories. Use only as described in this
manual and with Vonhaus recommended
attachments.
Always switch off and unplug when not in use.
Do not use if air vents are blocked.
Technical Specifications
Rated Voltage: 220–240V
Rated Power: 2500W
Rated Frequency: 50Hz
Information
10 11
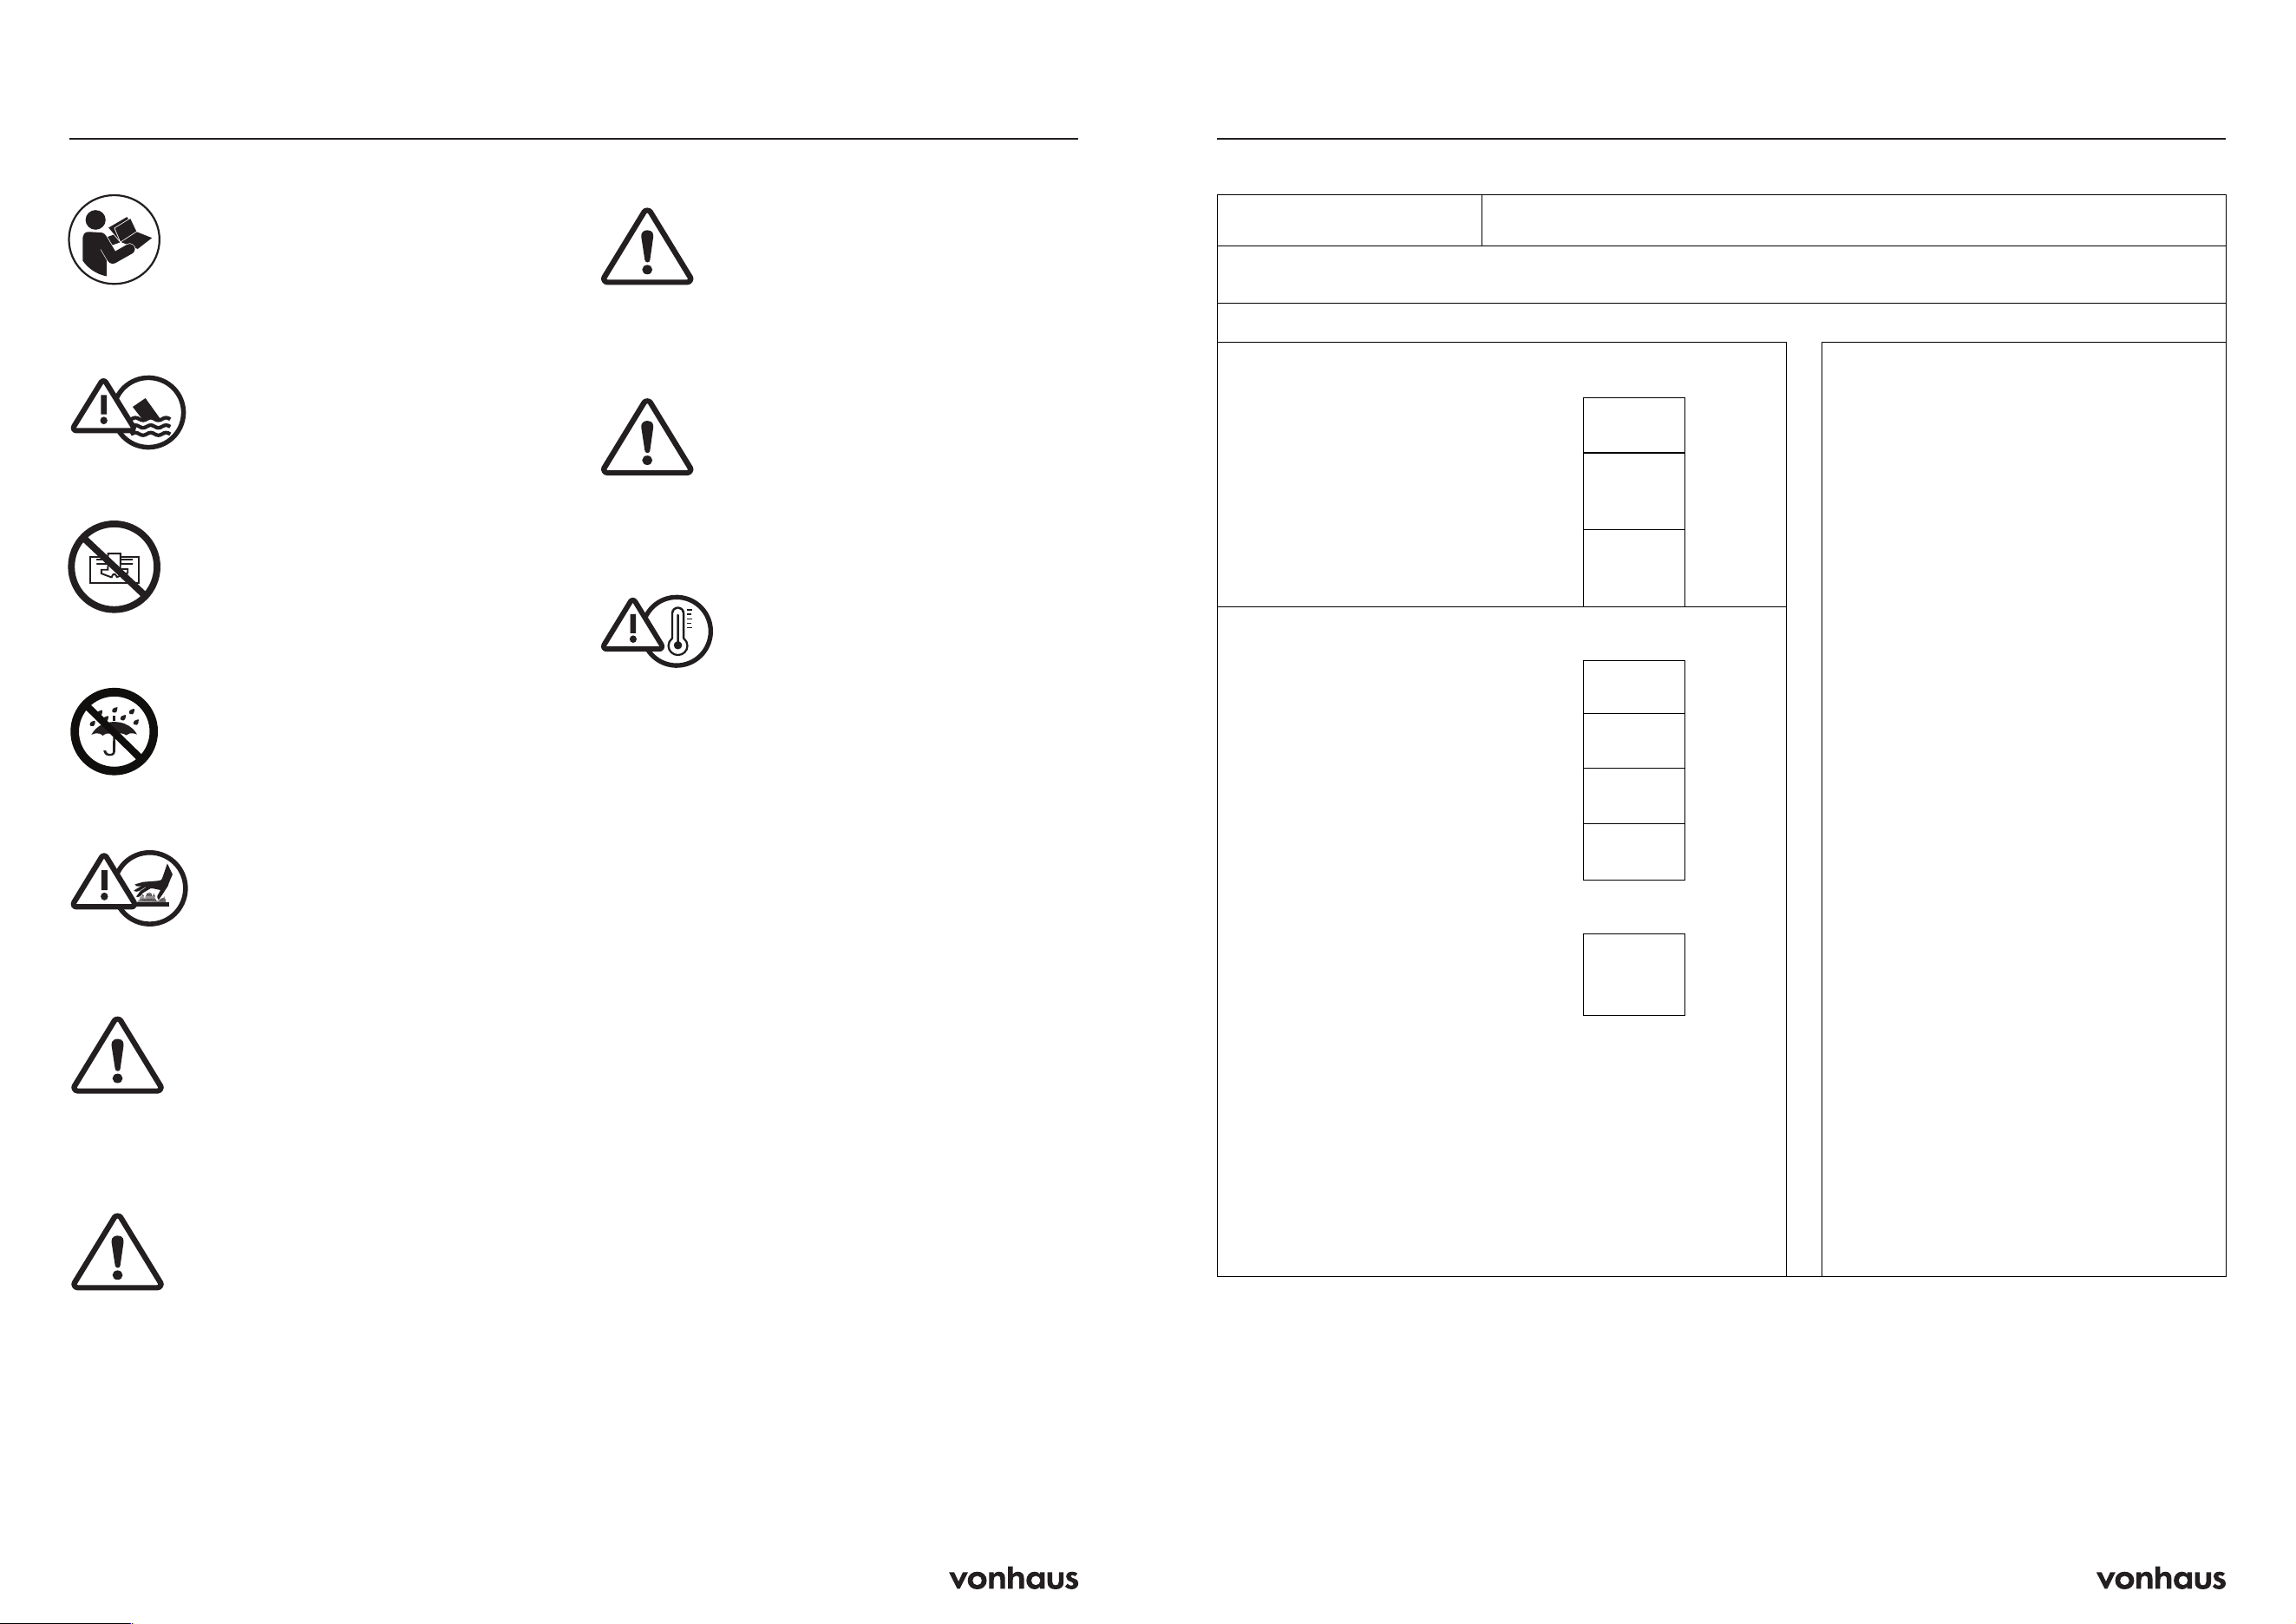
Please read all instructions before use⚠
Do not immerse in water
Do not cover
Do not use outdoors⚠
WARNING: Hot surfaces
WARNING: Keep children and pets away
from the heater during use
WARNING: Risk of fire if instructions are not
followed
Suitable for well-insulated spaces or
occasional use only⚠
This product has a tip switch — if tipped or
knocked over, it will switch off automatically⚠
This appliance has a thermal cut-out switch.
If the appliance overheats, it will shut down
automatically. Unplug and allow to cool for
15 minutes before restarting
Information Information
I
I
n
n
f
f
o
o
r
r
m
m
a
a
t
t
i
i
o
o
n
n
r
r
e
e
q
q
u
u
i
i
r
r
e
e
m
m
e
e
n
n
t
t
f
f
o
o
r
r
t
t
h
h
e
e
e
e
l
l
e
e
c
c
t
t
r
r
i
i
c
c
l
l
o
o
c
c
a
a
l
l
s
s
p
p
a
a
c
c
e
e
h
h
e
e
a
a
t
t
e
e
r
r
s
s
Contact details DOMU Brands Ltd., Unit 30, Stakehill Industrial Estate, Middleton, Manchester, M24 2RW
Model identifier(s): 2000353 / 2000354 / 2000355
Item Symbol Value Unit Item Unit
H
H
e
e
a
a
t
t
o
o
u
u
t
t
p
p
u
u
t
t
T
T
y
y
p
p
e
e
o
o
f
f
h
h
e
e
a
a
t
t
o
o
u
u
t
t
p
p
u
u
t
t
/
/
r
r
o
o
o
o
m
m
t
t
e
e
m
m
p
p
e
e
r
r
a
a
t
t
u
u
r
r
e
e
c
c
o
o
n
n
t
t
r
r
o
o
l
l
(
(
s
s
e
e
l
l
e
e
c
c
t
t
o
o
n
n
e
e
)
)
Nominal heat output Pnom 2.500 kW
single stage heat output and no
room temperature control
No
Minimum heat output
(indicative)
Pmin 1.000 kW
two or more manual stages, no
room temperature control
No
Maximum continuous heat
output
Pmax,c 2.500 kW
with mechanic thermostat room
temperature control
No
P
P
o
o
w
w
e
e
r
r
c
c
o
o
n
n
s
s
u
u
m
m
p
p
t
t
i
i
o
o
n
n
with electronic room temperature
control
No
In off mode Po 0.00 W
electronic room temperature
control plus day timer
No
In standby mode Psm 0.33 W
electronic room temperature
control plus week timer
Yes
In idle mode Pidle 0.70 W
O
O
t
t
h
h
e
e
r
r
c
c
o
o
n
n
t
t
r
r
o
o
l
l
o
o
p
p
t
t
i
i
o
o
n
n
s
s
(
(
m
m
u
u
l
l
t
t
i
i
p
p
l
l
e
e
s
s
e
e
l
l
e
e
c
c
t
t
i
i
o
o
n
n
s
s
p
p
o
o
s
s
s
s
i
i
b
b
l
l
e
e
)
)
In network standby Pnsm 0.68 W
room temperature control, with
presence detection
No
Standby mode with display information or status No
room temperature control, with
open window detection
No
Seasonal space heating
energy efficiency in active
mode
ηS,on
94.5 % distance control option Yes
adaptive start control No
working time limitation Yes
black bulb sensor No
self-learning functionality No
control accuracy No

12 13
Customer Service
If you are having difficulty using this product
and require support, please contact
suppor[email protected]
Warranty
To register your product and find out if you
qualify for a free extended warranty please
go to www.vonhaus.com/warranty
Please retain a proof of purchase receipt or
statement as proof of the purchase date.
The warranty only applies if the product is used
solely in the manner indicated in the warnings
page of this manual, and all other instructions
have been followed accurately.
Any abuse of the product or the manner in
which it is used will invalidate the warranty.
Returns
Returned goods will not be accepted unless
re-packaged in its original packaging and
accompanied by a relevant and completed
returns form. This does not affect your statutory
rights.
No rights are given under this warranty to a
person acquiring the appliance second-hand
or for commercial or communal use.
Copyright
All material in this instruction manual are
copyrighted by DOMU Brands.
Any unauthorised use
may violate worldwide
copyright, trademark, and other laws.
Thank You
Thank you for purchasing your product/
appliance.
Should you require assistance with your
purchase, please contact us at
suppor[email protected]
Vonhaus is a registered trademark of DOMU
Brands Ltd.
Made in China for DOMU Brands Ltd.
Unit 30, Stakehill Industrial Estate
Middleton, Manchester, M24 2RW
EU Authorised Representative
Authorised Representative Service,
Harcourt Centre, Block 4
Regus House, Harcourt Road, Dublin,
D02 HW77, Ireland
Information
Product No. 2000353 / 2000354 / 2000355
Let’s get started!
Visit our product hub for
useful tips and tricks on
getting the most out of
your new product.
SCAN ME