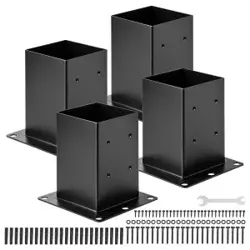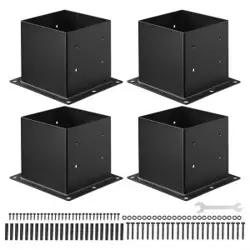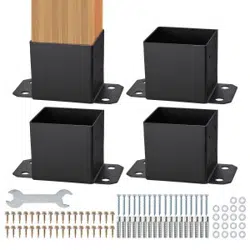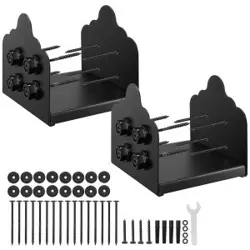

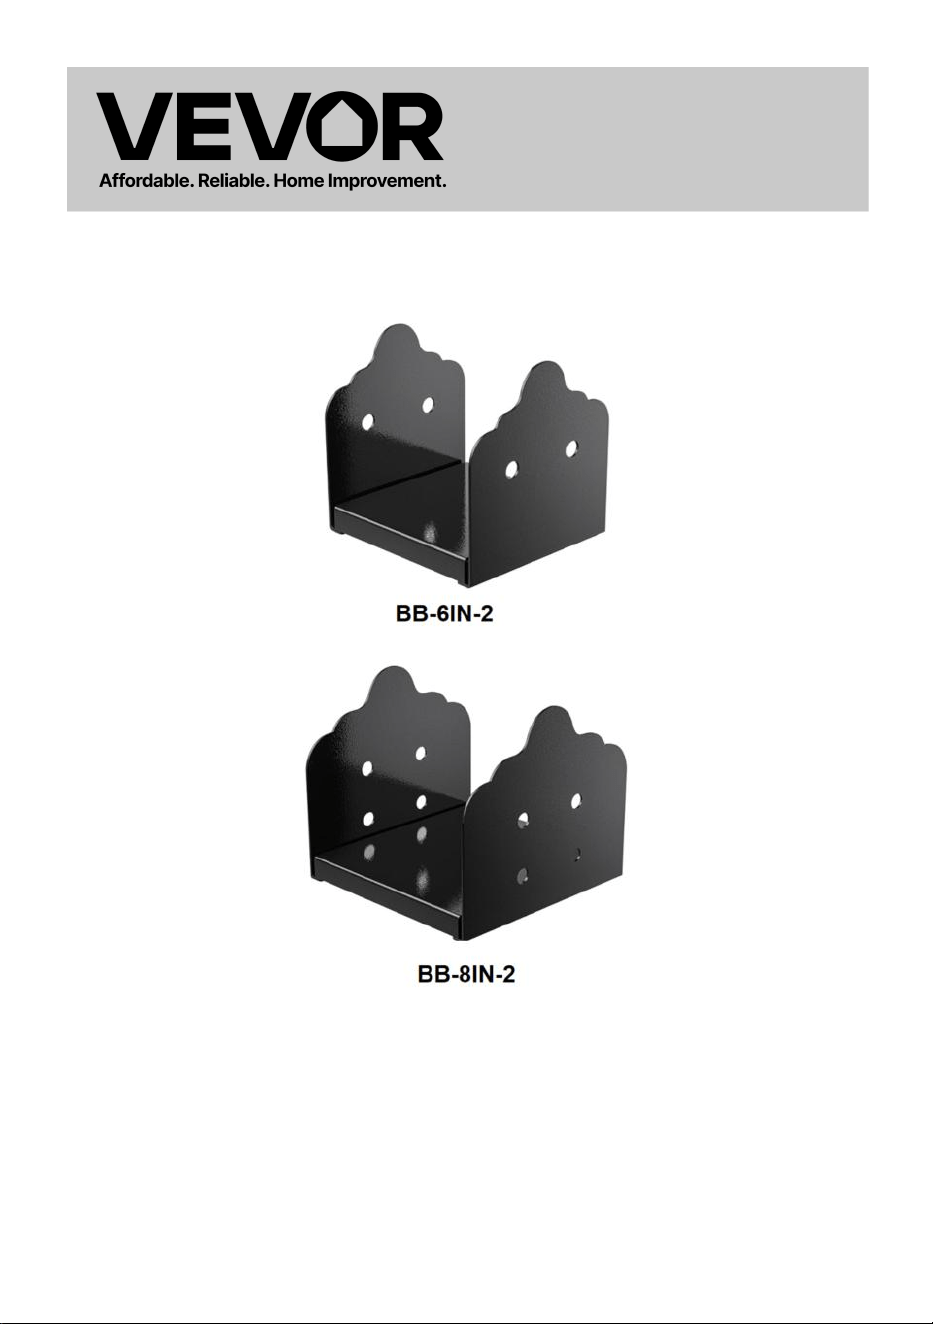
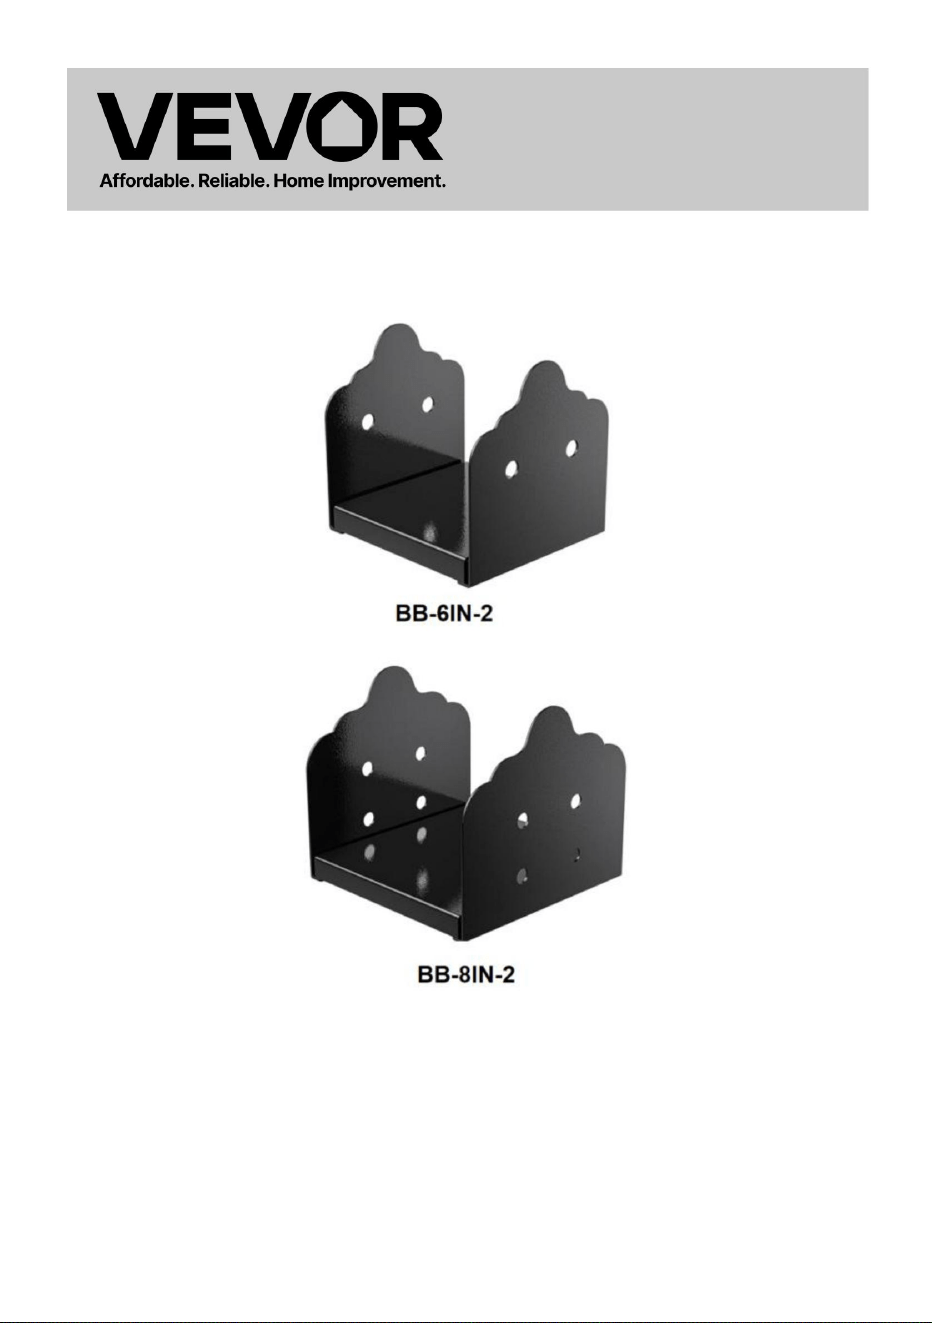
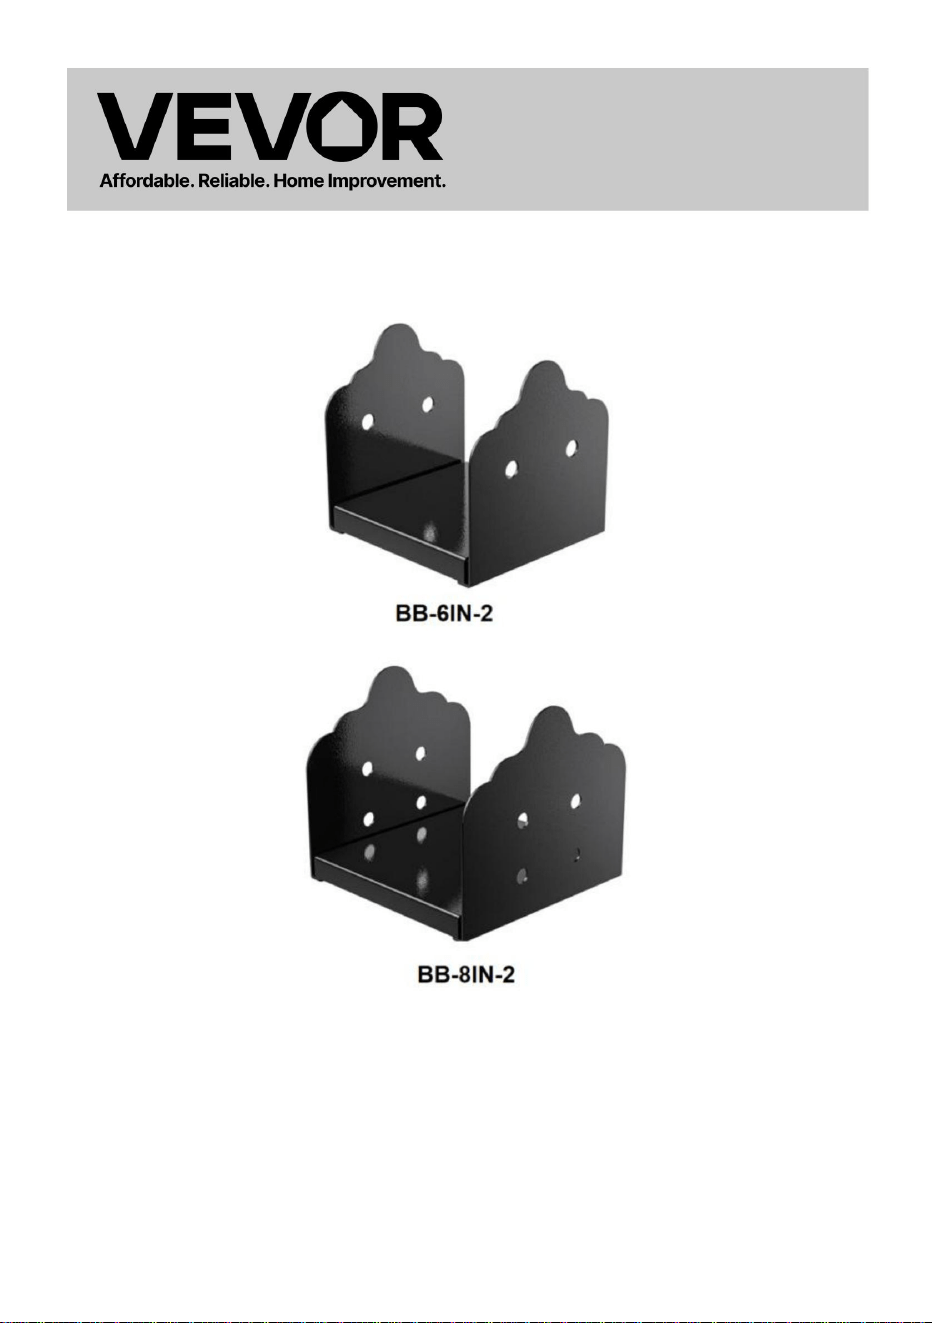
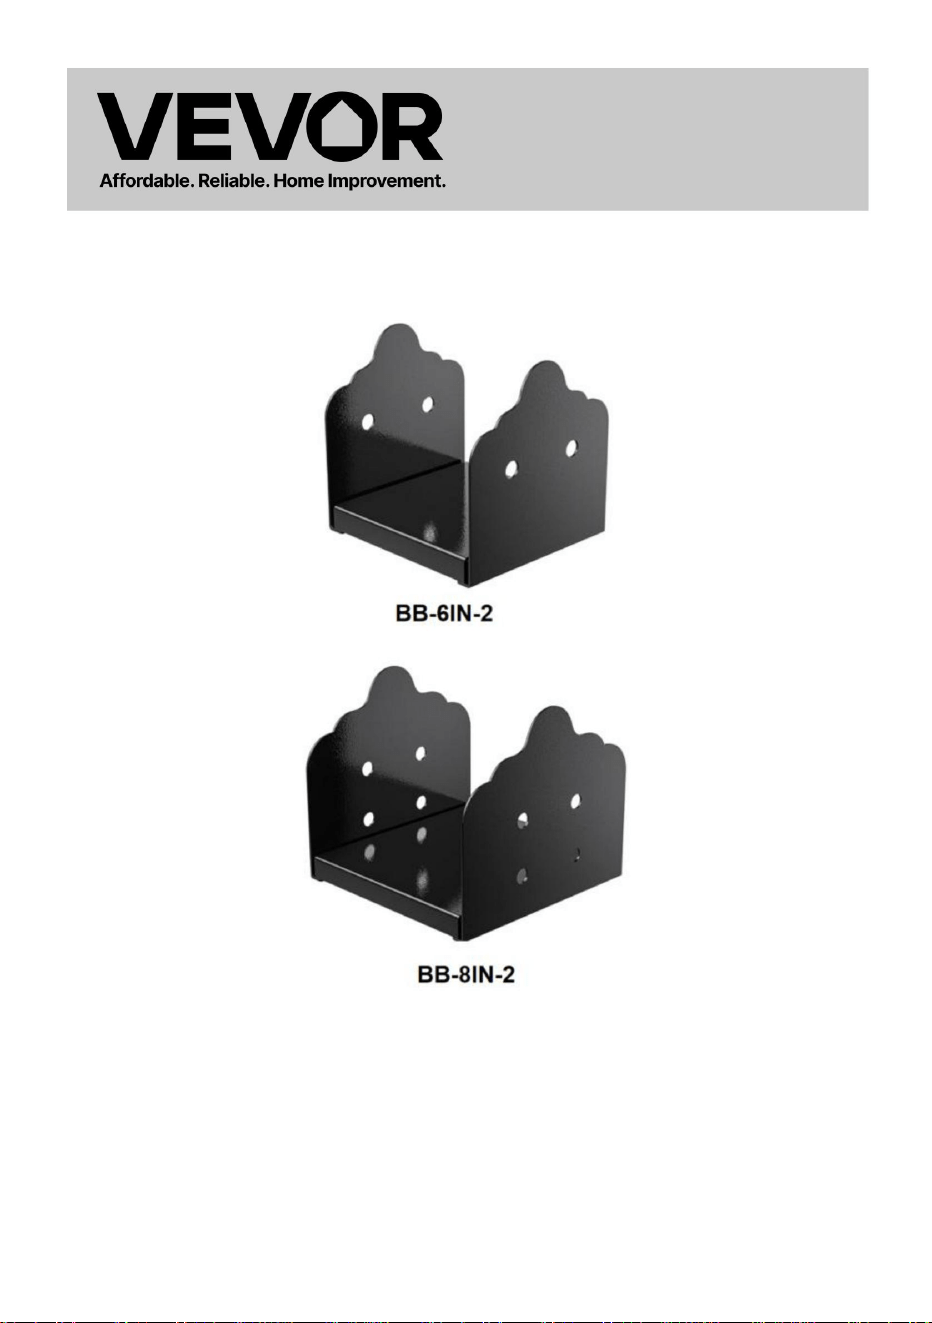
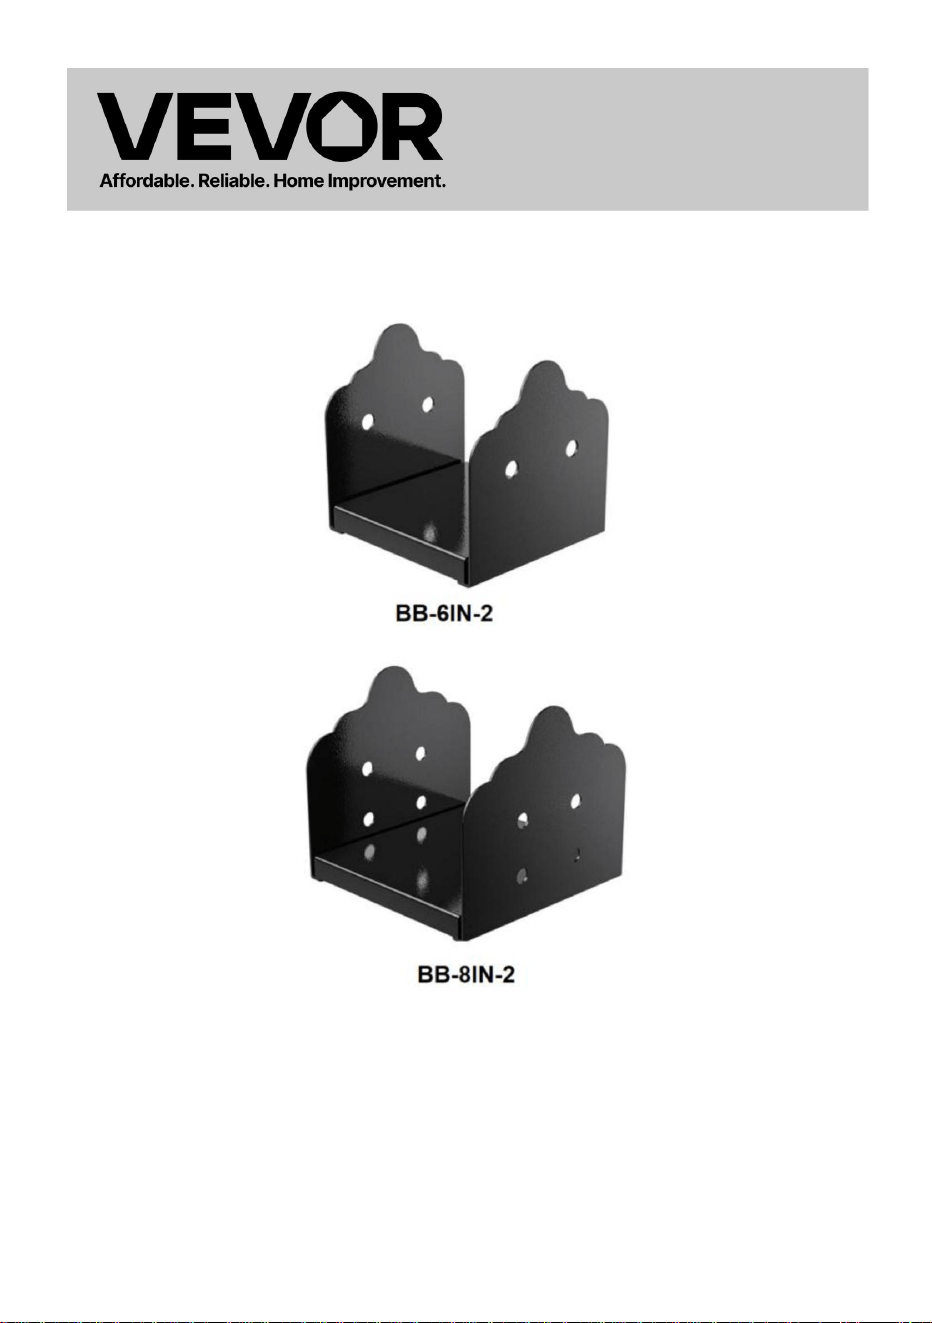
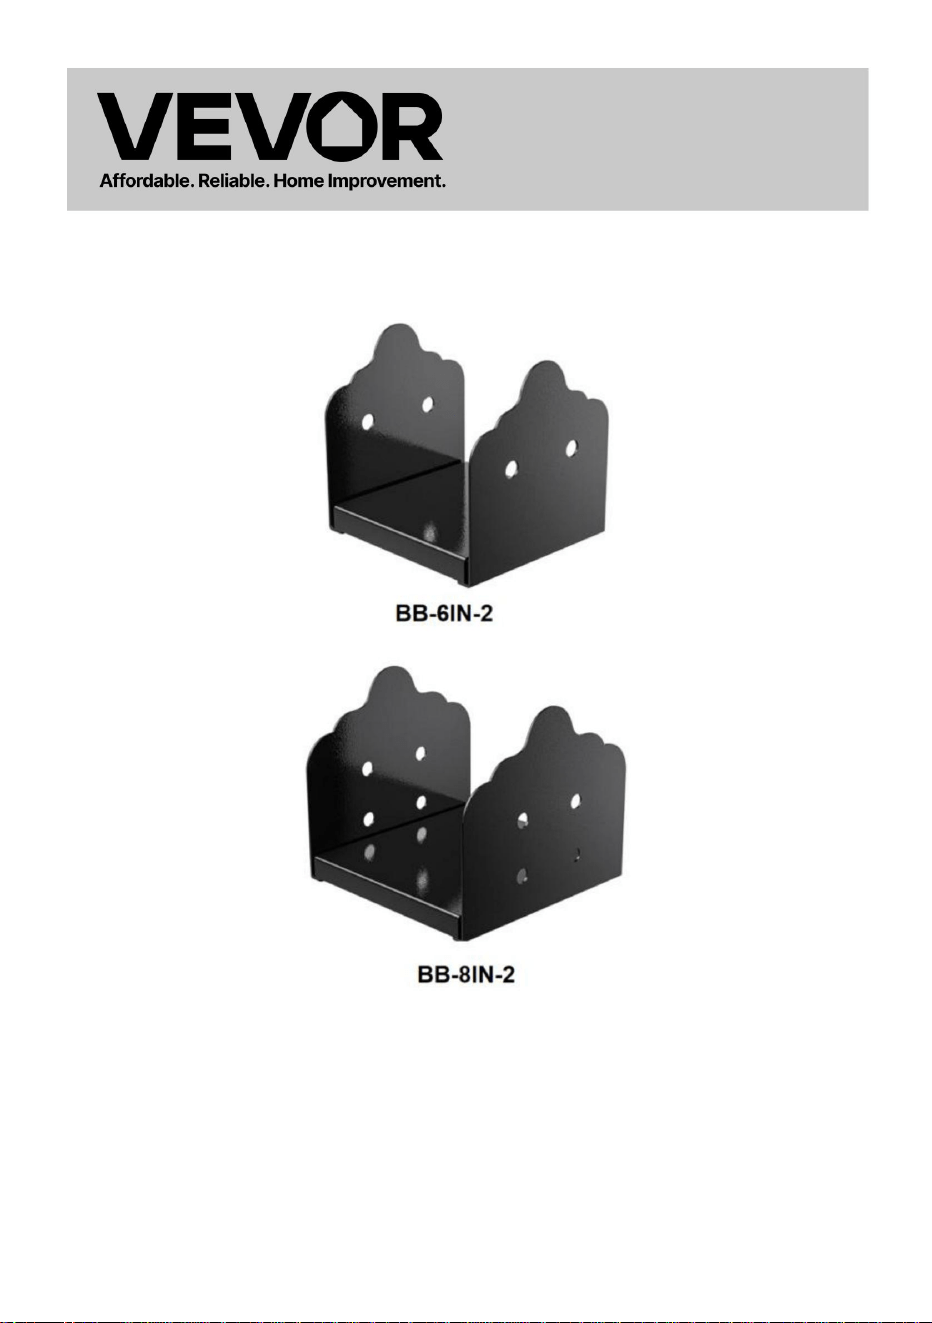
SEMI ENVELOPMENT POST BASE
MODEL:BB-6in-2/BB-8in-2
Technical Support and E-Warranty Certificate
www.vevor.com/support

- 1 -
MODEL:BB-6in-2/BB-8in-2
This is the original instruction, please read all manual instructions
carefully before operating. VEVOR reserves a clear interpretation of our
user manual. The appearance of the product shall be subject to the
product you received. Please forgive us that we won't inform you again if
there are any technology or software updates on our product.
Semi Envelopment Post
Base

- 2 -
Warning-To reduce the risk of injury, user must read
instructions manual carefully.
Safety Instructions
Read and understand this entire manual before assembling,installing,
operating, or servicing this product.Failure to follow these warnings and
instructions can cause personal injury or damage to valuable property.
ALL AROUND USE
The product can be used in the existing concrete and wood floors,
separating the wooden column from the ground water, effectively prevent
the wooden column from water rot; corrosion is suitable for the need to fix
the wooden column, such as pavilion, pavilion, fence, pavilion, mailbox,
porch railing, deck bracket, etc
1. Do not allow children to climb on the unit. 2. Keep children and pets
away during assembly.
ASSEMBLY PRECAUTIONS
1. Please assemble the product in strict accordance with the instructions.
Incorrect assembly could be hazardous.
2. Please wear safety goggles and work gloves properly during assembly.
3. Do not try to assemble the product when feeling tired or when under the
influence of alcohol, drugs or medication.
4. Load bearing capacity and other product parameters are applied to the
properly and completely assembled product only.
5. Separate and count all parts and hardware.
6. Prepare the following tool: Philips Head Screwdriver.
7. If using power tools, please be careful to slow down and stop when
needed.
8. Two people are required for assembly.
9. Follow the intended uses only.

- 3 -
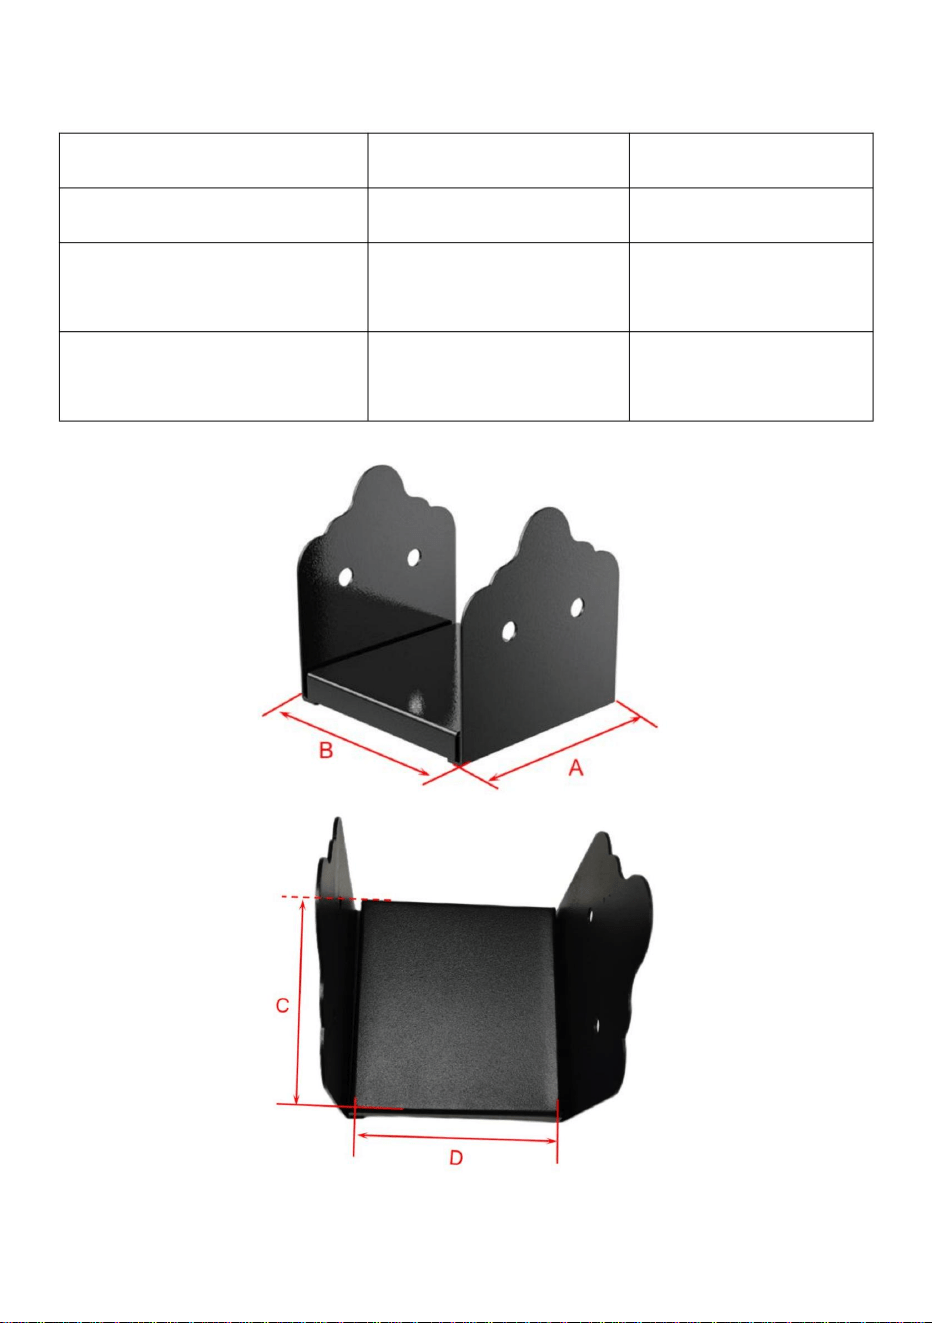
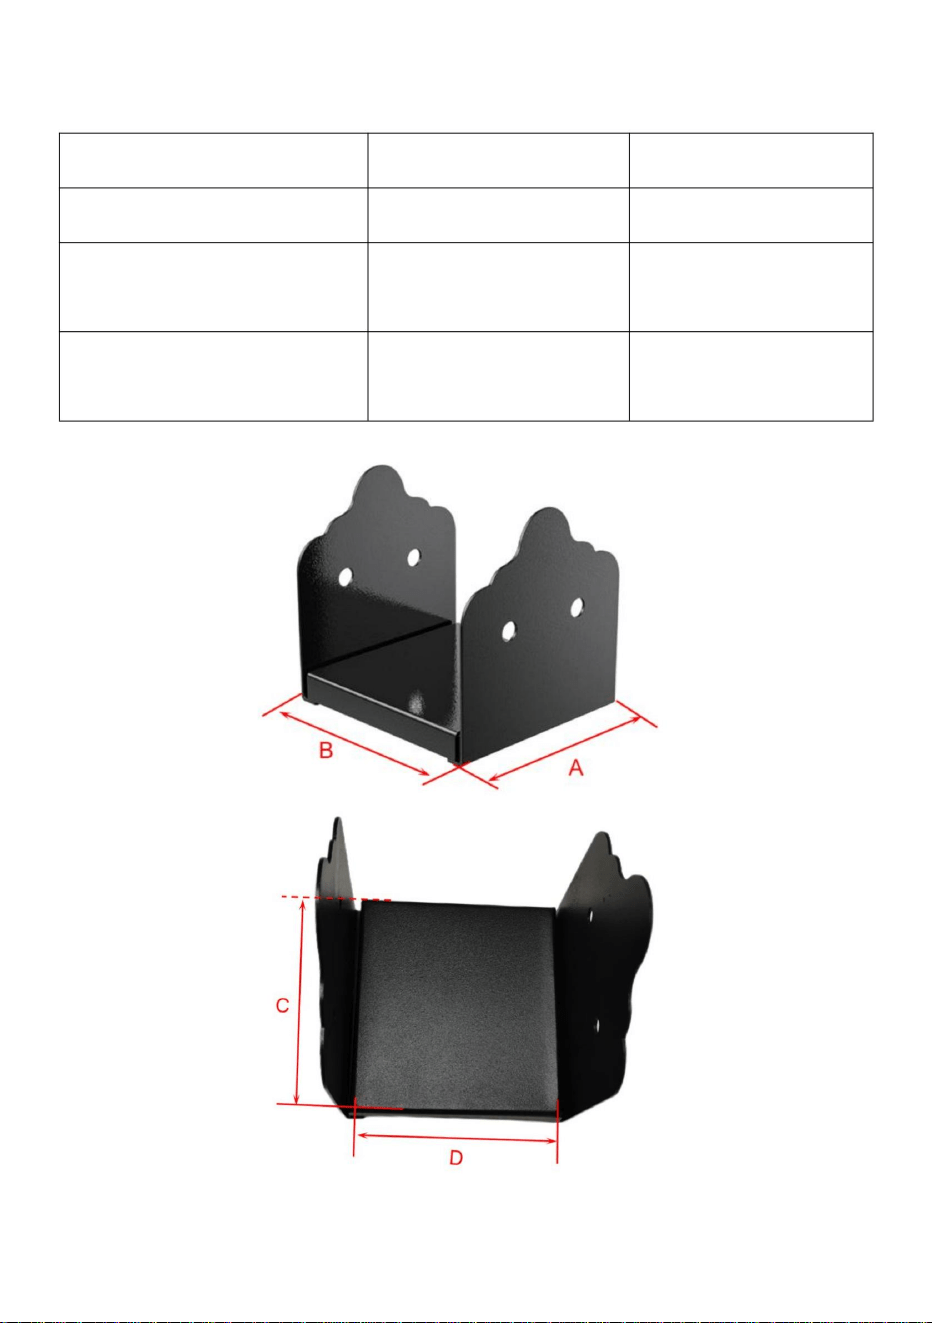
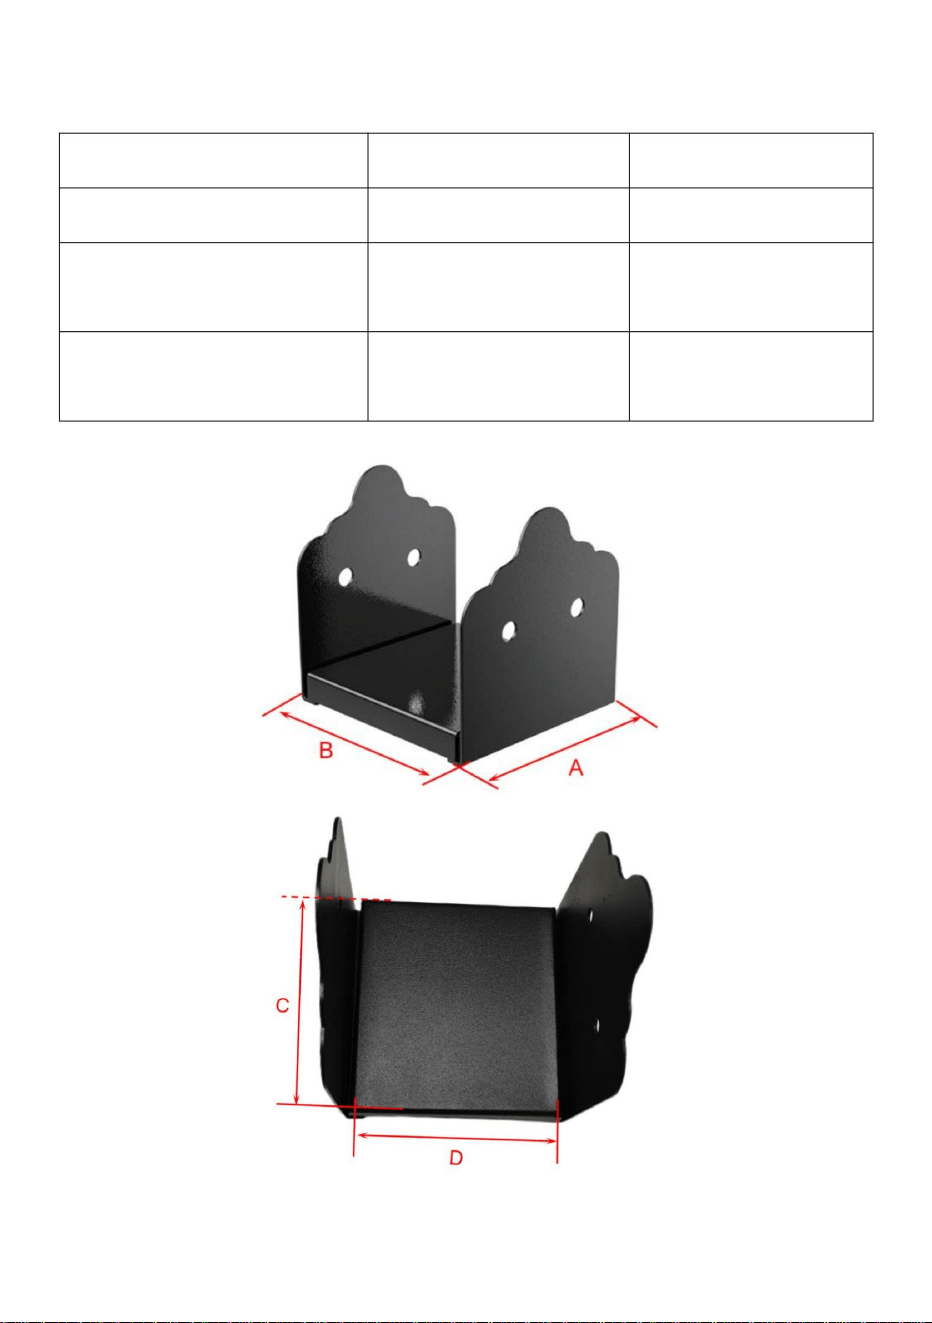
PARAMETER LIST
Product Model
BB-6in-2
BB-8in-2
Number of kits
2pcs
2pcs
Base size
(A*B)
5.9×5.7inch
(150×145mm)
7.9×7.64inch
(200×194mm)
Product cavity size
(C*D)
5.9×5.55inch
(150×141mm)
7.9×7.5inch
(200×190mm)
- 4 -
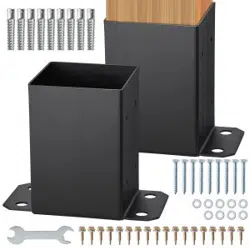
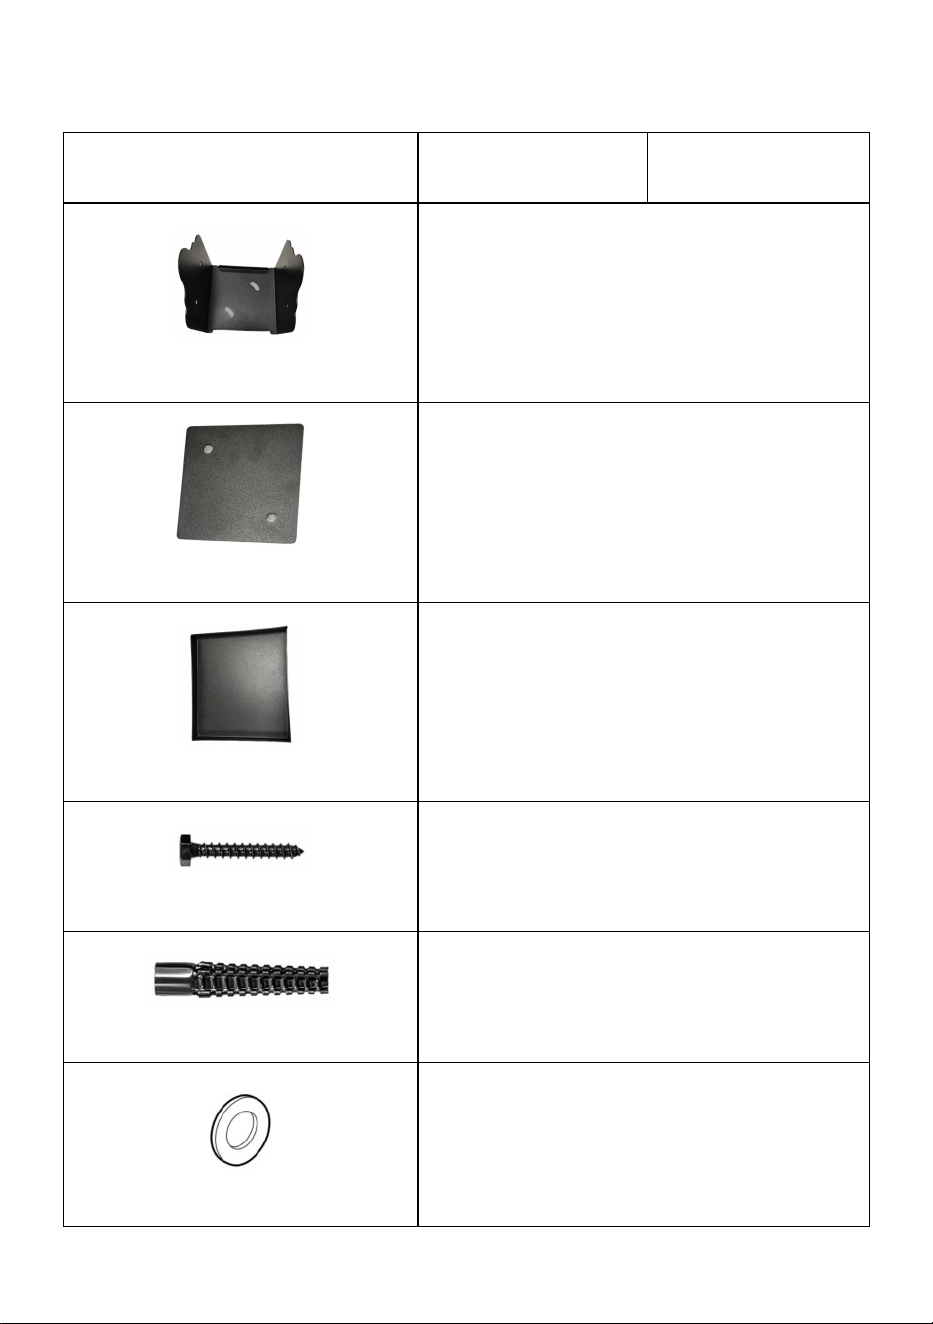
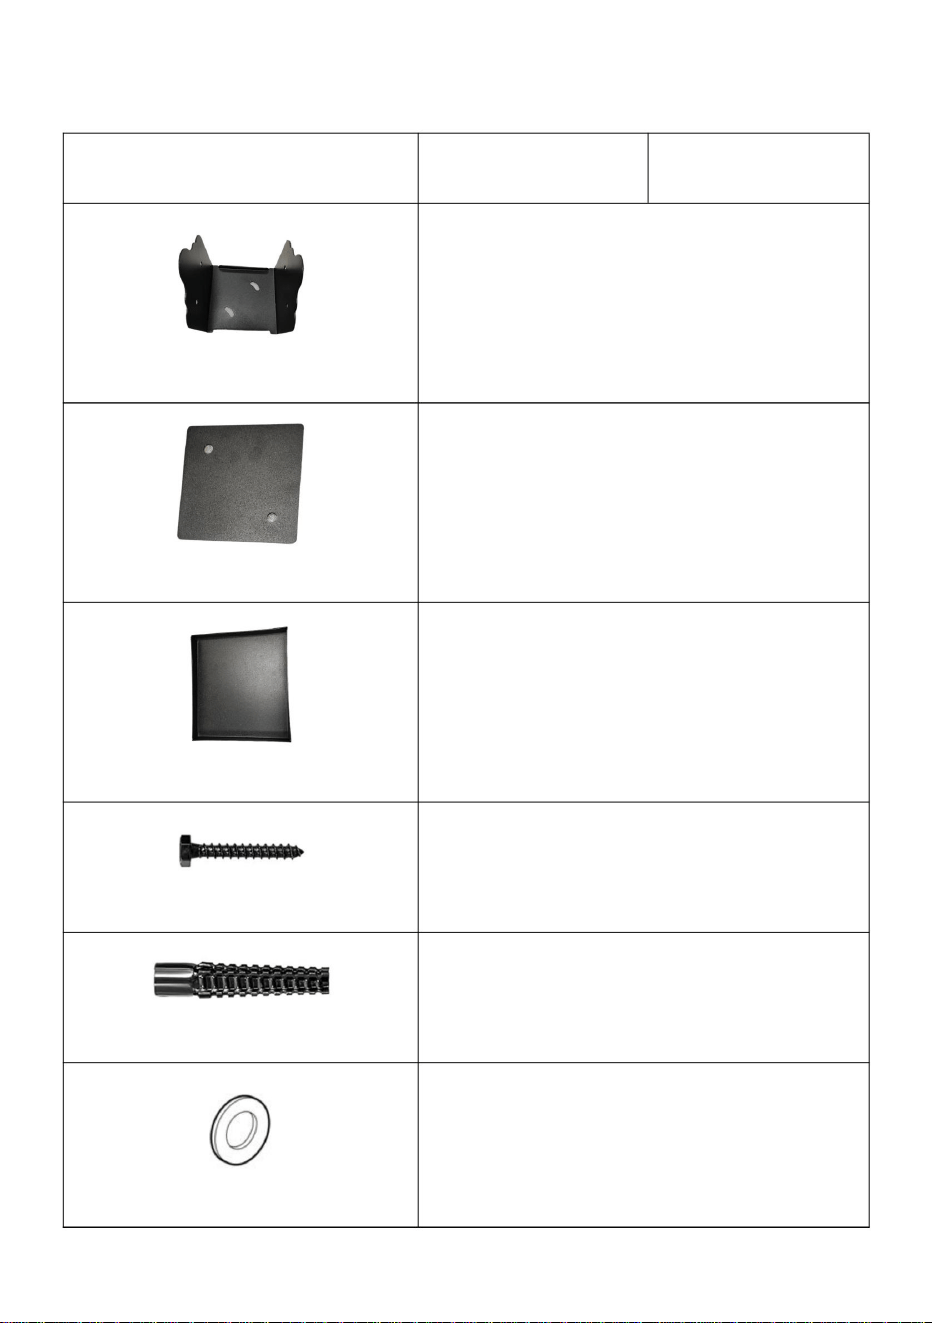
PARTS LIST
Product Model
BB-6in-2
BB-8in-2
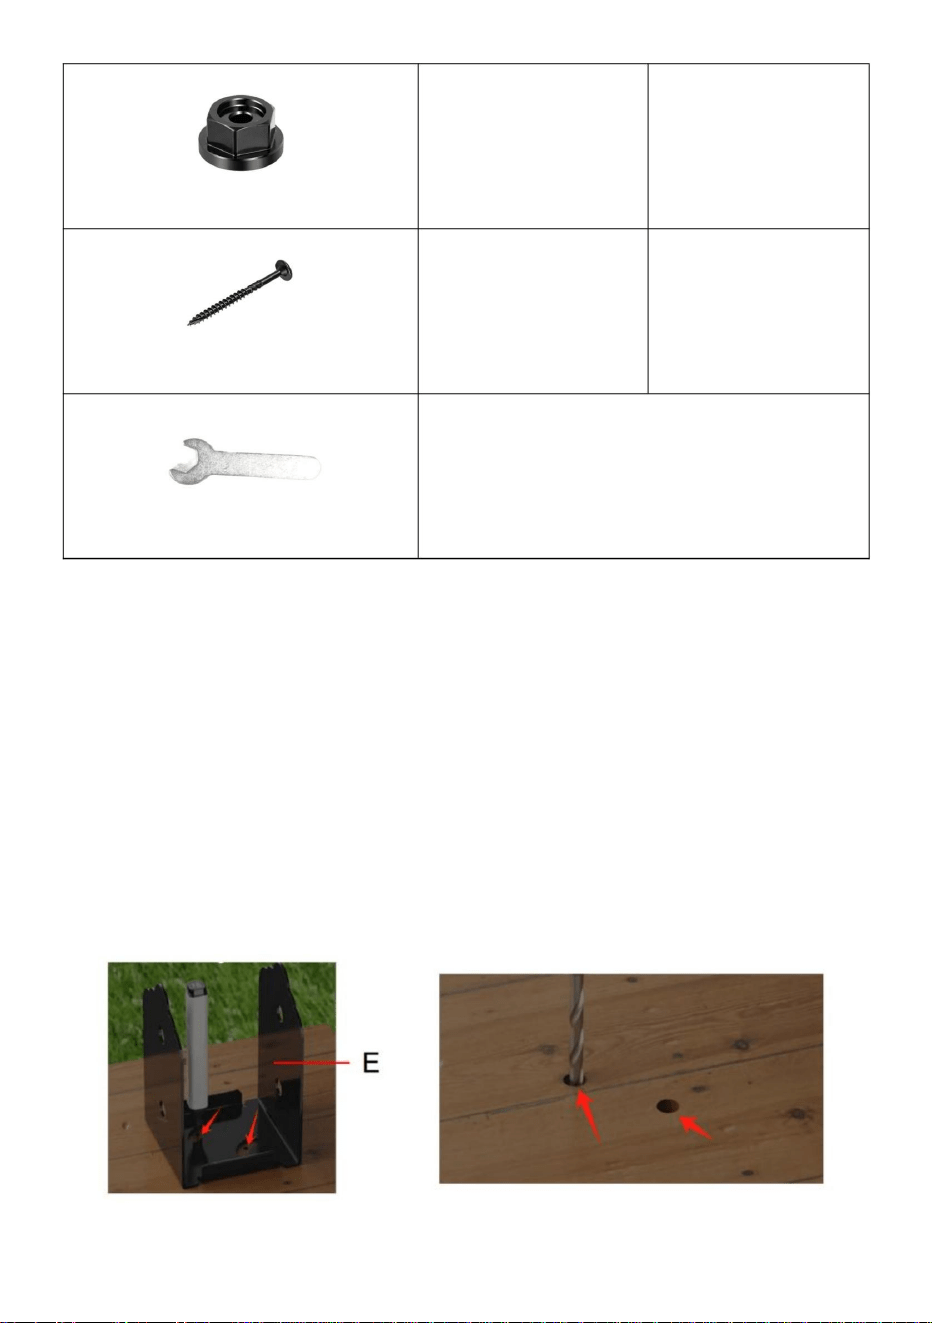
E:Post Base
2pcs
F:Square gasket
2pcs
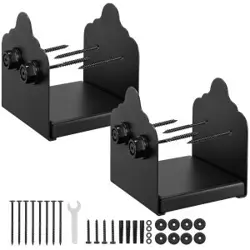
G:Support bracket
2pcs
H:Self-tapping Screw
4pcs
I:Serrated Expansion Sleeve
4pcs
J::washer
4pcs

- 5 -
K:Heavy Hex Nut
8pcs
16pcs
L:Self-tapping Screw
8pcs
16pcs
M:wrench
1pc
Our products are constantly updated, the pictures may be different from the
shape of the actual items, please refer to the actual items.
Count the parts when receiving samples.
Wrench M is used to turn the screws
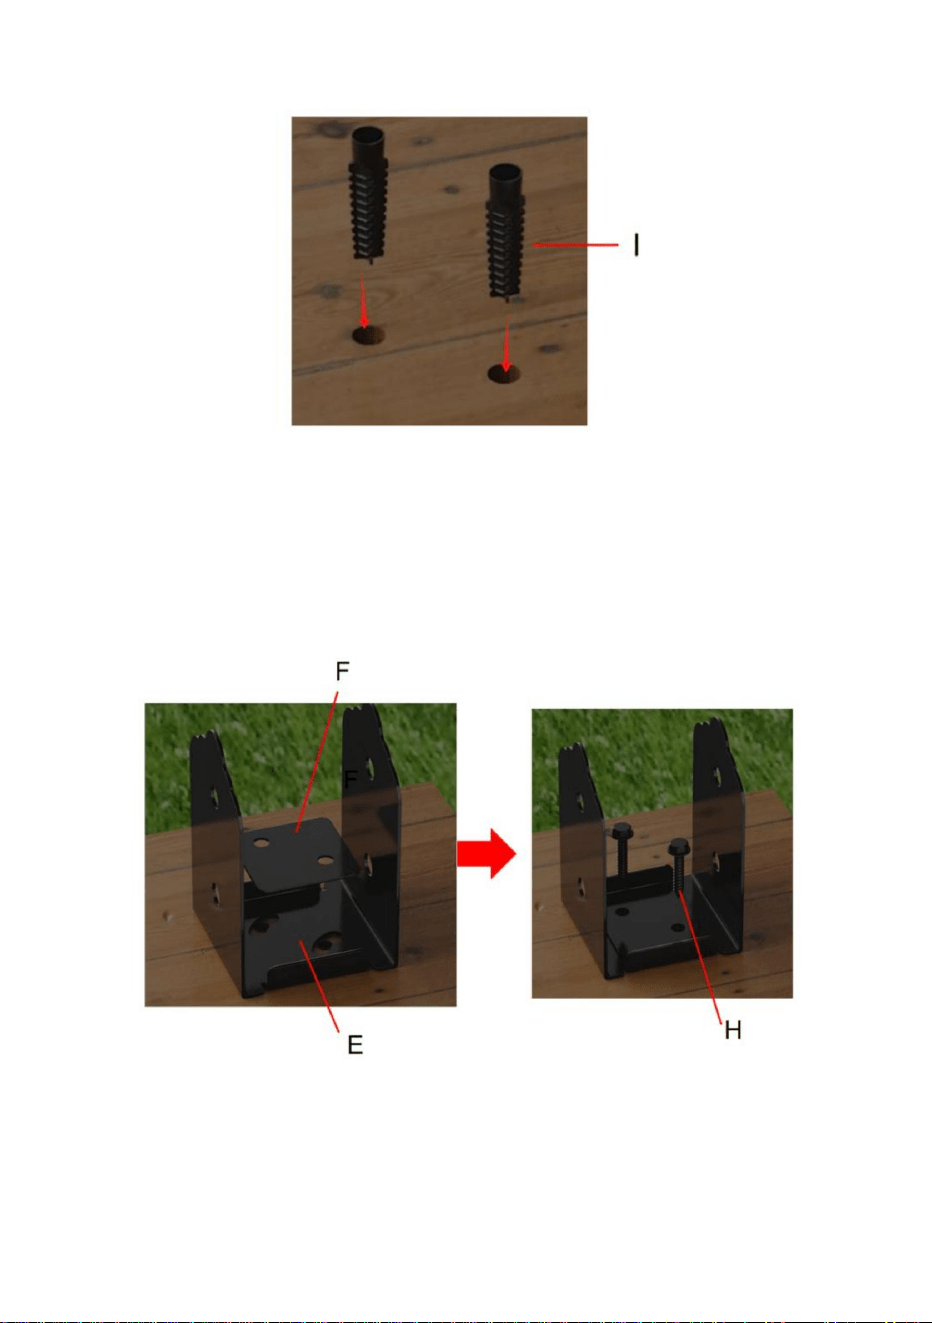
INSTALLATION GUIDE
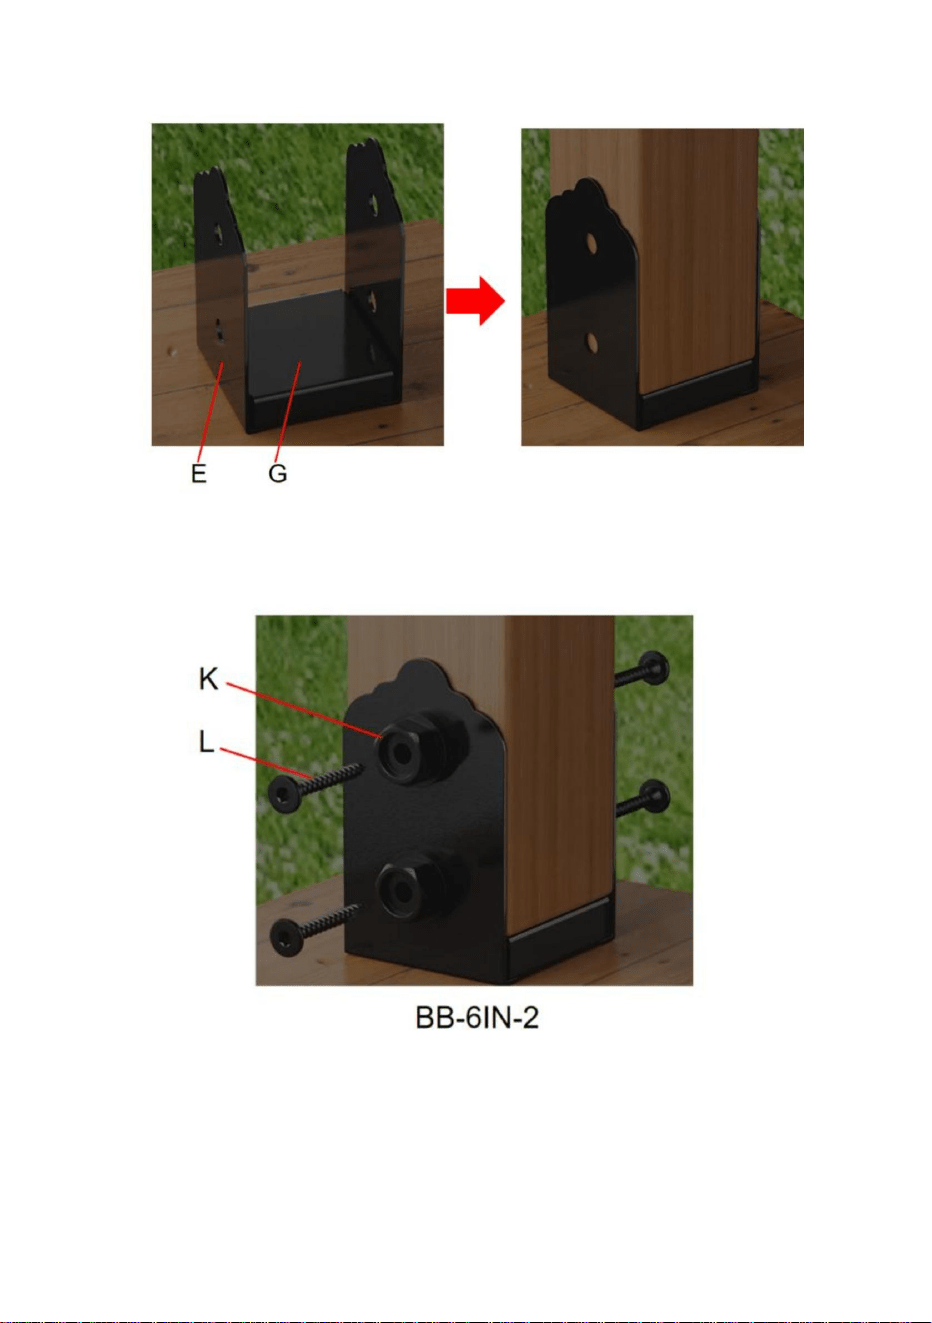
1.Mark 2 points on the ground through 2 holes at the Post Base E surface
of the base;Drilling in the marking position using a Φ29/64" Drill Bit;The
depth of the hole was 65mm.
- 6 -
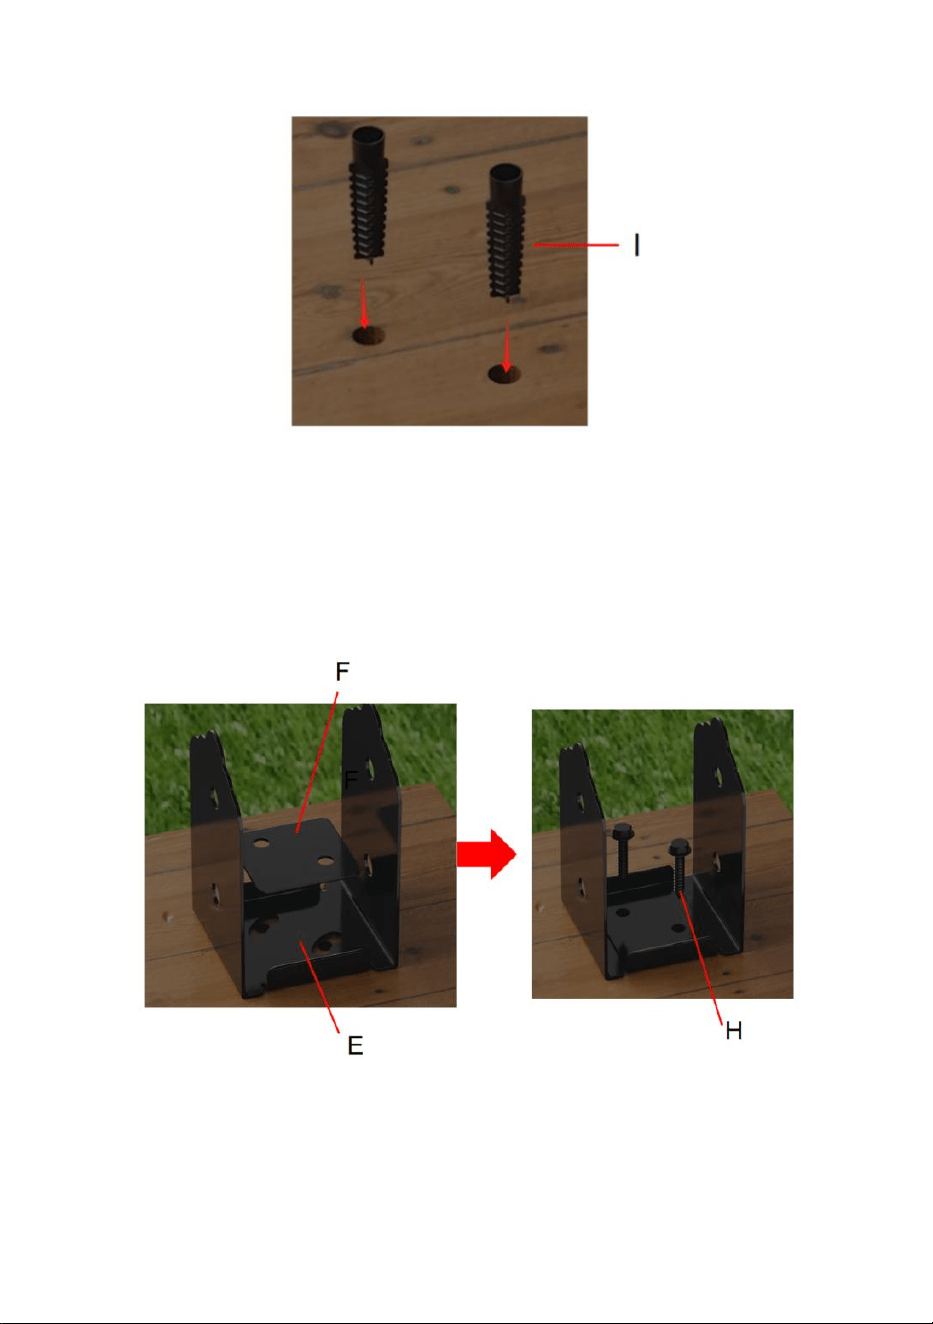
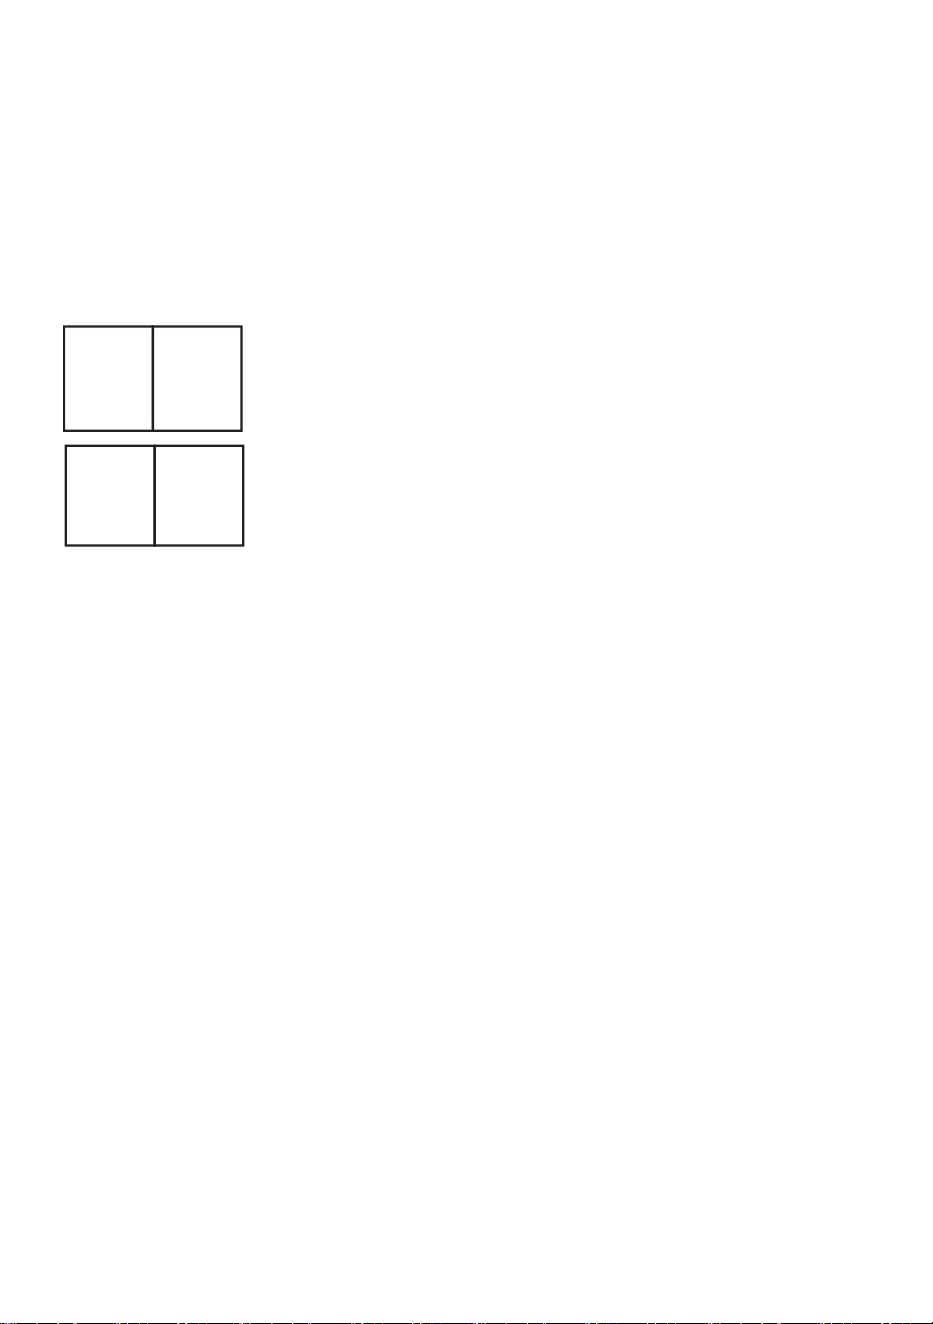
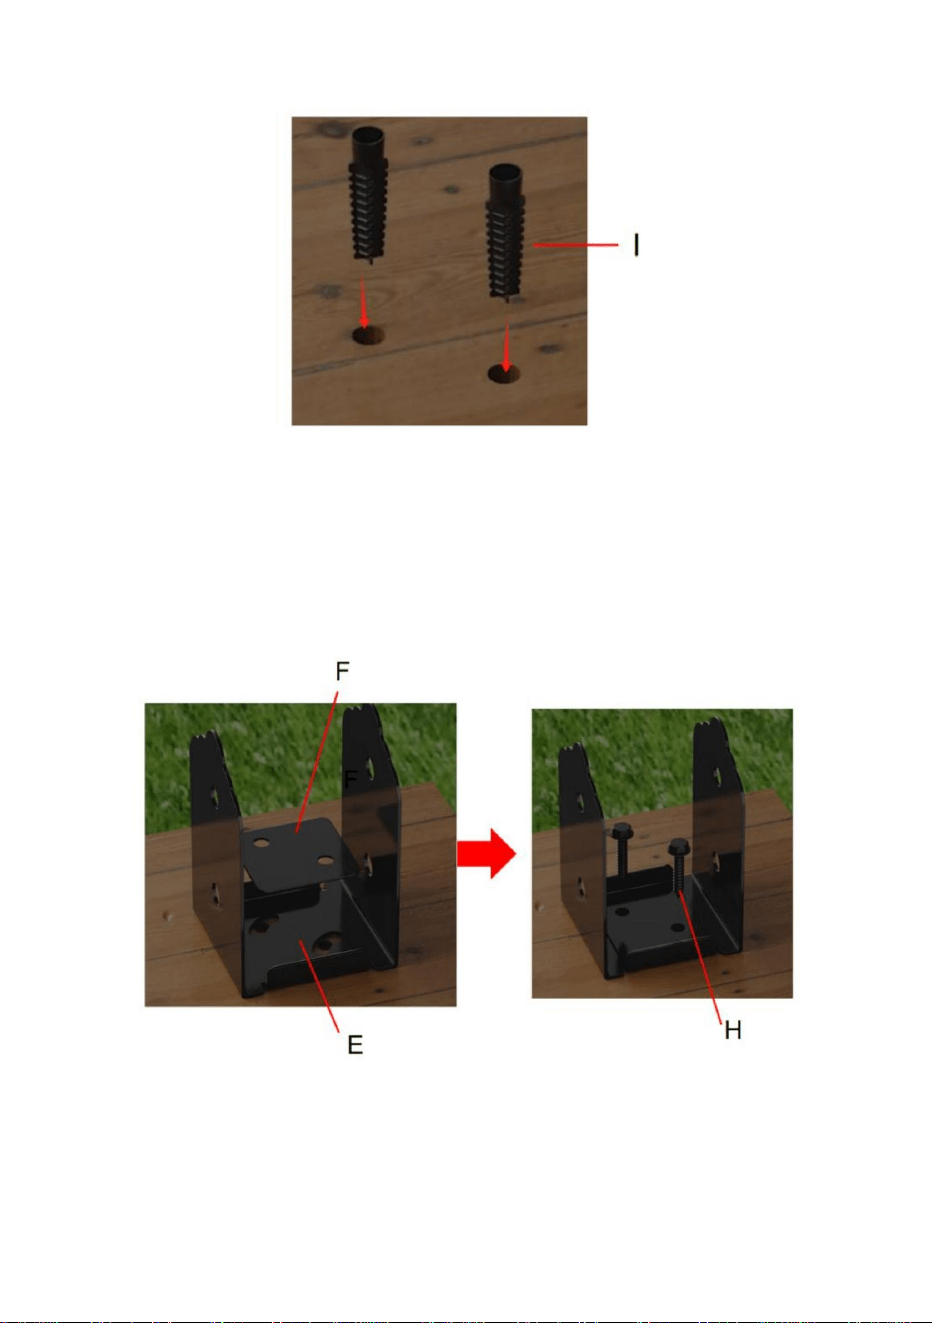
2.Install the 2 Serrated Expansion Sleeve I into the finished holes.
3.Align the post base E-base face to the serrated expansion sleeve I;
3.1.Place square gasket f inside the post base E, the through hole of
square gasket f alignment serrated expansion sleeve I;
3.2.Pass self-tapping screw H through the washer J and lock it to serrated
expansion sleeve I.
4.Place Support bracket G in post base E and cover the inner parts; insert
wood into the cavity of post base E;
It is recommended that the wood square section is 0.1inch smaller than the

- 7 -
cavity size.
5.Lock the wooden side with two heavy hex nut K and self-tapping screw L
in the post base E.
Note that 4 heavy hex nut K and self-tapping screw L are required on both
sides of model BB-8in-2;
- 8 -
Manufacturer: Shanghaimuxinmuyeyouxiangongsi
Address: Shuangchenglu 803nong11hao1602A-1609shi, baoshanqu,
shanghai 200000 CN.
Imported to AUS: SIHAO PTY LTD. 1 ROKEVA STREETEASTWOOD
NSW 2122 Australia
Imported to USA: Sanven Technology Ltd. Suite 250, 9166 Anaheim
Place, Rancho Cucamonga, CA 91730
REP
UK
YH CONSULTING LIMITED. C/O YH Consulting
Limited Office 147, Centurion House, London
Road, Staines-upon-Thames, Surrey, TW18 4AX
REP
EC
E-CrossStu GmbH
Mainzer Landstr.69,
60329 Frankfurt am Main.


Technical Support and E-Warranty Certificate
www.vevor.com/support

BASEDEPOTEAUSEMIENVELOPPANTE
MODÈLE:BB6po2/BB8po2
Assistancetechniqueetcertificatdegarantieélectronique
www.vevor.com/support
Machine Translated by Google

Machine Translated by Google
1
Base
Poteausemienveloppant
Ceciestlemoded'emploid'origine.Veuillezlireattentivementl'intégralitédumanuelavant
utilisation.VEVORseréserveledroitd'interpréterclairementcemanueld'utilisation.L'apparencedu
produitdépendduproduitquevousavezreçu.Veuilleznousexcuserpourleséventuellesmises
àjourtechnologiquesoulogicielles.
MODÈLE:BB6po2/BB8po2
Machine Translated by Google

Consignesdesécurité
2
UTILISATIONTOUTTERRAIN
Lisezattentivementlemanueld'instructions.
àl'écartpendantlemontage.
5.Séparezetcompteztouteslespiècesetlematériel.
produitcorrectementetcomplètementassembléuniquement.
1.Nelaissezpaslesenfantsgrimpersurl'appareil.2.Gardezlesenfantsetlesanimauxdomestiquesàl'écart.
AvertissementPourréduirelerisquedeblessure,l'utilisateurdoitlire
lacolonneenbois,tellequepavillon,pavillon,clôture,pavillon,boîteauxlettres,balustradedeporche,
supportdeterrasse,etc.
4.Lacapacitédechargeetd'autresparamètresduproduitsontappliquésau
l'influencedel'alcool,dedroguesoudemédicaments.
lacolonneenboisdelapourrituredel'eau;lacorrosionestadaptéeàlanécessitéderéparer
Leproduitpeutêtreutilisédanslessolsenbétonetenboisexistants,enséparantlacolonnede
boisdel'eausouterraine,empêchantefficacement
3.N'essayezpasd'assemblerleproduitlorsquevousvoussentezfatiguéousousla
9.Respecteruniquementlesusagesprévus.
8.Deuxpersonnessontnécessairespourl'assemblage.
2.Veuillezporterdeslunettesdesécuritéetdesgantsdetravailcorrectementpendantl'assemblage.
Unassemblageincorrectpeutêtredangereux.
lenonrespectdesinstructionspeutentraînerdesblessurescorporellesoudesdommagesàdesbiensdevaleur.
nécessaire.
7.Sivousutilisezdesoutilsélectriques,veillezàralentiretàvousarrêterlorsque
Lisezetcomprenezl'intégralitédecemanuelavantd'assembler,d'installer,d'utiliseroud'entretenirce
produit.Lenonrespectdecesavertissementset
1.Veuillezassemblerleproduitenstricteconformitéaveclesinstructions.
PRÉCAUTIONSDEMONTAGE
6.Préparezl’outilsuivant:tourneviscruciforme.
Machine Translated by Google

(CD)
Modèledeproduit
Tailledelacavitéduproduit
(A*B)
(200×190mm)
Tailledelabase
2pièces
7,9×7,5pouces
2pièces
(150×141mm)
5,9×5,55pouces
Nombredekits
BB8en2
7,9×7,64pouces
(200×194mm)
5,9×5,7pouces
(150×145mm)
BB6en2
LISTEDESPARAMÈTRES
3
Machine Translated by Google

Modèledeproduit
4pièces
G:Supportdefixation
2pièces
F:Jointcarré
2pièces
J::washer
E:PostBase
4pièces
I:Manchond'expansiondentelé
2pièces
BB8en2
4pièces
H:Visautotaraudeuse
BB6en2
LISTEDESPIÈCES
4
Machine Translated by Google

5
16pièces
Comptezlespièceslorsdelaréceptiondeséchantillons.
8pièces
formedesarticlesréels,veuillezvousréférerauxarticlesréels.
Nosproduitssontconstammentmisàjour,lesimagespeuventêtredifférentesdes
M:cléàmolette
1pièce
laprofondeurdutrouétaitde65mm.
L:Visautotaraudeuse
delabase;Perçageenpositiondemarquageàl'aided'unforetΦ29/64";Le
1.Marquez2pointssurlesolàtravers2troussurlasurfacedelabasedupoteauE
16pièces8pièces
LacléMestutiliséepourtournerlesvis
K:Écrouhexagonallourd
GUIDED'INSTALLATION
Machine Translated by Google

4.PlacezlesupportGdanslabasedupoteauEetcouvrezlespartiesintérieures;
insérezleboisdanslacavitédelabase
dupoteauE;ilestrecommandéquelasectioncarréeduboissoit0,1poucepluspetitequela
2.Installezles2manchonsd'expansiondentelésIdanslestrousfinis.
3.AlignezlafacedelabasedupoteauEsurlemanchond'expansiondenteléI;
3.1.Placezlejointcarréfàl'intérieurdelabasedupoteauE,letroutraversant
dujointcarréfalignelemanchond'expansiondenteléI;3.2.
PassezlavisautotaraudeuseHàtraverslarondelleJetverrouillezlasurlemanchon
d'expansiondenteléI.
6
Machine Translated by Google

7
5.VerrouillezlecôtéenboisavecdeuxécroushexagonauxlourdsKetunevisautotaraudeuseLdanslabasedu
poteauE.
tailledelacavité.
Notezque4écroushexagonauxlourdsKetunevisautotaraudeuseLsontnécessairesdesdeuxcôtésdumodèle
BB8in2;
Machine Translated by Google

REPRÉSENTANTDELACE
REPRÉSENTANTDUROYAUMEUNI
ImportéauxÉtatsUnis:SanvenTechnologyLtd.Suite250,9166AnaheimPlace,
RanchoCucamonga,CA91730
YHCONSULTINGLIMITED.A/SYHConsultingLimited,
bureau147,CenturionHouse,LondonRoad,Staines
uponThames,Surrey,TW184AX
ImportéenAustralie:SIHAOPTYLTD.1ROKEVASTREET,ASTWOODNSW2122,
Australie
Fabricant:ShanghaimuxinmuyeyouxiangongsiAdresse:
Shuangchenglu803nong11hao1602A1609shi,baoshanqu,shanghai200000CN.
ECrossStuGmbH
MainzerLandstr.69,
60329FrancfortsurleMain.
8
Machine Translated by Google

Machine Translated by Google

Assistancetechniqueetcertificatdegarantie
électroniquewww.vevor.com/support
Machine Translated by Google

Technischer Support und E-Garantie-Zertifikat
www.vevor.com/support
MODELL: BB-6in-2/BB-8in-2
Halbumhüllender Pfostenfuß
Machine Translated by Google

Machine Translated by Google

Dies ist die Originalanleitung. Bitte lesen Sie alle Anweisungen sorgfältig
durch, bevor Sie das Gerät in Betrieb nehmen. VEVOR behält sich das Recht vor,
die Bedienungsanleitung klar und deutlich zu interpretieren. Das Aussehen
des Produkts hängt vom gelieferten Produkt ab. Bitte haben Sie Verständnis dafür,
dass wir Sie nicht erneut über Technologie- oder Software-Updates informieren.
MODELL: BB-6in-2/BB-8in-2
Base
Halbumschlagpfosten
- 1 -
Machine Translated by Google

ALLROUND-NUTZUNG
- 2 -
Sicherheitshinweise
die Holzsäule vor Wasserfäule; Korrosion ist für die Notwendigkeit der Reparatur geeignet
Einfluss von Alkohol, Drogen oder Medikamenten.
benötigt.
Das Produkt kann in den vorhandenen Beton- und Holzböden verwendet werden, trennt
die Holzsäule vom Grundwasser und verhindert effektiv
3. Versuchen Sie nicht, das Produkt zusammenzubauen, wenn Sie müde sind oder unter
9. Befolgen Sie nur die vorgesehenen Verwendungszwecke.
Nur ordnungsgemäß und vollständig montiertes Produkt.
Lesen Sie die Bedienungsanleitung sorgfältig durch.
die Holzsäule, wie Pavillon, Pavillon, Zaun, Pavillon, Briefkasten, Verandageländer, Deckhalterung
usw.
während der Montage weg.
4. Tragfähigkeit und andere Produktparameter werden auf die
1. Erlauben Sie Kindern nicht, auf das Gerät zu klettern. 2. Halten Sie Kinder und Haustiere
Warnung - Um das Verletzungsrisiko zu verringern, muss der Benutzer
5. Trennen und zählen Sie alle Teile und die Hardware.
Lesen und verstehen Sie dieses Handbuch vollständig, bevor Sie dieses Produkt
zusammenbauen, installieren, betreiben oder warten. Die Nichtbeachtung dieser Warnungen und
1. Bitte montieren Sie das Produkt streng nach der Anleitung.
7. Achten Sie beim Einsatz von Elektrowerkzeugen darauf, die Geschwindigkeit zu verringern und anzuhalten,
VORSICHTSMASSNAHMEN BEI DER MONTAGE
6. Bereiten Sie das folgende Werkzeug vor: Kreuzschlitzschraubendreher.
2. Bitte tragen Sie während der Montage eine Schutzbrille und Arbeitshandschuhe.
8. Für die Montage sind zwei Personen erforderlich.
Anweisungen können zu Verletzungen oder Sachschäden führen.
Eine falsche Montage kann gefährlich sein.
Machine Translated by Google

Basisgröße
(200×190 mm)
2 Stück
7,9×7,5 Zoll
Produktmodell
(A*B)
(CD)
Produkthohlraumgröße
BB-8in-2
7,9 × 7,64 Zoll
(200 × 194 mm)
BB-6in-2
5,9 × 5,7 Zoll
(150 × 145 mm)
2 Stück
(150×141 mm)
Anzahl der Kits
5,9×5,55 Zoll
PARAMETERLISTE
- 3 -
Machine Translated by Google

F: Quadratische Dichtung
2 Stück
J::Unterlegscheibe
Produktmodell
2 Stück
4 Stück
G: Stützhalterung
BB-8in-2
4 Stück
BB-6in-2
H: Selbstschneidende Schraube
E:Pfostenbasis
4 Stück
2 Stück
I:Gezackte Spreizhülse
TEILELISTE
- 4 -
Machine Translated by Google

INSTALLATIONSANLEITUNG
M:Schraubenschlüssel
1 Stück
Die Tiefe des Lochs betrug 65 mm.
16 Stück
Unsere Produkte werden ständig aktualisiert, die Bilder können von der tatsächlichen
Zählen Sie die Teile beim Empfang von Proben.
8 Stück
Die Form der tatsächlichen Artikel entnehmen Sie bitte den tatsächlichen Artikeln.
8 Stück
K:Schwere Sechskantmutter
Der Schlüssel M dient zum Drehen der Schrauben
L: Selbstschneidende Schraube
der Basis;Bohren in der Markierungsposition mit einem ÿ29/64" Bohrer;Die
16 Stück
1.Markieren Sie 2 Punkte auf dem Boden durch 2 Löcher an der Pfostenbasis E-Oberfläche
- 5 -
Machine Translated by Google
- 6 -
4.Stützhalterung G in Pfostenbasis E einsetzen und die Innenteile abdecken; Holz in den Hohlraum
der Pfostenbasis E einlegen; Es wird empfohlen,
dass der quadratische Holzabschnitt 0,1 Zoll kleiner ist als der
2. Installieren Sie die 2 gezackten Expansionshülsen I in den fertigen Löchern.
3. Richten Sie die Basisfläche des Pfostenfußes E an der gezahnten Spreizhülse I aus; 3.1.
Platzieren Sie die quadratische Dichtung f im Inneren des Pfostenfußes E, das Durchgangsloch
der quadratischen Dichtung f richtet die gezahnte Spreizhülse I aus; 3.2.
Führen Sie die selbstschneidende Schraube H durch die Unterlegscheibe J und befestigen Sie sie an
der gezahnten Spreizhülse I.
Machine Translated by Google

- 7 -
5. Die Holzseite mit zwei schweren Sechskantmuttern K und Blechschrauben L im Pfostenfuß E fixieren.
Hohlraumgröße.
Beachten Sie, dass auf beiden Seiten des Modells BB-8in-2 4 schwere Sechskantmuttern K und
selbstschneidende Schrauben L erforderlich sind.
Machine Translated by Google

EG-Vertreter
Britische Republik
Importiert in die USA: Sanven Technology Ltd. Suite 250, 9166 Anaheim Place,
Rancho Cucamonga, CA 91730
Importiert nach AUS: SIHAO PTY LTD. 1 ROKEVA STREETEASTWOOD NSW 2122
Australien
Hersteller: Shanghaimuxinmuyeyouxiangongsi Adresse:
Shuangchenglu 803nong11hao1602A-1609shi, Baoshanqu, Shanghai 200000 CN.
YH CONSULTING LIMITED. C/O YH Consulting Limited,
Büro 147, Centurion House, London Road, Staines-upon-
Thames, Surrey, TW18 4AX
E-CrossStu GmbH
Mainzer Landstr.69,
60329 Frankfurt am Main.
- 8 -
Machine Translated by Google

Machine Translated by Google

Technischer Support und E-Garantie-Zertifikat
www.vevor.com/support
Machine Translated by Google

BASE PER PALO SEMI AVVOLGENTE
Supporto tecnico e certificato di garanzia
elettronica www.vevor.com/support
MODELLO:BB-6in-2/BB-8in-2
Machine Translated by Google

Machine Translated by Google
- 1 -
Base
Post semi-avvolgente
Questa è l'istruzione originale, si prega di leggere attentamente tutte le
istruzioni del manuale prima di utilizzare. VEVOR si riserva una chiara
interpretazione del nostro manuale utente. L'aspetto del prodotto sarà
soggetto al prodotto ricevuto. Vi preghiamo di perdonarci se non vi informeremo
di nuovo se ci sono aggiornamenti tecnologici o software sul nostro prodotto.
MODELLO:BB-6in-2/BB-8in-2
Machine Translated by Google

Istruzioni di sicurezza
- 2 -
UTILIZZO COMPLETO
attentamente il manuale di istruzioni.
via durante il montaggio.
5. Separare e contare tutte le parti e l'hardware.
solo prodotti correttamente e completamente assemblati.
1. Non permettere ai bambini di salire sull'unità. 2. Tenere i bambini e gli animali domestici fuori dalla portata dei bambini.
Attenzione: per ridurre il rischio di lesioni, l'utente deve leggere
la colonna di legno, come padiglione, padiglione, recinzione, padiglione, cassetta postale, ringhiera
del portico, staffa del ponte, ecc.
4. La capacità di carico e altri parametri del prodotto vengono applicati al
influenza di alcol, droghe o farmaci.
la colonna di legno dal marciume dell'acqua; la corrosione è adatta alla necessità di riparare
Il prodotto può essere utilizzato nei pavimenti in calcestruzzo e legno esistenti, separando la
colonna di legno dall'acqua di falda, prevenendo efficacemente
3. Non tentare di montare il prodotto quando ci si sente stanchi o sotto sforzo.
9. Attenersi esclusivamente agli usi previsti.
8. Per il montaggio sono necessarie due persone.
2. Durante il montaggio, indossare occhiali protettivi e guanti da lavoro.
Un montaggio non corretto potrebbe rivelarsi pericoloso.
istruzioni possono causare lesioni personali o danni a beni di valore.
necessario.
7. Se si utilizzano utensili elettrici, fare attenzione a rallentare e fermarsi quando
Leggere e comprendere l'intero manuale prima di montare, installare, utilizzare o effettuare la
manutenzione di questo prodotto. La mancata osservanza di queste avvertenze e
1. Si prega di montare il prodotto seguendo scrupolosamente le istruzioni.
PRECAUZIONI DI MONTAGGIO
6. Preparare il seguente utensile: cacciavite a croce.
Machine Translated by Google
- 3 -
ELENCO PARAMETRI
Modello del prodotto
(CD)
Dimensioni della cavità del prodotto
(Un*B)
Dimensioni: 200×190 mm
Dimensioni della base
2 pezzi
7,9×7,5 pollici
2 pezzi
Dimensioni: 150×141 mm
5,9×5,55 pollici
Numero di kit
BB-8in-2
7,9×7,64 pollici
(200×194 mm)
5,9×5,7 pollici
(150×145 mm)
BB-6in-2
Machine Translated by Google
- 4 -
ELENCO DELLE PARTI
Modello del prodotto
4 pezzi
G:Staffa di supporto
2 pezzi
F:Guarnizione quadrata
2 pezzi
J::rondella
E:Base del palo
4 pezzi
I:Manicotto di espansione seghettato
2 pezzi
BB-8in-2
4 pezzi
H:Vite autofilettante
BB-6in-2
Machine Translated by Google

- 5 -
Quando si ricevono i campioni, contare le parti.
16 pezzi8 pezzi
forma degli articoli effettivi, fare riferimento agli articoli effettivi.
I nostri prodotti vengono costantemente aggiornati, le immagini potrebbero essere diverse da quelle reali.
M:chiave inglese
1 pz.
la profondità del foro era di 65 mm.
L:Vite autofilettante
della base;Foratura nella posizione di marcatura utilizzando una punta da trapano da ÿ29/64";Il
1.Segnare 2 punti sul terreno attraverso 2 fori sulla superficie della base del palo E
16 pezzi8 pezzi
La chiave M viene utilizzata per girare le viti
K: Dado esagonale pesante
GUIDA ALL'INSTALLAZIONE
Machine Translated by Google
3.Allineare la faccia della base E della base del palo al manicotto di espansione dentellato
I; 3.1.Posizionare la guarnizione quadrata f all'interno della base del palo E, allineando il
foro passante della guarnizione quadrata f con il manicotto di espansione
dentellato I; 3.2.Fare passare la vite autofilettante H attraverso la rondella J e bloccarla al manicotto
di espansione dentellato I.
2. Installare il manicotto di espansione dentato I nei fori finiti.
4. Posizionare la staffa di supporto G nella base del palo E e coprire le parti interne; inserire il
legno nella cavità della base del palo E; si
consiglia che la sezione quadrata del legno sia 0,1 pollici più piccola della
- 6 -
Machine Translated by Google
- 7 -
5. Bloccare il lato in legno con due dadi esagonali pesanti K e la vite autofilettante L nella base del palo
E.
dimensione della cavità.
Si noti che su entrambi i lati del modello BB-8in-2 sono necessari 4 dadi esagonali pesanti K e una
vite autofilettante L;
Machine Translated by Google

Rappresentante della CE
RAPPRESENTANZA DEL REGNO UNITO
Importato negli USA: Sanven Technology Ltd. Suite 250, 9166 Anaheim Place,
Rancho Cucamonga, CA 91730
YH CONSULTING LIMITED. C/O YH Consulting Limited
Ufficio 147, Centurion House, London Road, Staines-
upon-Thames, Surrey, TW18 4AX
Importato in AUS: SIHAO PTY LTD. 1 ROKEVA STREETEASTWOOD NSW 2122
Australia
Produttore: Shanghaimuxinmuyeyouxiangongsi Indirizzo:
Shuangchenglu 803nong11hao1602A-1609shi, baoshanqu, shanghai 200000 CN.
E-CrossStu GmbH
Mainzer Landstr.69,
60329 Francoforte sul Meno.
- 8 -
Machine Translated by Google

Machine Translated by Google

Supporto tecnico e certificato di garanzia
elettronica www.vevor.com/support
Machine Translated by Google

Soportetécnicoycertificadodegarantía
electrónicawww.vevor.com/support
MODELO:BB6in2/BB8in2
BASEDEPOSTESEMIENVOLVENTE
Machine Translated by Google

Machine Translated by Google

MODELO:BB6in2/BB8in2
Estassonlasinstruccionesoriginales;leaatentamentetodaslas
instruccionesdelmanualantesdeutilizarlo.VEVORsereservaelderechode
interpretarsumanualdeusuario.Laaparienciadelproductodependerá
delproductoquehayarecibido.Lerogamosquenosdisculpesinoleinformamos
denuevosihayactualizacionestecnológicasodesoftwareennuestroproducto.
Puestodesemienvolvimiento
Base
1
Machine Translated by Google

USOGENERAL
Instruccionesdeseguridad
2.Utilicegafasdeseguridadyguantesdetrabajoadecuadamenteduranteelmontaje.
Elproductosepuedeutilizarenpisosdeconcretoymaderaexistentes,separandola
columnademaderadelaguasubterráneaypreviniendoeficazmente
3.Nointenteensamblarelproductocuandosesientacansadoobajolainfluenciadelalcohol.
9.Sigaúnicamentelosusosprevistos.
Lacolumnademaderasepudreporelagua;lacorrosiónesadecuadaparalanecesidaddearreglar
influenciadelalcohol,drogasomedicamentos.
Advertencia:Parareducirelriesgodelesiones,elusuariodebeleer
Lacolumnademadera,comoelpabellón,elpabellón,lacerca,elpabellón,elbuzón,labarandilla
delporche,elsoportedelaterraza,etc.
1.Nopermitaquelosniñossesubanalaunidad.2.Mantengaalosniñosylasmascotas
4.Lacapacidaddecargayotrosparámetrosdelproductoseaplicanala
Leaatentamenteelmanualdeinstrucciones.
lejosduranteelmontaje.
únicamenteproductoensambladocorrectaycompletamente.
5.Separeycuentetodaslaspiezasyelhardware.
PRECAUCIONESDEMONTAJE
6.Preparelasiguienteherramienta:destornilladordecabezaPhilips.
Leaycomprendatodoestemanualantesdeensamblar,instalar,operarorealizar
mantenimientoaesteproducto.Elincumplimientodeestasadvertenciasy
1.Ensambleelproductosiguiendoestrictamentelasinstrucciones.
7.Siutilizaherramientaseléctricas,tengacuidadodereducirlavelocidadydetenersecuando
Unmontajeincorrectopodríaresultarpeligroso.
necesario.
Lanoobservanciadeestasinstruccionespuedeprovocarlesionespersonalesodañosabienesvaliosos.
8.Senecesitandospersonasparaelmontaje.
2
Machine Translated by Google
2piezas
(150×141mm)
2piezas
7,9×7,5pulgadas
Tamañodelabase
(200×190mm)
Tamañodelacavidaddelproducto
(A*B)
Modelodeproducto
(CD)
BB6en2
5,9×5,7pulgadas
(150×145mm)
BB8en2
7,9×7,64pulgadas
(200×194mm)
5,9×5,55pulgadas
Númerodekits
LISTADEPARÁMETROS
3
Machine Translated by Google

E:Basedepostes
4piezas
2piezas
J::lavadora
F:Juntacuadrada
G:Soportedeapoyo
2piezas
Modelodeproducto
4piezas
BB6en2
H:Tornilloautorroscante
4piezas
BB8en2
I:Manguitodeexpansióndentado
2piezas
LISTADEPIEZAS
4
Machine Translated by Google

GUÍADEINSTALACIÓN
L:Tornilloautorroscante
delabase;PerforaciónenlaposicióndemarcadoutilizandounabrocadeΦ29/64";El
1pieza
Laprofundidaddelagujeroerade65mm.
M:llaveinglesa
8piezas
Nuestrosproductosseactualizanconstantemente,lasimágenespuedenserdiferentesalas
Formadelosartículosreales,consultelosartículosreales.
16piezas
Cuentelaspiezasalrecibirmuestras.
K:Tuercahexagonalpesada
LallaveMseutilizaparagirarlostornillos.
8piezas
1.Marque2puntosenelsueloatravésde2orificiosenlasuperficiedelabasedelposteE
16piezas
5
Machine Translated by Google

6
3.AlineelacaradelabasedelposteEconelmanguitodeexpansióndentadoI;
3.1.ColoquelajuntacuadradafdentrodelabasedelposteE,alineeelorificio
pasantedelajuntacuadradafconelmanguitodeexpansión
dentadoI;3.2.PaseeltornilloautorroscanteHatravésdelaarandelaJyfíjeloal
manguitodeexpansióndentadoI.
2.Instalelos2manguitosdeexpansióndentadosIenlosorificiosterminados.
4.ColoqueelsoporteGenlabasedelposteEycubralaspartesinternas;inserte
maderaenlacavidaddelabasedelposte
E;serecomiendaquelaseccióncuadradademaderasea0,1pulgadasmáspequeñaquela
Machine Translated by Google

7
5.BloqueeelladodemaderacondostuercashexagonalespesadasKyuntornilloautorroscanteLenlabase
delposteE.
tamañodelacavidad.
Tengaencuentaqueserequieren4tuercashexagonalespesadasKyuntornilloautorroscanteLenambos
ladosdelmodeloBB8in2;
Machine Translated by Google

RepresentantedelaCE
REPRESENTANTEDELREINOUNIDO
ImportadoaEE.UU.:SanvenTechnologyLtd.Suite250,9166AnaheimPlace,
RanchoCucamonga,CA91730
YHCONSULTINGLIMITADA.A/CYHConsultingLimited
Oficina147,CenturionHouse,LondonRoad,Staines
uponThames,Surrey,TW184AX
ImportadoaAUS:SIHAOPTYLTD.1ROKEVASTREET,EASTWOOD,NSW2122,
Australia
Fabricante:ShanghaimuxinmuyeyouxiangongsiDirección:
Shuangchenglu803nong11hao1602A1609shi,baoshanqu,shanghai200000CN.
ECrossStuGmbH
MainzerLandstr.69,
60329FráncfortdelMeno.
8
Machine Translated by Google

Machine Translated by Google

Soportetécnicoycertificadodegarantía
electrónicawww.vevor.com/support
Machine Translated by Google

MODEL:BB-6in-2/BB-8in-2
Wsparcie techniczne i certyfikat gwarancji
elektronicznej www.vevor.com/support
PODSTAWA SŁUPKA PÓŁOKRĄGŁA
Machine Translated by Google

Machine Translated by Google
MODEL:BB-6in-2/BB-8in-2
To jest oryginalna instrukcja, przed użyciem należy uważnie przeczytać
wszystkie instrukcje. VEVOR zastrzega sobie jasną interpretację naszej instrukcji
obsługi. Wygląd produktu będzie zależał od produktu, który otrzymałeś.
Prosimy o wybaczenie, że nie poinformujemy Cię ponownie, jeśli w naszym
produkcie pojawią się jakiekolwiek aktualizacje technologiczne lub oprogramowania.
Opierać
Słupek pół-osłaniający
- 1 -
Machine Translated by Google

Wszechstronne zastosowanie
- 2 -
Instrukcje bezpieczeństwa
kolumna drewniana z gnicia wodnego; korozja nadaje się do naprawy
pod wpływem alkoholu, narkotyków lub leków.
wymagany.
Produkt można stosować w istniejących podłogach betonowych i drewnianych,
oddzielając słup drewniany od wód gruntowych, skutecznie zapobiegając
3. Nie próbuj składać produktu, gdy jesteś zmęczony lub osłabiony.
9. Stosuj wyłącznie produkty zgodne z przeznaczeniem.
wyłącznie produkt prawidłowo i kompletnie zmontowany.
Przeczytaj uważnie instrukcję obsługi.
Drewniana kolumna, taka jak pawilon, pawilon, ogrodzenie, pawilon, skrzynka pocztowa,
balustrada ganku, wspornik tarasu itp.
z dala od miejsca montażu.
4. Nośność i inne parametry produktu są stosowane do
1. Nie pozwalaj dzieciom wspinać się na urządzenie. 2. Nie pozwalaj dzieciom i zwierzętom domowym przebywać w pobliżu urządzenia.
Ostrzeżenie – aby zmniejszyć ryzyko obrażeń, użytkownik musi przeczytać
5. Oddziel i policz wszystkie części i elementy montażowe.
Przed montażem, instalacją, obsługą lub serwisowaniem tego produktu należy przeczytać
i zrozumieć całą instrukcję. Nieprzestrzeganie tych ostrzeżeń i
1. Produkt należy złożyć ściśle według instrukcji.
7. Używając elektronarzędzi, pamiętaj o zwolnieniu i zatrzymaniu się.
ŚRODKI OSTROŻNOŚCI PODCZAS MONTAŻU
6. Przygotuj następujące narzędzie: śrubokręt krzyżakowy.
2. Podczas montażu należy prawidłowo nosić okulary ochronne i rękawice robocze.
8. Do montażu potrzebne są dwie osoby.
Nieprzestrzeganie tych instrukcji może spowodować obrażenia ciała lub uszkodzenie cennego mienia.
Nieprawidłowy montaż może być niebezpieczny.
Machine Translated by Google

Rozmiar podstawy
(200×190 mm)
2 szt.
7,9×7,5 cala
Model produktu
(A*B)
(PŁYTA CD)
Rozmiar wnęki produktu
BB-8w-2
7,9×7,64 cala
(200×194 mm)
BB-6w-2
5,9×5,7 cala
(150×145 mm)
2 szt.
(150×141 mm)
Liczba zestawów
5,9×5,55 cala
LISTA PARAMETRÓW
- 3 -
Machine Translated by Google

F: Uszczelka kwadratowa
2 szt.
J::pralka
Model produktu
2 szt.
4 szt.
G: Wspornik podporowy
BB-8w-2
4 szt.
BB-6w-2
H: Śruba samogwintująca
E:Podstawa słupka
4 szt.
2 szt.
I: Ząbkowana tuleja rozszerzająca
LISTA CZĘŚCI
- 4 -
Machine Translated by Google

INSTRUKCJA INSTALACJI
M:klucz
1 szt.
głębokość otworu wynosiła 65mm.
16 szt.
Nasze produkty są stale aktualizowane, zdjęcia mogą się różnić od rzeczywistych.
Przy odbiorze próbek należy policzyć części.
8szt
kształtu rzeczywistych przedmiotów, proszę odnieść się do rzeczywistych przedmiotów.
8szt
K: Ciężka nakrętka sześciokątna
Klucz M służy do przykręcania śrub
L: Śruba samogwintująca
podstawy;Wiercenie w miejscu oznaczenia za pomocą wiertła Φ29/64";
16 szt.
1. Zaznacz 2 punkty na ziemi przez 2 otwory na powierzchni podstawy słupka E
- 5 -
Machine Translated by Google

- 6 -
3. Wyrównaj powierzchnię podstawy słupka E z ząbkowaną tuleją rozporową I;
3.1. Umieść kwadratową uszczelkę f wewnątrz podstawy słupka E, tak aby otwór
przelotowy kwadratowej uszczelki f wyrównał ząbkowaną tuleję
rozporową I; 3.2. Przełóż wkręt samogwintujący H przez podkładkę J i zablokuj go w
ząbkowanej tulei rozporowej I.
2. Zamontuj 2 ząbkowane tuleje rozprężne I w gotowych otworach.
4. Umieść wspornik G w podstawie słupka E i zakryj wewnętrzne części; włóż drewno do
wnęki podstawy słupka E; zaleca się, aby
kwadratowy przekrój drewna był o 0,1 cala mniejszy od
Machine Translated by Google

- 7 -
Należy pamiętać, że po obu stronach modelu BB-8in-2 wymagane są 4 nakrętki sześciokątne K i wkręty
samogwintujące L;
rozmiar jamy.
5. Zablokuj drewnianą stronę za pomocą dwóch mocnych nakrętek sześciokątnych K i wkrętów samogwintujących
L w podstawie słupka E.
Machine Translated by Google

REP WIELKIEJ BRYTANII
Przedstawiciel UE
Importowane do USA: Sanven Technology Ltd. Suite 250, 9166 Anaheim Place, Rancho
Cucamonga, CA 91730
Importowane do AUS: SIHAO PTY LTD. 1 ROKEVA STREETEASTWOOD NSW 2122 Australia
Producent: Shanghaimuxinmuyeyouxiangongsi Adres:
Shuangchenglu 803nong11hao1602A-1609shi, Baoshanqu, Szanghaj 200000 CN.
YH CONSULTING LIMITED. C/O YH Consulting Limited Biuro
147, Centurion House, London Road, Staines-upon-
Thames, Surrey, TW18 4AX
E-CrossStu GmbH
Mainzer Landstr.69,
60329 Frankfurt nad Menem.
- 8 -
Machine Translated by Google

Machine Translated by Google

Wsparcie techniczne i certyfikat gwarancji
elektronicznej www.vevor.com/support
Machine Translated by Google

MODEL:BB-6in-2/BB-8in-2
Technische ondersteuning en e-garantiecertificaat
www.vevor.com/support
HALF OMHULLING POST BASIS
Machine Translated by Google

Machine Translated by Google
MODEL:BB-6in-2/BB-8in-2
Dit is de originele instructie, lees alle handleidingen zorgvuldig door
voordat u het product gebruikt. VEVOR behoudt zich een duidelijke interpretatie
van onze gebruikershandleiding voor. Het uiterlijk van het product is
afhankelijk van het product dat u hebt ontvangen. Vergeef ons dat we u niet
opnieuw zullen informeren als er technologie- of software-updates voor ons product zijn.
Baseren
Half omhullende paal
- 1 -
Machine Translated by Google

ALGEMEEN GEBRUIK
- 2 -
Veiligheidsinstructies
Het niet opvolgen van de instructies kan leiden tot persoonlijk letsel of schade aan waardevolle eigendommen.
Een verkeerde montage kan gevaarlijk zijn.
2. Draag tijdens de montage een veiligheidsbril en werkhandschoenen.
nodig.
8. Voor de montage zijn twee personen nodig.
MONTAGEVOORZORGSMAATREGELEN
6. Bereid het volgende gereedschap voor: kruiskopschroevendraaier.
7. Als u elektrisch gereedschap gebruikt, wees dan voorzichtig en vertraag en stop wanneer u
Lees en begrijp deze hele handleiding voordat u dit product monteert, installeert, bedient of
onderhoudt. Als u deze waarschuwingen niet opvolgt en
1. Monteer het product strikt volgens de instructies.
de houten kolom, zoals paviljoen, paviljoen, hek, paviljoen, brievenbus, veranda leuning,
dekbeugel, enz.
Waarschuwing - Om het risico op letsel te verminderen, moet de gebruiker de gebruiksaanwijzing lezen
1. Laat kinderen niet op het apparaat klimmen. 2. Houd kinderen en huisdieren uit de buurt
4. Het draagvermogen en andere productparameters worden toegepast op de
Alleen een product dat correct en volledig is gemonteerd.
Lees de gebruiksaanwijzing zorgvuldig door.
weg tijdens de montage.
Het product kan worden gebruikt in bestaande beton- en houten vloeren, waarbij de
houten kolom wordt gescheiden van het grondwater en effectief wordt voorkomen
3. Probeer het product niet te monteren als u zich moe voelt of onder invloed bent.
5. Scheid alle onderdelen en hardware en tel ze.
9. Gebruik het product uitsluitend voor het beoogde gebruik.
invloed van alcohol, drugs of medicijnen.
de houten kolom van waterrot; corrosie is geschikt voor de noodzaak om te repareren
Machine Translated by Google
- 3 -
PARAMETERLIJST
Aantal sets
5,9×5,55 inch
2 stuks
(150×141mm)
5,9×5,7 inch
(150×145 mm)
BB-6in-2 BB-8in-2
7,9×7,64 inch
(200×194 mm)(A*B)
Grootte van de productholte
Productmodel
(CD)
2 stuks
7,9×7,5 inch
(200×190mm)
Basismaat
Machine Translated by Google

- 4 -
ONDERDELENLIJST
2 stuks
I: Getande expansiehuls
E: Postbasis
4 stuks
H: Zelftappende schroef
BB-6in-2
BB-8in-2
4 stuks
2 stuks
G: Steunbeugel
Productmodel
4 stuks
2 stuks
J::wasmachine
F:Vierkante pakking
Machine Translated by Google

- 5 -
16 stuks
1. Markeer 2 punten op de grond door 2 gaten op het oppervlak van de paalbasis E
L: Zelftappende schroef
van de basis;Boren in de markeerpositie met behulp van een ÿ29/64" boor;De
Met sleutel M worden de schroeven aangedraaid
K: Zware zeskantmoer
8 stuks
Onze producten worden voortdurend bijgewerkt, de afbeeldingen kunnen afwijken van de
8 stuks
Voor de vorm van de werkelijke items verwijzen wij u naar de werkelijke items.
16 stuks
Tel de onderdelen bij ontvangst van de monsters.
1 stuk
diepte van het gat was 65 mm.
M:moersleutel
INSTALLATIEGIDS
Machine Translated by Google

3. Lijn het E-basisvlak van de paalvoet uit met de gekartelde expansiehuls I;
3.1. Plaats de vierkante pakking f in de paalvoet E, het doorlopende gat van
de vierkante pakking f lijnt de gekartelde expansiehuls I uit;
3.2. Steek de zelftappende schroef H door de ring J en bevestig deze aan de
gekartelde expansiehuls I.
2. Plaats de 2 gekartelde expansiehulzen I in de afgewerkte gaten.
4. Plaats de steunbeugel G in de paalvoet E en bedek de binnenste delen; plaats
hout in de holte van de paalvoet E; het
wordt aanbevolen dat het vierkante houtgedeelte 0,1 inch kleiner is dan de
- 6 -
Machine Translated by Google

Houd er rekening mee dat aan beide zijden van model BB-8in-2 4 zware zeskantmoeren K en
zelftappende schroeven L nodig zijn;
Grootte van de holte.
5. Zet de houten zijkant vast met twee zware zeskantmoeren K en zelftappende schroeven L in de
paalvoet E.
- 7 -
Machine Translated by Google

- 8 -
Geïmporteerd naar de VS: Sanven Technology Ltd. Suite 250, 9166 Anaheim Place,
Rancho Cucamonga, CA 91730
YH CONSULTING LIMITED. C/O YH Consulting Limited
Kantoor 147, Centurion House, London Road, Staines-
upon-Thames, Surrey, TW18 4AX
Geïmporteerd naar AUS: SIHAO PTY LTD. 1 ROKEVA STREETEASTWOOD NSW
2122 Australië
Fabrikant: Shanghaimuxinmuyeyouxiangongsi Adres:
Shuangchenglu 803nong11hao1602A-1609shi, baoshanqu, shanghai 200000 CN.
E-CrossStu GmbH
Mainzer Landstr.69,
60329 Frankfurt am Main.
EC-REP
VK REP
Machine Translated by Google

Machine Translated by Google

Technische ondersteuning en e-
garantiecertificaat www.vevor.com/support
Machine Translated by Google

HALVKUVERT STÄLLBAS
Teknisk support och e-garanticertifikat
www.vevor.com/support
MODELL: BB-6in-2/BB-8in-2
Machine Translated by Google

Machine Translated by Google
- 1 -
Bas
Semikuvertpost
Detta är den ursprungliga instruktionen, läs alla instruktioner
noggrant innan du använder den. VEVOR reserverar sig för en tydlig
tolkning av vår användarmanual. Utseendet på produkten är beroende
av den produkt du fått. Ursäkta oss att vi inte kommer att informera dig igen
om det finns någon teknik eller mjukvaruuppdateringar på vår produkt.
MODELL: BB-6in-2/BB-8in-2
Machine Translated by Google

Säkerhetsinstruktioner
- 2 -
ANVÄNDNING OM ALLT
bruksanvisningen noggrant.
borta under monteringen.
5. Separera och räkna alla delar och hårdvara.
endast korrekt och färdigmonterad produkt.
Varning - För att minska risken för skada måste användaren läsa
1. Låt inte barn klättra på enheten. 2. Håll barn och husdjur
träpelaren, såsom paviljong, paviljong, staket, paviljong, postlåda, verandaräcke,
däcksfäste etc.
4. Bärförmåga och andra produktparametrar tillämpas på
påverkan av alkohol, droger eller mediciner.
träpelaren från vattenröta; korrosion är lämplig för behovet att fixa
Produkten kan användas i befintliga betong- och trägolv, separera
träpelaren från grundvattnet, effektivt förhindra
3. Försök inte att sätta ihop produkten när du känner dig trött eller under den
9. Följ endast avsedd användning.
8. Två personer krävs för montering.
2. Använd skyddsglasögon och arbetshandskar ordentligt under monteringen.
Felaktig montering kan vara farligt.
instruktioner kan orsaka personskada eller skada på värdefull egendom.
behövs.
7. Om du använder elverktyg, var noga med att sakta ner och stoppa när
1. Vänligen montera produkten i strikt enlighet med instruktionerna.
Läs och förstå hela denna manual innan du monterar, installerar, använder
eller servar denna produkt. Underlåtenhet att följa dessa varningar och
FÖRSIKTIGHETSÅTGÄRDER FÖR MONTERING
6. Förbered följande verktyg: Philips huvudskruvmejsel.
Machine Translated by Google

- 3 -
PARAMETERLISTA
Produktmodell
(C*D)
Produktens hålighetsstorlek
(A*B)
(200×190 mm)
Basstorlek
2 st
7,9×7,5 tum
2 st
(150×141 mm)
5,9×5,55 tum
Antal kit
BB-8in-2
7,9×7,64 tum
(200×194 mm)
5,9 × 5,7 tum
(150 × 145 mm)
BB-6in-2
Machine Translated by Google

- 4 -
DELLISTA
Produktmodell
4 st
G: Stödfäste
2 st
F: Fyrkantig packning
2 st
J::tvättmaskin
E:Post Base
4 st
I: Tandad expansionshylsa
2 st
4 st
BB-8in-2
H: Självgängande skruv
BB-6in-2
Machine Translated by Google
INSTALLATIONSGUIDE
16 st
Räkna delarna när du tar emot prover.
8 st
formen på de faktiska föremålen, se de faktiska föremålen.
Våra produkter uppdateras ständigt, bilderna kan skilja sig från
M:nyckel
1 st
hålets djup var 65 mm.
L: Självgängande skruv
av basen; Borrning i markeringspositionen med en ÿ29/64" borr;
1.Markera 2 punkter på marken genom 2 hål vid stolpbasens E-yta
16 st8 st
Skiftnyckel M används för att skruva på skruvarna
K:Tung sexkantsmutter
- 5 -
Machine Translated by Google

- 6 -
3. Rikta in stolpbasens E-basyta mot den tandade expansionshylsan I;
3.1.Placera den fyrkantiga packningen f inuti stolpbasen E, det genomgående
hålet på den fyrkantiga packningen f inriktning tandad
expansionshylsa I; 3.2. För självgängande skruv H genom brickan J och lås den
på den tandade expansionshylsan I.
2. Installera den 2 tandade expansionshylsan I i de färdiga hålen.
4. Placera stödfästet G i stolpbasen E och täck de inre delarna; sätt in trä i
hålrummet på stolpbasen E; Det
rekommenderas att träsektionen är 0,1 tum mindre än den
Machine Translated by Google

5.Lås träsidan med två tunga sexkantsmutter K och självgängande skruv L i
stolpbasen E.
kavitets storlek.
Observera att 4 tunga sexkantsmutter K och självgängande skruv L krävs på båda
sidor av modell BB-8in-2;
- 7 -
Machine Translated by Google
- 8 -
Importerad till USA: Sanven Technology Ltd. Suite 250, 9166 Anaheim Place,
Rancho Cucamonga, CA 91730
YH CONSULTING LIMITED. C/O YH Consulting Limited
Office 147, Centurion House, London Road, Staines-
upon-Thames, Surrey, TW18 4AX
Importerad till AUS: SIHAO PTY LTD. 1 ROKEVA STREETEASTWOOD NSW 2122
Australien
Tillverkare: Shanghaimuxinmuyeyouxiangongsi Adress:
Shuangchenglu 803nong11hao1602A-1609shi, baoshanqu, shanghai 200000 CN.
E-CrossStu GmbH
Mainzer Landstr.69,
60329 Frankfurt am Main.
UK REP
EC REP
Machine Translated by Google

Machine Translated by Google

Teknisk support och e-garanticertifikat
www.vevor.com/support
Machine Translated by Google