SD19-MN

Contents
1 Introduction
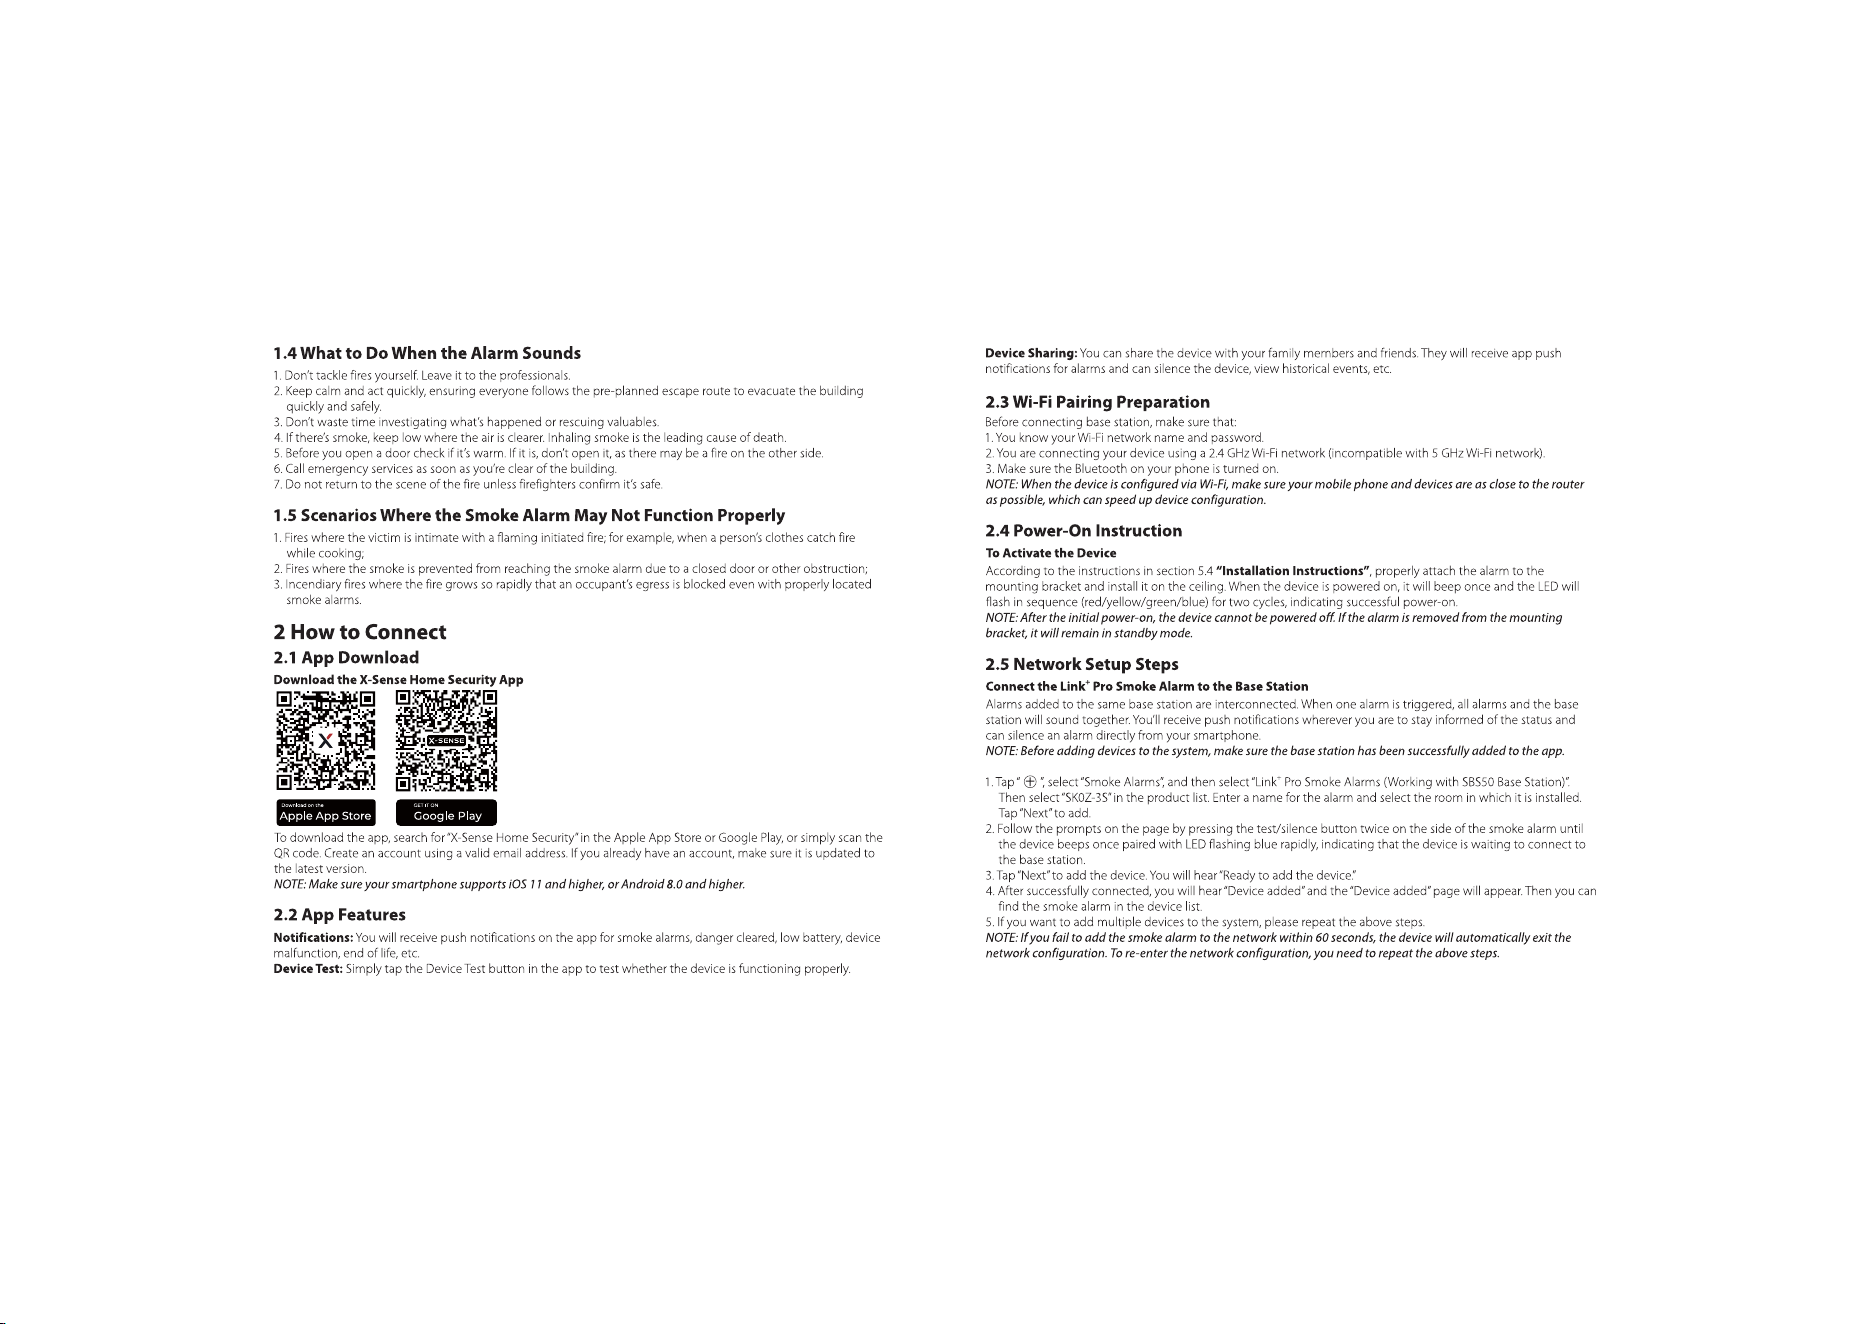
2 How to Connect
3 Interconnect the Alarms Without Adding to the Base Station
4 Factory Reset
5 How to Install
6 Functions' Overview
7 Deactivation of the Alarm
8 Daily Maintenance
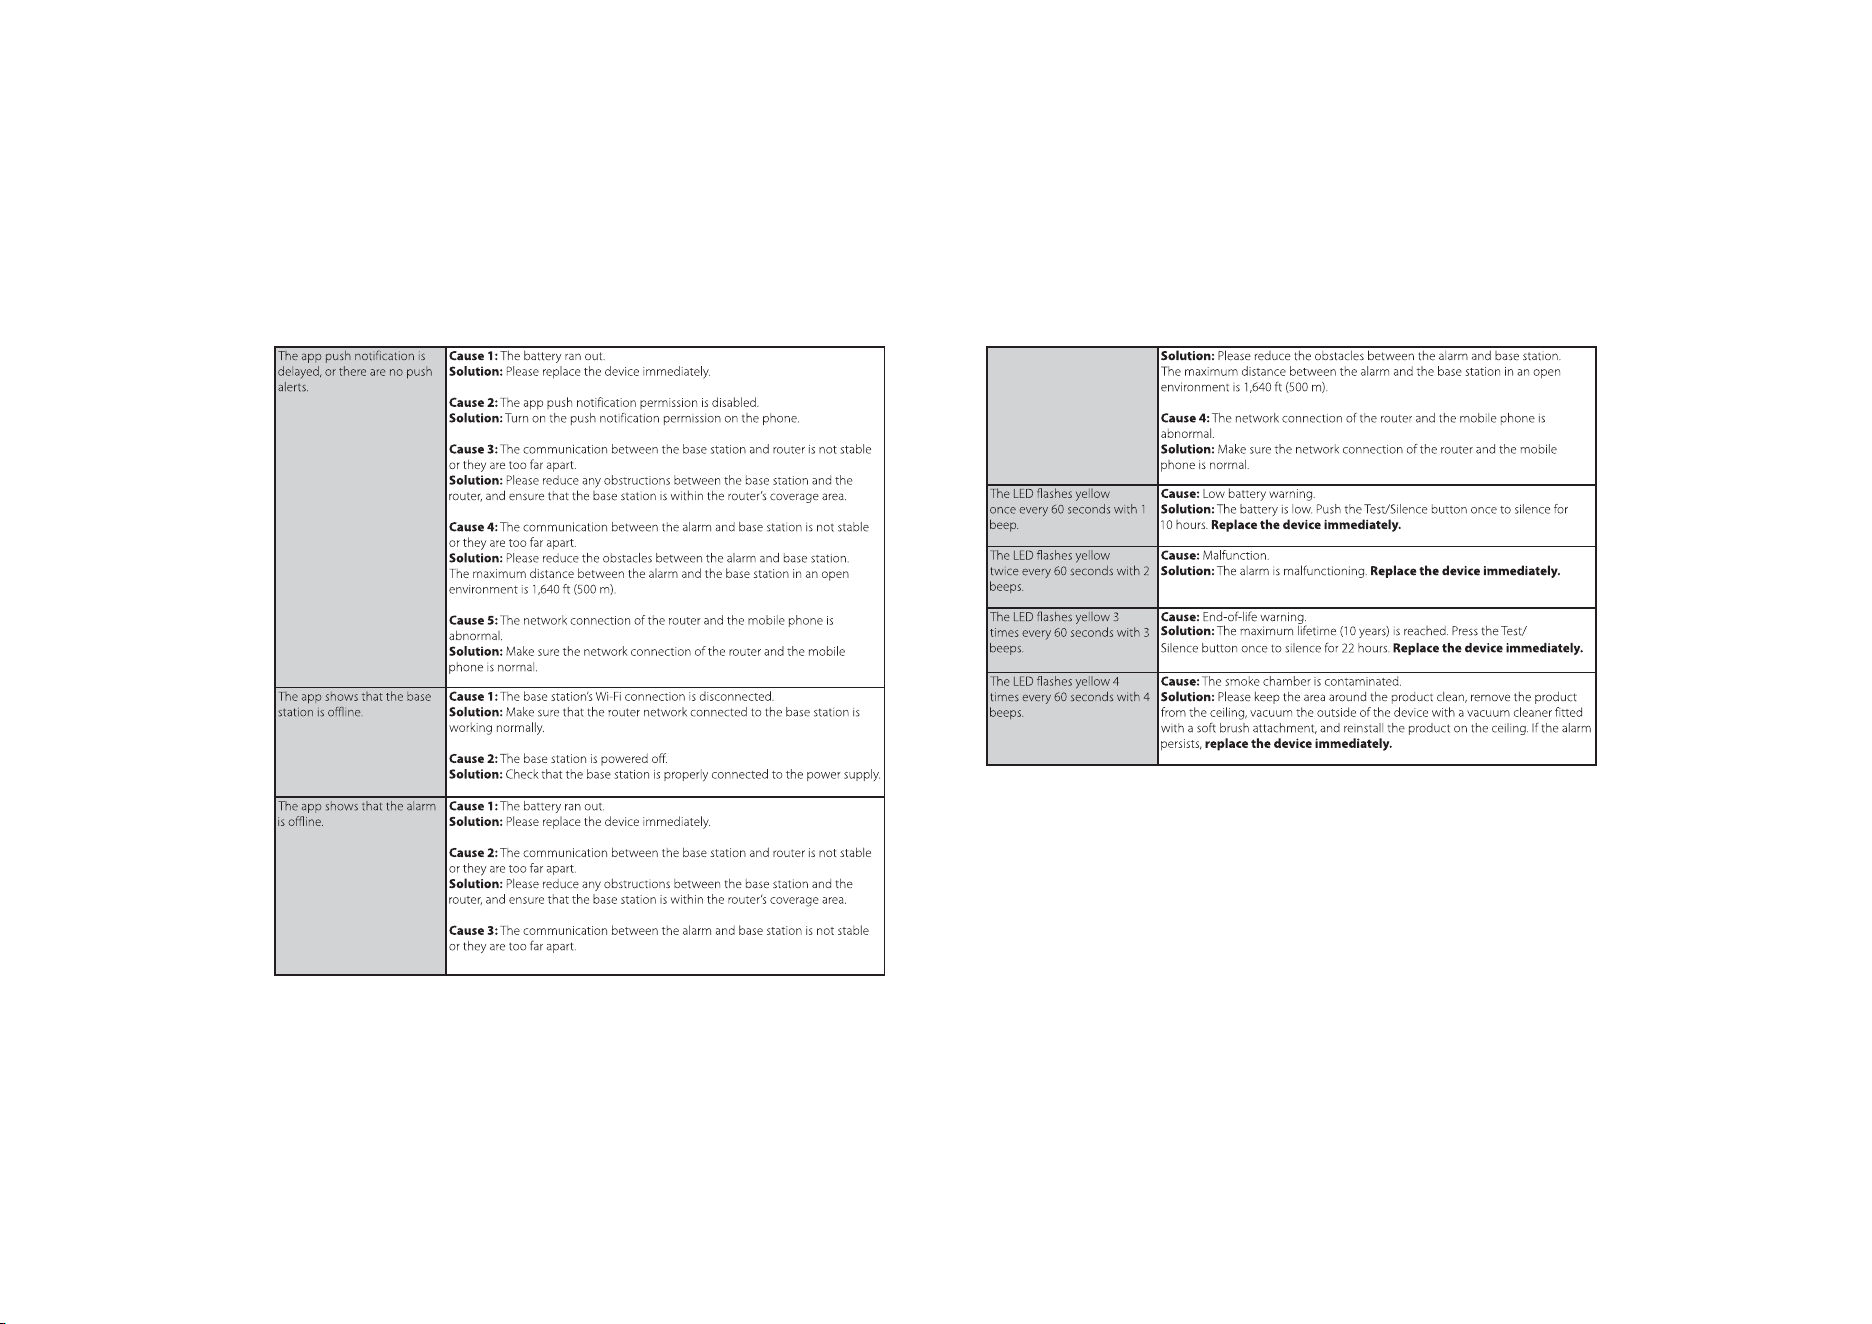
9 Audio-Visual Indicators
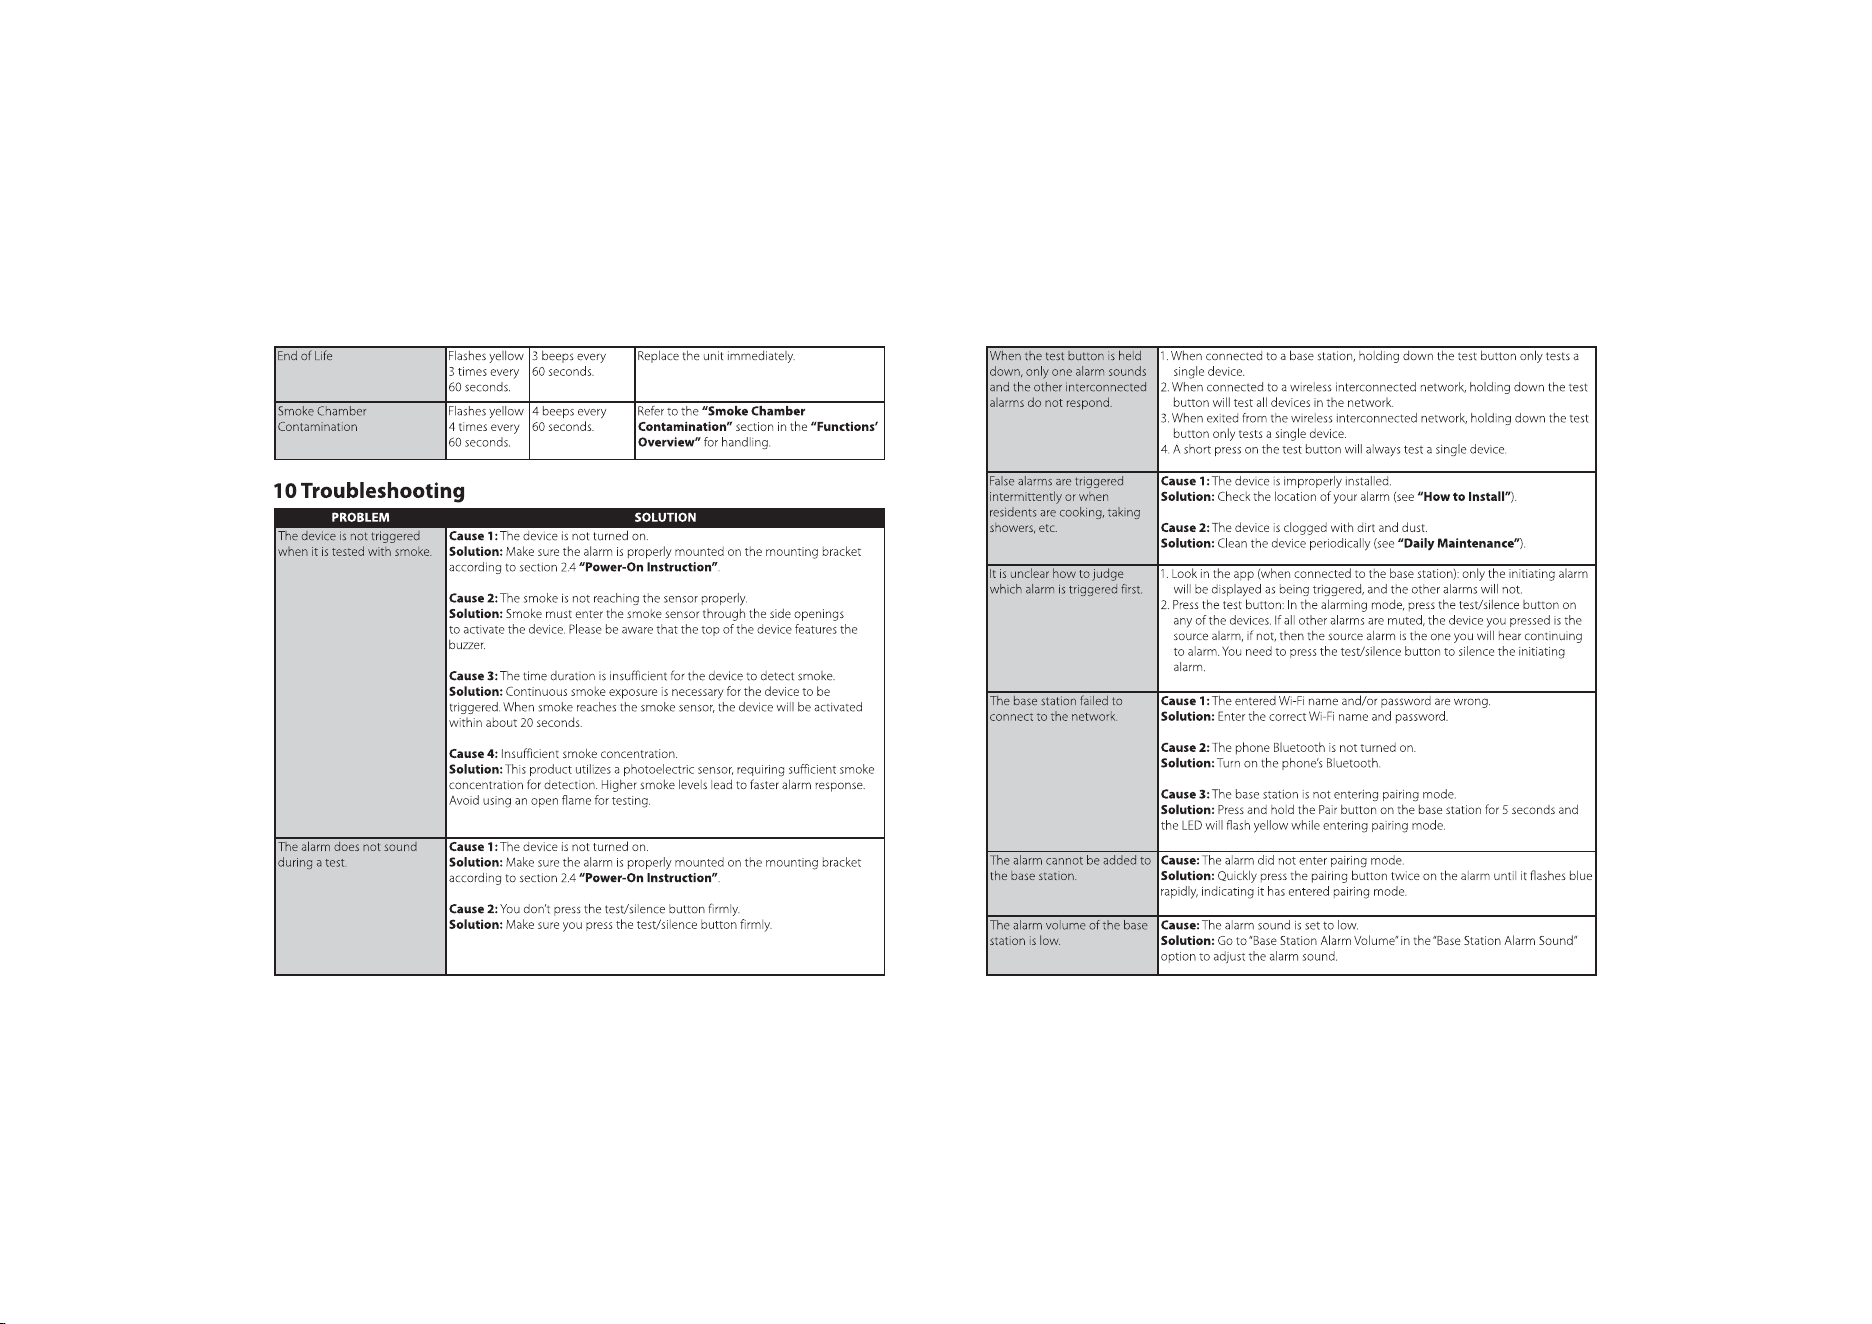
10 Troubleshooting
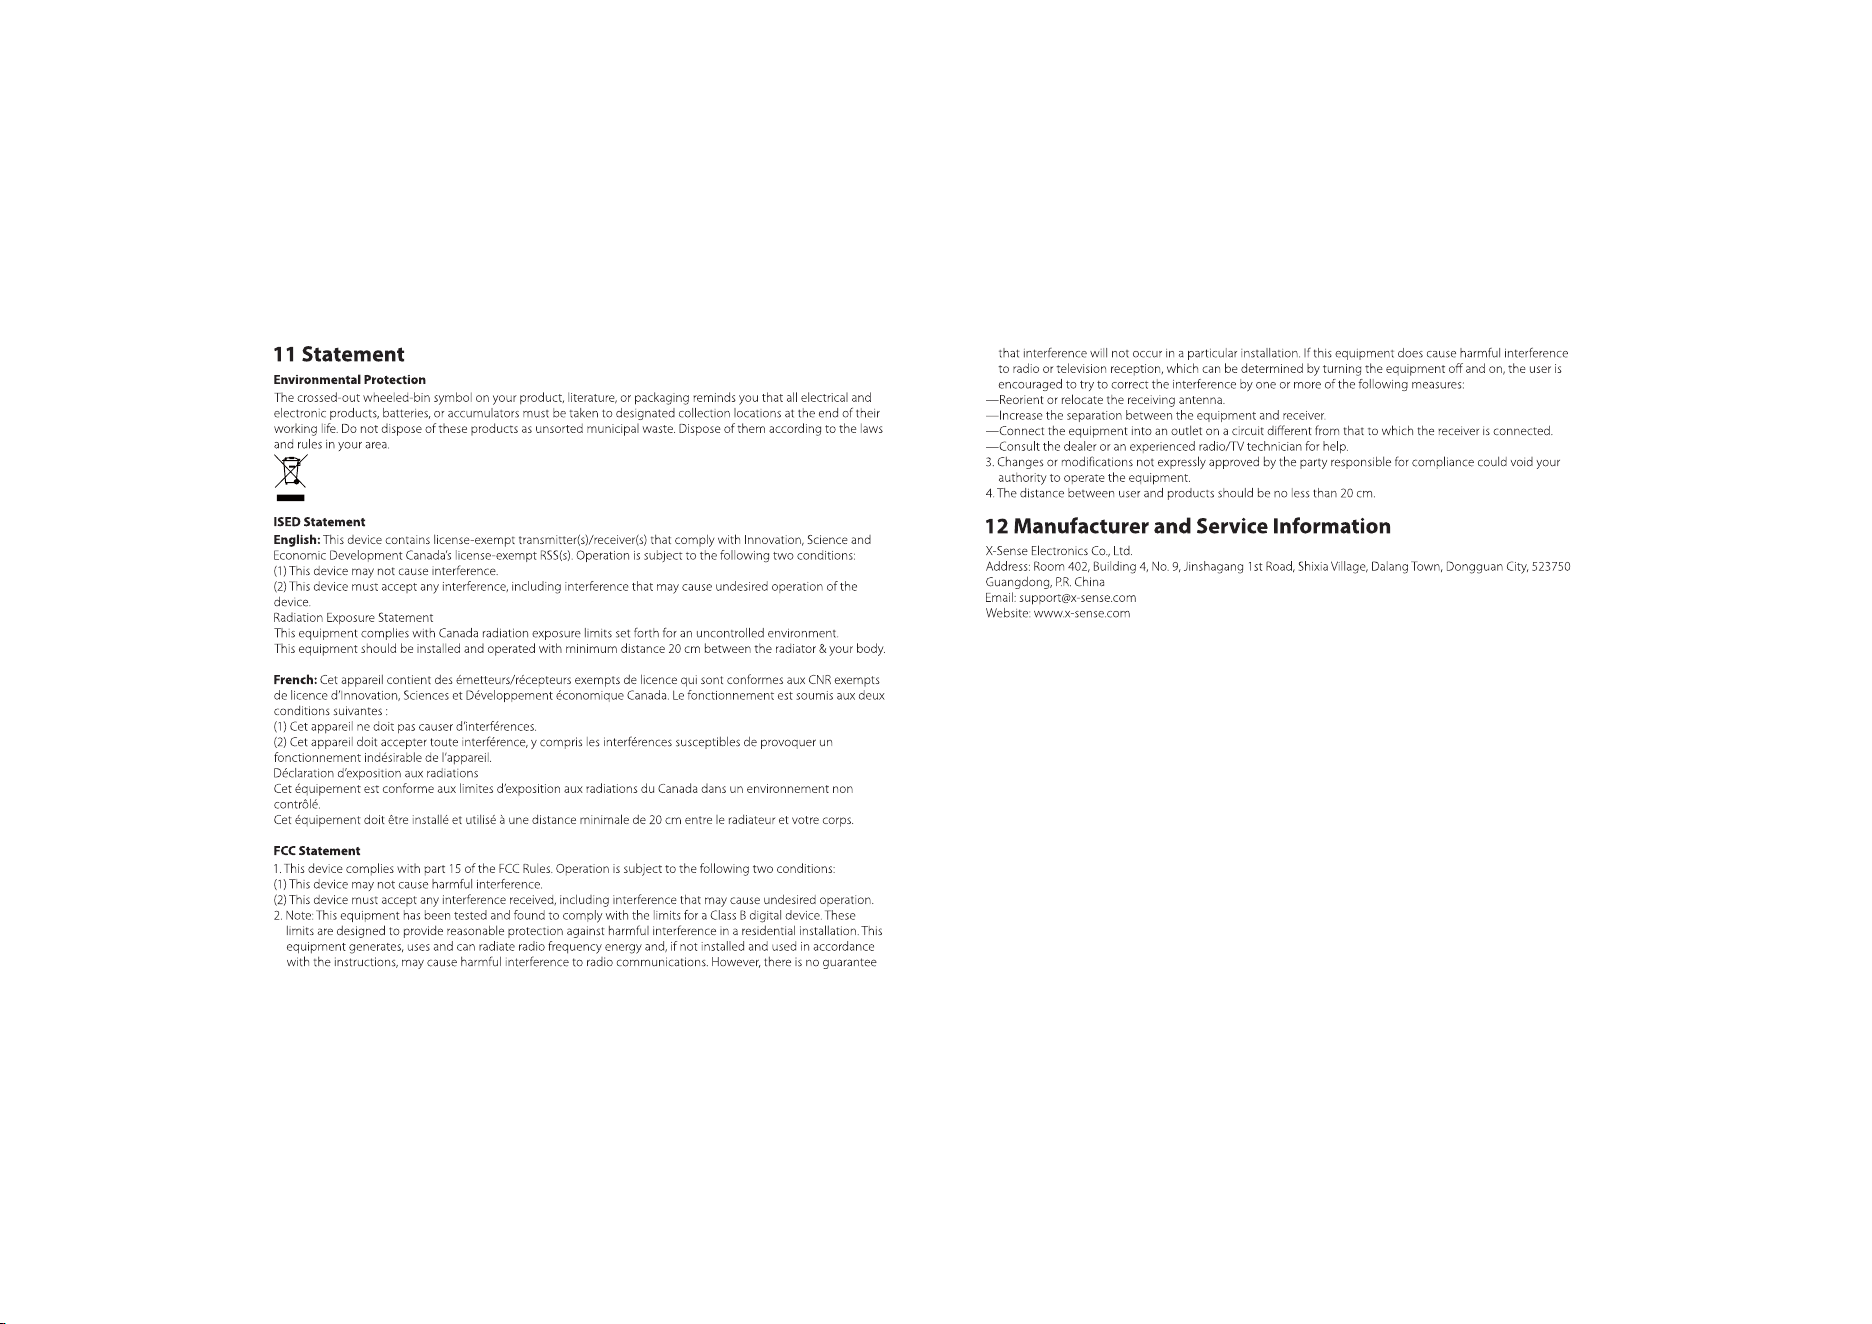
11 Statement
12 Manufacturer and Service Information
01
05
07
08
09
12
15
17
17
19
23
24
01 02
03 04
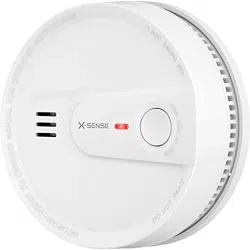
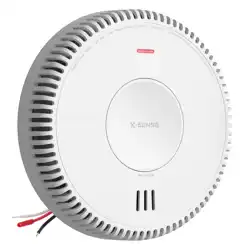
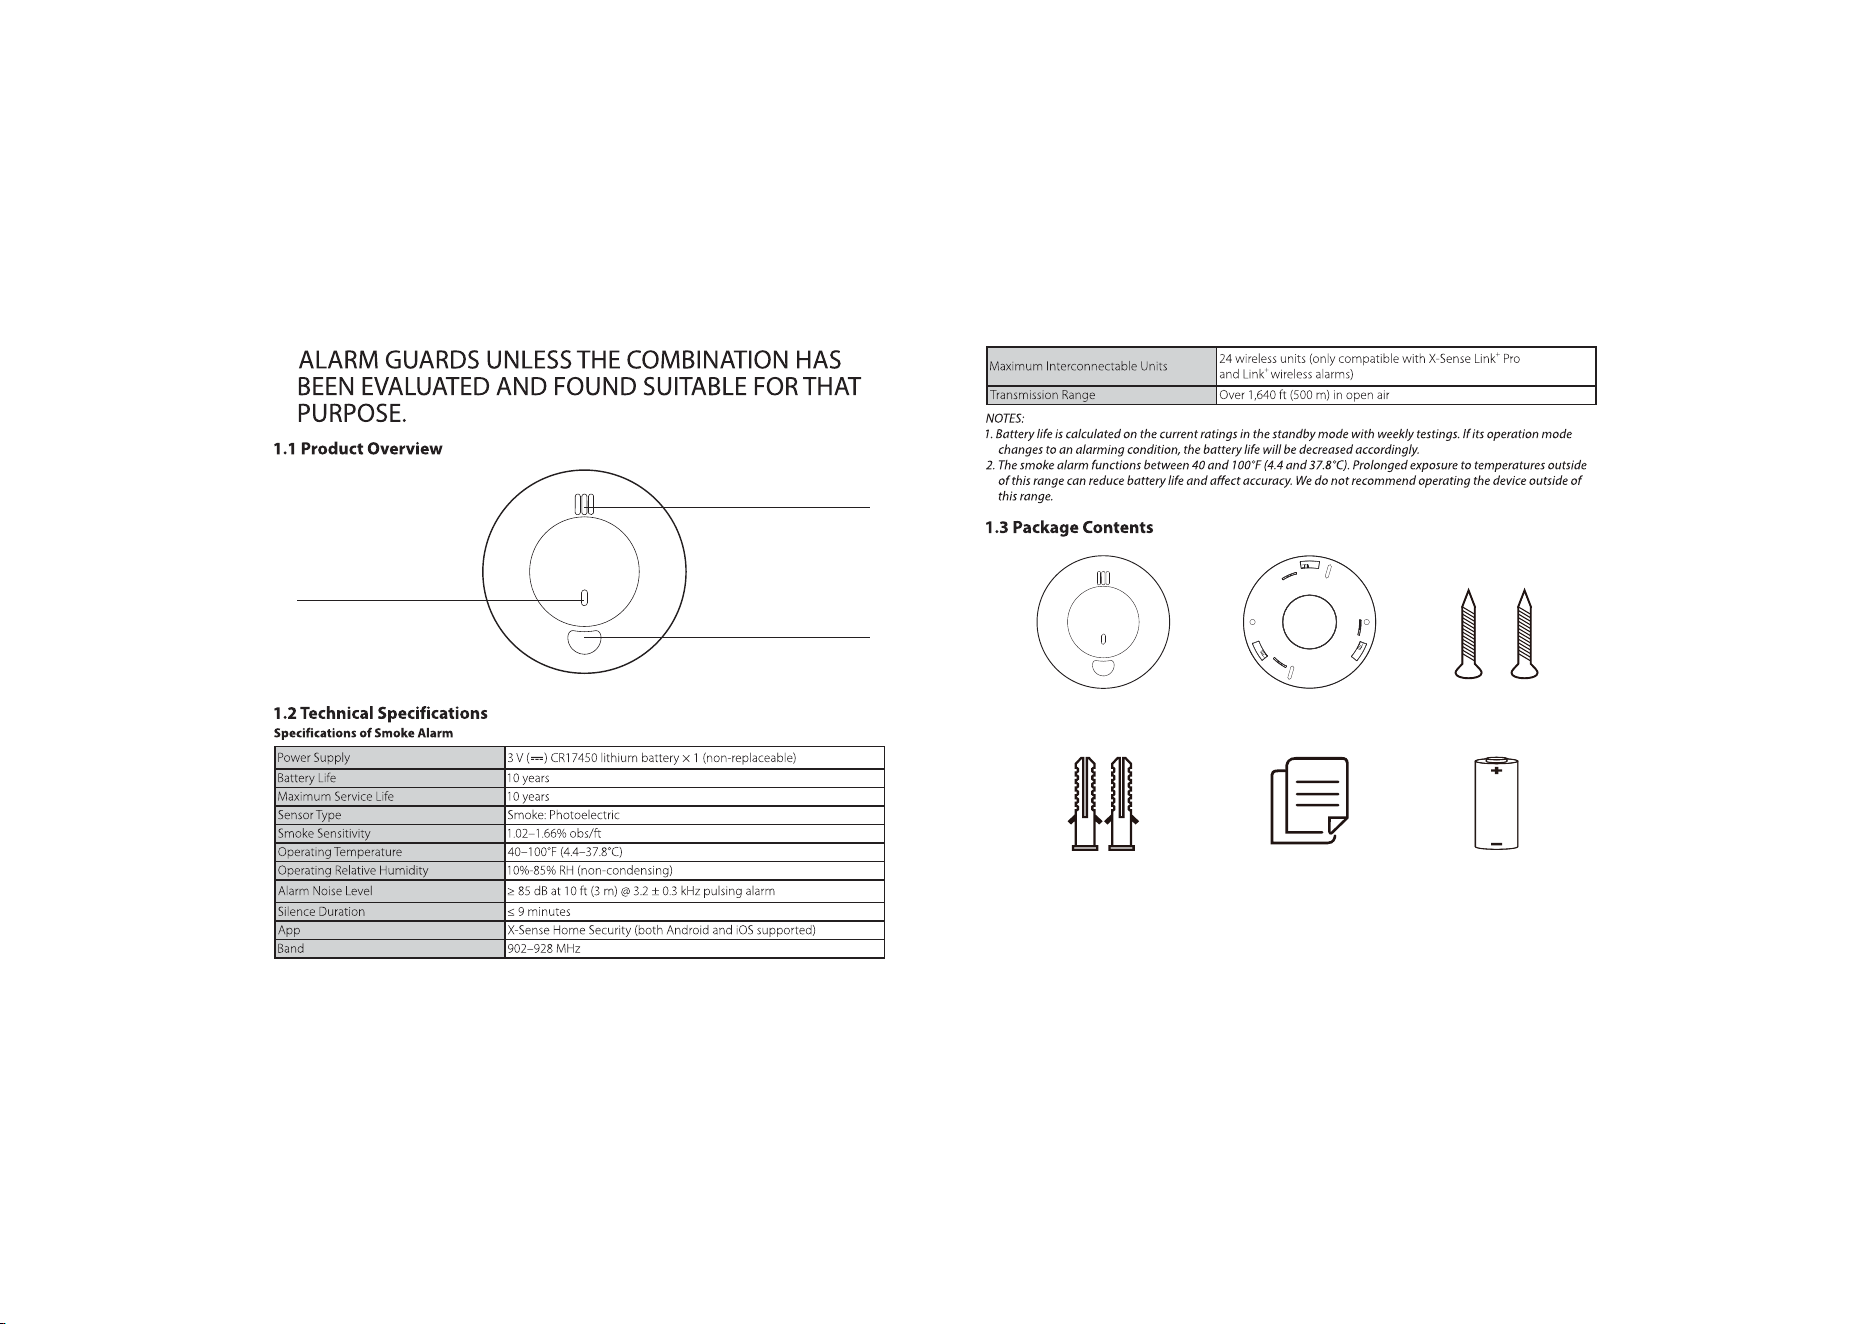
Anchor Plugs User Manual CR17450 Battery
(Pre-installed)
Alarm Unit Mounting Bracket Screws
Buzzer
Test/Silence Button
LED Indicator
(Red/Green/Yellow/Blue)
05 06
07 08
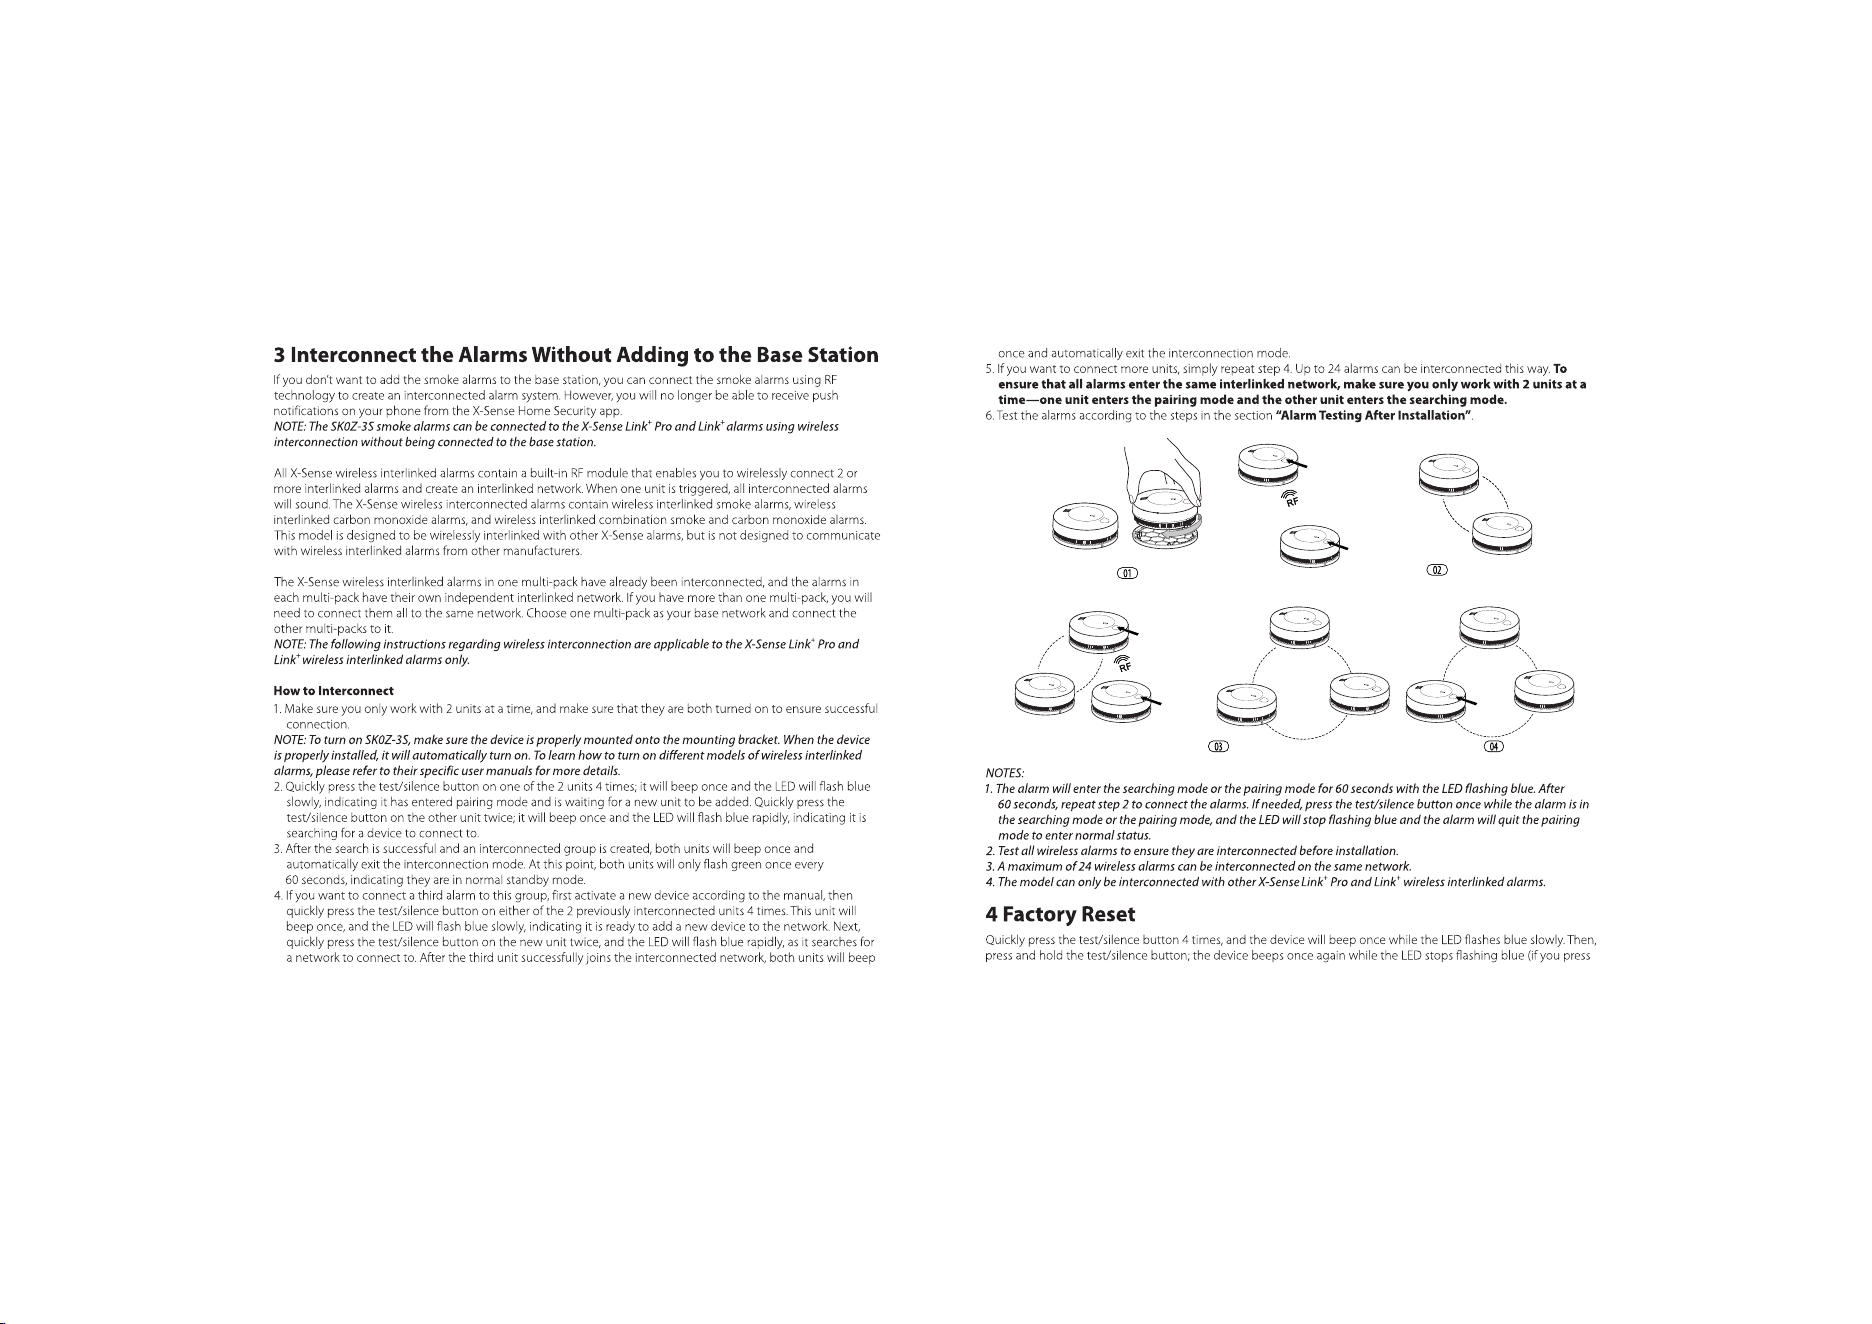
Quickly press
4 times
Quickly
press twice
Quickly
press twice
Quickly press
4 times
Hold
down
09 10
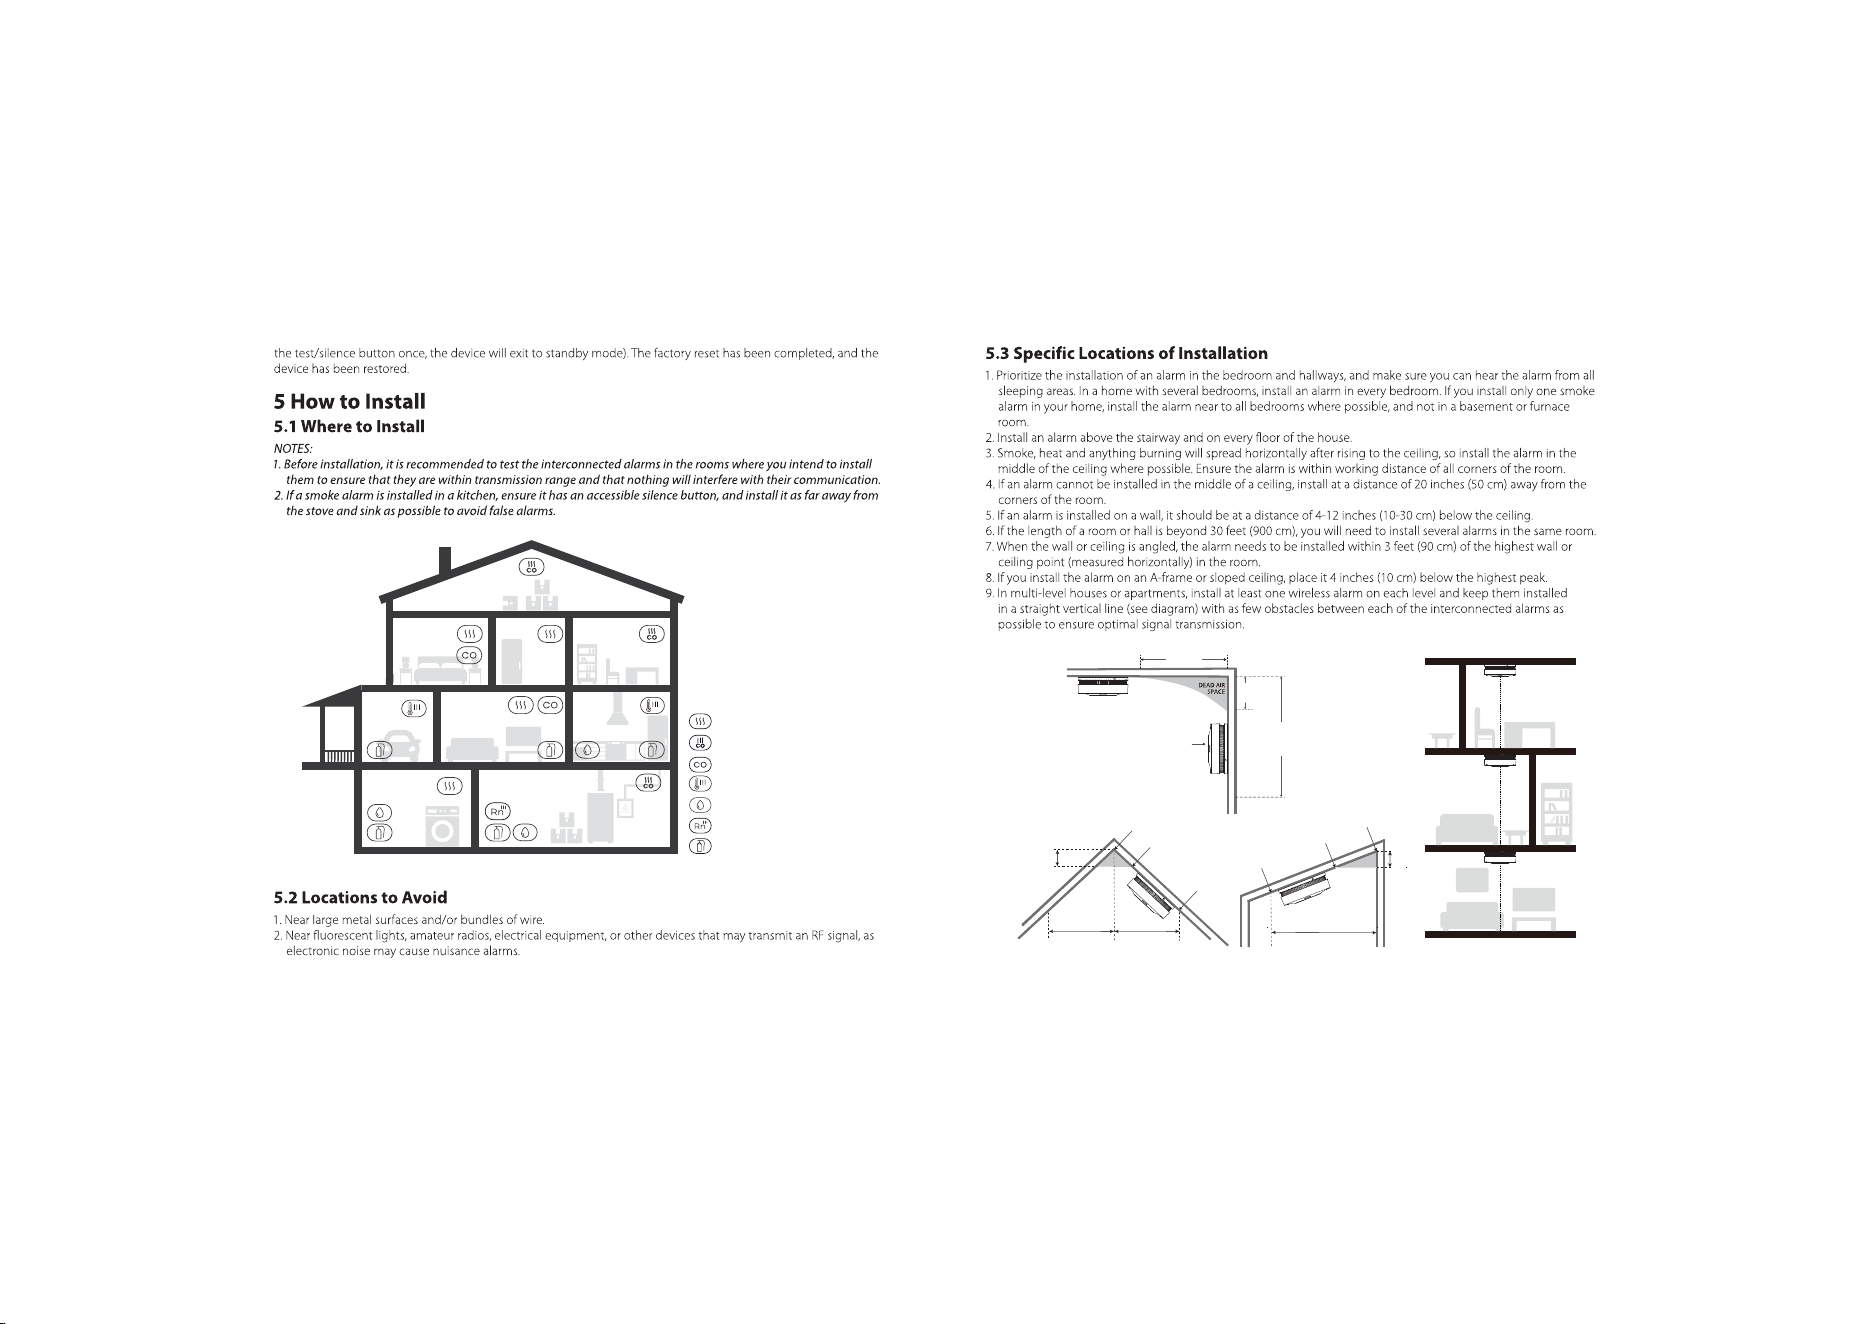
CEILING
(10 cm)
4’’
MINIMUM
(30 cm)
12’’
MAXIMUM
SIDEWALL
ACCEPTABLE
HERE
BEST
HERE
(50 cm)
20’’
MINIMUM
NEVER HERE
(90 cm) (90 cm) (90 cm)
3 ft 3 ft 3 ft
NOT IN
THIS AREA
ANYWHERE
IN THIS AREA
ANYWHERE
IN THIS AREA
NOT IN
THIS AREA
4’’
(10 cm)
4’’
(10 cm)
Laundry Room Basement
Garage KitchenLiving Room
Hallway Study RoomBedroom
Attic
SMOKE ALARMS
CARBON MONOXIDE ALARMS
FIRE EXTINGUISHERS
SMOKE & CARBON MONOXIDE ALARMS
HEAT ALARMS
WATER LEAK SENSORS
RADON ALARMS
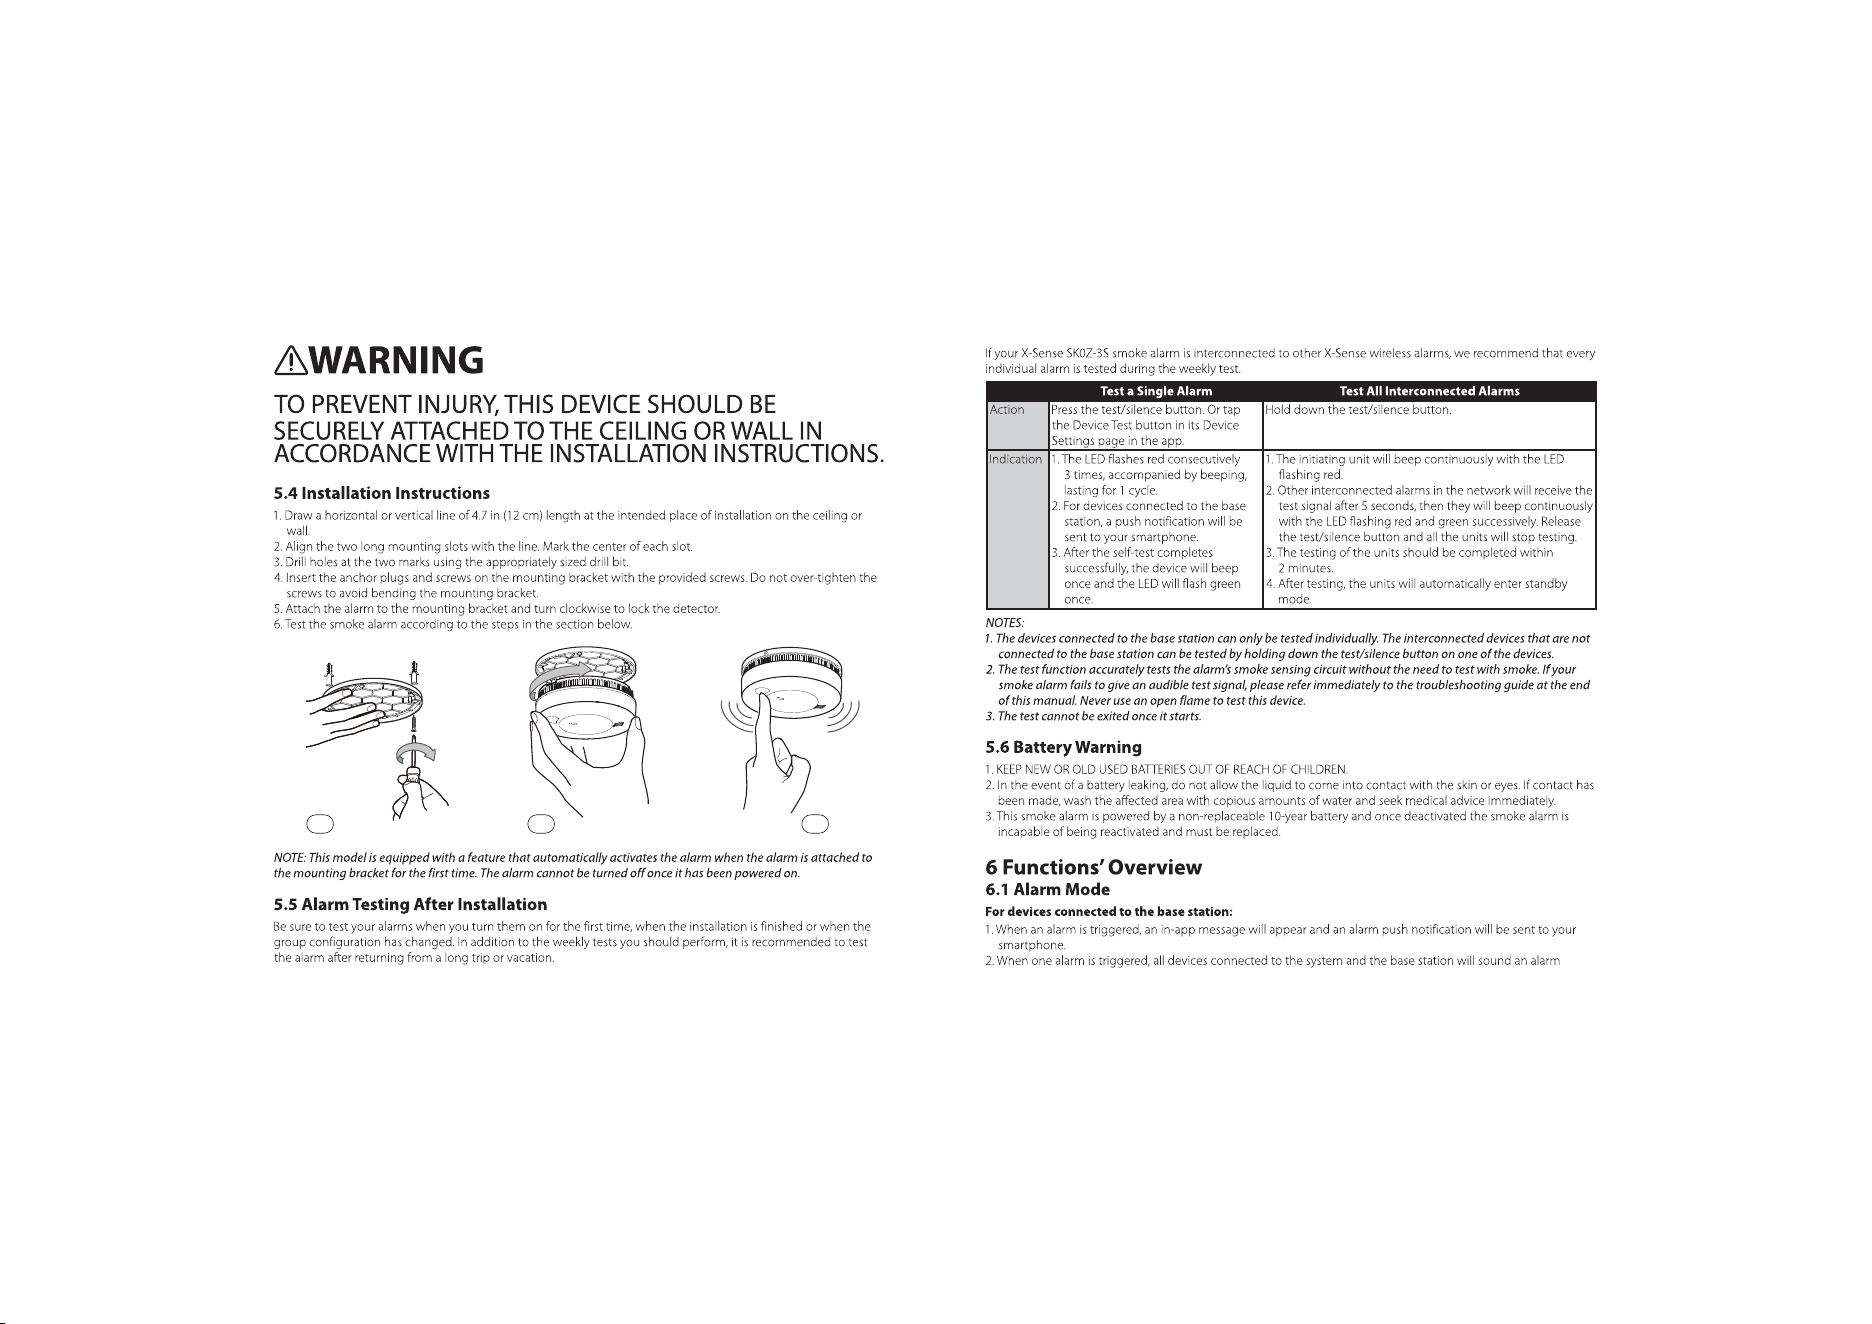
11 12
01
02 03
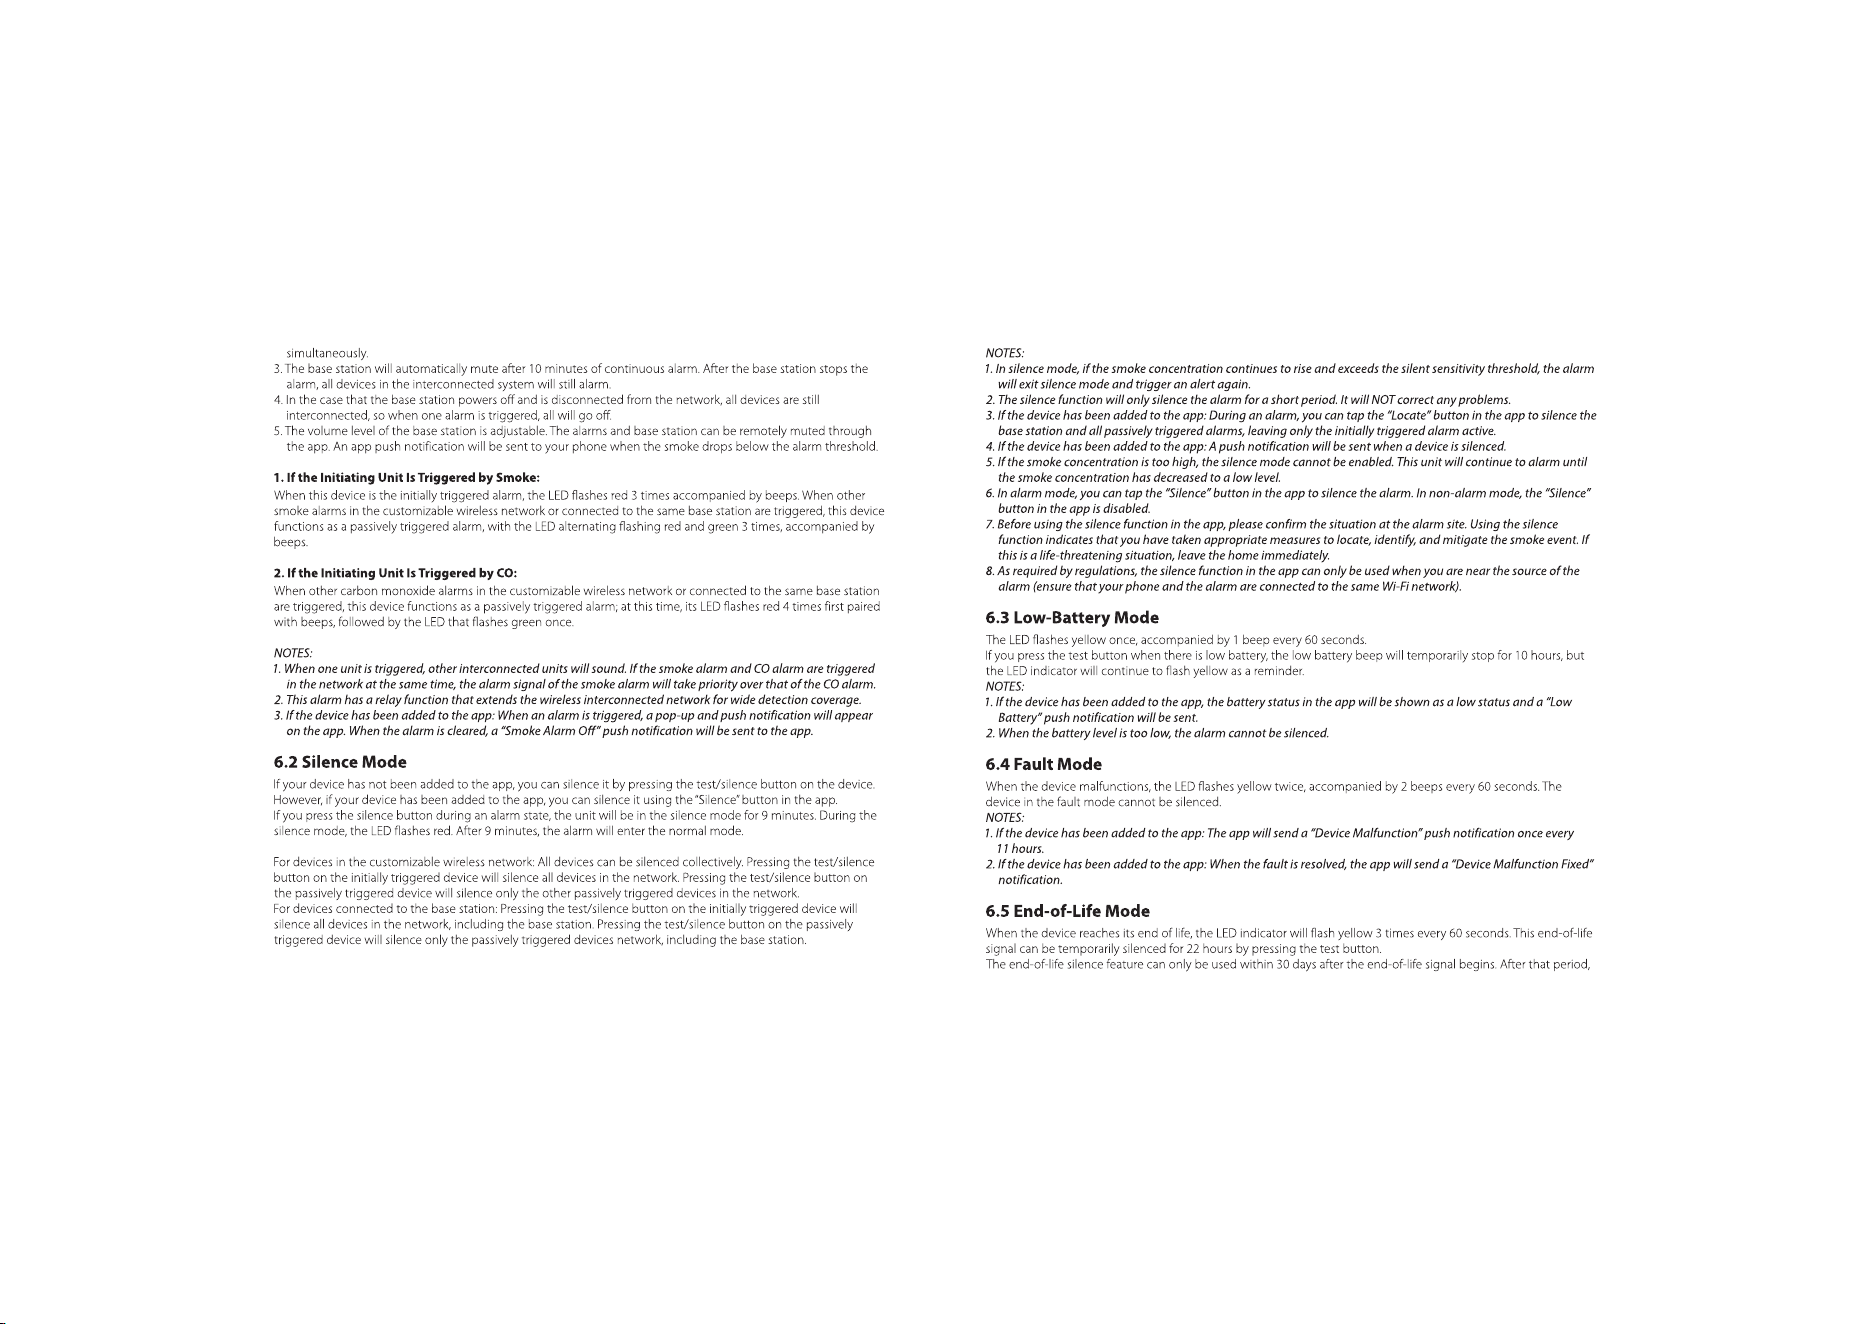
13 14
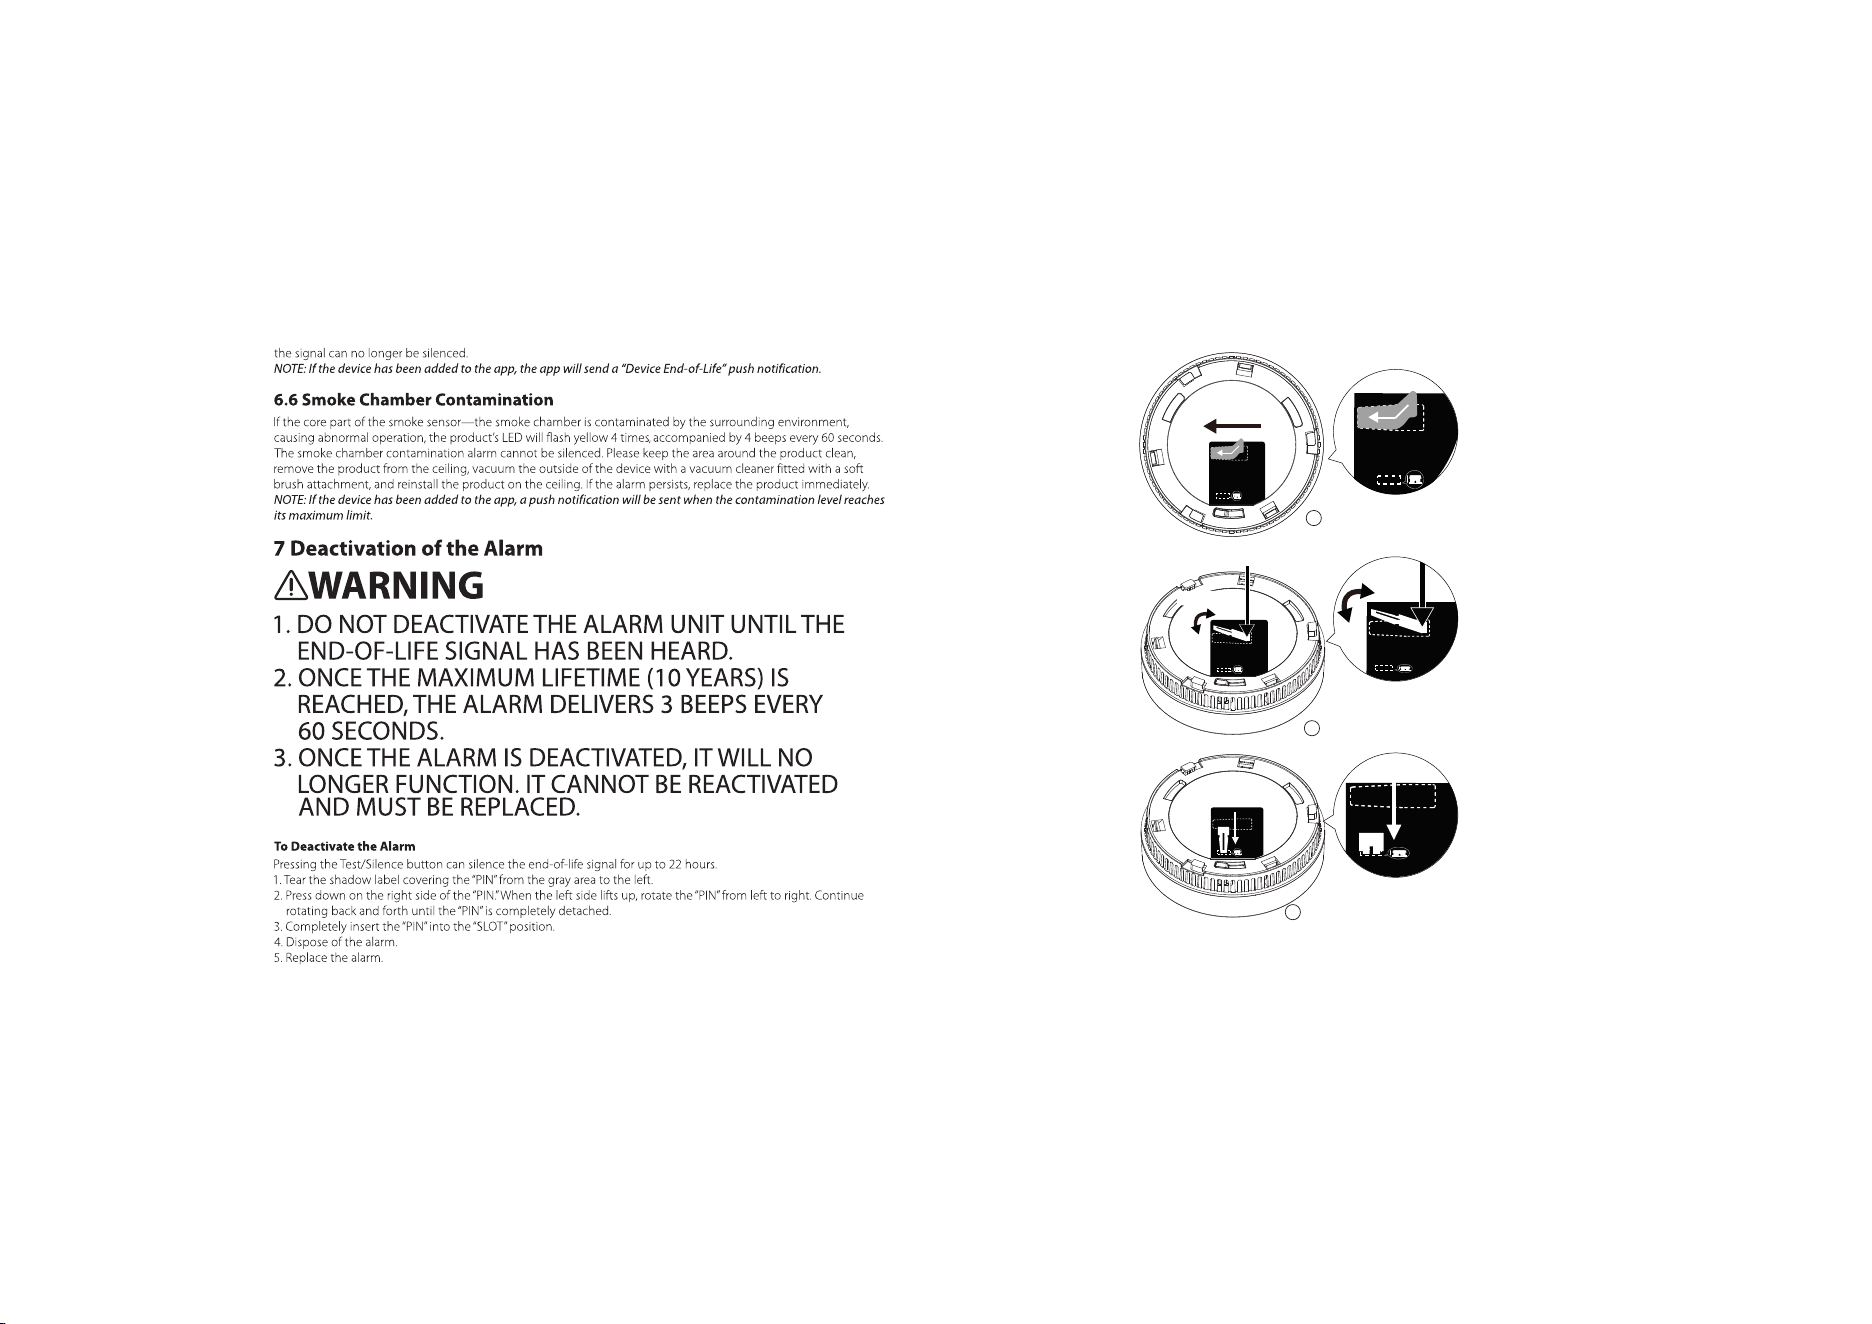
15 16
3
PIN
SLOT
2
PIN
SLOT
1
PIN
SLOT
Tear to the left
PIN
SLOT
Press down
SLOT
PIN
Fully Insert
SLOT
PIN
Fully Insert
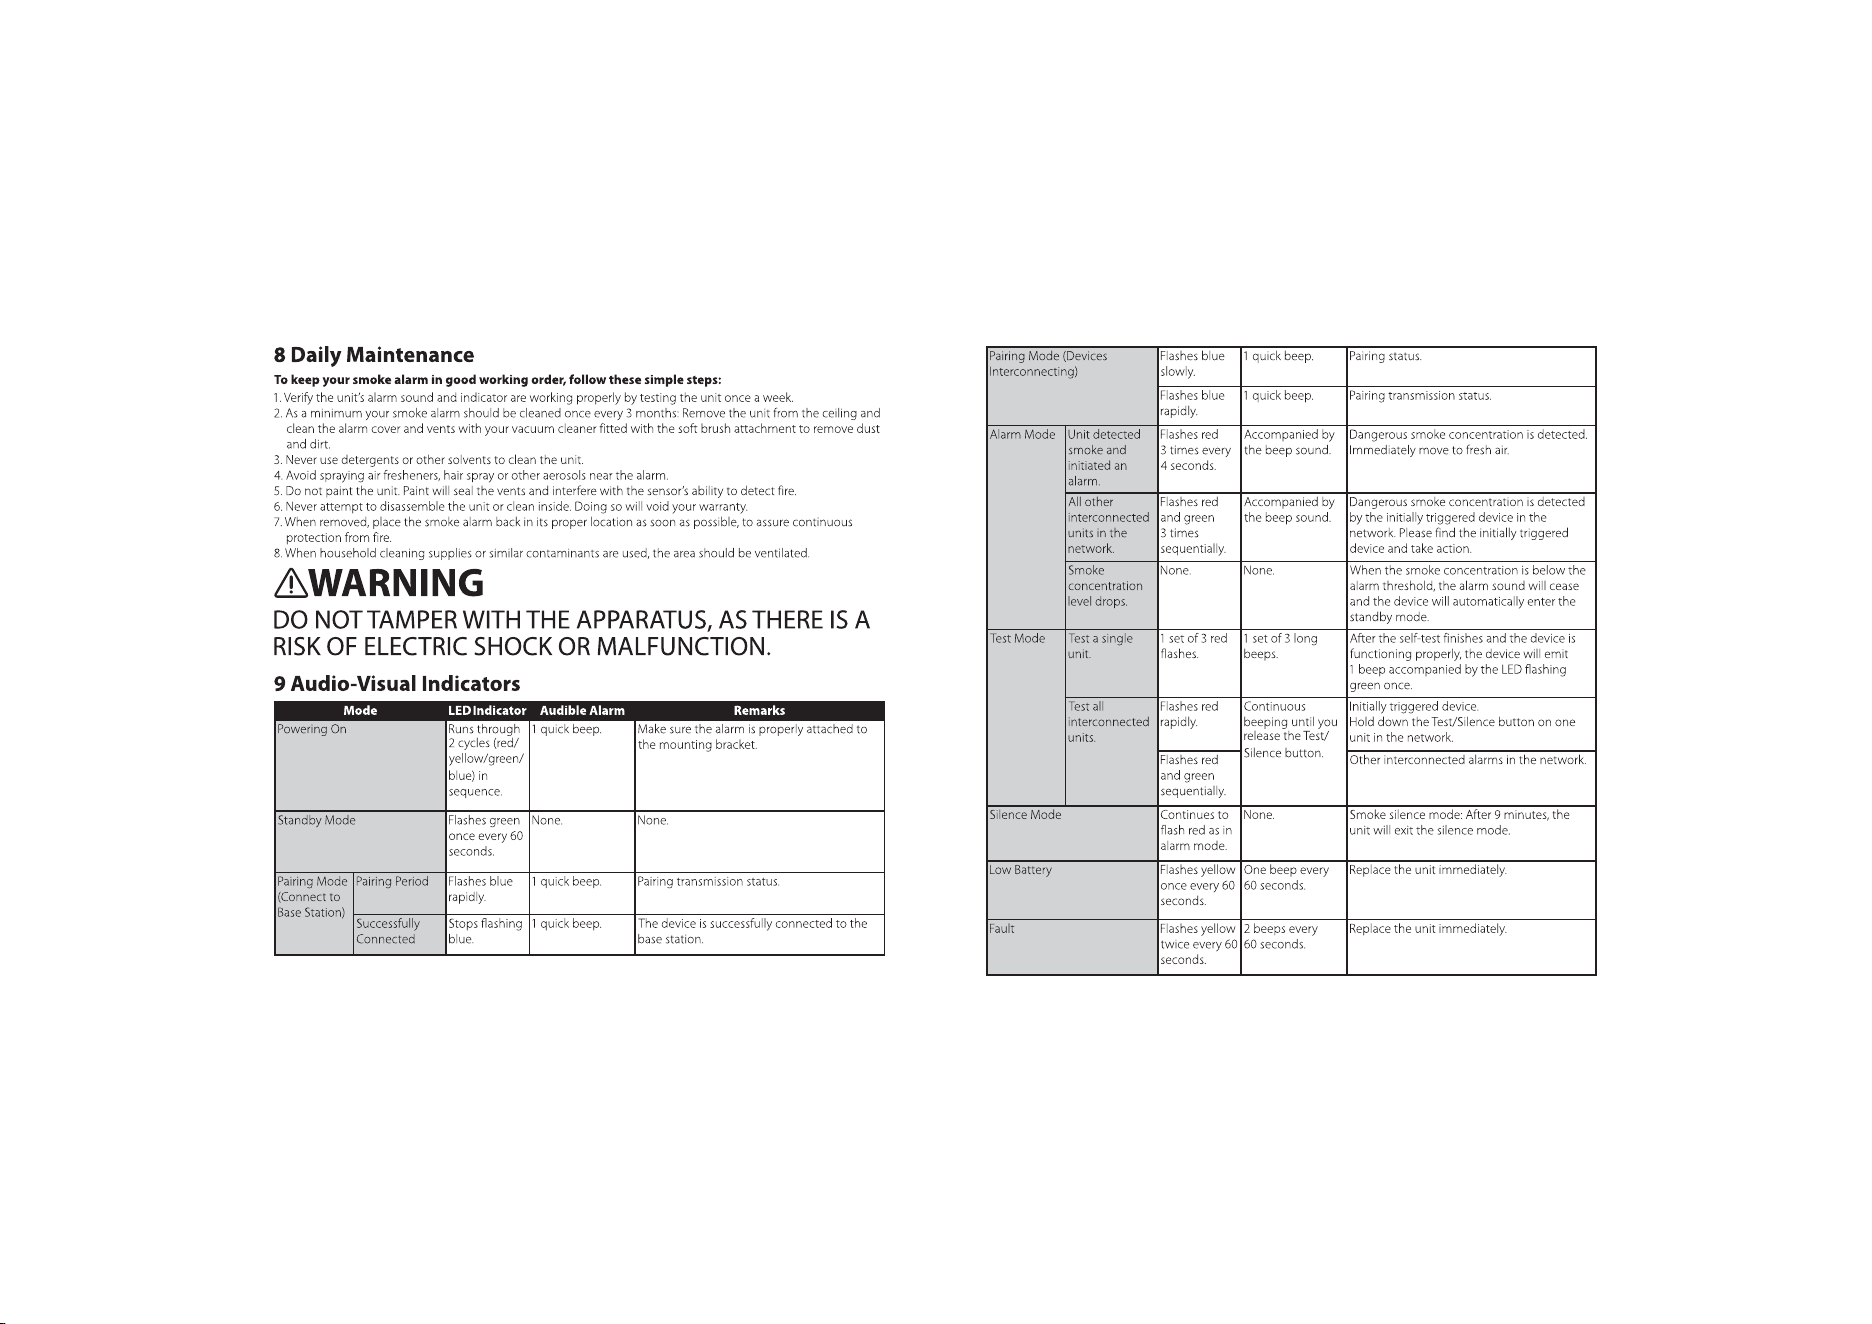
17 18
19 20
21 22
23 24