BLUETOOTH SMART
IRRIGATION TIMER
USER MANUAL
SWV002

Product Oveiew
Main Functions
Installations
Warranty & Warnings
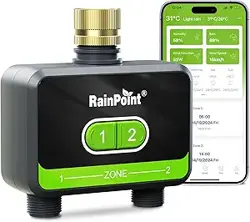
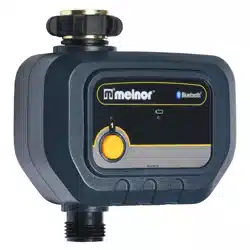
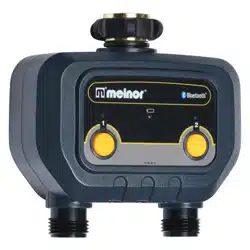
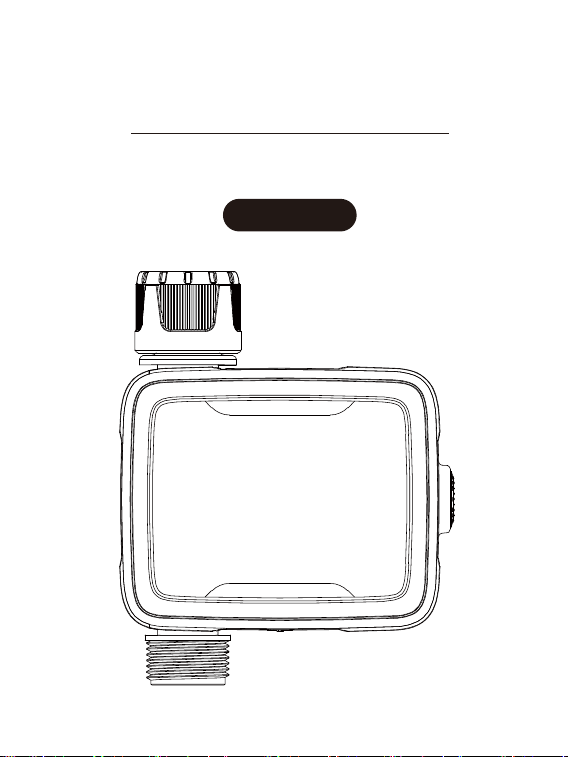
1.Product Appearance
2.Product Specication
1.Download the Sma Life App
2.Power the Bluetooth Water Timer
3.Add a Device
4.Add the WiFi hub
5.Basic information of Home Screen
6.Manual Operation
7.Weather Delay
8.Schedule and settings
9.Irrigation Histo
10.Non-irrigation Time Setting
11. Timer Reset & Restore
1
1
1
2
2
2
3
3
8
5
9
10
10
13
14
15
15
DIRECTORY
Product Oveiew
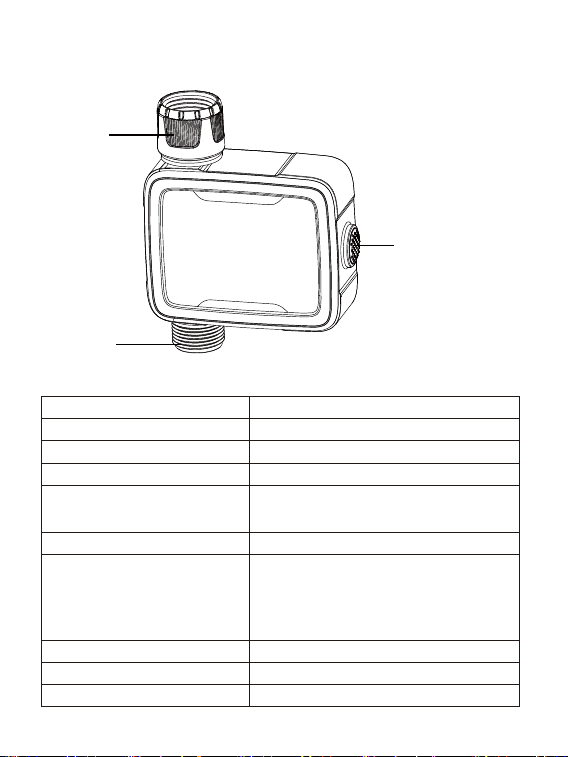
1.Product Appearance
2.Product Specications
Inlet
Connect/Manual
Button
Outlet
Working Pressure 0.5bar-8bar (7.25 psi-116 psi)
5L/Min-35L/Min
2℃-50℃
IP54
BLE 4.2
≥12 months
≥60m
For 3/4" standard garden hose
NH(US) for 3/4"faucet/hose
BSP (EU) for 1"or 3/4" faucet/hose
Voltage>2.8V:100%
2.6V<Voltage<2.8V:50%
2.4V<Voltage<2.6V:10% (low batte)
Voltage<2.4V:0%
Flow Rate
Working Temperature
Waterproof
Inlet
Outlet
Batte Status
Bluetooth Type
Batte Life
Transmission Distance
1

Main Function
Set and check irrigation schedule through sma phone APP,
connecting with Bluetooth water timer or Bluetooth-WIFI hub.
Manually ON/OFF the water timer.
With 2 schedule types: Normal Schedule, and Cycle & Soak mode.
Max 10 plans in each schedule type.
Weather delay 24/48/72 hours.
Irrigation histo track to avoid operation error.
Low power indicator.
Set non-irrigation time according to local water restriction policy.
Built-in lter of inlet.
Installations
1.Download the Sma Life App
Scan the QR code and download the free Andriod or IOS app, then install
the APP.
Follow the prompts to register account or log in with an existing account.
If you have already installed the Sma Life APP, go to step 2.
2
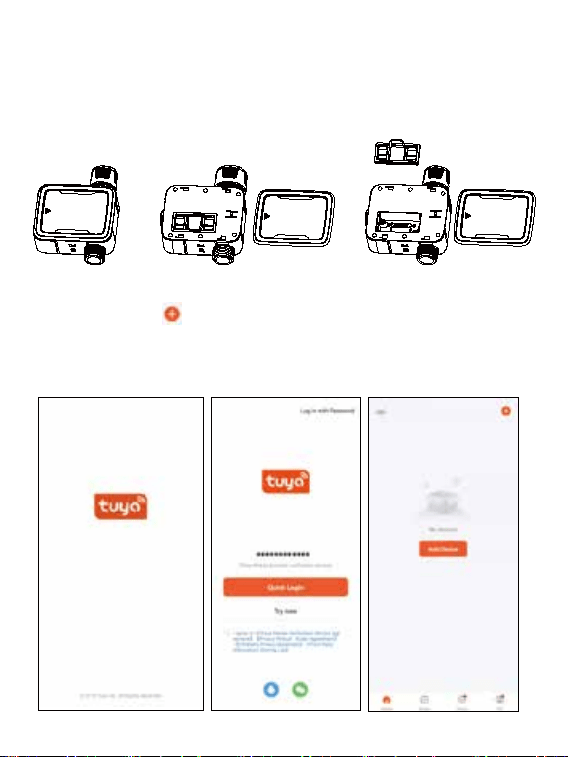
2.Power the Bluetooth Water Timer
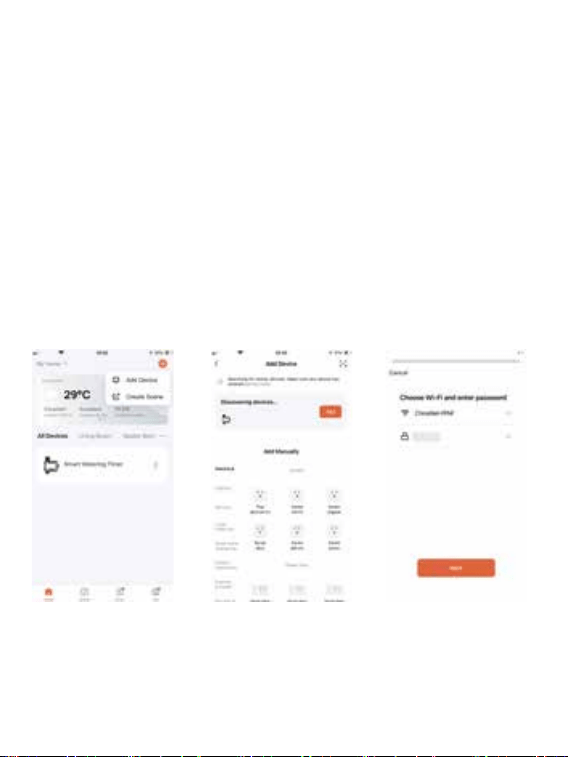
3.Add the Device
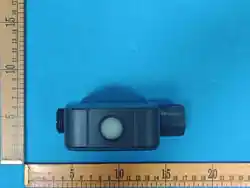
Remove the back case pull out batte cover of Sma Watering Timer
SWV-02 and load 2xAA batteries (not included). Press and hold the
button until the green LED ashes rapidly, which means the devices is
ready to connect.
1 2 3
Launch APP, tap “ ” button on the top right corner, or tap “Add
Device” directly, the App will search for nearby device, tap “Add” when
the devices are discovered. Then follow the instructions on the App page
to complete pairing.
3
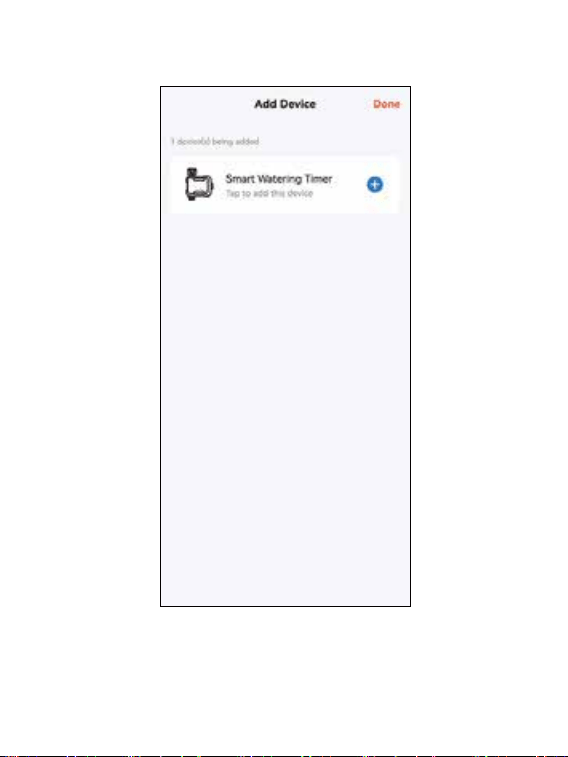
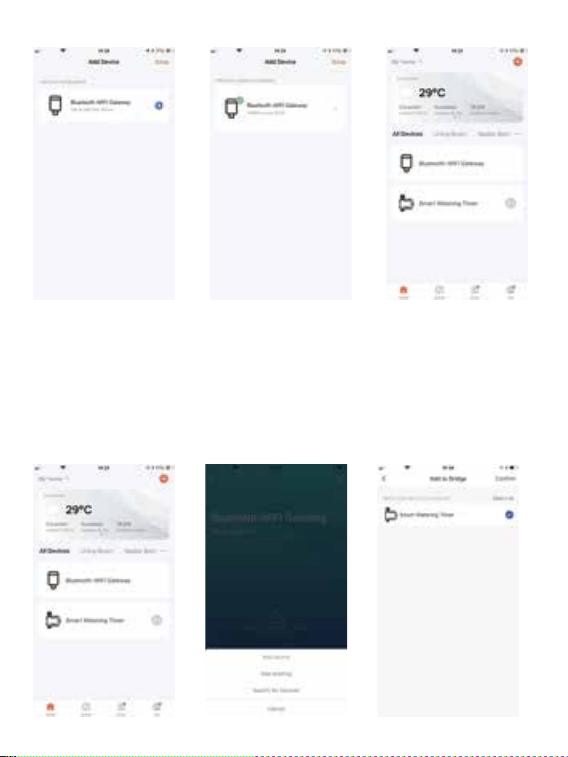
Press the “Add ” button on the right of the found device and tap
“Done” button after connection nished.
4
5
(1). Power Your Wi-Fi Hub
Plug the GWB-03 Wi-Fi hub(with adapter) into an indoor outlet. And wait
10 seconds for the device initialization to complete.LED color in Blue/Purp
lealternating eve 1-second means device is in pairing mode.
TIPS:
Choose an indoor location for your hub near the outside location of your
timer and within range of Wi-Fi.Avoid areas where the signal must travel
through more than onewall, or thick steel barriers
.
(2). Pair Your Hub
Step ①. Open Tuya Sam App and tap “Add device ” to add WIFI Hub.
Step ②. Enter your Wi-Fi password and connect to the network. (Only 2.4
Ghz Wi-Fi is suppoed ). You are waiting for bonding to be 100%.
Tap “Done” and the WIFI Hub icon will be on the device list.
Tap “ ” edit the name you favorite.
4.ADD THE WIFI HUB
6
(3). Add the Water timer
Step ①. Once the connection is complete, the paired device will be listed
on the home screen. Tap the “ Bluetooth-Wi-Fi gateway " icon to enter the
device details screen.
Step ②. Tap “Add existing " and select “Sma Watering Timer ," tap “".
Confirm Timer added successfully and listed on the hub screen. Now you
could program the watering schedule.
Once the connection is complete, the paired devices will be shown on
the home page.
Click the Bluetooth Water Timer and get into main page of the device.
7
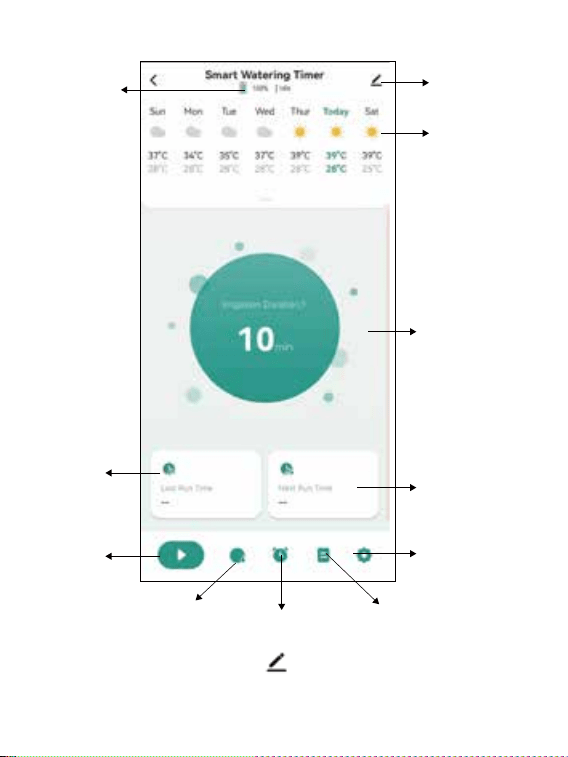
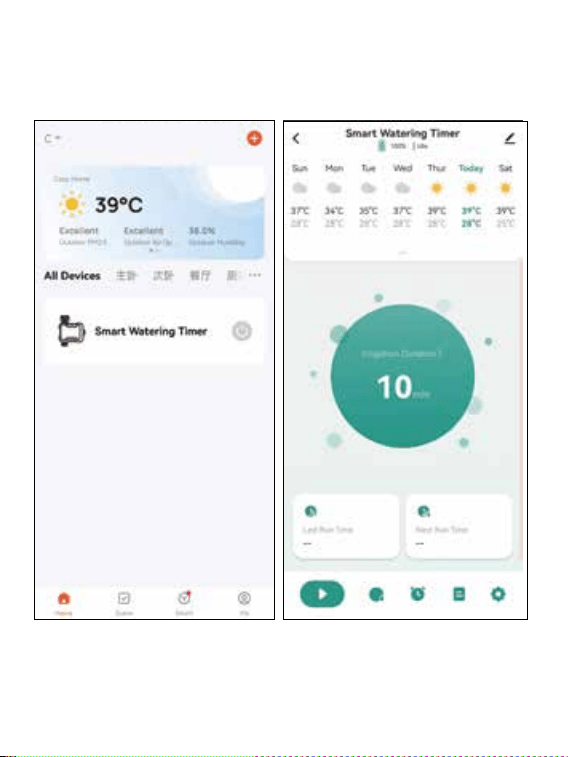
5.Basic information of Home Screen
Batte Status
Setting
Weekday &
Weather Forecast
Manual Watering
Duration Setting
Next Schedule
None Irrigation
Setting
Last Irrigation
Time
Remote
Control
Weather Delay Timer Schedule
Events Tracking
Press the button on the top right corner to enter device information
page.
8
Click the Sma Watering Timer to enter the device details pages. This
page displays the following information: date, batte status, device
status, weather information, irrigation time, last run timer, next run time.
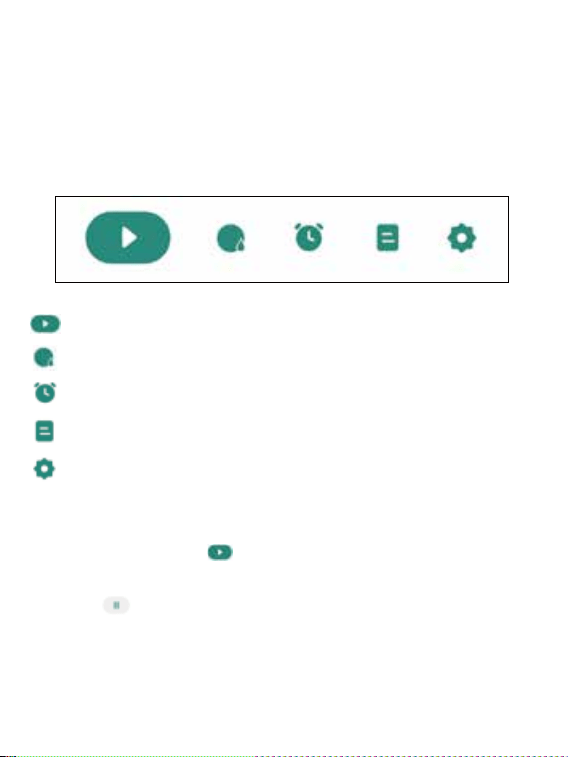
At the bottom, there is an operation panel with several options:
Remote Control, Weather Delay, Timer Schedule, Events Tracking, None
Irrigation Setting.
Remote control button for instant watering.
Weather delay for 24/48/72hours.
Schedule Setting with normal schedule and cycle & soak
schedule for options.
To set no-irrigation time. Once this setting is done and enabled, the
sma watering timer will skip the preset irrigation schedule.
Manual mode: Click the “ ” to manually turn ON the water timer to
sta watering. The default time is 10 mins.
Irrigation histo for irrigation events track and avoid false operation.
6.Manual Operation
Click the “ ” to manually turn o water timer.
Tap the central circle to set manual watering time, from 1min to 24 hours.
9
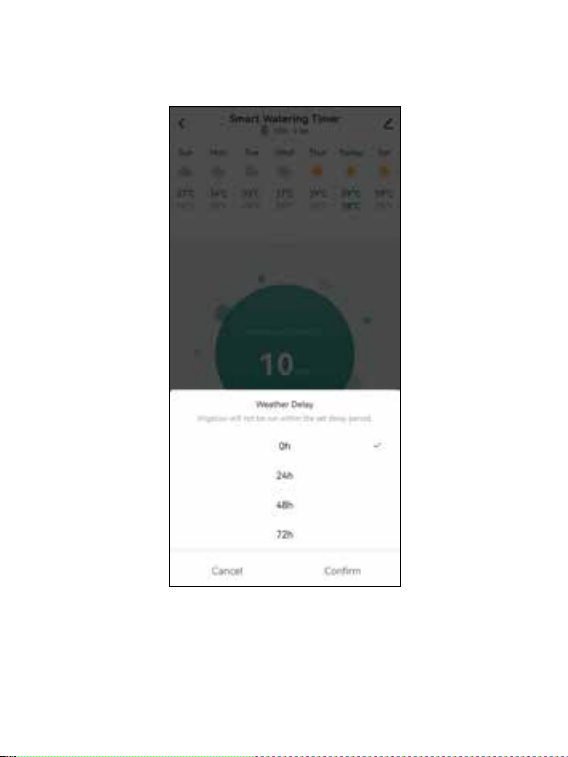
7.Weather Delay
8.Schedule and settings
Tap the “Weather Delay” to enable the rain delay function. The
weather delay can set with 24H,48H,72H and cancel.
Click and choose the schedule type you need and conrm the watering
sta time, duration, weekdays to water, and save all settings.
The soak & Cycle type have dierent setting options. It needs to set
the sta time, end time of irrigation, the cycle duration and soak
10
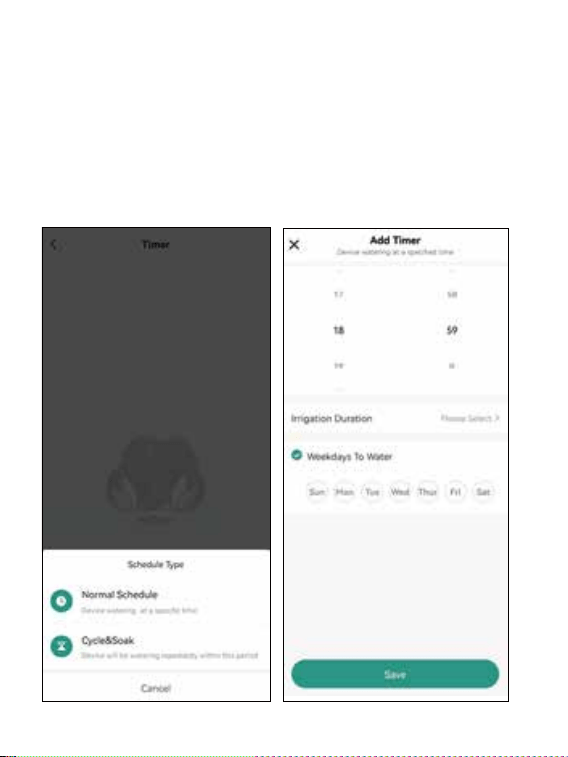
Schedule Type
On the schedule page, after select button, there are two types for
selection: Normal type and Cycle & Soak type.
Normal Schedule: means device watering at a paicular period in a day.
a.Select Sta Time: when you want the device to sta watering.
b.Select Irrigation Duration: how long you want to irrigate.
c.Select Weekdays: which days you want to water.
11
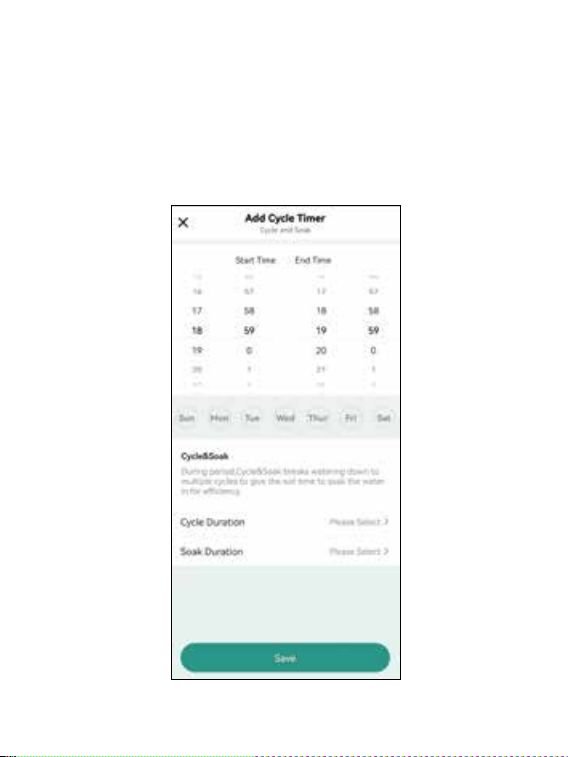
Cycle & Soak: means the device will run the watering schedule
repeatedly in this period.
a. Select Sta Time for the time you want the device to sta watering and
select End Time to stop watering.
b. Select days of the week to decide which day or days you want watering.
c. Cycle Duration: Determine how long to water.
d. Soak Duration: Set the pause time.
12
*****Tips******
a.The minimum period cannot be greater than the total time period.
b.There will be time conict notice when the time schedule overlap,
causing plans fail of setting.
c.When all plans are set up, they will be displayed on the timer list. There
is shocut button behind each group of plans to quick sta or stop the
plan directly.
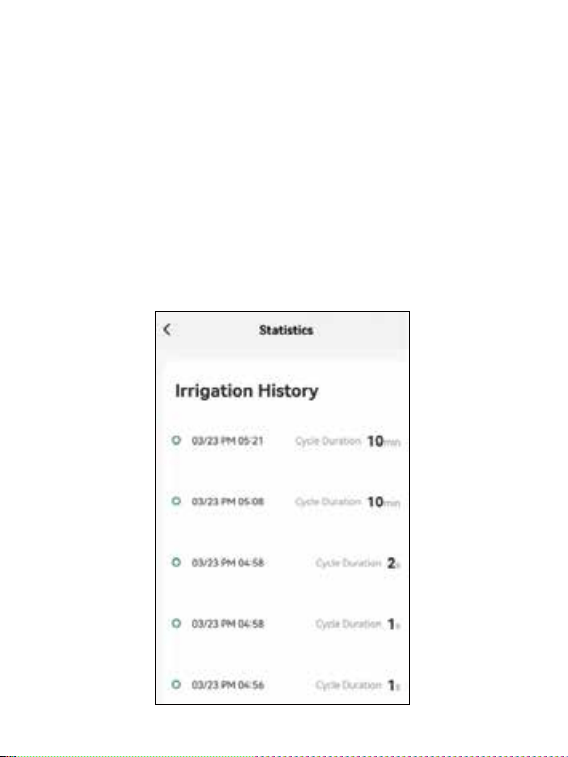
9.Irrigation Histo
Eve irrigation plan will be recorded. It’s convenient for users to track
the implementation of irrigation plans.
13
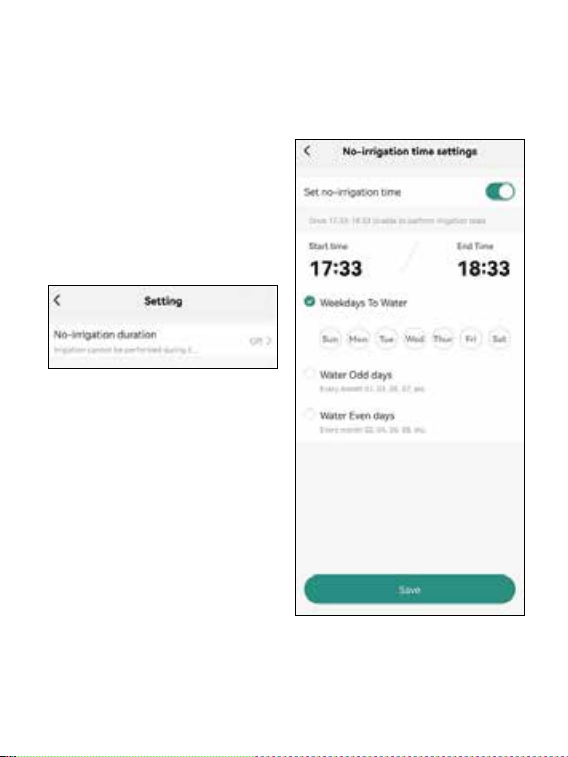
10.Non-irrigation time setting
Once this setting is done and enabled, the sma watering timer will
skip the preset irrigation schedule.
14

11.Timer Reset & Restore
Press and hold the ON/OFF button of the Bluetooth water timer more
than 5 seconds. LED light will fast blink in Green light, the water timer
is now in pairing mode, and reconnect to your sma device. All preset
settings are still saved.
Press and hold the ON/OFF button of the Bluetooth water timer for
more than 10 seconds after re-install batteries. The LED light type
from blink to stay on for 3 seconds. The device will be restored to the
facto setting, and all data will be wiped out. Now t to add the
water timer device via App again.
Warranty & Warnings
1.Please make sure the sma phone is near the Bluetooth water timer
when connecting or setting the watering plan. The best range for
connection and operation is within 60 meters in the open area.
2.The watering timer will follow and peorm the preset watering schedule
after application set successfully, even if the phone is out of the best
connecting range.
15

15
FCC Statement
This equipment has been tested and found to comply with the limits
for a Class B digital device, pursuant to part 15 of the FCC Rules.
These limits are designed to provide reasonable protection against
harmful interference in a residential installation. This equipment
generates, uses and can radiate radio frequency energy and, if not
installed and used in accordance with the instructions, may cause
harmful interference to radio communications. However, there is no
guarantee that interference will not occur in a particular installation.
If this equipment does cause harmful interference to radio or
television reception, which can be determined by turning the
equipment off and on, the user is encouraged to try to correct the
interference by one or more of the following measures:
Reorient or relocate the receiving antenna.
Increase the separation between the equipment and receiver.
Connect the equipment into an outlet on a circuit different from that
to which the receiver is connected.
Consult the dealer or an experienced radio/TV technician for help.
Caution: Any changes or modi?cations to this device not explicitly
approved by manufacturer could void your authority to operate this
equipment.
This device complies with part 15 of the FCC Rules. Operation is
subject to the following two conditions: (1) This device may not
cause harmful interference, and (2) this device must accept any
interference received, including interference that may cause
undesired operation.
RF Exposure Information
The device has been evaluated to meet general RF exposure
requirement.
The device can be used in portable exposure condition, compliance
with exposure requirements.
This equipment should be installed and operated with minimum
distance 0 mm between the radiator & your body.