USER MANUAL
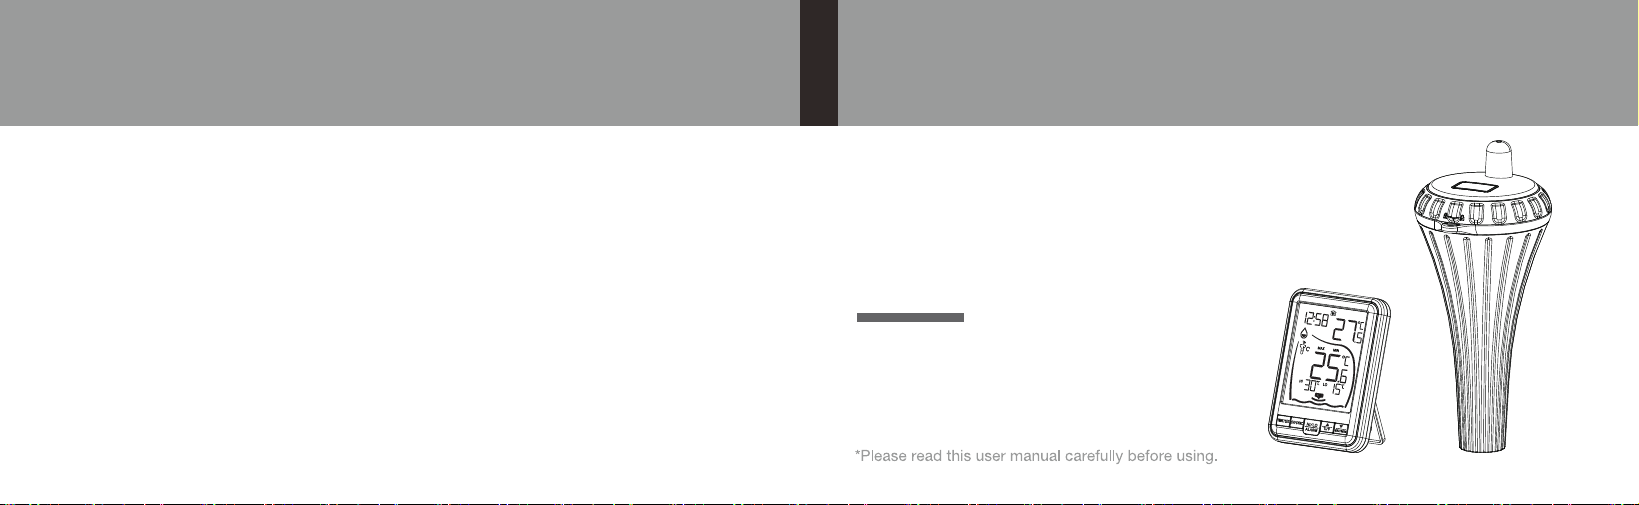
DIGITAL POOL THERMOMETER
EN2073
DIGITAL POOL THERMOMETER
EN01 EN02
1 FUNCTION
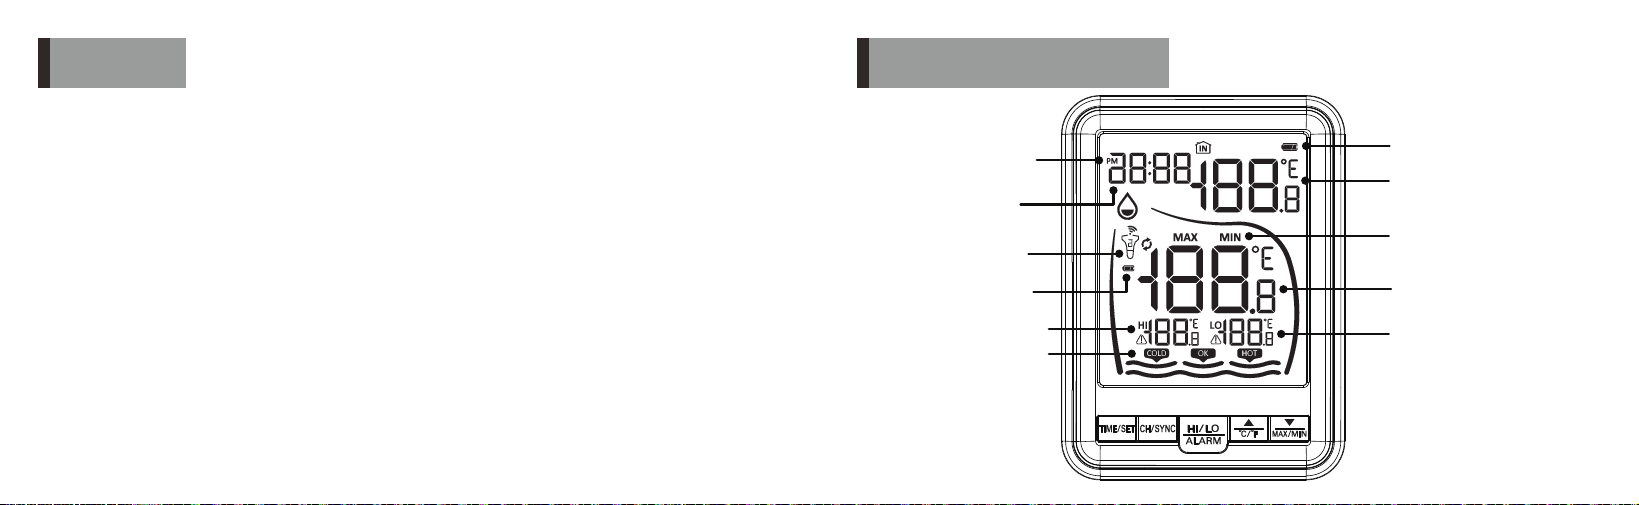
2 LCD SCREEN AND SETTINGS
RF icon and channel
12/24 hour format
Time
Indoor temperature
in
°C/°F values
MIN/MAX Outdoor
temperature values
Outoor temperature
in
°C/°F values
Water temperature zone
High temperature alert
Low temperature alert
● Time display: 12/24HR.
● Displays of indoor temperature.
● Indoor temperature detection range is -10°C-50°C(14°F-122°F).
● Water temperature level display.
● Outdoor temperature detection range is -30°C-60°C(14°F-140°F).
● MIN/MAX outdoor temperature record.
● Outdoor temperature comfort display: COLD、 OK、HOT.
● Outdoor High/Low temperature alert: Default high-temperature alert: 60.0°C; Default
low-temperature alert: -10°C. Setting range: -10°C to 60°C (manually adjustable).
● Outdoor temperature channel up to connect with 3 transmitters simultaneously.
● Temperature unit optional: °C/°F.
● Power supply: Receiver: 2x1.5V AAA size alkaline battery; Transmitter: 2xAA size alkaline battery.
● Low battery detection.
● Water resistance: Indoor receiver: Not waterproof; Outdoor transmitter: IP67 waterproof rating.
Low battery of receiver
Low battery of
transmitter
EN03 EN04
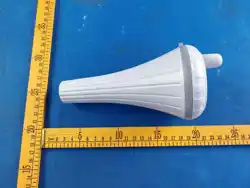
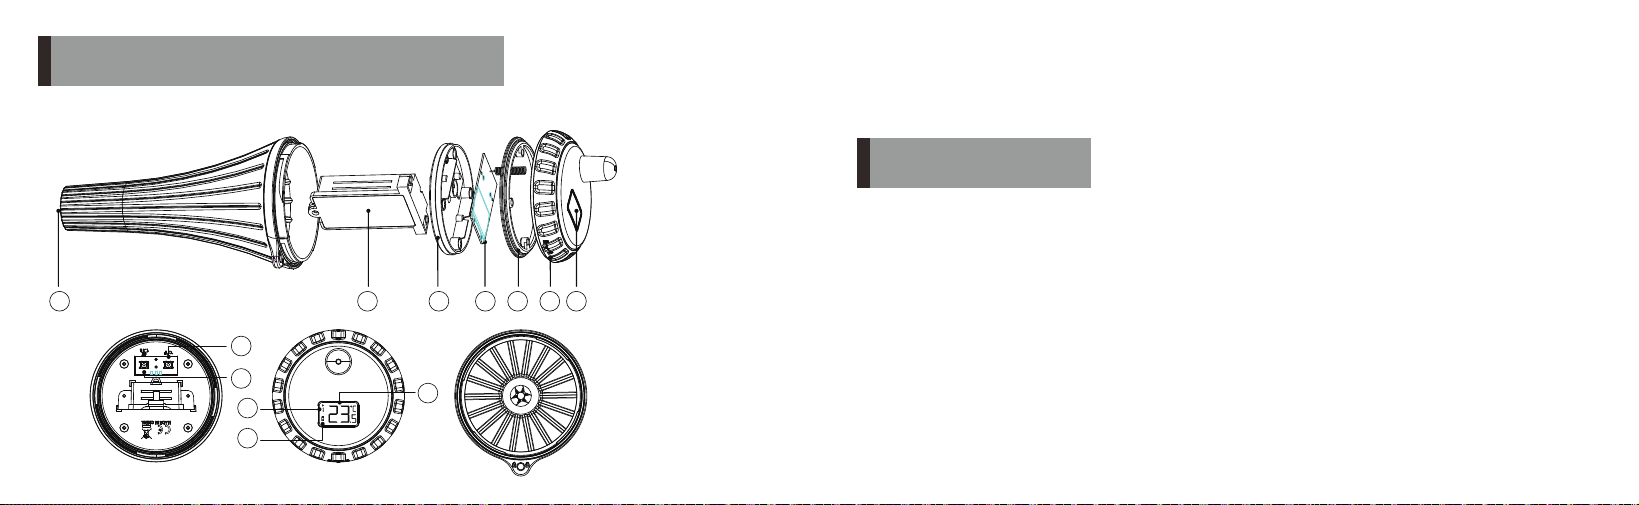
3 Wireless remote sensor (transmitter)
A
B
C
D E F
G
H
I
J
K
L
TX
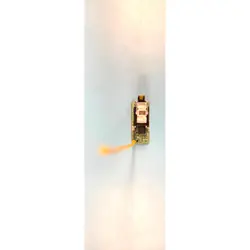
A: Temperature sensor B:Battery box C: Battery compartment securing module
D: Main control module E: Waterproof rubber ring F: Locking cover G: Lens H: °C/°F selection
switch I: Channel selection switch J: Temperature value K:Channel L: Low battery
● Transmitter frequency: 433.92 MHz.
● Range of transmission is up to100M(328feet).
4 Initial operation
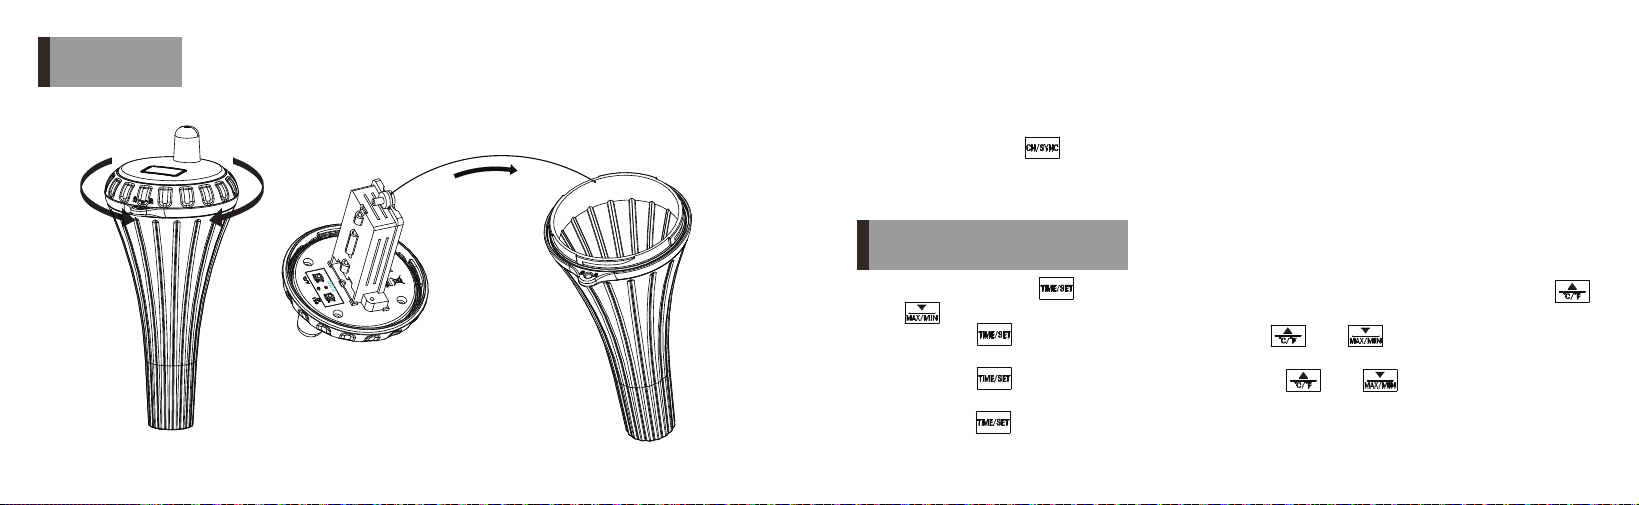
● Open the battery compartment on the rear side of the outdoor remote sensor and insert 2x AA
batteries(Unscrew the screws). Pay attention to observe the correct polarity (“+” and “-” marks) and
choose the temperature unit and channel you need.
● Select the °C/°F display by pressing the button H inside the compartment. The channel can be
selected by pressing the switch I. Close the battery compartment.
● Open the battery compartment on the rear side of the receiver and insert the batteries. Pay attention
to observe the correct polarity. Close the battery compartment.
● When you insert the batteries, all the icon on the LCD display will briefly light up for 3 seconds.
● The receiver will now start to make a connection to the outdoor remote sensor. This operation takes
about 3 minutes and is displayed by a flashing reception RF antenna symbol in the outdoor display
area on the receiver.
EN05 EN06
5 CAUTION
● After disassembly, do not touch other components, especially the electronic components, pay
attention to the direction of the slot when installing the battery box. After setting, cover the lens and
lock the cover tightly.
● This pairing mode only takes 3 minutes. If the pairing fails after more than 3 minutes, you need to
press and hold the “ ” button for 3 seconds to re-enter the pairing mode.
● After successful pairing, the remote sensor can be put into the swimming pool to detect its water
temperature.
6 Manual time setting
OPEN CLOSE
● Press and hold the “ ” for about 3 seconds, the display shows“ 24Hr” and flashes, press “ ”
or “ ” to select “12Hr” or “24Hr”.
● Press the “ ” again, the hour digits flash, press “ ” or “ ” to set hour. (Long press the
button will accelerate setting at high speed).
● Press the “ ” again, the minute digits flash, press “ ” or “ ” to set minute. (Long press
the button will accelerate setting at high speed).
● Press the “ ” or without any operation within 10 seconds, it will exit the current setting mode.
EN07 EN08
Note: When 12-hour time format is selected, the “PM” icon will appear on the screen in the
afternoon. Single press the “ ” to switch from “12Hr” or “24Hr”.
● Press “ ” to switch the outdoor temperature display channel(1-3).
● Press and hold “ ” for 3 seconds to clear the outdoor signal channel and search for the signal
again.
7 Switch the outdoor receiving channel
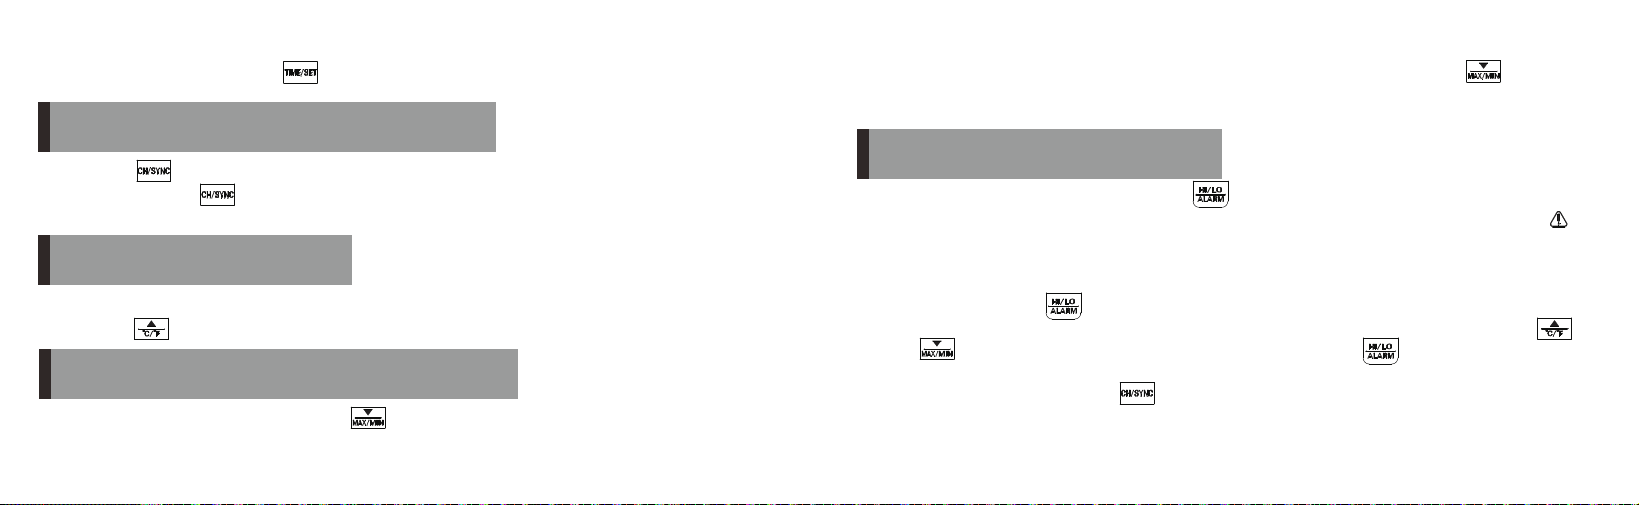
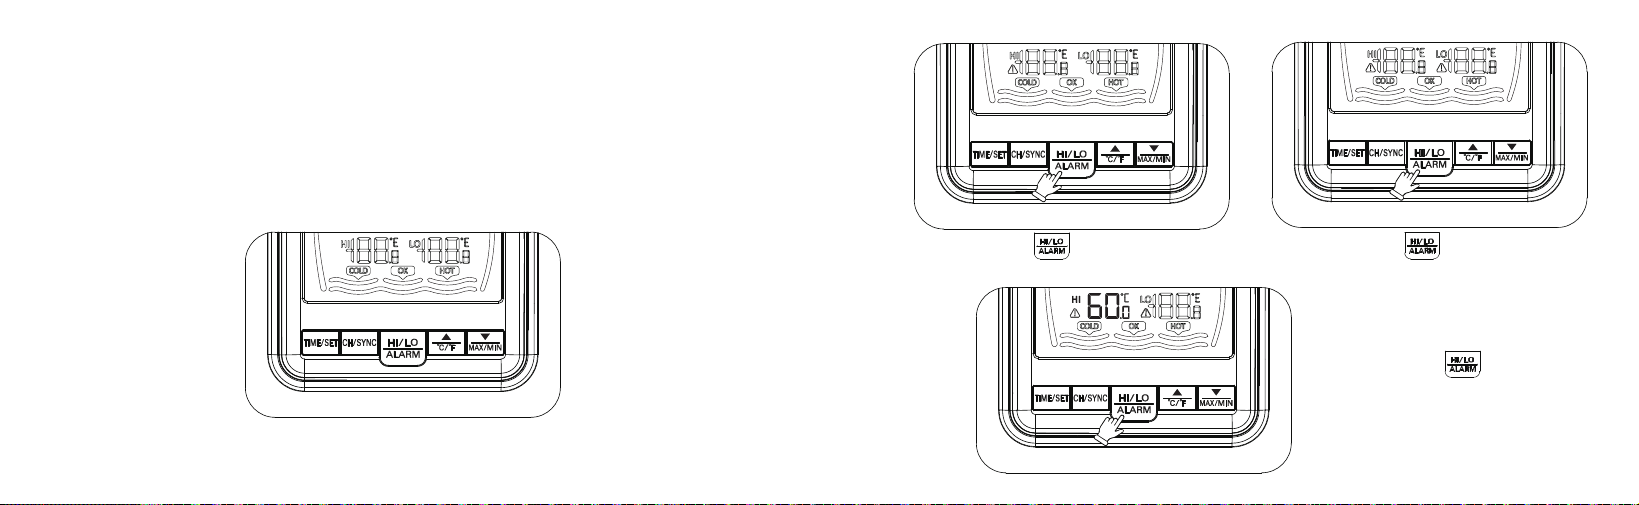
● In normal display mode, short press the “ ” button to turn the high/low temperature alert
ON and OFF. The sequence is: HI ON-LO ON- HI OFF - LO OFF (Once the alert is setting, the “ ”
icon will appear on the screen).
● High/Low temperature setting range: -10°C to 60°C (14°F to 140°F). The default is: High (HI)
alarm at 60°C, Low (LO) alarm at -10°C.
● Press and hold the “ ” button for 3 seconds to enter manual setting mode. The sequence is:
High (HI) - Low (LO) - Exit settings. The corresponding value blinks during setting. Press the “
” or “ ” button to adjust the value. After setting, short press the “ ” button to confirm and
enter other mode. The alarm is automatically turned ON after setting is complete.
● During alert setting, press the “ ” button to switch to different channels for setting their
respective high/low temperature alarms.
● Three times to return to the current temperature value.
● On the outdoor maximum/minimum temperature display screen, hold down the “ ” button
for about 3 seconds to clear current value (Displays “--.-” for 3 seconds). This will reset the
MAX/MIN temperature record to the currently displayed value.
● The default unit of temperature is °C.
● Press “ ” to switch the unit from°C to °F.
8 Displays of temperature
10 TEMPERATURE ALERT SETTINGS
● To view outdoor maximum, press the “ ” button.
● Once to show the maximum temperature value.
● Twice to show the minimum temperature value.
9 Maximum/Minimum temperature display
EN09 EN10
● When the current temperature exceeds the set HIGH&LOW temperature range, the alert alarm will
be activated and sound, the corresponding value and icon will blink. Press any button to stop the
alarm, the alarm will be silent and come on again if still exceeds the temperature range.
● If multiple outdoor transmitters are connected, and one triggers an alarm, the display will
automatically switch to the alarming channel (regardless of being in cycle mode or fixed channel
display). The alarm sounds and the corresponding value/icon blinks. The cycle display mode is
automatically activated. When cycling to the alarming channel, the alarm sounds and blinks. The alarm
must be manually turned off, or it will stop when the value is no longer within the set alarm range.
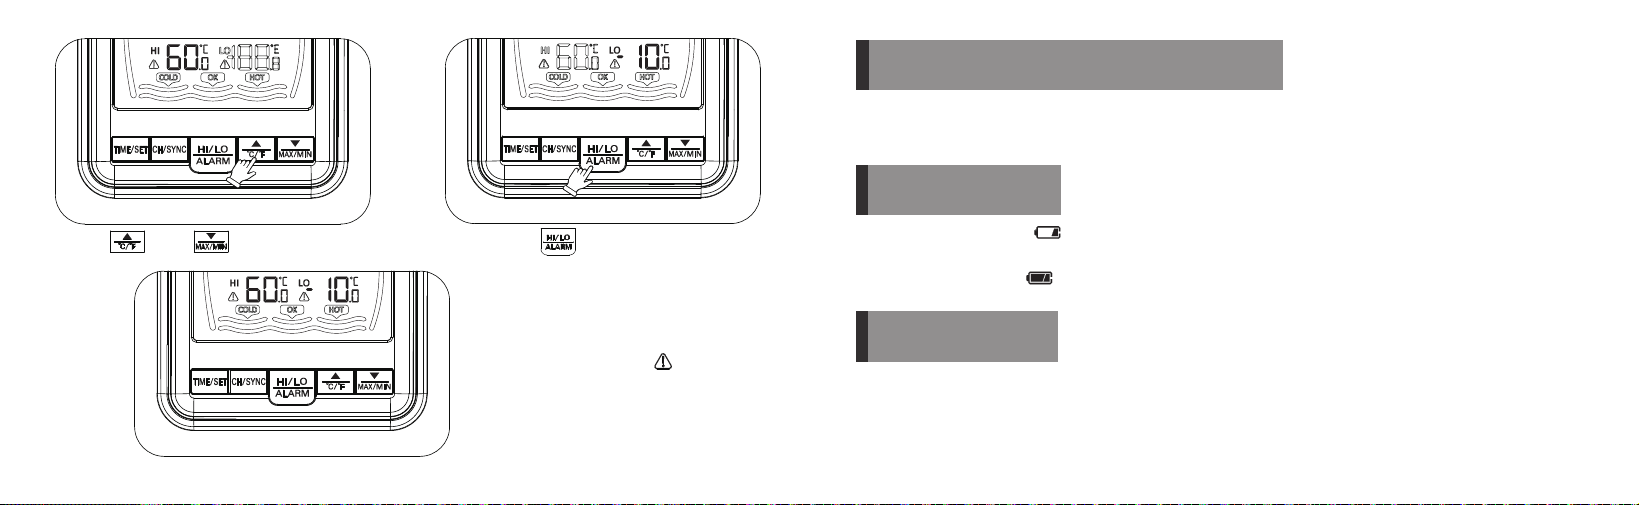
No HI or LO Temperature alert is set
Short press the “ ” button to set Outdoor
HIGH Temperature(HI)
Then short press “ ” button to set Outdoor
LOW Temperature(LO)
Press and hold the “ ” button to set the
alert value of HI temperature
EN11 EN12
11 WATER TEMPERATURE LEVEL DISPLAY
● COLD: When the outdoor temperature is below 20°C.
● OK: When the outdoor temperature is between 20°C and 30°C.
● HOT: When the outdoor temperature is above 30°C.
12 Low battery
● If the battery icon “ ” appears, the batteries in the remote sensor and receiver should be replaced
as soon as possible.
● The battery icon “ ” represent of full of electricity.
● 3-levels battery display: 100%, 30%, 0%.
13 FCC WARNING
This device complies with part 15 of the FCC Rules. Operation is subject to the following two
conditions: (1) This device may not cause
harmful interference, and (2) this device must accept any interference received, including interference
that may cause undesired operation.
Note: This equipment has been tested and found to comply with the limits for a Class B digital device,
pursuant to part 15 of the FCC
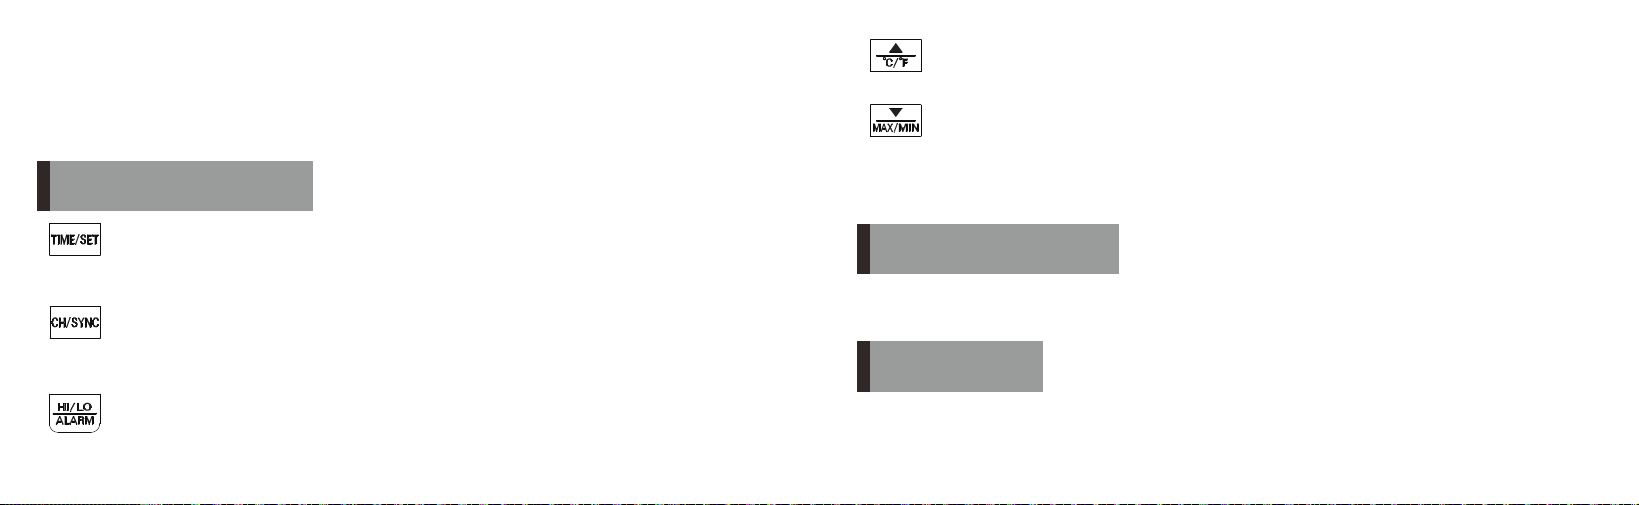
Press “ ” and “ ” to adjust the value
Then press “ ” button to set alert value
of LO temperature
After setting, the alert icon “ ” is appeared

EN13 DE14
1 Funktionen
Rules. These limits are designed to provide reasonable protection against harmful interference in a
residential installation. This
equipment generates, uses and can radiate radio frequency energy and, if not installed and used in
accordance with the instructions,
may cause harmful interference to radio communications. However, there is no guarantee that
interference will not occur in a particular
installation. If this equipment does cause harmful interference to radio or television reception, which can
be determined by turning
the equipment off and on, the user is encouraged to try to correct the interference by one or more of the
following
measures:
—Reorient or relocate the receiving antenna.
—Increase the separation between the equipment and receiver.
—Connect the equipment into an outlet on a circuit different from that to which the receiver is connected.
—Consult the dealer or an experienced radio/TV technician for help.
Note: The Grantee is not responsible for any changes or modifications not expressly approved by the
party responsible for
compliance. such modifications could void the user's authority to operate the equipment.
The device has been evaluated to meet general RF exposure requirement.
To maintain compliance with FCC's RF exposure guidelines, the distance must be at least 20 cm
between the radiator and your body, and fully supported by the operating and installation
DEUTSCHES HANDBUCH
● Zeit anzeigen: 12/24-Stunden-Format.
● Innenraumtemperatur anzeigen.
● Innenraumtemperatur-Messbereich: -10°C bis 50°C (14°F bis 122°F).
● Wassertemperatur anzeigen.
● Außentemperatur-Messbereich: -30°C bis 60°C (14°F bis 140°F).
● Außentemperatur-Aufzeichnung: MIN (Minimum) und MAX (Maximum).
● Außentemperatur-Komfortanzeige: COLD (kalt), OK (komfortabel), HOT (heiß).
● Hohe/niedrige Außentemperatur-Alarm.
Standard-Hochtemperaturalarm: 60,0°C.
Standard-Niedertemperaturalarm: -10°C.
Einstellbereich: -10°C bis 60°C (manuell einstellbar).
● Im Außentemperaturkanal können gleichzeitig bis zu 3 Sender angeschlossen werden.
● Wählbare Temperatureinheit: °C/°F.
Bitte lesen Sie die Bedienungsanleitung vor dem Gebrauch sorgfältig durch und bewahren Sie
sie für spätere Referenz auf.
DE15 DE16
● Stromversorgung:
Empfänger: 2 x AAA-Batterien.
oSender: 2 x AA-Batterien.
● Niedrige Batterieanzeige für Empfänger und Sender.
● Der Inneneempfänger ist nicht wasserdicht. Der Außensender hat die Schutzart (IP): IP67.
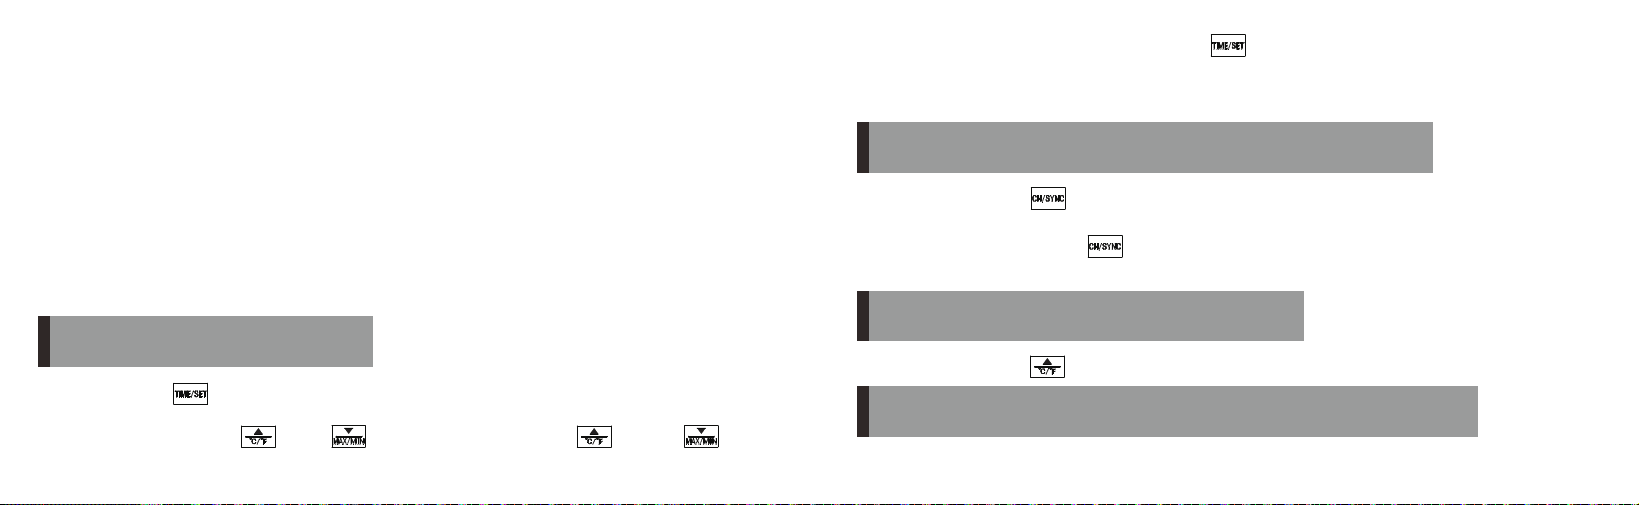
2 Tastenbeschreibung
● Kurzer Druck: Umschalten zwischen 12/24-Stunden-Format.
● Langer Druck (3 Sek.): Eintritt in die Zeiteinstellung.
● Kurzer Druck: Wechselt den Senderkanal.
● Langer Druck (3 Sek.): Löscht die Daten des aktuellen Kanals und sucht erneut nach dem Signal.
● Kurzer Druck: Aktiviert/Deaktiviert den Hohe-/Niedertemperaturalarm für den aktuellen Kanal.
● Langer Druck (3 Sek.): Eintritt in die Hohe-/Niedertemperatur-Einstellung (HI/LO) für außen.
● Kurzer Druck: Wechselt die Temperatureinheit (°C/°F); im Einstellmodus erhöht sich der Wert.
● Kurzer Druck: Zeigt die MAX-/MIN-Werte der Außentemperatur des aktuellen Kanals an; im
Einstellmodus verringert sich der Wert.
● Langer Druck (3 Sek.): Löscht die MAX-/MIN-Werte des aktuellen Kanals.
● Funkfrequenz: RF 433,92 MHz
● Drahtlose Reichweite: 100 Meter (328 Fuß)
● Öffnen Sie das Batteriefach auf der Rückseite des Außensenders und setzen Sie die Batterien ein.
Achten Sie auf die Polarität. Drücken Sie die °C/°F-Taste, um die Einheit auszuwählen.
3 Drahtloser Sender
4 Einschalten
DE17 DE18
5 Manuelle Zeiteinstellung
● Nach der Einstellung drücken Sie kurz auf “ ”, um zu bestätigen und zum nächsten Schritt
überzugehen. (Nach 10 Sekunden ohne Aktion werden die aktuellen Einstellungen gespeichert und
der Modus verlassen.)
● Kurzer Druck auf “ ”: Wechselt den Anzeigekanal für die Außentemperatur (CH1 -> CH2 ->
CH3). Zum Beispiel wird bei Empfang von CH1 Kanal 1 mit maximalem RF-Signal angezeigt.
● Langer Druck (3 Sek.) auf “ ”: Löscht die Daten des aktuellen Kanals und sucht erneut nach
dem Signal.
● Kurzer Druck auf “ ” wechselt die Einheit.
6 Wechsel des Außentemperatur-Empfangskanals
7 Wechsel der Temperatureinheit °C/°F
8 Anzeige der maximalen/minimalen Außentemperatur
● Öffnen Sie das Batteriefach auf der Rückseite des Empfängers und setzen Sie die Batterien ein. Achten Sie
auf die Polarität. Beim Einschalten leuchten alle Symbole auf dem LCD-Display 3 Sekunden lang kurz auf.
● Der Empfänger versucht nun, eine Verbindung zum Außensender herzustellen. Dies dauert etwa 3
Minuten, während dieser Zeit blinkt das Signal-Symbol auf dem Display des Empfängers.
● Nach dem Wiederzusammenbau berühren Sie bitte keine anderen Komponenten, insbesondere
nicht die Antenne. Achten Sie beim Schließen des Batteriefachs auf die Ausrichtung des
Schnappverschlusses. Nach der Einstellung setzen Sie den Dichtungsring und die Abdeckung wieder
ein und verriegeln Sie diese fest.
● Dieser Paarungsmodus dauert 3 Minuten. Wenn nach 3 Minuten keine Verbindung zustande kommt,
drücken Sie die “CH”-Taste lange (2 Sek.), um den 3-minütigen Paarungsmodus neu zu starten.
● Nach erfolgreicher Paarung kann der Sender in den Pool gelegt werden, um die Wassertemperatur
zu messen.
● Drücken Sie “ ”lange (3 Sek.), um in die Zeiteinstellung zu gelangen. Das 12/24h-Symbol blinkt.
Einstellreihenfolge: 12/24h-Format -> Stunde -> Minute -> Beenden.
● Drücken Sie kurz auf “ ” oder “ ”, um den Wert einzustellen. “ ” erhöht, “ ”
verringert.
DE19 DE20
● Im Normal-Anzeigemodus: Kurzer Druck auf “ ” zeigt die MAX- (Maximum) und MIN- (Minimum)
Werte der Außentemperatur des aktuellen Kanals an. Reihenfolge: Maximale Außentemperatur ->
Minimale Außentemperatur -> Zurück zur Normalanzeige.
● Beim Betrachten der MAX/MIN-Werte löscht ein langer Druck (3 Sek.) auf “ ” die aktuellen Werte
und startet die Aufzeichnung neu.
9 Einstellung des Hohe-/Niedertemperaturalarms für außen
● COLD (Kalt): Wenn die Außentemperatur unter 20°C liegt.
● OK (Komfortabel): Wenn die Außentemperatur zwischen 20°C und 30°C liegt.
● HOT (Heiß): Wenn die Außentemperatur über 30°C liegt.
● Während der Alarm-Einstellung wechselt ein kurzer Druck auf “ ” den Kanal, um den Alarm
für einen anderen Kanal einzustellen.
● Wenn die Außentemperatur einen eingestellten Alarmwert erreicht, ertönt der Alarm und der
entsprechende Wert/das Symbol blinkt. Während des Alarms stoppt das Drücken einer beliebigen
Taste den Ton, aber das Blinken setzt sich fort, bis die Temperatur nicht mehr im Alarmbereich liegt.
● Wenn mehrere Außensender verbunden sind, wird beim Auslösen eines Alarms an einem dieser
Sender die Anzeige automatisch auf diesen Kanal umgeschaltet. Der Alarm ertönt und die
Werte/Symbole blinken. Der zyklische Anzeigemodus (Kanalrotation) wird automatisch aktiviert.
Wenn der Zyklus zum Alarmkanal zurückkehrt, ertönt der Alarm erneut. Der Alarm muss manuell
deaktiviert werden oder die Temperatur muss den eingestellten Bereich verlassen.
10 Komfortanzeige (Außentemperatur)
● Im Normal-Anzeigemodus: Kurzer Druck auf “ ” aktiviert/deaktiviert den Alarm.
Reihenfolge: Hoher Alarm (HI) EIN -> Niedriger Alarm (LO) EIN -> Hoher Alarm (HI) AUS ->
Niedriger Alarm (LO) AUS -> (Zyklus). (Das entsprechende Symbol wird angezeigt, wenn der Alarm
aktiviert ist.)
● Einstellbereich: -10°C bis 60°C (14°F bis 140°F). Standard: Hoher Alarm (HI) = 60°C, Niedriger
Alarm (LO) = -10°C.
● Im Normal-Anzeigemodus: Langer Druck (3 Sek.) auf “ ” aktiviert den manuellen
Einstellmodus. Reihenfolge: Hohe Temperatur (HI) -> Niedrige Temperatur (LO) -> Beenden. Der
entsprechende Wert blinkt während der Einstellung. Verwenden Sie “ ” oder “ ” zum
Einstellen. Drücken Sie “ ”, um zum nächsten Schritt zu gehen. Nach der Einstellung wird der
entsprechende Alarm automatisch aktiviert (Symbol angezeigt).

DE21 FR22
● Sowohl der Empfänger als auch der Sender haben eine Funktion zur Anzeige niedriger Batterie.
● 3-stufige Batterieanzeige: 100%, 30%, 0%.
11 Anzeige des niedrigen Batteriesymbols
Instructions en français
1 Fonctionnalités
● Affichage de l'heure : format 12/24 heures.
● Affichage de la température intérieure.
● Plage de détection de la température intérieure : -10°C à 50°C (14°F à 122°F).
● Affichage de la température de l'eau.
● Plage de réglage de la température extérieure : -30°C à 60°C (14°F à 140°F).
● Enregistrement des températures extérieures MIN (minimum) et MAX (maximum).
● Affichage du confort thermique extérieur : FROID, OK, CHAUD.
● Alarme haute/basse température extérieure. Alarme haute par défaut : 60.0°C, alarme basse
par défaut : -10°C. Plage de réglage : -10°C à 60°C (réglage manuel possible).
● Canal de température extérieure pouvant connecter simultanément jusqu'à 3 émetteurs.
● Unité de température sélectionnable : °C / °F.
● Alimentation : Récepteur : 2 piles AAA ; Émetteur : 2 piles AA.
● Détection de faible batterie pour l'intérieur et l'extérieur.
● Le récepteur intérieur n'est pas étanche. Degré de protection de l'émetteur extérieur : IP67.
Veuillez lire attentivement le mode d’emploi avant utilisation et le conserver pour référence
ultérieure.
FR23 FR24
3 Émetteur sans fil
● Fréquence : RF 433.92 MHz
● Portée sans fil : 100 mètres (328 pieds)
4 Démarrage
● Ouvrir le compartiment à piles de l'émetteur extérieur et installer les piles (faire attention aux pôles
+/-). Choisir l'unité avec le bouton °C/°F.
● Ouvrir le compartiment à piles du récepteur et installer les piles (faire attention aux pôles +/-). Toutes
les icônes de l'écran LCD s'allumeront brièvement pendant 3 secondes.
● Le récepteur commencera la connexion à l'émetteur extérieur. La connexion prend environ 3
minutes, le symbole de signal clignotera pendant ce temps.
● Après installation, éviter de toucher d'autres composants, notamment l'antenne. Remettre le
couvercle avec attention au joint d'étanchéité et le verrouiller.
● Appui simple pour afficher la température MAX/MIN du canal extérieur actuel ; appui long (3 sec.)
pour effacer ces valeurs. En mode réglage, diminue la valeur.
2 Introduction des boutons
● Appui simple pour basculer entre 12h/24h ; appui long (3 sec.) pour régler l'heure.
● Appui simple pour changer de canal de l'émetteur ; appui long (3 sec.) pour effacer les données du
canal actuel et recevoir à nouveau le signal.
● Appui simple pour activer/désactiver l'alarme haute/basse du canal actuel ; appui long (3 sec.) pour
régler la température haute/basse extérieure (HI/LO).
● Appui simple pour basculer l'unité °C/°F ; en mode réglage, augmente la valeur.
FR25 FR26
5 Réglage manuel de l'heure
● Appui long (3 sec.) sur “ ” pour régler l'heure. Le symbole 12/24h clignote. Ordre des réglages :
format 12/24h -> heures -> minutes -> sortie.
● Appui simple sur “ ” ou “ ” pour ajuster la valeur (UP pour augmenter, DOWN pour
diminuer).
● Appui simple sur “ ” pour confirmer et passer à l'étape suivante. (Les réglages sont enregistrés
et on sort du mode après 10 sec. d'inactivité).
● Cette procédure de jumelage dure 3 minutes. Si elle échoue, appuyer longuement (2 sec.) sur le
bouton "CH" pour relancer le mode de jumelage de 3 minutes.
● Une fois le jumelage réussi, l'émetteur peut être placé dans la piscine pour mesurer la température
de l'eau.
7 Changement d'unité de température °C/°F
● Appui simple sur “ ”.
8 Affichage de la température extérieure MAX/MIN
● En mode d'affichage normal, appui simple sur “ ” pour afficher dans cet ordre : température
MAX -> MIN -> retour à l'affichage normal.
● Lors de l'affichage des valeurs MAX/MIN, appui long (3 sec.) sur “ ” pour effacer ces
valeurs et recommencer l'enregistrement.
9 Réglage de l'alarme haute/basse température extérieure
● En mode normal, appui simple sur “ ” pour activer/désactiver l'alarme. Cycle : Activation HI
-> Activation LO -> Désactivation HI -> Désactivation LO, etc. (Les icônes correspondantes
s'affichent).
● Plage de réglage : -10°C à 60°C (14°F à 140°F). Par défaut, alarme haute (HI) à 60°C, alarme
basse (LO) à -10°C.
6 Changement de canal de l'émetteur extérieur
● Appui simple sur “ ” pour changer de canal (CH1 -> CH2 -> CH3). Lors de la réception du
signal CH1, le canal 1 est affiché et le signal RF est plein.
● Appui long (3 sec.) sur “ ” pour effacer les données du canal actuel et relancer le jumelage.
FR27 FR28
● En mode normal, appui long (3 sec.) sur “ ” pour régler manuellement. Ordre : HI -> LO ->
sortie. La valeur ajustée clignote. Utiliser “ ” ou “ ” pour ajuster. Appui simple sur “ ” pour
confirmer et passer à l'étape suivante. L'alarme s'active automatiquement après le réglage (icône
affichée).
● Pendant le réglage, appui simple sur “ ” pour changer de canal et régler l'alarme d'un autre
émetteur.
● Lorsque la température atteint la valeur d'alarme, celle-ci retentit et la valeur/icône clignote. Appuyer
sur n'importe quel bouton arrête l'alarme sonore, mais le clignotement continue jusqu'à ce que la
température sorte de la plage d'alarme.
● Si plusieurs émetteurs sont connectés et qu'un d'eux déclenche l'alarme, l'affichage passe
automatiquement sur le canal concerné. L'alarme retentit et l'icône clignote. L'affichage passe en mode
cycle automatique, et l'alarme retentit à chaque passage sur le canal problématique. Il faut désactiver
l'alarme manuellement ou attendre que la température sorte de la plage.
● FROID : lorsque la température extérieure est inférieure à 20°C.
● OK : lorsque la température extérieure est comprise entre 20°C et 30°C.
● CHAUD : lorsque la température extérieure est supérieure à 30°C.
10 Affichage du confort thermique
● Le récepteur et l'émetteur ont une fonction d'indication de batterie faible.
● Affichage de 3 niveaux : 100%, 30%, 0%.
11 Affichage du niveau de batterie

ES29 ES30
1 Funciones
● Visualización de hora: Formato 12/24 horas.
● Visualización de temperatura interior.
● Rango de detección de temperatura interior: -10°C a 50°C (14°F a 122°F).
● Visualización de temperatura del agua.
● Rango de ajuste de temperatura exterior: -30°C a 60°C (14°F a 140°F).
● Registro de valores de temperatura exterior: MÍN (mínima) y MÁX (máxima).
● Indicador de confort térmico exterior: COLD (frío), OK (cómodo), HOT (calor).
● Alarma de alta/baja temperatura exterior. Alarma alta por defecto: 60.0°C, alarma baja por defecto: -10°C.
Rango de ajuste: -10°C a 60°C (se puede ajustar manualmente).
● El canal de temperatura exterior puede conectar hasta 3 transmisores simultáneamente.
● Unidad de temperatura seleccionable: °C / °F.
● Fuente de alimentación: Receptor: 2 pilas AAA; Transmisor: 2 pilas AA.
● Detección de batería baja para interior y exterior.
● El receptor interior no es resistente al agua. Grado de protección del transmisor exterior: IP67.
● Pulsación breve: conmutar entre formato 12/24h. Pulsación larga (3 seg.): entrar en el ajuste de hora.
● Pulsación breve: cambiar de canal del transmisor. Pulsación larga (3 seg.): borrar datos del canal
actual y re-recibir señal.
● Pulsación breve: activar/desactivar alarma de alta/baja temperatura del canal actual. Pulsación larga
(3 seg.): entrar en el ajuste manual de temperatura alta/baja (HI/LO) exterior.
● Pulsación breve: cambiar unidad °C/°F. En modo de ajuste, pulsación breve aumenta el valor.
2 Introducción a los botones
Instrucciones en español
Lea atentamente el manual antes de usar el producto y guárdelo en un lugar seguro para
futuras consultas.
ES31 ES32
● Pulsación breve: ver temperatura máxima/mínima del canal exterior actual. Pulsación larga: borrar
el valor del canal actual. En modo de ajuste, pulsación breve disminuye el valor.
● Frecuencia: RF 433.92 Mhz
● Alcance inalámbrico: 100 metros (328 pies)
3 Transmisor inalámbrico
● Abra el compartimento de pilas en la parte trasera del transmisor exterior e instale las pilas,
prestando atención a la polaridad (+/-). Seleccione la unidad con el botón °C/°F.
● Abra el compartimento de pilas en la parte trasera del receptor e instale las pilas, prestando
atención a la polaridad (+/-). Al instalar las pilas, todos los iconos de la pantalla LCD se iluminarán
brevemente durante 3 segundos.
4 Procedimiento de encendido
● Mantenga presionado el botón “ ” durante 3 segundos para entrar en el ajuste de hora. El
símbolo 12/24h parpadea. Orden de ajuste: Formato 12/24h -> Hora -> Minuto -> Salir.
● Pulse brevemente “ ” o “ ” para ajustar el valor. “ ” aumenta el valor, “ ” lo
disminuye.
● Después de ajustar, pulse brevemente “ ” para confirmar y pasar al siguiente paso. (Si no
hay ninguna operación de teclas durante 10 segundos, se guarda la configuración actual y se
sale).
● El receptor comenzará a conectarse con el transmisor exterior remoto. Esto lleva unos 3 minutos,
durante los cuales el símbolo de señal en la pantalla parpadeará.
● Después de abrir, no toque otros componentes, especialmente la antena. Al instalar la tapa de la
batería, preste atención a la dirección de las ranuras. Una vez configurado, coloque la lente y el
anillo de estanqueidad, y cierre la tapa firmemente.
● Este modo de emparejamiento dura solo 3 minutos. Si el emparejamiento falla después de 3
minutos, debe mantener presionado el botón "CH" durante 2 segundos para volver a entrar en el
modo de emparejamiento de 3 minutos.
● Una vez emparejado con éxito, el transmisor puede colocarse en la piscina para detectar la
temperatura del agua.
5 Ajuste manual de la hora
ES33 ES34
● Pulse brevemente el botón “ ” para cambiar el canal de visualización de temperatura
exterior (CH1 -> CH2 -> CH3). Por ejemplo, al recibir la señal CH1, se muestra el canal 1 y la
señal RF está al máximo.
● Mantenga presionado el botón “ ” durante 3 segundos para borrar el valor actual y
re-emparejar la señal.
6 Cambiar la señal de recepción exterior
● Pulse brevemente el botón “ ” para cambiar entre °C y °F.
7 Cambiar la unidad de temperatura °C/°F
● En modo de visualización normal, pulse brevemente el botón “ ” para ver la temperatura
máxima/mínima exterior actual. El orden es: Temperatura exterior MÁX (máxima) -> MÍN (mínima)
-> Volver a visualización normal.
● Al ver los valores máximo/mínimo, mantenga presionado el botón “ ” durante 3 segundos
para borrar el valor actual y comenzar a registrar nuevamente.
8 Ver la temperatura máxima/mínima exterior
9 Configuración de alarma de alta/baja temperatura exterior
● En modo de visualización normal, pulse brevemente el botón “ ” para activar/desactivar la
alarma de alta/baja temperatura. El orden es: Alta (HI) ON -> Baja (LO) ON -> Alta (HI) OFF ->
Baja (LO) OFF -> Ciclo. (Cuando la alarma está activada, se muestra el identificador
correspondiente).
● Rango de ajuste de alta/baja temperatura: -10°C a 60°C (14°F a 140°F). Por defecto al
encender: alarma alta (HI) 60°C, alarma baja (LO) -10°C.
● En modo de visualización normal, mantenga presionado el botón “ ” durante 3 segundos
para entrar en el modo de ajuste manual de alarma de alta/baja temperatura. Orden: Alta (HI) ->
Baja (LO) -> Salir. Durante el ajuste, el valor correspondiente parpadea. Pulse brevemente “ ”
o “ ” para ajustar el valor. Después de ajustar, pulse brevemente “ ” para pasar al
siguiente paso. Una vez configurado, la alarma se activa automáticamente (se muestra el
identificador correspondiente).
● Durante la configuración de la alarma, puede pulsar brevemente “ ” para cambiar a un
canal diferente y configurar la alarma para otro transmisor.
● Cuando el valor de temperatura exterior alcanza el valor de alarma establecido, suena la
alarma y el valor/identificador correspondiente parpadea. Durante la alarma, presione cualquier
tecla para detener la alarma sonora, pero el valor/identificador correspondiente seguirá
parpadeando hasta que la temperatura actual esté fuera del valor de alarma establecido.

ES35 IT36
10 Indicador de confort
● COLD (frío): Cuando la temperatura exterior es inferior a 20°C.
● OK (cómodo): Cuando la temperatura exterior está entre 20-30°C.
● HOT (calor): Cuando la temperatura exterior es superior a 30°C.
11 Indicador de batería baja
● Tanto el receptor como el transmisor tienen función de indicación de batería baja.
● Indicador de batería de 3 niveles: 100%, 30%, 0%.
tecla para detener la alarma sonora, pero el valor/identificador correspondiente seguirá parpadeando
hasta que la temperatura actual esté fuera del valor de alarma establecido.
● Si se conectan varios transmisores exteriores simultáneamente, ya sea en modo cíclico o
visualización de canal fijo, si uno de ellos suena la alarma, el canal cambia directamente al canal de
alarma actual. Suena la alarma y el valor/identificador correspondiente parpadea. Se activa
automáticamente el modo de visualización cíclica. Al pasar al canal de alarma, suena la alarma y el
valor/identificador correspondiente parpadea. Es necesario desactivar manualmente la alarma actual o
esperar a que el valor ya no esté en el valor establecido para detener la alarma.
1 Funzioni
Manuale italiano
● Visualizzazione orario: Formato 12/24 ore.
● Visualizzazione temperatura interna.
● Gamma di rilevamento temperatura interna: da -10°C a 50°C (da 14°F a 122°F).
● Visualizzazione temperatura acqua.
● Gamma di regolazione temperatura esterna: da -30°C a 60°C (da 14°F a 140°F).
● Registrazione dei valori di temperatura esterna: MIN (minima) e MAX (massima).
● Indicatore di comfort termico esterno: COLD (freddo), OK (comfort), HOT (caldo).
● Allarme alta/bassa temperatura esterna. Allarme alta temperatura predefinito: 60.0°C. Allarme bassa
temperatura predefinito: -10°C. Gamma di regolazione: da -10°C a 60°C (regolabile manualmente).
● Il canale per la temperatura esterna può connettere fino a 3 trasmettitori contemporaneamente.
● Unità di temperatura selezionabile: °C / °F.
● Alimentazione: Ricevitore: 2 batterie AAA; Trasmettitore: 2 batterie AA.
● Rilevamento batteria scarica per interno ed esterno.
● Il ricevitore interno non è impermeabile. Grado di protezione del trasmettitore esterno: IP67.
Leggere attentamente il manuale prima dell'uso e conservarlo per riferimenti futuri.
IT37 IT38
3 Trasmettitore wireless
● Frequenza: RF 433.92 MHz
● Portata wireless: 100 metri (328 piedi)
4 Procedura di accensione
● Aprire il vano batterie sul retro del trasmettitore esterno e installare le batterie, prestando attenzione
alla polarità (+/-). Selezionare l'unità con il tasto °C/°F.
● Aprire il vano batterie sul retro del ricevitore e installare le batterie, prestando attenzione alla polarità
(+/-). Durante l'installazione delle batterie, tutte le icone sul display LCD si illumineranno brevemente
per 3 secondi.
● Il ricevitore inizierà a connettersi con il trasmettitore remoto esterno. Ciò richiede circa 3 minuti,
durante i quali il simbolo del segnale sullo schermo lampeggerà.
● Premere brevemente per vedere temperatura massima/minima del canale esterno corrente.
Premere a lungo (3 sec.) per cancellare il valore del canale corrente. In modalità impostazione,
premere brevemente per diminuire il valore.
2 Introduzione ai tasti
● Premere brevemente per alternare formato 12/24h. Premere a lungo (3 sec.) per entrare nelle
impostazioni orario.
● Premere brevemente per cambiare canale del trasmettitore. Premere a lungo (3 sec.) per
cancellare i dati del canale corrente e riacquisire il segnale.
● Premere brevemente per attivare/disattivare l'allarme alta/bassa temperatura per il canale corrente.
Premere a lungo (3 sec.) per entrare nella regolazione manuale temperatura alta/bassa (HI/LO)
esterna.
● Premere brevemente per cambiare unità °C/°F. In modalità impostazione, premere brevemente per
aumentare il valore.
IT39 IT40
● Dopo l'apertura, non toccare altri componenti, in particolare l'antenna. Durante il montaggio del vano
batterie, prestare attenzione alla direzione degli intagli. Dopo la configurazione, posizionare la lente e la
guarnizione di tenuta, e chiudere saldamente il coperchio.
● Questa modalità di abbinamento dura solo 3 minuti. Se l'abbinamento fallisce dopo 3 minuti, è
necessario premere a lungo il tasto "CH" per 2 secondi per rientrare nella modalità di abbinamento di 3
minuti.
● Dopo l'abbinamento riuscito, il trasmettitore può essere immerso in piscina per rilevare la
temperatura dell'acqua.
● Tenere premuto il tasto “ ” per 3 secondi per entrare nelle impostazioni orario. Il simbolo 12/24h
lampeggia. Ordine di regolazione: Formato 12/24h -> Ore -> Minuti -> Uscita.
● Premere brevemente “ ” o “ ” per regolare il valore. “ ” aumenta il valore, “ ” lo
diminuisce.
● Dopo la regolazione, premere brevemente “ ” per confermare e passare al passaggio
successivo. (Se non viene premuto alcun tasto per 10 secondi, viene salvata l'impostazione corrente e
si esce).
5 Regolazione manuale dell'orario
● Premere brevemente il tasto “ ” per cambiare il canale di visualizzazione della temperatura
esterna (CH1 -> CH2 -> CH3). Ad esempio, quando si riceve il segnale CH1, viene visualizzato il canale
1 e il segnale RF è al massimo.
● Tenere premuto il tasto “ ” per 3 secondi per cancellare il valore corrente e ri-accoppiare il
segnale.
6 Cambiare il segnale ricevuto esterno
● Premere brevemente il tasto “ ” per alternare tra °C e °F.
7 Cambiare l'unità di temperatura °C/°F
● In modalità visualizzazione normale, premere brevemente il tasto “ ” per vedere i valori di
temperatura esterna massima/minima corrente. L'ordine è: Temperatura esterna MAX (massima) ->
MIN (minima) -> Ritorna a visualizzazione normale.
● Mentre si visualizzano i valori massimo/minimo, tenere premuto il tasto “ ” per 3 secondi per
cancellare il valore corrente e iniziare una nuova registrazione.
8 Visualizzare la temperatura esterna massima/minima
IT41 IT42
● In modalità visualizzazione normale, premere brevemente il tasto “ ” per attivare/disattivare
l'allarme alta/bassa temperatura. L'ordine è: Alta (HI) ON -> Bassa (LO) ON -> Alta (HI) OFF ->
Bassa (LO) OFF -> Ciclo. (Quando l'allarme è attivo, viene visualizzato l'identificatore
corrispondente).
● Gamma di regolazione alta/bassa temperatura: da -10°C a 60°C (da 14°F a 140°F). Predefinito
all'accensione: allarme alta (HI) 60°C, allarme bassa (LO) -10°C.
● In modalità visualizzazione normale, tenere premuto il tasto “ ” per 3 secondi per entrare
nella modalità di impostazione manuale allarme alta/bassa temperatura. Ordine: Alta (HI) -> Bassa
(LO) -> Uscita. Durante la regolazione, il valore corrispondente lampeggia. Premere brevemente
“ ” o “ ” per regolare il valore. Dopo la regolazione, premere brevemente “ ” per
passare al passaggio successivo. Una volta configurato, l'allarme si attiva automaticamente (viene
visualizzato l'identificatore corrispondente).
● Durante la configurazione dell'allarme, è possibile premere brevemente “ ” per cambiare
canale e impostare l'allarme per un altro trasmettitore.
● Quando il valore di temperatura esterna raggiunge il valore di allarme impostato, suona l'allarme
e il valore/identificatore corrispondente lampeggia. Durante l'allarme, premere un qualsiasi tasto
per fermare il suono, ma il valore/identificatore corrispondente continuerà a lampeggiare finché la
temperatura corrente non sarà fuori dal valore di allarme impostato.
9 Impostazioni allarme alta/bassa temperatura esterna
10 Indicatore di comfort
● COLD (freddo): Quando la temperatura esterna è inferiore a 20°C.
● OK (comfort): Quando la temperatura esterna è compresa tra 20-30°C.
● HOT (caldo): Quando la temperatura esterna è superiore a 30°C.
11 Indicatore batteria scarica
● Sia il ricevitore che il trasmettitore hanno la funzione di indicatore batteria scarica.
● Indicatore batteria a 3 livelli: 100%, 30%, 0%.
● Se sono connessi più trasmettitori esterni simultaneamente, sia in modalità ciclica che in
visualizzazione canale fisso, se uno di essi suona l'allarme, il canale cambia direttamente al canale
di allarme corrente. Suona l'allarme e il valore/identificatore corrispondente lampeggia. Si attiva
automaticamente la modalità visualizzazione ciclica. Al passaggio al canale di allarme, suona
l'allarme e il valore/identificatore corrispondente lampeggia. È necessario disattivare manualmente
l'allarme corrente o attendere che il valore non sia più al valore impostato per fermare l'allarme.

JP43 JP44
1 主な機能
● 時刻表示: 12時間/24時間表示。
● 室内温度表示。
● 室内温度測定範囲: -10℃ ~ 50℃ (14℉ ~ 122℉)。
● 水温表示。
● 屋外温度設定範囲: -30℃ ~ 60℃ (14℉ ~ 140℉)。
● 屋外温度最小値(MIN)·最大値(MAX)記録。
● 屋外温度快適度表示: COLD(寒い)、OK(快適)、HOT(暑い)。
● 屋外高·低温アラーム設定。高温アラームデフォルト: 60.0℃、低温アラームデフォルト: -10℃。設
定範囲: -10℃ ~ 60℃ (手動設定可)。
● 屋外温度チャンネルは最大3台の送信機を同時接続可能。
● 温度単位選択: ℃/℉。
● 電源: 受信機: 単4形電池x2本、送信機: 単3形電池x2本。
● 屋内·屋外機の電池低下検知機能。
● 室内受信機は防水ではない。屋外送信機防水等級: IP67。
● 短押しで12/24時間表示切替;3秒間長押しで時刻設定モードへ。
● 短押しで送信機チャンネル切替;3秒間長押しで現在チャンネルのデータを削除·信号再受信。
● 短押しで現在チャンネルの高·低温アラームON/OFF;3秒間長押しで屋外温度HI/LO設定モードへ。
● 短押しで℃/℉単位切替;設定モード時、短押しで数値増加。
● 短押しで屋外現在チャンネルの温度最大値/最小値を表示;長押しで数値をクリア。設定モード時、短
押しで数値減少。
2 ボタン説明
日本語の説明書
本製品をご使用になる前に、必ずお読みください。なお、この取扱説明書は大切に保管し、必要に応
じてご覧ください。
JP45 JP46
● 周波数: RF 433.92 MHz。
● 無線通信距離: 100メートル (328フィート)。
3 ワイヤレス送信機仕様
● 屋外送信機背面の電池ケースを開け、電池を正しい向き(+/-極性注意)でセットします。℃/℉ボタ
ンで単位を選択。
● 受信機背面の電池ケースを開け、電池を正しい向き(+/-極性注意)でセットします。電池を入れる
と、LCD画面の全アイコンが3秒間点灯します。
● 受信機が屋外送信機との接続を開始します。接続完了まで約3分かかり、その間、画面の信号マーク
が点滅します。
● 組み立て時、他の部品、特にアンテナには触れないでください。電池ケースを取り付ける際は溝の
向きに注意し、設定後はレンズと防水リングを取り付け、しっかりと蓋を閉めてロックしてください。
● このペアリングモードは3分間のみ有効です。3分を超えてもペアリングに失敗した場合は、“CH”ボ
タンを2秒間長押しして、再度3分間のペアリングモードを開始してください。
4 初期設定・起動手順
● 「 」ボタンを3秒間長押しで時刻設定モードに入ります。12/24時間表示マークが点滅しま
す。設定順序: 12/24時間表示 -> 時 -> 分 -> 設定終了。
● 「 」または「 」ボタンを短押しして数値を調整します(「 」で増加、「 」
で減少)。
● 設定後、「 」ボタンを短押しして確定し、次の項目へ進みます。(10秒間操作がない場合
、現在の設定を保存し終了します)。
● ペアリングが成功したら、送信機をプール内に入れて水温を測定できます。
5 時刻の手動設定
● 「 」ボタンを短押しすると、屋外温度表示チャンネルを切り替えられます(CH1 -> CH2 ->
CH3)。例: CH1の信号を受信している場合、チャンネル1が表示され、RF信号マークが満タンにな
ります。
● 「 」ボタンを3秒間長押しすると、現在のチャンネルの数値がクリアされ、信号のペアリン
グが再開されます。
6 屋外受信チャンネル切替
JP47 JP48
● 「 」ボタンを短押しすると、℃/℉単位を切り替えられます。
7 ℃/℉温度表示単位切替
● 通常表示モードで「 」ボタンを短押しすると、屋外温度の最大値(MAX) -> 最小値(MIN) -> 通
常表示に戻る、の順で表示されます。
● 最大値/最小値表示中に「 」ボタンを3秒間長押しすると、現在の数値がクリアされ、新たな記
録を開始します。
8 屋外温度最大値/最小値表示
● 高·低温設定範囲: -10℃ ~ 60℃ (14℉ ~ 140℉)。初期設定では高温(HI)アラーム60℃、低温
(LO)アラーム-10℃です。
● 通常表示モードで「 」ボタンを3秒間長押しすると、アラーム手動設定モードに入ります。
順序: 高温(HI) -> 低温(LO) -> 設定終了。設定時、該当数値が点滅します。「 」ボタンまたは
「 」ボタンで数値を調整します。設定後、「 」ボタンを短押しして次の項目へ進みます
。設定完了後、アラームは自動的にONになります(対応アイコン表示)。
● アラーム設定中に「 」ボタンを短押しすると、異なるチャンネルに切り替えて、他の送信機
のアラーム設定が可能です。
● 屋外温度が設定したアラーム値に達すると、警報音が鳴り、該当する数値とアイコンが点滅しま
す。警報音は任意のボタンを押すと停止しますが、点滅は現在の温度がアラーム設定値を外れるま
で継続します。
● 複数の屋外送信機を接続している場合、循環モードまたは固定チャンネル表示中、いずれか1台
でアラームが作動すると、チャンネルは自動的にその警報チャンネルに切り替わります。警報音が
鳴り、数値とアイコンが点滅します。自動的に循環表示モードが開始され、警報チャンネルに循環
する度に警報音が鳴り、数値とアイコンが点滅します。手動で現在のアラームをオフにするか、温
度が設定値を外れるまで、警報は継続します。
● 通常表示モードで「 」ボタンを短押しすると、高·低温アラームのON/OFFを切り替えられま
す。順序: 高温(HI)ON -> 低温(LO)ON -> 高温(HI)OFF -> 低温(LO)OFF -> 循環 (アラームON時、対応
するアイコンが表示されます)。
9 屋外高・低温アラーム設定

JP49 JP50
● COLD(寒い): 屋外温度が20℃未満の場合。
● OK(快適): 屋外温度が20℃~30℃の場合。
● HOT(暑い): 屋外温度が30℃を超える場合。
10 快適度表示
● 受信機と送信機には電池低下表示機能があります。
● 3段階の電池残量表示: 100%、30%、0%。
11 電池残量表示