HIGH-EFFICIENCY
REVERSE OSMOSIS
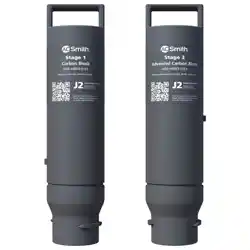
CARBON BLOCK REPLACEMENTS
AOS-HERO-S1S3
REPUESTO DE BLOQUE DE CARBÓN
DE OSMOSIS INVERSA DE ALTA EFICIENCIA
Replacement Manual | El manual del repuesto
IF YOU NEED HELP OR HAVE A QUESTION, WE’VE GOT YOU COVERED.
GIVE US A CALL AT 877.333.7108
PLEASE DO NOT RETURN TO THE STORE.
SI NECESITA AYUDA O TIENE ALGUNA CONSULTA, NOSOTROS NOS
ENCARGAMOS. LLÁMENOS AL 877.333.7108.
NO ES NECESARIO QUE VUELVA A LA TIENDA.
1. Turn off COLD water valve. Release pressure from system
by turning on dedicated faucet until water stops owing.
Once water stops owing from the dedicated faucet, turn
the faucet off.
2. Unbox lter cartridge replacements and remove plastic.
3. Remove the Carbon Block lter cartridge from Stage 1
by turning the handle to the left and pulling out. Discard
entire lter cartridge. Repeat for the Advanced Carbon
Block (Stage 3).
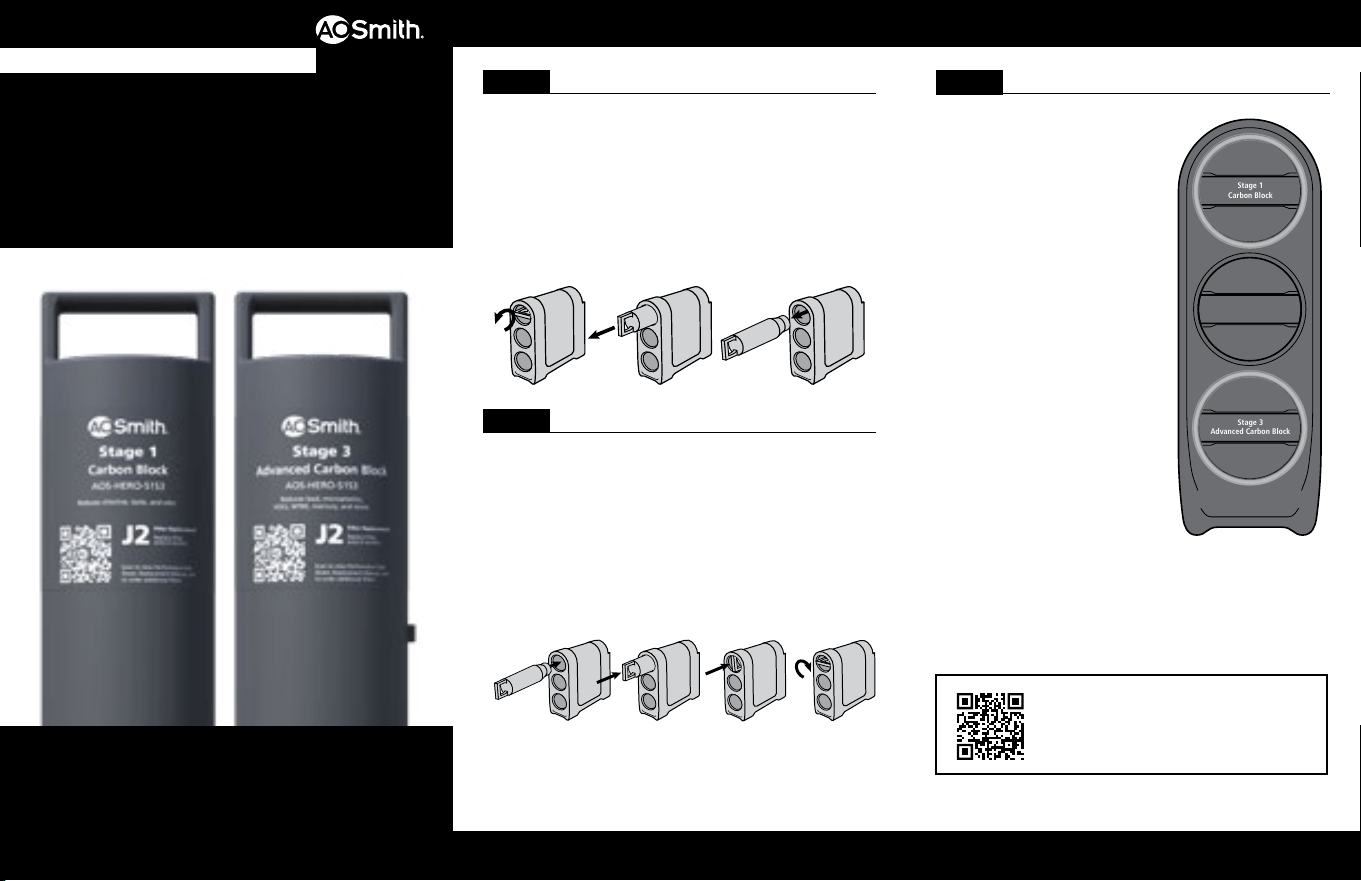
STEP 1 Prepare for Installation
1. Insert each lter cartridge into its designated location in
the system manifold by turning to the right. The guides
on each lter will ensure proper alignment within the
system manifold.
2. Once the lter is engaged, push the lter fully in while
rotating 90 degrees to the right. Continue this step for
each lter.
• Top Filter: Carbon Block
• Bottom Filter: Advanced Carbon Block
Stage 1
Carbon Block
Stage 2
SmartFlow
™
Membrane
Stage 3
Advanced Carbon Block
STEP 2 Insert Filter Cartridges
STEP 3 Flush and Check for Leaks
Note: Do not drink the ushed
water.
1. Turn on COLD water valve
and conrm dedicated faucet
is off. While tank rells,
carefully inspect for leaks.
Note: It will take 1-3 hours for
the water tank to rell.
2. After the water tank is full,
turn on the dedicated faucet
and empty the tank again.
3. Once the water tank is empty,
turn off the dedicated faucet
and allow tank to rell for the
second time. After the tank
has relled, your system is
ready to use.
NEED HELP? GIVE US A CALL 877.333.7108
INSTALLATION GUIDE
Scan to view the AOS-HERO-S1S3 installation video.

System tested and certied by WQA to NSF/ANSI
Standards 42, 53, and 401 for the reduction of the
claims specied on the Performance Data Sheet and at
www.WQA.com.
Sistema probado y certicado por WQA según las normas
NSF/ANSI 42, 53 y 401 para la reducción de las declaraciones
especicadas en la Hoja de datos de rendimiento y en
www.WQA.com.
Care
To clean the system manifold and tank, wipe exterior with a damp cloth.
Do not use any strong or abrasive cleaning agent or solvent cleaner.
NOTICE
Safeguards
• If you are experiencing a tubing connection leak, shut off COLD water,
disconnect and re-set the tube.
• Do not use with water that is microbiologically unsafe or of unknown
quality without adequate disinfection before or after the system.
• Conforms to NSF/ANSI 53 for VOC reduction. See performance data
sheet for individual contaminants and reduction performance.
• The recommended replacement frequency for the AOS-HERO-S1S3 is
every 6 months or 365 gallons of use.
Cuidado
Para limpiar el colector del sistema y el tanque, limpie el exterior con
un paño húmedo. No use agentes de limpieza abrasivos o fuertes ni
limpiadores con solventes.
AVISO
Resguardos
• Si tiene una fuga en la conexión del tubo, cierre el agua FRÍA,
desconecte el tubo y vuelva a jarlo.
• No usar con agua que no sea microbiológicamente segura o cuya
calidad sea desconocida sin la desinfección adecuada antes o
después de usarla en el sistema.
• Conforme a la norma NSF/ANSI 53 para la reducción de COV.
Consulte la hoja de datos de rendimiento para conocer los
contaminantes individuales y el rendimiento de reducción.
• La frecuencia de reemplazo recomendada para el AOS-HERO-S1S3 es
cada 6 meses o cada 1,893litros (365galones) de uso.
A. O. Smith Corporation
11270 W Park Pl #170, Milwaukee, WI 53224
877.333.7108
CARE & SAFEGUARDS | CUIDADO Y RESGUARDOS
For the full list of contaminants ltered, scan to view
the AOS-HERO-CHR Performance Data Sheet.
Para conocer la lista completa de los contaminantes
ltrados, escanee para ver la hoja de datos de rendimiento
de AOS-HERO-CHR.
1. Cierre la válvula de agua FRÍA. Para liberar la presión del
sistema, gire la llave dedicada hasta que se detenga el
ujo de agua. Una vez que el agua deje de uir desde la
llave dedicada, cierre la llave.
2. Desempaque los repuestos del cartucho de ltro y retire
el plástico.
3. Para retirar el cartucho de ltro con bloque de carbón de
la Etapa 1, gire el mango hacia la izquierda y tire de él
hacia fuera. Deseche todo el cartucho de ltro. Repita el
procedimiento para el bloque de carbón avanzado (Etapa 3).
PASO 1 Prepare para la instalación
1. Inserte cada cartucho de ltro en su lugar designado en el
colector del sistema y gírelo hacia la derecha. Las guías en
cada ltro garantizarán la alineación adecuada dentro del
colector del sistema.
2. Una vez que el ltro esté enganchado, presiónelo
completamente hacia dentro mientras lo gira en 90 grados
hacia la derecha. Continúe con este paso para cada ltro.
• Filtro superior: Bloque de carbón
• Filtro inferior: Bloque de carbón avanzado
PASO 2 Inserte los cartuchos de ltro
PASO 3 Purgue y revise si hay fugas
Nota: No beba el agua de lavado.
1. Abra la válvula de agua
FRÍA y conrme que la
llave dedicada está cerrada.
Mientras se rellena el tanque,
inspeccione detenidamente
en busca de fugas.
Nota: El tanque de agua tardará
1 a 3 horas en rellenarse.
2. Cuando el tanque de agua
esté lleno, abra la llave
dedicada y vacíe el tanque
de nuevo.
3. Una vez que el tanque de
agua esté vacío, cierre la llave
dedicada y deje que se rellene
el tanque por segunda vez.
Una vez que se rellene el
tanque, el sistema estará listo
para usar.
¿NECESITAS AYUDA? LLÁMANOS AL 877.333.7108
GUÍA DE INSTALACIÓN
Stage 1
Carbon Block
Stage 2
SmartFlow
™
Membrane
Stage 3
Advanced Carbon Block
Escanee para ver el video de instalación de
AOS-HERO-S1S3.