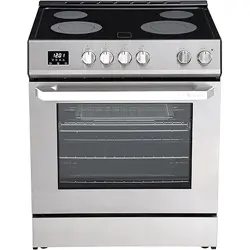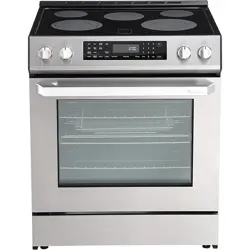

30” Electric Range | RRE303GS
1
Rangaire: Product Installation
Product Installation & User Manual


Rangaire: 30” Electric Range | RRE
303GS
SAFETY .................................................................................................. 1
INSTALLATION ......................................................................................... 9
OPERATION ............................................................................................ 21
USING THE COOKTOP ............................................................................... 26
USING THE OVEN ...................................................................................... 31
MAITENANCE ......................................................................................... 43
TROUBLESHOOTING ................................................................................. 49
30” Electric Range | RRE303GS
1
Rangaire: Product Installation
This is the safety alert symbol.
This symbol alerts you to potential hazards that can kill or hurt you and others. All
safety messages will follow the safety alert symbol and either the word “DANGER”,
“WARNING” or “CAUTION”.
All safety messages will tell you what the potential hazard is, tell you how to reduce the
chance of injury, and tell you what can happen if the instructions are not followed.
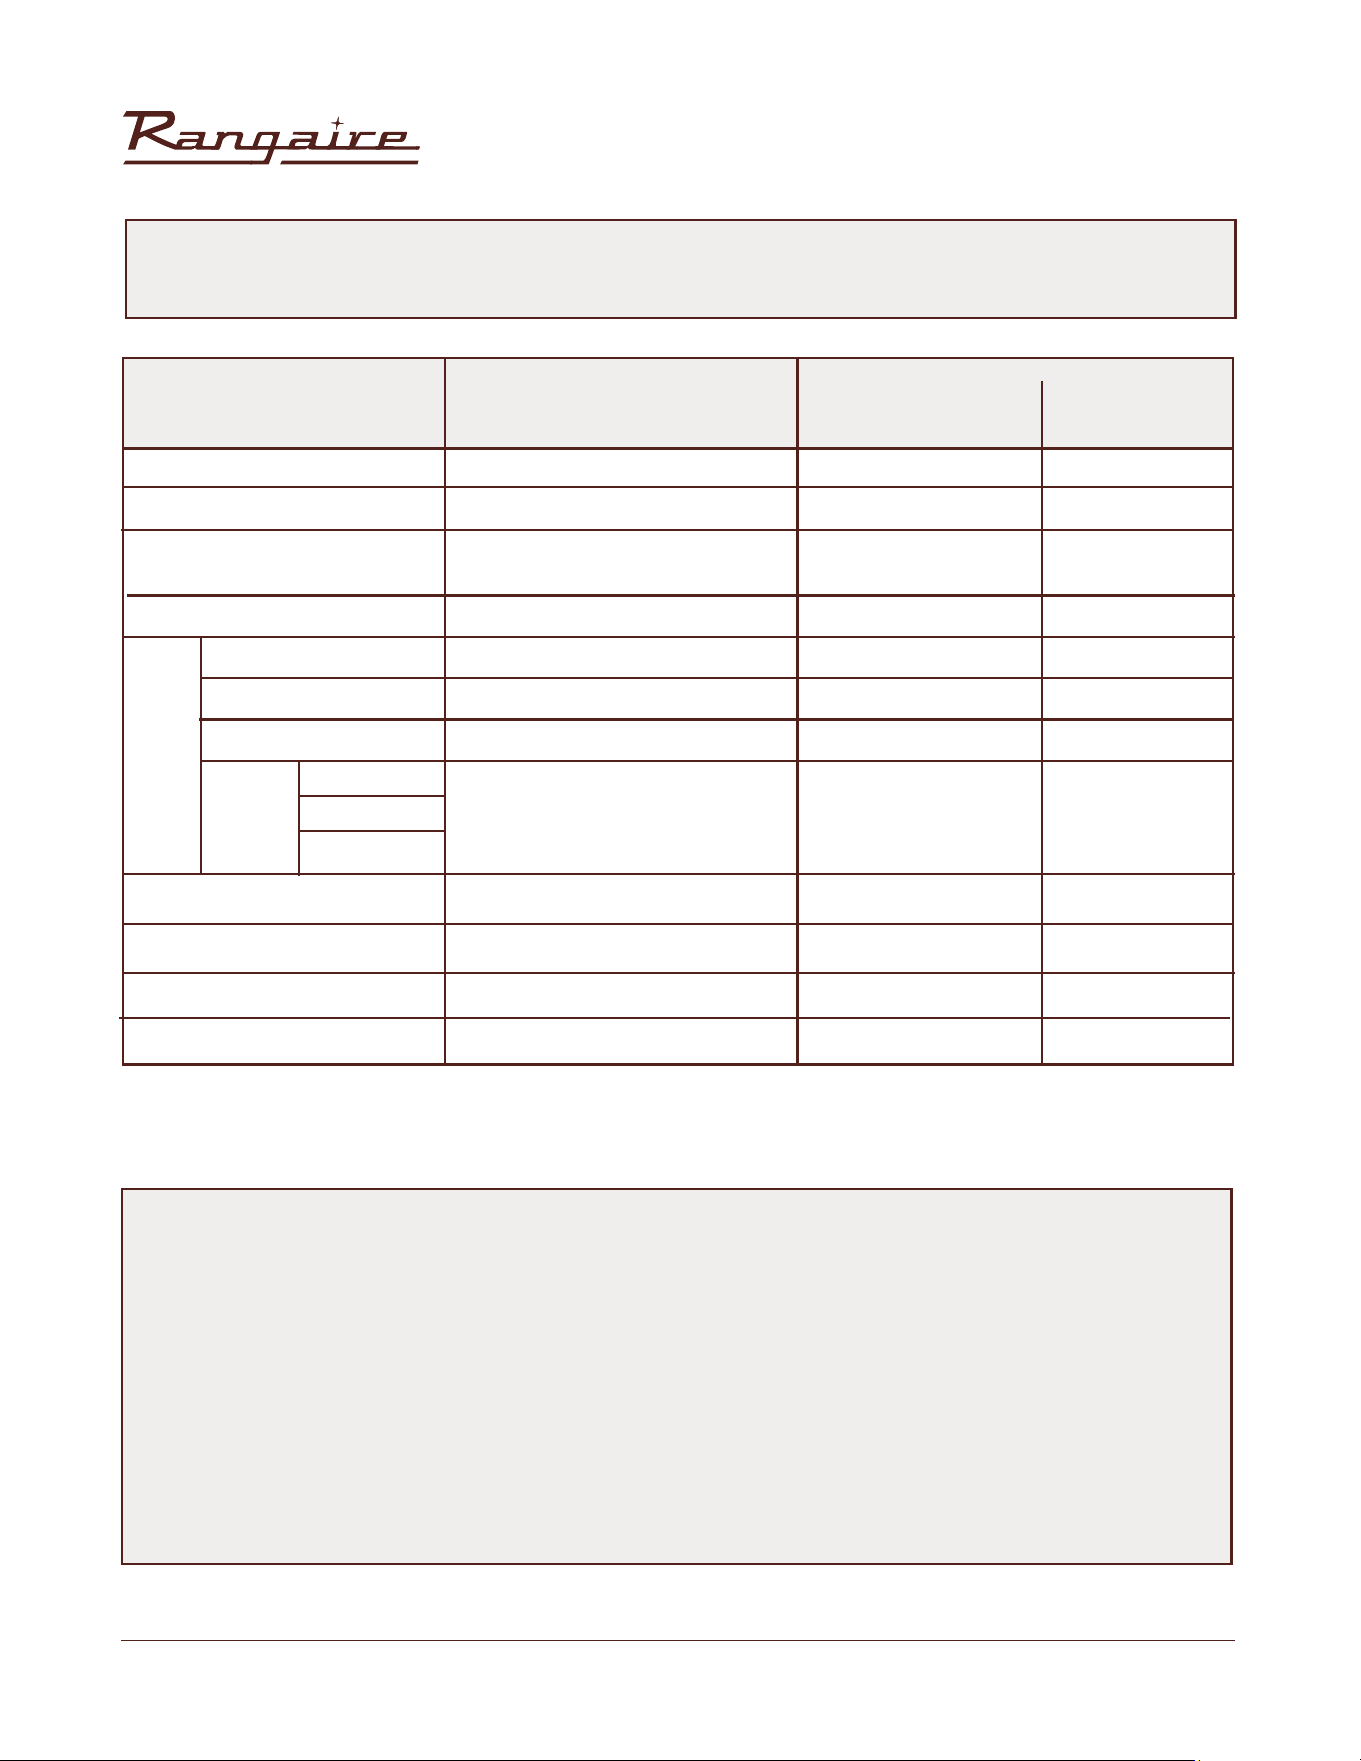
An imminently hazardous situation. You could be killed or seriously
injured if you don’t immediately follow instructions.
• Remove all tape and packaging before using the appliance. Never allow children to play with
packaging material. Do not remove the model/serial plate attached to the appliance.
• Be sure your appliance is properly installed and grounded by a QUALIFIED TECHNICIAN in accordance
with the National Fuel Gas Code ANSI Z223.1—latest edition in the United States, or in Canada CAN/
CGA B149.1, and CAN/CGA B149.2, and the National Electrical Code ANSI/NFPA No. 70—latest edition
in United States, or in Canada CSA Standard C22.1, Canadian Electrical Code, Part 1, and local code
requirements. Install only as per installation instructions provided in the literature package for this
appliance.
A potentially hazardous situation which, if not avoided, could result in
death or serious bodily injury.
A potentially hazardous situation which, if not avoided, may result in
moderate or minor injury.
YOUR SAFETY AND THE SAFETY OF OTHERS ARE VERY IMPORTANT.
DANGER
WARNING
CAUTION
We have provided many important safety messages in this manual and on your appliance.
Always read and obey all safety messages.
SAFETY REQUIREMENTS
30” Electric Range | RRE303GS
2
Rangaire: Product Installation
RANGE SAFETY
If the information in this manual is not followed exactly, a re or explosion
may result causing property damage, personal injury or death.
Do not store or use gasoline or other ammable vapors and liquids in the
vicinity of this or any other appliance.
Failure to follow this warning statement could result in re, explosion, or burn hazard that could cause
property damage, personal injury, or death.
If a re should occur, keep away from the appliance and immediately call your re department.
DO NOT ATTEMPT TO EXTINGUISH AN OIL/GREASE FIRE WITH WATER.
Never Operate the Top Surface Cooking Section of this Appliance Unattended
SAFETY REQUIREMENTS
30” Electric Range | RRE303GS
3
Rangaire: Product Installation
To reduce the risk of re, electric shock, or serious personal injury, please read and save all instructions
before using the Electric Freestanding Range. When using this or any other electrical appliance, basic
safety precautions should be observed, including the following:
1. READ ALL INSTRUCTIONS BEFORE USE.
2. Have a qualied technician properly install and ground the appliance in accordance with the
National Fuel Gas Code ANSI Z223.1- latest edition in the United States, or in Canada CAN/CGA
B149.1, and CAN/ CGA B149.2, and the National Electrical Code ANSI/NFPA No. 70- latest edition in the
United States, or in Canada CSA Standard C22.1, Canadian Electrical Code, Part 1, and local code
requirements. Install only as per installation instructions provided in this manual.
3. This appliance is intended for household use only. DO NOT use the appliance outdoors or for any
other purpose.
4. Remove all tape and packaging before using the appliance. DO NOT allow children to play with
packaging material. DO NOT remove the model/series plate attached to the appliance.
5. To avoid the risk of electric shock, ALWAYS ensure the appliance is off and completely cool before
cleaning or doing any sort of maintenance.
6. DO NOT store or use gasoline or other ammable vapors and liquids in the vicinity of this or any other
appliance.
7. Installation and service must be performed by a qualied technician. Know how to disconnect the
electrical power to the appliance at the circuit breaker or fuse box in case of emergency.
8. DO NOT repair or replace any part of the appliance unless specically recommended in the manual.
All other servicing should be done only by a qualied technician. This may reduce the risk of personal
injury and damage to the appliance.
9. Disconnect power before servicing.
10. Never modify or alter the construction of the appliance by removing panels, wire covers or any other
part of the appliance.
11. Injuries may result from the misuse of the appliance doors or drawers such as stepping, leaning, or
sitting on the doors or drawers.
IMPORTANT SAFETY INSTRUCTIONS
READ AND SAVE THESE INSTRUCTIONS
SAFETY REQUIREMENTS
30” Electric Range | RRE303GS
4
Rangaire: Product Installation
12. Flammable materials should not be stored on or in the appliance or near surface units. This includes
paper, plastic and cloth items, such as cookbooks, plastic ware and towels, as well as ammable
liquids. Do not store explosives, such as aerosol cans, on or near the appliance. Flammable materials
may explode and result in re or property damage.
13. Keep range area clear and free from combustible materials, gasoline, and other ammable vapors
and liquids.
14. DO NOT store items of interest to children in the cabinets above the appliance or on the backsplash
of the range.
15. Children should not be left alone or unattended in the area when the appliance is in use. DO NOT
allow children to climb or play around the appliance. They should never be allowed to sit or stand
on any part of the appliance. Children climbing on the appliance to reach items could be seriously
injured.
16. DO NOT TOUCH THE COOKING SURFACE, THE BURNERS, GRATES OR ANY AREAS NEAR THEM. Surface
burners on appliance may be hot. Areas near surface burners or appliance may become hot enough
to cause burns. DO NOT touch or let clothing or other ammable materials touch these areas during
or after use until it has had sufcient time to cool.
17. DO NOT wear loose-tting or hanging garments while using the appliance. DO NOT let clothing or
other ammable materials contact hot surfaces.
18. DO NOT use water on grease res. Never pick up a aming pan. Smother grease res with a pan lid,
baking soda, a dry chemical or foam-type extinguisher.
19. If there is a re in the oven while baking, smother the re by closing the oven door and turning the
oven off or by using a dry chemical or foam-type extinguisher.
20. Use an extinguisher ONLY if:
a. You know you have a Class A, B, C extinguisher, and you already know how to operate it.
b. The re is small and contained in the area where it is started.
c. The re department is being called.
d. You can ght the re with your back to an exit.
21. When heating fat or grease, watch it closely. Fat or grease may catch re if allowed to become too
hot. Use a deep fat thermometer whenever possible to monitor oil temperature.
22. To avoid spillovers and res, use minimal amounts of oil when pan-frying in a shallow pan and avoid
cooking frozen foods with excessive amounts of ice.
IMPORTANT SAFETY INSTRUCTIONS
READ AND SAVE THESE INSTRUCTIONS
SAFETY REQUIREMENTS
30” Electric Range | RRE303GS
5
Rangaire: Product Installation
1. Use only dry potholders. Moist or damp potholders on hot surfaces may result in burns from steam.
DO NOT let potholders touch hot heating elements, the ame or burners. DO NOT use a towel or other
bulky cloth instead of a potholder.
2. DO NOT heat unopened food containers. Buildup of pressure may cause the container to burst and
result in injury.
3. Stepping, leaning or sitting on this appliance can result in serious injuries and also cause damage to
the appliance.
4. DO NOT use this appliance as a space heater to heat or warm the room.
5. Know which knob controls which surface burner. The burner will begin to turn red when it is on,
indicating it is heating up.
6. Clean the appliance regularly to keep all parts free of grease that could catch re. Exhaust fan
ventilation hoods and grease lters should be kept clean. DO NOT allow grease to accumulate on
hood or lter. Greasy deposits in the fan could catch re. When cooking food turn the hood fan on.
Refer to hood manufacturer’s instructions for cleaning.
7. To reduce the risk of burns, ignition of ammable materials, and spillage due to unintentional contact
with the utensil, the handle of the utensil should be positioned so that it is turned inward, and does
not extend over adjacent surface burners.
8. Never leave surface burners unattended at high heat settings. Boil overs cause smoke and greasy
spillovers that may ignite, or a pan that has boiled dry may melt.
9. DO NOT use aluminum foil to line any part of the appliance. Use aluminum foil only to cover food
during cooking. Improper installation of these liners may result in risk of electric shock or re.
10. Only certain types of glass, glass/ceramic, ceramic, earthenware, or other glazed utensils are
suitable for appliance service without breaking due to the sudden change in temperature. Check the
manufacturer’s recommendations for appliance use.
11. DO NOT use decorative surface burner covers. If a burner is accidentally turned on, the decorative
cover will become hot and possibly melt. You will not be able to see that the burner is on. Burns will
occur if the hot covers are touched. Damage may also be done to the range or burners because the
covers may cause overheating. Air will be blocked from the burner and cause combustion problems.
12. Use the proper pan sizes. This appliance is equipped with surface units of different sizes. Select
utensils having at bottoms large enough to cover the surface unit. The use of undersized utensils will
expose a portion of the surface heating unit to direct contact and may result in ignition of clothing.
Proper relationship of utensil to the surface unit will also improve efciency.
13. Ensure the anti-tip bracket is installed properly and engaged.
IMPORTANT SAFETY INSTRUCTIONS
READ AND SAVE THESE INSTRUCTIONS
SAFETY REQUIREMENTS
30” Electric Range | RRE303GS
6
Rangaire: Product Installation
14. Avoid scratching or hitting the glass door, range, or control panels. This may lead to glass breakage.
DO NOT cook on an appliance with broken glass. Shock, re, or cuts may occur.
15. Have the fan hood on when preparing aming foods.
IMPORTANT SAFETY INSTRUCTIONS
READ AND SAVE THESE INSTRUCTIONS
Do not store items of interest to children in the cabinets above the appliance or on the
backguard of a range. Children should not be left alone or unattended in the area where
appliance is in use. Do not allow children to climb or play around the appliance. They should
never be allowed to sit or stand on any part of the appliance. Children climbing on the
appliance to reach items could be seriously injured.
SAFETY REQUIREMENTS
30” Electric Range | RRE303GS
7
Rangaire: Product Installation
FOR YOUR SAFETY:
• Clean the appliance regularly to keep all parts free of grease that could catch re. Exhaust fan
ventilation hoods and grease lters should be kept clean. Do not allow grease to accumulate on hood
or lter. Greasy deposits in the fan could catch re. When cooking food turn the hood, fan on. Refer to
hood manufacturer’s instructions for cleaning.
• Utensil handles should be turned inward and not extend over adjacent surface burners. To reduce the
risk of burns, ignition of ammable materials, and spillage due to unintentional contact with the utensil,
the handle of the utensil should be positioned so that it is turned inward, and does not extend over
adjacent surface burners.
• Never leave surface burners unattended at high heat settings. Boil overs cause smoke and greasy
spillovers that may ignite, or a pan that has boiled dry may melt.
• Do not use aluminum foil to line any part of the appliance. Use aluminum foil only to cover food during
cooking. Improper installation of these liners may result in risk of electric shock or re.
• Only certain types of glass, glass/ceramic, ceramic, earthenware, or other glazed utensils are
suitable for appliance service without breaking due to the sudden change in temperature. Check the
manufacturer’s recommendations for appliance use.
• Do not use decorative surface burner covers. If a burner is accidentally turned on, the decorative cover
will become hot and possibly melt. You will not be able to see that the burner is on. Burns will occur if the
hot covers are touched. Damage may also be done to the range or burners because the covers may
cause overheating. Air will be blocked from the burner and cause combustion problems.
• Use the proper pan sizes. This appliance is equipped with surface units of different sizes. Select utensils
having at bottoms large enough to cover the surface unit. The use of undersized utensils will expose
a portion of the surface heating unit to direct contact and may result in ignition of clothing. Proper
relationship of utensil to the surface unit will also improve efciency.
TO REDUCE THE RISK OF TIPPING OF THE RANGE, THE RANGE MUST BE SECURED BY PROPERLY INSTALLED
ANTI-TIP DEVICES. TO CHECK IF THE DEVICES ARE INSTALLED PROPERLY, SLIDE RANGE FORWARD, LOOK
FOR ANTI-TIP BRACKET SECURELY ATTACHED TO FLOOR OR WALL, AND SLIDE RANGE BACK SO REAR
RANGE FOOT IS UNDER ANTI-TIP BRACKET.
IMPORTANT
The range will not tip during normal use. However, the range can tip if you apply too much force
or weight to the open door without having the anti-tip bracket fastened down properly.
SAFETY REQUIREMENTS
30” Electric Range | RRE303GS
8
Rangaire: Product Installation
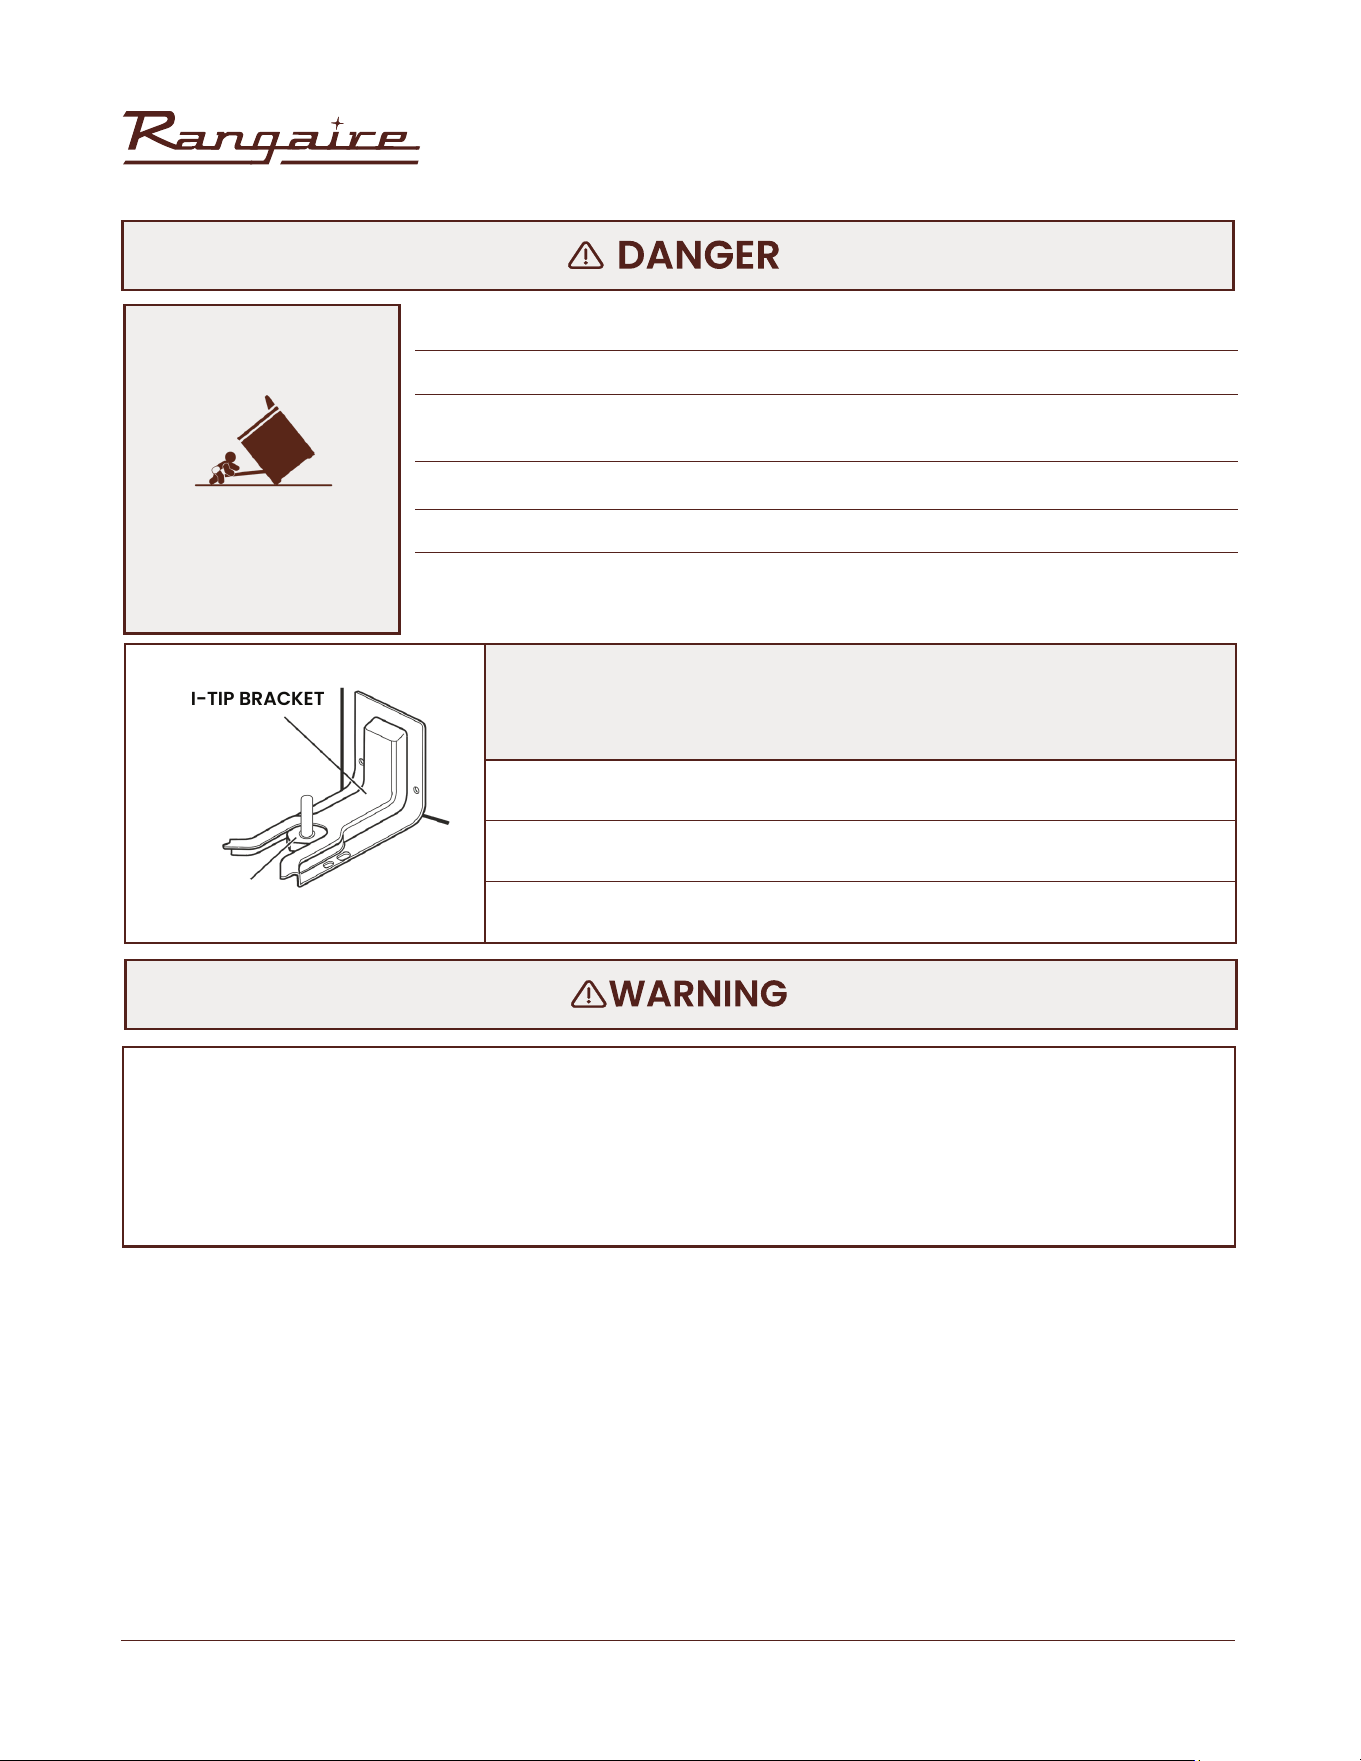
ANTI-TIP BRACKET
RANGE FOOT
• A child or adult can tip the range and be killed.
• Install anti-tip bracket to oor or wall per installation instructions.
• Slide range back so rear range foot is engaged in the slot of the anti-tip
bracket.
• Re-engage the anti-tip bracket if range is moved.
• Do not operate the range without anti-tip bracket installed and engaged.
• Failure to follow these instructions can result in death or serious burns to
children and adults
• Slide range forward.
• Look for the anti-tip bracket securely attached to oor and wall.
• Slide range back so rear range foot is under anti-tip bracket.
Making sure the anti-tip bracket is installed:
TIP-OVER HAZARD
The range should have proper ventilation in order to keep the unit operating properly and maintain the
temperature of immediate surroundings within safe limits. Check your local building codes as they may
vary from the general rules outlined in this guide. It is recommended that a hood be installed above the
range that is rated no less than 400 CFM. This will provide adequate ventilation for this range. Mounting
distance of your ventilation is outlined by the manufacturer of your hood.
SAFETY REQUIREMENTS
30” Electric Range | RRE303GS
9
Rangaire: Product Installation
VENTING REQUIREMENTS
• Observe all governing codes and ordinances. Do not obstruct ow of combustion and ventilation
air.
• It is the installer’s responsibility to comply with installation clearances specied on the model/
serial rating plate.
• The range should be located for convenient use in the kitchen.
• Recessed installations must provide complete enclosure of the sides and rear of the range.
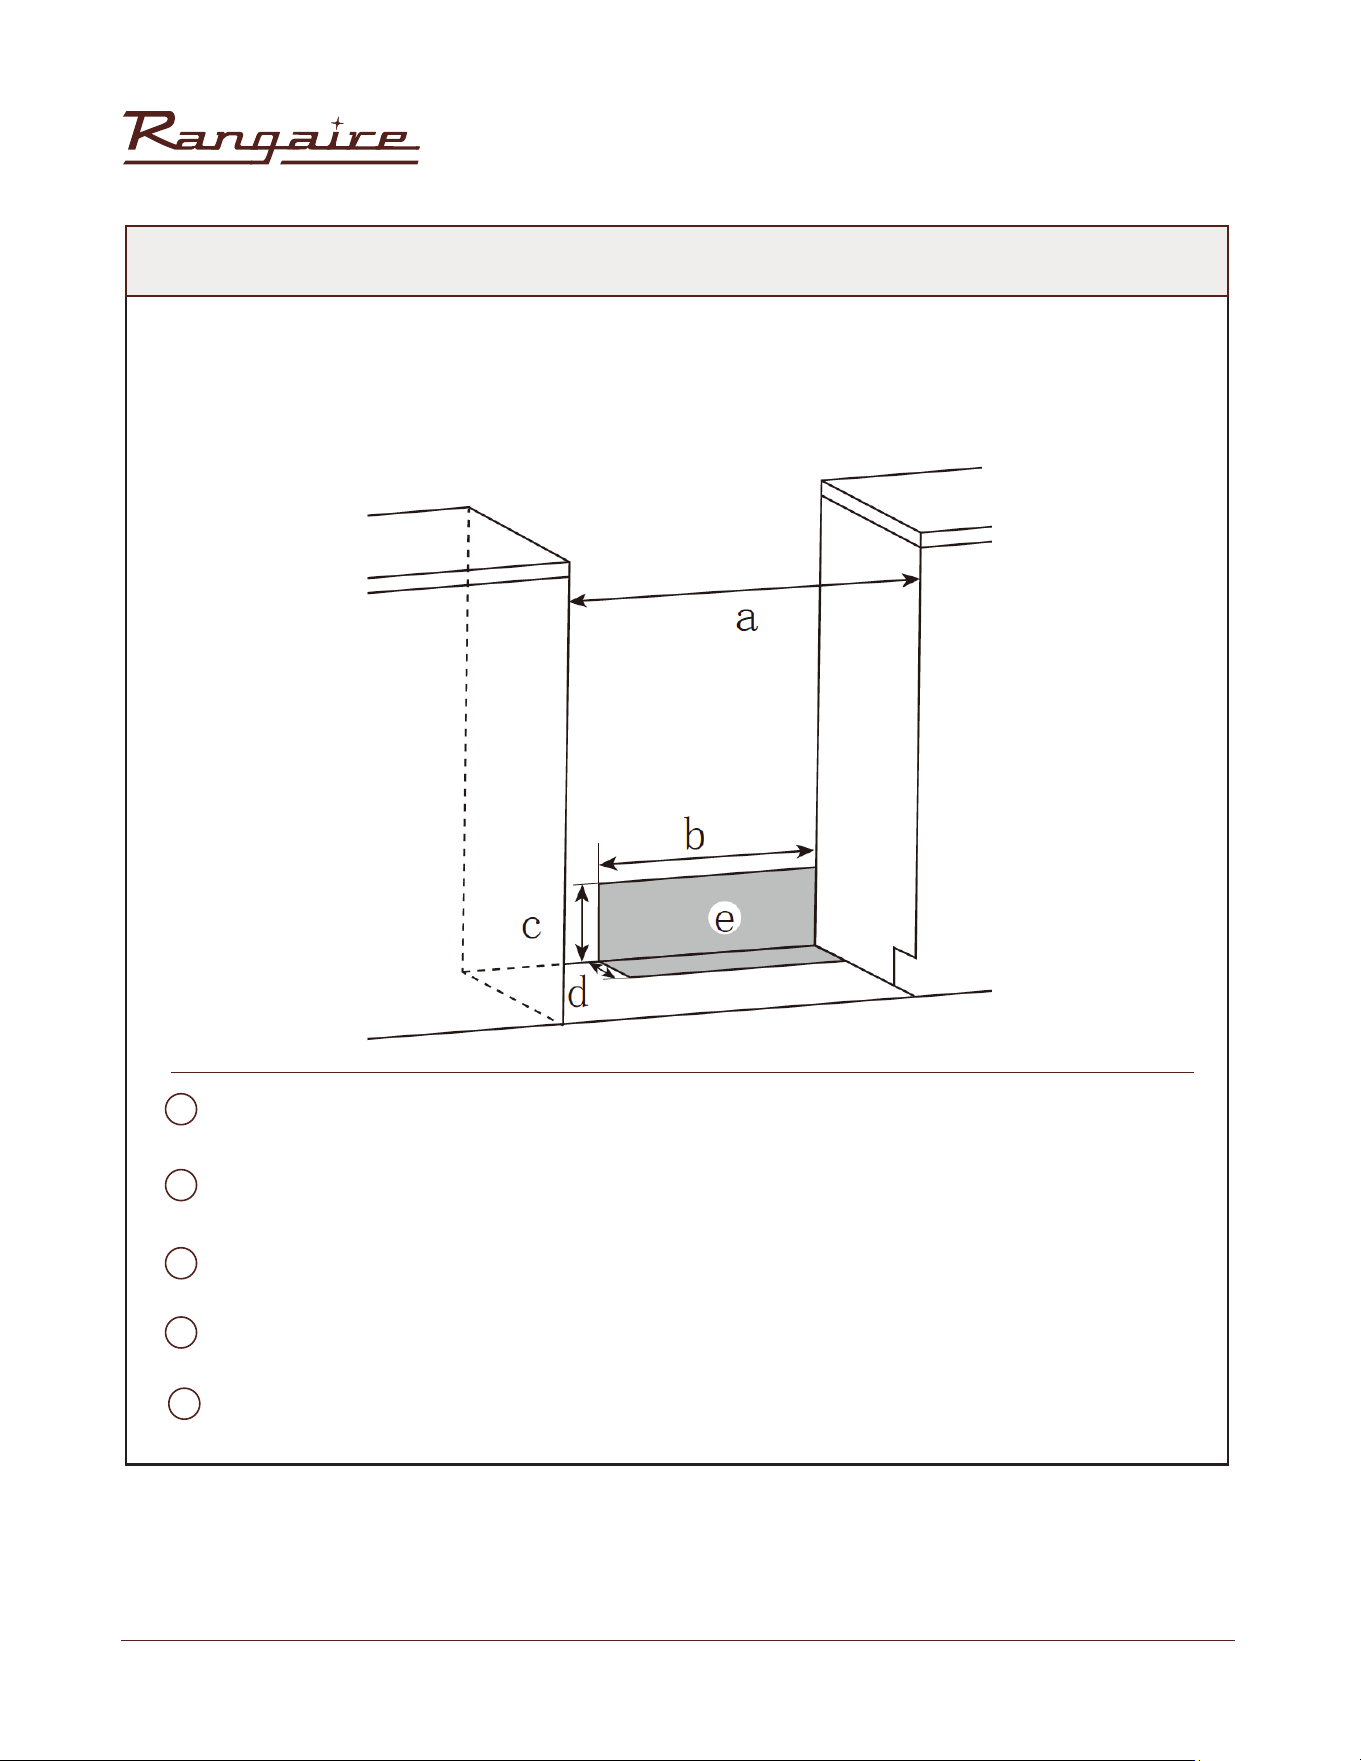
• To eliminate the risk of burns or re by reaching over heated surface units, cabinet storage space
located above the surface units should be avoided. If cabinet storage is to be provided, the risk
can be reduced by installing a range hood or microwave hood combination with minimum 400
CFM that projects horizontally a minimum of 5“ (12.7 cm) beyond the bottom of the cabinets. (See
Figure 1)
• If a range hood is installed above the appliance, maintain a 30” minimum clearance between
cooking surface and bottom of range hood. The range hood must be connected directly to ues or
to the outside. (See Figure 1)
• Avoid placing cabinetry directly above the appliance when possible. If cabinetry is used above the
cooking surface, use cabinets no more than 13“ deep. Make sure the wall coverings, countertop and
cabinets around the appliance can withstand heat up to 200º F (93°C) generated by the appliance.
(See Figure 1)
• Cabinet opening dimensions that are shown must be used. Given dimensions are minimum
clearances. (See Figure 1)
• Working areas adjacent to the range should have 18“ minimum clearance between countertop and
cabinet bottom. (See Figure 1)
• All openings in the wall or oor where range is to be installed must be sealed.
• Contact a qualied oor covering installer to check that the oor covering can withstand at least
200°F (93°C).
• Use an insulated pad or ¼“ (0.64 cm) plywood under range if installing range over carpeting.
• The oor anti-tip bracket must be installed. To install the anti-tip bracket shipped with the range,
see “Install Anti-Tip Bracket” section.
• Grounded electrical supply is required. See “Electrical Requirements” section.
INSTALLATION
INSTALLATION REQUIREMENTS

30” Electric Range | RRE303GS
10
Rangaire: Product Installation
TEMPERATURE
MOBILE HOME - ADDITIONAL INSTALLATION REQUIREMENTS
IMPORTANT: Some cabinet and building materials are not designed to withstand the heat produced by
the oven for baking and self cleaning. Check with your builder or cabinet supplier to make sure that the
materials used will not discolor, delaminate or sustain other damage.
• Contact a qualied oor covering installer to check that the oor can withstand at least 200°F(93°C)
• Use an insulated pad or 1/4”(0.64cm) plywood under range if installing range over carpeting.
• The installation of this range must conform to the Manufactured Home Construction and Safety
Standard, Title 24 CFR, Part 3280 (formerly the Federal Standard for Mobile Home Construction
and Safety, Title 24, HUD Part 280). When such standard is not applicable, use the Standard for
Manufactured Home Installations, ANSI A225.1/NFPA 501A or with local codes.
• In Canada, the installation of this range must conform with the current standards CAN/CSAA240-
latest edition, or with local codes.
• When this range is installed in a mobile home, it must be secured to the oor during transit. Any
method of securing the range is adequate as long as it conforms to the standards listed above.
To avoid damage to your cabinets, check with your builder or cabinet supplier to make sure that the
materials used will not discolor, delaminate or sustain other damage. This oven has been designed
in accordance with the requirements of UL and CSA International and complies with the maximum
allowable wood cabinet temperatures of 194°F (90°C).
• Use cabinets no more than 13“ deep.
• 18“ minimum clearance between countertop and cabinet bottom.
• 30” minimum clearance between cooking surface and bottom of
range hood.
FIGURE 1
INSTALLATION
30” Electric Range | RRE303GS
11
Rangaire: Product Installation
DO NOT USE AN EXTENSION CORD.
Failure to do so can result in death, re or electrical shock.
• If codes permit and a separate ground wire is used, it is recommended that a qualied electrical
installer determine that the ground path is adequate and wire gauge are in accordance with local
codes. Be sure that the electrical connection and wire size are adequate and in conformance
with CSA Standard C22.1, Canadian Electrical Code, Part 1- lastest edition, and all local codes and
ordinances. A copy of the above code standards can be obtained from:
Canadian Standards
Association 178 Rexdale Blvd.
Toronto, ON M9W 1R3 CANADA.
• Check with a qualied electrical installer if you are not sure the range is properly grounded.
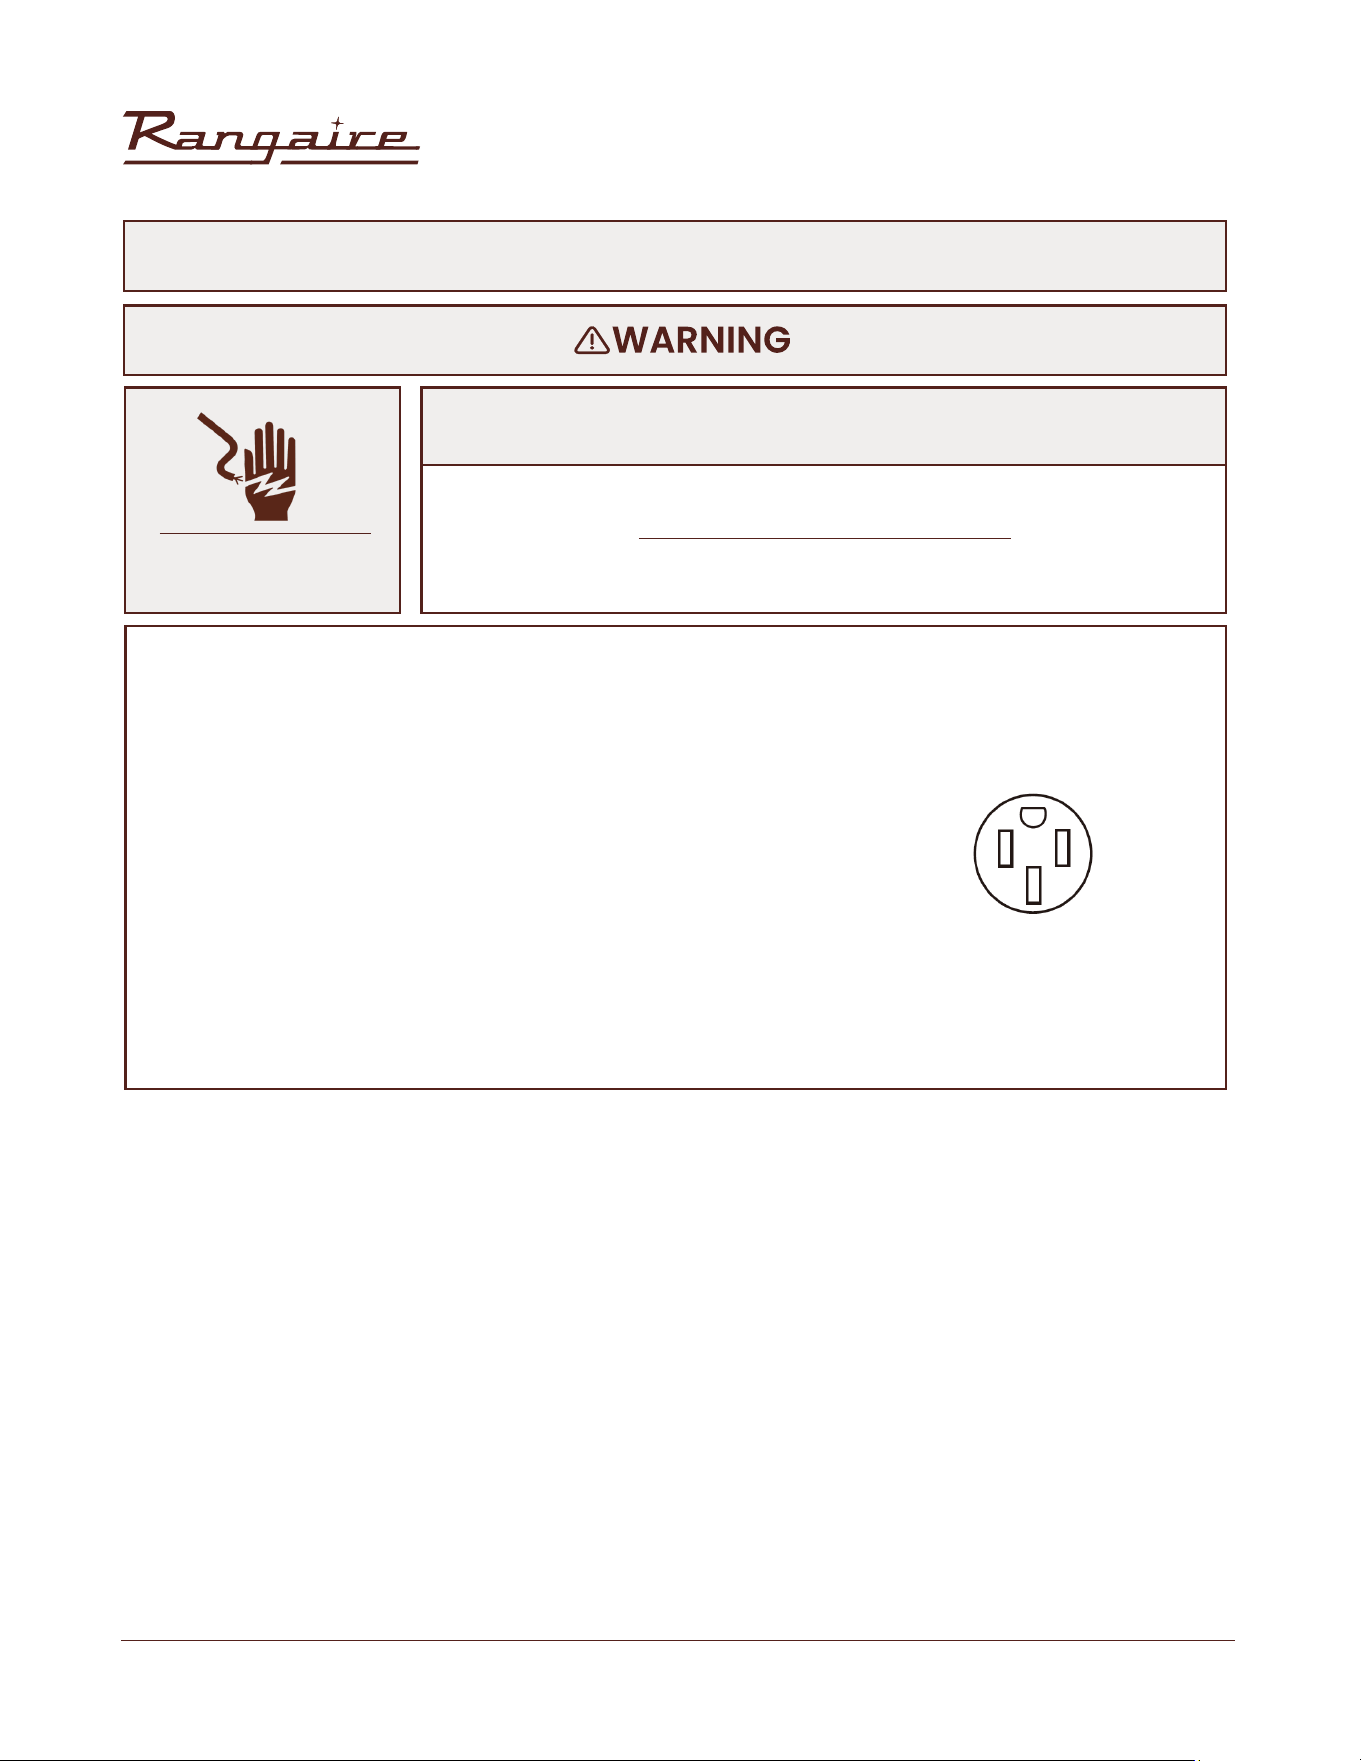
• This range is equipped with a CSA International Certied Power Cord intended to be plugged into a
standard 14-50R wall receptacle. Be sure the wall receptacle is within of range’s nal location.
• Do not use an extension cord.
ELECTRICAL SHOCK
HAZARD
Electrical Grounding Instructions
ELECTRICAL REQUIREMENTS - CANADA ONLY
INSTALLATION
30” Electric Range | RRE303GS
12
Rangaire: Product Installation
INSTALLATION REQUIREMENTS
RANGE DIMENSIONS
• Tape Measure
• Flat-Blade Screwdriver
• Phillips Screwdriver
• Level
• Hand or electric drill
• Wrench or Pliers
The anti-tip bracket must be securely mounted to the oor. Thickness of ooring may
require longer screws to anchor bracket to suboor.
Tools Needed:
• 1/8” at blade screwdriver
• 1/8” (3.2 mm) Drill Bit (for wood oors)
• Marker or Pencil
• 3/16” (4.8 mm) Carbide-Tipped Masonry Drill Bit (for concrete/
ceramic oors)
• 3 - Oven racks
• 1 Anti-tip brackets
• 2 plastic anchors
• 2 screws
Parts Supplied: Parts Needed:
Check local codes.
Check existing electrical supply.
See “Electrical Requirements” section.
Gather the required tools and parts before starting installation. Read and follow the
instructions provided with any tools listed here.
• Avoid placing cabinetry directly above the appliance when possible. If cabinetry is used above the
cooking surface, use cabinets no more than 13” deep. Make sure the wall coverings, countertop and
cabinets around the appliance can withstand heat up to 200º F (93°C) generated by the appliance.
• Cabinet opening dimensions that are shown must be used. Given dimensions are minimum
clearances.
• Working areas adjacent to the range should have 18” minimum clearance between countertop and
cabinet bottom.
INSTALLATION
30” Electric Range | RRE303GS
13
Rangaire: Product Installation
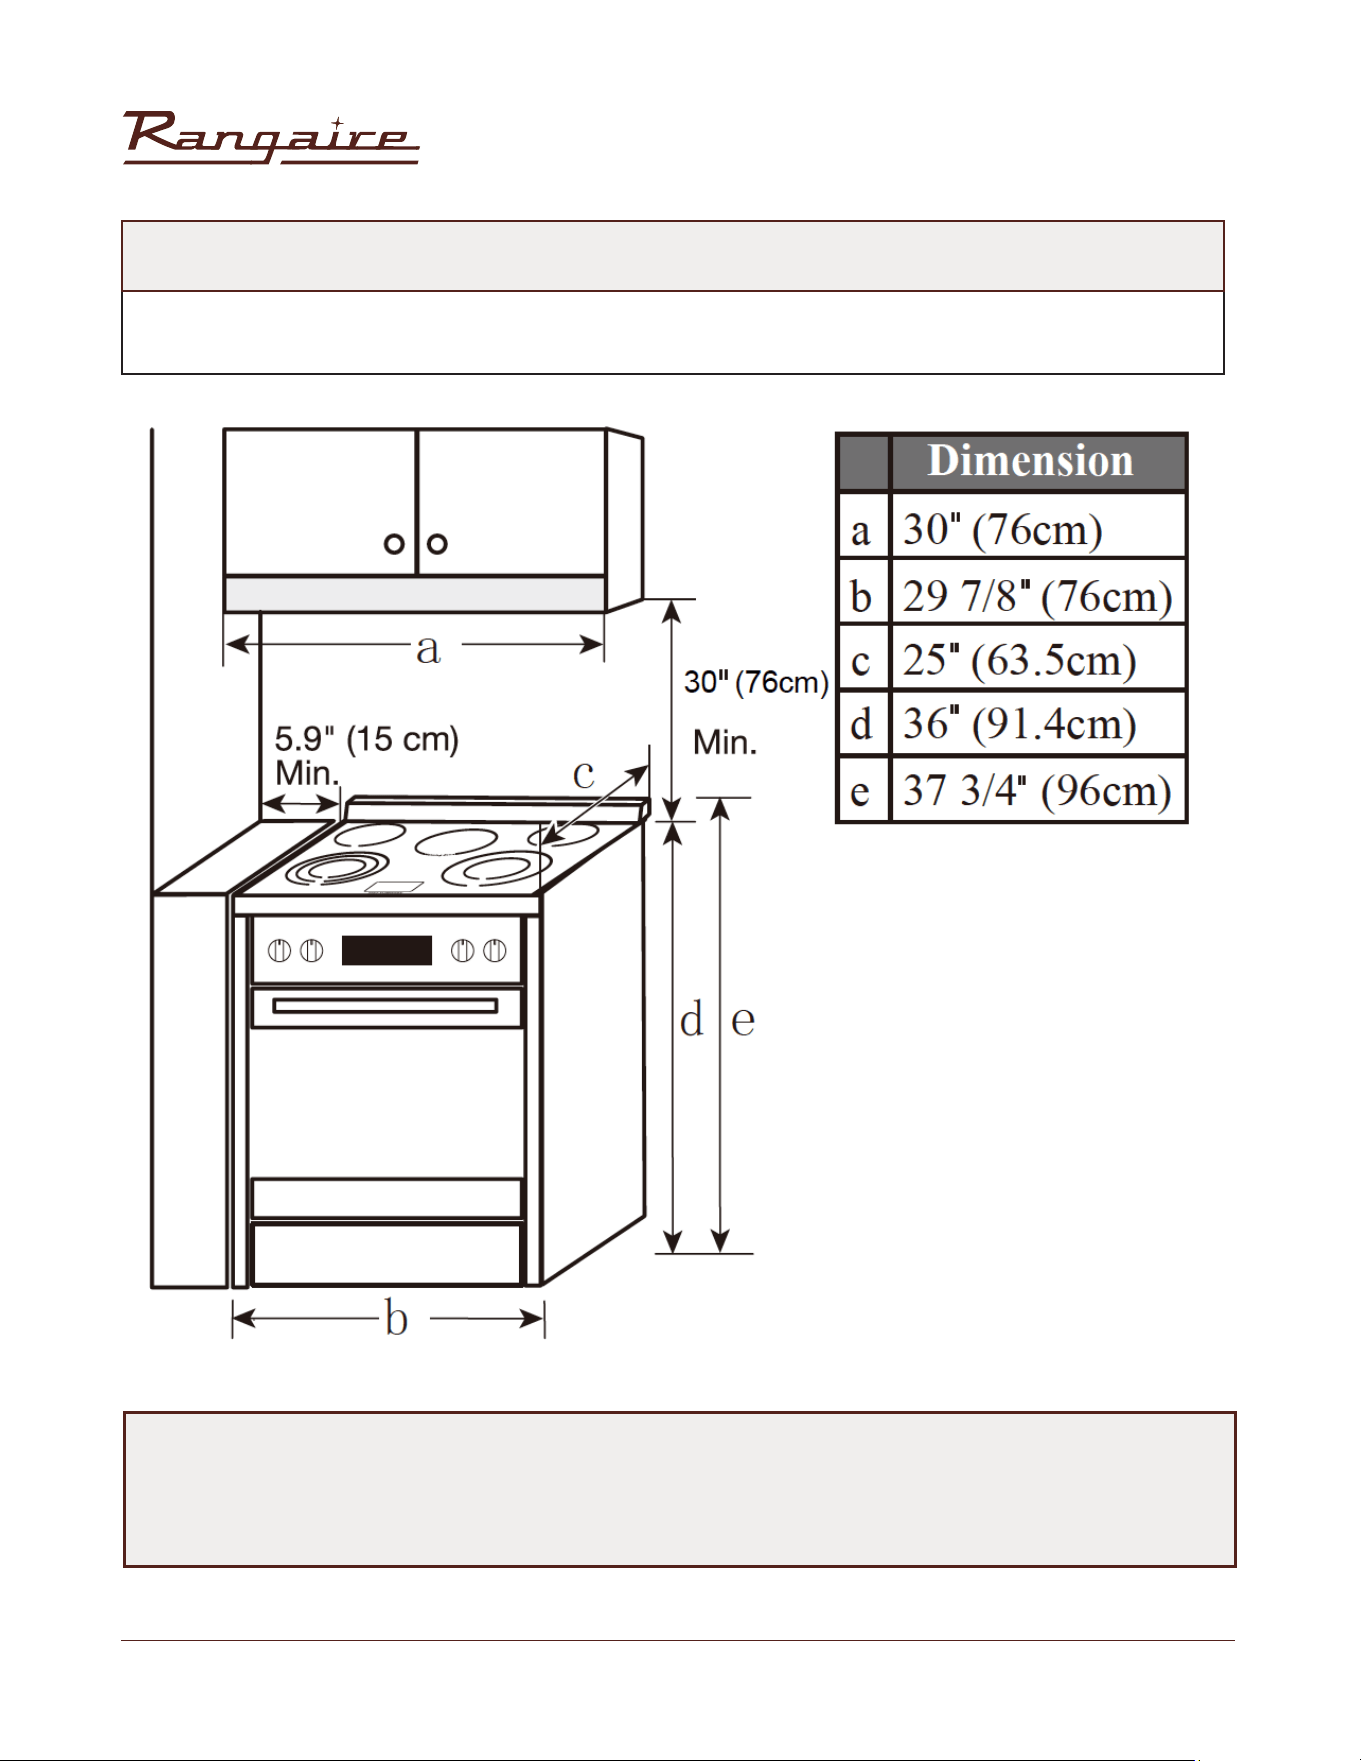
DIMENSIONS
NOTE:
Range can be raised approximately 1”(2.5cm) by adjusting the leveling legs. Front of door and
drawer may extend farther forward depending on styling.
Opening dimensions shown are for25” (64cm) countertop depth, 24”(61cm) base cabinet depth and
36” (91.4cm) countertop height.
INSTALLATION
30” Electric Range | RRE303GS
14
Rangaire: Product Installation
POWER SUPPLY
IMPORTANT:
To connect to an outlet in the wall, the electrical outlet must be recessed. If the electrical outlet is in the
oor, it can be either recessed or surface mounted.
30" (76 cm)
17 1/2" (44 cm)
7 1/4" (18.4 cm)
3" (7.6 cm)
Recommended Location for Electrical Outlet
A
B
C
D
E
INSTALLATION
30” Electric Range | RRE303GS
15
Rangaire: Product Installation
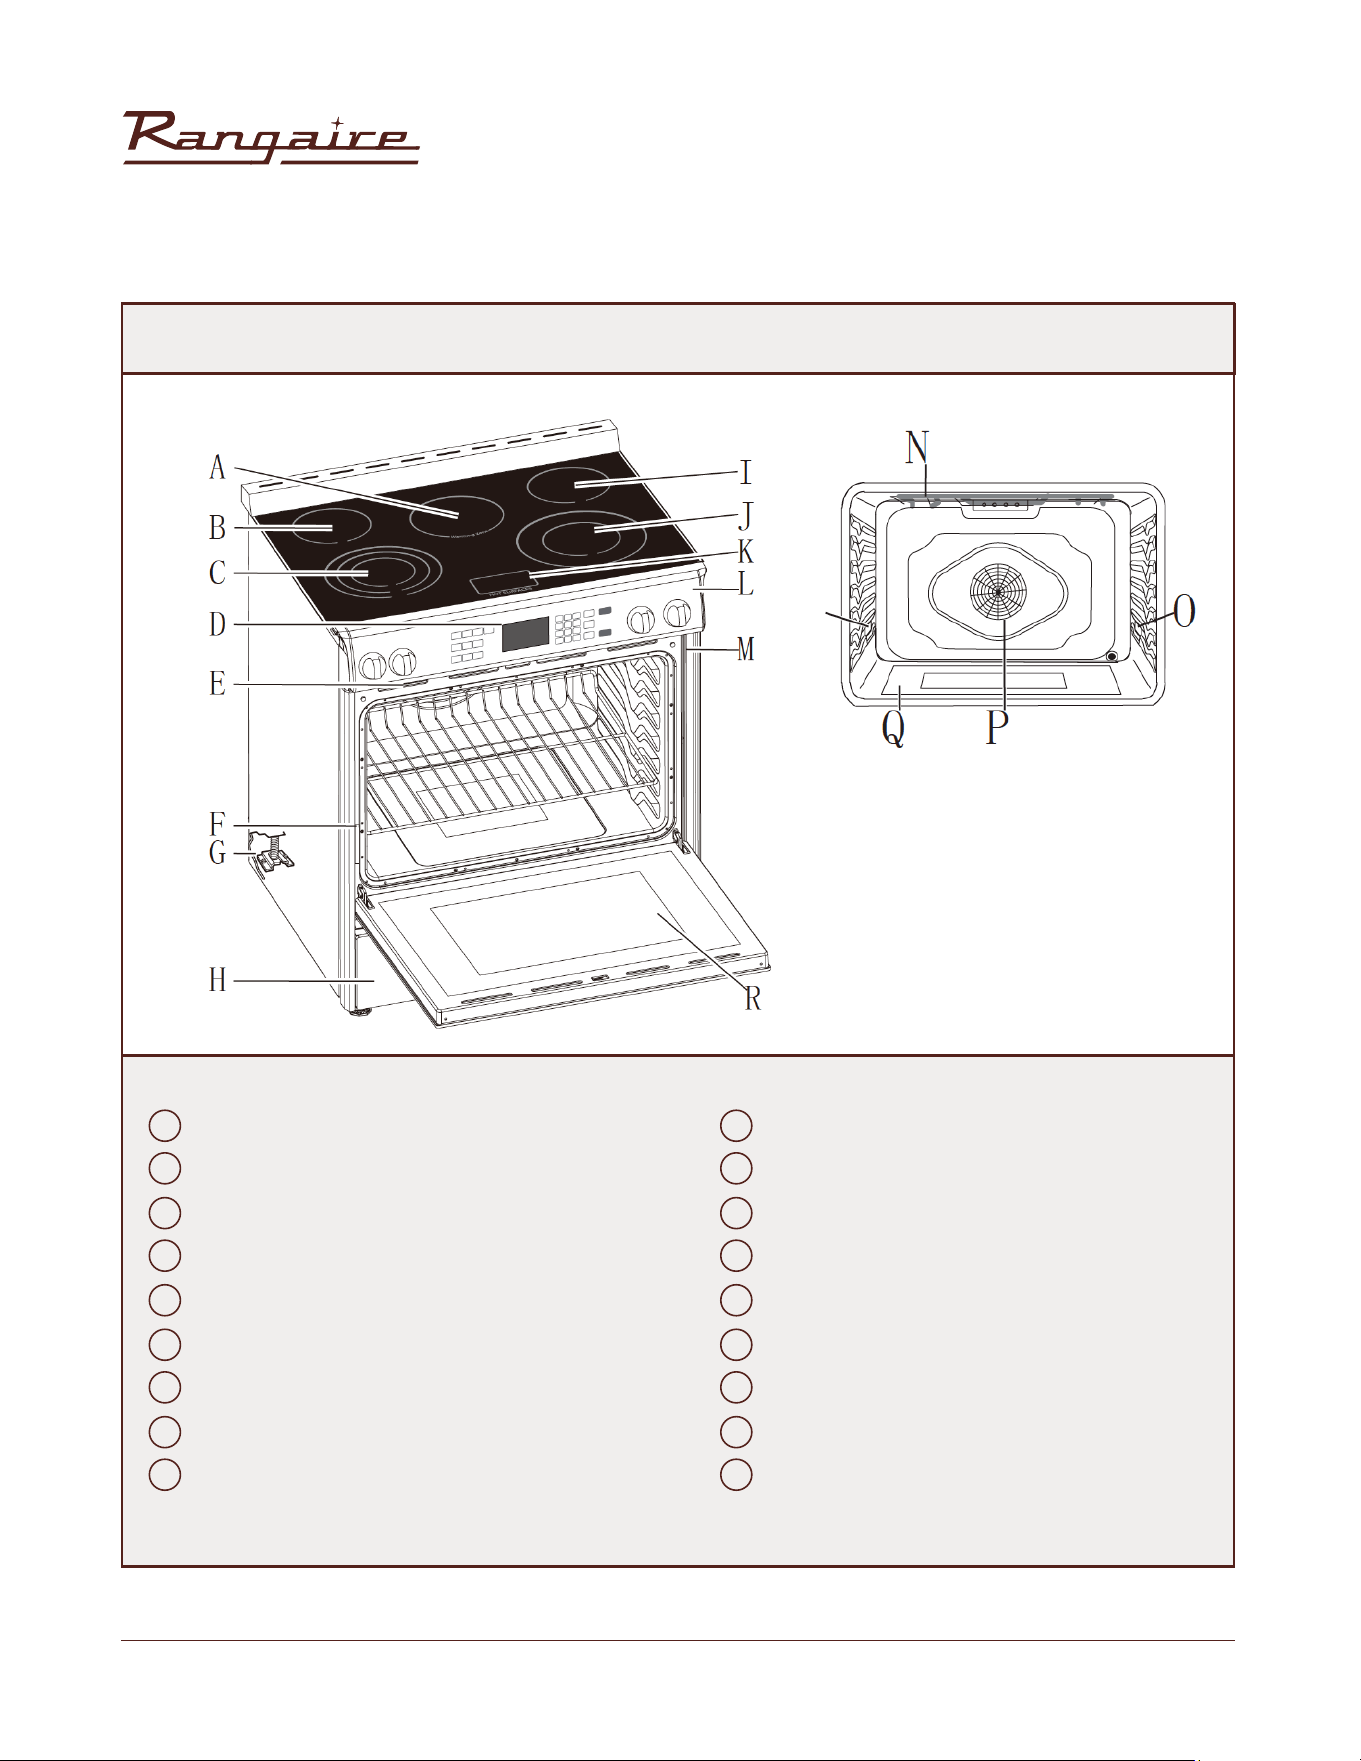
FIGURE 2
A J
F O
B K
G P
C L
H Q
D M
I R
E N
Warming Zone Burner
Left Rear Surface Burner
Left Front Surface Burner (Triple-element)
Clock/Timer
Oven Vent
Model and Serial Number Plate
Anti-tip Bracket
Storage Drawer
Right Rear Surface Burner
Right Front Surface Burner (Dual -element)
Hot Surface Indicator Lights
Control Panel
Door Gasket
Broil Element
Oven Light
Convection Fan and Element
Bottom Element (not visible)
Oven Door Window
INSTALLATION
30” Electric Range | RRE303GS
16
Rangaire: Product Installation
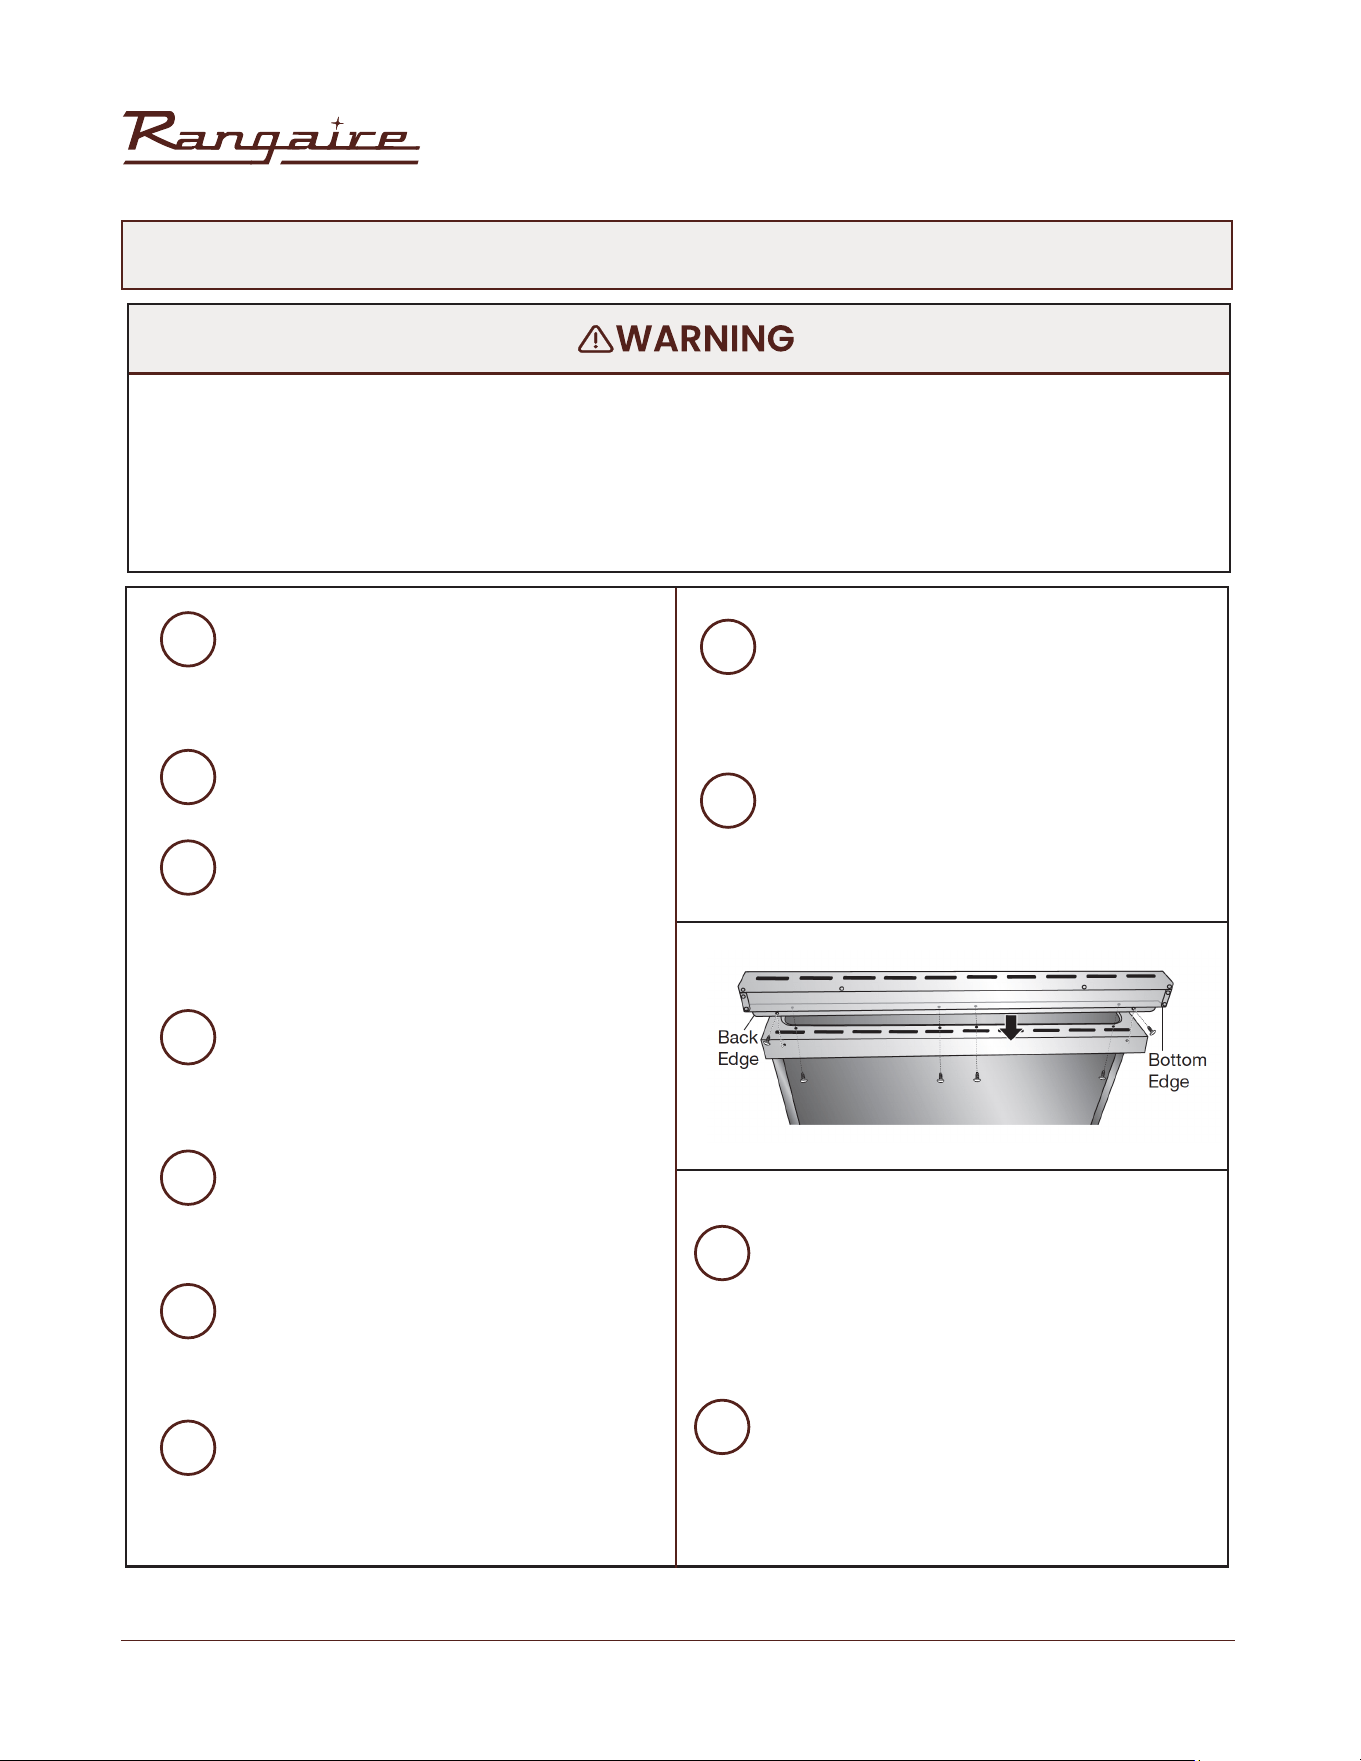
INSTALL LEVELING FEET AND BACK PANEL
• Excessive Weight Hazard
• Tip Over Hazard
• A child or adult can tip the range and be killed.
• Use two or more people to move and install range.
• Failure to follow these instructions can result in death or serious burns to children and adults.
1
3
4
5
6
7
8
9
10
11
2
Remove shipping materials from the
range. DO NOT remove protective lm
covering the appliance. DO NOT remove
tape securing the drawer.
Place range on its back; take four (4)
Lshaped cardboard corners from the
carton. Stack one cardboard corner on
top of another. Repeat with the other 2
corners.
Place the four (4) L-shaped cardboard
corners lengthwise on the oor behind
the range to support the range when it is
laid on its back.
Using 2 or more people rmly grasp the
range and gently lay it on its back on the
cardboard corners.
Install the leveling feet one at a time. The
leveling feet can be found in one of the
boxes that was inside the oven.
Place cardboard or hardboard in front of
range. Using 2 or more people, stand
range back up onto cardboard or
hardboard.
Remove the protective lm covering the
appliance. Remove tape securing the
drawer.
The stainless steel back panel can now
be installed. Align backsplash holes with
holes at the edge of the stovetop, which
extends past the back of the oven.
With one person holding the backsplash
and working from underneath the
extended rear edge, insert screws
through the bottom of the backsplash.
Tighten completely.
Insert the two screws on each side,
through the back edge of the backsplash
and into the cooktop. Tighten completely.
Remove oven racks and parts package
from inside oven.
INSTALLATION
30” Electric Range | RRE303GS
17
Rangaire: Product Installation
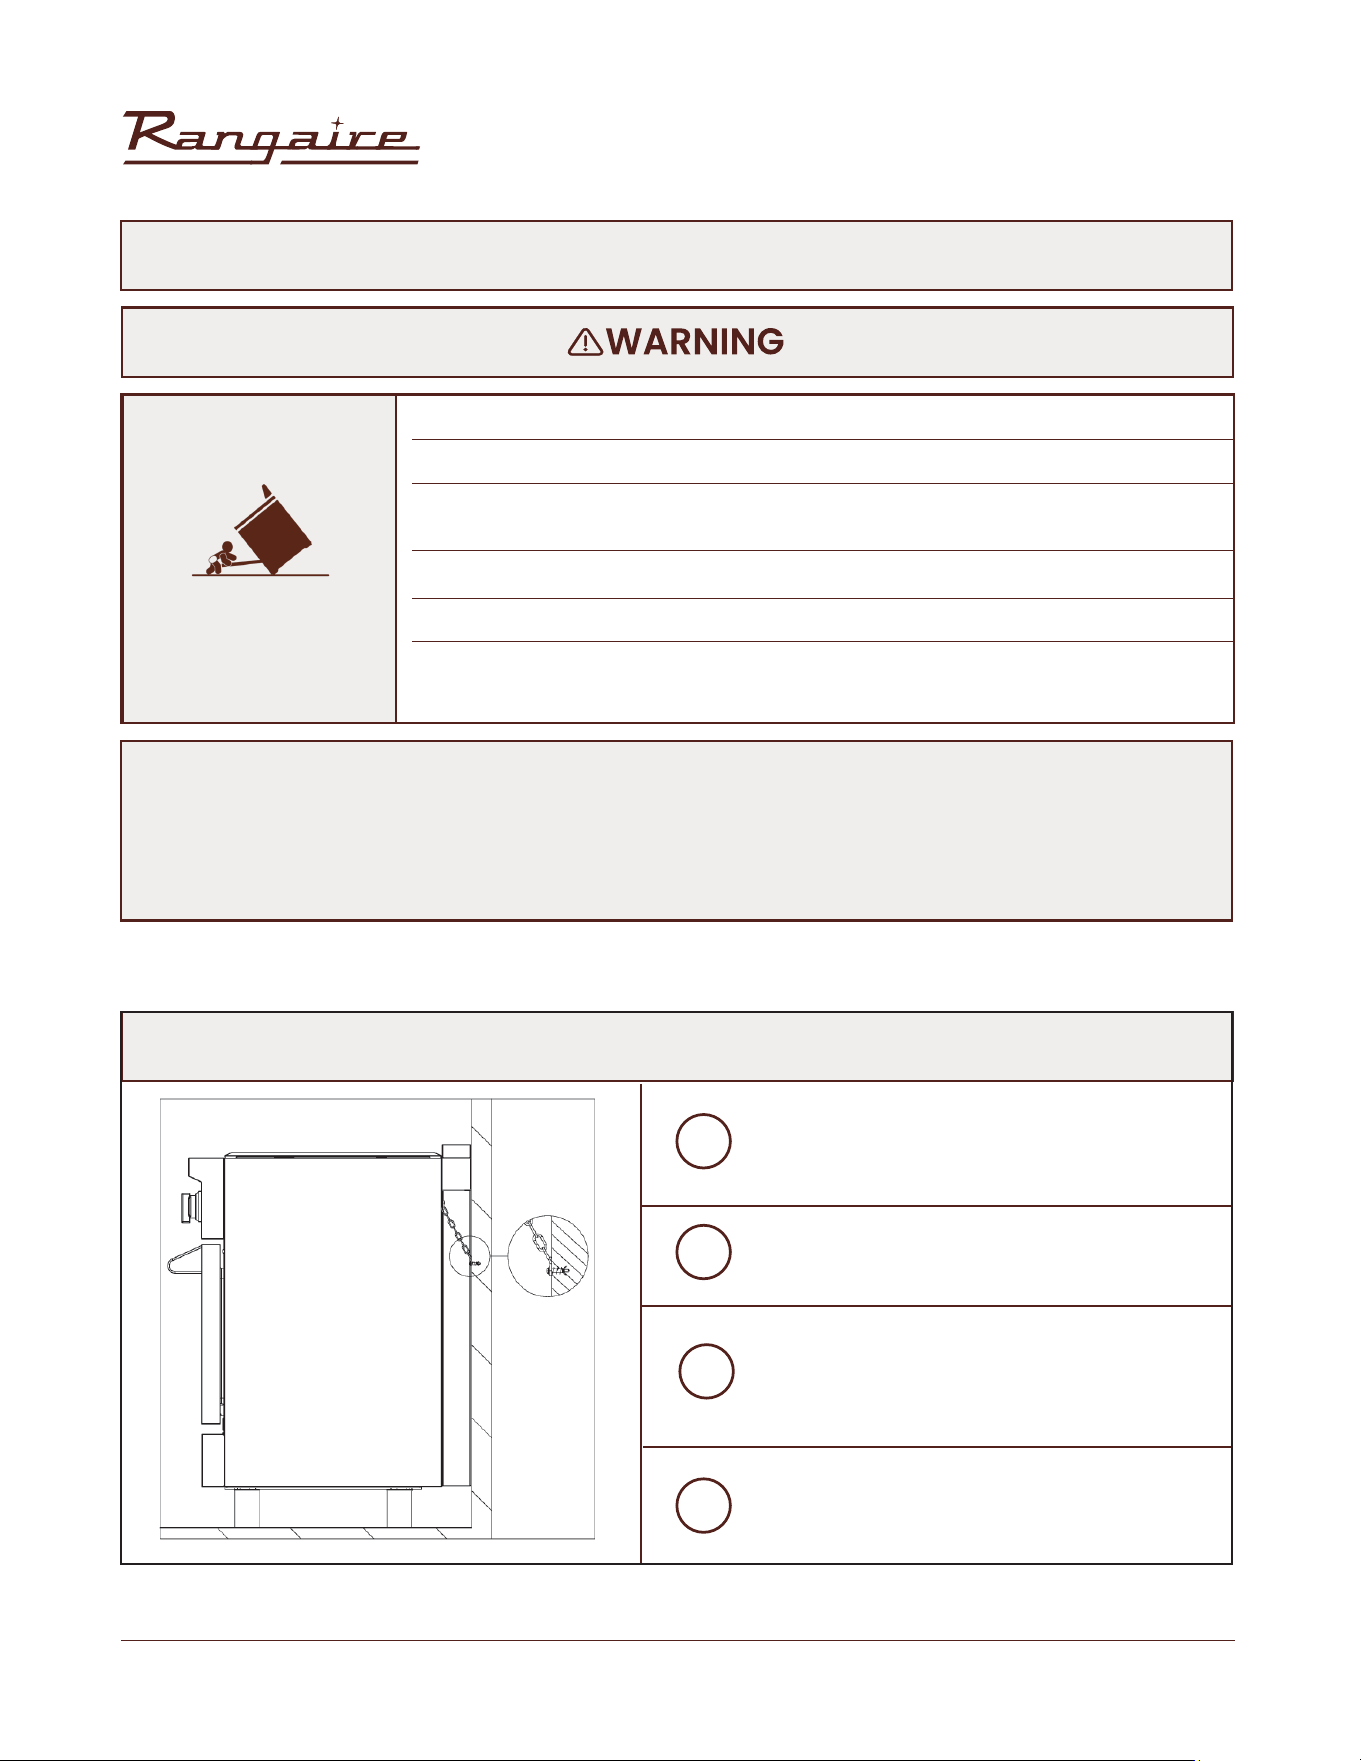
• A child or adult can tip the range and be killed.
• Install anti-tip bracket to oor or wall per installation instructions.
• Slide range back so rear range foot is engaged in the slot of the anti-tip
bracket.
• Re-engage the anti-tip bracket if range is moved.
• Do not operate the range without anti-tip bracket installed and engaged.
• Failure to follow these instructions can result in death or serious burns to
children and adults
Contact a qualied oor covering installer for the procedure of drilling mounting holes
through your type of oor covering.
Assemble the required tools and parts before starting installation. Read and follow the
instructions provided with any tools listed here.
TIP-OVER HAZARD
INSTALL ANTI-TIP BRACKET
INSTALL ANTI-TIP CHAIN (WITH ROUND ADJUSTABLE LEGS)
Remove the anti-tip wall anchor hooks and
screws from the parts bag.
Drill an adequate hole at similar chain level
in the back wall.
Insert and screw in the wall anchor hooks
until it is rmly secured to the wall.
After moving the range to its nal position,
connect the chain to the hook.
1
2
3
4
INSTALLATION
30” Electric Range | RRE303GS
18
Rangaire: Product Installation
• Do not use an adapter
• Do not use an extension cord.
• Failure to follow these instructions can result in death, re, or electrical shock.
• Electrical connection must be performed by a qualied service technician in
accordance with the kit instructions and all local codes and requirements.
• Plug into a standard 14-50R grounded wall receptacle.
ELECTRICAL CONNECTION
ELECTRICAL SHOCK
HAZARD
BEFORE MAKING THE ELECTRICAL CONNECTION, MAKE SURE THAT:
• The safety circuit-breaker and the electrical system are able to with stand the load of the
appliance. See rating label on back of range.
• Rating plate is located on back of range should you need to verify any of the electrical
requirements.
• The power supply system has a ground connection in good working order in accordance with the
regulations in force.
• The electrical socket is easily accessible with the appliance installed. In all cases, the power
supply lead must be positioned so that it does not reach a temperature of 50°C above the room
temperature at any point.
• The manufacturer is not liable for any direct or indirect damage caused by faulty installation or
connection. It is therefore necessary that all installation and connection operations are carried out by
qualied personnel complying with the local and general regulations in force.
INSTALLATION
30” Electric Range | RRE303GS
19
Rangaire: Product Installation
INSTALLATION
INSTALLATION INSTRUCTIONS
COMPLETE INSTALLATION
1. Reconnect power at the circuit breaker or fuse box.
2. Turn on each element to check that it is heating correctly
3. Turn on the oven to check that it is heating correctly.
NOTE: When the range has been on for 5 minutes, check for heat. If range is cold, turn off the range
and contact a qualied technician.
4. Check that the indicator lights on the control panel, and the interior oven lights illuminate correctly. If
the range does not operate correctly, check the following:
• Household fuse is intact and tight; or circuit breaker has not tripped.
• Range is plugged into a grounded outlet
• Electrical supply is connected.
• Contact a qualied electrician to verify the electrical supply.

30” Electric Range | RRE303GS
20
Rangaire: Product Installation
30” Electric Range | RRE303GS
21
Rangaire: Product Installation
OPERATION
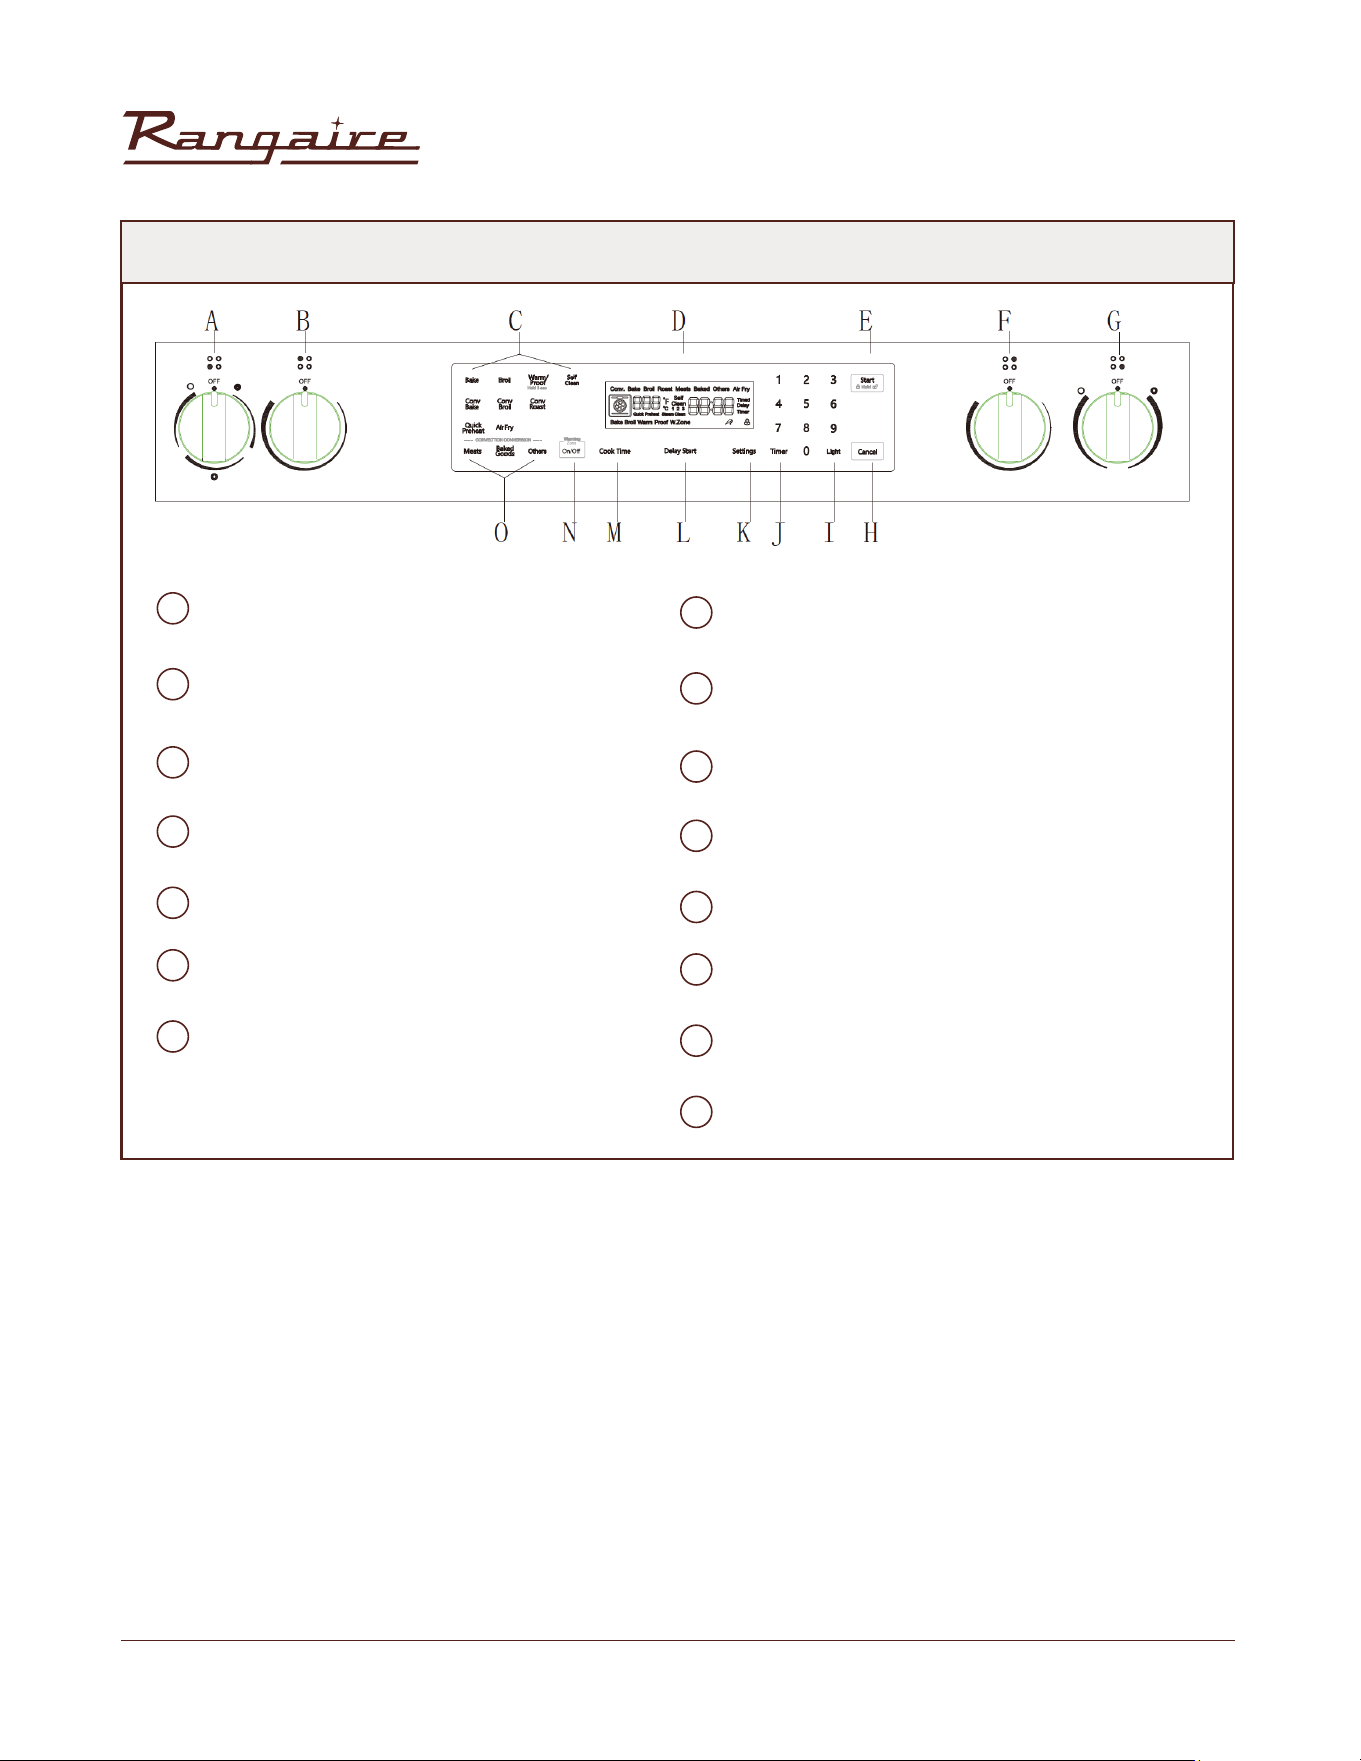
OPERATION CONTROLS
Front Left Burner
Rear Left Burner
Oven Modes
Display
Start/Control Lock (Hold 3 Seconds)
Rear Right Burner
Front Right Burner
Cancel
Light
Timer
Setting
Delay Start
Cook Time
Warming Zone
Convection Conversion
A
H
B
I
C
J
D
K
F
M
E
L
G
N
O
30” Electric Range | RRE303GS
22
Rangaire: Product Installation
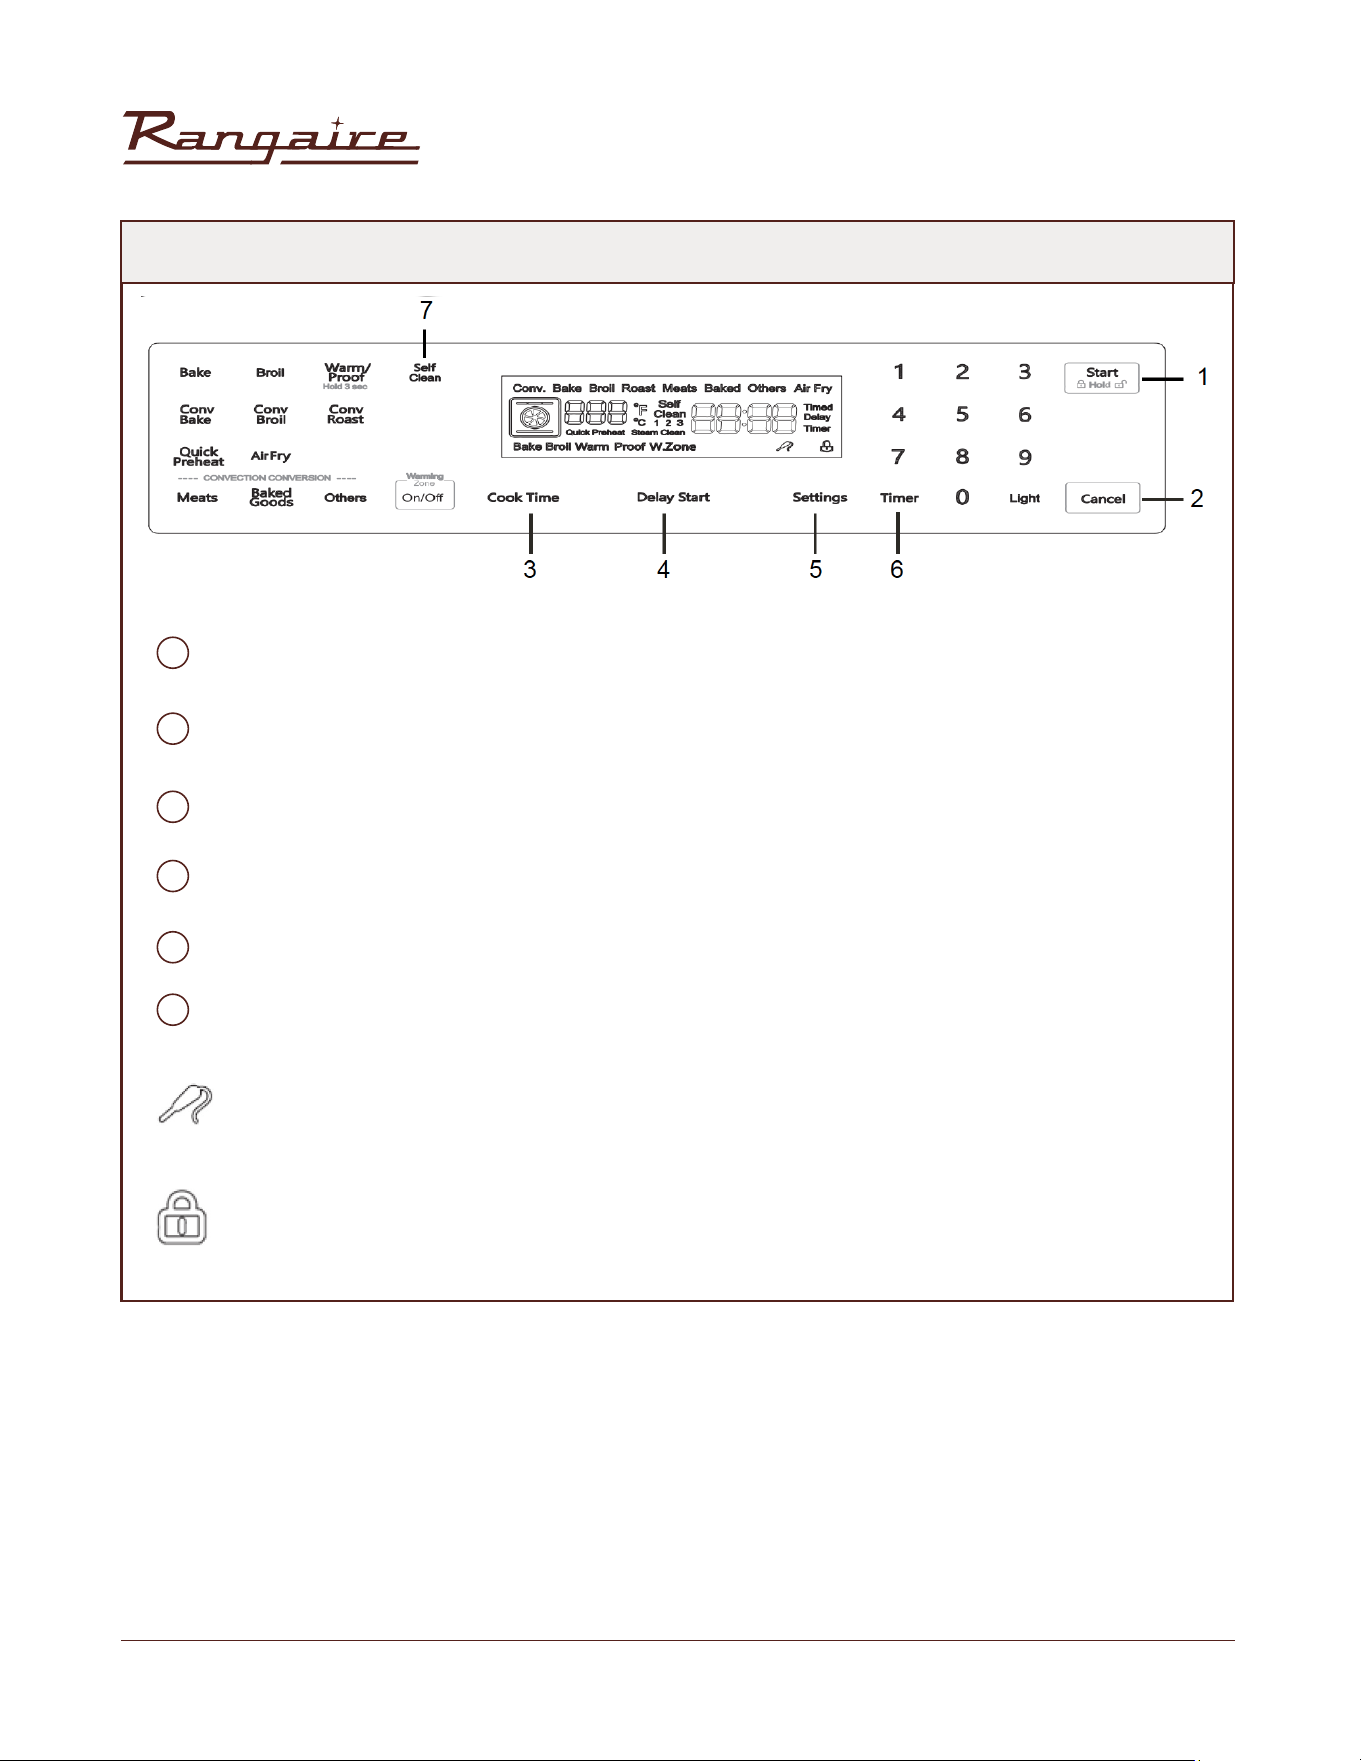
OPERATION CONTROLS
START: Start button, start operation or start Setting to take effect.
CANCEL: Cancel button to cancel the current operation.
COOKTIME: Bake time button, used to set the bake time.
DELAY START: The appointment time button is used to set the start time.
SETTINGS: Select system settings. Press repeatedly to display different settings.
TIMER: Timer symbol - This symbol is displayed on the LCD after the timer function is set
PIN SYMBOL: this symbol appears on the display screen when the system detects a thermometer
pin.
CHILD LOCK SYMBOL: the same as locking all keys, the child lock is set, the display will appear this
symbol
1
2
3
4
6
5
OPERATION
30” Electric Range | RRE303GS
23
Rangaire: Product Installation
NOTE:
Always use a utensil for its intended purpose. Follow manufacturer’s instructions. Some utensils were not
made to be used in the oven or on the cooking surface.
Do not place plastic items such as salt and pepper shakers, spoon holders or
plastic wrappings on top of the appliance when it is in use. These items could
melt or ignite. Potholders, towels or wood spoons could catch re if placed too
close to a heat.
SURFACE COOKING UTENSILS
• For best results and energy savings, only use pans suitable for electric cooking.
• The bottom of the pan must be very thick and perfectly at.
• Before placing on the burner, make sure that the pan and burner, are perfectly clean and dry.
• To avoid scratching of the ceramic glass surface, never use cast-iron pans or pans with a rough
bottom.
• To avoid wasting energy, make sure that the diameter of the pan bottom is 20mm bigger than the
circle marked on the hotplate.
• The pot sizes stated in the table below are suitable for your ceramic surface. Solids pots and pans
with at bottoms are recommended for efcient cooking.
POT SIZES
OPERATION
30” Electric Range | RRE303GS
24
Rangaire: Product Installation
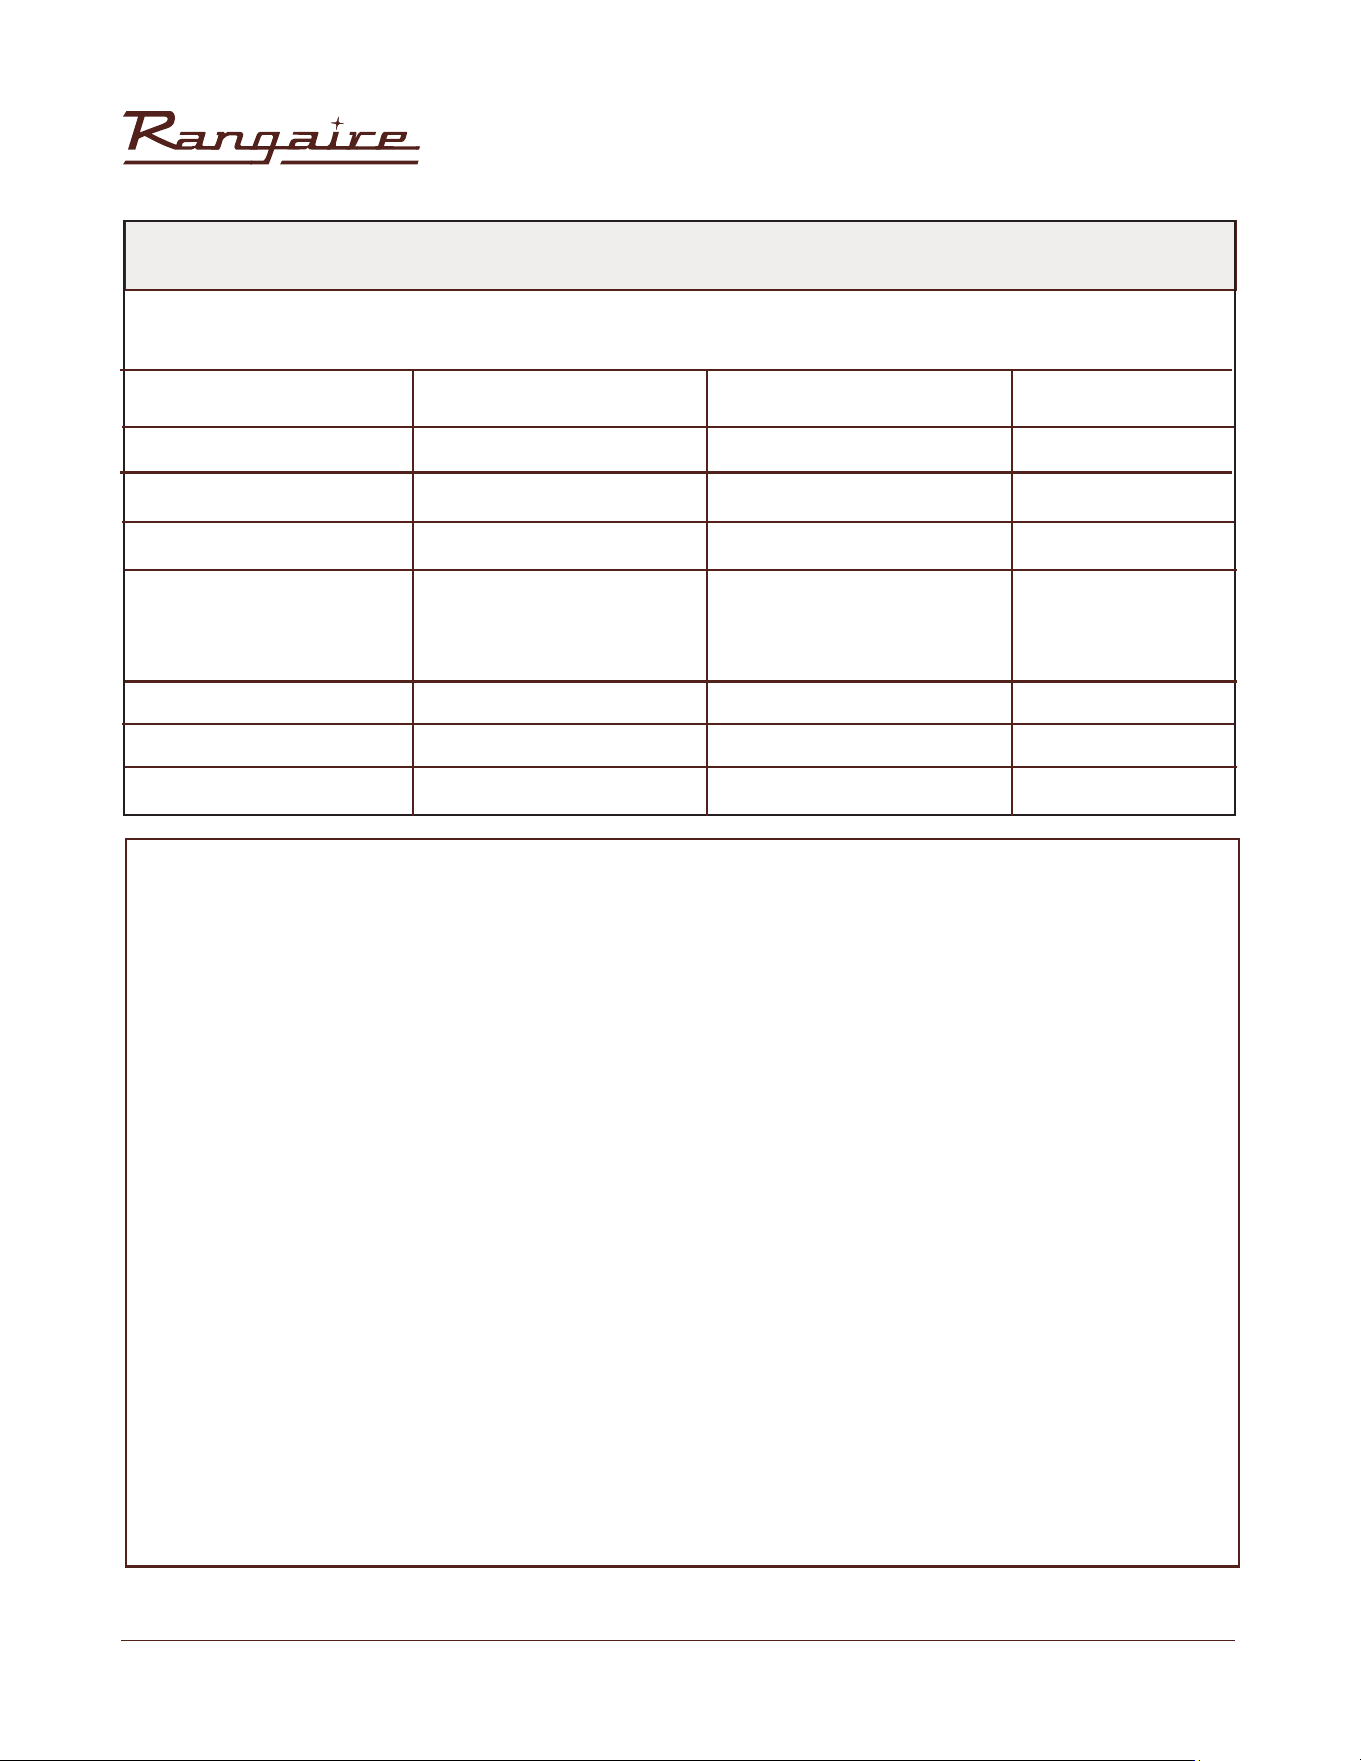
OPERATION MODES
OPERATING MODE
DEFAULT
TEMPERATURE (°F)
ADJUSTABLE
RANGE
PREHEAT
PHASE
350
Hi
140
420
/
No
/
325
450
325
350
100
170-500
Lo (450) Hi(550)
140-210
300-450
/
Core up to
806°F (430°C)
/
170-500
170-500
170-500
170-500
80-120
Yes
No
No
Yes
No
No
No
No
Yes
Yes
Yes
No
Bake
Broil
Warm
Air Fry
Warming Zone
Self Clean
Steam Clean
Convect bake
Convect broil
Convect roast
Conv
Baked good
Meats
Others
Easy
Conv
Proof (Press for 3 seconds in
warm mode temp)
NOTE:
The preheating stage indicates whether real-time display of temperature is required.
There is a preheating stage: When the actual oven core temperature is less than 170°F, the interface displays
Lo.
When the actual core temperature of the oven is greater than or equal to 170°F, the interface displays the
temperature in real time.
When the actual oven core temperature reaches the set value, the interface always displays the set
temperature value.
Non-preheating stage: the set temperature value is always displayed on the heating interface of the oven
from the beginning.
OPERATION
30” Electric Range | RRE303GS
25
Rangaire: Product Installation
FUNCTIONS
To access the setting function, press the Setting button on the switch panel. There are seven Settings. You
can press the Settings button repeatedly to select the settings.
Parameter That Can Be Set
Clock
Temp Unit
Sound
Demo Mode
12/24H
Sabbath
Calibration
Touch Settings Repeatedly
Touch Once
Touch Twice
Touch Three Times
Touch Five Times
Touch Six Times
Touch Seven Times
Touch Four Times
Congurable Content
Set Clock
Press “1”: Degree °F /°C
Press “1”: On/Off
Press “1”: On/Off
Press “1”: 12 H/ 24H
Press “1”: On/Off
Press “1” to change mode
Press “3” to increase
Press “6” to decrease
Default
12:00PM
°F
On
Off
12H
Off
00°F
(-30°F~30°F)
REMINDER
SETTING CLOCK:
Touch the “Setting’ once to enter the clock setting. By default, the current time is 12:00. At this time, you
can enter the required time by touching number key, then press the ”Start’ key to save current data
and exit.
SETTING DEMO MODE:
This parameter is set to facilitate users to enter the demonstration mode and perform operations
on the interface in any mode. However, heating components such as the electric heat pipe are not
enabled. The default value is OFF. Press the Settings key 5 times to enter the demo, then press the
number key “1” to switch. Touch the Start key to conrm exit.
CHILD LOCK:
1. When the oven is on standby or enters the working state, touch the "Start" button and hold it for 3
seconds, the control panel will be locked, except the "Start" button, other keys are invalid . The child
lock icon will ash and an invalid tone is heard concurrently when touching other keys.
2. If there is no unlock after 3 seconds, it will return to the standby or current operating state. Touch the
"Start" button and hold it for 3 seconds, the child lock will be released and the symbol will disappear.
3. The child lock function is only effective in the interface of standby and mode operation, and not in
other Settings interface.
OPERATION
30” Electric Range | RRE303GS
26
Rangaire: Product Installation
ALARM:
1. Touch the “Timer” button to enter the alarm Settings as shown below: The maximum allowable
setting time of the alarm clock is 12 hours with a countdown and display mode (hour : minute)/
(minute : second), if the setting time is left less than 1 hour, then the system shown in the form of
(minute: second, otherwise in the form of (hour: minute).
2. After the alarm is set, the alarm countdown starts. In standby mode, the alarm time is displayed on
the screen. In the running state, only the alarm symbol is displayed, no alarm time.
3. At the end of the countdown, the buzzer rings and the alarm symbol blinks with “00:00” at the same
time. At this time, you can touch any key to cancel the alarm. If there is no touch, the alarm will stop
after one minute, and the alarm icon and “00:00” will stop blinking and disappear.
4. Alarm cancellation: just touch the “Timer” button.
ERROR ALARM:
Abnormal Temperature sensor: “Err1”.
In any state, if the temperature sensor is open or short, the oven will give an alarm and display “Err1”. In
this case, cancel will be performed.
USING THE COOKTOP
The ceramic cooking area will glow red when a heating element is on. Some parts of the cooktop may
not glow red when an element is on. This is normal. The cooking area cycles off and on, even when set
to HI, to keep the cooktop glass from overheating. It is normal for the surface of ceramic glass to appear
to change color when surface cooking areas are hot. As the glass cools, it will return to its original color.
IMPORTANT: To avoid permanent damage from pitting or scratching, and to keep the cooktop surface
in good condition, clean the cooktop after each use. Ceramic glass cooktop cleaner and a cooktop
scraper are also recommended for stubborn soils. Do not use abrasive cleaners, cleaning pads or harsh
chemicals for cleaning. All of the items to clean and condition your ceramic glass cooktop are available
at most grocery stores. See the “Range Care” section for additional information.
• Make sure the bottoms of pots and pans are clean and dry before using them. Residue and water can
leave deposits when heated.
• Avoid storing jars or cans above the cooktop. Dropping a heavy or hard object onto the cooktop could
crack the cooktop.
• To avoid damage to the cooktop, do not leave a hot lid on the cooktop. As the cooktop cools, air can
become trapped between the lid and the cooktop, and the ceramic glass could break when the lid is
removed.
• For foods containing sugar in any form, clean up all spills as soon as possible. If sugary spills are allowed
to cool down, they can adhere to the cooktop and can cause pitting and permanent marks.
• Allow the cooktop to cool down slightly.
• While wearing oven mitts, remove the spill using a scraper while the surface is still warm.
• To avoid scratches, do not slide cookware or bakeware across the cooktop. Aluminum or copper bottoms
and rough nishes on cookware or bakeware could leave scratches or marks on the cooktop.
OPERATION
30” Electric Range | RRE303GS
27
Rangaire: Product Installation
• Do not cook popcorn in prepackaged aluminum containers on the cooktop. They could leave aluminum
marks that cannot be removed completely.
• To avoid damage to the cooktop, do not allow objects that could melt, such as plastic or aluminum foil,
to touch any part of the entire cooktop.
• To avoid damage to the cooktop, do not use the cooktop as a cutting board.
• To avoid damage to the cooktop, do not cook foods directly on the cooktop.
BEFORE USE:
1. If present, remove all packing and literature from the cooktop surface.
2. Clean your glass top. A thorough cleaning with a glass top cleaner is recommended. It only takes a
minute and puts a clean, shiny coating on the glass top before its initial use.
3. Place a saucepan of water on each of the front burners and turn them on HI heat for at least 30
minutes. Turn off the front burners.
4. Place a saucepan of water on each of the rear burners and turn them on HI heat for at least 30
minutes. Turn off the rear burners
HEATING ELEMENTS:
NOTES:
• For fastest boiling with pots 10" (25.4 cm) and larger, use the large Triple-ring element with all elements
set to “HI.”
• For best low heat performance with pans 10" (25.4 cm) and larger, use the Dual-Size element set to
“Single Lo.”
• For best melting performance with small pans, use the Triple Ring element.
HOT SURFACE INDICATOR LIGHT are located on the glass cooktop... The Hot Surface Indicator Lights will
glow as long as any cooking area is too hot to touch, even after the surface cooking area is turned off.
DUAL-RING COOKING ELEMENT offer the exibility to use larger cookware.
• Single-size elements can be used in the same way as a regular element.
• The dual-size combines both the single and outer element and is recommended for larger size cookware.
NOTE:
• This procedure evaporates any protective oils and humidity collected during the manufacturing process,
and enables the electronic control circuits to operate properly.
• There may be a slight odor during the rst several uses: this is normal and will dissipate.
• The cooking surface will hold the heat and remain hot over 20 minutes after the elements have been turned
off.
OPERATION
30” Electric Range | RRE303GS
28
Rangaire: Product Installation
USING THE COOKTOP
USING THE COOKTOP
TRIPLE-RING ELEMENT offers exibility because it features a wide range of settings.
• The High heat option can be used to boil small amounts of liquid quickly. To reduce the power setting,
turn the knob clockwise.
• The Melt setting is designed for delicate foods that require low heat, such as when melting chocolate or
holding sauces. Use cookware appropriate in size for the triple-ring Element.
WARMING ZONE ELEMENT
• Use the Warming Zone element to keep cooked foods warm. One hour is the recommended maximum
time recommended to maintain food quality.
• Do not use the Warming Zone element to heat cold foods.
• The Warming Zone element can be used alone or when any of the other surface cooking areas are being
used.
• The Warming Zone element area will not glow red when cycling on. However, the hot surface indicator
will glow while the Warming Zone element is in use.
• Use only cookware recommended for cooktop use.
• Cover all foods with a lid or aluminum foil. When warming baked goods allow a small opening in the
cover for moisture to escape.
• Do not use plastic wrap to cover food because the plastic wrap may melt.
• Use pot holders to remove food.
• Do not let food sit in oven more than one hour before or after cooking.
• Doing so can result in food poisoning or sickness.
• Foods that can easily spoil such as milk, eggs, sh, meat or poultry, should be chilled in the
refrigerator rst. Even when chilled, they should not stand in the oven for more than 1 hour before
cooking begins, and should be removed promptly when nished cooking.
FOOD POISONING HAZARD
30” Electric Range | RRE303GS
29
Rangaire: Product Installation
RECOMMENDED HEATING ELEMENT SETTINGS
Heating elements do not require preheating. A range of heating settings is listed in the following chart
because the required temperature depends on:
• Type and quality of pan
• Type, quantity and temperature of the food
• Element used and cook’s preferences
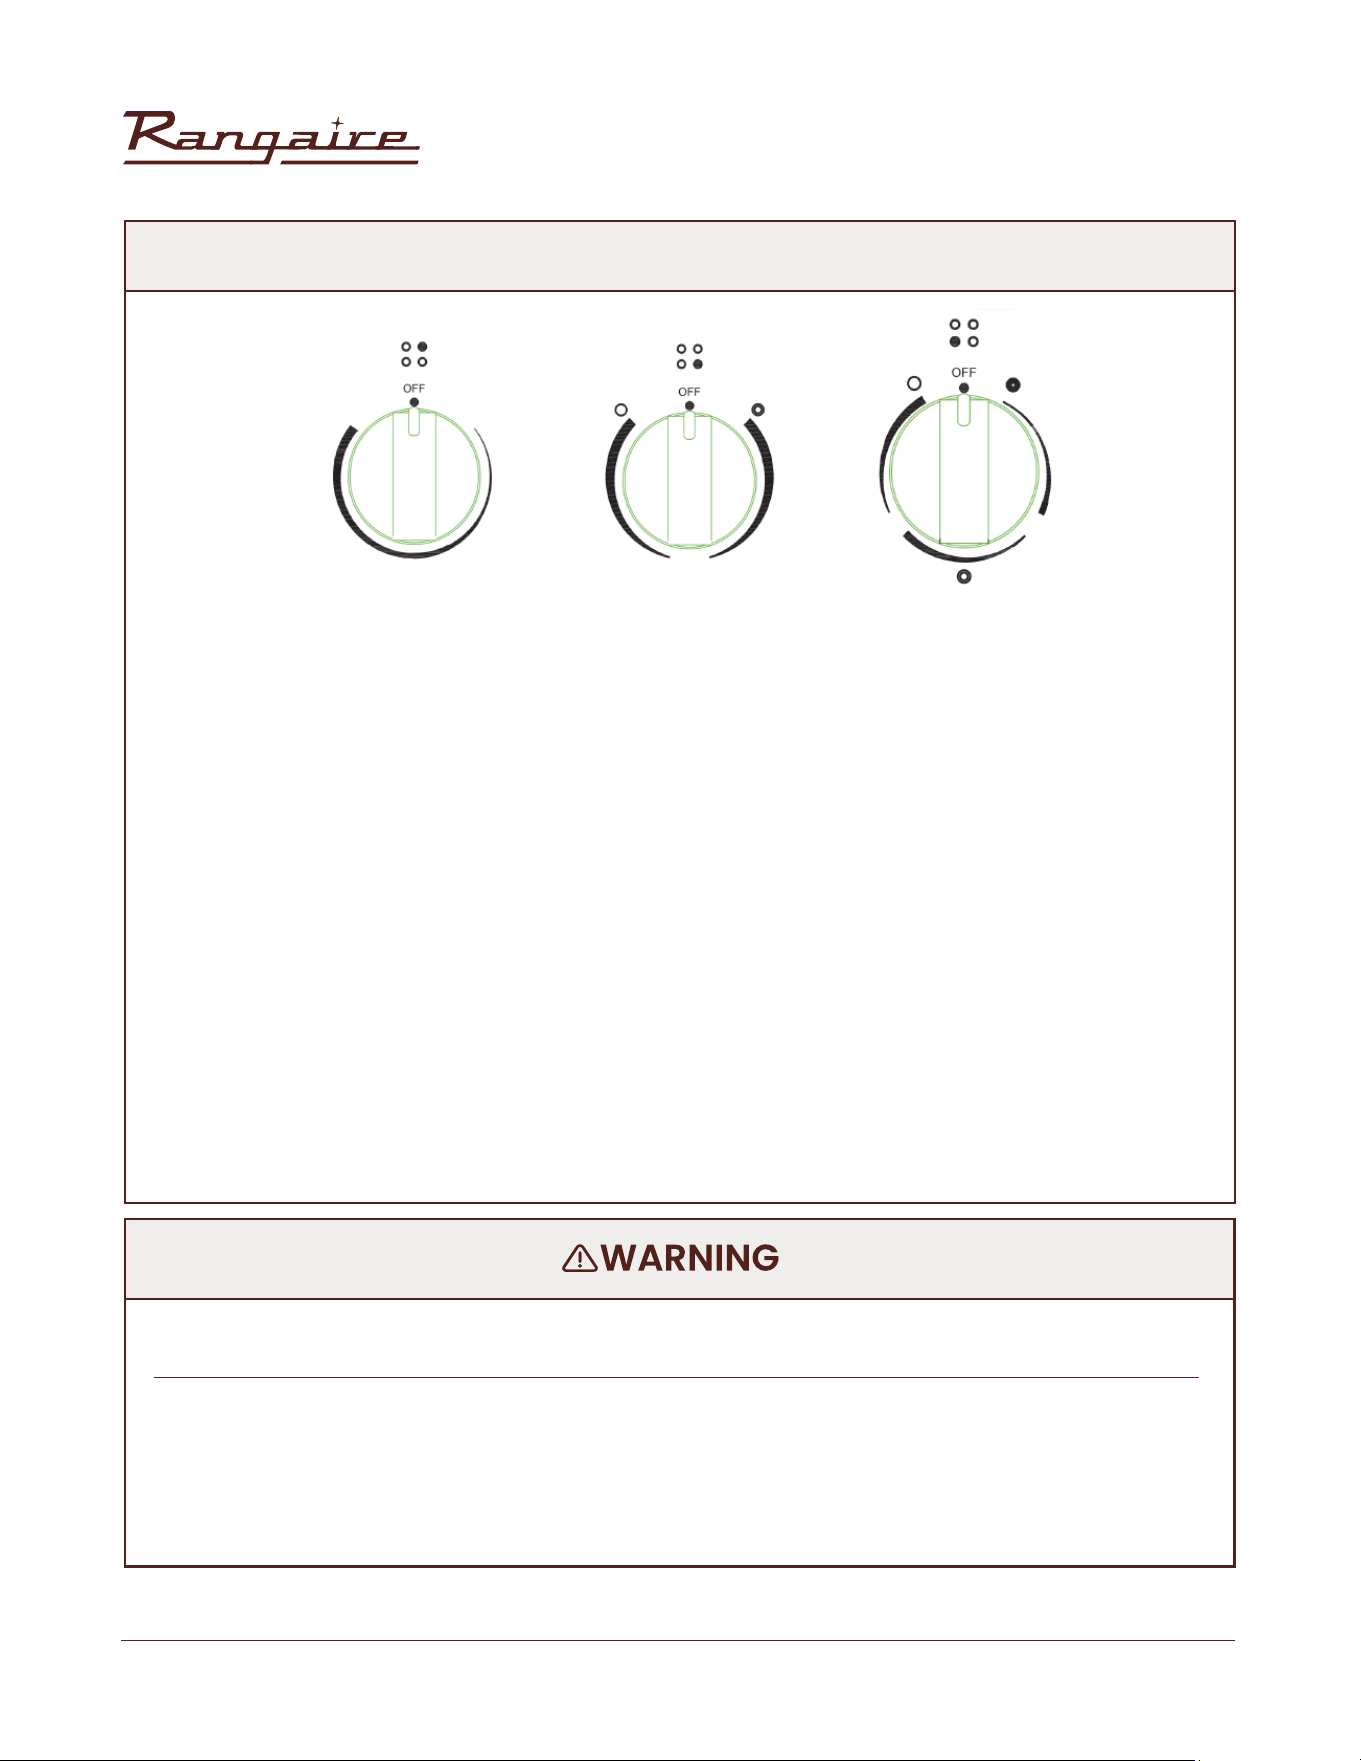
CONTROL KNOBS
The control knobs turn in either direction and from any position to the desired temperature setting or to
OFF.
NOTE: Once the element is turned Off, the Hot Surface indicator light will remain illuminated until the surface
temperature of the element has cooled.The placement of each knob corresponds to the placement of
the heating element that it controls.
To Turn On Any Heating Element: PUSH DOWN on the knob and TURN in either direction to desired heat
setting.
TYPE OF FOOD
Melt Butter, Chocolate
Rice, Simmer Sauces With Butter and Egg Yolk
Braise/Fry/Saute/Quickly Boil meat, sh, egg.
Boil water for vegetables, pasta
Cook vegetables, sh broths, cereals, pasta, milk,
Pancakes, pudding; Scramble egg; Simmer meat; Steam
vegetables; Made pop-corn, bacon; Stew meat soup;
Saute vegetables, spaghetti sauces.
HEAT SETTINGS RADIANT ELEMENTS
ENERGY REGULATOR
Lo
Lo to Medium
Medium to HI
HI
Medium
Turn off all controls when done cooking.
Failure to do so can result in death or re.
USING THE COOKTOP
30” Electric Range | RRE303GS
30
Rangaire: Product Installation
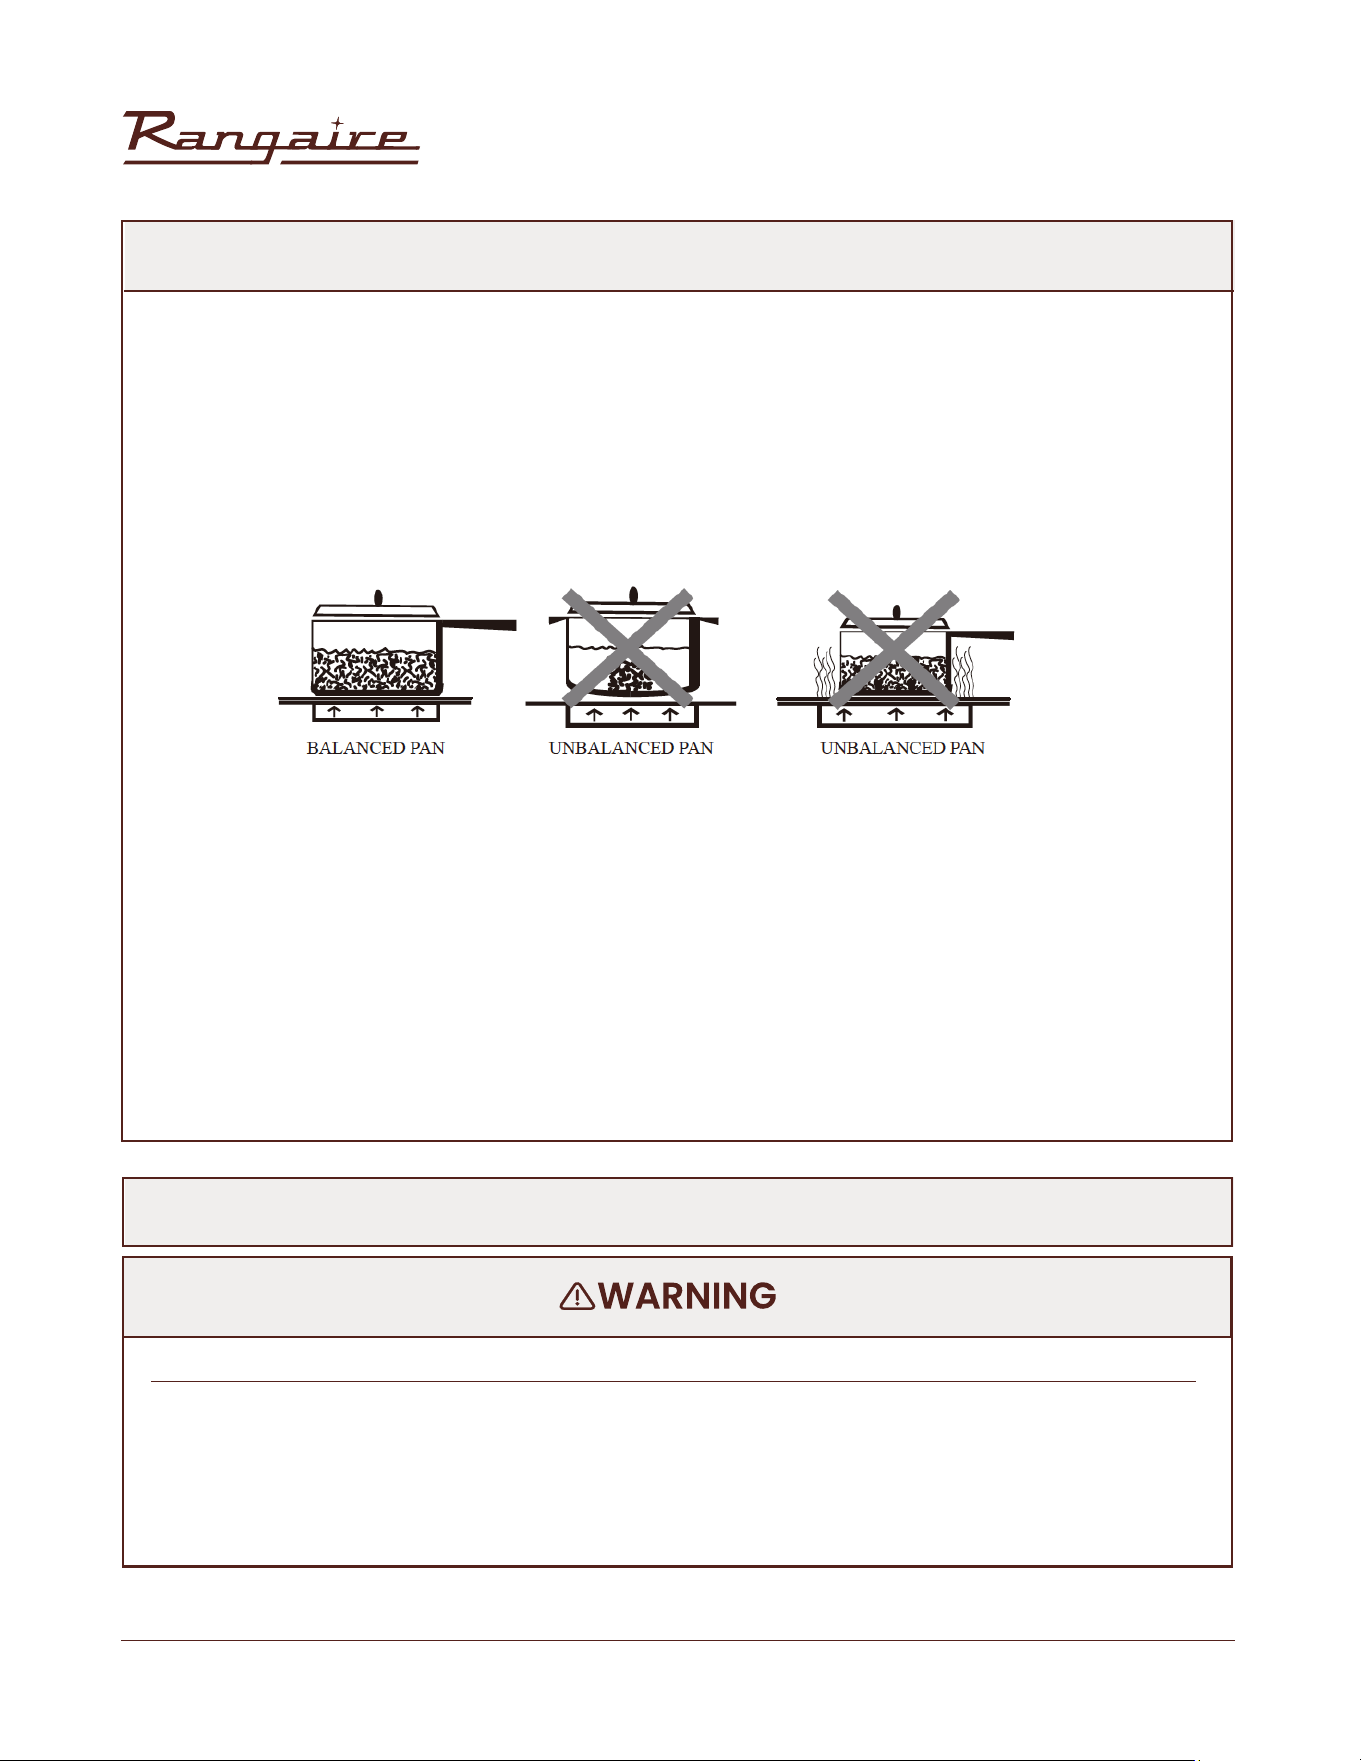
COOKWARE
The choice of pan directly affects the cooking performance(speed and uniformity). For best results, select
pans with the following features.
Flat Base: Use at-bottomed cookware for best heat conduction and energy efciently. Cookware with
rounded, warped, ribbed or dented bottoms could cause uneven heating and poor cooking.
• Determine atness by placing the straight edge of a ruler across the bottom of the cookware. While you
rotate the ruler, no space or light should be visible between it and the cookware.
• Cookware designed with slightly indented bottoms or small expansion channels can be used.
Match Pan Diameter to Element:
COOKWARE CHARACTERISTICS
• Aluminum: Heat and cool quickly. It can be used for frying, braising and roasting, but may leave metal
marks on the glass.
• Cast iron: Heat and cool slowly, but it retain heat and cook evenly.
• Copper: Heat and cool quickly. Best for gourmet cooking, wine, sauce, egg dishes.
• Enamel ware: The reaction depends on the base metal. Not recommended. Flaws in the enamel may
scratch the cooktop.
• Glass ceramics: Heat and cool slowly,. Not recommended. The heat is too slow. Flaws may scratch the
cooktop.
• Stainless steel: Heat and cool quickly. Suitable for soups, sauces, vegetables and general cook.
Safe canning requires that harmful micro organisms are destroyed and that the jars are sealed
completely. When canning foods in a water-bath canner, a gentle but steady boil must be maintained
for the required time. When canning foods in a pressure canner, the pressure must be maintained for the
required time. After you have adjusted the controls, it is very important to make sure the prescribed boil
or pressure levels are maintained for the required time. Failure to do so can result in food poisoning or
sickness.
FOOD POISONING HAZARD
HOME CANNING
USING THE COOKTOP

30” Electric Range | RRE303GS
31
Rangaire: Product Installation
USING THE OVEN
This multi-function oven combines the functions of traditional oven modes with the functions of modern,
fan-assisted convection modes in a single oven. Use the Cooking Mode control, located on the control
panel, to select the oven mode.
IMPORTANT: During any cycle, the heating elements will turn off when the oven door is opened, and stay
off until the door is closed. To maintain oven temperature, the door is limited during cooking.
BEFORE USE
1. Close the oven door.
2. Press Bake.
3. Press 500°F (260°C) on the number keypad.
4. Press Start.
NOTE: Allow the oven to operate for 30 minutes with the door closed and no food in the cavity.
5. Turn off the oven, and then open the oven door to allow the oven to cool.
NOTE: Any odor that may be detected during this initial use is due to the evaporation of substances used
to protect the oven during storage.
GENERAL
IMPORTANT: Do not place anything, including dishes, foil and oven trays, on the bottom of the oven when
in operation to avoid damaging the enamel.
1. Place bakeware with food on one or both of the shelves provided.
2. Close the oven door.
NOTE: The oven cannot be set with the door open.
3. Press the desired oven mode ie. “BAKE”.
4. Set the oven to the desired temperature.
5. Press “START”.
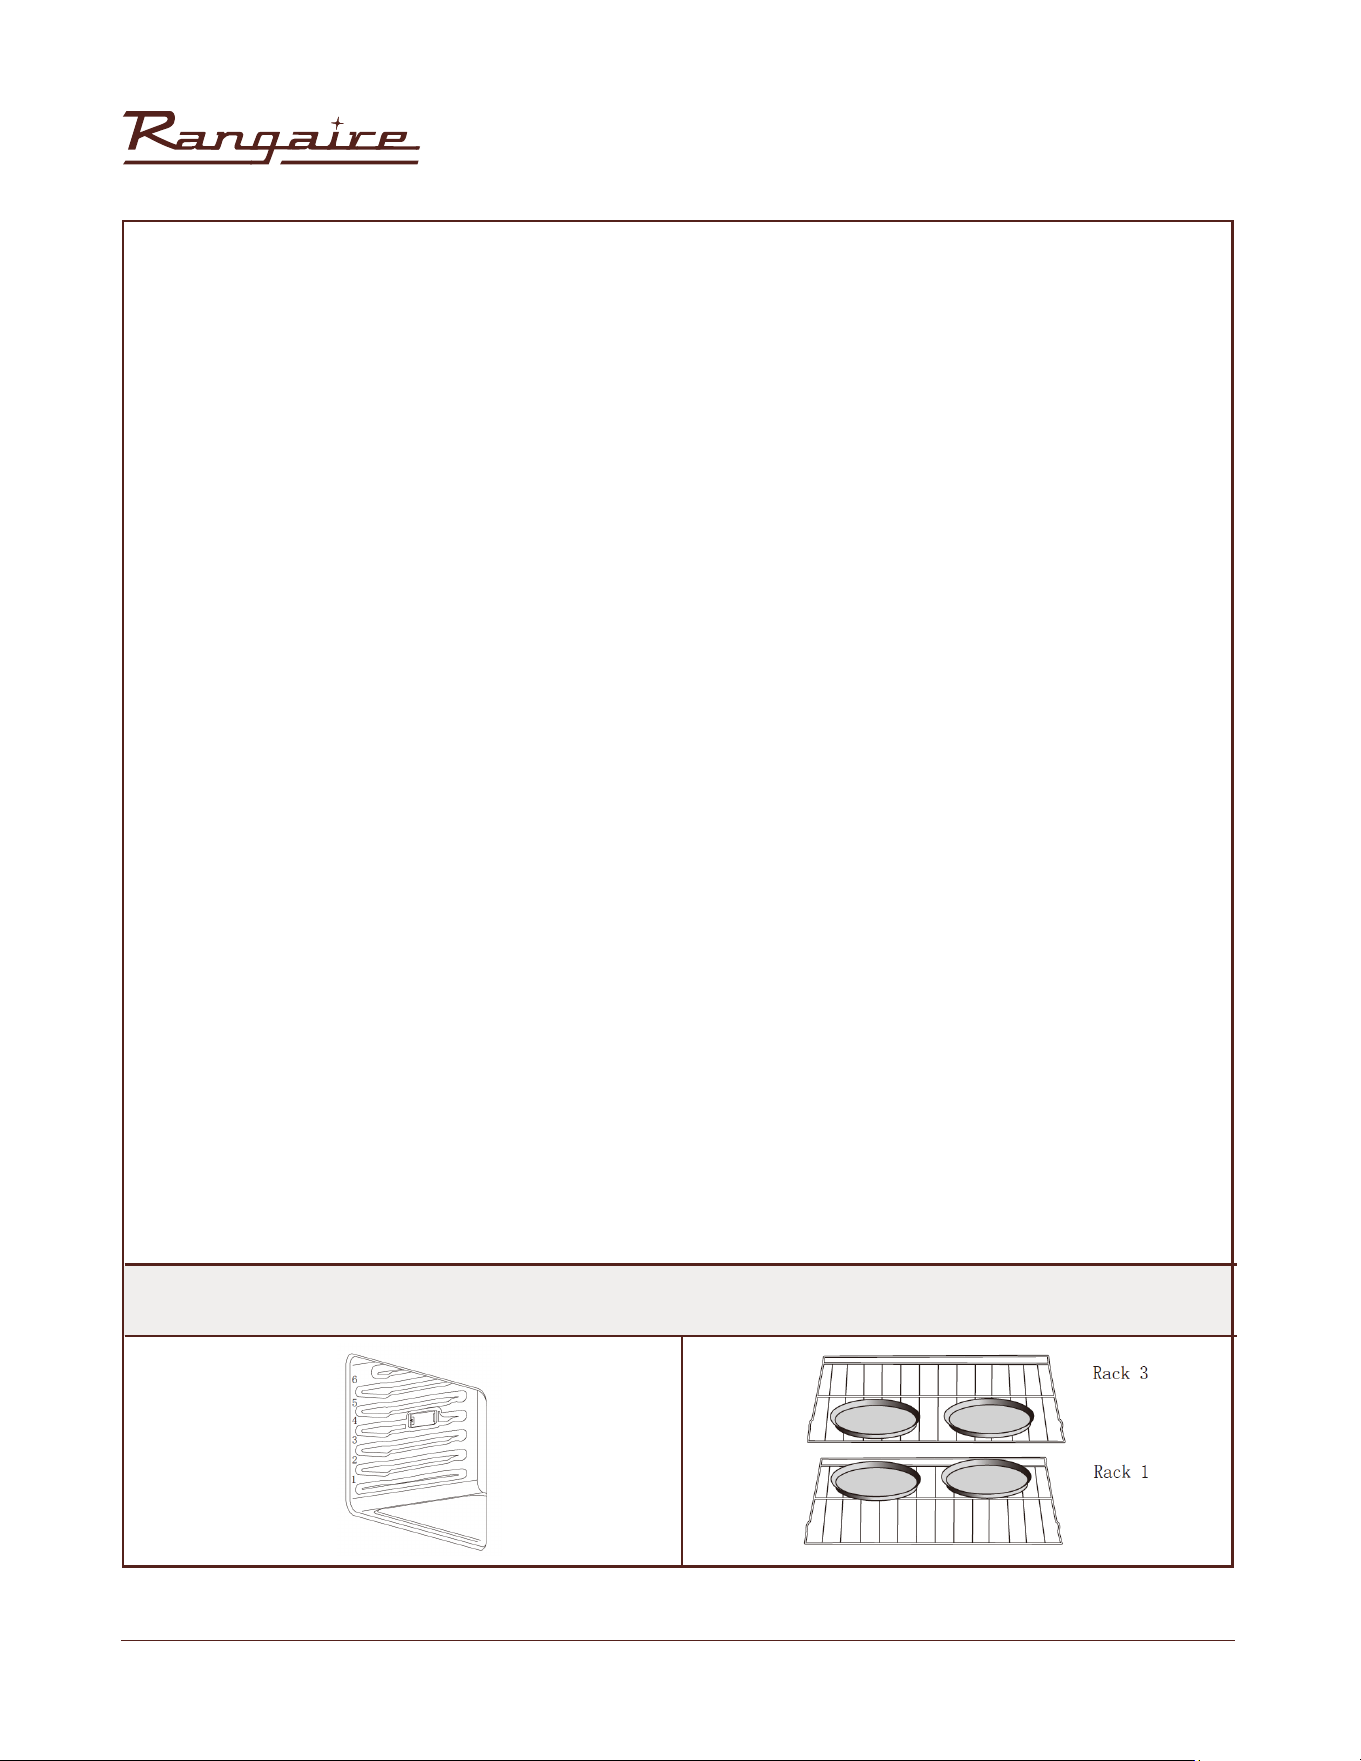
OVEN RACKS
The oven racks can be placed in any of the height positions in oven. Oven racks have a stop to keep them
from being unintentionally withdrawn fully.
MEAT THERMOMETER
Use a meat thermometer to determine whether meat, poultry and sh are cooked to the desired degree
of doneness. The internal temperature, not appearance, should be used to determine doneness. Insert
the meat thermometer probe (provided) into the socket on the lefthand side of the oven liner.
MEAT THERMOMETER PROBE SOCKET
USING THE OVEN

30” Electric Range | RRE303GS
32
Rangaire: Product Installation
PREHEATING
When beginning a Bake, Convection Bake or Convection Roast cycle, the oven will begin preheating after
Start pressed. The oven will take approximately 12 to 15 minutes to reach 350°F (177°C) with all of the oven
racks provided with your oven inside the oven cavity. Higher temperatures will take longer to preheat.
The preheat cycle rapidly increases the oven temperature. The actual oven temperature will go above
your set temperature to offset the heat lost when you open the oven door to place the food on the rack.
This ensures that cooking will begin at the proper temperature. Do not open the door while the oven is
preheating. When the oven has heated to the set temperature, a tone will sound. You can then open the
door and place food in the oven.
OVEN MODES
BAKE
Baking is cooking with heated air. Both upper and lower elements in the oven are used to heat the air but no
fan is used to circulate the heat. Follow the recipe or convenience food directions for baking temperature,
time and rack position. Baking time will vary with the temperature of ingredients and the size, shape and
nish of the baking utensil.The temperature can be set from 170°F (77°C) to 500°F (260°C).
GENERAL GUIDELINES
• For best results, bake food on a single rack with at least 1" - 11/2" (2.5 - 4 cm) space between bakeware
and oven walls.
• Use one rack when selecting the bake mode.
• Check for doneness at the minimum time.
• Use metal bake ware (with or without a non stick nish), heatproof glass, glass ceramic, pottery or other
utensils suitable for the oven.
• When using heatproof glass, reduce temperature by 25°F (15°C) from recommended temperature.
• Use baking sheets with or without sides or jelly roll pans.
• Dark metal pans or nonstick coatings will cook faster with more browning. Insulated bake ware will slightly
lengthen the cooking time for most foods.
• Do not use aluminum foil or disposable aluminum trays to line any part of the oven. Foil is an excellent
heat insulator and heat will be trapped beneath it. This will alter the cooking performance and can damage
the nish of the oven.
• Avoid using the opened door as a shelf to place pans.
• See Troubleshooting for tips to Solving Baking and Roasting Problems.
USING THE OVEN
30” Electric Range | RRE303GS
33
Rangaire: Product Installation
BAKE CHART
FOOD ITEM
TEMP. °F (°C)
(PREHEATED OVEN)
RACK POSITION TIME (MIN)
2
2
2
2
2
2
2
1
2
2
1
2
2
2
350 (175)
350-375 (175-190)
375 (190)
400-450 (205-235)
375-400 (190-205)
350 (175)
350-375 (175-190)
375-400 (190-205)
475 (246)
375 (190)
350 (175)
350 (175)
375-400 (190-205)
425 (220)
19-22
8-10
18-22
23-26
45-50
40-45
8-13
12-15
15-18
68-78
35-39
29-36
7-9
15-19
Cake
Cookies
Breads
Pizza
Pie
Cupcakes
Sugar
Yeast bread loaf, 9x5
Frozen
2 crust, fresh, 9"
Bundt Cake
Bundt Cake
Yeast rolls
Fresh
2 crust, frozen fruit, 9"
Angel Food
Angel Food
Biscuits
Mufns
TO BAKE
1. Close the oven door.
NOTE: The oven controls cannot be set if the oven door is open.
2. Press BAKE. “BAKE” will appear in the display, and 350°F (177°C) will be displayed. “Set temp or Press
START” will appear in the text area.
3. Press START, if you wish to bake at 350°F (177°C). OR Enter the desired temperature by pressing the
number keypad, and then press START. The temperature can be set from 170°F (77°C) to 500°F (260°C).
NOTES:
• The temperature may be changed at any time during cooking. Press CANCEL to clear the settings. Select
oven mode, then enter the desired temperature by pressing the number keypad, and then press START.
• After selecting an Oven Mode and Temperature, you have the option to set a Cook Time and Start Time
before pressing START. See “Cook Time” and “Start Time.”
USING THE OVEN

30” Electric Range | RRE303GS
34
Rangaire: Product Installation
4. Once START has been pressed, the oven will begin to preheat. When the oven has reached the set
temperature, a tone will sound.
NOTE: If a Start Time was set, the oven will turn on at the set time.
5. Place the food in the oven and close the oven door when preheat is complete.
6. Press CANCEL when nished cooking, and remove food from the oven.
NOTE: If you used Cook Time or Start Time to set a cook time, the oven will
turn off automatically.
BROIL
“Broil” uses direct radiant heat to cook food. The lower the temperature, the slower the cooking. Thicker
cuts and unevenly shaped pieces of meat, sh and poultry may cook better at lower broiling temperatures.
NOTES:
• Before broiling, position rack according to the Broiling Chart.
• For best results, use a two-piece broiler pan with a grid (not provided). It is designed to drain juices which
helps to avoid spatter and smoke.
• For proper draining, do not cover the grid with foil. The bottom of the pan may be lined with aluminum
foil for easier cleaning.
• Trim excess fat to reduce spattering. Slit the remaining fat on the edges to avoid curling.
• Select HI Broil 550°F (288°C) for most broiling. Select LO Broil 450°F (232°C) for low-temperature broiling
for foods that take longer to cook, such as poultry, to avoid over browning.
• Pull out oven rack to stop position before turning or removing food. Use tongs to turn food to avoid the
loss of juices. Very thin cuts of sh, poultry or meat may not need to be turned.
• After broiling, remove the pan from the oven when removing the food. Drippings will bake on the pan if
left in the heated oven, making cleaning more difcult.
• Position food on grid in the broiler pan, then place it
TO BROIL
The temperature can be set from 450°F (232°C) to 550°F (288°C).
1. Place the food in the oven, preheating is not necessary.
2. Close the oven door.
3. Press BROIL. “BROIL” and “Set temp or START” and “550ºF” (288ºC) will be displayed.
4. Press START, if you wish to broil at 550°F (288°C). OR Enter the desired temperature by pressing the
number keypad, and then press START. The temperature can be set from 450°F (232°C) to 550°F
(288°C).
NOTES:
• The temperature can be changed at any time during cooking. Press CANCEL to clear the settings. Select
oven mode, then enter the desired temperature by pressing the number keypad, and then press START.
• After selecting an Oven Mode and Temperature, you have the option to set a Cook Time and Start Time
before pressing START. See “Cook Time” and“Start Time.”
5. BROIL will appear in the display after Start is pressed.
6. When cooking is nished, press CANCEL, and then remove food from the oven.
NOTE: If you used Cook Time or Delay Start to set a cook time, the oven will turn off automatically.
WARM/PROOF
The Warm mode keeps hot, cooked foods at serving temperature.
The Proof mode prepares dough for baking by activating the yeast.
USING THE OVEN
30” Electric Range | RRE303GS
35
Rangaire: Product Installation
IMPORTANT: Food must be at serving temperature before placing it in the warmed oven. Food may be
held up to 1 hour; however, breads and casseroles may become too dry if left in the oven during the Warm
function. For best results, cover food.
WARM
1. Press WARM/PROOF, and then press WARM on the menu screen. “WARM” and “Set Temp or Press START”
and 170°F (78°C) will be displayed.
2. Press START, if you wish to Warm food at 170°F (78°C). OR Enter the desired temperature by pressing the
number keypad, and then press START. The temperature can be set from 140°F (60°C) to 210°F (99°C).
3. “WARM” will appear in the display, once Start is pressed.
NOTE: After selecting an Oven Mode and Temperature, you have the option to
set a Cook Time and Start Time before pressing START. See “Cook Time” and
“Start Time.”
4. Place food in the oven and close the door.
5. Press CANCEL when nished, and remove food from the oven.
PROOF
Before proong, place the dough in a lightly
greased bowl and cover loosely with wax paper,
coated with shortening.
1. Place on second rack from the bottom and close the ovendoor.
2. Press WARM/PROOF, and then press PROOF on the menu screen. “PROOF” and “Set Temp or Press
START,” and 100°F (38°C) will be displayed.
3. Press START, if you wish to Proof dough at 100°F (38°C). OR Enter the desired temperature by pressing
the number keypad, and then press START.The temperature can be set from 80°F (27°C) to 120°F (49°C).
4. “PROOF” will appear in the display, once Start is pressed.
NOTE: After selecting an Oven Mode and Temperature, you have the option to set a Cook Time and Start
Time before pressing START. See “Cook Time” and “Start Time.”
5. Let the dough rise until nearly doubled in size, checking after 20-25 minutes.Proong time may vary
depending on dough type and quantity.
6. Press CANCEL when nished.
7. Before second proong, shape the dough, place it in baking pan(s) and cover loosely with plastic
wrap, coated with cooking spray. Follow the same placement and control steps above. Before baking,
remove the plastic wrap.
Do not let food sit in oven more than one hour before or after cooking.
Doing so can result in food poisoning or sickness.
FOOD POISONING HAZARD
USING THE OVEN
30” Electric Range | RRE303GS
36
Rangaire: Product Installation
CONVECTION MODES
During convection cooking, the fan provides hot air circulation throughout the oven. The movement of
heated air around the food can help to speed up cooking by penetrating the cooler outer surfaces. Food
cooks more evenly, browning and crisping outer surfaces while sealing moisture inside. When the oven
is set to the Convection function, the ring element, bake and broil elements, and the fan operate to heat
the oven cavity. If the oven door is opened during convection cooking or preheating, the fan turns off
immediately and the element(s) will turn off after 30 seconds. Once the door is closed, the element(s) will
automatically turn on.
CONVECTION FAN
The convection fan operates during any convection mode. When the oven is operating in convection
mode, the fan will turn off automatically when the door is opened. The convection fan may run in non-
convection modes during the preheat time.
CONVECTION BAKE
• Use Convection Bake for single or multiple rack baking. Reduce standard recipe baking temperature by
25°F (15°C).
• For best results, foods should be cooked uncovered, in low-sided pans to take advantage of the forced
air circulation. Use shiny aluminum pans for best results unless otherwise specied.
• Heatproof glass or ceramic can be used. Reduce temperature by another 25°F(15°C) when using
heatproof glass dishes for a total reduction of 50°F (30°C).
• Dark metal pans may be used. Note that food may brown faster indarkmetal bakeware.
• The number of racks used is determined by the height of the food to be cooked.
• Baked items, for the most part, cook extremely well in convection. Don’t try to convert recipes such
as custards, quiches, pumpkin pie, or cheesecakes, which do not benet from the convection-heating
process. Use the regular Bake modefor these foods.
• Multiple rack cooking for oven meals is done on rack positions 1, 2, 3 , 4 and 5. All ve positions can be used
for cookies, biscuits and appetizers.
- 2 Rack baking: Use positions 1 and 3.
- 3 rack baking: Use positions 2, 3 and 4 or 1, 3 and 5.
• When baking four cake layers at the same time, stagger pans so that one pan is not directly above
another. For best results, place cakes on front of upper rack and back of lower rack. Allow 1" - 11/2" (2.5 -4
cm) air space around pans.
FOODS RECOMMENDED FOR CONVECTION BAKE MODE.
Appetizers Biscuits Coffee Cakes, Cookies (2 to 4 racks), Yeast Breads, Cream Puffs, Popovers, Casseroles
and One-Dish Entreés, Oven Meals (rack positions 1, 2, 3), Air Leavened Foods (Soufés, Meringue, Meringue-
Topped Desserts, Angel Food Cakes, Chiffon Cakes)
RACK POSITIONS
USING THE OVEN
30” Electric Range | RRE303GS
37
Rangaire: Product Installation
TO SET CONVECTION BAKE:
1. Press Convection BAKE once. “Set Temp or Press START” and 325°F (162°C) will be displayed.
2. Press START If you wish to convection bake at 325°F (162°C). OR Enter the desired temperature by
pressing the number keypad, and then press START. The temperature can be set from 170°F (77°C) to
500°F(260°C).
NOTES:
• To change the set temperature press CANCEL. Press the number keypad
to enter the desired temperature, and then press START.
• After selecting an Oven Mode and Temperature, you have the option to
set a Cook Time and Start Time before pressing START. See “Cook Time”
and “Start Time.”
3. The oven will begin preheating once Start is pressed. A tone will sound when the oven is at the set
temperature.
NOTE: There are two preheat modes for Convection Bake. Use Rapid Preheating when using multiple racks.
It is possible to switch between “Rapid Preheating”and “Preheating” by pressing START during the
preheating.
4. Place the food in the oven and close the oven door when preheat is completed.
5. Press CANCEL when nished, and then remove food from the oven.
NOTE: If you used Cook Time or Start Time to set a cook time, the
oven will turn off automatically.
CONVECTION BROIL
General Guidelines
• Place rack in the required position needed before turning on the oven.
• Use Convection Broil mode with the oven door closed.
• When convection broiling, enter your normal broiling temperature.
• Do not preheat oven.
• Use the 2-piece broil pan.
• Turn meats once halfway through the cooking time. See the Convection Broil chart.
• Thicker cuts and unevenly shaped pieces of meat, sh and poultry may cook better at lower broiling
temperatures.
FOOD AND THICKNESS
RACK
POSITION
BROIL SETTING
INTERNAL TEMP °F
(°C)
TIME SIDE 1
MIN
TIME SIDE 2
MIN
Steak (1½" or more)
Medium rare
Medium
Well
Hamburgers (more than 1")
Medium
Well
Chicken Quarters
Chicken Halves
Chicken Breasts
Pork Chops (1 ¼ or more)
Sausage - Fresh
4
4
4
4
4
4
3
4
4
4
Low
Low
Low
High
High
Low
Low
Low
Low
Low
145 (65)
160 (71)
170 (77)
160 (71)
170 (77)
180 (82)
180 (82)
170 (77)
160 (71)
160 (71)
9-12
11-13
18-20
8-11
11-13
16-18
25-27
13-15
12-14
4-6
8-10
10-12
16-17
5-7
8-10
10-13
15-18
9-13
11-13
3-5
USING THE OVEN

30” Electric Range | RRE303GS
38
Rangaire: Product Installation
TO SET CONVECTION BROIL:
1. Place the food in the oven and close the oven door.
2. Press Convection BROIL once. “Set Temp or Press Start” and 450°F (232 °C) will be displayed.
3. Press START, if you wish to broil at 450°F (232°C). OR Enter the desired temperature by pressing the
number keypad, and then press START. The temperature can be set from 170°F (77°C) to 550°F (288°C).
NOTES:
• To change the set temperature press CANCEL. Press the number keypad to enter the desired temperature,
and then press START.
• After selecting an Oven Mode and Temperature, you have the option to set a Cook Time and Start Time
before pressing START. See “Cook Time” and “Start Time.”
4. “Convect Broil” will be displayed, once Start is pressed.
5. Press CANCEL when cooking is nished, and then remove food from the oven.
CONVECTION ROAST
When Convection roasting, enter your normal roasting temperature. The roasting time should be 15-30%
less than in conventional cooking. It is not necessary to preheat the oven for convection roast.
General Guidelines
• Do not preheat for Convection Roast.
• Roast in a low-sided, uncovered pan.
• When roasting whole chickens or turkey, tuck wings behind back and loosely tie legs with kitchen string.
• Use the 2-piece broil pan for roasting uncovered.
• Use the probe or a meat thermometer to determine the internal doneness.
• Double-check the internal temperature of meat or poultry by inserting meat thermometer into another
position.
• Large poultry may need to be covered with foil (and pan roasted) during a portion of the roasting time
to prevent over-browning.
• The minimum safe temperature for stufng in poultry is 165ºF (75ºC).
• After removing the food from the oven, cover loosely with foil for 10 to 15 minutes before carving if
necessary to increase the nal food stuff temperature by 5° to 10°F (3° to 6° C).
To Set Convection Roast:
1. Place the food in the oven and close the oven door.
2. Press CONVECTION ROAST once. “Set Temp or Press Start”, and 325°F (163°C) will be displayed.
3. Press START, if you wish to convection roast at 325°F (163°C). OR Enter the desired temperature by
pressing the number keypad, and then press START. The temperature can be set from 170°F (77°C) to
500°F (260°C).
NOTES:
• To change the set temperature press CANCEL. Press the number keypad to enter the desired temperature,
and then press START.
• After selecting an Oven Mode and Temperature, you have the option to set a Cook Time and Start Time
before pressing START. See “Cook Time” and “Start Time.”
4. Press START. After pressing START, the oven will display ”CONVECT ROAST” while cooking.
5. Press CANCEL when nished, and then remove food from the oven.
NOTE: If you used Cook Time or Start Time to set a cook time, the oven will turn off automatically.
USING THE OVEN

30” Electric Range | RRE303GS
39
Rangaire: Product Installation
CONVECTION CONVERSION
When using a Convection Recipe, enter your normal cooking temperature and time. The Convection
Conversion mode will adjust the temperature and time for perfect cooking results.
IMPORTANT:
• The oven door must be closed before selecting a Convection Conversion oven mode.
• Setting Cook Time is required for a Convection Conversion oven mode. If Cook Time was not set, the
control will prompt you to Set Cook Time. See “CookTime.”
NOTE: At the end of the set Cook Time, the oven will turn off automatically, the end of cycle tone will sound
and “Cooking Complete” will appear in the display.
BAKED GOODS
1. Press BAKED GOODS among the Convection Conversion controls.
2. Set the oven temperature.
NOTE: The temperature can be set from 170°F (77°C) to 500°F (260°C).
3. Press START. “Set cooking time” will appear in the display.
4. Press the number keypad to enter the desired cook time. Press START will appear in the display.
NOTE: If a delayed start time is desired, Press START TIME, and then press the number keypad to enter the
desired start time. Press START will appear the display. Set Cook Time is mandatory for the Convection
oven mode.If Cook Time was not set, the control will prompt you to “Set Cook Time.”
5. Press START. The oven begins to preheat. Once the set temperature has been reached, a tone will
sound.
NOTE: If the recipe requires the food to be cooked in a preheated oven, add 15 minutes to Cook Time to
allow time for the oven to preheat. Once the oven is heated to the set temperature and the tone sounds,
place food in the oven.
6. At the end of the set Cook Time the oven will turn off automatically, the end of cycle tone will sound
and “Cooking Complete” will appear in the display.
MEATS
IMPORTANT: It is not necessary to preheat the oven for the convection conversion MEAT option.
1. Press MEATS among the Convection Conversion controls.
2. Set the oven temperature.
NOTE: The temperature can be set from 170°F (77°C) to 500°F (260°C).
3. Press START. “Set cooking time” will appear in the display.
4. Press the number keypad to enter the desired cook time. “Press START” will appear in the display.
NOTE: Set Cooking Time is mandatory for the Convection Conversion oven mode.
5. At the end of the set Cook Time the oven will turn off automatically, the end of cycle tone will sound
and “Cooking Complete” will appear in the display.
OTHER FOODS
1. Press OTHER FOODS among the Convection Conversion controls.
2. Set the oven temperature.
NOTE: The temperature can be set from 170°F (77°C) to 500°F (260°C).
3. Press START. “Set cooking time” will appear in the display.
4. Press the number keypad to enter the desired cook time. Press START will appear in the display.
NOTE: If a delayed start time is desired, Press START TIME, and then press the number keypad to enter the
desired start time. Press START will appear the display. Set Cook Time is mandatory for the Convection
oven mode.If Cook Time was not set, the control will prompt you to “Set Cook Time.”
5. Press START. The oven begins to preheat. Once the set temperature has been reached, a tone will
sound.
USING THE OVEN
30” Electric Range | RRE303GS
40
Rangaire: Product Installation
NOTE: If the recipe requires the food to be cooked in a preheated oven, add 15 minutes to Cook Time to
allow time for the oven to preheat. Once the oven is heated to the set temperature and the tone sounds,
place food in the oven.
6. At the end of the set Cook Time the oven will turn off automatically, the end of cycle tone will sound
and “Cooking Complete” will appear in the display.
MEATS
WEIGHT
(LB)
OVEN TEMP.
°F (°C)
RACK
POSITION
TIME MIN
PER LB
INTERNAL
TEMP °F (°C)
BEEF
PORK
POULTRY
LAMB
Rib Roast
Rib Eye Roast (Boneless)
Loin Roast
Shoulder
Chicken Whole
Turkey, Not Stuffed
Turkey, Not Stuffed
Turkey, Not Stuffed
Turkey Breast
Cornish Hen
Half Leg
Whole Leg
Tenderloin Roast
Rump, Eye, Tip, Sirloin
(Boneless)
4-6
4-6
5-8
3-6
3-4
12-15
16-20
21-25
3-8
1-1 ½
3-4
6-8
2-3
3-6
325 (160)
325 (160)
350 (175)
350 (175)
375 (190)
325 (160)
325 (160)
325 (160)
325 (160)
350 (175)
325 (160)
325 (160)
400 (205)
325 (160)
2
2
2
2
2
1
1
1
1
2
2
1
2
2
16-20
16-20
16-20
20-25
18-21
10-14
9-11
6-10
15-20
45-75
22-27
22-27
28-33
28-33
15-20
16-20
18-22
18-22
18-22
145(63) Medium Rare
145(63) Medium Rare
160(71) Medium
160(71) Medium
180(82)
180(82)
180(82)
180(82)
170(77)
180(82)
160(71) Medium
160(71) Medium
170(77) Well
170(77) Well
145(63) Medium Rare
145(63) Medium Rare
160 (71) Medium
160 (71) Medium
160 (71) Medium
USING THE OVEN
30” Electric Range | RRE303GS
41
Rangaire: Product Installation
TO SET CONVECTION ROAST:
1. Place the food in the oven and close the oven door.
2. Press CONVECTION ROAST once. “Set Temp or Press Start”, and 325°F (163°C) will be displayed.
3. Press START, if you wish to convection roast at 325°F (163°C). OR Enter the desired temperature by
pressing the number keypad, and then press START. The temperature can be set from 170°F (77°C) to
500°F (260°C).
NOTES:
• To change the set temperature press CANCEL. Press the number keypad to enter the desired temperature,
and then press START.
• After selecting an Oven Mode and Temperature, you have the option to set a Cook Time and Start Time
before pressing START. See “Cook Time” and “Start Time.”
4. Press START. After pressing START, the oven will display ”CONVECT ROAST” while cooking.
5. Press CANCEL when nished, and then remove food from the oven.
NOTE: If you used Cook Time or Start Time to set a cook time, the oven will turn off automatically.
CONVECTION CONVERSION
When using a Convection Recipe, enter your normal cooking temperature
and time. The Convection Conversion mode will adjust the temperature and
time for perfect cooking results.
IMPORTANT:
• The oven door must be closed before selecting a Convection Conversion oven mode.
• Setting Cook Time is required for a Convection Conversion oven mode. If Cook Time was not set, the
control will prompt you to Set Cook Time. See “CookTime.”
NOTE: At the end of the set Cook Time, the oven will turn off automatically, the end of cycle tone will sound
and “Cooking Complete” will appear in the display.
BAKED GOODS
1. Press BAKED GOODS among the Convection Conversion controls.
2. Set the oven temperature.
NOTE: The temperature can be set from 170°F (77°C) to 500°F (260°C).
3. Press START. “Set cooking time” will appear in the display.
4. Press the number keypad to enter the desired cook time. Press START will appear in the display.
NOTE: If a delayed start time is desired, Press START TIME, and then press the number keypad to enter the
desired start time. Press START will appear the display. Set Cook Time is mandatory for the Convection
oven mode. If Cook Time was not set, the control will prompt you to “Set Cook Time.”
5. Press START. The oven begins to preheat. Once the set temperature has been reached, a tone will
sound.
NOTE: If the recipe requires the food to be cooked in a preheated oven,add 15 minutes to Cook Time to
allow time for the oven to preheat. Once the oven is heated to the set temperature and the tone sounds,
place food in the oven.
6. At the end of the set Cook Time the oven will turn off automatically, the end of cycle tone will sound
and “Cooking Complete” will appear in the display.
MEATS
IMPORTANT: It is not necessary to preheat the oven for the convection
conversion MEAT option.
1. Press MEATS among the Convection Conversion controls.
2. Set the oven temperature.
NOTE: The temperature can be set from 170°F (77°C) to 500°F (260°C).
USING THE OVEN
30” Electric Range | RRE303GS
42
Rangaire: Product Installation
3. Press START. “Set cooking time” will appear in the display.
4. Press the number keypad to enter the desired cook time. “Press START” will appear in the display.
NOTE: Set Cooking Time is mandatory for the Convection Conversion oven mode.
5. At the end of the set Cook Time the oven will turn off automatically, the end of cycle tone will sound
and “Cooking Complete” will appear in the
6. display.
OTHER FOODS
1. Press OTHER FOODS among the Convection Conversion controls.
2. Set the oven temperature.
NOTE: The temperature can be set from 170°F (77°C) to 500°F (260°C).
3. Press START. “Set cooking time” will appear in the display.
4. Press the number keypad to enter the desired cook time. Press START will appear in the display.
NOTE: If a delayed start time is desired, Press START TIME, and then press the number keypad to enter the
desired start time. Press START will appear the display. Set Cook Time is mandatory for the Convection
oven mode.If Cook Time was not set, the control will prompt you to “Set Cook Time.”
5. Press START. The oven begins to preheat. Once the set temperature has been reached, a tone will
sound.
NOTE: If the recipe requires the food to be cooked in a preheated oven,add 15 minutes to Cook Time to
allow time for the oven to preheat. Once the oven is heated to the set temperature and the tone sounds,
place food in the oven.
6. At the end of the set Cook Time the oven will turn off automatically, the end of cycle tone will sound
and “Cooking Complete” will appear in the display.
USING THE OVEN
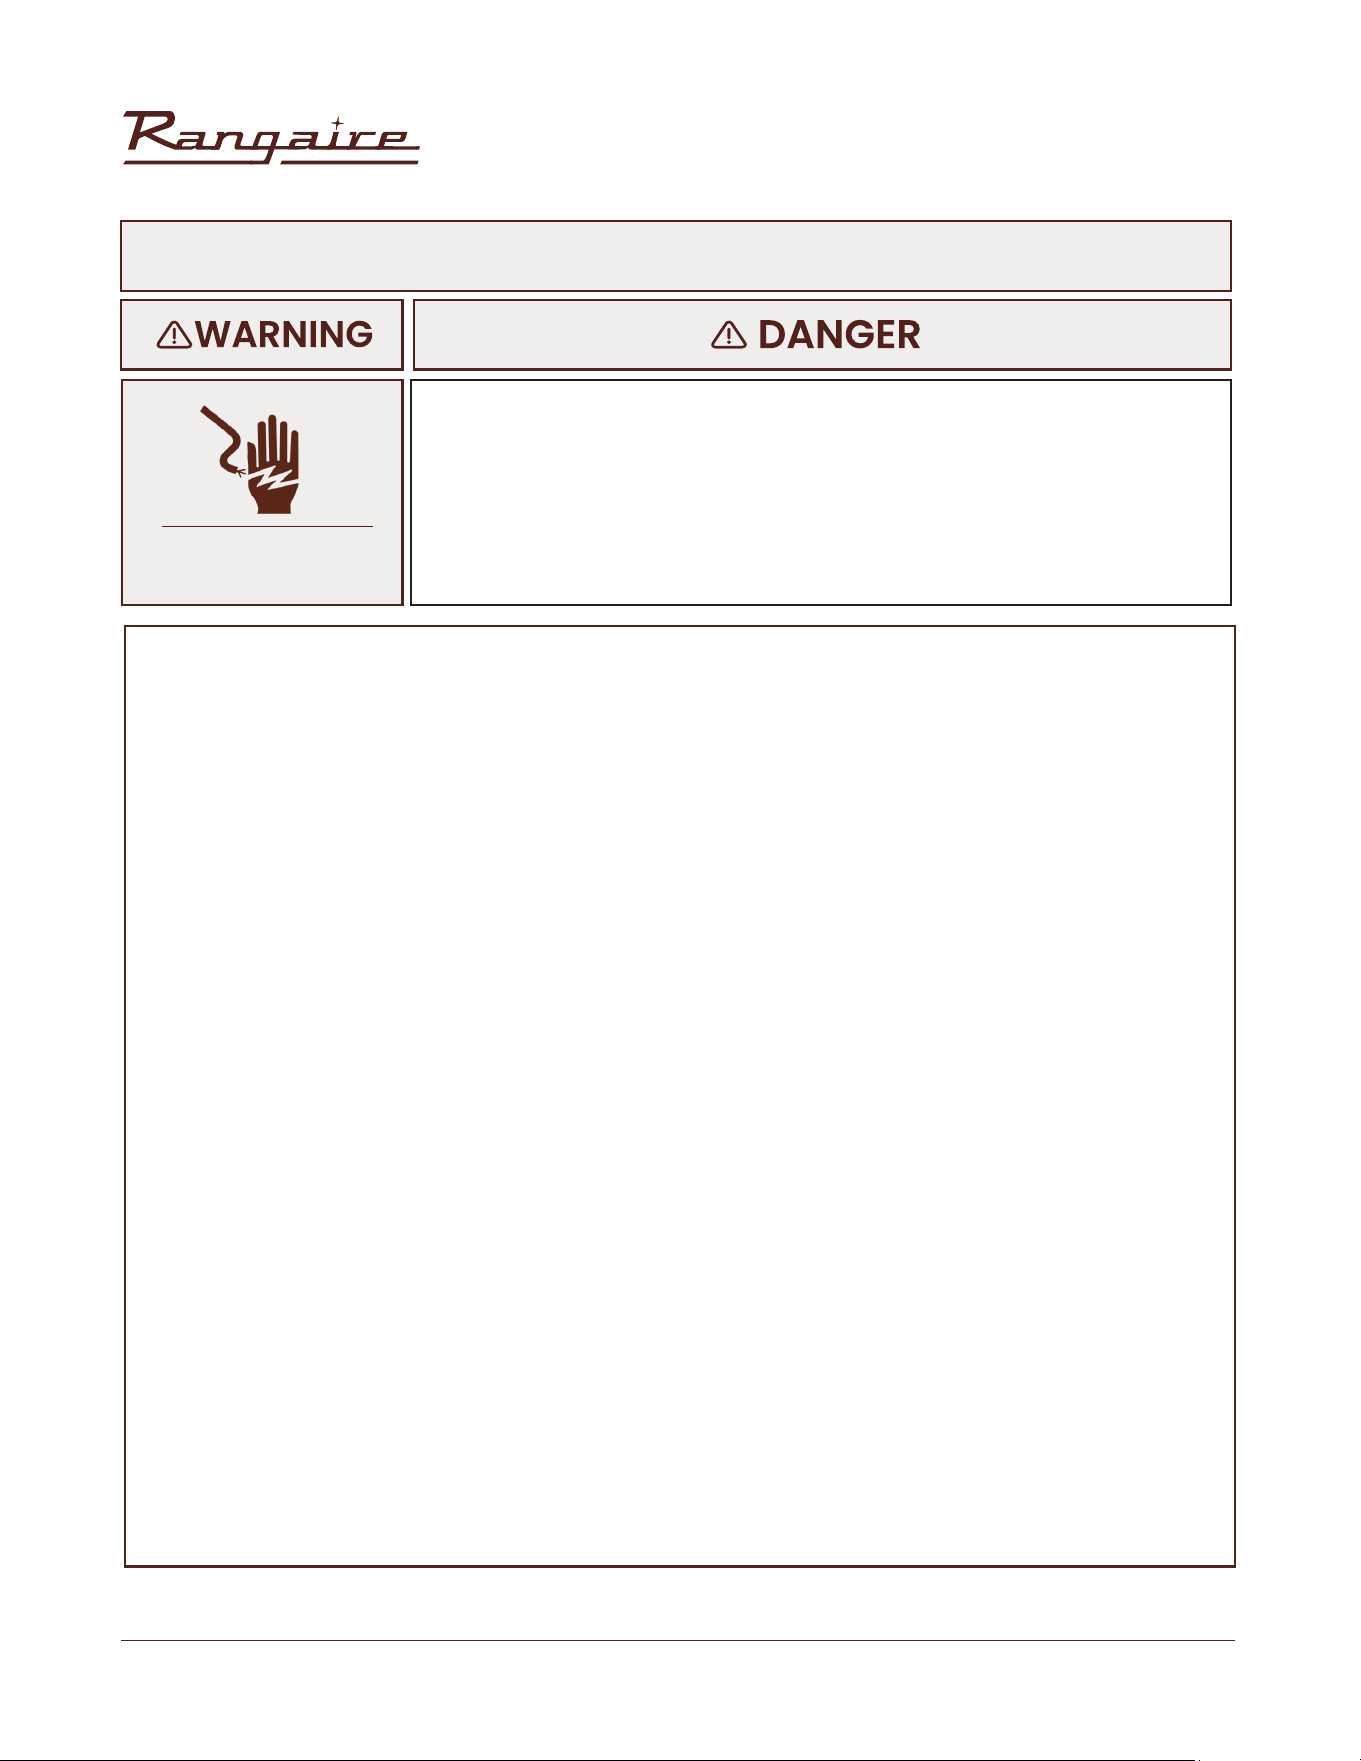
30” Electric Range | RRE303GS
43
Rangaire: Product Installation
CARE AND CLEANING
BURN HAZARD
To avoid possible burns use care when cleaning the appliance.
DO NOT attempt to clean the appliance whenever the oven or burner heads
are still hot.
To avoid possible burns DO NOT attempt any of the following cleaning
instructions before turning OFF ALL of the surface burners and allowing them
to cool.
IMPORTANT: Always follow label instructions on cleaning products.
ELECTRICAL SHOCK
HAZARD
MAITENANCE
CLEANING
IMPORTANT: Before cleaning, make sure all controls are turned off, and the oven and cooktop are cool.
Always follow label instructions on cleaning products. It is recommended that you rst use soap, water
and a soft cloth or sponge unless otherwise noted. Do not use abrasive cleaning products.
EXTERIOR PORCELAIN ENAMEL SURFACES
Food spills containing acids, such as vinegar and tomato, should be cleaned as soon as the entire
appliance is cool. These spills may affect the nish.
Cleaning Method:
Glass cleaner, mild liquid cleaner or nonabrasive scrubbing pad: Gently clean around the model and serial
number plate because scrubbing may remove numbers.
EXTERIOR STAINLESS STEEL
NOTE: Do not use soap-lled scouring pads, abrasive cleaners, cooktop polishing cream, steel-wool pads,
gritty washcloths or some paper towels. Damage may occur, even with one-time or limited use. Rub in
direction of grain to avoid damaging.
Cleaning Method:
Liquid detergent or all-purpose cleaner: Rinse well with clean water and dry with soft, lint-free cloth.
Stainless Steel Cleaner and Polish Vinegar for hard water spots
OVEN DOOR EXTERIOR
Cleaning Method:
Glass cleaner and paper towels or nonabrasive plastic scrubbing pad: Apply glass cleaner to soft cloth or
sponge, not directly on panel.
CERAMIC GLASS COOKTOP
IMPORTANT: To avoid damaging the cooktop, do not use steel wool, abrasive powder cleansers, chlorine
bleach, rust remover or ammonia. Ceramic
cooktop cleaning materials: cooktop cleaner, cooktop scraper and cooktop
cleaning pads are available at most grocery stores.
To Clean the Ceramic Glass Cooktop:
1. Remove food/residue with a cooktop scraper.
• For best results, use the cooktop scraper while the cooktop is still warm, but not hot to the touch.
30” Electric Range | RRE303GS
44
Rangaire: Product Installation
• It is recommended to wear an oven mitt while scraping the warm cooktop.
• Hold the cooktop scraper at approximately a 45° angle against the glass surface and scrape the residue.
It will be necessary to apply pressure in order to remove the residue.
• Allow the cooktop to cool down completely before proceeding to Step 2.
2. Apply a few dime-sized drops of cooktop cleaner to the affected areas.
• Rub cooktop cleaner onto the cooktop surface with a nylon or similar cooktop cleaning pad. Some
pressure is needed to remove stubborn stains.
• Allow the cleaner to dry to a white haze before proceeding to Step 3.
3. Polish with a clean, dry cloth or a clean, dry paper towel. SMUDGES FROM ALUMINUM BOTTOMED PANS
Cleaning Method:
A cloth dampened in vinegar.
COOKTOP CONTROL KNOBS
• Pull knobs straight out from the control panel to remove.
• When replacing knobs, make sure knobs are turned to the Off position.
Cleaning Method:
Soap and water or dishwasher:
NOTE: Do not use steel wool, abrasive cleansers or oven cleaner. Do not soak knobs.
CONTROL PANEL
Cleaning Method:
Glass cleaner and soft cloth or sponge: Apply glass cleaner to soft cloth or sponge, not directly on panel.
NOTE: Do not use abrasive cleaners, steel-wool pads, gritty washcloths or some paper towels. Damage
may occur.
OVEN CAVITY
Food spills should be cleaned when oven cools. At high temperatures, foods react with porcelain, so
staining, etching, pitting or faint white spots can result.
Cleaning Method:
Mild detergent and warm water.
NOTE: Do not use oven cleaners.
OVEN RACKS
Cleaning Method:
Steel-wool pad
MAITENANCE
30” Electric Range | RRE303GS
45
Rangaire: Product Installation
BURN HAZARD
Do not touch the oven during the Self-Cleaning cycle.
Keep children away from oven during Self-Cleaning cycle.
Failure to do so can result in burns.
BURN HAZARD
OVEN SELF CLEANING
The Self-Cleaning cycle uses very high temperatures, burning soil to a powdery ash.
IMPORTANT: The health of some birds is extremely sensitive to the fumes given off during the Self-Cleaning
cycle. Exposure to the fumes may result in death to certain birds. Always move birds to another closed and
well-ventilated room.
NOTES:
• Self-clean the oven before it becomes heavily soiled. Heavy soil results in longer cleaning and more
smoke.
• Keep the kitchen well-ventilated during the Self-Cleaning cycle to help get rid of heat, odors, and smoke.
• Do not clean, rub, damage or move the oven gasket. The door gasket is essential for a good seal.
• Allow the oven to cool to room temperature before using the Self- Clean feature. If your oven cavity is
above 170°F (77°C), “Oven Cooling” will appear in the display and the Self-Clean cycle will not activate until
it cools down.
• The oven light will not work during the Self-Cleaning cycle. On some models, the surface elements will not
work during the Self-Cleaning cycle.
• When “LOCK” shows in the display, the oven door cannot be opened. To avoid damage to the door, do not
force the door open when “LOCK” is displayed.
Prepare Oven:
• Remove the broiler pan, cookware and bakeware and, on some models, the temperature probe from the
oven.
• Remove oven racks to keep them shiny and easy to slide. See “General Cleaning” section for more
information.
• Remove any foil from the oven because it may burn or melt, damaging the oven.
• Hand clean inside door edge and the 1½" (3.8 cm) area around the inside oven cavity frame, being certain
not to move or bend the gasket. This area does not get hot enough during self-cleaning to remove soil. Do
not let water, cleaner, etc., enter slots on door frame. Use a damp cloth to clean this area.
• Wipe out any loose soil to reduce smoke and avoid damage. At high temperatures, foods react with
porcelain. Staining, etching, pitting or faint white spots can result. This will not affect cooking performance.
To Self-Clean:
NOTE: The oven is preset for a 2.5 hour Cleaning cycle; however, the Cleaning time can be adjusted.
Suggested cleaning times are:
2 Hours - Light soil
MAITENANCE

30” Electric Range | RRE303GS
46
Rangaire: Product Installation
3 Hours - Average soil
3.5 Hours - Heavy soil.
1. Close the oven door.
NOTE: If an oven door is left open, “Door Open Clean Canceled” will appear in the display and a tone will
sound.
2. Press SELF CLEAN. “Remove Racks” will scroll in the selected oven text area for 5 seconds, followed by
“Select Option.” “Select Level” and “Press 1. Level 1 (Quick) 2. Level 2, 3. Level 3, 4. Level 4 (reg), 5. Level 5,
6. Level 6 (Maxi)” will scroll in the display text area.
3. Enter the desired Clean level by pressing the number keypad, and then press START.
NOTE: The oven door will lock. “SELF CLEAN” will scroll in the display panel until the clean cycle is nished.
When the self-clean cycle ends: “COMPLETE” appears in the display and the oven door unlocks
4. Open the oven door. Once the oven has completely cooled, remove ash with a damp cloth.
NOTE: Set Cooking Time is mandatory for the Convection Conversion oven mode.
To Delay Start Self-Clean:
1. Press START TIME.
2. “--:--” will be displayed, and “Set time to delay. Then Press START” will scroll from right to left in the
selected oven text area. Enter the time-of-day that you want oven cleaning to begin, by pressing the
number keypad.
3. Press START. “Select cooking/cleaning mode” will scroll in the selected oven text area.
4. Press SELF CLEAN. “Remove Racks” will scroll in the selected oven text area for 5 seconds, followed by
“Select Option.”
5. “Select Level” and “Press 1. Level 1 (Quick) 2. Level 2, 3. Level 3, 4. Level 4 (reg), 5. Level 5, 6. Level 6 (Maxi)”
will scroll in the display text area.
6. Enter the desired Clean level by pressing the corresponding number on the keypad.
7. Press START. The cleaning cycle will begin when the set Time is reached.
When the self-clean cycle ends:
“COMPLETE” appears in the display and the oven door unlocks.
8. Open the oven door. Once the oven has completely cooled, remove ash with a damp cloth.
NOTE: To avoid breaking the glass, do not apply a cool, damp cloth to the
inner door glass before it has completely cooled.
MAITENANCE

30” Electric Range | RRE303GS
47
Rangaire: Product Installation
• Make sure the oven and lights are cool and power to the oven has
been turned off before replacing the light bulb(s).
• The lenses must be in place when using the oven. The lenses
serve to protect the light bulb from breaking.
• The lenses are made of glass. Handle carefully to avoid breakage.
• Failure to do so could result in death, electric shock, cuts or burns.
REMOVING AND CLEANING THE OVEN DOOR
For normal range use, it is not suggested to remove the oven door. However, if removal is necessary,
make sure the oven is off and cool. The oven door is heavy. Follow these instructions.
• Open the door fully.
• Lift up and push the small levers located on the two hinges all the way back.
• While holding the door on each side, shut the door until it touches the levers.
• Then continue closing the door until it is about 4 inches (10cm) from being fully closed.
• Pull the door towards you, pulling it out of its seat. Door will gently come away from the oven. (See
Figure 15)
• To replace the door, perform the reverse of the above procedure.
• Note: If door does not come away from oven easily, do not force it.
FIGURE 15 FIGURE 16
ELECTRICAL SHOCK
HAZARD
MAITENANCE
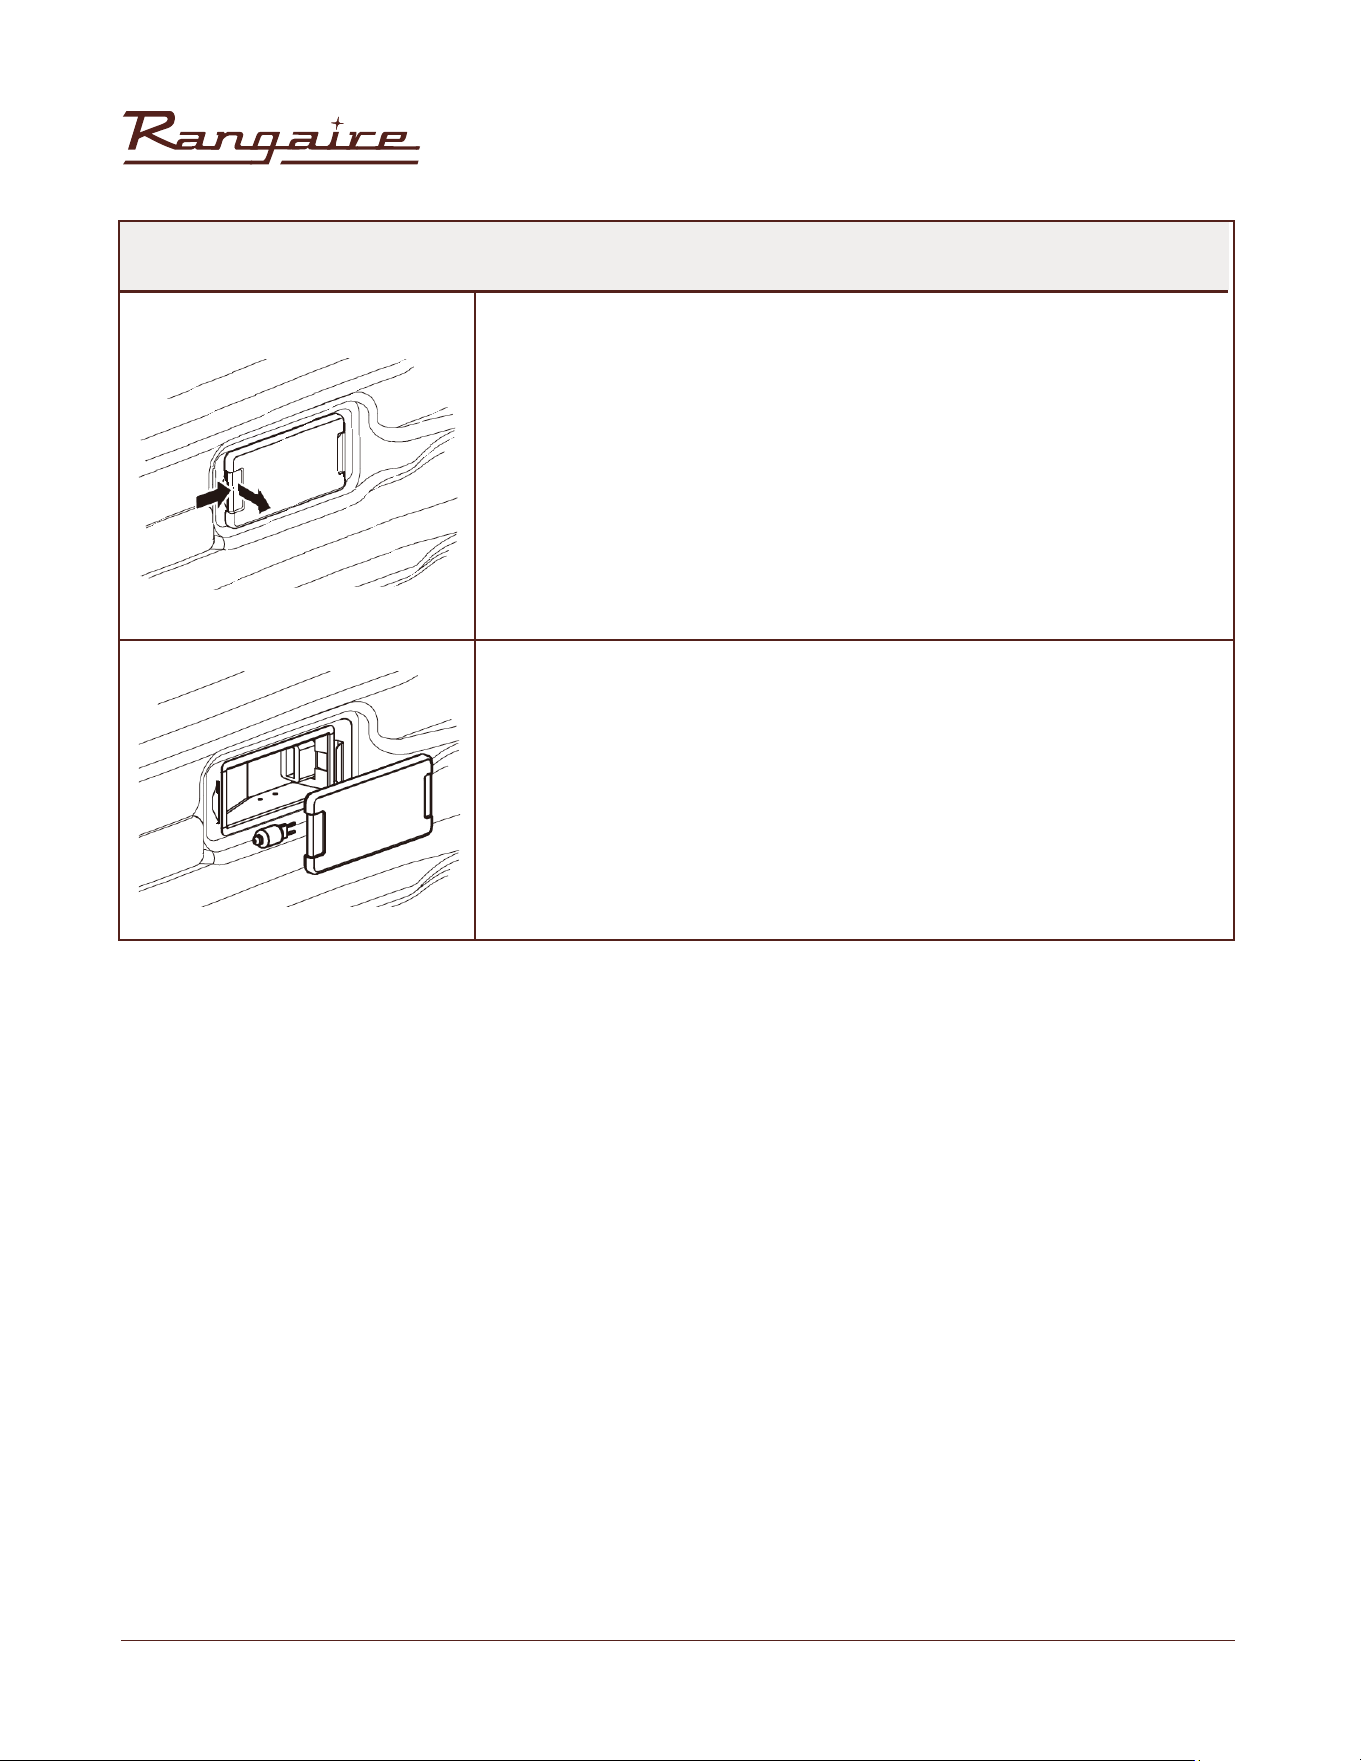
30” Electric Range | RRE303GS
48
Rangaire: Product Installation
REPLACING AN OVEN LIGHT
The oven light is a standard 25 watt (G9) appliance bulb.
IMPORTANT: Before replacing the bulb, make sure the oven is cool and
the controls are turned off.
1. Disconnect power at the main power supply (fuse or breaker box).
2. Remove the bulb cover by pulling it out of the opening.
3. Remove the burned out bulb from the socket.
NOTE: To avoid damage or decreasing the life of the new bulb, do not
touch bulb with bare ngers. Wear cotton gloves or use a tissue when
replacing the light bulb.
4. Replace the bulb, and then replace the bulb cover.
5. Reconnect power at the main power supply (fuse or breaker box).
MAITENANCE
30” Electric Range | RRE303GS
49
Rangaire: Product Installation
SOLUTIONS TO COMMON PROBLEMS
Before calling for service, review this list. It may save you both time and expense. This list includes
common experiences that are not the result of defective workmanship or material in your appliance.
TROUBLESHOOTING
BAKING PROBLEMS
With any oven setting poor results can occur for many reasons other than a malfunction of the oven.
Check the chart below for causes of the most common problems. Since the size, shape and material of
baking utensils directly affect the baking results, the best solution may be to replace old baking utensils
that have darkened and warped with age and use.
PROBLEM CAUSE
Food browns unevenly
Food too brown on
bottom
Food is dry or has
shrunk excessively
Food is baking or
roasting too slowly
Pie crusts do not
brown on bottom or
crust is soggy
Cakes pale, at and
may not be done
inside
Cakes high in middle
with crack on top
Pie crust edges too
brown
• Oven not preheated
• Aluminum foil on oven rack or oven bottom
• Baking utensil too large for recipe
• Pans touching each other or oven walls
• Oven not preheated
• Using glass, dull or darkened metal pans
• Incorrect rack position
• Pans touching each other or oven walls
• Oven temperature too high
• Baking time too long
• Oven door opened frequently
• Pan size too large
• Oven temperature too low
• Oven not preheated
• Oven door opened frequently
• Tightly sealed with aluminum foil
• Pan size too small
• Baking time not long enough
• Using shiny steel pans
• Incorrect rack position
• Oven temperature is too low
• Oven temperature too low
• Incorrect baking time
• Cake tested too soon
• Oven door opened too often
• Pan size may be too large
• Oven temperature too high
• Baking time too long
• Pans touching each other or oven walls
• Incorrect rack position
• Pan size too small
• Pan size may be too large
• Oven temperature too high
• Edges of crust too thin
30” Electric Range | RRE303GS
50
Rangaire: Product Installation
TROUBLESHOOTING
COOKTOP PROBLEMS
PROBLEM POSSIBLE CAUSE SOLUTION
Heating elements
and controls do not
work.
Heating elements do
not heat properly.
Heating elements
elements are turned
to their highest
settings.
Glass ceramic
surface is see
through or appears
to be red in color.
Fuse is blown or circuit
breaker is tripped.
No electricity to the
cooktop.
Replace the fuse or reset the circuit breaker. If the
problem continues, call an electrician.
Have electrician check your power supply.
Select proper cookware. See “Cookware.”
If the problem continues, call for service.
This is a normal operating condition, especially
during rapid heat-up operations. The element will
cycle back on automatically after it has cooled
sufciently
These are normal properties of black ceramic glass
panels.
Improper cookware is
being used.
Heating element
temperature limiters
are temporarily shutting
exceeding the maximum
allowable temperature.
Under direct or bright
lighting, you will
sometimes be able to
see through the glass
and into the chassis due
to its transparent quality.
You may also notice
a red tint under these
conditions
30” Electric Range | RRE303GS
51
Rangaire: Product Installation
OVEN PROBLEMS
PROBLEM POSSIBLE CAUSE SOLUTION
Oven is not heating
Oven is not cooking
evenly
Oven display stays off
Cooling fan continues
to run after oven is
turned off
Oven light is not
working properly
Oven light stays on
Cannot remove lens
cover
Clock and timer are
not working properly
Excessive Moisture
Porcelain Chips
Oven mode and
temperature controls
cannot be set.
No power to the range.
Check the circuit breaker or fuse box to your house.
Make sure there is proper electrical power to the
oven.
Refer to cook charts for recommended rack position.
Always reduce recipe temperature by 25 °F (15 °C)
when baking with Convention Bake mode.
Turn off power at the main power supply (fuse or
breaker box). Turn breaker back on. If condition
persists, call for service.
The fan will turn off automatically when the
electronic components have cooled sufciently.
Reinsert or replace the light bulb. Touching the bulb
with ngers may cause the bulb to burn out.
Check for obstruction in oven door. Check to see if
hinge is bent or door switch broken.
Wipe lens cover area with a clean, dry towel prior to
attempting to remove the lens cover.
Check the circuit breaker or fuse box to your house.
Make sure there is proper electrical power to the
oven.
When using bake mode, preheat the oven rst.
Convection Bake and Convection Roast will
eliminate any moisture in the oven.
When removing and replacing oven racks, always
tilt racks upward and do not force them to avoid
chipping the porcelain.
Close the oven door. The oven mode and
temperature controls cannot be set if the oven door
is open.
Make sure the oven temperature has
been selected.
Oven control not
turned on.
Not using the correct
bake ware or oven
rack position.
Power interruption.
The electronic
components have not
yet cooled sufciently.
Light bulb loose or
burned-out.
Door is not closing
completely.
Soil build-up around
the lens cover.
No power to the range.
Porcelain interior is
chipped by oven racks
The oven door is
open.
TROUBLESHOOTING
30” Electric Range | RRE303GS
52
Rangaire: Product Installation
Correct Disposal of this Product
This marking indicates that this appliance should not
be disposed with other household wastes. To prevent
possible harm to the environment or human health from
uncontrolled waste disposal, recycle it responsibly to
promote the sustainable resuse of material resources.