OPERATOR'S MANUAL
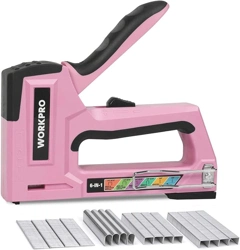
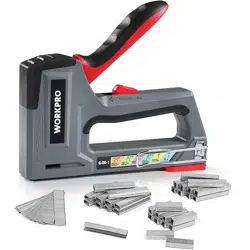
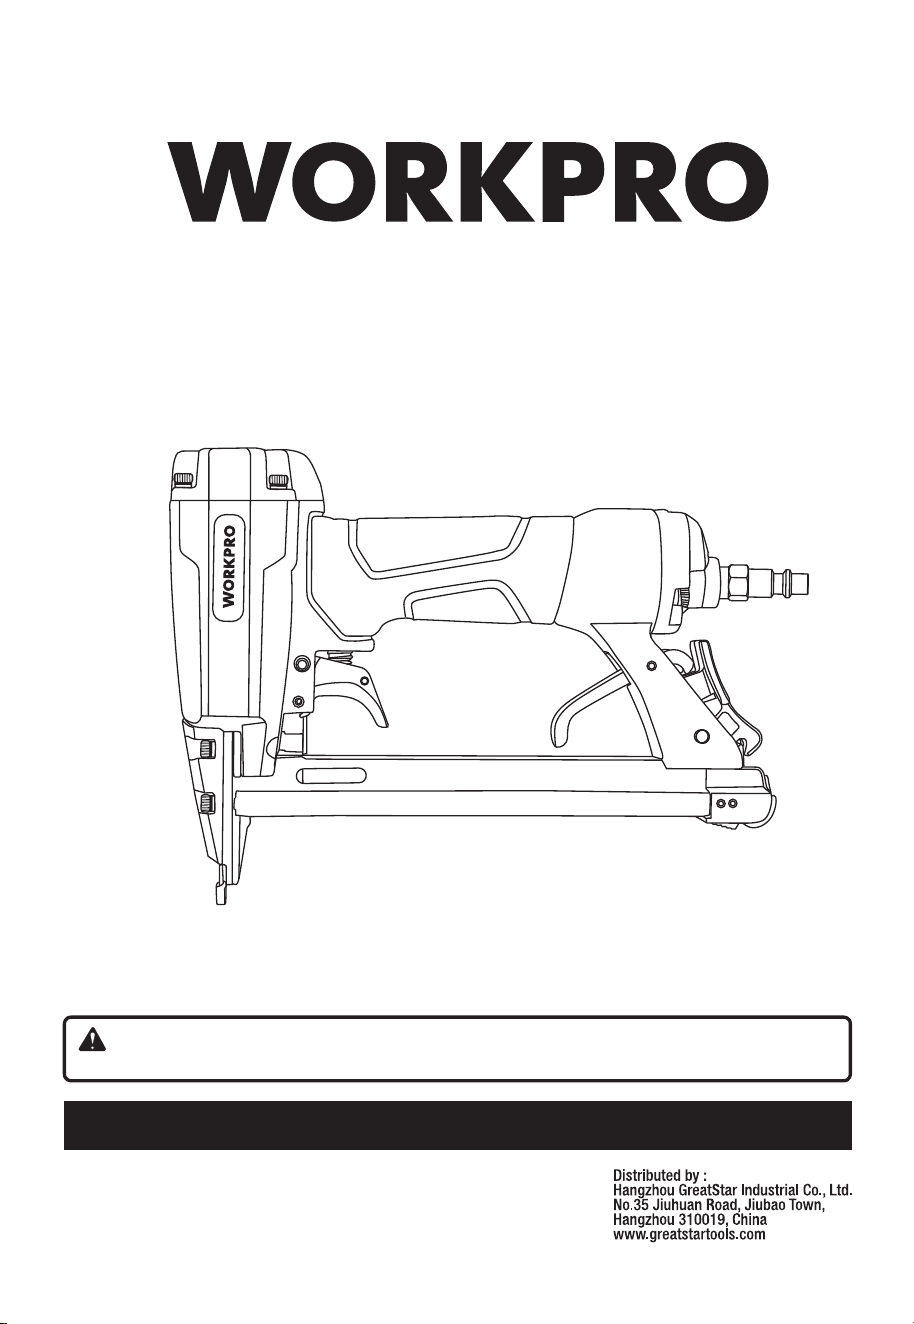
PNEUMATIC STAPLER
W181003A
SAVE THIS MANUAL FOR FUTURE REFERENCE
WARNING: To reduce the risk of injury, the user must read and understand the operator’s manual before
using this product.
Thank you for buying a WORKPRO product. Your pneumatic stapler has been engineered and manufactured to
WORKPRO’s high standard for dependability, ease of operation, and operator safety. When properly cared for, it will
give you years of rugged, trouble-free performance.
2
WORK AREA
Keep your work area clean and well lit. Cluttered
and dark areas invite accidents.
Operate in a safe work environment. Do not use in
damp or wet locations. Do not expose to rain. Do not
use in the presence of flammable gases or liquids.
Keep children, bystanders and visitors away
from the work area. Distraction can cause you to
lose control. Do not let them handle tools, hoses or
extension cords. No one should be in the work area
if they are not wearing suitable protective equipment.
Store unused equipment. When not in use, tools
must be stored in a dry location to prevent rust.
Always lock up tools and keep them out of reach of
children
PERSONAL SAFETY
Dress properly, wear protective equipment. Use
eye, face, head, breathing and ear protection.
Always wear ANSI approved impact safety goggles,
which must provide both frontal and side protection.
Protect your hands with suitable gloves. Wear a full
face shield if your work creates metal filings or wood
chips. Wear an ANSI approved dust mask or
respirator when working around metal, wood and
chemical dusts and mists. Wear ANSI approved
earplugs. Protective, electrically non-conductive
clothes and non-skid footwear are recommended
when working. Wear steel toed boots to prevent
injury from falling objects.
Do not over reach; keep proper footing and
balance at all times. Proper footing and balance
enables better control of the tool in unexpected
situations.
Do not wear loose clothing or jewellery as they
can be caught in moving parts. Tie back long hair.
These can be caught in moving parts, resulting in
damage to the tool and/or serious injury.
Stay alert, watch what you are doing and use
your common sense. Do not operate any machine
or tool when you are tired, under the influence of
drugs, alcohol or medications.
Use clamps or other practical ways to secure
and support the work piece to a stable platform.
Holding the work piece by hand or against your
body is unstable and may lead to loss of control.
SPECIFIC SAFETY PRECAUTIONS
Do not point the tool at yourself, or others. Keep
hands, and any other body parts away from the
nosepiece, this will help prevent injury.
Do not drive a fastener on top of a previously
nailed fastener, or the fastener can ricochet
causing personal injury.
Do not drive any fasteners close to the edge of
the work piece. The work piece could split allowing
a fastener to fly free or ricochet, causing personal
injury.
Make sure the correct fasteners are being used,
as specified.
TOOL USE AND CARE
Use the right tool for the job. Do not attempt to
force a small tool or attachment to do the work of a
larger industrial tool. The tool will perform better and
more safely at the task for which it was intended. Do
not modify this tool or use for a purpose for which it
was not designed.
Read and understand all instructions before
using this tool. Failure to follow all instructions
may result in electric shock, fire and/or personal
injury. Keep this manual for the safety warnings
and precautions, operating, inspection and mainte-
nance instructions. When using this tool, basic
precautions should always be followed to reduce
the risk of personal injury and/or damage to the
equipment. Note that when this manual refers to a
part number, it refers to the parts list included.
WARNING!
IMPORTANT SAFETY INSTRUCTIONS
TOOL SPECIFICATIONS
Staple capacity
Staple length
Fastener size
Operating pressure
Max pressure
100 pieces
1/4" (6mm) - 5/8" (16mm) (1/4", 5/16", 3/8," 1/2", 17/32", 9/16", 5/8")
20 Gauge
60 - 100 PSI (4 - 7bar)
120PSI (8.3bar)
Avoid unintentional starts. Be sure that the trigger
is in neutral or OFF position when not in use and
before connecting it to any air source. Do not carry
the tool with fingers near or on the trigger.
When not in use for an extended period, apply a thin
coat of lubricant to the steel parts to avoid rust.
3
Maintain tools with care. Keep tools clean and in
good condition for a better and safer performance.
Follow instructions for lubricating, reloading and
changing accessories. Inspect tool fittings,
alignment and hoses periodically and, if damaged,
have them repaired by an authorized technician or
replaced. The handle must be kept clean, dry and
free from oil and grease at all times. A properly
maintained tool reduces the risk of binding and is
easier to control.
IMPORTANT SAFETY INSTRUCTIONS
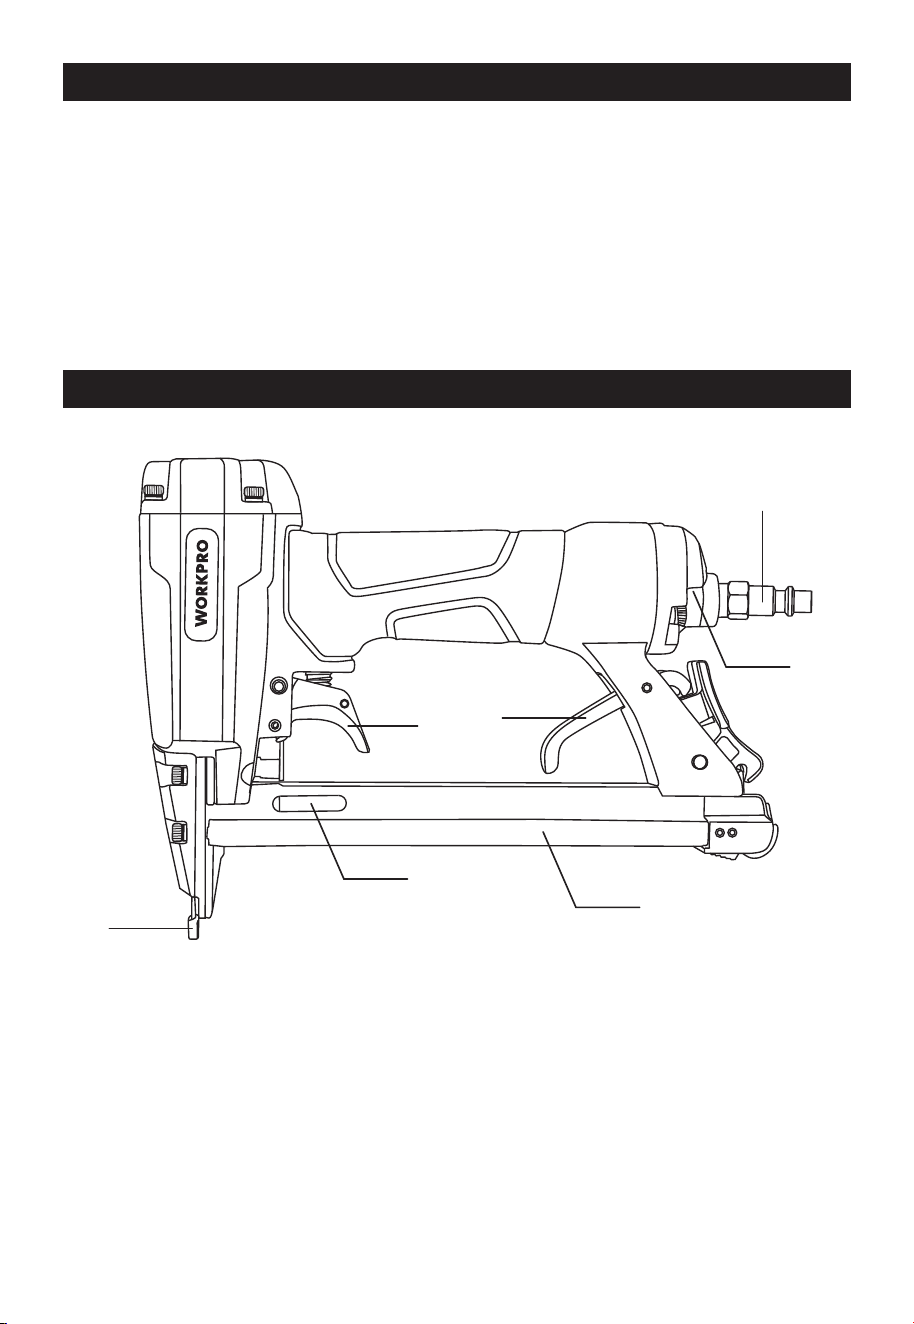
KNOW YOUR PRODUCT
3
1
2
4
6
5
7
1. Trigger
2. Staples reload window
3. Contact safety mechanism
4. Air inlet
5. Rear exhaust
6. Magazine release latch
7. Magazine
Never use pure oxygen, carbon dioxide, combustible
gases or any bottled gas as an air source for a tool.
Such gases are capable of causing an explosion and
serious injury to persons. Do not use an air source
besides an air compressor to power this tool.
Turn off the air compressor, disconnect the air
pressure hose and discharge any residual pressure
inside the tool before changing accessories or
making any adjustments to the tool. Failure to do so
could result in severe injury, tool or property
damage.
WARNING!
GENERAL OPERATION
Disconnect air supply. Disconnect tools from air
pressure source when not in use before cleaning,
servicing or changing a piece or accessory. After
disconnecting, discharge any residual air pressure.
Do not use tools if the trigger switch does not
function properly. Any tool that cannot be controlled
with the ON/OFF switch is dangerous and must be
repaired.
Use proper size and type of air pressure line and
fittings. The recommended air line for a tool with a
min I.D. of 1/5" (5mm) and max length of no more
than 17' (5m).
Always verify prior to using a tool that the air source
has been adjusted to the rated air pressure or within
the rated air-pressure range. Over pressurizing a tool
may cause bursting, abnormal operation, breakage
of the tool or serious injury to persons. Use only
clean, dry, regulated compressed air at the rated
range as marked on the tool.
4
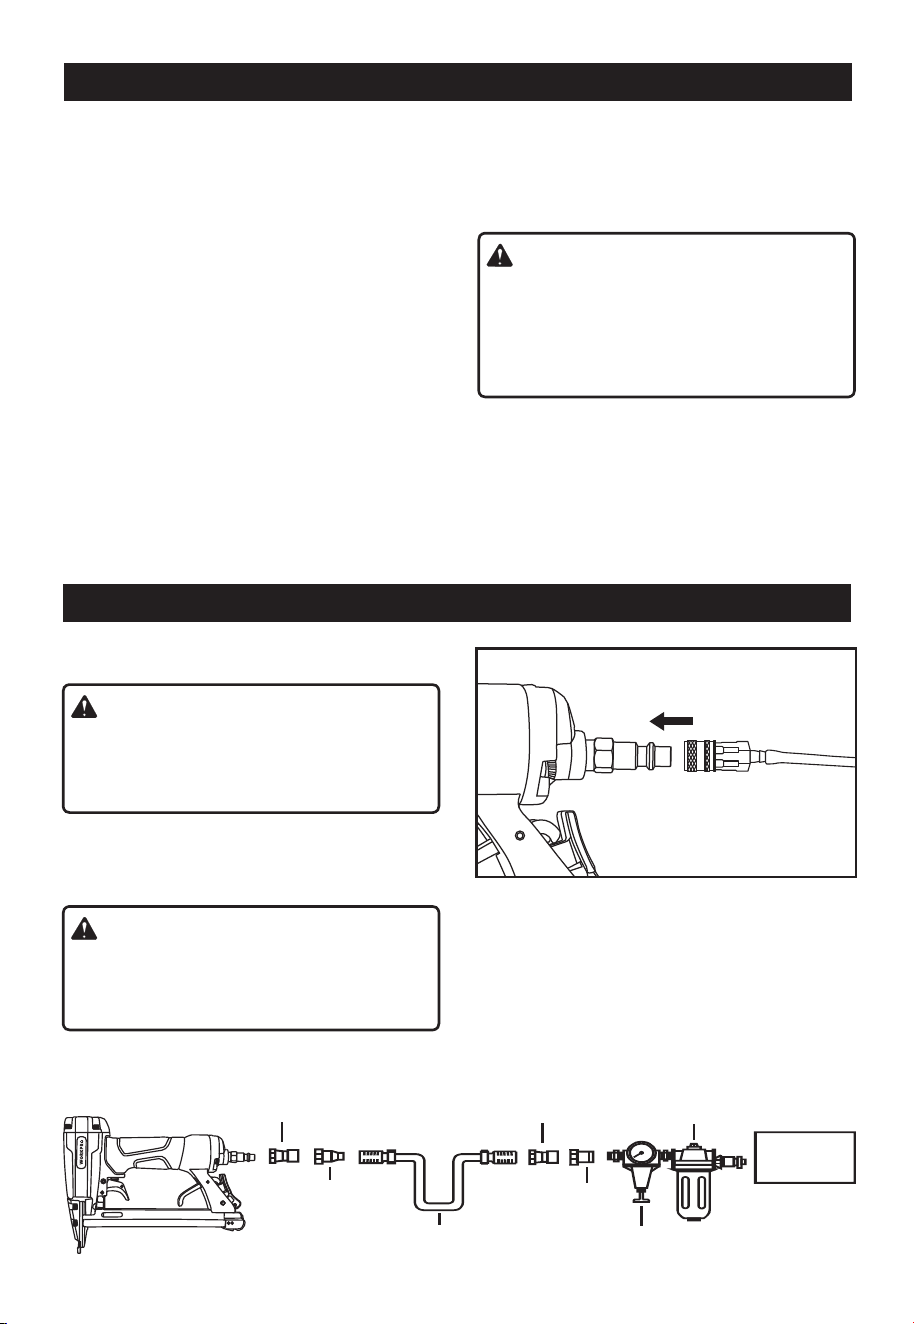
AIR SUPPLY LINE (SEE FIG. 1)
OPERATION
Do not use oxygen, carbon dioxide, high-pressure
compressed gas or bottled gases as the power
source for this tool. The tool will explode and serious
personal injury could result.
DANGER!
Keep hands and body away from discharge area of
tool when connecting air supply. Always disconnect
tool from air supply when servicing or adjusting tool
and when tool is not in use.
WARNING!
Fig. 1
Quick
Connector
Quick
Connector
Quick
Coupler
Quick
Coupler
Air Hose
Regulator
Filter
AIR
Compressor
AIR CONNECTION SETUP
Never connect the tool to air pressure which could
potentially exceed 200 PSI. Use only clean, dry, regulated
air within rate range as marked on tool.
5
OPERATION
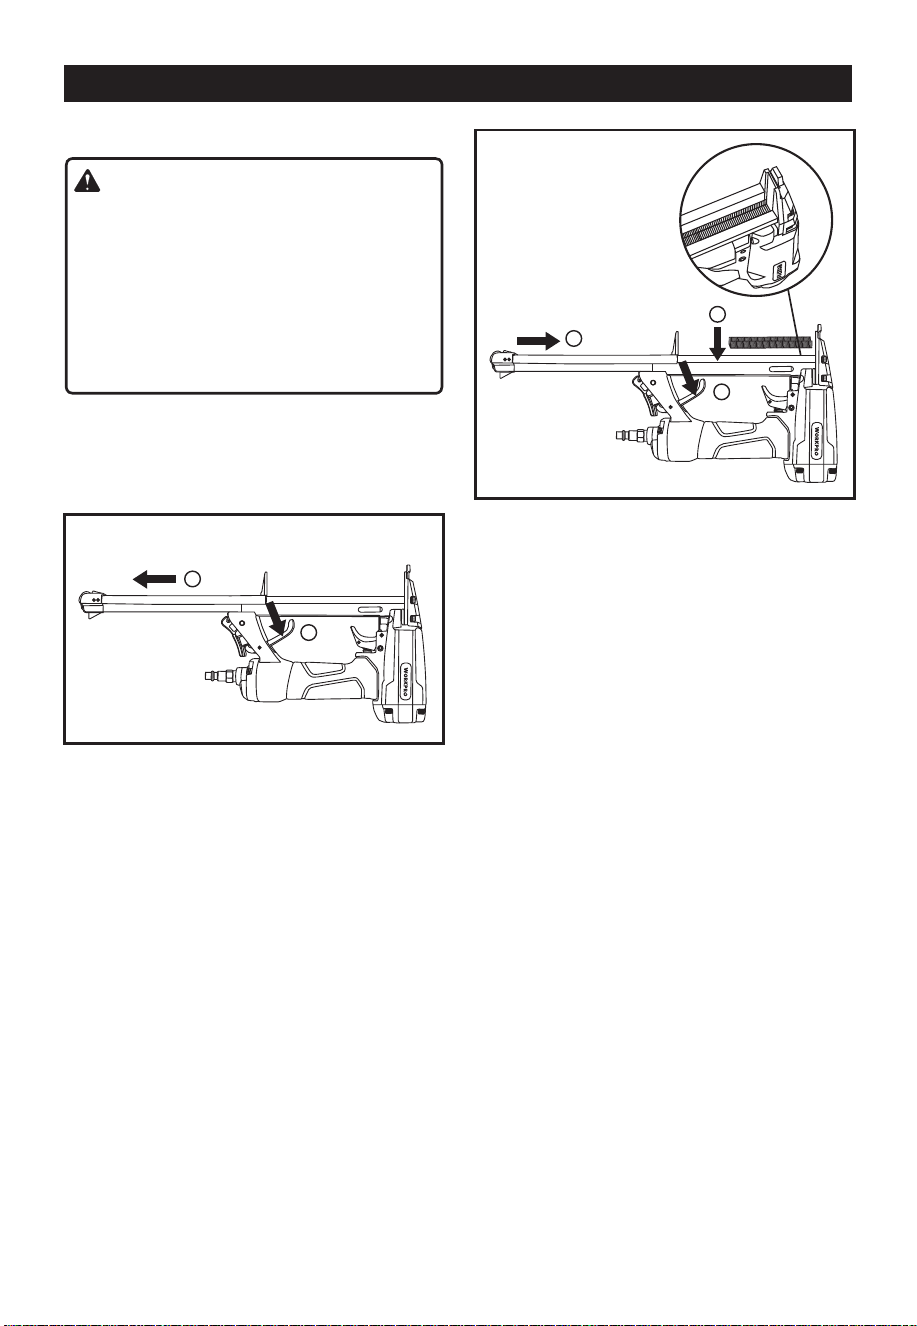
LOADING STAPLES (SEE FIG. 2 & 3)
Disconnect tool from air supply. Only use the proper
size and type of staple with this stapler, described in
the as “Tool Specifications” section. Do not load
tool until you are ready to use it. Do not pull trigger
or depress contact trip while loading tool. Make sure
that the tool noseplate is securely closed before
loading fasteners. Always load with nose of tool
pointing away from you and others. Always wear
safety goggles that comply with United States ANSI
Z87.1.
WARNING!
Connect the pneumatic stapler to the compressed
air connection (See Fig. 1).
Before starting the stapler, switch on the compres-
sor and set the operating pressure on the pressure
reducer to 4.0 bar.
For the purpose of setting the operating pressure it is
advisable to use a test workpiece which is similar in
structure and material thickness to the workpieces to
be joined.
To staple, place the pneumatic stapler against the
workpiece. Pull the trigger once and release it again
after each shot.
If the staple goes in too deep, reduce the operating
pressure on the pressure reducer by 0.5 bar.
If the staple does not go in deep enough or projects,
increase the operating pressure on the pressure
reducer by 0.5 bar.
Place the stapler against the test workpiece again
and fire.
Depending on results, keep changing the operating
pressure in 0.5 bar increments until the depth that
the staples are driven in is roughly correct.
The equipment also has continuously shot mode. If
you keep pressing the contact safety mechanism
against the workpiece, and slide the stapler to a
fresh piece of wood, release and squeeze the trigger
again, it will be shot continuously. Another mode is
that if you keep pressing the trigger, when remove
the equipment from the workpiece and press the
contact safety mechanism against a fresh piece of
wood, the stapler will be shot.
To prevent faults, make sure that you do not staple
at the same point twice.
STAPLER OPERATION
Press the magazine cover release latch.
Slide magazine cover open. (See Fig. 2)
Hold the stapler upside down as shown in Fig. 2.
Place a full strip of staples into the staple
magazine, with the staple points facing upward
(with the staple legs are pointing up, See Fig. 3.1).
Slide the staple magazine closed until the track
release lever snaps back into place with a click.
(Close the staple magazine while staples are
loaded engages the spring-load mechanism, so it
will take slightly more pressure to slide the
magazine closed. Or you can press the magazine
release latch to make magazine cover easier to
close. ) See Fig. 3.2
Fig. 2
1
press
2
pull
Fig. 3
Fig. 3.1
Fig. 3.2
2
1
pull
3
press
6
OPERATION
Remove any remaining loose staples from inside
the staple magazine, using pliers to grasp the
staples, if necessary.
Once jammed staples have been removed, reload
stapler.
If a fastener becomes jammed, keep the tool pointed
away from you and follow these instructions to clear:
Disconnect the air hose from the stapler.
Carefully remove staple strip from staple magazine.
CLEARING STAPLE JAMS
MAINTENANCE
Disconnect the air hose from the stapler.
Remove all staples from the staple magazine of the
stapler.
Shut off air compressor and drain any moisture from
the compressor tank.
Drain the air line filter, clean the filter element, then
blow air in opposite direction to remove any
dirt/debris.
Disconnect the tool from the air compressor before
adjusting, clearing jams, servicing, relocating and
during non-opreation.
WARNING!
Fasteners are under spring pressure and may
dislodge from the magazine.
NOTE:
The following lubrication options are available:
Each time before using the compressed air tool insert
3-5 drops of special compressed air oil into the
compressed air connection. If the compressed air tool
has not been used for several days you must insert
5-10 drops of special compressed air oil into the
compressed air connection before switching on. Store
your compressed air tool only in a dry room.
Check for damaged parts. Before using any tool,
any part that appears to be damaged should be
carefully checked to determine that it will operate
properly and perform its intended functions. Check
for alignment and binding of moving parts, for
broken parts or mounting fixtures, or for any other
condition that may affect proper operation. Any part
that is damaged should be repaired or replaced by
a qualified technician.
When servicing, use only identical replacement
parts. Only use accessories intended for use with
this tool. Replace damaged parts immediately.
Non-authorized parts may be dangerous.
Disposing of the tool
If your tool has become damaged beyond repair, do not
throw it out. Bring it to the appropriate recycling facility.
Never use a penetrating oil to lubricate the tool.
Penetrating oil may act as a solvent that will break
down the grease and cause the tool to seize up.
NOTE:
Keep the tool clean. Wipe the tool with a clean cloth
and periodically blow out all areas with compressed
air. If compressed air is not available, use a brush to
remove dust from all areas. Do not use harsh
chemicals or solvents to clean the tool. Be sure to
switch power OFF and disconnect the air source
during maintenance and inspection.
Regularly inspect all mountings and screws to
ensure tightness. Should any screws become loose,
tighten immediately.
7
PROBLEM POSSIBLE CAUSES SOLUTIONS
No staple is
fired
The driven
staple is bent
Air leak
1. Air leak near top of the tool or in trigger
area.
2. Air leak near bottom of tool.
3. Air leak between body and cylinder cap.
Incorrect or abnormal staples (large sized
head, staples that are bent or incorrectly
chained) are loaded.
1. Check the trigger head stem, O-ring
and replace if damaged.
2. Check the O-ring or bumper and
replace if damaged, tighten screws.
3. Check the O-ring or bumper and
replace if damaged, tighten screws.
Remove incorrect staples and load
20-gauge, 1/4" – 5/8"staples.
Have the tool serviced by a qualified
technician.
Magazine unit
1. The magazine push lever/nail feed
portion is damaged.
2. Defective nail feeder is defected,bent or
broken.
3. Defective feed spring is worn or broken.
4. Adhesive fragment or wood dust is
sticking on the magazine or staple feeder.
5. Push lever is damaged
1. Repair deformed parts.
2. Replace defective parts.
3. Replace defective parts.
4. Remove adhesive fragment or wood dust.
5. Check push lever movement and eplace
if necessary.
Have the tool serviced by a qualified
technician.
Output unit: piston or driver
1. Air pressure is too low.
2. Piston ring is worn.
3. Piston bumper is defective.
4. Defective bumper piece is defective, worn,
or broken.
5. Defective O-ring is disconnected,
deformed or broken.
6. Defective driver blade is deflected,
deformed, or broken.
7. Foreign material (adhesive or wood
fragment) is present inside the cylinder.
1. Check compressor for pressure setting.
2. Replace piston ring if tool des not drive
at minimum operating pressure.
3. Replace the piston bumper.
4. Replace the piece.
5. Reassemble or replace the O-ring.
6. Replace the blade.
7. Remove the material (adhesive fragment
or wood) and clean the clylinder.
Have the tool serviced by a qualified
technician.
1. staples are inaccurately fed.
2. Incorrect staples are loaded.
3. Air pressure is too low.
4. Driver blade is worn or broken.
5. The wood is too hard.
1. Remove and load the staples properly.
2. Remove incorrect staples and load the
recommended staples (see section
“Technical specifications.")
3. Adjust the air pressure.
4. Replace the driver blade if it either
protrudes from the blade guide or
appears to be excessively worn.
5. Test fire to determine whether staples
bend on soft wood. If it bends, a higher
gauge stapler is required.
If any of the following symptoms appears during your operating, stop using the tool immediately, or serious
personal injury could result. Only a qualified persons or an authorized service center can perform repairs or
replacement of tool.
WARNING!
The following form lists the common operating system with problem and solutions. Please read the form carefully
and follow it.
TROUBLE SHOOTING

8
PROBLEM POSSIBLE CAUSES SOLUTIONS
Staples do
not fire ‘flush’
into the
workpiece.
Staples jam
1. The wood is too hard.
2. Air pressure is too low.
3. Drive blade is worn or broken.
1. Test fire to determine whether staples
bend on softer wood. If it bends, a
higher gauge stapler is required.
2. Adjust the air pressure.
3. Replace the driver blade if it either
protrudes from the blade guide or
appears to be excessively worn.
1. Piston ring or cylinder is worn, broken,
or dirty.
2. Nails are not feeding into the chamber
properly.
3. Incorrect staples being used.
4. Driver blade tip is worn.
5. Driver guide is damaged or worn.
6. Workpiece material (or backer) is too
hard.
1. Send for service.
2. See above items.
3. See above items.
4. Send for service.
5. Inspect and send tool for service.
6. Use an alternate tool.
IMPORTANT! Repairs should be carried out by a qualified person
TROUBLE SHOOTING