We strongly rec
ommend utilizing a water filter with this ice maker.
For the latest news, recipes and cooking tips for your new
Renaissance Cooking Systems , check out www.RCSGasGrills.com
* Installer: Leave this manual with the proud new owner *
Renaissance Cooking Systems
Owner’s Manual
America's Best Value in Outdoor Kitchen Equipment
Installation, Operation, Maintenance
Instructions & Parts List
REFR3 & REFR3A
Cubed & Nugget Ice Makers
Page 1
Certified For Outdoor Use
Safety information
Before using your ice machine, please read this manual thoroughly to ensure that you know how
to operate the features and functions that the equipment offers safely and efficiently.
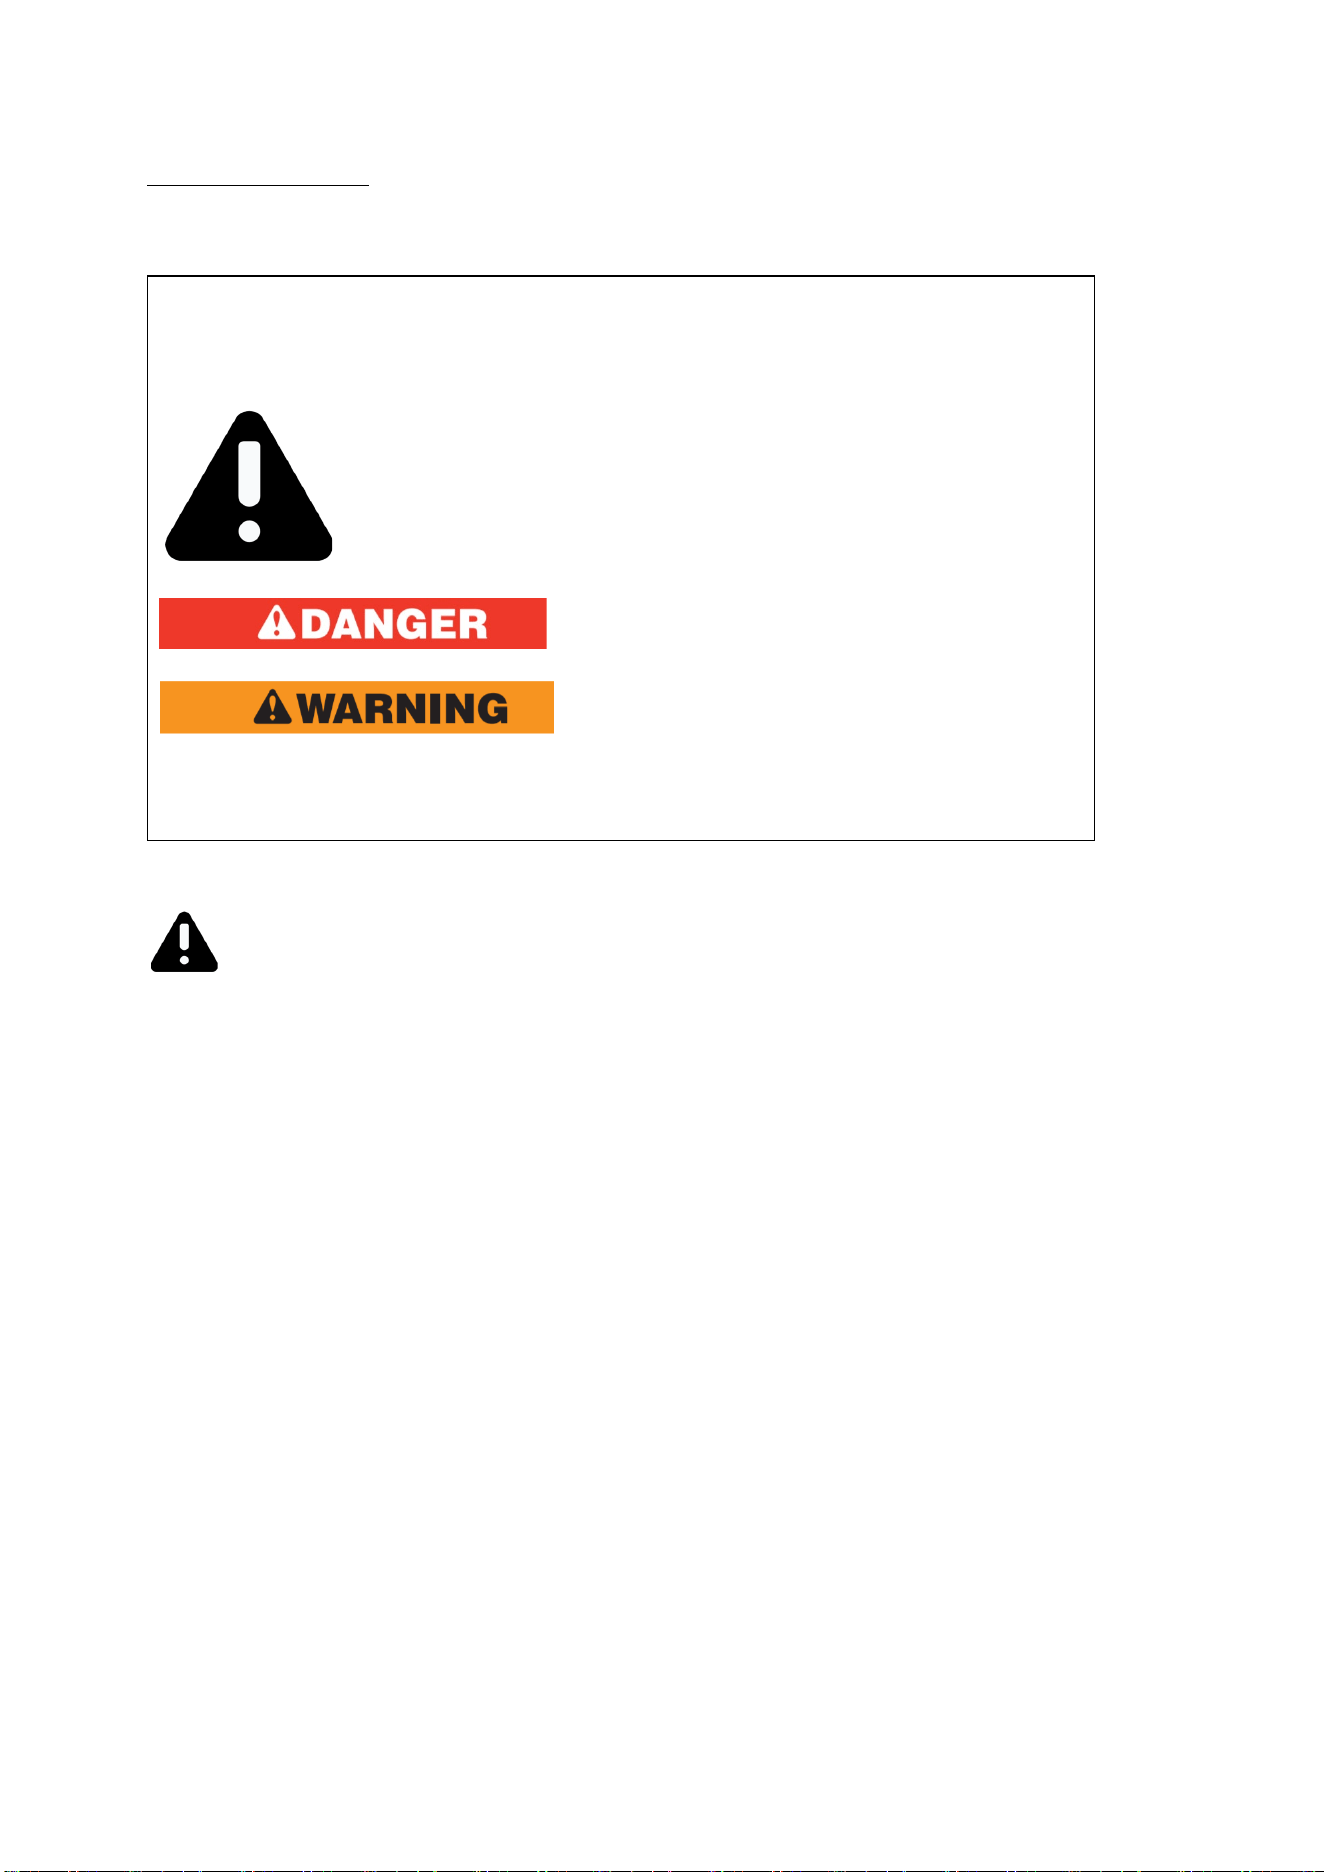
Important safety symbols and precautions:
Please read and always follow all safety instructions in this manual.
The warning signs are here to prevent injury to you and others, please follow them explicitly. After reading
this manual, keep it in a safe place for further reference.
Warning information
1- Read this instructions carefully before operating, installation or maintenance. Failure to
follow instruction can cause personal injury, property damage, injury or death.
2- The installation instructions shall indicate the ice maker is to be installed in accordance with
the Safety Standard for Refrigeration Systems, ASHRAE 15. In addition, the instructions shall
indicate the ice maker shall not be installed in corridors or hallways of public buildings.
3- The installation and operating instructions shall indicate that component parts shall be
replaced with like components and that servicing shall be done by authorized service
personnel, to minimize the risk of possible ignition due to incorrect parts or improper service.
4- Installation and operating instructions shall be provided with cautionary statements
concerning the handling, moving, and use of the ice maker to avoid either damaging the
refrigerant tubing, or increasing the risk of a leak.
5- At least three people are required to lift this ice machine or it is recommended that a lifting
device is used to avoid injury.
6- When moving this ice machine, please keep the unit upright with inclination not exceeding
45° degrees. Do not invert the unit or lay it horizontally.
7- Allow sufficient space (minimum clearance of 15mm) around the ice maker and install it on a
flat, firm surface to support the full weight of the ice machine when loaded with ice and
water.
8- Do not keep volatile, flammable objects or liquids in or near to the ice machine.
9- Do not use high-pressure water cleaning devices to clean the ice machine.
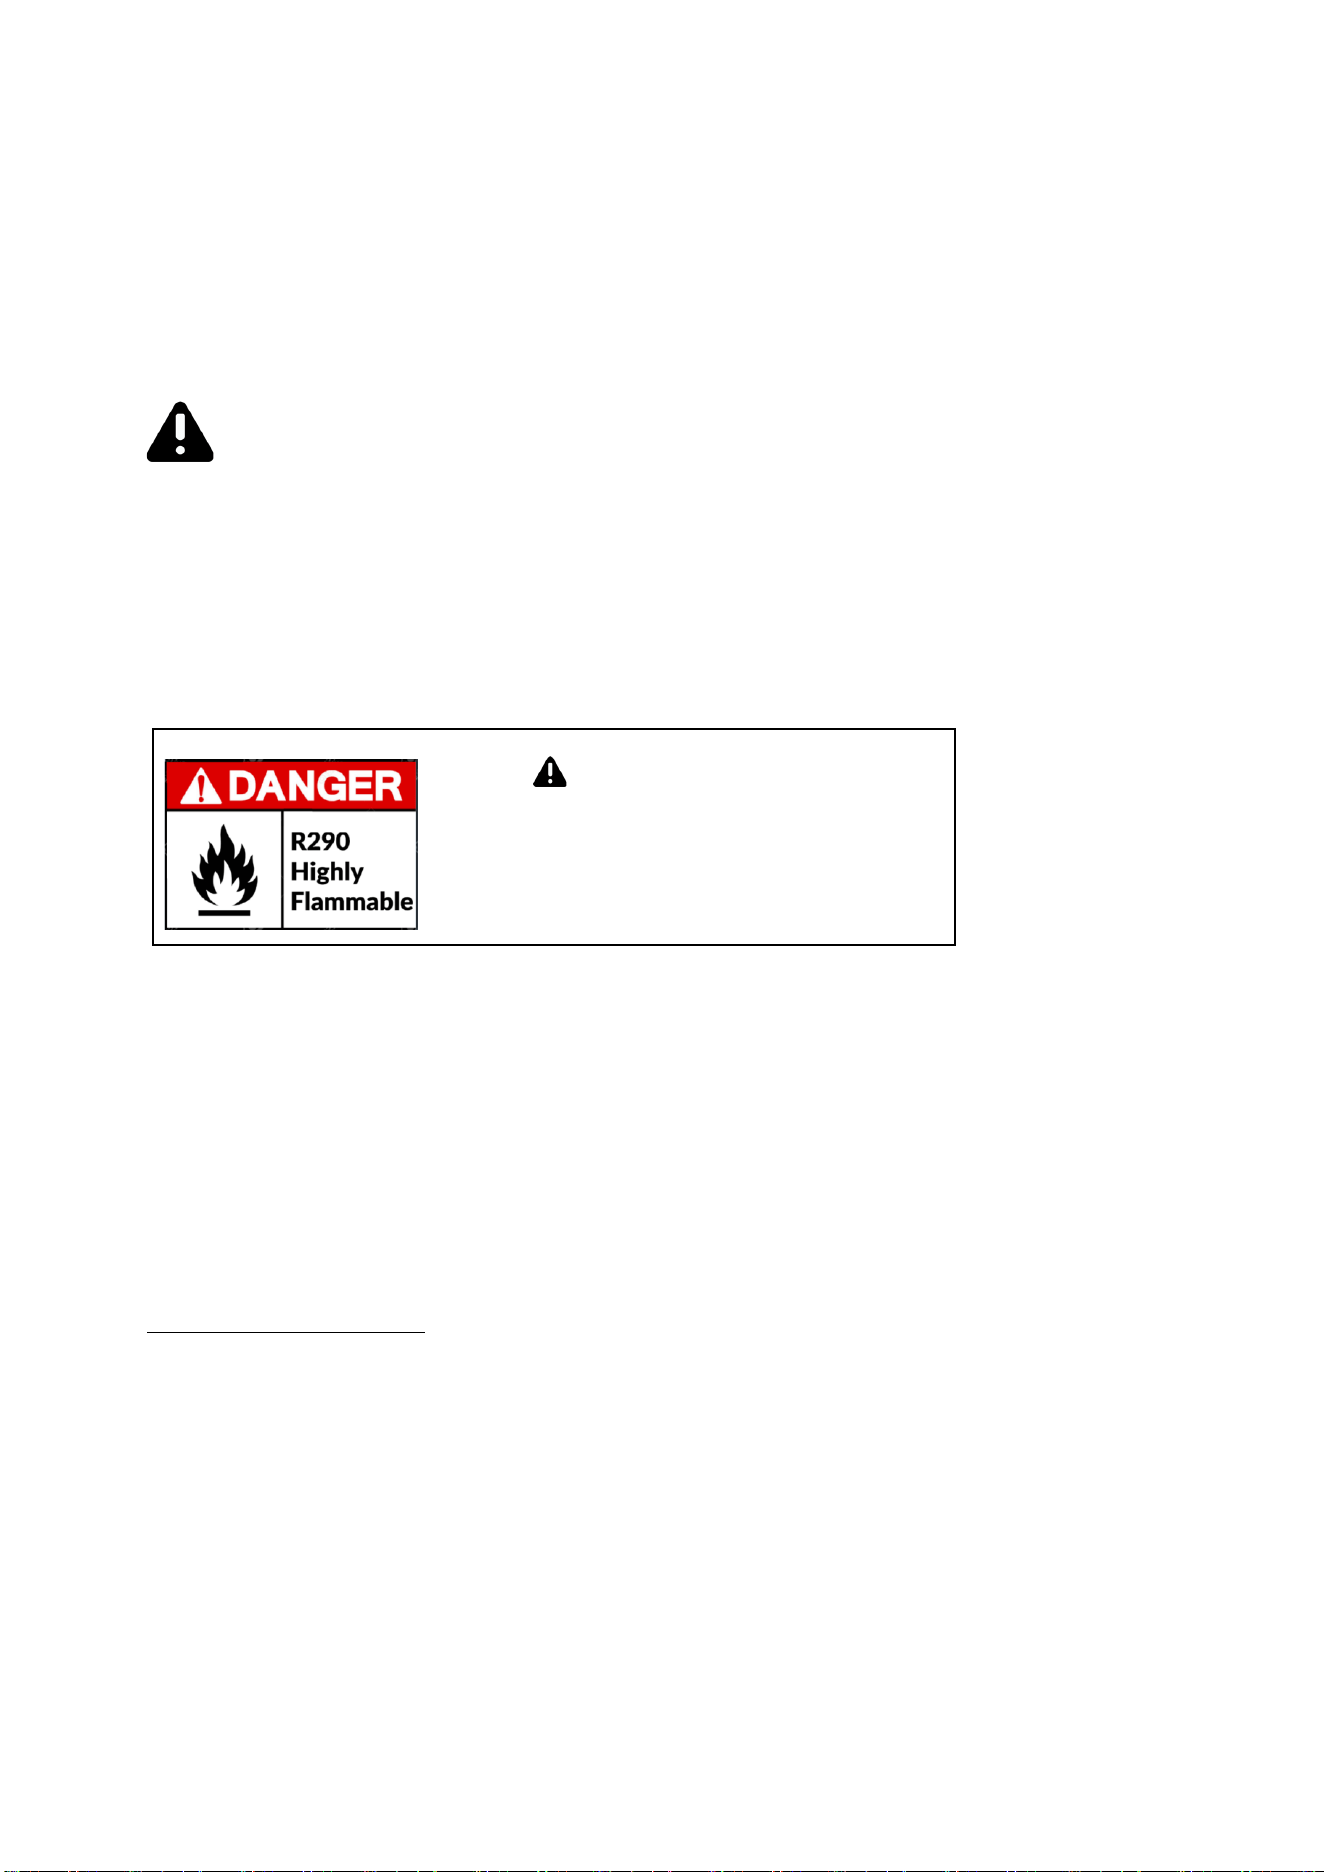
This is the safety alert symbol.
All safety messages will follow the safety alert symbol and either the word
“ DANGER“ or “WARNING”
This symbol alerts you to potential hazards that can kill or hurt you and others.
Hazard or unsafe practices that may result in severe
personal injury,property damage or death.
Hazard or unsafe practices that may result in severe
personal injury,property damage or death.
Page 2
10- Do not install the ice machine in a damp location where it may come in contact.
Deteriorated insulation on electrical parts may cause an electric shock or fire.
11- In order to keep the lubricant fully precipitated before start up, please keep the machine
upright for 24 hours before plugging to prevent compressor damage.
Danger information
1-The Ice machine may contain flammable refrigerant R-290 that risk fire and explosion. Please
contact your local authority in regard to safe disposal of this product. Please check the nameplate
on the rear panel of machine to identify the type of refrigerants to confirm the refrigerant type
and amount.
2-To minimize the risk of ignition due to improper installation, replacement part or service
procedures, only certified and properly trained refrigerator technicians are allowed to work on
these ice machine.
3-Do not operate the ice
machine if there are any unauthorized change to the
original manufactures specifications or if the machine has been misused, abused or
neglected.
4-All replacement parts must be use obtained from the equipment manufacturer.
5-Due to potential safety hazard risk, make sure that the power plug is not
crushed or damaged. Do not use the ice machine with an extension cord.
Installation information
Unpacking
- Carefully remove all shipping material such as wrapping, tape and packing, if any is left in the
ice machine it will cause the machine to work improperly. (Make sure the packing is in good
condition before unpacking.)
- After removing the packing make sure the machine and all components are in good
condition. If any doubt, do not install or use the ice machine and contact to your supplier
immediately.
- Put the ice machine on the floor and screw the four adjustable feet into the bottom of the
ice machine. A level should be use to check the machine is perfectly level.
Risk of fire or explosion! Do not
use mechanical devices to defrost
the machine,do not puncture the
cooling tube
Page 3

1- The water used for ice machine must be in accordance with local drinking water quality
standards. We recommend installation of an in-line water filter to the ice machine, this will
reduce lime and scale build up, improve efficiency and extend the overall lifespan of the
machine.
2- Water supply pressure should be between 0.2psi and 0.8psi. If pressure exceed 0.8psi, a
pressure reducing device must be used.
3- Water inlet temperature should be between 41°F and 77°F. Faults due to low or high
water pressure and temperature are not covered under warranty.
4- The ice maker drain is gravity flow, make sure the unit is installed above the height of the
drain connector and make sure the hose does not bent to allow for easy draining out.
5- Attach one end of the water inlet hose to the rear of the ice machine, attach the other end
of the hose to the water supply. It is advisable to have a stop valve close to the ice machine.
6- Check both connector washers for a good fit.
7- Put the flexible drain hose on the drain connector at the rear of the machine and secure with
clip provided. The drain pipe can be cut to length to allow drain connection to have a slight fall.
8- It is recommended that the water supply and drain lines be insulated to prevent condensation.
9- Ambient temperature for the ice machine operation should between 41~89.6
°F
.
water
temperature
Water
pressure
Internal diameter
of water inlet pipe
Drain pile
41 ~ 77 °F
0.2psi~0.8psi Internal diameter
3/4 connector
Internal diameter
3/4 connector
Water supply and ambient temperature
Page 4
1- The ice machine must be plugged into an independent power source or an electrical
socket of voltage and frequency specified. Electrical rating information can be found on the
name plate of the machine. Do not operate this machine above or below the voltage specified
limited on the machine name plate.
2- Due to potential safety hazards this ice machine is no
t recommended for use with
an extension cord.
3- This ice machine must be connected to a stable power source. The maximum
accepted range of voltage fluctuation is +10%, -5% than the rated voltage.
4- Electric Specification
MODEL VOLTAGE WATTE CURRENT
REFR3 & REFR3A
220 /50Hz, 110V/60Hz 160W 1.5A
Warning
If the power supply is damaged, do not install or operate the ice machine
until the cable has been replaced by an authorized service partner or a
qualified electrician.
Warning
All electrical connections must conform to local regulations and be
carried out by a qualified electrician.
Warning
If the ice machine is turned off, please wait for at least 3 minutes before
restarting to prevent damage to the compressor.
Electrical
Page 5

1- Has the unit been connected to the proper water supply and no leaks?
2- Has the unit been connected to a drain a
nd no leaks?
3- H
a
s the unit connected to the proper electrical supply?
4- Has
the
u
nit
been leveled?
5- Have all packing materials been removed from the ice machine?
6- Is there proper ventilation around all side of the ice machine?
7- Does the unit have an earth ground (electrical)?
8- Is the water to ice maker turned on?
9- Is the power to the ice maker switched on?
10- Has the unit located in room that temperature between
41°F AND 89.6°F?
11- Has the water temperature between
41°F AND 77°F?
12-
Has the user been fully trained in the operation of the ice machine?
Pre-start up check list
Page 6
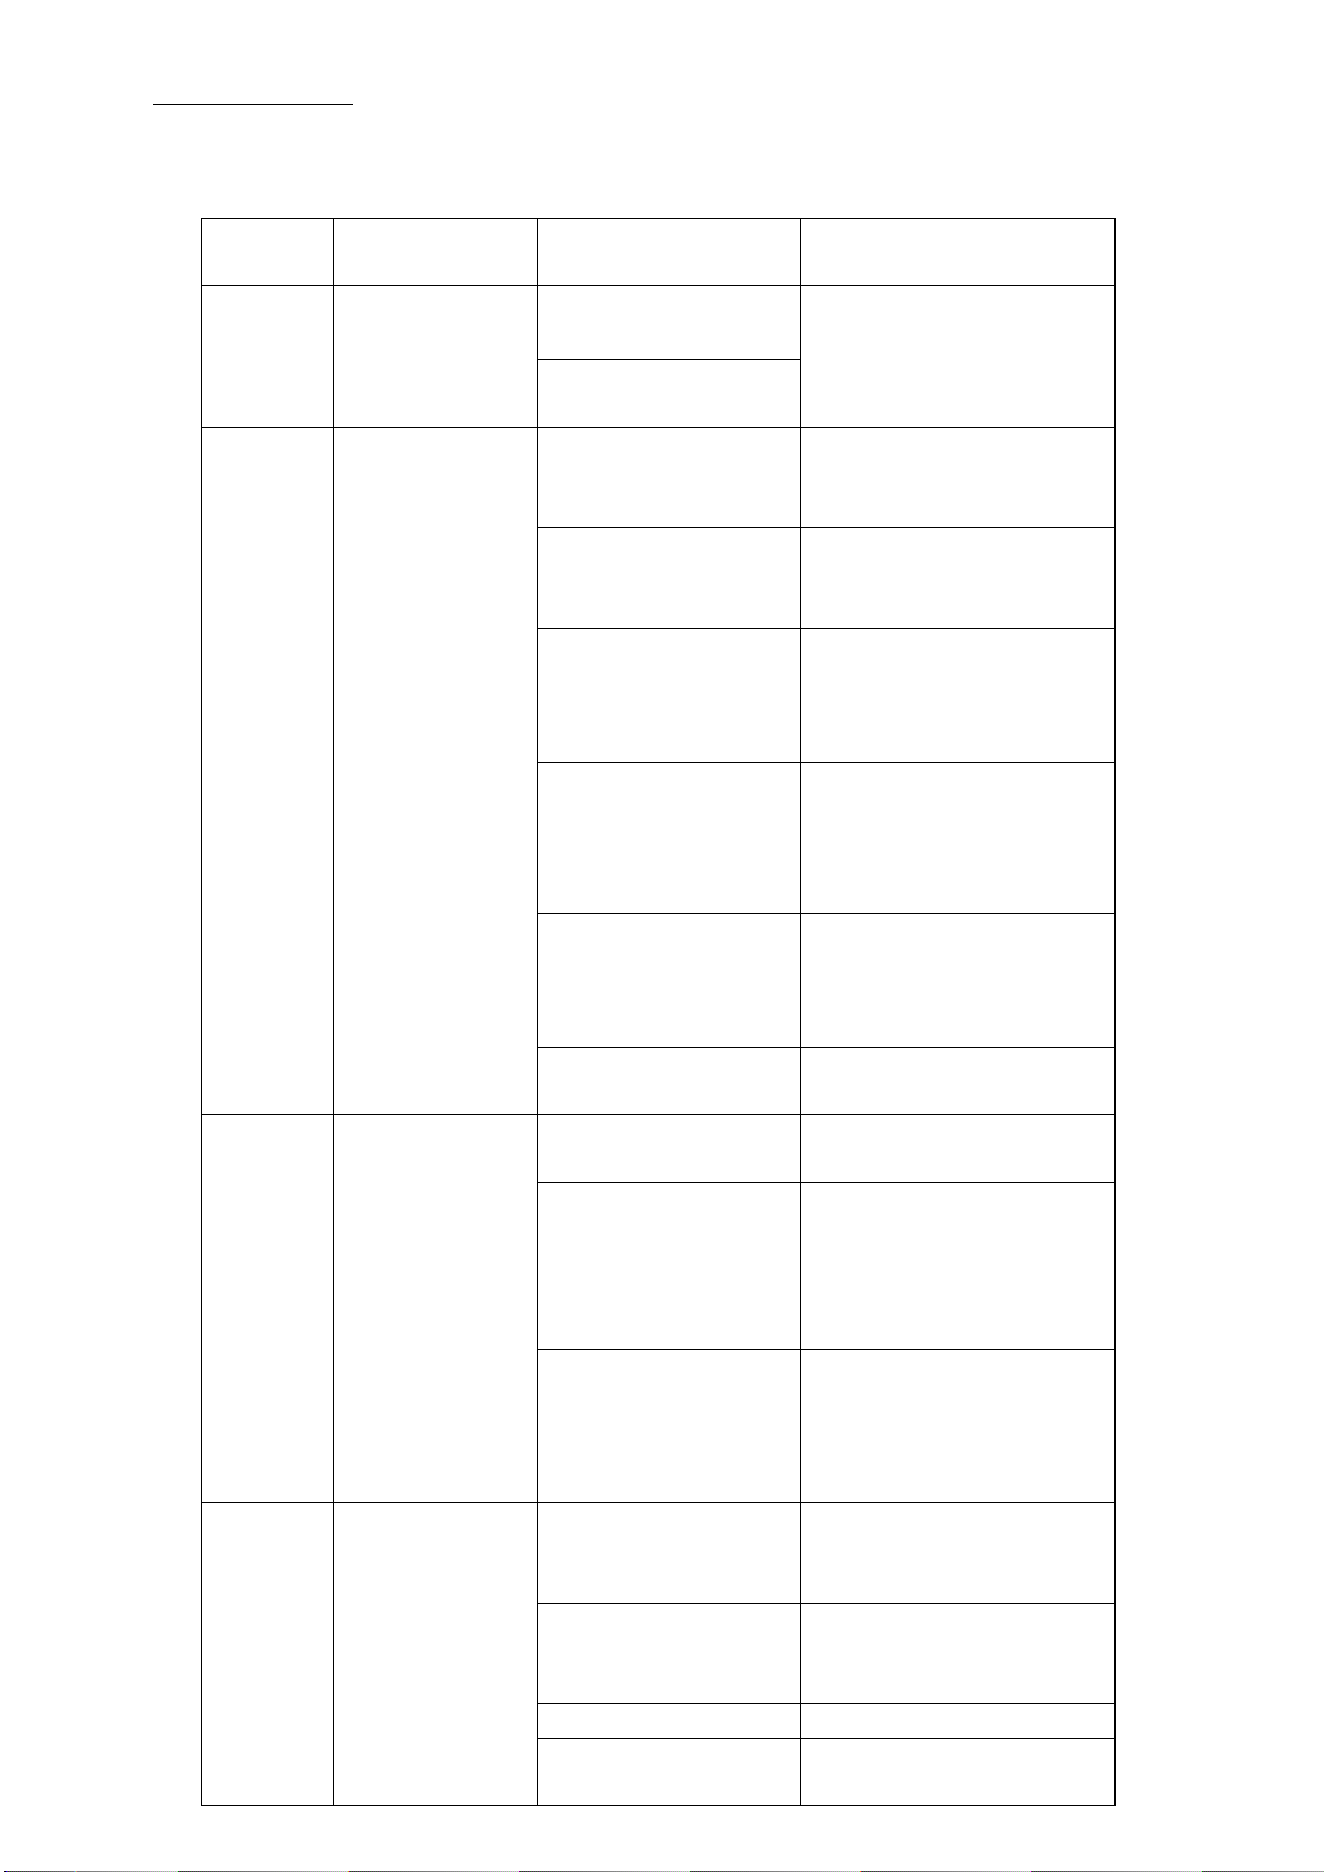
+
_
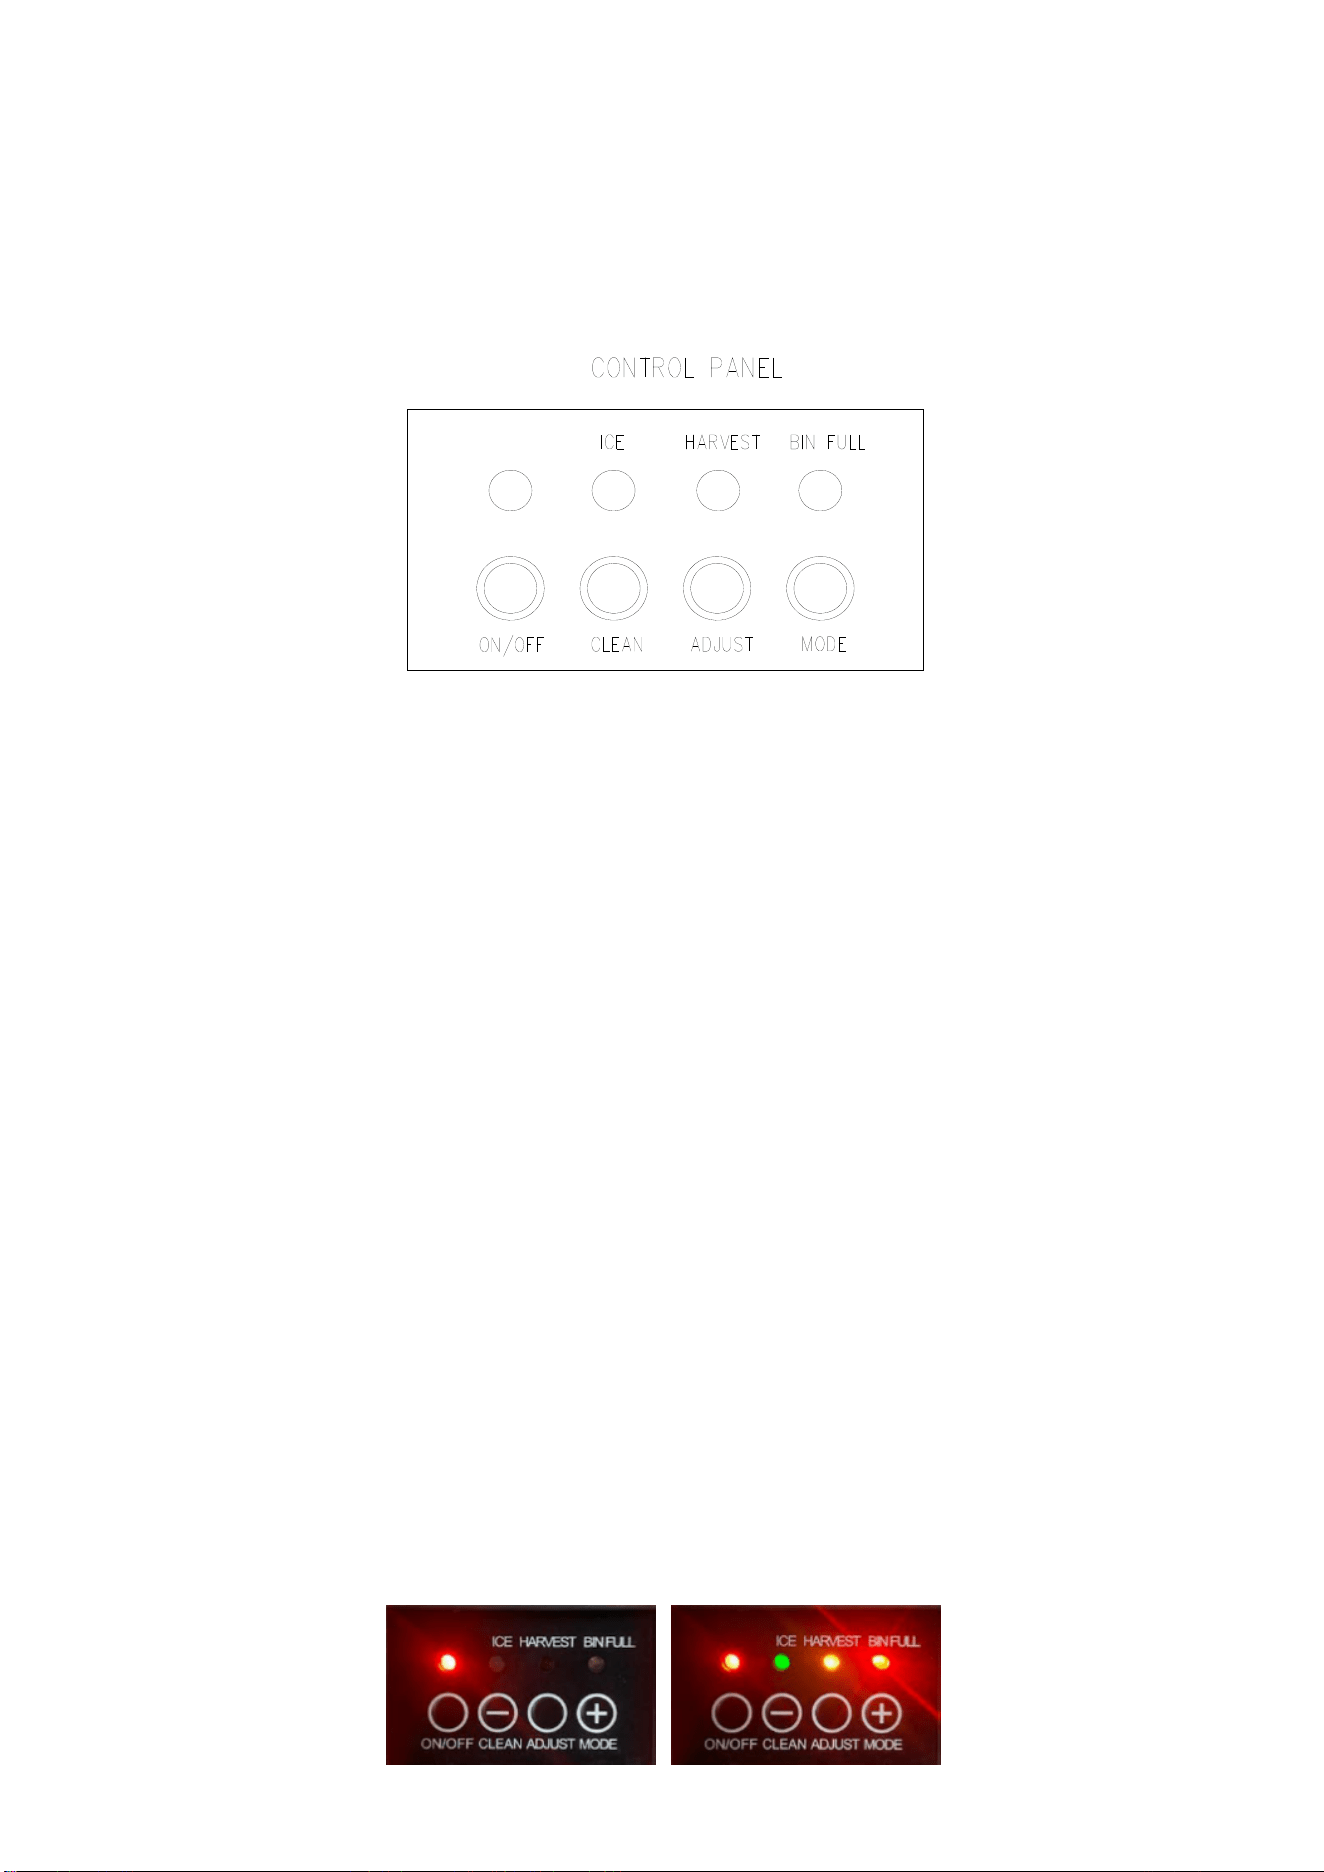
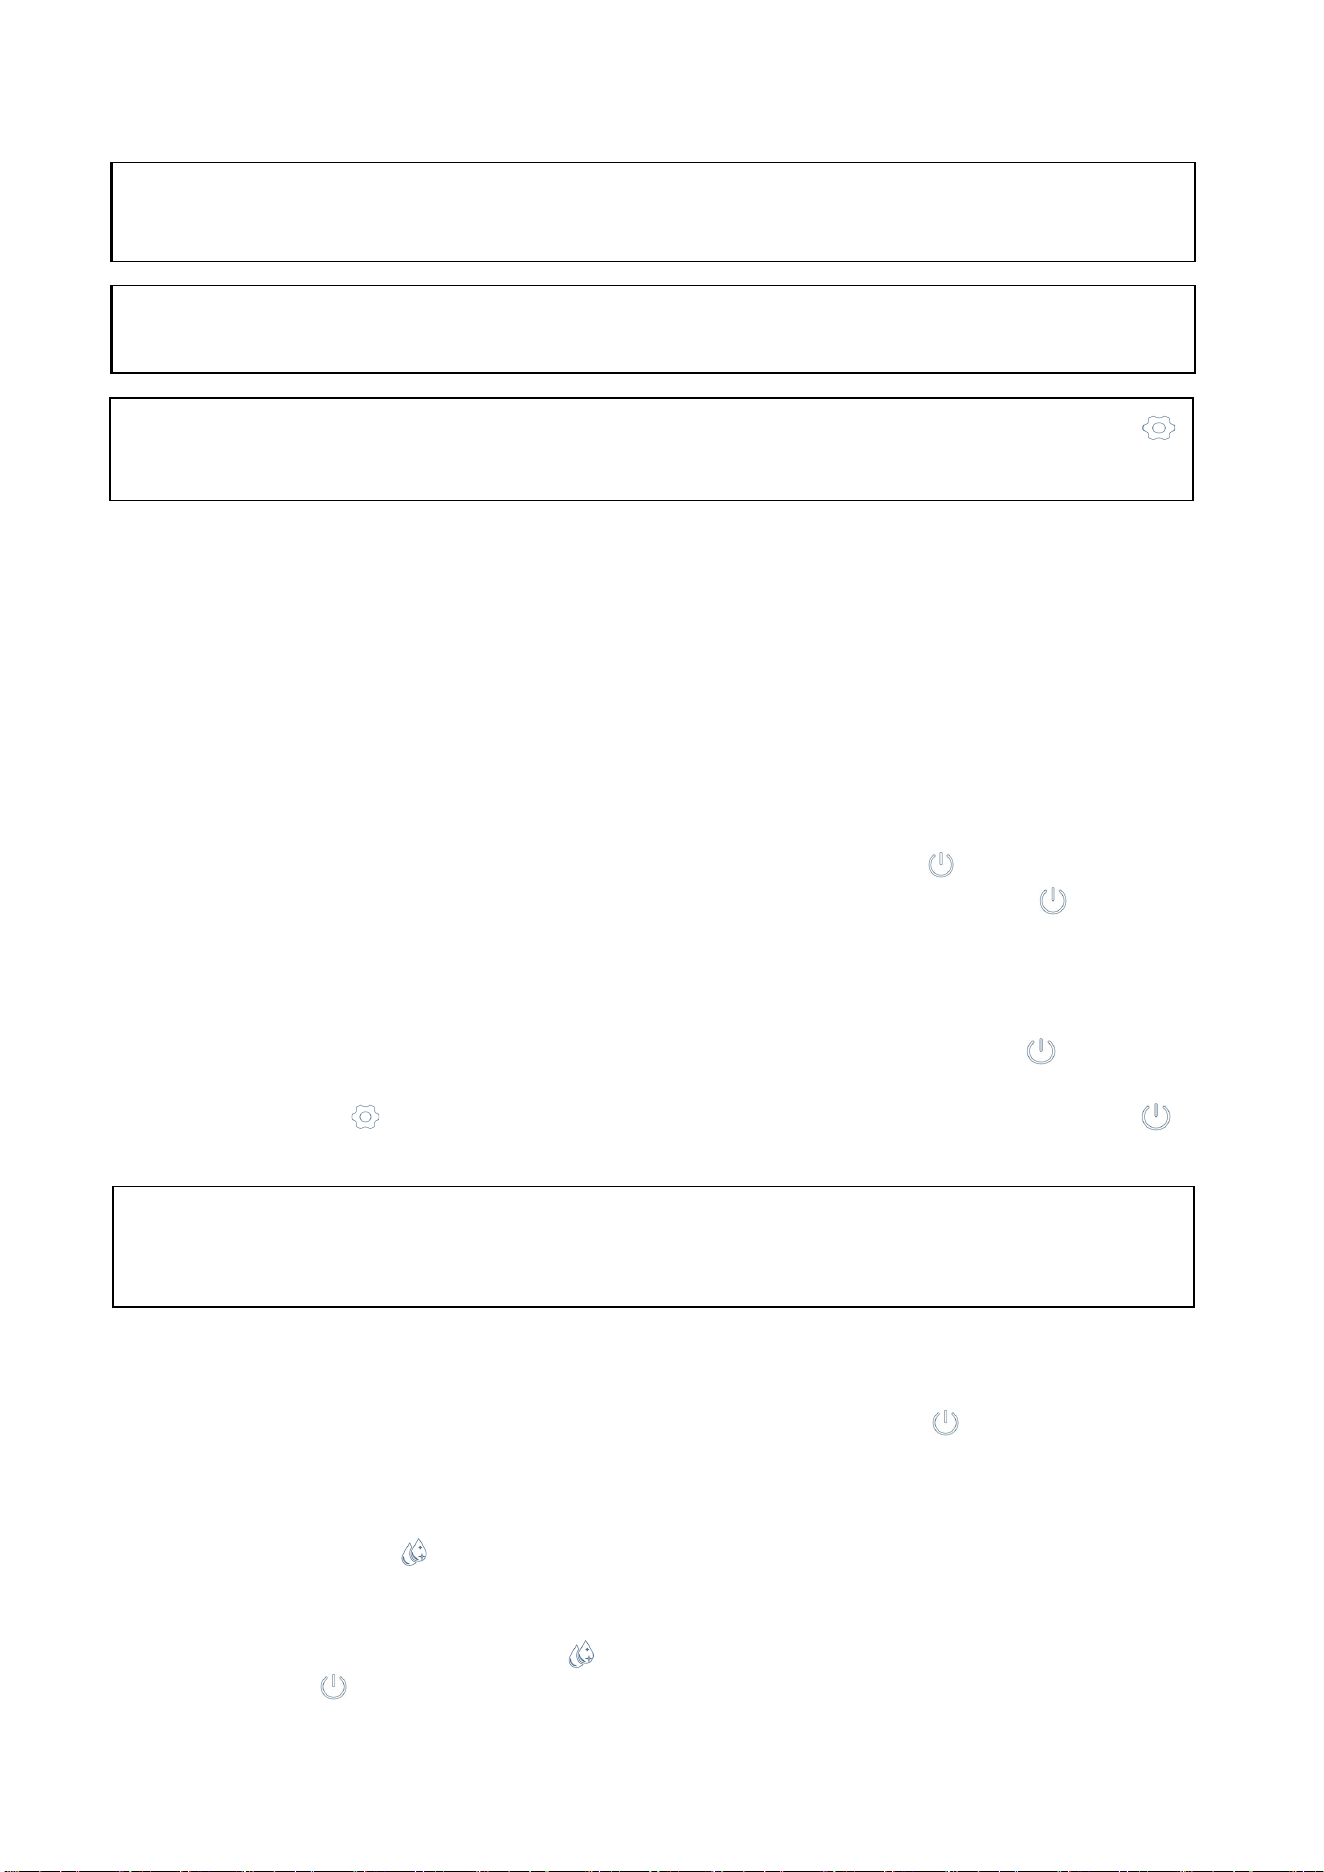
Description of LEDs and buttons:
1. Bin Full (Red) LED: Bin full indicator light
When this is lit, the ice storage bin is full of ice or there is something blocking the
bin-full probe. The unit will stop working. When ice cubes are removed from the ice
storage bin, freeing the bin-full probe, the red LED will remain flashing for 3 minutes,
then the unit will restart and return to the ice making mode.
2. Ice Making(Green) LED: Ice making indicator light
When this is lit, the unit is working in the ice making mode controlled by a
temperature probe on the evaporator. When the green LED flashes, the unit is
working in the ice making mode controlled by a fixed timer.
3. Ice Harvest (Yellow) LED: Ice harvest indicator light
When this is lit, the unit is working in the ice harvest mode controlled by the ice-full
probe.
4. Mode button: Mainly for service. When this is pressed, the ice making mode changes
to the ice harvest mode or vice versa. The mode can be judged from the status of
the green and yellow LEDs.
5. Adjust button: Mainly for service. When it is pressed over 3 seconds, the unit will
enter the Ice
Size Adjustment mode. The mode can be judged from the status of
the yellow LEDs.
REFR3 - Cubed Ice Machine
Your ice machine features a touch control to operate the controls, please lightly tap the
control button with your finger tip. The control panel also feature an easy read display
which shows the status of the ice machine at all times.
Digital & indicator display
To manually restart the unit press power button for 2 seconds and you should hear the
unit power up. All lights should be lit, if only the ON/OFF button is red the unit has power
but is turned off. Press the ON/OFF button to turn on (all lights should light up).
Page 7

Ice Size Adjustment Guide:
1. Press and hold the “Adjust” button for at least 3 seconds. The unit will enter the Ice
Size Adjustment mode. The “HARVEST” LED (yellow) will be blinking continuously
during the ice size adjustment. Release the button when the LED blinks continuously
to adjust the ice size.
2. While in the Ice Size Adjustment mode, press the “Clean” (-) button or the “Mode” (+)
button for the desired ice size.
Smaller ice setting:
By pressing the “Clean” (-) button, you can decrease the size of the ice cubes. The “ICE”
LED (green) will
flash as you lower the ice size and will finally be blinking at the setting
of smallest ice size.
Larger ice setting:
By pressing the “Mode” (+) button, you can increase the size of the ice cubes. The “BIN
FULL” LED (red) will flash as the larger size is set and will blink when the setting of
largest ice size has been reached.
After 10 seconds without any operation, the unit will return to the previous mode.
NOTE:
• If during the ice size adjustment mode the “BIN FULL”, “ICE” and “HARVEST”
LEDS blink all at once,
this indicates that the unit is in the regular (middle) setting of
the ice size.
• When the machine is in the cleaning stage or ice full stage, the ice size
adjustment mode cannot be accessed
MAJOR FUNCTIONS
1. The operating procedure is completely automatic.
2. When the ice storage bin is full of ice cubes, the machine stops making ice
automatically. It starts making ice again after ice cubes are removed.
3. The different colors of the LED disp
lay indicate various work modes.
4. A sensitive probe and accurate timer enhance the performance of the ice
maker.
5. A compressor protection system is built in.
REFR3 - Cubed Ice Machine
Page 8
Your ice machine features a touch control to operate the controls, please lightly tap the
control button with your finger tip. The control panel also feature an easy read display
which shows the status of the ice machine at all times.
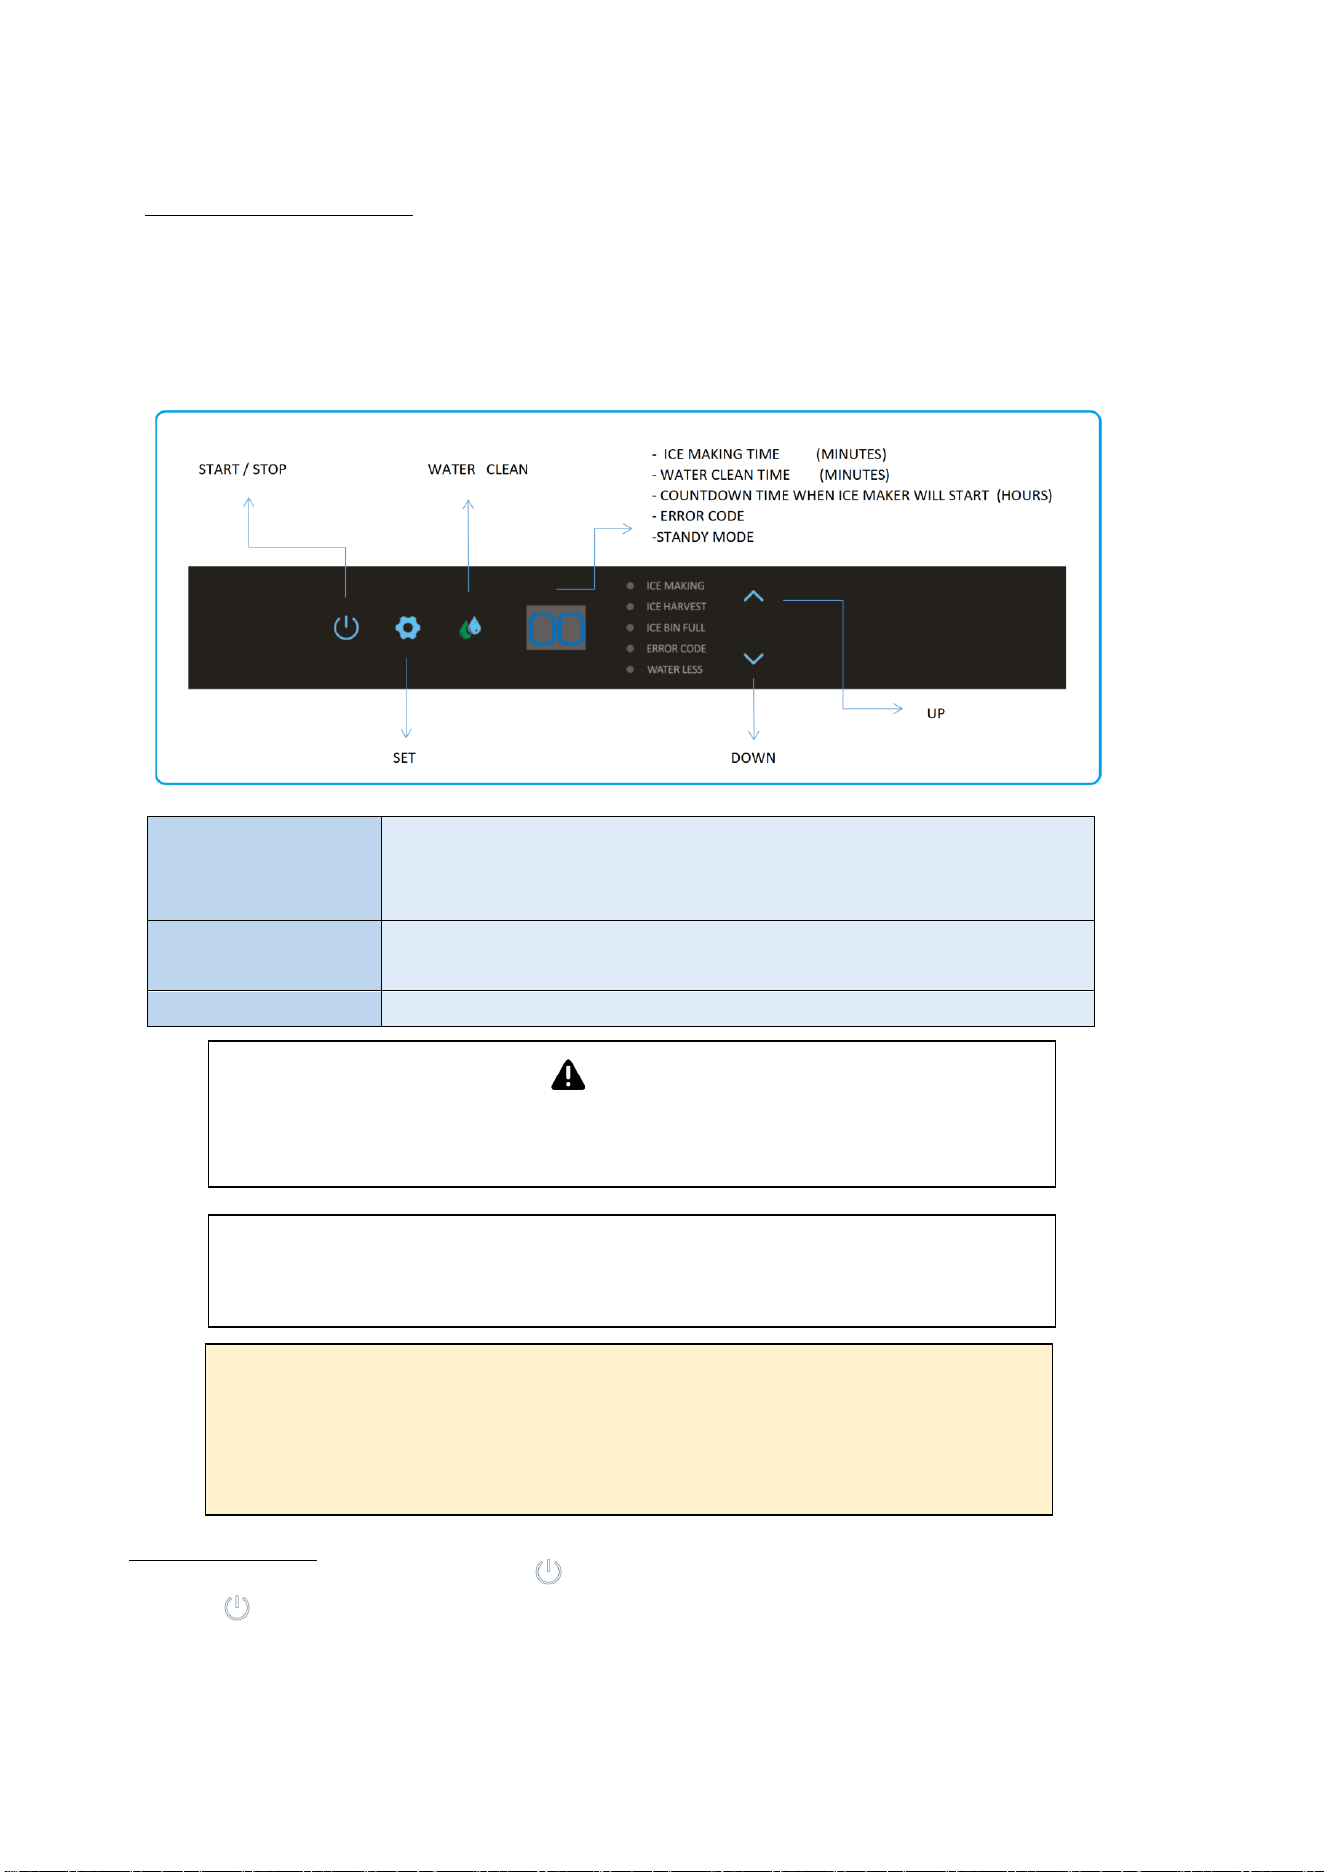
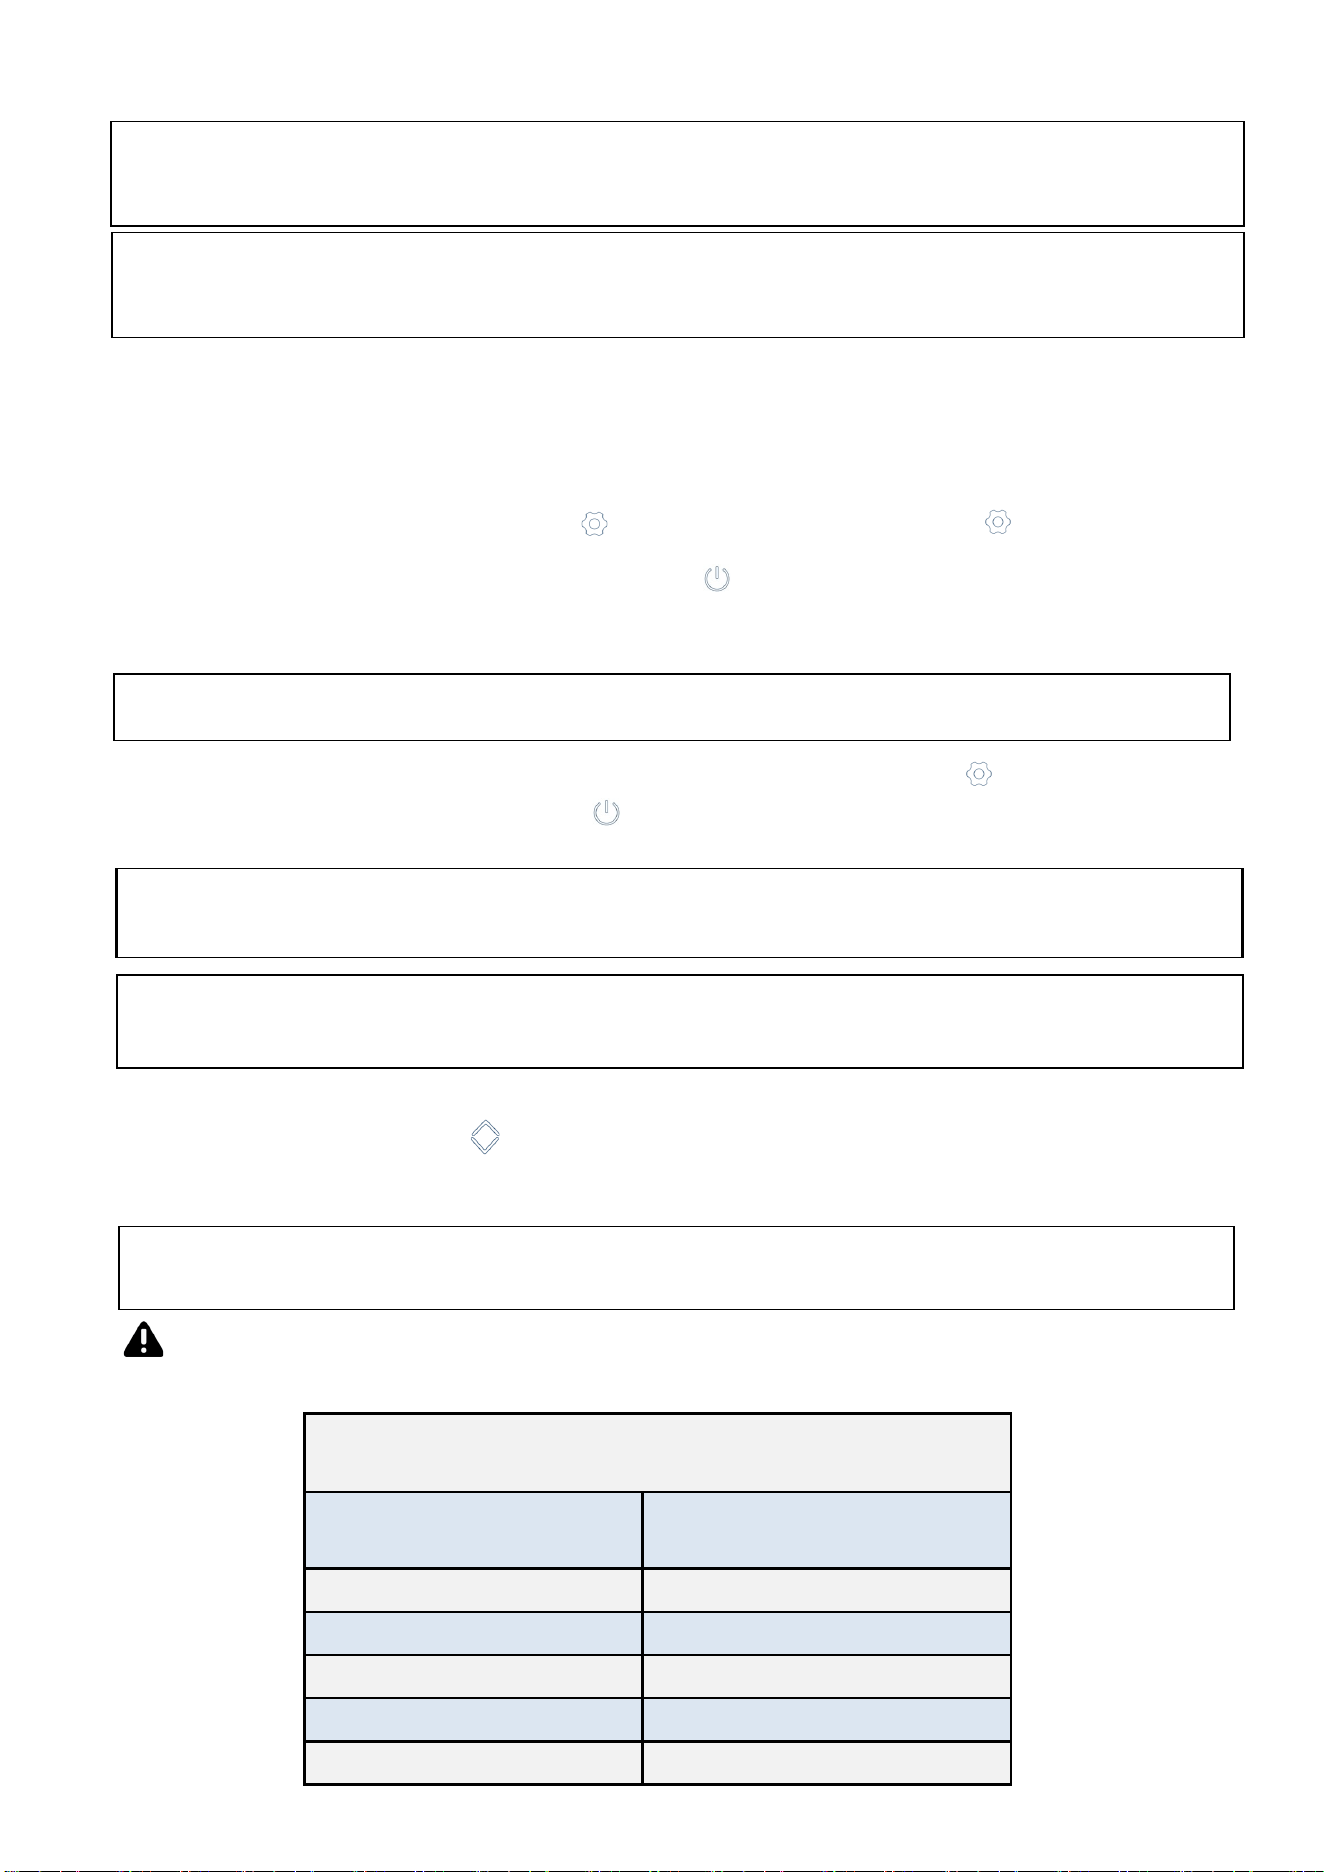
Digital& indicator display and controller
Display Per Ice making cycle time / Water clean on / Error code /
Delay time of resume ice production / Water inlet / Panel
locked / Standby status
Indicators Start & Standby / Set / Water clean / Ice making / Ice harvest
/ Ice bin full / Error code / water less / Up / Down
Button Start & standby / Set / Water clean / Up / Down
Noted: The ice machine will aut
o-locked if no tap or operate in 30
seconds!
Un-lock: tap the “power” key for 3 seconds to un-lock the control
panel before operating the desired button.
Warning
After turning off your ice maker, please wait at least 3 minutes before
restarting to avoid damage to the compressor.
Noted: If a “.” appeared on the button right coroner of the display
window, the ice machine was under locked status.
Operating Instructions
REFR3A - Nugget Ice Machine
for 3 seconds to start ice making. The
button will illuminate
green and the ice making indicator will illuminate
green. The ice making time will be displayed in the digital window also.
The water inlet valve, compressor, and water pump will start and step by
step the evaporator will cool to make ice.
Ice production
Tap the start/standby button
Page 9
Ice harvest
Once the ice production cycle has completed the machine will switch
into the
ice harvest cycle, the ice harvest indicator will illuminate blue, then water pump
will stop and the hot gas bypass valve will energize to release ice from the
evaporator. Once the ice harvest cycle has completed the hot gas bypass valve
and ice harvest indicator will both shut off.
If the ice bin is not full the next ice making cycle will begin until the ice bin full.
Standby
To stop the ice production cycle tap the start/ standby button ,the ice machine
will return to standby status, the display window will show “Of” and the button
will flash.
If the ice machine has started the program of “counting down time of
delay until ice production will resume”, tap the start/ standby button to revert
the program
to standby mode, the display window will show the countdown
time, and the set button will illuminate white and the start/ standby button
will flash.
Ice bin full
When the ice bin is full, the ice maker will stop ice production automatically. The
ice full indicator will illuminate yellow and start/standby button will illuminate
green. “FL” will also be display in the digital window.
Water cleaning cycle
Tap the clean button for 3 seconds to start a water cleaning cycle, the clean
indicator will illuminate white and “CN” will be displayed in the digital window.
Once the clean cycle has finished, the ice maker will revert to standby mode.
Alternately, press the clean button for 3 seconds again or tap the start/
standby button during the water cleaning cycle, the cycle will finish and
return to standby mode or countdown mode immediately.
Note:
Tapping the start/standby button DOES NOT turn off the power of the
ice machine. The
ice machine must be unplugged and isolated from the main
electricity before any service or cleaning is undertaken.
Note: The display window will appear “Co” while water inlet is filled by the
water valve
Note: The ice maker will automatically start the ice making cycle after
plugging in the machine and powering it on.
Note:
During the ice making cycle, Pressing the set button for 5 seconds
will
enforce the harvest cycle immediately.
REFR3A - Nugget Ice Machine
Page 10
How
to delay the ice production cycle
The delay function is a key feature that allows the operato
r to delay the ice production
f
or 0-24hours. This
makes it easier to manage ice production and lower costs. After
the set delay time passed, the machine will automatically resume ice production.
To set up the delay feature tap the set button for 3 second, the set button will
illuminate white and the start/standby button will flash
, the
countdown
time
will also
be
displayed
on
the
digi
tal window. You can touch the up and down arrows to
increase or decrease the countdown time.
How to set the ice making cycle time
T
ap the up / dow
n button , the display window will show the ice making cycle
time. The time can be set between 0~45minutes, default time is 16 minutes for
maximum ice production.
Note:
The ice maker is only able to set up the ice making time during the ice
making cycle.
Note:
During
the ice making
cycle the ice production delay function will not work.
Note:
If the ice
maker is powered off
or disconnected, the delay function will
need to be reset.
Note:
During the ice making cycle or ice harvest cycle, the water clean
button
does not
work, the clean
indicator
will
quickly
flash.
Note:
Time set to ”00” will not execute the
delay program.
Note:
When first turning on the ice maker, the system will rinse itself before making
ice. The rinsing process takes about 5 minute.
After the delay
function
has been implemented, the set button will illuminate
white and the start/standby button will
flash. The display window will also show
the countdown time.
REFR3A - Nugget Ice Machine
Below are recommended cycle times. Please do not set the ice making time
out
of our suggested time frame to prevent issues.
Ambient Air
Temperature
Recommended Cycle
Length
50° F 8 - 12 minutes
50 - 57° F 10 - 15 minutes
59 - 75° F 12 - 20 minutes
77 - 93° F 14 - 25 minutes
95 - 107° F 20 - 30 minutes
Recommended ice production time
for different ambient temperatures
Page 11
Maintenance & Cleaning
Periodic cleaning and proper maintenance will extend
the life of your ice
machine, ensure maximum efficiency, and deliver better ice.
Exterior cleaning
Always clean the exterior stainless
steel surface of the ice machine with a micro-
fibre cloth or a
sponge. Make sure to clean in the direction of the grain of the
stainless steel.
Warning:
Disconnect the ice maker
from the
main electrical and the water
source before preforming any cleaning or maintenance.
Warning:
Inspection, descaling and servicing should only
be
performed by a
qualified technician.
Warning:
Never clean the ice maker with a pressure washer
or by
spraying water, never use acidic or abrasive detergents.
Warning:
Do not use abrasive or metallic products such as wire wool which
could cause
corrosion of the stainless steel finish.
Warning:
Do not clean plastic components with alcohol or disinfectants
as this could cause damage to the plastic components.
Page 12
Condenser cleaning
A dirty or clogged condenser will prevent proper air flow. This will lead to reduced
efficiency, reduced ice production performance and increase operation
temperatures which may lead to component failure. We recommend the
condenser is cleaned every six month by a qualified technicians. To clean the
condenser disconnect the ice machine from the main electricity and water
source. Remove the condenser from the back panel of the machine. Clean dirt
and dust from the condenser with a soft brush and vacuum cleaner. Reattach the
rear panel and reconnect the power and water to the machine after cleaning.
Water distributor, water tank and float switch cleaning
Mineral, dirt and lime scale that are present in the water during the freezing cycle
will build up in the water distributor, water tank and other parts of the ice maker.
Routine cleaning will help prevent build up.
We recommend cleaning the water distributor, water tank, and float switch
every three months with a citric acid and baking soda powder solution.
We strongly recommend utilizing a in line water filter with this ice maker.
Note:
Push down the buckle at the rear panel of the machine to lift out the
panel and remove air filter from the metal side of the rear panel. Clean
with soft brush and vacuum cleaner and replace back.
Warning:
Failure to clean the condenser could cause component
failure
and will invalidate your warranty.
Warning:
Be careful when doing the condenser cleaning
as the edge of
the condenser and pin are sharp.
Warning:
Dirt and lime scale build up will reduce the efficiency of the ice
maker and could lead to component failure which will invalidate your
warranty.
Air filter cleaning
The ice machine is equipped with a condenser dust filter to prevent dirt and dust
from entering the condenser. It is important that the condenser and air filter is
cleaned routinely to ensure efficient operation of the machine. We recommend
this procedure is carried out every 30 days.
Page 13
Trouble shooting
Before calling for service, revie
w the error code, symptoms and recommended
solution below, if none of the suggested solution resolve your problem, please
contact your local distributor or authorized service company.
Error
code
Symptom Possible cause Solution
E1 Ice damper
or ice full
sensor fault
Ice damper
dislocation
Check ice damper and
ice full sensor, replace
if necessary
Ice full sensor
defective
Eb Poor cooling
performance
High ambient
temperature
Wait until ambient
temperature meets
requirement
Poor ventilation Ensure the sufficient
clearance for proper air
circulation
Shortage of
refrigerant,
inefficient
compressor
Check for leak &
recharge refrigerant,
replace compressor if
necessary
Shortage of water Check or replace water
system components of
ice machine and water
supply.
Water
temperature
sensor inoperative
or disconnect.
Check and replace if
necessary
Inefficient
compressor
Check the compressor,
replace if necessary
E3 Ice harvest
overtime
solenoid valve not
opening
Check and replace valve
if necessary
Ice making time
set too short (ice
too thin)
Make sure the set time
of ice making cycle is
complying with the
suggested set time
range by manufacturer
In-sufficient water
or water less in
water tank
See remedies for
shortage of water
E4 Ambient
temperature
too high
ambient
temperature too
high
Wait until ambient
temperature meets
requirement
Poor ventilation Make sure the sufficient
clearance for air
circulation
Condenser dirty Clean the condenser
Condenser fan
faulty
Check the condenser
fan, replace if necessary
Page 14
E5 Shortage of
Water
Water supply
is turned off or
no water
Make sure the water
supply is turned on and
has a good connection.
Water pressure
too low or water
leak
Make sure the water
pressure is between
0.2psi to 0.8psi
Water inlet valve
not opening
Check the water inlet
valve, replace if
necessary
Water tank leak Check the water tank,
replace if necessary
Water pump fault Check the pump,
replace if necessary
Leak of water drain
valve
Check the valve, replace
if necessary
E6 Out of the
pressure
limit
Condenser
temperature too
high
Make sure the sufficient
clearance for proper air
circulation, Check the
pressure of
refrigeration system
Blockage of cooling
system
Check the condenser
and clean
Pressure switch
fault
Check the switch,
replace if necessary
E7 Open circuit
fail of the
condenser
sensor
Condenser sensor
defective
Check related parts,
replace if necessary
Connector lose or
disconnect
E8 Short circuit
fault of the
condenser
sensor
Condenser sensor
defective
Connector lose or
disconnect
E9 Open circuit
fault of water
temperature
Water
temperature
sensor defective
Check the water
temperature sensor,
replace if necessary
Connector lose or
disconnect
EA Short circuit
fault of water
temperature
Water
temperature
sensor defective
Connector lose or
disconnect
Page 15
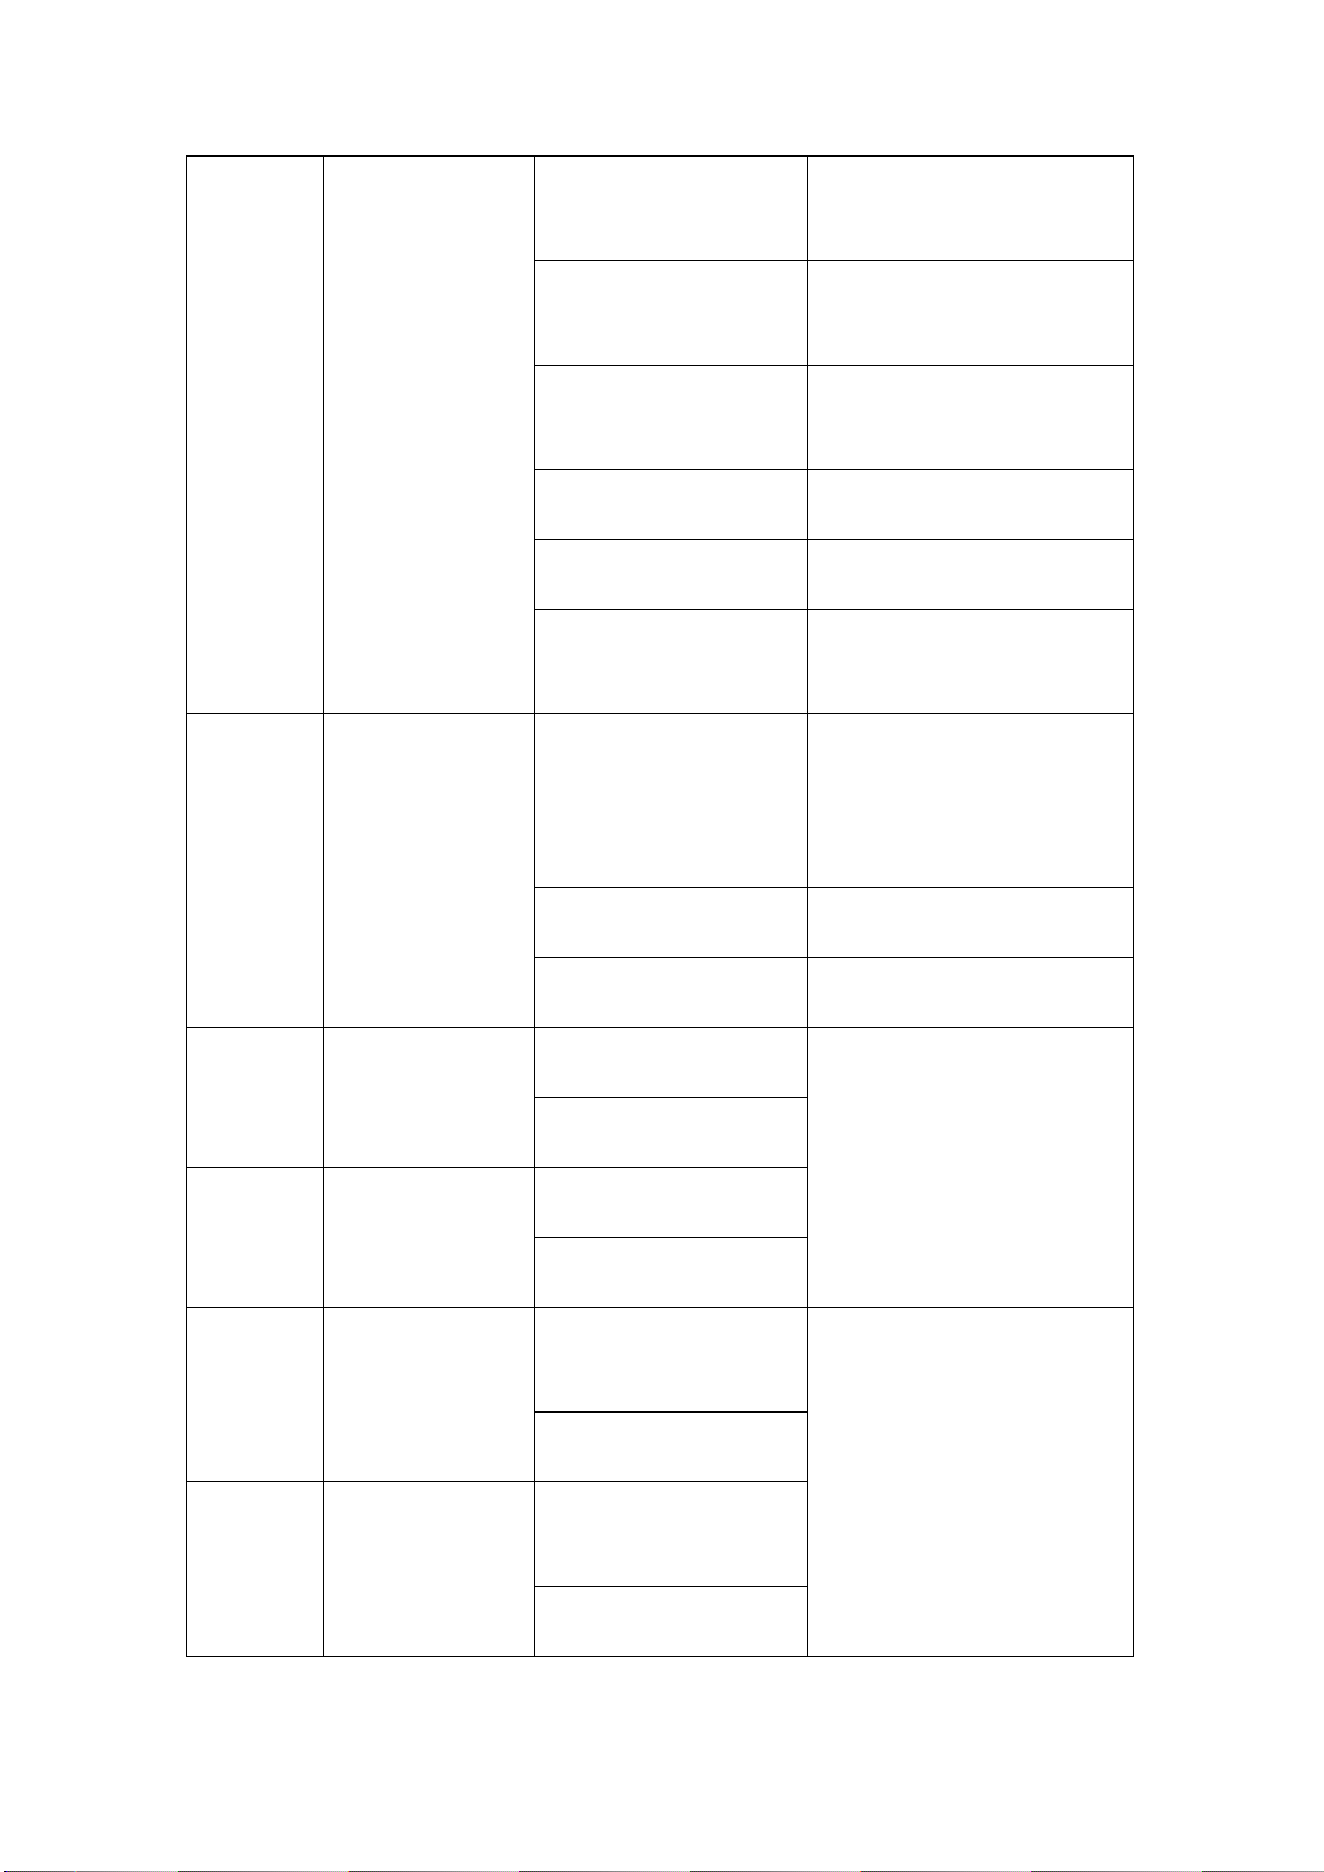
E12
REFR3
Cubed Ice
Maker Water
Supply Issue
Water supply
blockage
Does the water tray on the
REFR3 have water in it?
Is
the tube on the top of the
REFR3 feeding water to
the freezer tray? See
picture. Remove the two
screws shown and see if
water is flowing. If not,
remove the white zip tie
and clean out the white
tube. If either of these are
a no the water supply may
be blocked. Clear out line
and add a in-line water
filter if one isn't being
used. (See below for instructions
on clearing out the water line).
E11 Power
Power Surge or
Power Outage
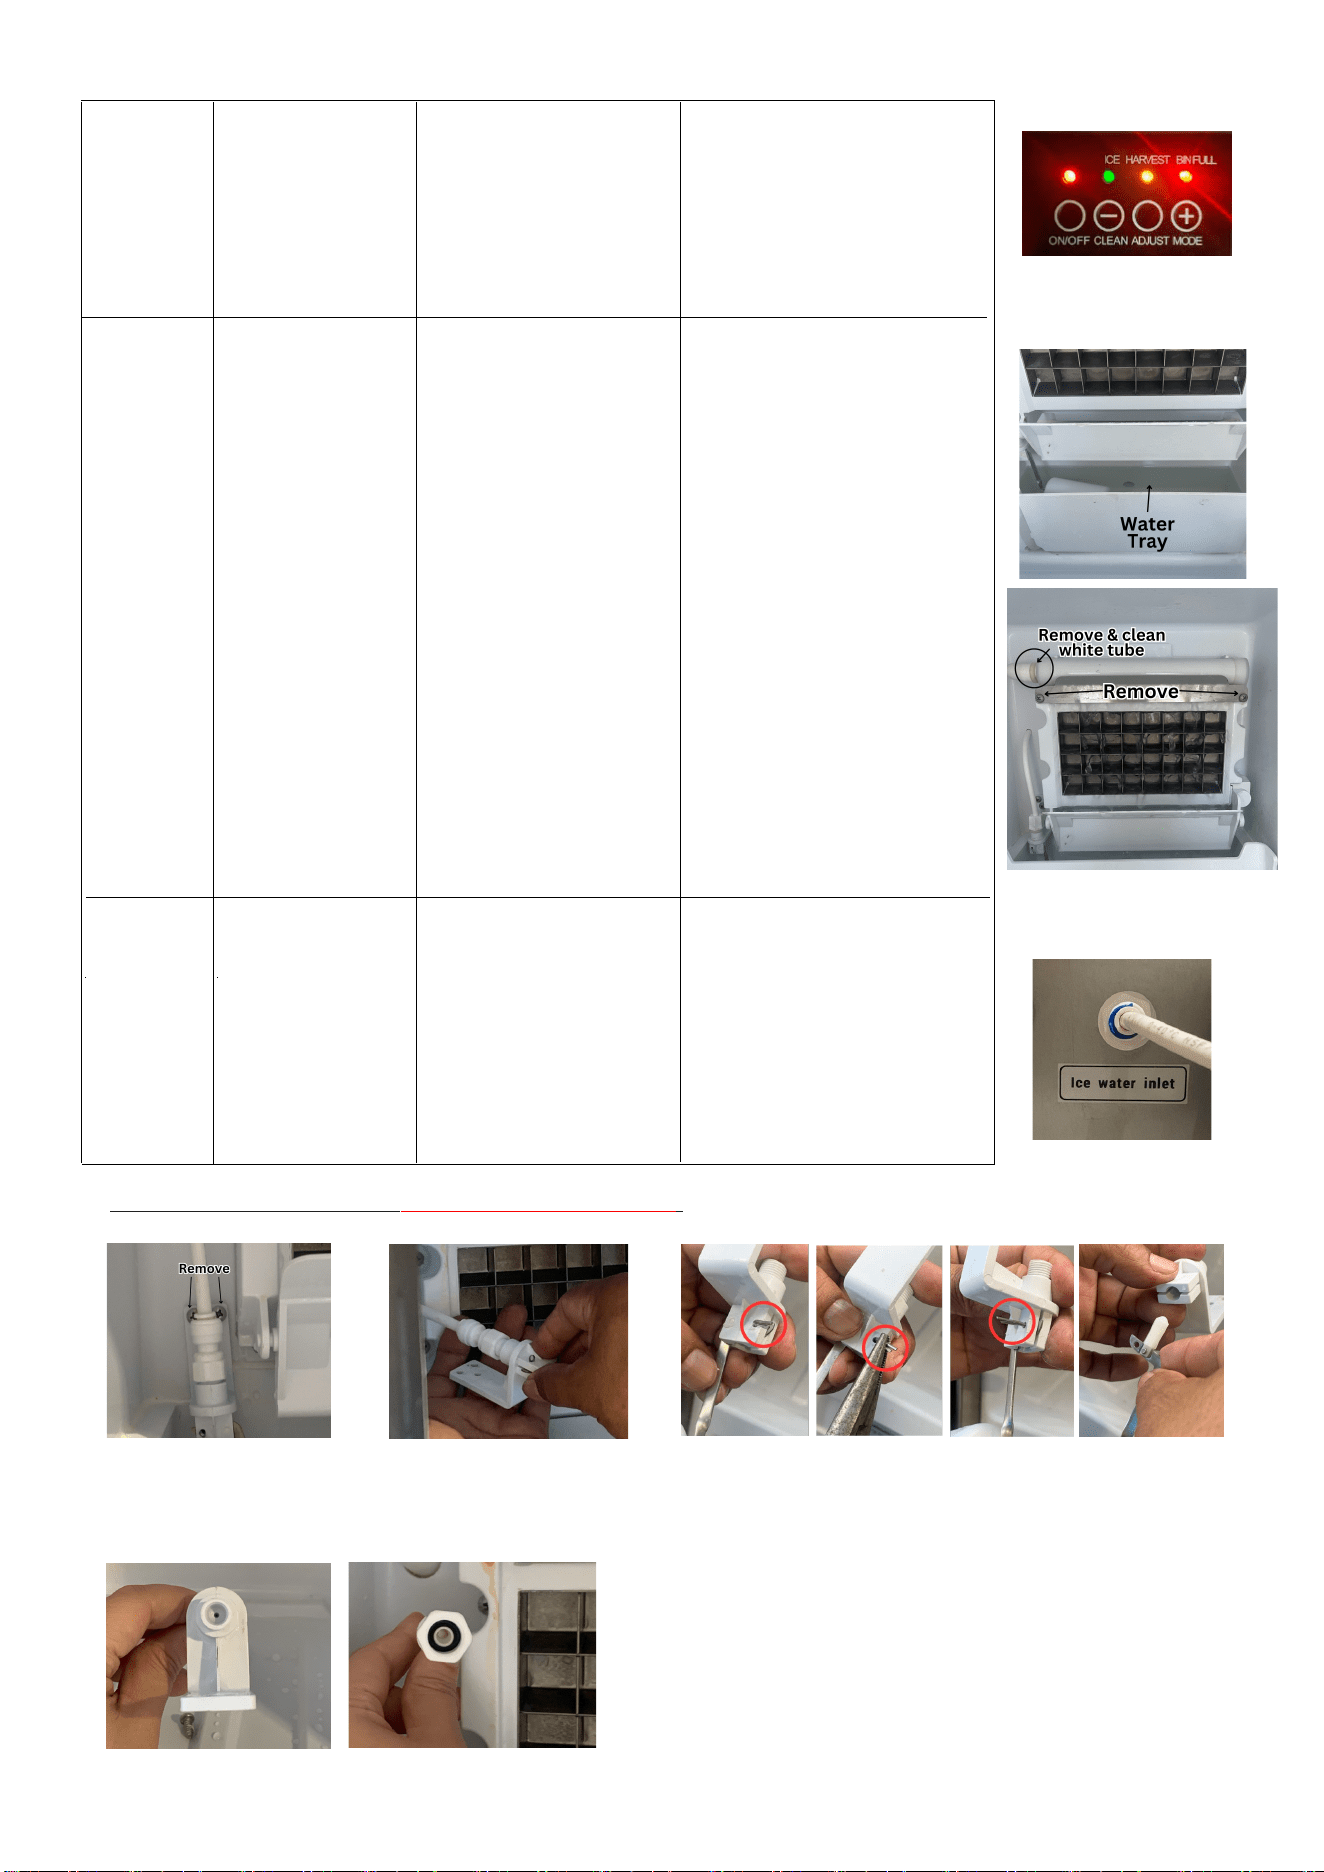
Cleaning out water line for REFR3 Cubed Ice Machine:
2. Unscrew the water
line from the float
valve.
1. Remove the two
screws that secure
the float valve.
3. On the float valve is a metal pin. Straighten it
out with pliers and remove the float.
4. Make sure both the water line and the float
valve are clear of debris.
To reconnect, replace the flat and metal pin.
Connect the float valve to the water line and
screw back into place.
Restart the unit. After
unplugging make sure to
wait 3 minutes before
restarting the machine.
(See page 7 for additional help
with REFR3 Cubed Ice Maker)
E13 REFR3A
Nugget Ice
Maker Water
Supply Issue
Water supply
bl
ockage
Is water flowing through
the white tube on the
back of the fridge
? If not
clean out the line by
removing the little blue
piece and pulling out the
line. Clean any debris from
the line before replacing.
Make sure all lights are on for REFR3
Remove to clean line on REFR3A
Page 16

Renaissance Cooking Systems Product Warranty
RCS is proud to provide the industries most comprehensive warranty program.
All RCS American Renaissance Grills, Cutlass Pro Series Grills and Cutlass Pro Series side burners,
sinks, as well as ALL doors and drawers are warrantied to be free from manufacturer defects for
the lifetime of the original owner.
All RCS Premier Series Grills and Premier Series Side Burners are warrantied to be free from
manufacturer defects for 15 years to the original owner.
All RCS Refrigeration p
roducts are warrantied to be free from manufacturer defects for 5 years
to the original owner.
All other products carry a one-year warranty to the original owner.
This RCS warranty is effective for product sales beginning January 1st, 2020. For service
assistance, please reach out to us at the email address below. You may also check our website
for lots of great information on using, servicing, or cooking on your new RCS grill.
This warranty excludes normal surface corrosion, discoloration, surface scratches and surface
rust which may occur. Improper maintenance, salt spray, chemicals, pesticides will affect the
look and integrity of the components of these products. RCS will not be responsible for any
damage caused as a result of not following owner’s manual instructions. This non-transferrable
warranty is limited to the replacement of original (one-time) defective parts, does not include
shipping and labor to remove or install replacement parts, if necessary. The owner must retain
and submit their original receipt with any warranty claim to receive warranty parts. The warranty
applies to the original owner only. Coverage is for residential use only, no commercial
applications apply. No registration required.
For more information, questions or assistance please visit us at
RCSGasGrills.com and click
the Customer Care Form
Page 17