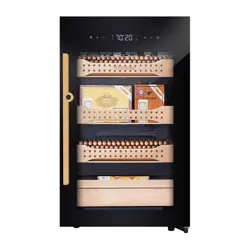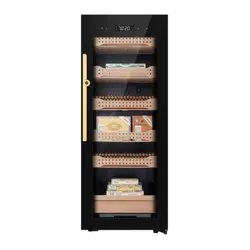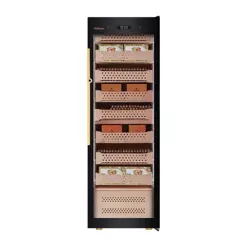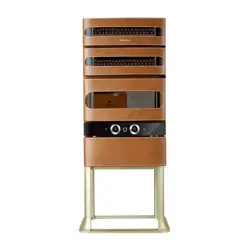
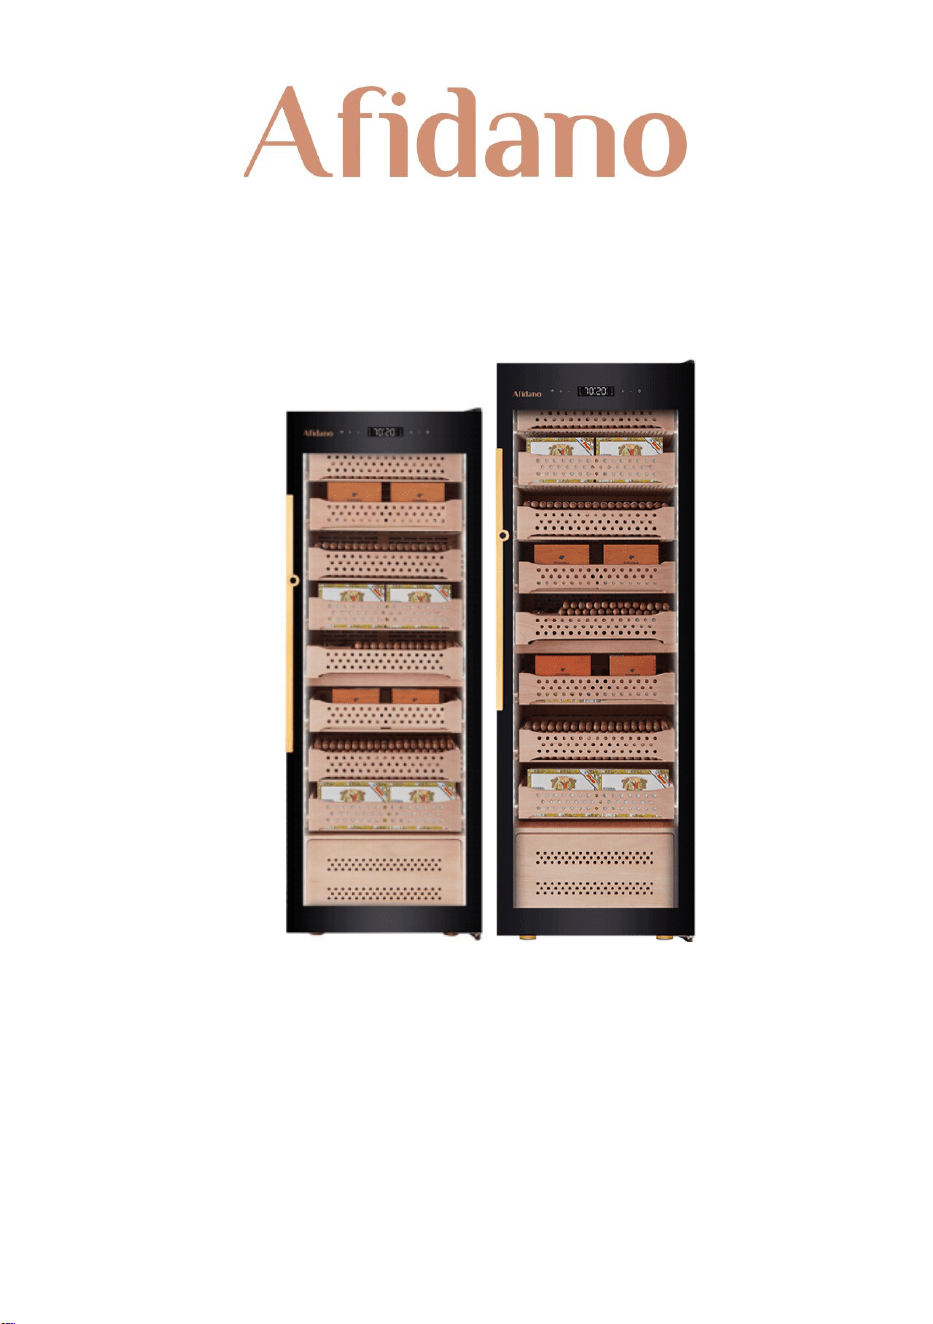
Premium Compressor Electric Cigar Humidor
B6 / B8
Please read this user manual carefully before using the product. Please keep this user manual
for your future reference.


Contents
Safety Information..……………………………………………………..……………………01
Installation...............................…………………………….……………………………08
Operating Your Humidor.....………………………………………………………………09
Technical parameter……………………………………………………………….…………12
Product structure drawing…………………………………………………………………13
Circuit diagram…………………………………………………………………….……………12
Trouble shooting............……………………………………………………………………14
Cleaning instructions…………………………………………………………………………15
Cigar storage knowledge……………………………………………………………………16
Warranty Terms…………………….............………………………………………………18

1
Safety Information
To reduce the risk of fire, electric shock, or personal injury, thoroughly
read the manual and all instructions completely and carefully.
Store this manual in a safe place for future reference.
All owners, current or future, must have access to this manual.
WARNING
To avoid accidents or serious injury, all people using this appliance must
be familiar with the contents of this User Manual, including Safety
Information. The manufacturer is not responsible for damages or injury
caused using this device beyond normal operations.
This appliance is not recommended for use by persons (including
children) with reduced physical, sensory, or mental capabilities, or lack
of experience and knowledge, unless they have been given supervision
or instruction concerning use of the appliance by a person responsible
for their safety.
The appliance is designed for indoor use only. It is not suitable for
camping use, and it shall not be exposed under rain.
This product is not a toy. Children shall not play with or inside the
appliance. Small children and pets should be supervised when using the
appliance.
Cleaning should be conducted by a suitable adult or child aged 8 or
above under supervision.
When discarding the appliance, make sure to unplug the appliance and
wait a while before cutting the power cable (as close to the appliance as
possible) and remove the door to prevent children from playing with the
appliance, thereby reducing the risk of serious injury or death from
electric shock or suffocation.
The cyclopentane foaming the humidor uses is flammable, which when
disposing should not be burned down and be kept away from fire
source. Please seek help from professional recycling companies dealing
with the disposal to avoid environment damage or undesired danger.

2
If this appliance features a magnetic door seal and is to replace an older
appliance with a spring lock (latch) on the door or lid, be sure to remove,
disable, or make the spring lock unusable before discarding the
appliance to prevent serious injury or death.
WARNING: To avoid the danger of suffocation, keep plastic packaging
away from pets, babies, and children. Do not use packaging bags in
cribs, beds, carriages, or playpens.
DANGER: Risk of child entrapment. Before you throw away your old
humidor:
Take off the door;
Leave the shelves in place so that children may not easily climb
inside.
3
IMPORTANT SAFETY INSTRUCTIONS
Do not puncture the refrigerant tube.
R-600a is used as a refrigerant. This product contains flammable gas
(Refrigerant R-600a).
CAUTION: Risk of fire or explosion. Dispose of refrigerator and
refrigerant in accordance with federal and local regulations.
When disposing of a humidor, remove doors, door seals, and door
latches to avoid entrapment of children or animals.
In order to avoid the creation of flammable gas-air mixture in the event
that a leak in the refrigerating circuit occurs, the size of the room in
which the appliance may be placed depends on the mass of the
refrigerant loaded in the system. The room must be 35.3 ft3 in size for
every 8 grams of R-600a refrigerant inside the appliance. Please refer to
the rating label on the back of the humidor to determine the amount of
R-600a refrigerant used in this product.
The installation location should not be exposed to direct sunlight and
not placed near any electrical appliance or heat source, e.g., stove, oven
or hob, radiator, etc.
GENERAL SAFETY
WARNING! Keep the ventilation openings, in the appliance enclosure or
in the built-in structure clear of obstruction.
WARNING! Do not damage the refrigerant circuit.
WARNING! Do not use mechanical devices or other means to
accelerate the defrosting process, other than those recommended by
the manufacturer.
WARNING! Do not use electrical appliances inside the storage
compartments of the appliance, unless they are the of the type
recommended by the manufacturer.
WARNING! If there is a light bulb in you unit, do not touch it if it has

4
been on for an extended period of time as it could be very hot and may
result in serious injury.
WARNING! When positioning the appliance, ensure the supply cord is
not trapped or damaged.
WARNING! Do not locate multiple portable socket-outlets or portable
power supplies at the rear of the appliance.
WARNING! Do not use extension cords or ungrounded (two-prong)
adaptors. NEVER plug multiple appliances into the same outlet.
Make sure that the power plug is not crushed or damaged by the back
of the appliance. A crushed or damaged power plug may overheat and
cause a fire, resulting in injury or death. Do not bend, twist, pull or place
heavy objects on the power cord or supply.
Do not store explosive substances such as aerosol cans with a
flammable propellant in this appliance.
The refrigerant isobutane (R600a) is contained within the refrigerant
circuit of the appliance, a natural gas with a high level of environmental
compatibility, which is flammable. Be sure to keep open flames, sources
of ignition, and high heat sources away from the unit.
Ensure that none of the refrigerant circuit components become
damaged during transportation and installation.
Make sure the room where the unit will be installed has thorough
ventilation.
It is dangerous to alter the specifications or modify this product in any
way. Any damages to the cord may cause a short circuit, fire and/or
electric shock.
This appliance is intended to be used in household and similar
application such as:
Staff kitchen areas in shops, offices, and other working
environments;
Farmhouses and by clients in hotels, motels, and other residential
type environments;
Bed and breakfast type environments;
Catering and similar non-retail applications.
WARNING! Any electrical components (plug, power cord, compressor
and etc.), if damaged, must be replaced by a certified service agent or

5
qualified service personnel. Contact our support team for help.
WARNING! The light bulb supplied with this appliance is designed
explicitly for this appliance and should not be used in any other device,
lamp, or similar application outside of its intended use in this machine.
The humidor must be plugged into its own dedicated 110-120V, 60Hz,
10A, AC only electrical outlet. Do not lengthen or shorten the cord.
The power cord of the appliance is equipped with a three-prong
grounding plug for your protection against electrical shock hazards. It
must be plugged directly into a properly grounded three prong
receptacle. The receptacle must be installed in accordance with local
codes and ordinances.
Make sure you have quick access to the outlet the appliance is plugged
into in case of an emergency where disconnection is quickly needed.
Make sure the appliance is plugged into a wall main outlet and not into
any power strip or similar device.
Do not pull on the main power cable.
If the power socket is loose, do not use it for the appliance under any
circumstance as it may result in electric shock or fire.
You must not operate the appliance without the lamp (if applicable to
your unit).
This appliance is heavy. Care should be taken when moving it. Team lift
is recommended.
Avoid prolonged sunlight exposure to the appliance.
DAILY USE
The humidor shall be used on a level surface.
Do not put hot objects or devices on the plastic parts in the appliance.
Do not move the humidor when there are objects inside as it may
damage the cabinet.
If the appliance is left empty for long periods, switch off, defrost, clean,
dry and leave the door open to prevent mold growing inside the
appliance.
CARE, CLEANING AND MAINTENANCE
Before cleaning or maintenance, switch off the appliance and disconnect

6
the power plug from the main socket.
When pulling out the shelves from the rails, please make sure the door
is wide open in order to prevent undesired damage to the magnetic
door seal.
Do not clean the appliance with metal objects.
INSTALLATION
IMPORTANT! For electrical connection, carefully follow the instructions
given in the following points.
The humidor must be disconnected from the source of electrical supply
before attempting the installation.
Only use accessories as indicated and not for any other use.
Remove all protective plastic before using the appliance.
Unpack the appliance and check if there is any damage to it. Do not
connect the appliance if it is damaged. Report possible damages
immediately to the retailer you purchased from. In the case of any
damages, keep the packaging for proof.
We advise to let humidor stand upright for 24 hours before plugging in
the appliance to allow the oil to flow back into the compressor.
There should be adequate air circulation around the appliance. Poor air
circulation may lead to overheating. To achieve sufficient ventilation,
follow the instructions relevant to installation.
Where possible, make sure the product spacers are against a wall to
avoid touching or catching warm parts (compressor, condenser),
resulting in possible burning.
The appliance must not be located adjacent to radiators or cookers.
Make sure that the power plug is accessible after installing the appliance.
Allow the humidor to operate for 2-3 hours after installation before
placing cigars inside.
SERVICE
A qualified electrician should carry out any electrical work or service
required.
The product shall be serviced by an authorized Service Center. And only
genuine parts are used.

7
ENVIRONMENT PROTECTION
This appliance does not contain gasses that could damage the
ozone layer in either its refrigerant circuit or insulation materials. The
appliance should not be discarded in urban refuse or rubbish. The insulation
foam contains flammable gases: the appliance should be disposed according
to local authorities. Avoid damaging the cooling unit, especially the heat
exchanging unit. The materials used in this appliance marked by the recycle
symbol are recyclable.
This symbol on the product or on its packaging indicates that this
product may not be treated as typical household waste. Instead, it
should be taken to the appropriate collection point for the recycling
of electrical and electronic equipment. Ensuring this product is disposed
correctly will help prevent potential negative environmental and human
health consequences, which could otherwise be caused by inappropriate
waste handling of this product. For more detailed information about the
recycling of this product, please contact your local council, your household
waste disposal service or the shop you purchased the product from.
8
Installation
BEFORE USING YOUR HUMIDOR
Remove the exterior and interior packaging.
Before connecting to power, let it stand upright for at least 24 hours.
This will reduce the likelihood of cooling system malfunction due to
handling during transportation.
Clean the interior with lukewarm water using a soft cloth. Please do not
apply erosive cleaning agent or solvent.
Place humidor on a level surface that is strong enough to support the
humidor when it is fully loaded.
Adjust the legs accordingly to level your humidor.
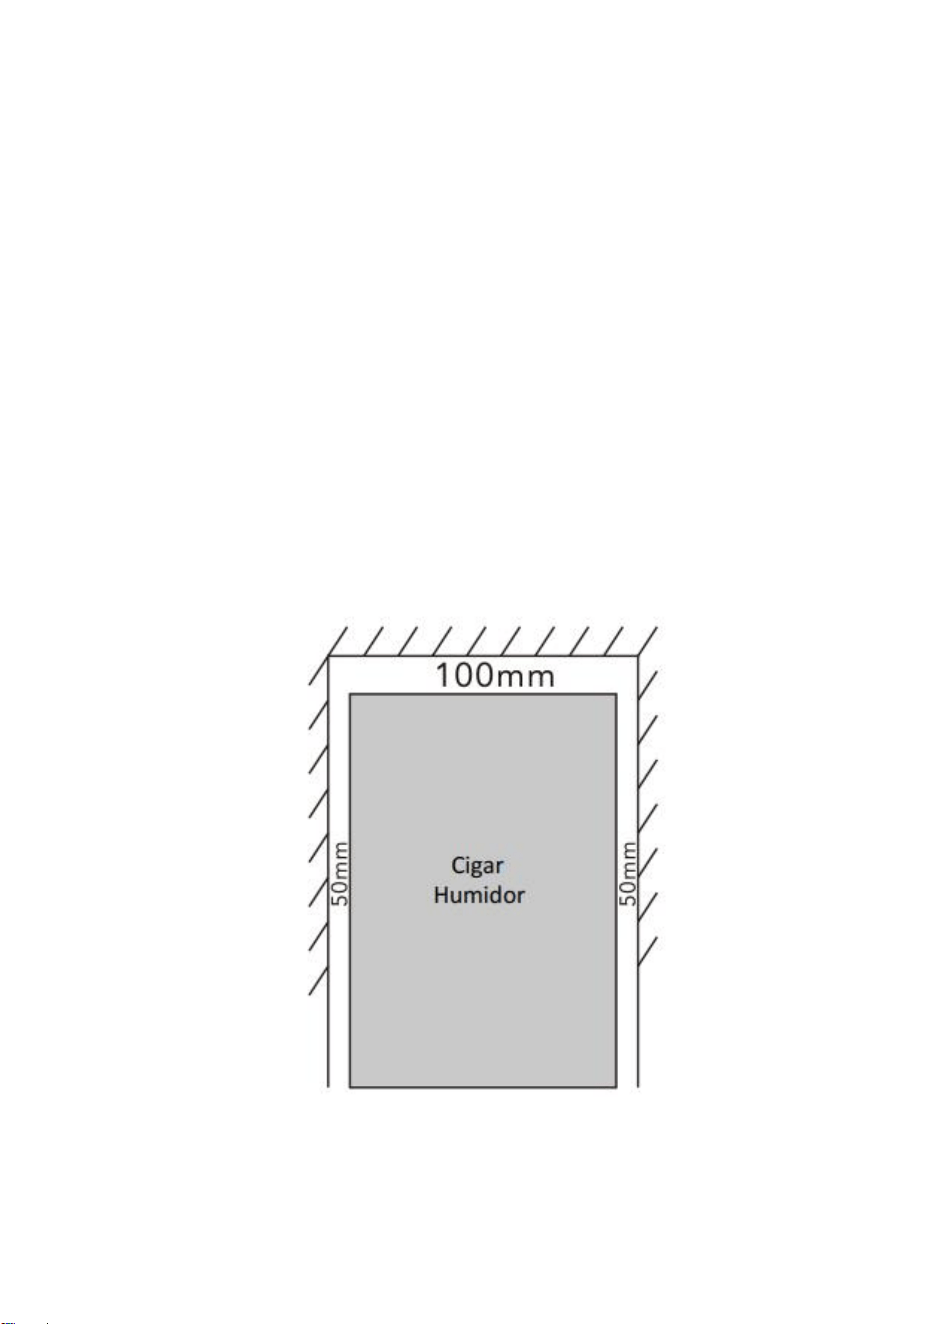
SUGGESTED CABINET CLEARANCES
Please allow 50mm (2’’) clearance on both sides, the top and the back of
the humidor for better ventilation.
9
Operating Your Humidor
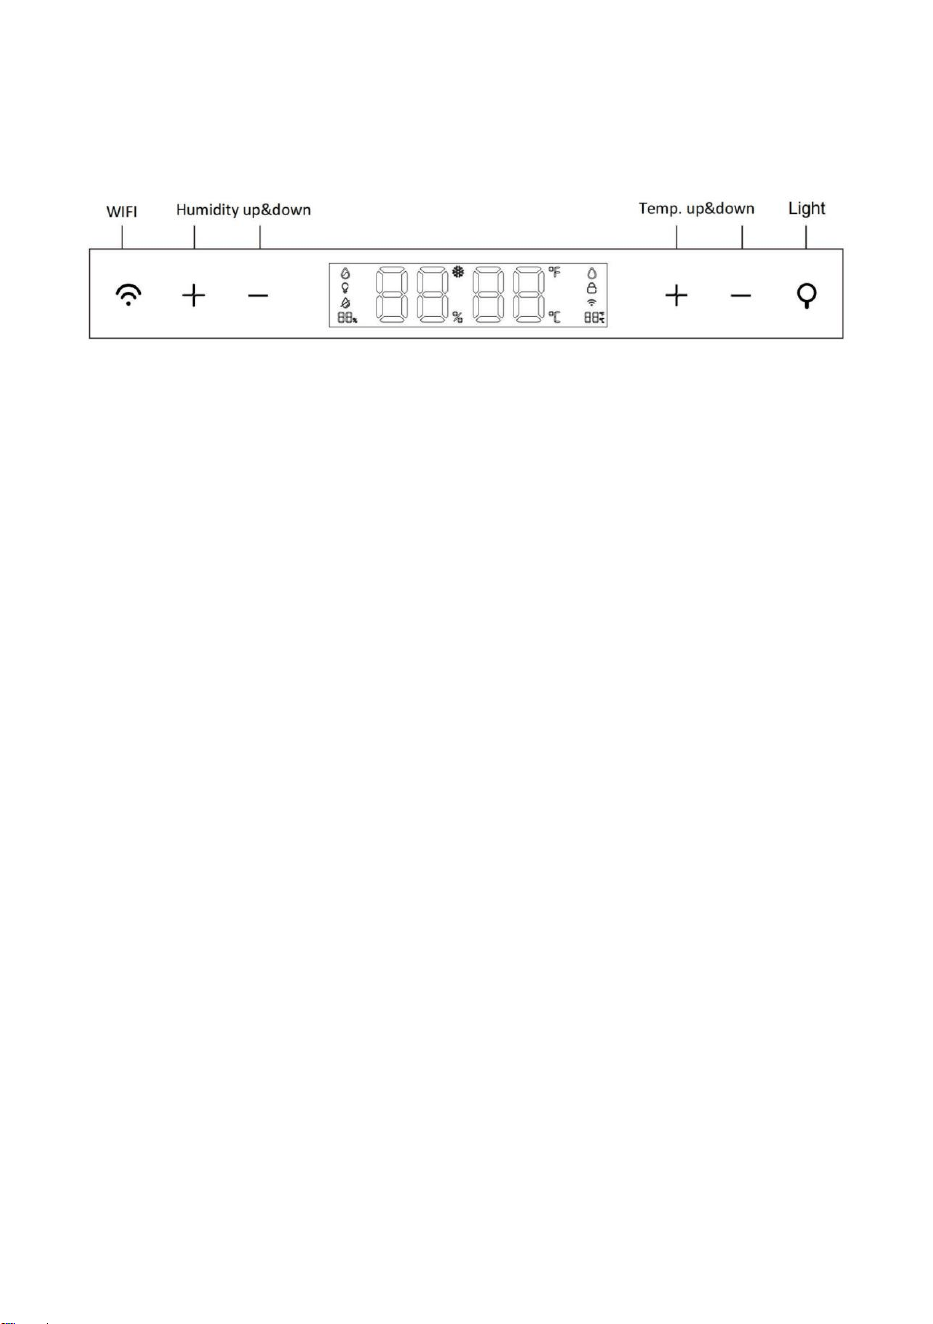
1. Connect to Wi-Fi: Turn on the humidor, press and hold the Wi-Fi button
for three seconds. You will hear a beep, and the Wi-Fi indicator light will
flash for 60 seconds. Open AFIDANO app on your smartphone and
follow these steps: Add Device -> Select Category -> Choose
"Refrigerator" -> Select the corresponding model -> Next -> Enter your
Wi-Fi account and password to connect to the cloud server. Once the
connection is successful, the Wi-Fi indicator light will stay on
continuously. You can connect up to 15 smartphones.
During the network configuration process, the Wi-Fi indicator light will
flash.
If Wi-Fi is successfully connected, the Wi-Fi indicator light will stay on
continuously.
If Wi-Fi is fail to successfully connected, the Wi-Fi indicator light will turn
off.
2. Light: press to turn on/off the inner light. Press and hold to switch
degrees Fahrenheit between Celsius display.
3. Humidity adjustment: The plus and minus keys on the left are humidity
adjustments, plus key to increase humidity, minus key to reduce between
60%-75%.
4. Temperature adjustment: The plus and minus keys on the right are for
temperature adjustment, plus key to increase the temperature, minus key
to reduce the temperature between 62-74°F.

10
5. Button combination functions:
1) Power-on, unlocked & no error displayed, press Wi-Fi and light
button and hold for 3 seconds, to enter the menu selection.
2) The left knob screen shows menu options, while the right shows the
number of recorded fingerprints (show 00 if all fingerprints are
deleted in in factory default mode).
3) Exit: a, status will end in 5 sec without further operation; b, press
Light button to select other menu, press Wi-Fi button to enter.
4) Door heating: In the unlocked state, hold down the light button for
3 seconds to change the door heating state.
6. Register fingerprints:
1) In unlocked state (any fingerprint can be unlocked by factory
default), press "Wi-Fi" button and "Light" button at the same time.
2) Press the Light button again and then adjust the digit on the left
temperature screen to “1” by turning the light button. Then press
the Wi-Fi button to confirm.
3) Press your finger on the fingerprint lock. When the fingerprint lock
lights turn from white to blue, your fingerprint is successfully
registered.
4) If red-light blinks three times and the buzzer beeps three times, it
means registration fails. Repeat the procedure steps until the
recording succeeds.
5) Delete all fingerprint: Press the Wi-Fi button and the light button at
the same time, and then press the light until "02" is displayed. Press
the Wi-Fi button again to confirm. The fingerprint lock flashes
green light 3 times, delete successfully.
7. Fingerprint registered successful: the display board is fully lit, and the
buttons and drawers will be unlocked. No operation is performed within 10
seconds after unlocking, and the display board becomes dark. No operation

11
in 90 seconds, drawers will lock.
8. Water for humidifier, adding water from the top of the cabinet. Please
add about 0.6gal of distilled water, until water level alarm beeps.
9. Alarm code:
1) When the environment sensor is faulty, “F2” is displayed; When the
space sensor is faulty, “F3” will be displayed.
2) When the defrosting sensor is faulty, “F4” is displayed.
3) The dual display panel displays “E0”. When the driver panel is faulty,
the left display panel displays “E0”.
4) The space humidity sensor fails to communicate, and “ E1 ” is
displayed on the left screen.
5) Water shortage alarm: when the water level of the water tank is low,
the display on the right-side lights up the mark of low water level
and makes a buzzer.
6) Full water alarm: when the water level of the water tank reaches the
highest, the right.
7) Display screen shows the high-water level mark, emit a buzzer. The
alarm can be neutralized by closing the tank lid. Or drain until the
alarm stops.
10. Precautions:
The maximum number of fingerprints that can be registered is 50. If the
number exceeds the limit, all fingerprints need to be deleted first, and then
re-registered one by one.
If there is no response after pressing the finger for 4-5 seconds, release the
finger and wait for 3-5 seconds, and then try again. To increase the
recognition accuracy, please try to make more contact between the finger
and the fingerprint recognition head position, and make sure to touch the
black metal part.
12
Technical parameter
Model
B6
B8
Volume
9.6 cu.ft
13.2 cu.ft
Rated Voltage
110-120V
110-120V
Rated Current
1.2 A
1.2A
Rated Frequency
60Hz
60Hz
Climatic type
SN & N & ST & T
SN & N & ST & T
Heating Power
150W
150W
Temp. range
62~74°F
62~74°F
%RH
60~75%
60~75%
N.W
207lb
236lb
Size
W 23.4” x H 66.2” x 24.1D ”
W 23.4” x H 71.1” x D 27.9”
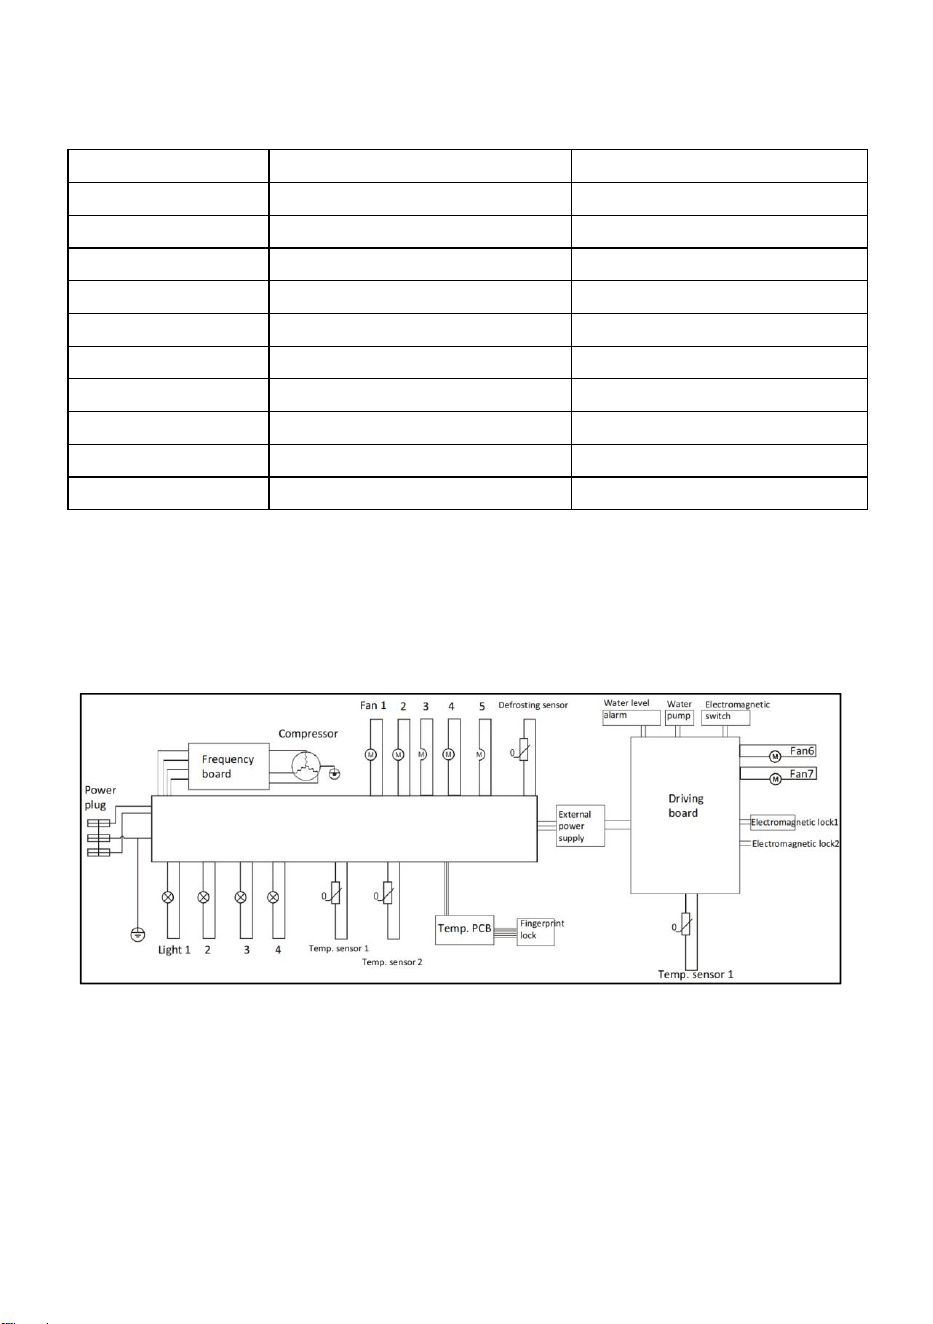
Circuit Diagram:
B6 / B8
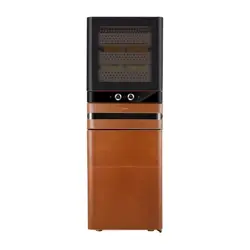
Product illustration:
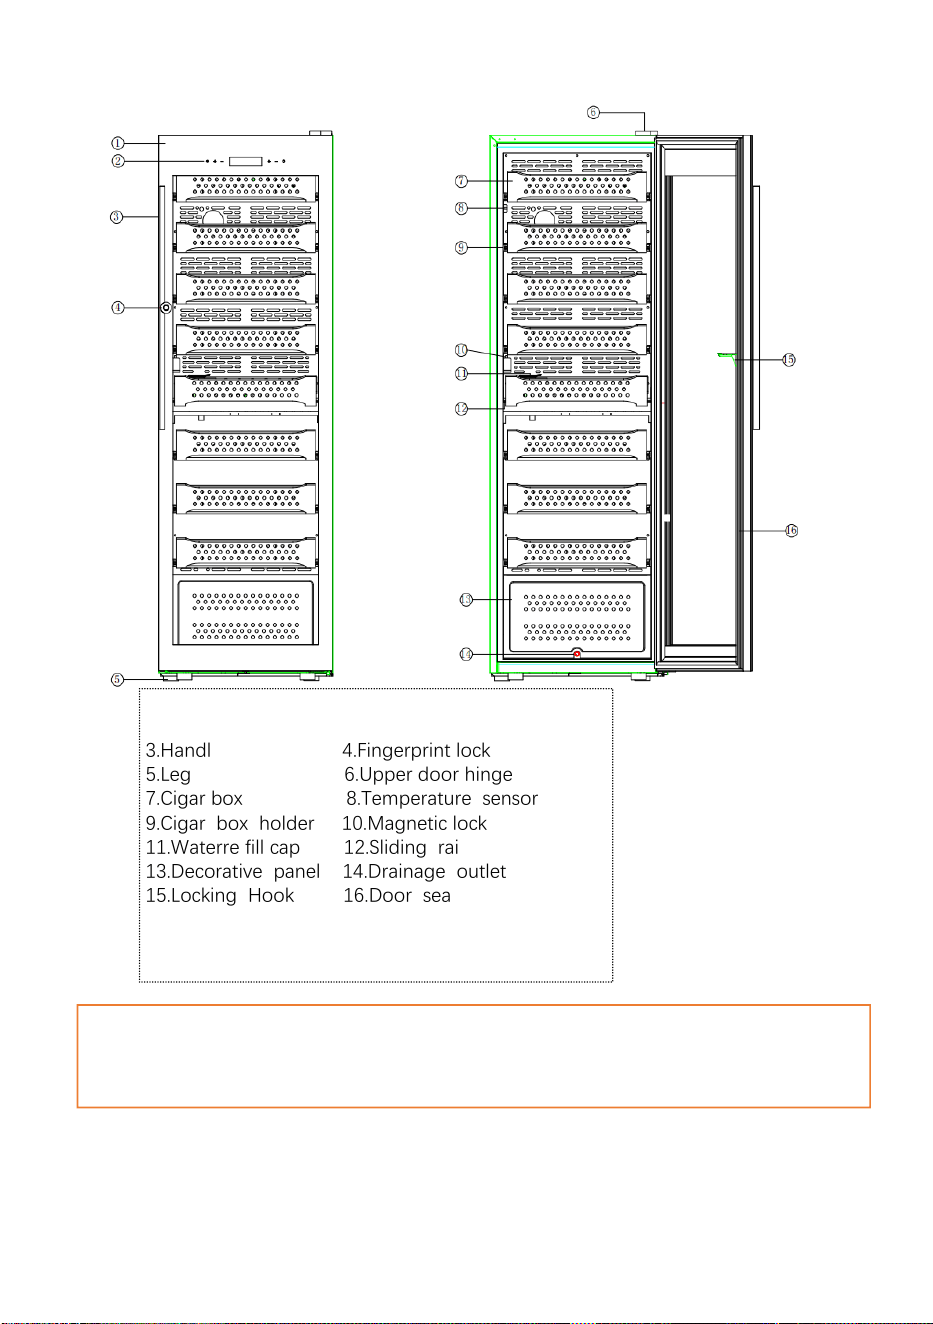
13
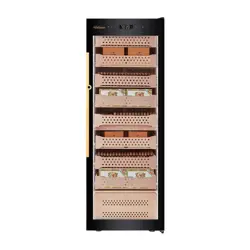
1. Glass door 2. Control panel
3.Handl 4.Fingerprint lock
5.Leg 6.Upper door hinge
7.Cigar box 8.Temperature sensor
9.Cigar box holder 10.Magnetic lock
11.Waterre fill cap 12.Sliding rai
13.Decorative panel 14.Drainage outlet
15.Locking Hook 16.Door sea
A Fermentation case in the drawer is a wooden case with temp and humidify. It is
suitable to put cigar in it 30 min before enjoying it, with the best flavor from it.
14
Trouble shooting
Trouble shooting
Problem description
Check & Fix
The cigar humidor is
not working.
Check power cord plug in power outlet.
Check if the product is turned off.
Check if switch is damaged or the fuse blown?
The temperature inside the cabinet is not low enough.
Inner temperature is
not low enough
Check if temperature is correctly set.
Check if outer environment is too high.
Check if the door is frequently opened and closed.
Check if the door is not properly closed.
Check if door is sealed.
Humidor is frequently
on & off
Check if temperate in your home is higher than regular days.
Overloaded in the humidor.
Check if the door is frequently opened.
Check if the door is not properly closed.
Temperature is not correctly set.
Check if door is sealed.
No light
Check if power cord is well connected to power outlet.
Check if switch is broken or fuse blown.
Vibration noise
Check if the humidor is well leveled.
Loud noise
Check if the humidor housing shrank or expanded.
Check if the ventilation is blocked.
Check if the humidor is placed on a level and solid ground.
When the compressor starts or stops, the internal coil device
has to be transformed from static to high-speed operation or
from high-speed to static state. At the moment of
transformation, the compressor will make a louder sound than
normal operation, such as “clack” sound, which is normal.
Door could not close
Check if the cigar humidor placed on a level and solid ground.
Check if the door properly installed.
Check if the door seal too dirty to affect its sealing tightness.
Check if the shelf is misaligned.

15
Cleaning instructions:
Before cleaning, please unplug from power outlet to ensure that the cigar
humidor is powered off.
Remove all items stored in the humidor and temporarily keep them in low
temperature space.
Remove all shelves and cases.
Use a clean damp cloth to clean the interior, door seal and control panel.
Note! Do not use any chemical agents.
Use a clean, soft cloth to clean the exterior walls of the humidor and the
surface of the door. If necessary, use a slightly moistened cloth (water + mild
cleaning agent). After cleaning, thoroughly dry the surface with a clean cloth.
Regularly check the water tank. Make sure to keep sufficient water level, not
overtly filled. Change the water once every three months and maintain a
moderate water level.
(After draining water tank, add an appropriate amount of baking soda to
purified water at a ratio of 1:200, pour it into the water tank, start the cigar
cabinet and run it for 4 hours, then drain the water in the water tank again,
and refill with purified water.)
After cleaning, restart the cigar cabinet and put your cigars back in.
Do not damage the nameplate on the back. The information on the
nameplate will be needed for warranty service.

16
Leather Daily Maintenance
1. Keep leather away from direct sunlight and heat sources, which can
cause fading and drying out.
2. Regularly clean leather with a soft, dry cloth to remove dust and dirt. For
more stubborn stains, use a damp cloth with a mild soap solution.
3. Use a leather conditioner or protectant to keep the leather moisturized
and prevent cracking or peeling. Apply it with a soft cloth and allow it to
absorb into the leather for several hours or overnight.
4. Avoid getting leather wet, or if it does get wet, allow it to air dry naturally
away from heat sources. Do not use a hairdryer or other heat source to
dry leather as this can damage it.
5. Store leather items in a cool, dry place and use appropriate protective
covers to prevent damage from dust and moisture.
Cigar storage, moisturizing and humidifying.
No matter how you store cigars, you should check them regularly to ensure
appropriate humidity! It is recommended to check the status of cigars once a
week.
When we buy good cigars and leave the tobacco shop, we usually don't have
to worry about whether these cigars can be enjoyed immediately. However,
for consumers who buy a large number of cigars and store them in many
boxes, proper storage becomes an issue that needs attention. It is generally
believed that cigars are best stored in an environment suitable for smoking.
Many cigar enthusiasts believe that the "ideal" temperature in this

17
environment is about 77°F and the relative humidity is about 70% or a similar
range. If the cigars are too dry, they will overheat and burn quickly and
unevenly when smoked. If the cigars are too humid, the flavor will easily
dissipate, making it difficult to enter the mouth, and there is a risk of mold
during storage. None of these extreme conditions are ideal. Therefore, no
matter how you store cigars, you should check their condition regularly to
ensure appropriate humidity. It is recommended to check them once a week.
Recommended cigar storage temperature and humidity
Temperature 70 °F , Humidity 70%

18
WARRANTY
The manufacturer warrants to the original purchaser of this product that the
product is free from defects in workmanship and materials for a period of 1
year from the date of purchase, given this product is used and maintained
according to instructions that comes with the product.
The purchaser must contact Kalamera Customer Service Department and
provide description of the defect, digital pictures if necessary, purchase
channel, serial number, order ID and the original purchase documents for
validation of warranty coverage date.
Once it’s been confirmed that your appliance is eligible for warranty service,
Kalamera Customer Service Department will contact you by mail or phone
regarding warranty solution. Replacement parts and/or units will be new, re-
manufactured or refurbished and is subject to the manufacturer’s discretion.
Kalamera is not responsible for damage resulting from shipper mishandling
or improper packing. Do not return a defective product to the place of
purchase. Product received without a return authorization number will be
refused.
After receiving the unit, please do not remove or alter original model/serial
number. This will influence the after sales service. Please carefully keep the
user manual for future reference.
If you need help, please refer to troubleshooting section first. If your trouble
persists, feel free to contact us by mail or call. Filling in below table will assist
our warranty service should you be needing it. You may find model and
serial numbers on the product.
Model No.
Serial No.
Dealer Name
Date of Purchase

19
Warranty Exclusions:
The warranty does not apply if damage is caused by any of the following:
1. Damage to the product due to misuse, mishandling and abuse.
2. Product is not assembled or installed according to manufacturer’s
instruction.
3. Repairs by unauthorized persons or service centers with unauthorized
spare parts.
4. Failure to provide reasonable and necessary maintenance.
5. Improper power supply such as low voltage, defective household wiring
or inadequate fuses.
6. Accident, alteration, misuse or abuse of the appliance such as using non-
approved accessories, inadequate air circulation in the room or abnormal
operating conditions, such as extreme temperatures.
7. Damage in transit or when moving the appliance.
8. Use of force or damage caused by external influences.
9. Storage of improper items.
10. Normal wear and tear.
11. Cosmetic damage, including scratches, dents, chips, or other damage to
the finish of your product, unless such damage results from defects in
materials or workmanship and is reported to us within 30 days from the
date of purchase.
12. Fire, water damage, theft, war, riot, hostility or acts of God such as
hurricanes, floods, etc. In addition, consequential damage and incidental
damages, such as damage to person or property are not covered under
this warranty.
13. Partially or completely dismantled appliances


Manufacturer Information
MINEA ELECTRICAL APPLIANCE CO., LTD
Email: info@afidano.com