
User Manual
Parts & Buttons
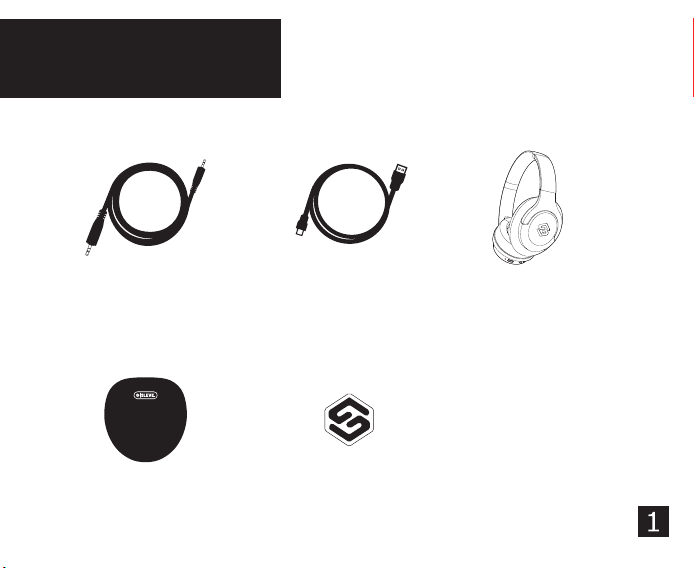
Make sure the following items are included in your package.
Audio cable
USB Charging cable
Storage case Logo Sticker
PULSE.ANC
Parts & Buttons
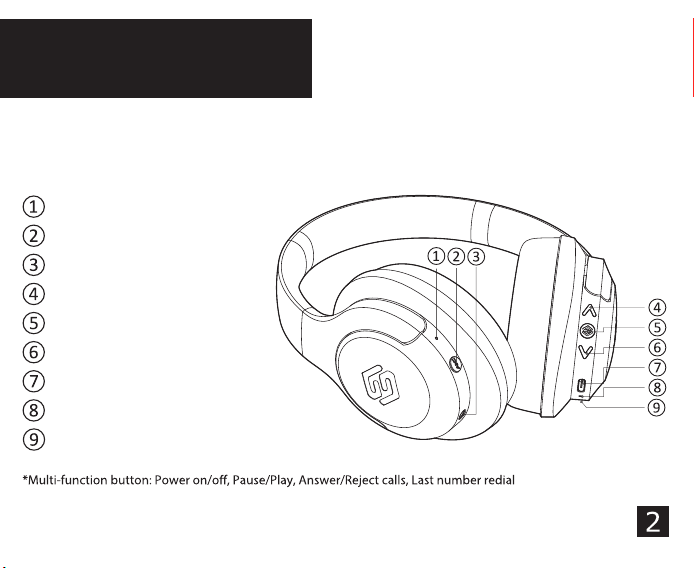
For a look at the various buttons and parts of your headphones,view
the graphic below.
MFB
Vol+/Track Forward
Vol-/Down/Track Back
ANC
LED Indicator
1
LED Indicator
2
Charging Port
AUX IN
MIC
Charging the Headphone
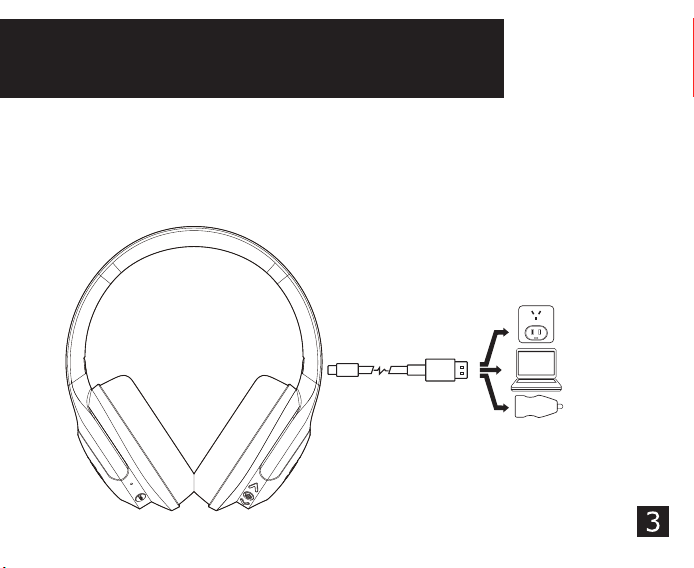
Connect the headphone to power supply rated 5V/1A with the provid-
ed charging cable to charge and the LED light
2
will turn green. It takes
up to three to four hours to fully charge the headphone. The light will
turn solid White when fully charged.
Using your headphone
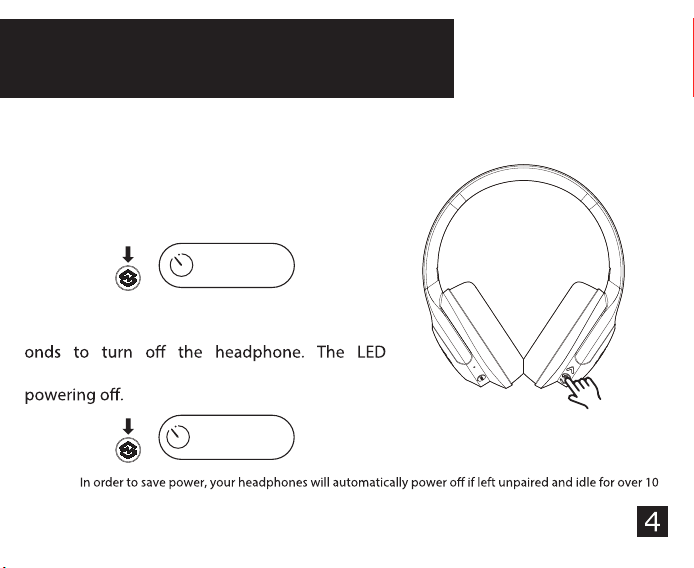
Power ON/Power OFF Your Headphones:
-Press and hold the Power button for approxi-
mately three seconds to power on your
headphones. Your headphones will automatical-
ly connect with the last phone they were paired
with.
-Once powered on, you can press and hold the
Power button again for approximately ve sec-
Indicator light
2
will briefly turn white before
NOTE:
minutes.
3 seconds
POWER ON
5 seconds
POWER OFF
Pairing Your Headphones
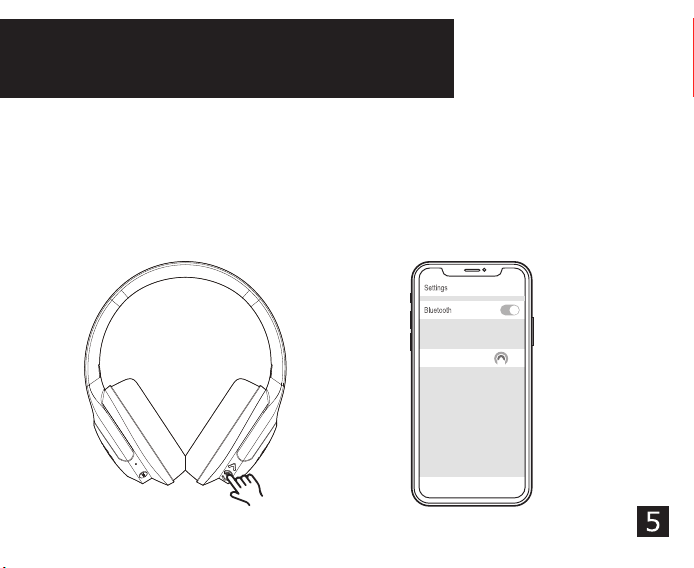
SLEVE PULSE ANC
-Powered on with indicator ashing white, go to the Bluetooth setting
of your Bluetooth devices. Search Bluetooth devices and select “SLEVE
PULSE ANC” to start connecting.
-If required, enter the PIN code ”0000” and conrm the entry.
-Pairing successful, the indicator will ash white slowly. If not, turn o
and repeat the above steps.
Listening to Music
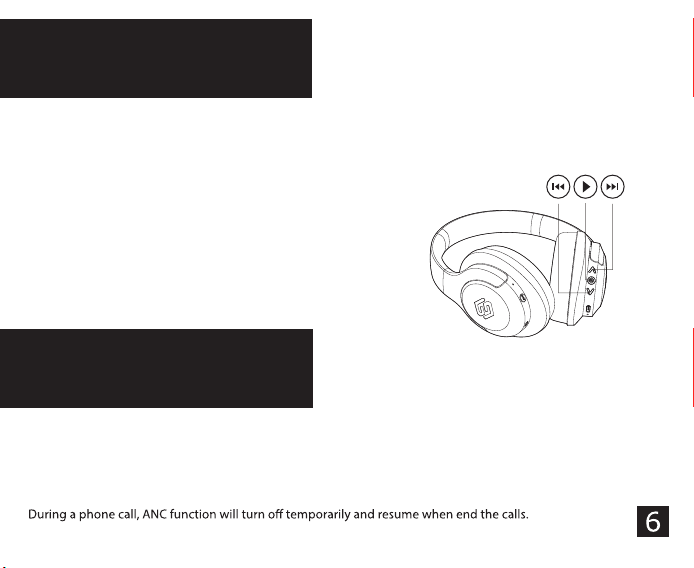
Noise cancellation
Turn ON/Turn OFF ANC function:
-Click the ANC button to Turn ON/OFF ANC function. When Turned ON, the LED light
1
will turn white. Turned OFF, the light will turn o.
Play/Pause
Press the Power button to get music from your audio source to play or pause.
Next/Previous Song
Press and hold the volume Up or volume Down
buttons for one seconds to advance to the next
song or go back to the previous one.
NOTE:
Music will automatically pause when a call is
dialed out or when there is an incoming call. It will
resume when the call ends.
Click the volume Up or volume Down buttons to
increase or decrease the volume.
Increase/Decrease Volume
*Active Noise cancellation: Up to 22 ± 3dB between 50-500HZ
*
Free Hands
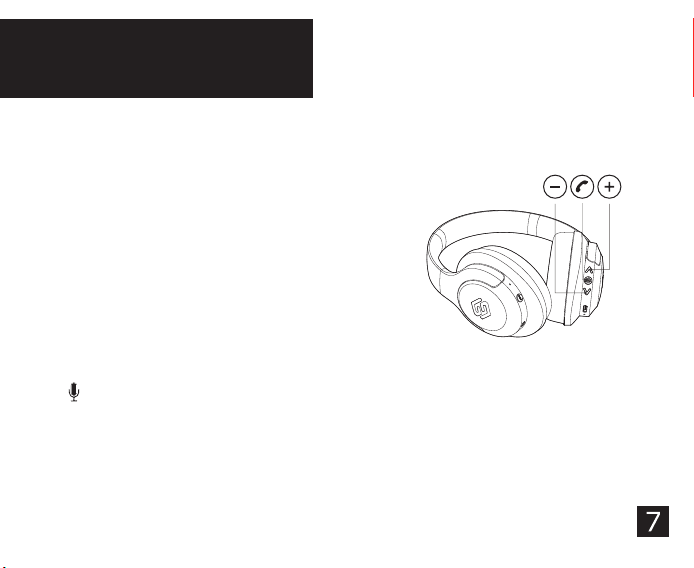
Siri *
Last Number Redialing
Quickly click on the Answer button twice and the last number that you dialed will be
redialed.
Answering/Rejecting an Incoming Call
To answer an incoming call, click the MFB button
once. To reject, click the MFB button twice.
Ending a Call
To end a call, click the MFB button once, and
the call will be disconnected.
Adjusting Volume
Click the Volume Up or Volume Down buttons to
increase or decrease the volume of the phone call.
*Siri is supported when connected with an IOS or mac OS device.
Quickly click Volume up button twice to activate Siri or other voice control software.

This device complies with part 15 of the FCC Rules. Operation is subject to the following two
conditions:(1) This device may not cause harmful interference, and (2) this device must accept any
interference received, including interference that may cause undesired operation.
Any Changes or modications not expressly approved by the party responsible for compliance could
void the user's authority to operate the equipment.
This equipment has been tested and found to comply with the limits for a Class B digital device,
pursuant to part 15 of the FCC Rules. These limits are designed to provide reasonable protection
against harmful interference in a residential installation. This equipment generates uses and can
radiate radio frequency energy and, if not installed and used in accordance with the instructions, may
cause harmful interference to radio communications. However, there is no guarantee that interfer-
ence will not occur in a particular installation. If this equipment does cause harmful interference to
radio or television reception, which can be determined by turning the equipment o and on, the user
is encouraged to try to correct the interference by one or more of the following measures:
- Reorient or relocate the receiving antenna.
- Increase the separation between the equipment and receiver.
- Connect the equipment into an outlet on a circuit dierent from that to which the receiver is connected.
- Consult the dealer or an experienced radio/TV technician for help.
The device has been evaluated to meet general RF exposure requirement. The device can be used in
portable exposure condition without restriction.
FCC Warning

