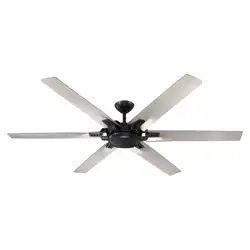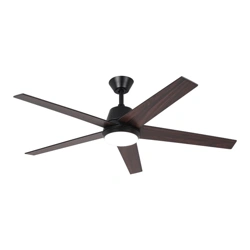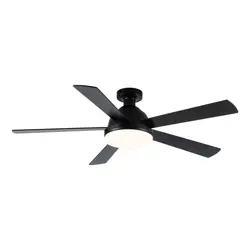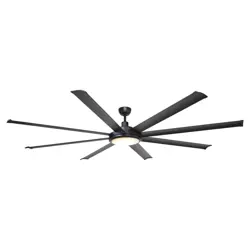
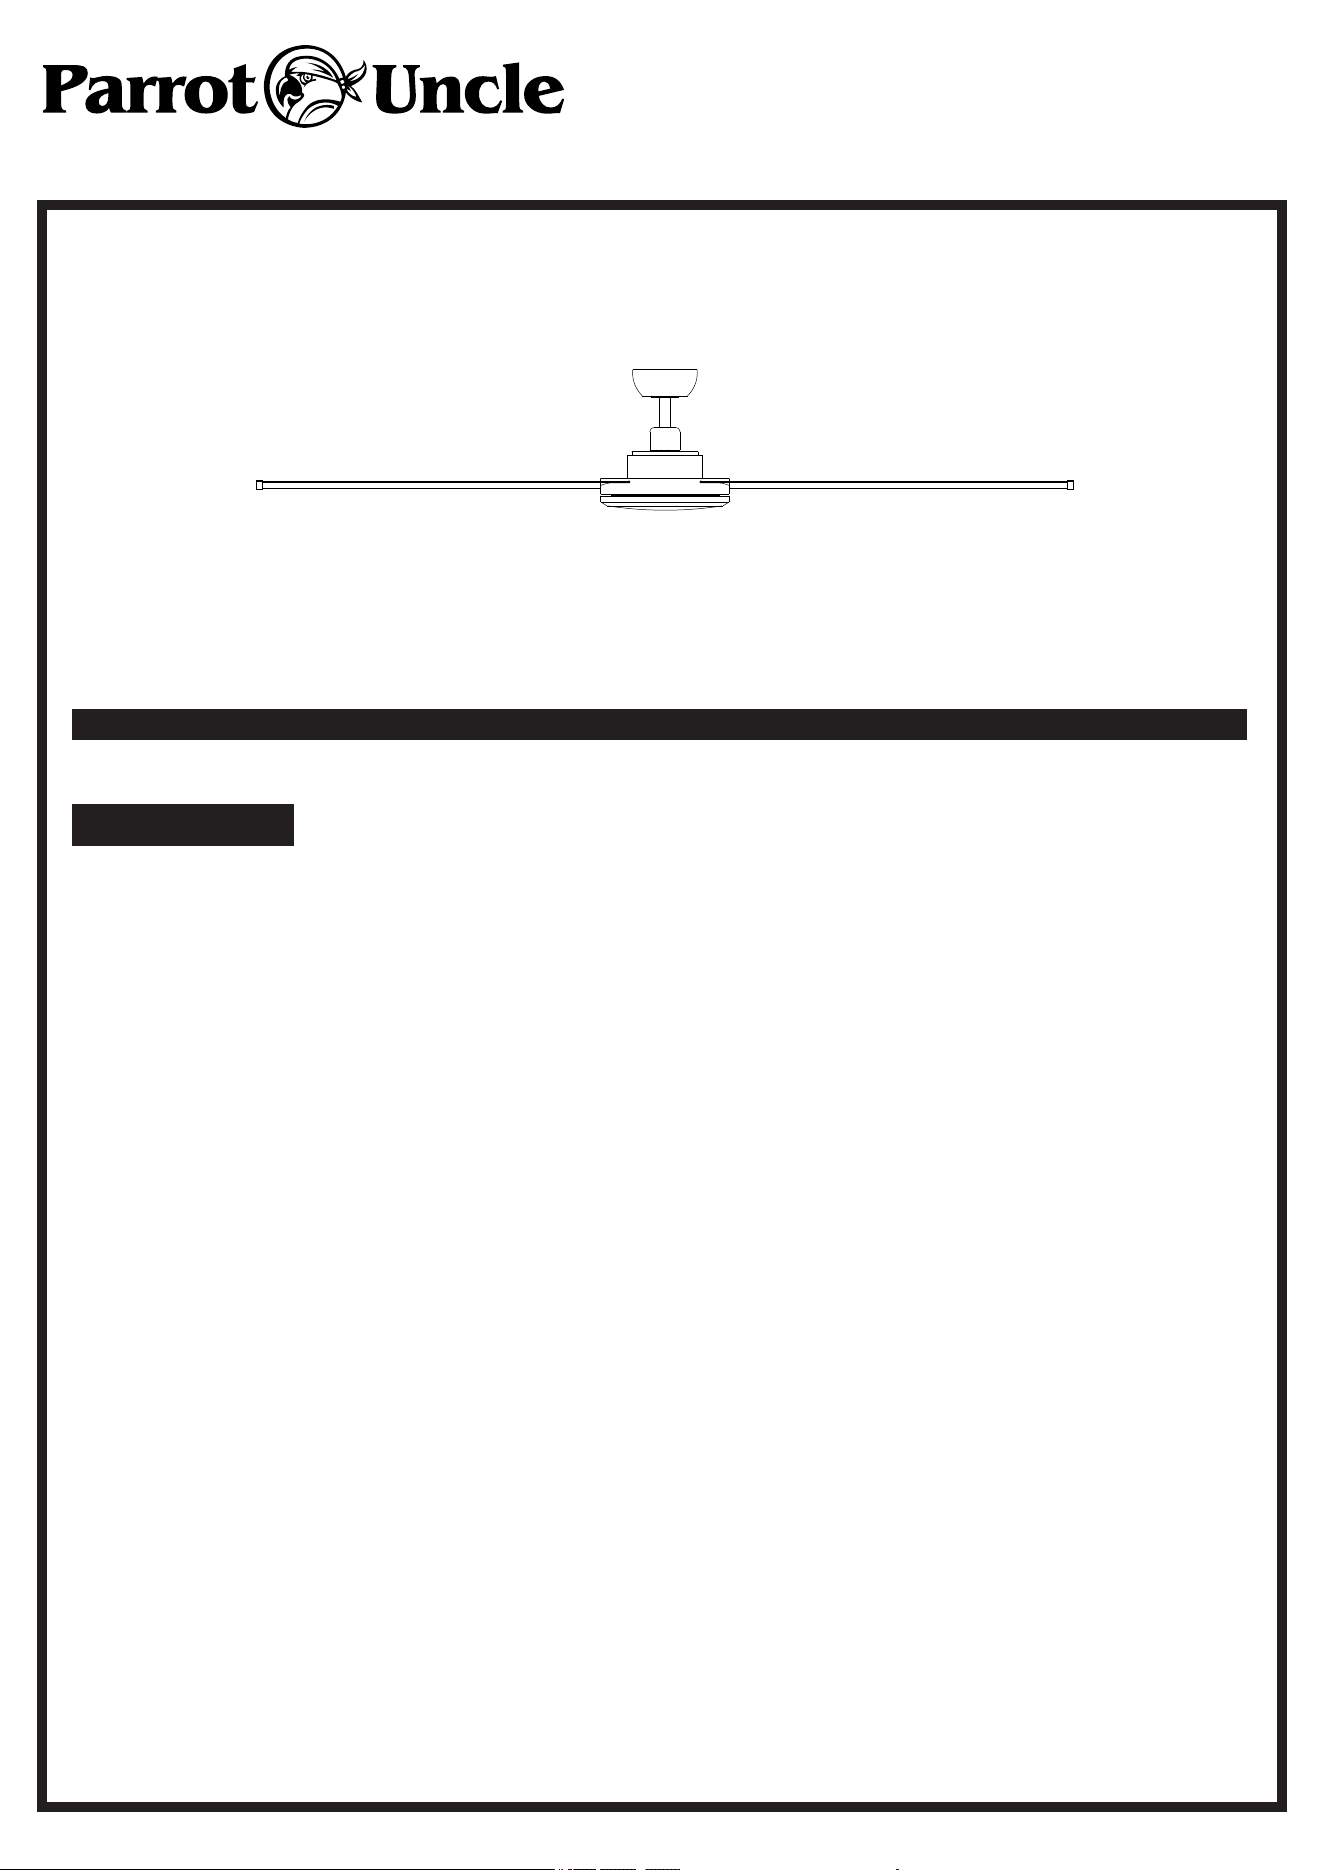
CEILING FAN
F8219110V
Installation & Operating Instructions for the
Parrotuncle Owner's Installation ,Manual
WARNING: SHUT POWER OFF AT FUSE OR CIRCUIT BREAKER
F8219110V
Installation & Operating Instructions for the
Parrotuncle Owner's Installation ,Manual
WARNING: SHUT POWER OFF AT FUSE OR CIRCUIT BREAKER
Thank you for purchasing this quality product. To ensure correct function and safety, please read and save all
instructions before using the product
To avoid possible electric shock, turn o ffthe electricity at the main fuse box or circuit panel before you begin the fan installation or
before servicing the fan or installing accessories.
Read all instructions and safety information carefully before installing your fan and save these instructions.
Make sure all electrical connections comply with local codes or ordinances and the National Electrical Code. If you are unfamiliar with
electric wiring, please use a qualified and licensed electrician.
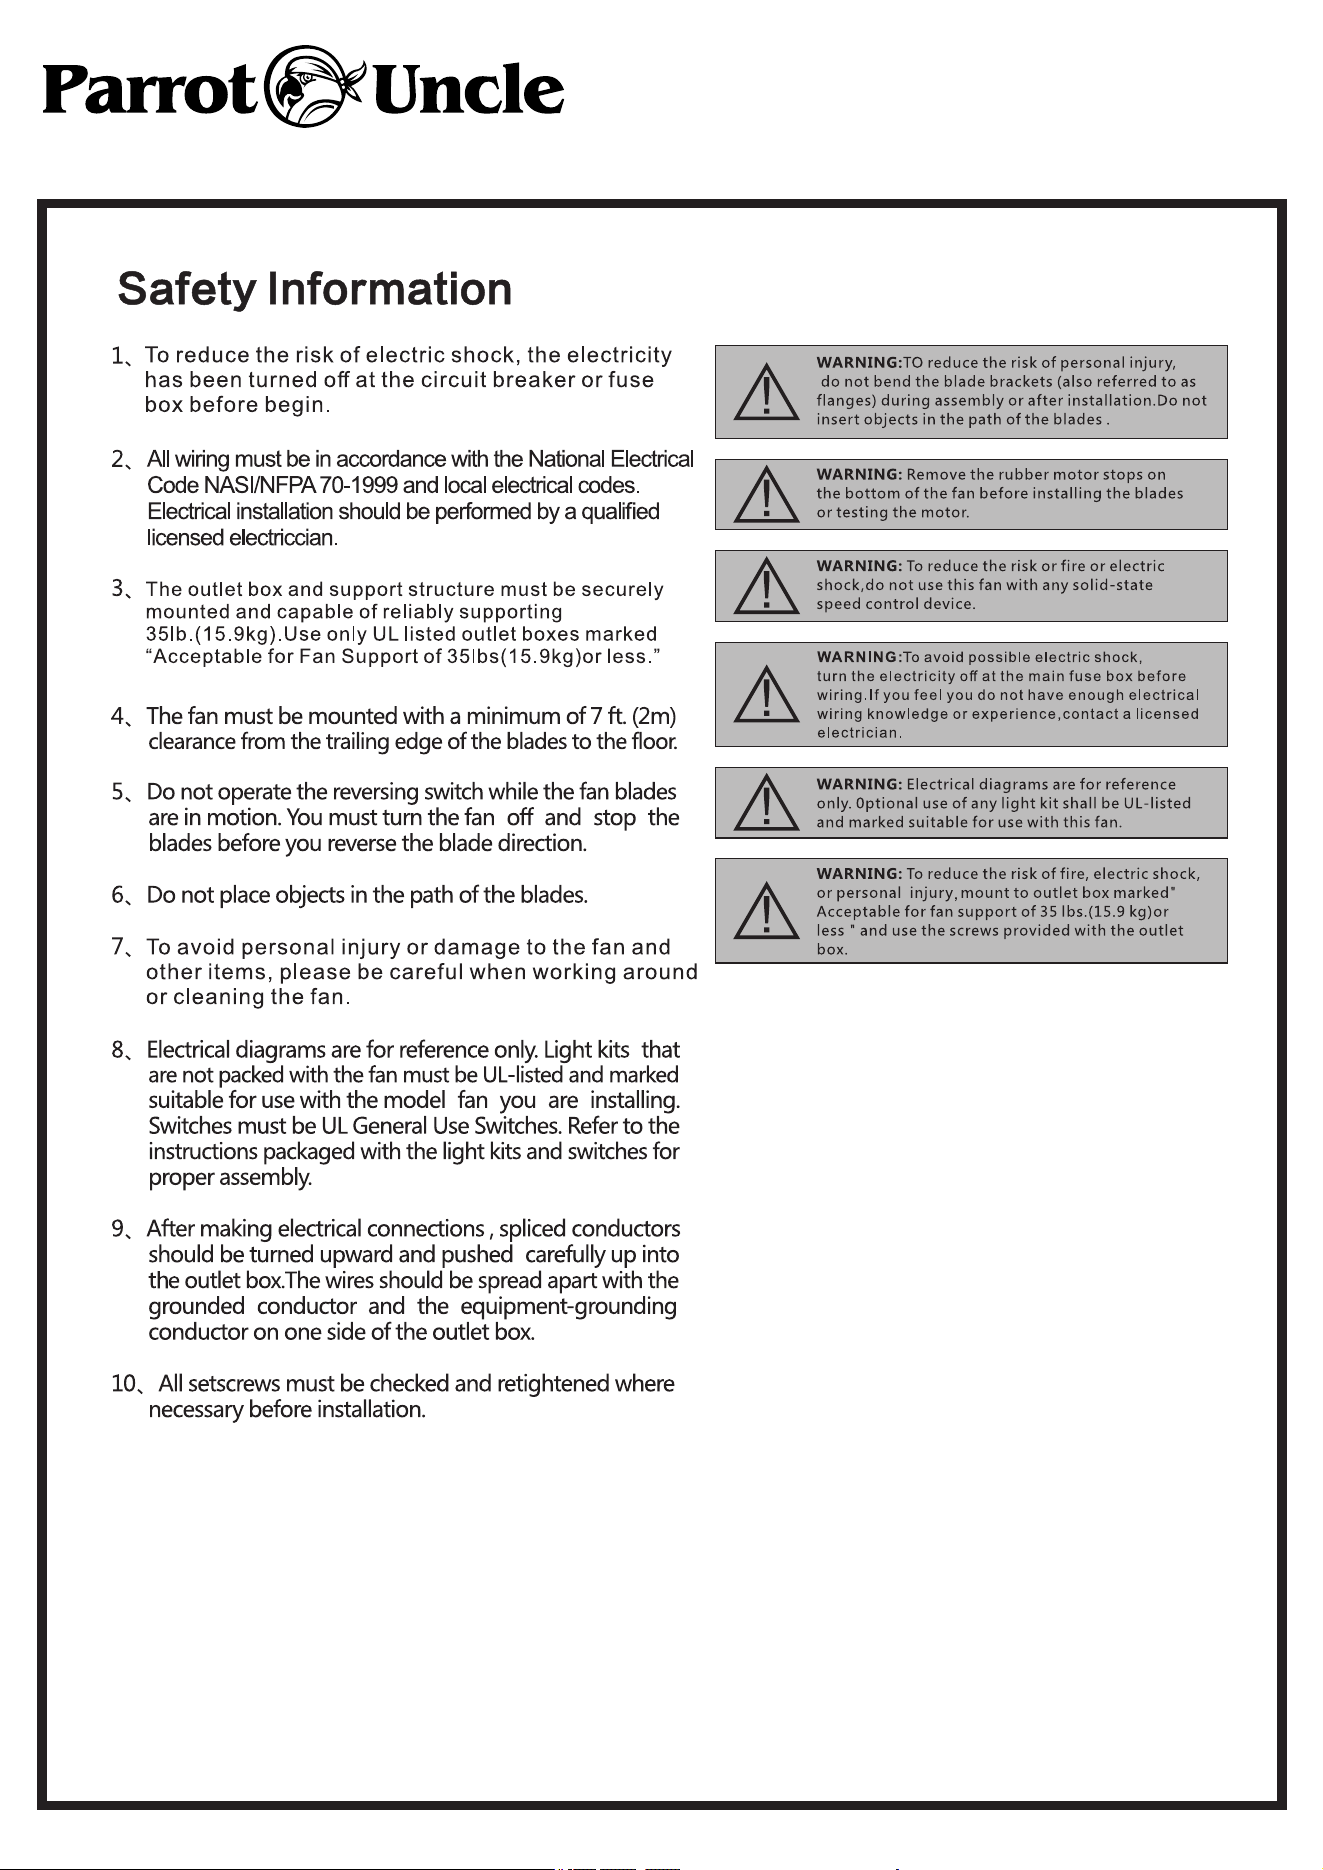
Make sure you have a location selected for your fan that allow clear space for the blades to rotate, and at least seven (7) feet of clearance between the floor and
the fan blade tips. The fan should be mounted at least thirty (30) inches from walls or other upright structures.
WARNING: The outlet box and ceiling support joist used must be securely mounted, and capable of supporting at least 100 pounds. To
reduce the risk of fire, electric shock or personal injury, mount to the outlet box marked acceptable for fan supported and use mounting
screws provided with the outlet box. The box must be supported directly by the building structure.
WARNING: To reduce the risk of fire, electric shock or personal injury, mount to outlet box marked “acceptable for fan support” and use mounting
screws provided with the outlet box most outlet boxes commonly used for the support of lighting fixtures are not acceptable for fan
support and may need to be replaced. Consult a qualified electrician if in doubt.
Electrical diagrams are for reference only. Light kits that are not packed with the fan must UL listed and marked suitable for use with the
model fan you are installing. Switches must be UL. general use switches. Refer to the instructions packaged with the light kits and
switches for proper assembly.
After installation is complete, check that all connections are absolutely secure.
After making electrical connections, spliced conductors should be turned upward and pushed carefully up into outlet box. The wires
should be spread apart with the grounded conductor and the equipment-grounding conductor on one side of the outlet box.
WARNING: To reduce the risk of electrical shock and fire, do not use this fan with any solid-state fan speed control device, or rheostat.
Do not separate the reverse switch until the fan has come to a complete stop.
Do not insert anything into the fan blades while they are rotating.
WARNING: To reduce the risk of personal injury, do not bend the blade brackets (also referred to as “flanges”) during assembly or after
installation. Do not insert objects in the path of the blades.
To avoid personal injury or damage to the fan and other items, be cautious when working around or cleaning the fan.
Do not use water or detergent when cleaning the fan or fan blades. A dry dust cloth or lightly dampened cloth will be suitable for most cleaning.
1.
2.
3.
4.
5.
6.
7.
8.
9.
10.
11.
12.
13.
14.
15.
NOTE: The important safety precautions and instructions appearing in the manual are not meant to cover all possible conditions and situations that may
occur. It must be understood that common sense and caution are necessary factors in the installation and operation of this fan.
NOTE: This product is not intended for use by persons (including children) with reduced physical, sensory or mental capabilities are
different or are impaired, or lack of experience or knowledge, unless such persons are supervised or trained to operate the appliance
by a person responsible for their safety.
NOTE: Children should be supervised to ensure that they do not use appliances as a toy.
THANK YOU FOR YOUR PURCHASE
SAFETY TIP
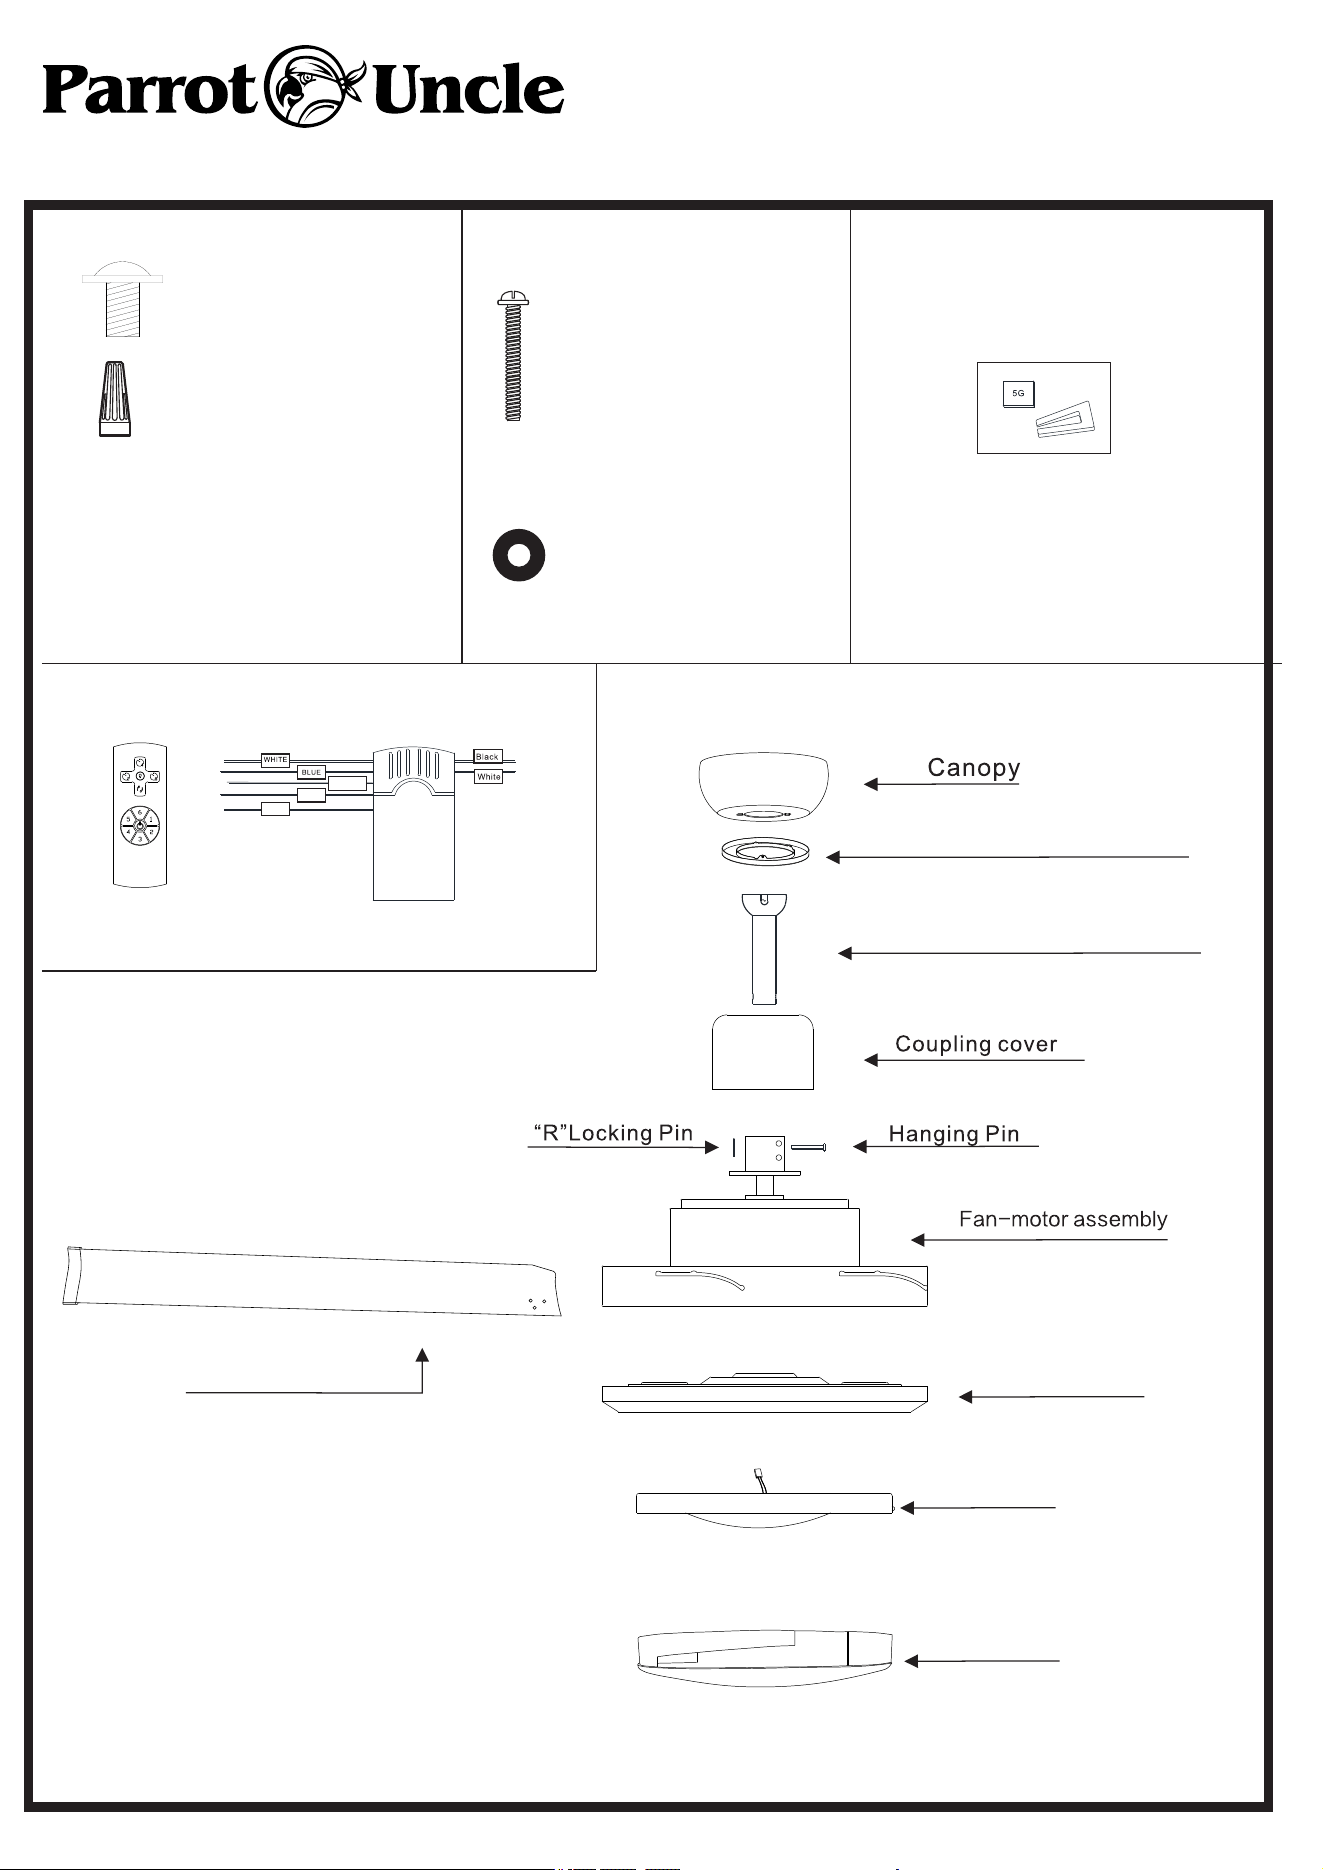
Blade screws(25PCS)
Plastic wire nut (7PCS)
Mounting screws (2PCS)
Balanced parts package(1PCS)
washer (2PCS)
Pls check whether above accessories are completed or not?Yes,and install.
REMOTE CONTROL(1PCS)
F8219110V
Installation & Operating Instructions for the
Parrotuncle Owner's Installation ,Manual
WARNING: SHUT POWER OFF AT FUSE OR CIRCUIT BREAKER
LED light plate
light kit
shade
10"ball/downrod assembly
Blade(8PCS)
YELLOW
GREY
RED
Decorative covers
F8219110V
Installation & Operating Instructions for the
Parrotuncle Owner's Installation ,Manual
WARNING: SHUT POWER OFF AT FUSE OR CIRCUIT BREAKER
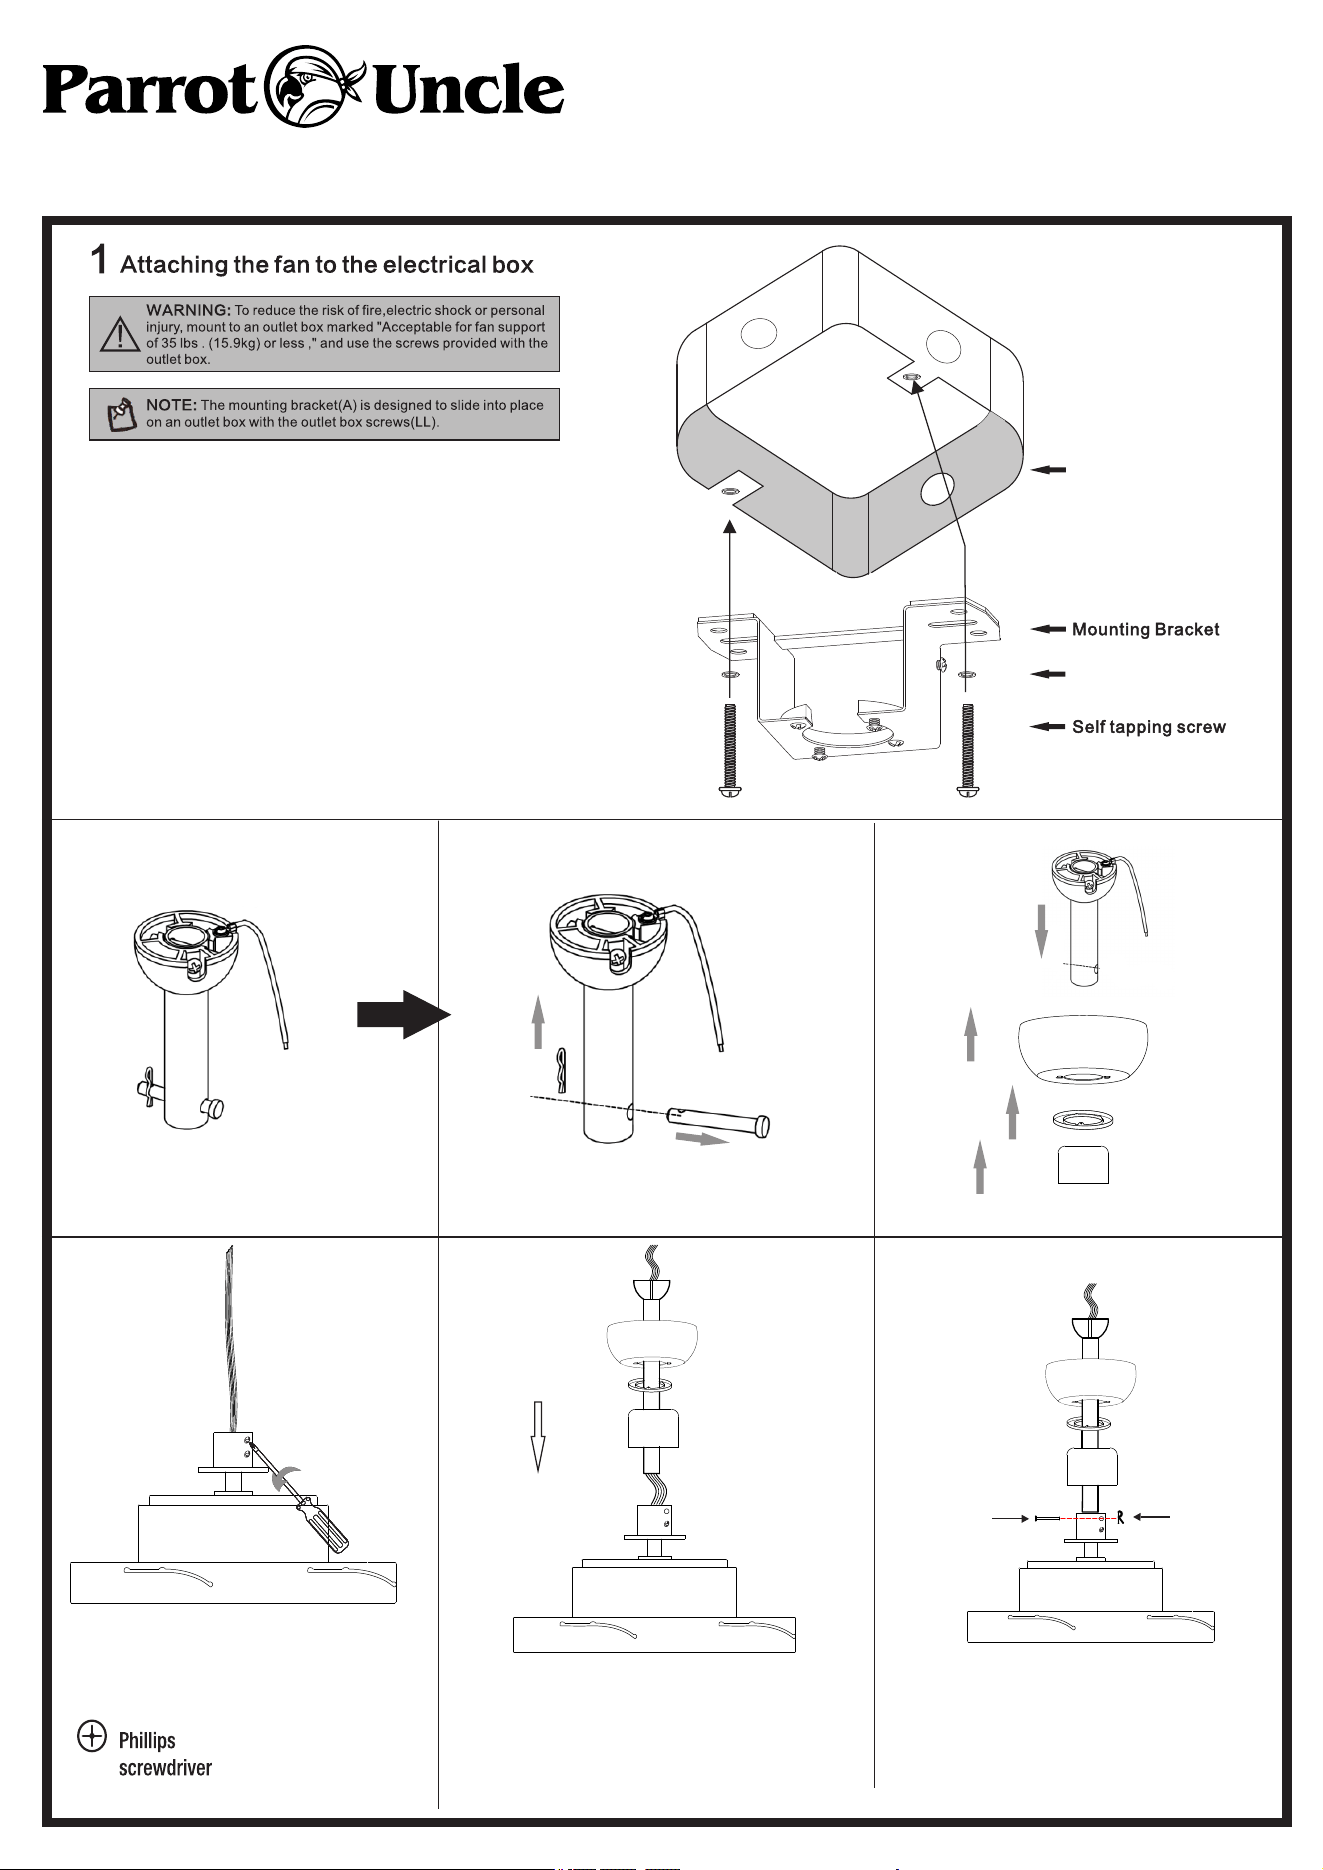
washers
Outlet box
Hitch pin
Retaining
clip
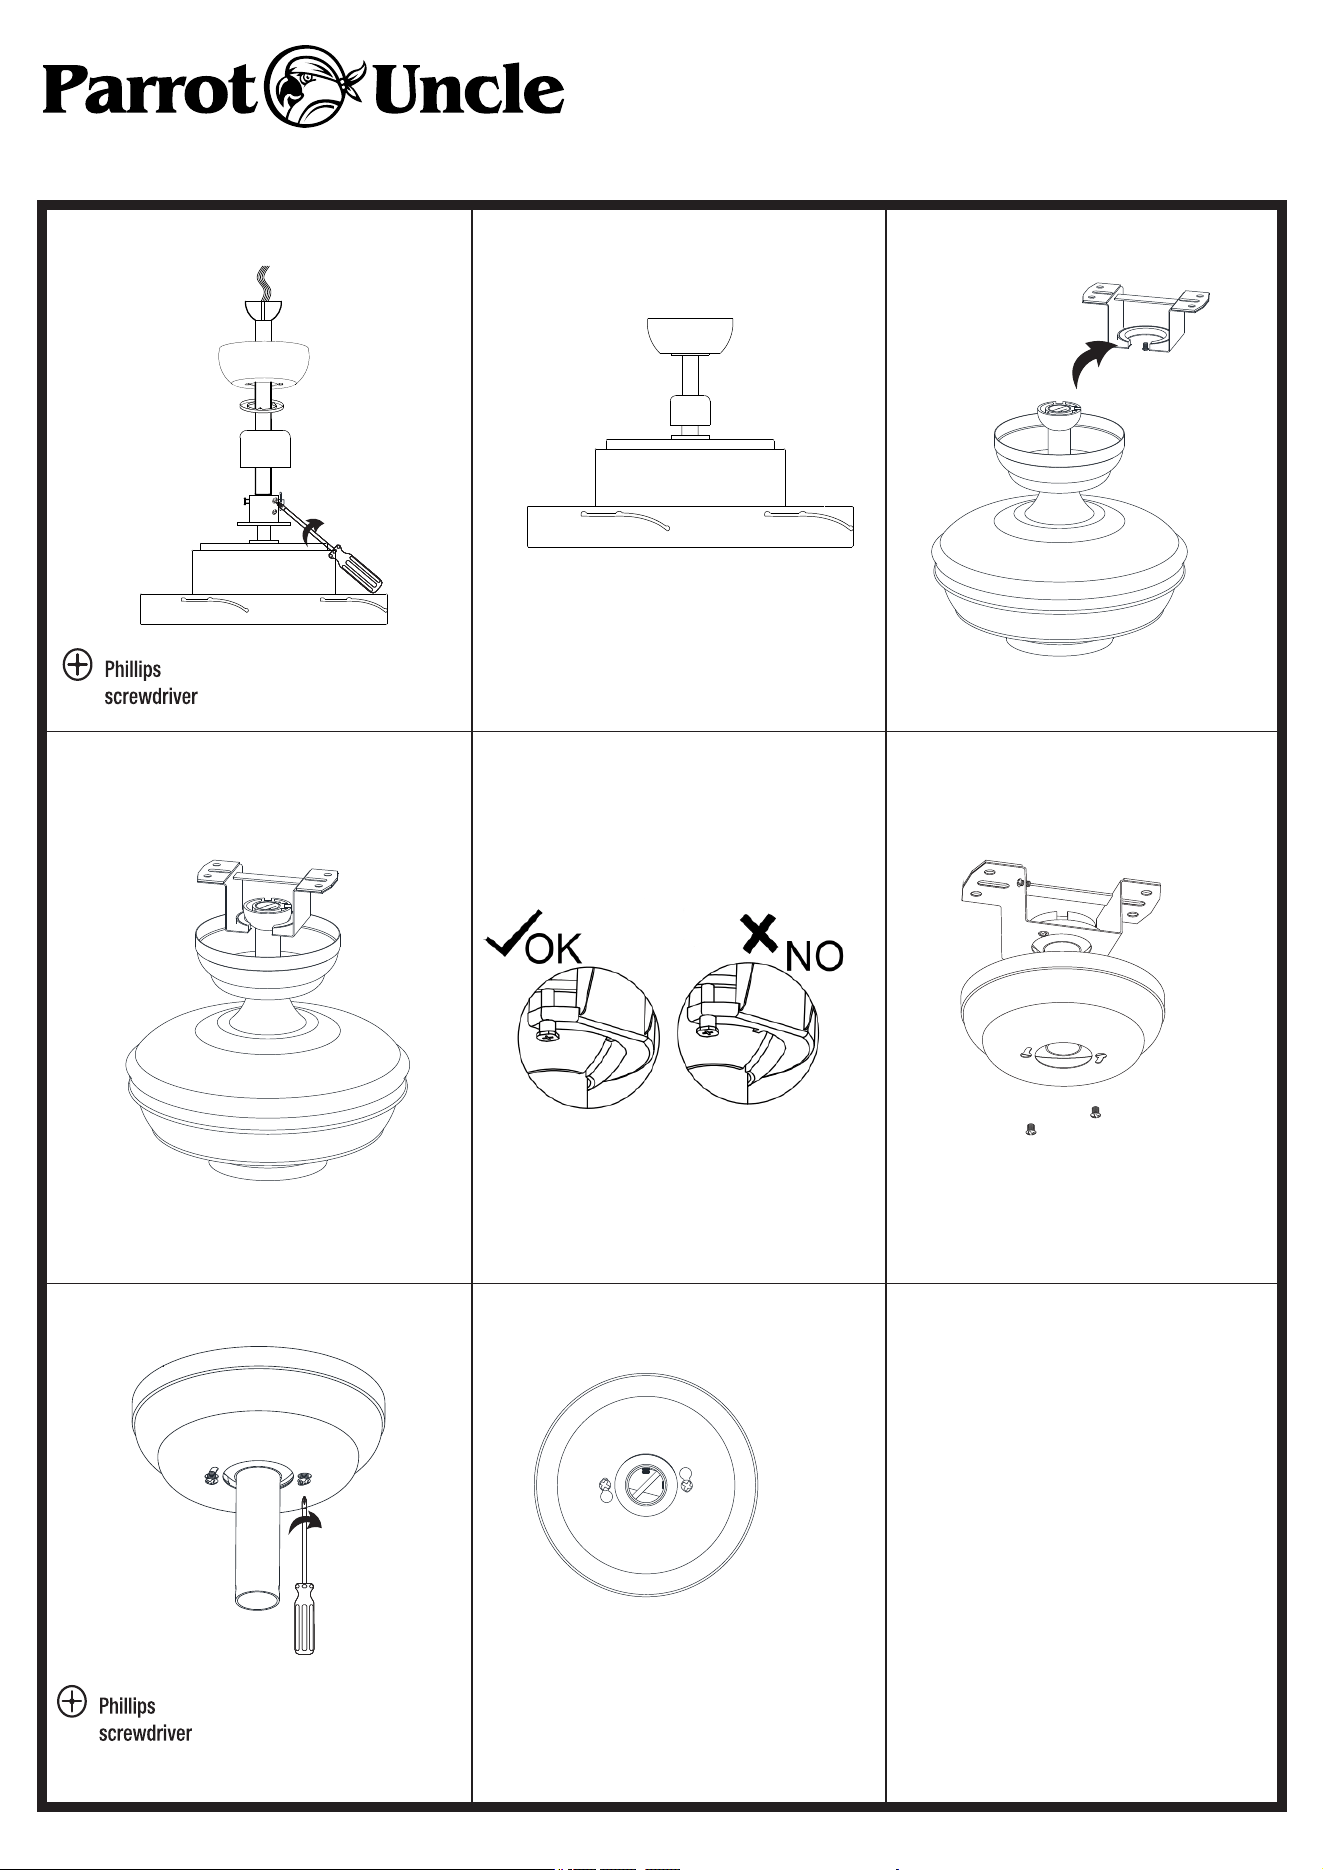
Finish
F8219110V
Installation & Operating Instructions for the
Parrotuncle Owner's Installation ,Manual
WARNING: SHUT POWER OFF AT FUSE OR CIRCUIT BREAKER
Finish
F8219110V
Installation & Operating Instructions for the
Parrotuncle Owner's Installation ,Manual
WARNING: SHUT POWER OFF AT FUSE OR CIRCUIT BREAKER
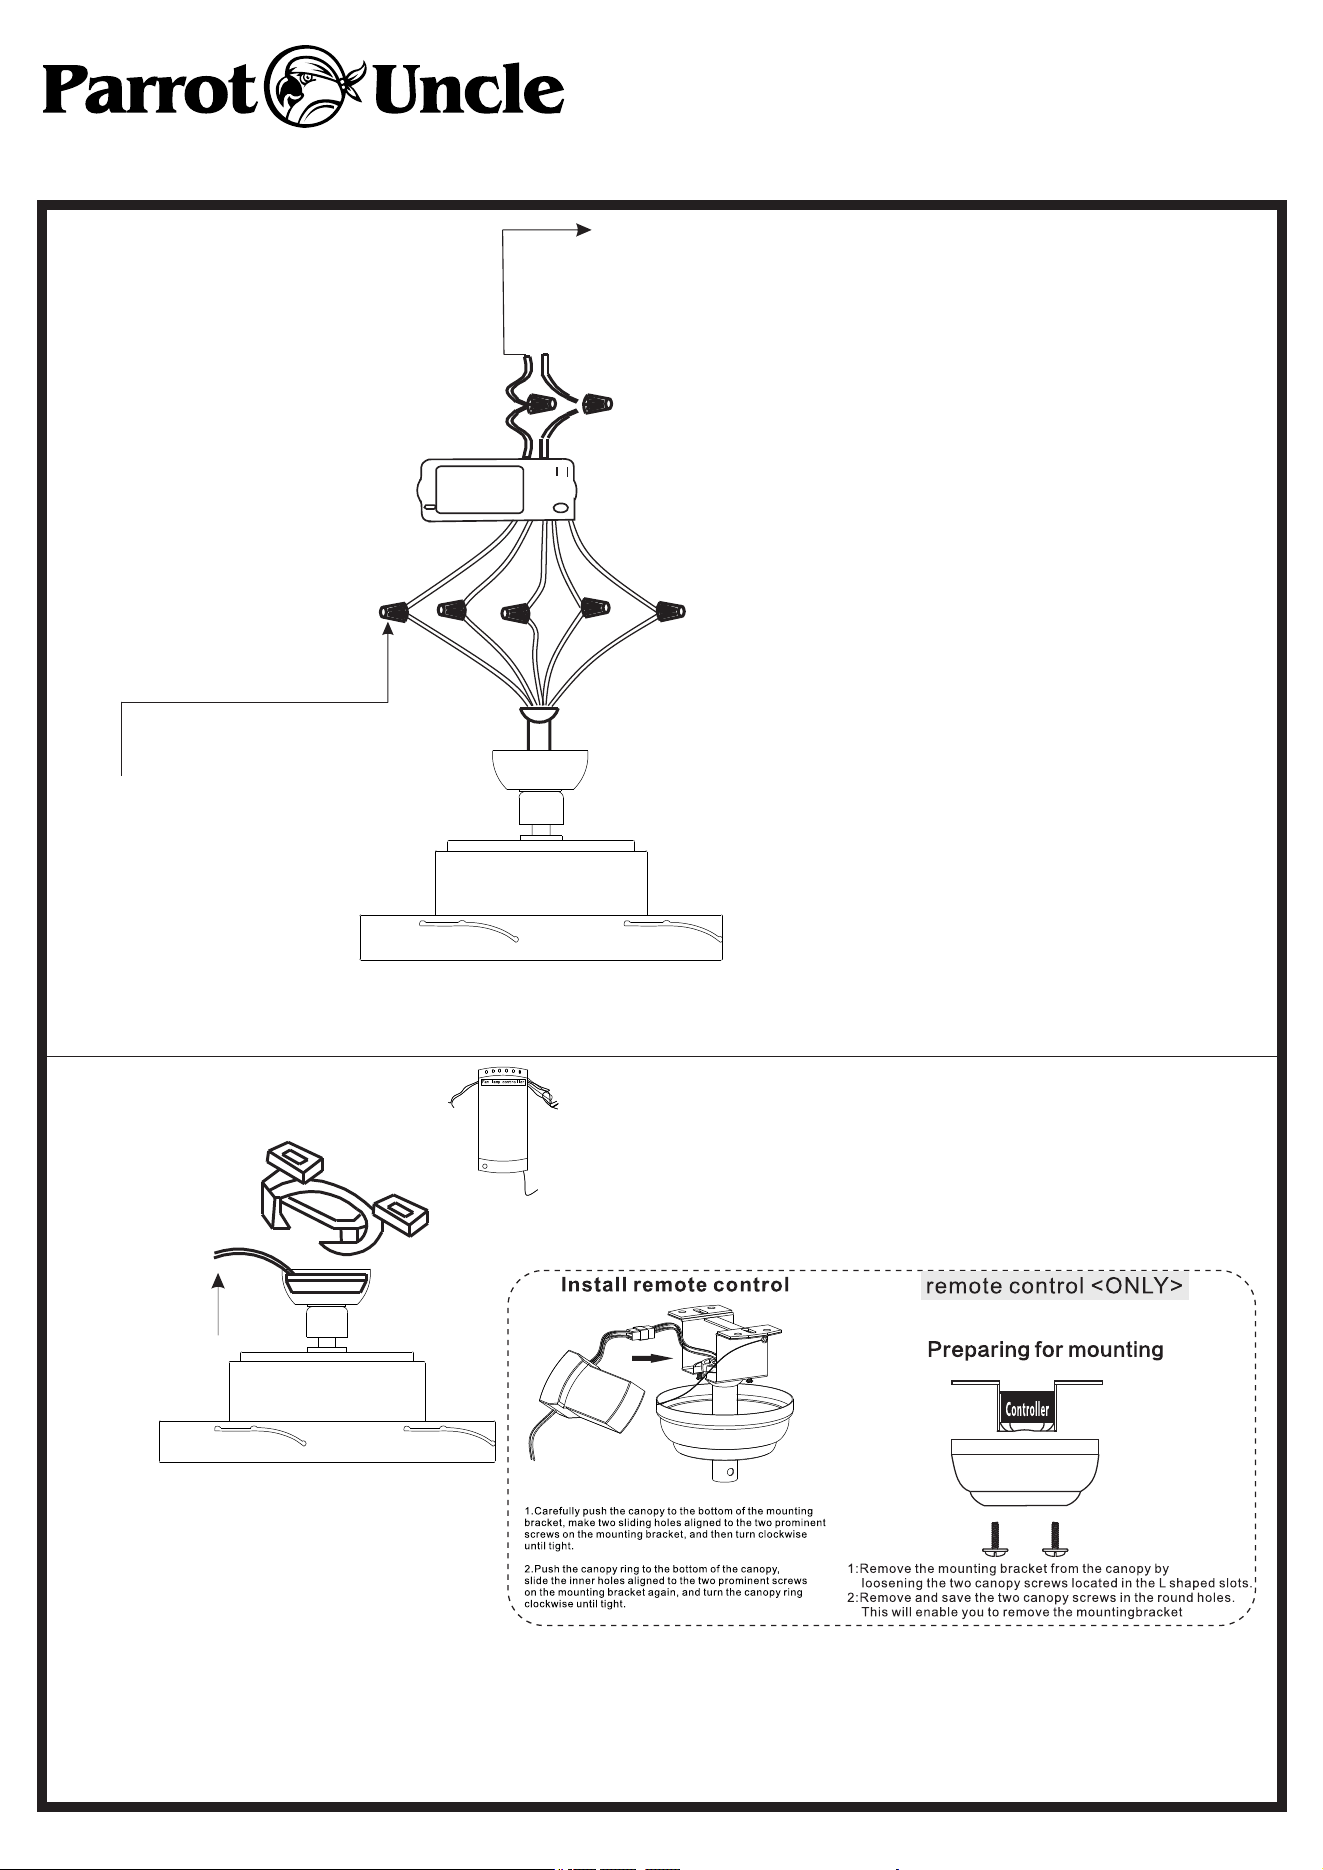
Use wire connecting nuts supplied with the fan
FROM POWER SOURCE
AC 110- 120 VOLT 60Hz
3.5AMPS.
CANOPY
RECEIVER
(FIG.4)
ANTENNA PUT AT OUTSIDE
OF CANOPY BOX CAN GET
MORE OPERATION
DISTANCE
FAN MUST BE KEPT AT THE HIGH SPEED
LIGHT MUST BE KEPT AT THE ON P0SITION
WHITE
INPUT
OUTPUT
RED or BLACK
RECEIVER
WIRE NUT
Use wire connecting nuts
supplied with the remote
controller.
RED
RED
GREY
GREY
YELLOW
YELLOW
BLUE
BLUE
WHITE
WHITE
x3
F8219110V
Installation & Operating Instructions for the
Parrotuncle Owner's Installation ,Manual
WARNING: SHUT POWER OFF AT FUSE OR CIRCUIT BREAKER
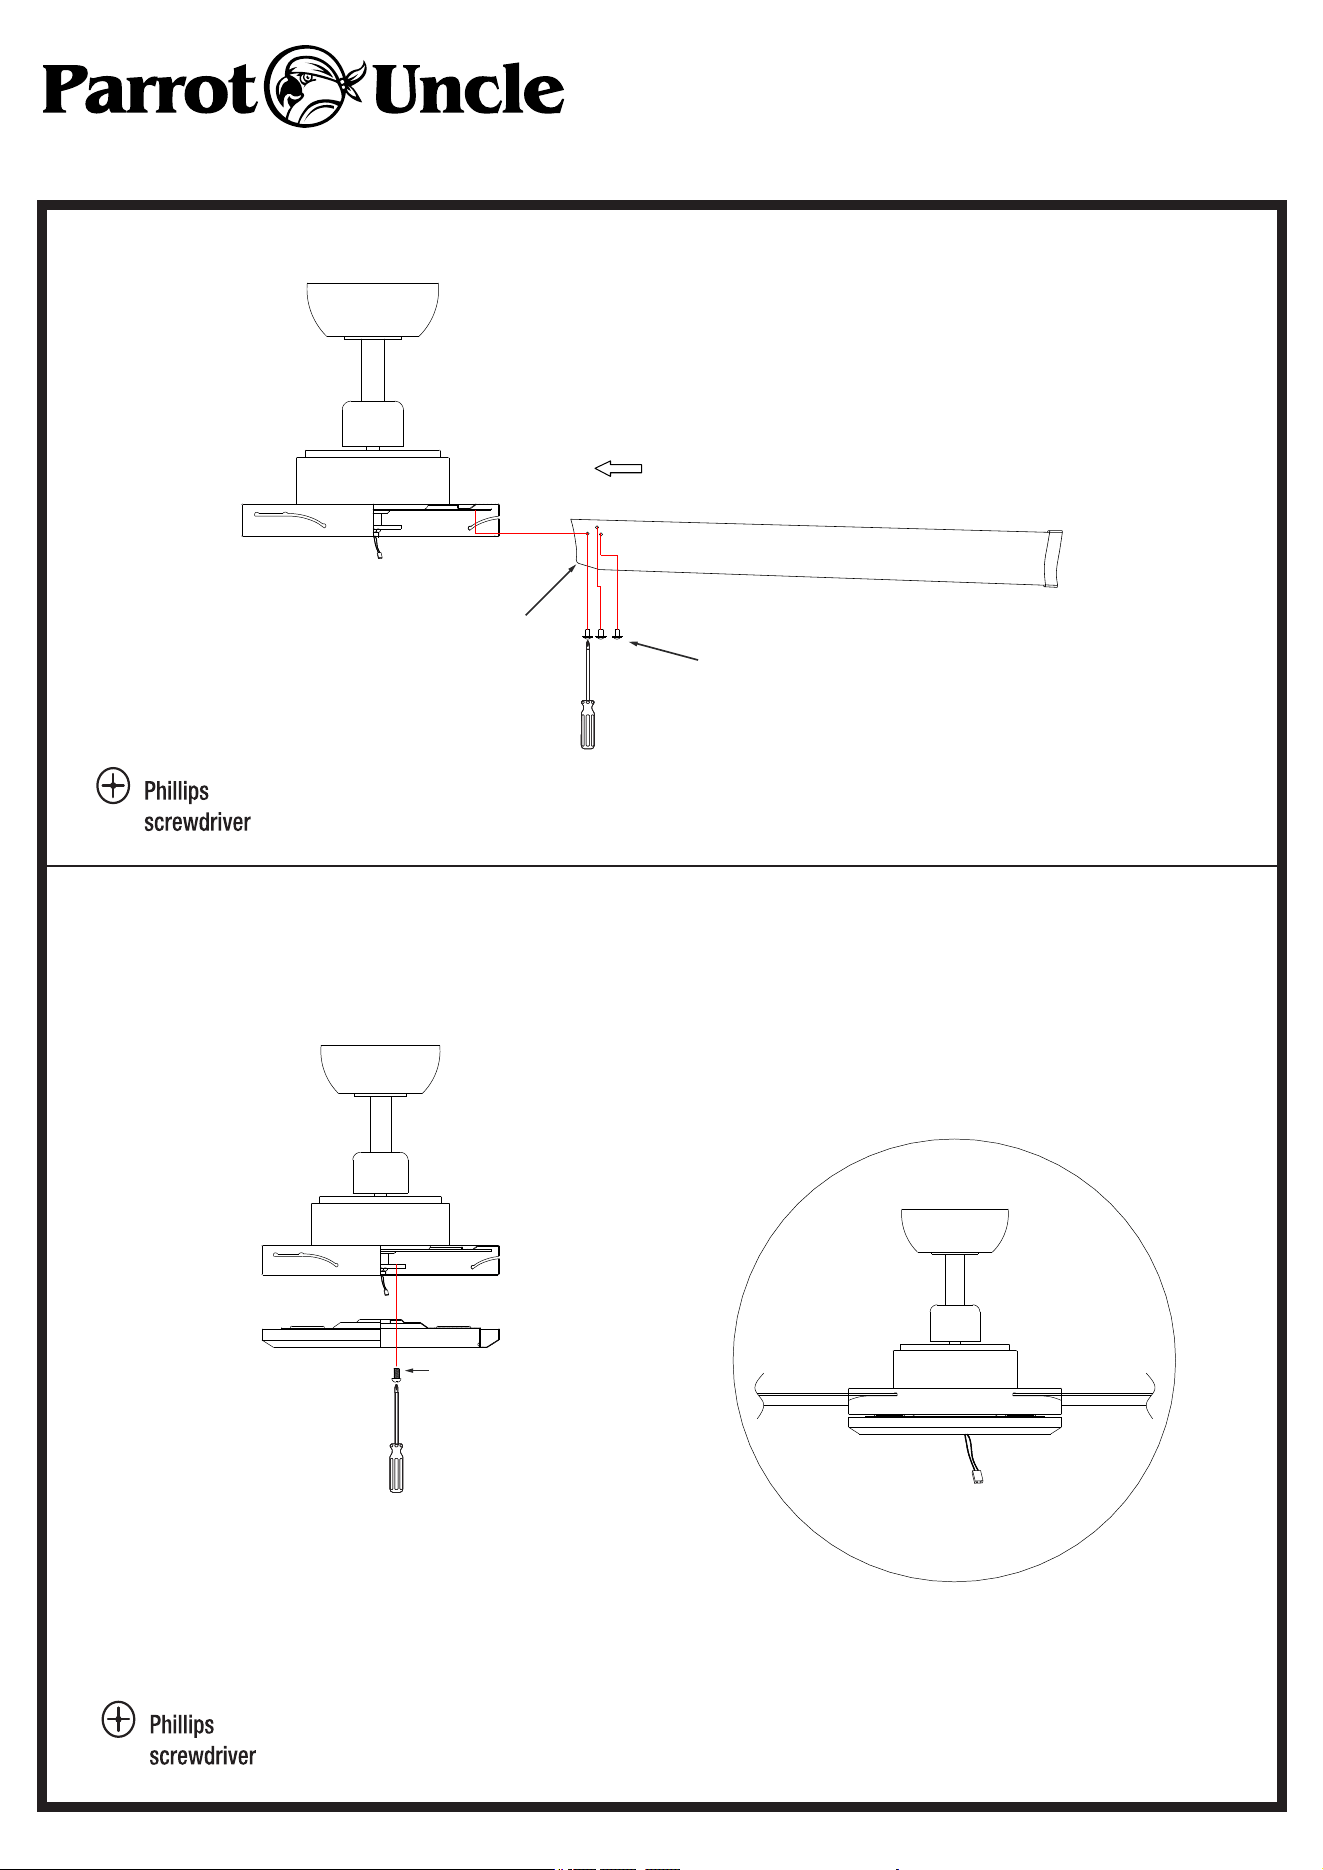
x24
x8
Finish
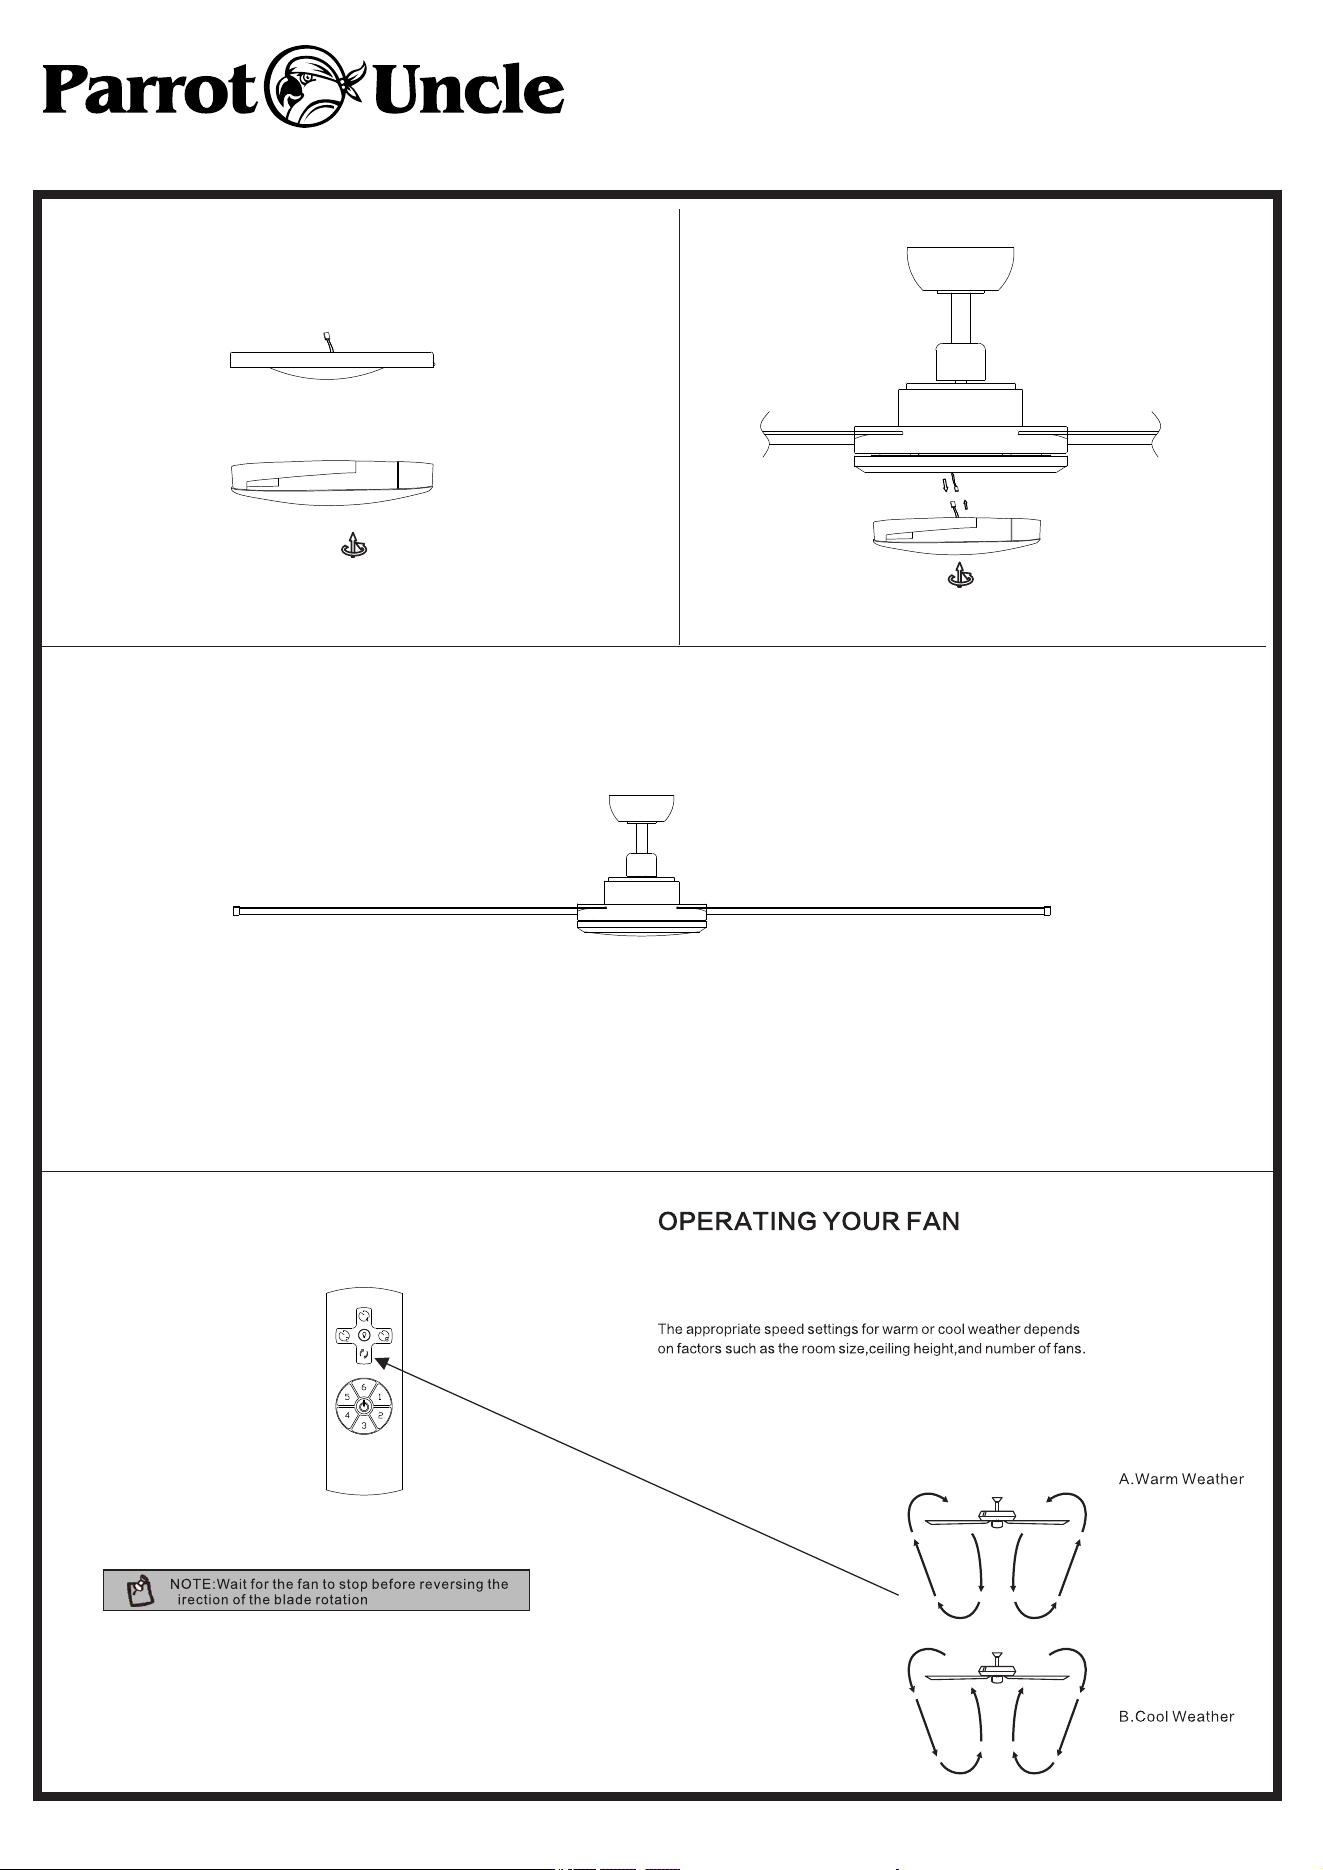
Turn on the power and check the operation of the fan. The fan
remote controls the fan speed as follows:
1=low speed
2=medium low speed
3=medium speed
4=medium high speed
5= high speed
6= Extra high speed
(WINTER TIME)
(SUMMER TIME)
d
A.warm weather-(Forward).
This allows you to set your air conditioner on a higher setting without
affecting your comfort.
B.Cool weather-(Reverse)
This allows Reverse you to set heating unit on a lower setting
without affecting your comfort.
F8219110V
Installation & Operating Instructions for the
Parrotuncle Owner's Installation ,Manual
WARNING: SHUT POWER OFF AT FUSE OR CIRCUIT BREAKER
The remote control (XX) controls the direction of the blades: forward or reverse.
Finish
For Mounting Controller,Model T101B
2.INSTALLING RECEIVER IN CEILING FAN
A.Safety precautions:
WARNING: HIGH VOLTAGE! Disconnect power by
removing fuse or switching off circuit breaker.
Do not use with solid state fans.
Electrical wire must meet all local and national
electrical code requirements.
Supply for fan must be 110/120 volt, 60Hz. Maximum
fan motor amps: 1.0,Maximum light watts: 180
incandescent or ballast and LED.
Otherwise power can cause serious injury or death.
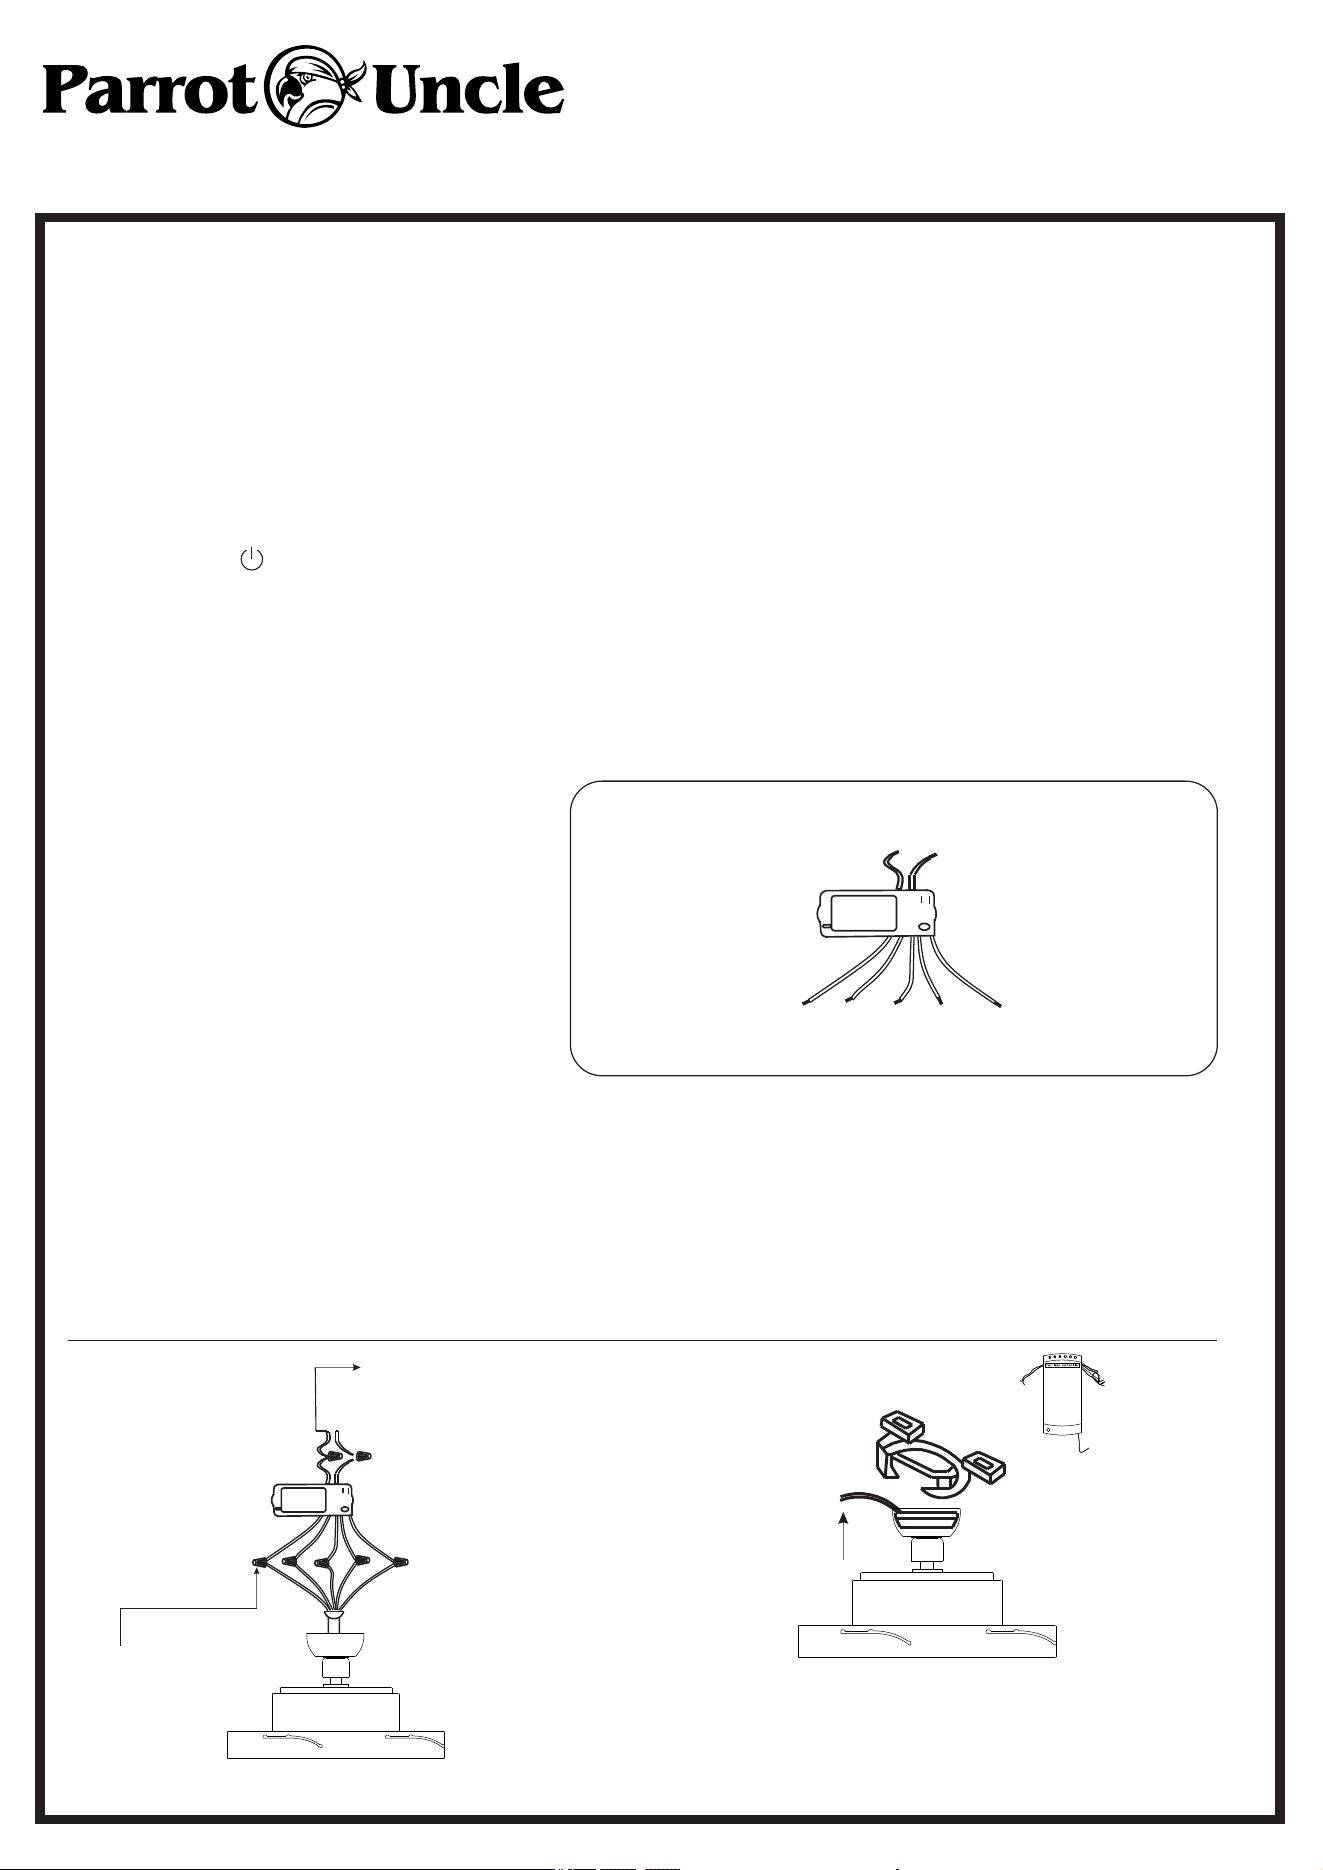
B.lnstalling receiver in fan:
a.Remove power from the circuit.
b.Remove ceiling fan canopy from the mounting
bracket.
c.Disconnect existing wiring between ceiling fan and
Supply in electrical junction box.
d. Make connections as follows, using the wire nuts
supplied:
F8219110V
Installation & Operating Instructions for the
Parrotuncle Owner's Installation ,Manual
WARNING: SHUT POWER OFF AT FUSE OR CIRCUIT BREAKER
Use wire connecting nuts supplied with the fan
FROM POWER SOURCE
AC 110- 120 VOLT 60Hz
3.5AMPS.
WHITE
INPUT
OUTPUT
RED or BLACK
RECEIVER
WIRE NUT
Use wire connecting nuts
supplied with the remote
controller.
RED
RED
GREY
GREY
ORANGE
ORANGE
BLUE
BLUE
WHITE
WHITE
FAN MUST BE KEPT AT THE HIGH SPEED
Install the remote control holder onto any wall or suitable
flat surface using the two steel screws. Upon first use, connect
the remote control to its receiver in the fan by holding the
remote's button. There should be a beep to announce that
the remote has successfully connected to its receiver.
OPERATION FOR REMOTE
WHITE
INPUT
OUTPUT
BLACK
RECEIVER
RED
GREY
YELLOW
BLUE
WHITE
CANOPY
RECEIVER
(FIG.4)
ANTENNA PUT AT OUTSIDE
OF CANOPY BOX CAN GET
MORE OPERATION
DISTANCE
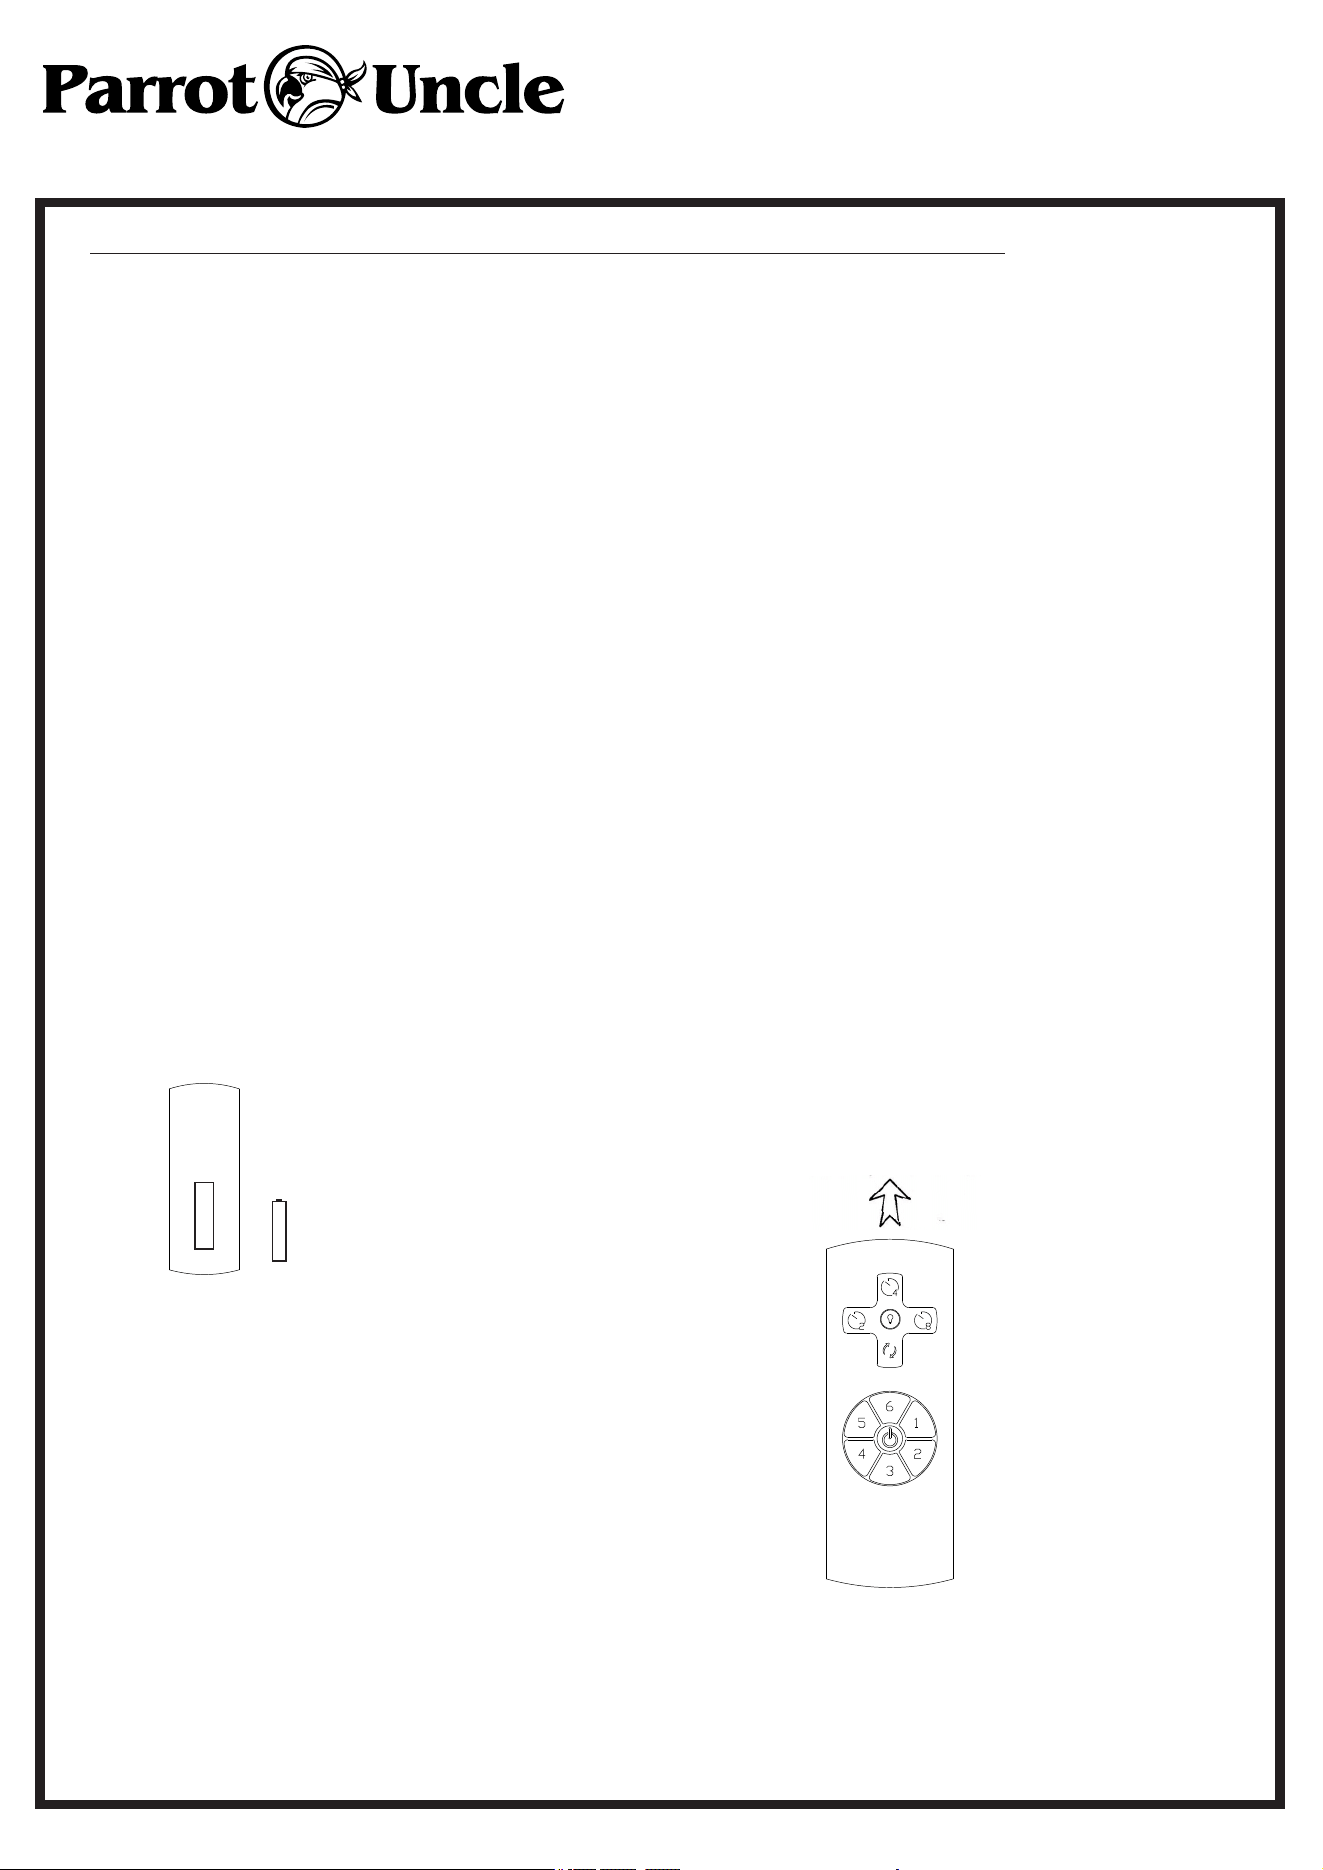
YOUR REMOTE NOW HAS FULL CONTROL OF THE FAN AND LIGHT .
OPERATION DISTANCE 20 FEET
TRANSMITTER
Optional Wall Mounting for Transmitter Holder
Place in accessible area of your home, and screw the
transmitter holder into wall using the two screws
provided,slide hand unit into holder.
4.TROUBLE SHOOTING GUIDE1.Fails to operate
a. Power to receiver ?
b.Receiver wired correctly ?
c.Fan manual speed control in highest position ?d.Light kit switch turned on ?
e.Good battery in the transmitter ?
2.Won' t operate at distance
MAX. Motor amps: 1.0
MAX.Light watts: 180-(incandescent, or ballast non-dimmer, or LED)
If transmitter operates fan/light kit when up close,but not at 20 feet away.
NOTICE!
Your ceiling fan and light kit assembly must meet the following requirements:
1.Do not use with solid state fans.
2.Electrical rating: 120v 60Hz 3.5A
WARNING
TO REDUCE THE RISK OF SHOCK, THIS FAN MUST BE INSTALLED WITHAWALL CONTROL/SWITCH.
FCC Statement:
1. This device complies with Part 15 of the FCC Rules.Operation is subject to the following two conditions:
(1) This device may not cause harmful interference.
(2)This device must accept any interference received, including interference that may cause undesired operation.
2.Changes or modifications not expressly approved by the party responsible for compliance could void the user's
authority to operate the equipment.
NOTE:This equipment has been tested and found to comply with the limits for a Class B digital, pursuant to Part 15 or
the FCC Rules.These limits are designed to provide reasonable protection against harmful interference in a residential
installation.This equipment generates, uses and can radiate radio frequency energy and, if not installed and used in
accordance with the instructions, may casue harmful interference to radio communications,
However, there is no guarantee that interference will not occur in a particular installation.If the equipment does cause
harmful interference to radio or television reception, which can be determined by turning the equipment off and on, the
user is encouraged to try to correct the interference by one or more of the following measures:
--- Reorient or relocate the receiving antenna.
--- Increase the separation between the equipment and receiver.
--- Connect the equipment into an outlet on a circuit different from that to which the receiver is connected.
--- Consult the dealer or an experienced radio/ TV technician for help.
If other fans or supply wires are different color, have this unit installed by qualified licensed electrician.
e.Push all connected wires up into junction box.
f. Lay the brown antenna wire on top of the receiver, and put the receiver into the mounting bracket.
g.Reinstall the canopy on the mounting bracket.
h.Restore power.
3.OPERATINGTRANSMITTER:
A. lnstall 12 volt battery(not included).(To prevent damage to transmitter, remove the battery if not used for along time).
B.Store the transmitter away from excessive heat or humidity.
C. Operating the buttons on the panel of the transmitter.
OFF key-for fan off.
LIGHT key-for light on and off.
2hr , 4hr , 8hr button to set the FAN sleep timer
F8219110V
Installation & Operating Instructions for the
Parrotuncle Owner's Installation ,Manual
WARNING: SHUT POWER OFF AT FUSE OR CIRCUIT BREAKER
MODEL:
T301A
Start the fan at the indicated speed level from
low (1) to high (6)
12V
+
-
F8219110V
Installation & Operating Instructions for the
Parrotuncle Owner's Installation ,Manual
WARNING: SHUT POWER OFF AT FUSE OR CIRCUIT BREAKER
Installation & Operating Instructions for the
Parrotuncle Owner's Installation ,Manual
WA RNING: SHUT POWER OFF AT FUSE OR CIRCUIT BREAK ER
Table of Contents
1.
Fan
/ Remote is not working
2.
Fan is noisy
3.
Fan Wobbles
4.
Light is not working
Please refer to the instruction sheet for detailed directions and descriptions of
installation steps
and requirements.
1.
FAN
/ REMOTE IS NOT WORKING
Ensure the remote is within the 20
foot range of the receiver
To reset the remote control: 1) Turn o ffpower to fan
using the wall switch or circuit breaker. 2) Remove batt
tt
tt
eries from remote.
3) Wait 10 seconds. 4) Replace ba eries and turn power on
Check ba eries to
insure they are good and oriented correctly
Check the main and branch circuit fuses or breakers
If using a Variable Speed Wall Switch, ensure
it is specifically designed for use with a ceiling fan.
Check the line wire connections to the fan and the
switch wire connections in the switch housing
per the instructions
If fan still does not work, pleasecontact Customer Service Support@ parrotuncle.com
2.
THE FAN IS NOISY
Make sure all motor housing screws are ghtened
Make sure the screws that a ach fan blade to motor are ght
Make sure the wire nut connectors are not ra ling against each other or the interior wall of the switch housing
Allow 24-hour break in period. Most noises associated with the new fan may disappear during this me
If using a ceiling light kit, make sure the glassware is secured ghtly
Make sure there is a short distance/gap from the ceiling to the top of the canopy. The canopy
should not touch the ceiling!
Make sure your ceiling box is secure and that the rubber isolator pads are used between the moun ng bracket and outlet box
TROUBLESHOOTING GUIDE
F8219110V
ti
t
ti
ti
t
ti
ti
Installation & Operating Instructions for the
Parrotuncle Owner's Installation ,Manual
WA RNING: SHUT POWER OFF AT FUSE OR CIRCUIT B REAKER
3. THE FAN WOBBLES
Verify all blades and blade bracket screws are secure (most fan wobble problems are caused by loose parts). Once fan is properly
installed, run the ceiling fan for 10 minutes to let the fan self-adjust.
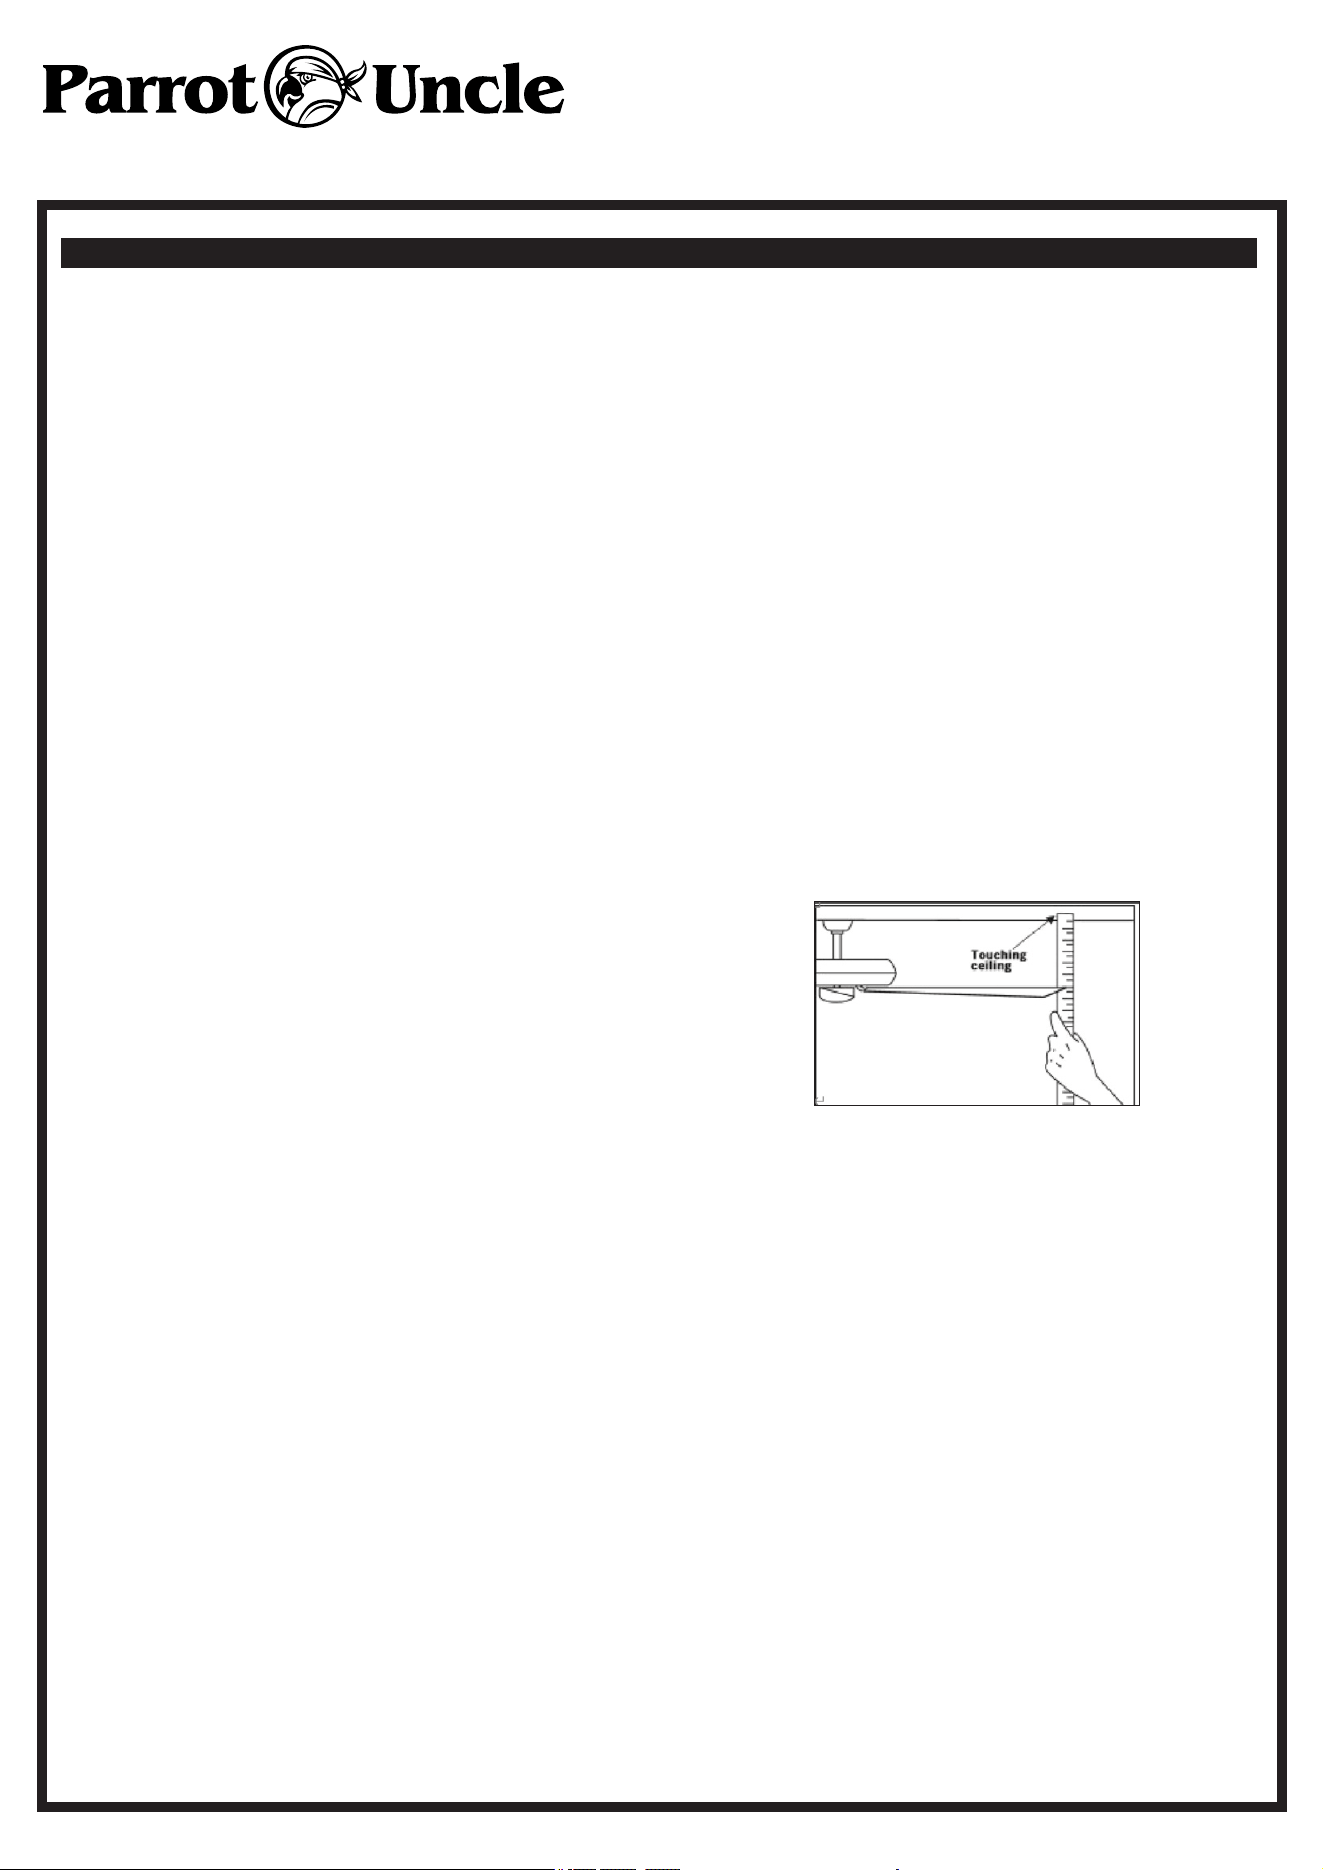
If wobble occurs atier running the fan for 10 minutes, verify blade level using the following process:
a)
select a point on the ceiling above the tip of one of the blades. Then select the fan blade and measure from the center
of the selected blade to point on the ceiling. Rotate the fan until the next blade is positioned and repeat the
measurement using the same point from the ceiling for every blade. Measurements
should be within 1/8 inch.
b) If all deviation are less than 1/8 inch and the fan contnues to wobble, please contact Customer Service Support@ parr
otuncle.com to order a complimentary Blade Balancing Kit
-If all deviationsare less than 1/8 inch and the fan continues to wobble, pleasecontact Customer Service Support@ parrotuncle
.com to order a complimentaryBlade Balancing Kit
4.
LIGHT IS NOT WORKING
Check Bulb to make sure it is installed correctly
Remove non-working bulb and replace with a bulb that is known to be a good working bulb
To reset the remote control: 1) Turn o ffpower to fan
using the wall switch or circuit breaker. 2) Remove batteries from
remote. 3) Wait 10 seconds. 4) Replace batteries and turn power on
F8219110V
AFTER INSTALLATION
The fan blades have been adjusted in the factory to minimize any wobble
NOTE:CEILING FANS TEND TO MOVE DURING OPERATION DUE TO THE FACT THAT THEY
ARE MOUNTED ON A RUBBER CROMMET. IF THE FAN WAS MOUNTED RIGIDLY TO THE
CEILING, IT WOULD CAUSE EXCESS VIBRATION. MOVEMENT OF A FEW CENTIMENTERS
IS QUITE ACCEPTABLE AND DOES NOT SUGGEST ANY PROBLEM
WOBBLE”
TO REDUCE THE FAN WOBBLE: PLEASE CHECK THAT ALL SCREWS WHICH SECURED THE MOUNTING
BRACKET AND DOWNROD ARE SECURE.
BALANCING A WOBBLING CEILING FAN:
For your convenience, a Balancing Kit is included; please follow this procedure when balancing the fan:
1.Check that all blade and blade arm screws are secure.
2.Most fan wobbling problems are caused when blade levels are unequal. Check this level by
selecting a point on the ceiling above the tip of one of the
blades. Measure this distance.Rotate the fan until the next blade is positioned for
measurement. Repeat for each blade. The distance deviation should be equal within
1/8"(0.32cm).
3.Use the enclosed Blade Balancing Kit if the blade
wobble is still noticeable.
4.If the blade wobble is still noticeable, interchanging two
adjacent (side by side) blades can redistribute the weight and possibly result in smoother
operation. WARNING: TO REDUCE THE RISK OF PERSONAL INJURY, DO NOT BEND THE
BLADE ARM WHILE INSTALLING, BALANCING THE BLADES, OR CLEANING THE FAN. DO
NOT INSERT FOREIGN OBJECTS BETWEEN ROTATING FAN BLADES.
NOISE
When it is quiet(especially at night) you may hear occasional small noises. This is normal. Please allow
a 24-hour “breaking-in” period, most noises associated with a new fan disappear during the time.
CARE AND CLEANING
1.Periodic cleaning of your ceiling fan is the only maintenance required. Use a soft brush or lint free cloth to
avoid scratching the paint finish. Please make sure to turn o ffelectricity power before you clean your fan
2.Do not use water when cleaning your ceiling fan. It could damage the motor or the blades
and create the possibility of an electrical shock.
3.Motor has permanently lubricated ball bearing. No need to oil
NOTE: MAKE SURE THE POWER IS OFF AT THE ELECTRICAL PANEL BOX BEFORE YOU
ATTEMPT ANY CLEANING OR REPAIRS.
Installation & Operating Instructions for the
Parrotuncle Owner's Installation ,Manual
WARNING: SHUT POWER OFF AT FUSE OR CIRCUIT BREAKER
F8219110V