ASSEMBLY INSTRUCTIONS
Stainless Steel Worktable with
Optional Knockdown Welded Base
EG10101 Revised 07/23
CAUTION
INSPECT CONTENTS IMMEDIATELY AND FILE CLAIM WITH DELIVERING CARRIER FOR ANY DAMAGE.
SAVE YOUR BOX AND ALL PACKING MATERIALS.
YOU ARE RESPONSIBLE FOR DAMAGE TO YOUR UNIT IF RETURNED IMPROPERLY PACKED.
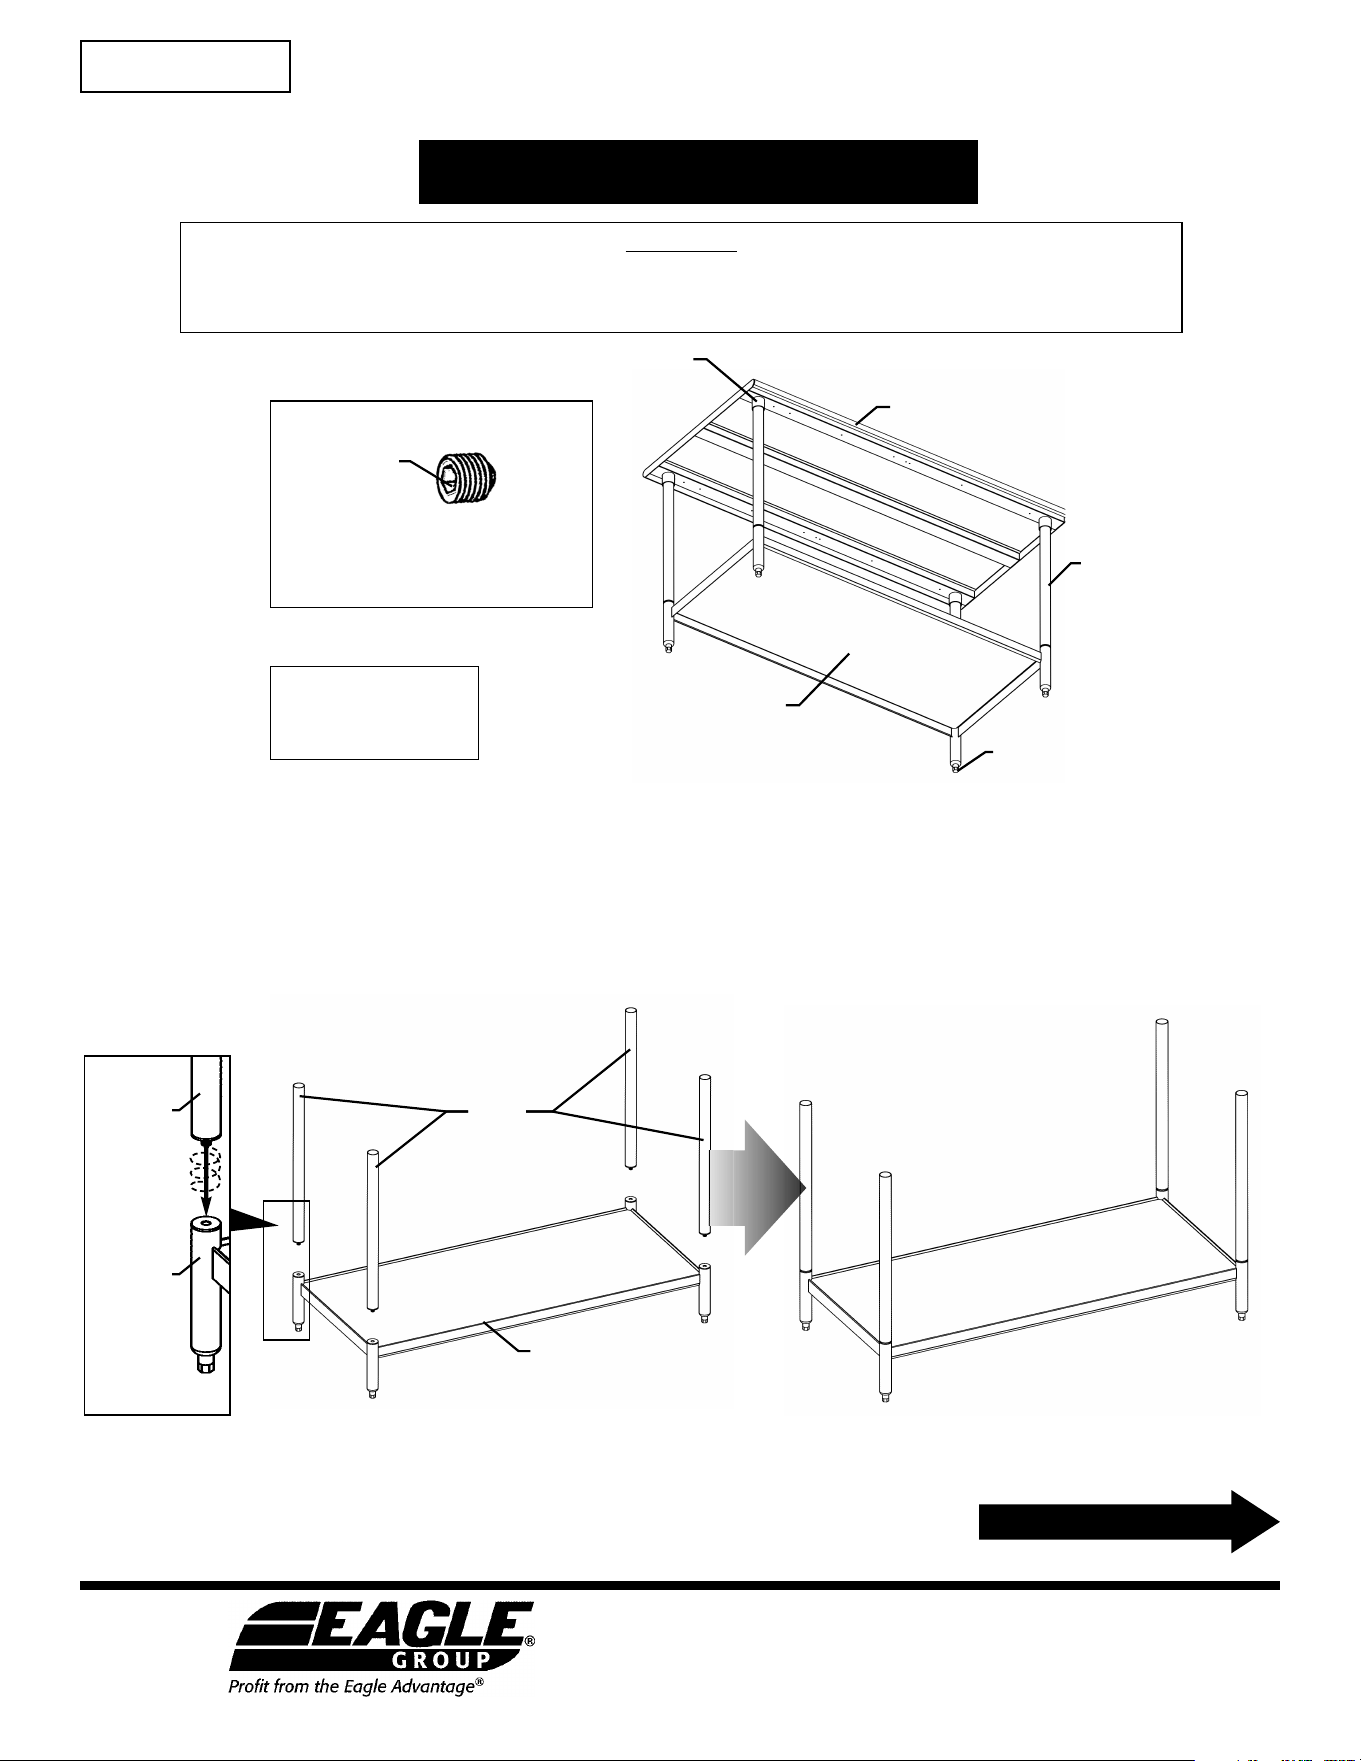
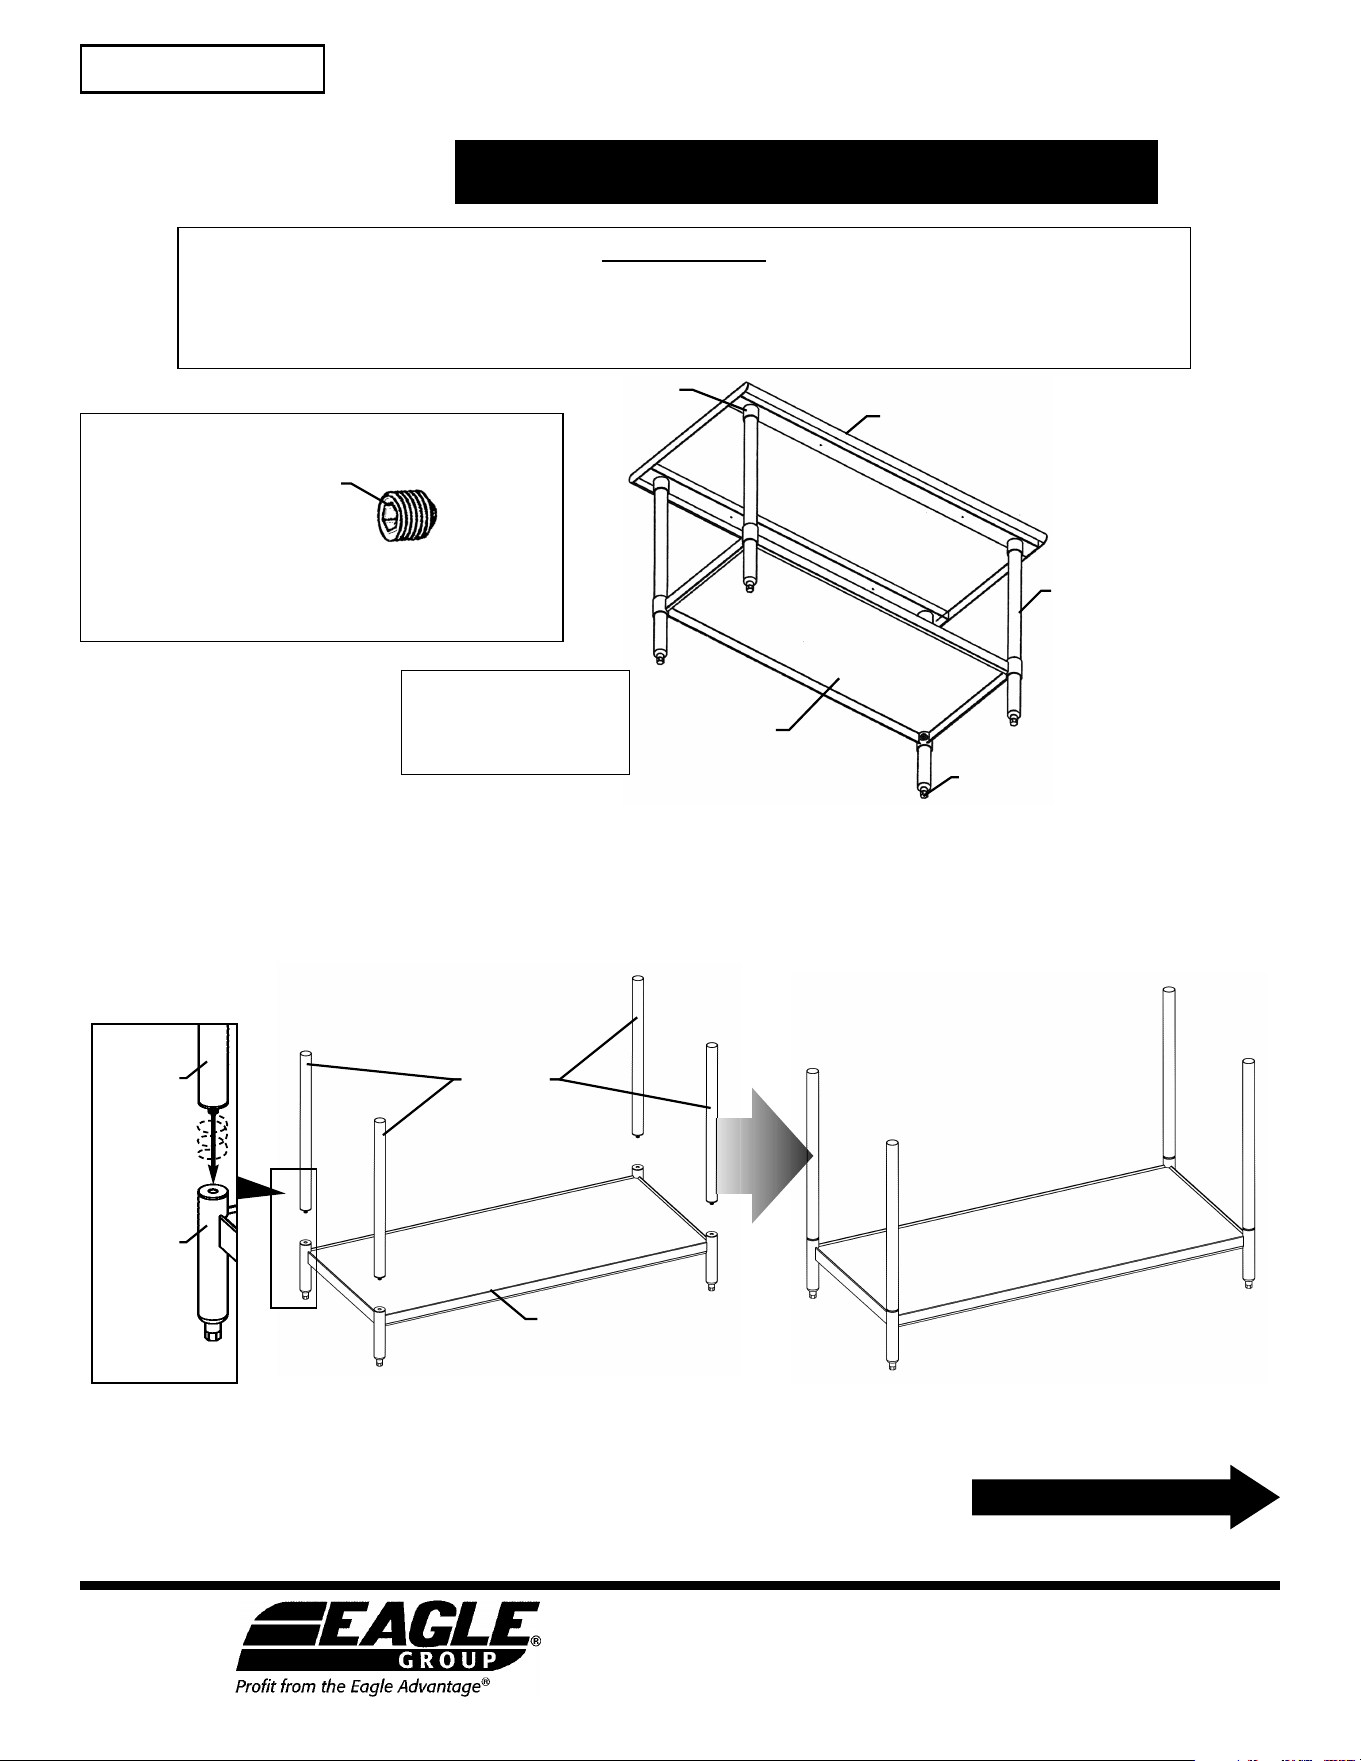
Step 1 - Set welded undershelf assembly on its feet on the floor or working surface. Screw a leg/bolt
assembly hand tight onto all four corners
Hardware:
gusset
tabletop
leg
adjustable foot
(UNDERSIDE VIEW)
Tool required:
• 5/32˝ allen wrench
undershelf
assembly
undershelf
assembly
leg/bolt
assemblies
set
screw
(continued on next page)
Hardware is located in
plastic bag with brightly colored
“HARDWARE ATTACHED” tape.
INSTRUCTION SHEET
#392318
legs joined with undershelf
leg/bolt
assembly
undershelf
assembly
Eagle Foodservice Equipment, Eagle MHC, and SpecFAB
®
are divisions of Eagle Group. ©2023 by the Eagle Group
• 100 Industrial Boulevard, Clayton, Delaware 19938-8903 U.S.A.
• Phone: 302/653-3000 • 800/441-8440 • Fax: 302/653-2065
• www.eaglegrp.com • www.eaglegrpnews.com • www.eaglemhc.com
Eagle Foodservice Equipment, Eagle MHC, and SpecFAB
®
are divisions of Eagle Group. ©2023 by the Eagle Group
• 100 Industrial Boulevard, Clayton, Delaware 19938-8903 U.S.A.
• Phone: 302/653-3000 • 800/441-8440 • Fax: 302/653-2065
• www.eaglegrp.com • www.eaglegrpnews.com • www.eaglemhc.com
(End)
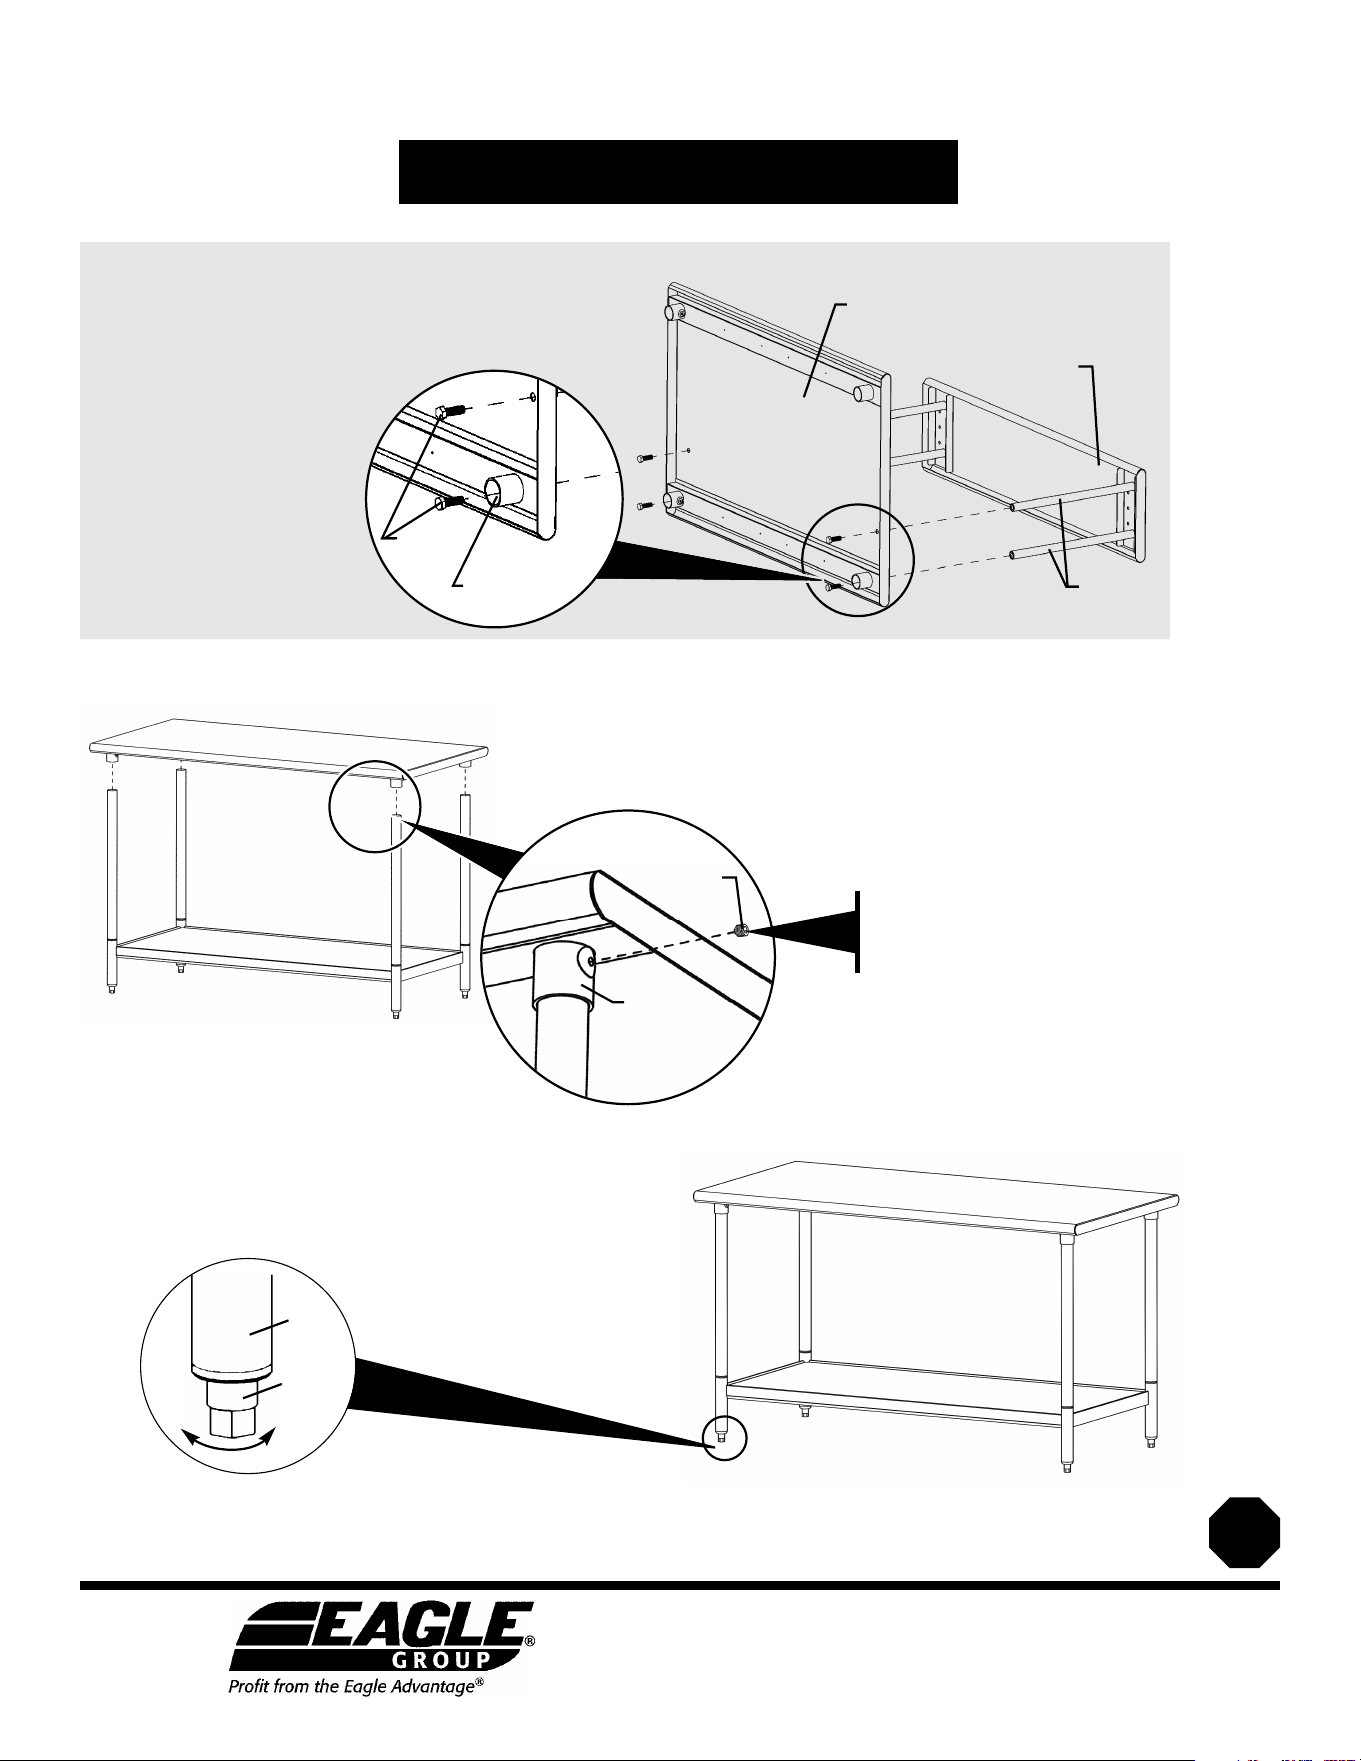
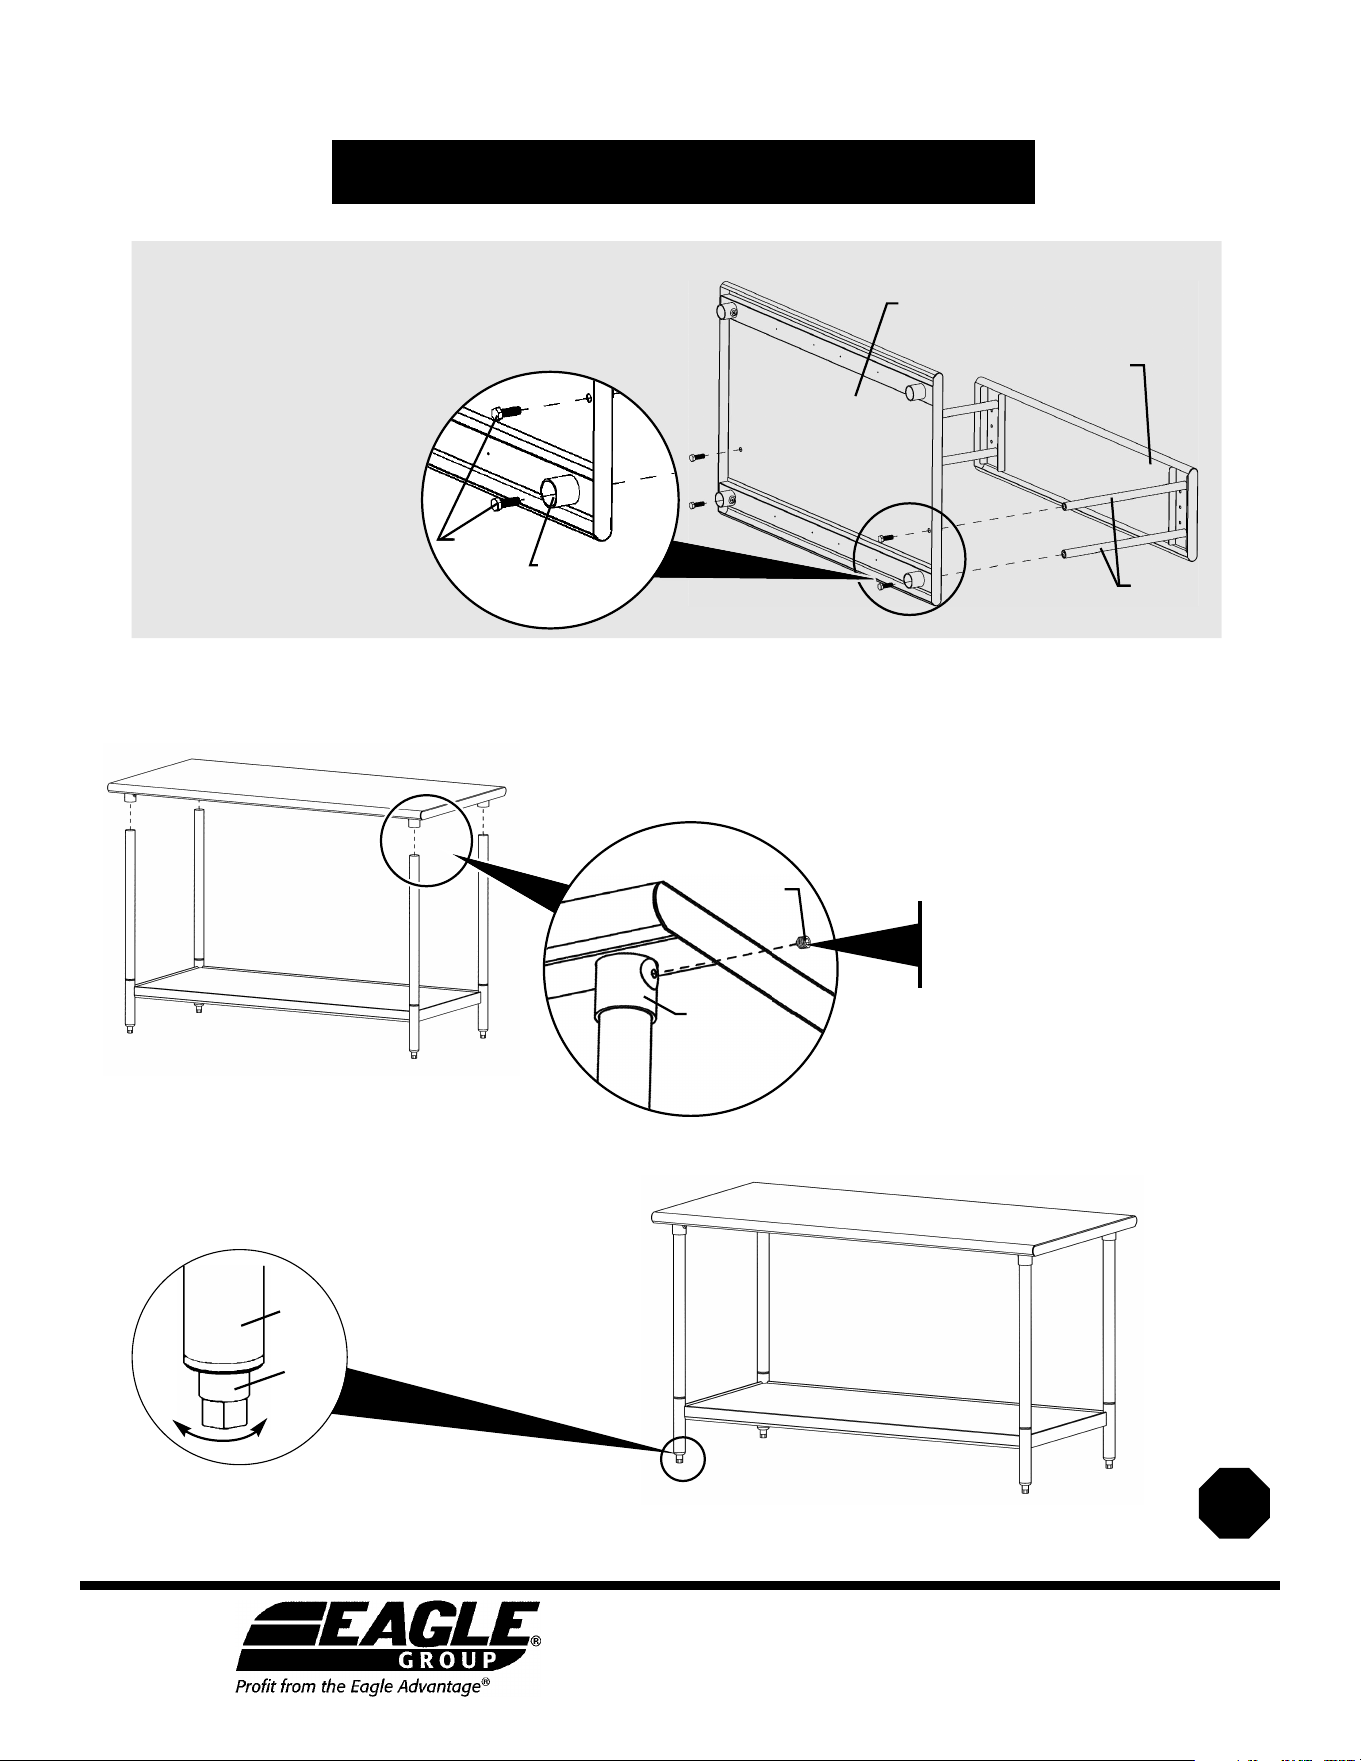
Step 3 - Level unit.
The leveling feet allow approximately 1˝ adjustment.
Assembly is complete.
Step 2 - Stand table upright and mount tabletop.
• Place tabletop onto top of legs.
• Insert each leg into each tabletop gusset.
• With 5/32˝ allen wrench, tighten set screw* on each gusset.
set screw
(UNDERSIDE
VIEW)
gusset
leveling
foot
leg
ASSEMBLY INSTRUCTIONS
Stainless Steel Worktable with
Optional Knockdown Welded Base
If table includes overshelf, attach
overshelf to tabletop NOW before
attaching to base…
… as some mounting bolts
may require access through
gusset/channel assemblies
and into bottom of overshelf
posts.
overshelf
tabletop
overshelf
posts
gusset/channel
assembly
mounting
bolts
* To be compliant with NSF guidelines,
set screws must be filled with
NSF-approved sealant.
ensamblaje del
estante inferior
conjuntos de
pata/perno
conjunto de estante unido a las patas
conjunto de
pata/perno
ensamblaje
del estante
inferior
Eagle Foodservice Equipment, Eagle MHC y SpecFAB son departamentos de Eagle Group. ©2023 por Eagle Group
• 100 Industrial Boulevard, Clayton, Delaware 19938-8903 U.S.A.
• Teléfono: 302/653-3000 • 800/441-8440 • Fax: 302/653-2065
• www.eaglegrp.com • www.eaglegrpnews.com • www.eaglemhc.com
Paso 1: Coloque el ensamblaje del estante inferior soldado sobre sus pies en el piso o superficie de trabajo.
Atornille con la mano un conjunto de pata/perno en las cuatro esquinas.
Articulas de ferretería:
unión
parte superior
de la mesa
pata
pie ajustable
(VISTA DESDE ABAJO)
Herramientas
necesarias:
• llave Allen de 5/32”
estante
inferior
tornillo de fijación
Están localizada en una bolsa plástica con cinta
coloreado brillantemente marcado
“HARDWARE ATTACHED”.
INSTRUCCIONES PARA EL ENSAMBLAJE
Mesa de trabajo de acero inoxidable
con base golpear-abajo soldada opcional
PIEZA Nº 392318
PRECAUCIÓN
INSPECCIONE EL CONTENIDO INMEDIATAMENTE Y PRESENTE UN RECLAMO
AL TRANSPORTISTA ENCARGADO DE LA ENTREGA EN CASO DE HABER DAÑOS.
CONSERVE LA CAJA Y TODOS LOS MATERIALES DE EMBALAJE.
USTED ES RESPONSABLE DEL DAÑO DE SU UNIDAD SI ÉSTA SE DEVUELVE EMBALADA INCORRECTAMENTE.
(continúa en la próxima página)
EG10101 Revisado 07/23
Eagle Foodservice Equipment, Eagle MHC y SpecFAB son departamentos de Eagle Group. ©2023 por Eagle Group
• 100 Industrial Boulevard, Clayton, Delaware 19938-8903 U.S.A.
• Teléfono: 302/653-3000 • 800/441-8440 • Fax: 302/653-2065
• www.eaglegrp.com • www.eaglegrpnews.com • www.eaglemhc.com
Paso 3: Nivele la unidad.
El pie nivelador permite un ajuste de aproximadamente 1”.
pie
nivelador
pierna
(Fin)
El ensamblaje está completo.
• Coloque la parte superior de la mesa sobre la parte superior de las patas.
• Introduzca cada pata en la respectiva unión de la parte superior de la mesa.
• Con una llave Allen de 5/32”, ajuste el tornillo de fijación* en cada unión.
Paso 2: Ponga la mesa derecha y coloque la parte superior de la mesa.
tornillo de
fijación
(VISTA DESDE
ABAJO)
unión
INSTRUCCIONES PARA EL ENSAMBLAJE
Mesa de trabajo de acero inoxidable
con base golpear-abajo soldada opcional
Si la mesa incluye repisa superior, fije la
repisa superior a la superficie de la mesa
AHORA antes de unirla a la base…
… Algunos pernos de montaje
pueden requerir el acceso a
través de los ensamblajes
del escudete/del canal y
en la parte inferior de los
postes del overshelf.
overshelf
parte superior de la mesa
postes del
overshelf
ensamblaje
del escudete/
del canal
pernos
de montaje
* Para ser obediente con las guías de
consulta del NSF, los tornillos de fijación
deben llenarse con sellador aprobado
por NSF.