
QUICK START GUIDE
SCL-2XL / SCL-4XL
© 2026 Harman International
Introduction
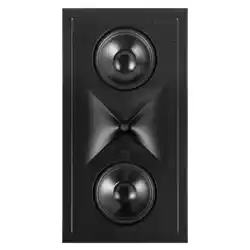
Congratulations, and thank you for purchasing JBL Synthesis Custom Loudspeakers (SCL)
series in-wall loudspeakers. For more than 80 years, JBL engineers have been providing audio
equipment for homes, concert halls, recording studios and movie theaters around the world,
and JBL products have become the hands-down choice of leading recording artists and sound
engineers. The SCL-2XL and SCL-4XL are the latest members of the JBL Synthesis Home Theater
system.
Please take the time to study this document so that you can obtain the best possible
performance from your loudspeakers. For more information and other languages, visit
https://www.jblsynthesis.com.
Should further assistance be required feel free to contact JBL Synthesis technical support at
the numbers below.
Inside the US and Canada: +1 888.691.4171
Outside the US and Canada: +44 1707 668 012
Package Contents
Each SCL-2XL / SCL-4XL package contains:
1x JBL Synthesis Custom Loudspeaker
1x Quick-start Guide & Safety Sheet
1x Magnetically Attachable Paintable Grille
1x Scrim Cloth
1x Installation Template
1x MDF Enclosure & Mounting Hardware
If you suspect that there has been shipping damage, report it immediately to your dealer. We
recommend that you keep the box and packing materials for future use.
General Installation Notes
• Identify all wiring connections to rear enclosure and to baffle network.
• Choose from the wiring options (single wire, bi-wire, bi-amp) before installation.
• Note the wall depth requirements per loudspeaker model.
© 2026 Harman International 2
Wall Depth Requirement
SCL-2XL SCL-4XL
6-inch (152mm) 4-Inch (101.6mm)
Connecting the Speakers to Amplification
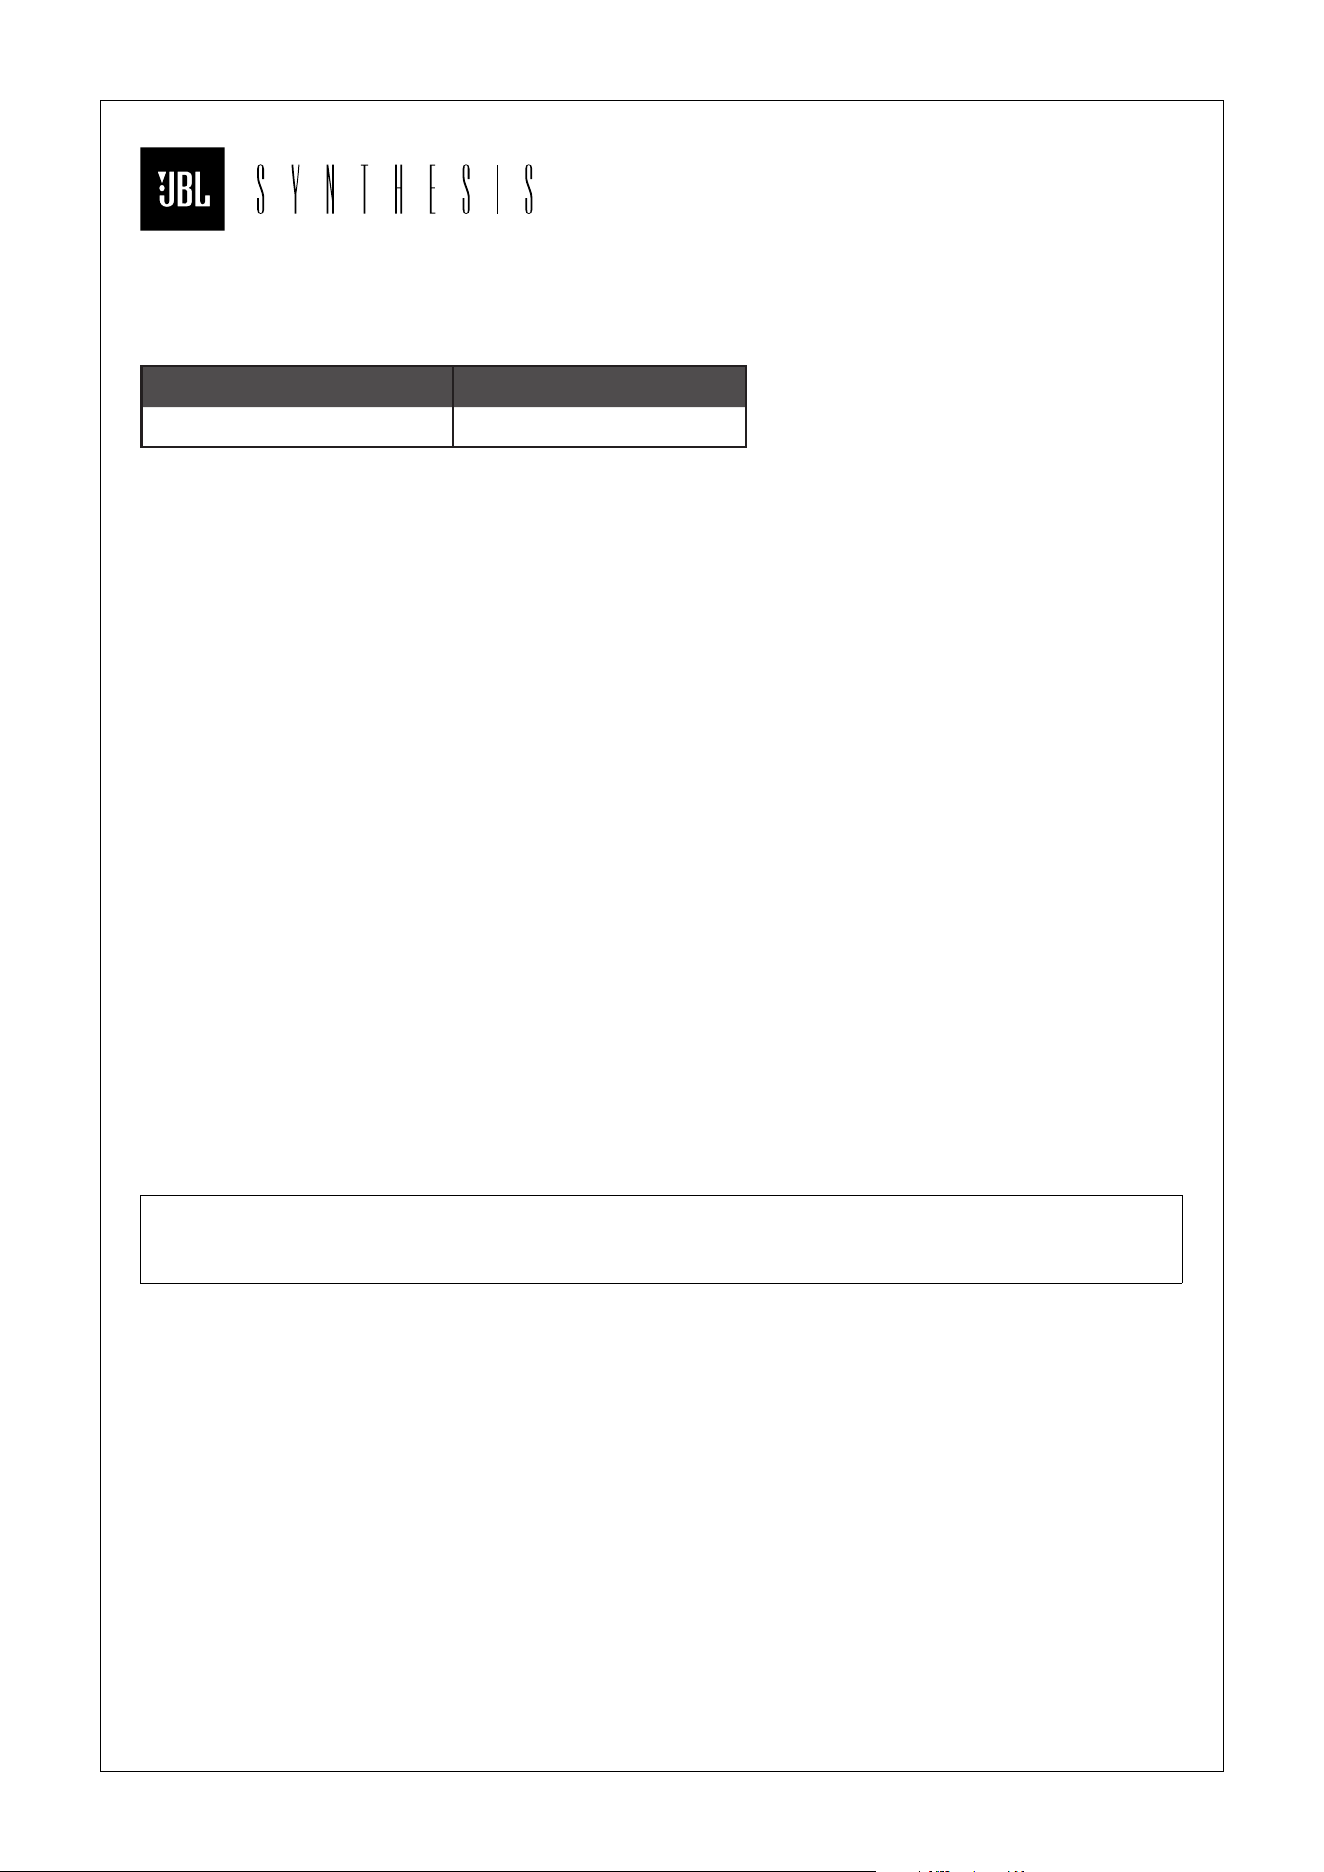
To connect the SCL-2XL/SCL-4XL loudspeakers to power amplifier(s) or a receiver, use two-
conductor insulated speaker wire.
Wire Length Recommended Size
Up to 20 ft. 14-gauge
Up to 30 ft. 12-gauge
Greater than 30ft. 10-gauge
The spring-loaded binding posts can accommodate up to #10 AWG stranded wire.
Important Notes:
The SCL-2XL is a large, heavy loudspeaker. Installation will go more smoothly and safely with two
people.
The crossover with Molex connector is at one end of the back box. Before cutting existing drywall
or installing the back box, be sure to orient the back box so that the JBL logo on the baffle is in the
desired location when installed.
For vertical orientation mounting, the SCL-2XL/SCL-4XL should be located between two wall studs.
If you need to cut through existing wall studs, make sure in advance that they are not load
bearing studs.
WARNING: HARMAN International assumes no responsibility for improper installation
of hardware or for any personal injuries or product damages resulting from improper
installation or a fallen loudspeaker.
Painting the Grille
JBL Synthesis architectural loudspeaker grilles can be painted to match any decor. If you wish to
change the grille’s color, its satin finish will function as a primer coat. For the best results follow
this procedure:
1. Gently remove the scrim cloth from the back side of the grille before painting.
2. Use a high-quality spray paint and apply a thin coat of color. Ensure that the grille
perforations remain free of paint. Filling them with paint will diminish the speaker’s sound
quality. If any perforations are plugged, use compressed air to blow the paint out of the
perforations. Note: If you find any grille perforations that are plugged with paint after the
paint has dried, carefully use a straight pin or sewing needle to remove the paint.
3. We have included a replacement scrim cloth. After the paint has dried, apply a light coat of
spray adhesive to the inside of the perforated grille and attach a new scrim cloth. IMPORTANT:
Never spray adhesive on the cloth.
© 2026 Harman International 3
Preparing The Hook-Up Wire
1. First determine the distance between your amplifier and the most distant speaker in each
group (fronts, surrounds, back surrounds, passive subwoofers).
2. Now make the hookup wires for all speakers in each group this length, even if one speaker
is much closer to your amplifier than the other. This will help maintain proper signal balance.
Remember to make extra wires for bi-amp or bi-wire usage should this be selected.
3. Strip off 3/8” of insulation from both ends of each conductor.
4. Twist each set of stranded wires into a tightly bunched spiral. Run wires through walls to the
mounting positions.
5. It is important to connect all speakers identically: (+) on the speaker to (+) on the amplifier and
(–) on the speaker to (–) on the amplifier.
With multichannel surround sound systems, connecting all of the speakers in your system with
the correct polarity remains equally important to preserve the proper ambience and frequency
response of the program material.
When attaching to the back box, push on the top of the spring-loaded post and insert the bare
wire into the hole on the side.
Single-Channel Amplification
For single-ended use, do not remove the jumpers.
© 2026 Harman International 4
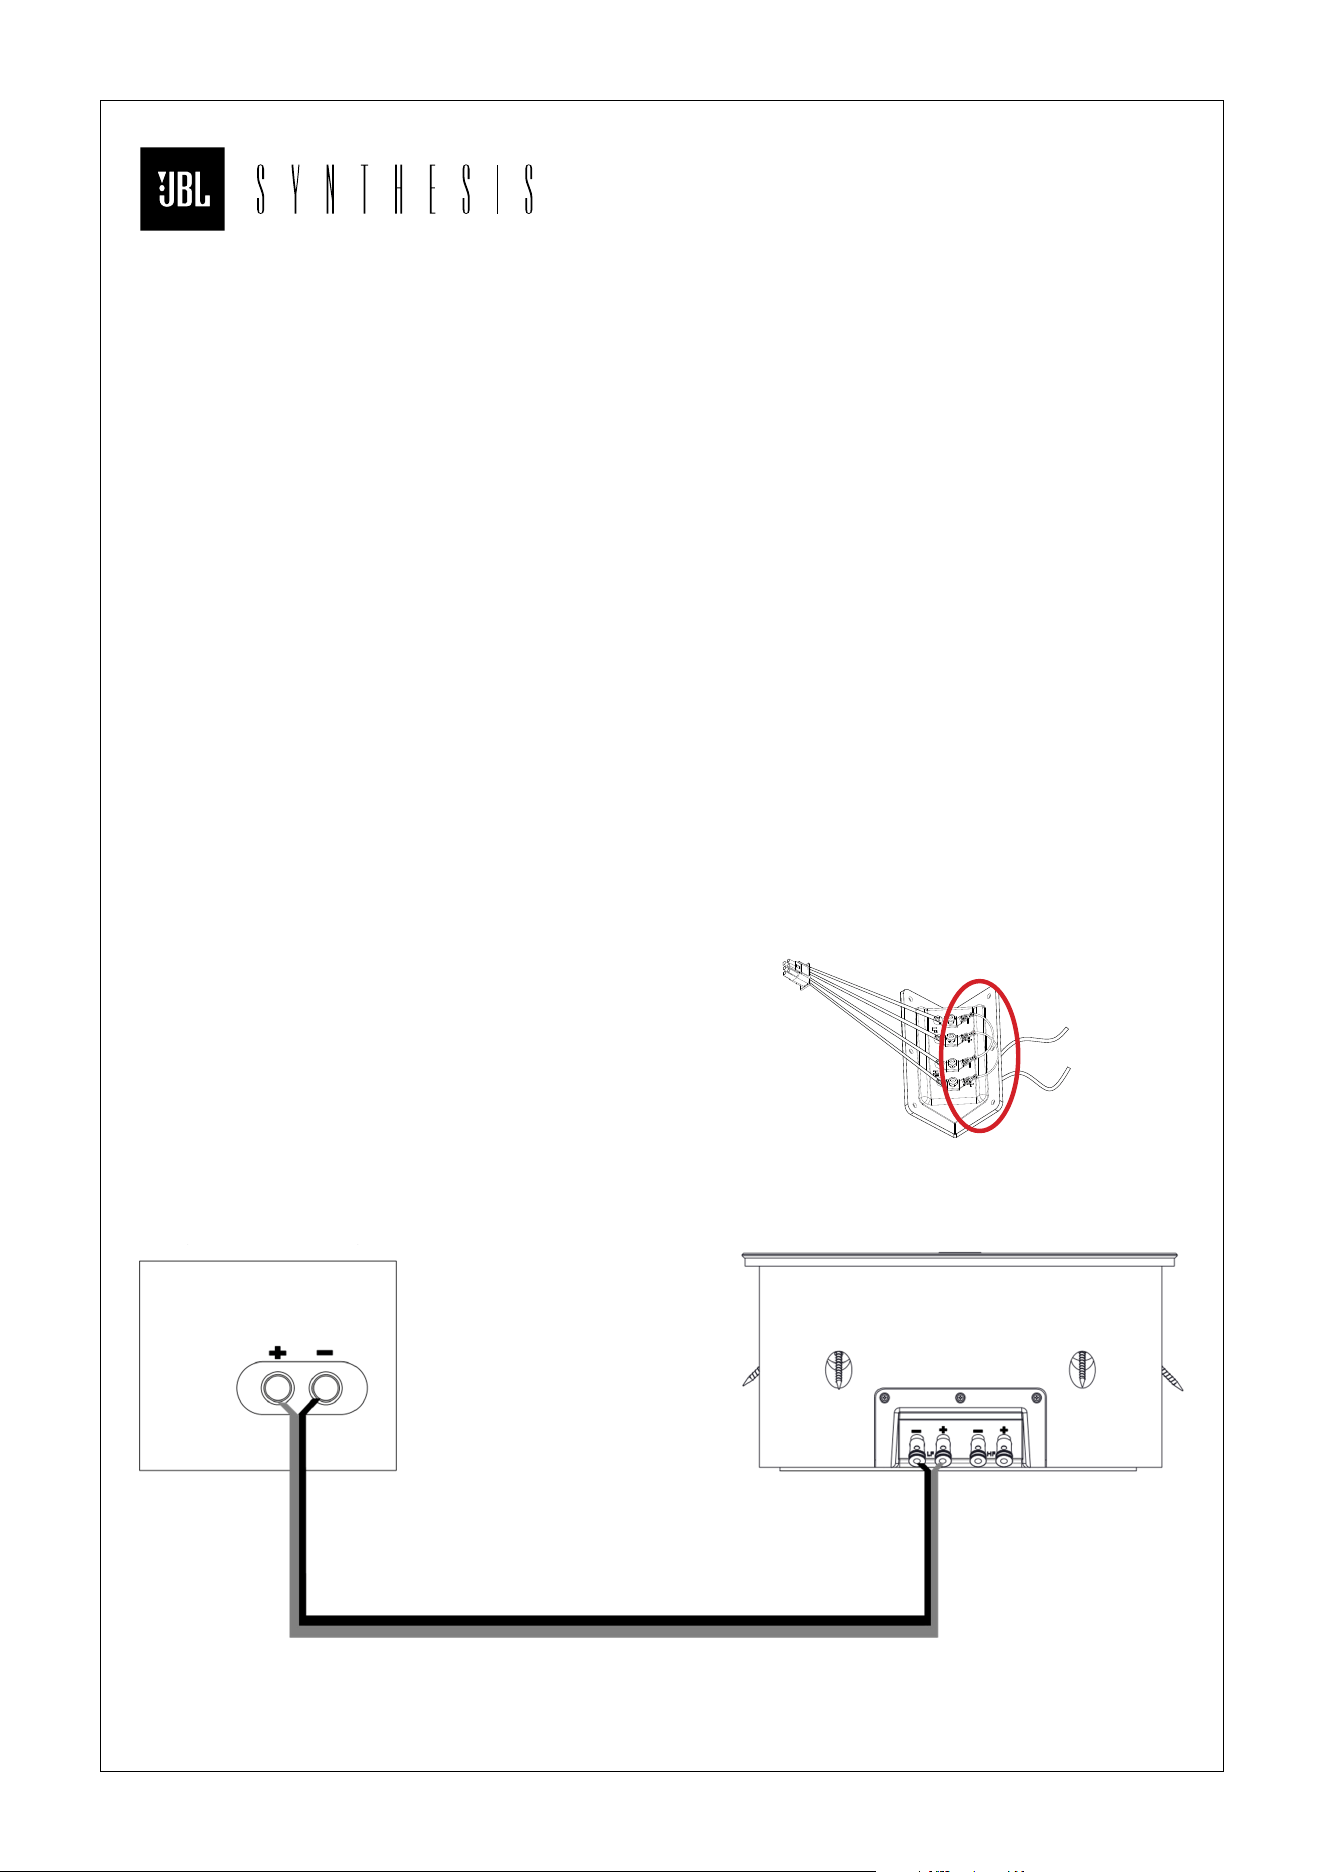
Bi-Wire or Bi-Amplifier Options
1. Cut two pairs of wires for each bi-wired speaker.
2. Mark both ends of the wire pairs intended for low frequency use as “LF,” and both ends of the
wire intended for high frequency use as “HF.” Then run the two sets of wire to the mounting
position.
3. Connect “HF” labeled pair to the speaker’s “HF” input, and the “LF” labeled pair to the “LF”
input.
4. Before installing the speaker that will be bi-wired or bi-amplified, remove the two jumpers,
shown below. The jumpers are located on the terminal cup on the inside of the back box. To
remove each jumper, secure the connector with your fingers and pull directly away from the
clip terminal. Repeat until all jumpers have been disconnected.
5. Proceed to install the back box and speaker following the instructions elsewhere in this
manual.
Note: Ensure that both jumper
cables have been completely
removed
© 2026 Harman International 5
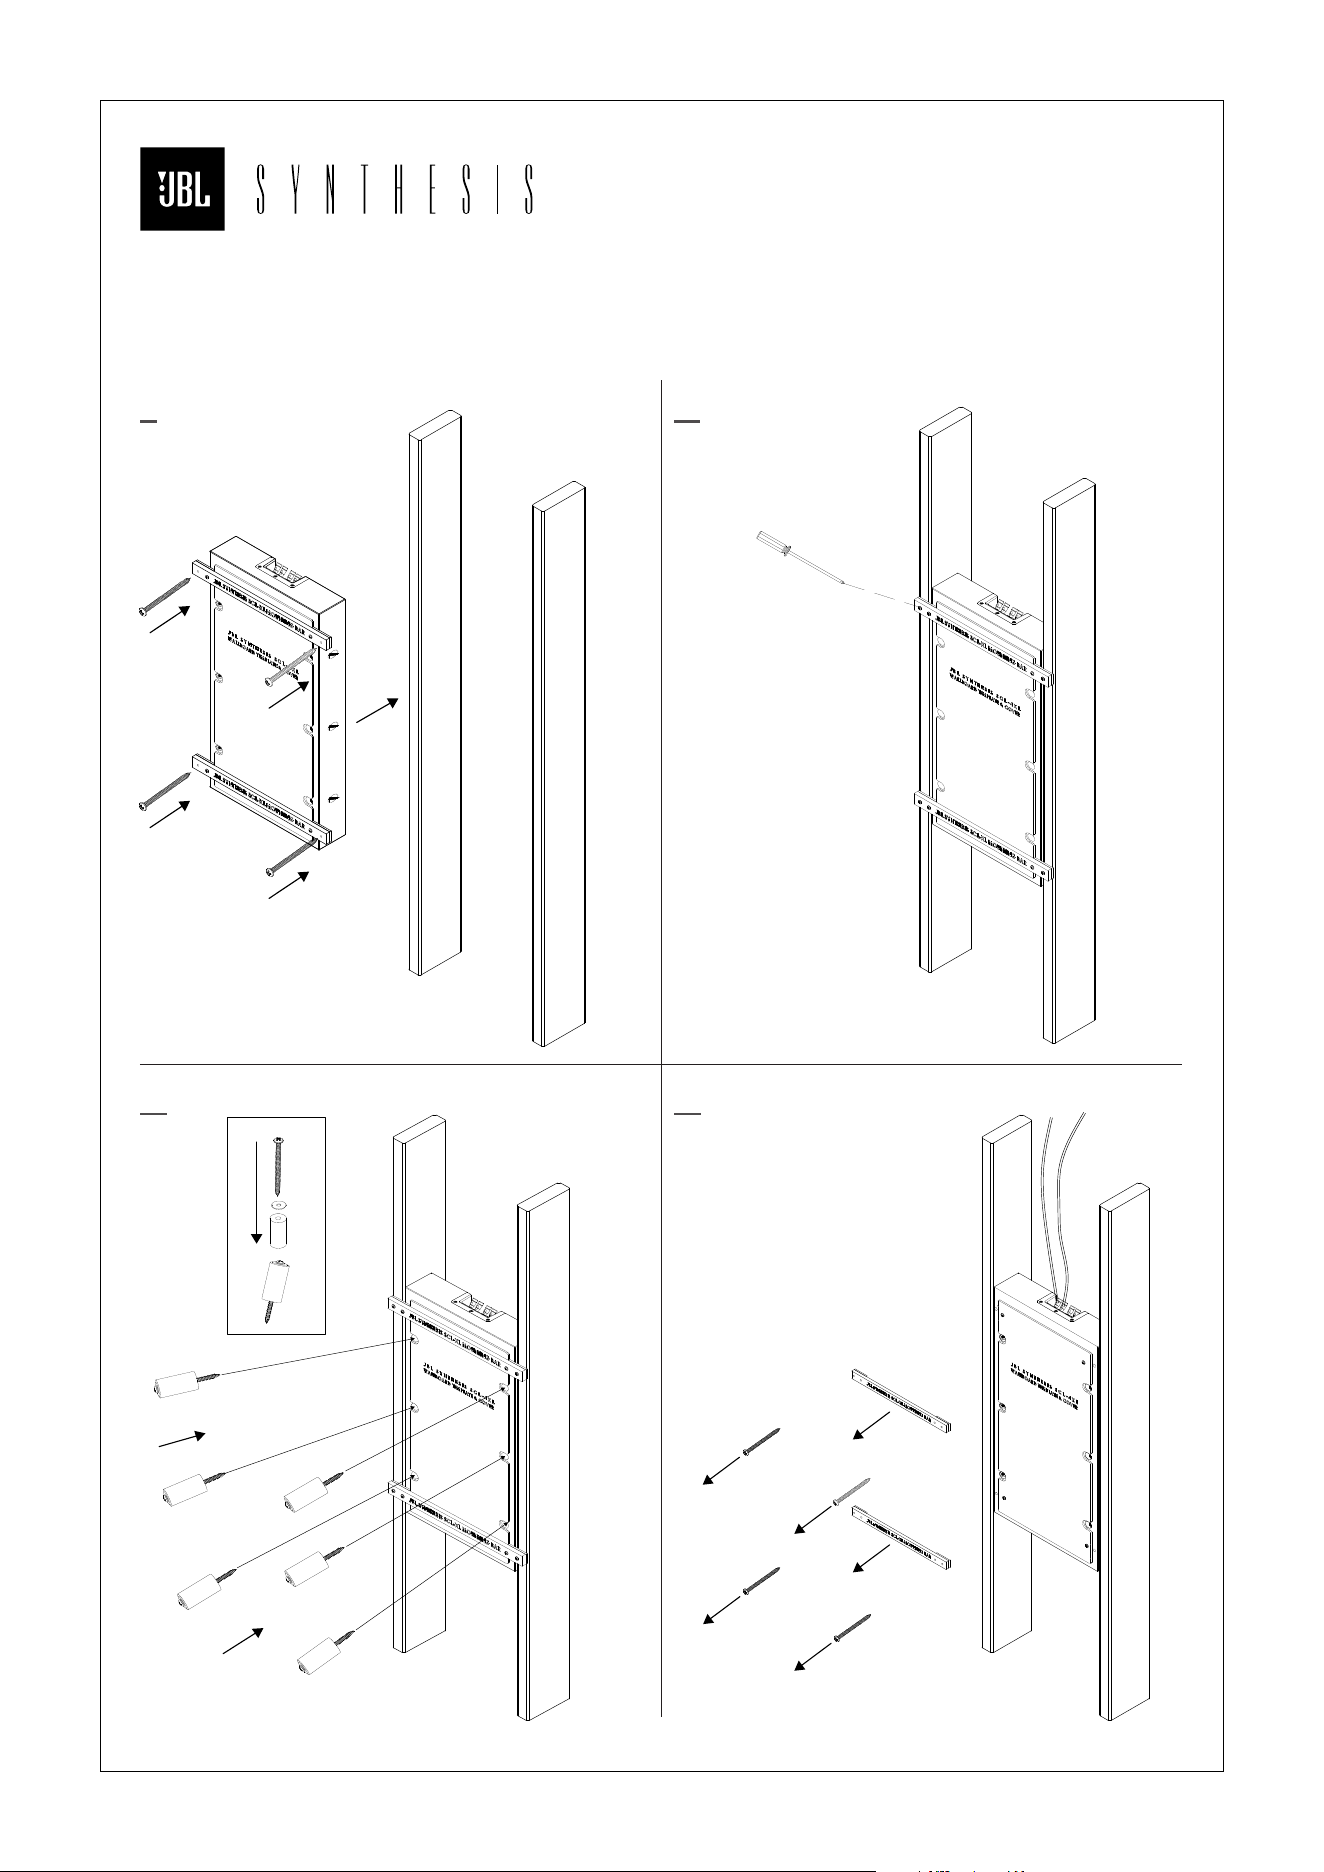
Installation
1 2
3 4
© 2026 Harman International 6
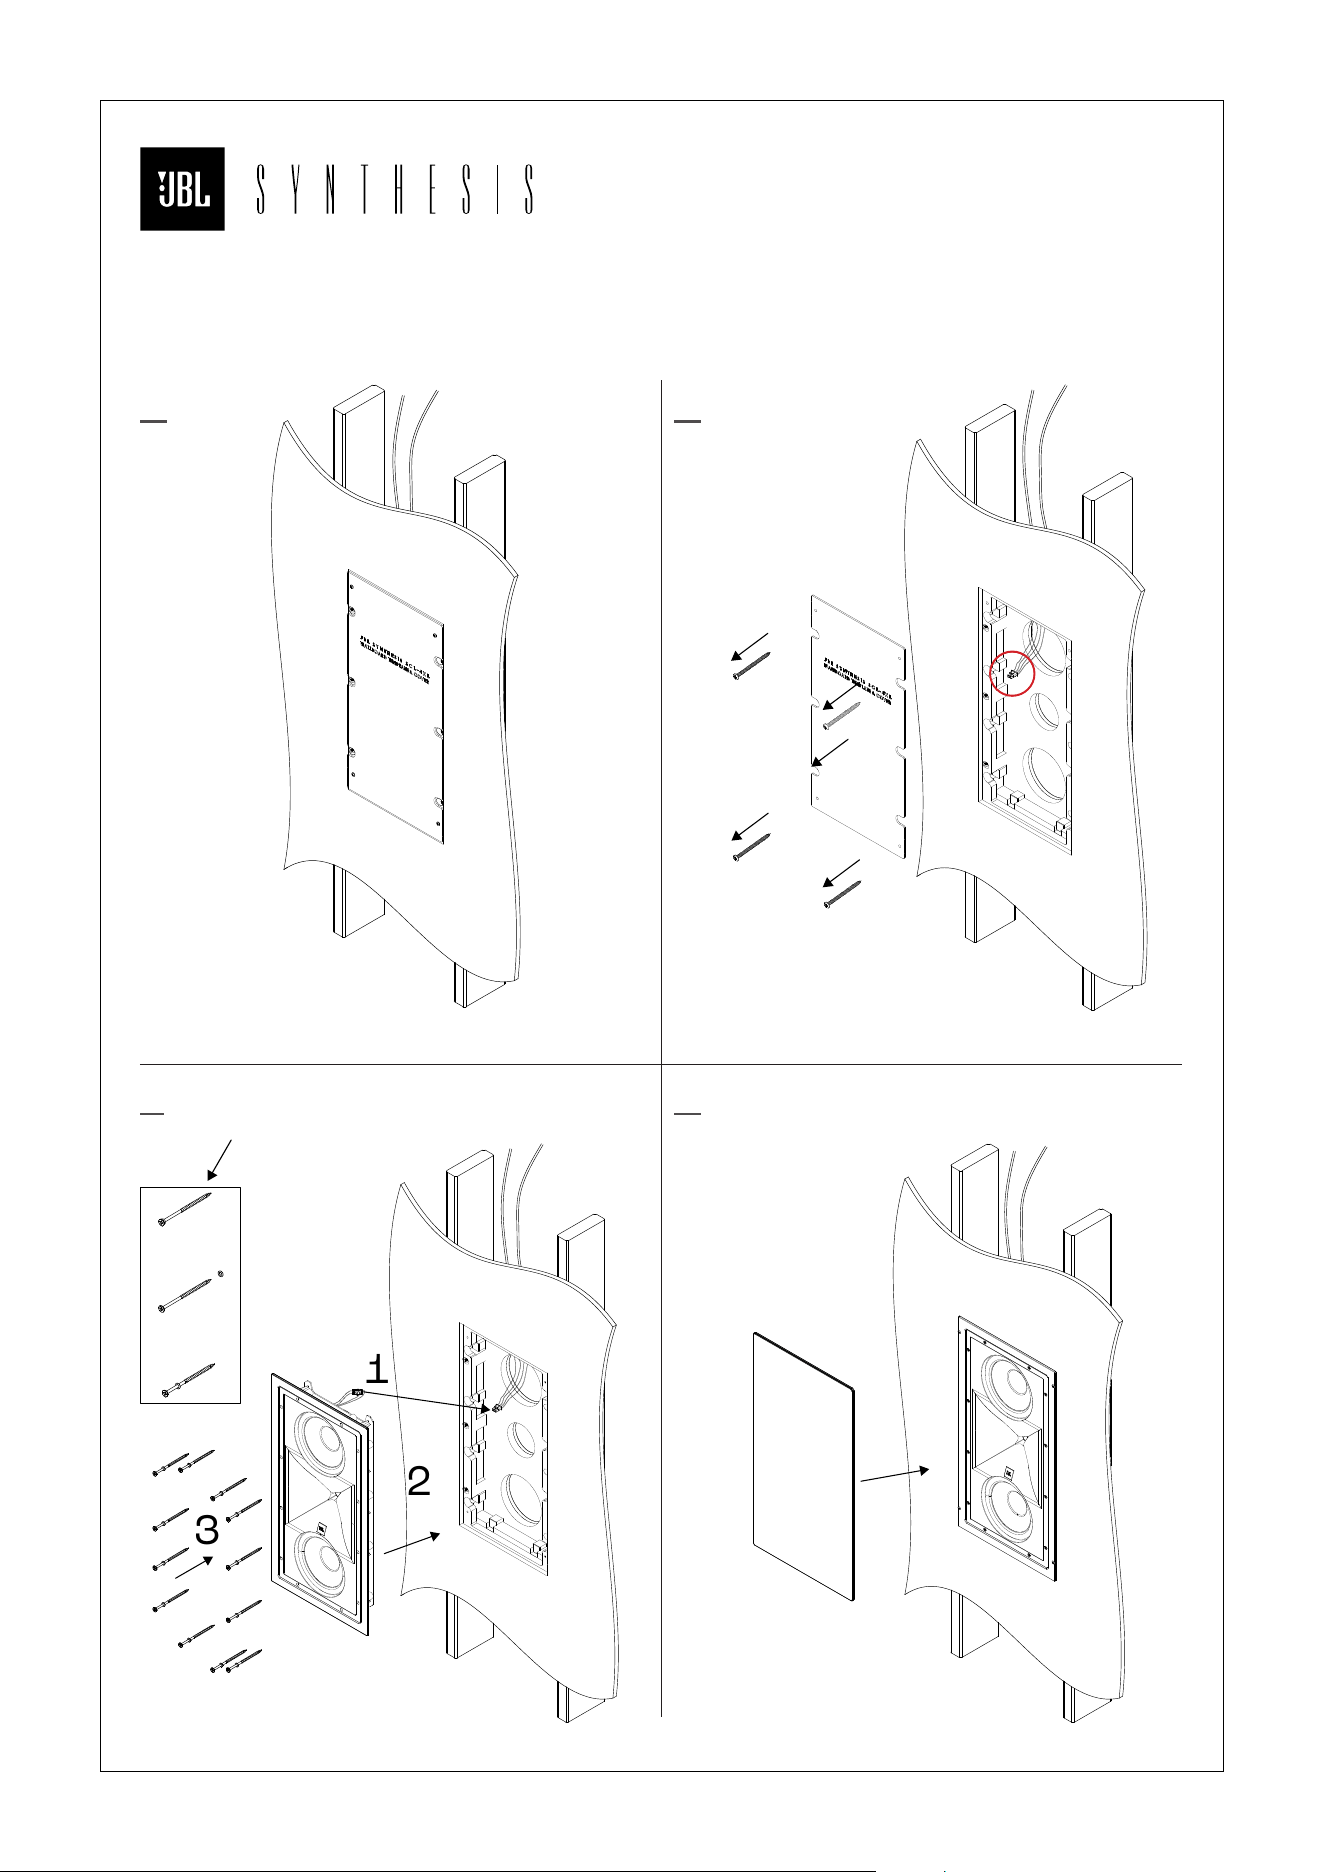
Installation
5 6
7 8
1
2
3
Note: To ensure an air-tight seal, ensure that the
O-rings are pre-installed on the screws prior to
securing the baffle to the backbox.
© 2026 HARMAN International Industries, Incorporated. All rights reserved.
JBL Synthesis is a trademark of HARMAN International Industries,
Incorporated, registered in the United States and/or other countries. Features,
specifications and appearance are subject to change without notice.
HARMAN International Industries, Incorporated
8500 Balboa Boulevard, Northridge, CA 91329 USA
EMEA Liaison Oice, Danzigerkade 16G, 1013 AP
Amsterdam, The Netherlands.
Ground Floor, Westside 2, London Road, Apsley, Hemel
Hempstead, Hertfordshire, HP3 9TD, United Kingdom.
www.jblsynthesis.com
铅
(Pb)
汞
(Hg)
镉
(Cd
)
六价铬
(Cr(VI))
多溴联苯
(PBBs)
多溴二苯醚
(PBDEs)
邻苯二甲酸二正丁酯
(DBP)
邻苯二甲酸二异丁酯
(
DIBP)
邻苯二甲酸丁苄酯
(BBP)
邻苯二甲酸(2-乙基)已酯
(DEHP)
木箱 ○ ○ ○ ○ ○ ○ ○ ○ ○
○
金属件 × ○ ○ ○
○ ○ ○ ○ ○ ○
线路板及其组件 × ○ ○ ○ ○ ○ ○ ○ ○ ○
塑胶件 ○ ○ ○ ○ ○ ○ ○ ○ ○ ○
喇叭单元 × ○ ○ ○ ○ ○ ○ ○ ○ ○
产品中有害物质的名称及含有信息表
部件名称
有害物
质
注1: ○ :表示
该有害物质在该部件所有均质材料中的含量均不超出电器电子产品有害物质限制使用国家标准要求。
× :表示该有害物质至少在该部件的某一均质材料中的含量超出电器电子产品有害物质限制使用国家标准要求。
注2:
以上未列出的部件,表明其有害物质含量均不超出电器电子产品有害物质限制使用国家标准要求。
在中华人民共和国境内销售的电子电气产品上将印有”环保使用期”(EPuP)符号。
圆圈中的数字代表产品的正常环保使用年限。
Atenção: conforme lei brasileira n° 11.291, a exposição prolongada a ruídos
superiores a 85dB pode causar danos ao sistema auditivo.
LS_JBLSynthesis_SCL2XL_SCL4XL_QSG_EN_v1.0_20260227
