SG810ZB-100-01
®
Slim Profile Gateway for
Salus Mesh Networks
Installer Manual
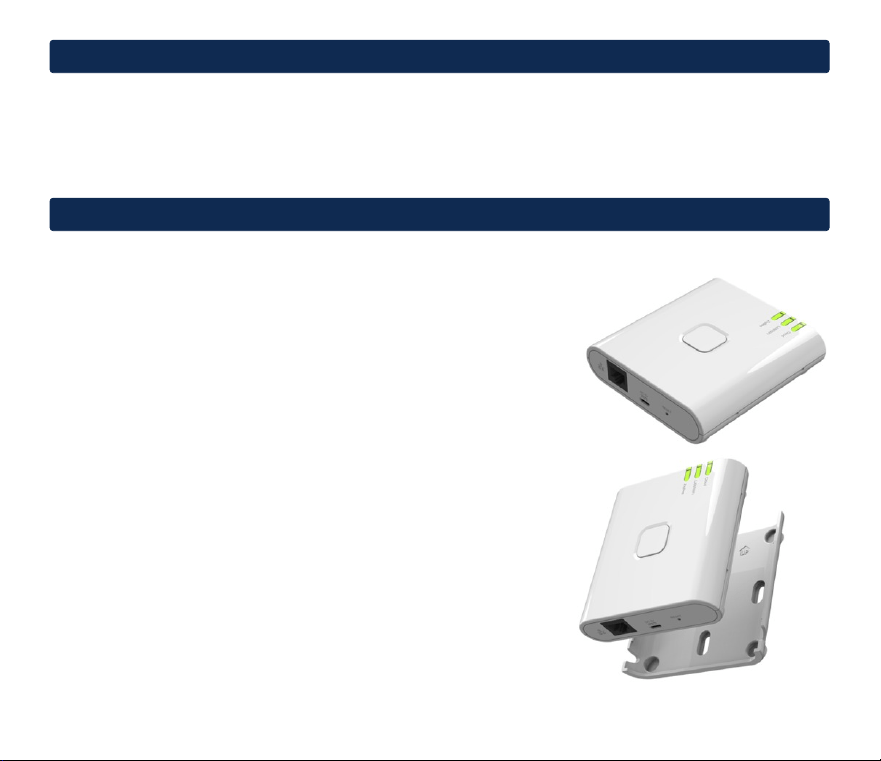
1 Introduction 2 Features 3 LED Indicator Status 4 Install the App
5 Installation 6 Add Devices 7 Wi-Fi Setup
8 Identify Connected Devices 9 Zigbee Mesh Network 10 Factory Reset
Read these instructions before installing and using the Gateway. An authorized,
qualified installer may be required.
Verify compatibility with your connected home system before installation.
Follow all instructions provided by your connected home manufacturer regarding
the addition of devices to your connected home system.
Salus accepts no responsibility for damage caused by not following
these instructions.
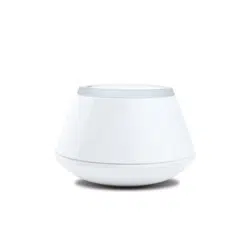
SG810ZB
The Slim Prole Gateway is the key product for the Salus
®
Smart System and supports cloud
integration to AWS IoT and other cloud platforms. This enables connection of multiple Salus
wireless devices to the cloud in a smart home system by using your smartphone or your
computer. You can connect up to 100 devices to one gateway.
•
Supports up to 100 Salus devices
•
Supports cloud integration to AWS IoT
•
10/100Mbps Power over Ethernet connection
•
802.11 b/g/n WiFi
•
Bluetooth communication for easier commissioning
•
Zigbee 3.0 compliance
•
Over-the-air rmware update capability
•
5VDC micro-USB power adapter and wall mount
bracket included
•
Dimensions: 3.66”W x 3.86”D x .99”H
(93mm W x 98mm D x 25mm H)
Installer Manual 2
1
Introduction
2
Features

3
Installer Manual
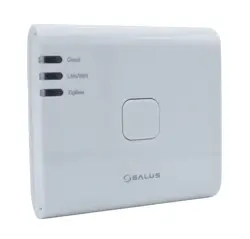
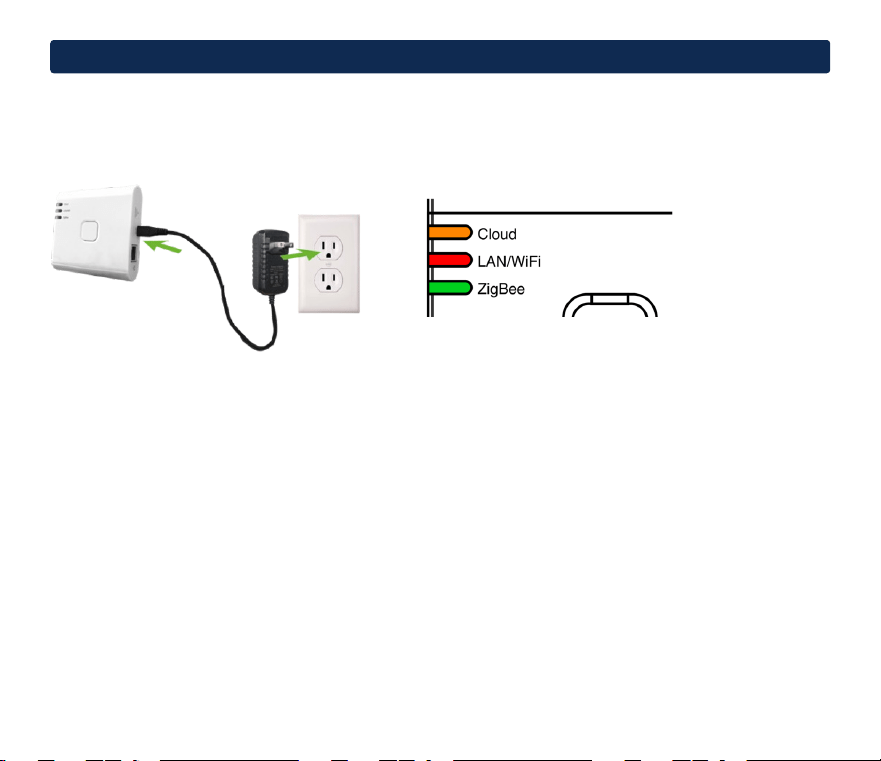
The SG810ZB has 3 multi-color LEDs to show the current operating state.
As the Gateway is being provisioned, the LEDs will have different patterns to show the current
connection and operational status. See details in the Installation section.
3
LED Indicator Status
Device is connected to the Cloud
Device cannot connect to the Cloud
The Cloud LED shows the connection status to the Smart Connect cloud.
The LAN/WiFi LED shows the connection status with the local network.
Connected to the internet
Not connected to the internet
The Zigbee LED shows various states of the Zigbee mesh network.
Zigbee network closed
Blinking: Identify mode is active
Scan and add devices
Blinking: Max number of devices is exceeded
Unless installed in ofine mode, this product requires the
Salus
®
Smart Connect application for conguration, control,
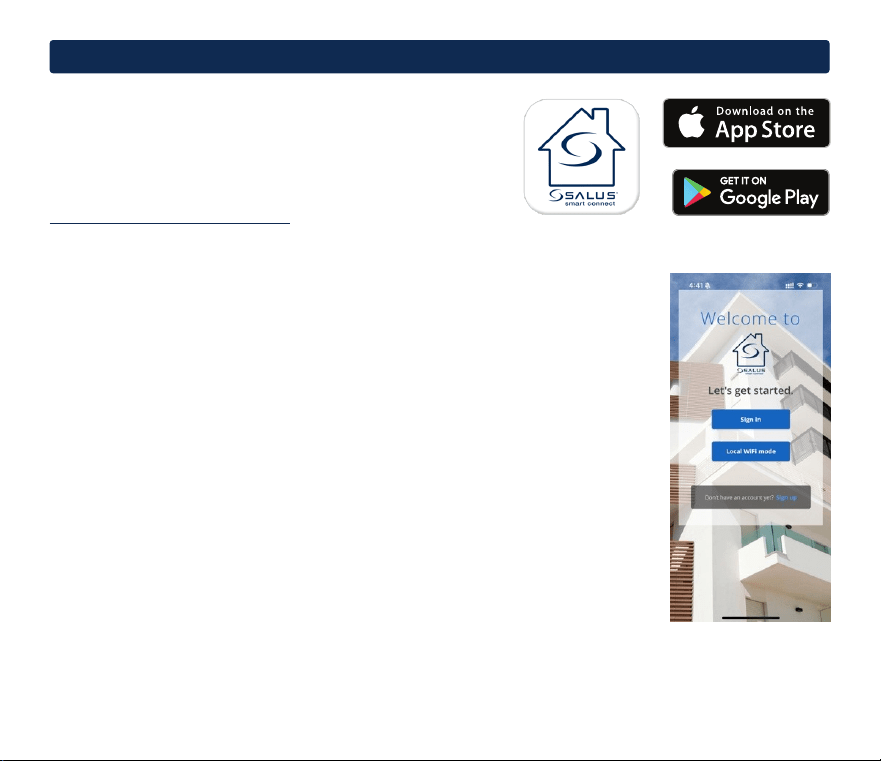
and monitoring. Download and install the Salus Smart
Connect App from the Google Play or Apple Store.
A desktop version is also available at
https://salussmartconnect.com/
Follow the instructions in the app to sign up for an account.
1. Tap Sign up.
2. Enter account information.
3. Tap Create my prole.
4. A Conrmation code will be sent to the email address
used to set up the account.
5. Enter the Conrmation Code and tap Conrm.
6. You may now Sign in and begin using the App.
Once signed in, you will be prompted to add a gateway to your account.
You can follow the prompts and instructions in section 5 (Installation) to
register your gateway.
4
Install the App
Installer Manual 4
The following instructions will detail how to congure the gateway in online mode. If you prefer to use
the gateway in ofine mode (only as a local zigbee co-ordinator), please skip to page 8.
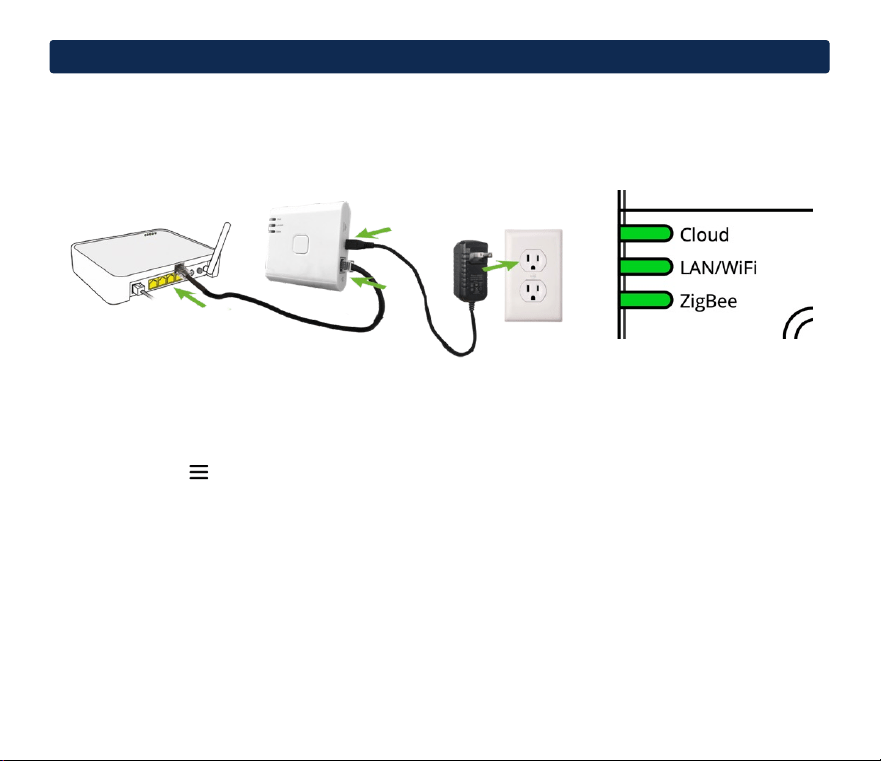
Connecting to LAN using Ethernet
Connect the Gateway to the router and apply power, wait until all LEDs are green.
Add a Gateway
1. Launch the Salus
®
Smart Connect App and Sign In.*
2. Tap the menu icon > Devices > Gateways > Add a gateway.
3. Tap Connect via LAN.
4. Press the multifunction button on the Gateway, the Zigbee LED will ash.
5. Tap Search for Gateway.
6. Follow the prompts as the Gateway is added to the account.
*The mobile device or computer must be on the same network as the SG810ZB during commissioning.
Once the gateway is activated, the application will automatically go to the Dashboard.
The Gateway is now ready to add devices (see section 6 on page 7).
5
Installation
5
Installer Manual
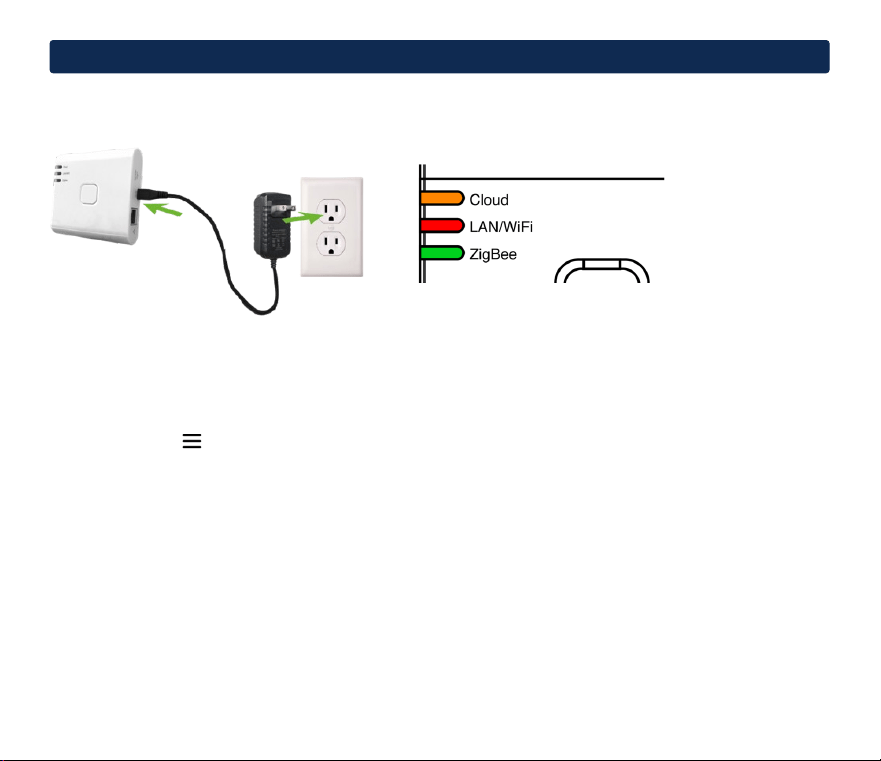
Connecting to Wi-Fi using Bluetooth
Apply power to the Gateway and wait until the LEDs appear as above.
Add a Gateway
1. Launch the Salus
®
Smart Connect App and Sign In.*
2. Tap the menu icon > Devices > Gateways > Add a gateway.
3. Tap Connect via WiFi.
4. Press the multifunction button on the Gateway, the Zigbee LED will ash.
5. Tap Setup with Bluetooth > Tap selected Device.
6. Tap desired network > Enter Password > Tap Provision.
7. Follow the prompts as the Gateway is added to the account.
*Bluetooth must be enabled on the mobile device and the mobile device must be on the same
network as the SG810ZB.
Once the gateway is activated, the application will automatically go to the Dashboard.
5
Installation
Installer Manual 6
Devices may be added to the mesh network either through the Salus
®
Smart Connect App or manually
via the ofine mode.
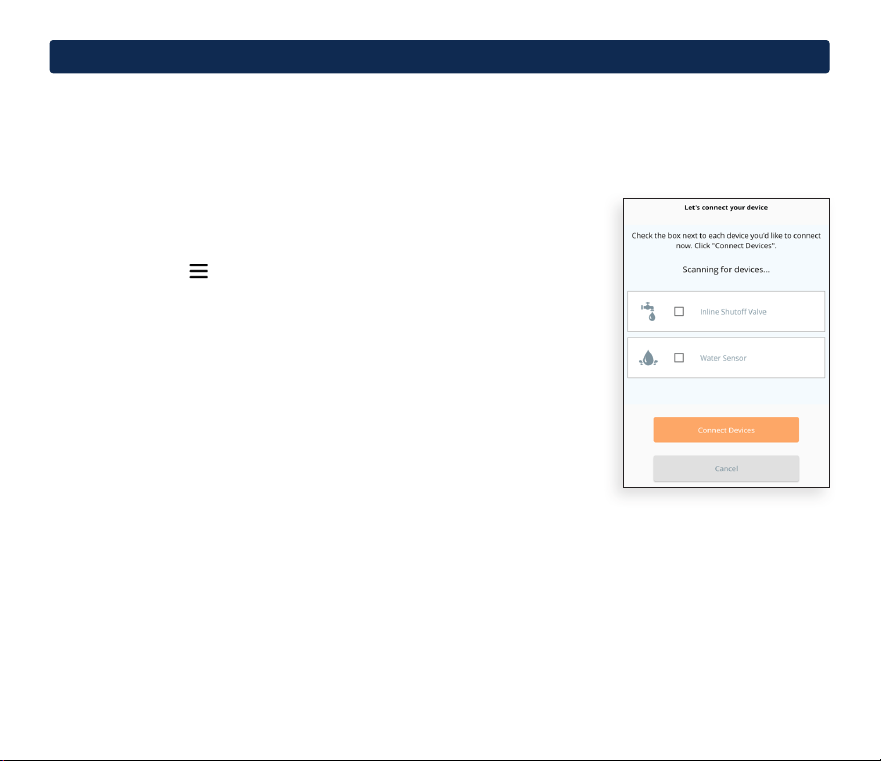
Adding Devices Using the Salus Smart Connect App
To add devices to the mesh network use either the mobile or desktop
Smart Connect App:
1. Launch the Smart Connect App and Sign In.
2. Tap the menu icon > Settings > Setup Equipment.
3. Initiate pairing mode on target device. Refer to the device manual for
instructions on placing the device in pairing mode.
4. Repeat step 4 for any additional devices to add to the network.
5. Once target device is in pairing mode, tap Scan Devices. The Zigbee
LED will turn orange.
6. Once the devices have been discovered, tap the select box for
each device. At the bottom of the list tap Connect Devices.
7. Give each device a meaningful name, tap Next to save.
8. Tap Finish to complete the installation.
6
Add Devices
7
Installer Manual
Adding Devices Using Offline Mode
To add devices to the Gateway without either an Internet connection or the Salus
®
Smart Connect
App, follow these steps:
Apply power to the Gateway and wait until the LEDs appear as above.
1. Press the multifunction button for 5 seconds until the Zigbee LED turns orange.
The Gateway is now in pairing mode for 15 minutes.
2. Initiate pairing mode on target device. Refer to the device manual for instructions on placing
the device in pairing mode.
3. Repeat step 2 for any additional devices to add to the network.
4. Once all devices are paired, press the multifunction button for 5 seconds. The Zigbee LED
will turn green. The Gateway is no longer in pairing mode.
NOTE: If you decide to change Offline mode to Online mode, you must use the Salus Smart
Connect Application to scan for the equipment. All system settings will be automatically
moved into Salus cloud server.
6
Add Devices
Installer Manual 8

If you installed the gateway with LAN via ethernet in section 5 (Installation),
follow the steps below to change connectivity to Wi-Fi.
1. From the Dashboard, tap the Gateway ‘tile’ to ip it.
2. Tap the name of the device on the back tile.
3. Tap the Settings icon .
4. Conrm Disable Local Mode is No and Network Connection
Mode is selected.
5. Tap the in the SSID box and select the desired network from the
drop-down list.
6. Enter the password for the selected network.
Once the SSID and password are saved, you can remove the ethernet
cable from the gateway.
7
Wi-Fi Setup
8
Identify Connected Devices
To check which devices are paired with your system, you can use
Identify mode.
1. Press and release the multifunction button to activate Identify mode.
The Zigbee LED will ash.
2. The gateway will put all connected devices into Identify mode.
Each device may display it is in Identify mode differently. Typically
showing ID, IDENTIFY, and/or ashing backlight or LED.
3. Identify mode will time out after 10 minutes, or you can press the button
again to manually cancel the Identify process.
9
Installer Manual
If necessary, you can remove paired devices and return the Gateway to its factory default settings by
performing a factory reset.
To perform a factory reset:
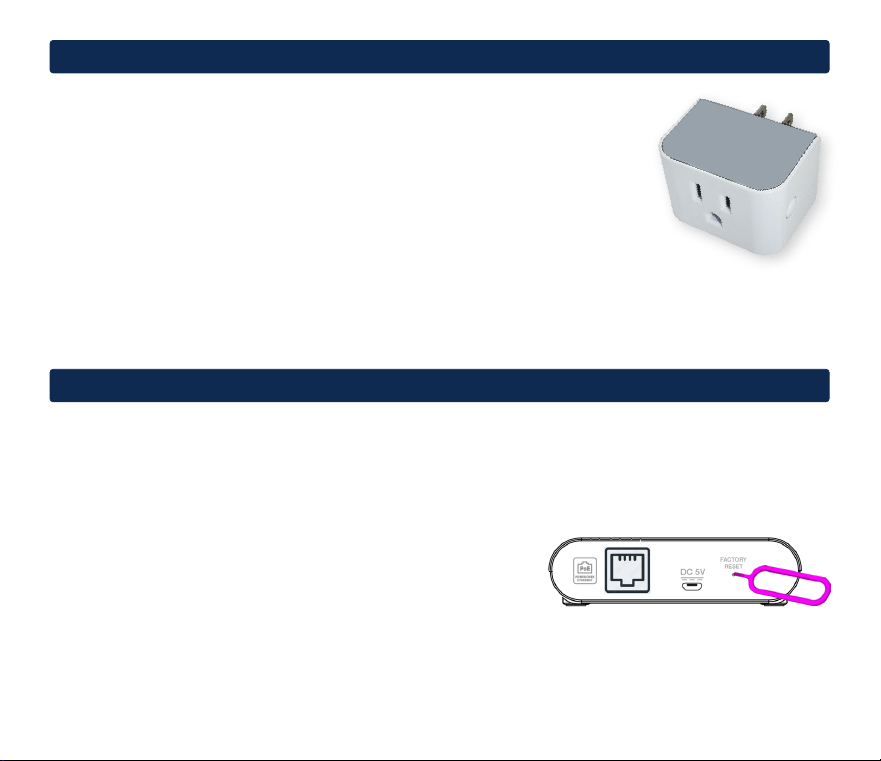
1. Use paper clip to press and hold the FACTORY RESET button for about 10 seconds until all LED’s
turn orange and release it.
2. The Gateway will reboot and reset to factory default settings.
NOTE: A factory reset cannot be undone.
10
Factory Reset
9
Zigbee Mesh Network
The Gateway unites up to 100 devices into Zigbee network. When
com
patible Zigbee repeater or router devices are used, the network
range and signal strength can be extended to improve performance and
responsiveness.
If range or connectivity issues are encountered, consider adding
repeater devices.
Adding a combination Smart Plug and Repeater is an easy way
to strengthen your Salus
®
Zigbee mesh network.
Smart Plug and
Repeater
Installer Manual 10

Regulatory Statements
This equipment has been tested and found to comply with the limits for a Class B digital device, pursuant to Part 15 of the FCC Rules. These limits are
designed to provide reasonable protection against harmful interference in a residential installation. This equipment generates uses and can radiate
radio frequency energy and, if not installed and used in accordance with the instructions, may cause harmful interference to radio communications.
However, there is no guarantee that interference will not occur in a particular installation. If this equipment does cause harmful interference to radio or
television reception, which can be determined by turning the equipment off and on, the user is encouraged to try to correct the interference by one or
more of the following measures:
• Reorient or relocate the receiving antenna.
• Increase the separation between the equipment and receiver.
• Connect the equipment into an outlet on a circuit different from that to which the receiver is connected.
• Consult the dealer or an experienced radio/TV technician for help.
Changes or modifications not expressly approved by the party responsible for compliance could void the user’s authority to operate the equipment.
This device complies with part 15 of the FCC Rules. Operation is subject to the following two conditions: (1) This device may not cause harmful
interference, and (2) this device must accept any interference received, including interference that may cause undesired operation.
This device complies with Industry Canada’s licence-exempt RSSs. Operation is subject to the following two conditions:
(1) This device may not cause interference; and
(2) This device must accept any interference, including interference that may cause undesired operation of the device.
Cet appareil est conforme aux CNR exempts de licence d’Industrie Canada. Son fonctionnement est soumis aux deux conditions suivantes :
(1) Ce dispositif ne peut causer des interf é rences ; et
(2) Ce dispositif doit accepter toute interf é rence , y compris les interf é rences qui peuvent causer un mauvais fonctionnement de l’appareil.
La operación de este equipo está sujeta a las siguientes dos condiciones: (1) es posible que este equipo o dispositivo no cause interferencia
perjudicial y (2) este equipo o dispositivo debe aceptar cualquier interferencia, incluyendo la que pueda causar su operación no deseada.
11
Installer Manual

Limited Warranty
When installed by a professional contractor, this product is backed by a 5 year limited warranty. Limitations apply.
For limitations, terms and conditions, you may obtain a full copy of this warranty:
• Visit us online: www.braeburnonline.com/warranty
• Call us: 866.268.5599
• Write us: Braeburn Systems LLC
2215 Cornell Avenue
Montgomery, IL 60538
Installer - store this manual for future reference.
Braeburn Systems LLC
2215 Cornell Avenue • Montgomery, IL 60538
Technical Assistance: www.braeburnonline.com
Call us toll-free: 866-268-5599 (U.S.)
630-844-1968 (Outside the U.S.)
©2025 Braeburn Systems LLC • All Rights Reserved. SG810ZB-100-01