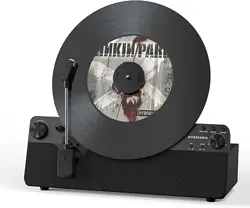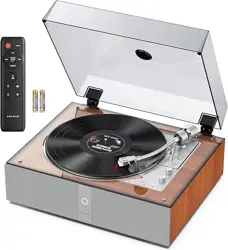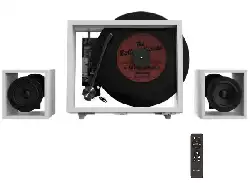

VERTICAL TURNTABLE
Model: TT521S
Instruction Manual
Please read this instruction manual carefully
before use and keep it for future reference.
SAFETY INSTRUCTIONS
1. Always follow basic safety precautions when using this appliance, especially when
children are present.
2. Children should be supervised to ensure that they do not play with the appliance.
3. Do not damage the power cord, place heavy objects on it, stretch or bend it.
4. Do not attach extension cables. Damage to the power cord may cause fire or electric
shock.
5. If the supply cord is damaged, it must be replaced by the manufacturer, a service agent
or similarly qualied persons in order to avoid a hazard.
6. Ensure that the unit is plugged into an AC 100-240V 50/60Hz power outlet. Using higher
voltage may cause the unit to malfunction or catch fire.
7. If the power plug does not fit into the socket, do not force it.
8. Turn off the unit before unplugging it from power source to completely switch it off.
9. Do not disconnect or connect the power cord with wet hands. This may cause an electric
shock.
10. If the unit is not going to be used for a long period time, disconnect the power supply.
11. Ensure that the mains plug is always easily accessible.
12. This product does not contain any parts that are serviceable by the user. In case of a
fault, contact the manufacturer or authorised service department. Exposing the internal
parts inside the device may endanger your life.
13. The manufacturers guarantee does not extend to faults caused by repairs carried out
by unauthorized third parties.
14. Do not use this product immediately after unpacking. Wait until it warms up to room
temperature before using it.
15. Ensure this product is used in moderate climates only
(not in tropical/subtropical climates).
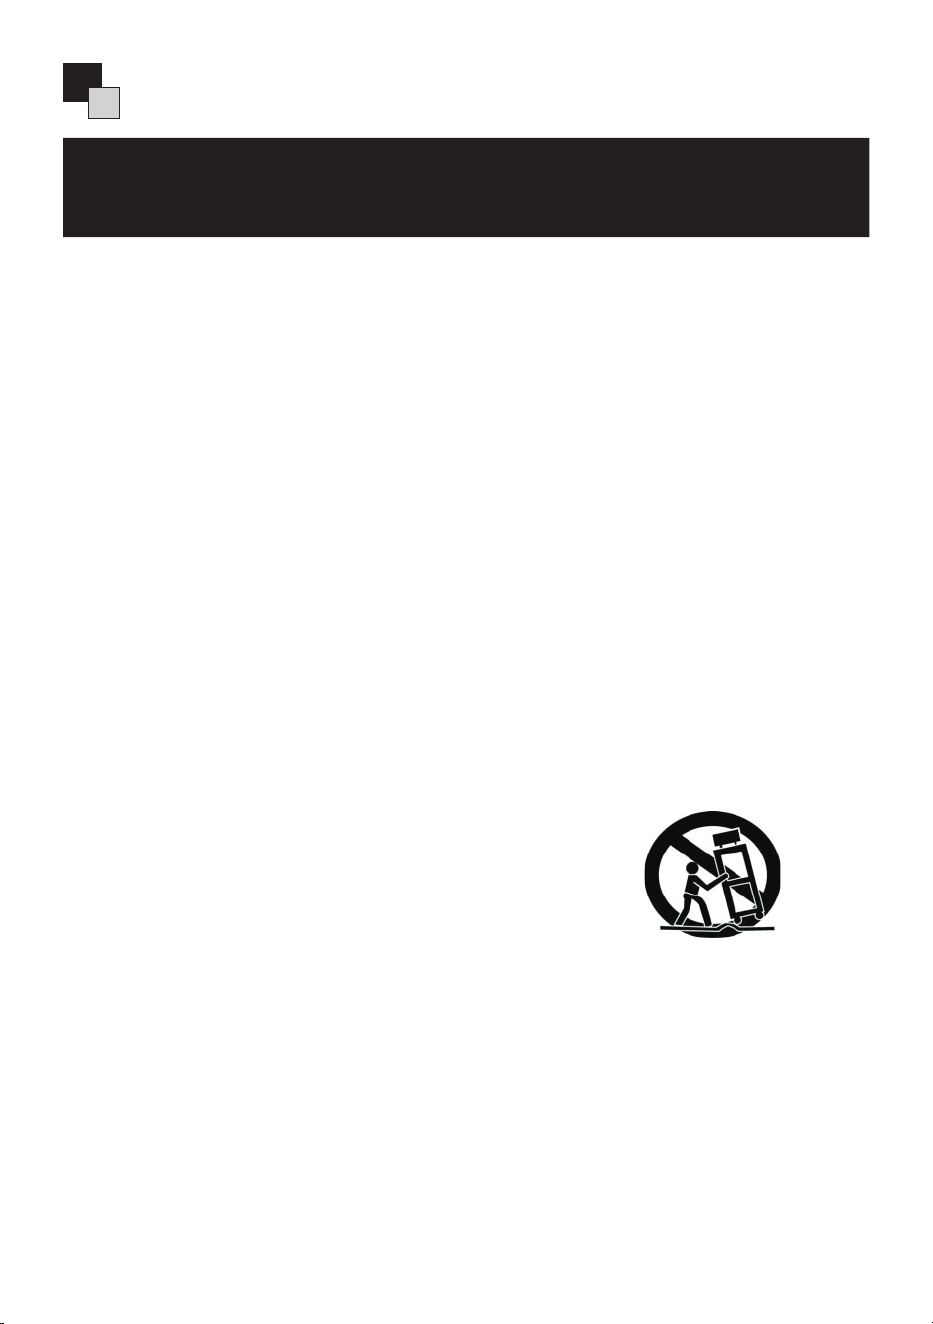
16. Place product on a flat, stable surface that is not subject
to vibrations.
17. Ensure the product and its parts are not overhanging the
edge of the supporting furniture.
18. To reduce the risk of fire, electric shock or damage to this product, do not expose it to
direct sunlight, dust, rain and moisture.
19. Never expose it to dripping or splashing and do not place objects filled with liquids on
or near the product.
20. Do not place objects filled with liquids, such as vases, on the apparatus.
21. Do not install near any heat sources such as radiators, heat registers, stoves, or other
apparatus (including amplifiers) that produce heat.
22. Do not place the product where the humidity is high and ventilation is poor.
23. Ensure a minimum distance of 5 cm around the apparatus for sufficient ventilation. Do
not block any ventilation openings of this product.
3
Please read the following safety instructions and
respect the warnings before the appliance is operated:
SAFETY INSTRUCTIONS
For indoor use only.
Use only power supply listed in the user manual.
24. Always ensure that the ventilation openings are not covered with items such as
newspapers, table-cloths, curtains, etc.
25. NEVER let anyone, especially children, push anything into holes, slots or any other
openings in the unit’s casing as this could result in a fatal electric shock.
26. Storms are dangerous for all electric appliances. If the mains or aerial wiring is struck
by lightning, the appliance might get damaged, even if it is turned off. You should
disconnect all the cables and connectors of the appliance before a storm.
The exclamation point within an equilateral triangle is intended to
alert the user to the presence of important operating and maintenance
(servicing) instructions in the literature accompanying the appliance.
1
2
3
4
5
8
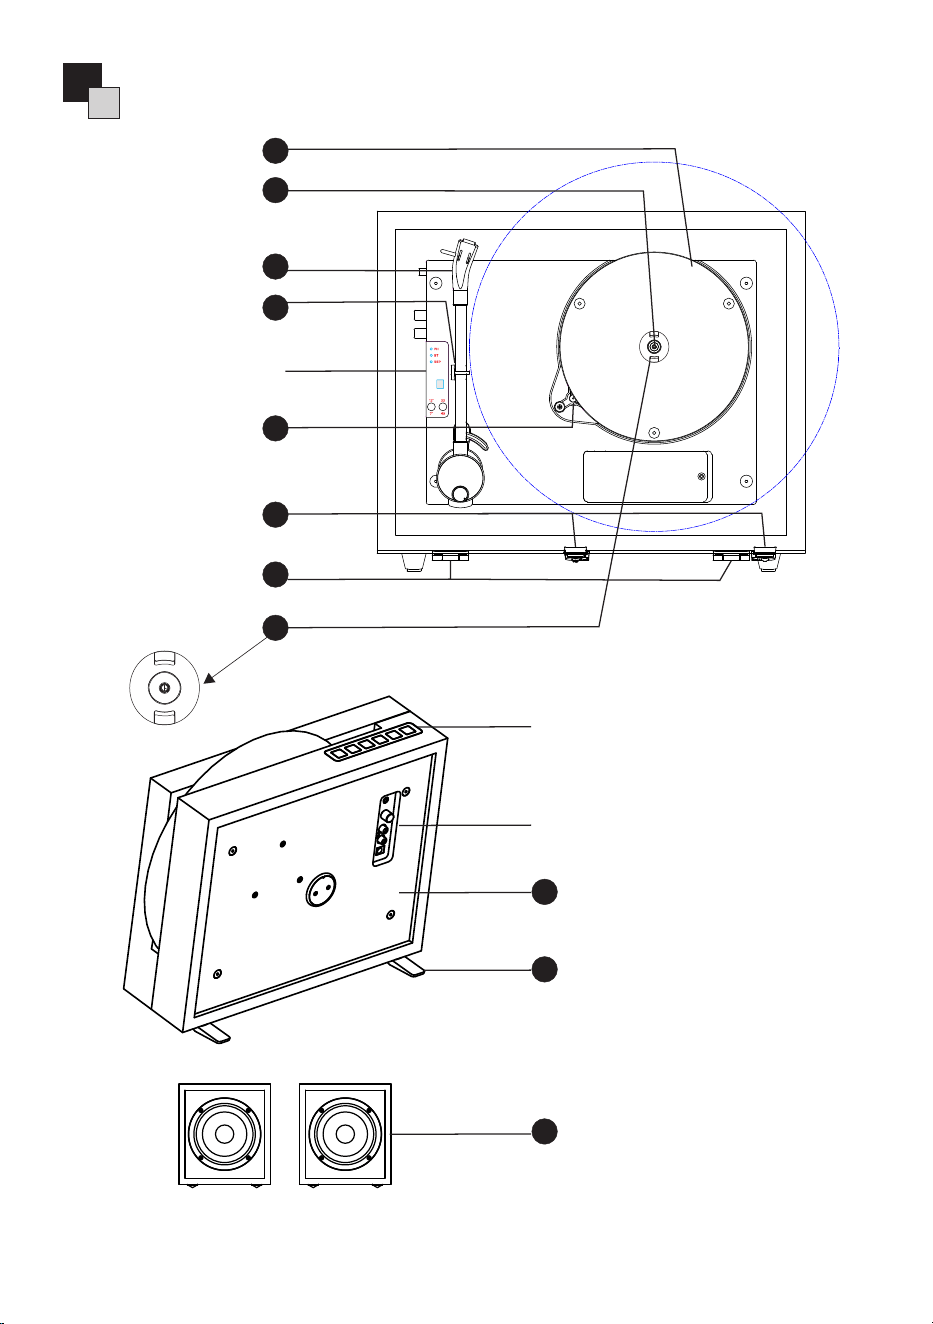
Stylus
Turntable Platter
45 RPM Adapter
Tone arm holder
Motor Pulley
Turntable Spindle
A
Panel control
6
Storage Cradles
(Record/Remote Holder)
7
Lid hinges
Speakers
11
Bottom Support Foot
Rear Panel
Top Panel
Transparent Acrylic Back Panel
9
10
B
C
PRODUCT OVERVIEW
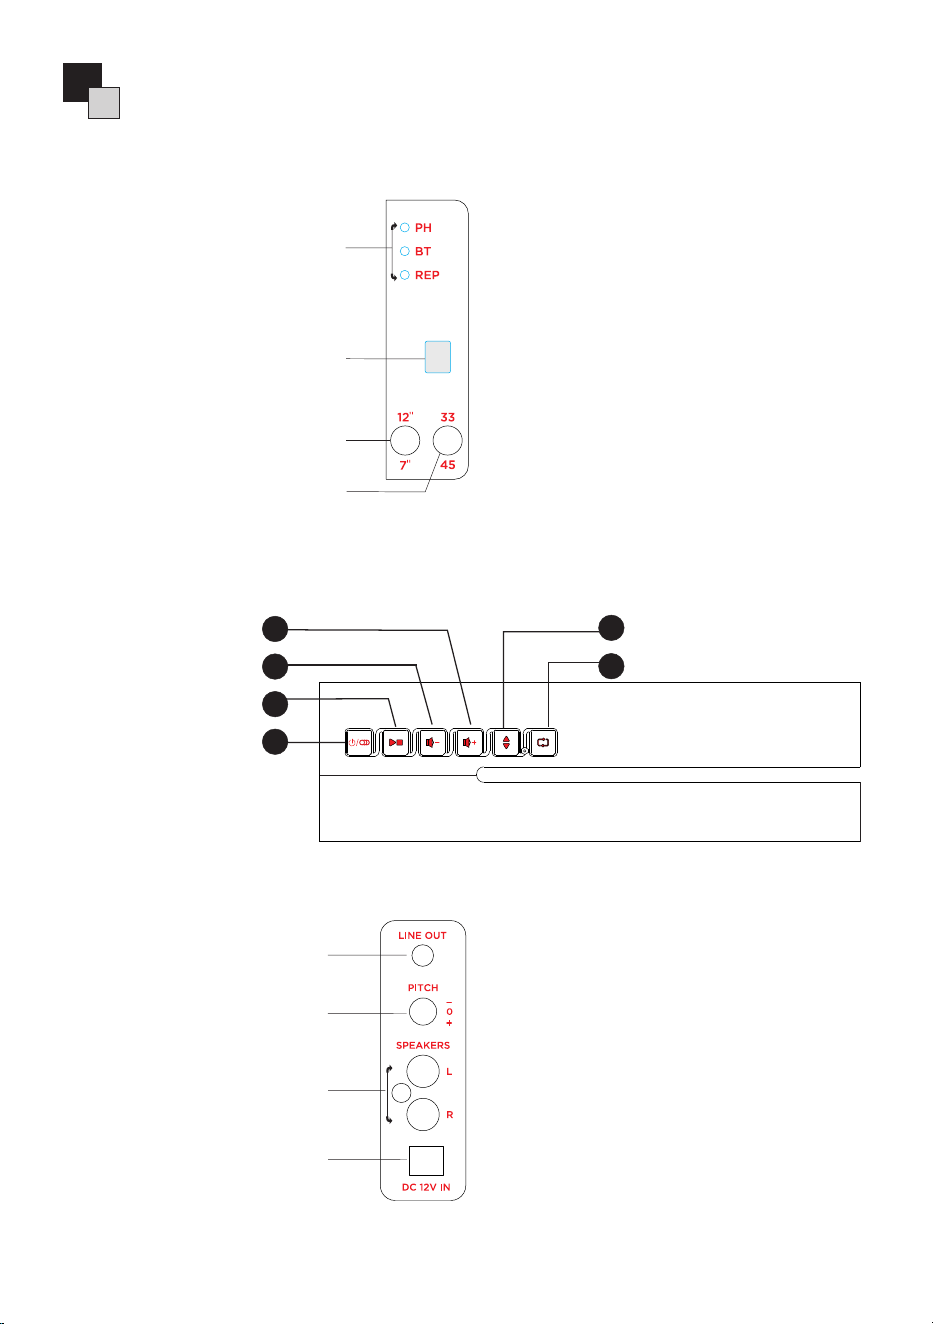
B Top Panel
12
15
14
13
Play/Pause Button
Tonearm UP/DOWN Button
Repeat Button
Power Button /
Mode Selector Button
Volume - Button
Volume + Button
17
16
A Panel control
①
②
③
④
①. Mode Indicator Light
②. Remote sensor
③. Size selector
④. Speed selector
C Rear Panel
⑤. Aux line out jack
⑥. PITCH Knob
⑦. Right/Left RCA jack
⑧. Power adaptor jack
⑤
⑥
⑦
⑧
PRODUCT OVERVIEW
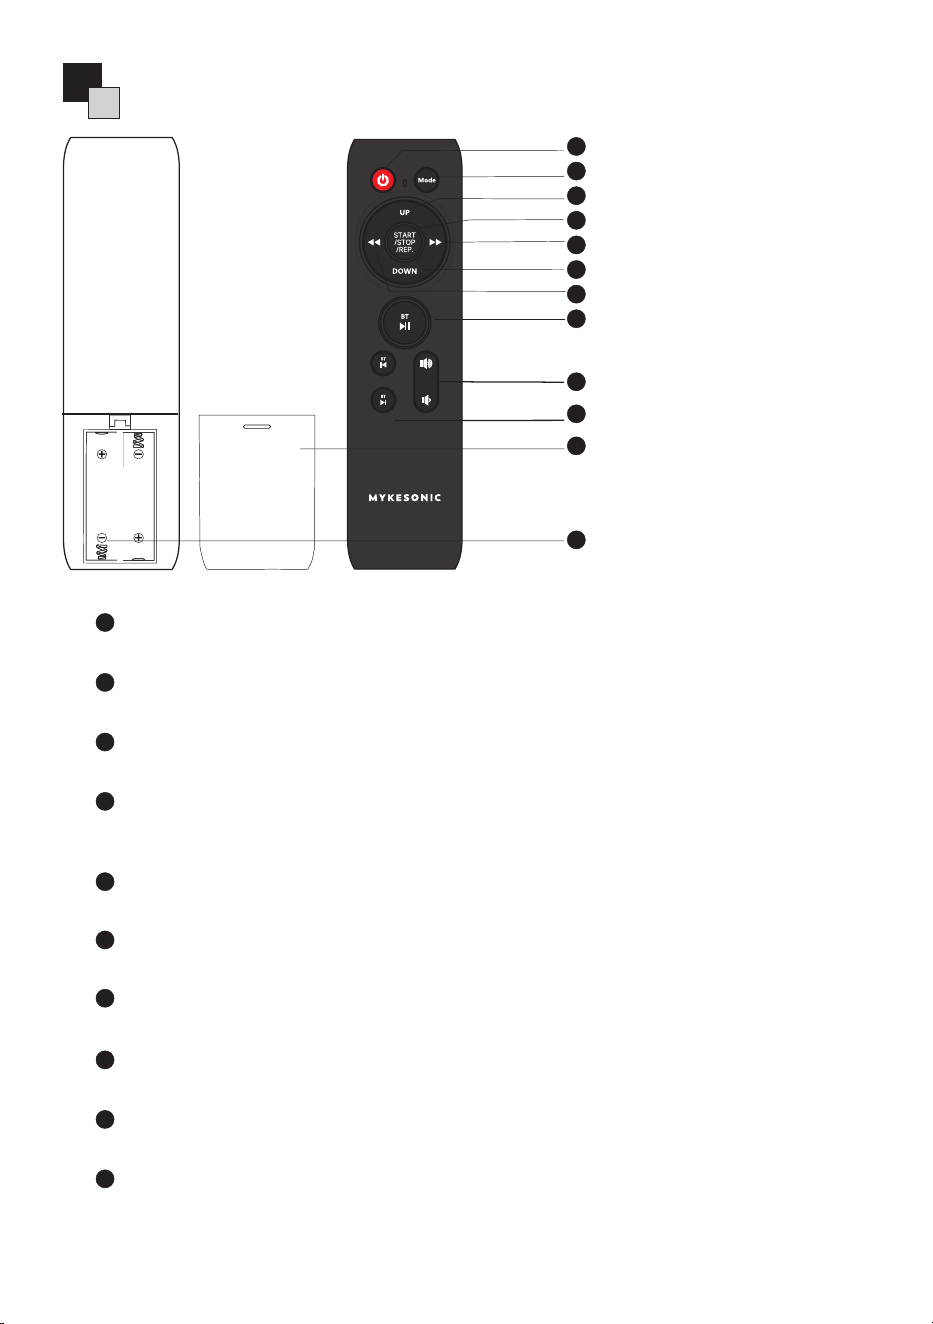
Power ON/OFF
Mode Selector Button
Tonearm up Button
Reward Button
Start/Pause/Repeat Button
Tonearm down Button
Fast Forward Button
BT Start/Pause Button
Battery Cover
Battery Holder
Volume±
Fast Forward/Reward Button
6
5
4
3
2
1
11
7
8
9
10
12
REMOTE CONTROL
Power ON/OFF
Press the button to turn on/off the turntable.
Mode Selector Button
Press the button to select Phono / BT / AUX in mode.
Tonearm up Button
Press it to lift the Tonearm.
Start/Pause/Repeat Button
Press it to start/stop the playback. Or activate (indicator turns green) or exit the
Repeat mode.
Reward Button
Press it to reverse the playback.
Tonearm down Button
Press it to lower the Tonearm.
Fast Forward Button
Press it to forward the playback.
BT Start/Pause Button
Press it to start/pause the playback(Only use in the BT mode).
Volume±
Press it to adjust the turntable's volume to your desired level.
Fast Forward/Reward Button
Press it ro forward/reverse the playback(Only use in the BT mode).
6
5
4
3
2
1
7
8
9
10
Before installing the turntable, check the package contents to ensure all parts below are
included and free of visible damage. Please retain the original packaging materials for
exchange or return purposes.
1) Turntable Unit
2) Power Adapter
3) Remote Control (with two AAA batteries)
4) 45 RPM Adapter
5) Instruction Manual
6) Speaker x 2
7) RCA Speaker Cable x 2
INCLUDED ITEMS
Battery installation
• When installing the battery, pay attention to the corresponding Positive (+) pole and
Battery precautions: Negative (-) pole marks.
• Use 2x AAA (LR03) batteries.
• Please replace the battery in time when it runs out of power.
• Keep the battery out of reach by children.
• Do not expose the battery to extreme heat or fire.
• Non-Rechargeable batteries are not to be recharged
• Different types of batteries or new and used batteries are not to be mixed.
• Dispose of the battery properly
Battery precautions:

①. Mode Indicator Light
PH: When enter to the BT mode, the BT indicator lights blue.
BT: When enter to the BT mode, the BT indicator flash blue.
REP: When enter to the repeat mode, the REP indicator lights green.
②. Remote sensor
The effective control distance is 7 meters, the effective angle is ±30 degrees to the
turntable's IR receiver
③. Size selector
Select between 7" and 12" according to the record size.
④. Speed selector
Select between 33RPM and 45RPM speeds according to the record type.
⑤. Aux line out jack
⑥. PITCH Knob
Turn the PITCH Knob on the rear panel to fine-tune the turntable playback speed.
⑦. Right/Left RCA jack
⑧. Power adaptor jack
Attach the included Power Adapter to the turntable, press and hold the POWER button
to on or off the unit.
GENERAL OPERATION
A Panel control & C Rear Panel
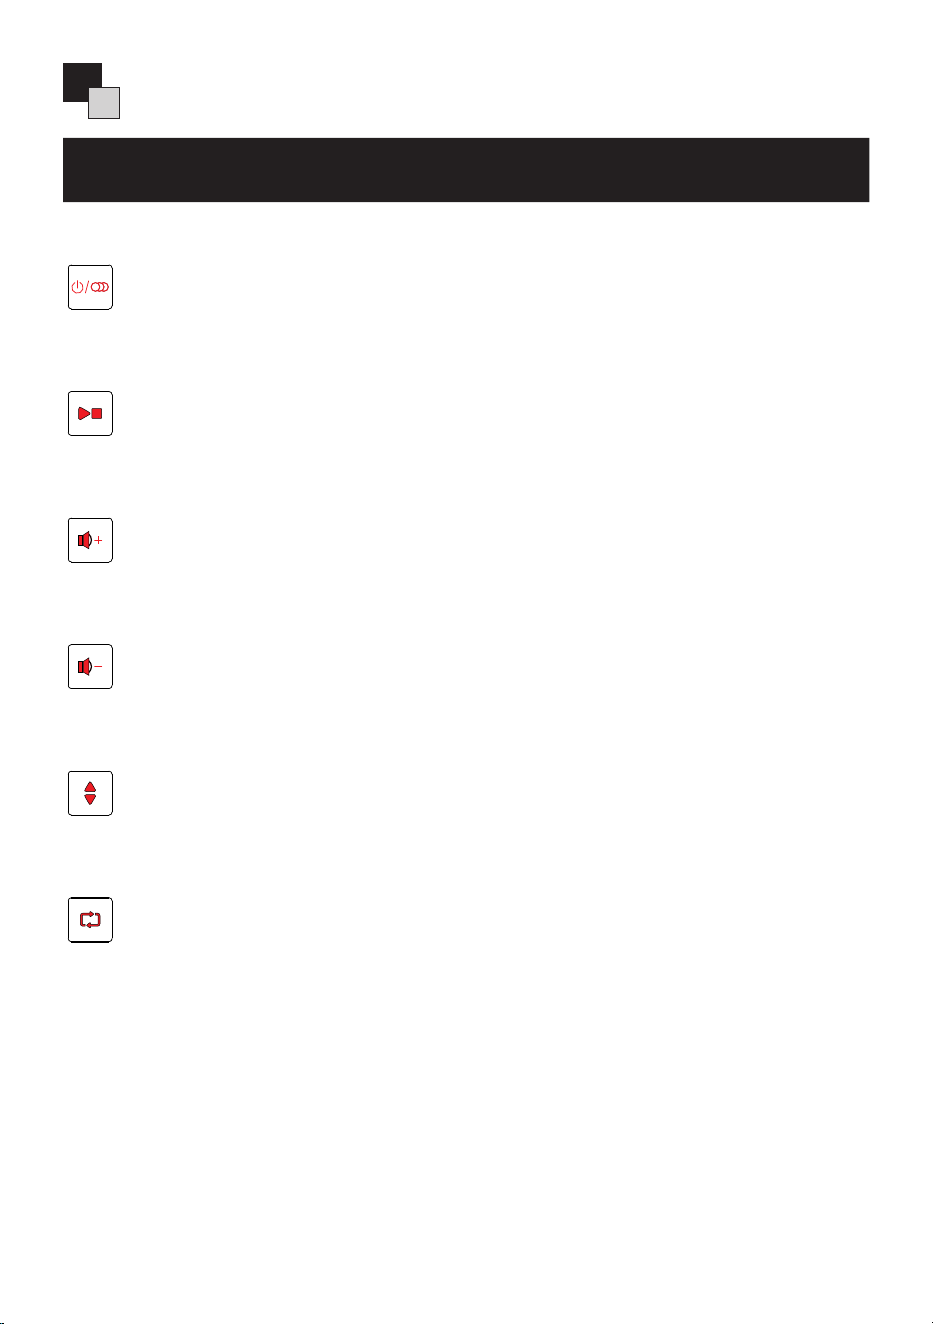
Power / Mode Button
Long press for 3 seconds to turn on/off the turntable. Press the button to select
Phono / BT / AUX in mode.
Start/Pause Button
Short press to start playback when in stop state; short press to pause playback
when in play state.
Tonearm UP/DOWN Button
Short press to control the lift and lower of the Tonearm.
Repeat Button
Short press to activate repeat mode (the REP indicator light on the front panel
turns green) when repeat play is on; the tonearm will automatically return to the
start position of the record and play it from the beginning when the record finishes
playing. Short press again to exit repeat mode (the REP indicator light on the front
panel turns off).
OPERATION INTRODUCTION
Volume + Button
Press this button to increase the volume of the turntable to the level you desire.
Volume - Button
Press this button to reduce the volume of the turntable to the level you desire.
B Top Panel
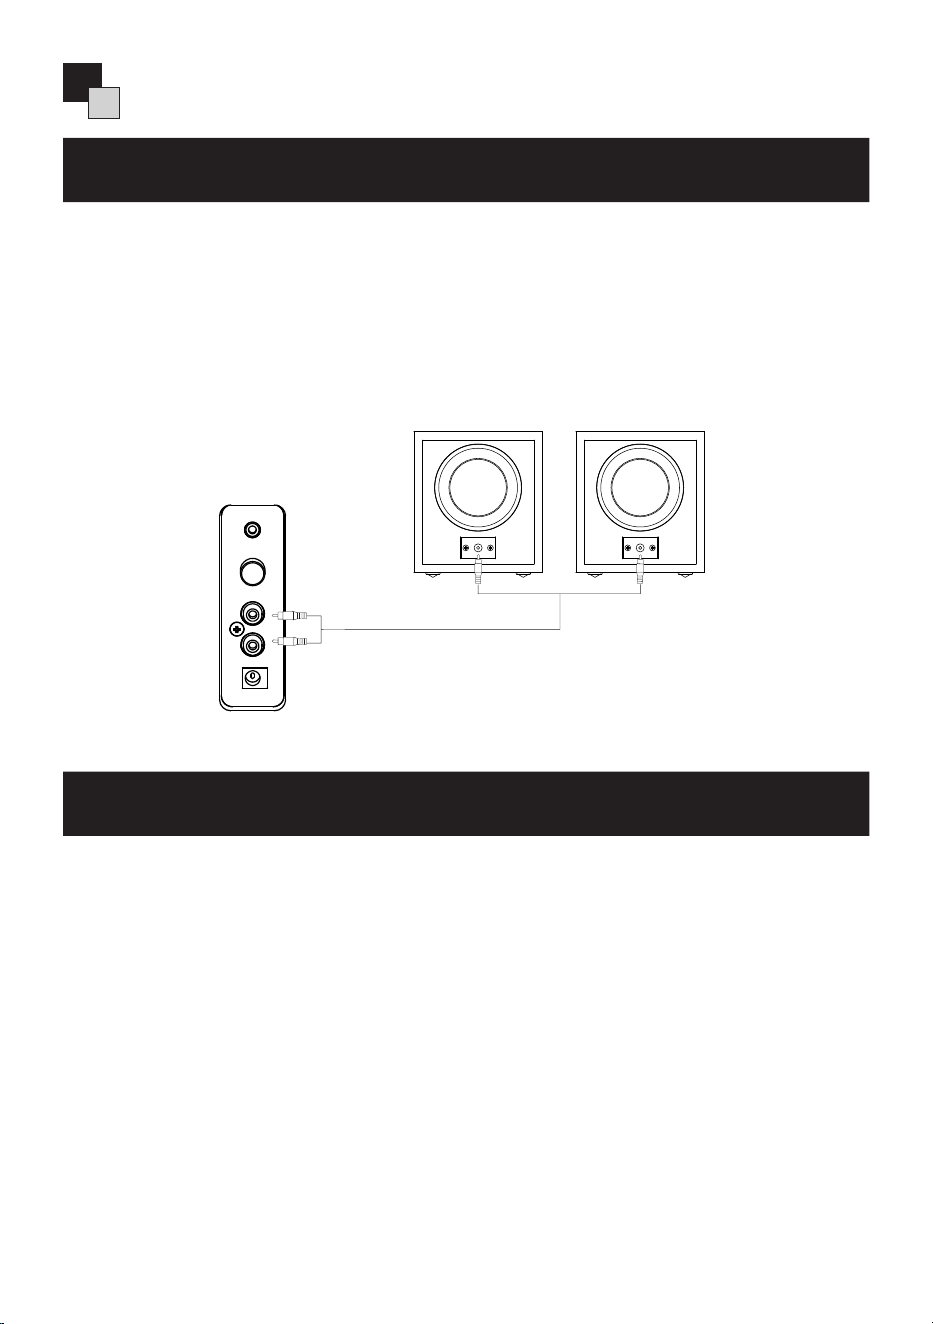
Before using your turntable, make sure you connect the supplied speakers to your turntable.
MPORTANT: To prevent damage, always plug the cable into the port labeled "SPEAKERS"
when using the supplied speakers.
1. Plug the speaker cables and match cable ends to port colors(red - R, white - L)
2. Check that all cables have been properly plugged.
Supplied Speakers
1. Press the POWER/MODE KNOB to enter the Bluetooth mode. When the BT indicator
light flash blue, it is in Bluetooth pairing mode.
2. Place the device to be connected within a range of 10 meters.
3. Turn on the Bluetooth function of your media device, search and select “TT521S” to pair
your device with the turntable.
4. Once the turntable is successfully paired with your media device, the BT indicator light
will be stabilized.
5. You can control the playback through your device now.
6. The turntable will automatically reconnect to the last paired Bluetooth device when
powered on.
7. Press the POWER Button twice in a row, and the turntable will disconnect from the
connected external device.
8. If you need to reconnect the Bluetooth device, please repeat step 1 to 3.
CONNECTIONS
Connecting the Supplied Speakers
Connecting via Bluetooth
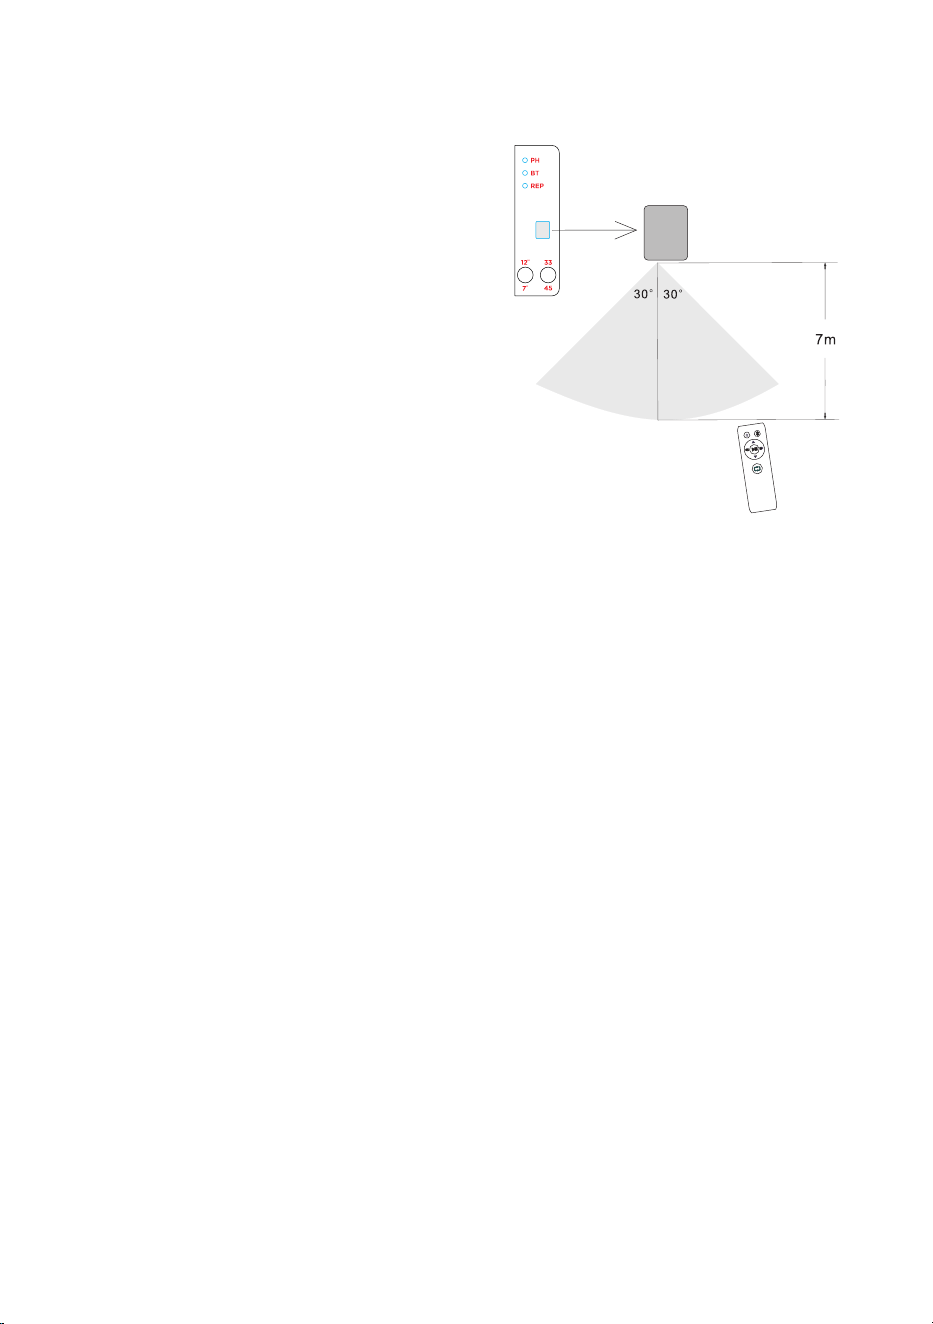
Remote Control Use
Effective Distance
• Under ideal indoor conditions (no obstacles or
weak ambient infrared interference), the
typical effective control distance is 7 meters.
• The actual distance may shorten if there are
obstacles (like furniture) between the remote
and the turntable's IR receiver, or if the
remote's battery is low.
Effective Angle
• The horizontal effective angle is usually ±30
degrees relative to the turntable's IR receiver
(the "center line" of the receiver).
• Beyond this angle range, the IR signal will
weaken significantly, possibly causing delayed
responses or control failure.
1. Press the Power ON/OFF Button to turn on or off the device.
2. Press the Bluetooth Pairing/RCA Button to switch between Bluetooth or RCA mode.
3. Press the Repeat Button to activate (indicator turns green) or exit repeat mode.
4. Press the Play/Pause Button to start or pause playback.
5. Press the FORWARD or BACKWARD Button to rotate to fast-forward or rewind the
playback.
6. Press the Up or Down Button to lift or lower the tonearm.
Operations
If there is no operation within 15 minutes, the turntable will enter energy-saving mode and the
indicator light will go out. To reactivate the turntable, please press and hold the POWER button.
Turntable Power Management
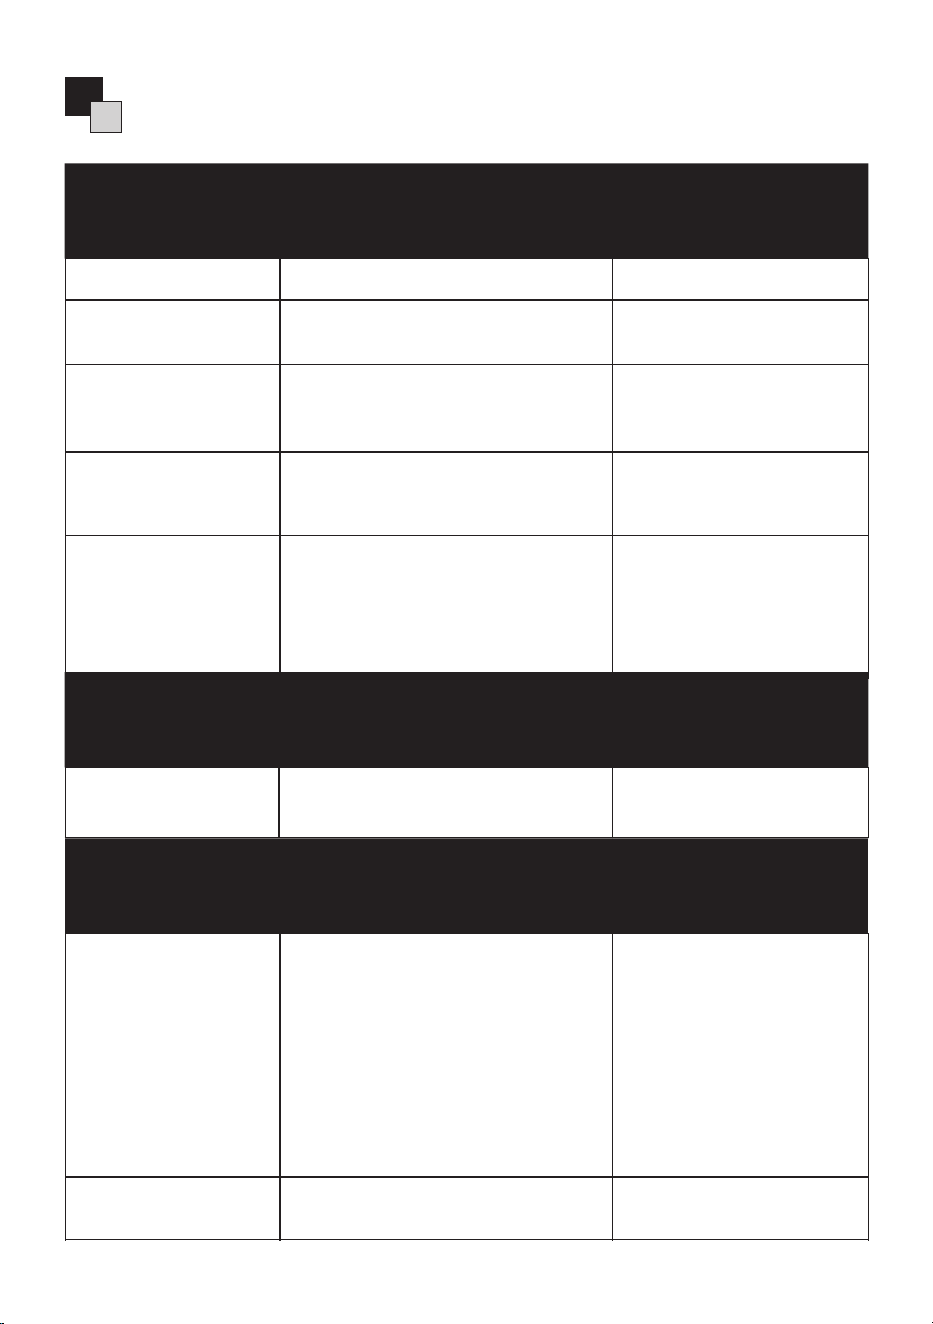
TROUBLE SHOOTING
TROUBLE SHOOTING
Can not power
Unit is unplugged.
Connect the DC
No sound output
from speakers.
Volume is set too low.
The input selector does not
Adjust the volume.
Select the correct
Noise /
distortion
The unit is too close to a TV
set
Turn off the TV or
other
Fails to respond.
It might result from
external
factors such as ESD
(Electro-static discharge).
Disconnect the
power
cord and external
audio
PHONO
BLUETOOTH
No sound.
The unit is not switched to
the
Bluetooth mode.
Your device’s and/or unit’s
volumes is not turn up.
Your device is toot far from
the
unit or there’re some
Ensure the unit is
switched toBT mode.
Move your BT device
closer to the unit.
Turn up the volume
on
your paired device
and/
Unable to pair
Unable to pair with a
Confirm the device is
Unable to pair
with
The turntable stylus is worn
out.
Replace the stylus.
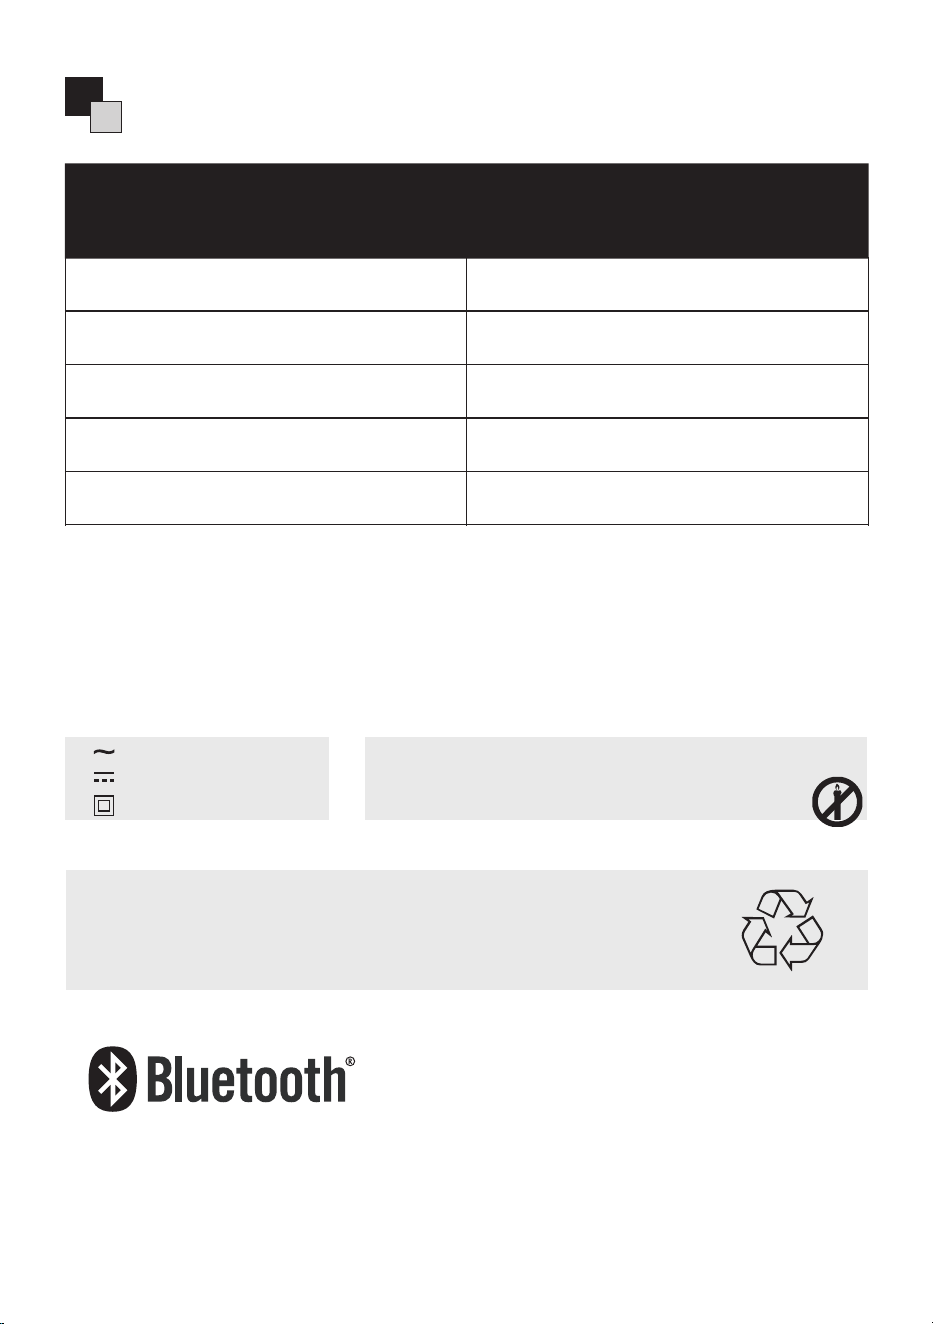
SPECIFICATIONS
AC voltage
DC voltage
Class II equipment
In order to prevent fire, always keep candles
and open flames away from this product.
Trademarks:
The Bluetooth word mark and logos are registered
®
This symbol appears on electrical and electronical equipment (or
packaging) to remind users of this. Users are requested to use
existing return facilities for used equipment and batteries.
POWER ADAPTOR
1. To disconnect the unit from the mains supply, unplug the lead from the mains socket.
2. Only use the supplied mains adaptor as failure to do this may result in a safety risk
and/or damage to the unit.
trademarks owned by Bluetooth SIG,. Inc.
PRODUCT SPECIFICATIONS
Power Input
Power Adapter Output
Maximum Power Consumption
Standby Power
Cartridge Model
Input AC 100-240V~50-60Hz
12V,2.0A
20W
<0.5W
Audio-Technica AT3600L

FCC/IC STATEMENTS
IMPORTANT INFORMATION
This device complies with Part 15 of the FCC Rules. Operation is subject to the following
two conditions:
(1) This device may not cause harmful interference, and
(2) this device must accept any interference received, including interference that may
cause undesired operation.
NOTE:
This equipment has been tested and found to comply with the limits for a Class B digital
device, pursuant to Part 15 of the FCC Rules. These limits are designed to provide
reasonable protection against harmful interference in a residential installation. This
equipment generates uses and can radiate radio frequency energy and, if not installed
and used in accordance with the instructions, may cause harmful interference to radio
communications.
However, there is no guarantee that interference will not occur in a particular
installation. If this equipment does cause harmful interference to radio or television
reception, which can be determined by turning the equipment off and on, the user is
encouraged to try to correct the interference by one of the following measures:
- Reorient or relocate the receiving antenna.
- Increase the separation between the equipment and receiver.
- Connect the equipment into an outlet on a circuit different from that to which the
receiver is connected.
- Consult the dealer or an experienced radio/TV technician for help.
WARNING:
- Any changes or modifications not expressly approved by the party responsible for
compliance could void the user's authority to operate this equipment.
FCC & IC RADIATION EXPOSURE STATEMENT:
This equipment complies with FCC and Canada radiation exposure limits set forth for
an uncontrolled environment. This equipment should be installed and operated with a
minimum distance of 20cm between the radiator and your body. This transmitter must
not be co-loacted or operating in conjunction with any other antenna or transmitter.
12