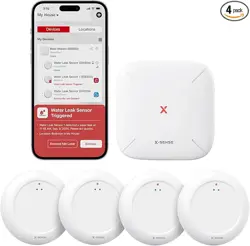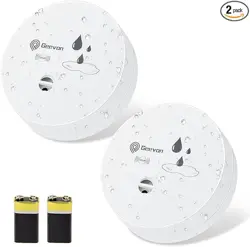
WiFiWater / Flood Detector
INSTRUCTION
Please read this manual carefully before use
and keep it for future reference.
WARNING: Do not immerse the product completely in water. After
the leak alarm is triggered, remember to dry the metal probe.
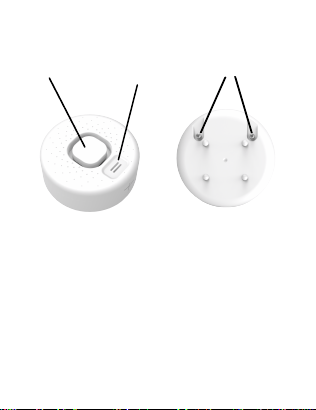
Product Configuration:
Buzzer
Front
Detection Probe
Detection Probe
Back
Usage:
bottom detection probes.They are used to detect
dripping alarms and leak alarms. Once the detector is
triggered, you will receive APP alarm message, and
This detector can be installed anywhere a leak needs
to be detected. The detector supports both top and
detector will make loudly sound alarm.

Specifications:
Battery
:
AAA 1.5V x2 (not include)
Standby Current
:≤
uA
Protocol
:
IEEE 802.11b/g/n
Operating Temperature
:
-10
℃
--60
℃
14
℉
--140℉
Operating Humidity:≤
95%RH
Storage Temperature
:
-10
℃
--60
℃
14
℉
--140
℉
Storage Humidity
: ≤
95%RH
Detection mode: Water sense detection
Installation mode: Place on the floor
Wireless Type
:
2.4GHz WiFi
Standby Time
:
4-6 months
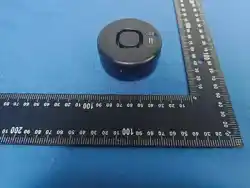
Size:
φ
65*31.5mm
TuyaSmart / Smart life
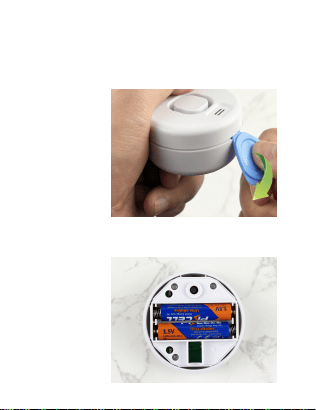
2. Install 2 pcs 1.5V AAA batteries, pay attention to
the ± poles. (Product does not include batteries)
How to install the batteries?
1. Insert the blue card into the gap, with the side
with the round groove facing up, and pry open the
outer casing.
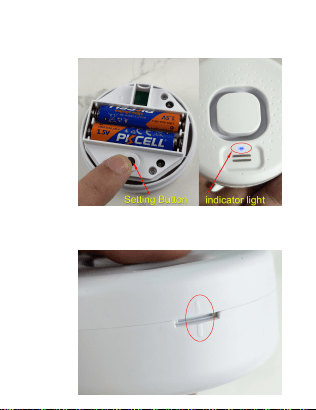
3. Long press the setting button about 6 seconds,
until the indicator light flashes rapidly. The detector
will enter into WIFI configuration mode.
4. After successfully connecting to the WIFI network,
make sure the marking lines are aligned and close the
bottom cover.

Download App:
Search and download
“
Smart Life
”
in APP Store.
Also you can scan below QR code directly to
download the app.
Run App:
1. Install
“
Smart life
”
in your smartphone
2. Register and login the app.
There are 2 methods to connect the device to wifi
router, you can choose Smart wifi mode or AP mode.
Recommended the Smart WiFi Mode.
Connect to wifi (Smart WiFi Mode).
1. (MobilePhone) Please enable the bluetooth
function of your phone.
2. (Device) Press and hold: “Setting Button” on the
detector for 6 seconds, the LED indicator will blink
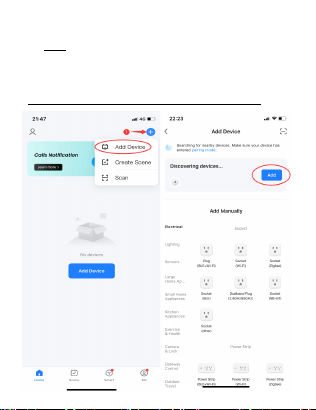
rapidly. The device will be in Smart Wi-Fi Mode.
3. (APP) Click "+". Choose: Add Device.
4. APP will discover the devices, then click "Add".
5. Click "Next". Then wait to connect successfully.
(Only compatible 2.4G WiFi, please not 5G WiFi)

Connect to wifi (AP Mode).
1. (Device) Press and hold: “Setting Button” on the
detector for 6 seconds, the LED indicator will blink
rapidly, and then press and hold: “Setting Button” on
the detector for 6 seconds again, the LED indicator
will blink slowly. The device will be in AP Mode.
2. (APP) Click "+". Choose: Add Device.
3. Choose: "Sensors", then choose: "Flood Detector"
4. Input your wifi name and password. Click: "Next".
5. Click: "Confirm the indicator is blinking".
6. Choose: "Blink Slowly".
7. Connect your phone to WiFi: SmartLife-xxxx
8. Back to APP until connect wifi successfully.
Place a drop of water on the metal probe of the detector,
you can see the LED indicator light come on, and you will
receive APP alert. If you can not receive the APP alert
message, please make sure water cover the 2 metal pins at
the same time, and make sure all the app notification
permissions are enabled. After test the device, please wipe
the water off the metal probe.
How to test it?

FCC Warnning:
This equipment has been tested and found to comply with the limits for a Class B digital device,
pursuant to part 15 of the FCC Rules. These limits are designed to provide
reasonable
protection against harmful interference in a residential installation. This equipment generates,
uses and can radiate radio
frequency
energy
and,
if
not
installed
and
used
in
accordance
with
the
instructions,
may cause
harmful
interference
to
radio
communications.
However,
there
is
no
guarantee
that interference
will
not
occur
in
a
particular
installation.
If
this
equipment
does
cause
harmful interference to radio or television reception, which can be
determined by turning the equipment off
and
on,
the
user
is
encouraged
to
try
to
correct
the interference
by
one
or
more
of
the following measures:
•
Reorient or relocate the receiving antenna.
•
Increase the separation between the equipment and receiver.
•
Connect the equipment into an outlet on a circuit different from that to which the receiver is
connected.
• Consult the dealer or an experienced radio/TV technician for help.
Caution:
Any
changes
or
modifications
to
this
device
not
explicitly
approved
by
manufacturer
could void your authority to operate this equipment.
This
device
complies
with
part
15
of
the
FCC
Rules.
Operation
is
subject
to
the
following
two
conditions:
(1)This
device
may
not
cause
harmful
interference,
and
(2)
this
device
must
accept
any
interference received, including interference that may cause undesired operation.
This
equipment
complies
with
FCC
radiation
exposure
limits
set
forth
for
an
uncontrolled
environment.
This
equipment
should
be
installed
and
operated
with
minimum
distance
0cm
between the radiator and your body.