MT095 - 8/12
TO ADJUST TEMPERATURE
LIMIT STOP
ADJUSTABLE TEMPERATURE LIMIT STOPS
FOR ALL MOEN TUB AND SHOWER VALVES
MOENTROL - USE PART No. 10066
MOEN - CHATEAU - MOENIQUE - BOUTIQUE
USE PART No. 10510
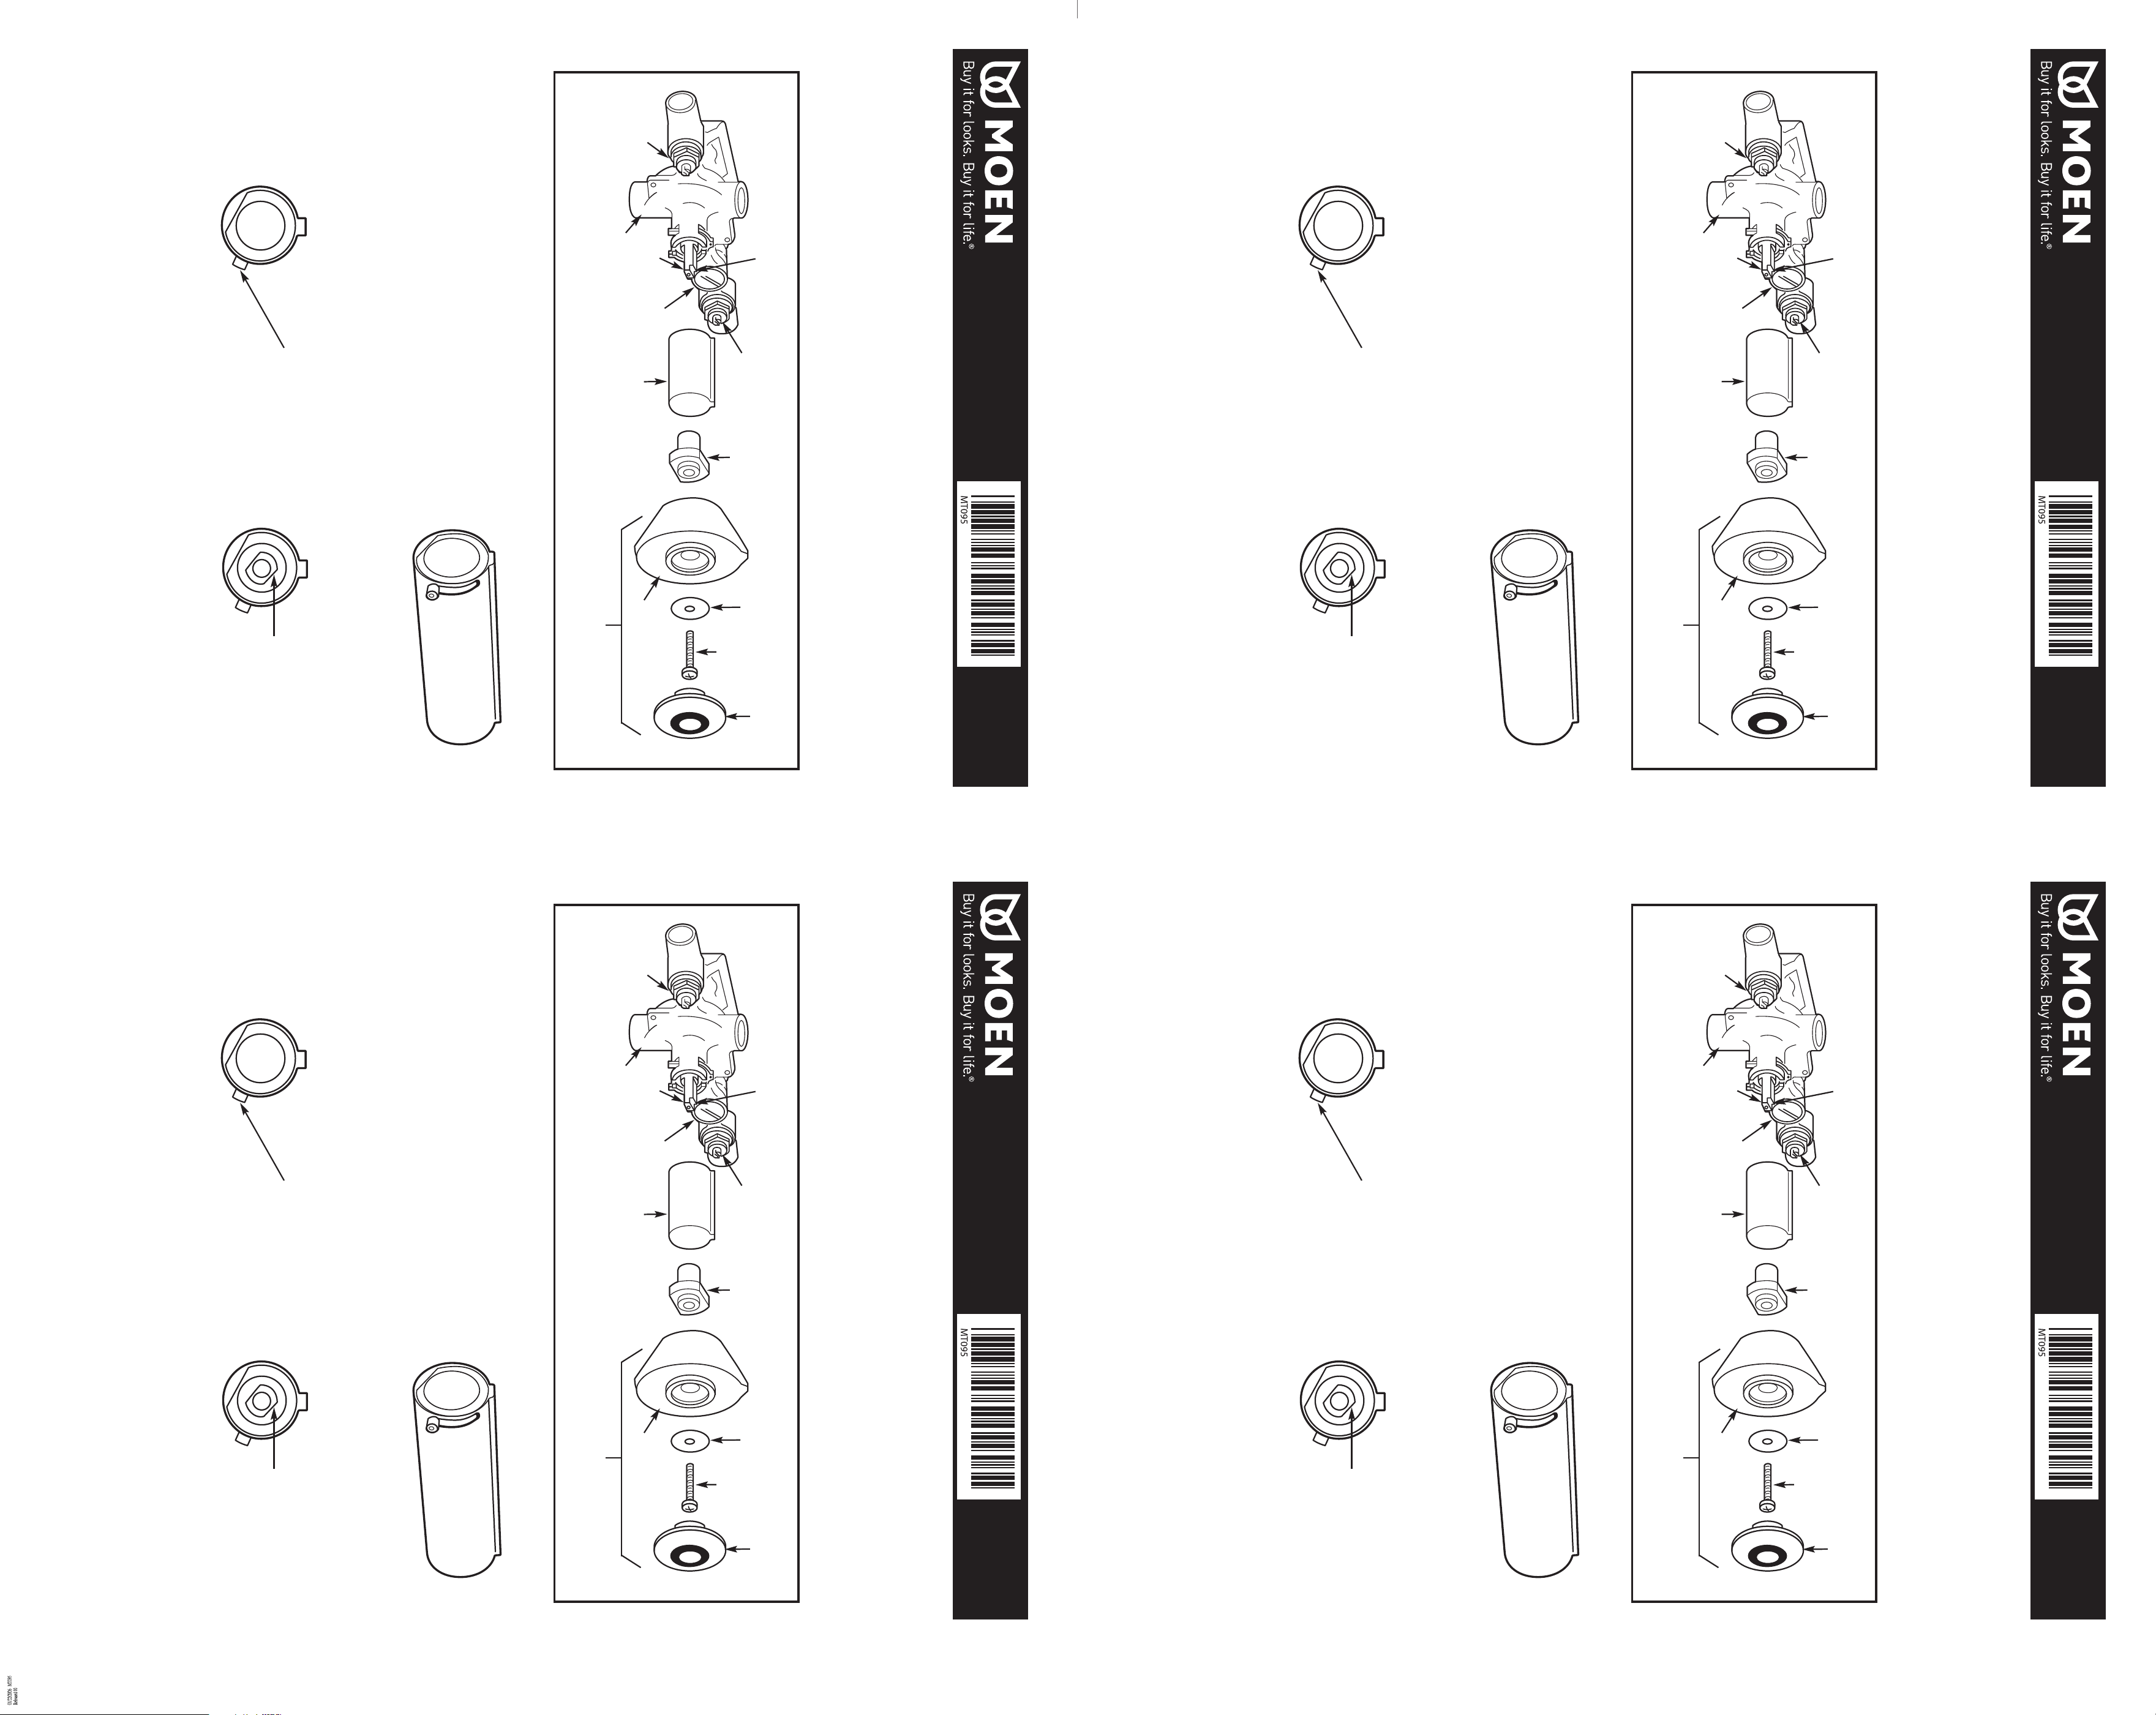
To install adjustable temperature limit stop, remove handle cover, handle screw, handle knob, handle parts and stop tube.
Discard the stop tube. Slide on in it’s place the adjustable temperature limit stop.
1. Adjustment screw of temperature limit stop must be set full
down at the 4:00 o’clock position. DO NOT TIGHTEN.
3. Re-install handle knob with pointer in line with notched flat on stem at 2:00 o’clock position. Turn valve on.
4. Slowly turn handle knob to left and up to mix position. When desired, maximum temperature of mixed water is
reached, carefully remove handle knob so that cartridge stem does not turn.
5. Securely tighten adjustment screw and lock in place with hex wrench furnished.
6. Re-assemble handle parts, handle knob and handle screw. Tighten handle screw securely and replace handle
cover.
NOTE: Before adjusting, make sure hot water supply is delivering maximum hot water temperature.
2. Turn valve cartridge stem to cold position at 2:00
o’clock position.
NOTCHED FLAT ON STEM
ADJUSTMENT SCREW
(ILLUSTRATED WITH MOENTROL)
2:00 O’CLOCK POSITION
4:00 O’CLOCK POSITION
HANDLE
KNOB
HANDLE
COVER
HANDLE
SCREW
HANDLE
WASHER
HANDLE
BUSHING
*
STOP
TUBE
STEM
VALVE
BODY
BALANCING
SPOOL
NOTCHED FLAT
ON STEM
HANDLE ASSEMBLY
INTEGRAL
CHECK STOP
* NOTE: HANDLE BUSHING MIGHT REMAIN INSIDE
THE HANDLE KNOB WHEN DISASSEMBLED.
INTEGRAL
CHECK STOP
NOT SHOWN:
ESCUTCHEON AND
ESCUTCHEON SCREWS
MT095 - 8/12
TO ADJUST TEMPERATURE
LIMIT STOP
ADJUSTABLE TEMPERATURE LIMIT STOPS
FOR ALL MOEN TUB AND SHOWER VALVES
MOENTROL - USE PART No. 10066
MOEN - CHATEAU - MOENIQUE - BOUTIQUE
USE PART No. 10510
To install adjustable temperature limit stop, remove handle cover, handle screw, handle knob, handle parts and stop tube.
Discard the stop tube. Slide on in it’s place the adjustable temperature limit stop.
1. Adjustment screw of temperature limit stop must be set full
down at the 4:00 o’clock position. DO NOT TIGHTEN.
3. Re-install handle knob with pointer in line with notched flat on stem at 2:00 o’clock position. Turn valve on.
4. Slowly turn handle knob to left and up to mix position. When desired, maximum temperature of mixed water is
reached, carefully remove handle knob so that cartridge stem does not turn.
5. Securely tighten adjustment screw and lock in place with hex wrench furnished.
6. Re-assemble handle parts, handle knob and handle screw. Tighten handle screw securely and replace handle
cover.
NOTE: Before adjusting, make sure hot water supply is delivering maximum hot water temperature.
2. Turn valve cartridge stem to cold position at 2:00
o’clock position.
NOTCHED FLAT ON STEM
ADJUSTMENT SCREW
(ILLUSTRATED WITH MOENTROL)
2:00 O’CLOCK POSITION
4:00 O’CLOCK POSITION
HANDLE
KNOB
HANDLE
COVER
HANDLE
SCREW
HANDLE
WASHER
HANDLE
BUSHING
*
STOP
TUBE
STEM
VALVE
BODY
BALANCING
SPOOL
NOTCHED FLAT
ON STEM
HANDLE ASSEMBLY
INTEGRAL
CHECK STOP
* NOTE: HANDLE BUSHING MIGHT REMAIN INSIDE
THE HANDLE KNOB WHEN DISASSEMBLED.
INTEGRAL
CHECK STOP
NOT SHOWN:
ESCUTCHEON AND
ESCUTCHEON SCREWS